-
Contents
-
Table of Contents
-
Bookmarks
Quick Links
For Firmware Version V1.1
Check www.allen-heath.com for the latest version available
Publication AP9031
Related Manuals for ALLEN & HEATH Qu-16
Summary of Contents for ALLEN & HEATH Qu-16
-
Page 1
For Firmware Version V1.1 Check www.allen-heath.com for the latest version available Publication AP9031… -
Page 2
Any changes or modifications to the equipment not approved by Allen & Heath could void the compliance of the product and therefore the users authority to operate it. Qu-16 User Guide AP9031 Issue 2 Copyright © 2013 Allen & Heath. All rights reserved ALLEN&HEATH Allen &… -
Page 3: Safety Instructions
It is recommended that servicing is carried out only by an authorised Allen & Heath agent. Contact details for your local distributor can be found on the Allen & Heath website. Allen & Heath do not accept liability for damage caused by maintenance, repair or modification by unauthorised personnel. Qu-16 User Guide AP9031 iss.2…
-
Page 4: Packed Contents
Read this before starting Accessories available 19” Rack Ear Kit Part: QU-16-RK19 To mount the Qu-16 in a standard 19” rack or flightcase. These fit over the plastic trims. LEDlamp Part: LEDlampX Right angled 4-pin XLR with built-in dimmer 120m (396’) Cat5 drum…
-
Page 5: Table Of Contents
Utility – Qu-Drive ……………………40 8.12 Utility – Firmware Update ………………….41 Resetting the Mixer ……………………… 42 Reset Mix Settings – A starting point for mixing …………..42 Qu-16 User Guide AP9031 iss.2…
-
Page 6
Please Note V1.1 This User Guide refers to Qu-16 firmware version . A few features are not supported by this release. Please refer to the Allen & Heath website for the latest version of firmware and this user guide. For more details read the Release Notes available with the firmware. -
Page 7: Introduction
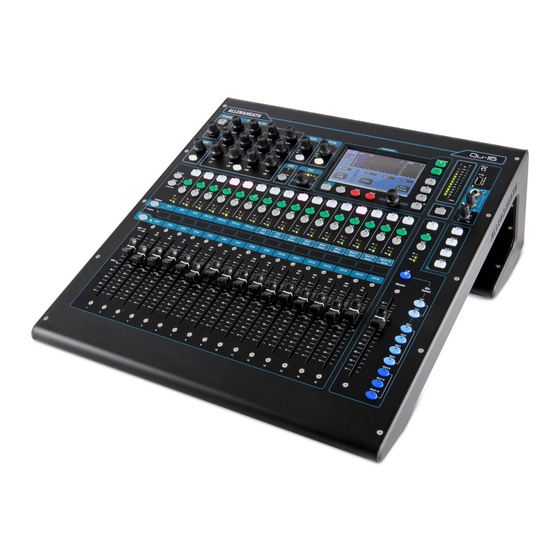
3. Introduction The Qu-16 is a compact, rack mountable digital audio mixer from Allen & Heath. Building on the heritage of the GLD and flagship iLive digital consoles the Qu presents exceptional performance together with an intuitive analogue style user…
-
Page 8: Connection Overview
4. Connection Overview The following connections are available on the rear panel of the Qu-16. AES digital out Alt out Lamp 2Trk out LR main out Analogue Mix out 1-10 Mic and Line inputs 1-16 Talkback Mic in ST1 and ST2…
-
Page 9: Output Connections
The Lnk indicator flashes to indicate network activity. dSNAKE – The proprietary Allen & Heath ‘digital snake’ connection for remote audio using an AR2412 or AR84 AudioRack, and for personal monitoring using the ME Personal Mixing System. Qu-16 User Guide AP9031 iss.2…
-
Page 10: Powering Up The Mixer
Switching the mixer off – First select the Home screen. Touch Shut Down to safely complete processes such as parameter storing and USB data transfer or recording. Once complete, press the ON/OFF switch to turn the mixer off. Qu-16 User Guide AP9031 iss.2…
-
Page 11: Connecting Dsnake Remote Audio
5. Connecting dSNAKE Remote Audio The Qu-16 mixer provides local sockets on its rear panel for all audio inputs and outputs. It can also work with remote audio by connecting over a single cable ‘digital snake’ to an Allen & Heath AudioRack, or to the Allen &…
-
Page 12: Connecting To The Me Personal Mixing System
Connecting ME to the Qu-16 — ME-1 mixers, a standard Ethernet switch or the ME-U hub can be plugged directly into the Qu-16 dSNAKE port if you are not using this to connect to an AudioRack. Power can be provided over the Cat5 by the ME-U or a PoE switch.
-
Page 13: Operational Overview
6. Operational Overview This section provides an overview of the Qu-16 layout and operation to help you get started quickly. Touch Screen TouchChannel Screen select SuperStrip Qu-Drive Fader Flip Engineer’s monitor Copy/Paste/reset Function key Mix assign SoftKeys Layer select Master Strip…
-
Page 14
Sel key active. The range of frequencies accessed by the faders is highlighted in the touch screen and labelled at the top of the faders. The centre 0dB flat position is marked on the fader scale. Qu-16 User Guide AP9031 iss.2… -
Page 15: Channel Processing
Press the Fn key to open the Source Select screen. Touch the CH buttons to highlight those you wish to change. Select the source from the list. Choose either Qu-Drive or USB (affects all channels) Qu-16 User Guide AP9031 iss.2…
-
Page 16
In most cases delay is not needed, but can be useful in time aligning sound from the PA to the acoustic sound from an instrument on stage. Allow 1ms per foot distance as a starting point. Qu-16 User Guide AP9031 iss.2… -
Page 17
LM (low mid frequency) HM (high mid frequency) HF (high frequency) Each provides 3 parameters that can be adjusted: Gain – Boost or cut frequencies by up to 15dB. Centre 0dB is flat response (no affect). Qu-16 User Guide AP9031 iss.2… -
Page 18
Two ‘Auto’ types provide automatic control of the compressor dynamics. Experiment with the effect of the compressor settings on different sounds. Try to use compression only where it is needed, and avoid compression in stage monitor speakers. Qu-16 User Guide AP9031 iss.2… -
Page 19
0dB mid (flat) position while in fader flip mode. Press a Sel key to return a slider to 0dB. It is better to cut rather than boost frequencies when tuning speakers using the GEQ. Qu-16 User Guide AP9031 iss.2… -
Page 20: Channel Routing
FX devices, for example a delay effect send for a single vocal. The channel source for the Direct Outputs can be changed on this screen. This is a global setting affecting all channel direct outputs. Qu-16 User Guide AP9031 iss.2…
-
Page 21
EQ to affect the monitor. Choose Post-EQ if you want the EQ but not the compressor to affect the monitor. Choose Post-All for effects sends. Post-Preamp Pre-EQ Post-EQ Post-All Insert Gain/Trim GATE COMP DELAY Qu-16 User Guide AP9031 iss.2… -
Page 22: Mute Groups
The Mute key will flash red if the channel is muted by a Mute Group. A short flash shows it is muted by the group only. A long flash shows it is muted by the Mute key and a group. Qu-16 User Guide AP9031 iss.2…
-
Page 23: The Master Strip
The channel faders move to become the sends to the selected mix. Channels can be set pre or post-fader and assigned using the Sel keys. Qu-16 User Guide AP9031 iss.2…
-
Page 24: Working With The Sends On Faders
+ HPF In key = HPF only + PEQ In key = PEQ only + Gate In key = Gate only + Comp In key = Compressor only + touch Scene item in list = Scene contents Qu-16 User Guide AP9031 iss.2…
-
Page 25: Touch Screen Mixing Functions
If available, its function will appear in the lower toolbar above the key. Press the key again to close the option screen. This example shows access to the Mute Groups screens from within a Routing screen. Qu-16 User Guide AP9031 iss.2…
-
Page 26: The Sel Screens — Processing And Routing
Admin – Full access to all functions Firmware V1.1 does not support User Permissions. The only User Profile available is Admin. Standard – Operation only, setup not allowed Basic – Fader and Mute control only Qu-16 User Guide AP9031 iss.2…
-
Page 27: Home Screen — Meters
Do not use it for other applications. Format the hard drive on the Qu mixer before starting to record. Use the Setup / Utility / Qu-Drive screen. This clears the drive and sets up the Qu directory structure. Qu-16 User Guide AP9031 iss.2…
-
Page 28
Select the track to play back by touching the name box. You can choose a track from the Playback or the Recordings directory. Touch Select to confirm. Press the key for options to choose playback mode: Qu-16 User Guide AP9031 iss.2… -
Page 29
Press the key for options to choose playback mode: Note – Choose to play back either Qu-Drive stereo or multitrack. It is not possible to play back both stereo and multitrack at the same time. Qu-16 User Guide AP9031 iss.2… -
Page 30: The Fx
Chorus — Chorus derives from the late 80’s where different stereo field creation techniques influenced the sound of each chorusing unit. Chorus recreates the classics using 3 stereo-field emulations. These emulations can be switched in any combination creating many different stereo fields. Qu-16 User Guide AP9031 iss.2…
-
Page 31
Press an FX Send or Return strip key while the Processing screen is active to view and work with its parameters. Touch the top of the screen to open the PEQ view and adjust its return channel equaliser. Qu-16 User Guide AP9031 iss.2… -
Page 32: Working With Fx — Adding Vocal Reverb
Use the FX Library to recall different effects types and presets. Listen to their effect of different signals and experiment with their levels and settings so that you can use them as a creative tool while mixing. Qu-16 User Guide AP9031 iss.2…
-
Page 33: Scene Memories
This copies the scene contents and name. PAFL settings Signal generator settings USB record/playback settings Scene preferences User profile settings Network settings Qu-16 User Guide AP9031 iss.2…
-
Page 34
FX sends FX1-2 Main LR mix This protects its: Master processing, Master fader and balance Routing and sends from the channels Global channel send source Mute Group assignments Qu-16 User Guide AP9031 iss.2… -
Page 35: Touch Screen Setup Functions
Gain – Adjust the talkback mic level. Assign – Touch to toggle the assignments to the LR and Mixes 1-10 on or off. Press the surface Talk key to talk to the musicians or house. Qu-16 User Guide AP9031 iss.2…
-
Page 36: Audio Setup -Signal Generator
Insert sends. Qu-Drive is 18-tracks with one patchable stereo pair for track 17-18. USB B is 24 channel with three patchable stereo pairs including the same track 17-18 as Qu-Drive and the LR post-fade mix on track 23-24. Qu-16 User Guide AP9031 iss.2…
-
Page 37: Audio Setup — Dsnake Output Patch
Mix5 L CH12 ST2 R FX2ret R Mix6 R CH13 ST3 L FX3ret L Mix7 L CH14 ST3 R FX3ret R Mix8 R CH15 Main L Mix1 Mix9 L CH16 Main R Mix2 Mix10 R Qu-16 User Guide AP9031 iss.2…
-
Page 38: Control Setup — Custom Strip
Qu features 4 SoftKeys. These are called ‘Soft’ because they can be assigned to different functions by the user. Function – Touch the box to open and choose from the list of available functions. Touch Apply to confirm the changes. Qu-16 User Guide AP9031 iss.2…
-
Page 39: Usb Data — Show Transfer
SHOW.DAT file in the folder. To view the Show name on your computer – Open the numbered Show folder and find its SHOW.DAT text file at the end of the list. Open the file to view the Show name. Qu-16 User Guide AP9031 iss.2…
-
Page 40: Network Setup
– Do not remove the USB device or turn off power while until formatting is complete. For more information on working with USB refer to the ‘Understanding Qu-Drive and USB’ article in the Qu Knowledgebase at www.allen-heath.com. Qu-16 User Guide AP9031 iss.2…
-
Page 41: Utility — Firmware Update
After a while the mixer will reboot. Important note Do not remove power during the firmware update. Do not remove the USB device until the update has completed. The mixer restarts automatically after the firmware update. Qu-16 User Guide AP9031 iss.2…
-
Page 42: Resetting The Mixer
SoftKeys = Mute Groups 1-4 preferences. Name and store this as a Scene, for example Scene 1 “Reset Board”. You could also copy this to another Scene as a backup. Qu-16 User Guide AP9031 iss.2…
-
Page 43: System Hard Reset
Sig Gen Pink Noise, unassigned Clears all scene Safes (not in V1.0) Clears all Scene memories Clears all User Libraries (not in V1.0) Resets Network address to DHCP Resets touch screen calibration Qu-16 User Guide AP9031 iss.2…
-
Page 44: Specifications
100‐240V AC, 50/60Hz, 82W max Meter Calibration 0dB meter = ‐18dBFS (+4dBu at XLR out) Meter Peak indication ‐3dBFS (+19dBu at XLR out), multi sensing Fuse rating T1.6 AL 20mm Meter Signal indication ‐48dBFS (‐26dBu at XLR out) Main meter Type 12 LED, Fast (peak) response Strip meter Type 3 LED, Fast (peak) response Dimensions and Weights Sampling Rate 48kHz +/‐100PPM Qu‐16 Mixer Width x Depth x Height 24‐bit Delta‐Sigma Desk mounted 440 x 500 x 186 mm (17.4″ x 19.7″ x 7.4″) 24‐bit Delta‐Sigma Rack mounted 483 x 486 x 190 mm (19″ x 19.1″ x 7.5″), 11U Latency 1.2 ms (local XLR in to XLR out) Packed in shipping box 610 x 680 x 380 mm (24″ x 27″ x 15″) 0.7 ms (local XLR in to AES out) Packed weight 13.5 kg (30 lbs) Unpacked weight 10 kg (22 lbs) Operating Temperature Range 0 deg C to 35 deg C (32 deg F to 95 deg F) Qu-16 User Guide AP9031 iss.2…
-
Page 45: System Block Diagram
10.1 System Block Diagram Qu-16 User Guide AP9031 iss.2…
-
Page 46: Mechanical Details
10.2 Mechanical Details The following provides information for mixer installation. The Qu-16 can be operated on a flat surface, mounted in a 19” equipment rack or plinth, or fitted into a flightcase. Ventilation — Make sure that air flow around the ventilation slots at the rear and underside of the mixer is not obstructed.
-
Page 47
Qu-16 User Guide AP9031 iss.2… -
Page 48
Qu-16 User Guide AP9031 iss.2…
-
Contents
-
Table of Contents
-
Bookmarks
Quick Links
For Firmware V1.2
Check www.allen-heath.com for the latest firmware available
Publication AP9031
Related Manuals for ALLEN & HEATH Qu — 16
Summary of Contents for ALLEN & HEATH Qu — 16
-
Page 1
For Firmware V1.2 Check www.allen-heath.com for the latest firmware available Publication AP9031… -
Page 2
Qu-16 Qu-Drive. USB ( USB, « Qu-Drive USB ‘ Qu Knowledgebase www.allen-heath.com. Qu-Drive . USB. Setup / Utility / Qu-Drive. USB. Qu-Drive: File System: Format, ‘OK’. www.allen-heath.com Qu16UpdtV1_10_2411.QUU .QUU. Qu-Drive Setup / Utility / Firmware. Update. USB, ALLEN&HEATH How to Update Qu Firmware Iss.2 Page 1 of 1… -
Page 3
Limited One Year Manufacturer’s Warranty This product is warranted to be free from defects in materials or workmanship for period of one year from the date of purchase by the original owner. To ensure a high level of performance and reliability for which this equipment has been designed and manufactured, read this User Guide before operating. -
Page 4: Safety Instructions
IMPORTANT — Read these instructions before starting: Safety instructions Before starting, read the Important Safety Instructions printed on the sheets supplied with the equipment. For your own safety and that of the operator, technical crew and performers, follow all instructions and heed all warnings printed on the sheet and on the equipment panels. System operating firmware The function of the Qu mixer is determined by the firmware (operating software) that runs it.
-
Page 5: Register Your Product
1. Packed contents Qu-16 Mixer User Guide AP9031 Safety Sheets AP3345 – English AP7287 – French • AP8513 – Chinese Mains lead Check this • is correct for your territory Read this before starting Accessories available 19” Rack Ear Kit Part: QU-16-RK19 To mount the Qu-16 in a standard 19”…
-
Page 6: Table Of Contents
2. Contents ………………..4 ………………..5 ………………….. 7 ………………8 …………….. 8 …………….9 …………….9 …………….10 dSNAKE …………11 AudioRack ……….. 11 ……12 ………………..13 ………………13 …………….15 .
-
Page 7
8.13 …………….43 8.14 – Qu-Drive …………….. 43 8.15 – …………. 44 DAW ………………..45 Qu-Pad iPad …………….. 46 ………………47 11.1 – ……. 47 11.2 …………….. 48 ………………..49 12.1 …………….50 12.2 …………… -
Page 8
3. Introduction Qu-16 — Allen & Heath, iLive. Qu-16 iPad. AR2412 or AR84 alkback – 10 mix, 2 FX, LR, PAFL 12 XLR – 4 + LR AES, Alt Out, … -
Page 9: Stereo Line Input
Qu-16.. 1-10 Mic and Line inputs 1-16 2Trk Talk- back Kensington Lock Cable clamp dSNAKE USB B Mono Line Input – ¼” TRS (Tip, Ring, Sleeve) TRS. Microphone Input – Pin2 = hot 48V. 48V. Stereo Line Input – ST2 ¼” TRS (Tip, Ring, Sleeve) L/M.
-
Page 10
Mix Outputs – 0dBu. Ma +22dBu. Pin2 = hot 3 XLR (” ”) 1 (” ”). Main LR Output – AES Output – 2- XLR co AES (Audio En- gineering Society) AES. Setup / Audio / Output Patch. Alt Out –… -
Page 11
100 to 240 V.AC 47 to 63Hz AC MAINS IN – – Torx T20. Fuse – Power ON/OFF – – ON/OFF. – – Home. Shut Down USB. ON/OFF. complete, press the ON/OFF switch to turn the mixer off. Qu-16 User Guide AP9031 iss.3… -
Page 12: Dsnake
dSNAKE Qu-16 “digital snake” & Heath Allen & Heath ME. AudioRack Qu-16 Allen & Heath GLD-AR2412 GLD-AR84, Qu-16 Cat5 dSNAKE. «Digital snake” — dSNAKE — dSNAKE CAT5 – Gain, Pad, 48 Cat5 — STP ( Cat5 — dSNAKE Neutrik EtherCon Qu-16 CH1-16…
-
Page 13
& Heath Qu-16. ME-1 — dSNAKE CH1-16, ST1-3, LR, FX1-3 Mix1-10 . M -1 M -1 CAT5 thernet ll n & Heath ME-U hub.M dSNAKE, CAT5. AR2412 AudioRack — ME-1 Ethernet ME-U MONITOR, EXPANDER AR2412 MONITOR EXPANDER dSNAKE Qu-16 — ME-1 Ethernet ME-U Qu-16 dSNAKE… -
Page 14
Qu-16 TouchChannel SuperStrip Qu-Drive Fader Flip Copy/Paste/reset Mix assign Layer select Fader Strips Qu-16 Fader Flip. Layers – Qu-16 User Guide AP9031 iss.3… -
Page 15: Ap9031 Iss
Mute – Mute Mute Group. Sel – Channel Processing. SuperStrip Processing Routing. – Assign, Master Strip. – Pre- Fade, – Copy, Paste, – Reset, PAFL – PAFL. PAFL. PAFL PAFL, Setup uto-cancel – Additive mode – Sel follow PAFL – PAFL LR to PAFL –…
-
Page 16
SuperStrip Processing. Sel. Mono input H1-16 = Source, Preamp, Gate, P Q, ompressor, Delay, Stereo linking Stereo input ST1-3 = Source, Trim, Gate, P Q, ompressor, Delay FX Return 1-4 = FX parameters, Mix1-10 = P Q, G Q, ompressor, Delay Main LR = G Q,… -
Page 17
— Mic / Line dSNK — dSNAKE. Qu-DRV — USB. USB B — Mac. Qu-Drive USB ( Local ( Gain) dSNAKE ( Gain) Local ( Gain) — Mic / Line PADL SS dSNAKE ( Gain) — AR2412 AR84 AudioRack Qu dSNAKE CAT5. -
Page 18
G G G a a a i i i n n n Peak Gain Polarity — Ø Preamp Insert FX / Back panel Delay — Post-Preamp Pre-EQ Post-EQ Post-All Insert Gain/Trim GATE COMP DELAY Linking ( Preamp – Gain/48V, Polarity Dynamics (Compressor Gate) — Side Chains Main mix –… -
Page 19
12dB PEQ — — 20 LF ( LM ( HM ( HF ( Gain – o Frequency – a sweep o 20 Width – a 1/9 o Thres Ratio: (1:1) — ; (Inf) — 3:1. Compressor active GR = Gain Reduction Qu-16 User Guide AP9031 iss.3… -
Page 20
Gain, Attack . Release ‘ ’ . Hard Knee . Soft Knee ‘ ’ ‘ ’ Insert FX / Back panel Delay GEQ ( — 20 31.5 + / -12 GEQ. Qu-16 User Guide AP9031 iss.3… -
Page 21
GEQ Fader Flip Gate Comp Channel (Preamp, Gate, PEQ, Comp, Delay) Gate, PEQ Comp. CH1-16 ST1-3. “Recall Preamp”, LOCAL, dSNAKE PEQ. Qu-16 User Guide AP9031 iss.3… -
Page 22
Routing. Mute Routing. Sel. Routing Mute Pan c Sel. Master Strip: LR = Channel main pan FX send = Channel main pan Mono Mix1-4 = Disabled Stereo Mix5-10 = Channel send pan Width – Direct Output Trim . -
Page 23
(Pre) (Post) Level FX2. Mix>Return, (Pre) (Post) ost-fade, Level. 1-10. FX / Back panel. Routing Output Balance hannel Source Post-Preamp Pre- Q Post- Q Post- ll Post-Preamp Pre-EQ Post-EQ Post-All Insert Gain/Trim GATE COMP DELAY Qu-16 User Guide AP9031 iss.3… -
Page 24: Mute
6.8 Mute 4 Mute Mute Mute- Home Routing, Mute Routing. O Mute Grp Assign. 4 Mute Mute Routing, Mute Mute Clear/Set Mute Mute Mute Home. Routing Mute MG Masters SoftKeys Mute . Mute SoftKeys Mute Mute Mute…
-
Page 25: The Master Strip
6.10 Mix. Mute – Mute Sel – Processing. SuperStrip. Processing Routing, Copy mix processing – Copy, Mix, Paste Reset mix processing – PAFL – PAFL. PAFL PAFL Setup, PAFL. AFL ( – ‘post-fader’ Pk – 0 – 0dBu ( 18dB). Sig –…
-
Page 26
6.11 Select a Mix — Mix. . 16 Adjust Send levels – Adjust Send pans — Assign sends to the mix – ssign Sel, ssign. To toggle all assignments on or off — ssign Set sends Pre or Post Fade — Fade pre/post fade… -
Page 27
Button – o ‘(Hold)’. – o – o – AES. – Apply / ancel – Apply Cancel – Mute Groups Routing. Qu-16 User Guide AP9031 iss.3… -
Page 28: Copy, Paste, Reset
Status bar Scene — (Curr:) (Next:) (Curr:) Next: opy / Paste / Reset. dSNA E AudioRack AR2412 AR84 dSNAKE — ME- 1 AudioRack USB — Qu -Drive Qu-Drive Qu -Drive Stereo Multitrack Copy, Paste, Reset opy – Copy + Paste + Sel.
-
Page 29: Sel
– Processing Routing rocessing – Sel: Preamp, Gate, Com- pressor. Preamp PEQ. TouchChannel. SuperStrip Routing – Sel. Master Strip Home ome. Sel. Mute Shut Down Lock Surface Home – Admin – V1.2 dmin. Qu-16 User Guide AP9031 iss.3…
-
Page 30: Rta
Home – Home – RT (RTA), PAFL. 20Hz o 20kHz — RTA — iPad Qu-Pad RTA ( Home – Q-Drive (USB Audio) Qu-Drive Stereo page – Qu-Drive Stop USB, Qu-Drive: = 48 , 24-bit, WAV = 288 K / (4GB) …
-
Page 31
Drive LR Post-Fade. Record USB, Qu-Drive: 44,1 , 16 ,WAV / Qu-Drive A QU / USBPLAY. USB- Qu-Drive. Source. Qu-Drive «Global USB”. ST3. Qu-Drive USB. Recordings. Select Qu-16 User Guide AP9031 iss.3… -
Page 32
Qu Drive USB, Qu -Drive. Stop USB, Qu-Drive = CH1-16 , 24- , WAV ‘ QU- MTnnn ‘ ‘ NNN ‘ 999, ‘ TRKnn ‘ “nn “ USB, Setup/ Utilities / Qu-Drive Screen. Setup udio / Output Patch, 17-18 1-16… -
Page 33
Qu-16 Allen & Heath iLive. Library – Library. Recall Reverb – SMR Live (Spatial Modelling Reverberator) — Classic, Hall, Room EMT, . HF , a Expert o Delay – e DT — ‘slapback’. . DT horus — 80- , Qu-16 User Guide AP9031 iss.3… -
Page 34
Symphonic Chorus — 80- . : Frequency Depth, ‘SymphonicVox’ ‘SymphonyStrings’. Flanger – Qu ‘Ambient’, ‘Vintage’ ‘Wild’. Stereo Split Stereo Spread, Vintage Depth Regeneration. Phaser — , Feed forward Feed back, ‘zero’ Gated Verb — Gated Reverb, ‘Panned’ ‘Powerbox’. Lo-cut Hi-cut Back Panel. -
Page 35
– FX1. P Library. Reverb FX1. O Back Panel Mix>Return ‘0’ FX1. FX1. 16 FX1. FX1. ‘0’ Mute Group. Qu-16 User Guide AP9031 iss.3… -
Page 36
7.10 Qu-16 “ ” Scenes Scenes, Scene list – Name – o Store – o Recall – o Reset Mix Settings – ‘ ’ – Reset Mix Settings Global Recall Filter. – Reset Mix Settings Preamp settings Channel processing and linking … -
Page 37: Output Patch
F F F Recall ilter Recall Filter. Global Filter Filter selections are grouped according to input, output and type: – Global Filter, Inputs/FX (All CH1-16, ST1-3, FX1-4) — Safes screen Input patch (Local, dSNAKE, USB) Recall Safe Preamps (Gain/Pad/Trim/48V/Pol) .
-
Page 38: Pafl
Setup Setup, – Setup, — PAFL PAFL dditive mode – PAFL PAFL Input/Output PFL ( ) – Input/Output AFL ( ) – Sel follow PAFL – PAFL a LR to PAFL – PAFL. PAFL Delay – PAFL Trim – PFL ( 24dB AFL ( — Talkback…
-
Page 39: Signal Generator
– Source – – – – Band-pass Noise – Level – Mute – Assign – 1-10. – – Output Patch Output Patch Qu-Drive Stereo – Qu-Drive Alt Out – Alt Out AES Out – AES. Multitrack – Qu-Drive USB B 1-16…
-
Page 40: Dsnake Output Patch
– dSNAKE dSNAKE . AR2412 AR84 AudioRack . dSNAKE dSNAKE — dSNAKE Allen & Heath ME , AR2412 udioRack dSNAKE AR2412 FOH PA AudioRack — EXPANDER AR2412 AudioRack . AR84 AudioRack dSNAKE AR84 dSNAKE ME- 1 dSNAKE . ME- 1 ME- U dSNAKE MONITOR…
-
Page 41: Softkeys
, FX, MIDI Digital Audio Workstation (DAW). Rotary Fn ‘+1’ DAW — DAW (Digital Audio Workstation) MIDI DAW. “MIDI”, Fn ‘+1’ Unassigned DAW. Mono input channels 1-16 Stereo input channels 1-3 FX Ret FX returns 1-4 FX Send FX sends 1-2 Mix masters 1-10 Main LR master MIDI…
-
Page 42: Midi
-MIDI MIDI MIDI MIDI Mutes Faders and Pan Mix and FX Level, Pan, Assign, Pre/Post MIDI USB — Mute Group Assign, master Mute Apple ® Mac OSX 10.6 PAFL select . USB B Input channel source MIDI …
-
Page 43: Usb Data
8.11 USB, Qu-Drive . ‘ ’ USB. USB. ‘0‘. USB. Utility/Qu-Drive screen A Show stores the following: Current mixer settings USB. Mixer setup and preferences Show. Show USB. All Scenes All User Libraries USB Show. MIDI channel number Show.
-
Page 44
8.12 TCP/ IP- MIDI Qu-Pad Ipad. DHCP, 8.13 8.14 Qu-Drive USB ( Qu -Drive . Qu-Drive USB. USB : ‘OK’ . USB , “ Qu-Drive USB“ www.allen — heath.com . Qu-16 User Guide AP9031 iss.3… -
Page 45
8.15 www.allen — heath.com .Quu Qu16UpdtV1_10_2411.QUU . Quu. Drive Setup/Utilities/Firmware Update. USB , Qu-16 User Guide AP9031 iss.3… -
Page 46
Qu-16 MIDI Apple ® Mac USB B DAW (Digital Audio Workstation) Qu MIDI Allen & Heath DAW Mac, Mackie Control. — Qu Apple ® Mac. USB MIDI Windows ® Home /Home screen. v1.20 Allen — Heath . MIDI Qu-16 / MIDI MIDI channel. -
Page 47
Qu-Pad iPad Qu-Pad Qu-16. . Qu-Pad . Qu-Pad Ipad Qu-Pad Ipad Fader levels, mutes, pan Aux and FX sends, routing and Pre/Post switching Input Preamp/USB selection Preamp Gain, Pad, Polarity and 48V HPF, Gate, PEQ, GEQ, Comp, Delays … -
Page 48
11.1 Mix — Reset Mix Settings ‘ “ MIC GAIN, Reset mix settings: Gates Source Preamp, Gain 28dB, 48V off ST1-3 trim 0dB HPF out, 100Hz PEQ and GEQ in, flat Gates out, thres -36dB, depth 20dB … -
Page 49
11.2 Hold for 3 seconds while powering up the mixer Source Preamp, Gain 28dB, 48V off ST1-3 trim 0dB Touch Screen Reset Setup HPF out, 100Hz PEQ and GEQ in, flat Gates out, thres -36dB, depth 20dB … -
Page 50
XLR Mic/Line 1 16 Mix1‐10 LR , XLR <75Ω ‐60 o +5dBu +4dBu = 0dB ‐5 to +60dB, 1dB steps +22dBu +19dBu ‐90 dBu (muted, 20‐20kHz) >5kΩ , 1/4″ TRS Line TRS 1 16 ‐50 to +20dBu <75Ω ‐10 to +60dB, 1dB steps +4dBu = 0dB meter reading +29dBu +22dBu… -
Page 51
12.1 Qu-16 User Guide AP9031 iss.3… -
Page 52
12.2 Qu- 16 Qu-16 “ QU-16-RK19 11U. 6x M4x8 AB0332) T20 Torx. 19“ Qu-16 User Guide AP9031 iss.3… -
Page 53
Qu-16 User Guide AP9031 iss.3…
This manual is also suitable for:
Qu-16
Посмотреть инструкция для Allen & Heath Qu-16 бесплатно. Руководство относится к категории Смесители, 29 человек(а) дали ему среднюю оценку 8.3. Руководство доступно на следующих языках: английский. У вас есть вопрос о Allen & Heath Qu-16 или вам нужна помощь? Задайте свой вопрос здесь
Не можете найти ответ на свой вопрос в руководстве? Вы можете найти ответ на свой вопрос ниже, в разделе часто задаваемых вопросов о Allen & Heath Qu-16.
Как лучше всего выполнять чистку Смеситель?
Инструкция Allen & Heath Qu-16 доступно в русский?
Не нашли свой вопрос? Задайте свой вопрос здесь