Товары для дома
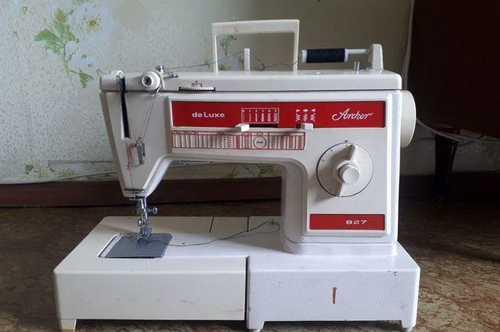
продаю на запасные части. сгорел двигатель
Мы нашли это объявление 3 года назад
Нажмите Следить и система автоматически будет уведомлять Вас о новых предложениях со всех досок объявлений
| Вид товара | Бытовая техника |
Адрес (Кликните по адресу для показа карты)
Омск, улица Лукашевича, 23А
Еще объявления
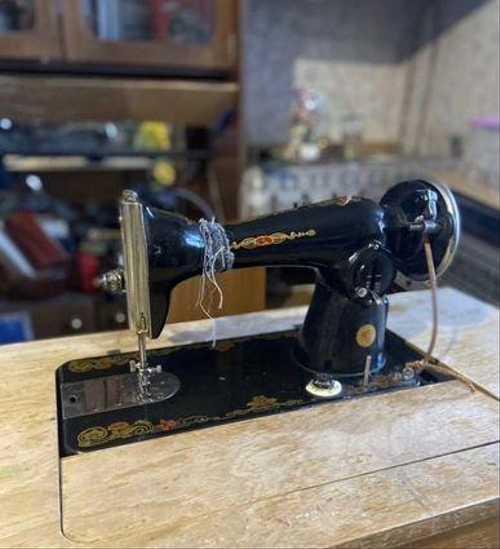
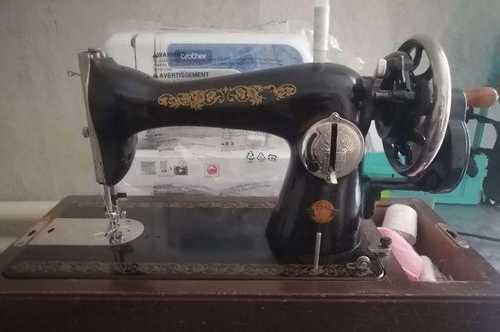
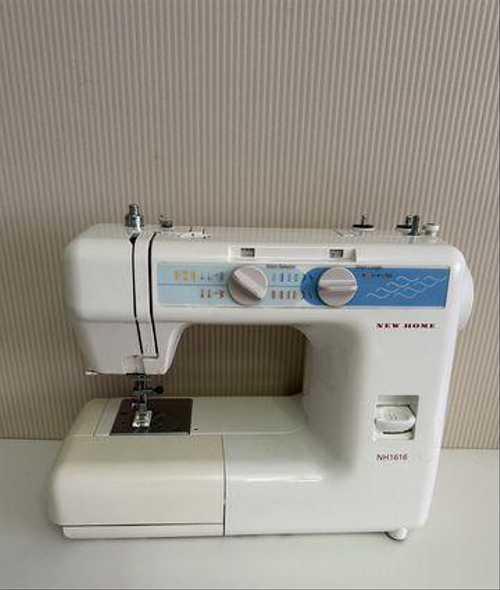
Машинка рабочая, есть запасной ремень
Бытовая техника
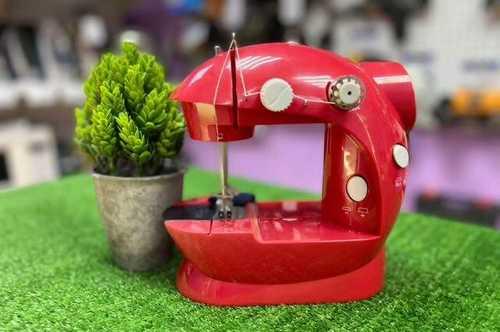
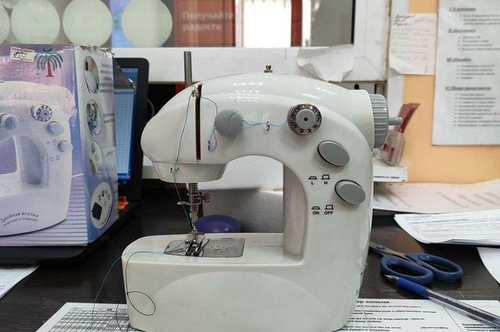
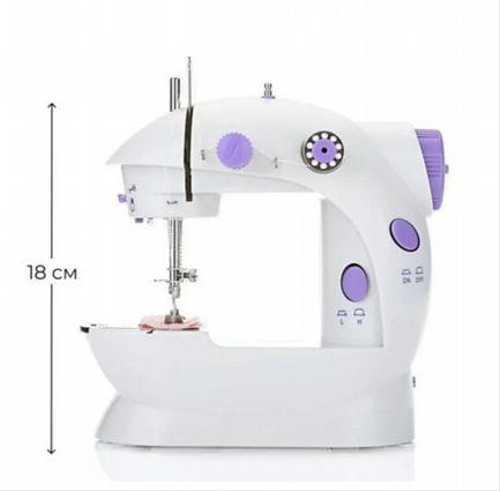
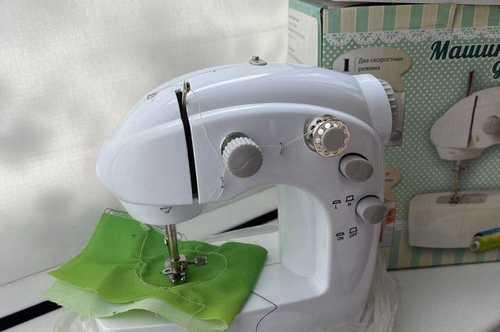
Мини швейная машинка Mini Sewing Machine — очень удобна и легка в управлении. С ней справится сможет любая хозяйка. Благодаря своим небольшим размерам и очень малому весу она всегда будет у вас под рукой. С ее помощью вы быстро и качественно можете не только отремонтировать одежду, но и сделать множество других хозяйственных дел, например, подшить слишком длинные шторы. Маленький размер машинки делает возможным использование и хранение ее даже в самой маленькой квартире. В отличие от обычной швейной машины, Мини швейная машинка Mini Sewing Machine практически не занимает пространства, ее можно положить даже в ящик тумбочки или на полку в шкафу. Она так же станет прекрасным подарком для ваших близких НЕДОСТАТКИ: НЕТ ••• Данный товар приобрести можно: «Комиссионный магазин «УРАЛМАШ» (ул. Ильича д.28), Перекресток улиц Ильича – Калинина (с 9:00 до 22:00).••• ••• Основной ассортимент нашего магазина представлен в блоке справа. Нажмите на надпись «Комиссионный магазин «Уралмаш»» и увидите весь наш ассортимент >>>>> •••Покупаем и Продаём ювелирные изделия, бывшие в употреблении телефоны, ноутбуки, строительный инструмент и другую аппаратуру.••• ••• Доставка по России: Почта и «СДЕК».•••
Бытовая техника
Швейная машинка Подольская, рабочая
Бытовая техника
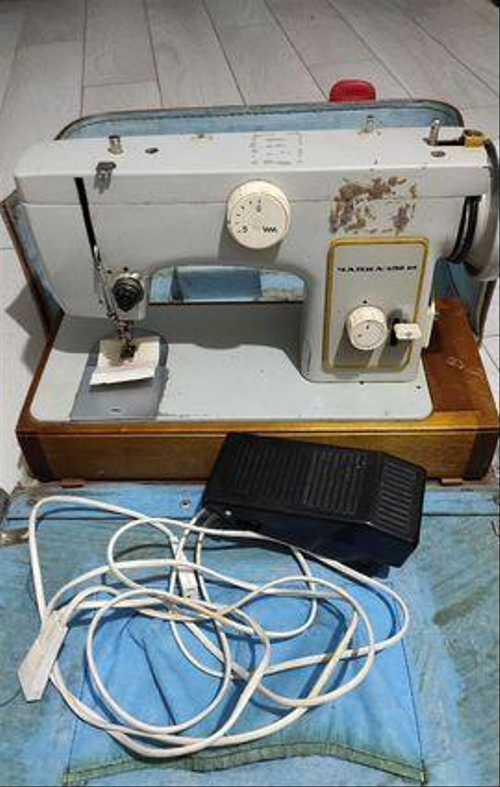
В рабочем состоянии, любые проверки на месте.
Бытовая техника
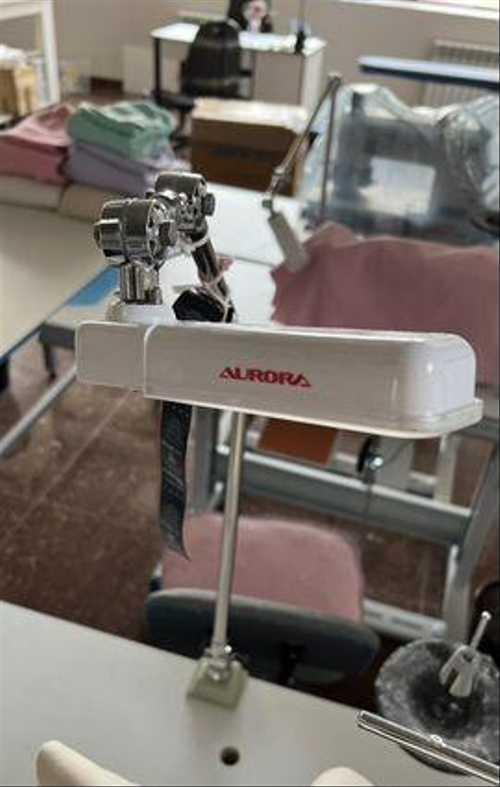
Лампа для швейной машины Аврора в ОТЛИЧНОМ состоянии ! Характеристики читайте в интернете ! продается в связи с закрытием швейного производства. Возможна доставка в другой город вашими силами Самовывоз из Дзержинского района
Бытовая техника
ТОРГА НЕТ!!! Машинка шьёт, но капризнячает иногда. Умелые лучки,которые умеют правильно подобрать нитки и подкрутить все, будет служить долго! В комплекте все по 1 шт. Можно сразу шить. Пушкин самовывоз
Бытовая техника

Швейная машинка, ручная. 2 шт в наличии, 1000 рублей штука.
Бытовая техника
Старая рабочая машинка
Бытовая техника
Швейная машина в хорошем состоянии, только нужно смазать маслом.
Бытовая техника
Швейная машинка, б/у
Бытовая техника

Только ОПТОМ Продажа от 1 коробки — 20 шт Цена за ед. — 672,00 р. Цена за коробку — 13440 р Для получения прайс листа (БОЛЕЕ 2000 товаров) пишите! Маленькая швейная машина SM-202A для домашнего использования с простым управлением. Компактная швейная машина предназначена для несложных задач по ремонту одежды или домашнего текстиля из мягких тканей. Мини швейная машина поможет: отремонтировать одежду или вещь; подшить шторы; прихватить скатерть; сшить с нуля небольшое изделие; детские игрушки красивую одежду для игрушек и мн. др. Ручная швейная машинка маленькая и не требует специального оборудованного для нее места. После использования машину легко спрятать в ящик или на полку, т.к. она очень компактна. Ручная швейная машинка мини оснащена ножной педалью, функцией намотки нити на шпульку и адаптером от электрической сети. Кроме того, устройство может функционировать при помощи батареек в количестве 4х штук класса АА, поэтому ее удобно брать с собой в поездки. Мини швейная машинка имеет качественную сборку и весь необходимый функционал обычной швейной машины. Для заботливой хозяйки эта вещь станет незаменимой помощницей в доме. TopOptMsk — компания, специализирующаяся на оптовой продаже товаров из Китая со склада в Москве. Наша компания работает на рынке оптовой торговли уже несколько лет и зарекомендовала себя как надежный поставщик качественной продукции. Мы предлагаем широкий ассортимент товаров, включая электронику, бытовую технику, аксессуары для мобильных устройств, игрушки, товары для дома и сада, а также многое другое. Ключевой принцип нашей работы — оперативность и надежность. Мы стремимся к максимальному удовлетворению потребностей наших клиентов, поэтому всегда готовы предложить наилучшие условия оплаты и доставки. Мы работаем как с физическими, так и с юридическими лицами, и всегда готовы обсудить индивидуальные условия сотрудничества.
Бытовая техника
Машинка в рабочем состоянии, требуется настройка (путает нижнюю нитку)
Бытовая техника
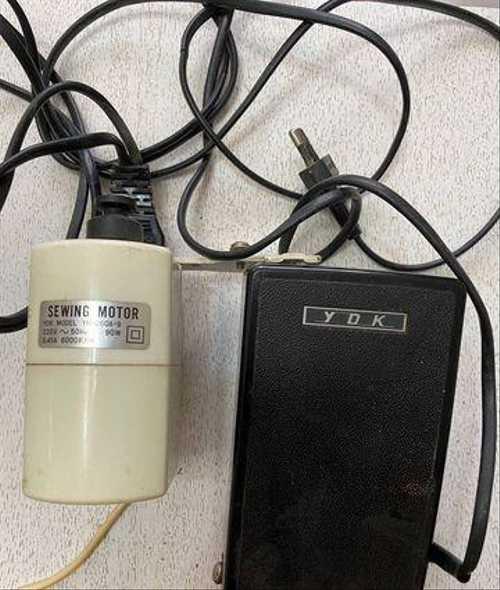
Моторчик к швейной машине
Бытовая техника
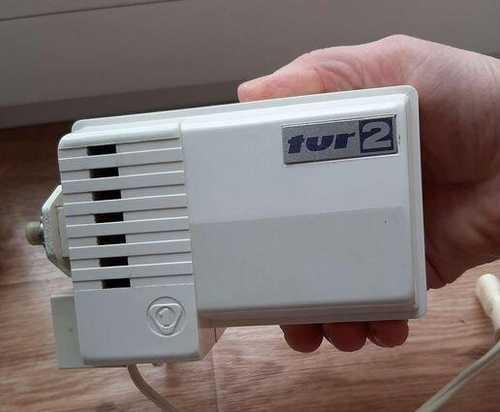
Практически новая. Работает от батареек и от сети. Адаптер утерян
Бытовая техника
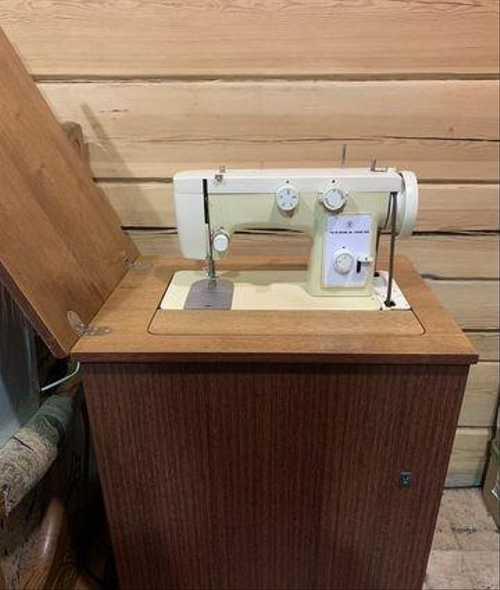
Продается швейная машина Подольск — 2м1
Бытовая техника

Продаётся педаль с мотором б/у в рабочем состоянии.
Бытовая техника
Швейная машина Irit IRP-01 Арт.2534664 Товар в хорошем состоянии, полностью иcпpaвен, вcе функции paбoтaют. Гарантия обмена или возврата — предоставляем возможность проверки работоспособности дома. Дополнительно предоставим фото и видеообзор товара, пишите в чат. Товар находится в Магазине АВРОРА по адресу: Воронеж, Южно-Моравская ул., 30Д Бронирование товара (услуга бесплатная, осуществляется через чат Авито) — Доставка Курьером до двери в пределах города — Доставка по РФ Почтой России и любой транспортной компанией — Гарантия — Рассрочка 0% — TRADE-IN (обмен) Все вопросы по телефону или в сообщениях Работаем 24/7 без выходных и праздников Ещё больше товаров на сайте аврора24 АВРОРА – ПОКУПАЙ ВЫГОДНО И БЕЗОПАСНО!
Бытовая техника

Набор лапок, есть оверлочная лапка
Бытовая техника

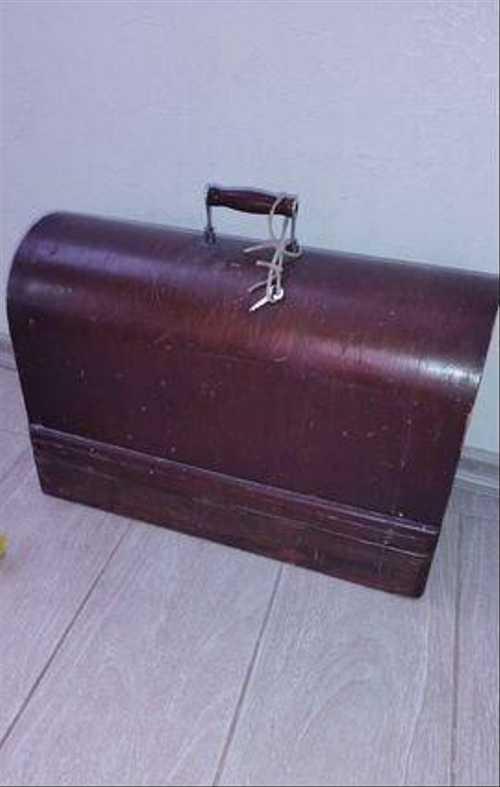
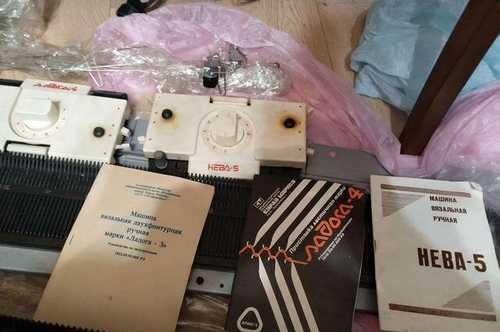
Комплект швейной ручной машины в разобранном виде. Комплектность и работоспособность неизвестна, визуально в неплохом состоянии.
Бытовая техника
В хорошем состоянии
Бытовая техника
Внимание! Festima.Ru является поисковиком по объявлениям с популярных площадок.
Мы не производим реализацию товара, не храним изображения и персональные данные.
Все изображения принадлежат их авторам
Отказ от ответственности
-
Page 1
827/827-M Service Instructions… -
Page 2
IMPORTANT READ CAREFULLY BEFORE USE KEEP FOR FUTURE REFERENCE All rights reserved. Property of Dürkopp Adler AG and protected by copyright. Any reuse of these contents, including extracts, is prohibited without the prior written approval of Dürkopp Adler AG. Copyright © Dürkopp Adler AG 2019… -
Page 3: Table Of Contents
9.2.1 Adjusting the feed movement …………. 40 9.2.2 Adjusting the feed dog height at top dead center ……. 41 9.2.3 Adjusting the stroke movement ……….42 9.2.4 Adjusting the compensating weight ……….43 Service Instructions 827/827-M — 01.0 — 05/2019…
-
Page 4
18.3.2 Assembling the stator …………..83 18.3.3 Assembling the encoder …………. 84 18.3.4 Assembling the cover …………..84 18.3.5 Locking the machine in place …………. 85 18.3.6 Assembling the handwheel flange ……….86 18.3.7 Assembling the handwheel…………86 Service Instructions 827/827-M — 01.0 — 05/2019… -
Page 5
Troubleshooting …………..109 23.1 Customer Service …………..109 23.2 Messages of the software…………109 23.2.1 Information messages ………….. 109 23.2.2 Error Messages ……………. 113 23.3 Errors in sewing process …………115 Technical data…………….. 117 Service Instructions 827/827-M — 01.0 — 05/2019… -
Page 6
Table of Contents Service Instructions 827/827-M — 01.0 — 05/2019… -
Page 7: About These Instructions
Proper setting Specifies proper setting. Disturbances Specifies the disturbances that can occur from an incorrect setting. Cover Specifies which covers must be disassembled in order to access the components to be set. Service Instructions 827/827-M — 01.0 — 05/2019…
-
Page 8
Safety ( p. 9). If no other clear location information is used in a figure, indications of right Location information or left are always from the user’s point of view. Service Instructions 827/827-M — 01.0 — 05/2019… -
Page 9: Other Documents
Leave machines, equipment and packaging material in the condition in which they were found when the damage was discovered. This will ensure any claims against the transport company. Report all other complaints to Dürkopp Adler immediately after receiving the product. Service Instructions 827/827-M — 01.0 — 05/2019…
-
Page 10
About these instructions Service Instructions 827/827-M — 01.0 — 05/2019… -
Page 11: Safety
• Setting up the machine • Performing maintenance work and repairs • Performing work on electrical equipment Only authorized persons may work on the machine and must first have understood these instructions. Service Instructions 827/827-M — 01.0 — 05/2019…
-
Page 12: Signal Words And Symbols Used In Warnings
If ignored, environmental damage can result NOTICE (without hazard symbol) If ignored, property damage can result The following symbols indicate the type of danger to personnel: Symbols Symbol Type of danger General Electric shock Service Instructions 827/827-M — 01.0 — 05/2019…
-
Page 13
Type and source of danger! Consequences of non-compliance. Measures for avoiding the danger. This is what a warning looks like for a hazard that could result in moderate or minor injury if the warning is ignored. Service Instructions 827/827-M — 01.0 — 05/2019… -
Page 14
NOTICE Type and source of danger! Consequences of non-compliance. Measures for avoiding the danger. This is what a warning looks like for a hazard that could result in property damage if ignored. Service Instructions 827/827-M — 01.0 — 05/2019… -
Page 15: Working Basis
3. Cut off any overlapping cable ties. NOTICE Property damage may occur! Excess cables can impair the functioning of moving machine parts. This impairs the sewing function and can result in damage. Lay excess cable as described above. Service Instructions 827/827-M — 01.0 — 05/2019…
-
Page 16: Removing The Covers
Tilting the machine head To tilt the machine head: 1. Tilt the machine head as far as it will go. Erecting the machine head To erect the machine head: 1. Erect the machine head. Service Instructions 827/827-M — 01.0 — 05/2019…
-
Page 17: Disassembling And Assembling The Arm Cover
3. Disassemble the arm cover (2). Assembling the arm cover To assemble the arm cover: 1. Turn the adjusting wheel for the sewing foot stroke to 2. 2. Assemble the arm cover (2). 3. Tighten the screws (1). Service Instructions 827/827-M — 01.0 — 05/2019…
-
Page 18: Disassembling And Assembling The Head Cover
To disassemble the head cover: 1. Loosen the screws (1). 2. Disassemble the head cover (2). Assembling the head cover To assemble the head cover: 1. Assemble the head cover (2). 2. Tighten the screws (1). Service Instructions 827/827-M — 01.0 — 05/2019…
-
Page 19: Disassembling And Assembling The Valve Cover
When disassembling the cover, make sure not to tear off any cables. Assembling the valve cover To assemble the valve cover: 1. Assemble the valve cover (2). 2. Tighten the screws (1). Important When assembling the cover, make sure not to pinch any cables. Service Instructions 827/827-M — 01.0 — 05/2019…
-
Page 20: Opening And Closing The Throat Plate Slide
1. Press the clamping spring (3) downwards. 2. Push the throat plate slide (1) apart. Closing the throat plate slide To close the throat plate slide: 1. Screw the throat plate slide (1) to the throat plate (2). Service Instructions 827/827-M — 01.0 — 05/2019…
-
Page 21: Disassembling And Assembling The Throat Plate
To assemble the throat plate: 1. Insert the throat plate (2). Ensure that the bobbin case nose (3) is in the cutout of the throat plate. 2. Tighten the screws (1). 3. Close the throat plate slide. Service Instructions 827/827-M — 01.0 — 05/2019…
-
Page 22: Disassembling And Assembling The Feed Dog
3. Assemble the throat plate ( p. 19). Important Check the feed dog position in motion and with the stitch length at its maximum by turning the handwheel. The feed dog must not hit against the throat plate. Service Instructions 827/827-M — 01.0 — 05/2019…
-
Page 23: Flats On Shafts
This stabilizes the connection and makes adjustment easier. For all adjustments on the surface, the first screw in the direction of rotation is screwed onto the surface. Important Always ensure that the screw faces are completely flush with the surface. Service Instructions 827/827-M — 01.0 — 05/2019…
-
Page 24: Locking The Machine In Place
3. Insert the locking peg (2) into the slot. Removing the lock To remove the lock: 1. Pull the locking peg (2) out of the slot. 2. Insert the plug into the locking opening (1). Service Instructions 827/827-M — 01.0 — 05/2019…
-
Page 25: Adjusting The Handwheel Into Position
For some adjustments, the graduated scale (1) on the handwheel has to be moved to a certain position. To adjust the handwheel into position: 1. Turn the handwheel until the specified number on the graduated scale (1) is next to the marking (2). Service Instructions 827/827-M — 01.0 — 05/2019…
-
Page 26
Working basis Service Instructions 827/827-M — 01.0 — 05/2019… -
Page 27: Adjusting The Handwheel Scale
(1). 3. Turn the handwheel so that the marking (2) points to the degree number 0°. 4. Tighten the fastening screw. 5. Turn the handwheel to 50° and tighten the 2 fastening screw. Service Instructions 827/827-M — 01.0 — 05/2019…
-
Page 28: Positioning The Arm Shaft
4. Push the arm shaft with the arm shaft crank (3) to the right as far as it will go and flush with the machine casting. 5. Tighten the threaded pins (1). Service Instructions 827/827-M — 01.0 — 05/2019…
-
Page 29: Positioning The Toothed Belt Wheels
The distance between the winder wheel (3) and the upper toothed belt wheel (1) must be 0.8 mm. The toothed belt (4) runs correctly without running against the snap ring or slipping off. Service Instructions 827/827-M — 01.0 — 05/2019…
-
Page 30: Positioning The Lower Toothed Belt Wheel
1. Tilt the machine head ( p. 14). 2. Loosen the threaded pins (4). 3. Turn the lower toothed belt wheel (3) such that the threaded pins (4) are seated on the flat of the arm shaft. Service Instructions 827/827-M — 01.0 — 05/2019…
-
Page 31
4. Move the lower toothed belt wheel (3) sufficiently far to the side so that the toothed belt (1) makes contact with the snap ring (2) without being pushed away. 5. Tighten the threaded pins (4). Service Instructions 827/827-M — 01.0 — 05/2019… -
Page 32: Stitch Length Adjusting Wheel
7.1 Adjusting the stitch length adjusting wheel Proper setting 1. Adjust the stitch length adjusting wheel to 0. No play on the stitch regulator gear. The plates for the gear are parallel; the frame cannot be moved. Service Instructions 827/827-M — 01.0 — 05/2019…
-
Page 33
Fig. 17: Adjusting the stitch length adjusting wheel (2) ⑪ ⑦ ⑧ ⑨ ⑩ (7) — Frame for the stitch regulator gear (10) — Screw (8) — Plates for the stitch regulator gear (11) — Tension spring (9) — Hole Service Instructions 827/827-M — 01.0 — 05/2019… -
Page 34: Adjusting The Stitch Length Limit
Proper setting Turn the stitch length adjusting wheel clockwise as far as it will go. The stitch length adjusting wheel can only be turned up to the set maximum stitch length. Service Instructions 827/827-M — 01.0 — 05/2019…
-
Page 35: Adjusting The Eccentric For The Forward And Backward Stitches
Fig. 19: Adjusting the eccentric for the forward and backward stitches ④ ① ③ ② ③ ② (1) — Block (3) — Eccentric (2) — Threaded pin (4) — Recess Service Instructions 827/827-M — 01.0 — 05/2019…
-
Page 36
(4) faces the front. • Turn clockwise: the forward stitch becomes larger, the backward stitch smaller • Turn counterclockwise: the forward stitch becomes smaller, the backward stitch larger 4. Tighten the threaded pin (2). Service Instructions 827/827-M — 01.0 — 05/2019… -
Page 37: Needle Bar Linkage
1. Disassemble the arm cover ( p. 15). 2. Disassemble the head cover ( p. 16). 3. Adjust the stitch length adjusting wheel to 0. 4. Loosen the threaded pins (1) for the set collars (2). Service Instructions 827/827-M — 01.0 — 05/2019…
-
Page 38
9. Align the thread lever (7) exactly in the middle of the slot. 10. Tighten the threaded pins (6). Order Then check the following adjustment: • Looping stroke position ( p. 44) • Distance between hook and needle ( p. 44) Service Instructions 827/827-M — 01.0 — 05/2019… -
Page 39: Aligning The Needle Bar Linkage In The Sewing Direction
3. Loosen the screw (5). 4. Position the lever (2). 5. Tighten the threaded pins (4). 6. Tighten the screw (5). Order Then check the following adjustment: • Looping stroke position ( p. 44) Service Instructions 827/827-M — 01.0 — 05/2019…
-
Page 40: Adjusting The Feed Dog
(1) — Feed dog (3) — Feed dog carrier (2) — Screws To move the feed dog on the feed dog carrier: 1. Disassemble the throat plate ( p. 19). 2. Loosen the screws (2). Service Instructions 827/827-M — 01.0 — 05/2019…
-
Page 41: Moving The Feed Dog Carrier
8. Tighten the threaded pins for the set collars (2). 9. Tighten the screw (6). 10. Tighten the threaded pins (1). In the process, make sure that the feed dog height has the proper setting ( p. 41). Service Instructions 827/827-M — 01.0 — 05/2019…
-
Page 42: Adjusting The Feed Dog Movement
5. Press the stitch regulator (3) down and observe how the feed dog and needle respond. 6. Turn the pusher eccentric (2) so that the feed dog and needle no longer move when the stitch regulator (3) is pressed. 7. Tighten the threaded pins (1). Service Instructions 827/827-M — 01.0 — 05/2019…
-
Page 43: Adjusting The Feed Dog Height At Top Dead Center
3. Loosen the threaded pins (2) on the lever (1) at the left, above the hook. 4. Turn the lever (1) such that the upper edge of the feed dog protrudes 0.5 mm above the throat plate. 5. Tighten the threaded pins (2). Service Instructions 827/827-M — 01.0 — 05/2019…
-
Page 44: Adjusting The Stroke Movement
4. Turn the stroke eccentric (2) such that the upper edge of the feed dog is at the same height as the upper edge of the throat plate during the upward movement. 5. Tighten the threaded pins (1). Service Instructions 827/827-M — 01.0 — 05/2019…
-
Page 45: Adjusting The Compensating Weight
3. Turn the compensating weight (2) such that the threaded pin (1) is parallel to the base plate (3). Use the allen key inserted in the threaded pin as a means of orientation. 4. Tighten the threaded pin (1). Service Instructions 827/827-M — 01.0 — 05/2019…
-
Page 46: Position Of The Hook And Needle
The looping stroke is precisely 2 mm. Order First, check the following adjustments: • Needle bar linkage( p. 35) • A straight and undamaged needle has to be inserted ( Operating Instructions) Service Instructions 827/827-M — 01.0 — 05/2019…
-
Page 47
7. Tighten the threaded pins (2) for the set collar (1). Order Then check the following adjustments: • Needle guard ( p. 48) • Timing of cutting by the thread trimmer ( p. 63) Service Instructions 827/827-M — 01.0 — 05/2019… -
Page 48: Adjusting The Hook Side Clearance
(6) and the groove for the needle (5) is 0.1 mm at most, without the hook tip (6) touching the needle. 7. Tighten the screws (3). Order Then check the following adjustment: • Needle guard ( p. 48) Service Instructions 827/827-M — 01.0 — 05/2019…
-
Page 49: Adjusting The Needle Bar Height
When doing so, take care not to twist the needle to the side. The groove (3) must face toward the hook. Service Instructions 827/827-M — 01.0 — 05/2019…
-
Page 50: Adjusting The Needle Guard
To adjust the needle guard: 1. Disassemble the feed dog ( p. 20). 2. Turn the handwheel and check how far the needle guard (2) pushes the needle away. Service Instructions 827/827-M — 01.0 — 05/2019…
-
Page 51
3. Turn the screw (1) such that the needle guard (2) just pushes the needle (3) far away enough so that it cannot be touched by the hook tip: • To push away more forcefully: turn counterclockwise • To push away less forcefully: turn clockwise Service Instructions 827/827-M — 01.0 — 05/2019… -
Page 52: Bobbin Case Lifter
So that the thread can slip through without a problem, the width of the lifting gap and the timing of opening have to be set. Disturbance • Thread breaking • Formation of loops on the bottom side of the seam • Loud machine noise Service Instructions 827/827-M — 01.0 — 05/2019…
-
Page 53: Adjusting The Lifting Gap
While doing so, ensure that the gap is not so big that the middle part of the hook swings back and forth, hitting the slot in the throat plate. 7. Tighten the threaded pin (1). 8. Push the cover (2) upwards. 9. Tighten the screw (3). Service Instructions 827/827-M — 01.0 — 05/2019…
-
Page 54: Adjusting The Timing For Opening
5. Use the allen key to turn the control cam (3) so that the bobbin case lifter opens at the correct point in time. 6. Tighten the threaded pin (4). 7. Insert the plug (1) into the opening. Service Instructions 827/827-M — 01.0 — 05/2019…
-
Page 55: Adjusting The Sewing Foot Lifting Height
• Raise the sewing feet to a lesser height: turn clockwise • Raise the sewing feet higher: turn counterclockwise 3. Tighten the counternut (2) for the adjusting wheel (1). Service Instructions 827/827-M — 01.0 — 05/2019…
-
Page 56: Needle Thread Tension
3. Turn the tension disk (3) to set the spring tension: • Greater spring tension: turn counterclockwise • Lower spring tension: turn clockwise Important Do not twist the stop collar (1) when doing so. 4. Tighten the screw (4). Service Instructions 827/827-M — 01.0 — 05/2019…
-
Page 57: Winder
The winding process will stop automatically when the required filling quantity of the bobbin is reached. To adjust the winder filling quantity: 1. Disassemble the arm cover ( p. 15). 2. Loosen the screws (1). 3. Remove the winder. Service Instructions 827/827-M — 01.0 — 05/2019…
-
Page 58
4. Adjust the block (8) such that it is resting against the locking disk (9). 5. Adjust the block (8) such that its distance to the winder wheel (10) is 0.5 mm. 6. Tighten the threaded pin in the block (8). Service Instructions 827/827-M — 01.0 — 05/2019… -
Page 59
(14) when the block (8) has engaged in the locking disk. 3. Adjust the switch cam (13) such that the winder lever (3) has no axial play. 4. Tighten the threaded pin (12). 5. Re-assemble the winder. Service Instructions 827/827-M — 01.0 — 05/2019… -
Page 60: Adjusting The Hook Thread Guide
2. Turn the hook thread guide (2): • To the front: The hook thread will be wound on further to the front • To the rear: The hook thread will be wound on further to the rear Service Instructions 827/827-M — 01.0 — 05/2019…
-
Page 61: Thread Trimmer
(5) — Screw (3) — Hook bearing screw-on surface Proper setting The thread-pulling knife (2) pivots as close as possible above the hook and is at the same height as the counter blade (1). Service Instructions 827/827-M — 01.0 — 05/2019…
-
Page 62: Adjusting The Cutoff Curve
2. Open the throat plate slide ( p. 18). 3. Loosen the threaded pins (2). 4. Push the set collar (1) as far as it will go to the left. 5. Tighten the threaded pins (2). Service Instructions 827/827-M — 01.0 — 05/2019…
-
Page 63
15. Push the set collar (1) to the right as far as it will go and against the control cam (3). Important Check the looping stroke position ( p. 44). 16. Tighten the threaded pins (2). Service Instructions 827/827-M — 01.0 — 05/2019… -
Page 64: Adjusting The Cutting Pressure
6. Turn the counter blade (2) such that it rests against the thread-pulling knife (3). 7. Tighten the screw (1). Important Check the position of the cutters, since the counter blade can easily become warped when the screw is being tightened. Service Instructions 827/827-M — 01.0 — 05/2019…
-
Page 65: Adjusting Point In Time For Cutting
(5). 6. Adjust the handwheel position to 60°. 7. Push the control cam (3) to the left as far as it will go and against the set collar (2). Service Instructions 827/827-M — 01.0 — 05/2019…
-
Page 66
• Insert the thread into thread-pulling knife (4) and slowly turn the handwheel. • Check the handwheel position at which the thread is cut. 11. If necessary, repeat adjustment steps 1 – 7 until the cut takes place at 60°. Service Instructions 827/827-M — 01.0 — 05/2019… -
Page 67: Puller
The carrier roller is lifted automatically during the sewing foot lift and the bartack. You set the puller at the control panel ( p. 91). The maximum feed length of the intermittent puller is 7 mm. Service Instructions 827/827-M — 01.0 — 05/2019…
-
Page 68: Adjusting The Synchronization Of Feed Dog And Puller
This prevents ruffing on the seam during stitch formation. Fig. 48: Adjusting the synchronization of feed dog and puller 20° ① ③ ② (1) — Small arresting groove (3) — Eccentric (2) — 1 screw in the direction of rotation Service Instructions 827/827-M — 01.0 — 05/2019…
-
Page 69
• Turn the eccentric (3) on the shaft • Tighten the eccentric (3) • Assembling the arm cover • Check if feed dog and puller are running in sync and make adjustments if necessary Service Instructions 827/827-M — 01.0 — 05/2019… -
Page 70: Adjusting The Distance Between Carrier Roller And Needle
The distance between the middle of the carrier roller and the middle of the needle is 28.5 mm. 3. Tighten the screw (1). Order Proceed by adjusting the carrier roller stroke ( p. 69). Service Instructions 827/827-M — 01.0 — 05/2019…
-
Page 71: Adjusting The Carrier Roller Stroke
To adjust the upper end position: 1. Turn the bolt (2). The slot of the bolt (2) is parallel to the cylinder axis. 2. Turn the threaded pin (3) to limit the stroke of the cylinder (4). Service Instructions 827/827-M — 01.0 — 05/2019…
-
Page 72: Adjusting The Carrier Roller Pressure
• To reduce pressure: Slide the cylinder (1) to the back • To increase pressure: Slide the cylinder (1) to the front 3. Tighten the screw (2). Order Proceed by adjusting the upper end position of the carrier roller stroke ( p. 69). Service Instructions 827/827-M — 01.0 — 05/2019…
-
Page 73: Adjusting The Fabric Deflector
1. Loosen the screw (2). 2. Adjust the fabric deflector (1). The fabric deflector abuts closely on the carrier roller, leaving just enough space for the carrier roller to move freely. 3. Tighten the screw (2). Service Instructions 827/827-M — 01.0 — 05/2019…
-
Page 74: Adjusting The Toothed Belt Tension
3. Tighten the screw (2). To adjust the lower toothed belt tension: 1. Loosen the screw (6). 2. Move the lever (4) to adjust the tension of the toothed belt (5). 3. Tighten the screw (6). Service Instructions 827/827-M — 01.0 — 05/2019…
-
Page 75: Changing The Carrier Roller
To change the carrier roller: 1. Remove the nut (1). CAUTION: Left-handed thread! 2. Lock the axle (3) with a screw driver. 3. Change the carrier roller (2). 4. Insert the nut (1) and tighten. Service Instructions 827/827-M — 01.0 — 05/2019…
-
Page 76: Adjusting The Potentiometer
3. Release the buttons P (2) and Reset (3). The display indicates the current level. The potentiometer is set at technician level t 10 04. If the display indicates a different level: Service Instructions 827/827-M — 01.0 — 05/2019…
-
Page 77
12. Tighten the threaded pin (3) without changing the value shown in the display. 13. Press the ESC button 2 times. Important 14. Switch off the machine. 15. Switch on the machine. Switching off and on will save the adjustment. Service Instructions 827/827-M — 01.0 — 05/2019… -
Page 78: Safety Release Clutch
1. Tilt the machine head ( p. 14). 2. Turn the left set collar (2) such that the threaded pins (1) are parallel to one another. The safety release clutch latches into place. Service Instructions 827/827-M — 01.0 — 05/2019…
-
Page 79: Adjusting The Torque
3. Using the screw driver, turn the disk on the adjustment slot (5) so that 8 Nm is reached for the torque. • Increase force: turn in the direction + • Decrease force: turn in the direction — 4. Tighten the screw (7). Service Instructions 827/827-M — 01.0 — 05/2019…
-
Page 80: Integrated Motor
② ① ⑤ ⑥ ⑦ ⑧ (1) — Handwheel (5) — Cover plate (2) — Handwheel flange (6) — Stator (3) — Encoder (7) — Ring (4) — Encoder disk (8) — Rotor Service Instructions 827/827-M — 01.0 — 05/2019…
-
Page 81: Disassembling The Drive
Fig. 61: Disassembling the cover ① ② ① ③ (1) — Screws (3) — Handwheel flange (2) — Cover To disassemble the cover: 1. Loosen all 5 screws (1). 2. Disassemble the cover (2) from the side. Service Instructions 827/827-M — 01.0 — 05/2019…
-
Page 82: Disassembling The Encoder
4. Carefully and uniformly pull the encoder (2) and encoder disk (1) away from the shaft. 18.2.4 Disassembling the stator Fig. 63: Disassembling the stator ① ② ③ (1) — Stator with ring (3) — Cover plate (2) — Screws Service Instructions 827/827-M — 01.0 — 05/2019…
-
Page 83: Disassembling The Rotor
(2) — Threaded pins To disassemble the rotor: 1. Remove the arm cover ( p. 15). 2. Loosen the threaded pins (1), (2). 3. Remove the rotor with deep groove ball bearing (3). Service Instructions 827/827-M — 01.0 — 05/2019…
-
Page 84: Assembling The Drive
2. Tighten all threaded pins (1), (2) firmly in place, observing the surface of the shaft in doing so: Tighten the first screw in the direction of rotation firmly in place on the surface. Service Instructions 827/827-M — 01.0 — 05/2019…
-
Page 85: Assembling The Stator
1. Push the stator with ring (1) onto the shaft, paying attention to the ring gap for the cable. 2. Assemble the cover plate (3). 3. Evenly tighten the screws (2) firmly in place so that a uniform gap exists between the cover plate (3) and shaft. Service Instructions 827/827-M — 01.0 — 05/2019…
-
Page 86: Assembling The Encoder
18.3.4 Assembling the cover Fig. 68: Assembling the cover ① ② ① (1) — Screws (2) — Cover To place the cover: 1. Position the cover (2) at the side. 2. Tighten the screws (1). Service Instructions 827/827-M — 01.0 — 05/2019…
-
Page 87: Locking The Machine In Place
Fig. 69: Locking the machine in place ① (1) — Locking peg To lock the machine in place: 1. Lock the machine in place using the locking peg (1). The needle is in the top dead center position. Service Instructions 827/827-M — 01.0 — 05/2019…
-
Page 88: Assembling The Handwheel Flange
(2) — Screws To assemble the handwheel: 1. Attach the handwheel (1) and tighten all 3 screws (2). 2. Adjust the reference position via the control; see Instructions for use DAC comfort. Service Instructions 827/827-M — 01.0 — 05/2019…
-
Page 89: Programming
(1) — Power LED (5) — Seam program button group (2) — Thread button group (6) — LED for 2 stitch length (3) — Function button (7) — Display (4) — Programming button group Service Instructions 827/827-M — 01.0 — 05/2019…
-
Page 90
Soft start • Activates or deactivates the soft start Speed • Reduces the motor speed Function button • Activates or deactivates any stored function Programming button group • Ends parameter mode Service Instructions 827/827-M — 01.0 — 05/2019… -
Page 91
• Starts or ends the parameter mode • Decreases parameter • Changes user level • Selects subprogram • Decreases parameter • Changes to next lower category • Selects subprogram • Decreases parameter • Selects subprogram Service Instructions 827/827-M — 01.0 — 05/2019… -
Page 92
• Resets the (piece) counter Seam program button group Seam program I • Activates seam program I Seam program II • Activates seam program II Seam program III • Sets seam program III Service Instructions 827/827-M — 01.0 — 05/2019… -
Page 93: Adjusting The Electropneumatic Switching Of The Carrier Roller
• Use D+ to enter the value 3: raise on bartack and sewing foot lift 5. Press the button to save the setting. 6. To switch to sewing mode, press the button. For additional parameter settings, refer to Parameter list. Service Instructions 827/827-M — 01.0 — 05/2019…
-
Page 94: Adjusting The Stitch Count Before The Carrier Roller Is Lowered
3. Use the buttons A+, B+, C+ and D+ to enter the desired s.p.m. 4. Press the button to save the setting. 5. To switch to sewing mode, press the button. For additional parameter settings, refer to Parameter list. Service Instructions 827/827-M — 01.0 — 05/2019…
-
Page 95: Maintenance
Cleaning the motor fan mesh Check the oil level Check the hook lubrication Checking the toothed belt Pneumatic system Check the water level in the pressure controller Cleaning the filter element Service Instructions 827/827-M — 01.0 — 05/2019…
-
Page 96: Cleaning
Lint and thread remnants can impair the operation of the machine. Clean the machine as described. NOTICE Property damage from solvent-based cleaners! Solvent-based cleaners will damage paintwork. Use only solvent-free substances for cleaning. Service Instructions 827/827-M — 01.0 — 05/2019…
-
Page 97: Cleaning The Machine
• Area under the throat plate (3) • Hook (2) • Area around the needle (1) To clean the machine: 1. Remove any lint and thread remnants using a compressed air gun or a brush. Service Instructions 827/827-M — 01.0 — 05/2019…
-
Page 98: Cleaning The Motor Fan Mesh
Fig. 74: Cleaning the motor fan mesh ① ② (1) — Tabletop (2) — Motor fan mesh To clean the motor fan mesh. 1. Remove any lint and thread remnants using a compressed air gun. Service Instructions 827/827-M — 01.0 — 05/2019…
-
Page 99: Lubricating
• Flash point: 150 °C You can order the lubricating oil from our sales offices using the following part numbers: Container Part no. 250 ml 9047 000011 9047 000012 9047 000013 9047 000014 Service Instructions 827/827-M — 01.0 — 05/2019…
-
Page 100: Lubricating The Machine Head
1. Fill oil through the oil filler opening (1) up to the MAX marking (2). 2. Turn the machine off, then on again after refilling oil. The red light will turn off. Service Instructions 827/827-M — 01.0 — 05/2019…
-
Page 101: Adjusting The Hook Lubrication
• Release less oil: turn clockwise Important The released amount of oil does not change until the operating time has run a few minutes. Sew for several minutes before you check the adjustment again. Service Instructions 827/827-M — 01.0 — 05/2019…
-
Page 102: Servicing The Pneumatic System
2. Turn the pressure controller until the pressure gage (2) indicates the proper setting: • Increase pressure = turn clockwise • Reduce pressure = turn counterclockwise 3. Push the pressure controller (1) down. Service Instructions 827/827-M — 01.0 — 05/2019…
-
Page 103: Draining The Water Condensation
2. Place the collection tray under the drain screw (3). 3. Loosen the drain screw (3) completely. 4. Allow water to drain into the collection tray. 5. Tighten the drain screw (3). 6. Connect the machine to the compressed air supply. Service Instructions 827/827-M — 01.0 — 05/2019…
-
Page 104: Cleaning The Filter Element
6. Wash out the filter tray using benzine. 7. Tighten the filter element (1). 8. Tighten the water separator (2). 9. Tighten the drain screw (3). 10. Connect the machine to the compressed air supply. Service Instructions 827/827-M — 01.0 — 05/2019…
-
Page 105: Checking The Toothed Belt
When pressed with a finger, the toothed belt must yield no more than 10 mm. Important A damaged toothed belt must be replaced immediately. 20.5 Parts list A parts list can be ordered from Dürkopp Adler. Or visit our website for further information at: www.duerkopp-adler.com Service Instructions 827/827-M — 01.0 — 05/2019…
-
Page 106
Maintenance Service Instructions 827/827-M — 01.0 — 05/2019… -
Page 107: Decommissioning
5. Cover the control panel to protect it from soiling. 6. Cover the control to protect it from soiling. 7. Cover the entire machine if possible to protect it from contamination and damage. Service Instructions 827/827-M — 01.0 — 05/2019…
-
Page 108
Decommissioning Service Instructions 827/827-M — 01.0 — 05/2019… -
Page 109: Disposal
When disposing of the machine, be aware that it consists of a range of different materials (steel, plastic, electronic components, etc.). Follow the national regulations when disposing these materials. Service Instructions 827/827-M — 01.0 — 05/2019…
-
Page 110
Disposal Service Instructions 827/827-M — 01.0 — 05/2019… -
Page 111: Troubleshooting
(Sub-D, 9-pin) not connected to DACextension box using the correct DACextension box connection 2120 DA stepper card 1 not responding • Check connection cables • Check LEDs of DACextension box • Perform a software update Service Instructions 827/827-M — 01.0 — 05/2019…
-
Page 112: Mains Voltage
3223 Skip stitch detected 3224 Bobbin failed to rotate 6360 No valid data on external EEprom • Perform a software update (internal data structures are not compatible with the external data storage device) Service Instructions 827/827-M — 01.0 — 05/2019…
-
Page 113
• Check connection cables • Perform a software update • Replace DACextension box 7223 Checksum error occurred while • Check connection cables updating DA stepper card 2 • Perform a software update • Replace DACextension box Service Instructions 827/827-M — 01.0 — 05/2019… -
Page 114
• Replace control basic will remain available) 7803 Communication error (DAC classic • Restart the control only; only the functions of the DAC • Perform a software update basic will remain available) • Replace control Service Instructions 827/827-M — 01.0 — 05/2019… -
Page 115: Error Messages
If error is not corrected, check encoder 1012 Synchronizer fault • Replace synchronizer 1052 Sewing motor overcurrent, internal • Check selection of class current increase > 25 A • Replace control • Replace sewing motor • Replace encoder Service Instructions 827/827-M — 01.0 — 05/2019…
-
Page 116
LEDs are off and then switch on again 6354 External EEprom communication • Switch off the control, wait until the error LEDs are off, check connection for machine ID, and switch on control again Service Instructions 827/827-M — 01.0 — 05/2019… -
Page 117: Errors In Sewing Process
Thread-guiding parts, such Check threading path as thread tube, thread guide or thread take-up disk, are sharp-edged Throat plate, hook or Have parts reworked by qualified spread have been specialists damaged by the needle Service Instructions 827/827-M — 01.0 — 05/2019…
-
Page 118
Needle thread and hook Check threading path thread have not been threaded correctly Needle breakage Needle thickness is Use recommended needle unsuitable for the sewing thickness material or the thread Service Instructions 827/827-M — 01.0 — 05/2019… -
Page 119: Technical Data
[mm] Height [mm] Weight [kg] Characteristics Single and twin-needle double lockstitch flatbed sewing machine with bottom feed and needle feed. For light to moderately heavy sewing material with needle thickness of Nm 80-130. Service Instructions 827/827-M — 01.0 — 05/2019…
-
Page 120
• Automatic wick lubrication with inspection glasses for oil level indication • Large vertical hook with CTB bobbins • Safety snap-on coupling prevents any misadjustment or damage to the hook in the event of a thread jamming Service Instructions 827/827-M — 01.0 — 05/2019… -
Page 122
DÜRKOPP ADLER AG Potsdamer Straße 190 33719 Bielefeld GERMANY Phone +49 (0) 521 / 925-00 service@duerkopp-adler.com E-mail www.duerkopp-adler.com…
Полуавтомат швейный промышленный класса 827 челночного стежка предназначен для пришивания плоских пуговиц с двумя и четырьмя отверстиями к ткани на различных швейных изделиях. Для установки пуговиц различного диаметра в пуговичном аппарате предусмотрена регулировка прижимных лапок. Смазка полуавтомата централизованная с помощью фитилей
-
Максимальная частота вращения главного вала 1500 об/мин
-
Количество стежков при пришивании пуговиц 17
-
Число уколов для пришивания пуговиц 20 (из них 3 закрепочных)
-
Форма пришивки пуговиц с четырьмя отверстиями «и-образная»
-
Концы ниток после обрезки не более 5 мм
-
Поперечное отклонение иглы регулируется 3-5 мм
-
Продольное перемещение пуговичного аппарата регулируется 3-5 мм
-
Вылет цилиндрической части платформы до стойки пуговичного аппарата 175 мм Пришиваемые пуговицы: диаметр 11 -32 мм, толщина до 4 мм
Посмотреть инструкция для Dürkopp Adler 827 бесплатно. Руководство относится к категории Швейные машины, 2 человек(а) дали ему среднюю оценку 9.1. Руководство доступно на следующих языках: английский. У вас есть вопрос о Dürkopp Adler 827 или вам нужна помощь? Задайте свой вопрос здесь
Не можете найти ответ на свой вопрос в руководстве? Вы можете найти ответ на свой вопрос ниже, в разделе часто задаваемых вопросов о Dürkopp Adler 827.
Какой размер иглы лучше всего использовать?
Какой срок службы у швейной иглы?
Что может повредить иглу при шитье?
Инструкция Dürkopp Adler 827 доступно в русский?
Не нашли свой вопрос? Задайте свой вопрос здесь