Инструкция и руководство для
Argox CP Series  на русском

85 страниц подробных инструкций и пользовательских руководств по эксплуатации
 02:13
02:13
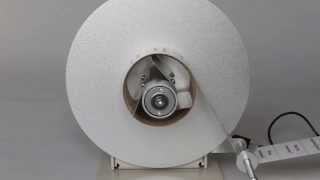
Argox CP series Ribbon Installation
 01:45
01:45
Argox CP-series printer — media & ribbon installation
 01:45
01:45
Argox CP-series printer — media & ribbon installation
 10:05
10:05
Cara instal printer barcode Argox CP2140M
 04:44
04:44
Принтер для печати лент ECO (бюджетный вариант)
 02:05
02:05
Смотчик этикеток АТОЛ BR22
 02:12
02:12
Argox CP-2140M Label Printer
 02:08
02:08
Argox CP Media & Ribbon Installation
Руководство пользователя портативного принтера РУ…
Принтеры Argox
- Изображение
- Текст
1
Руководство пользователя портативного принтера
РУКОВОДСТВО ПОЛЬЗОВАТЕЛЯ
НАСТОЛЬНЫЙ ПРИНТЕР СЕРИИ
CP-2140 / CP-2140Z / CP-2140E
CP-3140L / CP-3140ZL
CP-3140LE / CP-3140ZLE
Website: http://www.argox.com

Руководство пользователя портативного принтера Содержан…
Страница 2
- Изображение
- Текст

Руководство пользователя портативного принтера Сброс на…
Страница 3
- Изображение
- Текст

Руководство пользователя портативного принтера Программ…
Страница 4
- Изображение
- Текст

Введение, Заявление о правах собственности, Усовершенствование продукции
Соответствие требованиям fcc, Отказ от обязательств
- Изображение
- Текст
5
Руководство пользователя портативного принтера
1.
Введение
Заявление о правах собственности
Данное руководство содержит информацию, являющуюся собственностью
компании Argox Information Co., Ltd. Лтд. Оно предназначено исключительно
для информирования и использования в работе и обслуживании оборудования,
описанного в данном документе. Данная информация не должна
использоваться, воспроизводиться или раскрываться любым другим лицам для
любых других целей без письменного разрешения компании Argox Information
Co., Ltd.
Усовершенствование продукции
Постоянное совершенствование продуктов является политикой компании Argox
Information Co., Ltd
. Все характеристики могут быть изменены без
предварительного уведомления.
Соответствие требованиям FCC
Данное оборудование было протестировано и признано соответствующим
ограничениям для цифровых устройств класса А согласно части 15 правил
Федеральной комиссии связи (FCC). Эти ограничения разработаны для
обеспечения разумной защиты от вредных помех в жилых помещениях. Данное
оборудование генерирует, использует и может излучать радиочастотную
энергию и, если оно установлено и используется не в соответствии с
инструкциями, может создавать помехи для радиосвязи. Однако, нет никакой
гарантии, что помехи не будут возникать в каждом конкретном случае. Если это
оборудование вызывает помехи для радио или телевизионного приема, что
может быть определено путем включения и выключения устройства,
пользователь может попытаться устранить помехи с помощью следующих мер:
Переориентировать или переместить приемную антенну.
Увеличить расстояние между оборудованием и приемником.
Подключить оборудование к иному источнику питания.
Обратиться за консультацией к дилеру или опытному радио / ТВ
мастеру.
Это устройство было испытано при использовании экранированных кабелей на
периферийных устройствах. Экранированные кабели должны использоваться с
устройством для обеспечения надлежащего соответствия. Пользователь
предупрежден, что любые изменения или модификации, не одобренные Argox
Information Co., Ltd
, могут лишить пользователя права на эксплуатацию
оборудования.
Отказ от обязательств
Argox Information Co., Ltd
предпринимает все шаги, чтобы гарантировать, что
опубликованные компанией инструкции по эксплуатации и руководства

Руководство пользователя портативного принтера пользова…
Страница 6
- Изображение
- Текст
6
Руководство пользователя портативного принтера
пользователя содержали бы достоверную информацию. Однако, все-таки
существует вероятность незначительных неточностей. Argox Information Co.,
Ltd
оставляет за собой право исправлять любые ошибки такого вида и не несет
никакой ответственности за возможные результаты подобных действий.
Ни при каких условиях компания Argox Information Co., Ltd или любая иная
компания, участвующая в разработке, производстве или доставке
сопутствующего продукта (включая аппаратное и программное обеспечение),
не несет ответственности за любой ущерб (включая, без ограничения, убытки
за потерю выгоды, прерывание бизнеса, потерю деловой информации или
иных денежных потерь), вытекающие из использования, результатов
использования или невозможности использования данного продукта, даже
если Argox Information Co., Ltd была предупреждена о возможности таких
убытков.
ВНИМАНИЕ:
Любые изменения или модификации, не одобренные стороной, ответственной
за соответствие продукции стандартам производителя, могут привести к
лишению пользователя прав на эксплуатацию данного оборудования.

7
Руководство пользователя портативного принтера
2.
Начало работы
Поздравляем вас с приобретением компактного принтера
производства Argox Information Co. – мирового лидера в
индустрии работы со штрих-кодами. Принтеры серии CP-2140,
CP-2140Z, CP-2140E, CP-3140L, CP-3140ZL
и CP-3140LE и
CP-3140ZLE
спроектированы наилучшим образом для
повышения эффективности вашего бизнеса. Данное руководство
поможет вам познакомиться с вашим новым принтером и
предоставит достаточную информацию.
Распаковка принтера
При получении принтера внимательно осмотрите его на наличие
повреждений:
Осмотрите коробку и принтер внешне для того, чтобы убедиться
в отсутствии повреждений.
1.
Откройте верхнюю крышку принтера для того, чтобы
убедиться в отсутствии внутренних повреждений.
2.
Проверьте наличие всех описанных ниже частей.
В случае отсутствия какой-либо части, пожалуйста,
свяжитесь с локальным дилером.
Внимание: в случае обнаружения повреждений
немедленно свяжитесь с поставщиком

Комплект поставки, Руководство по быстрой установке, Cd rom ( документации & программное обеспечение)
Шнур питания, Держатель и ограничители ленты, Принтер, Адаптер питания, Кабель usb, Втулки для риббона, 1” сердечник для красящей ленты
- Изображение
- Текст
8
Руководство пользователя портативного принтера
Комплект поставки
Руководство по быстрой установке
CD ROM (
документации & программное обеспечение)
Шнур питания
Держатель и ограничители ленты
Принтер
Адаптер питания
Кабель USB
Втулки для риббона
1
” сердечник для красящей ленты
Руководство по
быстрой установке
Принтер
CD ROM
Адаптер питания
Шнур питания
Держатель и
ограничители ленты
Втулки для риббона
USB
кабель
1
” сердечник для
красящей ленты

9
Руководство пользователя портативного принтера
Внешний вид принтера
Вид спереди:
Кнопка протяжки
Индикатор питания
Индикатор готовности
Верхняя
крышка

Вид сзади: cp-2140, cp-2140z, cp-3140l, Cp-3140zl, Вид сзади: cp-2140e, cp-3140le, cp-3140zle . 10
Страница 10
- Изображение
- Текст
10
Руководство пользователя портативного принтера
Вид сзади: CP-2140, CP-2140Z, CP-3140L, CP-3140ZL
Вид сзади: CP-2140E, CP-3140LE, CP-3140ZLE
Выключатель питания
Параллельный порт
USB
Разъем питания
Последовательный
порт RS232
Выключатель питания
Ethernet
USB
Разъем питания
Последовательный
порт RS232

Комментарии

-
Contents
-
Table of Contents
-
Troubleshooting
-
Bookmarks
Quick Links
R
EFINE SERIES
‘
U
M
SER
S
ANUAL
R-400plus / R-400K plus /R-600S
Website: http://www.argox.com
Related Manuals for Argox R-400plus
Summary of Contents for Argox R-400plus
-
Page 1
EFINE SERIES ’ ANUAL R-400plus / R-400K plus /R-600S Website: http://www.argox.com… -
Page 2: Table Of Contents
Table of Contents 1. Introduction …………..5 Proprietary Statement ……….. 5 Product Improvements ……….5 FCC Compliance Statement ……… 5 Liability Disclaimer …………5 No Liability for Consequential Damage ……6 2. Getting Started ………….. 7 Unpacking Printer …………7 Attaching Power …………
-
Page 3
only) …………..35 Installing a Printer Driver (for other interfaces except USB) …………..41 5. Troubleshooting …………48 Problems on Media ………… 48 Problems on Ribbon ……….. 49 Miscellaneous…………. 49 Recovery …………..50 6. Caring for the printer ……….51 Cleaning the Print Head (TPH) …….. -
Page 4
Printer Status…………64 Stand-Alone Operation ……….. 65 Dispenser Kit installation ……..65 Cutter Installation ……….. 68… -
Page 5: Introduction
NOTE: This unit was tested with shielded cables on the peripheral devices. Shielded cables must be used with the unit to insure compliance. The user is cautioned that any changes or modifications not expressly approved by Argox Information Co., Ltd. could void the user’s authority to operate the equipment.
-
Page 6: No Liability For Consequential Damage
Argox Information Co., Ltd. has been advised of the possibility of such damages.
-
Page 7: Getting Started
If there is any item missing, contact your local dealer to get it. Printer Power cord An extra ribbon core (R-400plus / R-400K plus) Ribbon core adaptor Media hanger USB cable (R-400plus / R-400K plus) …
-
Page 9: Attaching Power
Attaching Power WARNING: NEVER OPERATE THE PRINTER AND POWER SUPPLY IN AN AREA WHERE THEY CAN GET WET. Leave the power switch at the “ O ” Position. Connect the power supply plug to the power cord connecter and the other end to your AC source. AC Electrical Outlet Power Switch Power Cord Connecter…
-
Page 10: Parts And Features
Parts and Features Top Cover Power Switch Cover Lock…
-
Page 11
Media Hanger Release Levers Ribbon Pick-up Holder Thermal Printhead Ribbon Supply Holder Cover Lock Power Switch Platen Roller… -
Page 12: Loading Ribbon
Loading Ribbon Note: This section is not applicable to the direct thermal printing. 1. Press the cover locks on both sides to open the top cover Cover Lock…
-
Page 13
2. Unlatch the print head module by pushing the two green release levers on the sides toward the rear. 3. This allows print head module to rotate upward automatically and expose the ribbon supply holder. Print Head Module Release Lever Ribbon Supply Holder… -
Page 14
6. Insert the ribbon roll into the supply holder. (First snap in the right side and then the left side.) Ribbon Roll Bare Core Noted: It is the figure illustrating ribbon wound ink-side in for R-400plus/R-600S. For R-400K plus model, please use ribbon wound coated side out. -
Page 15
7. Turn back the print head module and then insert the bare core into the pick-up holder. (First snap in the right side, then the left side.) 8. Turn the wheel of the print head module to ensure the ribbon is tightly wound. 9. -
Page 16
Wheel Print Head Module Note: 1. R-400plus / R-600S use ribbon wound coated side in. R-400K plus use ribbon wound coated side out. 2. Optional ribbon core adapter is available once ribbon width is less than 4’’ width. -
Page 17: Loading Media
Loading Media R-Series printers can be operated in three different options: standard, peel-off, or with a cutter. Standard mode allows you to collect each label freely. In peel-off mode, the backing material is being peeled away from the label as it is printed. After the former label is removed, the next one will be printed.
-
Page 18: Standard Mode
Standard Mode 1 . Press the cover locks on both sides to swing the top cover toward the rear and expose the media compartment. 2. Load the media roll onto the media hanger. 3. Put the media roll on the hanger holder. Media Hanger Media Roll…
-
Page 19
4. Unlatch the print head module. 5. Hold the print head module upright with one hand to allow the media pass under it. Lead the media through the media guides with the other hand. The media guides can be adjusted centrality to well fit with different label width. -
Page 20
8. Turn back the print head module and then press it down firmly on both sides till you hear a snap. Print Head Module… -
Page 21
9. Close the top cover and turn on the printer or press feed button if the printer is already on. Feed Button Note: 3” holder paper is available for 3” ID media roll. -
Page 22: Peel Off Mode
Peel Off Mode (Installing the dispenser kit, please refer to the Appendix Follow the common procedure of «Loading the Media «of Standard Mode from step 5.1.1 to step 5.1.9. 1. Remove approximate 6» long labels from the backing paper.
-
Page 23
2. Trim the edge of label backing paper with scissors or knife. 3. Push down peeler-switch to ease the access packing paper. 4. Lead the backing paper over the plate, then thread it back into the slot, ensuring that it is inserted between white plastic roller and plate. -
Page 24
6. Latch print head module 7. Turn on the printer and press feed button. 8. Labels will be separated from backing paper and fed out on H cover, while backing paper will come out from the slot under the H cover, and label will be fed out. 9. -
Page 25: Cutter Mode
Cutter Mode (Installing the cutter, please refer to Appendix D ) Follow the same procedure as «Loading the Media» from step 5.1.1 to step 5.1.9. 1. Mount cutter on print head module by fastening with two screws. 2. Thread the media over the platen roller, and then route the media through the slot of the cutter module.
-
Page 26
3. Press down the print head module firmly. Cutter Note: The «Feed» button will not drive the printer to cut. The cutting work can be executed only when the software setting is ready. -
Page 27: Printer Operations
3. Printer Operations Power Switch Controls printer power On-normal operation Off-the power should be turned off before connect or disconnect the communication cables and power cables Buttons There are three buttons, each has two basic functions BUTTON Pressed at normal status Pressed during power-on FEED…
-
Page 28: Led Indicators
LED Indicators There are three LED indicators on the front panel, “READY”, “MEDIA” and “RIBBON”. These indicators display the operation status of the printer. READY The READY indicator will remain lighted except if any of the following conditions prevail. — Receiving data from host. — A fault condition.
-
Page 29
occur, especially for small-size labels (less than 20mm in height). 3. Before calibration, the media and ribbon must be loaded properly and move the label sensor to correct position. 4. After self-test, the printer is at dump mode, If you need normal operation, you must press CANCEL to restart the printer. -
Page 30: Performing Calibration
Performing Calibration After the media loaded, it is necessary to do the calibration for the label size detection. 1. Press and hold the pause button. 2. Turn on the power. 3. Media indicators will blink, at this point release PAUSE button.
-
Page 31: Printing Configuration Report
Printing Configuration Report Performing Self Test Page 1. Turn off the printer. Press and hold the feed button. 2. Turn on the power. 3. Ready indicator blinks, release feed button. 4. The printer will print out a configuration report. 5. Ready indicator stops blinking and lights up. 6.
-
Page 32
2. On the report: PPLA – Present emulation type R2A0-1.00 – Firmware version 052302 – Date code Please provide the above information to Argox support team in case your printer has a printing problem. -
Page 33: Resetting Printer To Factory Defaults
Resetting Printer to Factory Defaults If you would like to reset the printer to its factory defaults after certain commands have been sent or settings changed: 1. Turn off the printer. Press and hold the CANCEL button. 2. Turn on the power. 3.
-
Page 34: Communications
4. Communications Connecting Printer to the Host 1. You can connect the printer with any standard Centronics cable to the parallel port of the host computer. 2. Alternatively you can connect the printer with a serial cable to the RS232C port of your computer or terminal.
-
Page 35: Communicating With The Printer
Windows XP/ Vista/ Windows 7/ Windows 8, supporting 32-bit/ 64-bit operation systems. With this driver you can operate any popular Windows software applications including Argox Bartender UL label editing software or MS Word, etc., to print to this printer. Before installation The following installation steps are based on R-400plus as an example.
-
Page 36
1. Turn off the printer. Plug the power cable into the power socket on the wall, and then connect the other end of the cable to printer’s power socket. Connect the USB cable to the USB port on the printer and on the PC. 2. -
Page 37
4. Choose Commercial Barcode Printers on the screen, go to R-400plus product page, click on version of Seagull driver and then start installation:… -
Page 38
Seagull driver is to run the DriverWizard utility from the Installation Directory where the Seagull driver files locates. 5. On the Seagull Driver Wizard prompt, select the first radio button to “Install a driver for a Plug and Play printer”: Argox R-400plus PPLB USB002 Then click “Next.”… -
Page 39
6. Enter Printer name (i.e. Argox R-400plus PPLB) and select «do not share this printer”, and click «Next» Argox R-400plus PPLB 7. Check all the data on the showing screen, if it is correct, click «Finish». Argox R-400plus PPLB USB002… -
Page 40
8. After the related files have been copied to your system, click «Finish». Installing printer ‘Argox R-400plus PPLB’… 9. After driver installation is complete, click «Close». The driver should now be installed. Installed printer Argox R-400plus PPLB… -
Page 41: Installing A Printer Driver (For Other Interfaces Except Usb)
Installing a Printer Driver (for other interfaces except USB) 1. Turn off the printer. Plug the power cable into the power socket on the wall, and then connect the other end of the cable to printer’s power socket. Connect the Parallel cable, Serial cable, or Ethernet cable to the proper port on the printer and on your computer.
-
Page 42
3. Choose Commercial Barcode Printers on the screen, go to R-400plus product page, click on version of Seagull driver and then start installation:… -
Page 43
Instead of the flash prompt above, another way to install Seagull driver is to run the DriverWizard utility from the Installation Directory where the Seagull driver files locates. 4. On the prompt, Windows Printer Driver, select “I accept…” and click «Next». 5. -
Page 44
6. Click «Finish». 7. Select Install printer drivers and Click «Next» 8. Select model & emulation — the following examples are based on model R-400plus PPLB:… -
Page 45
Argox R-400plus PPLB 9. Select the port of the printer and click «Next». LPT1 Parallel Port40 PPLB 10. Enter Printer name (i.e. Argox R-400plus PPLB) and select «do not share this printer”, and click «Next». -
Page 46
Argox R-400plus0 PPLB 11. Check all the data on the showing screen, if it is correct, click «Finish». Argox R-400plus PPLB LPT1 Argox R-400plus PPLB 12. After the related files have been copied to your system, click… -
Page 47
«Finish». Installing printer ‘Argox R-400plus PPLB’… 13. After driver installation is complete, click «Close». The driver should now be installed. Installed printer Argox R-400plus PPLB… -
Page 48: Troubleshooting
5. Troubleshooting Generally, when a malfunction or an abnormal condition occurs, the “READY” LED will keep blinking and printing and communication between the host and printer will stop. To understand what the problem, please check the LEDs. Problems on Media Possible Solutions Remarks…
-
Page 49: Problems On Ribbon
Problems on Ribbon Possible Solutions Remarks Problems Ribbon has run Supply the ribbon Does not apply to roll. direct thermal. If you use direct thermal, set bit 1 of DIP switch to OFF. Ribbon jam Recover the jam. not for direct thermal. Ribbon sensor Replace the ribbon not for direct thermal.
-
Page 50: Recovery
3. Vertical streaks in the printout usually indicate a dirty or faulty print head. Clean the print head first, if they still persist, replace the print head. 4. Unstable ribbon roll rotation. Check the label path and make sure the head latch is securely closed.
-
Page 51: Caring For The Printer
6. Caring for the printer Before maintenance be sure to turn off the printer power. Cleaning the Print Head (TPH) To keep the Print Head remain in the best conditions and efficiency and to extend duration for use, regular cleaning action is needed.
-
Page 52
Cleaning Material Surface of print head’s heating element is very fragile. To prevent from any possible damage, please use soft cloth/ cotton buds with “Ethanol” or “IPA” to clean print head surface. It’s strongly recommended to wear hand gloves during cleaning progress. -
Page 53: Cleaning The Roller
Cleaning the Roller Using a cotton moistened with alcohol, clean the roll and rip off the attached glue. Note : The roller should be cleaned whenever it has been in contact with foreign materials such as dust or adhesives. Cleaning the media compartment Clean the media compartment with cotton, which has been moistened with a mild detergent.
-
Page 54: Product Specification
7. Product Specification General Specification Specifications R-400plus R-600S Printing method Direct thermal & Thermal Transfer Printing resolution 203 dpi 300 dpi Printing speed 2 ~ 6 2 ~ 4 (ips) Printing length 0.4 ~ 43 0.4 ~ 30 (in.) Printing width Max 4.25…
-
Page 55
Ribbon roll – max 2.67” (OD 68 mm) Ribbon length – max 360m wax, 300m resin Ribbon Core size — ID 1” core (25.4 mm) Ribbon wound ink-side in: R-400plus/ R-600S; Ribbon wound ink-side out: R-400K plus Built-in Tear off bar, front-open cover, clear window, Mechanism… -
Page 56: Fonts, Barcodes, And Graphics Specification
There are printer PPLA / PPLB programming languages for R-series. Printer Programming Language PPLA Specification R-400plus R-600S General fonts 7 alpha-numeric fonts, OCR A and OCR B ASD smooth…
-
Page 57: Printer Programming Language Pplb
Stand-alone ArgoKee operation Printer Programming Language PPLB Specification R-400plus / R-600S General fonts 5 fonts with different point sizes Symbol sets 8 bits: code page 437, 850, 852, 860, 863 (Code pages) and 865. 7 bits: USA, British, German, French,…
-
Page 58: Printer Programming Language Pplz
Printer Programming Language PPLZ Specification R-400plus General fonts 9 alpha-numeric bitmapped fonts and 1 scaleable font (CG Triumvirate Bold Condensed) Symbol sets Scaleable font: PC 850 Bitmapped font: USA, UK, Holland, Germany, France, Denmark/Norway, Italy, Span, Sweden/Finland, Japan and miscellaneous…
-
Page 59: Interface Specifications
Interface Specifications This appendix presents the interface specifications of I/O ports for the printer. These specifications include pin assignments, protocols and detailed information about how to properly interface your printer with your host or terminal. Serial The RS232 connector on the printer side is a female, DB-9. Signal Description No function…
-
Page 60: Usb
do not connect this pin if you are using a general host like a PC USB series “B” Receptacle Interface Signal Name VBUS Connector Terminal Pin Assignment Connection with host Host 25S Printer 9P Host 9S Printer 9P (PC or compatible) (PC or compatible) DTR 20 ………
-
Page 61
Alternatively you can just connect the 3 wires in the following way. Host 25S Printer 9P Host 9S Printer 9P (PC or compatible) (PC or compatible) …… 2 RX …… 2 RX TX 2 TX 3 …… 3 TX …… 3 TX RX 3 RX 2 GND 7 ……… -
Page 62: Parallel (Centronics)
Data format: always 7 or 8 data bits; 1,2 stop bit. Parity : note, even, odd parity. Handshaking : XON/XOFF as well as CTS/RTS (hardware flow control). If you run an application with the bundled printer driver under Windows and use the serial port, you should check the above parameters and set the flow control to “Xon/Xoff”…
-
Page 63: Auto Polling
Auto Polling Both the serial and parallel ports are active at the same time on this printer, i.e. data can be received on either one, however no provision is made for port contention. If data is transmitted to both ports simultaneously, it will cause the data in the received buffer to be corrupted ASCII Table 0 NUL…
-
Page 64: Appendix
8. Appendix Printer Status Blinking Description MEDIA The printer is at pause state. Press PAUSE or CANCEL to return to normal state. MEDIA The media is uninstalled or used up. Load new READY media to the printer. RIBBON The ribbon is uninstalled or end-of-ribbon READY occurred.
-
Page 65: Stand-Alone Operation
Stand-Alone Operation Stand-Alone operation for keyboard and barcode reader Apart from related hardware devices and PPLB emulation, in order to use keyboards and barcode readers (scanner) you should follow apply with ArgoKee. Dispenser Kit installation 1. Turn off the power switch. 2.
-
Page 66
3. Remove gear (27) and (31). 4. Plug spring–peeler (83) into the right hole on chassis 2 and lock screw (F) up. 5. Put shaft-peeler (86) and peeler-switch (88) into shaft-peeler (87) and then insert it in hole on right side. -
Page 67
11. Put back gear (27) and gear (31). Mount the cable into chassis 2 and plug the other side into the label on the main board. 13. Close the middle cover. Peeler-Cover… -
Page 68: Cutter Installation
Cutter Installation 1. Turn off the power switch. 2. Remove the top cover and middle cover Top Cover H Cover Middle Cover Pull Chassis 2 Screw…
-
Page 69
Remove the E- ring(I), gear(27) and release the screw(F). Remove the bracket-peeler(71) from the module. Secure two attached screws (B) for the cable connector. Add a baby board to JP29 on the main board. 5. Plug the cable connector into JP13, and make sure Jumper (J1) position is “2-3”… -
Page 70
Environmentally sensible disposal of electrical and electronic equipment Electrical and electronic equipment contains valuable materials that should be supplied to recycling or recovery. Please dispose of electrical and electronic equipment at qualified collecting points separate from municipal waste.
Печать на траурной (или цветной) ленте путём термопереноса, в отличие от печати наклеек, обычно требует некоторых специфических настроек принтера. В этом материале я постараюсь обобщить опыт эксплуатации термопринтеров на примере Argox CP-2140M.
Argox FAQ
Как редактировать настройки принтера
Как редактировать настройки принтера
Если Вы в программе нажали «Печать», затем кнопку «Настройка» для выбранного принтера, то Ваши настройки подействуют только на текущую сессию работы с программой, т.е. при следующем запуске программы потребуется повторять настройку. Чтобы настройки сохранялись, нужно вызвать диалог настроек из папки принтеры.
Как улучшить качество печати
Как улучшить качество печати
Настройка «Интенсивность цвета» по сути отвечает за температуру нагрева термотрансферной планки.,

Как правило значение «12» является оптимальным, но поскольку свойства разных Риббонов и Траурных лент даже у одного производителя могут заметно отличаться, иногда параметр необходимо подобрать опытным путем. При этом стоит иметь ввиду, что чрезмерный нагрев может привести к быстрому загрязнению нагревающего элемента. Последняя проблема кстати легко решается с помощью тампона со спиртом.

Параметр «Скорость печати» влияет на качество косвенно: чем меньше скорость, тем больше успевает прогреться Риббон.
Автоматизация Видеонаблюдение Технологии