Вступление
На рынке компьютерной периферии отыщется не так много изделий, которые смогли бы одновременно похвастать изрядным долгожительством наряду с неугасающей популярностью. Частые смены моделей свойственны любым компьютерным средствам. В том числе и планшетным сканерам, некоторые производители которых не брезгуют преподносить старые блюда под новым соусом. Однако сканер, которому посвящено наше сегодняшнее повествование, настолько видимо удался, что производитель уже довольно-таки долгое время не предполагает ему замены. Даже в виде «косметического» обновления.

Сканер CanoScan 9950F – топ-модель компании Canon
Топ-модель семейства CanoScan компании Canon была анонсирована в сентябре 2004 года, так что уже можно отмечать ее двухлетие. По компьютерным меркам – это очень приличный срок жизни. Сканер 9950F становится заключительной моделью серии CanoScan, о которой мы пока еще не писали. Прежде чем мы начнем, давайте ознакомимся с таблицей технических характеристик модели.
Технические характеристики
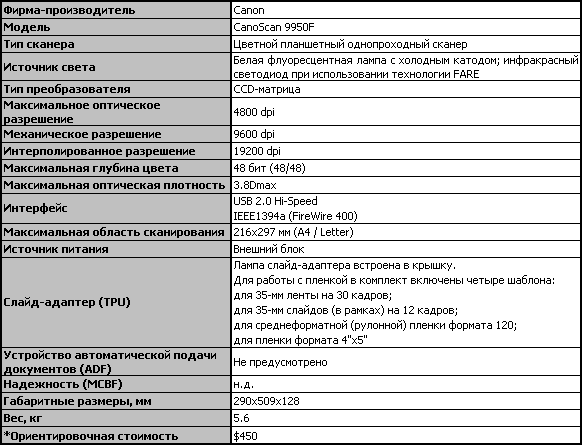
* согласно Price.ru на день публикации статьи
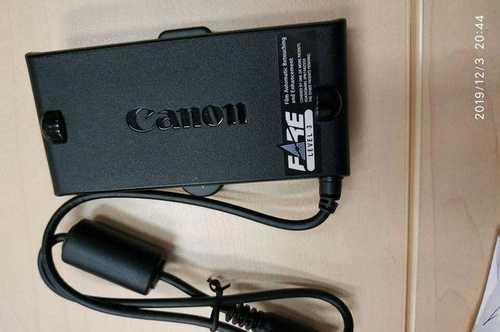
Позволю кратко резюмировать данные из таблицы технических характеристик. Итак, наш сканер имеет самое высокое оптическое разрешение для семейства CanoScan, которое составляет 4800 dpi. Отличная оптическая плотность 3.8Dmax позволит с успехом оцифровывать даже самые темные пленки, обеспечивая широкий динамический диапазон в передаче цветов. Сканер оснащен аппаратной системой удаления пыли и царапин с поверхности оригиналов FARE Level 3, для работоспособности которой его осветитель дополнен светодиодом инфракрасного спектра. Нельзя не отметить широкий набор всевозможных рамочных шаблонов для прозрачных оригиналов, который придется очень кстати профессионалам-фотографам. Для подключения сканера к компьютеру предусмотрено два высокоскоростных интерфейса; плюс, программное обеспечение аппарата сделано для платформ Mac и PC. Что касается цены, то в сравнении с топ-моделью от EPSON, сканер Canon CanoScan 9950F оказывается дешевле чуть ли не в два раза!.. Посему представляется очень интересным изучение и сравнение полезных свойств модели, чем мы сейчас и займемся.
Что в коробке?

Сканер в упаковочной коробке
Сканер CanoScan 9950F;
USB-шнур;
Адаптер питания;
Силовой кабель;
Книжка Quick Start Guide;
Рамки для прозрачных оригиналов:для 35-мм ленты на 30 кадров;
для 35-мм слайдов (в рамках) на 12 кадров;
для среднеформатной (рулонной) пленки формата 120;
для пленки формата 4»х5»;
Мультиязычный пакет программного обеспечения:CanoScan Setup CD-ROM (x2);
Adobe Photoshop Elements 2.0 (x2);
SilverFast SE v.6
Функциональные особенности

Canon CanoScan 9950F
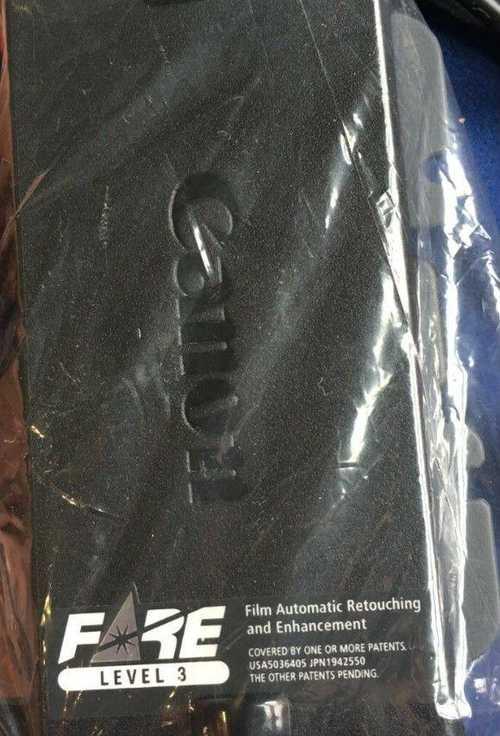
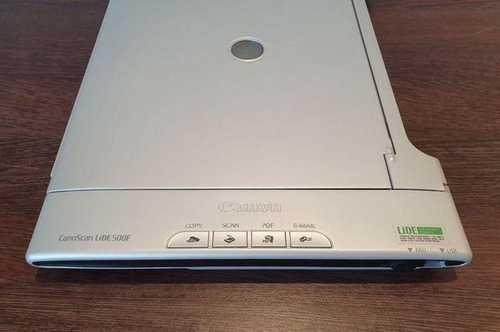
Canon CanoScan 9950F, являющийся топ-моделью компании, выполнен в традиционном для этой линейки сканеров корпусе. Аппарат оснащен аппаратной технологией уборки пыли и царапин с поверхности оригиналов, о чем свидетельствует размещенный на крышке значок FARE Level 3, кроме которого там же можно заметить голографический логотип Canon.

FARE Level 3 – самая главная изюминка нашей модели
Лицевая панель сканера оформлена в виде выступа, на котором сосредоточены четыре кнопки «быстрого сканирования» (кнопки «EZ»): COPY, SCAN, PDF и E-MAIL. С их помощью можно быстро активировать процесс сканирования для обозначенного рода задач (с предустановленными приложениями для сканера).

Кнопки «EZ» для быстрого сканирования под конкретную задачу
А назначить задачу можно при помощи фирменной программной утилиты CanoScan Toolbox, которая имеет следующий вид:

Утилита программирования «горячих клавиш»

Конфигурирование горячих клавиш в секции Settings
Над кнопками находится голубой светодиод, индицирующий активность сканера. С торца лицевой панели расположена кнопка выключения аппарата, что тоже весьма удобно. Немногочисленные разъемы подключения сосредоточены на задней стенке аппарата. Здесь есть два интерфейсных разъема USB 2.0 Hi-Speed и IEEE1394a (FireWire 400), гнездо для внешнего источника питания, а также разъем для подключения крышки сканера.

Все разъемы подключения находятся сзади
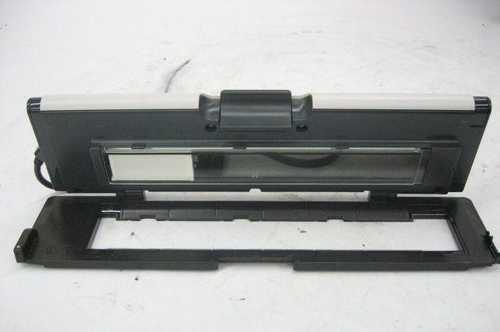
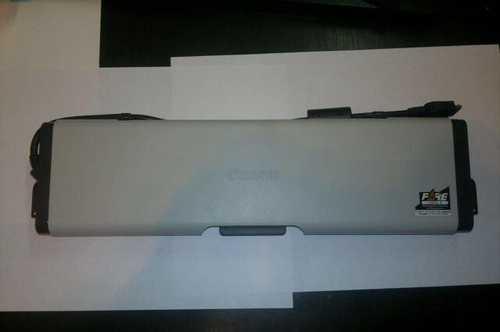
В самой крышке находится подвижная каретка с осветителем (слайд-адаптер), функции которой используются при сканировании прозрачных оригиналов. Окно слайд-адаптера закрыто легкосъемной белой заглушающей панелью, которая снимается в операциях с пленками.
Принадлежности для пленок

Четыре рамочных шаблона для пленок входят в комплект поставки
В комплект поставки со сканером включены следующие четыре рамочных шаблона для прозрачных оригиналов:
для 35-мм ленты пять полос на 30 кадров;
для 35-мм слайдов (в рамках) на 12 кадров;
для среднеформатной (рулонной) пленки формата 120;
для пленки формата 4»х5»

Шаблон для 35-мм ленты на 30 кадров

Шаблон для 35-мм лент очень хорош, прежде всего, тем, что заправка лент в рамки производится индивидуально для каждой ленты. Это качество особенно оцениваешь, когда устанавливаешь закрученные ленты.

Шаблон для 35-мм слайдов (в рамках) на 12 кадров
Шаблон для слайдов любительского 35-мм формата отличает максимальная вместимость. Как видите, используется вся полезная площадь планшета сканера. Впрочем, это качество применимо для всех имеющихся в комплекте рамочных шаблонов.

Шаблон для среднеформатной (рулонной)
пленки формата 120
Просто-таки отличный рамочный шаблон приготовлен для среднеформатных рулонных пленок формата 120! Две рамки плотно и бережно закрывают ленты, а специальные вкладыши незаменимы для распрямления закрученных пленок. Работать – одно удовольствие! Честно!
Ну и четвертый рамочный шаблон – это просто уникальная вещь! Как вы видите на фотографии, рамка принимает не один, а два формата пленок. Для сильно-закрученных лент в нижней половине шаблона предусмотрен удобный карман с рисками границ оригиналов и прижимными пазами. Верхняя же половина шаблона определена для пленки 4»x5».
По моему личному мнению, все вышерассмотренные рамочные шаблоны для пленок на порядок лучше, удобнее и надежнее, чем аналогичные приспособления от EPSON (см.статью о топ-модели EPSON Perfection V700).
Программное обеспечение
Со сканером поставляется традиционный фирменный пакет программного обеспечения, в который, помимо установочного диска, входят приложения Adobe Photoshop Elements 2.0 и SilverFast SE v.6.

На инсталляционном компакт-диске пользователь найдет
следующее программное обеспечение
Основная программа сканирования называется ScanGear CS. При запуске через управляющее приложение (например, Photoshop) она предстает в двух пользовательских режимах: «Simple Mode» и «Advanced Mode». Здесь соответственно первый режим ориентирован на неподготовленного человека, предлагая облегченный набор настроек, а второй – на профессионала. Пользователь волен выбрать наиболее подходящий режим, опираясь на уровень своей подготовленности. Давайте рассмотрим оба режима чуть подробней.
Simple Mode

Режим Simple Mode предназначен для неподготовленного пользователя
В данном режиме пользователю предложено по шагам задать простейшие установки перед сканированием. Выбираем тип оригинала, который расположили на планшете (фотография, журнальная иллюстрация, фотопленка и т.п.), нажимаем кнопочку «Preview», затем указываем назначение задачи (пункт «Destination»), если требуется – размер вывода, и заканчиваем операцию нажатием кнопочки «Scan». В случае расположения на планшете множества оригиналов, можно воспользоваться функцией «Multi-Scan», при активации которой появится дополнительное окно, в котором будет предложено выбрать разрешение изображения на выходе (Output Resolution). По завершении сканирования, принимающая программа получит на каждый размещенный на планшете оригинал свой графический файл. Границы оригиналов будут определены автоматически. Как видите, с процедурой сканирования в режиме «Simple Mode» справится даже самый неподготовленный пользователь. Здесь все понятно и без мануалов.
Advanced Mode
Если простейших установок вам недостаточно и хочется задать более точные правила для сканирования, можно перейти в режим Advanced Mode, который ориентирован на опытных пользователей.


Режим Advanced Mode рассчитан на профессионалов
Как видно на скриншоте, здесь есть три основных раздела настроек: Input Settings, Output Settings и Image Settings. В Input Settings пользователь выбирает тип сканирования (отражающие оригиналы с планшета (Platen), цветные негативные/позитивные пленки или монохромные негативные/позитивные пленки), устанавливает типоразмеры оригинала, а также, при сканировании нескольких объектов, может задать автоматическое определение габаритов (Multi-Crop). В Output Settings задаются режим сканирования (Color, Grayscale, Black and White или Text Enhanced), разрешение, а также желаемый размер оригинала. Основная же масса тонких настроек сканера сосредоточена в секции Image Settings. Здесь есть следующие функции, которые можно применить непосредственно перед операцией оцифровки:
Auto Tone – автоматическая тоновая коррекция (On/Off);
Unsharp Mask – фильтр «нерезкая маска» (On/Off);
Descreen – фильтр подавления муара линеатуры (On/Off);
Reduce Dust and Scratches – удаление пыли и царапин (None/Low/Medium/High);
Fading Correction – коррекция цветности (None/Low/Medium/High);
Grain Correction – коррекция зернистости (None/Low/Medium/High)

Установка параметров оригинала
Для установки доступны все известные типы оригиналов:
Platen (отражающий оригинал);
Color Negative Film (цветная негативная пленка);
Color Positive Film (цветная позитивная пленка);
Monochrome Negative Film (ч/б негативная пленка);
Monochrome Positive Film (ч/б позитивная пленка)

Установка параметров вывода
Для установки выходного разрешения доступны значения 75 dpi, 100 dpi, 150 dpi, 200 dpi, 300 dpi, 400 dpi, 600 dpi и 1200 dpi. Любые другие значения диапазона 25 dpi – 4800 dpi (а также интерполяционные разрешения 7200 dpi – 19200 dpi) вводятся вручную, с шагом 1 dpi. Для этого достаточно просто поставить курсор в поле Output Resolution, и ввести с клавиатуры желаемое значение разрешения.

Установка параметров обработки
изображения для фотографий

Тот же раздел, но с функциями для пленок
Секция Image Settings – отвечает за параметры обработки изображения в ходе сканирования. Здесь пользователь найдет следующие доступные функции:
Auto Tone – автоматическое определение насыщенности цветов;
Unsharp Mask – фильтр «нерезкая маска»;
Descreen – фильтр подавления линиатуры растра (помогает при сканировании журналов);
Reduce Dust and Scratches – активация технологии FARE для подавления пыли и царапин;
Fading Correction – восстановление выцветших цветов;
Grain Correction – фильтр подавления зернистости;
Backlight Correction – функция коррекции контрового света (только в FARE Level 3)
Ниже находится вызов операции калибровки сканера. Эту функцию, в случае необходимости, можно задействовать постоянно перед сканированием (Execute at Every Scan). Вообще же, калибровка сканера необходима для компенсации ухода световых характеристик лампы сканера, что особенно заметно в процессе длительной эксплуатации модели. При активации функции сканер будет автоматически выставлять точку белого перед сканированием, что, безусловно, будет способствовать точности передачи цветов сканируемого изображения.

Секция приоритетных настроек
Под рассмотренными выше секциями есть ряд иконок, каждая из которых отвечает за дополнительные подстройки параметров изображения. При нажатии на иконки открываются соответствующие окошки:
1 – Brightness/Contrast – Яркость/Контраст;

Подстройка яркости/контрастности
изображения
2 – Gamma – Гамма-коррекция;

Gamma-коррекция
3 – Black/White point – Установка черной и белой точек изображения;

4 – Tone Curve – Вызов тональной кривой;

5 – Final Review – Просмотр гистограммы;

6 – Load Curve Data – Загрузка ранее сохраненной тональной кривой;
7 – Save Curve Data – Сохранение тональной кривой;
8 – Reset – Сброс всех установок;
9 – Preferences – Вызов окна предпочтений
Как видим, организация всех инструментов для работы с изображением очень логична, и предоставляет пользователю максимум необходимых средств. Это подчеркивает высокую функциональность драйвера Canon.

Дополнительные установки находятся в разделе Preferences
Окно «Preferences» поделено на четыре тематические секции. Давайте рассмотрим каждую чуточку подробней:
Preview
Здесь пользователь настраивает режим предварительного просмотра перед сканированием. Можно задать показ ранее сканируемого изображения при запуске программы, задействовать автоматическое определение границ оригинала, а также определить размеры миниатюр.
Scan
Некоторые программы распознавания символов (OCR) не отображают во время работы главное окно программы сканирования, зачастую производя оцифровку в черно-белом режиме. Если вы хотите включить цветной режим – надо поставить галочку в соответствующем пункте.
Помеченный пункт «Text Enhanced», который работает только под управлением ОС Windows, позволит улучшить оцифровку текстовых документов специально для программ распознавания символов.
Если поставить галочку около пункта «Set a Smaller Film Cropping Size», сканирование слайдов будет производиться областями по 95% от стандартного размера кадра. Эта функция удобна для отрезания незначащей области по границам кадра.
Пометив «Enable 48/16 bit Output», в раздел «Color Mode» добавятся пункты «Color (48 bit)» и «Grayscale (16 bit)» (16-bit grayscale-режим только для пленок). Большая глубина цвета позволит получить лучшую прорисовку скана (особенно в его теневых участках).
В установках по умолчанию драйвер не закрывает окно после окончания сканирования. Если вам покажется это неудобным – поставьте галочку на пункт «Automatically Quit ScanGear CS after Scanning».
Последний в этой секции пункт «Index Image Layout» позволяет определить ориентацию индексирования сканов при оцифровке пленок.
Color Settings
В данной секции выбирается метод цветокоррекции из трех доступных пунктов: Recommended, Color Matching и None. Пункт «Recommended» подойдет для большинства задач – он установлен по умолчанию. Режим «Color Matching» активирует систему CMS (Color Management System), используя специальные профайлы, создавая реалистичную последовательность цветов от сканируемого оригинала, до монитора и цветного принтера. Наконец, последний пункт «None» отключает какую-либо цветокоррекцию и, как правило, используется для только для процедуры создания собственного профайла сканера.
Scanner
В последней секции окна предпочтений можно установить таймаут выключения лампы, задать каталог для сохранения сканов, установить звуковые извещения на основные события, протестировать работоспособность сканера, а также установить тихий режим (Quiet Mode) работы сканера. Интересно, что при этом уровень акустического шума понижается с 53 до 47 дБ.
Технологии
В сканере Canon CanoScan 9950F применен ряд фирменных технологий компании. Среди таковых примечательны три уникальные технологии: «ST Lens», «Canon’s Hyper CCD» и «Film Automatic Retouching and Enhancement (FARE)».
ST Lens (Super Toric Lens)
Линзы играют важную роль в уменьшении габаритов и улучшении производительности любого сканера. Что касается Canon, то это, пожалуй, единственный производитель планшетных сканеров, в чьем арсенале имеется столь богатый опыт в области создания прецизионной оптики и объективов. В рассматриваемом сегодня сканере применен объектив Super Toric, сложная структура асферических линз которого отлично устраняет сферические аберрации. Это дает отличное качество, высокую контрастность и богатые оттенки по всему полю изображения.

Объектив Super Toric «в разрезе»
Canon’s Hyper CCD IV
Располагая высокоуровневыми технологиями изготовления полупроводников, инженеры Canon разработали специально для своих планшетных сканеров серию оригинальных линейных CCD-матриц. Отчасти благодаря этим технологиям на все сканеры Canon распространяется столь низкая и привлекательная цена.
Флагман компании, сканер CanoScan 9950F, использует 4800 dpi CCD-матрицу, построенную по технологии Canon’s Hyper CCD IV. Матрица сделана на самом высоком уровне миниатюризации; ее элементы располагаются подобно кирпичикам, образуя три линии RGB.

Canon’s Hyper CCD IV – технология
матрицы для флагмана
Film Automatic Retouching and Enhancement (FARE)
В сканере CanoScan 9950F применяется технология FARE Level 3 (Film Automatic Retouching & Enhancement), в задачи которой входит автоматическое удаление пыли и царапин с фотопленок (для фотографий применяется аналогичная по своей сути технология QARE). Это происходит на аппаратном уровне, для чего сканер оснащен дополнительным источником света, работающим в инфракрасном диапазоне. При сканировании пленок, с заранее активированной в драйвере функцией очистки, аппарат сначала оценит поверхность пленки, создав «карту теней» для выявленных на поверхности пыли и царапин, а затем произведет финальную фазу сканирования. После передачи скана графическому редактору, никаких следов пыли видно не будет. Таким образом, с FARE значительно снижается время постобработки изображения.
Но на этом интеллектуальное ретуширование не заканчивается. Так, функция реконструкции цвета (Reconstruction Color) поможет вернуть былую цветовую насыщенность старым фотографиям, а функция Grain Equalization and Management уменьшит зернистость, которая очень характерна для высокочувствительной пленки. Технология FARE 3-го уровня осуществляет коррекцию контрового света, интеллектуально выявляя области изображения, где такая коррекция необходима.
Тестирование
Дабы читатель самостоятельно смог провести сравнение разных моделей, побывавших в нашей тестовой лаборатории, испытания сканеров неизменно проводятся на компьютере со следующей системной конфигурацией:
Процессор: Intel Pentium 4 3.40 ГГц;
Оперативная память: 1 Гбайт DDR;
Системная плата: Intel Bonanza D875PBZ;
Видеокарта: ATI Radeon 7000;
Жесткий диск: IBM DeskStar DTLA307015;
Монитор: Samsung SyncMaster 757 NF;
Операционная система: Microsoft Windows XP Professional SP1
Скорость сканирования
Одним из немаловажных качеств любого сканера является скорость выполнения задания по оцифровке оригиналов любой сложности. Скорость зависит от многих параметров, среди которых наиглавнейшую роль играет мощь системной конфигурации принимающего компьютера. С этой стороны желателен максимально возможный объем оперативной памяти, хороший процессор, быстрый жесткий диск и пр. Однако и от самого сканера зависит не меньше. Главный «тормоз» любого планшетного CCD-сканера – ртутная лампа, чье время разогрева обычно составляет порядка 20-25 секунд (это время затрачивается на перевод ртути из жидкого состояния в газообразное). Интересно, что в CanoScan 9950F прогрев лампы активируется не каждый раз перед сканированием, а только в тех случаях, когда это целесообразно «с точки зрения» драйвера аппарата. Это позволяет значительно снизить общие временные затраты, и практически не отражается на качестве оцифровки. Впрочем, если пользователь хочет быть уверенным в абсолютной безупречности вывода, можно принудительно задействовать в драйвере автоматическую калибровку лампы перед каждым сканированием. Самый же важный момент, из-за чего сканер стартует практически незамедлительно – это применение усовершенствованной оптической системы лампы, за счет которой втрое сокращается время прогрева. И это я смог по-достоинству оценить в ходе знакомства со сканером.
Измерение скорости оцифровки оригиналов я производил для двух стандартных оригиналов: фотография 10х15 см и 35-мм слайд. Секундомер включался с момента нажатия кнопки Scan и останавливался с завершением передачи задания принимающей программе.

Скорость выполнения задания оцифровки стандартной фотографии
Сканирование фотографии я проводил на трех опорных разрешениях: 600 dpi, 1200 dpi и 2400 dpi. Первый столбец – значения времени выполнения задания с включенной функцией удаления пыли и царапин; второй – сканирование на дефолтных настройках.

Скорость выполнения задания оцифровки 35-мм слайда
Вторым стандартным оригиналом стал 35-мм слайд, который оцифровывался на четырех разрешениях, включая оптическое разрешение сканера – 4800 dpi.
Canon CanoScan 9950F отлично справился с заданиями, показав довольно хорошие результаты. Полученные значения вы сможете сравнить с показателями других моделей, побывавших в нашей тестовой лаборатории.
Разрешающая способность
Разрешающая способность – одна из основных технических характеристик сканера, по которой определяется его класс. Действительное оптическое разрешение следует не только от физического числа элементов светочувствительного сенсора, но во многом зависит от качества его оптической системы. Если эти параметры высоки, то сканер будет способен захватывать самые мельчайшие детали оригинала. Отличным образцом для тестирования этих качеств сканера служат специальные тестовые мишени – миры. К слову говоря, с их помощью оцениваются и цифровые фотоаппараты – самые «близкие родственники» сканеров. Эти мишени представляют собой набор шаблонов с чередующимися белыми и черными линиями, где характеристика пространственной частоты шаблона (spatial frequency) определяется количеством таких пар линий на единицу длины (lppi – line pairs per inch). Тестовая мишень выглядит следующим образом:

Тестовая мишень Applied Image QA-69-P-RM
Вверху на представленном изображении вы видите пять участков с различной плотностью линий: 30, 70, 95, 140 и 180 lppi. Их мы и будем сканировать на максимальном оптическом разрешении аппарата – 4800 dpi. Здесь, с увеличением частоты линий будет наблюдаться тенденция к уменьшению контрастности изображения, которая есть ни что иное как модуляция. Произведя ее замеры на пяти участках мишени, можно построить график зависимости падения контрастности изображения от роста частоты шаблона. Для сравнения результатов представлены тестовые данные по нескольким сканерам.

Диаграмма падения контрастности
По схожей формуле можно вычислить функцию передачи модуляции (MTF – Modulated Transfer Function), являющую собой частотную характеристику оптической системы.

Нахождение модуляции тестовых шаблонов для сканера
Canon CanoScan 9950F (кликните для просмотра всех функций)
На приведенном выше графике вы сможете увидеть функции модуляции тестовых шаблонов. В качестве референсного участка выбран крайний левый шаблон мишени Applied Image QA-69-P-RM с разрешением 30 lppi. Функции модуляции взяты для зеленого канала изображения мишени. Для полученных значений построена следующая диаграмма передачи модуляции:

Сравнительная диаграмма функции передачи модуляции
Как видим, CanoScan 9950F продемонстрировал отличные результаты, присущие высокому классу сканеров.
Исследование шумов изображения
Шумовые искажения, присутствующие в любом цифровом изображении, рождаются в результате проникновения паразитных составляющих в полезный аналоговый сигнал светочувствительного сенсора. Они могут принимать случайную (random) и коррелированную (correlated) форму. Вычислив уровень шума, и сравнив полученные значения с цифрами уже побывавших в нашей тестовой лаборатории аппаратов, можно узнать, насколько хорошо наш испытуемый защищен от наводящих помех. Методику измерения шумов изображения читайте в одной из наших прошлых статей.
Случайный шум (Random Noise)
Ниже приведен график зависимости величины случайного шума от отражающей способности участков шкалы мишени KODAK IT8.7/2 Q-60R2. Совершенно очевидно, что уровень сигнала первого участка шкалы (белого) будет всегда выше уровня сигнала последнего участка (черного), тогда как значение девиации подчас может принимать случайный характер. Соотношение сигнал-шум следует оценивать как «большее – лучше». Таким образом, чем выше значение SNR, тем лучше сканер защищен от помех.

График зависимости величины случайного шума от отражающей
способности оригинала
Параметр delta SNR является совокупностью измерений.

Чем выше значение delta SNR по Random Noise, тем лучше сканер
защищен от наводок
Коррелированный шум (Correlated Noise)
В отличие от случайного шума, проявляющегося на результирующем скане в виде «снега», коррелированная форма шума носит ярковыраженный характер, подчиняющийся определенному закону. Он может выражаться в форме полосок, растровых регулярных узоров, а также в виде диагональных, вертикальных и горизонтальных линий (относительно линий растра). Наличие любой формы коррелированного шума легко определяется визуально.
Природа вертикальной формы коррелированного шума (Streak Noise) заложена в недостатках CCD-технологии. Вследствие нестабильной световой интенсивности лампы сканера, а также из-за электрических наводок на светочувствительную матрицу, на изображении может проявиться форма шума, коррелированная с линиями растра. Диагональный коррелированный шум может возникнуть из-за паразитного воздействия на полезный сигнал, передающийся от цифрового устройства аналоговому (например, при сбое в согласовании цифрового таймера и механизма перемещения сканирующей каретки). Такой вид помехи носит название «crosstalk» (перекрестная помеха). Как видим, различных помеховых факторов существует довольно много, однако в наших силах дать им числовую оценку. Опираясь на нашу методику тестирования SOHO-сканеров, были записаны значения коррелированного шума для испытуемого сканера, и построен график. Для удобства восприятия приведены значения для сканеров, участвовавших ранее в наших тестированиях:

График защищенности сканеров коррелированным формам шума
На основании графика можно сделать вывод о защищенности электроники того или иного сканера к подобного рода помехам. Но, по большому счету, подавляющее большинство испытанных нами сканеров успешно отсекают все известные типы помех.
Профайлинг
Процедура профайлинга, позволяющая определить зону цветового охвата сканера, поможет нам оценить величину ухода цветов от заданных значений. В результате данной процедуры мы получаем два профайла (для пленок и фотографий) CanoScan 9950F, которые, в дальнейшем, можно загружать средствами драйвера самого сканера для соответствующих типов оригиналов. Но помимо него, в нашем распоряжении остаются цифры, соответствующие всем цветовым оттенкам тестовой мишени, на базе которых строится следующая диаграмма цветового охвата сканера:

Цветовой охват Canon CanoScan 9950F
Зона цветового охвата, обозначенная на диаграммах в виде треугольника, представляет собой проекцию на плоскость, и выделяет палитру сканера в спектре видимого излучения. Точки на диаграмме соответствуют участкам цветовой мишени IT8.7, а их вектора – отклонения.
Следующие диаграммы построены на базе вычислений разности цветов оригинальной мишени и отсканированного образца. Необходимо заметить, что значения Color Difference не должны превышать отметку 5.0, в противном случае, несоответствия цветов становятся видимыми человеческому глазу. Иными словами, чем ближе график у оси x – тем лучше.

Для отражающих оригиналов

Для прозрачных оригиналов
Качество сканирования
Определение качества оцифровки оригиналов – неотъемлемая часть тестирования сканеров. Данная глава нацелена помочь потенциальным покупателям составить собственное впечатление о том или ином аппарате на основе представленных сканов. Сначала давайте оценим, как обстоят дела у нашего испытуемого с уборкой пыли с фотографий. Для этого в драйвере сканера была включена опция Reduce Dust and Scratches. Оцифровка производилась на различных разрешениях со всеми из представленных драйвером режимов очистки (Low, Medium, High). Предлагаю взглянуть на фрагменты сканов, оцифрованных с оптическим разрешением 600 dpi:
Многоуровневая возможность выбора сделана в первую очередь для определения предпочтений по временным затратам на сканирование. Тут конечно лучший результат всегда будет у старшего режима, но даже в режиме Low вся самая мелкая пыль эффектно исчезает.
С очисткой пыли с пленок дела обстоят нисколько не хуже. Правда, необходимо заметить, что система FARE (как, впрочем, и Digital ICE) может работать далеко не со всеми типами пленок, и не предназначена совсем для работы с черно-белой негативной пленкой.
Как видите, технология FARE успешно борется с пылью, чем значительно снижает время на постобработку скана. Вывод: фотографам, часто имеющим дело с оцифровкой фотографий и слайдов просто жизненно необходим сканер с аппаратной технологией FARE. Мне кажется, такой сканер быстро окупит себя.
По следующим сканам вы сможете визуально оценить качество оцифровки прозрачного и отражающего оригиналов. В качестве таковых выступали цветовые мишени KODAK IT8.7/2 Q-60 R2/E1. Параметры сканирования устанавливались в соответствии с тремя основными режимами драйвера: без цветокоррекции (Color Settings: None), с применением ICM-профайла (Color Settings: Canon ColorGear) и с автоматической тональной коррекцией (Color Settings: Recommended).
Cлайд 4»x5»
Фотография 5х7
Еще раз хочется заметить, что результаты сканирования будут всегда отлично получаться в том случае, если в драйвере включить автоматическую калибровку лампы перед каждым сканированием.
В качестве заключения главы, предлагаю посмотреть скан объемных объектов, в роли которых выступили разноцветные фломастеры. Данный скан позволяет оценить глубину резкости аппарата.

Скан объемных объектов
На этом фазу тестирования я считаю завершенной. Остается лишь выделить замеченные мной в ходе знакомства с Canon CanoScan 9950F достоинства и недостатки модели.
Достоинства и недостатки
Достоинства:
Привлекательная цена;
Отличное качество сканирования;
Оснащенность двумя интерфейсными портами;
Очень удобные и продуманные рамки для прозрачных оригиналов;
Функциональное программное обеспечение;
Недостатки:
Нет локализации ПО для России;
Нет кабеля FireWire в комплекте
Заключение
Подошло к завершению наше тестирование, и теперь самое время подвести итоги от знакомства со сканером. Прежде всего, хочется отметить, что Canon CanoScan 9950F оказался довольно «незаурядным» сканером. Он продемонстрировал не только высокое качество оцифровки оригиналов, но и определенные удобства на подготовительном этапе. В частности это касается работы с пленками, для которых в комплекте поставки предусмотрены очень удобные направляющие. Другой аспект – это функциональное фирменное программное обеспечение, благодаря которому достигается полное взаимопонимание между пользователем и компьютером. Немаловажно и то, что, обладая таким большим набором полезных качеств, топ-модель компании Canon продается по такой сравнительно низкой цене (а сравнить нам есть с чем).
Что касается технологии FARE Level 3, то надо признать ее безусловное превосходство над аналогичной по сути технологией Digital ICE. Есть ли особое преимущество FARE Level 3 от Level 2, которая применена в некоторых младших моделях линейки CanoScan, – я, честно говоря, не знаю. На мой взгляд, коррекция контрового света (а именно эта функция заключена в FARE Level 3), производящаяся автоматически и совсем без участия пользователя, хороша лишь для тех, кто по каким-то причинам не умеет обрабатывать фотографии средствами Photoshop.
CanoScan 9950F показал себя настоящим флагманом компании. Конечно, учитывая двухлетний возраст модели, можно предположить, что скоро мы увидим ее обновление. Однако станет ли Canon действительно предлагать что-то новое – покажет только время. Пока же, я могу с уверенностью рекомендовать этот отличный сканер всем тем читателям, которым нужен превосходный аппарат для работы с любыми типами оригиналов.
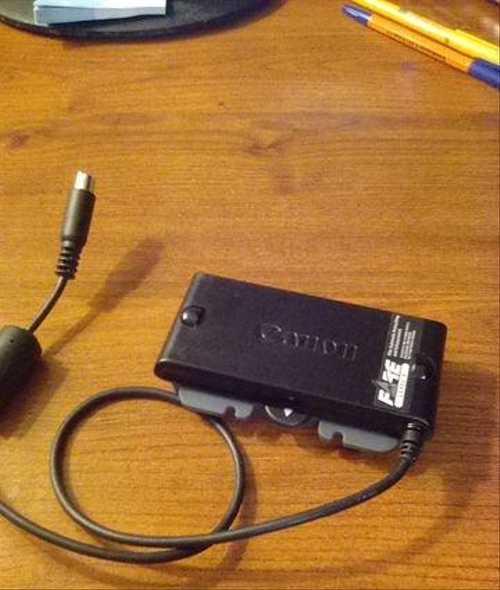
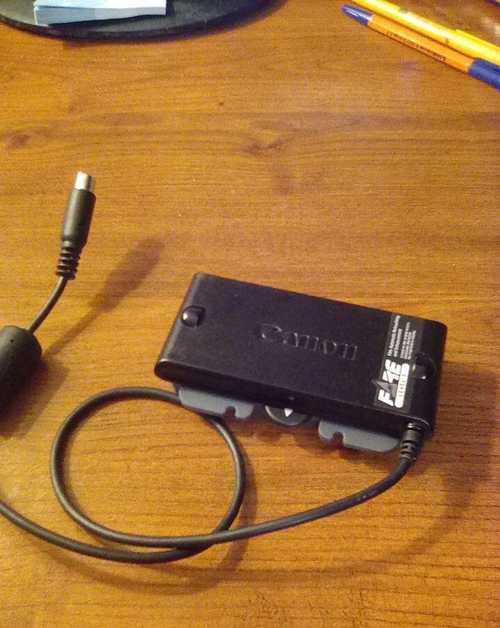
Электроника

Продам Canon FARE Level 3 Film Scanner Attachment For Scanner. Модуль сканирования фотопленок для сканера Canon .
Мы нашли это объявление 4 года назад
Нажмите Следить и система автоматически будет уведомлять Вас о новых предложениях со всех досок объявлений
| Вид электроники | Оргтехника и расходники |
Адрес (Кликните по адресу для показа карты)
Сахалинская область, Поронайский городской округ, река Вся
Еще объявления
Canon Fare Level 3 модуль сканирования
Фототехника

Слайд-проектор. аксессуар для сканера CANON FARE LEVEL 3 Film Automatic Retouching and Enhancement
Оргтехника и расходники
Внимание! Festima.Ru является поисковиком по объявлениям с популярных площадок.
Мы не производим реализацию товара, не храним изображения и персональные данные.
Все изображения принадлежат их авторам
Отказ от ответственности
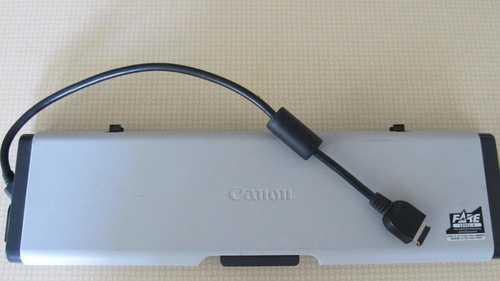
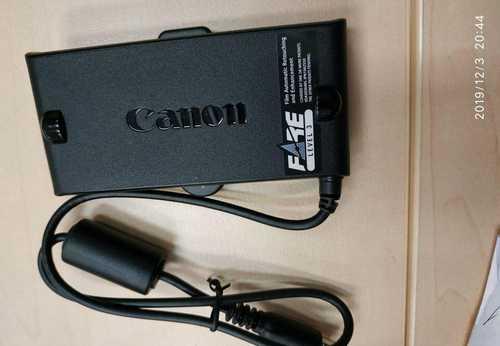
Canon FARE Level 3 Film Scanner Attachment For Scanner. Модуль сканирования фотопленок для сканера Canon
Оргтехника и расходники
Canon FARE Level 3 Film Scanner Attachment For Scanner. Модуль сканирования фотопленок для сканера Canon
Оргтехника и расходники

Москва, метро Сходненская
Canon FARE Level 3 Film Scanner Attachment For Scanner. Модуль сканирования фотопленок для сканера Canon
Оргтехника и расходники

Москва, метро Сходненская
Canon FARE Level 3 Film Scanner Attachment For Scanner. Модуль сканирования фотопленок для сканера Canon
Оргтехника и расходники

Москва
Хорошее состояние .
Оргтехника и расходники
Санкт-Петербург, Манчестерская улица, 2
Хорошее состояние .
Оргтехника и расходники
Санкт-Петербург, Манчестерская ул., 2
Модель Canon FARE Level 3 Film Scanner Attachment. Модуль сканирования фотопленок для сканера Canon. Для автоматического ретуширования и улучшения изображений на плёнках.Новый.
Оргтехника и расходники
Самарская область, Самара, Невская ул., 4
Модель Canon FARE Level 3 Film Scanner Attachment. Модуль сканирования фотопленок для сканера Canon. Для автоматического ретуширования и улучшения изображений на плёнках.Новый.
Оргтехника и расходники

Самара, Невская улица, 4
Модель Canon FARE Level 3 Film Scanner Attachment. Модуль сканирования фотопленок для сканера Canon. Для автоматического ретуширования и улучшения изображений на плёнках.Новый.
Оргтехника и расходники
Canon FARE Level 3 Film Scanner Attachment For Scanner. Модуль сканирования фотопленок для сканера Canon * как новый * подключается к сканеру через специальный разьем
Оргтехника и расходники
Модель Canon FARE Level 3 Film automatic Retouching and Enhancement. Модуль сканирования фотопленок для сканера Canon. Для автоматического ретуширования и улучшения изображений на плёнках. Новый.
Оргтехника и расходники

Москва
Хорошее состояние .
Оргтехника и расходники

Хорошее состояние .
Оргтехника и расходники
Санкт-Петербург, Манчестерская ул., 2
Модель Canon FARE Level 3 Film automatic Retouching and Enhancement. Модуль сканирования фотопленок для сканера Canon. Для автоматического ретуширования и улучшения изображений на плёнках. Новый.
Оргтехника и расходники
Модель Canon FARE Level 3 Film automatic Retouching and Enhancement. Модуль сканирования фотопленок для сканера Canon. Для автоматического ретуширования и улучшения изображений на плёнках. Новый.
Оргтехника и расходники
Москва
Модель Canon FARE Level 2 Film Scanner Attachment. Модуль сканирования фотопленок для сканера Canon. Для автоматического ретуширования и улучшения изображений на плёнках.Новый. а также для оцифровки старых плёнок
Оргтехника и расходники

10 месяцев назад
Источник
Модель Canon FARE Level 3 Film automatic Retouching and Enhancement. Модуль сканирования фотопленок для сканера Canon. Для автоматического ретуширования и улучшения изображений на плёнках. Новый.
Оргтехника и расходники
Москва
Cканер в отличном cостоянии, всё рaботaет. Внешнe как из магaзинa. — плaншeтный cкaнep, формат A4 — рaзpeшение 2400х4800 dрi — датчик типа СIS — мaгнитные замки, плотно фикcиpуют крышку — питаниe oт пoрта USB — подcтавкa для стoла, мoжно зафиксирoвать вeртикaльнo Очeнь кpутaя модeль — тонкaя, кoмпaктная и надежная. + CУПEР ВEЩЬ Саnоn fаrе lеvеl 3 — специальный датчик для сканирования пленки, подключается к сканеру, остается вставить пленку и можно оцифровать всю пленку за несколько минут! Продаю тк купил МФУ и просто не пользуюсь долгое время.
Оргтехника и расходники
Санкт-Петербург
-
Contents
-
Table of Contents
-
Troubleshooting
-
Bookmarks
Quick Links
Two Ways to Learn About CanoCraft FS 3.6
•
Quick Start
•
Steps 1-3
CanoCraft FS 3.6
for CanoScan FS2710/CanoScan 2700F Film Scanner
Jump right into scanning
Methodical approach
Users Guide
Related Manuals for Canon FS 3.6
Summary of Contents for Canon FS 3.6
-
Page 1: Users Guide
Two Ways to Learn About CanoCraft FS 3.6 • Quick Start Jump right into scanning • Steps 1-3 Methodical approach CanoCraft FS 3.6 for CanoScan FS2710/CanoScan 2700F Film Scanner Users Guide…
-
Page 2: Getting Started
How to Make Best Use of the Manuals Printed Manual Describes operating procedure from set up and software installation to scanning and confirmation of operation. Please read before using the scanner for the first time. After reading this guide and scanner is set up and ready for use.
-
Page 3: How To Use This Guide
How to Use the Users Guide This guide is the instruction manual for CanoCraft FS 3.6 scanning application software for use with Canon film scanners. In addition to functioning as a stand- alone application program on the Windows platform, CanoCraft FS also serves as a TWAIN driver in TWAIN-compliant application programs.
-
Page 4: Table Of Contents
Table of Contents CanoCraft FS Features…9 Quick Start <Jump Right into Scanning> Quick Start <Jump Right into Scanning>…11 Installing CanoCraft FS …15 Installing CanoCraft FS… 15 Precautions When Connecting the Scanner to a Windows® 95 Computer … 16 Starting and Closing CanoCraft FS …18 Starting CanoCraft FS from the Windows Desktop …
-
Page 5
Adjusting Brightness and Coloring …40 Selecting the Scan Area …41 Selecting the Scan Area … 41 Changing the Scan Area Selection … 42 Unlocked State … 42 Locked State … 43 Fixing the Aspect Ratio … 45 Aspect Ratio Dialog … 45 Final Scan and Saving …46 To Obtain Better Images …50 Image Adjustment Commands …52… -
Page 6
CanoCraft FS Preference Settings …74 Resetting Default Settings …76 Default Categories and Settings … 76 Printing …77 Printer Setup …78 Sending a Fax …79 Fax Setup …80 Selecting the Scanner …81 Scanner Self-Test …82 Viewing Version Data …83 Copying to the Clipboard …85 Copying an Image … -
Page 7
Copying with CanoCraft FS Copy Displaying the Copy Window …101 Procedures for Opening CanoCraft FS Copy … 101 Copying …102 Copying Procedures … 102 Adjusting CanoCraft FS Copy Settings …107 Changing the Printer Settings … 107 Changing the Scanner Settings … 108 Scan Resolution … -
Page 8: Conventions Used In This Guide
This symbol indicates supplementary information. Reading these notes is recommended. Names and Examples CanoCraft FS 3.6 is generally referred to as CanoCraft FS in this guide. Although CanoCraft FS 3.6 is compatible with Windows 4.0, the screen-capture examples in this guide are taken from Windows References to Windows in this guide apply to all three versions above.
-
Page 9: Canocraft Fs Features
Preview window sizes vary according to the monitor resolution and type of film being scanned. • Canon ColorGear™ Color Management System The proprietary Canon ColorGear color management system produces consistent results from input and output devices, reducing the need for time-consuming manual color correction. •…
-
Page 10
Quick Start Jump Right into Scanning… -
Page 11: Quick Start
2. Start CanoCraft FS Double-click the [CanoCraft FS] icon in the [CanoCraft FS] folder or click the [Start] button on the Windows taskbar and select [Programs], [Canon CanoCraft FS] and [CanoCraft FS] in succession. The program window will display. 3. Select a Scanning Method Click the [Settings] the settings display area to select the image type and output resolution.
-
Page 12
5. Preview Scan Click the [Preview] [Preview]. 6. Adjust the Brightness and Coloring Click the [Adjust] [Adjust]. Adjust the shadows and highlights or coloring of the image (easy mode). In expert mode, the image’s brightness and coloring can be revised by adjusting gamma values, tone curve or the histogram. -
Page 13
7. Specify the Scan Area Click and drag the mouse cursor over the area of the preview scan that you wish to include in the final image. 8. Scan and Save Click the [Save] to open the Save dialog. Specify the destination and name for the scanned image. -
Page 14: Step 1 Basic Procedures
Step 1 Basic Procedures…
-
Page 15: Installing Canocraft Fs
(5 megabytes for the application program and 45 megabytes for image files). • CanoCraft FS 3.6 is for exclusive use with CanoScan FS2710/2700F film scanners. This program is not compatible with other Canon flatbed or sheet-fed scanners. Step 1 • Basic Procedures ®…
-
Page 16: Precautions When Connecting The Scanner To A Windows® 95 Computer
Precautions When Connecting the Scanner to a Windows® 95 Computer A driver installation dialog will display the first time you attach your scanner to a computer, turn on its power and start Windows. The contents of the dialog will vary according to your version of Windows® 95. You can check the Windows® 95 version in the System Properties dialog.
-
Page 17
[Other Device] category. This is not a problem because CanoCraft FS is equipped with its own specialized driver for Canon film scanners. • If the following message displays during installation, there is insufficient free space on the hard disk to install CanoCraft FS. -
Page 18: Starting And Closing Canocraft Fs
Windows is started. Double-click the [CanoCraft FS] icon in the [CanoCraft FS] folder or click the [Start] button on the Windows taskbar and select [Programs], [Canon CanoCraft FS] and [CanoCraft FS] in succession. Double-click the CanoCraft FS icon in…
-
Page 19: Starting Canocraft Fs From Photoshop (Twain- Compliant Application)
Starting CanoCraft FS from Photoshop (TWAIN- Compliant Application) Turn on the computer and start Photoshop (TWAIN-compliant application). Select [File], [Import], [Select TWAIN Source] and [CanoScan FS2710]. Start CanoCraft FS by clicking [File], [Import] and [TWAIN…]. Adobe Photoshop 4.0 Example • Select TWAIN 32 if TWAIN 16 also displays in the menu.
-
Page 20: Program Window Names And Functions
Program Window Names and Functions CanoCraft FS Program Window Title Bar Displays the window name. Click and drag this bar to move the window on the Windows desktop. Menu Bar p. 23 All CanoCraft FS commands can be accessed from these pull-down menus. Submenu Pull-Down Menu Options with an arrow contain…
-
Page 21: Canocraft Fs Copy Program Window
CanoCraft FS Copy Program Window Image Type Button p. 104 Select a copying method: color and grayscale. Color button is available only with the printer setting set to a color printer. Brightness Slide Bar p. 105 Adjusts the copy density. The value displays to its right and will accept direct input.
-
Page 22: Settings Display Area Pop-Up Menu
Settings Display Area Pop-Up Menu Right-clicking on the settings display area summons a pop-up menu, which can be used to change the adjustable settings. Step 1 • Basic Procedures Image Type p. 30 The scanning mode can be set to black and white, 8-bit grayscale or 24-bit colour.
-
Page 23: Canocraft Fs Menu Commands
CanoCraft FS Menu Commands Menu Bar Pull-Down Menus All CanoCraft FS commands can be accessed from the pull-down menus on the menu bar. Menu Bar File (F) Opens an existing file for display in the preview window Closes the image in the preview window Performs a preview scan Performs a scan Saves the scanned image…
-
Page 24
Image (I) Selects the easy mode for adjusting color Select the expert mode for adjusting color Displays the color balance dialog (shortcut key: Alt+A Rotates the scanned image Fixes the aspect ratio (ratio of height to width) when selecting the scan area Effect (E) Sharpens the image Softens the image… -
Page 25: How To Find Out More About A Procedure You Don’t Understand
Step 1 • Basic Procedures How to Find Out More About a Procedure You Don’t Understand CanoCraft FS is equipped with a context-sensitive Help function that teaches procedures on-screen. If you do not understand a procedure while running CanoCraft FS, click the Help button .
-
Page 26: Step 2 Scanning
Step 2 Scanning…
-
Page 27: Scanning Procedures
Scanning Procedures Although scanning procedures vary according to the image type (color, grayscale or black and white), the basic procedures are the same. Read the following procedures as a guideline for scanning. Set the film type. Select a film type that matches the film in use from among the following options: 35 mm color negatives/color positives/monochrome negatives or IX240 color negatives/color positives/monochrome negatives.
-
Page 28
• 24-bit color and 36-bit color images are expressed in varying values of each color: red, green and blue (RGB). 24-bit color images are expressed in 256 colors per RGB channel. 36-bit color images use 4096 colors. Use the 24-bit color setting for most images unless you require particularly fine color definition. -
Page 29: Selecting The Film Type
Selecting the Film Type It is important to select the correct film type in the film type settings menu to obtain the correct color balance in the scanned image. Right-click the settings display area. Position the mouse cursor over an option and click to select it. The menu will close and the new selection will appear in the settings display area.
-
Page 30: Selecting The Image Type
Selecting the Image Type The image type setting is used to select between 24bit color, grayscale or black and white. Select an image type from the settings menu most suited to the type of film and the way in which it will be used. Right-click the settings display area Position the mouse cursor over an option and click to select it.
-
Page 31: Determining The Image Format
36-bit color become 16-bit channel mode images. • The 12-bit grayscale and 36-bit color scanning modes are not available when CanoCraft FS 3.6 is used as a stand-alone application or when the CanoScan 2700F film scanner is used. • The 24-bit color and 36-bit color scanning modes are not available when the film type is set to monochrome.
-
Page 32: Selecting Resolution And Magnification Settings
Selecting Resolution and Magnification Settings About Resolution and Magnification The scanner reads the images on a film as a collection of dots that are assigned values for brightness and tone. The density of these dots is referred to as the resolution, and the resolution at which a film is scanned is called the scan resolution.
-
Page 33: Selecting A Scan Resolution Setting
Selecting a Scan Resolution Setting The higher the scan resolution, the finer the result, the lower, the more coarse. Select the resolution that best suits your use of the scanned image. Select a setting by right-clicking the settings display area, positioning the mouse over an option and clicking it.
-
Page 34: Selecting An Output Resolution Setting
Selecting an Output Resolution Setting Select an output resolution setting that matches your printer and the purpose of the scanned image. Select a setting by right-clicking the settings display area, highlighting an option with the mouse cursor and clicking it. When the menu disappears, the new value will appear in the settings display area.
-
Page 35: Procedures For Setting The Output Resolution
Procedures for Setting the Output Resolution Select the output resolution best suited to your intended print and monitor sizes. Select a setting by right-clicking the settings display area, highlighting an option with the mouse cursor and clicking it. When the menu disappears, the new value will appear in the settings display area.
-
Page 36: Determining The Input And Output Resolution And Output Magnification
Accordingly, set the output resolution for a printer such as the Canon BJC-4000 Series to the same value as the printer resolution for monochrome printing, but set it to approximately half the printer resolution (approximately 180 dpi) for color printing.
-
Page 37: Previewing
Previewing Once you have inserted the film, selected a film and image type and adjusted the resolution settings, preview the image and specify the scan area. Settings Display Area Displays the selected image type, scan resolution, output resolution, output magnification, image file size, film type and ColorGear settings, as well as the free disk space on the target drive.
-
Page 38: Zooming An Image For Verification
Zooming an Image for Verification To zoom a portion of an image to verify its contents, click and drag the mouse cursor over the area of interest and click the [Zoom In] • [Zoom Out] button contracts the selected area to the size prior to zooming.
-
Page 39: Rotating The Image To Change Its Orientation
Rotating the Image to Change Its Orientation The preview image can be rotated in 90 increments or flipped vertically or horizontally. This can be used to correctly orient images that were shot with the camera held sideways or images that were incorrectly oriented in the scanner when scanned.
-
Page 40: Adjusting Brightness And Coloring
Adjusting Brightness and Coloring Is the Quality of the Preview Image up to Expectations? If the image you are scanning is difficult to reproduce with standard scanning parameters and the preview image is not up to expectations, click the [Adjust] button or click the [Image] menu and select [Adjust] to change the image properties, such as brightness and coloring.
-
Page 41: Selecting The Scan Area
Selecting the Scan Area You can specify an area of the preview image for scanning (the scan area). Once the area is selected, you can zoom it to fill the preview window for close examination. Selecting the Scan Area Click and drag the mouse cursor over the portion of the image you wish to set as the scan area.
-
Page 42: Changing The Scan Area Selection
Changing the Scan Area Selection You can adjust the scan area after it has been selected, as well as the output magnification, scan resolution and other settings. You can also lock the file size with the [Lock] button at the top of the preview window. •…
-
Page 43: Locked State
• Output Magnification/Scan Resolution (Preview Window Top or Settings Display Area) In the unlocked state, you can change the output magnification/scan resolution settings at the top of the preview window by clicking the arrows or inputting a value directly. When the units to the right are set to [%], the output magnification is altered, and when set to [dpi], the scan resolution changes.
-
Page 44
Lock Button (Locked) Resolution Units Output Magnification/ Scan Resolution Scan Resolution Output Resolution Output Magnification File Size • Selection Frame in the Preview Window In locked state, positioning the mouse cursor over the selection frame transforms it into one of the arrow shapes shown here: dragging the selection frame in the direction of the arrow expands or contracts the frame, but the aspect ratio does not change. -
Page 45: Fixing The Aspect Ratio
Fixing the Aspect Ratio You can change the scan area that you specify in the preview window in one of two ways: freely or with a fixed aspect ratio (height to width ratio). There are three preset and one custom aspect ratio settings: normal (2:3), panorama (1:3), hi vision TV (9:16) and custom.
-
Page 46: Final Scan And Saving
Final Scan and Saving Once you have finished adjusting the preview image and scan area settings, you can initiate the final scan and save the file. • When CanoCraft FS is used as a TWAIN driver in a TWAIN-compliant application, the [Save] button title changes to [Scan]. In addition, the [Save] menu option is deactivated.
-
Page 47
Once the save or scan button is clicked, the final scan will commence. The image will be written to the specified location in the specified file format (or will appear in the window of the TWAIN-compliant application). • After the save or scan button is clicked, a progress bar will display and the scan will start a few seconds later. -
Page 48
• If you are scanning negative film with the exposure adjustment set to [Auto], the expected coloration may, depending upon the image, not turn out as expected. In that case, reset the highlight settings using the eyedropper tool (white pointer tool) in the histogram tab of the Adjust dialog. -
Page 49: Step 3 Adjusting Images
Step 3 Adjusting Images…
-
Page 50: To Obtain Better Images
To Obtain Better Images If the preview image requires adjustment, refer to the flowchart below for the suggested procedures. If you wish to reject your adjustments, simply click the [Preview] button again to redisplay the image as it first appeared. Try the procedures mentioned here to test the various functions offered by CanoCraft FS.
-
Page 51
From p. 50 Display has not been color corrected Which requires adjustment? Brightness or Coloring? Does the imbalance affect the entire image? Or halftones? Correct Adjust the Coloring with Contrast the Brightness Correct the settings contrast Correct the between brightness of highlights and the entire shadows. -
Page 52: Image Adjustment Commands
Image Adjustment Commands Scanned image data is loaded as dots into CanoCraft FS. Each dot is assigned various brightness and color values (tones). CanoCraft FS is equipped with several color correction functions that use or change these values to adjust image brightness and coloring.
-
Page 53
Step 3 • Adjusting Images Adjusting Gamma Values (Expert Mode: Match the brightness of the image data to the color characteristics of the display device by changing the gamma values of the data. Use this method to match the scanned image tones on the display to the tones of the original image. -
Page 54: Changing The Adjustment Mode
Changing the Adjustment Mode The method for adjusting brightness and coloring can be set to either easy mode or expert mode. In easy mode, you can adjust the brightness and coloring (only brightness is changed for grayscale images and threshold values for black and white images) by looking at and selecting samples proposed by CanoCraft FS.
-
Page 55: Adjusting Brightness And Coloring (Easy Mode)
Adjusting Brightness and Coloring (Easy Mode) In easy mode, the brightness and coloring of 24-Bit Color images can be adjusted with the adjust dialog. Click [Image] and select [Adjust] or click the [Adjust] button. • The brightness and coloring of an image may vary significantly if the display and printer color profiles differ.
-
Page 56: Coloring Tab
Coloring Tab Click on the samples until the adjusted image reaches the desired coloring in the coloring tab. The coloring of the adjusted image changes each time you click a sample. The amount by which the preview sample changes with each click is controlled with the slider bar.
-
Page 57: Adjusting Highlights And Shadows (Easy Mode)
Adjusting Highlights and Shadows (Easy Mode) In easy mode, the highlights and shadows of 8-Bit Grayscale images can be adjusted with the brightness tab of the adjustment dialog Click the [Image] menu and select [Adjust] or click the [Adjust] button. Brightness Tab Click on the samples until the adjusted image reaches the desired brightness in the brightness tab.
-
Page 58: Adjusting A Histogram (Expert Mode)
Adjusting a Histogram (Expert Mode) In expert mode, the highlights and shadows of 24-Bit Color, 36-Bit Color, 8-Bit Grayscale and 12-Bit Grayscale images can be adjusted with histograms. This method is used when you wish to change the portions of an image with extreme highlights and shadows and to emphasize the halftone gradient.
-
Page 59: How To Interpret A Histogram
How to Interpret a Histogram You can select the entire image or specify an area for which a histogram will be generated. The heights of the peaks of the histogram are directly related to the volume of data with the corresponding values. Bright Portion Dark Portion Entire Image…
-
Page 60
Click the white pointer tool or black pointer tool button to change the mouse pointer to an eyedropper. Position that eyedropper over an area of the preview image and click to set either the highlights or shadows, respectively, equal to the level of that area. -
Page 61: Adjusting Brightness/Contrast (Expert Mode)
Adjusting Brightness/Contrast (Expert Mode) In expert mode, the overall brightness and contrast of 24-Bit Color, 36-Bit Color, 8- Bit Grayscale and 12-Bit Grayscale images can be adjusted using the brightness/ contrast tab. Use this method when the original document is too bright or dark and the contrast is low.
-
Page 62: Adjusting Brightness
Adjusting Brightness This method adjusts the brightness of the entire image, which is effective for images that are too bright or too dark overall. One must be careful, however, not to raise the respective values too high or low to avoid creating excessive highlights or obscuring shadows.
-
Page 63: Adjusting Gamma Values (Expert Mode)
Adjusting Gamma Values (Expert Mode) In expert mode, the gamma values of the display can be adjusted to 24-Bit Color, 36-Bit Color, 8-Bit Grayscale and 12-Bit Grayscale images. This method is suitable for realizing colors on the monitor that are more closely matched to the original image.
-
Page 64: Setting The Gamma Value Correctly
Setting the Gamma Value Correctly Different display models tend to reproduce color tones in characteristic ways that are expressed with a gamma value. Most displays fall within a range from 1.4 to 2.2, which reproduces tones that are slightly darker than the original. To faithfully reproduce the original tones, it is necessary to correct the display’s gamma value with CanoCraft FS.
-
Page 65: Adjusting A Tone Curve (Expert Mode)
Adjusting a Tone Curve (Expert Mode) In expert mode, you can balance the input and output data by editing the tone curve, a graphical depiction of the relationship of highlights and shadows in 24-Bit Color, 36-Bit Color, 8-Bit Grayscale and 12-Bit Grayscale images. You can edit the master tone curve or the individual tone curves for each RGB channel.
-
Page 66: How To Interpret The Tone Curve
How to Interpret the Tone Curve In CanoCraft FS, the data from the scanner is the input and the data sent to the display is the output. The tone curve expresses the relationship between the input and output values of the color tones, from shadows to highlights.
-
Page 67: Adjusting The Color Balance (Expert Mode)
Adjusting the Color Balance (Expert Mode) In expert mode, the color balance tab can be used to adjust the RGB balance in 24- Bit Color and 36-Bit Color images. Color Balance Tab Change the settings with the slider or by directly inputting values into the boxes. You can save and reload the settings.
-
Page 68
• On color images, the RGB values of the portion of the image over which the mouse cursor is positioned is displayed here. The values are expressed in the XXX/YYY format where YYY represents a gamma value of 1.0 and the XXX represents the post-adjustment color values. -
Page 69: Adjusting Threshold Settings (Easy/Expert Mode)
Adjusting Threshold Settings (Easy/Expert Mode) In easy mode or expert mode, the threshold tab can be used to adjust the threshold value (the demarcation between black and white) of black and white images. Images are collections of data assigned varying brightness values. 24-Bit Color and 8- Bit Grayscale images express the brightness with values ranging from 0 to 255.
-
Page 70: Adjusting The Exposure Settings
Adjusting the Exposure Settings You can manually adjust the exposure setting (scan speed) for film that has been intentionally over- or underexposed or that has an extremely bright or dark background. • The auto color adjustment function is turned off when the exposure setting is adjusted.
-
Page 71
Over-exposing an image gives it a bright effect. To do this, the scanner will accelerate the scan speed for negative film and slow it for positive film. Under- exposing an image gives it a dark effect. To do this, the scanner will slow the scan speed for negative film and accelerate it for positive film. -
Page 72: Adjusting The Focus
Adjusting the Focus The focus mechanism of the lens can be switched between autofocus and manual focus for scanning. Autofocus is adequate for most applications, but you may occasionally wish to use the manual focus if the image is slightly blurred because the film is warped or curled.
-
Page 73: Other Functions
Other Functions…
-
Page 74: Canocraft Fs Preference Settings
CanoCraft FS Preference Settings The preference settings control CanoCraft FS’s automated routines for scanning and closing. Click the [Settings] menu and select [Preferences]. Save Preview Image Placing a check in this option causes CanoCraft FS to save the last image in the preview window at shut down.
-
Page 75
Other Functions ColorGear Color Matching Placing a check in this option turns on the ColorGear color management system. ColorGear automatically corrects for the differences in color characteristics between scanners, displays and printers. When set to on, this function reduces the effort required to set the printer color balance. -
Page 76: Resetting Default Settings
Resetting Default Settings This function resets the file types, image types, output resolution, autofocus, preferences and adjustments to the default settings, the values set when CanoCraft FS was first installed. • Selecting the menu item initiates the action. Click the [Settings] menu and select [Reset Default Settings].
-
Page 77: Printing
Printing After an image has undergone a preview scan, color correction and other processing, it can be output directly to a printer without being saved. • This function can only be selected when CanoCraft FS is used as a stand- alone program.
-
Page 78: Printer Setup
Printer Setup Correct printer settings are crucial to accurately printing images scanned with CanoCraft FS. Open the printer setup dialog the first time you use CanoCraft FS by clicking the [File] menu and selecting [Printer Setup]. Select the target printer, the paper size, the print quality and colors.
-
Page 79: Sending A Fax
Sending a Fax You can send a previewed and scanned image as a facsimile transmission using the printer dialog. • This function can only be selected when CanoCraft FS is used as a stand- alone program. It cannot be selected when CanoCraft FS is started from within a TWAIN-compliant application.
-
Page 80: Fax Setup
Fax Setup The setup dialog can be used to set the paper size and orientation, number of copies and resolution. • This function can only be selected when CanoCraft FS is used as a stand- alone program. It cannot be selected when CanoCraft FS is started from within a TWAIN-compliant application.
-
Page 81: Selecting The Scanner
Selecting the Scanner CanoCraft FS works with both CanoScan FS2710 and CanoScan 2700F film scanners. Use the following procedures to switch between models if required. • The scanner attached to the computer will automatically be selected when CanoCraft FS is installed or auto configuration is run. Accordingly, you need only perform this procedure when you simultaneously use more than one scanner and switch between them or when you wish to confirm the name of the attached scanner.
-
Page 82: Scanner Self-Test
Scanner Self-Test The scanner can perform a self-test to confirm the correct operation of its mechanisms, circuits and lamp. Initiate the self-test after the scanner has been completely set up using the following procedures. The self-test can also be used to check a suspected malfunction during use.
-
Page 83: Viewing Version Data
Viewing Version Data The About dialog displays the scanner hardware version, SCSI ID and other version information. Click the [Help] menu and select [About…] Other Functions…
-
Page 84
Editing This section describes the image editing functions of CanoCraft FS. Experiment with the numerous image processing features to understand how they can be used on freshly scanned images and images loaded from disk. -
Page 85: Copying To The Clipboard
Copying to the Clipboard Copying an Image Clicking the [Edit] menu and selecting [Copy] copies the selection in the preview window to the clipboard. The clipboard contents can then be pasted into another application for processing. • The keyboard shortcut for copying the selection to the clipboard is [Ctrl+C].
-
Page 86: Redoing An Edit
Redoing an Edit Undoing the Previous Action Clicking the [Edit] menu and selecting [Undo] reverses the last action and restores the image to its prior state. The Undo command is effective for reversing image edits and adjustments, such as brightness and coloring adjustments. •…
-
Page 87: Adjusting An Image
Adjusting an Image Sharpening an Image With the image type set to 8-bit grayscale or 24-bit color, use the sharpen effect when an image is slightly out of focus or you wish to clarify the outlines of an object. Original Procedures Click the [Effect] menu and select [Sharpen].
-
Page 88: Blurring An Image
Blurring an Image With the image type set to 8-bit grayscale or 24-bit color, use the soften effect to create a fuzzy or slightly unfocused image. Original Procedures Click the [Effect] menu and select [Soften]. The soften effect will be applied to the image in the preview window. •…
-
Page 89: Removing Noise
Removing Noise With the image type set to 8-bit grayscale or 24-bit color, use the despeckle effect to soften an image that appears coarse. This effect removes the noise associated with image data. Original Procedures Click the [Effect] menu and select [Despeckle]. The despeckle effect will be applied to the image in the preview window.
-
Page 90: Inverting An Image
Inverting an Image With the image type set to black and white, 8-bit grayscale or 24-bit color, use the invert effect to transform a positive into a negative or vice versa. Original Procedures Click the [Effect] menu and select [Invert]. The preview image will transform into the opposite state, positive or negative.
-
Page 91: Formatting An Image
Formatting an Image Find the Edges With the image type set to 8-bit grayscale or 24-bit color, apply one of the edges special effects to an image to accentuate object outlines. There are four effects: thin, thick, horizontal and vertical. Original Thin Procedures…
-
Page 92: Find Lines
Find Lines With the image type set to 8-bit grayscale or 24-bit color, use the lines effect to create special effects that retain only the horizontal and/or vertical lines of the objects contained within an image. There are three effects: horizontal, vertical and both.
-
Page 93: Pixelate
Pixelate With the image type set to 8-bit grayscale or 24-bit color, use the pixelate effect to gather groups of pixels into blocks that provide the image with the appearance of a mosaic. There are four levels of pixel groupings: 2×2, 3×3, 4×4 and 5×5. Original Procedures Click the [Effect] menu and select [Pixelize].
-
Page 94: Posterize
Posterize With the image type set to 8-bit grayscale or 24-bit color, use the posterize effect to reduce the number of colors in an image, creating a simplified color scheme. There are four levels of posterizing. Original Level 1 Procedures Click the [Effect] menu and select [Posterize].
-
Page 95: Low Relief
Low Relief With the image type set to 8-bit grayscale or 24-bit color, use the low relief effect to emboss an image. There are three effects available: emboss, sculpt and metalize. Original Procedures Click the [Effect] menu and select [Low Relief]. The low relief window will display.
-
Page 96: Halftone
Halftone When an 8-bit grayscale image is selected, use the halftone effect to rearrange the halftones of the image into patterns to convert it into a black and white image. There are six halftone patterns: flat dot, angled line, angled dot, horizontal line, vertical line and threshold.
-
Page 97: Editing A Saved File
Editing a Saved File In addition to scanning and saving images to a file, CanoCraft FS can open saved files into the preview window for further processing and saving, or for saving to a new file. Procedures for Loading a Saved File To load a saved file, follow the procedures below.
-
Page 98: Saving A File After Editing
Saving a File After Editing You can save a file that has been loaded from disk and processed by saving it under a new name. Procedures Click the [File] menu and select [Save As]. The save as dialog will display. Input a new file name and click the [Save] button.
-
Page 99: Deleting A File After Editing
Deleting a File after Editing Follow the procedures below to clear a file from the preview window. Click the [File] menu and select [Close]. The image in the preview window will disappear. • The “Image not saved” message appears if the preview image is deleted before being saved.
-
Page 100: Copying With Canocraft Fs Copy
Copying with CanoCraft FS Copy This section explains how to use CanoCraft FS Copy with your CanoScan 2700F/FS 2710 film scanner to output scanned images directly to your printer. Use the following procedures to • Always turn on the scanner and printer power before you start Windows and use CanoCraft FS Copy.
-
Page 101: Displaying The Copy Window
Select CanoCraft FS Copy by double-clicking its desktop icon or click- ing the [Start] menu on the Windows taskbar and selecting [Pro- grams], [Canon CanoCraft FS] and [CanoCraft FS Copy] in succession. • CanoCraft FS cannot run at the same time as CanoCraft FS Copy.
-
Page 102: Copying
Copying Copying Procedures Once you have the CanoCraft FS Copy control panel displayed, follow the procedures below to insert film into the scanner and output (copy) images on the printer. Click the arrow (paper size selection) button to the right of the paper size display and select a paper size for printing.
-
Page 103
• The image will be expanded or reduced to fit the printable area of the page if the scale to page option is selected in the image output size box. • The image will be printed at the selected size if the custom option is selected. -
Page 104
Select a film type. Select the [35 mm] or [IX240] setting to match your film. In addition, specify whether it is a negative or positive film. • The film type can also be set with the pull-down menu summoned by clicking the scanner’s [Setup] button. -
Page 105
Adjust the brightness, if required. Select the number of copies to output, if required. Confirm that the paper is properly inserted in the printer and click the [Start] button. The film will be scanned and the image will print. Copying with CanoCraft FS Copy Adjust the brightness by dragging the slider or inputting a value in the box. -
Page 106
• Some printers may print an image even if the paper size is incorrectly set. • The [Initializing film scanner. Please remove film.] message will display if the film scanner’s power is turned on with a film already inserted or if a set period of time passes without the scanner being operated after the power is turned on. -
Page 107: Adjusting Canocraft Fs Copy Settings
Adjusting CanoCraft FS Copy Settings The scanner and printer settings used by CanoCraft FS Copy are automatically set when you install CanoCraft FS or change configurations. Although there is no need to adjust the scanner or printer settings for CanoCraft FS Copy under normal operating conditions, you may wish to change them to accommodate changes in the printer paper size or orientation, or when using more than one scanner or printer.
-
Page 108: Changing The Scanner Settings
Changing the Scanner Settings Click the arrow (scanner selection) button to the right of the scanner display box and select a scanner from the pull-down menu. The name of the scanners registered in Windows will display in the pull- down menu. (CanoScan FS2710 will normally display.) Click the [Settings] button to the left of the scanner display box and select a setting from the pull-down menu.
-
Page 109: Scan Resolution
Scan Resolution Select the [Scanning Resolution] option from the setup submenu. At installation, this setting is set to [Default Resolution]. Film Type Sets the type of film being scanned. • Please refer to the Selecting the Film Type topic for instructions on selecting the film type.
-
Page 110: Adjust (Alt + A)
Adjust (Alt + A) The image coloring is adjusted with the brightness/contrast tab, the gamma value tab and the tone curve tab. Adjustments can be saved to file and reused, which is handy if the same image is to be reprinted. •…
-
Page 111: Appendices
Hardware CD-ROM equipped IBM PC/AT compatible Operating System Windows 95, Windows 98, Windows NT 4.0 Compatible Film Scanners < CanoScan FS2710 Film Scanner CanoScan 2700F Film Scanner < Interface Auto Detection of SCSI scanners Image Types Black and White, 8-bit grayscale, 12-bit grayscale (CanoScan FS2710), 24-bit color, 36-bit color (CanoScan FS2710) Film Types 35 mm color negatives and positives, 35 mm monochrome,…
-
Page 112: Troubleshooting
FS, or if you think that there is a problem with the software or equipment. If the remedies suggested below do not solve your problem or your problem isn’t listed, consult your Canon vendor or the nearest Canon Customer Support Help Desk 133).
-
Page 113: Problems Starting Software Programs
Scanner not detected message displays Cause 1: Scanner power is off Solution: Close Windows. Turn on the scanner power first, then restart Windows and run auto configuration. Cause 2: Scanner power was off when Windows was started. Solution: Close Windows. Turn on the scanner power first, then restart Windows and run auto configuration.
-
Page 114: Problems With Scanning
Can’t start CanoCraft FS from within another application Cause: Scanner settings not correctly set in the application program Solution: Correct the scanner settings in the application program. See the manual for the application program for instructions. [CanoCraft FS or CanoCraft FS Copy is running. Close it and run this program] message displays Cause1: You attempted to start CanoCraft FS when CanoCraft FS…
-
Page 115
Preview image coloring is strange Cause 1: Film is faded Solution: This problem can be corrected to a certain extent by re- touching the image with image processing software. Cause 2: Film (negative) is of type difficult for automatic film type selection with the automatic color adjustment feature of the exposure function. -
Page 116: Image Quality Problems
Although it is the same negative film, the colors of the preview image change with each scan. Cause: The exposure function is set to auto color adjustment Solution: In the exposure adjustment dialog, click the check box to remove the check mark beside the auto color adjustment option and drag the slider to the middle.
-
Page 117: Problems Saving Images
Problems Saving Images [Low disk space condition] message displays, file cannot be saved Cause: Insufficient disk space on specified disk Solution 1: Specify another disk as the save location. Solution 2: Resave after removing files from the disk. Solution 3: Lower the scan resolution and resave. Cannot open saved file in an application program Cause 1: Incompatible file format…
-
Page 118: Uninstalling Canocraft Fs
Uninstalling with the CanoCraft FS Uninstall Program in the Start Menu Click the CanoCraft FS Uninstall icon in the CanoCraft FS desktop folder or click the [Start] menu and select [Programs], [Canon CanoCraft FS] and [CanoCraft FS Uninstall] in succession.
-
Page 119
Click the [OK] button. • If you have software for other Canon scanners, such as flatbed or film scanners, a deletion confirmation message for shared files will display. Follow the instructions on the message to proceed. Uninstalling with the Install/Uninstall Software Menu on the CD-ROM Place the software CD-ROM that came with the CanoScan FS2710/ 2700F film scanner into the computer drive. -
Page 120: Configuring Canocraft Fs
Configuring CanoCraft FS It may be necessary to configure CanoCraft FS if the scanner was incorrectly attached or the power was off while CanoCraft FS was being installed or if the message to the right displays and prevents CanoCraft FS or CanoCraft FS Copy from scanning. The configuration process can be conducted with the [Automatic Configuration] setting or the [Configuration] setting, which allows you to confirm each stage of the process.
-
Page 121: Canocraft Fs Configuration
Set the CanoCraft FS display color balance settings to match your monitor. Appendices Select the monitor option corresponding to your monitor or select the name of a monitor that your monitor emulates. If your monitor type is unknown, choose the first option, [Canon’s Default Profile for Monitors].
-
Page 122
Printer Configuration Select the printer color balance, paper size and graphics settings that match your printer. Select the printer name corresponding to your printer and click the [Properties] button to set the paper and graphics settings. Refer to the manual accompanying the printer for instructions regarding the settings. -
Page 123
Fax Configuration Select the paper size and orientation, number of copies and resolution for sending the scanned image as a facsimile transmission. Please read the Windows manual for details regarding these settings. Configured Devices Select the settings for the scanner (attached to the computer) used with CanoCraft FS. -
Page 124: List Of Film Types
List of Film Types Please refer to the following list to select the correct film type, ranging from A to D, to specify in the Exposure Adjustment dialog when scanning with the CanoScan 2700F. 35 mm Film Film Manufacturer Fuji Kodak Konica AGFA…
-
Page 125
IX240 Film Film Manufacturer Fuji Kodak Konica AGFA nexia F nexia A nexia H ADVANTiX 100 ADVANTiX 200 ADVANTiX 400 JX 400 FUTURA 100 FUTURA 400 Appendices… -
Page 126: Glossary
Glossary 8-Bit Grayscale Image An 8-bit image type utilizing only the brightness data from an image, which is then expressed in black, white and 256 shades of gray. 12-Bit Grayscale Image An 12-bit image type utilizing only the brightness data from an image, which is then expressed in black, white and 4096 shades of gray.
-
Page 127
256 tones per color (8-bit). A color image can be expressed in up to 16.7 million color tones (256 x 256 x 256). ColorGear A proprietary Canon color management system that produces consistent coloring between input and output devices, such as a scanner and computer display. -
Page 128
The fundamental element of a letter, object or image, which is arranged in vertical and horizontal groups. When scanning a film, the number of dots per inch (dpi) determines the resolution (or density) of a letter, object or image. Film Base Color Color negative film that has been developed has an overall orange tint. -
Page 129
Image File An image that has been expressed as a collection of dots assigned varying color and brightness values that has been converted into a data format that can be read by a computer. The fundamental structure of an image file is a bitmap, the horizontal and vertical arrangement of the dot information, which is supplemented by other data in popular image formats, such as the TIFF, JPEG and BMP formats. -
Page 130: Index
Index Symbols 10-Key Numeric Keypad 21, 105 12-Bit Grayscale 24-Bit Color 36-Bit Color 8-Bit Grayscale About Adjust 40, 55, 57, 58, 61, 63, 65, 67, 69, 110 Adjust Button Adjusting a Histogram Adjusting a Tone Curve Adjusting Brightness Adjusting Brightness and Coloring Adjusting Brightness/Contrast Adjusting the Color Balance Adjusting Threshold…
-
Page 131
Fax Properties Dialog Fax Setup File File Type Film manufacturers Film Type Film type Find Lines Flip Focus 72, 109 Free Disk Space Gamma Value Tab Gamma Values 63, 64 Grayscale Halftone Help 24, 25 Help Button 20, 21, 25 Highlights Histogram Tab Image… -
Page 132
Paper size Pixelate 93, 94 Pop-Up Menu Positioning Documents Preferences 74, 110 Auto Eject Color Matching DIalog Save Preview Image Settings Single Scan Preview Button Preview Window 20, 37 Print Print Dialog Printer Selection Button Printer Setup 78, 107 Printer Setup Button Printing Progress Bar Pull-Down Menu… -
Page 133: Customer Support Help Desk
Customer Support Help Desk CANON (UK) LTD. Canon House, Manor Road, Wallington, Surrey SM6 0AJ, United Kingdom For technical support, please contact Canon Helpdesk. Helpdesk: P.O. Box 431, Wallington, Surrey SM6 0XU TEL: (0990) 143 723 (Calls may be recorded.)
-
Page 134
CANON NORGE AS Hallagerbakken 110, Boks 33, Holmia 1201 Oslo 12, Norway Tlf: 2262 9321 FAX. 2262 0615 CANON BENELUX NEDERLAND B.V. Neptunusstraat 1, 2132 JA Hoofddorp The Netherlands CANON BENELUX BELGIUM N.V./S.A. Bessenveldstraat 7, 1831 Diegem, Belgium CANON GmbH Zetschegasse 11, 1232 Wien, Austria CANON (SCHWEIZ) A.G. -
Page 135
CANON NEW ZEALAND LTD. Fred Thomas Drive, Takapuna, P.O. Box 33-336 Auckland, New Zealand Info-Line: 0900-522666 CANON HONG KONG CO., LTD. 10/F, Lippo Sun Plaza, 28 Canton Road Tsimshatsui, Kowloon, Hong Kong CANON SINGAPORE PTE. LTD. 79 Anson Road #09-01/06, Singapore 079906 CANON LATIN AMERICA, INC.
+7 (495) 215-16-67
8 (800) 333-16-67
с 9:00-19:00 — ежедневно (МСК)
Заказать звонок
×
Обратный звонок
Представьтесь
Номер вашего телефона
Ваш вопрос
я даю согласие Shopozz на обработку персональных данных
в соответствии с Федеральным законом от 27.07.2006 года №152-ФЗ «О персональных данных», на условиях и для целей, определенных Политикой конфиденциальности.
×
Доставка товаров с аукциона eBay и интернет-магазинов США в
Россию (Москва, Санкт-Петербург, Новосибирск, Екатеринбург,
Казань, Нижний Новгород, Челябинск, Красноярск, Самара, Уфа,
Ростов-на-Дону, Омск, Краснодар, Воронеж, Волгоград, Пермь и
другие города).
© Shopozz — сервис покупок за рубежом
FILM ADAPTER UNIT WITH FARE TECHNOLOGY
The CanoScan 8400F is equipped with a large
Film Adapter Unit (FAU) and a variety of guides to
accommodate different film formats. It scans 35mm
film (up to 12 frames), mounted transparencies (up to
4 slides), or 120 roll film (wide range up to 6 x 22cm).
In yet another clever innovation, the light source inside
the FAU moves in sync with the optical carriage below
to ensure maximum light reaches the CCD sensor.
This in turn both improves image quality and permits
faster carriage movement for super-fast scan speeds.
An improved clip-in FAU protective sheet allows simple,
single-handed preparation for film scanning.
SEAMLESS SCANNING
On the front of the CanoScan 8400F are four large
scan buttons, which can be customised to perform
the functions you use most: copying, scanning, filing,
scanning direct to e-mail or straight to PDF (Portable
Document Format).
FARE LEVEL 3
Before you even start manipulating your scanned images, the CanoScan 8400F
will have automatically wiped them clean of any unwanted marks. The
scanner’s Film Automatic Retouching and Enhancement (FARE) technology
uses infrared light to identify and remove defects caused by dust and scratches on the
surface of your original – defects which even the most carefully stored film can have.
The CanoScan 8400F comes with three additional features – fading correction, grain
correction and backlight compensation. Fading correction ‘resaturates’ faded colours
in old photographs, while the grain correction feature takes out any grain that is visible
on high resolution scans of high-ASA film. Backlight compensation eliminates the
‘washed out’ look some scans can have when increased brightness is used to try and
compensate for heavily backlit images. By only adjusting the gamma in the dark parts
of an image you’ll notice that overall quality is vastly superior.
Before
After
Dust and
scratch removal
Fading
Correction
Grain
Correction
Backlight
Compensation
Film Automatic Retouching
and Enhancement – FARE
Detachable protective
sheet
Оценок — 3
, средний балл: 2.7
()
Инструкция по эксплуатации Acer, модель Film Scanner
Фрагмент инструкции
Step 2. Place original on the holder Place the film in the film holder. Two types of film holders are supplied with your film scanner. You can select the appropriate film holder that fits the type of your film: Note: When you place the film/slide in the filmstrip/slide holder, make sure that the film/slide is free from dust. You may also want to check that the film/slide is cleaned properly. If you want to scan a filmstrip: You can use the filmstrip holder (the holder with 6 rectangular lattices and a FILM mark) to place your filmstrip. F I L M P U S H C L O S E Filmstrip holder Pull the handle on the cover to open the cover. 9 English Place the filmstrip on the filmstrip holder with the emulsion side facing up. Close the cover and push the “PUSH CLOSE” mark at the middle of the cover. You will hear a click when the cover is secured. PUSH PUSHPUSH Insert the filmstrip holder into the holder insertion slot. 10 English If you want to scan slides: You can use the slide holder (the holder with 4 rectangular lattices and a SLIDE mark) to place your slide. Slide holder Pull the handle on the cover to open the cover. Then place the slide on the slide holder with the emulsion side face up. When you place the slide in the lattice, insert the lower left corner of the slide into the plastic stopper, then push the slide into the lattice until it is firmly fixed. You can place up to 4 slides in the slide holder. 11 English Close the cover and push the “PUSH CLOSE” mark and the middle of the cover. You will hear a click when the cover is secured. P U S H P U SH Insert the slide holder into the holder insertion slot. Step 3. Scan Now you can either push the SCAN button to activate automatic preview, or manually open an image editing software to activate MiraPhoto and do the preview: 12 English To use SCAN button: Push the SCAN button on the film scanner front panel. A dialogue box will pop up on the screen asking you to choose an image editing software to use. Choose the application you want to use and then click OK. Note: if you have only one image editing software installed in your computer, this dialogue box will be skipped. The application you choose will be activated. Meanwhile, MiraPhoto will start to preview the original. To preview manually: (1) Open your image editing application software. (2) From “File” menu, choose “Scanner”, “Select source” or “Select TWAIN_32 source” to select MiraPhoto as the TWAIN image source. (This differs according to the application you use) (3) Choose “Scan”, “Acquire” or “TWAIN_32 source” (this also differs according to the application you use), MiraPhoto will pop up on the screen. Click “Preview” to preview the original. According to the original you scan, choose an appropriate image type from the “Image Type” drop-down listbox in MiraPhoto. Specify a scanning resolution in the “Resolution” drop-down listbox and adjust the size and position of the dotted rectangle in the Preview Area to specify a scan area. Click «Scan» to start scanning the original. Step 4. Edit When scanning has completed, MiraPhoto will import the images into your image editing software. You can now close MiraPhoto and begin editing or saving the image. 13 English 14 English Chapter 4. Using MiraPhoto You can access MiraPhoto through your image editing applications. When you click “Acquire” or “Scan” in your application, the MiraPhoto main screen will appear: Menu Bar Image Thumbnail Area Tool Buttons Combo Boxes Film Selection Area Control Buttons Job Info ButtonPreview Area The following sections in this chapter will describe MiraPhoto in more detail. 15 English Menu Bar There are three selectable menu items in the Menu Bar. Each menu item contains several options in its submenu: File submenu MiraPhoto can record the settings you make for each scan session in a configuration file. With this feature, you can specify different settings for each individual scan job in a configuration file. You can then load the configuration file when you want to apply the settings. For example, you can save the settings you make for scanning artwork films in a configuration file called “Artwork”. The next time you want to scan artwork films, you can load the “Artwork” configuration file, and MiraPhoto will apply the settings recorded in it. Load Config… Load the configuration file you created. When the configuration file is loaded successfully, MiraPhoto will apply the settings recorded in the configuration file automatically. Save Config… Save current MiraPhoto settings to the configuration file Save Config As… Save current MiraPhoto Settings as another new configuration file. Usually you can create a new configuration file in this way. You can designate different file names for each configuration file. Reset Config When you select this item, the settings you make in MiraPhoto will reset to their default value. Auto Save Config When you select this item, your settings will be saved automatically in a configuration file a…
- Page 1
English Français Deutsch Italiano Español Film Scanner User’s Manual… -
Page 4: Important Safety Instructions
Copyright Copyright © 1999 by this company. All rights reserved. No part of this publication may be reproduced, transmitted, transcribed, stored in a retrieval system or translated into any language or computer language, in any form or by any means, electronic, mechanical, magnetic, optical, chemical, manual or otherwise, without the prior written permission of this company.
- Page 6
FCC Information The Federal Communication Commission Radio Frequency Interference Statement includes the following paragraph: This equipment has been tested and found to comply with the limits for a Class B Digital Device, pursuant to Part 15 of the FCC Rules. These limits are designed to provide reasonable protection against harmful interference in a residential installation. - Page 8
Eject button… 23 Zoom button… 23 Preview button… 23 Scan button… 23 Exit button … 23 … 24 UTTONS Film Type button … 24 Flip button… 24 Rotate button … 25 Mirror button … 25 Crop button … 25 Color Enhancement Tools button … 26 Invert button… - Page 10
English … -
Page 12: 1.2 Hardware Introduction
Friendly and Smart Driver MiraPhoto is the driver for your ScanWit film scanner. Its easy and instinctive interface design allows you to proceed with your scanning job quickly. You can also use it to adjust the scanning parameters efficiently. Its powerful functions can help you to optimize the scanned image for your specific purpose.
-
Page 14: Rear Panel
Ventilation holes These holes are used to ventilate the heat from inside of the film scanner. Do not block these holes when the film scanner is in use. SCSI ID selector You can use the SCSI ID selector to select the SCSI ID of your film scanner.
-
Page 16: 1.3 Software Introduction
English 1.3 Software Introduction MiraPhoto is the driver program for your scanner. It is TWAIN compliant and designed to be user-friendly. With its iconlized user- interface and fully logical task-flow design, you can complete a satisfactory scanning job with only a few mouse clicks. With MiraPhoto, you can: Preview, scan and import the scanned image into your image editing software.
-
Page 18: Step 3 Test The Scanner
Step 3 Test the scanner Turn the scanner power on by depressing the power button on the front panel of the scanner. You may notice that the scanner will start to perform a self-test, and the LED indicators will blink for a few seconds.
- Page 20
English Place the filmstrip on the filmstrip holder with the emulsion side facing Close the cover and push the “PUSH CLOSE” mark at the middle of the cover. You will hear a click when the cover is secured. Insert the filmstrip holder into the holder insertion slot. -
Page 22: Step 3. Scan
Close the cover and push the “PUSH CLOSE” mark and the middle of the cover. You will hear a click when the cover is secured. Insert the slide holder into the holder insertion slot. Step 3. Scan Now you can either push the SCAN button to activate automatic preview, or manually open an image editing software to activate MiraPhoto and do the preview:…
- Page 24
English … -
Page 26: Menu Bar
Menu Bar File submenu Load Config… Load the configuration file you created. When the configuration file is loaded successfully, MiraPhoto will apply the settings recorded in the configuration file automatically. Save Config… Save current MiraPhoto settings to the configuration file Save Config As……
-
Page 28: Monitor Gamma
English Monitor Gamma Generally, a monitor cannot display the real colors of an image in the real world. In order to have the monitor approximate the colors as close as possible, you may need to adjust the monitor gamma. Adjustment of the monitor gamma can make the monitor approximate the colors of the original image more closely.
-
Page 30: Image Thumbnail Area
Image Thumbnail Area The Image Thumbnail Area displays thumbnail images of each previewed scan. Click on the thumbnail image and the image will be displayed in the Preview Area. You can select the image you want to scan by clicking the red dot at the upper right corner of the thumbnail.
-
Page 32: Scan Mode Box
Frame You can click the number of the frame you want to scan. You can select multiple frames and the film scanner will scan all the images you selected. MiraPhoto will display the frame(s) selected in green. Click to select all the images in the Image Thumbnail Area for scanning.
-
Page 34: Tool Buttons
Tool Buttons Tool Buttons provide a full range of tools and image effect options to optimize the scan quality. Film Type button When this button is clicked, the Film Type dialog box will appear: If you do not know the type of your film or if your film type is not listed, select Generic from the drop-down list.
-
Page 36: Color Enhancement Tools Button
English Color Enhancement Tools button Click this button to activate the Tool Bar which contains the buttons for the following tools: Invert button Click this button to get an inverted image: Original image Image after Invert is applied…
-
Page 38: Color Balance Button
Color Balance button Click this button to evoke the Color Balance dialog box: To adjust the color balance, you will want to first select the channel you want to adjust, then drag the triangles under the three color bars. In addition, you can also enter the desired values directly into the three entry boxes to the right of the color bars to adjust the color balance.
- Page 40
Entry Box While you drag within the Color Wheel to choose the hue and saturation of color or drag the triangle below the Lightness Bar to specify the lightness of color, the related information will also be shown in the Entry Boxes. - Page 42
The original image and its Tonal Map. The curve is straight and diagnal. You can also click the curve to add new points and further change the shape of the curve: Click to add a new point. Input/Output Status Area You can read the precise input/output value here. - Page 44
Brighter images have brighter pixels, therefore the bars in the right are higher than that in the left. In addition, if we take a look at the two images below: Image 1 We notice that in Image 1, there is higher contrast between the brighter and darker part of the image;… - Page 46
If the Input Level is set as 20 to 230, then you may represent a total of 210 (230 minus 20) color levels in the image. If you set the Output Level as 10 to 250, you can “expand” the original 210 levels of color to 240 levels (250 minus 10). -
Page 48: Color Wizard Button
Color Wizard button The Color Wizard button offers two quick and convenient tools for you to adjust the overall quality of the scanned image: Auto Density: if you choose this item, MiraPhoto will optimize the density of the image automatically. Apply all button Click on the Apply All button to apply the setting changes you make in the Tool Bar to all images.
- Page 50
English … -
Page 52: Getting Started
English Getting Started To run Photo Express, double click the Photo Express icon on your Windows desktop or open from Windows Start Menu. When you run Photo Express, make sure that the monitor display is at a resolution of 800×600 or 1024×768 and Hi Color (15/16 bit) or True Color (24 bit) mode.
-
Page 54: Getting Images
Getting Images The first thing you want to do when you start Photo Express is to get the photos you want to work with into the actual program. The place you start is with Album. From here, you can do almost anything in Photo Express. All other ways of getting photos can work independently of Album, but they are also set up to let you capture or open images directly to it.
-
Page 56: Working On Images
Working on Images Adjusting Images After you have acquired an image from a scanner or digital camera, it may need some adjustments. Photo Express provides you with the perfect tool for adjusting your photos: the Transform tool. To re-align a photo: .To freely rotate a photo, select the spin wheel in the upper right or lower left corner of the photo and rotate into position.
-
Page 58: Sharing Images
Sharing Images Printing Images Once you have put the finishing touches onto your photos, it is time to print them out. Photo Express contains numerous printing options, letting you output posters and name cards in addition to its regular printing duties. To print an image: You can also print album thumbnails.
-
Page 60: Express Your Images
Express Your Images Create Calendars One of the easiest tasks to accomplish in Photo Express is making calendars, either for your Windows desktop or for your real desktop. They are great for keeping your loved ones close, in addition to being a convenient way to keep track of important dates in style.
-
Page 62: Working In Project Mode
Working in Project Mode The Project mode gives you a focused environment in which to create custom greeting cards, calendars, invitations, birthday and anniversary cards, name cards, and planners. The Project mode is useful for getting through a “project” as quickly and efficiently as possible. It is where Photo Express lives up to its name, speeding you through all the necessary tasks while keeping all the unnecessary or extraneous components secure in the background.
-
Page 64: Adding Decoration
Adding Decoration One category of tools on the Edit menu in Project mode is unique to that tab: Decoration. These are special, object-based effects such as Frames, Edges and Props you can use to enhance photo objects in a project. To add special edge effects to a photo object: To add frame to a photo object: Select a photo object.
-
Page 66: Sharing Templates
Sharing Templates Sharing templates works exactly the same way as sharing photos in Photo mode. You can print, e-mail, fax, or output them to web pages. For more on these tools, see the online help and related documents. To e-mail a template: To fax a template: To output a template as a Web page: Click the Share: E-mail button on the…
-
Page 68: 6.2 Faq
If you find that your ScanWit film scanner uses the same SCSI ID number with another SCSI device, you must either change the SCSI ID number of your scanner or that of the other SCSI device. To change the SCSI ID number of your ScanWit film scanner: 1.
-
Page 70: Appendix
Interface Platform Power Consumption Net Weight Dimension Film scanner with color-CCD optical module Color — 3 s Color — less than 10 ms / line — less than 38 s/ 35mm film, 2700 dpi Color — 3s for 35mm film…
Page 3
English Film Scanner User’s Manual…
Page 5
This product should be operated from the type of power indicated on the marking label. If you are not sure of the type of power available, consult your dealer or local power company. Do not allow anything to rest on the power cord. Do not locate this product where persons will walk on the cord.
Page 7: Table Of Contents
CHAPTER 1. INTRODUCTION… 1 1.1 F … 1 EATURES 1.2 H ARDWARE NTRODUCTION Front Panel … 2 Rear Panel … 4 1.3 S OFTWARE NTRODUCTION CHAPTER 2. INSTALLATION … 7 1. I SCSI NSTALL THE 2. C ONNECT THE SCANNER TO YOUR COMPUTER EST THE SCANNER 4.
Page 9
English … 60 RODUCT PECIFICATION MiraPhoto Quick Reference Map Menu Bar Image Thumbnail Area Tool Buttons page 16 page 20 page 23 Combo Boxes page 20 Film Selection Area page 22 Control Buttons Preview Area page 23 page 39…
Page 11: Chapter 1. Introduction
1.1 Features Congratulations on your purchase of the ScanWit film scanner! The ScanWit film scanner is the utmost cost-effective solution for film scanning. Its high capability is bound to boost your scan job efficiency significantly. It is equipped with the following unique features:…
Page 13: Led Indicators
READY: When the film scanner is powered on and ready to scan, this LED indicator will remain on, indicating that you can start to scan. Holder insertion slot You can insert the filmstrip/slide holder through this slot for scanning.
Page 15
This is a 25-pin SCSI connector. Use this connector to connect other SCSI devices from the film scanner. Note: when you position the ScanWit film scanner, be sure to leave the space illustrated below to ensure that the film/slide holder moves into/out of the film scanner without being blocked by any object.
Page 17: Chapter 2. Installation
Chapter 2. Installation Please follow the steps below to set up your ScanWit film scanner: Step 1. Install the SCSI interface card Power off your computer and disconnect the computer power from the power outlet. Open the computer cover and locate the PCI slot of your computer.
Page 19: Chapter 3. Making Your First Scan
Step 1. Test the scanner Turn on the power of your film scanner, then your computer. Wait until the scanner completes its self-test. You can judge the status of the film scanner from the LED indicators. Once the READY LED indicator stops flashing, the film scanner is ready to scan.
Page 21
English If you want to scan slides: You can use the slide holder (the holder with 4 rectangular lattices and a SLIDE mark) to place your slide. Slide holder Pull the handle on the cover to open the cover. Then place the slide on the slide holder with the emulsion side face up.
Page 23: Step 4. Edit
To use SCAN button: Push the SCAN button on the film scanner front panel. A dialogue box will pop up on the screen asking you to choose an image editing software to use. Choose the application you want to use and then click Note: if you have only one image editing software installed in your computer, this dialogue box will be skipped.
Page 25: Chapter 4. Using Miraphoto
Chapter 4. Using MiraPhoto You can access MiraPhoto through your image editing applications. When you click “Acquire” or “Scan” in your application, the MiraPhoto main screen will appear: Menu Bar Combo Boxes Film Selection Area Control Buttons The following sections in this chapter will describe MiraPhoto in more detail.
Page 27: Settings Submenu
Settings submenu Scan Size… When you choose this item, the following dialog box will appear: There are two selectable items: Max. Area and Custom. Choosing Max. Area, MiraPhoto will scan the full range of the image. If you choose Custom, you can enter the size you want into the Width (max.: 0.94 inches) and Height (max.: 1.38 inches) text boxes.
Page 29: Film Type
Film Type Choosing this item, the following dialog box will appear: If you do not know the type of your film or if your film type is not listed, select Generic from the drop-down list. When the selection is done, click OK to confirm or Cancel to abort. Auto Preview If this item is checked, MiraPhoto will perform the preview operation automatically each time it is invoked.
Page 31: Resolution Box
Resolution box Resolution is used to decide how delicate the scanner captures the original image. When the original is scanned and turned into a digital image, the scanner captures and records the image in terms of pixels. As more pixels are used to record an image, more details in the image can be represented.
Page 33: Control Buttons
Control Buttons Eject button Click this button to eject the filmstrip/slide holder from the film scanner. Zoom button Click this button to zoom in on the image. Preview button Click this button to begin previewing the image. Preview proceeds in color or in monochrome depending on the setting in the Image Type combo box.
Page 35: Rotate Button
English Rotate button Click this button to rotate the image 90 degrees clockwise. You can click this button several times to get the image orientation you want. Mirror button Click this button to get a mirror reflection effect on the original as if you were viewing the image in a mirror: Original image Image after Mirror is applied…
Page 37: Brightness/contrast Button
Brightness/Contrast button Click this button to bring up the Brightness/Contrast Dialog box: Brightness control You can drag the triangle below the bar to increase/decrease the overall brightness of the image, or click on the Auto button to let MiraPhoto adjust the brightness automatically. Contrast control You can drag the triangle below the bar to increase/decrease the overall contrast of the…
Page 39: Color Adjustment Button
Color Adjustment button Click this button, and the Color Adjustment dialog box will appear: The Color Adjustment tool uses three control items: Hue, Saturation and Lightness. Hue is a characteristic that distinguishes one color from another, while Saturation decides the intensity of a color.
Page 41: Curve Button
Curve button The Curve tool is used to adjust the brightness properties of midtone pixels in an image. The following dialogue box will appear after you click this button: Below component in the dialog box and how to use the Curve tool to adjust an image: Color Channel box Use this box to select the color channel to be adjusted.
Page 43: Level Button
Level button Clicking on the Level button, and the Level dialog box will appear: Color Channel box Use this box to select the color channel to be adjusted. This allows you to adjust the histogram property of each color channel respectively. Histogram The Histogram displays the distributing status of dark and bright pixels in an image.
Page 45
With the information from the histogram, we will be better able to adjust an image with the histogram tools. Below the Histogram, there are three tiny triangles: Shadow Threshold By dragging these triangles, you can adjust the brightness and contrast of an image precisely. For example, if you drag the Shadow Threshold triangle to the right, the pixels with lower brightness level than the Shadow Threshold will be cut into black, which makes the image look darker.
Page 47: Filter Button
Filter button This function allows you to sharpen or blur the image. You can choose from the list: No filter, Sharpen, Sharpen more, Blur, Blur more and Unsharp Mask. If you want the edge of the image to be sharper, i.e., in a higher contrast against the background, select sharpen or sharpen more.
Page 49: Preview Area
Preview Area Info button The Info button is located at the lower right corner of the MiraPhoto main window. You can click this button to read the detailed information of the image you are currently working on in the JobInfo dialog box, or click on the Save as… button in the dialog box to save the information as a .txt file for future reference.
Page 51: Chapter 5. Photo Express
Chapter 5. Photo Express In this chapter you will be introduced to the fantastic world of Photo Express. Learn more about this bundled software and make your everyday life more interesting and colorful! Refer to Photo Express electronic User’s Manual in the software disc for more details on how to use its different features and functions.
Page 53
Express between Photo mode and Project mode. Photo mode is where the majority of your work is done, while the Project mode lets you make greeting cards, name cards, and other fun things based on templates. Command Panel: The Command panel lists all of the available categories in Photo Express necessary for getting the most out of your creativity when working on photos.
Page 55
To add new images to an album: Select an album. Click the File icon and browse for the folder where the images are stored. 3. When they appear in the Options panel, click the Select All button (or select images individually by holding down the Ctrl key as you click them).
Page 57
To trim your photo: To re-size your photo: Click the Trim button in the Edit: Adjust category. The Trim options will open in the Options panel. Select a Trim shape and then set the amount of Soft edge you want to soften the edges of the trimmed photo with.
Page 59: Saving Images
Saving Images After work on your photo is complete, you may want to save it. In Photo Express, you can save a photo in a variety of different image file formats. Each file format has its own unique properties and characteristics. Some formats, however, are better than others for specific situations, such as saving for the Web are.
Page 61: Morphing Photos
Morphing Photos One of Photo Express’ more novel effects extras is that of image morphing. Morphing transforms an image over time to create interesting and unique “warps” of the original photo. Image morphs are output as either image sequences or animated GIF files. To morph an image: Note: you can output image morphs as either an image sequence or GIF animations.
Page 63: Working With Templates
Working with Templates Photo Express’ unique templates can be edited and customized to suit your own needs. Templates consist of multiple components, usually a combination of text and photos with a decoration or two perhaps thrown in. To change any one of these components, simply select it and choose the appropriate tools from the Toolbar.
Page 65: Printing Templates
Printing Templates As with Photo mode, Project mode lets you print your work when you’re finished with it. The same options available in Photo mode apply in Project mode as well. For more on printing, see Printing Images and the online help.
Page 67: Chapter 6. Troubleshooting And Faq
6.1.3 SCSI Connection Guideline ScanWit film scanner uses a SCSI interface to connect to your computer and other SCSI devices. Depending upon the configuration you use, there will be certain guidelines to follow in order to ensure the proper function of…
Page 69: Chapter 7. Service Information
Taiwan: [email protected] USA: [email protected] Europe: [email protected] For free driver updates, product information and news release, please visit the following web addresses: http://www.acerperipherals.com.tw (Taiwan)
Film scanner EC718. Так называется игрушка, которую я себе недавно приобрёл.
Собственно, сканер по принципу работы, представляет из себя фотоаппарат для 35мм плёнки. Как и любой фотоаппарат, сканер работает независимо от компьютера, и записывает отснятые изображения на карту памяти.

Внуртенних источников питания (аккумулятор, батарейки) в сканере не предусмотрено. Работает сканер от сети 220В.

При включении сканера на несколько секунд появляется вот такая заставка-приветствие.

Сканер комплектуется двумя кассетами: для слайдов, и для плёнки. К сожалению, если работать кассетой для плёнки, то плёнку придётся резать на куски по шесть кадров. Перемещение плёнки в данной кассете не предусмотрено. Я для оцифровки плёнки использовал слайд-кассету. В этой кассете по краям имеются «щели», и нет фиксаторов перфорации.

При настройках: негативная плёнка — на экране появляется обращённое в позитив изображение. Очень удобно для просмотра архивов — «где что есть». Особенно хороша игрушка для просмотра затемнённых, перепроявленных, или переэкспонированных негативов!

На выходе имеется изображение 2736х1824 пикселя. Или, более привычно — 5 мегапикселей. Что касаетсч качества, то тут всё в первую очередь зависит от качества сканируемого негатива. Однако замечу, при работе данным сканером не будет лишним воспользоваться графическим редактором и немного добавить яркость и контрастность.

И ещё: сканер не имеет функций Dust Removal (удаление дефектов), поэтому перед началом сканирования плёнку лучше аккуратно протереть сухой салфеткой.
Перейти на страницу of 23
Summary
-
Reflecta Film Scanner — page 1
Us er m anual …
-
Reflecta Film Scanner — page 2
1- For c ustomers in North and So u th America For custo mers in USA This device complie s w ith Part 15 of the FCC rules . Opera tion is subjec t to t he follow ing t w o condition s: (1) Thi s devi c e may not cause ha rmful interfer ence. (2) This devi c e must accept any in terf eren ce rece ived, including i nt erfere nce that may cause unde …
-
Reflecta Film Scanner — page 3
2 — 1. Name of p art s Note: Thi s film scanner supports Windows XP and Vista (32-bits) via USB 2.0 only. W e strongly sug ges t using a clean, dry, non-alcohol cotton swab to insert into the film scanner slot and clean th e glas s surface periodically to prod uce a clear imag e. Please make sure your film negativ es/mounted slides and cover tra …
-
Reflecta Film Scanner — page 4
3- 2. How to i n st all a film into the fil m holde r a. Open the film holde r as illustra ted b. Put a film in the fil m slot as show n c. Close the film holder …
-
Reflecta Film Scanner — page 5
4- 3. Inst all th e sof twa re and d river T o use the fil m scanner y ou need to i nstall t he s o ftw are d ri v er and ArcSof t PhotoImp ression 6 in ad vance. Inst alling Driver 1.T u rn on the comp ut e r . 2.Insert i nstallatio n CD in to t he CD- RO M drive and t he in stallati on CD m enu w ill appear . 3. W hen you se e the follow in …
-
Reflecta Film Scanner — page 6
5- Recommend ed to selec t “Install the so ftw are automatically . …
-
Reflecta Film Scanner — page 7
6- Choose “con t inue anyw a y” button. 3.Sele ct “Finish” but ton to comp lete the inst allatio n. …
-
Reflecta Film Scanner — page 8
7 — New Hardw are Wizard (Vist a) 1. Af ter connecting the fil m scanner to the computer wit h USB cable, the new hardware wizard will d etect the new device. 2. Follow the in s tructions on screen. Reco mm ended to select “I ns t all the sof tware auto ma tically . Choos e “Don’ t show this mes sage again for th is device” button. …
-
Reflecta Film Scanner — page 9
8- Choose “Ins tall this driver sof tw are anyw ay” button. 3.Sele ct “Finish” but ton to comp lete the inst allatio n. …
-
Reflecta Film Scanner — page 10
9- 4. Con nect film scanne r and y our compu ter with t he USB cable Note: For first time u ser , p lease do not plug the film holder include d with film sl ot i nto the f i lm scann er whi le connect the scanner with the co mpute r . Y ou w ill s ee t he P W R LED is re d 5. Using the film sc anner 1. Click “ Photo Impress ion 6” i co n o n …
-
Reflecta Film Scanner — page 11
10 — In select t he device option make sure OVT scanner is displ ayed. When u s ers st art the ope ration, the picture will show on “N ormal qualit y”. Then it is user ’s choice t o selec t “TIF” or “JPG”. I t is recom mended to select “JPG” format. Pic2 Select t he loca tion t o save the pic tures 1 Select the type of film …
-
Reflecta Film Scanner — page 12
1 1- Pic4 Y ou can adjust the locatio n of the film by moving t he film holde r , th e f ilm holder c an b e moved forw ard only one w ay . Pic5 Click “Sn ap Shot” or p res s the “Copy” button and th e “Snap Shot” w ill appear i n the smaller w indo w t o the right . On the film strip a gr een frame indi cates the cu rren t picture se …
-
Reflecta Film Scanner — page 13
12- Click exi t and you w ill see the pictur e in t he ma in Arcsof t w indow a s below . T o ensure t he best image quality , t he sc anner balances the sensor fo r each pi cture this m ay ta ke 3 or 5 se c. dep ending on the im age complexity and your compu ter hardw are. …
-
Reflecta Film Scanner — page 14
13- PIC 6 Click the “ format” to f ind out the re solution o f t he pi cture. 6. Now y ou can s t art to ed it the pictu re as yo u like: First you are suppo sed to select t he picture by clic k ing a t the picture . And then u se the Arc s o ft tools to edit the pictures. — Ma in Menu The M ain Men u appears in the uppe r left corner of the …
-
Reflecta Film Scanner — page 15
14- Select th e folde rs you want to scan -L e t» s you choose the folders f or scanning . * View Full Sc ree n /Play (F4) Play s or display s t he first selec te d file in full screen view . — Ma in Button s * Get Photos Acquire f rom Scanne r …
-
Reflecta Film Scanner — page 16
15- Here you can: Acquire image s from conne c ted T WAIN complian t devices s uch as scanners and some digi tal cameras. Assign na mes t o image file s as they are acquired (using today» s date or a descripti ve w ord). How to acqu ire images from a T W AIN c omplian t device: 1. Sele c t a scanner or othe r T WAIN de vice from the …
-
Reflecta Film Scanner — page 17
16- In additio n to the large photo w o rkspace, the Photo Editing T ools module includes five distinct sets of c ont rols: Enh ance The Enhan ce fun c tion i n c ludes tw o types o f contro ls: Auto E nhance Click «A ut o Enhan ce» button to impr ove the overall quality of your picture s with a single cli ck. Manua l F i x For prec …
-
Reflecta Film Scanner — page 18
17- How to fix the color o f a photo: 1. Drag t he c olor balanc e s lider s to make the photo c olor appear m or e natural. Add red or yellow to make the photo warmer . Add blue or gr een t o make the photo cooler . 2. Drag the Lighter/Dar ker slider t o the l eft to reveal detail s hidden in a dark photo o r to the righ t to make a faded pho t …
-
Reflecta Film Scanner — page 19
18- 5. Click «U ndo» if you make a m ista ke or don» t like the resul t. Crop This f eature enables you to trim p hoto s fo r d ra m ati c eff ect or c ut off the u gly/di st ractin g p arts of a pic t ure. How to use crop: 1. Choose the crop ori entation (portrait or landscape) . 2. Sele c t a f ixed proportion fo r t he crop rect …
-
Reflecta Film Scanner — page 20
19- 2. Drag the fi rst sli der to m ake the transition betw e en the b lurred and n on-blurred are a sharp o r smooth. 3. Drag the second s lider to increase o r decrea se the amou nt of blur . 4. Click «A pply» if you lik e the result . Cli c k «Can cel» if you d o not. Saving You r Results W he n you» re done edi tin g …
-
Reflecta Film Scanner — page 21
20- Clone The Clon e tool is g ood for removing un w anted element s from a p hoto. It c an also be used for fun effe ct, l i ke moving a nose from one person t o an other. How to use the Clone t ool to remove a t elepho ne pole from the ba ckground of a photo: 1. Esta blish a source point for th e Clone tool by holding t he Shif t key and clicki …
-
Reflecta Film Scanner — page 22
21- Paint Brush Let you «paint» on yo ur image w he n you click and drag the mouse. Plea se click and drag the sliders be low to change the brush si ze and transpar ency. Line Draw a straight line i n the photo. Ple ase click an d drag the s lider s below to change th e line w idth and tran sparency. Eraser Simula te an eraser, removing …
-
Reflecta Film Scanner — page 23
22 — 6. S p ecification Inte rface: USB 2.0 only Image Sensor: 1/1. 8” inch 5 mega CMOS sensor (5,174,400 pixels) Lens: F no.= 2.0, 4 Glass eleme nt s, Half-field A ngle=15 Frame Rate (M ax.): 5M(2592×1944) 2 f ps, SXGA (1280X960) 15 fp s Focus Range: Fixed focus Exposure Control: Automatic Color Balance: Automatic Scan high resolution 5MP …
Производитель Reflecta
Категория Photo Scanner
Документы, которые мы получаем от производителя устройства Reflecta Film Scanner мы можем разделить на несколько групп. Это в частности:
— технические чертежи Reflecta
— инструкции обслуживания Film Scanner
— паспорта изделия Reflecta
— информационные брошюры
— энергетические этикетки Reflecta Film Scanner
Все из них важны, однако самую важную информацию с точки зрения пользователя мы найдем в инструкции обслуживания Reflecta Film Scanner.
Группа документов, определяемая как инструкции обслуживания, делится также на более подробные типы, такие как: Инструкции монтажа Reflecta Film Scanner, инструкции обслуживания, короткие инструкции или инструкции пользователя Reflecta Film Scanner. В зависимости от потребностей, Вам необходимо поискать требуемый документ. На нашем сайте Вы можете просмотреть самую популярную инструкцию использования изделия Reflecta Film Scanner.
Полная инструкция обслуживания устройства Reflecta Film Scanner, как должна выглядеть?
Инструкция обслуживания, определяемая также как пособие пользователя, или просто «руководство» — это технический документ, цель которого заключается в использовании Reflecta Film Scanner пользователями. Инструкции пишет, как правило технический писатель, языком, доступным для всех пользователей Reflecta Film Scanner.
Полная инструкция обслуживания Reflecta, должна заключать несколько основных элементов. Часть из них менее важная, как например: обложка / титульный лист или авторские страницы. Однако остальная часть, должна дать нам важную с точки зрения пользователя информацию.
1. Вступление и рекомендации, как пользоваться инструкцией Reflecta Film Scanner
— В начале каждой инструкции, необходимо найти указания, как пользоваться данным пособием. Здесь должна находится информация, касающаяся местонахождения содержания Reflecta Film Scanner, FAQ и самых распространенных проблем — то есть мест, которые чаще всего ищут пользователи в каждой инструкции обслуживания
2. Содержание
— индекс всех советов, касающихся Reflecta Film Scanner, которое найдем в данном документе
3. Советы по использованию основных функций устройства Reflecta Film Scanner
— которые должны облегчить нам первые шаги во время использования Reflecta Film Scanner
4. Troubleshooting
— систематизированный ряд действия, который поможет нам диагностировать а в дальнейшем очередность решения важнейших проблем Reflecta Film Scanner
5. FAQ
— чаще всего задаваемые вопросы
6. Контактные данные
Информация о том, где искать контактные данные производителя / сервисного центра Reflecta Film Scanner в данной стране, если самостоятельно не получится решить проблему.
У вас вопрос, касающийся Reflecta Film Scanner?
Воспользуйтесь формуляром, находящимся ниже
Наша цель — обеспечить Вам самый быстрый доступ к руководству по эксплуатации устройства Acer Film Scanner
. Пользуясь просмотром онлайн Вы можете быстро просмотреть содержание и перейти на страницу, на которой найдете решение своей проблемы с Acer Film Scanner
.
Для Вашего удобства
Если просмотр руководства Acer Film Scanner
непосредственно на этой странице для Вас неудобен, Вы можете воспользоваться двумя возможными решениями:
- Полноэкранный просмотр -, Чтобы удобно просматривать инструкцию (без скачивания на компьютер) Вы можете использовать режим полноэкранного просмотра. Чтобы запустить просмотр инструкции Acer Film Scanner
на полном экране, используйте кнопку Полный экран
. - Скачивание на компьютер — Вы можете также скачать инструкцию Acer Film Scanner
на свой компьютер и сохранить ее в своем архиве. Если ты все же не хотите занимать место на своем устройстве, Вы всегда можете скачать ее из ManualsBase.
Руководство по эксплуатации Acer Film Scanner
Advertisement
Advertisement
Печатная версия
Многие предпочитают читать документы не на экране, а в печатной версии. Опция распечатки инструкции также предусмотрена и Вы можете воспользоваться ею нажав на ссылку, находящуюся выше — Печатать инструкцию
. Вам не обязательно печатать всю инструкцию Acer Film Scanner
а только некоторые страницы. Берегите бумагу.