-
Contents
-
Table of Contents
-
Bookmarks
Quick Links
刺绣机电脑
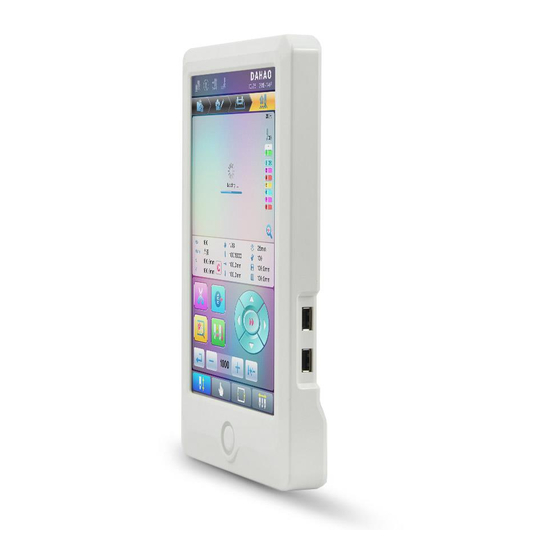
Computerized Embroidery Machine Controller
BECS-A15
( General Part )
Version : 2019-03
操作手册
OWNER’S MANUAL
http://www.dahaobj.com/en/sh.asp
Related Manuals for DAHAO BECS-A15

Summary of Contents for DAHAO BECS-A15
-
Page 1
刺绣机电脑 Computerized Embroidery Machine Controller BECS-A15 ( General Part ) Version : 2019-03 操作手册 OWNER’S MANUAL http://www.dahaobj.com/en/sh.asp… -
Page 2: Table Of Contents
Contents Contents Chapter 1 General Information ……1 1.1 Warnings and Cautions ………………. 1 1.2 Main Features ………………..3 1.3 Technical Specifications …………….. 6 Chapter 2 Embroidery Guide ……. 7 2.1 Structure and Usage Instruction of Control Panel ………. 7 2.2 Instruction of the Main Interface …………..
-
Page 3
Contents 4.1.1. Settings of X-Y Scale ……………….. 30 4.1.2. Settings of Rotate Angle ………………31 4.1.3. Pattern Direction ………………..32 4.1.4. Prior Mode ………………….32 4.1.5. Rep. Mode ………………….32 4.1.6. Rep. Order ………………….32 4.1.7. X-Y Rep. Times ………………… 33 4.1.8. -
Page 4
Contents 6.6 Create Outline Pattern ……………… 48 6.7 Create High-speed Pattern …………….48 6.8 Divide Pattern ………………..48 6.9 Create Parameter Pattern …………….49 6.10 Mosaic Pattern ……………….. 50 6.11 Create Combined Pattern …………….51 6.12 Satin Stitch Adjustment …………….54 Chapter 7 Letter Pattern Operation …… -
Page 5
Contents 9.3 Language …………………. 68 9.4 Machine Information ………………. 68 9.5 Machine Debugging ………………69 9.6 Date and Time ………………..70 9.7 Touch Screen Correction …………….70 Chapter 10 About JF Sequin Embroidery ….72 10.1 Brief of Sequin Embroidery …………..72 10.2 Embroidery Procedure of Sequin ………….. -
Page 6
Contents Chapter 12 Taping Embroidery ……89 12.1 Function Introductions …………….89 12.2 Main Technical Specification …………..89 12.3 Parameters and setting …………….89 12.4 Relative Operations of Special Embroidery ……….91 12.4.1. Shift between Flat Stitch Head and Special Head ……….91 12.4.2. -
Page 7: Chapter 1 General Information
General Information Chapter 1 General Information Thank you for using Dahao Computerized Control System for Embroidery Machine. Please read this manual carefully so as to operate the machine correctly and effectively. Besides that, you should keep this manual properly for future use.
-
Page 8
Chapter 1 General Information Matters for Attention on Installation Don’t jam the vent on the device. Don’t insert other items into the machine, or it Attention may get fire. Attention Make sure the installation direction is correct. Don’t expose the machine to humidity gas, corrosive gas, water, and other Attention flammable material. -
Page 9: Main Features
Chapter 1 General Information The power supply switch has over-current protection function. If the over-current Attention switch is activated, the switch can only be closed after 3 minutes. Matters for Attention on Maintenance and Inspection If you need to open the machine cover, please cut off the power supply at first. Warning Due to the capacitance, operator must wait at least one minute before opening the machine cover.
-
Page 10
Chapter 1 General Information Pattern will be saved along with its parameters, color-changing orders and needle bar colors. System can save the operational details for each pattern. Users can set parameters for a pattern during the embroidery process of the previous pattern, which will save time and improve efficiency. -
Page 11
Chapter 1 General Information enjoys the advantage of data transmitting through the World Wide Web (other formats may not be transmitted directly). Repetition Embroidery The user can increase embroidery productivity by using the function of repetition embroidery, which can also be used with cyclic embroidery. Cyclic Embroidery With this function, the machine can automatically return to the origin and start the same embroidery again when finishing the pattern one time. -
Page 12: Technical Specifications
Chapter 1 General Information Thread-trimming Thread-trimming can be manually operated. The machine can trim the thread automatically at the end of embroidery process or at color-changing. Thread-breakage Detection In case of thread breakage or running-out of bobbin thread, the machine will stop and give warning by indicator.
-
Page 13: Chapter 2 Embroidery Guide
Chapter 2 Embroidery Guide Chapter 2 Embroidery Guide 2.1 Structure and Usage Instruction of Control Panel Structure of Control Panel 1. Touching Panel It adopts high-luminance LCD displayer and touching screen man-machine interaction interface. 2. Buttons Press the keys to start the embroidery, pause the embroidery. 3.
-
Page 14: Instruction Of The Main Interface
Chapter 2 Embroidery Guide cut off during the data input/output, the data could be lost. In that case, please check the integrity of data in the USB disk and repair it before using. Attention: During the process of initialization, if the power is cut off or the USB disk is pulled out, the USB disk may be damaged permanently.
-
Page 15
Chapter 2 Embroidery Guide Icon Name Description Reference Page Pattern Interface for pattern management Management Parameter Interface for parameter setting Setting Color-changing Interface for color-changing order Order Setting setting Main Interface Main interface Pattern Display The pattern for embroidery will be Area displayed in this area. -
Page 16
Chapter 2 Embroidery Guide Icon Name Description Reference Page the machine is set at auto start, the machine will begin the embroidery automatically; if it is set at manual start, the user needs to press the start key for embroidery. In this status, select the needle position with… -
Page 17
Chapter 2 Embroidery Guide Icon Name Description Reference Page Currently, the machine is under Embroidery Confirmation Status, and user can start embroidery at any time. When the machine stops, Embroidery user can click this key and confirm Confirmation cancelling Embroidery Confirmation Status. -
Page 18
Chapter 2 Embroidery Guide Icon Name Description Reference Page Display patterns by figures for Pattern List users to select Previous/Next Display patterns in different pages Page Used to check pattern details, scale Memory Pattern up/down pattern, move or make Preview analog display of pattern Letter pattern and its parameter Letter Pattern… -
Page 19
Chapter 2 Embroidery Guide Icon Name Description Reference Page Next Enter the next operation interface Icon Name Description Reference Page Common User can adjust these parameters to Parameter control the final embroidery effect Setting of the pattern. Load the selected pattern, display Pattern Preview the pattern data and draw up the pattern shape. -
Page 20
Chapter 2 Embroidery Guide Icon Name Description Reference Page Current Operation Set, insert or delete needle bar number Position here. Color Lump Display the color lump number of the Number List pattern Display the needle bar number and Needle needle thread color Number and Color… -
Page 21: Basic Procedure Of Embroidery
Chapter 2 Embroidery Guide Icon Name Description Reference Page Needle Bar Color Set the neeble bar color from default Setting colors 2.3 Basic Procedure of Embroidery The machine carries out embroidery based on the patterns saved in memory. The following figure is the basic procedure of the embroidery: ①…
-
Page 22
Chapter 2 Embroidery Guide Set repetition, rotation and scaling —— press to enter parameter management interface. Set color-changing orde —— press to enter color-changing setting interface. Set patch embroidery —— press to enter color-changing setting interface and set patch embroidery of the pattern according to hints. For border inquiry, border idling, pattern outline ——… -
Page 23
Chapter 2 Embroidery Guide V. Manual Operation Manual Thread-trimming: When the machine stops, press in the main interface to display a hint window, where user can press “Trim Upper&Bobbin Thread” to trim threads, or click “Trim Bobbin Thread” to trim the bobbin thread only. Press quit the thread-trimming operation. -
Page 24
Chapter 2 Embroidery Guide touch screen. Adjust Main Shaft Manually Usually, the main shaft needs to stop at 100° at needle/color-changing, frame-moving and beginning embroidery. User can manually turn the main shaft to 100° when it hasn’t reached there. Press in the main interface to carry out this function. -
Page 25: Normal Embroidery, Returning And Patching
Chapter 2 Embroidery Guide 2.4 Normal Embroidery, Returning and Patching In embroidery confirmation status ( is displayed), press to start normal embroidery, and during embroidery, press to stop embroidery. When the machine stops, press to return the frame back along with the original embroidery path;…
-
Page 26: Working Status
Chapter 2 Embroidery Guide changes, you need to adjust spring pressure between the take-up spring and contact point. When the spring pressure is too large, there will be False Alarm; when the spring pressure is too small, there will be Missing Alarm. For thread winding wheel type, it judges thread-breakage by detecting the winding wheel angle.
-
Page 27
Chapter 2 Embroidery Guide stop embroidery and return to embroidery confirmation status, where user can press start key again to enter embroidery running status. In embroidery confirmation status ( is displayed in the main interface), press and then press to confirm, user can release the confirmation status and return to embroidery ready status ( is displayed in the main interface). -
Page 28: Chapter 3 U Disk Management
Chapter 3 Management U Disk Chapter 3 U Disk Management In U disk management interface, user can input patternss from U disk to machine, and vise versa; meanwhile, user can undertake some common U disk managements, like erasing file or directory, initializing the disk, etc. User can save patterns data under different directories of the U disk based on different types.
-
Page 29
Chapter 3 Management U Disk Enter U disk operation interface. Icon Name Description Display the pattern files and file folders within the U File List disk in icons. It’s used to select files. Page The current page number and total page number Information Back to Upper Return to upper level… -
Page 30: Pattern Preview
Chapter 3 Management U Disk 3.2 Pattern Preview In the U disk management interface, press the pattern for preview. Pattern files and directories are shown in figure in the list. One page of the list contains 8 items. If the amount of the object within the current directory is more than 8, the object list will be displayed in many pages.
-
Page 31: Pattern Input
Chapter 3 Management U Disk The system loads the data from the U disk and user can check details of the pattern, scaleup/down the pattern, move or make analog display of the pattern. For more information, please refer to section 6.3. 3.3 Pattern Input To input patterns within the U disk to the machine’s memory, user need select the pattern files to be inputted, and then input the number and name for the patterns to be saved in…
-
Page 32: Directory Operation
Chapter 3 Management U Disk The system provides the minimum available pattern number as the default value. User can use the keypad below to change the number. Press to confirm; The system will save the pattern data from the U disk to the memory. 3.4 Directory Operation Enter directory: Double click the icon of the object directory to enter it, and the system will load the item…
-
Page 33: Delete Objects From U Disk (Including Pattern File And Directory)
Chapter 3 Management U Disk 3.6 Delete Objects from U Disk (including pattern file and directory) Select objects to be deleted; Press to delete; System will ask user to confirm the deletion. Note: If the user wants to delete a directory, the system will delete all the files and sub-directories within this directory.
-
Page 34: Create A New Directory In The Current Directory
Chapter 3 Management U Disk 3.7 Create a New Directory in the Current Directory Press Input the new directory name Press System will create the corresponding directory in the U disk and refresh the current object list. Owner’s Manual of BECS- A15 Computerized Control System…
-
Page 35: Chapter 4 Common Parameters And Color-Changing Order
Chapter 4 and Color-Changing Order Common Parameters Chapter 4 Common Parameters and Color-Changing Order In this system each pattern has its own settings of the normal parameters (like scale and repetition) and color-changing order. When a new pattern is selected, the corresponding settings of normal parameters and color-changing order will become effective.
-
Page 36: Settings Of X-Y Scale
Chapter 4 and Color-Changing Order Common Parameters The way for setting the parameter is similar to each other. This chapter will explain how to set the “X/Y Scale” as an example and give the definitions of other parameters (refer to 4.1.1 for setting method).
-
Page 37: Settings Of Rotate Angle
Chapter 4 and Color-Changing Order Common Parameters System will display independently the modification windows for X Scale and Y Scale for users to set respectively. Adjusting X-Y Scales User can press number pad to modify the scaling rate at X direction, press cancel the last input digit and press to clear the input number.
-
Page 38: Pattern Direction
Chapter 4 and Color-Changing Order Common Parameters Rota te 30 d eg re es Desig n sta rt b it Pattern Direction 4.1.3. Prior Mode 4.1.4. There are two modes: “rotation prior to scaling” and “scaling prior to rotation”. When user has set the parameters “Scale X/Y”…
-
Page 39: X-Y Rep. Times
Chapter 4 and Color-Changing Order Common Parameters X-Y Rep. Times 4.1.7. X repetition times represent the number of columns, while Y repetition times the number of lines; as shown in the above picture, X repetition times are 3 and Y repetition times is 2. The largest set value is 99*99.
-
Page 40
Chapter 4 and Color-Changing Order Common Parameters Icon Name Description Color Lump Number Display the number of the color lumps List of the pattern Display the needle bar number and Needle Bar Number thread color of each corresponding and Color color lump Move upward the color-changing list to Move Up… -
Page 41: Settings Of Color-Changing Order
Chapter 4 and Color-Changing Order Common Parameters Settings of Color-Changing Order 4.2.2. Press to enter color-changing setting interface. Input the needle bar numbers in order in the needle bar number selection area. The pattern display and the color list will be refreshed after each input. Press to check whether the inputted color-changing order is correct.
-
Page 42
Chapter 4 and Color-Changing Order Common Parameters 45 default colors for selection in the setting interface To set the needle bar color, select the needle bar first and then select the color from the 45 default color lumps. The corresponding color of the needle bar button will be refreshed. -
Page 43: Chapter 5 Settings Of Embroidery Parameters
Chapter 5 Embroidery Parameters Settings of Chapter 5 Settings of Embroidery Parameters Parameters are grouped according to different functions (see Appendix 1 Parameter List) Press in the main interface and press (for user) or (for specialist) to enter parameter setting interface. After system enters parameter setting interface, user can select the parameter for setting.
-
Page 44: Procedure For Setting General Parameters
Chapter 5 Embroidery Parameters Settings of Note: the number, name and current value of each parameter are displayed in the parameter list window. 5.1 Procedure for Setting General Parameters The setting procedure is similar for each general parameter. You can follow the guide of this section to set all parameters.
-
Page 45: Instruction On Some Functions Within General Parameters
Chapter 5 Embroidery Parameters Settings of Press to finish the setting. 5.2 Instruction on Some Functions within General Parameters There are brief descriptions of parameters in the appendix 1. Here, we will introduce some functions mainly used in embroidery. Cyclic Embroidery Function 5.2.1.
-
Page 46: Chapter 6 Memory Pattern Management
Chapter 6 Management Memory Pattern Chapter 6 Memory Pattern Management Memory pattern management includes selection of embroidery patterns, settings of patterns, change of patterns and operations for creating patterns. 6.1 Memory Pattern Management Interface and Other Memory Pattern Operation Interfaces Press to enter memory pattern management interface.
-
Page 47
Chapter 6 Management Memory Pattern Icon Name Description Used to shift to appointed page Previous/Next Page number Display the detailed information of Information Area the selected pattern and the memory information. Check the details of the pattern; scale Pattern Preview up/down, move or simulate the pattern. -
Page 48: Select Pattern For Embroidery
Chapter 6 Management Memory Pattern In this interface, press each operation to enter the corresponding interface. Please read the following paragraphs for detailed explanation. Press to turn page, and press to return to memory pattern management interface. 6.2 Select Pattern for Embroidery Press to enter memory pattern management interface.
-
Page 49
Chapter 6 Management Memory Pattern Icon Name Description Pattern Preview Display the pattern in the appointed method Area and speed Draw/Pause Shift between drawing pattern Switch and pausing display Move up Move the pattern upwards Single Step Draw the pattern by drawing single steps Display Scale up Enlarge the pattern in the preview area… -
Page 50: Pattern Output
Chapter 6 Management Memory Pattern Icon Name Description Move down Move the pattern downward Move right Move the pattern rightward Deceleration Lower the display speed of patterns Acceleration Fasten the display speed of patterns Redraw Redisplay the selected pattern Quit Quit the operation in pattern preview interface Press to enter memory pattern management interface.
-
Page 51
Chapter 6 Management Memory Pattern System will display the window to “Select U disk” and press to make the selection. Input the pattern name saved in the U disk. The system provides the minimum available pattern number as the default value. User can use the keypad below to change the number. -
Page 52: Copy The Memory Pattern
Chapter 6 Management Memory Pattern Press of the completion hint. Press to return to pattern management interface. 6.5 Copy the Memory Pattern Press to enter memory pattern management interface. Select a pattern in the memory pattern image display area. Press to enter memory operation selection interface.
-
Page 53
Chapter 6 Management Memory Pattern To change the new pattern name, click “New Pattern name” and input the new name in the pop-up window. Press to copy the pattern and return to pattern operation selection interface. Press to cancel the copy operation and return to pattern operation selection interface. -
Page 54: Create Outline Pattern
Chapter 6 Management Memory Pattern 6.6 Create Outline Pattern This operation can generate a new pattern based on the outline of the designated pattern. Press to enter memory pattern management interface. Select a pattern in the memory pattern image display area. Press to enter memory operation selection interface.
-
Page 55: Create Parameter Pattern
Chapter 6 Management Memory Pattern Press to enter memory pattern management interface. Select a pattern in the memory pattern image display area. Press to enter memory operation selection interface. Press “Divide Pattern” to enter the operation interface. User can press to input new pattern number and name instead of default ones. Press “Divide Stitch”…
-
Page 56: Mosaic Pattern
Chapter 6 Management Memory Pattern Select a pattern in the memory pattern image display area. Press to enter memory operation selection interface. Press “Create Parameter Pattern” to enter the operation interface. User can press to input new pattern number and name instead of default ones. Press to create the parameter pattern and return to pattern operation selection interface.
-
Page 57: Create Combined Pattern
Chapter 6 Management Memory Pattern 5. User can press to input new pattern number and name instead of default ones. 6. Press “X Interval” to input the value. Press “Y Interval” to input the value. 7. Press to combine patterns and return to pattern operation selection interface.
-
Page 58
Chapter 6 Management Memory Pattern Press “Create Combined Pattern” to enter the operation interface. The combined ID shows the current pattern number and how many patterns the combined pattern is composed of. Display form is “pattern number (the total amount of patterns)”. Set the parameters of the first pattern, including pattern number, scaling ratio, rotating angle, pattern direction and priority mode. -
Page 59
Chapter 6 Management Memory Pattern Press to enter the operation interface. The system will hint user to input the new pattern number and the new pattern name. Press to save the combined pattern and return to pattern operation selection interface. Press to quit saving and return to pattern operation selection interface. -
Page 60: Satin Stitch Adjustment
Chapter 6 Management Memory Pattern 6.12 Satin Stitch Adjustment This operation is to adjust the satin width in the design according to the need. Press to enter memory pattern management interface. Select a pattern in the memory pattern image display area. Press to enter memory operation selection interface.
-
Page 61: Chapter 7 Letter Pattern Operation
Chapter 7 Letter Pattern Operation Chapter 7 Letter Pattern Operation System can generate letter pattern based on the built-in font libraries. 7.1 Enter Main Interface for Letter Embroidery Press in the pattern management interface to enter the main interface for letter embroidery.
-
Page 62: Adjust Letter Pattern
Chapter 7 Operation Letter Pattern The upside of the window is the display area and the downside is the operation area. After inputting the letter string, press to save. 7.3 Adjust Letter Pattern 1. Letter Pattern Adjustment Interface There are 4 rows of operation keys in the interface, the first two rows are the file and view Owner’s Manual of BECS- A15 Computerized Control System…
-
Page 63
Chapter 7 Letter Pattern Operation functions keys, the third row are keys for adjusting letter arrangement, and the forth row are keys for adjusting letter string. In the middle of the interface is the letter pattern display area. Generally, user should set the parameters, such as whole arrangement method, rotate angle and letter interval of the letter string;… -
Page 64
Chapter 7 Operation Letter Pattern “Vertical Overturn”: overturn the selected letter vertically. “Clockwise Rotation”: use the letter as centre (“+” in the centre of letter), and rotate the selected letter clockwise. 3. View and File Operation “Letter Density”: adjust the density of the letter string. Press this key to display thedensity dialog box, where user can set stitch form, increase or decrease density. -
Page 65
Chapter 7 Letter Pattern Operation “Actual”: show the letter pattern in the actual size. At this time, the size of pattern in interface is equal to actual size. “Center”: scale up/down the view, so as to show the whole pattern for checking. “Save”: it is used for saving the edited letter pattern. -
Page 66: Save Letter Pattern
Chapter 7 Operation Letter Pattern change along with the position of arc, but fix at a certain angle “Increase Radian”: when user ranks the letters in arc, this key can enlarge the radian of the reference arc “Reduce Radian”: when user ranks the letters in arc, this key can reduce the radian of the reference arc “Whole Clockwise Rotate”: rotate the whole letter string clockwise “Enlarge…
-
Page 67
Chapter 7 Letter Pattern Operation After saving, system will return to the main interface for letter embroidery. If there is no need to edit letter pattern, press to quit and the following hint will be displayed. Press to save or press to cancel saving, and return to the pattern management interface. -
Page 68: Chapter 8 Assistant Operation
Chapter 8 Assistant Operation Chapter 8 Assistant Operation User can perform some common assistant operations by pressing keys. 8.1 Frame Selection User can press » » key to enter the interface for frame selection and position. Icon Name Pattern Range Display Frame Type Selection Position Pattern to the Center of the Frame…
-
Page 69: Clear Xy Displacement
Chapter 8 Assistant Operation Icon Name Recovery of Pattern Origin Manual Pattern Movement Exit 8.2 Clear XY Displacement This function is to clear the X and Y displacements. In the main interface , press System will set current X/Y value to 0. User can check the current X/Y value on the main interface.
-
Page 70: Low Speed Idling Backward
Chapter 8 Assistant Operation (1) Press once to idle forward by one stitch (2) Hold pressing for 2s to idle forward continuously Low Speed Idling Backward 8.3.2. 1. In the main interface , press 2. Press (1) Press once to idle backward by one stitch (2) Hold pressing for 2s to idle backward continuously High Speed Idling Forward…
-
Page 71: Chapter 9 Other Functions
Chapter 9 Other Functions Chapter 9 Other Functions These functions can be used during the usage, including machine maintenance, information inquiry and system settings. Press to enter the interface for other function, where a list of function keys will be displayed for user to operate by pressing. The words on the keys can help user understand the functions.
-
Page 72
Chapter 9 Other Functions In the above interface, the statistic information is displayed in a chart. If user need check details of each pattern, press to enter the corresponding interface. Press to return to the interface of statistics. Press to delete statistic information and press to return. -
Page 73: Set Frame Origin
Chapter 9 Other Functions 9.2 Set Frame Origin Setting the frame origin is the premise for saving the pattern’s start point and setting frame protection at sudden power-off. So after the installation or maintenance of machine, it’s necessary to set the frame origin. Press to enter the interface for other functions.
-
Page 74: Language
Chapter 9 Other Functions 9.3 Language System supports Chinese, English, Turkish, Spanish, and so on. Press to enter the interface for other functions. Press to enter language interface. Select the language you want and system will enter the main interface in the selected language.
-
Page 75: Machine Debugging
Chapter 9 Other Functions This function will help user check machine software information. Press to quit. 9.5 Machine Debugging This operation is only for repairman, ordinary users are banned to undertake these operations. Because these operations involve some mechanical work, please pay attention to the personal safety and equipment security during the operation.
-
Page 76: Date And Time
Chapter 9 Other Functions Debugging Interface 1 Debugging Interface 2 Facial Suture Clamp X-axis parameter test Y-axis parameter test Driver Parameter Test Main shaft parameter test Save driver parameters Load driver parameters Test pull bar switch, frame limit, knife origin, knife maximum point,…
-
Page 77
Chapter 9 Other Functions operation. In order to avoid the trouble caused by the inaccurate correction, this operation is only for the person with authorization. Press to enter the interface for other functions. Press to enter debugging interface, where user can select “Other” to enter the corresponding interface. -
Page 78: Chapter 10 About Jf Sequin Embroidery
Chapter 10 About JF Sequin Embroidery Chapter 10 About JF Sequin Embroidery 10.1 Brief of Sequin Embroidery Sequin embroidery is formed by many sequins and the specific stitch form. Because the sequins are made of the hard and shining material with smooth surface, the sequin embroidery, formed by the sequins with different colors, shapes and sizes, features the unique shining effect.
-
Page 79: Embroidery Procedure Of Sequin
Chapter 10 About JF Sequin Embroidery 5. Sequin-feeding method and the feeding angle can be changed via the operation panel. Ⅲ. Specifications 1. Size of Sequin available: Diameters at 3mm, 4mm, 5mm, 6.75mm and 9mm; 2. Max speed at 1000rpm. 10.2 Embroidery Procedure of Sequin At sequin embroidery, user needs to follow the procedure at below: 1.Input design with sequin code, refer to 10.3…
-
Page 80: Edit Sequin Design
Chapter 10 About JF Sequin Embroidery Enter to have access to the design input interface as shown in below: Setting procedures: User should input number and name of pattern. 10.4 Edit Sequin Design This function is to edit sequin design within the system. After edition, all the designs will be saved as special multi-sequin design.
-
Page 81
Chapter 10 About JF Sequin Embroidery Display design in the center; Display design 4.5 times as original one; Zoom in sequin design; Zoom out sequin design; Display in original size 3. Click to show all stitch forms of the design, as shown below: 4. -
Page 82
Chapter 10 About JF Sequin Embroidery keys, the next stitch code in that direction will be selected, regardless at its stitch number. “navigating by stitch number”: when you press direction keys “leftward” or “upward”, the last sequin stitch code (smaller than the current number) will be selected;… -
Page 83
Chapter 10 About JF Sequin Embroidery 7. Edition of Alternating Sequin If you want to use the alternating sequin, you should define a range for using them at first. In “ ”, use “Set Range Start Stitch” and “Set Range End Stitch” or “Select Current Color Range”… -
Page 84
Chapter 10 About JF Sequin Embroidery a) Click to select sequin mode and click to confirm. Sequin names are A, B, C and D. If all these four sequins are included, A will be on the top, then B, C and D. b) After that, press to confirm the sequin-feeding mode. -
Page 85: Setting Of Multi-Sequin Embroidery Parameters
Chapter 10 About JF Sequin Embroidery Input design number and name, then click to save the edited sequin design, or click to cancel the saving. 10.5 Setting of Multi-Sequin Embroidery Parameters In this section, we will introduce how to adjust sequin device and the parameters used in multi-sequin embroidery.
-
Page 86
Chapter 10 About JF Sequin Embroidery thread-breakage. When the setting is “No”, the user needs to lift the presser foot manually at thread-breakage. 6. Sequin Ind. Up/Down When the setting is “Yes”, the sequin devices will move independently. When the setting is “No”, they will move collectively 7. -
Page 87: Manual Operation Of Sequin Embroidery
Chapter 10 About JF Sequin Embroidery This is to set gap number. If there is no gap, then it should be set to 0. 16. L/R Sequin Valve Action Time This parameter is for setting the response time at adjusting the valve action. The larger value means the longer response time.
-
Page 88: Sequin Mending
Chapter 10 About JF Sequin Embroidery (2) Manual Operation for Middle Motor Sending B Sequin Put the sequin switch to the down position, dial the thread-breakage detection switch to turn on the red indicator and press manual sequin-feeding button. (3) Manual Operation for Rear Motor Sending C Sequin Put the sequin switch to the down position, dial the thread-breakage detection switch to turn off the head indicator (dial it to down position too) and press manual sequin-feeding button.
-
Page 89: Chapter 11 Operation Of Zigzag Embroidery
Chapter 11 Operation of Zigzag Embroidery Chapter 11 Operation of Zigzag Embroidery 11.1 Functions 1. Zigzag Embroidery (ZIG Embroidery): this function is to make the thread form the design with certain stitch forms, which have been saved in the computer in advance, the Z4 and Z5.
-
Page 90
Chapter 11 Operation of Zigzag Embroidery the parameters relating to the zigzag embroidery. 1. Right Zigzag Device: Y (N) —— Y means the first needle is the zigzag embroidery position. 2. Left Zigzag Device: Y (N) —— Y means the last needle is the zigzag embroidery position. -
Page 91: Relative Operations Of Zigzag Embroidery
Chapter 11 Operation of Zigzag Embroidery 15. Thread-loosing Motor for Zigzag Embroidery: Yes/No. if the device is double motor taping device, user needs to set it at “Y”, or user should set it as “N”. 16. Zigzag Device Movement Detection: Test whether the device moves to the proper position.
-
Page 92
Chapter 11 Operation of Zigzag Embroidery key to change the embroidery mode. If user has nothing to change, please press exit. Definition of icons: Normal Embroidery; Z4 Embroidery: The rod swings at each stitch. Z5 Embroidery: The feature of it is same to Z4. It is suitable for the thick thread. (Refer to the parameter: Swinging scope of frame in Zigzag sewing) (2)Automatic Shift Before embroidering, automatic shift can be achieved through setting the color-changing… -
Page 93: M Axis Operation Of Zigzag Embroidery
Chapter 11 Operation of Zigzag Embroidery Press the corresponding icon to select the very zigzag embroidery mode, if you don’t want to change, and then press to exit. After confirmation of the embroidery mode and the setting of color-changing order, the system will display as below: M Axis Operation of Zigzag Embroidery 11.5.2.
-
Page 94
Chapter 11 Operation of Zigzag Embroidery (2)Return the M-axis to the Origin Point (Step Moving) Press the key “M axis to cycle” and click on the dialogue window to let the M axis rotate to the “Zero point”, click to exit the operation. (3)M axis rotate left manual Press the key «M axis rotate left manual»… -
Page 95: Chapter 12 Taping Embroidery
Taping Embroidery Chapter 12 Chapter 12 Taping Embroidery Function Introductions 12.1 1. Taping function: Tape can be used as embroidery material. It includes taping 1 and taping 2 (blind embroidery) 2. The presser of special embroidery can go up and down automatically or manually. (This function is only for the machines installed with relevant apparatus) 3.
-
Page 96
Taping Embroidery Chapter 12 4. D31 Rod Pos. of ZIG: Left/ Right The “ROD POS. OF ZIG” determines the position of swing rod when M axis is in origin. This parameter must be set in accordance with actual mechanical position. 5. -
Page 97: Relative Operations Of Special Embroidery
Taping Embroidery Chapter 12 The parameter can change the coiling density; e.g. the set value 2 means one coiling every two stitches. 12.4 Relative Operations of Special Embroidery between Flat Stitch Head and Special Head Shift 12.4.1. (1)Manual Shift In the main interface, press the key to enter into color-changing interface.
-
Page 98: M Axis Operation Of Special Embroidery
Taping Embroidery Chapter 12 In the main interface, press “ ” to enter into color changing interface, and then press the key (zigzag head) to change zigzag embroidery mode: Press the corresponding icon to select the very zigzag embroidery mode, if you don’t want to change, and then press to exit.
-
Page 99: Operations Of Clamp Foot
Taping Embroidery Chapter 12 Press the key “M axis to be ready” and click on the dialogue window to let the M axis back to the working point, click to exit. (2)Return the M-axis to the Origin Point (Step Moving) Press the key “M axis to cycle”…
-
Page 100: Steps On Special Embroidery
Taping Embroidery Chapter 12 Move cursor to “Sway Zig Rod to 100”. According to the hint in dialogue window, user can pull bar to let all the swing rods act once. Click “ ”to exit. Users can adjust swing range by using this function. 2.
-
Page 101
Taping Embroidery Chapter 12 2. E axis According to the difference in motor and the equipment of proximity switch for positioning the origin, E axis devices can be divided to the following types: Driven by stepping motor separately, without proximity switch for positioning origin 2) Driven by stepping motor collectively, with proximity switch for positioning origin 3) Driven by stepping motor collectively, without proximity switch for positioning 4) Driven by servomotor, with proximity switch for positioning origin… -
Page 102: Chapter 13 Online Update Of Main Software
Online Update of Main Software Chapter 13 Chapter 13 Online Update of Main Software Update Procedure: 1. Hold pressing and power on. 2. The screen will display the following interface, where user should select “update program” 3. Select the update method (via U disk) Owner’s Manual of BECS- A15 Computerized Control System…
-
Page 103
Chapter 13 Online Update of Main Software 4. System will display the window to “Select U Disk”, and select the target U disk. 5. After entering the interface of the U disk, select the program to be updated. Owner’s Manual of BECS- A15 Computerized Control System… -
Page 104
Online Update of Main Software Chapter 13 6. Press to update. 7. When finishing update, system will automatically display a hint “update completed, if no others, please restart”, and then please restart. Owner’s Manual of BECS- A15 Computerized Control System… -
Page 105: Chapter 14 Update Of Software In Peripheral Board
Chapter 14 Update of Software in Peripheral Board Chapter 14 Update of Software in Peripheral Board Update Procedure: Press to enter the interface for other functions. Press to enter the interface of statistics. Owner’s Manual of BECS- A15 Computerized Control System…
-
Page 106
Update of Software in Peripheral Board Chapter 14 Select “peripheral board management” to enter the management interface, where user should select “peripheral board update”. Press Owner’s Manual of BECS- A15 Computerized Control System… -
Page 107
Chapter 14 Update of Software in Peripheral Board Select the U disk Select the program to be updated and press Owner’s Manual of BECS- A15 Computerized Control System… -
Page 108
Update of Software in Peripheral Board Chapter 14 when system hint successful update, the update is completed. Owner’s Manual of BECS- A15 Computerized Control System… -
Page 109: Appendix 1 Parameter List
Slow STI. After 0~3000 Patch Speed After Patch 80~1000 Support 3D? No, Yes It is fit for high-speed machine using dahao servo-motor Filter Short Stitch No, Yes driver. It only get effective after user confirm the embroidery again. Filtering Short Sti 0.5mm 0.1mm~0.6mm…
-
Page 110
Appendix 1 Parameter List Name of Parameter Default Value Range of Value Remarks Thread-breakage Detection Parameters T. B. Detect No, Yes Sti. Not T.B. Detect 8 stitch 0 stitch ~15 stitch Stop after T.B. No, Yes detect T.B. Back Sti. 0 stitch 0 stitch ~7 stitch Back&Patch Count… -
Page 111
Range of Value Remarks Speed Speed When Over 0,1,2,…,30 frame It is fit for high-speed machine X direction Frame 230~280 using Dahao servo-motor Angle A driver. X direction Frame 230~280 The same as above. Angle B Y direction Frame 230~280 The same as above. -
Page 112
Appendix 1 Parameter List Name of Parameter Default Value Range of Value Remarks to avoid main shaft vibration during braking. Usually it’s set as 1. Stop Ok bef. Pull No, Yes The parameter is used when the main shaft uses induction Ratio motor. -
Page 113
Appendix 1 Parameter List Name of Parameter Default Value Range of Value Remarks Para. Trim is OK No, Yes Set the hook angle by motor. Hook Angle by When user increases the value, -100 -100~+100 Motor the hook angle is moved backward. -
Page 114
Appendix 1 Parameter List Name of Parameter Default Value Range of Value Remarks … Speed for Sequin R 300,310, ,the maximum speed 300,310, … , Speed for Sequin L maximum speed Sequin R Adj. -15~15 Angle Sequin L Adj. -15~15 Angle Auto Start… -
Page 115
Appendix 1 Parameter List Name of Parameter Default Value Range of Value Remarks 5.4 ~ 36 One-way Set 5MM of R Double-ways angle; Double-ways Sequin 5.4~36 angle 5.4 ~ 36 One-way Set 6.75MM of R Double-ways angle; Double-ways Sequin /21.6 5.4~36 angle 5.4 ~… -
Page 116
Appendix 1 Parameter List Name of Parameter Default Value Range of Value Remarks /green/blue/purple/yell ow/cyanogen 3/4/5/6.75/9mm B Size&Color of L Light gray/gold/red 4mm blue Sequin /green/blue/purple/yell ow/cyanogen 3/4/5/6.75/9mm C Size&Color of L Light gray/gold/red 5mm purple Sequin /green/blue/purple/yell ow/cyanogen 3/4/5/6.75/9mm D Size&Color of L Light gray/gold/red… -
Page 117
Appendix 1 Parameter List Name of Parameter Default Value Range of Value Remarks pos. A-Zig great efficiency mode ST01 Work mode ST02 Actuation time adj. 1~20 ST03 Looped time 30~100 Whether cut line ST04 Yes, No when jump A-Zig Yes, No Loosing-Motor A-TAPING No, Yes… -
Page 118
Appendix 1 Parameter List Name of Parameter Default Value Range of Value Remarks conveyor motor Adj speed of R 0~15 add-power motor Time para for R 1~50 bead Time para for R 1~50 sequin Count of R bead None, Yes None motor All head change… -
Page 119
Appendix 1 Parameter List Name of Parameter Default Value Range of Value Remarks Spec. Emb. Trim Low, Above & Low, No Trim Mode No Trim Speed for Sequin L 300~850 Spec Minimum 250~400 Speed Spec. Speed-Down 1~180 Angle Spec. Speed-Down Ratio Z Shift Control 0~180… -
Page 120
Appendix 1 Parameter List Name of Parameter Default Value Range of Value Remarks M100 Start needle light no,yes Speed 80~800 limit 1~10 Number of heads Machine head 1~1500 distance Net Parameters Machine Number 1~245 Server Port 1600 1~9999 It is used for setting sever port when it is connected to PC. -
Page 121: Appendix 2 Directions Of U Disk Operation
Appendix 2 Directions of U Disk Operation Appendix 2 Directions of U Disk Operation Operations Methods or Standards Remarks USB I/O Same as floppy disk Operation priority between USB USB Disk disk and floppy disk Format supported by USB disk FAT16 and FAT32 Support long file name Support, but not displayed…
-
Page 122: Appendix 3 Automatic Position Limitation Function Instructions For
Appendix 3 Automatic Position Limitation Function Instructions for Apparel Embroidery Appendix 3 Automatic Position Limitation Function Instructions for Apparel Embroidery A、 Working Principle The automatic position limitation function of single-head embroidery machine controller is to determine the embroidery range of the frame by setting the distance from the center of the frame to the origin (that is X-/Y position limitation optical coupler) and the actual frame size (unit: mm).
-
Page 123
Appendix 3 Automatic Position Limitation Function Instructions for Apparel Embroidery 2、 Clear XY Displacement In the main interface, press » » key to clear the XY displacement displayed here. 3、 Manual Frame-moving In the main interface, click the frame-moving key to move the frame to overlap its center with the needle hole. -
Page 124
Appendix 3 Automatic Position Limitation Function Instructions for Apparel Embroidery 4、 Set Frame Center and Size In the main interface, check the coordinates of XY, which is the position of frame center. Press » » key, to enter the interface for frame selection and position setting; then press «… -
Page 125
Appendix 3 Automatic Position Limitation Function Instructions for Apparel Embroidery There are four parameters: «X direction center» means the distance at X direction between the frame center and X- direction position limitation optical coupler; «Y direction center» means the distance at Y direction between the frame center and Y+ direction position limitation optical coupler. -
Page 126
Appendix 3 Automatic Position Limitation Function Instructions for Apparel Embroidery C、 Cancel Position Limitation Set «Frame Selection» as «No Frame», the position limitation function will be canceled and the software protection for the frame of flat embroidery will also become invalid. Owner’s Manual of BECS- A15 Computerized Control System… -
Page 127
Appendix 3 Automatic Position Limitation Function Instructions for Apparel Embroidery D、 Common Frame Size (Unit: mm) Frame 1: Frame 2: Size: 550×375 Size: 290×290 Embroidery Range: 430×260 Embroidery Range: 230×230 Frame 3: Frame 4: Size: 200 Size: 150 Embroidery Range: 150 Embroidery Range: 100 Frame 5: Frame 6:… -
Page 128: Appendix 4 A15 Controller Operation Quick Guide
Appendix 4 A15 Controller Operation Quick Guide Appendix 4 A15 Controller Operation Quick Guide Part I. Embroidery Pattern Management » «: memory pattern preview, letter pattern operation, delete pattern, pattern input/output, pattern function setting, etc. A. Input Pattern B. Select Pattern for Embroidery →Use page keys to select patterns →…
-
Page 129
Appendix 4 A15 Controller Operation Quick Guide Part II. Manual Operation A. Manual Trimming B. Manual Color-changing C. Main Shaft Jog D. Manual Frame-moving Direction Keys: → → → Speed Shift Key: E. Empty Feed 1、 Empty Feed and Return at Low Speed →…
4.1.1. Settings of X-Y Scale ……………………………………………………………………………….. 30
4.1.3. Pattern Direction ……………………………………………………………………………………… 32
4.1.4. Prior Mode ………………………………………………………………………………………………. 32
4.1.5. Rep. Mode ………………………………………………………………………………………………. 32
4.1.6. Rep. Order ………………………………………………………………………………………………. 32
4.1.7. X-Y Rep. Times ……………………………………………………………………………………….. 33
4.1.8. X-Y Rep. Interval …………………………………………………………………………………….. 33
4.2.3. Set Needle Bar Color ………………………………………………………………………………… 35
6.1 Memory Pattern Management Interface and Other Memory Pattern
Operation Interfaces ………………………………………………………………………………… 40
6.3 Memory Pattern Preview ………………………………………………………………….. 42
6.4 Pattern Output …………………………………………………………………………………. 44
Owner’s Manual of BECS- A15 Computerized Control System
Contents
III
- Новинки
- Хиты месяца
- Популярное
- Распродажа
Производители
ООО «ГЕРАН «люкс» постоянно сотрудничает с лучшими зарубежными производителями швейного, раскройного и ВТО оборудования. В их ряду: Duerkopp Adler (Германия), Hoffman (Польша), Juki (Япония), Brother (Япония), Quick (Китай), Kannegisser (Германия), Veit (Германия).

Zoje
Сегодня китайские швейные машины ZOJE востребованы во всем мире. Это инновационная высокопроизводительная техника. Корпорация ZOJE существует более 20 лет, и за это время превратилась в одно из крупнейших предприятий, специализирующихся на производстве швейного оборудования. В его структуру включены 5 заводов, на которых трудятся более 1700 специалистов. Ежегодный оборот ZOJE составляет порядка 85 миллионов долларов.

Ankai
Швейные машины Ankai — это многофункциональное промышленное оборудование. С его помощью можно отшивать изделия различной сложности, в том числе обувь, сумки, кожгалантерею.

Juki
Японская компания Juki по праву считается мировым лидером по производству техники для шитья. Сегодня швейное оборудование Juki считается одним из самых престижных и высокотехнологичных, и это неудивительно!

Durkopp Adler
Dürkopp Adler AG — один из мировых лидеров в сфере разработки и производства промышленного швейного и обувного оборудования. И одна из старейших компаний в мире: она была основана в 1860-м году!

Hoffman
Уже более 25 лет раскройное оборудование HOFFMAN пользуется огромным успехом среди производителей одежды и другой текстильной продукции.
О компании «ГЕРАН «люкс»
Компания ООО «ГЕРАН «люкс» была основана в 1998 году. Уже 20 лет компания успешно работает в сфере продаж оборудования для швейного производства, начиная с продаж восстановленного бу оборудования, а с 2001 года являясь официальным дилером Duerkopp Adler (Германия) по центральной России. Промышленные швейные машины Duerkopp благодаря стабильному немецкому качеству прочно заняли лидирующие позиции на рынке промышленного швейного оборудования.
Однако высокие цены часто заставляют потребителя искать альтернативные варианты. Поэтому с 2003 года ООО «ГЕРАН «люкс» представляет российскому рынку промышленное швейное оборудование фирмы Zoje (Китай), прекрасно зарекомендовавшее себя на производстве. По сегодняшний день это качественное оборудование поставляется по доступным ценам. Являясь официальным партнером ZOJE в России компания ООО «ГЕРАН «люкс» активно взаимодействует с производством оборудования швейной промышленности для расширения ассортимента и удовлетворения всех потребностей клиентов.
Почему ГЕРАН «люкс»?
Есть как минимум 12 причин выбрать нас, самые важные мы перечислили здесь. Полный список — по ссылке ниже.

Надежность, проверенная временем
Мы уже 20 лет на рынке!

Большой ассортимент
От ведущих немецких, японских, итальянских и китайских производителей промышленного швейного оборудования, а также широчайший выбор раскройного и оборудования для влажно-тепловой обработки

Три выставочных зала
Представлены более семидесяти работающих моделей промышленных швейных машин. Здесь вы можете опробовать и подобрать именно те модели, которые наиболее подходят под ваши нужды и технологии.

Большие склады
(Более 5000 наименований изделий) делают выбор ещё более быстрым и лёгким.
Свяжитесь с нами!
ООО «ГЕРАН «Люкс» — промышленное швейное оборудование.
Хотите задать вопрос?
Заполните форму, и мы свяжемся с вами в ближайшее время
Компьютеризированная вышивальная машина DAHAO с одной головкой 15 иглПожалуйста, добавьте сервис Alibaba whatsapp :0086 15017784730Если обслуживание менеджера по продажам недостаточно хорошее, пожалуйста, не стесняйтесь сообщить нам
Платите меньше денег, получите потрясающую машину, наслаждайтесь лучшим обслуживанием
20 лет гарантии обслуживания24 часа онлайн сервис180 стран; Представители инженеров-заказчиковСамые мощные китайские сервисные команды
HOLiAUMA-ваш лучший выбор
Ищем мировых агентов, чтобы присоединиться к нам
 Пожалуйста, добавьте сервис Alibaba whatsapp: 0086 1501 7784 730
Если обслуживание менеджера по продажам недостаточно хорошее, пожалуйста, не стесняйтесь сообщить нам
3 года гарантии!
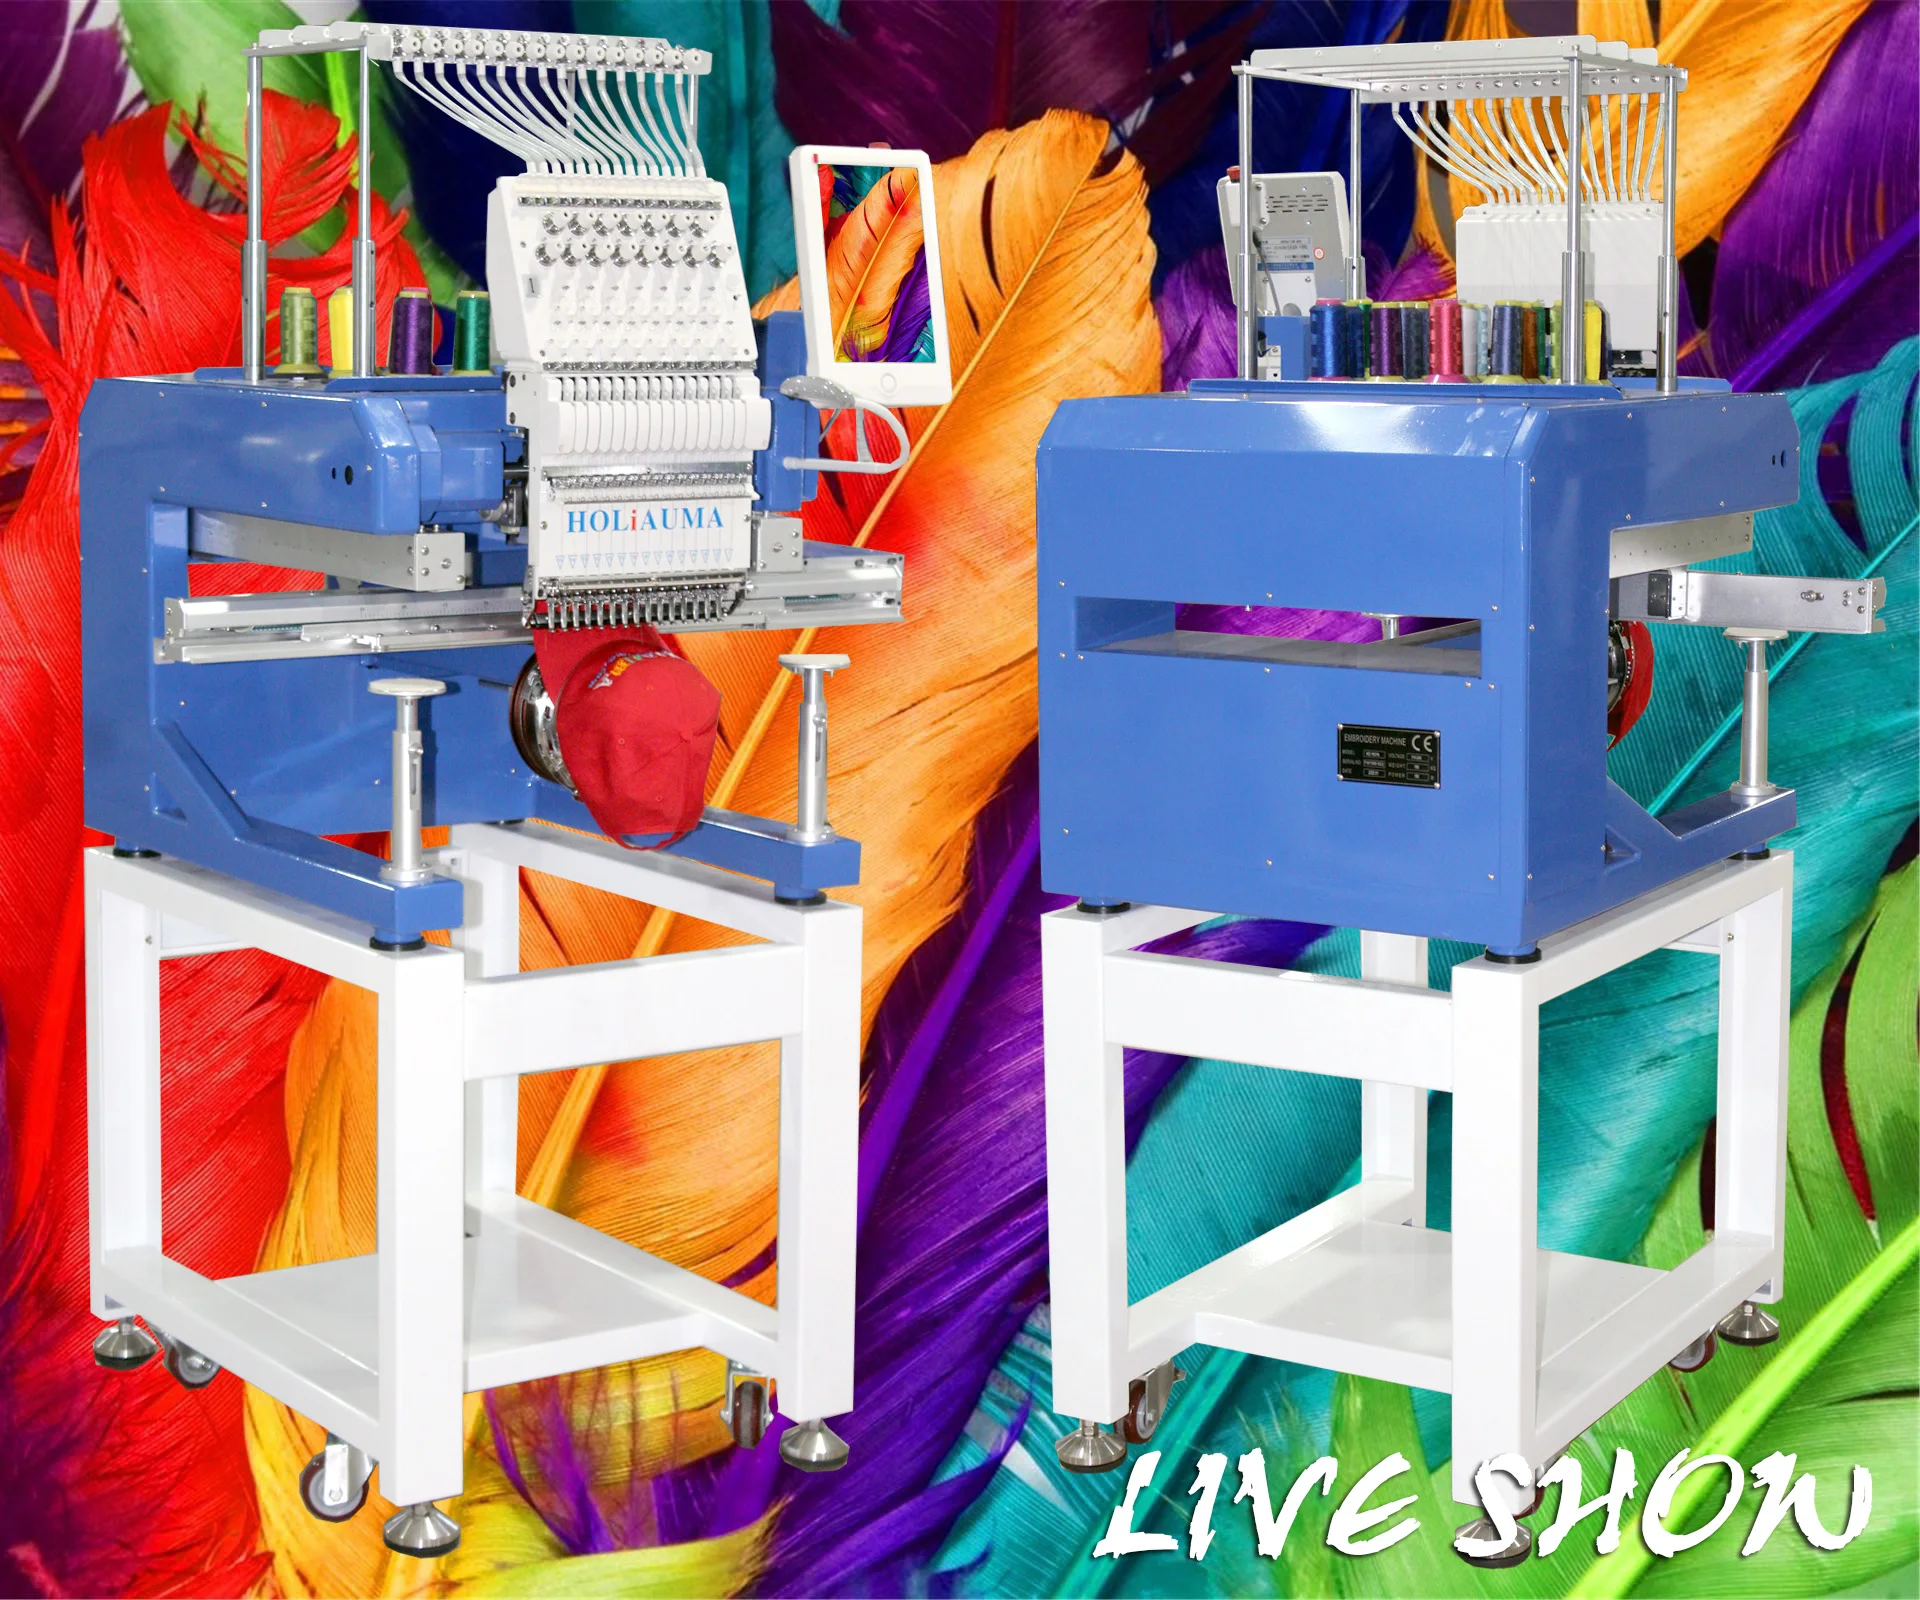
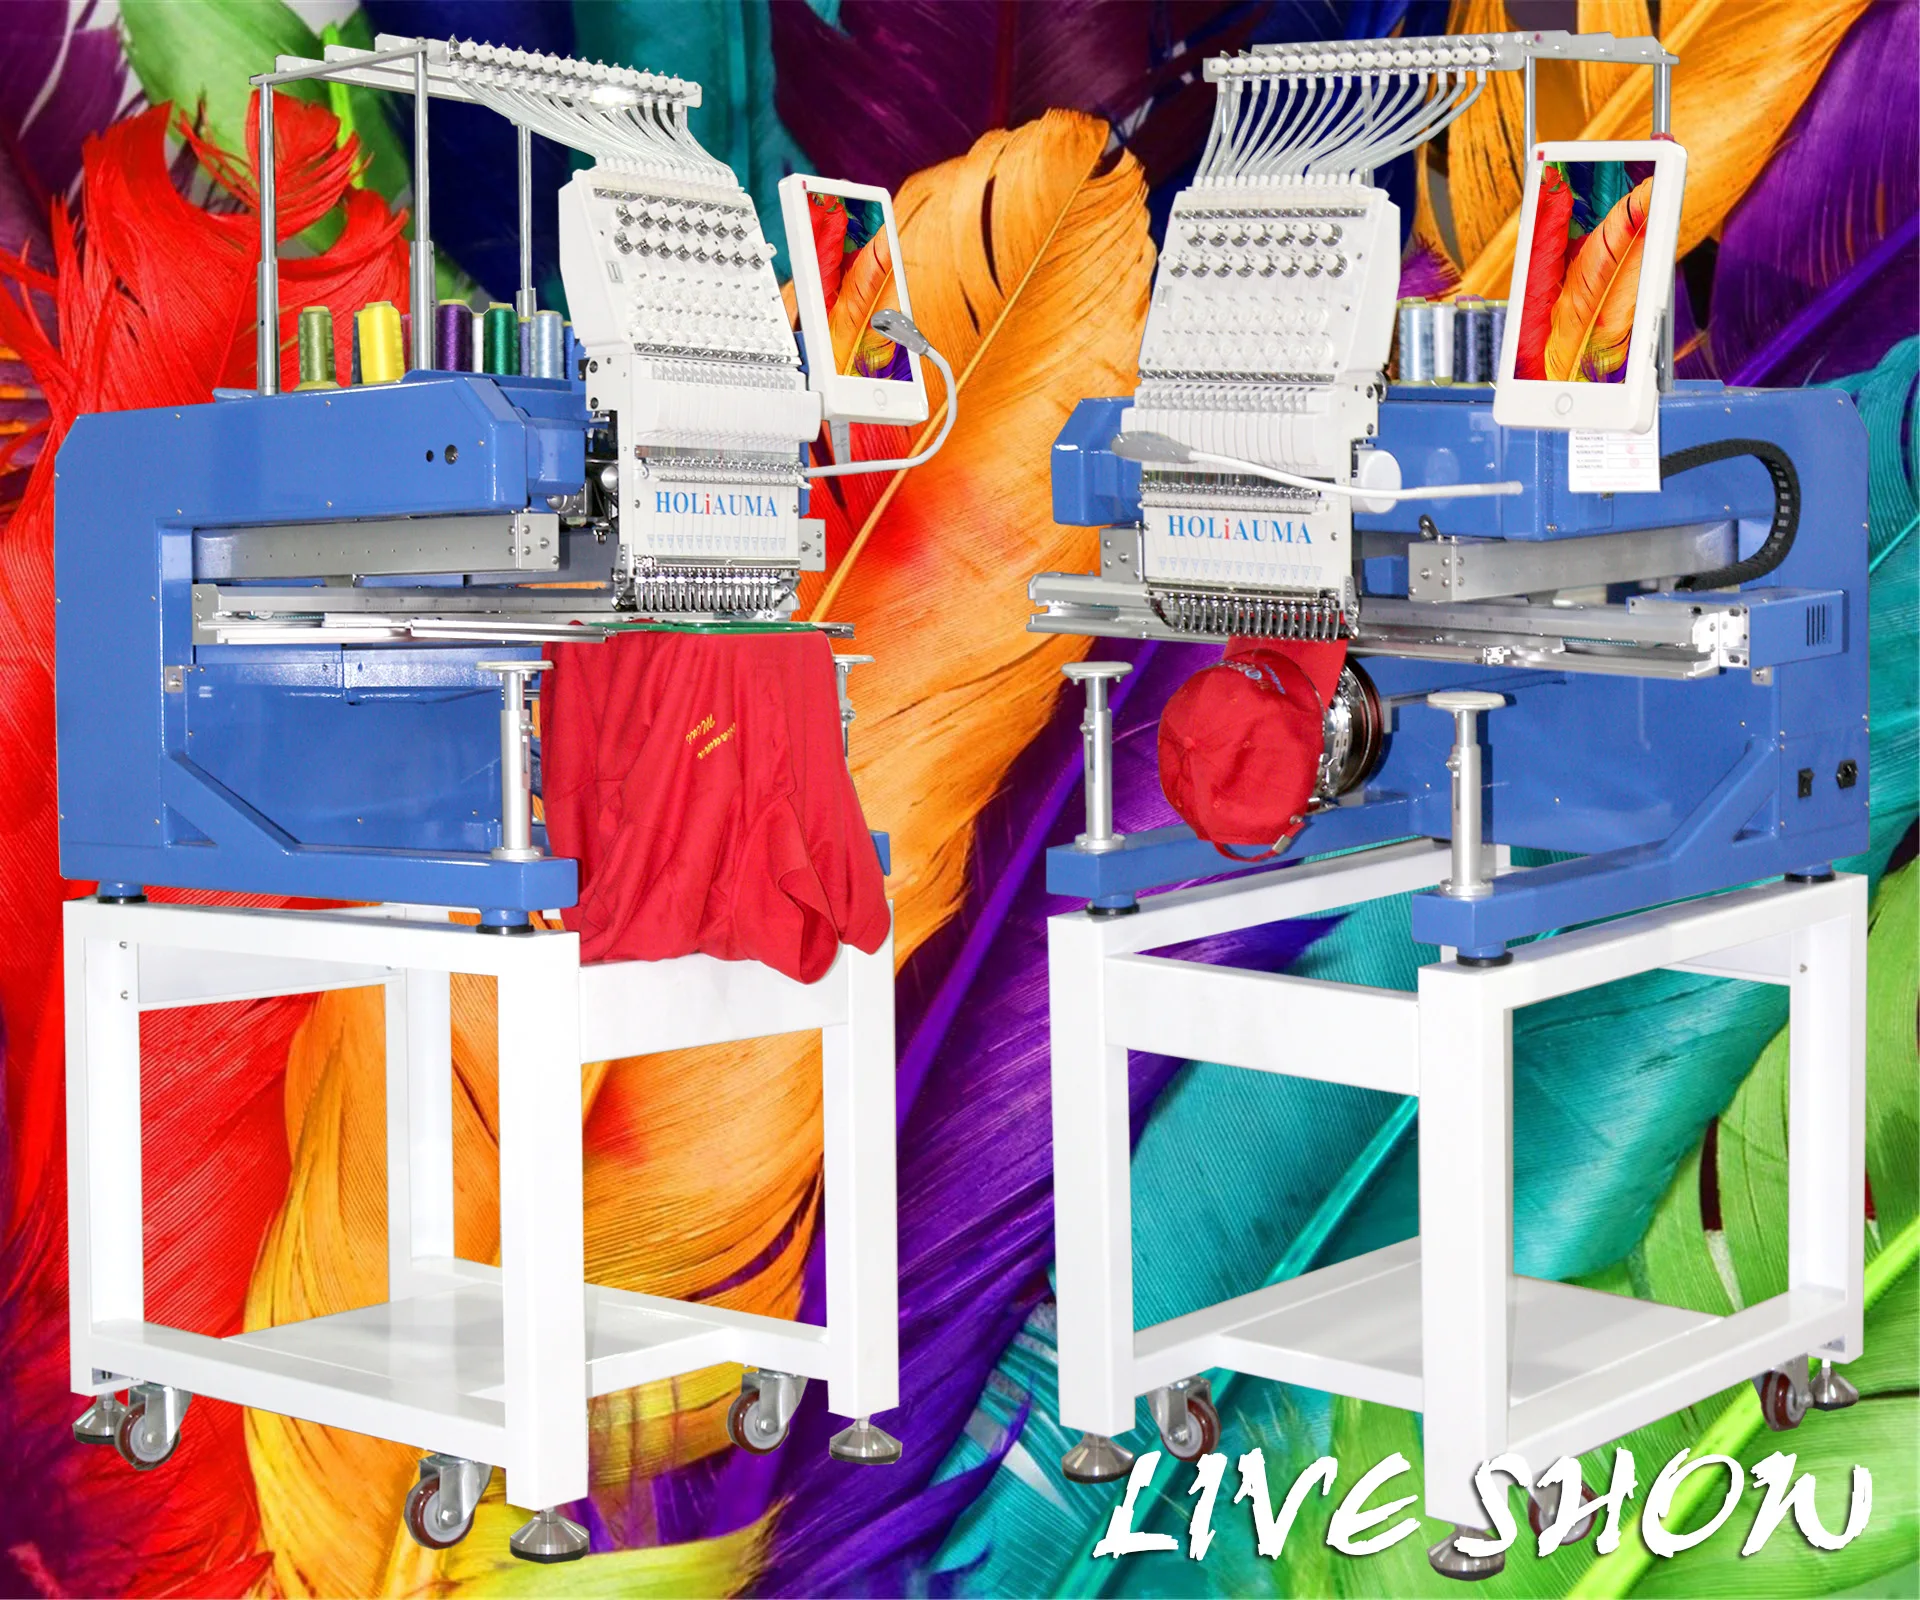
Компьютеризованная вышивальная машина DAHAO, высокоскоростная машина типа Brother, Happy с одной головкой и 15 иглами для вышивки на шляпах, футболках>Полноцветная сенсорная панель управления-делает ее очень простой в использовании>На борту фронтов для легкой монограммирования и надписей проектов>Огромный дизайн памяти на борту-1000 дизайнов или 400 миллионов стежков> 10,1 Полноцветный сенсорный экран с высоким разрешением> Usb-порт-удобная конструкция нагрузки>Быстрый дизайн нагрузки-экономит время производства>Сетевая готовая конструкция загрузки из любого места>Максимальная скорость 1200 SPM>Обнаружение разрыва резьбы>Управление точность-Мин. Управление этикетки стежка интервалы является 0,1 мм>Широкая рамка крышки-270 градусов>Тихая работа!-Тише, чем другие китайские дешевые типы копирования>Предварительный просмотр в режиме реального времени>Точечный Лазер для предпочтительного позиционирования вышивки>Расширенный светильник-так что вы можете увидеть, что вы делаете HO1501N Модель-2021 новейший тип
Параметры HO1501N
 Пожалуйста, добавьте сервис Alibaba whatsapp:0086 1501 7784 730
Если обслуживание менеджера по продажам недостаточно хорошее, пожалуйста, не стесняйтесь сообщить нам

 Если обслуживание менеджера по продажам недостаточно хорошее, пожалуйста, не стесняйтесь сообщить намПожалуйста, добавьте сервис Alibaba whatsapp:0086 15017784730Какая машина включает в себя
 Теплый наконечник:Если компания HOLiAUMA предлагает продукцию без швов илиНепрофессиональное машинное обслуживание, у вас естьПраво подать заявку на получениеВозврат денег, чтобы защитить себя


| Название | Модель | Размер | Вес | Код HS |
| Машина для вышивки | HO1501N | 1,39*0,89*1,18 м (1,5 куб. М) | 230 кг | 84479020 |
Пожалуйста, добавьте сервис Alibaba whatsapp:0086 15017784730Если обслуживание менеджера по продажам недостаточно хорошее, пожалуйста, не стесняйтесь сообщить нам


Если компания HOLiAUMA предлагает продукцию без швов илиНепрофессиональное машинное обслуживание, у вас естьПраво подать заявку на получениеВозврат денег, чтобы защитить себяПожалуйста, добавьте сервис Alibaba whatsapp : 0086 1501 7784 730


Пожалуйста, добавьте сервис Alibaba whatsapp :0086 1501 7784 730
Если обслуживание менеджера по продажам недостаточно хорошее, пожалуйста, не стесняйтесь сообщить нам
Оставьте нам профессиональную работуВозьмите машину для вышивки HOLiAUMA точно!


Напоминание о кэшбэке: Что бы получить кешбек при покупке этого или другого товара на Aliexpress. Перейдите по ссылке ниже, затем на открывшейся странице авторизуйтесь/зарегистрируйетсь, далее появиться подробная инструкция как получать кэшбэк при покупках на Алиэкспресс.
Кэшбэк в интернет магазинах
Отзывы покупателей
*о других товарах
Отзывы
Здесь вы можете оставить свой отзыв о данном товаре.
- Home
- Brand
- DAHAO Manuals
Guidessimo Database contain: PDF User Manuals, Service Guides and Owners Instructions for Online Reading and Download (9 DAHAO Manuals)
- Control Unit
- Control Systems
- Controller
- Sewing Machine
- Monitor
Popular Documents:
-

DAHAO BECS-185
Control Systems Owner’s manual
BECS-185, 236
-
DAHAO BECS-A18
Sewing Machine Owner’s manual
BECS-A18, 179
-
DAHAO BECS-D19
Control Systems Operation & user’s manual
BECS-D19, 173
-
DAHAO BECS-D16
Sewing Machine Owner’s manual
BECS-D16, 222
-
DAHAO BECS-328
Control Unit Manual
BECS-328, 124
-
DAHAO BECS-285A
Sewing Machine Owner’s manual
BECS-285A, 180
-
DAHAO A15
Controller Operation quick manual
A15, 11
-
DAHAO BECS-A15
Controller Owner’s manual
BECS-A15, 129
-
DAHAO A88
Monitor Owner’s manual
A88, 189


Searched along with DAHAO Devices:
| 1 | Kenmore |
758.296140C |
Kenmore 758.296140C |
36 | 03.12.2022 | |
| 2 | IBM |
WorkPad c3 |
IBM WorkPad c3 |
8 | 24.11.2022 | |
| 3 | Philips |
SWV3472S/10 |
Philips SWV3472S/10 |
1 | 2.29 Mb | 25.10.2022 |
| 4 | MSI |
X430 |
MSI X430 |
90 | 05.04.2023 | |
| 5 | LG |
E971 |
LG E971 |
198 | 19.04.2023 | |
| 6 | Boss |
LMB-3 |
Boss LMB-3 |
8 | 15.03.2023 | |
| 7 | Enviro |
EG31 Nova |
Enviro EG31 Nova |
36 | 15.03.2023 | |
| 8 | Casio |
Cassiopeia EM-500 |
Casio Cassiopeia EM-500 |
18 | 0.09 Mb | 08.01.2023 |