
Микрокамеры для удаленного наблюдения
Инструкция
")
Все диктофоны (нажмите здесь)
Зарядка
Для зарядки диктофона необходимо подключить устройство к USB порту ПК или к сети 220В.
В режиме зарядки красный индикатор будет медленно мигать. Как только аккумулятор полностью зарядится, красный индикатор будет гореть постоянно. Для полной зарядки аккумулятора достаточно 2-3 часов.
Режимы записи звука
Запись вручную
Диктофон работает в режиме аудиозаписи, если в разъём не вставлены наушники.
Для начала записи аудио необходимо перевести переключатель мини диктофона ON/OFF в положение ON. Красный индикатор вначале загорится постоянно, затем моргнёт 3 раза и погаснет. Аудиозапись началась. На диктофоне не мигает индикатор, позволяя записывать аудио незаметно для окружающих.
Для того, чтобы остановить запись, переведите переключатель ON/OFF в положение OFF. Красный индикатор мигнёт один раз – аудио-файл сохранился.
Запись по датчику звука
Для активации записи по датчику звука необходимо после включения мини диктофона зажать кнопку «-» до тех пор, пока красный индикатор не погаснет. После чего, можно оставить диктофон в любом месте. Устройство будет автоматически записывать аудио только в моменты наличия звука, экономя место на встроенной памяти и заряд батареи.
Запись с шумоподавлением
Для активации записи с шумоподавлением необходимо после включения мини диктофона зажать кнопку «+» до тех пор, пока красный индикатор не погаснет.
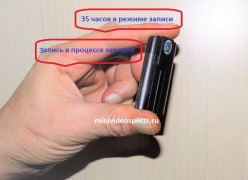
Запись во время зарядки
Для начала записи во время зарядки необходимо перевести переключатель ON/OFF в положение ON, подключить мини диктофон к источнику питания и зажать кнопки «+» и «-» до тех пор, пока красный индикатор не погаснет. Аудиозапись во время зарядки началась.
Проверка статуса записи
Во время аудио записи индикатор на корпусе мини диктофона не горит. При этом у Вас есть возможность убедиться в том, что аудиозапись ведётся.
Для этого нажмите и удерживайте кнопки «+» и «-«. Если индикатор загорелся и моргнул один раз, это означает, что звук в настоящий момент записывается.
Режим мониторинга
Данный режим позволяет при помощи наушников услышать то, что записывает в настоящий момент мини диктофон. Это даёт возможность выбрать наилучшее расположение устройства для наиболее чёткой аудиозаписи.
Для этого необходимо включить мини диктофон, переведя переключатель ON/OFF в положение ON, предварительно убедившись, что наушники не подключены к устройству. Нажмите и удерживайте кнопки «+» и «-» до тех пор, пока красный индикатор не погаснет. Подключите наушники к диктофону для прослушивания идущей аудиозаписи.
Режим очистки памяти
Перейдите в режим MP3-плеера, подключив наушники к диктофону.
Нажмите и удерживайте кнопки «+» и «-«. Индикатор начнёт гореть фиолетовым цветом — устройство находится в режиме очистки памяти.
Для удаления одного файла, который воспроизводится в настоящий момент, нажмите одновременно однократно кнопки «+» и «-«. Синий индикатор начнёт мигать до тех пор, пока файл полностью не удалится.
Для удаления всех файлов нажмите и удерживайте кнопки «+» и «-«. Красный индикатор начнёт мигать до тех пор, пока все файлы полностью не удалятся.
Прослушивание файлов
Прослушивание на ПК
Для прослушивания записанных аудио-файлов необходимо перевести переключатель ON/OFF в положение OFF и подсоединить мини диктофон к USB порту ПК. Устройство определится, как стандартная флешка, съёмный диск.
Прослушивание на MP3-плеере
Включите мини диктофон, переведя переключатель ON/OFF в режим ON. Оденьте наушники, входящие в комплект поставки. Устройство начнёт воспроизводить аудио-файлы.
Во время прослушивания есть возможность:
— увеличивать и уменьшать громкость звука, путём удерживания кнопок +/-
— выбирать проигрываемую композицию или записанный файл, путём однократного нажатия кнопок +/-
— перематывать аудиофайл вперёд/назад, путём нажатия и одновременного удерживания кнопок +/-
- Manuals
- Brands
- Interlogix Manuals
- DVR
- truVision DVR 31
- User manual
-
Contents
-
Table of Contents
-
Troubleshooting
-
Bookmarks
Related Manuals for Interlogix truVision DVR 31
Summary of Contents for Interlogix truVision DVR 31
-
Page 1
DVR 31 User Manual P/N 1072981 • REV A • ISS 06MAR12… -
Page 2
© 2012 UTC Fire & Security. All rights reserved. Trademarks and patents Interlogix, the truVision DVR 31 and the truVision Brand and logo are trademarks of UTC Fire & Security. Other trade names used in this document may be trademarks or registered trademarks of the manufacturers or vendors of the respective products. -
Page 3: Table Of Contents
Browser connections 46 Using the Web browser to configure the device 46 Searching and playing recorded video 47 Live dual streaming 47 Bandwidth throttle management 48 Controlling a PTZ camera in the Web browser 48 truVision DVR 31 User Manual…
-
Page 4
Factory defaults 91 Menu defaults 92 Network defaults 92 Appendix C Warranty and support 93 Warranty information 94 Contacting support 94 Appendix D KTD-405 keyboard mapping 95 DVR 31 to KTD-405 keyboard mapping 96 Index 97 truVision DVR 31 User Manual… -
Page 5: Product Introduction
Chapter 1 Product Introduction Summary This chapter provides an overview of the DVR 31, including its features and functions. Content Product overview 2 truVision DVR 31 User Manual…
-
Page 6: Product Overview
TVR-3116-4T • TVR-3116-6T The truVision DVR 31 is a network digital video recorder developed for digital surveillance. The truVision DVR 31 uses an embedded microcontroller unit (MCU) and Linux operating system, combining the most advanced technology in video and audio encoding/decoding, hard disk recording, and TCP/IP communication.
-
Page 7: Installation
Content Installation environment 4 Unpacking the DVR 31 and its accessories 4 HDD capacity 5 Back panel overview 6 Connecting devices to the unit 7 Connecting required devices 8 Connecting external devices 8 truVision DVR 31 User Manual…
-
Page 8: Installation Environment
Items shipped with the product include: • truVision DVR 31 • IR (infrared) remote control • Two AAA batteries for the remote control truVision DVR 31 User Manual…
-
Page 9: Hdd Capacity
• Video player application • Record duration calculator HDD capacity Storage capacity for the truVision DVR 31 varies depending on the model. Refer to Table 1 below for more information. Table 1: truVision DVR 31 model types Model Model number…
-
Page 10: Back Panel Overview
Video in (top row, loop out bottom row) LAN port Audio out 10. USB port S-video port 11. RS-232 port Audio in 12. VGA output Digital video output 13. Power switch Alarm I/O and RS-485 14. Power input truVision DVR 31 User Manual…
-
Page 11: Connecting Devices To The Unit
Alarm output Note: DVR 31 display options are: 800 x 600, 1024 x 768, 1280 x 1024, 720P, and 1080P. If looping video, ensure that the Termination option (Main Menu >Cameras > Adjust Video) is disabled. truVision DVR 31 User Manual…
-
Page 12: Connecting Required Devices
USB drive or any other USB devices, connect those devices only when the unit displays live view. The DVR 31 recognizes external devices only after the unit has gone through the initialization process. truVision DVR 31 User Manual…
-
Page 13: Operating Instructions
Controlling multiple DVRs with one remote control 16 Operating modes 17 Main menu overview 17 Main menu commands 18 Using the main menu 19 Navigating through dialog screens 19 Using the virtual keyboard 20 Exiting the main menu 21 truVision DVR 31 User Manual…
-
Page 14: Control Interfaces
Esc button to cancel a selection. Mouse. Move the pointer to a command, option, or button on a screen. Click (with the left mouse button) to confirm a selection. Right-click to save and exit a screen. truVision DVR 31 User Manual…
-
Page 15: Front Panel Overview
While in a setup menu, use the Left or Right Arrow keys to navigate through fields. Use the Up or Down Arrow keys to change the value of a selected field. Press Enter to confirm the selection or display additional screens. truVision DVR 31 User Manual…
-
Page 16: Using The Mouse
Enter button on the front panel. Click the right mouse button to the exit setup menus and save the settings. Use the scroll wheel to change values. Mouse sensitivity can be adjusted in the Systems menu. truVision DVR 31 User Manual…
-
Page 17: Mouse Toolbar
Indicates the ending point of a video segment for archive while in playback mode. The device is in PTZ mode. The device is playing video forward. The device is fast forwarding video playback. The device is playing back video reverse. The device is fast reversing video playback. truVision DVR 31 User Manual…
-
Page 18
Search Displays the Search screen. Archive Lets you archive video. Archives the video being played back while in playback mode. In Live mode, allows you to perform a quick archive. truVision DVR 31 User Manual… -
Page 19: Using The Ir Remote Control
The IR remote control buttons are similar to those on the DVR 31 front panel. You can use the remote control to perform any DVR 31 function. Figure 5: IR remote control Live Search Archive Display Enter MENU DVR ID Camera truVision DVR 31 User Manual…
-
Page 20: Controlling Multiple Dvrs With One Remote Control
DVR ID button on the remote control, and then press the numeric button with the desired remote ID. For more information on assigning a remote ID to a DVR, see “Audio and remote” on page 80. truVision DVR 31 User Manual…
-
Page 21: Operating Modes
DVR 31 settings. The main menu screen is shown in Figure 6 on page 18. Access to different option screens varies depending on your access privileges. Most screens are available only to system administrators. The menu icon is highlighted when selected. truVision DVR 31 User Manual…
-
Page 22: Main Menu Commands
Configures users, passwords, access privileges, and defines privilege levels. Network Configures standard network settings including IP address, e-mail notifications, DDNS setup, and advanced network settings. Display Configures display settings including sequence order, resolution, dwell time, on-screen alerts, display formats, and transaction overlay. truVision DVR 31 User Manual…
-
Page 23: Using The Main Menu
Closing a screen, either by clicking the X button at the top right corner or by right- clicking, automatically saves and applies your changes. You cannot cancel or undo any changes you have entered in a dialog screen. truVision DVR 31 User Manual…
-
Page 24: Using The Virtual Keyboard
The virtual keyboard allows you to enter a full range of alphanumeric characters, such as camera name, through a virtual keyboard as shown in Figure 8 on page 21. The virtual keyboard automatically displays when entering values in an edit truVision DVR 31 User Manual…
-
Page 25: Exiting The Main Menu
4. When finished, click OK on the virtual keyboard to close the keyboard. Exiting the main menu Click Esc on the mouse toolbar (or right-click) or press Esc on the front panel or remote control to exit the main menu and return to live mode. truVision DVR 31 User Manual…
-
Page 26
Chapter 3: Operating instructions truVision DVR 31 User Manual… -
Page 27: Basic Operation
Archiving recorded files 36 Using Quick Archive in live mode 37 Using the Archive screen in live mode 37 Archiving a video segment in playback mode 39 Using the DVR player 39 Turning off the DVR 31 41 truVision DVR 31 User Manual…
-
Page 28: Turning On The Dvr 31
DVR 31 on-screen display presents information such as the camera title, the current operating mode, and the date and time information as shown in Figure 9 below. Figure 9: On screen display Camera title Mouse toolbar truVision DVR 31 User Manual…
-
Page 29: Right-Click Mouse Menu
• Search • Archive • • Playback • Escape • Hide Panel Viewing in full screen Press a numeric button to switch to the corresponding camera display. For example, press 2 to view camera 2. truVision DVR 31 User Manual…
-
Page 30: Spot Monitor
Controlling the spot monitor Press and hold a numeric button for two seconds to display the corresponding camera in full screen. Additionally, press and hold the SEQ button (on the front truVision DVR 31 User Manual…
-
Page 31: Logging On
2. Select a user in the Account field. 3. Use the mouse or the Down Arrow button to select the Password field. 4. Enter the corresponding password. 5. Click Confirm to enter the main menu. truVision DVR 31 User Manual…
-
Page 32: Logging Off
PTZ button on the front panel or remote control. The PTZ control interface displays as shown in Figure 13 on page 29. Note: You can only access the PTZ control interface while in live mode. truVision DVR 31 User Manual…
-
Page 33: Ptz Control Buttons
Table 10: Front panel PTZ control function Front panel key PTZ control 8-channel 16-channel Zooms out Zooms in Focuses near Focuses far Closes iris Opens iris Enter Enter Auto focus/iris Exits PTZ mode Enter Preset Dialog truVision DVR 31 User Manual…
-
Page 34: Playing Back Video
Press Esc to exit the PTZ control mode and return to live mode. Playing back video The DVR 31 allows you to play back recorded video. This section describes the features and methods in playing back video. There are several ways to play back recorded video: truVision DVR 31 User Manual…
-
Page 35: Instant Video Playback
Date and time • Events • Text (if a POS machine is connected) While in live or playback mode, click Search to display the Search menu as shown in Figure 14 below. Figure 14: Search menu truVision DVR 31 User Manual…
-
Page 36
Days highlighted in gray indicate that the days are within the start and end time of the database. Days not highlighted indicate that the days are beyond the start and end time of the database. 4. Select a start time using the timeline. truVision DVR 31 User Manual… -
Page 37
Date/Time. When searching for video based on POS data, you can narrow your search by specifying a date and time range. Camera. When searching for video based on POS data, you can narrow your search by specifying a camera. truVision DVR 31 User Manual… -
Page 38
4. Click POS Search Result to display your search results. 5. Click a search result to play back the resulting video. Note: Make sure the Transaction Overlay (POS) box in the Display screen is set to include playback. truVision DVR 31 User Manual… -
Page 39: Playback Controls
Play forward Plays video forward at a speed based on how many times you press the key. Press once to play video 1x, twice for 2x, etc. Speeds include: 1x, 2x, 4x, 8x, 16x, and 32x. truVision DVR 31 User Manual…
-
Page 40: Archiving Recorded Files
Archive screen. Use the Archive screen (shown in Figure 16 below) to specify archiving settings such as date range, events, and data type. Note: You can archive up to 8 GB with a USB drive that is formatted to FAT Figure 16: Archive screen truVision DVR 31 User Manual…
-
Page 41: Using Quick Archive In Live Mode
Using the Archive screen in live mode To archive recorded video using the Archive screen in live mode: 1. Insert the backup device. truVision DVR 31 User Manual…
-
Page 42
In addition, when specifying a time range to archive, selecting the original file format results in the exporting of video clips that include the specified time range, but may not be contained in a single file. truVision DVR 31 User Manual… -
Page 43: Archiving A Video Segment In Playback Mode
If your PC is running on Windows Vista or Windows 7, the DVR player may not automatically launch. If so, open the backup media by double-clicking the device drive letter, and then launching the DVR Player file located in the Player folder. truVision DVR 31 User Manual…
-
Page 44
Good Signature, then the video has not been altered. To play back a local file previously saved from the DVR, click Local Playback in the Playback screen, and then click Open to browse for the local file. truVision DVR 31 User Manual… -
Page 45: Turning Off The Dvr 31
To turn off or restart the unit: 1. Display the main menu. 2. Select System to display the System screen. 3. Select Shutdown. The Shutdown screen displays. 4. Select Restart to restart the unit or Shutdown to turn off the unit. truVision DVR 31 User Manual…
-
Page 47: Using The Web Browser
Using the mouse to zoom in or out 47 Live dual streaming 47 Bandwidth throttle management 48 Controlling a PTZ camera in the Web browser 48 Exporting Video Clips 49 To play the clip 50 truVision DVR 31 User Manual…
-
Page 48: Overview
Figure 18: Web browser interface Table 11: Web browser interface features and controls Item Name Description Display and audio settings Enable audio. Record live video. Specify viewer layout. Camera View video from the selected camera. truVision DVR 31 User Manual…
-
Page 49: Windows Vista And 7 Users
DVR player due to the increased security measure. To have complete functionality of the Web browser interface and the DVR player with Windows Vista and Windows 7, do the following: truVision DVR 31 User Manual…
-
Page 50: Browser Connections
Camera settings including motion detection, PTZ controls, video image, covert camera, and camera title • Recording settings including recording schedule and recording quality • Alarm settings including alert notifications, audio alerts, prealarm, and post- alarm seconds • Display options including resolution and sequencing truVision DVR 31 User Manual…
-
Page 51: Searching And Playing Recorded Video
Web browser interface and select the appropriate bandwidth setting to enable dual streaming. Predefined bandwidth settings (for the second stream) in the browser include: • 768 kbps • 576 kbps • 384 kbps • 192 kbps truVision DVR 31 User Manual…
-
Page 52: Bandwidth Throttle Management
The Web browser interface lets you control the PTZ functions of a camera. Cameras with PTZ capabilities are marked with a PTZ icon (as shown in Figure 20 on page 49). Click on a PTZ camera to display the PTZ controls. truVision DVR 31 User Manual…
-
Page 53: Exporting Video Clips
1. Establish the start and stop times of the video clip you wish to export, write them down. 2. Re-open the playback window by clicking on the “playback” button, this time choose “download”. truVision DVR 31 User Manual…
-
Page 54: To Play The Clip
4. Click “Open”, select the CD drive and the DVR Player folder, click OK, you will see your clip highlighted in the window. 5. Click playback, then OK in the next window. The clip begins to play, you can double click it to make it full screen. truVision DVR 31 User Manual…
-
Page 55: Chapter 6 Advanced Setup
Defining recording quality 64 Rec wizard 64 Expert modes 65 Alarm settings 66 Configuring remote alert 67 Enabling the alarm buzzer 68 Camera alarm settings 68 Prealarm and post alarm seconds 68 Network settings 69 Ethernet settings 69 truVision DVR 31 User Manual…
-
Page 56
E-mail settings 71 DDNS settings 72 UPnP 73 Display settings 73 Display format 74 Camera title display 74 Unit name display 74 Dwell time 74 Sequence order 74 Event display 75 POS transaction display 75 truVision DVR 31 User Manual… -
Page 57: Managing Users
User 4, enter the initial default password of 4321. Figure 21: Users screen Customizing a user Only the system administrator can customize a user. Customizing a user includes changing the user name, password, and access privileges on the User truVision DVR 31 User Manual…
-
Page 58
5. Enter a new user name and click OK to return to the User screen. User names are case-sensitive. 6. Click Mod in the Password box to display the virtual keyboard as shown in the figure below. truVision DVR 31 User Manual… -
Page 59: Enabling Password
Search and play back recorded video COVERT View and configure covert camera settings CAMERA PTZ CONTROL Display and use the PTZ controls of a camera SPOT MONITOR Access the spot monitor ARCHIVE Archive recorded video truVision DVR 31 User Manual…
-
Page 60
The Privileges screen displays a list of all privileges or operating functions for the DVR 31 and the current access level of each. 3. Select an access level for each of the privilege using the drop-down list. truVision DVR 31 User Manual… -
Page 61: Configuring Cameras
Current Camera box. To copy a camera’s configuration settings to another camera, click Copy Settings. Settings copied include motion, PTZ, and video adjustment settings. Copied settings do not include the camera title and covert camera. Figure 24: Cameras screen truVision DVR 31 User Manual…
-
Page 62: Motion Detection Alarm
Alternatively, you can select the entire area by right-clicking, and then clicking Select All. A grid covers the entire display screen. Click Deselect All to clear the screen from motion detection. 6. Select a sensitivity level in the Sensitivity box. truVision DVR 31 User Manual…
-
Page 63: Assigning Ptz Protocol
In order to get the best image quality when capturing video, you may need to adjust the video image settings, including brightness, contrast, saturation, and hue. Use the Adjust Video screen (shown in Figure 25 on page 60) to modify these settings. truVision DVR 31 User Manual…
-
Page 64: Covert Camera
(see Table 12 on page 55). Instead there will be a gray screen displayed until a user with the proper privileges has logged in. truVision DVR 31 User Manual…
-
Page 65: Assigning A Camera Name
DVR 31 records video. The following options can be configured: • Recording schedule • Video compression • Recording quality Note: If video loss is detected on a camera, the unit will stop recording from that camera. truVision DVR 31 User Manual…
-
Page 66: Defining A Recording Schedule
Chapter 6: Advanced setup Figure 26: Schedule screen Defining a recording schedule The Scheduling screen (shown in Figure 27 on page 63) lets you define the elements of a schedule, such as the daytime, nighttime, and weekend ranges. truVision DVR 31 User Manual…
-
Page 67: Configuring Recording Compression
Weekend schedule takes precedence if overlapping on a weekday. Configuring recording compression To configure recording compression: 1. Click Schedule on the main menu to display the Schedule screen. 2. Click Compression Setup to display the Compression screen. truVision DVR 31 User Manual…
-
Page 68: Defining Recording Quality
Alternatively, you can select the recording resolution and quality to determine the recording schedule. Note: The Record At Weekend command is unavailable if the Weekend Schedule box in the Schedule screen is set to No. truVision DVR 31 User Manual…
-
Page 69: Expert Modes
You can set the resolution and recording quality in normal and event conditions based on the recording schedule. truVision DVR 31 User Manual…
-
Page 70: Alarm Settings
Use the Event FPS and Event Quality boxes to select the recording resolution and quality under event conditions. Alarm settings Use the Alarms screen (shown in Figure 30 on page 67) to define how the DVR 31 handles alarms. Configurable settings include: truVision DVR 31 User Manual…
-
Page 71: Configuring Remote Alert
DVR is still active. To configure remote alert: 1. Click Alarms on the main menu to display the Alarms screen. 2. Click Remote Alert Setup to display the Remote Alert screen. 3. Select an alert set. truVision DVR 31 User Manual…
-
Page 72: Enabling The Alarm Buzzer
In the Post-Alarm box, enter the post alarm seconds. The post alarm option defines the number of seconds recorded after a motion or external alarm is triggered and includes the alarm data. truVision DVR 31 User Manual…
-
Page 73: Network Settings
Figure 31: Network screen Ethernet settings Use the Ethernet Setting screen (shown in Figure 32 on page 70) to configure standard Ethernet settings. Click Ethernet Setting Setup in the Network screen to access the Ethernet Setting screen. truVision DVR 31 User Manual…
-
Page 74
7. Enter the gateway IP address in the Gateway edit box. 8. Enter the DNS IP address in the DNS edit box. 9. Enter the secondary DNS IP address box in the DNS2 edit box, if required. truVision DVR 31 User Manual… -
Page 75: Advanced Ip Settings
Figure 33: Email Setting screen To define e-mail settings: 1. Click Network on the main menu to display the Network screen. 2. Click Email Setting Setup to display the Email Setting screen. truVision DVR 31 User Manual…
-
Page 76: Ddns Settings
4. Enter the host name. If you leave this box blank, the system generates a host name for you. 5. Enter the port number. 6. In the Submit/Update box, select Yes to submit the DDNS information through the network. truVision DVR 31 User Manual…
-
Page 77: Upnp
• Unit name display • VGA resolution • Dwell time • Sequence order • Event display • POS transaction display To access the Display screen, click Display on the main menu. Figure 34: Display screen truVision DVR 31 User Manual…
-
Page 78: Display Format
To configure the order of cameras: 1. Click Display on the main menu to open the Display screen. 2. Click Main Sequence Order to display the Main Sequence Order screen. truVision DVR 31 User Manual…
-
Page 79: Event Display
Event display Select On in the Event Indicator box to display any alarm events on-screen. POS transaction display Select an option in the Transaction Overlay box to configure the format of POS transactions displayed on-screen. truVision DVR 31 User Manual…
-
Page 80
Chapter 6: Advanced setup truVision DVR 31 User Manual… -
Page 81: Chapter 7 System Settings
System date and time 79 Daylight Saving Time 79 Audio and remote 80 RS-485 settings 80 RS-232 settings 81 Hard drive settings 81 Importing and exporting configuration settings 82 System log 82 Upgrading the firmware 85 truVision DVR 31 User Manual…
-
Page 82: Overview
Hard drive settings and health status • Storing and uploading configuration settings • System logs • Shutting down the device Click System on the main menu to access the System screen. Figure 35: System screen truVision DVR 31 User Manual…
-
Page 83: System Date And Time
Daylight Saving Time Use the Daylight Saving Time screen (shown in Figure 36 on page 80) to enable and configure Daylight Saving Time. This screen lets you select when Daylight Saving Time begins and ends. truVision DVR 31 User Manual…
-
Page 84: Audio And Remote
Use the RS-485 Setting screen to define the settings for the RS-485 ports. Settings defined in this screen must match the PTZ settings of the camera connected to the RS-485 port. To access the RS-485 Setting screen, click RS- 485 Setting on the System screen. truVision DVR 31 User Manual…
-
Page 85: Settings
[1] Total Storage Displays the total hard drive space Free Capacity Displays the amount of available space in the hard drive [1] The Repair option under Disk Drives fixes file system errors. truVision DVR 31 User Manual…
-
Page 86: Importing And Exporting Configuration Settings
The System Log screen displays your device’s information that is generated each time your device boots up. A system log helps you diagnose your system in case of problems. Click Archive to save the system log into a backup device. truVision DVR 31 User Manual…
-
Page 87
HDD temperature back to normal from overheat state PurgeDB Normal Purge normal PurgeDB Event Purge Event DayStime Change day schedule start time DayEtime Change day schedule end time NigStime Change night schedule start time NigEtime Change night schedule end time truVision DVR 31 User Manual… -
Page 88
Scandisk was performed FAILSCAN INTDEVXX [1] Scandisk failed DESELFMT INTDEVXX [1] Drive formatted PASSSCAN INTDEVXX [1] Scandisk fixed file system errors [1] The XX represents the SATA port number that the Hard Drive is connected to. truVision DVR 31 User Manual… -
Page 89: Upgrading The Firmware
Click Upgrade Firmware to upgrade the firmware through a USB flash drive. Click Firmware Download to connect the device to a network and download the upgrade file. 4. Click Upgrade at the prompt to reboot the DVR 31 and begin the upgrade process. truVision DVR 31 User Manual…
-
Page 91: Appendix A Specifications And Troubleshooting
Appendix A Specifications and Troubleshooting Summary This appendix provides specifications and troubleshooting information for the DVR 31. Content Product specifications 88 HDMI Compatibility List 89 HDMI Incompatibility List 89 Battery removal 90 Troubleshooting 90 Scandisk 90 truVision DVR 31 User Manual…
-
Page 92: Product Specifications
Relative humidity 10% to 90% Dimensions (W x H x D) 17.3 x 3.54 x 16.3 in (440 x 90 x 413 mm) Weight Approx. 15.42 lb. (7 kg) with 1 HDD and DVD-RW drive truVision DVR 31 User Manual…
-
Page 93: Hdmi Compatibility List
* Other monitors may have been added to the list since the release date of the manual. Call Technical support for the current listing. HDMI Incompatibility List Manufacturer Model Hannspree Monitor HF237 Toshiba 19AV600UZ 19AV600UZ ViewSonic VT2230 truVision DVR 31 User Manual…
-
Page 94: Battery Removal
(confirming ext3 file system) and will display if the current hard drive has allocated bad sectors. If the Offline Uncorrectable count starts increasing, this may be a sign that the physical hard drive is failing. truVision DVR 31 User Manual…
-
Page 95: Appendix B Factory Defaults
Appendix B Factory defaults Summary This appendix provides the DVR 31’S factory defaults. Content Menu defaults 92 Network defaults 92 truVision DVR 31 User Manual…
-
Page 96: Menu Defaults
Record quality/FPS Normal Quality Menu timeout 5 minutes Video standard NTSC Disk overwrite mode Overwrite Brightness Contrast Saturation Daylight Saving Time Network defaults Function Setting IP address 192.168.1.82 Subnet mask 255.255.255.0 Gateway address 192.168.1.1 Http port truVision DVR 31 User Manual…
-
Page 97: Appendix C Warranty And Support
Appendix C Warranty and support Summary This appendix provides information on warranty and support for the DVR 31. Content Warranty information 94 Contacting support 94 truVision DVR 31 User Manual…
-
Page 98: Warranty Information
Contact technical support if you encounter any difficulties during this installation. Please make sure you have the requested diagnostic or log files ready before you contact us by phone or go to www.interlogix.com/customer-support. Technical Support Europe, Middle East and Africa Select Contact Us at www.utcfssecurityproducts.eu…
-
Page 99: Appendix D Ktd-405 Keyboard Mapping
Appendix D KTD-405 keyboard mapping Summary This appendix provides information on how to operate the DVR 31 using the KTD-405 keyboard. Content DVR 31 to KTD-405 keyboard mapping 96 truVision DVR 31 User Manual…
-
Page 100: Dvr 31 To Ktd-405 Keyboard Mapping
Press Fast Forward ( ) Frame reverse While in playback, pause video, hold Esc, and then press the Left Arrow Frame advance While in playback, pause video, hold Esc, and then press the Right Arrow truVision DVR 31 User Manual…
-
Page 101: Index
30 sequence order, 74 exiting playback mode, 36 unit name display, 74 playback controls, 35 searching for recorded video by events, 33 searching for video by POS text, 33 searching video for playback, 31 truVision DVR 31 User Manual…
-
Page 102
TVR 30, 41 upgrading the firmware, 85 users customizing a user, 53 defining access privileges, 55 enabling password, 55 managing users, 53 virtual keyboard using the virtual keyboard, 20 web browser using the web browser, 44 truVision DVR 31 User Manual…
Руководство пользователя
Спасибо за Ваш выбор и приобретение мини диктофона DVR-37
Savetek. Мы надеемся, что работа с диктофоном принесет вам удо-
вольствие.
Мини диктофон DVR-37 Savetek предназначен для записи/воспро-
изведения звуковой информации, для воспроизведения музыки и
использования в качестве носителя информации. Запись производится
во встроенную флеш-память. Объем памяти, соответствующий приоб-
ретенной Вами модели, указан на упаковке.
Перед началом работы с диктофоном внимательно ознакомьтесь с
данным руководством по эксплуатации, которое поможет вам изучить
возможности диктофона.
Если у вас возникнут вопросы по использованию диктофона, обращай-
тесь в службу технической поддержки продавца.
Пожалуйста, проверьте, все ли комплектующие на месте:
1. Диктофон DVR-37 Savetek
2. USB коннектор
3. USB кабель
3. Наушники
4. Руководство пользователя
Элементы управления диктофоном
1 — кнопка уменьшения громкости / перехода к предыдущему файлу.
2 — LED индикатор состояния.
3 — кнопка увеличения громкости / перехода к следующему файлу.
4 — переключатель режимов REC/PLAY/OFF (Записи/Воспроизведения/
Выключения питания).
5 — разъем для подключения наушников/USB коннектора или USB кабе-
ля для зарядки/для подключения к ПК.
Цифровой мини диктофон DVR-37 Savetek
с функциями MP3 плеера и флеш-накопителя
Индикация состояния
Для индикации режима работы диктофона, состояние заряда
аккумулятора и наличия свободного места в памяти служит LED
индикатор (2).
1. При включении режима записи LED индикатор несколько
раз мигает красным цветом затем отключается. Далее, он все
время находится в выключенном состоянии.
2. При завершении записи (переводе переключателя 4 из по-
ложения REC в любое другое положение) в течение нескольких
секунд происходит сохранение информации в файл, в это вре-
мя LED индикатор горит красным цветом.
3. LED индикатор не светится — диктофон находится в выклю-
ченном состоянии или в режиме записи. Для проверки, что дик-
тофон находится в режиме записи необходимо нажать и удер-
живать кнопку «+» (3) или «-» (1), LED индикатор должен миг-
нуть красным цветом один раз.
4. LED индикатор непрерывно мигает синим цветом — диктофон
находится в режиме воспроизведения
5. LED индикатор мигает между синим и красным — в памяти
диктофона недостаточно места.
6. LED индикатор непрерывно мигает красным цветом — разря-
дился аккумулятор
7. LED индикатор непрерывно светится синим цветом — аккуму-
лятор полностью заряжен
Зарядка диктофона
Подключите диктофон через USB коннектор или USB кабель к
USB порту компьютера. При подключении LED индикатор (2)
сначала загорится красным, затем синим цветом. В процессе за-
рядки индикатор мигает синим цветом. При полном заряде ак-
кумулятора индикатор будет гореть непрерывно синим цветом.
В процессе эксплуатации диктофона при низком заряде аккуму-
лятора LED индикатор непрерывно мигает красным цветом.
Включение / выключение диктофона
Для включение диктофона необходимо перевести переклю-
чатель (4) в положение PLAY или REC. При включении питания
производится инициализация диктофона и LED индикатор не-
сколько секунд светится непрерывным красным сигналом. Для
выключения диктофона необходимо перевести переключатель
(4) в положение OFF.
Запись
Для инициализации записи переведите переключатель (4) в по-
ложение REC. При этом LED индикатор (2) несколько раз мигнет
и выключится. Запись начнется после выключения LED индика-
тора. Для остановки записи переведите переключатель (4) в по-
ложение OFF, информация сохранится в файл в папку RECORD
в памяти диктофона. Во время сохранения информации в файл
LED индикатор (2) будет непрерывно гореть красным цветом,
после того как он погаснет можно продолжить пользоваться
диктофоном.
Функция активации записи голосом
Переведите переключатель (4) в положение REC, затем нажми-
те и удерживайте кнопку «-» (1) до тех пор, пока LED индикатор
(2) не погаснет, отпустите кнопку «-», диктофон перешел в
режим записи активации голосом. Примечание: по умолчани-
юиспользуется обычный режим записи, для переключения в
режим активации записи голосом используйте данные дей-
ствия каждый раз.
Запись во время зарядки аккумулятора
Подключите диктофон к компьютеру или зарядному устройству.
Переведите переключатель (4) в положение REC и коротким
нажатием нажмите на кнопку «+» (3) или «-» (1), диктофон
перейдет в режим записи.
Воспроизведение музыки и записей
Для перехода в режим воспроизведения переведите переклю-
чатель (4) в положени PLAY. Воспроизведение начнется автома-
тически, при этом LED индикатор (2) будет непрерывно мигать
синим цветом. По умолчанию диктофон воспроизводит музы-
кальные файлы (файлы, которые хранятся вне папки RECORD).
Для переключения к воспроизведению файлов записи нажмите
1
2
3
4
5