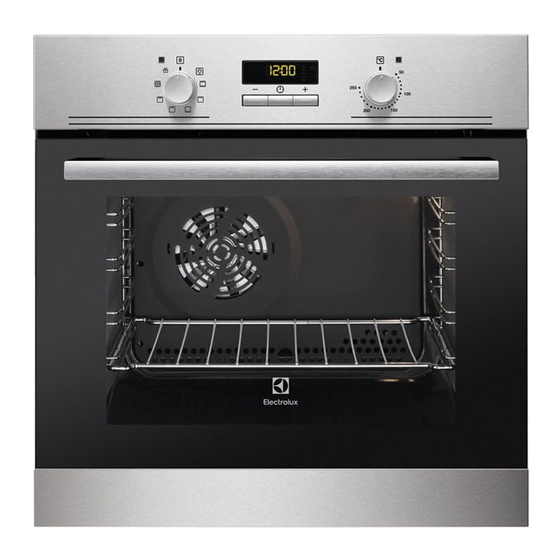
Требуется руководство для вашей Electrolux OPEA4300X духовой шкаф? Ниже вы можете просмотреть и загрузить бесплатно руководство в формате PDF. Кроме того, приведены часто задаваемые вопросы, рейтинг изделия и отзывы пользователей, что позволит оптимально использовать ваше изделие. Если это не то руководство, которое вы искали, – свяжитесь с нами.
Ваше устройство неисправно, и в руководстве отсутствует решение? Перейдите в Repair Café для получения бесплатных ремонтных услуг.
Руководство

Рейтинг
Сообщите нам, что вы думаете о Electrolux OPEA4300X духовой шкаф, оставив оценку продукта. Хотите поделиться вашими впечатлениями от данного изделия или задать вопрос? Вы можете оставить комментарий в нижней части страницы.
Довольны ли вы данным изделием Electrolux?
Да Нет
Будьте первым, кто оценит это изделие
0 голоса
Часто задаваемые вопросы
Наша служба поддержки выполняет поиск полезной информации по изделиям и отвечает на часто задаваемые вопросы. Если вы заметили неточность в наших часто задаваемых вопросах, сообщите нам об этом с помощью нашей контактной формы.
Духовка недостаточно нагревается. Что мне делать? Проверенный
За нагревание духовки до заданной температуры отвечает термостат. Скорее всего, термостат неисправен. Его следует заменить. В случае сомнений обратитесь к производителю.
Это было полезно (2312)
Что такое пиролиз? Проверенный
Некоторые духовки оснащены функцией пиролиза. Это система очистки, которая сжигает грязь и жир в духовке за счет очень высоких температур. После пиролиза вся грязь превратится в золу, и ее легко удалить. Если духовка имеет функцию пиролиза, рекомендуется использовать ее 3-4 раза в год, чтобы духовка оставалась чистой.
Это было полезно (2140)
Я хочу знать возраст моего прибора Electrolux. Как мне это сделать? Проверенный
Вы можете определить возраст вашего продукта по серийному номеру. Это можно найти на вашем устройстве. Первый символ серийного номера указывает год (например: 1 = 2001), а два символа после этого указывают неделю производства (например: 35 = 35 неделя этого года). Таким образом, серийный номер 13500016 указывает на то, что машина начиная с 35 недели 2001 года.
Это было полезно (733)
Могу ли я приготовить несколько блюд одновременно, используя несколько противней для гриля? Проверенный
Технически это возможно. Однако это зависит от типа продуктов, нужно ли вам регулировать время приготовления или менять противни на полпути во время приготовления.
Это было полезно (513)
Когда я использую духовку, продукты часто падают на дно, вызывая дым. Как я могу предотвратить это? Проверенный
Многие духовки поставляются с решеткой и противнем. Когда пища готовится на решетке, противень можно ставить на дно, чтобы остатки пищи не пригорали и не задымились.
Это было полезно (512)
Почему в духовке при разогреве накапливается дым? Проверенный
Вероятно, в духовке остались остатки пищи от предыдущего использования. При нагревании особенно жирные остатки пищи могут выделять дым. Тщательно очистите духовку.
Это было полезно (511)


Данная инструкция на русском языке предназначена для духового шкафа
Electrolux OPEA4300X, описывает принцип работы и основные моменты эксплуатации устройства.
Производитель настойчиво рекомендует перед включением духового шкафа
внимательно изучить настоящую инструкцию.
Инструкция для духового шкафа
представлена в формате PDF. Все современные браузеры уже поддерживают данный формат и сложностей с открытием файла возникнуть не должно.
Но если открыть инструкцию все же не удается, то необходимо установить на компьютер программу для чтения PDF файлов, например, Acrobat Reader. Если у вас возникли сложности с открытием инструкции на смартфоне под управлением Android, нужно установить, например, Adobe Acrobat Reader.
Комментарии (0)
Комментарии про другие Духовые шкафы
Другие Духовые шкафы Electrolux
- Manuals
- Brands
- Electrolux Manuals
- Oven
- OPEA4300X
- User manual
-
Contents
-
Table of Contents
-
Troubleshooting
-
Bookmarks
Available languages
-
EN
-
FR
Quick Links
OPEA4300X
EN
Oven
FR
Four
User Manual
Notice d’utilisation
2
27
Related Manuals for Electrolux OPEA4300X
Summary of Contents for Electrolux OPEA4300X
-
Page 1
OPEA4300X Oven User Manual Four Notice d’utilisation… -
Page 2: Table Of Contents
15. ENERGY EFFICIENCY……………… 25 WE’RE THINKING OF YOU Thank you for purchasing an Electrolux appliance. You’ve chosen a product that brings with it decades of professional experience and innovation. Ingenious and stylish, it has been designed with you in mind. So whenever you use it, you can be safe in the knowledge that you’ll get great results every time.
-
Page 3: Safety Information
ENGLISH SAFETY INFORMATION Before the installation and use of the appliance, carefully read the supplied instructions. The manufacturer is not responsible for any injuries or damages that are the result of incorrect installation or usage. Always keep the instructions in a safe and accessible location for future reference.
-
Page 4: Safety Instructions
Always use oven gloves to remove or put in • accessories or ovenware. Before carrying out any maintenance, disconnect the • appliance from the power supply. Ensure that the appliance is switched off before • replacing the lamp to avoid the possibility of electric shock.
-
Page 5
ENGLISH be replaced, this must be carried out • Do not use the appliance as a work by our Authorised Service Centre. surface or as a storage surface. • Do not let mains cables touch or • Open the appliance door carefully. come near the appliance door, The use of ingredients with alcohol especially when the door is hot. -
Page 6
2.4 Care and cleaning • The type of light bulb or halogen lamp used for this appliance is for WARNING! household appliances only. Do not Risk of injury, fire, or use it for house lighting. damage to the appliance. -
Page 7: Product Description
ENGLISH 3. PRODUCT DESCRIPTION 3.1 General overview Control panel Power lamp / symbol Knob for the heating functions Display Control knob (for the temperature) Temperature indicator / symbol Air vents for the cooling fan Heating element Lamp Shelf support, removable Shelf positions 3.2 Accessories •…
-
Page 8: Before First Use
5. BEFORE FIRST USE 1. Set the function .Set the maximum WARNING! temperature. Refer to Safety chapters. 2. Let the oven operate for 1 hour. To set the Time of day refer 3. Set the function . Set the to «Clock functions»…
-
Page 9: Clock Functions
ENGLISH Oven func‐ Application Oven func‐ Application tion tion This function is de‐ To defrost food (vegeta‐ signed to save energy bles and fruit). The de‐ during cooking. For the frosting time depends Moist Fan Defrost cooking instructions re‐ on the amount and size Baking fer to «Hints and tips»…
-
Page 10
7.2 Setting the time. Changing 7.5 Setting the TIME DELAY the time 1. Set an oven function and You must set the time before you temperature. operate the oven. 2. Press again and again until flashes when you connect the starts to flash. -
Page 11: Using The Accessories
ENGLISH 8. USING THE ACCESSORIES Wire shelf and deep pan together: WARNING! Push the deep pan between the guide Refer to Safety chapters. bars of the shelf support and the wire shelf on the guide bars above. 8.1 Inserting the accessories Wire shelf: Push the shelf between the guide bars of the shelf support and make sure that the…
-
Page 12: Hints And Tips
10. HINTS AND TIPS Baking cakes WARNING! Do not open the oven door before 3/4 of Refer to Safety chapters. the set cooking time is up. If you use two baking trays at the same The temperature and baking…
-
Page 13
ENGLISH Food Top / Bottom Heat True Fan Cooking Time Com‐ (min) ments Tempera‐ Shelf po‐ Tempera‐ Shelf po‐ ture (°C) sition ture (°C) sition Apple 2 (1 and 100 — 120 In two 20 cake (Ap‐ cm cake ple pie) moulds on a wire shelf… -
Page 14
Food Top / Bottom Heat True Fan Cooking Time Com‐ (min) ments Tempera‐ Shelf po‐ Tempera‐ Shelf po‐ ture (°C) sition ture (°C) sition Victoria 1 or 2 2 (left and 40 — 55 Left + right sandwich right) -
Page 15
ENGLISH Food Top / Bottom Heat True Fan Cooking Time Com‐ (min) ments Tempera‐ Shelf po‐ Tempera‐ Shelf po‐ ture (°C) sition ture (°C) sition Yorkshire 20 — 30 6 pudding mould pudding 1) Preheat the oven for 10 minutes. Meat Food Top / Bottom Heat… -
Page 16
Food Top / Bottom Heat True Fan Cooking Time Com‐ (min) ments Tempera‐ Shelf po‐ Tempera‐ Shelf po‐ ture (°C) sition ture (°C) sition Chicken 70 — 85 Whole on a deep Turkey 210 — 240 Whole on a deep… -
Page 17
ENGLISH Food Quantity Time (min) Pieces Quantity 1st side 2nd side (kg) Beef steaks 10 — 12 6 — 8 Sausages 12 — 15 10 — 12 Pork chops 12 — 16 12 — 14 Chicken (cut in 2) 30 — 35 25 — 30 Kebabs 10 — 15… -
Page 18
Food Accessories Temperature Shelf po‐ Time (min) (°C) sition Sweet rolls, 12 baking tray or dripping 35 — 40 pieces Rolls, 9 pieces baking tray or dripping 35 — 40 Pizza, frozen, wire shelf 35 — 40 0.35 kg… -
Page 19
ENGLISH Food Accessories Temperature Shelf po‐ Time (min) (°C) sition Poached vege‐ baking tray or dripping 35 — 40 tables, 0.4 kg Vegetarian pizza pan on wire shelf 30 — 45 omelette Vegetables, baking tray or dripping 35 — 40 mediterrean 0.7 kg 10.6 Defrost… -
Page 20: Care And Cleaning
Food Function Acces‐ Shelf Tem‐ Time (min) Comments sories posi‐ pera‐ tion ture (°C) Apple pie Conven‐ Wire 80 — 120 Use 2 tins (20 tional shelf cm diameter), di‐ Cooking agonally shifted. Sponge Conven‐ Wire 35 — 45…
-
Page 21
ENGLISH 11.2 Stainless steel or 11.5 Catalytic cleaning aluminium ovens The cavity with a catalytic coating is self- cleaning. It absorbs fat. Clean the oven door with a damp cloth or sponge only. Dry it with a soft cloth. Before you turn on the catalytic cleaning: Do not use steel wool, acids or abrasive •… -
Page 22
5. Release the locking system to remove the internal glass panel. 2. Lift and turn the levers fully on both hinges. 6. Turn the two fasteners by 90° and remove them from their seats. 90° 3. Close the oven door halfway to the first opening position. -
Page 23: Troubleshooting
ENGLISH When the cleaning is completed, install 1. Turn off the oven. the glass panel and the oven door. Wait until the oven is cooled down. 2. Disconnect the oven from the mains. When installed correctly the door trim 3. Put a cloth on the bottom of the clicks.
-
Page 24: Installation
12.2 Service data plate is on the front frame of the oven cavity. Do not remove the rating plate If you cannot find a solution to the from the oven cavity. problem yourself, contact your dealer or an Authorised Service Centre.
-
Page 25: Technical Data
ENGLISH 13.2 Securing the appliance to 13.4 Cable the cabinet Cable types applicable for installation or replacement: H07 RN-F, H05 RN-F, H05 RRF, H05 VV-F, H05 V2V2-F (T90), H05 BB-F For the section of the cable refer to the total power on the rating plate. You can also refer to the table: Total power (W) Section of the ca‐…
-
Page 26
16. ENVIRONMENTAL CONCERNS appliances marked with the symbol Recycle materials with the symbol with the household waste. Return the Put the packaging in relevant containers product to your local recycling facility or to recycle it. Help protect the contact your municipal office. -
Page 27
15. RENDEMENT ÉNERGÉTIQUE…………..53 NOUS PENSONS À VOUS Merci d’avoir choisi ce produit Electrolux. Avec ce produit, vous bénéficiez de dizaines d’années d’expérience professionnelle et d’innovation. Ingénieux et élégant, il a été conçu sur mesure pour vous. Grâce à cet appareil, vous savez que chaque utilisation vous apportera satisfaction. -
Page 28: Consignes De Sécurité
CONSIGNES DE SÉCURITÉ Avant d’installer et d’utiliser cet appareil, lisez soigneusement les instructions fournies. Le fabricant ne pourra être tenu pour responsable des blessures et dégâts résultant d’une mauvaise installation ou utilisation. Conservez toujours les instructions dans un lieu sûr et accessible pour vous y référer ultérieurement.
-
Page 29: Consignes De Sécurité
FRANÇAIS 1.2 Sécurité générale L’appareil doit être installé et le câble remplacé • uniquement par un professionnel qualifié . AVERTISSEMENT : L’appareil et ses parties • accessibles deviennent chauds pendant son fonctionnement. Veillez à ne pas toucher les éléments chauffants. Utilisez toujours des gants de cuisine pour retirer ou •…
-
Page 30
• Installez l’appareil dans un lieu sûr et • L’installation électrique doit être adapté répondant aux exigences équipée d’un dispositif d’isolement à d’installation. coupure omnipolaire. Le dispositif • Cet appareil est équipé d’un système d’isolement doit présenter une de refroidissement électrique. Il doit distance d’ouverture des contacts être utilisé… -
Page 31
FRANÇAIS 2.4 Entretien et nettoyage AVERTISSEMENT! Risque d’endommagement AVERTISSEMENT! de l’appareil. Risque de blessure, d’incendie ou de dommages • Pour éviter tout endommagement ou matériels sur l’appareil. décoloration de l’émail : – ne posez pas de plats allant au • Avant toute opération d’entretien, four ni aucun autre objet éteignez l’appareil et débranchez la directement sur le fond de… -
Page 32: Description De L’appareil
2.6 Maintenance • Débranchez l’appareil de l’alimentation électrique. • Pour réparer l’appareil, contactez un • Coupez le câble d’alimentation au ras service après-vente agréé. de l’appareil et mettez-le au rebut. • Utilisez exclusivement des pièces • Retirez le dispositif de verrouillage du d’origine.
-
Page 33: Avant La Première Utilisation
FRANÇAIS Touche sensitive Fonction Description PLUS Pour régler l’heure. 4.2 Affichage A. Fonctions de l’horloge B. Minuteur C. Fonction de l’horloge 5. AVANT LA PREMIÈRE UTILISATION 1. Sélectionnez la fonction .Réglez la AVERTISSEMENT! température maximale. Reportez-vous aux chapitres 2. Laissez le four en fonctionnement concernant la sécurité.
-
Page 34
L’éclairage s’allume lorsque l’appareil est en marche. Fonction du Utilisation 3. Pour éteindre le four, tournez la four manette des modes de cuisson sur la Cette fonction est con‐ position Arrêt. çue pour économiser de 6.2 Modes de cuisson l’énergie en cours de… -
Page 35: Fonctions De L’horloge
FRANÇAIS Fonction du Utilisation Fonction du Utilisation four four Pour rôtir de grosses Pour cuire et rôtir des pièces de viande ou de aliments sur un seul ni‐ la volaille sur un seul ni‐ veau. Turbo Gril Convection veau. Également pour naturelle gratiner et faire dorer.
-
Page 36: Utilisation Des Accessoires
7.4 Réglage de la FIN réglée, et s’arrête à l’heure de FIN choisie. Lorsque la durée définie s’est 1. Sélectionnez une fonction et la écoulée, un signal sonore retentit. température du four. 7. L’appareil s’éteint automatiquement. Appuyez sur n’importe quelle touche 2.
-
Page 37: Fonctions Supplémentaires
FRANÇAIS Plat à rôtir : Poussez le plat à rôtir entre les rails du support de grille. Les petites indentations sur le dessus apportent plus de sécurité. Les indentations Grille métallique et plat à rôtir ensemble : sont également des Poussez le plat à…
-
Page 38
énergétique sont donc Pour éviter qu’une trop grande quantité réduits. de fumée ne se forme dans le four, ajoutez de l’eau dans le plat à rôtir. Pour Cuisson de gâteaux éviter que la fumée ne se condense, N’ouvrez la porte du four qu’aux 3/4 du ajoutez à… -
Page 39
FRANÇAIS Plat Voûte Chaleur Tournante Durée Remar‐ (min) ques Tempéra‐ Positions Tempéra‐ Positions ture (°C) des gril‐ ture (°C) des gril‐ Cake aux 60 — 70 Dans un fruits moule à gâteau de 26 cm Génoise/ 35 — 45 Dans un Gâteau moule à… -
Page 40
Plat Voûte Chaleur Tournante Durée Remar‐ (min) ques Tempéra‐ Positions Tempéra‐ Positions ture (°C) des gril‐ ture (°C) des gril‐ Gâteau à 1 ou 2 2 (gauche 40 — 55 Gauche + étages et droit) droit dans un moule à… -
Page 41
FRANÇAIS Plat Voûte Chaleur Tournante Durée Remar‐ (min) ques Tempéra‐ Positions Tempéra‐ Positions ture (°C) des gril‐ ture (°C) des gril‐ Quiches 40 — 50 Dans un moule Lasagnes 25 — 40 Dans un moule Cannelloni 200 25 — 40 Dans un moule «… -
Page 42
Plat Voûte Chaleur Tournante Durée Remar‐ (min) ques Tempéra‐ Positions Tempéra‐ Positions ture (°C) des gril‐ ture (°C) des gril‐ Rôti de 51 — 55 Sur la gril‐ bœuf, à le métalli‐ point que et dans un plat à rôtir Rôti de… -
Page 43
FRANÇAIS Poisson Plat Voûte Chaleur Tournante Durée Remar‐ (min) ques Tempéra‐ Positions Tempéra‐ Positions ture (°C) des gril‐ ture (°C) des gril‐ Truite/ 2 (1 et 3) 40 — 55 3 — 4 pois‐ daurade sons Thon/ 2 (1 et 3) 35 — 60 4 — 6 filets saumon… -
Page 44
Plat Quantité Durée (min) Morceaux (kg) 1re face 2e face Poulet (coupé 25 — 30 20 — 30 en deux) Cuisses de 15 — 20 15 — 18 poulet Caille 25 — 30 20 — 25 Gratin de légu‐… -
Page 45
FRANÇAIS Plat Accessoires Température Positions Durée (min) (°C) des grilles Poisson poché, Plateau de cuisson ou 35 — 45 0,3 kg plat à rôtir Poisson entier Plateau de cuisson ou 35 — 45 (0,2 kg) plat à rôtir Filets de pois‐ plaque à… -
Page 46
Plat Quantité Durée de dé‐ Décongélation Remarques (kg) congélation complémentai‐ (min) re (min) Viande 100 — 140 20 — 30 Retournez à la moitié du temps. 90 — 120 Truite 0.15 25 — 35 10 — 15 Fraises 30 — 40… -
Page 47: Entretien Et Nettoyage
FRANÇAIS Plat Fonction Acces‐ Posi‐ Tem‐ Durée (min) Remarques soires tions pératu‐ re (°C) gril‐ Toasts Gril Grille max. 2 à 4 minutes Préchauffez le 4 — (6 piè‐ métalli‐ sur la premiè‐ four pendant ces) re face ; 2 à 3 minutes.
-
Page 48
11.5 Nettoyage catalytique N’utilisez jamais de produits abrasifs ou acides ni d’éponges métalliques car ils La cavité avec revêtement catalytique peuvent endommager la surface du four. est autonettoyante. Elle absorbe les Nettoyez le bandeau de commande du graisses four en observant ces mêmes recommandations. -
Page 49
FRANÇAIS 5. Désengagez le système de verrouillage pour retirer le panneau de verre intérieur. 2. Soulevez et tournez entièrement les leviers des deux charnières. 6. Faites pivoter les deux fixations de 90° et retirez-les de leurs logements. 90° 3. Fermez la porte du four à la première position d’ouverture (mi-parcours). -
Page 50: Cas D’anomalie De Fonctionnement
Les rails télescopiques ne 1. Éteignez le four. passent pas au lave-vaisselle. Attendez que le four ait refroidi. Une fois le nettoyage terminé, remettez 2. Débranchez le four de l’alimentation le panneau de verre et la porte du four secteur.
-
Page 51: Installation
FRANÇAIS Problème Cause probable Solution De la vapeur et de la con‐ Le plat est resté trop long‐ Ne laissez pas les plats densation se forment sur temps dans le four. dans le four pendant plus les aliments et dans la ca‐ de 15 à…
-
Page 52: Caractéristiques Techniques
550 min. 560 13.2 Fixation de l’appareil au 13.4 Câble meuble Types de câbles compatibles pour l’installation ou le remplacement : H07 RN-F, H05 RN-F, H05 RRF, H05 VV-F, H05 V2V2-F (T90), H05 BB-F Pour la section du câble, consultez la puissance totale sur la plaque signalétique.
-
Page 53: Rendement Énergétique
FRANÇAIS 15. RENDEMENT ÉNERGÉTIQUE 15.1 Économie d’énergie four au minimum 3 à 10 minutes avant la fin de la cuisson, en fonction de la durée Ce four est doté de de la cuisson. La chaleur résiduelle à caractéristiques qui vous l’intérieur du four poursuivra la cuisson.
-
Page 54
www.electrolux.com… -
Page 55
FRANÇAIS… -
Page 56
www.electrolux.com/shop…
Бесплатная доставка
По Москве и большинству городов России
Подробнее
Бесплатное подключение
Профессионально установим технику на готовые коммуникации
Подробнее
Бесплатное хранение
До 365 дней — купите сегодня, а получите когда удобно
Подробнее
Простой возврат и обмен
Что-то не так? Обменяем товар или вернем деньги
Подробнее
Не можете найти ответ на свой вопрос в руководстве? Вы можете найти ответ на свой вопрос ниже, в разделе часто задаваемых вопросов о Electrolux OPEA4300X.
Правильно ли, что вентилятор продолжает работать, когда духовка уже выключена?
Что происходит при использовании функции «гриль»?
Обязательно ли предварительно разогревать духовку Electrolux?
Как очистить духовку от пригоревшего жира?
Какой способ лучше всего подходит для очистки решетки в духовке?
Инструкция Electrolux OPEA4300X доступно в русский?
Не нашли свой вопрос? Задайте свой вопрос здесь