-
Инструкции по эксплуатации
3

Ikea РАФФИНЕРЭД инструкция по эксплуатации
(92 страницы)
- Языки:Русский
-
Тип:
PDF -
Размер:
9.47 MB -
Описание:
Комбинир микроволновая печь (СВЧ) с горячим обдувом
Просмотр

Ikea РАФФИНЕРЭД инструкция по эксплуатации
(120 страниц)
- Языки:Русский
-
Тип:
PDF -
Размер:
17.6 MB -
Описание:
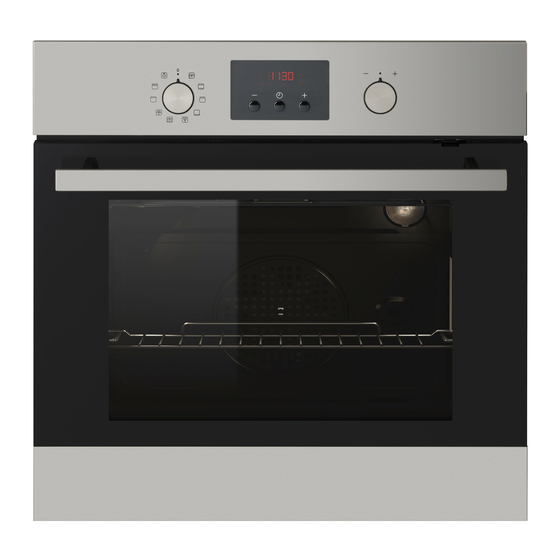
Духовка
Просмотр

Ikea РАФФИНЕРЭД инструкция по эксплуатации
(132 страницы)
- Языки:Русский
-
Тип:
PDF -
Размер:
19.28 MB -
Описание:
Духовка пиролитическая
Просмотр
На NoDevice можно скачать инструкцию по эксплуатации для Ikea РАФФИНЕРЭД. Руководство пользователя необходимо для ознакомления с правилами установки и эксплуатации Ikea РАФФИНЕРЭД. Инструкции по использованию помогут правильно настроить Ikea РАФФИНЕРЭД, исправить ошибки и выявить неполадки.
-
Contents
-
Table of Contents
-
Troubleshooting
-
Bookmarks
Quick Links
Related Manuals for IKEA RAFFINERAD RUTINERAD
Summary of Contents for IKEA RAFFINERAD RUTINERAD
-
Page 1
RAFFINERAD RUTINERAD… -
Page 3
ENGLISH… -
Page 4: Table Of Contents
Before first use Technical data Daily use Environment concerns Clock functions IKEA GUARANTEE Using the accessories Subject to change without notice. Safety information Before the installation and use of the appliance, carefully read the supplied instructions. The manufacturer is not responsible if an incorrect installation and use causes injuries and damages.
-
Page 5: Safety Instructions
ENGLISH General Safety • Only a qualified person must install this appliance and re- place the cable. • Internally the appliance becomes hot when in operation. Do not touch the heating elements that are in the appliance. Al- ways use oven gloves to remove or put in accessories or ovenware.
-
Page 6
ENGLISH • Do not use multi-plug adapters and ex- • Do not operate the appliance with wet tension cables. hands or when it has contact with water. • Make sure not to cause damage to the • Do not apply pressure on the open door. mains plug and to the mains cable. -
Page 7: Installation
ENGLISH • Be careful when you remove the door • Before replacing the lamp, disconnect the from the appliance. The door is heavy! appliance from the power supply. • Clean regularly the appliance to prevent • Only use lamps with the same specifica- the deterioration of the surface material.
-
Page 8: Before First Use
ENGLISH Before first use Warning! Refer to the Safety chapters. 2. Let the appliance operate for one hour. 3. Set the function and the maximum Initial cleaning temperature. • Remove all accessories and removable 4. Let the appliance operate for ten mi- shelf supports.
-
Page 9: Oven Functions
ENGLISH 2. Turn the knob for the temperature to set 3. To deactivate the appliance, turn the the temperature. The display shows the knob for the oven functions to the off set temperature. position. Oven functions Oven function Application Off position The appliance is off.
-
Page 10: Clock Functions
ENGLISH Display Time and temperature Heat-up and residual heat indicator Water tank (selected models only) Core temperature sensor (selected models only) Door lock (selected models only) Hours / minutes Clock functions Buttons Button Function Description Clock To set a clock function. Minus, plus To set the time.
-
Page 11: Using The Accessories
ENGLISH 6. When the set time ends, the symbol 3. The Minute Minder starts automatically after five seconds. and the set time flash. The acous- 4. When the set time ends, the acoustic tic signal sounds for two minutes. The signal sounds for two minutes.
-
Page 12: Additional Functions
ENGLISH You can also use the telescopic runners with the trays or pans supplied with the appliance (refer to “Product description”). °C °C Make sure you push back the telescopic runners fully in the appliance before you close the oven door. Caution! Do not clean the telescopic runners in the dishwasher.
-
Page 13
ENGLISH in a steamy environment and keep the Cooking meat and fish food soft inside and crusty outside. It de- • Use a deep pan for very fatty food to creases the cooking time and energy prevent the oven from stains that can be consumption to a minimum. -
Page 14: Care And Cleaning
ENGLISH Weight Food Oven Function Level Oven Cooking (kg) tempera- Time ture (°C) (min) Lasagne 45 — 60 White Bread 50 — 60 Pizza 190 — 20 — 30 Care and cleaning Warning! Refer to the Safety chapters. Shelf supports You can remove the shelf supports to clean •…
-
Page 15: Removing Oven Door/Glass Panels
ENGLISH Put a cloth on the bottom of the oven to prevent damage to the oven light and glass cover. 1. Turn the glass cover counterclockwise to remove it. 2. Clean the glass cover. 3. Replace the oven light bulb with a 25 watt, 230V (50Hz), 300 °C heat resist- ant oven light bulb (Connection type: E14).
-
Page 16: What To Do If
ENGLISH Clean the glass panels with water and Make sure that you install the top panel in soap. Dry the glass panels carefully. the seats correctly (refer to the illustration). Installing the door and the glass panels When the cleaning is completed, install the glass panels and the oven door.
-
Page 17: Technical Data
ENGLISH If you cannot find a solution to the problem The necessary data for the service centre is yourself, contact your dealer or the service on the rating plate. The rating plate is on centre. the front frame of the appliance cavity. Do not remove the rating plate from the appli- ance cavity.
-
Page 18: Ikea Guarantee
IKEA GUARANTEE How long is the IKEA guarantee valid? What will IKEA do to correct the problem? IKEA appointed service provider will exam- This guarantee is valid for five (5) years ine the product and decide, at its sole dis- from the original date of purchase of Your cretion, if it is covered under this guarantee.
-
Page 19
IKEA appliances: • Repairs caused by installation which is Please do not hesitate to contact IKEA After faulty or not according to specification. Sales Service to: • The use of the appliance in a non-domes- 1. -
Page 20
Note that the receipt After Sales of your appliances, please con- reports also the IKEA article name and tact our nearest IKEA store call centre. We number (8 digit code) for each of the recommend you read the appliance docu- appliances you have purchased. -
Page 21
Hétköznap 8 és 10 óra között 0900 235 45 32 ma-vr 9.00-21.00 Nederland and/or 0, 1 0 EUR/min (niet lokaal)Incl. BTW zat 9.00-20.00 0900 BEL IKEA zon 9.00-18.00 Norge 815 22052 Takst innland 8 til 20 ukedager Österreich 0810 300486… -
Page 24
© Inter IKEA Systems B.V. 2008 AA-720121-2…
Перед вами файл pdf, где представлена инструкция (руководство) на русском для IKEA РАФФИНЕРЭД. Вы можете скачать ее либо изучить в онлайн режиме.
Подробные сведения об инструкции:
Устройство из раздела: духовка пиролитическая
Бренд-производитель: IKEA
Наименование модели: IKEA РАФФИНЕРЭД
Язык: Руководство на русском языке
Файл: pdf
Размер файла: 19,28 MB

Скачать инструкцию к HARPER HDT2-1110
ЗАГРУЗИТЬ
Просмотр инструкции онлайн
BEJUBLAD RAFFINERAD PL TR RU SK
Na ostatniej stronie niniejszej instrukcji znajduje się pełna lista Autoryzowanych Serwisów Technicznym IKEA oraz ich lokalne numery telefonów. IKEA’nın atadığı Yetkili Servis Merkezleri ve ilgili yerel telefon numaralarının tam listesi için lütfen bu kılavuzun son sayfasına bakın. Полный список
POLSKI Spis treści Informacje dotyczące bezpieczeństwa Opis urządzenia Panel sterowania Lista funkcji Wyświetlacz Codzienna eksploatacja Tabele pieczenia Czyszczenie i konserwacja 4 4 7 9 9 10 13 16 21 Co zrobić, jeśli … Dane techniczne Instalacja Rady i sugestie Podłączenie do zasilania Ochrona
POLSKI — — — — aby umożliwić podłączenie zabudowanego urządzenia do gniazdka sieciowego. Po zakończeniu montażu urządzenia należy zamontować wielobiegunowy bezpiecznik z przerwą między stykami przynajmniej 3 mm na wszystkich biegunach zapewniających wyłączenie w przypadku przepięcia III, który musi
POLSKI — — — — — pozwolić na stopniowe wyjście gorącego powietrza oraz pary z wnętrza komory. Gdy drzwi urządzenia są zamknięte, gorące powietrze wychodzi na zewnątrz przez otwór nad panelem sterowania. Nie wolno blokować otworów wentylacyjnych. Do wyjmowania naczyń i akcesoriów z gorącego
POLSKI 7 Opis urządzenia 1 2 3 4 5 8 6 7 1 2 3 4 5 Panel sterowania Wentylator chłodzący 1) (niewidoczny) Grzałka górna/grill Tylna żarówka piekarnika Wentylator piekarnika 1) Wentylator chłodzący może nadal działać również po wyłączeniu piekarnika. W trakcie pirolizy prędkość działania wentylatora
POLSKI 8 Wkładanie rusztów oraz innych akcesoriów do piekarnika Zdjąć niebieską folię zgodnie z rysunkiem 1. Włożyć ruszt poziomo, tak aby podniesiona część „A” była skierowana do góry (Rys. 1). A Rys. 1 Wyrównanie ociekacza z prowadnicami teleskopowymi. Umieścić ociekacz na prowadnicach
POLSKI 9 Panel sterowania A A Pokrętło wyboru funkcji B Pokrętło nawigacji Uwaga: Pokrętła są wysuwane. Nacisnąć je na środku, aby wysunęły się z obsady. C Przycisk wyboru/potwierdzenia Lista funkcji Ustawić pokrętło wyboru funkcji w dowolnym położeniu — piekarnik zostanie włączony: na wyświetlaczu
POLSKI 10 Wyświetlacz 9 8 7 6 5 1 2 3 4 1 Wizualizacja aktywnych grzałek dla różnych funkcji 2 Symbole zarządzania czasem: zegar czasowy, czas pieczenia, zakończenie czasu pieczenia, godzina 3 Informacje o wybranych funkcjach 4 Informacja o wybraniu automatycznej funkcji CHLEB/PIZZA 5 Informacja o
POLSKI 11 Tabela funkcji piekarnika Piekarnik wyposażono w 4 poziomy pieczenia. Licząc w górę od najniższego poziomu. Funkcja 0 Opis funkcji WYŁ. Do przerywania pieczenia i wyłączania piekarnika. TERMOOBIEG Do równoczesnego przygotowywania różnych typów potraw w takiej samej temperaturze (np. ryb,
POLSKI Funkcja 12 Opis funkcji FUNKCJE SPECJALNE ROZMRAŻANIE UTRZYMANIE CIEPŁA WYRASTANIE TERMOOBIEG EKO SZYBKIE NAGRZEWANIE Do przyspieszania rozmrażania artykułów spożywczych. Zaleca się umieszczenie potrawy na środkowym poziomie. Zaleca się pozostawienie potrawy w opakowaniu, aby zapobiec
POLSKI 13 Codzienna eksploatacja Wybór funkcji pieczenia 1 2 1. Obrócić pokrętło wyboru funkcji A na żądaną funkcję; na wyświetlaczu pojawią się ustawienia dotyczące pieczenia. 2. Jeśli pokazane wartości są odpowiednie, nacisnąć C . Aby je zmienić, należy postępować zgodnie z poniższym opisem.
POLSKI 14 pojawi się godzina zakończenia pieczenia (na przykład 15:45) i zacznie migać symbol Wybór funkcji specjalnych . 2 1 Aby opóźnić czas zakończenia pieczenia (a tym samym również czas rozpoczęcia pieczenia), należy wykonać następujące czynności: 1. Pokrętłem nawigacji B ustawić godzinę, o
POLSKI 15 1. Ustawić pokrętło wyboru funkcji A na symbolu : na wyświetlaczu pojawia się komunikat „CHLEB” oraz AUTO. 2. Nacisnąć C , aby wybrać tę funkcję. 3. Pokrętłem nawigacji B ustawić żądaną temperaturę (między 180°C a 220°C) i potwierdzić przyciskiem C . 4. Ustawić pokrętłem nawigacji B
POLSKI 16 Tabele pieczenia Rodzaj potrawy Funkcja Nagrzewa- Półka Temperatura nie od dołu (°C) Ciasta drożdżowe X 2 160-180 X 1-3 160-180 Ciasta z nadzieniem (sernik, szarlotka) – 2 160-200 X 1-3 160-200 Kruche ciasteczka/ Rogaliki X 2 170-180 X 1-3 150-170 Ptysie X 2 180-200 X 1-3 180-190 X 2 90 X
POLSKI 17 Rodzaj potrawy Funkcja Nagrzewa- Półka Temperatura nie od dołu (°C) Chleb/Pizza/ Focaccia X 2 190-250 X 1-3 190-250 Chleb X 2 180-220 Pizza X 2 220-250 Mrożona pizza X 2 250 X 1-3 250 Tarta warzywa + mięso (tarty warzywne, quiche) X 2 180-190 X 1-3 180-190 Vols-au-vent/ Krakersy X 2
POLSKI 18 Rodzaj potrawy Funkcja Nagrzewa- Półka Temperatura nie od dołu (°C) Czas Akcesoria pieczenia (min.) 70-100 Ociekacz lub blacha na ruszcie Jagnięcina/ Cielęcina/ Wołowina/ Wieprzowina 1 kg Kurczak/Królik/ Kaczka 1 kg Indyk/Gęś 3 kg X 2 190-200 X 2 200-230 50-100 Ociekacz lub blacha na
POLSKI 19 Rodzaj potrawy Funkcja Nagrzewa- Półka Temperatura nie od dołu (°C) Rostbef krwisty 1 kg – 2 2 (średni) Udziec jagnięcy/ Golonka – 2 2 (średni) Pieczone ziemniaki – 2 2 (średni) Zapiekanka warzywna Lasagne i Mięsa – 2 3 (wysoki) Czas Akcesoria pieczenia (min.) 50-65 Poziom 2: ruszt
POLSKI 20 Rodzaj potrawy Funkcja Nagrzewa- Półka Temperatura nie od dołu (°C) Mięsa i Ziemniaki X 1-3 200 Ryby i Warzywa X 1-3 180 Nadziewane pieczenie Mięso w kawałkach (królik, kurczak, jagnięcina) – 3 200 – 3 200 Czas Akcesoria pieczenia (min.) 45-100* Poziom 3: tortownica na ruszcie Poziom 1:
POLSKI Czyszczenie i konserwacja CZYSZCZENIE OSTRZEŻENIE! — Nie wolno stosować urządzeń czyszczących parą. — Czyszczenie piekarnika przeprowadzać jedynie wtedy, gdy urządzenie jest zimne. — Odłączyć urządzenie od zasilania. Zewnętrzne części piekarnika WAŻNE: Nie stosować detergentów o i
POLSKI 22 Wymiana tylnej żarówki 1. Odłączyć piekarnik od zasilania elektrycznego. Ponowny montaż drzwi 2x Rys. 5 2. Odkręcić klosz (Rys. 5), wymienić żarówkę (typ — patrz uwaga poniżej) i z powrotem przykręcić klosz. 3. Podłączyć piekarnik z powrotem do zasilania elektrycznego. Aby zdjąć kraty
POLSKI 23 Co zrobić, jeśli … Problem Prawdopodobna przyczyna Rozwiązanie Piekarnik nie działa. Brak prądu w gniazdku zasilającym. Sprawdzić, czy w gniazdku zasilającym jest prąd. Piekarnik nie został podłączony do sieci zasilającej. Podłączyć piekarnik do zasilania. Wyłączyć piekarnik i włączyć
POLSKI 24 Dane techniczne Typ produktu: Piekarnik elektryczny do zabudowy Identyfikacja modelu: BEJUBLAD 603.009.01, BEJUBLAD 403.009.02, BEJUBLAD 603.008.97 BEJUBLAD 403.008.98, RAFFINERAD 003.009.18, RAFFINERAD 803.009.19 Liczba komór 1 Źródło ciepła Elektryczne Liczba funkcji 11 Pojemność netto.
POLSKI 25 Dane techniczne Informacje techniczne podano na tabliczce znamionowej wewnątrz urządzenia. Instalacja Po rozpakowaniu piekarnika należy sprawdzić, czy urządzenie nie zostało uszkodzone w czasie transportu oraz czy drzwi zamykają się prawidłowo. W razie jakichkolwiek problemów skontaktować
POLSKI Podczas eksploatacji — Nie umieszczać ciężkich przedmiotów na drzwiach, aby ich nie uszkodzić. — Nie opierać się na drzwiach i nie wieszać żadnych przedmiotów na uchwycie. — Nie przykrywać wnętrza piekarnika folią aluminiową. — Nie wlewać wody do środka rozgrzanego piekarnika; może to
POLSKI Rady i sugestie Sposób czytania tabeli pieczenia Tabela podaje najlepszą funkcję dla określonej potrawy oraz informację, czy należy ją piec na jednej czy kilku poziomach jednocześnie. Temperatury pieczenia dotyczą momentu włożenia potrawy do piekarnika, za wyjątkiem nagrzewania (gdy jest
POLSKI Pizza Lekko nasmarować blachę, aby pizza była bardziej chrupiąca, nawet na spodzie. Po upływie dwóch trzecich czasu pieczenia dodać mozzarellę na pizzę. Funkcja Wyrastanie Zaleca się przykrycie ciasta wilgotną ściereczką przed włożeniem do piekarnika. Czasy wyrastania w takiej funkcji
POLSKI Podłączenie do zasilania Sprawdzić, czy napięcie podane na tabliczce znamionowej urządzenia odpowiada napięciu w sieci. Tabliczka znamionowa znajduje się z przodu przy krawędzi piekarnika i jest widoczna przy otwartych drzwiach. Ochrona środowiska Utylizacja materiałów z opakowania —
POLSKI 30 GWARANCJA IKEA Ile trwa okres gwarancji IKEA? Niniejsza gwarancja obowiązuje przez okres pięciu (5) lat od daty zakupu urządzenia AGD w sklepie IKEA a w przypadku urządzenia oznaczonego marką LAGAN przez okres dwóch (2) lat. W celu potwierdzenia zakupu należy przedłożyć oryginał paragonu
POLSKI przypadków niezastosowania części oryginalnych. • Napraw będących następstwem instalacji wykonanych nieprawidłowo lub w sposób niezgodny ze specyfikacją. • Wykorzystania urządzenia w środowisku innym niż domowe, tj. użytku profesjonalnego. • Uszkodzeń transportowych. Jeśli transportem
POLSKI serwisowym prosimy o wybranie numeru podanego w broszurze dołączonej do danego urządzenia. Prosimy również o podanie numeru artykułu IKEA (ośmiocyfrowy kod) oraz dwunastocyfrowego numeru serwisowego, które znaleźć można na jego tabliczce znamionowej. PROSIMY O ZACHOWANIE DOWODU ZAKUPU!
TÜRKÇE İçindekiler Güvenlikle ilgili bilgiler Ürün tanımı Kontrol paneli Fonksiyon listesi Gösterge Günlük kullanım Pişirme tabloları Temizlik ve bakım 33 33 36 38 38 39 42 45 50 Güvenlikle ilgili bilgiler Sizin ve başkalarının güvenliği büyük önem taşır. Bu kılavuz ve cihazda belirtilen güvenlik
TÜRKÇE — — — çok kutuplu bir devre kesici takılmalı ve ulusal kablo tesisat tüzüklerine uygun olarak sabit kablo tesisatına dahil edilmelidir. Uzatma kablolarını veya üçlü prizleri kullanmayın. Cihazın fişini çıkarmak için kablosundan çekmeyin. Elektrikli parçalar, montajdan sonra kullanıcının
TÜRKÇE — — — — — — için dikkatli olarak, fırın tepsilerini ve aksesuarları çıkarmak için fırın eldivenleri kullanın. Cihazın içine veya yakınına yanıcı maddeler koymayın; cihaz yanlışlıkla çalıştırılırsa yangın çıkabilir. Cihazın içinde, kapağı kapalı olan kavanozları veya kapları ısıtmayın ve
TÜRKÇE 36 Ürün tanımı 1 2 3 4 5 8 6 7 1 2 3 4 5 Kontrol paneli Soğutma fanı1) (gizli) Üst ısıtma elemanı/Izgara Fırının arka lambası Fırın fanı 1) Soğutma fanı, fırın kapatıldıktan sonra bile çalışmaya devam edebilir. Isıyla temizleme programı sırasında fan, normal pişirme fonksiyonları esnasından
TÜRKÇE 37 Tel rafların ve diğer aksesuarların fırına yerleştirilmesi Mavi filmi resimde gösterildiği gibi çıkarın 1. Tel rafı yatay konumda, kalkık kısmı “A” yukarı bakacak şekilde yerleştirin (Şek. 1). A Tepsiyi teleskopik raylarla hizalayın. Damlama tepsisini arka ve ön sabitleyicinin arasına
TÜRKÇE 38 Kontrol paneli A A Fonksiyon seçme düğmesi B Ayar düğmesi Not: Kontrol düğmeleri geri çekilebilir. Ortadaki düğmelere bastığınızda bunlar açılır. C Seçim/Onay düğmesi Fonksiyon listesi “Fonksiyonlar” düğmesini herhangi bir konuma çevirin, fırın düğmelerini ise açın: Ekranda fonksiyonlar
TÜRKÇE 39 Gösterge 9 8 7 6 5 1 2 3 4 1 Çeşitli pişirme fonksiyonları sırasında devreye alınan ısıtma elemanlarına ilişkin gösterge 2 Zaman yönetimi simgeleri: zamanlayıcı, pişirme süresi, pişirme süresinin sonu, zaman 3 Seçilen fonksiyonlarla ilgili bilgiler 4 Seçilen otomatik EKMEK/PİZZA
TÜRKÇE 40 Fırın fonksiyonları tablosu Fırının 4 pişirme seviyesi vardır. Sayım alt seviyeden başlar. Fonksiyon 0 Fonksiyonların açıklamaları KAPALI Pişirmeyi durdurmak ve fırını kapatmak için kullanılır. FANLI HAVA DOLAŞIMI Aynı anda iki rafta ve aynı sıcaklıkta pişirilmesi gereken çeşitli
TÜRKÇE Fonksiyon ÖZEL FONKSİYONLAR BUZ ÇÖZME SICAK TUTMA KABARTMA EKO FANLI HAVA DOLAŞIMI HIZLI ÖN ISITMA 41 Fonksiyonların açıklamaları Yiyeceğin buzunu çözme işlemini hızlandırmak içindir. Yiyeceği orta rafa/kata yerleştirin. Dışarıda kurumasını önlemek için, yiyeceği ambalajı içinde bırakın.
TÜRKÇE 42 Günlük kullanım Pişirme fonksiyonlarını seçme 1 2 1. “Fonksiyonlar” düğmesini A istediğiniz fonksiyona çevirin: Göstergede pişirme ayarları gösterilir. 2. Gösterilen değerler istediğiniz değerlerse C düğmesine basın. Bunları değiştirmek için, aşağıdaki gibi ilerleyin. Izgaranın
TÜRKÇE 43 2 1 Pişirme süresinin sonunu ve böylece pişirme başlangıç zamanını geciktirmek için, aşağıdaki gibi ilerleyin: 1. “Ayar” düğmesini B pişirmenin sona ermesini istediğiniz zamanı gösterecek şekilde (örneğin 16:00) çevirin. 2. Seçilen değeri düğmeye C basarak onaylayın: Pişirme süresinin
TÜRKÇE 44 4. Gereken pişirme süresini ayarlamak için “Ayar” düğmesini B çevirin ve pişirmeyi başlatmak için C düğmesine basın. Pizza 1 3 2 4 5 1. “Fonksiyonlar” düğmesini A simgesine çevirin. Göstergede “EKMEK” ifadesi gösterilir. “PİZZA” fonksiyonunu seçmek için, aşağıdaki gibi ilerleyin: 2.
TÜRKÇE 45 Pişirme tabloları Yemeğin türü Mayalı kekler Dolgulu tartlar (cheesecake, elmalı pay) Kurabiye/tartlar Profiterol çöreği Beze Fonksiyon Ön ısıtma Seviye Sıcaklık (°C) (alttan üste doğru) X 2 160-180 Pişirme süresi (dk.) 30-90 X 1-3 160-180 30-90 – 2 160-200 30-85 X 1-3 160-200 35-90 X 2
TÜRKÇE Yemeğin türü Ekmek/pizza/ fokaçya 46 Fonksiyon Ön ısıtma Seviye Sıcaklık (°C) (alttan üste doğru) X 2 190-250 Pişirme süresi (dk.) 15-50 X 1-3 190-250 25-50 Ekmek X 2 180-220 30-50 Pizza X 2 220-250 15-30 Dondurulmuş pizza X 2 250 10-15 X 1-3 250 10-20 Tatlı tartlar (sebzeli tart, kiş) X 2
TÜRKÇE 47 Yemeğin türü Fonksiyon Ön ısıtma Seviye Sıcaklık (°C) (alttan üste doğru) Tavuk/Tavşan/ X 2 200-230 Ördek 1 Kg Hindi/Kaz 3 kg X 1-2 190-200 Pişirme süresi (dk.) 50-100 Fırında balık/ kağıtta (fileto, bütün) Sebze dolmaları (domates, kabak, patlıcan) Tost X 2 180-200 40-60 X 2 170-190
TÜRKÇE 48 Yemeğin türü Fonksiyon Ön ısıtma Seviye Sıcaklık (°C) (alttan üste doğru) Az pişmiş rozbif – 2 2 (orta) 1 Kg Pişirme süresi (dk.) 35-50 Kuzu budu/İncik – 2 2 (orta) 60-90 Fırında patates – 2 2 (orta) 35-50 Sebze graten – 2 3 (yüksek) 10-15 Lazanya & Et X 1-3 200 50-100* Et ve Patates X
TÜRKÇE Yemeğin türü Doldurulmuş rosto Parça et (tavşan, tavuk, kuzu) 49 Fonksiyon Ön ısıtma Seviye Sıcaklık (°C) (alttan üste doğru) – 3 200 – 3 200 Pişirme süresi (dk.) 80-120* 50-100* Aksesuarlar Tel rafın üzerinde damlama tepsisi veya fırın tepsisi Tel rafın üzerinde damlama tepsisi veya fırın
TÜRKÇE Temizlik ve bakım TEMİZLİK UYARI! — Asla buharlı temizleme cihazları kullanmayın. — Fırını sadece dokunulacak derecede soğukken temizleyin. — Cihazın elektrik fişini prizden çekin. Fırının dışı ÖNEMLİ: Paslandırıcı veya aşındırıcı i deterjanlar kullanmayın. Bu tür ürünlerden biri kazara
TÜRKÇE 51 Kapağı takmak için Arka lambayı yenisiyle değiştirme 1. Fırının elektrik fişini prizden çıkarın. 2x Yan ızgaraları çıkarmak için Yan ızgarayı iki alt terminal kurtulana kadar yukarıya doğru hareket ettirin, ardından ızgarayı bölmenin merkezine doğru döndürün. Izgarayı yeniden yerleştirmek
TÜRKÇE 52 Servis çağırmadan önce Sorun Olası neden Çözüm Fırın çalışmıyor. Elektrik prizine elektrik gelmiyordur. Elektrik olup olmadığını kontrol edin. Fırının fişi elektrik prizine takılmamıştır. Fırının fişini elektrik prizine takın. Sorunun gerilip giderilmediğini görmek için, fırını kapatıp
TÜRKÇE 53 Teknik veriler Ürün tipi: Ankastre Elektrikli Fırın Model tanıtımı: BEJUBLAD 603.009.01, BEJUBLAD 403.009.02, BEJUBLAD 603.008.97 BEJUBLAD 403.008.98, RAFFINERAD 003.009.18, RAFFINERAD 803.009.19 Bölme sayısı 1 Isı kaynağı Elektrikli Fonksiyon sayısı 11 Kullanılabilen hacim. Her türlü yan
TÜRKÇE 54 Teknik veriler Teknik bilgiler cihazın içerisindeki bilgi etiketinde bulunmaktadır. Kurulum Fırının ambalajını açtıktan sonra, nakliye sırasında hasar görmemiş olduğundan ve fırın kapağının düzgün kapanıp açıldığından emin olun. Sorun durumunda, satıcı veya size en yakın Yetkili Servis
TÜRKÇE 55 Kapak kilitleme aygıtı Kapağı, kapak kilitleme aygıtı ile açmak için şekil 1’e bakınız. Şekil 1 Kapak güvenlik teçhizatı resim sırası (bkz. Şek. 2) izlenerek çıkarılamaz. Şekil 2
TÜRKÇE Kullanım önerileri ve ipuçları Pişirme tablosundan nasıl yararlanırsınız? Tablo, yemekler için kullanılacak en uygun fonksiyonu ve yemeğin aynı anda bir veya birkaç seviyede mi pişirileceğini belirtir. Pişirme süreleri yemeğin fırına konulduğu andan itibaren başlar, dolayısıyla ön ısıtma
TÜRKÇE Kabartma fonksiyonu Hamuru fırına koymadan önce üzerini nemli bir bezle kapatmak her zaman en iyisidir. Bu fonksiyonla hamurun kabarma süresi, oda sıcaklığına (20-25°C) göre üçte bir oranında kısalmaktadır. 1 kilo pizza hamurunun kabarma süresi bir saat civarındadır. 57
TÜRKÇE Elektrik bağlantısı Cihazın bilgi etiketinde belirtilen elektrik voltajının, evinizdeki voltaja uygun olup olmadığını kontrol edin. Bilgi etiketi fırının ön tarafındadır (kapak açıldığında görünür). Çevre ile ilgili konular Ambalaj malzemesinin imhası — Ambalaj malzemesi %100
РУССКИЙ Содержание Информация по безопасности Описание изделия Панель управления Список функций/режимов Дисплей Повседневная эксплуатация Таблицы приготовления блюд Чистка и уход 59 59 62 64 64 65 68 71 76 Если прибор не работает… 78 Технические данные 79 Установка 80 Полезные советы и
РУССКИЙ — — — — в кухонную мебель, к розетке электрической сети. После установки электроприбора обеспечьте наличие многополюсного автомата защиты сети с зазором между замыкающими контактами (как минимум 3 мм) всех полюсов с целью полного размыкания по категории перенапряжения III, встроенного в
РУССКИЙ — — — — — — выход горячего воздуха происходит через отверстие, расположенное над панелью управления. Не перекрывайте вентиляционные отверстия. Необходимо пользоваться специальными рукавицами при вынимании из духовки кастрюль и других принадлежностей, следя при этом за тем, чтобы не касаться
РУССКИЙ 62 Описание изделия 1 2 3 4 5 8 6 7 1 2 3 4 5 Панель управления Охлаждающий вентилятор1) (не виден) Верхний нагревательный элемент/гриль Задняя лампочка освещения печи Вентилятор духовки 1) После выключения духовки охлаждающий вентилятор может продолжать работать в течение еще некоторого
РУССКИЙ 63 Установка решеток и других принадлежностей в духовку Снимите синюю пленку, как показано на рисунке. 1. Установите решетку горизонтально, приподнятой частью «A» вверх (Рис. 1). A Рис. 1 Теперь выровняйте противень на телескопических направляющих. Поставьте противень на телескопические
РУССКИЙ 64 Панель управления A A Ручка выбора режимов приготовления B Ручка просмотра/регулировки Примечание: ручки управления являются утапливаемыми. Нажмите по центру ручки, чтобы выдвинуть ручку наружу. Список функций/режимов Поверните ручку выбора режима в любое положение, при этом духовка
РУССКИЙ 65 Дисплей 9 8 7 6 5 1 2 3 4 1 Отображение нагревательных элементов, включенных в том или ином режиме 2 Символы времени: таймер, продолжительность приготовления, время окончания приготовления, время 3 Информация по предварительно выбранным режимам/функциям 4 Индикация выбора автоматического
РУССКИЙ 66 Режимы работы духовки Печь имеет 4 уровня приготовления. Отсчет ведется с нижнего уровня. Режим 0 Описание режима ВЫКЛЮЧЕНО Прерывание процесса приготовления и выключение духовки. КОНВЕКЦИЯ Этот режим используется для одновременного приготовления на двух полках разных блюд, требующих
РУССКИЙ Режим 67 Описание режима СПЕЦИАЛЬНЫЕ ФУНКЦИИ/РЕЖИМЫ Этот режим используется для ускорения размораживания продуктов. Рекомендуется класть продукты на среднюю полку. Рекомендуется оставлять продукты в упаковке, чтобы РАЗМОРАЖИВАНИЕ предотвратить их обезвоживание снаружи. Этот режим
РУССКИЙ 68 Повседневная эксплуатация Выбор режимов приготовления 1 1. 2. заданной температуры вместо него появится соответствующее значение (например, 200°), и будет подан звуковой сигнал. По окончании предварительного нагрева на духовке автоматически выбирается обычный (статический) 2 Поверните
РУССКИЙ 69 После задания продолжительности приготовления на дисплей выводится время окончания приготовления (например, 15:45), и мигает символ Выбор специальных функций/режимов . 1 2 1 Для отсрочки завершения приготовления (и, следовательно, для сдвига времени начала приготовления) действуйте
РУССКИЙ 1. 2. 3. 4. 70 Поверните ручку выбора режима A на символ : на дисплее высветятся сообщения «BREAD» («ХЛЕБ») и AUTO сбоку. Нажмите кнопку C для выбора этого режима. Поверните ручку просмотра/регулировки B для задания нужной температуры (от 180°C до 220°C) и подтвердите свой выбор нажатием
РУССКИЙ 71 Таблицы приготовления блюд Вид продукта Режим Прогрев Уровень (считая снизу) Торты из X 2 дрожжевого теста X 1-3 Температура (°C) Пироги с начинкой (чизкейк, штрудель, яблочный пирог) – 2 160-200 X 1-3 160-200 Печенье/ небольшие торты X 2 170-180 X 1-3 150-170 Эклеры X 2 180-200 X 1-3
РУССКИЙ 72 Вид продукта Режим Прогрев Уровень (считая снизу) Хлеб/пицца/ X 2 лепешки Температура (°C) 190-250 X 1-3 190-250 Хлеб X 2 180-220 Пицца X 2 220-250 Замороженная пицца X 2 250 X 1-3 250 Пироги с несладкой начинкой (с овощами, типа киш) X 2 180-190 X 1-3 180-190 Волованы/ печенье из
РУССКИЙ 73 Вид продукта Режим Прогрев Уровень (считая снизу) Лазанья, X 2 макаронные изделия, запекаемые в духовке, каннеллони (сорт макарон), открытые пироги Баранина, X 2 телятина, говядина, свинина 1 кг Курица, X 2 кролик, утка 1 кг Индейка/Гусь X 1-2 3 кг Температура (°C) Рыба, запекаемая в
РУССКИЙ 74 Вид продукта Режим Прогрев Уровень (считая снизу) Колбаса/ – 4 Кебаб/ Ребрышки/ Гамбургеры Температура (°C) Жареная курица 1-1,3 кг 2 (средняя) X 2 2-3 (средняя высокая) 3 (высокая) Ростбиф с кровью 1 кг – 2 2 (средняя) Баранья ножка, рулька – 2 2 (средняя) Печеный картофель – 2 2
РУССКИЙ 75 Вид продукта Режим Прогрев Уровень (считая снизу) Лазанья и X 1-3 мясо Температура (°C) Мясо и картофель X 1-3 200 Рыба и овощи X 1-3 180 Фаршированные мясные блюда Куски мяса (кролик, курица, баранина) – 3 200 – 3 200 200 Время при- Принадлежности готовления (мин) 50-100* Полка 3:
РУССКИЙ Чистка и уход ЧИСТКА ПРЕДУПРЕЖДЕНИЕ! — Никогда не используйте для чистки духовки пароочистители. — Выполняйте чистку духовки только после того, как она остынет. — Отключите прибор от электросети. Внешние поверхности духовки ВНИМАНИЕ! Не используйте i коррозионные или абразивные моющие
РУССКИЙ 77 Снятие дверцы 1 2x 2 Замена задней лампочки 1. Отсоедините духовку от сети электропитания. Установка дверцы на место 2x Для снятия боковых решеток Переместите боковую решетку вверх, пока не высвободятся два нижних штырька, затем поверните решетку к центру камеры. Чтобы поставить решетку
РУССКИЙ 78 Если прибор не работает… Неисправность Возможная причина Способ устранения Духовка не работает. Отсутствие напряжения в электрической сети. Проверьте наличие напряжения в электрической сети. Духовка не включена в сеть. Подключите духовку к электрической сети. Выключите и вновь включите
РУССКИЙ 79 Технические данные Тип изделия: Встроенная электрическая духовка Обозначение модели: BEJUBLAD 603.009.01, BEJUBLAD 403.009.02, BEJUBLAD 603.008.97 BEJUBLAD 403.008.98, RAFFINERAD 003.009.18, RAFFINERAD 803.009.19 Количество камер 1 Источник нагрева Электрический Число режимов 11 Полезный
РУССКИЙ 80 Технические данные Технические данные приведены на паспортной табличке, находящейся внутри прибора. Дата изготовления изделия является составной частью серийного номера, третья и четвертая цифры которого соответствуют последним двум цифрам года изготовления, а пятая и шестая цифры —
РУССКИЙ 81 В процессе эксплуатации — Не ставьте тяжелые предметы на дверцу; это может привести к ее повреждению. — Не опирайтесь на дверцу духовки и не вешайте никаких предметов на ручку дверцы. — Не закрывайте внутренние поверхности духовки фольгой. — Никогда не лейте воду в горячую духовку,
РУССКИЙ 82 Полезные советы и рекомендации по использованию Как пользоваться таблицей приготовления блюд В таблице указывается оптимальный режим для приготовления тех или иных блюд, с использованием одного или нескольких уровней одновременно. Указанная продолжительность приготовления отсчитывается
РУССКИЙ Мясо — Пользуйтесь противнями любого типа или емкостями из огнеупорного стекла, размеры которых соответствуют приготавливаемым кускам мяса. При приготовлении жаркого следует налить на дно емкости немного бульона; это не позволит мясу высохнуть и придаст ему более выраженный вкус. Когда
РУССКИЙ Подключение к электрической сети Проверьте, чтобы напряжение, указанное на паспортной табличке прибора, соответствовало напряжению сети в вашем доме. Паспортная табличка установлена в передней части духовки (видна при открытой дверце). 84 Замена кабеля питания (тип H05 RR-F 3 x 1,5 мм2)
РУCCКИЙ 85 Произведено для ИКЕА: Виерлпул Европа с.р.л Виале Г.Борге, 27 21025 Комерио (Варезе) Италия Завод: Полар СА — Виерлпул Польска Адрес: Ул. Ген.Т.Бора Коморовского 6, 51 210 Вроцлав – Польша Сделано в Польше Для РФ: ООО “ИКЕА ТОРГ” фактический и юридические адреса 141400, московская
РУCCКИЙ изделия, либо его замену таким же или аналогичным. Что не покрывает данная гарантия? • Естественный износ; • Умышленные повреждения; повреждения вследствие небрежного обращения, обусловленные невнимательностью, несоблюдением инструкций по эксплуатации, неправильной установкой или
РУCCКИЙ если установка была произведена квалифицированным специалистом, с использованием оригинальных запасных частей для адаптации бытовой техники к требованиям технической безопасности другой страны ЕС. Применимость законодательства конкретной страны Гарантия, предоставляемая IKEA, полностью
SLOVENSKY Obsah Informácie o bezpečnosti Popis výrobku Ovládací panel Zoznam funkcií Displej Každodenné používanie Tabuľky prípravy Čistenie a údržba 88 88 91 93 93 94 97 100 105 Informácie o bezpečnosti Vaša bezpečnosť i bezpečnosť iných osôb je veľmi dôležitá. Tento návod a samotný spotrebič
SLOVENSKY — — — — jeho umiestnení do výklenku, aby dosiahol až k napájacej elektrickej zásuvke. Po inštalácii spotrebiča namontujte multipólový spínač okruhu so vzdialenosťou medzi kontaktmi (aspoň 3 mm) na všetkých póloch, ktorý zaistí úplné odpojenie spotrebiča pri preťažení kategórie III a ktorý
SLOVENSKY — — — — — — postupne uniknúť horúci vzduch alebo paru a až potom siahajte do rúry. Keď sú dvierka spotrebiča zatvorené, horúci vzduch uniká otvormi nad ovládacím panelom. Vetracie otvory nezakrývajte. Pri vyberaní nádob a príslušenstva z horúcej rúry používajte ochranné rukavice, dávajte
SLOVENSKY 91 Popis výrobku 1 2 3 4 5 8 6 7 1 2 3 4 5 Ovládací panel Chladiaci ventilátor1) (zakrytý) Horný ohrevný článok/gril Zadné osvetlenie v rúre Ventilátor rúry 1) Chladiaci ventilátor môže ostať v činnosti určitú dobu aj ukončení pečenia a vypnutí rúry. Počas pyrolytického čistiaceho cyklu
SLOVENSKY 92 Vloženie roštov a iného príslušenstva do rúry Odstráňte modrú fóliu, ako vidno na obrázku 1. Zasuňte rošt vodorovne, zvýšenou časťou „A» smerujúcou hore (Obr. 1). A Obr. 1 Ako zarovnať plech s teleskopickými lištami. Položte nádobu na odkvapkávanie na teleskopické lišty, upevnite ju
SLOVENSKY 93 Ovládací panel A A Gombík ovládania funkcií B Gombík navigácie Poznámka: ovládacie gombíky sú zatláčacie. Aby sa vysunuli a dali použiť, zatlačte ich v strede. Zoznam funkcií Otočením gombíka „Funkcie” do ľubovoľnej polohy sa rúra zapne: na displeji sa zobrazia funkcie alebo priradené
SLOVENSKY 94 Displej 9 8 7 6 5 1 2 3 4 1 Zobrazovanie aktívnych ohrevných článkov pre rôzne funkcie pečenia 2 Symboly kontroly času: časovač, doba pečenia, čas ukončenia pečenia, presný čas 3 Informácie o zvolených funkciách 4 Zvolená automatická funkcia CHLIEB/ PIZZA 5 Indikácia zamknutých dvierok
SLOVENSKY 95 Tabuľka funkcií rúry Rúra má k dispozícii 4 úrovne na pečenie. Počítajú sa od spodnej úrovne. Funkcia 0 Popis funkcie VYPNUTIE Na prerušenie pečenia a vypnutie rúry. PRÚDENIE VZDUCHU Na súčasné pečenie jedál, aj rôznych, na dvoch úrovniach, ktoré sa pečú pri rovnakej teplote (napr.:
SLOVENSKY Funkcia 96 Popis funkcie ŠPECIÁLNE FUNKCIE ROZMRAZOVANIE UDRŽIAVANIE V TEPLE KYSNUTIE PRÚDENIE VZDUCHU ECO RÝCHLY PREDOHREV Na urýchlenie rozmrazenia potravín. Potraviny vložte na strednú úroveň. Potraviny nechajte v pôvodnom obale, aby sa nevysušili. Na udržiavanie chrumkavosti a teploty
SLOVENSKY 97 Každodenné používanie Voľba funkcií pečenia 1 2 1. Otočte gombík „Funkcie” A na želanú funkciu: nastavenia pečenia sa zobrazia na displeji. 2. Ak sa vopred nastavené hodnoty zhodujú so želanými, stlačte C . Aby ste ich zmenili, postupujte podľa nasledujúcich pokynov. Nastavenie
SLOVENSKY 98 2 1 Aby ste posunuli čas ukončenia pečenia posunutím štartu rúry, postupujte podľa nasledujúcich pokynov: 1. Otáčajte ovládacím gombíkom „Navigácia» B , až kým sa nezobrazí čas, kedy chcete, aby sa ukončilo pečenie (napríklad 16:00). 2. Potvrďte zvolenú hodnotu stlačením tlačidla C :
SLOVENSKY 99 „Navigácia» B nastavte želanú dobu pečenia a stlačte C , čím sa spustí pečenie. Pizza 1 3 2 4 5 1. Otočte gombík Funkcie A na symbol : displej zobrazí „CHLIEB”. Aby ste nastavili funkciu „PIZZA», dodržte nasledujúci postup: 2. Otočte ovládacím gombíkom „Navigácia» B : na displeji sa
SLOVENSKY 100 Tabuľky prípravy Druh jedla Kysnuté koláče Plnené koláče (tvarohový koláč, štrúdľa, jablkový koláč) Sušienky/ koláčiky Odpaľované cesto Snehové sušienky Funkcia Predohrev Úroveň Teplota (od dna) (°C) Doba Príslušenstvo prípravy jedla (min) 160-180 30-90 Forma na tortu na rošte 160-180
SLOVENSKY Druh jedla Predohrev Úroveň Teplota (od dna) (°C) X 2 X 1-3 Chlieb X 2 Pizza X 2 Mrazená pizza X 2 X 1-3 Slané plnené torty (zeleninové torty, slané plnené torty) X 2 X 1-3 Lístkové cesto/ odpaľované cesto X 2 X 1-3 Lasagne/ Zapečené cestoviny/ cannelloni/ nákypy X 2 Chlieb/pizza/ posúch
SLOVENSKY Druh jedla Funkcia 102 Predohrev Úroveň Teplota (od dna) (°C) Doba Príslušenstvo prípravy jedla (min) 190-200 70-100 Nádoba na odkvapkávanie alebo plech na pečenie na rošte Jahňacie/ teľacie/ hovädzie/ bravčové 1 kg Kurča/králik/ kačica 1 kg X 2 X 2 200-230 50-100 Morka/hus 3 kg X 1-2
SLOVENSKY Druh jedla Krvavý roastbeef 1 kg – 2 2 (stredná) Jahňacie stehno/koleno – 2 2 (stredná) Pečené zemiaky – 2 2 (stredná) Gratinovaná zelenina Lasagne a mäso – 2 3 (vysoká) Doba Príslušenstvo prípravy jedla (min) 50-65 Úroveň 2: rošt (po dvoch tretinách pečenia obráťte) Úroveň 1: nádoba na
SLOVENSKY Druh jedla Funkcia 104 Predohrev Úroveň Teplota (od dna) (°C) Lasagne a mäso X 1-3 200 Ryby a zelenina X 1-3 180 Plnené mäso – 3 200 Kúsky mäsa (králik, kurča, jahňa) – 3 200 Doba Príslušenstvo prípravy jedla (min) 45-100* Úroveň 3: pekáč na rošte Úroveň 1: nádoba na odkvapkávanie alebo
SLOVENSKY Čistenie a údržba ČISTENIE VAROVANIE! — Nikdy nepoužívajte čistiace zariadenia využívajúce paru. — Rúru očistite, až keď bude chladná na dotyk. — Odpojte spotrebič od elektrického napájania. Povrch rúry DÔLEŽITÉ: nepoužívajte korozívne ani i abrazívne čistiace prostriedky. Ak sa
SLOVENSKY 106 Montáž dvierok Výmena zadnej žiarovky 1. Odpojte rúru od elektrického napájania. 2x Vybratie bočných mriežok Posuňte bočnú mriežku nahor, kým sa neuvoľnia dve spodné koncovky, potom mriežku otočte k stredu priestoru rúry. Ak chcete mriežku vrátiť na miesto, urobte vyššie uvedené kroky
SLOVENSKY 107 Čo robiť, ak… Problém Možná príčina Riešenie Rúra nefunguje. Elektrické napájanie nefunguje. Skontrolujte, či je sieť pod napätím. Rúra nie je zapojená do elektrickej siete. Zapojte rúru do elektrickej siete. Rúru vypnite a znova zapnite, skontrolujte, či sa problém neodstránil.
SLOVENSKY 108 Technické údaje Druh výrobku: Zabudovaná elektrická rúra Identifikácia modelu: BEJUBLAD 603.009.01, BEJUBLAD 403.009.02, BEJUBLAD 603.008.97 BEJUBLAD 403.008.98, RAFFINERAD 003.009.18, RAFFINERAD 803.009.19 Počet otvorov 1 Zdroj tepla Elektrický Počet funkcií 11 Využiteľný objem.
SLOVENSKY 109 Technické údaje Technické informácie sa nachádzajú na typovom štítku vnútri spotrebiča. Montáž Po vybalení rúry skontrolujte, či sa spotrebič pri preprave nepoškodil a či sa dvierka správne zatvárajú. V prípade problémov zavolajte predajcu alebo najbližšie autorizované servisné
SLOVENSKY 110 Uzáver dvierok Spôsob otvorenia dvierok pomocou uzáveru je zobrazený na obr. 1. Obr. 1 Bezpečnostné zariadenie dvierok sa dá vybrať podľa nasledujúceho postupu na obrázkoch (pozrite Obr. 2). Obr. 2
SLOVENSKY Odporúčané používanie a rady Ako čítať tabuľku prípravy jedla Tabuľka indikuje najvhodnejšiu funkciu na použitie pre dané jedlo, na prípravu na jednej alebo viacerých úrovniach súčasne. Doba pečenia sa začína vložením potravín do rúry, bez zarátania doby predohrevu (keď sa vyžaduje).
SLOVENSKY Pizza Plech mierne vymažte, pizza tak bude mať chrumkavú kôrku. Po uplynutí dvoch tretín doby pečenia posypte pizzu posekanou mozzarellou. Funkcia kysnutia Pred vložením cesta do rúry sa odporúča prikryť ho vlhkou utierkou. V porovnaní s kysnutím cesta pri izbovej teplote (20-25°C) sa
SLOVENSKY Elektrické zapojenie Skontrolujte, či napätie uvedené na typovom štítku spotrebiča zodpovedá napätiu v elektrickej sieti domácnosti. Typový štítok je umiestnený na prednom okraji rúry, viditeľný pri otvorených dvierkach. 113 Výmenu elektrického napájacieho kábla (typ H05 RR-F 3 x 1,5 mm2)
SLOVENSKY ZÁRUKA IKEA Ako dlho platí záruka IKEA? Platnosť záruky je päť (5) rokov od pôvodného dátumu nákupu spotrebiča v predjani IKEA, s výnimkou spotrebičov s názvom LAGAN, u ktorých sa uplatňuje záruka trvajúca dva (2) roky. Ako doklad o nákupe slúži pôvodný pokladničný blok. V prípade opravy
SLOVENSKY z dôvodu výrobnej chyby. Prípady, v ktorých nebola zistená žiadna porucha pri prehliadke technikom. • Opravy, ktoré neboli vykonané v autorizovanom stredisku a/alebo stredisku autorizovaného servisného partnera alebo prípady, kedy neboli použité originálne náhradné diely. • Poruchy
SLOVENSKY Z dôvodu poskytnutia čo najrýchlejšieho servisu Vám odporúčame využiť príslušné telefónne čísla z uvedeného zoznamu v tomto návode. Vždy skontrolujte čísla uvedené v návode spotrebiča, pre ktorý potrebujete technickú pomoc. Prosím, vždy uvádzajte príslušné čísla spotrebiča IKEA (8 znakový
117 BELGIË — BELGIQUE — BELGIEN Telefoon/Numéro de téléphone/Telefon-Nummer: 026200311 Tarief/Tarif/Tarif: Lokaal tarief/Prix d’un appel local/Ortstarif Openingstijd: Maandag — Vrijdag 8.00 — 20.00 Heures d’ouverture: Lundi — Vendredi 8.00 — 20.00 Öffnungszeiten: Montag — Freitag 8.00 — 20.00
4000 107 74906 4 0 0 0 1 0 7 7 4 9 0 6 © Inter IKEA Systems B.V. 2015 18535 AA-1513760-1
-
Contents
-
Table of Contents
-
Troubleshooting
-
Bookmarks
Quick Links
Related Manuals for IKEA RAFFINERAD RUTINERAD
Summary of Contents for IKEA RAFFINERAD RUTINERAD
-
Page 1
RAFFINERAD RUTINERAD… -
Page 3
ENGLISH… -
Page 4: Table Of Contents
Before first use Technical data Daily use Environment concerns Clock functions IKEA GUARANTEE Using the accessories Subject to change without notice. Safety information Before the installation and use of the appliance, carefully read the supplied instructions. The manufacturer is not responsible if an incorrect installation and use causes injuries and damages.
-
Page 5: Safety Instructions
ENGLISH General Safety • Only a qualified person must install this appliance and re- place the cable. • Internally the appliance becomes hot when in operation. Do not touch the heating elements that are in the appliance. Al- ways use oven gloves to remove or put in accessories or ovenware.
-
Page 6
ENGLISH • Do not use multi-plug adapters and ex- • Do not operate the appliance with wet tension cables. hands or when it has contact with water. • Make sure not to cause damage to the • Do not apply pressure on the open door. mains plug and to the mains cable. -
Page 7: Installation
ENGLISH • Be careful when you remove the door • Before replacing the lamp, disconnect the from the appliance. The door is heavy! appliance from the power supply. • Clean regularly the appliance to prevent • Only use lamps with the same specifica- the deterioration of the surface material.
-
Page 8: Before First Use
ENGLISH Before first use Warning! Refer to the Safety chapters. 2. Let the appliance operate for one hour. 3. Set the function and the maximum Initial cleaning temperature. • Remove all accessories and removable 4. Let the appliance operate for ten mi- shelf supports.
-
Page 9: Oven Functions
ENGLISH 2. Turn the knob for the temperature to set 3. To deactivate the appliance, turn the the temperature. The display shows the knob for the oven functions to the off set temperature. position. Oven functions Oven function Application Off position The appliance is off.
-
Page 10: Clock Functions
ENGLISH Display Time and temperature Heat-up and residual heat indicator Water tank (selected models only) Core temperature sensor (selected models only) Door lock (selected models only) Hours / minutes Clock functions Buttons Button Function Description Clock To set a clock function. Minus, plus To set the time.
-
Page 11: Using The Accessories
ENGLISH 6. When the set time ends, the symbol 3. The Minute Minder starts automatically after five seconds. and the set time flash. The acous- 4. When the set time ends, the acoustic tic signal sounds for two minutes. The signal sounds for two minutes.
-
Page 12: Additional Functions
ENGLISH You can also use the telescopic runners with the trays or pans supplied with the appliance (refer to “Product description”). °C °C Make sure you push back the telescopic runners fully in the appliance before you close the oven door. Caution! Do not clean the telescopic runners in the dishwasher.
-
Page 13
ENGLISH in a steamy environment and keep the Cooking meat and fish food soft inside and crusty outside. It de- • Use a deep pan for very fatty food to creases the cooking time and energy prevent the oven from stains that can be consumption to a minimum. -
Page 14: Care And Cleaning
ENGLISH Weight Food Oven Function Level Oven Cooking (kg) tempera- Time ture (°C) (min) Lasagne 45 — 60 White Bread 50 — 60 Pizza 190 — 20 — 30 Care and cleaning Warning! Refer to the Safety chapters. Shelf supports You can remove the shelf supports to clean •…
-
Page 15: Removing Oven Door/Glass Panels
ENGLISH Put a cloth on the bottom of the oven to prevent damage to the oven light and glass cover. 1. Turn the glass cover counterclockwise to remove it. 2. Clean the glass cover. 3. Replace the oven light bulb with a 25 watt, 230V (50Hz), 300 °C heat resist- ant oven light bulb (Connection type: E14).
-
Page 16: What To Do If
ENGLISH Clean the glass panels with water and Make sure that you install the top panel in soap. Dry the glass panels carefully. the seats correctly (refer to the illustration). Installing the door and the glass panels When the cleaning is completed, install the glass panels and the oven door.
-
Page 17: Technical Data
ENGLISH If you cannot find a solution to the problem The necessary data for the service centre is yourself, contact your dealer or the service on the rating plate. The rating plate is on centre. the front frame of the appliance cavity. Do not remove the rating plate from the appli- ance cavity.
-
Page 18: Ikea Guarantee
IKEA GUARANTEE How long is the IKEA guarantee valid? What will IKEA do to correct the problem? IKEA appointed service provider will exam- This guarantee is valid for five (5) years ine the product and decide, at its sole dis- from the original date of purchase of Your cretion, if it is covered under this guarantee.
-
Page 19
IKEA appliances: • Repairs caused by installation which is Please do not hesitate to contact IKEA After faulty or not according to specification. Sales Service to: • The use of the appliance in a non-domes- 1. -
Page 20
Note that the receipt After Sales of your appliances, please con- reports also the IKEA article name and tact our nearest IKEA store call centre. We number (8 digit code) for each of the recommend you read the appliance docu- appliances you have purchased. -
Page 21
Hétköznap 8 és 10 óra között 0900 235 45 32 ma-vr 9.00-21.00 Nederland and/or 0, 1 0 EUR/min (niet lokaal)Incl. BTW zat 9.00-20.00 0900 BEL IKEA zon 9.00-18.00 Norge 815 22052 Takst innland 8 til 20 ukedager Österreich 0810 300486… -
Page 24
© Inter IKEA Systems B.V. 2008 AA-720121-2…
Посмотреть инструкция для Ikea RUTINERAD бесплатно. Руководство относится к категории Печи, 12 человек(а) дали ему среднюю оценку 8.4. Руководство доступно на следующих языках: русский, английский. У вас есть вопрос о Ikea RUTINERAD или вам нужна помощь? Задайте свой вопрос здесь
Не можете найти ответ на свой вопрос в руководстве? Вы можете найти ответ на свой вопрос ниже, в разделе часто задаваемых вопросов о Ikea RUTINERAD.
Правильно ли, что вентилятор продолжает работать, когда духовка уже выключена?
Что происходит при использовании функции «гриль»?
Обязательно ли предварительно разогревать духовку Ikea?
Как очистить духовку от пригоревшего жира?
Какой способ лучше всего подходит для очистки решетки в духовке?
Инструкция Ikea RUTINERAD доступно в русский?
Не нашли свой вопрос? Задайте свой вопрос здесь
Руководстве по эксплуатации Ikea RUTINERAD — вам приходилось его терять? Поскольку вы попали сюда, наверняка с вами это случилось. Но вы не единственный человек, сталкивающийся с проблемами с хранением руководства по эксплуатации всех домашних устройств. Ниже несколько советов, касающихся того, зачем собирать руководства по эксплуатации.
Руководстве по эксплуатации Ikea RUTINERAD это определенный вид технической документации, являющейся неразлучным элементом каждого устройства, которое мы приобретаем. Они отличаются между собой количеством информации, которую можно найти на тему данного устройства: напр. Ikea RUTINERAD. Конечно же, если производитель считает что необходимо передать нам большее количество информации, касающейся устройства Ikea RUTINERAD, то стоит ее хоть раз прочитать — в начале, сразу же после покупки данной вещи. Однако мы считаем, что инструкции должны заключать самую важную, наиболее необходимую информацию о Ikea RUTINERAD, так, чтобы не отнимать желания пользователя прочесть ее уже в самом начале. Несомненно, если устройство Ikea RUTINERAD имеет много продвинутых функций, неизбежно большое количество информации в содержании этого документа.
Które из информации в инструкции Ikea RUTINERAD необходимо обязательно прочитать?
- Информацию, касающуюся правильного использования и ухода за устройством Ikea RUTINERAD — нам необходимо ознакомиться с основными правилами, чтобы в случае проблем с устройством сервисный центр не отказал нам в гарантийном обслуживании, из-за неправильного использования
- Информация, касающаяся самых частых проблем с Ikea RUTINERAD и способы их решения
- Информация, касающаяся гарантии устройства Ikea RUTINERAD и ближайших сервисных центров, способных починить устройство в соответствии с рекомендациям производителя Ikea
Как хранить инструкции дома?
Хорошей идеей является предназначение одного ящика, в котором бы хранилась инструкция Ikea RUTINERAD а также всех других домашних устройств которыми мы пользуемся. Тогда значительно легче вам будет ее найти, чем искать в родных коробках, которые наверняка уже выбросили вы, или другие домочадцы. Раз в год достаточно просмотреть ящик и выбросить инструкции, которые касаются устройств, которыми вы уже не пользуетесь. Таким образом вы избежите хранения ненужных документов, а останутся только актуальные. Вы можете также скачать и распечатать инструкцию Ikea RUTINERAD чтобы разместить ее в своем ящике.
Похожие инструкции
View a manual of the Ikea RUTINERAD below. All manuals on ManualsCat.com can be viewed completely free of charge. By using the ‘Select a language’ button, you can choose the language of the manual you want to view.

MANUALSCAT | EN
Question & answers
Have a question about the Ikea RUTINERAD but cannot find the answer in the user manual? Perhaps the users of ManualsCat.com can help you answer your question. By filling in the form below, your question will appear below the manual of the Ikea RUTINERAD. Please make sure that you describe your difficulty with the Ikea RUTINERAD as precisely as you can. The more precies your question is, the higher the chances of quickly receiving an answer from another user. You will automatically be sent an e-mail to inform you when someone has reacted to your question.
Ask a question about the Ikea RUTINERAD
Page: 1
Contents
Safety information 4
Safety instructions 5
Installation 7
Product description 7
Before first use 8
Daily use 8
Clock functions 10
Using the accessories 11
Additional functions 12
Helpful hints and tips 13
Care and cleaning 14
What to do if… 16
Technical data 18
Environment concerns 18
IKEA GUARANTEE 19
Subject to change without notice.
Safety information
Before the installation and use of the appliance, carefully read
the supplied instructions. The manufacturer is not responsible if
an incorrect installation and use causes injuries and damages.
Always keep the instructions with the appliance for future refer-
ence.
Children and vulnerable people safety
Warning! Risk of suffocation, injury or permanent disability.
• This appliance can be used by children aged from 8 years
and above and persons with reduced physical, sensory or
mental capabilities or lack of experience and knowledge if
they are supervised by an adult or a person who is responsi-
ble for their safety.
• Do not let children play with the appliance.
• Keep all packaging away from children.
• Keep children and pets away from the appliance when it op-
erates or when it cools down. Accessible parts are hot.
• If the appliance has a child safety device, we recommend
that you activate it.
• Cleaning and user maintenance shall not be made by chil-
dren without supervision.
ENGLISH 4
Page: 2
General Safety
• Internally the appliance becomes hot when in operation. Do
not touch the heating elements that are in the appliance. Al-
ways use oven gloves to remove or put in accessories or
ovenware.
• Do not use a steam cleaner to clean the appliance.
• Before maintenance cut the power supply.
• Do not use harsh abrasive cleaners or sharp metal scrapers
to clean the glass door since they can scratch the surface,
which may result in shattering of the glass.
• To remove the shelf supports first pull the front of the shelf
support and then the rear end away from the side walls. In-
stall the shelf supports in the opposite sequence.
Safety instructions
Installation
Warning! Only a qualified person must
install this appliance.
• Remove all the packaging.
• Do not install or use a damaged appli-
ance.
• Obey the installation instruction supplied
with the appliance.
• Always be careful when you move the
appliance because it is heavy. Always
wear safety gloves.
• Do not pull the appliance by the handle.
• Make sure that the appliance is installed
below and adjacent safe structures.
• The sides of the appliance must stay ad-
jacent to appliances or to units with the
same height.
Electrical connection
Warning! Risk of fire and electrical
shock.
• All electrical connections should be made
by a qualified electrician.
• The appliance must be earthed.
• Make sure that the electrical information
on the rating plate agrees with the power
supply. If not, contact an electrician.
• Always use a correctly installed shock-
proof socket.
• Do not use multi-plug adapters and ex-
tension cables.
• Make sure not to cause damage to the
mains plug and to the mains cable. Con-
tact the Service or an electrician to
change a damaged mains cable.
• Do not let mains cables to come in touch
with the appliance door, specially when
the door is hot.
• The shock protection of live and insulated
parts must be fastened in such a way that
it cannot be removed without tools.
• Connect the mains plug to the mains
socket only at the end of the installation.
Make sure that there is access to the
mains plug after the installation.
• If the mains socket is loose, do not con-
nect the mains plug.
• Do not pull the mains cable to disconnect
the appliance. Always pull the mains
plug.
ENGLISH 5
Page: 3
• Use only correct isolation devices: line
protecting cut-outs, fuses (screw type
fuses removed from the holder), earth
leakage trips and contactors.
• The electrical installation must have an
isolation device which lets you disconnect
the appliance from the mains at all poles.
The isolation device must have a contact
opening width of minimum 3 mm.
• This appliance complies with the E.E.C.
Directives
Use
Warning! Risk of injury, burns or
electric shock or explosion.
• Use this appliance in a household envi-
ronment.
• Do not change the specification of this
appliance.
• Make sure that the ventilation openings
are not blocked.
• Do not let the appliance stay unattended
during operation.
• Deactivate the appliance after each use.
• Be careful, when you open the appliance
door while the appliance is in operation.
Hot air can release.
• Do not operate the appliance with wet
hands or when it has contact with water.
• Do not apply pressure on the open door.
• Do not use the appliance as a work sur-
face or as a storage surface.
• Always keep the appliance door closed
when the appliance is in operation.
• Open the appliance door carefully. The
use of ingredients with alcohol can cause
a mixture of alcohol and air.
• Do not let sparks or open flames to come
in contact with the appliance when you
open the door.
• Do not put flammable products or items
that are wet with flammable products in,
near or on the appliance.
Warning! Risk of damage to the
appliance.
• To prevent damage or discoloration to
the enamel:
– do not put ovenware or other objects in
the appliance directly on the bottom.
– do not put aluminium foil directly on the
bottom of the appliance.
– do not put water directly into the hot
appliance.
– do not keep moist dishes and food in
the appliance after you finish the cooking.
– be careful when you remove or install
the accessories.
• Discoloration of the enamel has no effect
on the performance of the appliance. It is
not a defect in the sense of the warranty
law.
• Use a deep pan for moist cakes. Fruit jui-
ces cause stains that can be permanent.
Care and Cleaning
Warning! Risk of injury, fire or damage
to the appliance.
• Before maintenance, deactivate the ap-
pliance and disconnect the mains plug
from the mains socket.
• Make sure the appliance is cold. There is
the risk that the glass panels can break.
• Replace immediately the door glass pan-
els when they are damaged. Contact the
Service.
• Be careful when you remove the door
from the appliance. The door is heavy!
• Clean regularly the appliance to prevent
the deterioration of the surface material.
• Remaining fat or food in the appliance
can cause fire.
• If you use an oven spray, obey the safety
instructions on the packaging.
Internal light
• The type of light bulb or halogen lamp
used for this appliance, is only for house-
hold appliances. Do not use it for house
lighting.
Warning! Risk of electrical shock.
• Before replacing the lamp, disconnect the
appliance from the power supply.
• Only use lamps with the same specifica-
tions.
ENGLISH 6
Page: 4
Disposal
Warning! Risk of injury or suffocation.
• Disconnect the appliance from the mains
supply.
• Cut off the mains cable and discard it.
• Remove the door catch to prevent chil-
dren and pets to get closed in the appli-
ance.
Installation
Warning! Refer to the Safety chapters.
Refer to the Assembly Instructions for
the installation.
Electrical installation
Warning! Only a qualified person must
do the electrical installation.
The manufacturer is not responsible if
you do not follow the safety precau-
tions from the chapter «Safety Information».
This appliance is only supplied with a main
cable.
Cable
Cable types applicable for installation or
replacement: H07 RN-F, H05 RN-F, H05
RRF, H05 VV-F, H05 V2V2-F (T90), H05 BB-
F.
For the section of the cable refer to the total
power (on the rating plate) and to the ta-
ble:
Total power Section of the cable
maximum 1380
W
3 x 0.75 mm²
maximum 2300
W
3 x 1 mm²
maximum 3680
W
3 x 1.5 mm²
The earth cord (green / yellow cable) must
be 2 cm longer than phase and neutral ca-
bles (blue and brown cables).
Product description
1 2 3
5
4
6
8
7
1 Knob for the oven functions
2 Electronic programmer
3 Knob for the temperature
4 Ventilation openings
5 Grill
6 Oven lamp
7 Fan
8 Rating plate
Oven accessories
• Wire shelf x 1
For cookware, cake tins, roasts.
• Baking tray x 1
For cakes and biscuits.
• Grill- / Roasting pan x 1
To bake and roast or as pan to collect
fat.
• Telescopic runners x 2 sets
For shelves and trays.
ENGLISH 7
Page: 5
Before first use
Warning! Refer to the Safety chapters.
Initial cleaning
• Remove all accessories and removable
shelf supports (if applicable).
• Clean the appliance before first use.
Important! Refer to the chapter «Care and
cleaning».
Setting the time of day
The display shows and 12:00. 12 flash-
es.
1. Press + or — to set the correct hour.
2. Press to confirm. This is necessary
only when you first set the time. After-
wards, the new time value is saved au-
tomatically after five seconds.
The display shows and the set
hour. 00 flashes.
3. Press + or — to set the correct minutes.
4. Press to confirm. This is necessary
only when you first set the time. After-
wards, the new time value is saved au-
tomatically after five seconds.
The display shows the new time.
Changing the time of day
You can change the time of day only if
the appliance is off.
Press again and again until the indicator
for the time of day flashes in the display.
To set the new time, follow the procedure
given in «Setting the time of day».
Preheating
Preheat the empty appliance to burn off the
remaining grease.
1. Set the function and the maximum
temperature.
2. Let the appliance operate for one hour.
3. Set the function and the maximum
temperature.
4. Let the appliance operate for ten mi-
nutes.
5. Set the function and the maximum
temperature.
6. Let the appliance operate for ten mi-
nutes.
Accessories can become hotter than usual.
The appliance can emit an odour and
smoke. This is normal. Make sure that the
airflow is sufficient.
Mechanical child lock
The appliance has the child lock installed
and activated. It is below the control panel
on the right side.
To open the oven
door with the child
lock installed, pull
the child lock han-
dle up as shown in
the picture.
Close the oven door
without pulling the
child lock.
To remove the child
lock, open the oven
door and remove
the child lock with
the torx key. The
torx key is in the
oven fitting bag.
Daily use
Warning! Refer to the Safety chapters.
Activating and deactivating the appliance
1. Turn the knob for the oven functions
clockwise to an oven function.
2. Turn the knob for the temperature to set
the temperature. The display shows the
set temperature.
ENGLISH 8
Page: 6
3. To deactivate the appliance, turn the
knob for the oven functions to the off
position.
Oven functions
Oven function Application
Off position The appliance is off.
Forced Air Cook-
ing
To bake on the maximum temperature on three oven lev-
els at the same time. When you use this function, de-
crease the oven temperature by 20 — 40 °C from the
standard temperatures you use for Conventional Cook-
ing. Also to dry food.
Conventional
(Top and Bottom
Heat)
To bake and roast on one oven level.
Grilling To grill flat food in the middle of the grill, and to toast.
Bottom Heat
To bake cakes with crispy or crusty bottoms, and to pre-
serve food.
Grilling with Fan
To roast larger joints of meat or poultry on one level. Al-
so to gratinate, and to brown.
Bread and Pizza
Baking
To bake food on one oven level for a more intensive
browning and a crispy bottom. When you use this func-
tion, decrease the oven temperature by 20 — 40 °C from
the standard temperatures you use for Conventional
Cooking.
Defrost
To defrost frozen food. The knob for the temperature
must be in the off position.
Top Heat To finish cooked dishes.
Fast Grilling To grill flat food in large quantities, and to toast.
Light
To activate the oven lamp without a cooking function.
It can be used with residual heat in final cooking phase to
save energy.
ENGLISH 9
Page: 7
Display
1
7 2 3
4
5
6
7
1 Time and temperature
2 Heat-up and residual heat indicator
3 Water tank (selected models only)
4 Core temperature sensor (selected
models only)
5 Door lock (selected models only)
6 Hours / minutes
7 Clock functions
Buttons
Button Function Description
Clock To set a clock function.
, Minus, plus To set the time.
Heat-up and residual heat indicator
When you activate an oven function, the
bars in the display come on one by one.
The bars show that the oven temperature
increases or decreases.
When you deactivate the appliance, the
display shows the residual heat indicator
if the temperature in the oven is more than
40 °C. Turn the temperature knob left or
right to show the oven temperature on the
display.
Clock functions
Sym-
bol
Function Description
Minute Minder To set a countdown time.
Time of day To set, change or check the time of day. Refer to «Setting the
time of day».
Duration To set how long the appliance must operate. First set an oven
function before you set this function.
End To set when the appliance must be deactivated. First set an
oven function before you set this function. You can use Dura-
tion and End at the same time (Time Delay) to set the time
when the appliance must be activated and then deactivated.
Press again and again to change
the clock function.
Press to confirm the settings of the
clock functions, or wait 5 seconds for
the setting to be confirmed automatically.
Setting the Duration or End function
1. Press again and again until the sym-
bol or flashes in the display.
2. Press + or — to set the minutes.
3. Press to confirm.
4. Press + or — to set the hour.
5. Press to confirm.
ENGLISH 10
Page: 8
6. When the set time ends, the symbol
or and the set time flash. The acous-
tic signal sounds for two minutes. The
appliance deactivates. Press a button
or open the appliance door to stop the
signal.
If you press while setting the time
for Duration , the appliance
switches to setting the End function.
Setting the Minute Minder
Used to set a countdown time. The maxi-
mum time you can set is 2 hours 30 minutes.
This function has no effect on the operation
of the oven. You can set the Minute Minder
at any time, also if the appliance is off.
1. Press again and again until and
00 flash in the display.
2. Press + or — to set the Minute Minder. At
first the time is calculated in minutes
and seconds. When the time you set is
longer than 60 minutes, the symbol
comes on in the display. The appliance
then calculates the time in hours and
minutes.
3. The Minute Minder starts automatically
after five seconds.
4. When the set time ends, the acoustic
signal sounds for two minutes. 00:00
and flash in the display. Press a but-
ton to stop the signal.
If you set the Minute Minder when the
Duration or End function oper-
ates, the symbol comes on in the display.
Count Up Timer
Use the Count Up Timer to monitor how
long the oven operates.
Press again and again until the display
shows time without clock symbols.
You cannot use the Count Up Timer
when the Duration or End func-
tion operates.
Using the accessories
Warning! Refer to the Safety chapters.
Telescopic runners
Installing the telescopic runners
You can put the telescopic runners on each
level.
Make sure that the two telescopic runners
are on the same level.
The stop element (A) that is at one end of
the telescopic runner must point up.
1 2
A
Using telescopic runners
With telescopic runners you can put in and
remove the shelves more easily.
ENGLISH 11
Page: 9
1
°C
Pull out the right
and left hand tele-
scopic runners.
2
°C
Put the wire shelf on
the telescopic run-
ners and carefully
push them into the
appliance.
You can also use the telescopic runners
with the trays or pans supplied with the
appliance (refer to “Product description”).
Make sure you push back the telescopic
runners fully in the appliance before you
close the oven door.
Caution! Do not clean the telescopic
runners in the dishwasher. Do not
lubricate the telescopic runners.
Additional functions
Child Lock
When the Child Lock is on, you cannot op-
erate the oven. This is to make sure that
children do not accidentally activate the
appliance.
Activating and deactivating the Child
Lock function:
1. Do not set an oven function.
2. Press and hold and + at the same
time for two seconds.
3. An acoustic signal sounds. SAFE and
come on or go out in the display (when
you activate or deactivate the Child
Lock).
Automatic switch-off
For safety reasons the appliance deacti-
vates after some time:
• If an oven function operates.
• If you do not change the oven tempera-
ture.
Oven temperature Switch-off time
30 — 115 °C 12,5 h
120 — 195 °C 8.5 h
Oven temperature Switch-off time
200 — 245 °C 5.5 h
250 °C 3.0 h
After an automatic switch-off, press a but-
ton to activate the appliance again.
Important! The automatic switch-off works
with all oven functions, except Light,
Duration and End.
Cooling fan
When the appliance operates, the cooling
fan activates automatically to keep the sur-
faces of the appliance cool. If you deacti-
vate the appliance, the cooling fan contin-
ues to operate until the temperature in the
appliance cools down.
Safety thermostat
Incorrect operation of the appliance or de-
fective components can cause dangerous
overheating. To prevent this, the oven has a
safety thermostat which interrupts the pow-
er supply. The oven activates again auto-
matically when the temperature drops.
ENGLISH 12
Page: 10
Helpful hints and tips
• The appliance has four shelf levels. Count
the shelf levels from the bottom of the ap-
pliance floor.
• The appliance has a special system which
circulates the air and constantly recycles
the steam. With this system you can cook
in a steamy environment and keep the
food soft inside and crusty outside. It de-
creases the cooking time and energy
consumption to a minimum.
• Moisture can condense in the appliance
or on the door glass panels. This is nor-
mal. Always stand back from the appli-
ance when you open the appliance door
while cooking. To decrease the conden-
sation, operate the appliance for 10 mi-
nutes before cooking.
• Clean the moisture after each use of the
appliance.
• Do not put the objects directly on the ap-
pliance floor and do not put aluminium
foil on the components when you cook.
This can change the baking results and
cause damage to the enamel.
Baking cakes
• Do not open the oven door before 3/4 of
the set cooking time is up.
• If you use two baking trays at the same
time, keep one empty level between
them.
Cooking meat and fish
• Use a deep pan for very fatty food to
prevent the oven from stains that can be
permanent.
• Leave the meat for approximately 15 mi-
nutes before carving so that the juice
does not seep out.
• To prevent too much smoke in the oven
during roasting, add some water into the
deep pan. To prevent the smoke conden-
sation, add water each time after it dries
up.
Cooking times
Cooking times depend on the type of food,
its consistency, and volume.
Initially, monitor the performance when you
cook. Find the best settings (heat setting,
cooking time, etc.) for your cookware, rec-
ipes and quantities when you use this appli-
ance.
Weight
(kg)
Food Oven Function Level Oven
tempera-
ture (°C)
Cooking
Time
(min)
1 Pork / lamb 2 180 100 — 110
1 Veal / Beef 2 190 70 — 100
1,2 Chicken/Rabbit 2 200 70 — 80
1,5 Duck 1 160 120 — 150
3 Goose 1 160 150 — 200
4 Turkey 1 180 210 — 240
1 Fish 2 190 30 — 40
1 Stuffed Pepperoni
Tomatos / Roasted
Potatos
2 190 50 — 70
ENGLISH 13
Page: 11
Weight
(kg)
Food Oven Function Level Oven
tempera-
ture (°C)
Cooking
Time
(min)
Instant cakes 2 160 45 — 55
1 Pies 2 160 80 — 100
Biscuits 3 140 25 — 35
2 Lasagne 2 180 45 — 60
1 White Bread 2 190 50 — 60
1 Pizza 1 190 —
200
20 — 30
Care and cleaning
Warning! Refer to the Safety chapters.
• Clean the front of the appliance with a
soft cloth with warm water and a clean-
ing agent.
• To clean metal surfaces use a usual
cleaning agent.
• Clean the oven interior after each use.
Then you can remove dirt more easily
and it does not burn on.
• Clean stubborn dirt with a special oven
cleaner.
• Clean all oven accessories after each use
and let them dry. Use a soft cloth with
warm water and a cleaning agent.
• If you have nonstick accessories, do not
clean them using aggressive agents,
sharp-edged objects or a dishwasher. It
can destroy nonstick coating.
Stainless steel or aluminium applian-
ces:
Clean the oven door with a wet sponge on-
ly. Dry it with a soft cloth.
Do not use steel wool, acids or abrasive
materials, as they can cause damage to the
oven surface. Clean the oven control panel
with the same precautions.
Cleaning the door gasket
• Regularly do a check of the door gasket.
The door gasket is around the frame of
the oven cavity. Do not use the appliance
if the door gasket is damaged. Contact
the Service Centre.
• To clean the door gasket, refer to the
general information about cleaning.
Shelf supports
You can remove the shelf supports to clean
the side walls.
Removing the shelf supports
1
Pull the front of the
shelf support away
from the side wall.
2
2
1
Pull the rear end of
the shelf support
away from the side
wall and remove it.
Installing the shelf supports
Install the shelf supports in the opposite se-
quence.
ENGLISH 14
Page: 12
The rounded ends of the shelf supports
must point to the front.
Oven lamp
Warning! Be careful when you change
the oven lamp. There is a risk of
electrical shock.
Before you change the oven lamp:
• Deactivate the oven.
• Remove the fuses in the fuse box or deac-
tivate the circuit breaker.
Put a cloth on the bottom of the oven
to prevent damage to the oven light
and glass cover.
1. Turn the glass cover counterclockwise to
remove it.
2. Clean the glass cover.
3. Replace the oven light bulb with a 25
watt, 230V (50Hz), 300 °C heat resist-
ant oven light bulb (Connection type:
E14).
4. Install the glass cover.
Cleaning the oven door
The oven door has three glass panels. You
can remove the oven door and the internal
glass panels to clean them.
The oven door can close if you try to
remove the glass panels before you re-
move the oven door.
Removing the oven door and the glass
panels
1
Open the door fully.
2
Lift and turn the lev-
ers on the two hing-
es.
3
Close the oven door
to the first opening
position (halfway).
Then pull forward
and remove it from
its seat.
4
Put the door on a
soft cloth on a sta-
ble surface.
5
Release the locking
system to remove
the glass panels.
6
90°
Turn the two fasten-
ers by 90° and re-
move them from
their seats.
ENGLISH 15
Page: 13
7
2
1
Carefully lift (step 1)
and remove (step 2)
the glass panels
one by one. Start
from the top panel.
Clean the glass panels with water and
soap. Dry the glass panels carefully.
Installing the door and the glass panels
When the cleaning is completed, install the
glass panels and the oven door. Do the
above steps in the opposite sequence.
Make sure that you put the glass panels
back in the correct sequence. The second
panel has a decorative frame. The screen-
printing zone must face the inner side of the
door. Make sure that after the installation
the surface of the glass panel frame on the
screen-printing zones is not rough when you
touch it.
Make sure that you install the top panel in
the seats correctly (refer to the illustration).
What to do if…
Warning! Refer to the Safety chapters.
Problem Possible cause Remedy
The oven does not heat up. The appliance is deactiva-
ted.
Activate the appliance.
The oven does not heat up. The clock is not set. Set the clock. Refer to «Set-
ting the time of day».
The oven does not heat up. The necessary settings are
not set.
Make sure that the settings
are correct.
The oven does not heat up. The automatic switch-off is
on.
Refer to «Automatic switch-
off».
The oven does not heat up. The fuse in the fuse box is
released.
Do a check of the fuse. If the
fuse is released more than
one time, contact a qualified
electrician.
The oven lamp does not op-
erate.
The oven lamp is defective. Replace the oven lamp.
ENGLISH 16
Page: 14
Problem Possible cause Remedy
The oven does not heat up.
The display shows Demo.
The demo mode is activa-
ted.
1. Deactivate the appli-
ance.
2. Press and hold the but-
ton +.
3. When an acoustic signal
sounds, turn the knob
for the oven functions to
the first function. Demo
flashes in the display.
4. Turn the knob for the
oven functions to the off
position.
5. Release the button +.
6. Turn the knob for the
temperature clockwise
three times. The acoustic
signal sounds three
times. The demo mode
is deactivated.
The display shows an error
code.
There is an electronic fault. 1. Deactivate the appli-
ance with the house
fuse or the safety switch
in the fuse box and acti-
vate it again.
2. If the display shows the
error code again, con-
tact the service centre.
Steam and condensation
collect on the food and in
the oven.
You left the dish in the oven
for too long.
Do not keep the dishes in
the oven for longer than 15
— 20 minutes after the cook-
ing ends.
If you cannot find a solution to the problem
yourself, contact your dealer or the service
centre.
The necessary data for the service centre is
on the rating plate. The rating plate is on
the front frame of the appliance cavity. Do
not remove the rating plate from the appli-
ance cavity.
We recommend that you write the data here:
Model (MOD.) …………………………………..
Product number (PNC) …………………………………..
Serial number (S.N.) …………………………………..
ENGLISH 17
Page: 15
Technical data
Dimensions (internal) Width
Height
Depth
437
328
401
Usable volumes 57 l
Area of baking tray 1140 cm²
Top heating element 800 W
Bottom heating element 1000 W
Grill 1650 W
Fan 2000 W
Total rating 2500 W
Voltage 230 V
Frequency 50 Hz
Number of functions 9
Energy Consumption with a standard
load, Conventional (Top and Bottom
Heat)
0.79 kWh
Energy Consumption with a standard
load, Forced Air Cooking
0.78 kWh
Environment concerns
The symbol on the product or on its
packaging indicates that this product may
not be treated as household waste. Instead
it should be taken to the appropriate
collection point for the recycling of electrical
and electronic equipment. By ensuring this
product is disposed of correctly, you will
help prevent potential negative
consequences for the environment and
human health, which could otherwise be
caused by inappropriate waste handling of
this product. For more detailed information
about recycling of this product, please
contact your local council, your household
waste disposal service or the shop where
you purchased the product.
Packaging material
The packaging material is environmentally-
friendly and recyclable. Plastic parts are
marked with international abbreviations
such as PE, PS, etc. Dispose of the packag-
ing material in the containers provided for
this purpose at your local waste manage-
ment facility.
ENGLISH 18
Page: 16
IKEA GUARANTEE
How long is the IKEA guarantee valid?
This guarantee is valid for five (5) years
from the original date of purchase of Your
appliance at IKEA, unless the appliance is
named LAGAN in which case two (2) years
of guarantee apply. The original sales re-
ceipt is required as proof of purchase. If
service work is carried out under guarantee,
this will not extend the guarantee period for
the appliance,
Which appliances are not covered by the
IKEA five (5) years guarantee?
The range of appliances named LAGAN
and all appliances purchased in IKEA be-
fore 1st of August 2007
Who will execute the service?
IKEA service provider will provide the serv-
ice through its own service operations or
authorized service partner network.
What does this guarantee cover?
The guarantee covers faults of the appli-
ance, which have been caused by faulty
construction or material faults from the date
of purchase from IKEA. This guarantee ap-
plies to domestic use only. The exceptions
are specified under the headline “What is
not covered under this guarantee?” Within
the guarantee period, the costs to remedy
the fault e.g. repairs, parts, labour and trav-
el will be covered, provided that the appli-
ance is accessible for repair without special
expenditure. On these conditions the EU
guidelines (Nr. 99/44/EG) and the respec-
tive local regulations are applicable. Re-
placed parts become the property of IKEA.
What will IKEA do to correct the problem?
IKEA appointed service provider will exam-
ine the product and decide, at its sole dis-
cretion, if it is covered under this guarantee.
If considered covered, IKEA service provider
or its authorized service partner through its
own service operations, will then, at its sole
discretion, either repair the defective prod-
uct or replace it with the same or a compa-
rable product.
What is not covered under this
guarantee?
• Normal wear and tear.
• Deliberate or negligent damage, dam-
age caused by failure to observe operat-
ing instructions, incorrect installation or by
connection to the wrong voltage, dam-
age caused by chemical or electro-chem-
ical reaction, rust, corrosion or water
damage including but not limited to dam-
age caused by excessive lime in the wa-
ter supply, damage caused by abnormal
environmental conditions.
• Consumable parts including batteries
and lamps.
• Non-functional and decorative parts
which do not affect normal use of the ap-
pliance, including any scratches and pos-
sible color differences.
• Accidental damage caused by foreign
objects or substances and cleaning or un-
blocking of filters, drainage systems or
soap drawers.
• Damage to the following parts: ceramic
glass, accessories, crockery and cutlery
baskets, feed and drainage pipes, seals,
lamps and lamp covers, screens, knobs,
casings and parts of casings. Unless such
damages can be proved to have been
caused by production faults.
• Cases where no fault could be found dur-
ing a technician’s visit.
• Repairs not carried out by our appointed
service providers and/or an authorized
service contractual partner or where non-
original parts have been used.
• Repairs caused by installation which is
faulty or not according to specification.
• The use of the appliance in a non-domes-
tic environment i.e. professional use.
ENGLISH 19
Page: 17
• Transportation damages. If a customer
transports the product to their home or
other address, IKEA is not liable for any
damage that may occur during transport.
However, if IKEA delivers the product to
the customer’s delivery address, then
damage to the product that occurs during
this delivery will be covered by this guar-
antee.
• Cost for carrying out the initial installation
of the IKEA appliance. However, if an
IKEA service provider or its authorized
service partner repairs or replaces the
appliance under the terms of this guaran-
tee, the service provider or its authorized
service partner will re-install the repaired
appliance or install the replacement, if
necessary.
This restriction do not apply to fault-free
work carried out by a qualified specialist
using our original parts in order to adapt
the appliance to the technical safety specifi-
cations of another EU country.
How country law applies
The IKEA guarantee gives You specific legal
rights, which covers or exceed local de-
mands. However these conditions do not
limit in any way consumer rights described
in the local legislation
Area of validity
For appliances which are purchased in one
EU country and taken to another EU coun-
try, the services will be provided in the
framework of the guarantee conditions nor-
mal in the new country. An obligation to
carry out services in the framework of the
guarantee exists only if the appliance com-
plies and is installed in accordance with:
• the technical specifications of the country
in which the guarantee claim is made;
• the Assembly Instructions and User Man-
ual Safety Information;
The dedicated After Sales Service for
IKEA appliances:
Please do not hesitate to contact IKEA After
Sales Service to:
1. make a service request under this guar-
antee;
2. ask for clarification on installation of the
IKEA appliance in the dedicated IKEA
kitchen furniture. The service won’t pro-
vide clarifications related to:
– the overall IKEA kitchen installation;
– connections to electricity (if machine
comes without plug and cable), to
water and to gas since they have to
be executed by an authorized serv-
ice engineer.
3. ask for clarification on user manual con-
tents and specifications of the IKEA ap-
pliance.
To ensure that we provide you with the best
assistance, please read carefully the As-
sembly Instructions and/or the User Manual
section of this booklet before contacting us.
How to reach us if You need our service
Please refer to the last page of this manual
for the full list of IKEA appointed contacts
and relative national phone numbers.
Important! In order to provide You with a
quicker service, we recommend that You
use the specific phone numbers listed at the
end of this manual. Always refer to the
numbers listed in the booklet of the specific
appliance You need an assistance for.
Before calling us, assure that You have to
hand the IKEA article number (8 digit code)
for the appliance of which you need our
assistance.
Important! SAVE THE SALES RECEIPT! It is
Your proof of purchase and required for the
guarantee to apply. Note that the receipt
reports also the IKEA article name and
number (8 digit code) for each of the
appliances you have purchased.
ENGLISH 20
Page: 18
Do You need extra help?
For any additional questions not related to
After Sales of your appliances, please con-
tact our nearest IKEA store call centre. We
recommend you read the appliance docu-
mentation carefully before contacting us.
ENGLISH 21
Report abuse
Libble takes abuse of its services very seriously. We’re committed to dealing with such abuse according to the laws in your country of residence. When you submit a report, we’ll investigate it and take the appropriate action. We’ll get back to you only if we require additional details or have more information to share.
Product:
Get your user manual by e-mail
Enter your email address to receive the manual of Ikea RUTINERAD in the language / languages: All languages as an attachment in your email.
The manual is 1,63 mb in size.
You will receive the manual in your email within minutes. If you have not received an email, then probably have entered the wrong email address or your mailbox is too full. In addition, it may be that your ISP may have a maximum size for emails to receive.
The manual is sent by email. Check your email
If you have not received an email with the manual within fifteen minutes, it may be that you have a entered a wrong email address or that your ISP has set a maximum size to receive email that is smaller than the size of the manual.
- Главная
- Каталог с отзывами
- Кухня
Offer links may be what’s known as affiliate or referral links which provide us a commission for purchases.
РУТИНЕРАД Духовка с горячим обдувом

3.3/5 оценка (84 голосов)
Артикульный номер 202.451.86
Описание
-Бесплатно 5 лет гарантии. Подробнее об условиях гарантии – в гарантийной брошюре.
-Духовка с горячим обдувом; обеспечивает нагревание духовки и позволяет одновременно готовить различные блюда на нескольких уровнях без смешения вкусов.
-Нагревающие элементы верх+дно+гриль; для приготовления блюд на гриле и медленной варки.
-Двойной гриль; для приготовления стейков, колбасок, овощей и поджаренного хлеба.
-Гриль с вентилятором; позволяет готовить большие порции и прожаривать крупные куски мяса.
-Выпечка хлеба и пиццы; для более интенсивного пропекания и образования хрустящей корочки.
-Разморозка с обудувом; быстро и гигиенично размораживает продукты.
-Электронный дисплей с электронным термостатом в режиме реального времени показывает температуру духовки, рекомендованные температурные настройки для каждой функции, низкое потребление энергии в режиме ожидания.
-Благодаря 2 комплектам зажимных телескопических направляющих выдвигать и задвигать проволочные полки в духовку будет проще и удобнее. Доставать горячую посуду безопаснее, вы можете просто выдвинуть полку.
-Когда пройдет установленное время готовки, прозвучит сигнал таймера, и духовка автоматически выключится.
-Гладкое внутреннее стекло дверцы духовки; дверцу можно снять для мытья.
-Дверца духовки с замком для безопасности детей.
Размеры товара
Ширина: 59.4 см
Глубина: 56.0 см
Высота: 58.9 см
Вес: 35.90 кг
Размеры и вес упаковки
Упаковки:1Упаковки:1Артикульный номер: 202.451.86
Ширина:66см
Высота63см
Длина:67см
Вес:37,2кг
количество 1
Дополнительная информация
Класс потребления энергии: А (традиционный метод нагревания) по шкале от А (наиболее эффективный) до G (наименее эффективный).
9 разных функций.
Обдув.
Нагревательные элементы: верх и дно.
Нагревающий элемент верх.
Нагревательный элемент дно.
Гриль.
Быстрый гриль.
Выпечка хлеба и пиццы.
Размораживание.
1 эмалированный противень прилагается.
1 эмалированный поддон для гриля прилагается.
1 проволочная полка прилагается.
2 комплекта телескопических направляющих прилагаются.
Расход энергии при стандартной загрузке, нагревающие элементы верх+дно: 0,79 кВт/ч.
Расход энергии при стандартной загрузке, обдув: 0,78 кВт*ч.
Размер духовки: Средняя. 35 л <= объем< 65 л.
Уровень шума: 47 дБ(А).
Напряжение: 230 В.
1х25 Вт лампочка.
Площадь самого большого противня: 1140 см².
Установку должен производить квалифицированный специалист.
Цены в магазинах ИКЕА в разных странах
Последнее обновление: 10.03.2023. Цены взяты с сайтов ИКЕА соответствующих стран.
- По цене
- По алфавиту
- Без сортировки
-
Индонезия
- 0 IDR
- 0 EUR
- 0 USD
-
Тайвань
- 0 TWD
- 0 EUR
- 0 USD
В следующих странах товар не представлен на сайте или продается под другим артикулом:
- Бельгия
- Болгария
- Чехия
- Дания
- Германия
- Испания
- Греция
- Франция
- Хорватия
- Исландия
- Ирландия
- Италия
- Кипр
- Латвия
- Литва
- Люксембург
- Венгрия
- Нидерладны
- Норвегия
- Австрия
- Россия
- Польша
- Португалия
- Румыния
- Швейцария
- Словакия
- Финляндия
- Швеция
- Турция
- Великобритания
- Сербия
- Украина
- Эстония
- Канада
- США
- Мексика
- Бахрейн
- Египет
- Кувейт
- Израиль
- Марокко
- Катар
- Саудовская Аравия
- ОАЭ
- Иордания
- Австралия
- Китай
- Гонконг
- Индия
- Япония
- Малайзия
- Сингапур
- Южная Корея
- Таиланд
- Доминиканская республика
- Пуэрто-Рико
История изменения цены на товар
За период начиная с марта 2019 года, с которого отслеживается история изменения цен, товар не продавался ни в одной из стран, в которых присутствует ИКЕА.
-
Инструкции по эксплуатации
3
Ikea РАФФИНЕРЭД инструкция по эксплуатации
(92 страницы)
- Языки:Русский
-
Тип:
PDF -
Размер:
9.47 MB -
Описание:
Комбинир микроволновая печь (СВЧ) с горячим обдувом
Просмотр
Ikea РАФФИНЕРЭД инструкция по эксплуатации
(120 страниц)
- Языки:Русский
-
Тип:
PDF -
Размер:
17.6 MB -
Описание:
Духовка
Просмотр
Ikea РАФФИНЕРЭД инструкция по эксплуатации
(132 страницы)
- Языки:Русский
-
Тип:
PDF -
Размер:
19.28 MB -
Описание:
Духовка пиролитическая
Просмотр
На NoDevice можно скачать инструкцию по эксплуатации для Ikea РАФФИНЕРЭД. Руководство пользователя необходимо для ознакомления с правилами установки и эксплуатации Ikea РАФФИНЕРЭД. Инструкции по использованию помогут правильно настроить Ikea РАФФИНЕРЭД, исправить ошибки и выявить неполадки.

- Регистрация
- Войти
Инструкции » Плиты / Духовки / СВЧ » IKEA
|
Всего инструкций в разделе: 33 |
|
|
Отсортировать по: Названию 

| инструкция | устройство | размер |
| IKEA ЭЛЬДСЛОГА | поверхность встраиваемая газовая | 7.67 MB |
| IKEA ХЮСХОЛЛА (СВЧ) | микроволновая печь (СВЧ) | 6.58 MB |
| IKEA ФРАМТИД (СВЧ) | микроволновая печь (СВЧ) | 6.58 MB |
| IKEA ФОЛКЛИГ | индукционная панель | 3.95 MB |
| IKEA УТРУЛИГ | индукционная панель | 4.89 MB |
| IKEA ТЬЕНЛИГ | духовка | 13.71 MB |
| IKEA ТРЕВЛИГ | индукционная панель | 3.44 MB |
| IKEA СМАКЛИГ | индукционная панель с функц мост | 12.22 MB |
| IKEA РЕАЛИСТИСК | духовка | 13.71 MB |
| IKEA РАФФИНЕРЭД | духовка пиролитическая | 19.28 MB |
| IKEA РАФФИНЕРЭД | духовка | 17.60 MB |
| IKEA РАФФИНЕРЭД | комбинир микроволновая печь (СВЧ) с горячим обдувом | 9.47 MB |
| IKEA РАФФИНЕРЭД (СВЧ) | микроволновая печь (СВЧ) | 8.74 MB |
| IKEA МИРАКУЛОС (СВЧ) | микроволновая печь (СВЧ) | 369.41 kB |
| IKEA МИРАКУЛОС | духовка пиролитическая | 572.62 kB |
| IKEA МИРАКУЛОС | духовка | 542.00 kB |
| IKEA МЁЙЛИГ | стеклокерамическая панель домино | 11.71 MB |
| IKEA МЁЙЛИГ | индукцион панель домино с ускорит | 12.74 MB |
| IKEA МЁЙЛИГ | газовая панель домино | 7.28 MB |
| IKEA ЛИВСГНИСТА | поверхность встраиваемая газовая черный | 7.35 MB |
| IKEA ЛАГАН OV3 | духовка | 4.69 MB |
| IKEA ЛАГАН HGA4K | поверхность встраиваемая газовая | 4.74 MB |
| IKEA КУЛИНАРИСК | паровая духовка | 888.08 kB |
| IKEA КУЛИНАРИСК | духовка пиролитическая | 360.84 kB |
| IKEA КУЛИНАРИСК | духовка | 382.98 kB |
| IKEA КУЛИНАРИСК (СВЧ) | комбинир микроволновая печь (СВЧ) с горячим обдувом | 437.94 kB |
| IKEA ДАГЛИГ | варочн панель стеклокерамика | 11.22 MB |
| IKEA ГРЭНСЛЁС | комбинир микроволновая печь (СВЧ) с горячим обдувом | 404.88 kB |
| IKEA ГРЭНСЛЁС (СВЧ) | микроволновая печь (СВЧ) | 368.91 kB |
| IKEA ВЭРМА (СВЧ) | микроволновая печь (СВЧ) | 2.78 MB |
| IKEA БЭЮБЛАД (СВЧ) | микроволновая печь (СВЧ) | 8.74 MB |
| IKEA БЭЮБЛАД | духовка стекло | 17.60 MB |
| IKEA БАРМХЭРТИГ | варочн панель стеклокерамика | 8.60 MB |
Что удобнее для чтения книг?
Планшет
Электронная книга
Смартфон
Книга в бумажном переплёте
Не читаю книг

© 2010- ManualBase.ru
- Статьи
- О сайте
- Помощь
- Контакты
© 2010- ManualBase.ru
Просмотр
Доступно к просмотру 117 страниц. Рекомендуем вам скачать файл инструкции, поскольку онлайн просмотр документа может сильно отличаться от оригинала.
-
BEJUBLAD                                                              PL
RAFFINERAD                                                           RU
TR
SK
-
POLSKI              4
Na ostatniej stronie niniejszej   TURKCE  33
instrukcji znajduje sie pelna
lista Autoryzowanych Serwisow   РУССКИЙ   59
Technicznym IKEA oraz ich   SLOVENCINA    88
lokalne numery telefonow.
IKEA’n?n atad?g? Yetkili Servis
Merkezleri ve ilgili yerel telefon
numaralar?n?n tam listesi
icin lutfen bu k?lavuzun son
sayfas?na bak?n.
Полный список
авторизованных сервисных
центров IKEA и номера
телефонов в соответствующих
странах см. на последней
странице данного руководства.
Pozrite si poslednu stranu tejto
prirucky, kde najdete kompletny
zoznam autorizovanych stredisk
IKEA a prislusne narodne
telefonne cisla.
-
POLSKI                                                               4
Spis tresci
Informacje dotyczace bezpieczenstwa   4  Co zrobic, jesli ...       23
Opis urzadzenia                  7   Dane techniczne                24
Panel sterowania                 9   Instalacja                     25
Lista funkcji                    9   Rady i sugestie                27
Wyswietlacz                     10   Podlaczenie do zasilania       29
Codzienna eksploatacja          13   Ochrona srodowiska             29
Tabele pieczenia                16   GWARANCJA IKEA                 30
Czyszczenie i konserwacja       21
Informacje dotyczace bezpieczenstwa
Bezpieczenstwo Twoje i innych jest   ponizszych instrukcji:
bardzo wazne.                        -  Podczas wszystkich czynnosci
Niniejsza instrukcja zawiera wazne     rozpakowywania i instalacji nosic
informacje dotyczace bezpieczenstwa,   rekawice ochronne.
z ktorymi nalezy sie zapoznac i ktorych   -  Przed przystapieniem do
nalezy scisle przestrzegac.            jakichkolwiek czynnosci
Ten symbol informuje                instalacyjnych urzadzenie
o potencjalnym ryzyku dla              nalezy odlaczyc od zasilania
bezpieczenstwa uzytkownika i osob      elektrycznego.
trzecich.                            -  Instalacja elektryczna lub
Wszystkie ostrzezenia dotyczace        konserwacja powinna zostac
bezpieczenstwa beda poprzedzone        przeprowadzona przez technika
tym symbolem oraz nastepujacymi        specjaliste zgodnie z instrukcjami
oznaczeniami:                          producenta oraz lokalnie
NIEBEZPIECZENSTWO! Oznacza          obowiazujacymi przepisami
niebezpieczna sytuacje, ktorej         bezpieczenstwa. Nie naprawiac
ewentualne zaistnienie prowadzi do     i nie wymieniac zadnej czesci
powaznych obrazen.                     urzadzenia, jesli nie jest to
OSTRZEZENIE! Oznacza                konkretnie zalecane w instrukcji
niebezpieczna sytuacje, ktorej         obslugi.
ewentualne zaistnienie mogloby       -  Ewentualnej wymiany przewodu
prowadzic do powaznych obrazen.        zasilajacego moze dokonac
Wszystkie komunikaty dotyczace         wylacznie wykwalifikowany
bezpieczenstwa okreslaja rodzaj        elektryk. Nalezy zwrocic sie do
potencjalnego ryzyka oraz informuja,   autoryzowanego serwisu.
w jaki sposob zmniejszyc ryzyko      - Zgodnie z przepisami urzadzenie
urazow, szkod oraz porazenia pradem    nalezy uziemic.
wskutek nieprawidlowej obslugi       -  Przewod zasilajacy powinien
urzadzenia. Nalezy scisle przestrzegac   miec wystarczajaca dlugosc,
- 1
- 2
- 3
- 4
- 117
Встраиваемыми электродуховками ИКЕА пользуюсь уже 4 года. Сначала у меня была молочно-белая ДОТИД, но, в связи с переездом, пришлось покупать новую, и я не сомневалась, что надо брать икеевскую. Тем более, что производитель их духовок — европейский Electrolux, с 5-летней гарантией качества. К предыдущей у меня претензий не было, поэтому вопрос стоял только по поводу дизайна и цены.
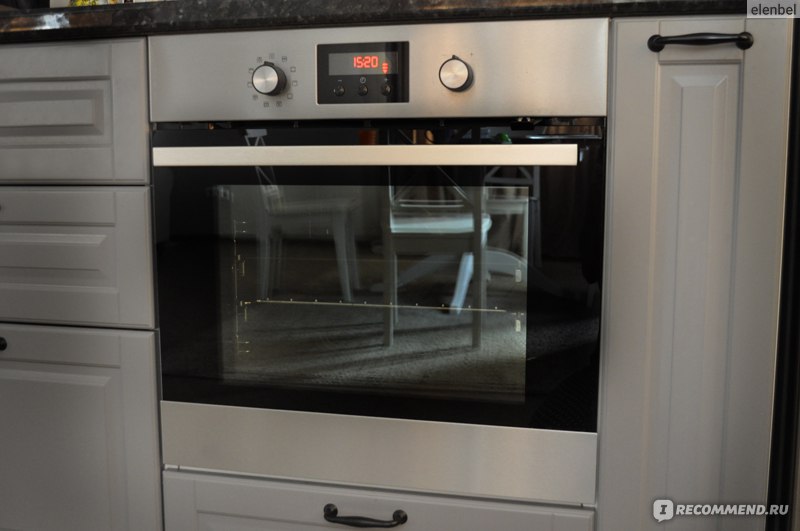
ИКЕА Раффинирэд
Вот уже год я пользуюсь икеевской духовкой Раффинерэд. Прекрасная моя помощница! Когда-то у меня была газовая печь (правда, непонятной марки), и у моих родителей уже много лет газовая печь, достаточно качественная, но ни одна из них не идет в сравнение с возможностями моей Раффинерэд! Вот почему, даже имея сейчас в новом доме сетевой газ я даже не рассматривала вероятность покупки встраиваемой газовой духовки — мне нужна была только электрическая!
Теперь расскажу о ней подробнее.
Цена:
Купили мы электродуховку Раффинирэд вместе с кухонной мебелью ИКЕА Метод в апреле 2015 года. Очень выгодно попали на акцию, при которой на некоторые виды встраиваемой техники была существенная скидка: таким образом, мне она вышла 19999 рублей. Сейчас цена выше на 6 тысяч. У ИКЕА есть еще такая же по внешнему виду модель Раффирирэд с фунцкией пиролитической самоочистки, но цена ее уже намного выше — около 37000 рублей. Уверена, что она будет выше всяких похвал, НО переплачивать за эту функцию я не посчитала целесообразным. В итоге у меня прекрасная духовка без самоочистки, но проблем с ней никаких! )))
Режимы работы:
Итак, в моей Раффинирэд 9 режимов работы, какждый из которых предполагает собственную температуру нагрева и тех.средства:
-
режим выпечки в трех вариациях (оба тена или верхний и нижний по отдельности) — печет отлично, вот, посмотрите, как пропеклась моя сегодняшняя утренняя бисквитная шарлотка:
-
2 режима турбонаддува (общий либо с включенным нижним теном);
-
функция турборазморозки;
-
3 режима «гриль» (с тенами и турбонаддувом).

Управление режимами
Этих режимов более, чем хватает для приготовления любых блюд. При включении нужного, духовка сама автоматически начинает нагреваться до определенной запрограммированной температуры, которую в любой момент можно отрегулировать до необходимой мне с помощью рычажка справа. Ее можно уменьшить или увеличить до нужной с точностью до +-5 С. Режимы можно менять во время приготовления блюда, например, запечь пиццу в течение 20 минут, выложить сыр, и затем быстро прогнать ее на конвекции, чтобы сыр равномерно расплавился. Очень классно.
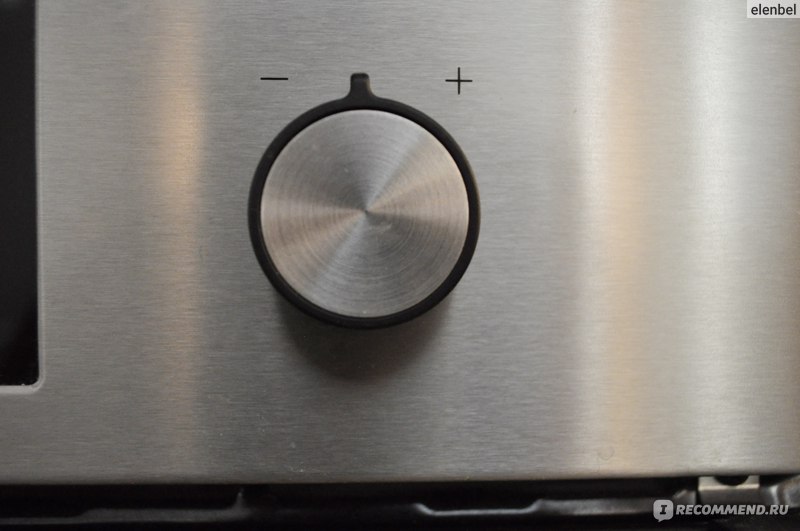
Регулировка температуры
Установка
Согласно инструкции, подключением духовки должен заниматься только квалифицированный специалист. Нам это сделал сборщик кухни, контакты которого нам дали в сервис-центре ИКЕА
Цифровое табло
На нем указывается текущее время, пока духовка выключена и температура нагрева, когда она включена. У меня Раффирирэд с красными циферками, в этом году ИКЕА поменяла их на белые. Кроме того, есть возможность установки таймера при готовке, и, когда проходит заданное время, она сообщает об этом и отключается. Я этой функцией почти не пользуюсь, потому что обычно слежу за степенью готовности блюда сама.
Противни и комплектующие
В комплект входит два противня, глубокий и мелкий, и решетка. Все прекрасно моется в посудомоечной машине. Также, можно установить телескопические направляющие, чтобы выдвигать противень по-максимуму вперед и не обжигаться. При сборке духовки мы про них забыли и я полгода ими не пользовалась, а потом случайно нашла их в шкафу, муж в течение 15 минут их прикрепил и я теперь радуюсь жизни )))

Уход
Нууу, тут конечно, есть необходимость немножечко поработать, но совсем немножечко  После использования я притираю духовку губкой, проблем нет. На дверце стекло съемное — снял, положил на мягкое полотенце, протер, поставил на место— красота! Нержавейка сверху, в принципе, качественная, особых отпечатков на ней не видно, не то, что на моей варочной поверхности ИКЕА ЛИВСЛОГА — вот ее я мою регулярно и с усилиями.

Рычажок для фиксации съемного стекла
Безопасность
Вот тут ИКЕЕ ОГРОМНОЕ СПАСИБО! Помимо того, что она предусмотрела программную защиту от включения духовки (необходимо нажать одновременно на две кнопки на табло, чтобы включить функцию защиты от детей — и все, ребенку можно сколько угодно нажимать на кнопочки — она не среагирует), но еще и механический блок-замочек на дверце духовки. Мои оба маленьких сына пока не справились ни с тем, ни с другим, чему я очень рада )))

Защитный режим
Подведу итог
Раффинирэд (IKEA Raffinirad) — хорошая электрическая духовка, качественная, с длительным сроком гарантии. Готовит прекрасно, ничего не пригорает и равномерно пропекается. Бисквиты и безе печет одинаково хорошо. Мясо, рыба , овощи — тоже без проблем. Есть возможность запекать одновременно пару блюд (например, я часто запекаю овощи на решетке и мясо под ними — сок попадает на мясо и пропитывает его). А можно и просто на двух противнях приготовить рыбу и гарнир, запахи не смешиваются.
Дизайн мне тоже очень нравится, прекрасно вписался в интерьер, «подружился» с другой бытовой техникой. В общем, ИКЕА — снова на высоте )))
А вот еще несколько моих отзывов о технике и мебели ИКЕА, которые есть в моем доме:
1. IKEA (Икеа) стул ИНГОЛЬФ
2. ИКЕА ИНГАТОРП раздвижной стол
3. Хемнэс серия для гостиной
4. Диван ИКЕА Фиксхульт
5. Матрас пружинный ИКЕА ХЭТЛЕВИК
6. Тумба под ТВ IKEA Hemnes (ИКЕА Хемнэс)