- Manuals
- Brands
- Mitsubishi Electric Manuals
- Inverter
- FR-F800
Manuals and User Guides for Mitsubishi Electric FR-F800. We have 9 Mitsubishi Electric FR-F800 manuals available for free PDF download: Instruction Manual, Hardware Instruction Manual, Sample Screen Manual, Safety Stop Function Instruction Manual
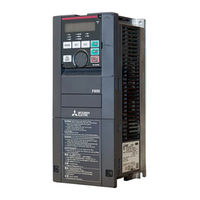
Mitsubishi Electric FR-F800 Instruction Manual (615 pages)
Brand: Mitsubishi Electric
|
Category: Inverter
|
Size: 18.16 MB
Table of Contents
-
Electric Shock Prevention
2
-
Safety Instructions
2
-
Fire Prevention
2
-
Injury Prevention
2
-
Transportation and Mounting — Warning
3
-
Usage — Warning
3
-
Contents
4
-
Table of Contents
7
-
Introduction
12
-
Inverter Model
13
-
Product Checking and Accessories
13
-
Accessory
14
-
How to Read the SERIAL Number
14
-
Component Names
15
-
Product View
15
-
Operation Steps
16
-
About the Related Manuals
17
-
Installing and Wiring
18
-
Inverter and Peripheral Devices
19
-
Peripheral Devices
21
-
Removal of the Front Cover (Lower Side) (FR-F820-01540(37K) or Lower, FR-F840-00770(37K) or Lower)
23
-
Removal and Reinstallation of the Operation Panel or the Front Covers
23
-
Reinstallation of the Front Covers (FR-F820-01540(37K) or Lower, FR-F840-00770(37K) or Lower)
24
-
Removal of the Front Cover (Upper Side) (FR-F820-01540(37K) or Lower, FR-F840-00770(37K) or Lower)
24
-
Removal of the Front Cover (Lower Side) (FR-F820-01870(45K) or Higher, FR-F840-00930(45K) or Higher)
25
-
Removal of the Front Cover (Upper Side) (FR-F820-01870(45K) or Higher, FR-F840-00930(45K) or Higher)
25
-
-
Installation of the Inverter and Enclosure Design
27
-
Reinstallation of the Front Covers (FR-F820-01870(45K) or Higher, FR-F840-00930(45K) or Higher)
26
-
Inverter Installation Environment
27
-
Standard Environmental Specifications of the Inverter
27
-
Temperature
27
-
Humidity
28
-
Corrosive Gas, Salt Damage
28
-
Explosive, Flammable Gases / High Altitude
28
-
Dust, Dirt, Oil Mist
28
-
Cooling System Types for Inverter Enclosure
29
-
Vibration, Impact
29
-
Above the Inverter
30
-
Installation Orientation of the Inverter
30
-
Inverter Installation
30
-
Inverter Placement
30
-
Arrangement of Multiple Inverters
31
-
Arrangement of the Ventilation Fan and Inverter
31
-
Heatsink Protrusion Attachment Procedure
32
-
-
Terminal Connection Diagrams
34
-
Panel Cutting
32
-
Installation of the Inverter
33
-
-
Main Circuit Terminals
38
-
Shift and Removal of a Rear Side Installation Frame
33
-
FM Type
34
-
CA Type
36
-
Details on the Main Circuit Terminals
38
-
Terminal Layout of the Main Circuit Terminals, Wiring of Power Supply and the Motor
39
-
Handling of the Wiring Cover
41
-
200 V Class (220 V Input Power Supply)
42
-
400 V Class (440 V Input Power Supply)
42
-
Applicable Cables and the Wiring Length
42
-
LD Rating (Pr.570 Multiple Rating Setting = «1»)
42
-
SLD Rating (Pr.570 Multiple Rating Setting = «0»)
43
-
Line Voltage Drop Calculation
44
-
-
Control Circuit
47
-
Total Wiring Length with Induction Motor
45
-
Total Wiring Length with PM Motor
45
-
Purpose of Earthing (Grounding)
46
-
Earthing (Grounding) Methods and Earthing (Grounding) Work
46
-
Earthing (Grounding) Precautions
46
-
Details on the Control Circuit Terminals
47
-
Input Signal
47
-
Output Signal
49
-
Communication
50
-
Safety Stop Signal
50
-
Control Logic (Sink/Source) Change
51
-
Sink Logic and Source Logic
52
-
Control Circuit Terminal Layout
53
-
Wiring Method
53
-
Wiring of Control Circuit
53
-
Common Terminals of the Control Circuit (SD, PC, 5, SE)
54
-
Signal Inputs by Contactless Switches
55
-
Wiring Precautions
55
-
Cable Size for the Control Circuit Power Supply (Terminals R1/L11 and S1/L21)
56
-
Connection Method
56
-
When Using Separate Power Supplies for the Control Circuit and the Main Circuit
56
-
Confirming the 24 V External Power Supply Input
58
-
Specification of the Applicable 24 V External Power Supply
58
-
Starting and Stopping the 24 V External Power Supply Operation
58
-
-
Communication Connectors and Terminals
61
-
When Supplying 24 V External Power to the Control Circuit
58
-
Function Description
59
-
Operation While the 24 V External Power Is Supplied
59
-
Safety Stop Function
59
-
Safety Stop Function Operation
60
-
Connection Diagram
60
-
Communication Operation
61
-
-
Connection of Stand-Alone Option Units
64
-
Mounting the Operation Panel or the Parameter Unit on the Enclosure Surface
61
-
PU Connector
61
-
USB Connector
62
-
USB Host Communication
62
-
RS-485 Terminal Block
63
-
USB Device Communication
63
-
Connection of the Brake Unit (FR-BU2)
64
-
Connection Example with the FR-BR-(H) Resistor Unit
65
-
Connection Example with the MT-BR5 Type Resistor Unit
65
-
-
Electro-Magnetic Interference (EMI) and Leakage Currents
73
-
Connection of the Brake Unit (BU Type)
66
-
Connection of the Brake Unit (FR-BU)
66
-
Connection of the High Power Factor Converter (FR-HC2)
67
-
Connection of the Power Regeneration Common Converter (FR-CV)
68
-
Connection of the Power Regeneration Converter (MT-RC)
69
-
Connection of the DC Reactor (FR-HEL)
70
-
-
Power Supply Harmonics
78
-
Precautions for Use of the Inverter
72
-
Leakage Currents and Countermeasures
73
-
Line-To-Line Leakage Currents
73
-
-
Installation of a Reactor
81
-
To-Earth (Ground) Leakage Currents
73
-
Selecting the Rated Sensitivity Current for the Earth Leakage Circuit Breaker
74
-
-
Power-OFF and Magnetic Contactor (MC)
82
-
Countermeasures against Inverter-Generated EMI
75
-
Countermeasures against Deterioration of the 400 V Class Motor Insulation
83
-
Checklist before Starting Operation
84
-
Failsafe System Which Uses the Inverter
86
-
EMI Countermeasure Example
76
-
Built-In EMC Filter
77
-
Application of the Specific Consumer Guidelines
79
-
Harmonic Suppression Guidelines
79
-
Harmonic Content (Values of the Fundamental Current Is 100%)
80
-
Rated Capacities and Outgoing Harmonic Currents of Inverter-Driven Motors
80
-
Equivalent Capacity Limits
80
-
Calculation of Outgoing Harmonic Current
80
-
-
Monitoring the Inverter Status
93
-
Easy Operation Mode Setting (Easy Setting Mode)
94
-
Frequently-Used Parameters (Simple Mode Parameters)
96
-
Harmonic Suppression Techniques
81
-
Basic Operation Procedure (PU Operation)
98
-
Handling of the Magnetic Contactor on the Inverter’s Output Side
82
-
Handling of the Manual Contactor on the Inverter’s Output Side
82
-
Inverter Input Side Magnetic Contactor (MC)
82
-
Interlock Method Which Uses the Inverter Status Output Signals
86
-
-
Basic Operation Procedure (External Operation)
103
-
Backup Method Outside the Inverter
87
-
Command Speed and Actual Operation Check
87
-
Start Signal and Actual Operation Check
87
-
Basic Operation
88
-
Components of the Operation Panel (FR-DU08)
89
-
-
Basic Operation Procedure (JOG Operation)
110
-
Basic Operation of the Operation Panel
90
-
Parameter Setting Mode
91
-
Correspondences between Digital and Actual Characters
91
-
Changing the Parameter Setting Value
92
-
Displaying the Set Frequency
93
-
First Monitored Item
93
-
Monitoring of Output Current and Output Voltage
93
-
Simple Mode Parameter List
96
-
Operating at a Set Frequency (Example: Operating at 30 Hz)
98
-
Using the Setting Dial Like a Potentiometer to Perform Operation
99
-
Setting the Frequency by Switches (Multi-Speed Setting)
100
-
Setting the Frequency with Analog Signals (Voltage Input)
101
-
Using an Analog Signal (Current Input) to Give a Frequency Command
102
-
Using the Frequency Set by the Operation Panel
103
-
Setting the Frequency by Switches (Multi-Speed Setting) (Pr.4 to Pr.6)
105
-
To Set the Frequency with Analog Signals (Voltage Input)
106
-
Changing the Frequency (60 Hz, Initial Value) at the Maximum Voltage Input (5 V, Initial Value)
107
-
To Use an Analog Signal (Current Input) to Give a Frequency Command
108
-
Changing the Frequency (60 Hz, Initial Value) at the Maximum Current Input (at 20 Ma, Initial Value)
109
-
Performing JOG Operation Using External Signals
110
-
JOG Operation from the Operation Panel
111
-
Parameters
112
-
Basic Functions
113
-
DC Injection Brake Function
113
-
Jog Operation Function
113
-
Parameter List (by Parameter Number)
113
-
Acceleration/Deceleration Times Function
114
-
Frequncy Jump/Frequency Direction Function
114
-
Sescond Functions/Monitor Functions
114
-
Stall Prevention / Multi-Speed Setting Function
114
-
Automatic Restart Function
115
-
Retry Function
115
-
PU Connector Communication Function
116
-
Adjustable 5 Points V/F Function
116
-
Motor Constants Function
116
-
Backlash Measures Function
117
-
Bypass Function
117
-
Current Detection Function
117
-
PID Operation Function
117
-
Automatic Restart Functions/Current Detection Function
118
-
Cumulative Monitor Clear Function
118
-
Input Terminal Function Assignment
118
-
User Group Function
118
-
Multi-Speed Setting Function
119
-
Slip Compensation Function
119
-
Power Failure Stop Function
120
-
Life Check Function
120
-
Password Function
120
-
Frequency Compensation Function
120
-
PLC Function
121
-
Pulse Train Input Function
121
-
RS-485 Communication
121
-
Maintenance Function
122
-
Remote Output Function
122
-
Second Motor Constants
122
-
USB Function
122
-
Communication Function
123
-
PID Control Function/Current Average Value Monitor Function
123
-
Pump Function
123
-
Second Motor Constants/Multiple Rating Function
123
-
Traverse Function
124
-
Increased Magnetic Excitation Deceleration Function
124
-
PID Control/Speed Smoothing Control/Analog Remote Output Function
124
-
Electronic Thermal O/L Relay Function
124
-
Bacnet MS/TP Protocol Function
125
-
Maintenance Function/Electronic Thermal O/L Relay Function
125
-
Motor Constants Function/Pid Control Function
125
-
Additional Function
126
-
Indication Function
126
-
Monitor Function/Adjustment Function
126
-
PID Pre-Charge Function
126
-
Energy Saving Monitor Function
127
-
Free Parameters
127
-
-
Earth (Ground) Fault Detection at Start
136
-
Multi-Function Input Terminal Parameters
137
-
Output Frequency Detection
137
-
Motor Constant Parameters
138
-
Applied Motor
138
-
Application Parameters
139
-
Operation Via Communication and Its Setting
140
-
Control Parameter
141
-
Control Method
142
-
V/F Control
142
-
Advanced Magnetic Flux Vector Control
142
-
PM Motor Control
143
-
Changing the Control Method
144
-
Setting the Motor Capacity and the Number of Motor Poles (Pr.80, Pr.81)
145
-
PM Motor Control Test Operation (Pr.800=»9″)
145
-
I/O Signal Operation During the Test Operation
145
-
Valid/Invalid Status of Monitor Outputs During the Test Run
146
-
Changing the Control Method with External Terminals (RT Signal, X18 Signal)
147
-
Selecting the Advanced Magnetic Flux Vector Control
148
-
Keeping the Motor Speed Constant When the Load Fluctuates (Speed Control Gain)
149
-
Driving Two Motors under Advanced Magnetic Flux Vector Control
149
-
Selecting the PM Motor Control by Performing Parameter Initialization on the Operation Panel
150
-
Initializing the Parameters Required for the PM Motor Control (Pr.998)
151
-
PM Parameter Initialization List
152
-
IPM Motor Specification List
153
-
Speed Control under PM Motor Control
154
-
Setting Procedure of PM Motor Control
154
-
Performing High-Accuracy, Fast-Response Control (Gain Adjustment for PM Motor Control)
155
-
Adjusting the Speed Control Gain Manually
156
-
Gain Adjustment of Current Controllers for the D Axis and the Q Axis
157
-
Troubleshooting in the Speed Control
158
-
Torque Detection Filter
159
-
Stabilizing Torque Detection (Pr.827, Pr.837)
159
-
Employing Multiple Primary Delay Filters
159
-
(E) Environment Setting Parameters
160
-
Real Time Clock Function
161
-
Simple Clock Function
161
-
Reset Selection/Disconnected PU Detection/Pu Stop Selection
163
-
Reset Selection (P.E100)
163
-
Disconnected PU Detection (P.E101)
164
-
PU Stop Selection (P.E102)
164
-
How to Restart after Stopping with Input from the PU During External Operation (PU Stop (PS) Release Method)
164
-
PU Display Language Selection
165
-
Buzzer Control
165
-
Reset Limit Function (P.E107)
165
-
PU Contrast Adjustment
166
-
Display-Off Mode
166
-
Resetting USB Host Errors
166
-
Setting Dial Potentiometer Mode/Key Lock Operation Selection
167
-
Using the Setting Dial Like a Potentiometer to Set the Frequency
167
-
Disabling the Setting Dial and Key Operation of the Operation Panel (Press and Hold [MODE] (2 S))
167
-
Frequency Change Increment Amount Setting
168
-
Multiple Rating Setting
169
-
Changing the Parameter Initial Values and Setting Ranges
169
-
Using the Power Supply Exceeding 480 V
169
-
Parameter Write Selection
170
-
Writing Parameters Only During Stop (Pr.77 = «0» Initial Value)
170
-
Disabling Parameter Write (Pr.77=»1″)
171
-
Writing Parameters During Operation (Pr.77=»2″)
171
-
Password Function/Registering a 4-Digit Password Can Restrict Parameter Reading/Writing
172
-
Parameter Reading/Writing Restriction Level (Pr.296)
172
-
Registering a Password (Pr.296, Pr.297)
172
-
Unlocking a Password (Pr.296, Pr.297)
173
-
Parameter Operations During Password Locking/Unlocking
173
-
Free Parameter
174
-
Setting Multiple Parameters as a Batch
174
-
Automatic Parameter Setting (Pr.999)
175
-
PID Monitor Indicator Setting (Pr.999 = «1 or 2»)
175
-
GOT Initial Setting (PU Connector) (Pr.999 = «10, 12»)
176
-
GOT Initial Setting (RS-485 Terminals) (Pr.999 = «11, 13»)
177
-
Rated Frequency (Pr.999 = «20 (50 Hz), 21 (60 Hz)»)
177
-
Extended Parameter Display and User Group Function
178
-
Display of Simple Mode Parameters and Extended Parameters (Pr.160)
178
-
User Group Function (Pr.160, Pr.172 to Pr.174)
178
-
Registering a Parameter in a User Group (Pr.173)
179
-
Clearing a Parameter from a User Group (Pr.174)
179
-
PWM Carrier Frequency and Soft-PWM Control
180
-
Changing the PWM Carrier Frequency (Pr.72)
180
-
Soft-PWM Control (Pr.240)
180
-
Inverter Parts Life Display
181
-
PWM Carrier Frequency Automatic Reduction Function (Pr.260)
181
-
Life Alarm Display and Signal Output (Y90 Signal, Pr.255)
182
-
Life Display of the Inrush Current Limit Circuit (Pr.256) (Standard Models)
182
-
Life Display of the Control Circuit Capacitor (Pr.257)
183
-
Life Display of the Main Circuit Capacitor (Pr.258, Pr.259) (Standard Models)
183
-
Life Display of the Cooling Fan
184
-
Maintenance Timer Alarm
185
-
Current Average Value Monitor Signal
186
-
Pr.556 Data Output Mask Time Setting
186
-
Pr.555 Current Average Time Setting
186
-
Operation Example
186
-
Pr.557 Current Average Value Monitor Signal Output Reference Current Setting
187
-
Pr.503 Maintenance Timer 1 Output
187
-
(F) Setting of Acceleration/Deceleration Time and Acceleration/Deceleration Pattern
188
-
Setting the Acceleration and Deceleration Time
188
-
Control Block Diagram
189
-
Acceleration Time Setting (Pr.7, Pr.20)
189
-
Deceleration Time Setting (Pr.8, Pr.20)
189
-
Changing the Setting Range and Increments of the Acceleration/Deceleration Time (Pr.21)
190
-
Setting Multiple Acceleration/Deceleration Times (RT Signal, Pr.44, Pr.45, Pr.147)
190
-
Setting the Acceleration/Deceleration Time in the Low-Speed Range (Pr.791, Pr.792)
191
-
Acceleration/Deceleration Pattern
192
-
Linear Acceleration/Deceleration (Pr.29 = «0» Initial Value)
192
-
S-Pattern Acceleration/Deceleration a (Pr.29 = «1»)
193
-
S-Pattern Acceleration/Deceleration B (Pr.29 = «2»)
193
-
Backlash Measures (Pr.29 = «3», Pr.140 to Pr.143)
194
-
Variable-Torque Acceleration/Deceleration (Pr.290 = «6»)
194
-
Remote Setting Function
195
-
Acceleration/Deceleration Operation
196
-
Output Frequency
196
-
Frequency Setting Storage
196
-
Clearing the Settings
196
-
Starting Frequency and Start-Time Hold Function
198
-
Starting Frequency Setting (Pr.13)
198
-
Start-Time Hold Function (Pr.571)
198
-
Minimum Motor Speed Frequency
199
-
(D) Operation Command and Frequency Command
200
-
Operation Mode Selection
201
-
Operation Mode Basics
202
-
Operation Mode Switching Method
203
-
Operation Mode Selection Flow
204
-
External Operation Mode (Pr.79 = «0» (Initial Value), «2»)
205
-
PU Operation Mode (Pr.79 = «1»)
205
-
Pu/External Combined Operation Mode 1 (Pr.79 = «3»)
206
-
Pu/External Combined Operation Mode 2 (Pr.79 = «4»)
206
-
Switchover Mode (Pr.79 = «6»)
206
-
PU Operation Interlock (Pr.79 = «7»)
207
-
Switching Operation Mode by External Signal (X16 Signal)
208
-
Switching the Operation Mode by External Signals (X65, X66 Signals)
208
-
Startup in Network Operation Mode at Power-ON
210
-
Selecting the Operation Mode for Power-ON (Pr.340)
210
-
Start Command Source and Frequency Command Source During Communication Operation
211
-
Selection of Command Source in Network Operation Mode (Pr.550)
211
-
Selection of the Command Source of the PU Operation Mode (Pr.551)
212
-
Controllability through Communication
213
-
Operation at Fault
215
-
Selection of Control Source in Network Operation Mode (Pr.338, Pr.339)
216
-
Reverse Rotation Prevention Selection
218
-
Command Source Switchover Via External Terminals (X67)
218
-
Frequency Setting Via Pulse Train Input
219
-
Selection of Pulse Train Input (Pr.291)
219
-
Pulse Train Input Specification
220
-
Adjustment of Pulse Train and Frequency (Pr.385, Pr.386)
220
-
How to Calculate the Input Pulse Division Scaling Factor (Pr.384)
220
-
Speed Synchronized Operation by Pulse Input/Output
221
-
Speed Synchronized Operation Specification
221
-
JOG Operation in the External Operation
222
-
JOG Operation in PU
222
-
-
Operation by Multi-Speed Setting
223
-
Multi-Speed Setting (Pr.4 to Pr.6)
223
-
Multi-Speed Setting for 4Th Speed or more (Pr.24 to Pr.27, Pr.232 to Pr.239)
224
-
Input Compensation of Multi-Speed Setting (Pr.28)
224
-
(H) Protective Function Parameter
225
-
-
Motor Overheat Protection (Electronic Thermal O/L Relay)
226
-
Electronic Thermal O/L Relay Operation Characteristic for Induction Motor (Pr.9, E.THM)
227
-
Electronic Thermal O/L Relay When Using IPM Motor (Pr.9, E.THM)
228
-
Set Two Types of Electronic Thermal O/L Relays (Pr.51)
229
-
Motor Permissible Load Level Setting (Pr.607, Pr.608)
230
-
Electronic Thermal O/L Relay Pre-Alarm (TH) and Warning Signal (THP Signal)
230
-
External Thermal Relay Input (OH Signal, E.OHT)
231
-
PTC Thermistor Input (Pr.561, Pr.1016, E.PTC)
231
-
Overheat Protection to Match the Characteristic of the Motor (Pr.600 to Pr.604, Pr.692 to Pr.696)
233
-
-
Cooling Fan Operation Selection
234
-
Cooling Fan Always on (Pr.244 = «0»)
234
-
Cooling Fan Operation Control (Pr.244 = «1» (Initial Value), «101 to 105»)
234
-
Cooling Fan Operation Command Signal (Y206 Signal)
234
-
Earth (Ground) Fault Detection at Start
235
-
-
Varying the Activation Level of the Undervoltage Protective Function
235
-
Initiating a Protective Function
236
-
I/O Phase Loss Protection Selection
236
-
Output Phase Loss Protection Selection (Pr.251)
236
-
Input Phase Loss Protection Selection (Pr.872) (Standard Models)
236
-
Retry Function Info
237
-
Setting the Retry Function (Pr.67, Pr.68)
237
-
Retry Count Check (Pr.69)
237
-
Selecting Retry Generating Faults (Pr.65)
238
-
-
Emergency Drive
239
-
An Example Connection Diagram of the Emergency Drive
240
-
Emergency Drive Execution Sequence
241
-
Emergency Drive Operation Selection (Pr.523, Pr.524)
242
-
Retry Operation During Emergency Drive (Pr.515, Pr.514)
242
-
Electronic Bypass During Emergency Drive (Pr.136, Pr.139, Pr.57)
243
-
PID Control During Emergency Drive Operation
244
-
Operation of Protective Functions During Emergency Drive
244
-
Input Signal Operation
245
-
Emergency Drive Status Monitor
245
-
-
Limiting the Output Frequency (Maximum/Minimum Frequency)
246
-
Setting the Maximum Frequency (Pr.1, Pr.18)
246
-
Setting the Minimum Frequency (Pr.2)
246
-
-
Avoiding the Mechanical Resonance Points (Frequency Jump)
247
-
3-Point Frequency Jump (Pr.31 to Pr.36)
247
-
6-Point Frequency Jump (Pr.552)
248
-
-
Stall Prevention Operation
249
-
Setting the Stall Prevention Operation Level (Pr.22)
250
-
Disabling the Stall Prevention Operation and Fast-Response Current Limit According to Operating Conditions (Pr.156)
251
-
Adjusting the Stall Prevention Operation Signal Output and Output Timing (OL Signal, Pr.157)
252
-
Setting for Stall Prevention Operation in the High-Frequency Range (Pr.22, Pr.23, Pr.66)
252
-
Setting Multiple Stall Prevention Operation Levels (Pr.48, Pr.49)
253
-
Stall Prevention Operation Level Setting (Analog Variable) from Terminal 1 (Terminal 4) (Pr.148, Pr.149, Pr.858, Pr.868)
254
-
To Further Prevent a Trip (Pr.154)
255
-
Trip During Stall Prevention Operation (Pr.874)
255
-
-
Load Characteristics Fault Detection
256
-
Load Characteristics Setting (Pr.1481 to Pr.1487)
257
-
Automatic Measurement of the Load Characteristics Reference (Load Characteristics Measurement Mode) (Pr.1480)
257
-
Load Fault Detection Setting (Pr.1488 to Pr.1491)
258
-
-
Motor Overspeeding Detection
260
-
(M) Monitor Display and Monitor Output Signal
261
-
Speed Display and Rotations Per Minute Setting
262
-
Display in Speed (Pr.37, Pr.144)
262
-
Display in Motor Speed (Pr.37, Pr.505)
262
-
Monitor Display (Setting) Increments
263
-
-
Monitor Indicator Selection Using Operation Panel or Via Communication
264
-
Monitor Description List (Pr.52, Pr.774 to Pr.776, Pr.992)
265
-
Monitor Display for Operation Panel (Pr.52, Pr.774 to Pr.776)
270
-
Displaying the Set Frequency During Stop (Pr.52)
270
-
Operation Panel Setting Dial Push Display (Pr.992)
271
-
Operation Panel (FR-DU08) I/O Terminal Monitor (Pr.52)
271
-
Cumulative Power Monitor and Clear (Pr.170, Pr.891)
272
-
Cumulative Energization Time and Actual Operation Time Monitor (Pr.171, Pr.563, Pr.564)
272
-
Hiding the Decimal Places for the Monitors (Pr.268)
272
-
Minus Sign Display for the Monitors (Pr.290)
273
-
Monitor Filter (Pr.1106 to Pr.1108)
273
-
-
Monitor Display Selection for Terminals FM/CA and am
274
-
Monitor Description List (Pr.54, Pr.158)
275
-
Frequency Monitor Reference (Pr.55)
277
-
Current Monitor Reference (Pr.56)
277
-
Torque Monitor Reference (Pr.866)
278
-
Terminal FM Pulse Train Output (Pr.291)
278
-
High-Speed Pulse Train Output Circuit (Example of Connection to Pulse Counter)
279
-
Monitor Display Selection for FM/CA Terminals and am
280
-
Terminal FM Calibration (C0 (Pr.900))
280
-
Calibration Procedure for Terminal FM When Using the Operation Panel (FR-DU08)
281
-
Terminal CA Calibration (C0 (Pr.900), C8 (Pr.930) to C11 (Pr.931))
282
-
Adjusting the Response of Terminal CA (Pr.869)
282
-
Calibration of Terminal am (C1 (Pr.901))
283
-
Adjusting the Response of Terminal am (Pr.867)
283
-
-
Energy Saving Monitor
284
-
Energy Saving Monitor List
285
-
Power Saving Real-Time Monitor ([1 Power Saving] and [2 Power Saving Rate])
286
-
Average Power Saving Monitor ([3 Average Power Saving], [4 Average Power Saving Rate], [5 Average Power Cost Savings])
286
-
Cumulative Energy Saving Monitors ([6 Power Saving Amount], [7 Power Cost Saving], [8 Annual Power Saving Amount], [9 Annual Power Saving Savings])
287
-
Estimated Power Value in Commercial Power Supply Operation (Pr.892, Pr.893, Pr.894)
287
-
Annual Power Saving Amount and Power Cost Savings (Pr.899)
288
-
-
Output Terminal Function Selection
289
-
Output Signal List
289
-
Adjusting the Output Terminal Response Level (Pr.289)
293
-
Inverter Operation Ready Signals (RY Signal) and Inverter Running Signals (RUN, RUN3 Signals)
293
-
Fault Output Signals (ALM, ALM2)
294
-
Input MC Shutoff Signal (Y91)
294
-
Output Frequency Detection
295
-
Output Up-To-Frequency Sensitivity (SU Signal, Pr.41)
295
-
Output Frequency Detection (FU Signal, FU2 Signal, Pr.42, Pr.43, Pr.50)
295
-
-
Output Current Detection Function
297
-
Output Current Detection (Y12 Signal, Pr.150, Pr.151, Pr.166, Pr.167)
297
-
Zero Current Detection (Y13 Signal, Pr.152, Pr.153)
298
-
Speed Detection Hysteresis (Pr.870)
296
-
-
Output Torque Detection
299
-
Remote Output Function Info
299
-
Remote Output Setting (REM Signal, Pr.496, Pr.497)
300
-
Remote Output Data Retention (REM Signal, Pr.495)
300
-
-
Analog Remote Output Function
301
-
Analog Remote Output (Pr.656 to Pr.659)
301
-
Analog Remote Output Data Retention (Pr.655)
302
-
-
Fault Code Output Selection
303
-
Pulse Train Output of Output Power
304
-
Pulse Increment Setting for Output Power (Y79 Signal, Pr.799)
304
-
Detection of Control Circuit Temperature
305
-
Control Circuit Temperature Monitor
305
-
Control Circuit Temperature Detection (Pr.663, Y207 Signal)
305
-
(T) Multi-Function Input Terminal Parameters
306
-
Analog Input Specification Selection
307
-
Protective Functions
127
-
Regeneration Avoidance Function
127
-
Calibration Parameters
128
-
Clock Function
129
-
Monitor Function
129
-
PU Function
129
-
Trace Function/Monitor Function
130
-
PID Control Function / PLC Function
131
-
PID Gain Tuning Function
131
-
Clear Parameters Function
132
-
Load Characteristic Fault Detection Function
132
-
PID Gain Tuning Function / Cleaning Function
132
-
Changing Parameter Settings in the Group Parameter Display
134
-
Changing to the Grouped Parameter Numbers
134
-
Group Parameter Display
134
-
Setting of Acceleration/Deceleration Time and Acceleration/Deceleration Pattern
135
-
Parameter List (by Function Group)
135
-
Operation Command and Frequency Command
135
-
Environment Setting Parameters
135
-
Monitor Display and Monitor Output Signal
136
-
Protective Function Parameter
136
-
Advertisement
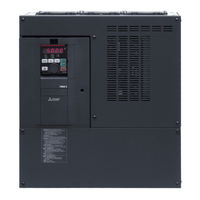
Mitsubishi Electric FR-F800 Instruction Manual (834 pages)
Brand: Mitsubishi Electric
|
Category: Inverter
|
Size: 21.11 MB
Table of Contents
-
Table of Contents
13
-
Introduction
21
-
General Remarks
21
-
Product Checking and Accessories
22
-
Inverter Model
22
-
Accessory
23
-
How to Read the SERIAL Number
23
-
Component Names
24
-
Operation Steps
26
-
Related Manuals
27
-
Installation and Wiring
29
-
Peripheral Devices
29
-
Inverter and Peripheral Devices
29
-
Peripheral Devices
32
-
Removal and Reinstallation of the Operation Panel or the Front Covers
40
-
Installation of the Inverter and Enclosure Design
45
-
Inverter Installation Environment
45
-
Cooling System Types for Inverter Enclosure
48
-
Inverter Installation
49
-
Panel through Attachment Procedure
51
-
Terminal Connection Diagrams
53
-
FM Type
53
-
CA Type
55
-
Main Circuit Terminals
57
-
Details on the Main Circuit Terminals
57
-
Terminal Layout of the Main Circuit Terminals, Wiring of Power Supply
58
-
Applicable Cables and the Wiring Length
61
-
Earthing (Grounding) Precautions
68
-
Control Circuit
70
-
Details on the Control Circuit Terminals
70
-
Control Logic (Sink/Source) Change
74
-
Wiring of Control Circuit
77
-
Wiring Precautions
81
-
When Using Separate Power Supplies for the Control Circuit
82
-
When Supplying 24 V External Power to the Control Circuit
85
-
Safety Stop Function
88
-
Communication Connectors and Terminals
90
-
PU Connector
90
-
USB Connector
91
-
RS-485 Terminal Block
93
-
Connection of Stand-Alone Option Units
94
-
Connection of the Brake Unit (FR-BU2)
94
-
Connection of the Brake Unit (FR-BU)
97
-
Connection of the Brake Unit (BU Type)
98
-
Connection of the High Power Factor Converter (FR-HC2)
99
-
Connection of the Power Regeneration Common Converter (FR-CV)
101
-
Connection of the Power Regeneration Converter (MT-RC)
102
-
Connection of the DC Reactor (FR-HEL)
103
-
Precautions for Use of the Inverter
105
-
Electro-Magnetic Interference (EMI) and Leakage Currents
105
-
Leakage Currents and Countermeasures
105
-
Countermeasures against Inverter-Generated EMI
110
-
Built-In EMC Filter
113
-
Power Supply Harmonics
115
-
Harmonic Suppression Guidelines
116
-
Installation of a Reactor
120
-
Power-OFF and Magnetic Contactor (MC)
121
-
Countermeasures against Deterioration of the 400 V Class Motor Insulation
123
-
Checklist before Starting Operation
124
-
Failsafe System Which Uses the Inverter
127
-
Basic Operation
131
-
Operation Panel (FR-DU08)
131
-
Components of the Operation Panel (FR-DU08)
131
-
Basic Operation of the Operation Panel
133
-
Correspondences between Digital and Actual Characters
135
-
Changing the Parameter Setting Value
136
-
Monitoring the Inverter Status
137
-
Monitoring of Output Current and Output Voltage
137
-
First Monitored Item
137
-
Displaying the Set Frequency
138
-
Easy Operation Mode Setting (Easy Setting Mode)
139
-
Frequently-Used Parameters (Simple Mode Parameters)
141
-
Simple Mode Parameter List
141
-
Basic Operation Procedure (PU Operation)
143
-
Operating at the Set Frequency (Example: Operating at 30 Hz)
143
-
Using the Setting Dial Like a Potentiometer to Perform Operation
145
-
Setting the Frequency by Switches (Multi-Speed Setting)
146
-
Setting the Frequency with Analog Signals (Voltage Input)
148
-
Using an Analog Signal (Current Input) to Give a Frequency Command
150
-
Basic Operation Procedure (External Operation)
152
-
Using the Frequency Set by the Operation Panel
152
-
Setting the Frequency by Switches (Multi-Speed Setting) (Pr. 4 to Pr. 6)
154
-
Setting the Frequency with Analog Signals (Voltage Input)
156
-
Changing the Frequency (60 Hz, Initial Value) at the Maximum Voltage Input
157
-
(5 V, Initial Value)
157
-
Using an Analog Signal (Current Input) to Give a Frequency Command
158
-
Changing the Frequency (60 Hz, Initial Value) at the Maximum Current Input
159
-
(At 20 Ma, Initial Value)
159
-
Basic Operation Procedure (JOG Operation)
160
-
Performing JOG Operation Using External Signals
160
-
JOG Operation from the Operation Panel
161
-
Parameters
163
-
Parameter List
164
-
Parameter List (by Number)
164
-
Group Parameter Display
186
-
Parameter List (by Function Group)
188
-
Control Method
198
-
Changing the Control Method
200
-
Selecting the Advanced Magnetic Flux Vector Control
204
-
Selecting the PM Motor Control
207
-
Speed Control under PM Motor Control
212
-
Setting Procedure of PM Motor Control
213
-
Performing High-Accuracy, Fast-Response Control
214
-
Troubleshooting in the Speed Control
217
-
Torque Detection Filter
218
-
E) Environment Setting Parameters
219
-
Real Time Clock Function
220
-
Reset Selection/Disconnected PU Detection/Pu Stop Selection
222
-
PU Display Language Selection
226
-
Buzzer Control
226
-
PU Contrast Adjustment
226
-
Display-Off Mode
227
-
Resetting USB Host Errors
227
-
Setting Dial Potentiometer Mode/Key Lock Operation Selection
228
-
Frequency Change Increment Amount Setting
229
-
Multiple Rating Setting
230
-
Using the Power Supply Exceeding 480 V
231
-
Parameter Write Selection
231
-
Password Function
235
-
Free Parameter
239
-
Setting Multiple Parameters as a Batch
239
-
Extended Parameter Display and User Group Function
244
-
PWM Carrier Frequency and Soft-PWM Control
247
-
Inverter Parts Life Display
250
-
Maintenance Timer Alarm
254
-
Current Average Value Monitor Signal
256
-
F) Setting of Acceleration/Deceleration Time and Acceleration/Deceleration Pattern
261
-
Setting the Acceleration and Deceleration Time
261
-
Acceleration/Deceleration Pattern
266
-
Remote Setting Function
270
-
Starting Frequency and Start-Time Hold Function
274
-
Minimum Motor Speed Frequency
276
-
D) Operation Command and Frequency Command
277
-
Operation Mode Selection
278
-
Startup in Network Operation Mode at Power-ON
287
-
Reverse Rotation Prevention Selection
296
-
Frequency Setting Via Pulse Train Input
297
-
JOG Operation
301
-
Operation by Multi-Speed Setting
303
-
H) Protective Function Parameter
306
-
Motor Overheat Protection (Electronic Thermal O/L Relay)
307
-
Cooling Fan Operation Selection
317
-
Earth (Ground) Fault Detection at Start
318
-
Varying the Activation Level of the Undervoltage Protective Function
318
-
Initiating a Protective Function
319
-
I/O Phase Loss Protection Selection
320
-
Retry Function
321
-
Emergency Drive (Fire Mode)
324
-
Limiting the Output Frequency (Maximum/Minimum Frequency)
333
-
Avoiding the Mechanical Resonance Points (Frequency Jump)
335
-
Stall Prevention Operation
337
-
Load Characteristics Fault Detection
346
-
Motor Overspeeding Detection
351
-
M) Monitor Display and Monitor Output Signal
352
-
Speed Display and Rotations Per Minute Setting
353
-
Monitor Indicator Selection Using Operation Panel or Via Communication
355
-
Monitor Display Selection for Terminals FM/CA and am
368
-
Adjusting Terminals FM/CA and am
375
-
Energy Saving Monitor
381
-
Output Terminal Function Selection
388
-
Output Frequency Detection
396
-
Output Current Detection Function
400
-
Output Torque Detection
402
-
Remote Output Function
403
-
Analog Remote Output Function
405
-
Fault Code Output Selection
408
-
Pulse Train Output of Output Power
409
-
Detection of Control Circuit Temperature
410
-
T) Multi-Function Input Terminal Parameters
416
-
Analog Input Terminal (Terminal 1, 4) Function Assignment
416
-
Analog Input Compensation
417
-
Analog Input Responsiveness and Noise Elimination
420
-
Frequency Setting Voltage (Current) Bias and Gain
422
-
Bias and Gain for Voltage (Current) Setting of Stall Prevention Operation Level
429
-
Checking of Current Input on Analog Input Terminal
436
-
Input Terminal Function Selection
441
-
Inverter Output Shutoff Signal
445
-
Selecting Operation Condition of the Second Function Selection Signal (RT)
447
-
Start Signal Operation Selection
449
-
C) Motor Constant Parameters
453
-
Applied Motor
453
-
Offline Auto Tuning
453
-
Offline Auto Tuning for a PM Motor (Motor Constants Tuning)
472
-
Online Auto Tuning
483
-
A) Application Parameters
488
-
Electronic Bypass Function
489
-
Self Power Management
498
-
Traverse Function
502
-
Cleaning Function
504
-
PID Control
509
-
PID Gain Tuning
529
-
Changing the Display Increment of Numerical Values Used in PID Control
537
-
PID Pre-Charge Function
541
-
Multi-Pump Function (Advanced PID Function)
548
-
PID Control Enhanced Functions
560
-
Automatic Restart after Instantaneous Power Failure
571
-
Automatic Restart after Instantaneous Power Failure
579
-
Offline Auto Tuning for a Frequency Search
582
-
Power Failure Time Deceleration-To-Stop Function
588
-
PLC Function
595
-
Trace Function
599
-
N) Operation Via Communication and Its Settings
608
Mitsubishi Electric FR-F800 Instruction Manual (694 pages)
Brand: Mitsubishi Electric
|
Category: Inverter
|
Size: 18.14 MB
Advertisement

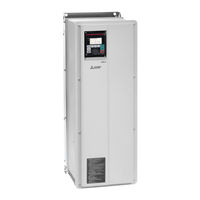
Mitsubishi Electric FR-F800 Instruction Manual (648 pages)
Brand: Mitsubishi Electric
|
Category: Inverter
|
Size: 14.73 MB
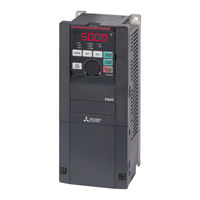
Mitsubishi Electric FR-F800 Hardware Instruction Manual (149 pages)
Inverter for fans and pumps, IP55/UL Type 12
Brand: Mitsubishi Electric
|
Category: Inverter
|
Size: 8.85 MB
Table of Contents
-
Table of Contents
7
-
2 Installation and Wiring
12
-
Peripheral Devices
13
-
Cover
16
-
Removal and Reinstallation of the Front
16
-
Installation of the Inverter
19
-
Terminal Connection Diagrams
22
-
Main Circuit Terminals
26
-
Control Circuit
33
-
Operation Panel (FR-LU08-01)
45
-
Communication Connectors and Terminals
48
-
Connection of Stand-Alone Option Units
52
-
Installing a Communication
59
-
-
3 Precautions for Use of the Inverter
60
-
Electro-Magnetic Interference (EMI) and Leakage Currents
61
-
Power Supply Harmonics
66
-
Installation of a Reactor
69
-
Power-OFF and Magnetic Contactor (MC)
70
-
Countermeasures against Deterioration of the 400 V Class Motor Insulation
71
-
Checklist before Starting Operation
72
-
Failsafe System Which Uses the Inverter
74
-
-
4 Protective Functions
76
-
Inverter Fault and Alarm Indications
77
-
Reset Method for the Protective Functions
77
-
Faults History and the List of Fault Displays
78
-
Causes and Corrective Actions
79
-
Measurement of Converter Output Voltage (Across Terminals P and N)
108
-
Measurement of Inverter Input Power Factor
108
-
Insulation Resistance Test Using Megger
109
-
Measurement of Inverter Output Frequency
109
-
Pressure Test
109
-
Specifications
110
-
Inverter Rating
111
-
Common Specifications
112
-
Inverter Outline Dimension Drawings
114
-
-
Appendix
118
-
Appendix 1 Differences and Compatibility with the FR-F840
119
-
Fr-F840
119
-
Appendix 2 Instructions for Compliance with the EU
120
-
Appendix 2 Instructions for Compliance with the EU Directives
120
-
Appendix 3 Instructions for UL and Cul
123
-
Appendix 4 Instructions for
123
-
Appendix 4 Instructions for EAC
125
-
Appendix 5 Restricted Use of Hazardous Substances in Electronic and Electrical Products
126
-
Directives
131
-

Mitsubishi Electric FR-F800 Sample Screen Manual (83 pages)
Brand: Mitsubishi Electric
|
Category: Inverter
|
Size: 2.39 MB
Table of Contents
-
Table of Contents
3
-
Revisions
5
-
1 Outline
6
-
2 System Configuration
6
-
3 Got
6
-
System Applications that Are Automatically Selected
6
-
Controller Settings of Screen Design Software
7
-
Ethernet Controller Settings of Screen Design Software
7
-
Overlap Window Settings of Screen Design Software
7
-
Graphics Mode (Graphics Setting)
7
-
-
4 Inverter FR-F800-E
7
-
Inverter FR-F800-E Communication Settings
7
-
The Output Terminal Assignment Settings
8
-
-
5 Screen Specifications
8
-
Display Language
8
-
Screen List/Transition
8
-
Screen Specifications
11
-
Menu (B-12000)
11
-
Startup (B-12010)
12
-
Operation (B-12020)
13
-
Maintenance (B-12030)
14
-
Manual Display (B-12090)
15
-
Parameter 1 (B-12100)
17
-
Batch Monitor 1 to 3 (B-12200 to 12202)
18
-
Operation Command (B-13100)
19
-
Alarm History (Inverter) (B-14100)
21
-
Machine Diagnosis (Load Characteristics Measurement) (B-14200)
22
-
Inverter Life Diagnosis (B-14300)
23
-
Station Number Switching (W-12010)
24
-
Parameter Recipe Settings (W-12100)
25
-
Backup Confirmation Dialog (W-12101)
26
-
Restoration Confirmation Dialog (W-12102)
27
-
Machine Diagnosis Confirmation (W-14200)
28
-
Diagnosis Start Warning (W-14201)
29
-
Machine Diagnosis Status Dialog (W-14202)
30
-
Out of Input Range Dialog (W-14900)
31
-
Alarm Reset (W-30001)
32
-
Language Setting (W-30002)
33
-
Clock Setting (W-30003)
34
-
-
Device List
35
-
Comment List
41
-
Recipe List
43
-
Script List
60
-
-
6 Manual Display
70
-
Preparing Document Data for Manual Display
70
-
-
7 Others
72
-
Connecting GOT and Inverter Via PLC (Ethernet)
72
-
Connecting GOT and Inverter Via PLC (CC-Link IE Field Network)
76
-
Changing the Inverter Channel no
80
-
Changing the Inverter Network No. and Station no
81
-

Mitsubishi Electric FR-F800 Instruction Manual (32 pages)
Brand: Mitsubishi Electric
|
Category: Inverter
|
Size: 1.78 MB
Table of Contents
-
Table of Contents
1
-
Inverter Installation and Precautions
4
-
Wiring
6
-
Failsafe System Which Uses the Inverter
13
-
Precautions for Use of the Inverter
13
-
Inverter Function Setting
15
-
Troubleshooting
21
-
Specifications
23

Mitsubishi Electric FR-F800 Instruction Manual (15 pages)
Brand: Mitsubishi Electric
|
Category: Inverter
|
Size: 0.33 MB
Table of Contents
-
Table of Contents
1
-
General Description
3
-
Installation and Wiring
5
-
Example of Safety System Configuration
9
-
Test and Checking Failure
12
-
Safety Parameters of Fr-A800/F800
13

Mitsubishi Electric FR-F800 Safety Stop Function Instruction Manual (14 pages)
Safety Stop Function
Brand: Mitsubishi Electric
|
Category: Inverter
|
Size: 0.29 MB
Table of Contents
-
Table of Contents
1
-
General Description
3
-
Installation and Wiring
4
-
Operation Panel
6
-
Example of Safety System Configuration
8
-
Test and Checking Failure
11
-
Safety Parameters of Fr-A800/F800
12
Advertisement
Related Products
-
Mitsubishi Electric FR-F800-E
-
Mitsubishi Electric FR-F806-E
-
Mitsubishi Electric FR-F802-E
-
Mitsubishi Electric FR-F806
-
Mitsubishi Electric FR-F802
-
Mitsubishi Electric FR-F860-04420
-
Mitsubishi Electric FR-F860-00027
-
Mitsubishi Electric FR-F860-00680-E
-
Mitsubishi Electric FR-F860-00450-E-N6
-
Mitsubishi Electric FR-F820-03160
Mitsubishi Electric Categories
![]()
Air Conditioner
Controller
![]()
Projector
Inverter
Heat Pump
More Mitsubishi Electric Manuals
![]() Инверторы серии FR-F800
Инверторы серии FR-F800
Руководство пользователя
Инвертор серии FR-F800
Карманный справочник
Схема кроссовера 208-230 В (Предполагается рейтинг SLD)
| HP | FR-F720 | FR-F820 |
| 1 | FR-F720-00046-NA | FR-F820-00046-E3N6 |
| 2 | FR-F720-00077-NA | FR-F820-00077-E3N6 |
| 3 | FR-F720-00105-NA | FR-F820-00105-E3N6 |
| 5 | FR-F720-00167-NA | FR-F820-00167-E3N6 |
| 7.5 | FR-F720-00250-NA | FR-F820-00250-E3N6 |
| 10 | FR-F720-00340-NA | FR-F820-00340-E3N6 |
| 15 | FR-F720-00490-NA | FR-F820-00490-E3N6 |
| 20 | FR-F720-00630-NA | FR-F820-00630-E3N6 |
| 25 | FR-F720-00770-NA | FR-F820-00770-E3N6 |
| 30 | FR-F720-00930-NA | FR-F820-00930-E3N6 |
| 40 | FR-F720-01250-NA | FR-F820-01250-E3N6 |
| 50 | FR-F720-01540-NA | FR-F820-01540-E3N6 |
| 60 | FR-F720-01870-NA | FR-F820-01870-E3N6 |
| 75 | FR-F720-02330-NA | FR-F820-02330-E3N6 |
| 100 | FR-F720-03160-NA | FR-F820-03160-E360 +FR-HEL-90K |
| 125 | FR-F720-03800-NA | FR-F820-03800-E3U6 +FR-HEL-110K |
| 150 | FR-F720-04750-NA | FR-F820-04750-E3U6 +FR-HEL-110K |
На этой диаграмме показан ближайший эквивалент по производительности между дисками FR-F700 и FR-F800.
Таблица выбора FR-F820
| Номер модели | AMPS Для Долг | Лошадиная сила для работы (NEC) | Размер рамки | Вес (кг) | ||
| SLD | LD | SLD | LD | |||
| ФР-Ф820-00046–E3N6 | 4.6 | 4.2 | 1 | 1 | A | 6 |
| FR-F820-00077-E3N6 | 7.7 | 7 | 2 | 2 | B | 6 |
| FR-F820-00105-E3N6 | 10.5 | 9.6 | 3 | 3 |
C |
9 |
| FR-F820-00167-E3N6 | 16.7 | 15.2 | 5 | 5 | 9 | |
| FR-F820-00250-E3N6 | 25 | 23 | 7.5 | 7.5 | 9 | |
| FR-F820-00340-E3N6 | 34 | 31 | 10 | 10 | D | 17 |
| FR-F820-00490-E3N6 | 49 | 45 | 20 | 15 | 17 | |
| FR-F820-00630-E3N6 | 63 | 58 | 20 | 20 | E | 20 |
| FR-F820-00770-E3N6 | 77 | 70.5 | 25 | 25 |
F |
37 |
| FR-F820-00930-E3N6 | 93 | 85 | 30 | 30 | 37 | |
| FR-F820-01250-E3N6 | 125 | 114 | 40 | 40 | 37 | |
| ФР-Ф820-01540-Э360 | 154 | 140 | 60 | 50 | G | 48 |
| ФР-Ф820-01870-Э360 | 187 | 170 | 60 | 60 | H | 92 |
| ФР-Ф820-02330-Э360 | 233 | 212 | 75 | 75 | 92 | |
| ФР-Ф820-03160-Э360 | 316 | 288 | 125 | 100 | K | 119 |
| FR-F820-03800-E3U6 | 380 | 346 | 150 | 125 | L | 163 |
| FR-F820-04750-E3U6 | 475 | 432 | 150 | 150 | 163 |
Важная заметка: Приводы в затененной зоне ДОЛЖНЫ использоваться вместе с дросселем звена постоянного тока FR-HEL (продается отдельно). Масса не включает отдельные дроссели звена постоянного тока.
Дроссели звена постоянного тока FR-HEL (продано отдельно)
Приводы в заштрихованной области ДОЛЖНЫ использоваться вместе с дросселем звена постоянного тока.
| Номер модели | LD |
SLD |
| ФР-Ф820-03160-Э360 | ФР-ХЕЛ-75К | ФР-ХЕЛ-90К |
| FR-F820-03800-E3U6 | ФР-ХЕЛ-90К | ФР-ХЕЛ-110К |
| FR-F820-04750-E3U6 | ФР-ХЕЛ-110К | ФР-ХЕЛ-110К |
Ключ к кодам обязанностей
| Рейтинг перегрузки | |||
| 60s | 3s | Окружающая температура. | |
| SLD | 110% | 120% | 40 ° C |
| LD | 120% | 150% | 50 ° C |
Схема кроссовера 460-480 В (Предполагается рейтинг SLD)
| HP | FR-F740 |
FR-F840 |
| 1 | FR-F740-00023-NA | FR-F840-00023-E3N6 |
| 2 | FR-F740-00038-NA | FR-F840-00038-E3N6 |
| 3 | FR-F740-00052-NA | FR-F840-00052-E3N6 |
| 5 | FR-F740-00083-NA | FR-F840-00083-E3N6 |
| 7.5 | FR-F740-00126-NA | FR-F840-00126-E3N6 |
| 10 | FR-F740-00170-NA | FR-F840-00170-E3N6 |
| 15 | FR-F740-00250-NA | FR-F840-00250-E3N6 |
| 20 | FR-F740-00310-NA | FR-F840-00310-E3N6 |
| 25 | FR-F740-00380-NA | FR-F840-00380-E3N6 |
| 30 | FR-F740-00470-NA | FR-F840-00470-E3N6 |
| 40 | FR-F740-00620-NA | FR-F840-00620-E3N6 |
| 50 | FR-F740-00770-NA | FR-F840-00770-E3N6 |
| 60 | FR-F740-00830-NA | ФР-Ф840-00930-Э360 |
| 75 | FR-F740-01160-NA | ФР-Ф840-01160-Э360 |
| 100 | FR-F740-01800-NA | FR-F840-01800-E360 +FR-HEL-H90K |
| 150 | FR-F740-02160-NA | FR-F840-02160-E3U6 +FR-HEL-H110K |
| 200 | FR-F740-02600-NA | FR-F840-02600-E3U6 +FR-HEL-H132K |
| 250 | FR-F740-03250-NA | FR-F840-03250-E3U6 +FR-HEL-H160K |
| 300 | FR-F740-03610-NA | FR-F840-03610-E3U6 +FR-HEL-H185K |
| 350 | FR-F740-04320-NA | FR-F840-04320-E3U6 +FR-HEL-H220K |
| 400 | FR-F740-04810-NA | FR-F840-04810-E3U6 +FR-HEL-H250K |
| 450 | FR-F740-05470-NA | FR-F840-05470-E3U6 +FR-HEL-H280K |
| 500 | FR-F740-06100-NA | FR-F840-06100-E3U6 +FR-HEL-H315K |
| 550 | FR-F740-06830-NA | FR-F840-06830-E3U6 +FR-HEL-H355K |
| 650 | FR-F740-07700-NA | FR-F842-07700-E3U6 +FR-CC2-H400K-60 |
| 700 | FR-F740-08660-NA | FR-F842-08660-E3U6 + FR-CC2-H450K-60 |
| 800 | FR-F740-09620-NA | FR-F842-09620-E3U6 +FR-CC2-H500K-60 |
| 900 | FR-F740-10940-NA | FR-F842-10940-E3U6 +FR-CC2-H560K-60 |
| 1000 | FR-F740-12120-NA | FR-F842-12120-E3U6 +FR-CC2-H630K-60 |
На этой диаграмме показан ближайший эквивалент по производительности между дисками FR-F700 и FR-F800.
Таблица выбора FR-F840
| Номер модели | AMPS Для Долг | Лошадиная сила для работы (NEC) | Размер рамки | Вес в фунтах)* | ||
| SLD | LD | SLD | LD | |||
| FR-F840-00023-E3N6 | 2.3 | 2.1 | 1 | 1 | C | 8 |
| FR-F840-00038-E3N6 | 3.8 | 3 | 2 | 2 | 8 | |
| FR-F840-00052-E3N6 | 5.2 | 4.8 | 3 | 3 | 8 | |
| FR-F840-00083-E3N6 | 8.3 | 7.6 | 5 | 5 | 9 | |
| FR-F840-00126-E3N6 | 12.6 | 11.5 | 7.5 | 7.5 | 9 | |
| FR-F840-00170-E3N6 | 17 | 16 | 10 | 10 | D | 17 |
| FR-F840-00250-E3N6 | 25 | 23 | 15 | 15 | 17 | |
| FR-F840-00310-E3N6 | 31 | 29 | 20 | 20 | E | 20 |
| FR-F840-00380-E3N6 | 38 | 35 | 25 | 25 | 20 | |
| FR-F840-00470-E3N6 | 47 | 43 | 30 | 30 | F | 37 |
| FR-F840-00620-E3N6 | 62 | 57 | 40 | 40 | 37 | |
| ФР-Ф840-00770-Э360 | 77 | 70 | 60 | 50 | G | 51 |
| ФР-Ф840-00930-Э360 | 93 | 85 | 60 | 60 | H | 90 |
| ФР-Ф840-01160-Э360 | 116 | 106 | 75 | 75 | 90 | |
| ФР-Ф840-01800-Э360 | 180 | 144 | 150 | 100 | 95 | |
| FR-F840-02160-E3U6 | 216 | 180 | 150 | 150 | J | 114 |
| FR-F840-02600-E3U6 | 260 | 216 | 200 | 150 | 121 | |
| FR-F840-03250-E3U6 | 325 | 260 | 250 | 200 | L | 156 |
| FR-F840-03610-E3U6 | 361 | 325 | 300 | 250 | 172 | |
| FR-F840-04320-E3U6 | 432 | 361 | 350 | 300 | M | 257 |
| FR-F840-04810-E3U6 | 481 | 432 | 400 | 350 | 257 | |
| FR-F840-05470-E3U6 | 547 | 481 | 450 | 400 |
N |
365 |
| FR-F840-06100-E3U6 | 610 | 547 | 500 | 450 | 365 | |
| FR-F840-06830-E3U6 | 683 | 610 | 550 | 500 | 365 | |
| FR-F842-07700-E3U6 + FR-CC2-H355K-60 | – | 683 | – | 550 | П+Р | 827 |
| FR-F842-07700-E3U6 + FR-CC2-H400K-60 | 770 | – | 650 | – |
П+С |
979 |
| FR-F842-08660-E3U6 + FR-CC2-H400K-60 | – | 770 | – | 650 | 979 | |
| FR-F842-08660-E3U6 + FR-CC2-H450K-60 | 866 | – | 700 | – | 986 | |
| FR-F842-09620-E3U6 + FR-CC2-H450K-60 | – | 866 | – | 700 | Q+S | 1162 |
| FR-F842-09620-E3U6 + FR-CC2-H500K-60 | 962 | – | 800 | – | 1168 | |
| FR-F842-10940-E3U6 + FR-CC2-H500K-60 | – | 962 | – | 800 | 1168 | |
| FR-F842-10940-E3U6 + FR-CC2-H560K-60 | 1094 | – | 900 | – | 1168 | |
| FR-F842-12120-E3U6 + FR-CC2-H560K-60 | – | 1094 | – | 900 | 1168 | |
| FR-F842-12120-E3U6 + FR-CC2-H630K-60 | 1212 | – | 1000 | – | 1168 |
Вес привода и модулей CC2 ОБЪЕДИНЕН.
Важное примечание. Приводы в заштрихованной области ДОЛЖНЫ использоваться вместе с дросселем звена постоянного тока FR-HEL-H (продается отдельно). Масса не включает отдельные дроссели звена постоянного тока.
FR-HEL-H Дроссели звена постоянного тока (продано отдельно)
Приводы, показанные в заштрихованной области таблицы выбора FR-F840, ДОЛЖНЫ использоваться вместе с дросселем звена постоянного тока.
|
Номер модели |
LD |
SLD |
| ФР-Ф840-01800-Э360 | FR-HEL-H75K | FR-HEL-H90K |
| FR-F840-02160-E3U6 | FR-HEL-H90K | FR-HEL-H110K |
| FR-F840-02600-E3U6 | FR-HEL-H110K | FR-HEL-H132K |
| FR-F840-03250-E3U6 | FR-HEL-H132K | FR-HEL-H160K |
| FR-F840-03610-E3U6 | FR-HEL-H160K | FR-HEL-H185K |
| FR-F840-04320-E3U6 | FR-HEL-H185K | FR-HEL-H220K |
| FR-F840-04810-E3U6 | FR-HEL-H220K | FR-HEL-H250K |
| FR-F840-05470-E3U6 | FR-HEL-H250K | FR-HEL-H280K |
| FR-F840-06100-E3U6 | FR-HEL-H280K | FR-HEL-H315K |
| FR-F840-06830-E3U6 | FR-HEL-H315K | FR-HEL-H355K |
Рейтинги FR-F860
| Номер модели (*3) | AMPS для долга | Лошадиная сила для работы (NEC) | Размер рамки | Вес (кг) | ||
| SLD | LD | SLD | LD | |||
| FR-F860-00027-E3N6 | 2.7 | 2.5 | 2 | 1.5 | C | 11.7 |
| FR-F860-00061-E3N6 | 6.1 | 5.6 | 5 | 3 | C | 12.8 |
| FR-F860-00090-E3N6 | 9 | 8.2 | 7.5 | 5 | C | 12.8 |
| FR-F860-00170-E3N6 | 17 | 16 | 15 | 10 | D | 15.4 |
| FR-F860-00320-E3N6 | 32 | 27 | 30 | 25 | E | 19.8 |
| FR-F860-00450-E3N6 | 45 | 41 | 40 | 40 | F | 37.4 |
| ФР-Ф860-00680-Э360 | 68 | 62 | 60 | 60 | H | 79.2 |
| FR-F860-01080-E360 (*1) | 108 | 99 | 100 | 100 | H | 90.2 |
| FR-F860-01440-E360 (*1) | 144 | 131 | 150 | 125 | J | 114 |
| FR-F860-01670-E360 (*1) | 167 | 152 | 150 | 150 | J | 114 |
| FR-F860-02430-E360 (*1) | 243 | 221 | 250 | 200 | J | 121 |
| FR-F860-02890-E360 (*1) | 289 | 255 | 300 | 250 | M | 246 |
| FR-F860-03360-E360 (*1) | 336 | 304 | 350 | 300 | M | 253 |
| FR-F860-04420-E360 (*1) | 442 | 402 | 450 | 400 | N | 337 |
| FR-F862-05450-E360+ FR-CC2-C355K-60 (*2) | 545 | 496 | 550 | 500 | П+Р | 810 |
| FR-F862-06470-E360+ FR-CC2-C400K-60 (*2) | 647 | 589 | 650 | 600 | Q+S | 920 |
| FR-F862-08500-E360+ FR-CC2-C560K-60 (*2) | 850 | 773 | 850 | 750 | Q+S | 1126 |
Ноты:
- Эти приводы НЕОБХОДИМО использовать с дросселем звена постоянного тока (продается отдельно).
- FR-F862 Приводы инверторныеtagтолько е; использовать вместе с выпрямителем FR-CC2-C. Максимальный входной и выходной ток модулей FR-CC2 соответствует показанному значению. Показан КОМБИНИРОВАННЫЙ вес.
- FR-F860 не имеет встроенного параметра. FR-DU08 или FR-LU08 продаются отдельно.
600V FR-HEL-C Дроссели промежуточного контура постоянного тока (продано отдельно)
| Номер модели | SLD |
LD |
| ФР-Ф860-01080-Э360 | FR-HEL-C75K | FR-HEL-C75K |
| ФР-Ф860-01440-Э360 | FR-HEL-C90K | FR-HEL-C90K |
| ФР-Ф860-01670-Э360 | FR-HEL-C110K | FR-HEL-C110K |
| ФР-Ф860-02430-Э360 | FR-HEL-C185K | FR-HEL-C132K |
| ФР-Ф860-02890-Э360 | FR-HEL-C220K | FR-HEL-C185K |
| ФР-Ф860-03360-Э360 | FR-HEL-C280K | FR-HEL-C220K |
| ФР-Ф860-04420-Э360 | FR-HEL-C280K | FR-HEL-C280K |
Размеры корпуса 200 В, 400 В, 600 В Приводы
| FR-F800-Е Номер модели | Размер рамки | Высота | Ширина | глубина |
| Размеры, дюймы (мм) | ||||
| ФР-Ф820-00046 (N6) | A | 12.2 (310) 10.24 (260) без распределительной коробки |
4.33 (110) | 4.41 (112) |
| ФР-Ф820-00077 (N6) | B | 12.2 (310) 10.24 (260) без распределительной коробки |
4.33 (110) | 5.00 (127) |
| ФР-Ф820-00105, 00167, 00250 (Н6) ФР-Ф840-00023, 00038, 00052, 00083, 00126 (N6) ФР-Ф860-00027, 00061, 00090 (Н6) |
C | 12.52 (318) 10.24 (260) без распределительной коробки |
5.91 (150) | 5.51 (140) |
| ФР-Ф820-00340, 00490 (Н6) ФР-Ф840-00170, 00250 (N6) ФР-Ф860-00170 (Н6) |
D | 12.76 (324) 10.24 (260) без распределительной коробки |
8.66 (220) |
6.69 (170) |
| ФР-Ф820-00630 (N6) ФР-Ф840-00310, 00380 (N6) ФР-Ф860-00320 (Н6) |
E | «14.29 (363) 11.81 (300) без распределительной коробки |
8.66 (220) | 7.48 (190) |
| ФР-Ф820-00770, 00930, 01250 (Н6) ФР-Ф840-00470, 00620 (N6) ФР-Ф860-00450 (Н6) |
F | 20.37 (517) 15.75 (400) без распределительной коробки |
9.84 (250) | 7.48 (190) |
| FR-F820-01540 FR-F840-00770 | G | 21.65 (550) | 12.80 (325) | 7.68 (195) |
| ФР-Ф820-01870, 02330 ФР-Ф840-00930, 01160, 01800 ФР-Ф860-00680, 01080 |
H | 21.65 (550) | 17.13 (435) | 9.84 (250) |
| ФР-Ф840-02160, 02600 ФР-Ф860-01440, 01670, 02430 |
J | 24.41 (620) | 18.31 (465) | 11.81 (300) |
| ФР-Ф820-03160 | K | 27.56 (700) | 18.31 (465) | 9.84 (250) |
| ФР-Ф820-03800, 04750 ФР-Ф840-03250, 03610 |
L | 29.13 (740) | 18.31 (465) | 14.17 (360) |
| ФР-Ф840-04320, 04810 ФР-Ф860-02890, 03360 |
M | 39.76 (1010) | 19.61 (498) | 14.96 (380) |
| ФР-Ф840-05470, 06100, 06830 ФР-Ф860-04420 | N | 39.76 (1010) | 26.77 (680) | 14.96 (380) |
| ФР-Ф842-07700, 08660 ФР-Ф862-05450 | P | 52.36 (1330) | 21.26 (540) | 17.32 (440) |
| ФР-Ф842-09620, 10940, 12120 ФР-Ф862-06470, 08500 |
Q | 62.20 (1580) | 26.77 (680) | 17.32 (440) |
| Номер модели FR-CC2 | Размер рамки | Высота | Ширина | глубина |
| Размеры, дюймы (мм) | ||||
| ФР-СС2-Х315К, Х355К, К355К | R | 52.36 (1330) | 23.62 (600) | 17.32 (440) |
| FR-CC2-H400K, H450H, H500K H560K, H630K, C400K, C560K | S | 62.20 (1580) | 23.62 (600) | 17.32 (440) |
Примечание: Код (N6) относится к распределительной коробке UL типа 1.
Размеры НЕОБХОДИМЫХ дросселей звена постоянного тока (продано отдельно)
| Номер модели | Высота | Ширина | глубина | Вес (кг) |
| Размеры в дюймах (мм) | ||||
| ФР-ХЕЛ-75К | 13.4 (340) | 5.9 (150) | 7.9 (200) | 37 |
| ФР-ХЕЛ-90К | 13.4 (340) | 5.9 (150) | 7.9 (200) | 42 |
| ФР-ХЕЛ-110К | 15.8 (400) | 6.9 (175) | 7.9 (200) | 44 |
| FR-HEL-H75K | 12.6 (320) | 5.9 (140) | 7.3 (185) | 35 |
| FR-HEL-H90K | 13.4 (340) | 5.9 (150) | 7.5 (190) | 44 |
| FR-HEL-H110K | 13.4 (340) | 5.9 (150) | 7.7 (195) | 48 |
| FR-HEL-H132K | 15.9 (405) | 6.9 (175) | 7.9 (200) | 57 |
| FR-HEL-H160K | 15.9 (405) | 6.9 (175) | 8.1 (205) | 62 |
| FR-HEL-H185K | 15.9 (405) | 6.9 (175) | 9.4 (240) | 64 |
| FR-HEL-H220K | 15.9 (405) | 6.9 (175) | 9.4 (240) | 66 |
| FR-HEL-H250K | 17.3 (440) | 7.5 (190) | 9.8 (250) | 77 |
| FR-HEL-H280K | 17.3 (440) | 7.5 (190) | 10.0 (255) | 84 |
| FR-HEL-H315K | 19.49 (495) | 8.27 (210) | 9.84 (250) | 92 |
| FR-HEL-H355K | 19.49 (495) | 8.27 (210) | 9.84 (250) | 101 |
| FR-HEL-C75K | 12.6 (320) | 5.5 (140) | 7.3 (185) | 35 |
| FR-HEL-C90K | 13.3 (340) | 5.9 (150) | 9.4 (240) | 44 |
| FR-HEL-C110K | 13.3 (340) | 5.9 (150) | 9.4 (240) | 51 |
| FR-HEL-C132K | 15.9 (405) | 6.9 (175) | 7.7 (195) | 53 |
| FR-HEL-C185K | 15.9 (405) | 6.9 (175) | 9.4 (240) | 70 |
| FR-HEL-C220K | 15.9 (405) | 6.9 (175) | 9.4 (240) | 73 |
| FR-HEL-C280K | 17.3 (440) | 7.5 (190) | 9.8 (250) | 88 |
Выбор периферийного оборудования (Предполагается рейтинг LD)
| Номер модели | замыкатель | Автоматический выключатель | ||
| Нет DCL | С ДКЛ | Нет DCL | С ДКЛ | |
| 200 вольт | ||||
| FR-F820-00046-E3N6 | S-T10 | S-T10 | НФ50-СВФУ3П10А | НФ50-СВФУ3П10А |
| FR-F820-00077-E3N6 | S-T10 | S-T10 | НФ50-СВФУ3П15А | НФ50-СВФУ3П15А |
| FR-F820-00105-E3N6 | S-T10 | S-T10 | НФ50-СВФУ3П20А | НФ50-СВФУ3П15А |
| FR-F820-00167-E3N6 | S-T10 | S-T10 | НФ50-СВФУ3П30А | НФ50-СВФУ3П30А |
| FR-F820-00250-E3N6 | С-Т20, С-Т21 | S-T10 | НФ50-СВФУ3П50А | НФ50-СВФУ3П40А |
| FR-F820-00340-E3N6 | S-T25 | С-Т20, С-Т21 | НФ125-СВУ3П60А | НФ50-СВФУ3П50А |
| FR-F820-00490-E3N6 | S-T25 | S-T25 | НФ125-СВУ3П75А | НФ125-СВУ3П75А |
| FR-F820-00630-E3N6 | S-N35 | S-N35 | НФ125-СВУ3П125А | НФ125-СВУ3П100А |
| FR-F820-00770-E3N6 | S-N50 | S-N50 | НФ250-СВУ3П150А | НФ125-СВУ3П125А |
| FR-F820-00930-E3N6 | S-N65 | S-N50 | НФ250-СВУ3П175А | НФ250-СВУ3П150А |
| FR-F820-01250-E3N6 | S-N80 | S-N65 | НФ250-СВУ3П225А | НФ250-СВУ3П175А |
| ФР-Ф820-01540-Э360 | S-N95 | S-N80 | НФ250-СВУ3П250А | НФ250-СВУ3П225А |
| ФР-Ф820-01870-Э360 | S-N150 | S-N125 | NF4SWU3300BB | NF4SWU3300BB |
| ФР-Ф820-02330-Э360 | S-N180 | S-N150 | NF4SWU3400BB | NF4SWU3350BB |
| ФР-Ф820-03160-Э360 | S-N220 | S-N180 | – | NF4SWU3400BB |
| FR-F820-03800-E3U6 | – | S-N300 | – | NF4SWU3400BB |
| FR-F820-04750-E3U6 | – | S-N300 | – | NF6SWU3500BB |
| 400 вольт | ||||
| FR-F840-00023-E3N6 | S-T10 | S-T10 | НФ100-ХРУ3П5А | НФ100-ХРУ3П5А |
| FR-F840-00038-E3N6 | S-T10 | S-T10 | НФ100-ХРУ3П10А | НФ100-ХРУ3П10А |
| FR-F840-00052-E3N6 | S-T10 | S-T10 | НФ100-ХРУ3П10А | НФ100-ХРУ3П10А |
| FR-F840-00083-E3N6 | S-T10 | S-T10 | НФ125-СВУ3П20А | НФ125-СВУ3П15А |
| FR-F840-00126-E3N6 | S-T10 | S-T10 | НФ125-СВУ3П30А | НФ125-СВУ3П20А |
| FR-F840-00170-E3N6 | С-Т20, С-Т21 | S-T12 | НФ125-СВУ3П30А | НФ125-СВУ3П30А |
| FR-F840-00250-E3N6 | С-Т20, С-Т21 | С-Т20, С-Т21 | НФ125-СВУ3П50А | НФ125-СВУ3П40А |
| FR-F840-00310-E3N6 | С-Т20, С-Т21 | С-Т20, С-Т21 | НФ125-СВУ3П60А | НФ125-СВУ3П50А |
| FR-F840-00380-E3N6 | S-T25 | С-Т20, С-Т21 | НФ125-СВУ3П75А | НФ125-СВУ3П60А |
| FR-F840-00470-E3N6 | S-T25 | S-T25 | НФ125-СВУ3П100А | НФ125-СВУ3П75А |
| FR-F840-00620-E3N6 | S-N35 | S-T25 | НФ125-СВУ3П125А | НФ125-СВУ3П100А |
| ФР-Ф840-00770-Э360 | S-N50 | S-N50 | НФ250-СВУ3П150А | НФ125-СВУ3П125А |
| ФР-Ф840-00930-Э360 | S-N65 | S-N65 | НФ250-СВУ3П175А | НФ250-СВУ3П150А |
| ФР-Ф840-01160-Э360 | S-N80 | S-N80 | НФ250-СВУ3П200А | НФ250-СВУ3П175А |
| ФР-Ф840-01800-Э360 | S-N80 | S-N95 | – | НФ250-СВУ3П225А |
| Номер модели | замыкатель | Автоматический выключатель | ||
| Нет DCL | С ДКЛ | Нет DCL | С ДКЛ | |
| FR-F840-02160-E3U6 | – | S-N150 | – | НФ250-СВУ3П225А |
| FR-F840-02600-E3U6 | – | S-N180 | – | НФ250-СВУ3П225А |
| FR-F840-03250-E3U6 | – | S-N220 | – | NF4SWU3400BB |
| FR-F840-03610-E3U6 | – | S-N300 | – | NF4SWU3400BB |
| FR-F840-04320-E3U6 | – | S-N300 | – | NF4SWU3400BB |
| FR-F840-04810-E3U6 | – | S-N300 | – | NF6SWU3500BB |
| FR-F840-05470-E3U6 | – | S-N400 | – | NF6SWU3600BB |
| FR-F840-06100-E3U6 | – | S-N600 | – | NF6SWU3600BB |
| FR-F840-06830-E3U6 | – | S-N600 | – | Продукт 700А |
| FR-F842-07700-E3U6 | – | S-N600 | – | Продукт 700А |
| + FR-CC2-H315K-60 | ||||
| FR-F842-08660-E3U6 | – | S-N600 | – | Продукт 700А |
| + FR-CC2-H315K-60 | ||||
| FR-F842-07700-E3U6 | – | S-N600 | – | Продукт 800А |
| + FR-CC2-H355K-60 | ||||
| FR-F842-08660-E3U6 | – | S-N600 | – | Продукт 800А |
| + FR-CC2-H355K-60 | ||||
| FR-F842-09620-E3U6 | – | S-N600 | – | Продукт 800А |
| + FR-CC2-H355K-60 | ||||
| FR-F842-07700-E3U6 | – | S-N800 | – | Продукт 900А |
| + FR-CC2-H400K-60 | ||||
| FR-F842-08660-E3U6 | – | S-N800 | – | Продукт 900А |
| + FR-CC2-H400K-60 | ||||
| FR-F842-09620-E3U6 | – | S-N800 | – | Продукт 900А |
| + FR-CC2-H400K-60 | ||||
| FR-F842-10940-E3U6 | – | S-N800 | – | Продукт 900А |
| + FR-CC2-H400K-60 | ||||
| FR-F842-08660-E3U6 | – | Продукт 1000А | – | Продукт 1000А |
| + FR-CC2-H450K-60 | ||||
| FR-F842-09620-E3U6 | – | Продукт 1000А | – | Продукт 1000А |
| + FR-CC2-H450K-60 | ||||
| FR-F842-10940-E3U6 | – | Продукт 1000А | – | Продукт 1000А |
| + FR-CC2-H450K-60 | ||||
| FR-F842-12120-E3U6 | – | Продукт 1000А | – | Продукт 1000А |
| + FR-CC2-H450K-60 | ||||
| FR-F842-09620-E3U6 | – | Продукт 1000А | – | Продукт 1200А |
| + FR-CC2-H500K-60 | ||||
| FR-F842-10940-E3U6 | – | Продукт 1200А | – | Продукт 1500А |
| + FR-CC2-H560K-60 | ||||
| FR-F842-12120-E3U6 | – | Продукт 1400А | – | Продукт 2000А |
| + FR-CC2-H630K-60 |
Ключ к кодам дисплея клавиатуры DU08
| Имя функции | Описание | индикация | |
| Сообщение об ошибке *2 | Блокировка панели управления | Попытка операции во время блокировки панели управления | |
| Ошибка записи параметра | Произошла ошибка при записи параметра | в | |
| Ошибка операции копирования | Произошла ошибка при копировании параметра | в | |
| Ошибка | Сигнал RES включен или PU и инвертор не могут установить нормальную связь | ||
| Предотвращение опрокидывания (перегрузка по току) | Защита от перегрузки по току | ||
|
Предупреждения *3 |
Предотвращение остановки (Оверволtage) | Оверволtage предотвращение опрокидывания. Появляется, когда активирована функция предотвращения регенерации. | |
| Электронное тепловое реле Функция Предварительная тревога | Электронное тепловое реле O/L достигло 85% от указанного значения. | ||
| ПУ Стоп | Стоп/сброс на панели управления нажат во время внешнего управления | ||
| Выходной сигнал технического обслуживания | Совокупное время подачи питания превысило установленное значение таймера выхода обслуживания. | ||
| Незначительный Вина | Ошибка вентилятора *4 | Вентилятор охлаждения неисправен | |
| Отключение при перегрузке по току Во время Ускорение | Возник перегруз по току во время разгона | ||
| Отключение при перегрузке по току при постоянной скорости | Перегрузка по току во время работы на постоянной скорости | ||
| Отключение при перегрузке по току Во время Замедление или остановка | Перегрузка по току во время торможения и при остановке | ||
| Регенеративный Оверволtage Отключение при ускорении | Оверволtage произошло во время разгона | ||
| Регенеративный Оверволtage Отключение при постоянной скорости | Оверволtage произошло во время работы на постоянной скорости | ||
| Регенеративный Оверволtage Отключение во время торможения или Стоп | Оверволtage произошло во время торможения и при остановке | ||
| Отключение инвертора при перегрузке (электронный тепловой O/L Реле)*1 | Функция электронного теплового реле для защиты элементов инвертора активирована. | ||
| Отключение двигателя при перегрузке (электронный тепловой O/L Реле)*1 | Функция электронного теплового реле для защиты двигателя активирована | ||
| Перегрев плавника | Радиатор перегрелся | ||
|
Серьезные неудачи *5 |
Мгновенный сбой питания Protection | Произошел мгновенный сбой питания на входе источника питания | |
| Андерволtage Защита | Основная цепь постоянного тока voltagе стал низким | ||
| Сбой входной фазы | Обрыв одной из трех фаз на стороне входа инвертора | ||
| Предотвращение остановки | Выходная частота упала до 0.5 Гц в результате торможения из-за чрезмерной нагрузки двигателя. | ||
| Замыкание на землю на стороне выхода Защита от перегрузки по току | Произошло замыкание на землю на стороне выхода инвертора. | ||
| Защита от обрыва выходной фазы. | Обрыв одной из трех фаз на выходе инвертора | ||
| Внешнее тепловое реле Операция *6 | Сработало внешнее тепловое реле, подключенное к клемме ОН. | ||
| Работа термистора PTC | Состояние перегрева двигателя определяется в течение 10 с или более с помощью входа внешнего термистора PTC, подключенного к клемме AU. | ||
| Аварийный сигнал блока HC | В дополнительной плате возник аварийный сигнал или к клеммам R/L1, S/L2, T/L3 подключен источник питания переменного тока, когда установлено подключение преобразователя высокой мощности. | ||
| Ошибка функциональной опции | Произошла ошибка связи в опции связи | ||
| Отключение дополнительной карты | Карта отключена или подключена неправильно | ||
| Устройство хранения параметров Сигнализация | Нарушилась работа элемента, в котором хранятся параметры (плата управления) | ||
| Отключение ПУ | Произошла ошибка связи между PU и инвертором, интервал связи превысил допустимое время во время связи RS-485 с разъемом PU, или ошибки связи превышают количество повторных попыток во время связи RS-485. |
Ноты:
- Сброс инвертора инициализирует встроенные внутренние тепловые данные функции электронного теплового реле.
- Сообщение об ошибке указывает на операционную ошибку. Выход инвертора не отключен.
- Предупреждения — это сообщения, выдаваемые до того, как произойдут серьезные сбои. Выход инвертора не отключен.
- Незначительные неисправности предупреждают оператора о сбоях с выходом. Выход инвертора не отключен.
- При возникновении серьезных сбоев активируются защитные функции, отключающие выход инвертора и выдающие аварийные сигналы.
- Внешний термодатчик работает только тогда, когда сигнал OH установлен в Pr. 178 до Пр. 189 (выбор функции входного терминала).
Опции и аксессуары для FR-F800
|
Номер модели |
Тип |
Описание |
| FR-A8AX | Ввода / вывода | 16-битная карта цифрового ввода |
| FR-A8AY | Ввода / вывода | Плата цифрового выхода/расширенного аналогового выхода |
| ФР-А8АР | Ввода / вывода | Плата релейных выходов |
| FR-A8AC | Ввода / вывода | Вариант управления A/F800 120 В |
| ФР-А8АН | Ввода / вывода | Плата ввода/вывода F/A800 4–20 мА |
| FR-A8NC | Коммуникация | Коммуникационная карта CC-Link |
| ФР-А8НД | Коммуникация | Плата связи DeviceNet |
| ФР-А8НП | Коммуникация | Коммуникационная карта Profibus DPV0 |
| A8NDPV1 | Коммуникация | Коммуникационная карта Profibus DPV1 |
| FR-A8NF | Коммуникация | Коммуникационная карта FL-Net |
| A8N-XLT | Коммуникация | Мультипротокольная карта связи RS-485 |
| А8НЭИП-2П | Коммуникация | Плата IP-коммуникации EtherNET |
| А8НПРТ-2П | Коммуникация | Коммуникационная карта Profinet |
| А8НЕКТ-2П | Коммуникация | Коммуникационная карта EtherCAT® |
| A8NETH-2P | Коммуникация | Многопротокольная коммуникационная карта EtherNET |
| FR-A8NCE | Коммуникация | Коммуникационная карта CC-Link IE |
| A8NC-КОН | Коммуникация | Коммуникационная карта CC-Link и разъемы |
| FR-LU08 | Аксессуар | Жидкокристаллическая панель управления |
| ФР-ПУ07 | Аксессуар | Блок параметров |
| ФР-ПУ07-01 | Аксессуар | Единица параметра (тип HVAC) |
| FR-PU07BB-L | Аксессуар | Блок параметров с резервным аккумулятором |
| FR-CB201 | Аксессуар | Соединительный кабель блока параметров 1 м |
| FR-CB203 | Аксессуар | Соединительный кабель блока параметров 3 м |
| FR-CB205 | Аксессуар | Соединительный кабель блока параметров 5 м |
| FR-АДП | Аксессуар | Блок адаптера клавиатуры для подключения FR-DU08 |
| FR-A8TAT | Аксессуар | Адаптер клеммной колодки управления |
| ФР-А8ТР | Аксессуар | Опция винтовой клеммной колодки |
| FR-HC2 | Аксессуар | Контроллер подавления гармоник |
| FR-HEL | Аксессуар | Дроссель звена постоянного тока 240 В |
| FR-HEL-H | Аксессуар | Дроссель звена постоянного тока 480 В |
| FR-HEL-C | Аксессуар | Дроссель звена постоянного тока 600 В |
| FR-Конфигуратор2 | Software | Утилита настройки программного обеспечения для серии 800 |
Знаки и бренды третьих лиц являются собственностью их соответствующих владельцев.
![]() МИЦУБИСИ ЭЛЕКТРИЧЕСКАЯ АВТОМАТИЗАЦИЯ, ИНК.
МИЦУБИСИ ЭЛЕКТРИЧЕСКАЯ АВТОМАТИЗАЦИЯ, ИНК.
500 Corporate Woods Parkway, Vernon Hills, IL 60061
Тел 847.478.2100
Fx 847.478.2253
us.MitsubishiElectric.com/fa/en
Февраль 2022
© 2022, Mitsubishi Electric Automation, Inc.
Технические характеристики могут быть изменены без предварительного уведомления
Все права защищены
L-VH-04069
Документы / Ресурсы
Рекомендации

Инновационные решения для автоматизации | Мицубиси Электрик Америкас
-
Mitsubishi Electronics F800 — page 1
INVERTER FR-A800/F800 Safety S top Function Instruction Manual CONTENTS 1. GENERAL DESCRIPTION .. …………………………………… 2 2. INSTALLATION AND WIRING ……………………………….. 3 3. EXAMPLE OF SAFETY SYSTEM CONFIGURATION …. 7 4. TEST AND CHECKING FAILURE …………………………. 10 5. SAFETY PARAMETERS OF FR …
-
Mitsubishi Electronics F800 — page 2
1 Compliance with the EU Machin ery Directive – Functional Safety WA R N I N G Any misuse of saf ety function could lead to per sonal injury or death, proper ty damage, or economic loss. T o ensure that the system complies fully with requirement of safety , make a system-level risk assessment. Mit subishi Electric Co. cannot assume responsibi …
-
Mitsubishi Electronics F800 — page 3
2 GENERAL DESCRIP TION 1 GENERAL DESCRIPTION Features Mitsubishi FR-A800/F800 safety stop function prevents a dr ive fr om supplying rotatio nal energy to motor s. Dual safety channels ‘S1’ and ‘S2’ cut o ff th e gate-drive powe r for IGBT to turn off. Fig.1 FR-A800 /F800 safety stop functio n diagram Standards Mitsubishi FR-A800/F800 safet …
-
Mitsubishi Electronics F800 — page 4
INSTALLATION AND WIRING 3 2 INST ALLA TION AND WIRING Installation Mitsubishi FR-A800/F8 00 safety stop function shoul d be used under following cond ition and environment. T able.1 The condition and envir onment for using safety stop functi on The ND and HD ratings can be selecte d only for the FR-A800. T emperature applicable for a …
-
Mitsubishi Electronics F800 — page 5
4 INSTALLATION AND WIRING ● Wiring The safety related terminals are de scribed in T a ble.2 and T abl e.3 T able.2 The safety relate d terminals S pecifications for conforming safety standards. ON: The transistor is conducted. OF F: The transistor is not conducted. CAUTION In order to meet safety stop, an approved safety relay u …
-
Mitsubishi Electronics F800 — page 6
INSTALLATION AND WIRING 5 T able.3 T ruth t able of safety relat ed signals ON: The transistor is conducted. OFF: The transistor is not conducted. When not using the safety stop function, short across terminals S1 and PC, S2 and PC, a nd SIC and SD to use the inverter . (In the initial status, terminals S1 and PC, S2 and PC, and SIC a …
-
Mitsubishi Electronics F800 — page 7
6 INSTALLATION AND WIRING ● Wire and ferrule specification T able.4 Wire and ferrule spec ification Ferrules and tools are distributed by Phoenix Contact. ● Jumper cable The jumper cable between S1,S2 and PC termin al between SIC and SD terminal has been inst alled in the factory as shown in Fig.2. Fig.2. Short wire Before conne cting sa …
-
Mitsubishi Electronics F800 — page 8
EXAMPLE OF SAFETY SYSTEM CONFIGURATION 7 3 EXAMPLE OF SAFETY SY STEM CONFIGURA TION ● FR-A800/F800 configuration exa mple If the control logic is SINK logic, the common terminal is terminal SD. Fig.3 Safety system example with FR- A800/F800 NOTE • When starting up the system’ s operation, press the RESET switch to reset the safety stop …
-
Mitsubishi Electronics F800 — page 9
8 EXAMPLE OF SAFETY SYSTEM CONFIGURATION ● Multiple inverter configuration exam ple Fig.4 When using multiple safety stop func tion inverters (FR-A800/F800) NOTE • Some models cannot be used together because thei r control logics are different. Refer to the SAFETY STOP FUNCTION MANUAL of each model. S 1 S 2 PC FR-A800/F800 SO R/L1 S/L2 T/L3 IGB …
-
Mitsubishi Electronics F800 — page 10
EXAMPLE OF SAFETY SYSTEM CONFIGURATION 9 ● Safety controller configuration exa mple Fig.5 Safety system example with FR- A800/F800 NOTE • When starting up the system’ s operation, press the RESET switch to reset the safety stop function first. • In the above configuration, af ter reset of emergency stop button, drive will be in safe-state u …
-
Mitsubishi Electronics F800 — page 11
10 TEST AND CHECKING FAILURE 4 TEST AND CHECKING F AIL URE I/O status and failure FR-A800/F800 safety re lated I/O status obeys the following truth t able. T able.5 T ruth t able of safety related signals ON: The transistor is conducted. OF F: The transistor is not conducted. When not using the safety stop function, short across termi …
-
Mitsubishi Electronics F800 — page 12
SAFETY PARAMETERS OF FR-A800/F800 11 Diagnostic If the failure detected, FR-A800/F800 output ala rm signal and i ndicate ‘E.SAF’ at the display . In case of FR-A800/F800 output the alar m, please take following action. 1) Check the S1-SIC and S2-SIC input sign al logic is the same. If these are differe nt lo gic, collect the input signal and re …
-
Mitsubishi Electronics F800 — page 13
12 REVISIONS Print Date Manual Number Revision Apr . 2013 BCN-A23228-001(E) First edition Jun. 2013 BCN-A23228-001-A(E) ● Multiple inverter configuration example Jul. 2014 BCN-A23228-001-B(E) Compatibility with the FR-F800 series Modification BCN-A23228-001-B(E) …
-
Mitsubishi Electronics F800 — page 14
HEAD OFFICE: TOKYO BUILDING 2-7-3, MARUNOUCHI, CHIYODA-KU, TOKYO 100-8310, JAP AN MITSUBISHI ELECTRIC EUROP E EUROPE B.V . German Branch Gothaer S traße 8 D-40880 Ratingen Phone: +49 (0) 21 02 / 486-0 Hotline: +49 2102 1805 000-76 5 /-766 Fax: +49 (0) 21 02 / 4 86-1 12 0 e mail: megfa-ma il@meg.mee.com www .mitsubishi-automatio n.com MITSUBISHI EL …
Заказать оборудование Mitsubishi Electric
Купить FR f800 руководство по эксплуатации в компании Олниса можно оптом или в розницу. Доставим FR f800 руководство по эксплуатации в любой регион России. Можем предложить точный аналог. Работаем напрямую с производителем, не используя посредников.
Частотные преобразователи серии FR F800 – это приборы общепромышленного назначения, они активно используются с целью автоматизации технологических процессов в нефтегазовых, нефтехимических отраслях, в пищевой промышленности, а также в упаковочном оборудовании, различных станках, насосах. Очень важно изначально правильно наладить приборы, чтобы обеспечить надежность и безопасность последующей работы электродвигателей.
.jpg "FR f800 руководство по эксплуатации")
Отличительные характеристики
Частотные преобразователи используются для управления скоростью вращения ротора электродвигателя и его крутящего момента путем изменения частоты переменного напряжения на его обмотке. Отличаются отменными характеристиками:
- контроль параметров расхода;
- параллельное управление несколькими приборами сразу;
- высокие показатели пропускной мощности;
- гарантия устранения без ущерба для техники различных замыканий сети, пикового скачка напряжения, потери контакта;
- усиленные показатели ударопрочности;
- защита от вибрации и влаги;
- удобный в использовании графический интерфейс;
- многозадачное меню программы привода;
- отключение в случае превышения заданных параметров крутящего момента;
- простота монтажа с защитой клемм и простой установкой в промышленные шкафы, выбором крепежей;
- отменные эксплуатационные характеристики – работа при высоких температурах, заморозках, под высоким атмосферным давлением;
- скоростное управление приборами с функцией регулировки вручную;
- надежная защита и безопасность от перегрузки по току и напряжению;
- автоматическое отключение при обрыве фаз или в случае заклиниваний в самом двигателе.
.jpg "FR f800 руководство по эксплуатации")
Ввод прибора в эксплуатацию
С помощью наладочного программного обеспечения FR Configurator2 настраивают параметры частотников через интерфейс USB. Простая загрузка конфигураций с флэш-карты упрощает ввод в эксплуатацию и настройку инвертора относительно характеристик работы электродвигателя. Принцип наладки прибора:
- в пульт встроен поворотный диск, который открывает доступ к регулировке всех параметров;
- в пульт встроен 5-разрядный 12-сегментный индикатор неполадок;
- далее настраивают ПИД-значение, лучше это выполнять в ручную;
- затем устанавливают на часах точную время и дату – это поможет определять момент срабатывания защитной функции и протоколировать проведенные диагностики системы;
- встроенная функция контроллера расширяет возможности интерфейсного контроля «человек-машина» по принципу «plug and play».
Лучше всего, чтобы наладкой занимался специалист – это обезопасит от возникновения ошибок в работе прибора, что гарантирует бесперебойную работу и изначально высокую производительность преобразователя.
Заказ оборудования
Приобрести частотные преобразователи можно в компании «Олниса». Для наших клиентов действует услуга отправки товаров в любую точку России, а также в страны СНГ. На весь ассортимент из каталога предоставляется долгосрочная гарантия. Мы дорожим своей репутацией, поэтому в случае возникновения каких-либо неисправностей, вы сможете обратиться к нам, и мы заменим или проведем ремонт неисправностей.
-
47, Installing a communication option 46 INSTALLATION AND WIRING 2.8 Installing a communication option • To use a communication option, the enclosed earthing (grounding) cable needs to be installed. Install the cable according to the following procedure. NOTE • The number and shape of the spacers used differ depending on the communication option type. Refer to th…
-
72, Measurement of main circuit voltages, currents and powers PRECAUTIONS FOR MAINTENANCE AND INSPECTION 71 5 Measuring points and instruments Use an FFT to measure the output voltage accurately. A tester or general measuring instrument cannot measure accurately. When the carrier frequency exceeds 5 kHz, do not use this instrument since using it may increase …
-
68, Inspection item PRECAUTIONS FOR MAINTENANCE AND INSPECTION 67 5 5.1.5 Cleaning Always run the inverter in a clean status. When cleaning the inverter, gently wipe dirty areas with a soft cloth immersed in neutral detergent or ethanol. NOTE • Do not use solvent, such as acetone, benzene, toluene and alcohol, as these will cause the inverter surface paint to peel off. • The display, etc. …
-
74, Measurement of main circuit voltages, currents and powers PRECAUTIONS FOR MAINTENANCE AND INSPECTION 73 5 5.2.3 Measurement of currents Use moving-iron type meter on the input side of the converter unit (FR-CC2-C) and the output side of the inverter. However, if the carrier frequency exceeds 5 kHz, do not use that meter since an overcurrent losses produced in t…
-
76, 6 SPECIFICATIONS 75 6 SPECIFICATIONS This chapter explains the SPECIFICATIONS of this product. Always read the instructions before using the equipment. 6.1 Inverter rating………………………………………………………………….76 6.2 Common specifications …………………………………………………..77 6.3 Outline dimension drawings…………………
-
30, Main circuit terminals INSTALLATION AND WIRING 29 2 The line voltage drop can be calculated by the following formula: Line voltage drop [V]= Use a larger diameter cable when the wiring distance is long or when it is desired to decrease the voltage drop (torque reduction) in the low speed range. NOTE • Tighten the terminal screw to the specified torque. A screw that has …
-
75, Measurement of main circuit voltages, currents and powers 74 PRECAUTIONS FOR MAINTENANCE AND INSPECTION 5.2.7 Measurement of inverter output frequency In the initial setting, a pulse train proportional to the output frequency is output across the analog current output terminals CA and 5 of the inverter. Measure the current using an ammeter or tester. For detailed specific…
-
6, CONTENTS 5 6.3 Outline dimension drawings 79 6.3.1 Inverter outline dimension drawings …………………………………………………………………………………………………79 APPENDIX 81 Appendix 1 Comparison with FR-F860 ………………………………………………………………………………………… 82 Appendix 2 Instructions for UL an…
-
22, Installation of the inverter and enclosure design INSTALLATION AND WIRING 21 2 Encasing multiple inverters and converter units Arrangement of the ventilation fan and inverter When multiple inverters and converter units are placed in the same enclosure, generally arrange them horizontally as shown in the figure on the right. Do not place multiple products verticall…
-
33, Control circuit 32 INSTALLATION AND WIRING Set Pr.73, Pr.267, and the voltage/current input switch correctly, then input an analog signal in accordance with the setting. Applying a voltage with the voltage/current input switch ON (current input is selected) or a current with the switch OFF (voltage input is selected) could cause component damage of the inverter or analog circuits of outp…
-
89, 88 REVISIONS *The manual number is given on the bottom left of the back cover. Print Date *Manual Number Revision Oct. 2016 IB(NA)-0600692ENG-A First edition IB(NA)-0600692ENG-A
… -
37, Control circuit 36 INSTALLATION AND WIRING Sink logic and source logic • In the sink logic, a signal switches ON when a current flows from the corresponding signal input terminal. Terminal SD is common to the contact input signals. Terminal SE is common to the open collector output signals. • In the source logic, a signal switches ON when a current flows into the corresponding si…
-
32, Control circuit INSTALLATION AND WIRING 31 2 2.6 Control circuit 2.6.1 Details on the control circuit terminals of the inverter The input signal function of the terminals in can be selected by setting Pr.178 to Pr.196 (I/O terminal function selection). For the parameter details, refer to the FR-F860 Instruction Manual (Detailed). Input signal Type Terminal symbol Terminal name…
-
65, Inspection item 64 PRECAUTIONS FOR MAINTENANCE AND INSPECTION The inverter is a static unit mainly consisting of semiconductor devices. Daily inspection must be performed to prevent any fault from occurring due to the adverse effects of the operating environment, such as temperature, humidity, dust, dirt and vibration, changes in the parts with time, service life, and other factors. �…
-
49, Electro-magnetic interference (EMI) and leakage currents 48 PRECAUTIONS FOR USE OF THE INVERTER 3.1 Electro-magnetic interference (EMI) and leakage currents 3.1.1 Leakage currents and countermeasures Capacitances exist between the inverter I/O cables, other cables and earth and in the motor, through which a leakage current flows. Since its value depends on the static c…
-
82, APPENDIX 81 APPENDIX APPENDIX provides the reference information for use of this product. Refer to APPENDIX as required. Appendix 1 Comparison with FR-F860 ……………………………………..82 Appendix 2 Instructions for UL and cUL…………………………………..83 Appendix 3 Restricted Use of Hazardous Substances in Electronic and Electrical Product…