This is a full walkthrough for the character Marina.
Introduction
This guide is a full walkthrough for the character Marina. Follow this guide to get all 3 endings in one play through.
This is not a comprehensive guide where you can look things up and make your own strategies. This is a guide where if you don’t follow the instructions the guide will fail you. So if you don’t want to do the things that I did then I don’t recommend following this guide.
This guide was made for Fear & Hunger v1.4+. So if something in the guide doesn’t work anymore it’s not my fault.
Strategy
This game has two major power spikes.
1. 16 Agility. When you reach 16 agility you permanently have double actions every turn after the first which in turn doubles your damage output.
2. The Enlightened Soul (aka O’ssa’s soul aka Yellow Mage’s soul)
O’ssa has a skill called La Danse Macabre which, over the course of a few turns, more than doubles your magic damage. O’ssa also has a skill called Spice Forge which lets you cast the same spell twice every turn at no extra cost. So with La Danse Macabre and Spice Forge, you have quadrupled your magic damage output.
So if you put these two power spikes together, your character will be dealing more than 8 times damage than normal. That is absolutely phenomenal and that is how we are going to beat this game. So the strategy here is grab both power spikes a.s.a.p. and then do other stuff.
So why Marina instead of O’ssa? Because you need access to three spell trees (Gro-goroth, Sylvian, and Fear & Hunger) and Marina can get access to all three spell trees without relying on luck. In addition she has Engrave which is essential for reaching 16 agility. The only thing she is missing is O’ssa’s skills which can be trivially obtained on the first day. O’ssa on the other hand needs to rely heavily on luck to get the 3 skin bibles to gain access to the three spell trees. In addition, unlike Marina, he cannot use guns and guns are essential against certain bosses and enemies. So to answer the question, we choose Marina because she is flat out superior to O’ssa in every way the entire game, including both early game and late game.
There’s only 3 sources of Agility: Small Thing’s Amulet, Engrave, and Hexen Table.
You start with 10 Agility
Small Thing’s Amulet is an accessory purchasable at Dr. Kefer & Co and gives +5 Agility.
Engrave is one of Marina’s skills and it gives +5 Agility.
Hexen Table has two skills that give +1 agility.
You will need all three because one of the endgame bosses, the Kaiser, actually has high agility too so if you want double actions against him you need all of the above to outspeed him.
Defensively, Spice Forge lets you cast a spell at the start of combat as a free action. So your primary defense strategy is to create a Blood Golem with Spice Forge at the start of combat and cast Pheromones on it as your first action so 100% of enemy attacks will go to your Blood Golem, not you. In addition to being a 200hp punching bag, this strategy will also protect you from game ending status ailments like blind or amputation.
WARNING. This ability of Spice Forge is BUG RIDDEN. Against some enemies it will give them a free turn before you. And some of those enemies’ free action is an instant-kill attack. Do NOT use this ability of Spice Forge against August.
Maps


X means it’s blocked from one side and must be opened from the other side first.
Yellow means it’s blocked because of plot.
The maps are high res. If you have trouble reading it I recommend downloading it and zooming in.
Character Creation
For character creation options, choose Blood Magic, Sylvian, and something to read. And then redo it all again and again until the Skin Bible you get is Gro-Goroth. Then save this character start and never rewrite over it.
The reason for this is because you need access to three skill trees: Gro-Goroth, Sylvian, and Fear & Hunger. In order to gain access to those skill trees you need to either draw their sigil on a ritual circle or do something special. There are only 4 ritual circles where you can draw Gro-Goroth or Sylvian sigils (GVSR Circles. Stands for Gro-goroth, Vinushka, Sylvian, Rher) and you can hit 3 Affinity with Gro-Goroth with only one circle. Sylvian requires two so that’s why we choose Sylvian as our god and reroll until we start with a Gro-goroth bible.
Fear & Hunger sigils can only be drawn on AF circles (All-mer, Fear & Hunger) but because Sylvian and Gro-goroth skills are significantly more important than Fear & Hunger skills, we prioritize Sylvian and Gro-goroth over Fear & Hunger.
Day 1 – Morning
It doesn’t have to be said that you need to loot everything the eye can see. So loot everything you see even without me telling you to.
1. Herbs
As soon as you get control of your character scavenge the immediate area for green and blue herbs. Green herbs cure the “infection” status ailment which will kill you if left untreated and blue herbs heal your hp. You can go to Outskirts 1 for more herbs but do NOT go to Outskirts 2. There is a very strong enemy there called Woodsman and he will kill you.
2. Sewer Keys
Once you gathered all the herbs make your way east Forest 1, Riverside, Lake, and then Old Town 1, Old Town 2, Derelict House, and finally Old Town 3. Kill all the villagers but dodge all the ghouls. Kill the villagers by attacking their Torso.
Enemies in this game have cone vision. Meaning if you are literally right next to them they still won’t be able to see you so dodging all the ghouls should be easy.
In Derelict House don’t step on the glass shards on the ground.
In Old Town 3, to kill the sickle villager, attack his sickle hand first, then attack his torso. It will take you 2-3 attacks to kill him.
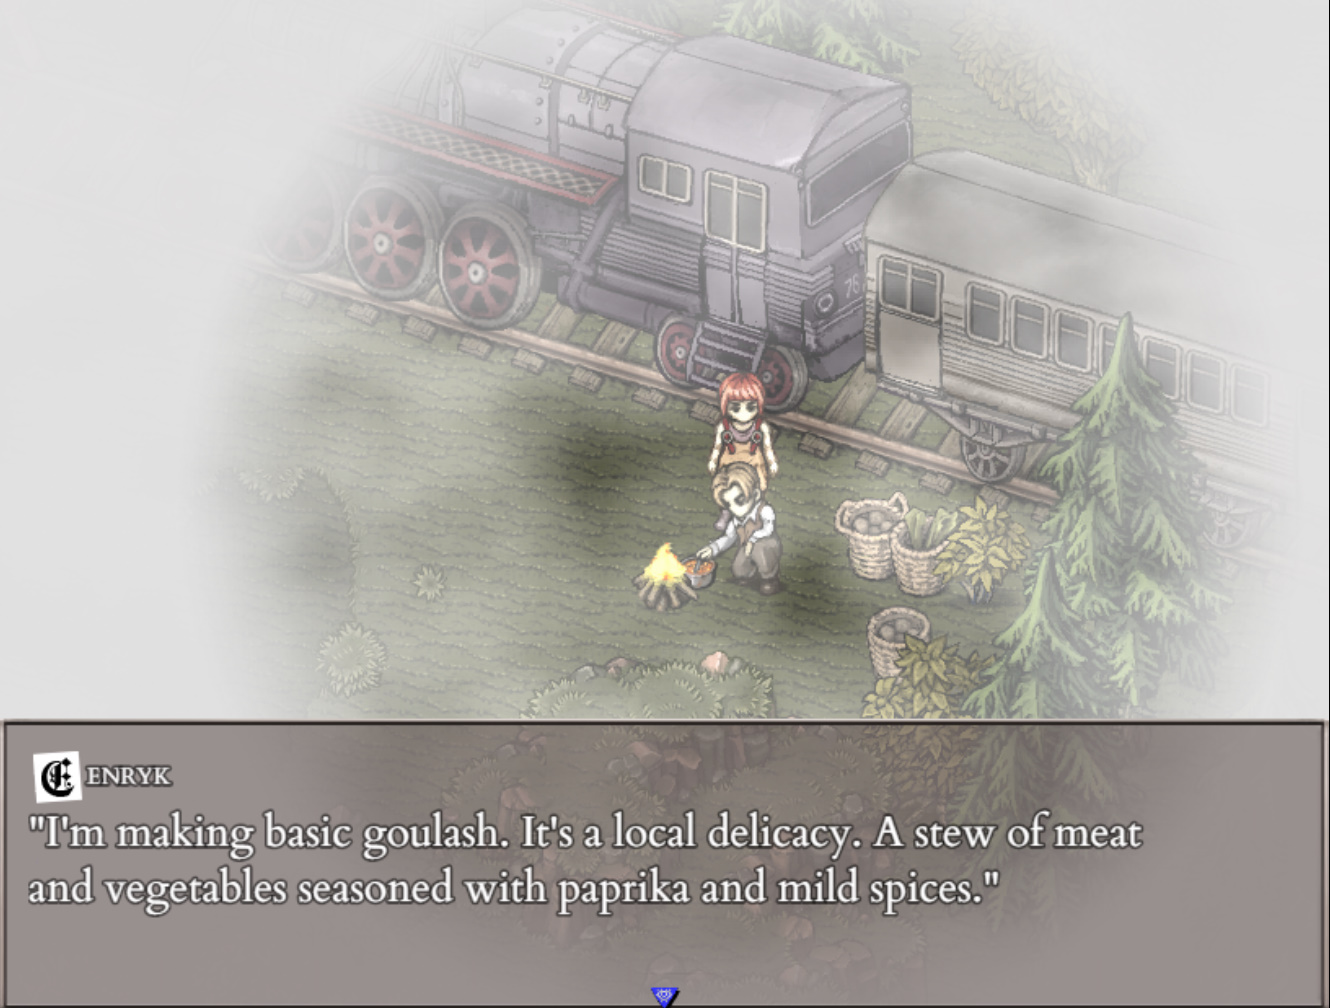
Go to the Mayor’s House 2nd floor and go LEFT. Not right. There’s a very powerful enemy on the right side. On the Left side is Henryk. Talk to him until you get the option to snap him out of it. Once you do that go right. You will see a priest kneeling on the ground. DODGE HIM. Go past him and in the room above him there is a way down. Go down there, grab the Manor Keys, come back up, and continue to dodge the Priest by going into the adjoining room and then exiting to the hallway. Don’t try to walk past him. Then go downstairs, then go down to the basement, and one of the rooms is the food storage. Go back to Henryk and he will give you the Sewer Keys.
3. Get 3 Ghouls
It’s time to raise your Ghoul Army. Raise the sickle villager you just killed and the soldier corpse next to him. Go back to the Derelict house, step on some glass shards, and kill both villagers. The Rifle villager is dangerous but you’re just gonna have to suck it up and take the hits. Attack his torso. His arms have way too much hp so ignore them and go for the torso. He should die in 2-3 turns. Once they’re both down raise the 2nd sickle villager as your 3rd Ghoul.
4. Get the Bonesaw
Go into the old house and go down to the basement. At the bottom right corner is a bonesaw.
5. Get 15 Heads.
Go to Old Town 5 while killing everything that crosses your path. In Old Town 5, kill everyone there EXCEPT the Pigman. He’s a guy wearing a pig mask holding a gas weapon. Stay the hell away from him for now but everyone else you can kill. Do NOT bonesaw the corpse of the sickle villager. Cut the heads off every other corpse. There is a dual knife villager in a house in this area, visit her and take her head. Afterwards backtrack all the way back to the train, killing all the ghouls and villagers and beheading them.
Once you reach the train, go to Outskirts 1, draw a Gro-goroth sigil in the GVSR circle and sacrifice your weakest most damaged Ghoul. Then go back to Old Town 5. You can cut across Outskirts 2 but don’t explore that area. Get to Old Town 5 a.s.a.p. while the Woodsman is busy beheading a villager.
Raise the sickle villager you killed in the middle of the town.
Go to the New God Altar in the Old House and offer all 15 heads to get 15 Soul Stone Shards. Go to the crafting menu (it’s located in your normal menu, underneath “Equip”) and craft 5 Soul Stones immediately. Make this a habit because I guarantee you you’re gonna forget to craft them and waste a sleep.
Once you have 5 Soul Stones, go upstairs to the bed and sleep. End of Day 1 – Morning.
Day 1 – Noon
In your dreams, save in a different save slot. Then go to hexen table and select these skills:
Engrave
The Warding Sigil
Advanced Occultism
Hurting
Black Smog
Then leave. I like to save before using Hexen in case I make a mistake.
Let me tell you about Black Smog. Black Smog is your go to spell for everything except endgame bosses. You’re gonna kill virtually everyone with this spell. It’s that amazing. Unfortuntaely it’s nowhere near it’s potential right now and you only got it because it has a great chance of landing a headshot which is instant-death to enemies. Now the problem is the enemy might get lucky and dodge the Black Smog so a little bit of luck is required for this part.
1. Kill the Priest.
Go back to the Mayor’s manor and kill the priest by casting Black Smog. You need to “rev up” once to cast it. Even if you miss the first one the second one should hit. If it doesn’t then lady luck hates you so reload and try again. Once he’s dead collect his soul stone and behead him.
2. Obtain the Betel Stone.
Make your way to the Riverside and then enter the Sewers. From there make your way to Prehevil Central. Kill any Neighbours you come by. If they dodge your Black Smog your ghouls will kill him with their head shots. If everything misses then lady luck hates you. You don’t have to reload as long as you don’t die. Unlike the Priest these guys don’t amputate or insta-kill.
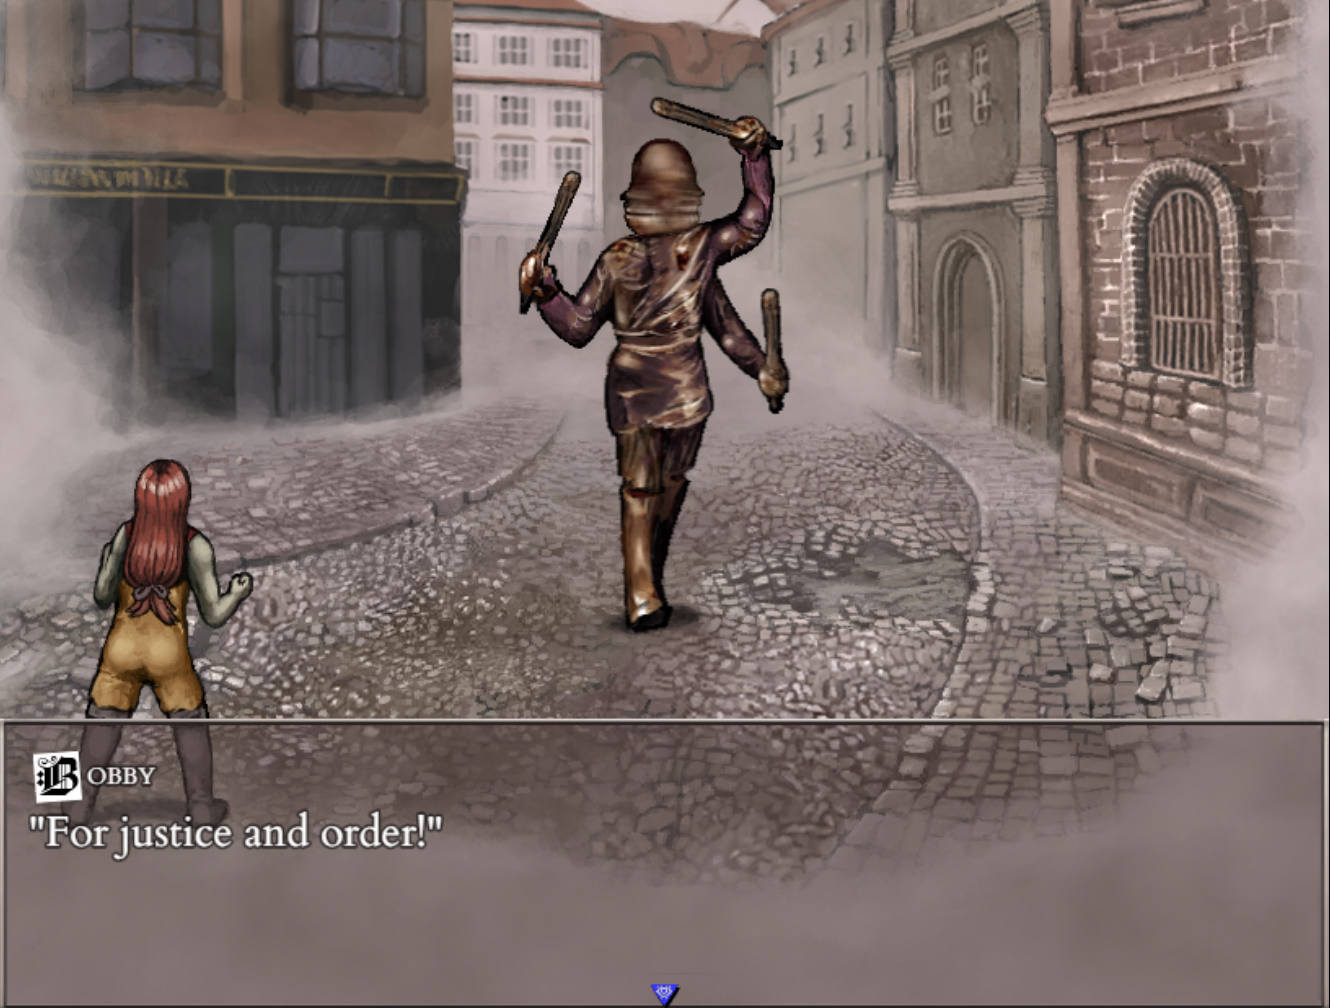
Once you’re at Prehevil Central go East. The path is a bit convoluted so be careful. Dodge the Bobby. Don’t fight it. If you do fight it use Black Smog solely to kill all of his arms and work the Torso with your weapon. If its head stops spinning hit it to kill it immediately.
Bobbies, after death, will resurrect themselves. However if you “beat up” their bodies they will stay dead. I like to keep the Bobby next to the Church, the Bobby next to the School, and the Bobby inside the bookshop alive for easy healing so don’t kill those 3 Bobbies but kill all the other Bobbies. Not right now though. Right now you need to avoid them all.
Once you make it to the church, on the right side there is a hole you can enter which will lead to some stairs. Climb them. Once you’re at the top go right to the next area. From there you should see a ladder. Go up the ladder and to the ceilings. Dodge the Pillarmans. At the bottom right corner is a hanging corpse. Drop the corpse down and make your way back down. If a Pillarman saw you and is chasing you, just drop down from the ceiling by falling.
Search the corpse you dropped to get the Betel stone. Equip it.
3. The Enlightened Soul
In the same room is a confessional. Go in there and confess. After you finish O’ssa would come out and reveal how much of a sadistic bastard he is so kill him to save mankind from him. Same deal as the priest. A single Black Smog should kill him. If not then lady luck hates you and hopefully he butchers your ghouls instead of you while you try to kill him again next turn. If he cuts a limb off then restart.
4. Bolt Cutters
At the entrance of this area there are a bunch of statues. On the wall with the exit there’s a loose tile with the Bolt Cutters. The tile is perfectly aligned with the bottom row of statues. Get it.
WARNING: DO NOT use the Bolt Cutters on the chandelier. Doing so will block content. Just take the bolt cutters and leave.
5. Get 12 Heads
Go back to the sewers and make your way to the Sewage Treatment Plant. In the middle is a control machine with 4 switches.
a. Turn the inner 2 switches off
b. Go to the left and lower the ladder.
c. Stay on the raised platform and go right and push the blue box as far right as you can.
d. Go back to the control machine and turn the outer 2 switches off.
e. Go back to the blue box and push it further, where the water used to be.
f. Go back to the control machine and turn that switch on. It should push the box off the platform. Turn that same switch back off.
And that’s it. Puzzle solved. Go left and ignore the path we just opened on the right side. Go left. Go all the way to the Western end and you will find 7 ghouls there. Kill them all. Not necessarily with Black Smog.
Note: There is a Levi Doppelganger somewhere in Western Tunnels. Somewhere in the north east. While you can kill him with a single Black Smog I’d hold off until the next day when you’re stronger because that single Black Smog can miss. So stay away from him. Stay south until you reach the exit to Western End.
Your own ghouls are no longer worth the food it takes to keep them alive so let them die. Let them get infected. Don’t heal them. Still feed them though so they can one shot the ghoul limbs. Keep one alive to sacrifice later.
Don’t be shy about using Vodka, Beer, and Wine to replenish your mind. After this day Mind is a non-issue so go ahead and use all of your supply.
By the time you’re done you should have 12 heads from ghouls, neighbours, and rat hags.
Go back to the New God Altar back at the Old House via the Sewers. Offer the 12 heads and craft 4 Soul Stones.
Then sleep. End of Day 1 – Noon
Day 1 – Night
In your dreams, save in a different slot and select these skills
La Danse Macabre
Meditation
Spice Forge
Blood Golem
Pheromones
Loving Whispers
Activate Spice Forge and put the Green Orb next to the Blood Golem, Red Orb next to Black Fog, and Blue Orb next to Loving Whispers.
1. Kill Karin
Go to Old Town 1 and kill Karin. She should die to a single Double black smog. Cut off her head.
2. Kill Levi Doppelganger
Go back to the sewers and make your way back to the Western Tunnels. Go find the Levi Doppelganger and kill him with a single Double Black Smog. Cut off his head.
3. PRHVL BOP
Exit the Sewers into the Shopping District. To the left is what appears to be the entrance to the underground. Go there. Avoid the Inquisitors. While you can kill them, if you get unlucky they will blind you permanently so it’s best to avoid them until you can cure blindness. So not for a while.
Inside PRHVL BOP there’s a trap door hidden underneath the butterflies. Enter it and loot the place dry including the guns.
* The Trenchgun kills Death Masks in two shots in the overworld and stuns them with each shot as well. That’s their sole purpose. To kill Death Masks.
* The Rifle shoots the arms off an enemy. Their sole purpose is to shoot the arms off of bosses.
* The Pistol is largely useless as it takes many shots to kill any monster except the smallest ones, which die in one shot. So there’s no reason to save any 9mm bullets. We’ll be using them all right now to kill all the small monsters in the school.
4. Leechmonger Ring + Chainmail Dress
Once you’re done looting exit the PRHVL BOP and go north west into the department store. There are no enemies here so no worries. Go to the 2nd floor and inside a shop is a Chainmail Dress. Grab it. Outside the store, look at the yellow guard rails. They go up. Follow them up to the 3rd floor and then 4th floor of the department store. On the 4th floor is a corpse that has the Leechmonger Ring. Grab it.
5. School
Exit the Department Store on the west side. There’s a shop called Dr.Kefer & Co. He sells three essential items. Small Thing’s Amulet, and 2 Purifying Talismans. If you haven’t gotten these items from random loot, buy these from him. Now this is important, you’re capped at 99 shillings so if you get any more shillings after 99, they’re wasted. So periodically come here to spend your shillings on these 3 items. The priority is 1 Purifying Talisman, 1 Small Thing’s Amulet, and a 2nd Purifying Talisman.
Keep going north west and you’ll come across a school. Enter it. Equip your Lugr Pistol and kill every Fallen Cherub in the school, school basement, school 1F, and school 2F with 1 bullet each. Do not fight the Headmaster. There are 14 Fallen Cherubs. If you don’t have enough bullets then don’t sweat it, leave them alive. There’s a Priest in the basement. Kill him and take the soul stone.
Return to the Old House, offer your 15 heads to the New God Altar, craft 5 Soul Stones from shards, and sleep in the same bed you’ve been sleeping in.
End of Day 1 – Night.
*Note: If you have a Fear & Hunger Skin Bible, engrave your face with the Fear & Hunger sigil and draw the Fear & Hunger sigil on two AF Ritual Circles before sleeping. My choice is the Train and the Two-Story House in Old Town 5 because they’ve already been cleared.
Day 2 – Morning
In your dreams, save to a different save slot and then select these skills.
Black Orb
Greater Occultism
Persuade
Lockpicking
*If you have the Fear & Hunger Skin Bible then get Rot and Agility +1.
Use Spice Forge and put the Blue Orb next to Black Orb. Switch back to Loving Whispers for out of combat healing or specific encounters I spell out. Otherwise keep it on Black Orb.
Today we’re gonna kill the majority of the contestants. Why? Because they all need to be dead for Endings B & C. Also because they’re time sensitive, miss-able because they disappear forever, and they’re buggy as hell. So follow my instructions carefully to avoid bugs and not miss anyone.
1. Olivia, Henryk
Go back to the train and kill both of them.
2. Caligura
Go to the sewers and make your way to Back Alleys 1. From here go to Back Alleys 2. You might face the mob. You might not. If you do you might have to restart depending on what gear you have.
If you have the Salmonsnake Rune then you’re good. You can kill them just fine with no amputations. Spam Black Smog until they’re dead. You can use Black Orb too.
If you have gotten the Fear & Hunger Skin Bible the previous night and as a result have 16 agility, then you’re good too. I pheromone up my Golem on my first turn. Then I Black smog them and heal my Golem. The now-blinded mob will miss most their attacks but some will still get through, especially the meat grinder which is why you keep your Golem alive. Then just spam Double Black Smog until they’re all dead.
If you don’t have either then it’s mainly luck. You have to double smog to blind them all and hope you don’t get amputated while you keep on Black Smoging them.
Arm Pieces might be enough too, I’m not entirely sure if the meatgrinder amputates your legs or not.
Once you’re in Back Alleys 2, go north to Prehevil – West. It is very IMPORTANT that you enter Prehevil – West from Back Alleys 2. Levi is buggy as hell so do as I say.
Once you’re in Prehevil – West you should see Caligura trying to kill Levi. Kill Caligura and say “Are you okay?” to Levi.
3. August
Enter Prehivil North West from Prehivil West. As soon as you climb the stairs go left as far as possible then go back to the stairs. You will see August killing a Cocoon. Open up Skill Forge, remove the Green Orb entirely and then fight August.
BUG WARNING: If you fight August with a Green Orb on any of your spells, he will get the first move and it will be an instant-death coin flip attack so don’t do that. Fight him without the Green Orb and kill him with a single Double Black Smog.
4. Levi
Go to the school and go right. Levi is in one of the classrooms on the right. Kill him. If you encountered Caligura and Levi from the other side, Levi won’t be here. He won’t be anywhere. He’s disappeared. I remember scouring the map for him, giving up and sleeping, only to find that I have his soul but he’s not considered dead. Levi is extremely buggy.
5. Pav, Marco, Tanaka
Go back to the Riverside via the Sewers (I know I know, it’s tedious as hell to walk all the way back and forth from the sewers.) Then make your way to Old Town 5. Cut the double bolt gate with Bolt Cutters you found from the Church and proceed. You will see Pav trying to kill Marco and Tanaka. Kill all 3. You have to kill all 3 yourself right now. Don’t let them leave and don’t let Pav shoot. Attack him on sight and then behead all 3.
6. Pocketcat
Finally, go up the staircase, permanently killing the Bobbies you encounter along the way. And go up the left staircase. You will see Pocketcat beating a girl inside a bag. Trade 9 contestant heads for the following books:
Fear & Hunger Skin Bible
Rher Skin Bible
Alchemillia Vol.3
If you have some these already get Book of Enlightenments instead.
Alright that concludes the Contestant slaughter for now. Only 4 remain. You, Daan, Abella, and Samarie.
Get a few more heads and soul stones and go to sleep. How much is up to you. Minimum is 1 though, you need a +1 Agility skill either from the Fear & Hunger tree or Tanaka’s tree. Only one, though, not both.
*Note: If you gotten the Fear & Hunger Skin Bible from the previous night, you don’t need to sleep. You can finish the game on Day 2 – Morning. But this guide is made with the worst-case scenario in mind so it’s gonna assume you didn’t get the Fear & Hunger Skin Bible from the previous night.
Day 2 – Noon Part 1
In your dreams save to another slot then select these skills
Agility +1
If you want other skills, sure, grab them. Weapon proficiency sounds nice. But none of them are mandatory as I beat the game without any of them.
This is the final day. You’re gonna get all 3 endings today. If you want to save you’ll need to use an AF Circle with the Fear & Hunger sigil drawn on them.
1. Moonless
Go to the Sewer Treatment Plant. It’s the sewer puzzle area. This time go right, past the newly accessible door we ignored earlier, and descend to the Foundations of Decay. Stick to the left until you come across a bag with 5 Blue Vials. Then stick to the right, ignoring the rat man. The rat man leads to an ambush with worthless gear so we’re just gonna ignore that. Keeping going south and sticking to the right and you’ll come across Moonless.
Pheromone up your Golem, wait until the Moonless fully shows himself, then spam Double Black Smog until all of his limbs are dead then attack his head until he’s dead. Black Smog will blind him and make him miss most of the time so it should be a cakewalk.
Black Steel is the better weapon and it will be the first to fall so don’t worry about getting the wrong weapon and spam Double Black Smog to your heart’s content.
Once finished, go to the next area and take the LEFT Elevator.
Activate the Telelectroscope.
Kill the Tanaka Doppelganger.
Then go back up and take the RIGHT Elevator.
Go left and check both crevices. The one that’s further in the left has an Elevator. Use it to go to Old Town 1 and the Church of All-mer to unlock this shortcut.
2. Church of All-mer
UNEQUIP YOUR WEAPON. Do not equip a weapon. There are Crimson Fathers here that will mind control you or your golem before your first turn. If your Golem is mind controlled spam Double Black Smog until all of his limbs are gone. Then kill him with a Black Orb. If you’re mind controlled, you should survive all of his attacks until you snap out of it if you’re full hp when you start the fight so do that. After you’re free heal yourself, Pheromone up your Golem, and kill him.
IMPORTANT: Don’t scribe any sigils here on the ritual circles unless I tell you to.
In the North Western most area there’s an angel statue holding something. Take it, it’s the Martyr Effigy. South of him is a dismembered corpse. Loot him for the Church Keys. Go to the north east corner of the map and enter the open cell. Pick up the Rusty Key.
There’s a GVSR circle in the middle of the map south of the Pillarman with the Rher sigil already drawn on it. Go through it and kill Samarie. Pheromone up your Golem and spam Double Black Smog.
There’s another GVSR circle on the map in the south side. Draw a Rher sigil on it, go through it, go to the end, unlock the gate with the Church Keys, free the Prisoner with the Rusty Key, and pick up the Heart-shaped lock.
Note: This summons a secret boss from the New God Altar. Do NOT accidentally sacrifice it while trying to sacrifice heads. You will die.
3. Fellatio Effigy
If you have a Purifying Talisman make your way to the School again. If you don’t buy one from Dr. Kefer & Co. Once there go to the schoolyard. There’s a door with a blood diagram on it to the left. Use a Purifying Talisman to open it and enter. There’s a ritual circle with Rher’s sigil on it. Use it to teleport to Rher’s dimension.
You’re going to have to make a full circle here so just keep going forward, all the way around, past the Golden Gate (can only be opened by the Golden Gate skill. It’s worthless so don’t bother) and you’ll reach an Angel Statue holding the Fellatio Effigy. Take it and leave.
4. Hunger Effigy & Daan
Go to the Back Alleys 1. From the Sewer Entrance go directly south and you’ll come across an apartment. Visit the two rooms on the floor. One has Keys. The other a Television. Don’t go to the basement or upstairs yet.
Watch the television and write down the 4 apartment numbers.
Go to floor 3 and go to room 10. Go all the way left into room 9 and you’ll see a horse statue. Move the horse statue onto the middle of room 10, over the cracked floorboards. Jump down the resulting hole.
Daan is here. KILL DAAN.
There’s a diary of a madman here. Pick it up and read it. He lists 4 of his neighbors he killed in order. Their room numbers is the password to the washing machine. Check out the 4 apartments mentioned on the TV to see what order he killed his neighbors. Once you have that go down to the basement to the bloody washing machine and input their apartment numbers in order. Crawl through the washing machine and you’ll be in Rher’s dimension.
Stick your hands in every hole. They won’t get chopped off. Instead they hold awesome loot so loot the place silly as you should.
Make your way to floor 3 and drop down into the room with the Angel Statue and take the Hunger Effigy. Then leave.
5. Sergal
Go back to the Church. Place the effigies on the altars in front of the stained glass. Go through the tunnel that opens up. You might have to fight some enemies but you can also just dodge all of them.
Once you get past the Church, just go straight through the Mausoleum Alley to the giant Alter of the One. Move to the middle and Sergal will challenge you to a fight.
Pheromone up your Golem.
There’s two ways to do this fight. Spam Black Smog until he runs away, or spam Black orb on his 2 arms until he runs away. The latter gives you the Sergal Spear which you can’t use.
Day 2 – Noon Part 2
6. The Heartless One
Secret boss time! She drops the best weapon in the game.
Go to Temple Site 1 and go south. In Prehevil Central there’s a blue box you can push. Push it out of the way so you can walk to Temple Site 1 without going through the church.
Go back and go to Temple Site 2. On the bottom right corner is a purple door that leads to Donnovan’s House. It has a hexen table on it which means you can now get any skill you want without sleeping.
There’s a museum in the middle of Temple Site 2. Grab these 3 items and get out.
Fluted Armpieces
Fluted Breast Plate
Chac Chac
The Chac Chac is located in the glass box next to the Gaelian Greatsword and Yggaegetsu Amulet. It’s hooked up to the alarm system so you can only get one of the three. Get the Chac Chac.
Go back to the Mayor’s House. In the basement, in the right most corner is a door. Destroy the door with a Double Black Orb. Not smog, Orb. In it is the Fluted Fauld and together with the other two Fluted pieces you can craft the Fluted Armor. This prevents limb loss at the cost of 5 agility so if you want to use this you got to get the Small Thing’s Amulet to keep your double turns. So if you haven’t found one yet buy one at Dr.Kefer & Co. Also buy another Purifying Talisman if you don’t have it. 100 Shillings might be much to get both but in all my playthroughs, I had significant amount of shillings to spare from looting. Just make sure you never hit 99 Shillings so you don’t waste any you find.
Craft the Brown Vial. That was what the Alchemillia Vol.3 was for. If you didn’t find a single pep pill after scouring the entire map, well, Lady Luck just said f*** you and you don’t get to fight the secret boss this playthrough. Also craft until you have at least 5 Light Blue Vials.
Once you’re equipped with the Death Mask, Fluted Armor, Betel Stone, Small Thing’s Amulet, and Chac Chac, go to the Church of All-mer 2F. There’s an AF ritual circle here. Draw a Fear & Hunger Sigil and save. If you have a 2nd Chac Chac from random looting equip that instead of the Betel Stone.
Now go to the New God Alter in this church and sacrifice the Heart-shaped lock to summon the Heartless one.
Turn 1: Consume the Brown Vial. This is how you stay alive, by dodging most of her attacks. Your Golem is gonna die brutally quickly.
Turn 2: Consume a Light Blue Vial and then cast Greater Black Orb on her TORSO. Her limbs have 6000 hp each. Her Torso has 9000 hp. Makes sense to just kill her Torso first.
Turn 3-5: Repeat. You need to kill her before your Brown Vial wears off. If she’s not dead by the last turn, just cast Black Orb twice instead of healing. I will guarantee you that she will die.
And that’s it! You now have maxed out on equipment. You’ll notice you have a status ailment from the fight that makes you miss most of your melee attacks. Use a Purifying Talisman to get rid of it.
7. Abella & Telelectroscope #2.
Go back to Old Town 5 and go west to the Maiden Forest. Go find the tunnel entrance and enter it. Find the two Gasoline Canisters and pour them into the generator.
When you approach the elevator that leads down Abella in her moonscorched form will pop out. Abella is bugged. If you kill her here she still appears after you descended and if you kill her there too you will get 2 “Caressing Souls”. As in, the game will treat you like you killed an extra contestant. So to avoid finding out what kind of bugs that will result from that, do NOT kill Abella on this floor. When she pops out simply run and go south at the first chance you get. Lure her through the south corridor. If she drops the chase try again. Once you’re both at the southern most part of the tunnel she will stop. Take out your Rifle and shoot her twice to amputate both her arms. Then go west, making a full circle back to the elevator and descend.
Once you’re down Abella with her amputated arms will attack you. Kill her this time. It’s very IMPORTANT that you Pheromone up your Golem because Abella’s will blow your head up if you don’t. Work her body not her head until she’s dead. Then activate the Telelectroscope, go south, enter the Rher circle, and make your way up to leave the Bunker.
Congratulations, all 13 contestants are finally dead.
8. Telelectroscope #3
Make your way to Prehevil – West. Then once you reach the building with the word Gazette on it, make your way south. You’ll reach the exit to Ruined Streets. From there keep going south until you reach Deeper Woods.
IMPORTANT. There are pitfall traps on the leaves. Don’t walk on the leaves if you can help it. You can see the traps if you look closely enough. Don’t be careless. Don’t die to this.
Deeper woods is where it gets frustrating. The exit to the west is hidden. Keep going south in Deeper Woods until you find an Owl Cultist that pops out of the ground solely to shoot poisoned darts at you. Kill him. Directly north of him is the entrance to the way west. Hug the tree wall until you find it and once you’re through, head west to Deepest Woods.
BUG WARNING. Remove the Green Orb from Spice Forge. It will give the Centaur a free first action that murder you.
You can avoid the centaur if you want. If you want to fight it there’s no secret. Just Double Black Smog and heal up with Greater Loving Whispers until it’s dead. I wouldn’t bother with the Golem. The Centaur’s main attack, Stampede, hits both of you so the Golem isn’t gonna be tanking anything.
Once the centaur is dead open up Spice Forge again and apply the Green Orb to Blood Golem again.
Once you’re down there, just find the 2 gas canisters and put them in the generator. There’s an enemy called Stitches here. Just Pheromone up your Golem and spam Double Black Smog until they’re dead.
Once you powered the generator, go down the elevator and turn on the final Telelectroscope.
9. Saving
Once you’re finished, once you got all the skills you want from Donnovan House, go to Prehevil Bop, draw the Fear & Hunger sigil on the AF Circle and save.
Endings A, B, & C
1. Endings B & C
Go to Temple Site 1 and touch the Moon Tower. It’ll open up. Equip the Betel Stone and Chac Chac and go up.
Choosing to join them will result in Ending C.
Choosing to leave will result in Ending B.
Per’kele is not difficult at all. Pheromone up your golem and spam Double Black Smog until he dies. Don’t use melee attacks, he reflects them or something. You have to kill him with magic.
2. Ending A
Go to the Museum. From the entrance go south and you’ll come across a door underneath a clock. Go to the clock and set the long hand between 7 and 6, set the small hand between 1 and 2, and set the double hand to encompass the symbol with the two triangles on top of each other. It kinda looks like a spear. It’s at the top. The door will open.
Go down the door and through the giant metal gate. Go to the Old Site for a gas canister (if you have gas canisters to spare this can be skipped). Then go towards “Logic”. Just make your way all the way to the end until you see a psycho latex bunny. Equip the Betel Stone and Chac Chac.
Against the Platoon, Pheromone up your Golem and spend your Lucky Coins on the coin toss. Spam Double Black Smog until the bunny is dead then switch to Greater Black Orb spam. If you get unlucky with the coin tosses you can die so maybe use a book of enlightenment beforehand.
Against the Kaiser, don’t equip the Fluted Armor. Equip the Darkness, Leechmonger Ring, and Small Thing’s Amulet. First turn use all 3 Revs and double attack his torso. Next turn attack his torso twice. Next turn he dies.
Against the final boss equip Leechmonger Ring and set your Blue Orb on Loving Whispers. You won’t be using Black Orb this fight.
In the first phase Pheromone up your golem and use Loving Whispers and Light Blue Vials to keep both of you alive and healthy. Whenever the red lights turn on use a Double Black Smog before returning to regular attacks.
In the second phase destroy the hand to YOUR right asap before your Golem goes down. Once that hand is down you’ve won and now begins the grind game. Attack the hand to your left until it dies then hack away at the boss until it dies. She does exactly 45 damage every time. So when you don’t think you’ll be over 45 with an attack with your sword + leechmonger ring, use Loving Whispers. Otherwise just attack attack attack and the final boss will die.
Once you get to the screen with the green nebula stuff, move forward to get the ending.
And that’s it! Game is beat! All 3 endings.
Missed Boss
Rher, the giant moon in the sky. If you qualify for Ending C you don’t get to fight him. So if you want to fight Rher, load up and early save and let Pav kill Marco and Tanaka. Maybe don’t kill some of the contestants until day 3. I don’t know the exact conditions for Ending C but not killing contestants yourself and killing some on day 3 seems to be what disqualifies you for Ending C.
Rher is a super cool boss fight even though he’s easier than the Heartless One and Logic so do it. Fight him. You won’t regret it.
And that’s the end of the guide.
That’s everything we are sharing today for this Fear & Hunger 2: Termina guide. This guide was originally created and written by CuddilyWuddily. In case we fail to update this guide, you can find the latest update by following this link.
If you believe that any of the content on this site violates your rights, including your intellectual property rights, please contact us immediately using our contact form.

Warning! Here might be some spoilers!
Beginners Tips
Abella is also really easy early recruit.
There are spots that you can mark with chalk. Fear & Hunger allows you to save without sleeping (limited amount) and Salvia can restore limbs. These can be relatively helpful.
Safe zones restore sanity. Certain characters such as Daan and Henrik can also restore stats if they are recruited/saved and left here.
Try talking, especially if you have saved recently. Certain strong foes can be defeated or slowed down by doing this.
Search everything. Barrels and boxes have really good items in them sometimes. Rotten meat isn’t entirely useless.
Return to places. The contestants will appear in different places and you could miss events by going some place early and never returning or waiting until very late to return.
Use glass and throw it at the enemies head. This will cause them to miss 80% of their shots. This is crucial in the early game until you get better equipment and more party members.
Aim for their limbs, mostly their arms. I’m sure you’ve figured that one out by now though.
You should rush and try and recruit at least one party member before entering Prehvail. Daan is a great first choice and easy to find.
Avoid fighting as much as possible. Very few enemies are worth fighting, there are ones (Priest for example) who drop soul stones, those are the only ones worth killing.
Hoard as much green and blue herbs as possible.
You will find a crazy amount of books used for magic in the orphanage.
Also try not to save too often as it advances time.
Майк Стокласа
2 мар
Смотрел первую часть, годнота! Эту обязательно гляну, спасибо!
Ответить
Развернуть ветку
Сергей Родин
2 мар
Этот чел прям открытие на Youtube. Тот самый редкий случай, когда тру хардкорщик + может в интересное повествование. Обычно такое не совмещается.
Ответить
Развернуть ветку
Валера Чумаков
2 мар
Автор
как увидел его первый видос год назад, так сразу подписался
Ответить
Развернуть ветку
Денис Большаков
2 мар
Там, кста, русификацию не завезли ещё? А то я это, только языком любви владею
Ответить
Развернуть ветку
Libens
2 мар
Ооо давай сюда . По первой части все пересмотрел
Ответить
Развернуть ветку
Читать все 9 комментариев
Ужасающая игра вернулась. В ней ваше положение все еще безнадежно. Голод все еще терзает тело, а мерзкие твари пытаются разорвать тело и разум. Придется проявить немалую смекалку, чтобы выжить в этой новой, но все еще смертельно опасной реальности.
Из Финляндии с ненавистью
Над вселенной Fear&Hunger работает финский разработчик под ником Miro Haverinen. Он поставил себе цель сделать максимально агрессивную по отношению к игроку игру. В Fear&Hunger герои хрупки, подвержены голоду и страху. Их враги, жуткие монстры, опасны и безжалостны. Сюжет первой части позаимствовал многие элементы из вселенной Berserk, ужасов Лавкрафта и многих религий. В плане атмосферы игра вдохновлялась играми серии Dark Souls, Silent Hill и многими другими. Несмотря на столь разные источники – в конце получился отличный хоррор на основе RPG Maker.
В первой Fear&Hunger на протагониста сразу натравливали стаю собак – чтобы заставить его спрятаться в подземелье Страха и Голода. Там ему приходилось рыскать в темноте, собирать скудные припасы и убегать от монстров. Неочевидные механики заставляли умирать снова и снова. И лишь потом, научившись на ошибках, удавалось обзавестись нормальной экипировкой и поддержкой богов. Это позволяло зайти в более глубокие части подземелья, где поджидали все новые опасности. И так до победного конца.
Хороший фестиваль. И конкурсы интересные
После событий первой части прошло много времени. Был совершен технологический прорыв, а человечество оказалось втянуто в аналог Второй мировой войны. При этом сохранилась практика поклонения Старым и Новым богам – их культы все еще обладают значительным влиянием.
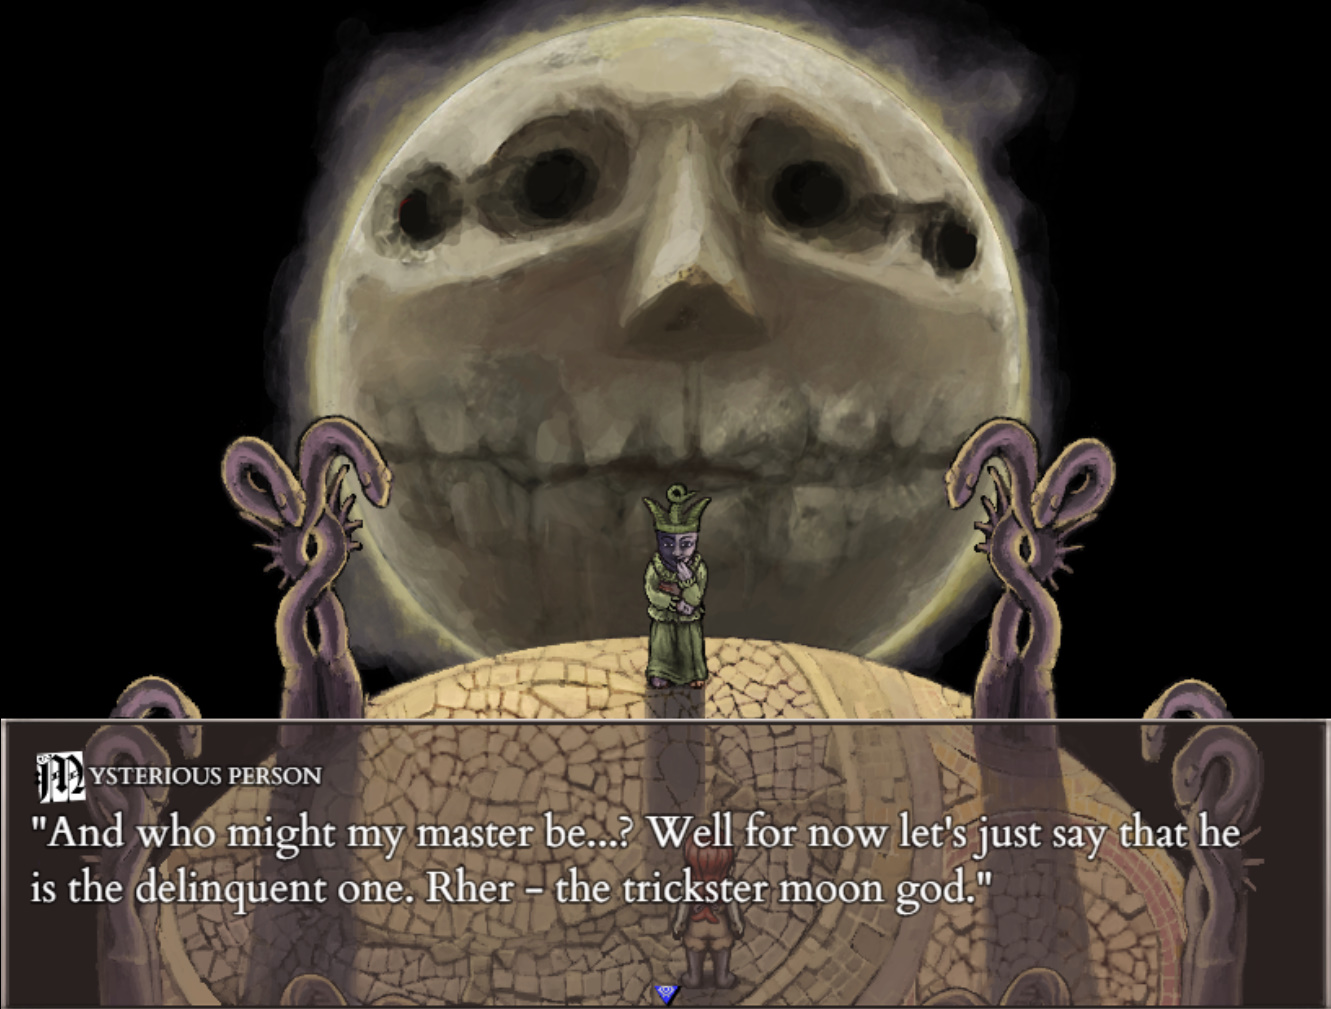
В этот раз сюжет вдохновлялся The Legend of Zelda: Majora’s Mask. Действие игры проходит в небольшом городке Прехевил, где бог луны Рхер решает устроить фестиваль Термины. Само божество выглядит как луна с лицом, что с каждым днем приближается к земле. Назвавшись его посланником, существо по имени Перкеле собрало на фестиваль 14 кандидатов. И выжить из них должен только один.
Из четырнадцати кандидатов управлять можно восемью. Каждый обладает уникальными способностями и характером. Некоторые из них пережили войну, где освоили свои специализации. Они здесь против своей воли. Другие хорошо знакомы с оккультизмом и преследуют собственные цели.
Игра встречает вашего персонажа не так агрессивно – если сравнивать с первой частью. Вам дадут немного освоиться, прежде чем начнут издеваться. Хотя безопасность здесь – сравнительное понятие. В прологе вам встретится существо по имени Уборщик. Если он одолеет вашего персонажа в бою, то отрежет ему ноги и оставит умирать. Вот такой «теплый» прием.

После пролога вы познакомитесь с другими кандидатами. Причем начальные диалоги меняются в зависимости от выбранного персонажа. После знакомства кандидаты разбегаются по всему Прехевилу, и уже от ваших действий зависит их судьба:
- Можно попытаться спасти этих леммингов от неминуемой гибели. После этого их можно попробовать рекрутировать.
- Если кандидат умрет от руки вашего персонажа, то его душа станет вашей. А вместе с ней и уникальные способности.
- Хотите – ничего не делайте. Результат будет… Интересным.
Будете вы геройствовать или нет – сугубо ваш выбор. Кандидаты могут быть искренне дружелюбными, притворяться или активно охотиться за коллегами. В этом мире страх и голод может любого превратить в монстра. Хотя бывают случаи, когда монстры проявляют человечность. Но такое случается редко.
Специалисты и оккультисты
Создание персонажа начинается с изучения его предыстории. Сделанные в этот момент выборы позволят получить различные способности. Специалисты научатся открывать электронные замки, двери, создавать лекарства или яды. У бойцов есть бонусы к ближнему или дальнему бою. Ну а религиозные персонажи получают бонусы от взаимодействия с богами.
С каждым персонажем прохождение будет уникально. Но даже среди них Оливия находится на ином уровне. Это девушка-ботаник, которая прикована к инвалидной коляске. В бою её могут сбить на землю, из-за чего она станет беспомощной. У неё возникают проблемы даже с перемещением по обычным лестницам. Это важный момент, поскольку локации в игре не только большие, но и полны лестниц! Зато она может не бояться потерять ноги – они все равно не работают.
Обожженные луной
В игре множество опасных локаций. Рядом с Прехевилом находится лес, где обитают безголовые псы, культисты и лесник. На задворках города находится небольшая деревушка. В ней жители обожжены лунным светом, из-за чего их тела изменились — приступе безумия они содрали с себя кожу. Некоторые из них стоят как истуканы, другие же набрасываются на чужаков. Их атаки способны заразить жертву. Если от заражения не избавиться травами или отпилив конечность пилой – последствия будут фатальны.
В городе бродят озверевшие блюстители закона. Им нет дело до убийц и маньяков, что находятся рядом с ними. Вместо этого трехрукие «бобби» охотятся на вас. Сам город находится под контролем Кайзера – Короля в Желтом. И ему нет дела до местных монстров. Его люди стреляют во всех на своем пути – включая вас.
Под городом находится канализация. Среди нечистот копошатся крысы и мутанты. Туда без необходимости соваться совсем не хочется! Также под землей находятся бункеры. В них полно отличных запчастей и оружия с патронами. Но и исследовать их стоит с особой осторожностью – мало ли что там обитает?
И будто этого мало! Связь с богами позволяет перемещаться в иное измерение. В этой изнанке мира можно найти ответы на некоторые вопросы. Еще такие перемещения нужны для продвижения по сюжету. Но обитающие здесь твари на редкость уродливы и опасны. Даже по местным стандартам.
Борьба за жизнь
Для выживания нужно собирать все, что не прибито к полу. В различных ящиках и бочках находится еда и полезные предметы. В сундуках есть вещи поценнее, но шанс их нахождения зависит от броска монетки. В хозяйстве сгодится даже использованная туалетная бумага. Да, после неё будет заражение крови, но рану-то вы перевяжете.
Это важно! Персонаж умеет разворачиваться по диагонали. Это позволяет обыскивать контейнеры, которые кажутся недоступными.

Если вы нашли кожаную библию, то вам крупно повезло! С ними вы сможете чертить знаки богов. Это позволит сохраняться, создавать порталы, лечиться или открывать новые локации. После начертания выбранное божество проявит к вам свою благосклонность. После этого вы сможете изучить полезные умения и заклинания.
Когда битвы не избежать – придётся действовать быстро! Отрубить вражине конечность с оружием, бросить ему в глаза битое стекло. Перед битвой с сильным противником лучше напичкать героя препаратами. Зависимость – наименьшая из его проблем. Помогут и заклинания богов, но они плохо влияют на психику.
В битве с монстрами отлично работает и современное оружие. Огнестрельное позволяет разобраться с врагом на расстоянии. Можно заманить его и на мину или капкан. Вот только некоторые противники также умеют стрелять – будьте осторожны.
Начинать игру стоит с легкого уровня сложности. Но даже на ней легко потерять конечности в бою или умереть. Зато так легче изучать игру, если хотите опробовать средний уровень позже. Ну а высокий уровень сложности называется «мазохизм» — поскольку подходит только самым отчаянным игрокам!
Атмосфера
Поначалу кажется, что игра стала мягче. Вас не загоняют с самого начала в гущу событий. Уменьшилось количество противников, которые пытаются навредить персонажу. Начальная локация выглядит уютно и безопасно. Но все это ширма!
В новых локациях появляются сообщения, что «здесь небезопасно», «здесь кто-то есть». Красочно комментируются ваши действия, вроде выглядывания в окно или осмотра предметов. После каждого отдыха день фестиваля становится все ближе. А вместе с этим ухудшается и обстановка.
Чем дальше вы продвинетесь – тем больше ужасов встретите, неизведанного увидите. Редкая возможность сохраниться заставляет нервничать, бояться потерять прогресс. Страх будет нагнетаться за счет звуков и музыки.
Игра будет делать все, чтобы унизить игрока и убить его персонажа. Любое место в ней может стать смертельной ловушкой. Но эта опасность возбуждает любопытство. Хочется заглянуть за еще один угол, зайти в еще одно здание — какой игроку подготовили сюрприз там? Этакое мазохистское удовольствие.
Diagnosis
Это все еще жестокая и кровавая игра. В ней легко умереть, а успехи, во многом, зависят от удачи и броска монетки (во второй части хоть поспать можно без броска). Но игра хорошо передает атмосферу уныния и безысходности. Это отлично сочетается с заимствованием элементов из Silent Hill и ужасов Лавкрафта. Даже лучше, чем в первой части.
Игру делает интересной и её вариативность. Будь то использование способностей, взаимодействие с персонажами или окружением. Её хочется проходить снова и снова. Просто, чтобы проверить: «что случится, если я сделаю то или это»?
Увы, но официального перевода на русский у второй части нет. Зато любительский русификатор можно найти в разделе «руководства» игры в Steam.
Pro:
- Жестокая (даже слишком) ролевая игра
- Интересная боевая система
- Вариативность прохождения
- Выразительный (даже слишком) визуальный стиль
- Жуткая атмосфера
Contra:
- Бог удачи все еще жесток
Сейчас на главной
Table of Contents
Show
Welcome to our Fear Hunger 2 Termina Character Day 1 Recruiting guide. This guide will show you how to recruit characters during the game!
This guide will show you how to recruit characters during the game!
Fear and Hunger 2 Termina Day 1 Character Recruit List
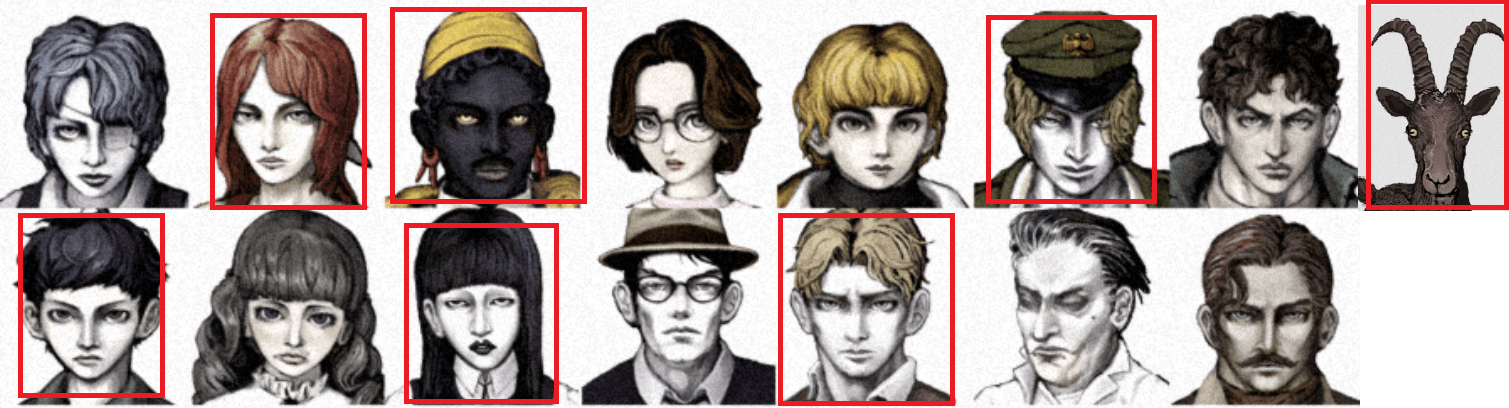
Karin, Levi, O’saa, Pav, Samarie, Henryk, Goat
Abella Recruitment
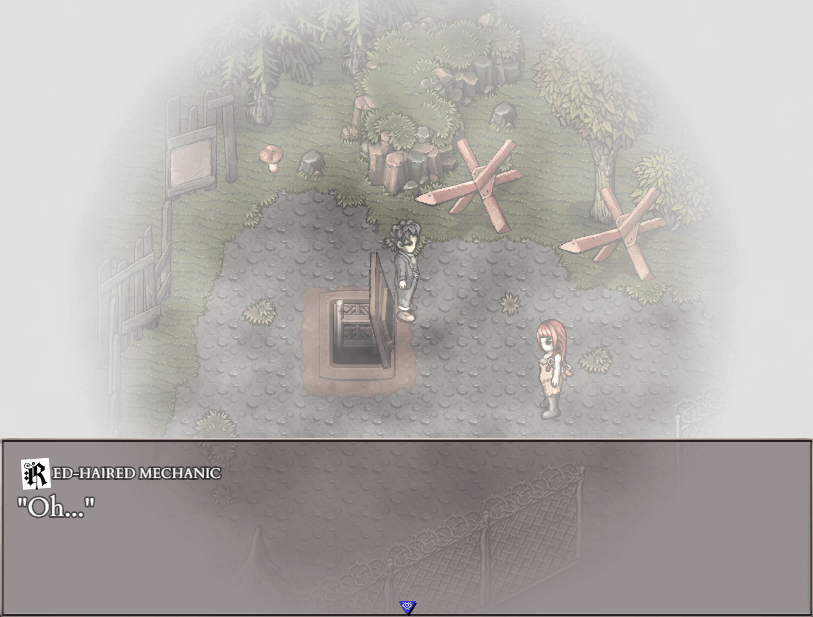
It’s very simple, on the first day of the game in the morning you go to tunnel 7, at the entrance she will offer you to explore the underground together. Tunnel 7 is to the left of the Woodsman house, and the path to the tunnel is guarded by headless dogs.

Daan Recruitment
In the process…
Karin Recruitment
During the first day, she will refuse to join you. On the second day, Karin is found in the ruined city near the deep woods and can be recruited.
Levi Recruitment
You can recruit him on the first day, if you do not recruit him, he will die the next day. The first meeting takes place in the basement where you can hand over the heads of enemies in exchange. The second time you will meet him in the basement of the restaurant, which is located just after the gate to the city. To recruit, you need to give him heroin, which can be randomly found, or can be obtained as loot from Needles (Enemy, doctor with syringes).

Marcoh Recruitment
In the process…
Marina Recruitment
She can be recruited from the second day. On the first day, she will be inside the train without the possibility of recruiting. On the second day, she can be found inside the mayor’s house in a room with a bed where you can save, and recruit her after a little dialogue.
Henryk Recruitment
Unable to recruit if you previously recruited Abella
O’saa Recruitment
In the process…
Olivia Recruitment
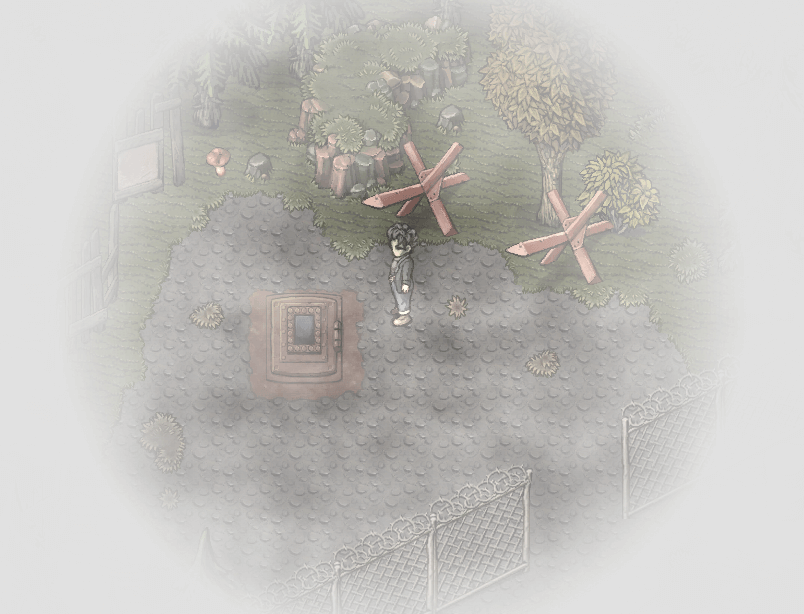
On the evening of the second day, if Tanaka is alive, he will find a wheelchair and take it to her for you, after which she will be available for recruitment. To keep Tanaka alive, you need to stay out of Tunnel 7 on the first day and/or don’t trigger scene with well near Woodsman’s house. There’s also another way, but currently unknown.
Goat
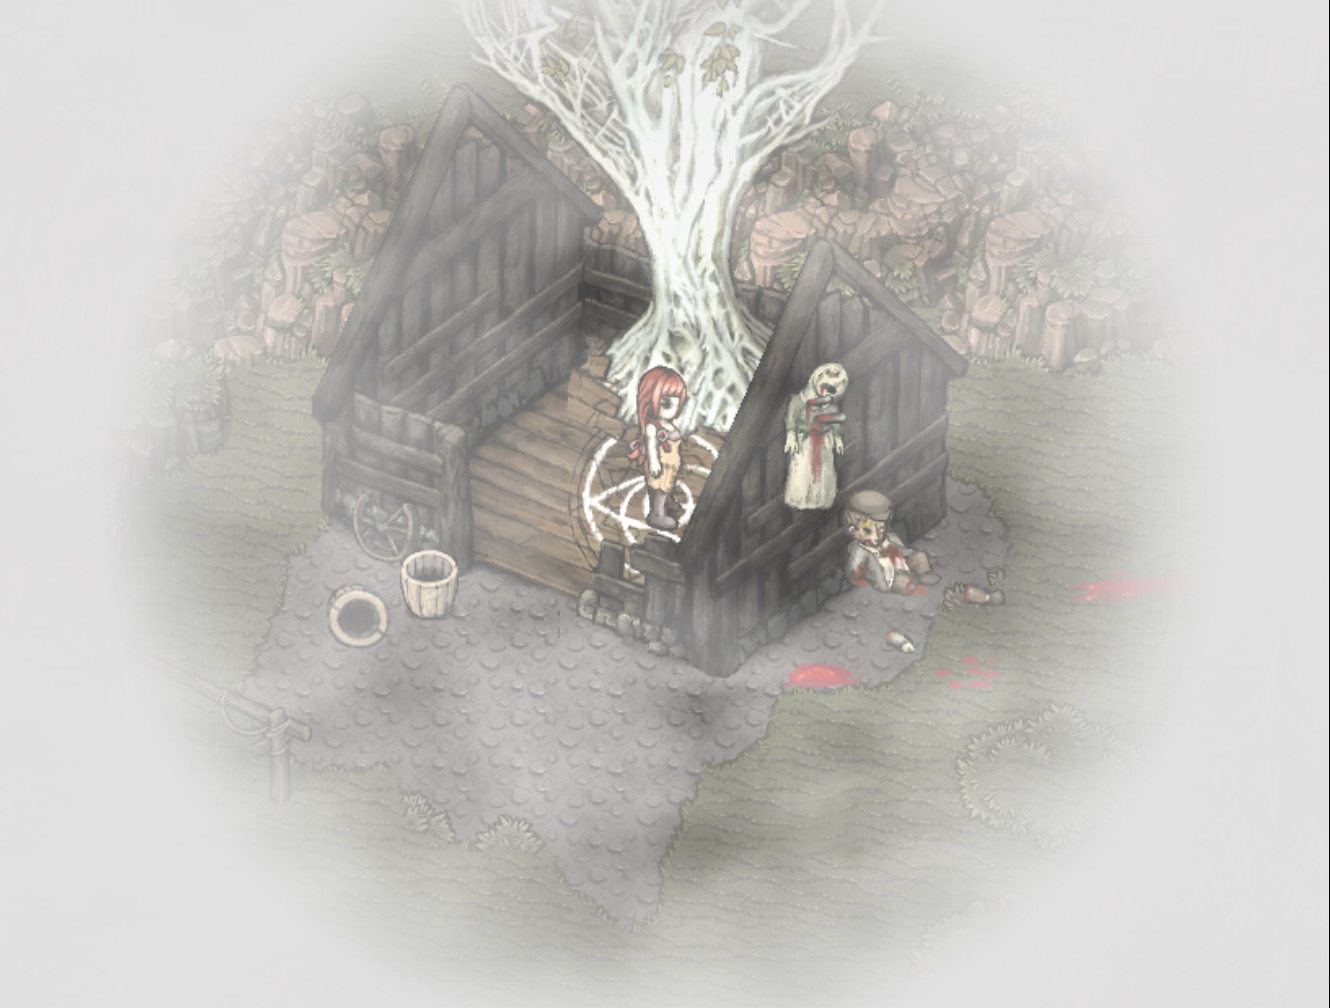
The way to recruit the goat needs the next few things. First thing is having beat and gotten the key from the Woodsman, chalk and the Skin Bible – Rher, which will teach you the sigil you need. (Getting the chalk and book can be entirely up to RNG.)
Go to the basement of the Woodsman house and draw the 3 circle sigil. Once you do, you’ll be able to go to the alternate version of the basement. In there you’ll find the Man in black, regardless of what you say to him he’ll respond differently but the outcome seems the same. Unless you pick the third option which will prompt the man in black to leave and you’ll be left with no recruit.
After the encounter the goat should be waiting by the porch outside. Make sure to feed the goat as you get him, since he seems to join up with 100 hunger, if you don’t feed him he’ll die shortly after recruiting. If short on food you can feed it black matter, he can safely eat it without becoming poisoned.