 07:41
07:41
Видеообзор Garmin Echo100
 06:08
06:08
Тест эхолота Garmin echo 151 зимой
 03:00
03:00
Garmin Echo 100 demo part 1
 03:42
03:42
Эхолот garmin fishfinder 140
 06:14
06:14
Garmin fishfinder 160c unboxing and the first try
 10:52
10:52
Garmin Striker 4 Review! Full specs + Why it’s the best $100 range fish locator on the market.
 10:38
10:38
GARMIN FishFinder Echo serija
 02:52
02:52
Эхолоты Garmin Echo 100, 150 FishFinder
www.badger.ru
Компания БАДЖЕР Тел. (812) 320 5565
Fishfinder 100
Руководство
пользователя

www.badger.ru WWW.BADGER.RU O GARMIN Corporation GARMIN Inte…
Страница 2
- Изображение
- Текст
www.badger.ru
WWW.BADGER.RU
O GARMIN Corporation
GARMIN International, Inc.
1200 East 151
st
Street, Olathe, Kansas 66062, U.S.A.
тел. 913/3978200 или 800/8001020
факс 913/3978282
GARMIN (Europe) ltd.
Unit 5, The Quadrangle, Abbey Park Industrial Estate, Romsey, SO51 9AQ, U.K.
Тел. 44/1794.519944
Факс 44/1794.519222
GARMIN Corporation
No. 68, Jangshu 2
nd
Road, Shijr, Taipei County, Taiwan
Тел. 886/226429199
Факс 886/226429099
Все права зарегистрированы. Кроме особо оговоренных ниже случаев, ни какая часть из настоящего руководства не может быть скопирована,
воспроизведена, передана, записана на электронный носитель или передана по электронным сетям для любых целей без предварительного
на то письменного разрешения корпорации GARMIN. Корпорация GARMIN дарит право загрузить из Интернета одну копию настоящего
Руководства пользователя для личного пользования и напоминает, что строжайше запрещено несанкционированное размножение настоящего
документа в коммерческих целях.
Сведения в настоящем руководстве пользователя могут быть изменены без специального предупреждения. Корпорация GARMIN оставляет
за собой право изменять или совершенствовать свои изделия и вносить соответствующие коррективы в документацию без обязательств
информирования об этом любых людей или организаций. Чтобы быть в курсе последних изменений и усовершенствований, а также для
ознакомления с новинками корпорации GARMIN советуем посетить наш сайт в Интернете www.garmin.com
GARMIN, DCG и See Thru – зарегистрированные торговые марки. Торговая марка «Fishfinder 160 Blue» принадлежит корпорации GARMIN
и не может быть использована без ее разрешения.

www.badger.ru
Компания БАДЖЕР Тел. (812) 320 5565
i
ВВЕДЕНИЕ
Техническая помощь и регистрация изделия
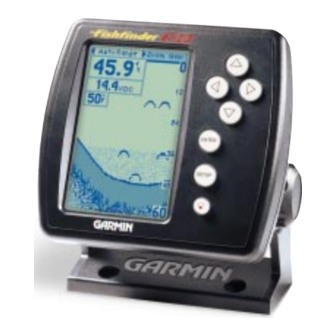
Благодарим Вас за выбор, сделанный в пользу «Fishfinder 100». Это изделие
создано для работы в любых условиях и отличается исключительной простотой
в пользовании.
Следует уделить немного времени и прочесть настоящее «Руководство
пользователя» и изучить правила управления Вашим новым прибором. Это
обеспечит получение максимума возможностей прибора за вложенные Вами в
него деньги.
Если у Вас возникнут проблемы в работе с прибором, свяжитесь с нашим Отделом
Поддержки Пользователей по телефону (913) 397 8200 в рабочие дни с 8 до 17
часов по центральному времени США (телефоны в США).
Желаем Вам приятного времяпрепровождения с “Fishfinder 100».
Чтобы своевременно получать всю необходимую
техническую помощь, советуем зарегистрировать свою
покупку через Интернет. Запишите серийный номер своего
рыбоискателя «Fishfinder 100» и зайдите на наш сайт
www.garmin.com. На домашней странице выберите ссылку
Product Registration.
Какая польза от регистрации нового «Fishfinder 100»?
·
Извещения об обновлениях.
·
Извещения о новых изделиях.
·
Поиск утерянных или похищенных приборов.
ЗАМЕЧАНИЕ
: Если Вы уже зарегистрировали купленный
эхолот «GARMIN», мы предлагаем Вам повторить
регистрацию с помощью нашей новой системы
оперативной (on line) регистрации. Многие услуги
будут оказываться автоматически именно при помощи
этой новой системы регистрации, так что Вы сможете
получить наилучшее сервисное обслуживание от
корпорации «GARMIN».

www.badger.ru WWW.BADGER.RU ii ВВЕДЕНИЕ Гарантийные обязател…
Страница 4
- Изображение
- Текст
www.badger.ru
WWW.BADGER.RU
ii
ВВЕДЕНИЕ
Гарантийные обязательства
Корпорация «Garmin» гарантирует, что в течение 1 года с момента продажи в
данном изделии не проявятся дефекты материалов или сборки. Корпорация
«Garmin» по своему собственному усмотрению отремонтирует или заменит
любую деталь, вышедшую из строя в нормальных условиях эксплуатации. Такого
рода замена или ремонт ничего владельцу изделия не будут стоить. Владелец
только оплачивает все транспортные расходы. Данные гарантийные
обязательства не относятся к повреждениям прибора, возникшим по умыслу,
по несчастному случаю, аварии или в случае несанкционированной попытки
самостоятельного ремонта прибора.
ЭТИ ГАРАНТИЙНЫЕ ОБЯЗАТЕЛЬСТВА НЕ ОГРАНИЧИВАЮТ ДРУГОГО РОДА
ГРАНТИЙНЫХ ПРАВИЛ И ВАШИХ ГРАЖДАНСКИХ ПРАВ, КОТОРЫЕ В
РАЗНЫХ СТРАНАХ МОГУТ БЫТЬ ВЕСЬМА РАЗЛИЧНЫ.
GARMIN НЕ НЕСЁТ ОТВЕТСТВЕННОСТИ ЗА ЛЮБЫЕ ПОСЛЕДСТВИЯ,
ВОЗНИКШИЕ ОТ НЕНАДЛЕЖАЩЕГО ИСПОЛЬЗОВАНИЯ ПРИБОРА ИЛИ ОТ
СЛУЧАЙНЫХ ПОВРЕЖДЕНИЙ В КОНСТРУКЦИИ ПРИБОРА.
Для получения гарантийного обслуживания, обращайтесь к авторизованным
дилерам GARMIN или непосредственно в службу сервисного обслуживания по
тел. 913 3978200 (в США). Отсылаемый для ремонта прибор должен быть
надёжно упакован, а серийный номер его следует указать на упаковке. Посылку
следует посылать оплаченной почтой с вложением копии кассового чека, что
подтвердит Ваши права на гарантийное обслуживание. GARMIN сама решает –
ремонтировать или заменять детали и узлы. ПОЛЬЗОВАНИЕ НАШИМИ
ГАРАНТИЙНЫМИ ОБЯЗАТЕЛЬСТВАМИ – Ваше право, которым Вы можете
пользоваться или нет – по своему усмотрению.

www.badger.ru
Компания БАДЖЕР Тел. (812) 320 5565
iii
ВВЕДЕНИЕ
Комплектность и дополнительные
принадлежности
Стандартная комплектация рыбоискателя «Fishfinder 100» включает:
·
Эхолот «Fishfinder 100»
·
Вкладыш крепление эхолота
·
Универсальный кабель данных/питания
·
Руководство пользователя
·
Краткая шпаргалка
·
Транцевый излучатель (с датчиками температуры и глубины)
*
.
*Дополнительно:
Дополнительные излучатели:
010 10251
Переходник погружного мотора
010 10252
Датчик скорости
010 10107 00
Латунный излучатель для установки в отверстии днища (с датчиками глубины и температуры)
010 10249 00
Пластмассовый транцевый излучатель (с датчиками глубины и температуры)
010 10119 00
Пластмассовый излучатель для установки в отверстии днища (с датчиком глубины)
010 10177 00
Латунный излучатель для установки в отверстии днища (с датчиками глубины, скорости и температуры)
010 10224 00
Пластмассовый излучатель для установки в отверстии днища (только для измерения глубины)
010 10225 00
Датчик температуры
Принадлежности
010 10170 00
Кабель удлинитель 3 м
010 10170 00
Кабель удлинитель 6 м
010 10269 00
Крышка для лицевой панели

www.badger.ru WWW.BADGER.RU iv ВВЕДЕНИЕ Содержание Введение…
Страница 6
- Изображение
- Текст
www.badger.ru
WWW.BADGER.RU
iv
ВВЕДЕНИЕ
Содержание
Введение ………………………………………………………………………. i vi
Техническая помощь ……………………………………………………………………… i
Гарантийные обязательства …………………………………………………………….. ii
Комплектность и дополнительные принадлежности ……………………………. iii
Описание экрана …………………………………………………………………………… vi
Установка ………………………………………………………………………….. 1 9
Излучатели …………………………………………………………………………………… 1
Установка излучателя на транце ………………………………………………………. 2
Установка излучателя в трюме …………………………………………………………. 3
Установка на погружном моторе ……………………………………………………… 4
Установка корневого разветвителя …………………………………………………… 5
Подключение предохранителей ……………………………………………………….. 5 6
Установка экранного блока (на плоскости) ……………………………………….. 7
Установка экрана типа «вкладыш» …………………………………………………… 8
Проверка правильности установки …………………………………………………… 9
Управление рыбоискателем ……………………………………………. 12 27
Панель управления
Range (Диапазон глубины) ……………………………………………………………… 12
Zoom (Увеличение) ………………………………………………………………………… 13
View (Просмотр глубины) ……………………………………………………………….. 13
Gain (Усиление, чувствительность) …………………………………………………… 14
Меню настроек
Закладка «Chart»
Whiteline (разделительная линия) …………………………………………………….. 16
Scroll Speed (скорость изображения) ……………………………………………….. 16
Scale (шкала глубин) ……………………………………………………………………… 17
Закладка «Tools»
Noise Reject (Шумоподавление) ………………………………………………………. 18
Flasher (Прожектор) ………………………………………………………………………. 19
Sim (Тренировка) ………………………………………………………………………….. 19
Закладка «Num»
Number Size (Размер цифр) ……………………………………………………………. 20
Battery Volts (Напряжение аккумулятора) …………………………………………. 20
Temperature (Температура) …………………………………………………………….. 21

www.badger.ru
Компания БАДЖЕР Тел. (812) 320 5565
v
ВВЕДЕНИЕ
Содержание
Speed (Скорость) ………………………………………………………………………….. 21
Закладка «Alarm»
Fish Alarm (Сигнализация обнаружения рыбы) ………………………………….. 22
Shallow Water (Сигнализация мелководья) ……………………………………….. 22
Deep Water (Сигнализация большой глубины) …………………………………… 23
Battery Volts (Напряжение аккумулятора) …………………………………………. 23
Закладка «System»
Contrast (Контрастность) ………………………………………………………………… 24
Beeper (Динамик) ………………………………………………………………………….. 24
NMEA Output (Обмен с внешними устройствами) ……………………………….. 24
Закладка «Cal»
Keel Offset (Смещение на киль) ……………………………………………………….. 25
Water Type (Тип воды) ……………………………………………………………………. 25
Закладка «Units»
Depth (Глубина) …………………………………………………………………………….. 26
Temperature (Температура) …………………………………………………………….. 26
Speed (Скорость) ………………………………………………………………………….. 26
Закладка «Mem»
Remember (Запоминание) ……………………………………………………………….. 27
Factory (Заводские настройки) ………………………………………………………… 27
Software (Версия программного обеспечения) ………………………………….. 27
На воде…………………………………………………………………………. 28 33
Как работает прибор и что видно на экране ………………………………………. 28
Конус излучения ……………………………………………………………………………. 29
Что показывает экран …………………………………………………………………….. 30
Распознавание типа дна ………………………………………………………………….. 31
Термоклины …………………………………………………………………………………. 32
Работа в режиме тренировки …………………………………………………………… 33
Приложение ……………………………………………………………………………… 34 38
Приложение А: Характеристики ………………………………………………………. 34
Приложение В: Сообщения и символы сигнализации ………………………….. 35
Приложение С: Переносной эхолот «Fishfinder 100 Portable» ………………. 36 37
Приложение D: Терминологический словарь ……………………………………… 38 40

www.badger.ru WWW.BADGER.RU vi ВВЕДЕНИЕ Что можно видеть на…
Страница 8
- Изображение
- Текст
www.badger.ru
WWW.BADGER.RU
vi
ВВЕДЕНИЕ
Что можно видеть на экране рыбоискателя?
Рыбоискатель «Fishfinder 100» может отображать на своем экране самую
разнообразную информацию о состоянии водной толщи. Ниже перечислено основное,
что можно увидеть при помощи рыбоискателя.
Глубина водоема
На экране видна глубина под днищем судна. Можно назначить сигнализацию мелководья
или очень большой глубины.
Напряжение питания
*
Напряжение тока от источника питания (в Вольтах).
Температуры воды
*
Если подключить излучатель с датчиком температуры, можно видеть температуру воды.
Скорость относительно воды
*
Если подключить излучатель с датчиком скорости, можно видеть скорость судна
относительно воды.
Рыба
На экране отображается рыба в виде круглой скобки (арки) или символом рыбки. При
обнаружении рыбы может сработать сигнализация.
Термоклины и образования в воде
Используя созданную GARMIN оригинальную технологию «See Thru»Т, рыбоискатель
«Fishfinder 100» может показать на своем экране не только термоклины и различные
затонувшие объекты. Можно увидеть рыбу и под термоклиной, и за растениями и в омуте,
что раньше было невозможно.
Рельеф и строение дна
Оригинальная технология GARMIN «DCG»Т (Автоподстройка усиления) обеспечивает
отчетливое графическое представление рельефа дна и его структуры.
*
Требуется излучатель с соответствующим датчиком

www.badger.ru
Компания БАДЖЕР Тел. (812) 320 5565
1
X
X
Широкоугольный конус
ИЗЛУЧАТЕЛИ
Узкоугольный конус
«Мертвая зона», где
рабы не видна
УСТАНОВКА
X
X
Излучатели
Излучатель рыбоискателя работает подобно человеческому глазу и уху. Поэтому
правильный выбор и установка излучателя имеют исключительно важное значение для
эффективной работы прибора.
Излучатель посылает звуковые волны, как свет из прожектора, конусом в направлении
дна. Чем шире конус излучения, тем большую часть дна можно будет увидеть на экране.
Поскольку просмотр большей части водной толщи позволяет получить больше
информации, следует выбирать такой излучатель, который отвечает вашим потребностям.
Излучатель, создающий широкий конус звуковой волны, наиболее пригоден для
мелководных водоемов. Хотя широкий конус излучения охватывает значительно большие
площади дна, качество изображения на экране эхолота будет существенно ниже. Кроме
того, если применять широкоугольный излучатель на глубоководных участках, на экране
будут в большом количестве формироваться «мертвые зоны», т.е. участки, в которых рыба
будет не видна.
Излучатель, создающий узкоугольный конус, наилучшим образом подходит для
глубоковдных водоемов. Хотя он покрывает меньшую область водной толщи
(сравнительно с широкоугольным конусом при одинаковой глубине), зато он обеспечивает
лучшее разрешение изображения и почти не создает «мертвых зон».
С эхолотом можно купить набор «Optional Package», в который входит транцевый
излучатель на 20
О
со встроенным датчиком температуры. Это универсальный излучатель.
Кроме того, разнообразные излучатели можно приобрести у распространителя товаров
«GARMIN».

www.badger.ru
WWW.BADGER.RU
2
УСТАНОВКА ИЗЛУЧАТЕЛЯ
Набить
водостойкий
герметик во все отверстия
под
шурупы
для
п р е д о т в р а щ е н и я
просачивания воды в трюм.
Крышку ввода кабеля
и з л у ч а т е л я
устанавливать выше
обреза воды.
Излучатель должен выступать ниже
стеклопластикового днища на 3 мм или
на 9,5 мм для алюминиевого днища
судна.
Убедиться в том, что излучатель
располагается ниже поверхности воды
во время глиссирования судна на
самой высокой скорости.
Не следует устанавливать излучатель прямо за винтом. От
излучателя может возникать кавитация, которая ухудшит
ходовые качества судна и постепенно разрушит винт.
Устанавливать
и з л у ч а т е л ь
с л е д у е т
параллельно
днищу.
УСТАНОВКА
СОВЕТ
НЕ СЛЕДУЕТ
устанавливать излучатель позади заклепок,
ребер, швов, отверстий всаса воды или других неровностей
на днище судна, которые всегда могут создавать облака
водяных пузырьков и образовывать завихрения воды. Очень
важно, чтобы излучатель работал в спокойной воде, иначе его
возможности будут серьезно ухудшены.
Правильная установка излучателя является ключевой по важности операцией для
обеспечения эффективной работы рыбоискателя. Если кабель излучателя слишком
короток, можно приобрести у дилера товаров GARMIN кабель удлинитель. НЕ СЛЕДУЕТ
резать кабель излучателя, так как это автоматически прекращает наши гарантийные
обязательства.
Ниже приводятся некоторые советы по основам установки излучателей трех популярных
типов. Подробные указания по установке излучателя прилагаются к самому излучателю.
Установка излучателя на транце
Транцевый излучатель (с датчиками глубины и температуры) типа 010 10248 00.

Комментарии
-
Contents
-
Table of Contents
-
Bookmarks
Quick Links
Fishfinder 100
owner’s
manual
Related Manuals for Garmin Fishfinder 100
Summary of Contents for Garmin Fishfinder 100
-
Page 1
Fishfinder 100 owner’s manual… -
Page 2
Visit the GARMIN website (www.garmin.com) for current updates and supplemental information concerning the use and operation of this and other GARMIN products. GARMIN and Fishfinder 100 are registered trademarks of GARMIN Corporation and may not be used without the express permission of GARMIN Corporation. -
Page 3: Customer Service
If you encounter a problem, or just have a question, contact or Product Support Department at 913-397-8200, Monday — Friday 8:00 a.m. to 5:00 p.m. Central Time. Enjoy you new Fishfinder 100 and once again thank you for choosing GARMIN. Introduction…
-
Page 4: Limited Warranty
GARMIN Corporation warrants this product to be free from defects in materials and manufacture for one year from the date of purchase. GARMIN will, at its sole option, repair or replace any components that fail in normal use. Such repairs or replacement will be made at no charge to the customer for parts or labor.
-
Page 5: Packaging And Accessories
The Fishfinder 100 Standard Package contains the following items: • Fishfinder 100 • Surface/Flush Mount Kit • Wiring Adapter Cable • Owner’ s Manual • Quick Reference Guide • *Transom Mount Transducer (w/depth/temp) * Optional Optional Transducers: 010-10251-00 Trolling Motor Mount Adapter…
-
Page 6: Table Of Contents
Introduction … i-viii Customer Service … i Limited Warranty … ii Introduction Packaging and Accessories … iii Unit Display … vi Installation … 1-9 Table of Contents Selecting A Transducer … 1 Transom Mount Installation … 2 In-hull Installation … 3 Trolling Motor Installation …
-
Page 7
Transducer Coverage … 29 Understanding the Chart … 30 Whiteline … 31 Thermoclines … 32 Simulator Mode … 33 Appendix … 28-33 Appendix A—Specfications … 34 Appendix B—Alarm Messages and Icons … 35 Appendix C—Fishfinder 100 Portable … 36-37 Appendix D—Index … 38-… -
Page 8
Introduction What can the Fishfinder 100 Display? The Fishfinder 100 is able to display a variety of useful information about the underwater environment. Below are a few things the unit will help you see. The unit displays water depth and can provide a warning for shallow or deep-water conditions. -
Page 9: Installation
Included in the Optional Package is a 20° cone angle, temperature sensing, transom mount transducer. This transducer provides good all- around performance. A variety of optional transducers are available from your local dealer or GARMIN. Installation Selecting a Transducer Wide cone angle…
-
Page 10: Transom Mount Installation
Proper transducer installation is key to getting the best performance from your new unit. If the transducer lead is too short, extension cables are available from you GARMIN dealer. DO NOT cut the transducer lead, this will void your warranty.
-
Page 11: In-Hull Installation
In-hull Installation The 010-10224-00 transducer is designed to be mounted inside a fiberglass hull. The standard plastic transom mount transducer can also be mounted in this fashion using this method. If using a temperature sensing transducer, the temperature displayed will reflect the hull temperature. Selecting a Location 1.
-
Page 12: Trolling Motor Installation
Installation Mounting the Transducer Cable Ties Worm Gear Clamp Band Slide clamp band through slots on transducer Trolling Motor Installation Included in the 010-10251-00 transducer kit you should have: 1. Worm Gear Clamp 2. Cable Ties 3. Transducer Mounting the Transducer: 1.
-
Page 13: Wiring Harness Installation
Wiring Harness Installation The Fishfinder 100 comes with a wiring harness that connects the unit to power and the transducer with one easy-to-remove connection. Make sure the wiring harness will reach the unit before beginning installation. If it is necessary to extend the power/data wires, use a wire of compa- rable size and keep your extension as short as possible.
-
Page 14: Installing The Wiring Harness
Make sure the 2-Amp in-line fuse supplied with the unit is installed. The Fishfinder 100 can be connected to another piece of NMEA compatible electronic equipment. If equipped with a capable transducer, the Fishfinder 100 sends depth, temperature and speed information that could be displayed on another device.
-
Page 15: Display Installation (Surface Mount)
Display Installation (Surface Mount) The Fishfinder 100 can be mounted to a flat surface using the supplied Surface Mounting Bracket. Surface Mounting the Display: 1. Position the Surface Mount in the desired location. Leave approximately 2’’ behind the unit for cable clearance.
-
Page 16: Display Installation (Flush Mount)
Installing the Display Pull bracket down until cam lobe contacts surface Display Installation (Flush Mount) The Fishfinder 100 can be mounted flush against the dash or electron- ics rack that is no more than 1/4” thick. Flush Mounting the Display: 1.
-
Page 17: Testing The Installation
While it is possible to perform some checks with the boat trailered, to properly test the installation the boat should be in the water. Press the Power button and the Fishfinder 100 should power on. If the unit fails to power on, verify that the wiring adapter is seated properly in the back of the unit, the Red and Black wires are connected to the correct polarity, and that the 2-Amp fuse is installed and not blown.
-
Page 18: Unit Operation
Unit Operation Keypad Function The Arrows Keys are used to select items on the Adjustment Bar and Setup menu and to change field data. The Enter key is used to activate/deactivate Adjustment Bar and Setup Menu data fields for review or change The Setup key is used to activate/deactivate Setup Menu.
-
Page 19
Depth, Battery Voltage, Water Temperature, and Speed Over Water. To provide data on Water Temperature and Speed Over Water, the Fishfinder 100 requires a transducer capable of producing the particular data. The Depth Scale and the Flasher Function are displayed from top to bottom along the right side of the display. -
Page 20: Using The Adjustment Bar
Unit Operation The Adjustment Bar Current Setting Adjustment List Using the Adjustment Bar The Adjustment Bar allows direct access to the settings most commonly changed while using the unit. These include the depth Range, Zoom setting, and the Gain (sensitivity) of the unit. Place the highlight (white bar) over the desired selection using the RIGHT or LEFT Arrow key and the current setting will be displayed in the highlight.
-
Page 21: Zoom
Zoom The Zoom Adjustment is used to quickly select a display zoom scale. To change the zoom scale: 1. Highlight ‘Zoom’ on the Adjustment Bar. 2. Using the UP or DOWN Arrow, select the desired display zoom level. When a scale other than ‘No Zoom’ is selected, the Adjustment Bar will display a new selection labeled View.
-
Page 22: Gain
Unit Operation The Adjustment Bar Minimum Gain Gain The Gain Adjustment allows the user to control the sensitivity of the unit’ s receiver. This provides some flexibility in what is seen on the display. To see more detail, increase the receiver sensitivity by selecting a higher gain (+).
-
Page 23: Chart
Setup Menu The Setup Menu contains the unit settings that should not require frequent change. The Setup Menu is divided into eight tabs Chart, Tools, Numbers, Alarms, System, Calibrations, Units, and Memory . Each tab will be described in more detail in this section. To enter and exit the Setup Menu, press the SETUP button on the face of the unit.
-
Page 24: Setup Menu
2. Highlight the ‘Scroll Speed’ selection field and press ENTER. 3. Choose ‘Fast’, ‘Medium’, ‘Slow’ or ‘Pause’, press ENTER to accept the selection. If you are using the Fishfinder 100 on the portable case battery power, slowing the scroll rate will help to conserve your battery.
-
Page 25: Scale
Scale The depth ‘Scale’ is displayed vertically along the right side of the chart. The depth ‘Scale’ can be configured to display four different ways: as an ‘Overlay’, in the ‘Corners’, with ‘Basic’ or ‘No Scale’. To Change the Scale Setting: 1.
-
Page 26: Tools
Unit Operation Setup Menu/Tools Tools Tab Noise Reject Selections Tools The Tools tab contains the ‘Noise Reject’, ‘Flasher’, and ‘Simulator’ tools. The ‘Noise Reject’ and ‘Flasher’ tools are used to enhance the chart and help in identifying and providing information about an underwater return.
-
Page 27: Flasher
Simulator The ‘Simulator’ tool allows you to select a transducer type for use with the Fishfinder 100’ s built in simulator. These choices allow the simulator to more accurately depict actual operation of the unit. For details on using the simulator see page 33.
-
Page 28: Numbers
3. Choose ‘Normal’ or ‘Large’, press ENTER to accept the selection. Battery Voltage The Fishfinder 100 can display the current battery voltage on the chart. To Show or Hide the Battery Voltage Display Field: 1. Highlight the ‘NUM’ tab on the Setup Menu.
-
Page 29: Temperature
3. Choose ‘Auto’, ‘Show’ or ‘Hide’, press ENTER to accept the selection. Speed The Fishfinder 100 can display the boat’ s ‘Speed’ Over Water when equipped with a speed capable transducer. The unit has the ability to automatically sense when a capable transducer is connected and display speed.
-
Page 30: Alarms
Alarms The ‘Alarm’ tab allows you to activate and configure the four alarms available in the Fishfinder 100. To access the ‘Alarm’ tab place the highlight over it using the arrow keys. See page 35 for alarm icons and messages.
-
Page 31: Deep Water
Deep Water The ‘Deep Water’ Alarm can be set to sound a warning at a depth determined by the user. Before the unit will sound a warning the alarm must be activated. Activating/Deactivating the Deep Water Alarm: 1. Highlight the ‘Alarm’ tab on the Setup Menu. 2.
-
Page 32: System
3. Choose ‘Off’, ‘Alarms’, or ‘Key & Alarms’, press ENTER to accept the setting. NMEA Output The Fishfinder 100 has the ability to output information about Depth, Speed, and Water Temp for display on another NMEA-compatible device. To Activate/Deactivate the NMEA Output: 1.
-
Page 33: Calibration
The ‘Cal’ (Calibration) tab contains calibrations fields for ‘Keel Offset’, and ‘Water Type’ (salt or fresh). These calibrations help to ensure the Fishfinder 100 will provide the most accurate readings at all times. To access the ‘Calibration’ tab, use the arrow keys to highlight it.
-
Page 34: Units
Unit Operation Setup Menu/Units Depth Selections Temperature Selections Speed Selections Units The ‘Units’ tab contains settings for ‘Depth’, ‘Temperature’ and ‘Speed’. To access the ‘Units’ tab, use the arrow keys to highlight it. Depth The ‘Depth’ field can be configured to display in Feet (ft), Meters (mt) or Fathoms (fa).
-
Page 35: Memory
To access the ‘Memory’ tab, use the arrow keys to highlight it. Remember The Fishfinder 100 can be set to remember All of the unit settings including the Adjustment Bar or the items in Setup Only. To Select a Memory Setting: 1.
-
Page 36: Understanding Sonar
If you are familiar with sonar, and can determine what is on the chart, this section may not be for you. This section is intended to help the novice user gain some understanding of how the Fishfinder 100 operates and how it can help improve their fishing productivity.
-
Page 37: On The Water
Transducer Coverage The area covered by the transmitted sound waves is determined by the cone angle of the transducer and the water depth. Using Garmin’ s standard 20° transducer, the coverage is approximately 1/3rd of the water depth. As shown in Example 1, the coverage area at a 30 foot depth is approximately a 10 foot diameter circle.
-
Page 38: Understanding The Chart
On the Water Understanding the Chart Branches Enlarged Transducer Fish View Remember that the Fishfinder displays a 2D picture of the underwater environment. The fish and tree could be located anywhere in the coverage area at that slice of time. Understanding the Chart It is important to understand that the unit does not display a 3-D representation of the underwater environment.
-
Page 39: Whiteline
Whiteline The Fishfinder 100 can help you to determine if the bottom is hard or soft. When the sonar soundwaves are reflected back by the bottom, a hard bottom will return a stronger signal than a soft bottom. The stronger bottom return, the wider the bottom layer is displayed.
-
Page 40: Thermoclines
On the Water Understanding the Chart Thermoclines One of the unique features offered by GARMIN is See-Thru™ technology. See-Thru™ technology allows the Fishfinder 100 to see through thermoclines and helps locate fish where they live, and fish love the thermocline.
-
Page 41: Simulator Mode
The message will be replaced by the simulator mode icon in the lower left corner of the chart. While in the simulator mode, the unit will display a random bottom scene and the Fishfinder 100 can be controlled just as if it were on the water.
-
Page 42: Appendix A-Specfications
Specifications Physical Case: Fully Gasketed, high-impact plastic alloy Display: 3.3” x 2” (8.3 x 5 cm) 160 H x 100 W pixels Size: 4.9” H x 5.3” W x 2.7” D (12.5 x 13.5 x 6.9 cm) Weight: 13 oz.
-
Page 43: Appendix B-Alarm Messages And Icons
Alarm Messages and Icons The Fishfinder 100 displays a message when an alarm is tripped. To clear the message press the ENTER key. If the ENTER key is not pressed, the unit will automatically remove most messages after 10 seconds and display a reminder icon in the lower left corner of the chart until the alarm is no longer valid.
-
Page 44: Appendix C-Fishfinder 100 Portable
The Portable Case is designed for rugged use and provides storage for the Battery Pack and the Portable Suction Cup Transducer and a mount for the Fishfinder 100. The case is water resistant but is not designed to float in the event it should go overboard.
-
Page 45: Appendix C—Fishfinder 100 Portable
Batteries The Fishfinder 100 Portable comes with a D-Cell battery pack. Eight D-Cell Alkaline batteries will provide approximately 20 hours of continu- ous operation. You have the option of purchasing a 12 Volt Rechargeable Gel-Cell Battery for the portable case.
-
Page 46
Depth … 26 Display … vi Display Installation … 7 Enter Key … 10 Factory Setup … 27 Fish Alarm … 22 Fish Symbols … 15 Fishfinder 100 Portable … 36 Flasher … 19 Flush Mount … 8 Gain … 14… -
Page 47
In-hull Installation … 3 Installing the Display … 7 Appendix D Keel Offset … 25 Keypad … 10 Index Limited Warranty … i Memory … 27 Messages … 35 NMEA Output … 24 Noise Reject … 18 Number Size … 20 Numbers … -
Page 48
Software Version … 27 Specifications … 34 Appendix D Speed 2 … 1, 26 Suction Cup Transducer … 36 System … 24 Index Table of Contents … vi Temperature … 21, 26 Testing the Installation … 9 Tools … 18 Transducers … -
Page 49
© 1999 GARMIN Corporation GARMIN International, Inc. 1200 East 151st Street, Olathe, Kansas 66062, U.S.A. GARMIN (Europe) Ltd. Unit 5, The Quadrangle, Abbey Park Industrial Estate, Romsey, SO51 9AQ, U.K. GARMIN (Asia) Corporation No. 68, Jangshu 2 Road, Shijr, Taipei County, Taiwan www.garmin.com…
Garmin
100 BLUE Инструкция по эксплуатации
Популярность:
2277 просмотры
Подсчет страниц:
50 страницы
Тип файла:
Размер файла:
1.46 Mb
- Инструкции и руководства
- Бренды
- Garmin
- 100 BLUE
- Справочник Пользователя
![]()
owner’s
manual
Fishfi nder 100 Blue
FF 100 Blue covers.indd
08/10/01, 11:56 AM
1

www.badger.ru
Компания БАДЖЕР Тел. (812) 320 5565
i
ВВЕДЕНИЕ
Техническая помощь и регистрация изделия
Благодарим Вас за выбор, сделанный в пользу «Fishfinder 100». Это изделие
создано для работы в любых условиях и отличается исключительной простотой
в пользовании.
Следует уделить немного времени и прочесть настоящее «Руководство
пользователя» и изучить правила управления Вашим новым прибором. Это
обеспечит получение максимума возможностей прибора за вложенные Вами в
него деньги.
Если у Вас возникнут проблемы в работе с прибором, свяжитесь с нашим Отделом
Поддержки Пользователей по телефону (913) 397 8200 в рабочие дни с 8 до 17
часов по центральному времени США (телефоны в США).
Желаем Вам приятного времяпрепровождения с “Fishfinder 100».
Чтобы своевременно получать всю необходимую
техническую помощь, советуем зарегистрировать свою
покупку через Интернет. Запишите серийный номер своего
рыбоискателя «Fishfinder 100» и зайдите на наш сайт
www.garmin.com. На домашней странице выберите ссылку
Product Registration.
Какая польза от регистрации нового «Fishfinder 100»?
·
Извещения об обновлениях.
·
Извещения о новых изделиях.
·
Поиск утерянных или похищенных приборов.
ЗАМЕЧАНИЕ
: Если Вы уже зарегистрировали купленный
эхолот «GARMIN», мы предлагаем Вам повторить
регистрацию с помощью нашей новой системы
оперативной (on line) регистрации. Многие услуги
будут оказываться автоматически именно при помощи
этой новой системы регистрации, так что Вы сможете
получить наилучшее сервисное обслуживание от
корпорации «GARMIN».