- Manuals
- Brands
- FLYGT Manuals
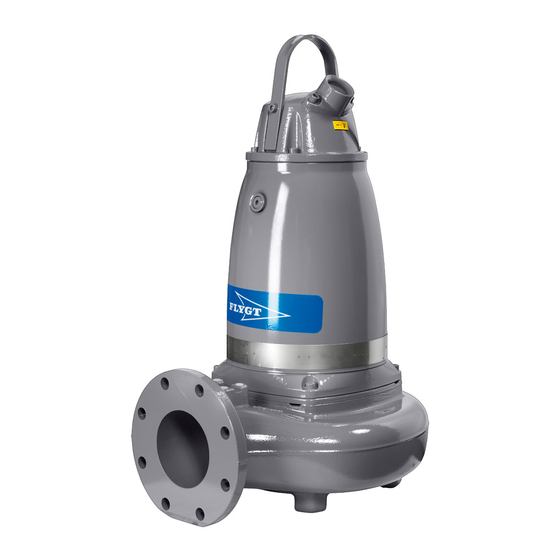
- Water Pump
- 3153
- Installation, operation and maintenance manual
-
Contents
-
Table of Contents
-
Troubleshooting
-
Bookmarks
Quick Links
Installation,
Operation, and
Maintenance Manual
Flygt 3153
Related Manuals for FLYGT 3153
Summary of Contents for FLYGT 3153
-
Page 1
Installation, Operation, and Maintenance Manual Flygt 3153… -
Page 3: Table Of Contents
Installation………………………..18 Install the pump……………………..18 Authority regulation……………………18 Fasteners……………………….18 Install with P-installation…………………….19 Install with S-installation…………………….20 Install with T/Z-installation………………….21 Make the electrical connections………………….22 General precautions……………………22 Requirements……………………..22 Cables…………………………23 Earthing (Grounding)……………………23 Connect the motor cable to the pump………………23 Flygt 3153 Installation, Operation, and Maintenance Manual…
-
Page 4
The pump does not stop when a level sensor is used…………..63 The pump starts-stops-starts in rapid sequence…………….63 The pump runs but the motor protection trips…………….64 The pump delivers too little or no water………………65 Technical Reference……………………..67 Application limits……………………..67 Motor data……………………….67 Flygt 3153 Installation, Operation, and Maintenance Manual… -
Page 5: Introduction And Safety
It is extremely important that you read, understand, and follow the safety messages and regulations carefully before handling the product. They are published to help prevent these hazards: • Personal accidents and health problems • Damage to the product • Product malfunction Flygt 3153 Installation, Operation, and Maintenance Manual…
-
Page 6: Environmental Safety
Magnetic hazard Magnetic hazards are indicated by a specific symbol that replaces the typical hazard level symbols: CAUTION: Environmental safety The work area Always keep the station clean to avoid and/or discover emissions. Flygt 3153 Installation, Operation, and Maintenance Manual…
-
Page 7: User Safety
Electrical connections Electrical connections must be made by certified electricians in compliance with all international, national, state, and local regulations. For more information about requirements, see sections dealing specifically with electrical connections. Flygt 3153 Installation, Operation, and Maintenance Manual…
-
Page 8: Ex-Approved Products
• Intrinsically safe circuits are normally required for the automatic level-control system by the level regulator if mounted in zone 0. • The yield stress of fasteners must be in accordance with the approval drawing and the product specification. Flygt 3153 Installation, Operation, and Maintenance Manual…
-
Page 9: Product Warranty
• Material damages • Economic losses Warranty claim Xylem products are high-quality products with expected reliable operation and long life. However, should the need arise for a warranty claim, then contact your Xylem representative. Flygt 3153 Installation, Operation, and Maintenance Manual…
-
Page 10
Introduction and Safety Spare parts Xylem guarantees that spare parts will be available for 15 years after the manufacture of this product has been discontinued. Flygt 3153 Installation, Operation, and Maintenance Manual… -
Page 11: Transportation And Storage
• Always lift the unit by its lifting handle. Never lift the unit by the motor cable or by the hose. • Do not attach sling ropes to shaft ends. Flygt 3153 Installation, Operation, and Maintenance Manual…
-
Page 12: Temperature Ranges For Transportation, Handling And Storage
13°C (9°F), the viscosity increases such that the glycol mixture will lose its flow properties. However, the glycol-water mixture will not solidify completely and thus cannot harm the product. Follow these guidelines to avoid freezing damage: Flygt 3153 Installation, Operation, and Maintenance Manual…
-
Page 13: Storage Guidelines
• Before operating the unit after storage, it must be inspected with special attention to the seals and the cable entry. • The impeller/propeller must be rotated every other month to prevent the seals from sticking together. Flygt 3153 Installation, Operation, and Maintenance Manual…
-
Page 14: Product Description
• Original spare parts and accessories that are authorized by Xylem are essential for compliance. The use of other parts can invalidate any claims for warranty or compensation. For more information contact your Xylem representative. Pressure class Low head Medium head High head Super high head Flygt 3153 Installation, Operation, and Maintenance Manual…
-
Page 15: Parts
• Inner seal: corrosion-resistant cemented carbide/Aluminum oxide WCCR/Al • Outer seal: silicon carbide RSiC/RSiC Main bearings Consisting of a two-row angular contact ball bearing Motor For information about the motor, see Motor data (page 67). Flygt 3153 Installation, Operation, and Maintenance Manual…
-
Page 16: Monitoring Equipment
The data plate is a metal label located on the main body of the products. The data plate lists key product specifications. Specially approved products also have an approval plate. Curve code/Propeller code Serial number, see Product denomination (page 17) Product number Flygt 3153 Installation, Operation, and Maintenance Manual…
-
Page 17: Approvals
• Dust ignition proof for use in Class II. Div 1. Group E, F and G • Suitable for use in Class III. Div 1. Hazardous Locations EN approval plate This illustration describes the EN approval plate and the information contained in its fields. Flygt 3153 Installation, Operation, and Maintenance Manual…
-
Page 18: Iec Approval Plate
11. Additional information 12. Max. ambient temperature 13. Serial number WS001279B FM approval plate This illustration describes the FM approval plate and the information contained in its fields. Temperature class Maximum ambient temperature WS003973A Flygt 3153 Installation, Operation, and Maintenance Manual…
-
Page 19: Product Denomination
The serial number is used for identification of an individual product, and is divided into four parts. This is an example of a serial number, and an explanation of its parts. NP 3085.183 — 951 0163 Product code Production year Production cycle Running number Flygt 3153 Installation, Operation, and Maintenance Manual…
-
Page 20: Installation
Fasteners WARNING: • Only use fasteners of the proper size and material. • Replace all corroded fasteners. • Make sure that all fasteners are properly tightened and that there are no missing fasteners. Flygt 3153 Installation, Operation, and Maintenance Manual…
-
Page 21: Install With P-Installation
Secure the guide bars in the bracket. b) Check that the guide bars are placed vertically. Use a level or a plumb line. 6. Connect the discharge pipe to the discharge connection. Flygt 3153 Installation, Operation, and Maintenance Manual…
-
Page 22: Install With S-Installation
5. Connect the motor cable and the starter and monitoring equipment according to the separate instructions. Make sure that the impeller rotation is correct. For more information, see Check the impeller rotation (page 33). Flygt 3153 Installation, Operation, and Maintenance Manual…
-
Page 23: Install With T/Z-Installation
Make sure that the impeller rotation is correct. For more information, see Check the impeller rotation (page 33). 5. Make sure that the weight of the pump does not put strain on the piping. Flygt 3153 Installation, Operation, and Maintenance Manual…
-
Page 24: Make The Electrical Connections
• If stated on the data plate, then the motor is convertible between different voltages. • The thermal contacts/thermistors must be in use. • For FM-approved pumps, FLS must be connected and in use in order to meet approval requirements. Flygt 3153 Installation, Operation, and Maintenance Manual…
-
Page 25: Cables
Connect the motor cable to the pump CAUTION: Leakage into the electrical parts can cause damaged equipment or a blown fuse. Keep the end of the motor cable above the liquid level. Flygt 3153 Installation, Operation, and Maintenance Manual…
-
Page 26: Connect The Motor Cable To The Starter And Monitoring Equipment
9. Fasten the screws on the entrance flange so that the cable insertion assembly bottoms out. Connect the motor cable to the starter and monitoring equipment WARNING: Do not install the starter equipment in an explosive zone unless it is explosion-proof rated. Flygt 3153 Installation, Operation, and Maintenance Manual…
-
Page 27: Cable Charts
Check that the relays, lamps, fuses, and connections are intact. Replace any defective equipment. Cable charts Description This topic contains general connection information. It also provides cable charts that show connection alternatives for use with different cables and power supply. Flygt 3153 Installation, Operation, and Maintenance Manual…
-
Page 28
Motor cable leads L1 L2 L3 T1 T2 T3 T4 Stator (internal connection illustrated) U1 V1 W1 W2 V2 U1 V1 W1 W2 U2 V2 U1 V1 W1 W2 U2 V2 L2 L3 Flygt 3153 Installation, Operation, and Maintenance Manual… -
Page 29
* * Ground conductor is stranded around core Screen (WH) Screen (WH) Screen (WH) GC=Ground check 773 29 00/2 Color code standard Code Description Brown Black White Orange Green GNYE Green-Yellow Flygt 3153 Installation, Operation, and Maintenance Manual… -
Page 30
If a separate control cable is used, then the control cores in the motor cable are never used. One cable (left) and two cables (right) Y-connection. Two cables One cable V1 U2 U1 W2 W1 V2 Figure 10: Y-connection One cable (left) and two cables (right) D-connection. Flygt 3153 Installation, Operation, and Maintenance Manual… -
Page 31
Figure 13: Y or D-connection 9-leads connection If a separate control cable is used, then the control cores in the motor cable are never used. One cable (left) and two cables (right) Y-parallel connection. Flygt 3153 Installation, Operation, and Maintenance Manual… -
Page 32
Cable without sep. ground conductor Screen as ground conductor GN/YE shrink hose FGB Screened Mini CAS Mini CAS+AUX Figure 16: Screened SUBCAB and FGB Screened * For screened SUBCAB T3 and T4 shall also be twisted separately. Flygt 3153 Installation, Operation, and Maintenance Manual… -
Page 33: Sensor-Connection
Screenflex WH T1 WH T1 WH T2 WH T2 WH T3 WH T4 Figure 18: Color and marking of control leads Sensor terminal clamps T15 T16 T1 T2 Figure 19: Sensor terminal clamps Flygt 3153 Installation, Operation, and Maintenance Manual…
-
Page 34
T=145°C (293°F) (T +5°C (41°F)) R ≤ 1330 Ohm Thermal detectors, FLS disconnected Thermal detectors FLS Disconnected Max 12 V T1 Control leads WH/YE Mini T1/*OG/1 T2/*BU/2 WH/YE **T3 **T4 *SUBCAB AWG **Screened SUBCAB Flygt 3153 Installation, Operation, and Maintenance Manual… -
Page 35: Check The Impeller Rotation
Check the impeller rotation WARNING: The starting jerk can be powerful. 1. Start the motor. 2. Stop the motor after a few seconds. 3. Check that the impeller rotates according to this illustration. Flygt 3153 Installation, Operation, and Maintenance Manual…
-
Page 36
The correct direction of impeller rotation is clockwise when you look at the pump from above. 4. If the impeller rotates in the wrong direction, transpose two phase leads (3-phase) and do this procedure again. Flygt 3153 Installation, Operation, and Maintenance Manual… -
Page 37: Operation
• In some installations, the pump and the surrounding liquid may be hot. Bear in mind the risk of burn injuries. • Make sure nobody is close to the unit when it is started. The unit will jerk in the opposite direction of the impeller rotation. Flygt 3153 Installation, Operation, and Maintenance Manual…
-
Page 38
1. Remove the fuses or open the circuit breaker, and check that the impeller can be rotated freely. 2. Conduct insulation test phase to ground. To pass, the value must exceed 5 megohms. 3. Check that the monitoring equipment works. 4. Start the pump. Flygt 3153 Installation, Operation, and Maintenance Manual… -
Page 39: Maintenance
• Lubricate all springs, screws, and O-rings with grease. During reassembly, always make sure that existing index markings are in line. The reassembled drive unit must always be insulation-tested and the reassembled pump must always be test-run before normal operation. Flygt 3153 Installation, Operation, and Maintenance Manual…
-
Page 40: Torque Values
2210 (825.1) (1630) Hexagon screws with countersunk heads For hexagon socket head screws with countersunk head, maximum torque for all property classes must be 80% of the values for property class 8.8 above. Flygt 3153 Installation, Operation, and Maintenance Manual…
-
Page 41: Change The Coolant
1. Empty the coolant in the inspection chamber: a) Remove the inspection plug. Figure 22: Without a cooling jacket Figure 23: With a cooling jacket b) Pump out any coolant from the inspection chamber, as shown here. Flygt 3153 Installation, Operation, and Maintenance Manual…
-
Page 42
Place the pump in a horizontal position, or leave it upright to use a pump to empty the coolant. b) If the pump is laid in a horizontal position, place a container under the pump. c) Remove the coolant plugs and empty the coolant. Flygt 3153 Installation, Operation, and Maintenance Manual… -
Page 43: Fill With Coolant
1. Fill with coolant until it overflows through the opposite hole, as shown here. Quantity: approximately • 2.2 L (2.3 qt.) without cooling jacket • 10.5 L (11.2 qt.) with cooling jacket Flygt 3153 Installation, Operation, and Maintenance Manual…
-
Page 44: Service The Pump
(liquid) temperatures <40°C. NOTICE: Shorter intervals may be required when the operating conditions are extreme, for example with very abrasive or corrosive applications or when the liquid temperatures exceed 40°C (104°F). Flygt 3153 Installation, Operation, and Maintenance Manual…
-
Page 45: Inspection
Check that the connections are properly tightened. Thermal contacts Normally closed circuit; interval 0–1 ohm. Thermistor Check the resistance is between 20–250 ohms and the measured voltage is maximum 2 V DC. Voltage and amperage Check the running values. Flygt 3153 Installation, Operation, and Maintenance Manual…
-
Page 46: Major Overhaul
Remove the impeller: wet installation CAUTION: Wear heavy work gloves when you handle impellers. The sharp edges can cause physical injury. 1. Place the pump in a horizontal position. 2. Remove the impeller: Flygt 3153 Installation, Operation, and Maintenance Manual…
-
Page 47
Turn the adjustment screw counterclockwise until the impeller breaks free from the shaft. e) Hand-tighten the impeller screw to prevent it from falling off. WS001490A f) Remove the rod. 3. Raise the pump. 4. Remove the drive unit from the pump housing: Flygt 3153 Installation, Operation, and Maintenance Manual… -
Page 48
Maintenance a) Remove the pump housing screws. b) Remove the drive unit from the pump housing. 5. Remove the impeller: a) Place the drive unit horizontally. b) Remove the impeller screw. Flygt 3153 Installation, Operation, and Maintenance Manual… -
Page 49
Polish off any flaws with a fine emery cloth. b) Grease the shaft end. NOTICE: Surplus grease can cause the impeller to become loose. Remove surplus grease from conical and/or cylindrical surfaces of shafts and/or sleeves. Flygt 3153 Installation, Operation, and Maintenance Manual… -
Page 50
Adjust the adjustment screw so that it is flush with the sleeve. WS001759A e) Fit the sleeve and impeller to the shaft. f) Hand-tighten the impeller screw to prevent it from falling off. Flygt 3153 Installation, Operation, and Maintenance Manual… -
Page 51
3. Fit the pump housing: a) Fit a new and greased O-ring on the seal housing cover. b) Grease the pump housing screws. c) Raise the drive unit. d) Place the drive unit into the pump housing. Flygt 3153 Installation, Operation, and Maintenance Manual… -
Page 52
Using a hexagon-bit adapter, turn the adjustment screw clockwise until the impeller makes contact with the pump housing. For tightening torque, see Torque values (page 38). b) Tighten it a further 1/8 turn (45°). Flygt 3153 Installation, Operation, and Maintenance Manual… -
Page 53
Check that the impeller can rotate freely. CAUTION: Beware of the pinch point hazard between the rotating impeller and the guide pin. 7. Check that the clearance between the impeller and the insert ring is 0.1–0.5 mm (0.004–0.02 in.). Flygt 3153 Installation, Operation, and Maintenance Manual… -
Page 54: Replace The Impeller For Dry Installation
8. If applicable, adjust clearance to 0.1–0.5 mm (0.004–0.02 in.) between the guide pin and the impeller. Replace the impeller for dry installation Remove the impeller: dry installation 1. Remove the drive unit from the pump housing: a) Remove the pump housing screws. Flygt 3153 Installation, Operation, and Maintenance Manual…
-
Page 55
Remove the drive unit from the pump housing. 2. Remove the impeller: a) Place the drive unit horizontally. b) Lock the impeller as shown in the figure. c) Remove the impeller screw. Flygt 3153 Installation, Operation, and Maintenance Manual… -
Page 56
Polish off any flaws with a fine emery cloth. b) Grease the shaft end. NOTICE: Surplus grease can cause the impeller to become loose. Remove surplus grease from conical and/or cylindrical surfaces of shafts and/or sleeves. Flygt 3153 Installation, Operation, and Maintenance Manual… -
Page 57
Grease the conical sleeve, the threads of the adjustment screw, the washer, and the impeller screw. Always use a new impeller screw. d) Unscrew the adjustment screw approximately 5 mm (0.2 in.). WS002106A e) Measure and note the distance A. Flygt 3153 Installation, Operation, and Maintenance Manual… -
Page 58
Maintenance 2. Mount the impeller: a) Fit the sleeve and the impeller to the shaft. b) Fit the impeller screw and washer and tighten. Flygt 3153 Installation, Operation, and Maintenance Manual… -
Page 59
Make sure that the drive unit is parallel with the pump housing by hand-tightening the pump housing screws. b) Check the distance between the seal housing cover and the pump housing with a feeler gauge. Check diagonally at four points. Flygt 3153 Installation, Operation, and Maintenance Manual… -
Page 60
Lift the drive unit out of the pump housing and remove the impeller and conical sleeve. 5. Trim to the correct distance: a) Calculate the measure C according to the formula shown in the image. Flygt 3153 Installation, Operation, and Maintenance Manual… -
Page 61
7. If applicable, check that the clearance between the impeller and the insert ring is maximum 1 mm (0.04 in.) radial. If not, send the pump for service. The insert ring is pressed into the seal housing cover. Flygt 3153 Installation, Operation, and Maintenance Manual… -
Page 62
Maintenance 8. Install the drive unit in the pump housing: a) Fit a new and greased O-ring to the seal housing cover. WS002056A b) Place the drive unit in the pump housing. Flygt 3153 Installation, Operation, and Maintenance Manual… -
Page 63
Tighten the greased screws diagonally. For tightening torque, see Torque values (page 38). WS001478A If you need to adjust the impeller, redo the replace the impeller procedure from the beginning. Flygt 3153 Installation, Operation, and Maintenance Manual… -
Page 64: Troubleshooting
• The main power switch is on. • There is control voltage to the start equipment. • The fuses are intact. • There is voltage in all phases of the supply line. Flygt 3153 Installation, Operation, and Maintenance Manual…
-
Page 65: The Pump Does Not Stop When A Level Sensor Is Used
• The sump in order to prevent the impeller from clogging again. If the problem persists, refer to the Flygt Service Guide on the web or contact the local Xylem service shop. Always state the serial number of your pump when you contact Xylem, Product Description (page 12).
-
Page 66: The Pump Runs But The Motor Protection Trips
• Whether the voltage drop in the line at the starting surge causes the contactor’s self-holding malfunction. If the problem persists, refer to the Flygt Service Guide on the web or contact the local Xylem service shop. Always state the serial number of your pump when you contact Xylem, Product Description (page 12).
-
Page 67: The Pump Delivers Too Little Or No Water
Replace the overload protection. overload protection. If the problem persists, refer to the Flygt Service Guide on the web or contact the local Xylem service shop. Always state the serial number of your pump when you contact Xylem, Product Description (page 12).
-
Page 68
• Depending on the installation type, add a means for priming the pump, such as a foot valve. If the problem persists, refer to the Flygt Service Guide on the web or contact the local Xylem service shop. Always state the serial number of your pump when you contact Xylem, Product Description (page 12). -
Page 69: Technical Reference
Code compliance IEC 60034-1 Rated output variation ±10% Voltage variation without ±10%, provided that it does not run continuously at full load overheating Voltage imbalance tolerance Stator insulation class H (180°C [360°F]) Flygt 3153 Installation, Operation, and Maintenance Manual…
-
Page 72
Gesällvägen 33 174 87 Sundbyberg The original instruction is in English. All non- English instructions are translations of the original Sweden instruction. Tel. +46-8-475 60 00 © 2012 Xylem Inc. Fax +46-8-475 69 00 http://tpi.xyleminc.com 895381_13.0_en.US_2012-08_IOM.3153.091/.095/.181/.185/.350/.390/.800/.810/.820/.830/.840/.850…
Specifications:
|
Accompanying Data:
FLYGT 3153 Water Pump PDF Installation, Operation And Maintenance Manual (Updated: Thursday 3rd of November 2022 11:41:24 AM)
Rating: 4.9 (rated by 27 users)
Compatible devices: ITT Flygt Series, 3085, 3202, WEDA L95, Nirolift, DX Series, 2125, Flygt 3069.
Recommended Documentation:
FLYGT 3153: Text of Installation, Operation And Maintenance Manual
(Ocr-Read Version Summary of Contents, UPD: 03 November 2022)
-
24, Make the electrical connections General precautions Electrical Hazard: • A certified electrician must supervise all electrical work. Comply with all local codes and regulations. • Before starting work on the unit, make sure that the unit and the control panel are isolated from the power supply and cannot be energized. This applies to the control circuit as well. �…
-
64, Troubleshooting Introduction Follow these guidelines when troubleshooting the pump: • Disconnect and lock out the power supply except when conducting checks that require voltage. • Make sure that no one is near the pump when the power supply is reconnected. • When troubleshooting electrical equipment, use the following: • Universal instrument multimeter • Test lamp (…
-
68, Cause Remedy There are signs of wear on the impeller, pump, and casing. Replace the worn parts. The liquid level is too low. • Check that the level sensor is set correctly. • Depending on the installation type, add a means for priming the pump, such as a foot valve. If the problem persists, refer to the Flygt Service Guide on the web or contact the local Xylem service sho…
-
9, • Do not modify the equipment without approval from an authorized Xylem representative. • Only use parts that are provided by an authorized Xylem representative. Guidelines for compliance Compliance is fulfilled only when you operate the unit within its intended use. Do not change the conditions of the service without the approval of an Xylem representative. When you install or mainta…
-
28, L2 L1 L2 L3 L3L1 WS000509B WS000509C L2 L3L1 L1 L3L2 T1 T2 Figure 8: Phase sequence Connection locations The figures in this section illustrate how to interpret the connection strip symbols. L1 L2 L3 T3 T4T1 T2 U1 V1 W1 U2 W2 V2 U1 V1 W1 W2 U2 V2 U1 V1 W1 GC W2 U2 V2 L1 L2 L3 *YE GN/YE WH L1 U1 U2 W2 V2 W1 V1 L3 L2 WS004133C 1. Stator leads 2. Terminal board 3. Motor cable leads 4. Stator …
-
17, 4. Country of origin 5. Additional information 6. Phase; type of current; frequency 7. Rated voltage 8. Thermal protection 9. Thermal class 10. Rated shaft power 11. International standard 12. Degree of protection 13. Rated current 14. Rated speed 15. Maximum submergence 16. Direction of rotation: L=left, R=right 17. Duty class 18. Duty factor 19. Product weight 20. Locked ro…
-
60, WS002089A c) Note the largest distance B. B WS001473A d) Lift the drive unit out of the pump housing and remove the impeller and conical sleeve. WS001477A 5. Trim to the correct distance: a) Calculate the measure C according to the formula shown in the image. Maintenance 58 Flygt 3153 Installation, Operation, and Maintenance Manual
… -
61, C=A-B-0.5 mm WS001475A b) Turn the adjustment screw until C is reached. 6. Fasten the impeller: a) Fit the sleeve, impeller, greased washer with a greased impeller screw. b) Tighten the impeller screw. For tightening torque, see Torque values (page 38). c) Tighten it further 1/8 turn (45°). WS001492A 7. If applicable, check that the clearance between the impeller and the insert ring i…
-
33, WS003824A Screenflex and SUBCAB with functional ground * For screened SUBCAB T3 & T4 shall also be twisted separately T1 and T2 twisted* White insulation hose Screen GN/YE L1 L2 L3 T1 T2 BN BK GY T1 and T2 White insulation hose twisted* Screen BK BK BK BK BK BK GN/YE 1 2 3 4 5 6 T1 T2 Figure 17: Screenflex and SUBCAB with functional ground Sensor-connection Connection to the pump WS003843A…
-
41, Change the coolant This image shows the plugs that are used to change the coolant. 1 2 2 Figure 20: With a cooling jacket 1 2 2 WS001480A Figure 21: Without a cooling jacket 1. Inspection plug 2. Coolant plugs Empty the coolant WARNING: The seal housing may be pressurized. Hold a rag over the inspection/ filling plugs to prevent splatter. 1. Empty the coolan…
-
10, Spare parts Xylem guarantees that spare parts will be available for 15 years after the manufacture of this product has been discontinued. Introduction and Safety 8 Flygt 3153 Installation, Operation, and Maintenance Manual
… -
7, Waste and emissions regulations Observe these safety regulations regarding waste and emissions: • Appropriately dispose of all waste. • Handle and dispose of the processed liquid in compliance with applicable environmental regulations. • Clean up all spills in accordance with safety and environmental procedures. • Report all environmental emissions to the appropriate authorities. WARNIN…
-
54, WS003730A WS003731A 8. If applicable, adjust clearance to 0.1–0.5 mm (0.004–0.02 in.) between the guide pin and the impeller. WS001504A Replace the impeller for dry installation Remove the impeller: dry installation 1. Remove the drive unit from the pump housing: a) Remove the pump housing screws. Maintenance 52 Flygt 3153 Installation, Operation, and Maintenance Manual
…
FLYGT 3153: Recommended Instructions
BDP904, DWC153BLSST, Clavinova CVP-405, SGS-24E


-
INSTRUCTIONS FOR INSTALLATION AND MAINTENANCE INSTRUCTIONS POUR L’INSTALLATION ET LA MAINTENANCE INSTRUCCIONES PARA LA INSTALACIÓN Y EL MANTENIMIENTO EVOSTA2 EVOSTA2d …
EVOSTA2 53
-
!»#$%$&'()*+,-,./)0,+1(20)1.32+4)5.6)6,5/7)8+(9)19*+(*,+)1.0/5::5/1(.;ONLY a qualified engineer with appropriate certifications may attempt designing a new compressor to ensure that all required safety and control elements are in place and will work together properly and safely. This compressor pump is intended ONLY as a replacement for a similarly rated pump on an existing c …
MG2HPSS 16
-
Viron xt pumpsINST 434INSTALLATION MANUALFOR YOUR SAFETY — This product must be installed and serviced by a licensed electrician in accordance with the latest applicable version of AS/NZS 3000, along with any other applicable local and national installation codes/standards”, and any other local applicable regulations. Before installing this product, read and follow all warning notices and in …
Viron P320 XT 28
-
309250 Ausg.LREPAIR – RÉPARATION – REPARATUR – REPARATIEDisplacement Pump / Bas de pompeUnterpumpe / OnderpompImportant Safety InstructionsRead all warnings and instructions in this manual.Save these instructions. Maximum Working Pressure / Pression de service maximum /Maximaler ArbeitsdruckMaximum werkdruk: 228 bar (23 MPa)Model 244195Ultra Max 695, Series AUltimate Mx 695, Series A …
244195 10
-
DosingConveyingControlLiquidsGasesSystemsOriginal operating instructions© Lutz-Jesco GmbH 2014BA-10103-02-V01Stepper Motor-driven Diaphragm Dosing PumpMEMDOS SMART LKOperating instructionsRead the operating instructions!The user is responsible for installation and operation related mistakes! …
MEMDOS SMART LK 62
-
NOTE! To the installer: Please make sure you provide this manual to the owner of the equip ment or to the responsible party who maintains the system.D35, D50 AND D60 SerieSINDUSTRIAL PUMPSPart # 23833A034 | © 2014 Pentair Ltd. | 06/04/14 …
Myers D35 Series 20
-
6. Do NOT run pump dry. Water is required to lubriucate the shaft seal. 7. Pumping chemicals or corrosive liquids may shorten the life of the pump and be hazardous to the operator.8. Personal Safety: a. Wear safety glasses at all times when working with pumps. b. Keep work area clean, uncluttered and properly lighted; replace all unused tools and equipment. c. Keep visit …
400GT 12
-
OWNER’S MANUALMODEL NO.390.269152CAUTION:Read and Follow All Safety Rules andOperating InstructionsBefore First Use of This Product.Save This Manual ForFuture Reference.Sears, Roebuck and Co., Hoffman Estates, IL 60179 U.S.A.• Safety Instructions• Installation• Operation• Maintenace• Repair PartsPRINTED IN U.S.A.PORTABLE UTILITY PUMP®Form No. F642-05001 (4/22/05)629 0405IN …
CRAFTSMAN 390.269152 8
-
ISTRUZIONI PER L’INSTALLAZIONE E LA MANUTENZIONE (IT) INSTRUCTIONS FOR INSTALLATION AND MAINTENANCE (GB) INSTRUCTIONS DE MISE EN SERVICE ET D’ENTRETIEN (FR) INSTALLATIONSANWEISUNG UND WARTUNG (DE) INSTRUCTIES VOOR INGEBRUIKNAME EN ONDERHOUD (NL) INSTRUCCIONES PARA LA INSTALACIÓN Y EL MANTENIMIENTO(ES) INSTALLATIONS — OCH UNDERHÅLLSANVISNING(SE) ΟΔΗΓΙΕΣ ΓΙΑ ΤΗΝ ΕΓ� …
VERTY NOVA 200 40
-
NOTE! To the installer: Please make sure you providethis manual to the owner of the pumping equipment or tothe responsible party who maintains the system.Pump Installation and Service ManualSubmersibleSump Pump W/D/V-A1W-A1V-A1D-A1 …
W-A1 8
Additional Information:
Popular Right Now:
Operating Impressions, Questions and Answers:
One cable
U1W2
L1
Figure 11: D-connection
One cable (left) and two cables (right)Y/ D-connection.
One cable
U1
L1
1
Figure 12: Y/D-connection
Y and D-connection, only applicable to 70 mm
Figure 13: Y or D-connection
9-leads connection
If a separate control cable is used, then the control cores in the motor cable are never
used.
One cable (left) and two cables (right) Y-parallel connection.
Flygt 3153 Installation, Operation, and Maintenance Manual
Two cables
V1 U2
W1V2
U1
W2
V1
L1
2
L3
L2
L3
L1
1
Two cables
W2
V1
U2
W1
V2
U1
W2
V1
L3
L2
L1
L1
2
2
2
2
4
6
5
4
L3
L2
L1
L3
1
1
2
1
3
2
1
3
U1
V1
W1
U2 V2
L2
L1
L3
1
1
1
Only applicable to 70mm2 terminal clamp
U2
W1
V2
GC
L2
L3
2
2
L2
1
1
U2
W1
V2
GC
L3
L2
2
2
6
5
L2
1
1
2
2
terminal clamp.
Y
V1
U1
W2
U2
W1V2
L3
L2
L1
1
1
D
L1
W2
W1
L2
Y/D
L2:1
L3:1
L1:1
L3:2
L1:2
V1
U1
V2
U2
D
GC
1
Installation
L3
L2:2
W1
W2
29
КАНАЛИЗАЦИОННЫЙ НАСОС С ТЕХНОЛОГИЕЙ N
Насосы Flygt серии Flygt N успешно справляются с самыми сложными задачами по перекачиванию сточных вод, в том числе при перекачивании волокнистых включений. Конструкция насоса обеспечивает стабильно высокие показатели эффективности. Благодаря запатентованной N-технологии с инновационным самоочищающимся рабочим колесом, насосы серии Flygt N обладают наивысшей эффективностью в своем классе, что позволяет существенно снизить затраты на электроэнергию и незапланированное техобслуживание. Для пользователя гарантирует спокойствие и большую экономию в течение длительного времени.
Конструкция насоса спроектирована таким образом, что большинство твердых включений, попадающих в насос, будут проходить сквозь рабочее колесо между его лопастями. Любое засорение, попадающее на переднюю кромку лопасти проходит вдоль загнутой назад кромки к периметру впуска и не засоряет рабочее колесо.
Благодаря механической самоочищающейся конструкции насос может перекачивать жидкости с содержанием шлама до 8%.
ГИБКАЯ И МОДУЛЬНАЯ КОНСТРУКЦИЯ
Самоочищающийся насосы Flygt серии N имеют инновационные характеристики и являются отличным выбором для различных сфер применения. Модульная конструкция гидравлики позволяет адаптировать ее под необходимые задачи.
- Заменяемое износное кольцо в двух материалах: серый чугун или высокохромистый чугун Hard IronTM в зависимости от условий эксплуатации
- Рабочее колесо из высокопрочного серого чугуна для обычный сточных вод
- Рабочее колесо из высокохромистого чугуна Hard IronTM для абразивных и высококоррозийных сред.
- Возможность модификации с режущей вставкой для резки длинных волокон или твердых материалов в канализационных стоках.
- Рабочее колесо из нержавеющей стали для специальных применений, требующих использования дуплексной нержавеющей стали.
- Небольшое смещение вала снижает прогиб вала и увеличивает срок службы уплотнений и подшипников.
- Конструкция двигателя разработана специально для погружной установки. Тепло концентрируется в сердечнике статора для улучшения охлаждающих свойств.
- Картриджные уплотнения Flygt Plug-in Seals™ с системой Active Seal™ исключают риск неправильной установки и небрежной эксплуатации. В зависимости от применения доступны материалы из карбида вольфрама (WCCR) или карбида кремния (SiC).
- Кабель двигателя SUBCAB® разработан специально для погружного применения.
- Гибкий выбор системы охлаждения: замкнутая система охлаждения, охлаждение средой или внешнее охлаждение.
Установка на автоматической трубной муфте (Р)

Для полустационарной погружной установки. Насос устанавливается с двумя направляющими штангами на напорном патрубке.
Соединение для подключения к напорному трубопроводу (S)

Полустационарная автономная установка. Переносная версия с трубным или шланговым подключением.
Сухая вертикальная установка (Т)

Вертикальная стационарная установка в сухом отделении или линейная установка с фланцевыми соединениями для всасывающих и нагнетательных трубопроводов.
Сухая горизонтальная установка (Z)

Горизонтальная стационарная установка в сухом отделении или линейная установка с фланцевыми соединениями для всасывающих и нагнетательных трубопроводов.