 07:21
07:21
Обзор навигатора Garmin GPSMAP 60
 05:37
05:37
GPS Навигатор Garmin GPSMAP 60CSx
 04:42
04:42
Compare Garmin GPSMap 62S vs Garmin GPSMap 60Csx
 07:16
07:16
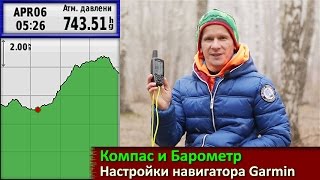
Навигаторы Garmin : обзор настроек компаса и барометра
 10:11
10:11
Garmin GPSMap 60CSX Crash Course — Part 1
 11:56
11:56
???? УСТАНОВКА OSM КАРТ в навигаторы Garmin. Бесплатные карты для туризма — OpenStreetMap
 07:56
07:56
Garmin GPSMap 60CSx Review
 06:38
06:38
Замена крепления платы на навигаторе Garmin gpsmap 60CSx
GPSMAP
®
60Cx/60CSx
Руководство пользователя

2
GPSMAP 60Cx/60CSx Руководство пользователя
Введение
Информация о руководстве пользователя
Чтобы Вы могли использовать все возможности Вашей новой
навигационной системы, мы рекомендуем Вам внимательно
прочитать инструкцию и изучить рабочие процедуры устройс-
тва. Руководство пользователя содержит следующие разделы:
Введение – содержит оглавление.
Вводный курс – в этом разделе помещена краткая инфор-
мация об устройстве, инструкции по включению прибора и
описание процедуры поиска спутников.
Основы работы – данный раздел содержит информацию о
настройке путевых точек, маршрутов и траекторий.
Основные страницы – общий обзор страницы спутников,
страницы путевого компьютера, страницы карты, страницы
компаса и страницы альтиметра.
Главное меню – описание функций главного меню и инструк-
ции по изменению настроек.
Приложение – включает в себя дополнительную информацию о
Вашем приборе – технические характеристики, дополнительные
аксессуары, инструкции по техническому уходу, а также гарантию
и информацию FCC.
ВВЕДЕНИЕ
Благодарим Вас за выбор навигатора Garmin GPSMAP 60CSx. В результате применения уже зарекомендовавшей себя техноло-
гии Garmin GPS и электронной карты с полным набором функций мы создали отличный портативный GPS-приемник. Пожа-
луйста, убедитесь в наличии всех компонентов системы, указанных в списке комплектации на упаковочной коробке. В случае
отсутствия каких-либо позиций немедленно свяжитесь с Вашим дилером Garmin.

GPSMAP 60Cx/60CSx Руководство пользователя
3
Введение
Обозначения, используемые в руководстве
пользователя
В тексте данного руководства пользователя под заголовком ВНИМАНИЕ! поме-
щены потенциально опасные ситуации, которые могут привести к авариям или
столкновениям со смертельным исходом.
В данном руководстве пользователя заголовок Внимание указывает на потенци-
ально опасные ситуации, которые могут привести к легким травмам или поломке
оборудования. Этот заголовок может также использоваться без символа “!”,
чтобы обратить Ваше внимание на правила безопасной эксплуатации.
Внимание!
При установке прошивки с сайта
garmin.com русский язык
в приборе утрачивается
Внимание!
Если карта региона или области
записана и разлочена (привязана к
внутреннему номеру) на SD-карту, то
никакие другие карты на эту SD-карту
добавлять нельзя или каким-либо
другим способом менять на ней файлы
из папки Garmin.

CSx Руководство пользователя Введение Содержание ВВЕдЕНИЕ…
Страница 4
- Изображение
- Текст
4
GPSMAP 60Cx/60CSx Руководство пользователя
Введение
Содержание
ВВЕдЕНИЕ
2
Информация о руководстве пользователя
3
Обозначения, используемые в руководстве
пользователя
3
Лицензия на программное обеспечение
7
Регистрация прибора
7
Контактная информация Garmin
8
Уход за устройством GPSMAP 60CSx
8
Чистка корпуса
8
Чистка экрана
8
Хранение
8
Водонепроницаемость
8
Меры безопасности
9
ВВОдНый курС
10
Компоненты прибора
10
Установка батареек
11
Функции кнопок
12
Включение прибора GPSMAP 60CSx
13
Настройка подсветки
13
Инициализация GPS-приемника
14
Использование прибора GPSMAP 60CSx
14
Определения, используемые
в данном руководстве пользователя
15
Выбор опций и ввод данных
15
Использование панели состояния
16
Экранные сообщения
16
Использование баз данных
17
ОСНОВы рАбОты
19
Создание и использование путевых точек
19
Отметка текущего местоположения
19
Создание путевых точек с использованием карты
20
Создание путевой точки путем ввода координат
20
Редактирование путевых точек
21
Удаление путевых точек
21
Усреднение местоположения путевой точки
22
Создание проекции путевой точки
23
Путевые точки с зоной сигнализации
23
«Человек за бортом» (МОВ)
25
Использование меню поиска
25
Поиск по названию
26
Недавно найденные объекты
26
Использование информационной
страницы объекта поиска
27
Меню опций информационной страницы
объекта поиска
27
Поиск путевой точки
29
Поиск тайника (игра геокэшинг)
29

GPSMAP 60Cx/60CSx Руководство пользователя
5
Введение
Поиск города
30
Поиск выезда с шоссе
30
Поиск адреса
31
Поиск перекрестка
32
Поиск объектов
33
Использование траекторий
34
Профили траектории
37
Навигация по сохраненной траектории
38
Создание и использование маршрутов
39
Создание маршрута
39
Навигация по маршруту
40
Редактирование маршрута
42
Использование опций страницы маршрута
44
ОСНОВНыЕ СтрАНИцы
45
Страница спутников
46
Использование меню опций страницы спутников
46
Страница карты
46
Использование дополнительной картографии
48
Изменение масштаба карты
48
Ориентация карты
49
Опции страницы карты
49
Навигационные инструкции
50
Настройка страницы карты
50
Измерение расстояний
53
Включение/выключение функции разгрузки карты
53
Восстановление заводских настроек по умолчанию
54
Страница компаса
54
Использование электронного компаса
55
Опции страницы компаса
57
Навигация “Sight ‘N Go”
58
Использование стрелки курса или стрелки азимута
59
Поля данных
60
Страница альтиметра
61
Опции страницы альтиметра
62
Индикация графика в зависимости
от времени (расстояния)
62
Просмотр графиков давления / высоты
63
Диапазоны масштабирования
63
Просмотр информации о точках графика
64
Просмотр точек графика на карте
65
Обнуление данных
65
Калибровка альтиметра
66
Изменение полей данных
66
Страница путевого компьютера
67
Меню опций страницы путевого компьютера
67
ГлАВНОЕ МЕНю
69
Траектории
69
Опции страницы траектории
70

CSx Руководство пользователя Введение Страница маршрутов…
Страница 6
- Изображение
- Текст
6
GPSMAP 60Cx/60CSx Руководство пользователя
Введение
Страница маршрутов
70
Страница дороги
70
Меню настройки
71
Системная настройка
71
Настройка дисплея
72
Настройка интерфейса
72
Настройка звуковых сигналов
73
Настройка последовательности страниц
74
Настройка карты
74
Настройка расчета маршрутов
74
Настройка игры геокэшинг
76
Настройка морских типов сигнализации
77
Настройка времени
77
Настройка единиц измерения
78
Настройка формата направления
79
Калибровка
80
Настройка альтиметра
80
Настройка страницы-приветствия
81
Настройка функции “Jumpmaster”
82
Путевые точки с зоной сигнализации
86
Календарь
86
Калькулятор
87
Секундомер
87
Информация о Солнце и Луне
88
Информация об охоте и рыбалке
89
Меню игр
90
Memory Race (гонки по памяти)
90
Virtua Maze (виртуальный лабиринт)
91
GekoSmak
91
Nibbons
92
Gekoids
92
Beast Hunt
92
ПрИлОжЕНИЕ
94
Технические характеристики
94
Физические характеристики
94
Эксплуатационные характеристики
94
Характеристики питания
95
Интерфейс
95
Опции полей данных
96
Дополнительные ак сессуары
99
Подключение прибора GPSMAP 60CSx к компьютеру
100
Что такое WAAS?
100
Геодезические системы и форматы местоположения
102
Что такое геодезическая система?
103
Что такое формат местоположения?
103

Лицензия на программное обеспечение, Регистрация прибора
Страница 7
- Изображение
- Текст
GPSMAP 60Cx/60CSx Руководство пользователя
7
Введение
лицензия на программное обеспечение
Используя прибор GPSMAP 60CSx, Вы принимаете условия
приведенного ниже лицензионного соглашения. Пожалуйста,
внимательно причтите данное соглашение.
Компания Garmin предоставляет Вам ограниченную лицен-
зию на использование программного обеспечения данного
устройства (далее именуется «Программное обеспечение») в
двоичной форме для нормальной эксплуатации данного про-
дукта. Все права собственности и авторские права на данное
программное обеспечение остаются у компании Garmin.
Данное программное обеспечение является собственностью
компании Garmin и защищается законом об авторских правах
США и международными законами об авторских правах.
Кроме того, структура, строение и кодировка данного про-
граммного обеспечения, а также программное обеспечение в
форме кодов являются ценными коммерческими секретными
данными компании Garmin. Вы не можете декомпилиро-
вать, разбивать на компоненты, вносить любые изменения
и преобразовывать в читаемую форму данное программное
обеспечение или любую его часть, а также создавать любые
работы на базе данного программного обеспечения. Вы не
можете экспортировать или повторно экспортировать данное
программное обеспечение в любую страну, если это нарушает
законы управления экспортом США.
регистрация прибора
Зарегистрируйтесь уже сегодня, чтобы мы имели возможность
оказывать Вам лучшую техническую поддержку. Выпишите се-
рийный номер Вашего прибора GPSMAP 60CSx, расположен-
ный на задней поверхности корпуса, и подключитесь к нашему
сайту (www.garmin.com). На странице “Home” найдите выход
на регистрацию продукции (Product Registration).
Запишите серийный номер Вашего прибора GPSMAP 60CSx
ниже. Этот номер понадобится Вам в случае утери или кражи
устройства, а также для организации ремонта. Храните
товарный чек в надежном месте или прикрепите копию чека к
данной инструкции.
Серийный номер: _ _ _ _ _ _ _ _

CSx Руководство пользователя Введение контактная информация…
Страница 8
- Изображение
- Текст
8
GPSMAP 60Cx/60CSx Руководство пользователя
Введение
контактная информация Garmin
Если у Вас возникли какие-либо вопросы по эксплуатации
Вашего прибора GPSMAP 60CSx, обращайтесь в компанию
Garmin. В США обращайтесь в отдел поддержки продукции по
тел. 913/397.8200 или 800/800.1020 (с 8 до 17 по рабочим дням)
или по электронной почте sales@garmin.com. В Европе звоните
в компанию Garmin (Europe) Ltd. по тел. 44/0870.8501241.
уход за устройством GPSMAP 60CSx
Корпус прибора GPSMAP 60CSx произведен из высококачествен-
ных материалов и не требует другого ухода кроме чистки.
Чистка корпуса
Протрите внешний корпус устройства (кроме экрана) тка-
нью, смоченной в несильном чистящем растворе, и затем
вытрите насухо. Не используйте химические очистители
и растворители, которые могут повредить пластиковые
компоненты.
Чистка экрана
Для протирки экрана прибора GPSMAP 60CSx следует при-
менять мягкую и чистую салфетку из нетканого материала.
При необходимости смочите салфетку в воде, изопропиловом
спирте или специальном очистителе для очков. Смочите сал-
фетку жидкостью и осторожно протрите экран.
Хранение
Не храните прибор GPSMAP 60CSx в местах, которые могут
находиться под длительным воздействием высокой температу-
ры (например, в багажнике автомобиля), поскольку это может
привести к поломке устройства. Информация пользователя
(путевые точки, маршруты и т.д.) может храниться в памяти
прибора без внешнего питания. Однако мы советуем Вам
создавать резервные копии важных данных пользователя, за-
писывая их вручную или загружая в ПК (с помощью программ-
ного обеспечения MapSource).
Водонепроницаемость
Прибор GPSMAP 60CSx характеризуется водонепрони-
цаемостью по стандарту IEC 60529 IPX7. Это означает, что
устройство может быть погружено на глубину 1 метр на 30
минут. Более длительное погружение может вызвать поломку
оборудования. Если прибор был погружен в воду, то перед
использованием или зарядкой его необходимо вытереть и
просушить на воздухе.
ВНИМАНИЕ!
Несоблюдение правил безопасности, указанных ниже,
может привести к серьезным последствиям, вплоть до
смертельного исхода.

GPSMAP 60Cx/60CSx Руководство пользователя
9
Введение
Во время навигации следует внимательно сравнивать показания
прибора GPSMAP 60CSx с показаниями других источников нави-
гационной информации, включая визуальные ориентиры и карты.
Для обеспечения безопасности следует всегда выяснять причину
различия в показаниях перед продолжением навигации.
Электронные карты прибора GPSMAP 60CSx используются
только для удобства навигации и не могут заменить собой
официальные правительственные карты. Полная информация,
необходимая для безопасной навигации, содержится только в
официальных картах и морских справочниках.
ВНИМАНИЕ!
Данный продукт, его упаковка и компоненты содержат
химические вещества, которые, согласно информации
штата Калифорния, могут явиться причиной рака,
врожденных дефектов или заболеваний репродуктив-
ной системы. Это предупреждение дано в соответс-
твии с Заявлением 65 штата Калифорния. За допол-
нительной информацией обращайтесь на наш сайт:
http://www.garmin.com/prop65.
ВНИМАНИЕ!
Несоблюдение правил безопасности, указанных ниже,
может привести к травмам или поломкам оборудования.
Прибор GPSMAP 60CSx предназначен для использования
только в качестве вспомогательного средства для навигации.
Он не должен применяться в случаях, требующих точного
измерения направления, расстояния, местоположения или
топографии. Также это устройство не должно использоваться
для определения расстояния до земли на средствах воздуш-
ного транспорта.
Система GPS (Global Positioning System) работает под управлени-
ем Правительства США, которое одно несет ответственность за
точность системы и ее техническое содержание. В систему могут
быть внесены изменения, что повлияет на точность и работу всего
GPS оборудования, включая GPSMAP 60CSx. Несмотря на то, что
устройство GPSMAP 60CSx является точным навигационным при-
бором, любой навигатор может быть неправильно использован
или интерпретирован, что делает его опасным.
Информация о картографических данных: Одна из целей
компании Garmin заключается в предоставлении пользова-
телям наиболее полной и точной картографии, доступной
по разумной цене. Мы используем и правительственные, и
частные источники данных. Информация об этих источниках
указывается в специальных сообщениях об авторских правах.
Практически все источники данных могут содержать в себе
неполную или неточную информацию. В большей степени это
относится к областям, находящимся за пределами США, где
полные и точные цифровые картографические данные могут
быть недоступными или неразумно дорогими.

10
GPSMAP 60Cx/60CSx Руководство пользователя
Вводный курс
GPSmap 60CSx
Прорези для креп-
ления ремешка
Крышка батарейного
отсека
Порт данных/ питания
(под защитной крыш-
кой).
Встроенная
антенна
Коннектор для подключе-
ния дополнительной GPS-
антенны (под защитной
крышкой).
D-образное кольцо,
запирающее крышку
батарейного отсека
USB-порт (под защит-
ной крышкой)
Клавиатура
ЖК-дисплей
Кнопка включе-
ния (Power)
ВВОДНЫЙ КУРС
компоненты прибора

Комментарии
-
Contents
-
Table of Contents
-
Bookmarks
Quick Links
GPSMAP
60Cx
®
color map navigator
owner’s manual
Related Manuals for Garmin GPSMAP 60Cx
Summary of Contents for Garmin GPSMAP 60Cx
-
Page 1
GPSMAP 60Cx ® color map navigator owner’s manual… -
Page 2
Garmin. Garmin hereby grants permission to download a single copy of this manual onto a hard drive or other electronic storage medium… -
Page 3: About This Manual
NTRODUCTION Thank you for choosing the Garmin GPSMAP 60Cx. The GPSMAP 60Cx uses the proven performance of Garmin GPS and full-featured mapping to create an unsurpassed portable GPS receiver. Take a moment now to compare the contents of this package with the packing list on the box.
-
Page 4: Table Of Contents
Manual Conventions … i Software License Agreement … v Product Registration … v Contact Garmin …v Caring for the GPSMAP 60Cx … vi Cleaning the Case … vi Cleaning the Screen … vi Storage … vi Water Immersion … vi Warning …
-
Page 5
Compass Page … 48 Compass Page Options …49 Using the Course Pointer or Bearing Pointer …49 Data Fields …51 GPSMAP 60Cx Owner’s Manual Trip Computer Page … 52 Trip Computer Page Options Menu …52 Main Menu … 53 Tracks … 53 Track Page Options …54… -
Page 6
Performance …74 Power …74 Interfacing … 75 Optional Accessories … 78 Connecting Your GPSMAP 60Cx to a Computer ..79 What is WAAS/EGNOS? …80 Loran TD Setup … 81 Map Datums and Location Formats … 82 What are Map Datums? …82 What is a Location Format? …82… -
Page 7: Software License Agreement
Software License Agreement BY USING THE GPSMAP 60Cx, YOU AGREE TO BE BOUND BY THE TERMS AND CONDITIONS OF THE FOLLOWING SOFTWARE LICENSE AGREEMENT. PLEASE READ THIS AGREEMENT CAREFULLY. Garmin grants you a limited license to use the software embedded in this device (the “Software”) in binary executable form in the normal operation of the product.
-
Page 8: Caring For The Gpsmap 60Cx
Avoid chemical cleaners and solvents that may damage plastic components. Cleaning the Screen The GPSMAP 60Cx screen should be cleaned using a soft, clean, lint-free cloth. Water, isopropyl alcohol, or eyeglass cleaner can be used if needed. If these are used, apply the liquid to the cloth and then gently wipe the screen with the moistened cloth.
-
Page 9: Warning
WARNING: This product, its packaging, and its components contain chemicals known to the State of California to cause cancer, birth defects, or reproductive harm. This Notice is being provided in accordance with California’s Proposition 65. If you have any questions or would like additional information, please refer to our Web site at http://www.garmin.com/prop65. GPSMAP 60Cx Owner’s Manual…
-
Page 10: Caution
Map Data Information: One of the goals of Garmin is to provide customers with the most complete and accurate cartography that is available to us at a reasonable cost. We use a combination of governmental and private data sources, which we identify in product literature and copyright messages displayed to the consumer.
-
Page 11: Getting Started
Unit Overview Power Key Display Screen GPSMAP 60Cx GPSMAP 60Cx Owner’s Manual ETTING TARTED Auxiliary GPS Antenna Connector (under weather cap) USB connector port (under weather cap) Carry Lanyard attachment slot Keypad ETTING TARTED Internal antenna External Data/Auxilary Power Port (under…
-
Page 12: Installing The Batteries
ETTING TARTED Installing the Batteries The GPSMAP 60Cx operates on two AA batteries (not included), which are located in the back of the unit. You can use Alkaline or NiMH batteries. See page 56 for information on setting the battery type.
-
Page 13: Using The Gpsmap 60Cx Keypad
Using the GPSMAP 60Cx Keypad POWER Key • Press and hold to turn the unit on or off. • Press and Release to adjust the backlighting. IN/OUT Zoom Keys • Press to zoom in or out on the Map Page.
-
Page 14: Turning On The Gpsmap 60Cx
1. Press and hold the POWER key. When the unit turns on, a tone sounds and the Introduction Page appears, followed by the Satellite Page. 2. To turn off the GPSMAP 60Cx, press and hold the POWER key again. Welcome Page Satellite Page…
-
Page 15: Initializing The Gps Receiver
Initializing the GPS Receiver The first time you turn on your GPSMAP 60Cx, the GPS receiver must collect satellite data and establish its current location. To ensure proper initialization, the GPSMAP 60Cx is shipped from the factory in AutoLocate mode, which allows the receiver to “find itself”…
-
Page 16: Using The Gpsmap 60Cx
TARTED Using the GPSMAP 60Cx This section explains how to enter and select information with the GPSMAP 60Cx. Understanding Terms As you progress through this owner’s manual, you are directed to press a specific key or highlight a field on the screen.
-
Page 17: Selecting Options And Entering Data
At the top of each page, the status bar provides status information for several unit features. Status Bar GPSMAP 60Cx Owner’s Manual • Power to the unit is provided by either batteries or from an auxiliary source (AC, DC or USB Adapter).
-
Page 18: On-Screen Messages
MapSource data from a PC to the MicroSD card in the GPSMAP 60Cx. Inserting the MicroSD card in a standard SD card adapter and card reader allows for faster transfer. You can purchase additional higher capacity MicroSD cards at your electronics supplier.
-
Page 19: Transferring Data To A Microsd Card
Transferring Data to a MicroSD Card The GPSMAP 60Cx is equipped with a pre-installed MicroSD card. To install or remove the MicroSD card: 1. Remove the Battery Compartment Cover from the back of the unit and remove the two batteries.
-
Page 20: Basic Operation
ASIC PERATION This section explains some of the more common operations you will perform with your GPSMAP 60Cx including creating and using waypoints, using the Find Menu, and how to create and use tracks and routes. Creating and Using Waypoints Waypoints are locations or landmarks you record and store in your GPS.
-
Page 21: Creating Waypoints Using The Map
Page, highlight the appropriate field, and press ENTER to open the on-screen keypad. After entering and confirming your changes, highlight OK, and press ENTER. GPSMAP 60Cx Owner’s Manual Information page for a Information page for a map point with data…
-
Page 22: Editing Waypoints
ENTER. The Waypoint Page opens. 4. Highlight the Delete button, and press ENTER. A confirmation message appears. 5. Highlight Yes, and press ENTER to delete the waypoint. NOTE: When you delete a waypoint, you cannot recover it from the unit. GPSMAP 60Cx Owner’s Manual…
-
Page 23: Averaging The Waypoint’s Location
ENTER. Original location Moving a waypoint GPSMAP 60Cx Owner’s Manual Averaging the Waypoint’s Location You can average a new waypoint location over time to produce a more accurate location. NOTE: You must have a GPS Satellite fix before you can average a waypoint’s location.
-
Page 24: Projecting A Waypoint
6. Enter the distance and bearing to the projected waypoint in the appropriate fields at the bottom of the page, and press QUIT when finished. Enter distance bearing Project Waypoint Projected waypoint Page GPSMAP 60Cx Owner’s Manual on the map…
-
Page 25: Proximity Waypoints
Page. 3. Highlight an empty line, and press ENTER to open the Find Menu. GPSMAP 60Cx Owner’s Manual 4. Select a waypoint from the Waypoints List or from any other group of map points, and press ENTER to open the information page for the item.
-
Page 26: Man Overboard (Mob)
MOB point. Using the Find Menu Use the Find Menu to search for waypoints, cities, and exits included in the GPSMAP 60Cx basemap. You can also find saved waypoint and geocache points. Additional icons appear depending on the optional BlueChart or MapSource data loaded to the unit.
-
Page 27: Find By Name
Points of Interest icon, and press ENTER. 3. Press MENU, highlight Find By Name, and press ENTER. GPSMAP 60Cx Owner’s Manual 4. Use the ROCKER and ENTER key to operate the on-screen keypad and enter the name of the location you want to find. When the Find list contains a match, highlight OK and press ENTER.
-
Page 28: Recent Finds
Average Location—samples a waypoint location over time and average the result for a more accurate location reference. See page 13 for more information. Project Waypoint—create a new waypoint by referencing another location by entering bearing and GPSMAP 60Cx Owner’s Manual…
-
Page 29
Map Information—show the map from which the map item originated. See the Appendix for information about downloading detailed maps. GPSMAP 60Cx Owner’s Manual To find an item near another item: 1. Press FIND to open the Find Menu. 2. Select an icon on the Find Menu, and press ENTER. -
Page 30: Finding A Waypoint
Finding a Geocache Use the Geocache icon to view the list of geocache locations created using your GPSMAP 60Cx or downloaded from your computer. A geocache location is a waypoint with a special geocache symbol assigned to give special significance and to allow it to be separated from others on the waypoints list.
-
Page 31: Finding A City
GPSMAP 60Cx Owner’s Manual Finding a City Use the Cities icon on the Find Menu to find any city listed in the mapping database (either in the basemap or from downloaded detailed mapping data).
-
Page 32: Finding An Interstate Exit
If you downloaded detailed mapping data, use the Addresses icon on the Find Menu to find an address. When you enter the street number, street name, and city, the find feature matches that data with addresses in the map database. GPSMAP 60Cx Owner’s Manual Available services…
-
Page 33
Addresses icon Addresses Page GPSMAP 60Cx Owner’s Manual 3. Highlight the <Enter Number> field, and press ENTER. 4. Type the street number using the on-screen keypad. When finished, highlight OK and press ENTER again. -
Page 34: Finding An Intersection
Searching for a Point of Interest If you downloaded MapSource detailed mapping, you can use the All Points of Interest icon on the Find Menu to locate a nearby restaurant, lodging, landmark, public building, and so on. GPSMAP 60Cx Owner’s Manual…
-
Page 35: Custom Points Of Interest
first. Custom Points of Interest You can create your own category for points of interest by using the Garmin POI Loader utility available from the Garmin web site: www.garmin.com/products/ poiloader/. Follow instructions for use on the web site.
-
Page 36: Using Tracks
1. Press MENU twice to open the Main Menu. 2. Select the Tracks icon, and press ENTER to open the Tracks Page. 3. Highlight the Setup button, and press ENTER to open the Track Log Setup Page. Percentage of memory used GPSMAP 60Cx Owner’s Manual…
-
Page 37
A message appears asking you if you want to save the entire track. 4. Select Yes, and press ENTER to save the track. A “Saving Track” message appears followed by the Saved Track Page. GPSMAP 60Cx Owner’s Manual Track distance Track color… -
Page 38
2. Highlight Area Calculation, and press ENTER to open the Area Calculation Page. 3. Press ENTER to start the area calculation. As you begin to move and define the area’s boundaries, a Stop button appears at the bottom of the page. GPSMAP 60Cx Owner’s Manual… -
Page 39: Navigating A Saved Track
Save calculated track 5. Press ENTER to save the new track to the Saved Tracks list on the Tracks Page. GPSMAP 60Cx Owner’s Manual Navigating a Saved Track You can save your track log to use later as a TracBack. When initiated, a TracBack route takes you back to the oldest stored track log point.
-
Page 40
2. Press and hold the ENTER key to open the Mark Waypoint Page. 3. Customize the user waypoint, highlight OK, and press ENTER to save it. GPSMAP 60Cx Owner’s Manual Creating a Waypoint on a Track… -
Page 41: Creating And Using Routes
Creating and Using Routes Route navigation allows you to create a sequence of intermediate waypoints that lead you to your final destination. The GPSMAP 60Cx lets you store 50 routes with up to 250 points each. Creating a Route You can create or modify a route using the Routes Page, and you can add waypoints to a route from the Find Menu.
-
Page 42: Navigating A Route
• If you select the Go To button on the Waypoint Page or other Find Menu items, the GPSMAP 60Cx creates a straight path (point to point) from your current location to that location. • If you select the Navigate button on a Route…
-
Page 43
Map Page. Route Page Route on the Map Page GPSMAP 60Cx Owner’s Manual 3. To view the list of turns on the route, press PAGE to open the Active Route Page. To view an individual turn on the list, use the ROCKER to highlight it, and press ENTER. -
Page 44: Editing A Route
Route point review options 6. Select Save (save the point as a waypoint), Map (show the point on the Map Page), or Go To (navigate to the point), and press ENTER. Information page GPSMAP 60Cx Owner’s Manual…
-
Page 45: Using The Route Page Options
Select Distance to enter a radius so that when you are within the entered distance, the GPSMAP 60Cx leads you to the next point on your route. Select Manual to transition to the next waypoint anytime while navigating a route.
-
Page 46
Reverse Route—reverses the order of the route points in the saved route. Profile—creates a vertical profile of the route. NOTE: This option is available only if Garmin MapSource U.S. Topo 24K map data is used. Refer to the Garmin web site, www.garmin.com/ cartography/onthetrail/, for more information. -
Page 47: Main
The GPSMAP 60Cx has six main pages: Satellite Page, Trip Computer Page, Map Page, Compass Page, Altimeter Page, and the Main Menu. You can cycle through these pages by pressing the PAGE key to move forward or pressing the QUIT key to reverse. Additional pages can be added using the Page Sequence option on the Main Menu.
-
Page 48: Satellite Page
New Location—use if you have moved the unit more than 600 miles and you are having trouble locking onto satellite signals. GPS Elevation—shows GPS determined elevation. GPSMAP 60Cx Owner’s Manual…
-
Page 49: Map Page
Map Page The GPSMAP 60Cx comes with a built-in basemap that includes a database of cities, interstates, state and county highways, exit information, and lake and river outlines. The standard basemap can be enhanced using MapSource or BlueChart data. Two map operating modes, position mode and pan mode, determine what cartography is shown on the map display.
-
Page 50: Using Additional Map Data
76 in the Appendix. Using Additional Map Data Optional Map Source mapping data disks enhance the versatility of your GPSMAP 60Cx. With MapSource data disks, you can view listings of nearby restaurants, lodging, shopping centers, attractions and entertainment, and you can retrieve addresses and phone numbers for any listed location.
-
Page 51: Changing The Zoom Range
Zoom Range When using MapSource detailed maps, “mapsource” appears below the scale. Map ranges GPSMAP 60Cx Owner’s Manual Map Orientation There are two map orientation options: North Up orients the map like a paper map. Track Up orients the map in the direction of travel.
-
Page 52: Guidance Text
If you select Show When Navigating, a guidance message shows until you select Stop Navigation from the Options Menu. Guidance Text shows useful information when navigating to a destination. GPSMAP 60Cx Owner’s Manual…
-
Page 53: Setting Up The Map Page
Each map setup page has a sub menu of general options. To access this menu, press the MENU key with the page displayed. GPSMAP 60Cx Owner’s Manual Map Setup – General Page The Map Setup – General Page contains the settings for Orientation, Below, Auto Zoom, Detail, and Lock On Road.
-
Page 54
Us the Map Setup – Points Page to set the map scale at which Map Points, User Waypoints, Street Label, and Land Cover appear on the Map Page. Select Auto, Off, or a specific zoom level. Map Setup – Points Page GPSMAP 60Cx Owner’s Manual… -
Page 55
Use the ROCKER to highlight a map and press ENTER to show it on the map display or turn it off. GPSMAP 60Cx Owner’s Manual Map Setup – Information Page Press MENU to view the list of options for displaying maps. -
Page 56: Measuring Distance
The distance between the two points is shown in the upper-right corner of the Map Page. 5. Press QUIT to cancel. Push pin indicating the beginning point of the measurement GPSMAP 60Cx Owner’s Manual Measured distance End point of measurement labeled REF…
-
Page 57: Turning Declutter On Or Off
2. Highlight Turn Declutter On, and press ENTER. 3. To turn Declutter off, press MENU, select Turn Declutter Off, and press ENTER. GPSMAP 60Cx Owner’s Manual Map with Declutter off Map with Declutter on Restoring Defaults Use the Restore Defaults option to return the map settings to factory settings.
-
Page 58: Compass Page
Ring moves to indicate North Orientation. Course Pointer The Bearing Pointer always indicates the direction of your destination. Scale The Course Pointer indicates your course of travel and the distance you drift off course. Bearing Pointer GPSMAP 60Cx Owner’s Manual…
-
Page 59: Compass Page Options
Course (Bearing) Pointer—toggles between the course arrow and the bearing pointer. Data Fields—allows you to select the number of data GPSMAP 60Cx Owner’s Manual fields that appear on the Compass Page. Change Data Fields—allows you to select the type of data you want to show in the data fields. See page 80 for descriptions of each option.
-
Page 60
> AGES GPSMAP 60Cx Owner’s Manual… -
Page 61: Data Fields
Show sub-menu appears. 3. Select the number of data fields you want to show on the Compass Page (three or four), and press ENTER. GPSMAP 60Cx Owner’s Manual To change data fields: 1. Press MENU to open the Compass Page Options menu.
-
Page 62: Trip Computer Page
fields with larger displays. Change Data Fields—allows you to select the type of data you want to show in the data fields. Restore Defaults—allows you to return the page to factory settings. GPSMAP 60Cx Owner’s Manual…
-
Page 63: Main Menu
Main Menu NOTE: If a page is added to the sequence, the icon does not appear on the Main Menu. GPSMAP 60Cx Owner’s Manual Tracks The Tracks Page shows the percentage of track memory used, and a list of saved tracks. Use the Tracks Page to set up, clear, or save a track log, or activate the TracBack feature for the current track log.
-
Page 64: Track Page Options
As you move toward each point on your route, the graphic will show the direction you should move to stay on course to the point. Five scale settings allow you to Zoom In or Out on the highway. GPSMAP 60Cx Owner’s Manual…
-
Page 65: Setup Menu Page
GPSMAP 60Cx Owner’s Manual Setup Menu Page Use the Setup Menu Page to customize your GPSMAP 60Cx to your personal preferences. To access the Setup Menu Page: 1. Press MENU twice to open the Main Menu. 2. Use the ROCKER to highlight the Setup icon, and press ENTER.
-
Page 66: System Setup
System Setup Menu The System Setup Menu contains Restore Defaults and Software Version. Use Restore Defaults to return the System Setup fields to their original values. Software Version shows the Software Version and Unit Id number. GPSMAP 60Cx Owner’s Manual…
-
Page 67: Display Setup
Display Mode—sets the display to Day, Night, or Auto mode. Select Auto to automatically switch from day to night at sunset and change back at sunrise. GPSMAP 60Cx Owner’s Manual Daytime Color Scheme/Nighttime Color Scheme— select the color scheme to use when operating in Day or Night mode.
-
Page 68: Interface Setup
On the Setup Menu Page, highlight the Interface icon, and press ENTER. Serial Data Format—sets the data format to one of the following: • GARMIN—the proprietary format used to exchange waypoint, route, track log and MapSource data with a PC. • NMEA In/NMEA Out—Supports input and output of standard NMEA 0183 version 3.01…
-
Page 69: Tones Setup
3. As you move down the list each different tone sounds. Press ENTER to select a tone. GPSMAP 60Cx Owner’s Manual Page Sequence Setup Use the Page Sequence Setup Page to change the order of the main pages, or add additional pages to the main page sequence when you press PAGE repeatedly.
-
Page 70: Map Page Setup
• Faster Time—routes calculated are faster to drive but might be longer in distance. • Shorter Distance—routes calculated are shorter in distance but take more time to drive. Next Turn Pop-up—turns the Next Turn pop-up window on or off. GPSMAP 60Cx Owner’s Manual…
-
Page 71: Geocache Setup
GPSMAP 60Cx Owner’s Manual Geocache Setup Use the Geocache Setup Page to find and record items hidden at geographic locations. See the Garmin Web site (www.garmin.com) for details and how to download geocache locations from the Internet . NOTE: Before setting up and placing physical…
-
Page 72: Marine Setup
On the Setup Menu Page, highlight the Time icon, and press ENTER. Time Zone—choose the time zone for your city so the GPSMAP 60Cx will show the correct local time. Select Other to enter a UTC Offset. GPSMAP 60Cx Owner’s Manual…
-
Page 73: Units Setup
(hddd Map Datum—these describe geographic location for surveying, mapping, and navigation and are not actual GPSMAP 60Cx Owner’s Manual maps built into the unit. The default setting is WGS 84. The unit automatically chooses the best datum based on your chosen format.
-
Page 74: Heading Setup
Mils) to show your heading. North Reference—provides headings based on a true north reference. Switch to compass heading when below (for more than the user selected distance)—Select speed and time delay for electronic compass switching. GPSMAP 60Cx Owner’s Manual…
-
Page 75: Welcome Setup
Welcome Setup Use the Welcome Setup Page to insert a message, such as ownership information, that appears when you turn on your GPSMAP 60Cx. Adding a welcome message To access the Welcome Setup Page: On the Setup Menu Page, highlight the Welcome Message icon, and press ENTER.
-
Page 76: Proximity Waypoints
Remove Points Options List. 7. To view other calendar formats, Sun and Moon or Hunt and Fish extended data for a specific date and location, press MENU and use the ROCKER to make your choice. GPSMAP 60Cx Owner’s Manual…
-
Page 77: Calculator
Calculator Select the Calculator icon to use your GPSMAP 60Cx as a calculator. You can select either a Standard or Scientific calculator and Degrees or Radians from the Options Menu. Options Menus Calculator Page To use the Calculator: 1. Press MENU twice to open the Main Menu.
-
Page 78: Sun And Moon
2. Select the Sun & Moon icon, and press ENTER. 3. To view the predictions for a different date and time, highlight either the Date or Time field, and press ENTER to open the on-screen keypad. GPSMAP 60Cx Owner’s Manual…
-
Page 79: Hunt And Fish
Sun and Moon Page GPSMAP 60Cx Owner’s Manual Hunt and Fish The Hunt and Fish Tables provide you with a listing of predicted best times for hunting and fishing for a chosen date and location.
-
Page 80: Games Menu
To select and play a game: 1. Press MENU twice to open the Main Menu 2. Select the Games icon, and press ENTER. 3. Use the ROCKER to highlight a game, and press ENTER. A brief description of each game appears. GPSMAP 60Cx Owner’s Manual…
-
Page 81: Memory Race
Travel to each square, highlight Open at the bottom of the screen, and press ENTER to view the symbol. GPSMAP 60Cx Owner’s Manual To adjust the grid size in custom mode: 1. Highlight the Grid Size or Square Size field, and press ENTER to select from the options lists.
-
Page 82: Gekosmak
Before you begin to play, be sure to make your game settings. Orient Map “Northwards” rotates your ship in the center of the map. The map is stationary and north is always up. GPSMAP 60Cx Owner’s Manual…
-
Page 83: Beast Hunt
A scoreboard keeps track of your wins and loses. GPSMAP 60Cx Owner’s Manual To play Beast Hunt: 1. Select Beast Hunt from the Games Menu, and press ENTER. The game overview page appears.
-
Page 84: Appendix
Rugged, fully gasketed, water resistant, IEC-529, IPX7 Temp Range: 5 to 158 F (-15 to 70 *The temperature rating of the GPSMAP 60Cx may exceed the usable range of some batteries. Some batteries can rupture at high temperatures. Performance Receiver:…
-
Page 85: Interfacing
Garmin Proprietary Sentences—PGRME (estimated error), PGRMM (datum string), PGRMZ (altitude). The NMEA 0183 version 3.01 interface format is supported by the GPSMAP 60Cx and enables the unit to drive up to three NMEA devices. The following are the sentences for NMEA 0183, version 3.01 output:…
-
Page 86
Data Field Definitions The following list provides a brief definition of each data field option. Some of these options are supported only by devices interfaced to your GPSMAP 60Cx Accuracy GPS — The current accuracy of you GPS determined location. -
Page 87
Trip Odometer — The running total of distance traveled since the Trip Computer was reset. GPSMAP 60Cx Owner’s Manual Trip Time — Moving — The length of time your vehicle has been in motion, since the Trip Computer was reset. -
Page 88: Optional Accessories
GPSMAP 60Cx and void the terms of the warranty. Auto Navigation Kit—provides the parts and map data to use the GPSMAP 60Cx in an automobile. Cigarette Lighter Adapter—provides auxiliary power from an automobile cigarette lighter.
-
Page 89: Connecting Your Gpsmap 60Cx To A Computer
Connecting Your GPSMAP 60Cx to a Computer You can connect your GPSMAP 60Cx to your computer using either a serial port or USB connector cable. NOTE: Fully install the supplied MapSource program, Trip & Waypoint Manager, on your computer before connecting the USB cable to the computer.
-
Page 90: What Is Waas/Egnos
SBAS system should be capable of providing your GPS unit with increased accuracy at any location in the world. Currently, enabling WAAS on your GPSMAP 60Cx in regions that are not supported by ground stations, may not improve accuracy, even when receiving signals from an SBAS satellite.
-
Page 91: Loran Td Setup
You must know your GRI chain number and secondary stations to create a LORAN TD position. For more information, read our LORAN TD Position Format Handbook, available on the Garmin Web site, at www.garmin.com/support/userManual.jsp. PPENDIX…
-
Page 92: Map Datums And Location Formats
Every chart has a map datum reference and the GPSMAP 60Cx can be set to match most of those commonly used. If you are navigating and comparing the GPS…
-
Page 93: Fcc Compliance
FCC Compliance The GPSMAP 60Cx complies with Part 15 of the FCC interference limits for Class B digital devices FOR HOME OR OFFICE USE. These limits are designed to provide more reasonable protection against harmful interference in a residential installation, and are more stringent than “outdoor”…
-
Page 94: Limited Warranty
PPENDIX Limited Warranty This Garmin product is warranted to be free from defects in materials or workmanship for one year from the date of purchase. Within this period, Garmin will at its sole option repair or replace any components that fail in normal use. Such repairs or replacement…
-
Page 95
States, Canada, or Taiwan for service. The Garmin GPSMAP 60Cx has no user-serviceable parts. Should you ever encounter a problem with your unit, please take it to an authorized Garmin dealer for repairs. The GPSMAP 60Cx is fastened shut with screws. Any… -
Page 96: Index
Initialization, GPS 5 Units Setup 63 Initializing the GPS Receiver Welcome Setup 65 Stopwatch 67 Installing the Lanyard 2 Sun and Moon 68 Interface Setup 58 Tracks Page 53 Main Pages 37 Lanyard Installation 2 Manual Conventions i GPSMAP 60Cx Owner’s Manual…
-
Page 97
PAGE/COMPASS Key 3 Secondary Stations 81 Page Sequence Setup 59 Selecting Options 7 POWER Key 3, 4 Setup Menu Page 55 GPSMAP 60Cx Owner’s Manual Software License Agree- Options Menu 52 ment v Status Bar 7 Units Setup 63 Stopwatch 67… -
Page 100
For the latest free software updates (excluding map data) throughout the life of your Garmin products, visit the Garmin Web site at www.garmin.com. © 2005 Garmin Ltd. or its subsidiaries Garmin International, Inc. 1200 East 151 Street, Olathe, Kansas 66062, U.S.A.
(скачивание инструкции бесплатно)
Формат файла: PDF
Доступность: Бесплатно как и все руководства на сайте. Без регистрации и SMS.
Дополнительно: Чтение инструкции онлайн

GPSMAP
®
60Cx/60CSx
Руководство пользователя
Страница:
(1 из 104)
навигация

1

2

3

4

5

6

7

8

9

10

11

12

13

14

15

16

17

18

19

20

21

22

23

24

25

26

27

28

29

30

31

32

33

34

35

36

37

38

39

40

41

42

43

44

45

46

47

48

49

50

51

52

53

54

55

56

57

58

59

60

61

62

63

64

65

66

67

68

69

70

71

72

73

74

75

76

77

78

79

80

81

82

83

84

85

86

87

88

89

90

91

92

93

94

95

96

97

98

99

100

101

102

103

104
Оглавление инструкции
- Страница 1 из 105
GPSMAP 60Cx/60CSx ® Руководство пользователя - Страница 2 из 105
Введение ВВЕДЕНИЕ Благодарим Вас за выбор навигатора Garmin GPSMAP 60CSx. В результате применения уже зарекомендовавшей себя технологии Garmin GPS и электронной карты с полным набором функций мы создали отличный портативный GPS-приемник. Пожалуйста, убедитесь в наличии всех компонентов системы, - Страница 3 из 105
Введение Обозначения, используемые в руководстве пользователя В тексте данного руководства пользователя под заголовком ВНИМАНИЕ! помещены потенциально опасные ситуации, которые могут привести к авариям или столкновениям со смертельным исходом. В данном руководстве пользователя заголовок Внимание - Страница 4 из 105
Введение Содержание Введение Информация о руководстве пользователя Обозначения, используемые в руководстве пользователя Лицензия на программное обеспечение Регистрация прибора Контактная информация Garmin Уход за устройством GPSMAP 60CSx Чистка корпуса Чистка экрана Хранение Водонепроницаемость - Страница 5 из 105
Введение Поиск города Поиск выезда с шоссе Поиск адреса Поиск перекрестка Поиск объектов Использование траекторий Профили траектории Навигация по сохраненной траектории Создание и использование маршрутов Создание маршрута Навигация по маршруту Редактирование маршрута Использование опций страницы - Страница 6 из 105
Введение Страница маршрутов Страница дороги Меню настройки Системная настройка Настройка дисплея Настройка интерфейса Настройка звуковых сигналов Настройка последовательности страниц Настройка карты Настройка расчета маршрутов Настройка игры геокэшинг Настройка морских типов сигнализации Настройка - Страница 7 из 105
Введение Лицензия на программное обеспечение Используя прибор GPSMAP 60CSx, Вы принимаете условия приведенного ниже лицензионного соглашения. Пожалуйста, внимательно причтите данное соглашение. Компания Garmin предоставляет Вам ограниченную лицензию на использование программного обеспечения данного - Страница 8 из 105
Введение Контактная информация Garmin Хранение Если у Вас возникли какие-либо вопросы по эксплуатации Вашего прибора GPSMAP 60CSx, обращайтесь в компанию Garmin. В США обращайтесь в отдел поддержки продукции по тел. 913/397.8200 или 800/800.1020 (с 8 до 17 по рабочим дням) или по электронной почте - Страница 9 из 105
Введение Во время навигации следует внимательно сравнивать показания прибора GPSMAP 60CSx с показаниями других источников навигационной информации, включая визуальные ориентиры и карты. Для обеспечения безопасности следует всегда выяснять причину различия в показаниях перед продолжением навигации. - Страница 10 из 105
Вводный курс Компоненты прибора ВВОДНЫЙ КУРС Коннектор для подключения дополнительной GPSантенны (под защитной крышкой). Кнопка включения (Power) USB-порт (под защитной крышкой) ЖК-дисплей GPSmap 60CSx Прорези для крепления ремешка Встроенная антенна Порт данных/ питания (под защитной крышкой). - Страница 11 из 105
Вводный курс Установка батареек, карты памяти MicroSD и ремешка USE BY 2009 USE BY 2009 В качестве источника питания прибора GPSMAP 60CSx используются две батарейки типа “AA” (не входят в комплектацию), которые устанавливаются в специальное отделение в задней части устройства. Вы можете применять - Страница 12 из 105
Вводный курс Функции кнопок Кнопка POWER • Нажмите и удерживайте в нажатом положении для включения или выключения устройства. • Нажмите и отпустите для настройки подсветки. Кнопки зума IN/OUT • На странице карты используются для уменьшения или увеличения масштаба карты. • На остальных страницах - Страница 13 из 105
Вводный курс Включение прибора GPSMAP 60CSx Настройка подсветки После включения устройства GPSMAP 60CSx на экране появляется страница-приветствие, а затем страница спутников. Прибор должен собрать необходимые спутниковые данные и рассчитать Ваше текущее местоположение. Вам может потребоваться - Страница 14 из 105
Вводный курс Инициализация GPS-приемника После первого включения Вашего прибора GPSMAP 60CSx GPS-приемник начинает проводить поиск спутников и рассчитывать местоположение. Для гарантии правильного проведения инициализации приборы GPSMAP 60CSx поступают с завода в режиме AutoLocate, благодаря чему - Страница 15 из 105
Вводный курс Определения, используемые в данном руководстве пользователя В тексте данного руководства пользователя Вам часто будут предлагать «нажать на какую-либо кнопку» или «выделить какоелибо поле на экране». Под нажатием кнопки подразумевается кратковременное однократное нажатие. Если кнопку - Страница 16 из 105
Вводный курс 2. С помощью кнопки ROCKER выделите нужную опцию и нажмите на кнопку ENTER. Для выхода из меню или возврата к предыдущей настройке: Нажмите на кнопку QUIT, с помощью которой Вы можете двигаться назад по Вашим шагам. Повторно нажимая на кнопку QUIT, вернитесь на страницу, с которой Вы - Страница 17 из 105
Вводный курс В некоторых случаях экранные сообщения описывают временную ситуацию. Например, сообщение“Calculating Route” (идет расчет маршрута) исчезнет с экрана, как только расчет будет завершен. Сообщение о расчете маршрута те вставить карту MicroSD в стандартный адаптер для карт SD и - Страница 18 из 105
Вводный курс Для передачи картографических данных на карту памяти MicroSD: 1. Поднимите защитную крышку, закрывающую USB-порт на задней поверхности прибора. Для более быстрой передачи данных рекомендуем Вам использовать USBпорт, а не последовательный порт. 2. Подключите USB-кабель, входящий в - Страница 19 из 105
Основы работы ОСНОВЫ РАБОТЫ В данном разделе описываются основные операции устройства GPSMAP 60CSx, включая создание и использование путевых точек, траекторий и маршрутов, а также использование меню поиска. Создание и использование путевых точек Путевыми точками называются местоположения или - Страница 20 из 105
Основы работы Создание путевых точек с использованием карты кнопку ENTER. Вы можете быстро создать путевую точку с помощью страницы карты. Если во время прокрутки карты Вы совместите курсор с каким-либо объектом, название этого объекта будет выделено. Для создания путевой точки с помощью страницы - Страница 21 из 105
Основы работы 4. Внесите необходимые изменения. Для этого выделите нужное поле и введите новые данные. 5. После окончания нажмите на кнопку QUIT. Введите координаты местоположения вручную Удаление путевых точек Вы можете удалять путевые точки, находясь на странице путевой точки “Waypoint”. - Страница 22 из 105
Основы работы 2. Выберите путевую точку, которую Вы хотите переместить, и нажмите на кнопку ENTER. На экране появится страница путевой точки (Waypoint). 3. Выделите поле Map (карта) и нажмите на кнопку ENTER для просмотра путевой точки на карте. 4. Снова нажмите на кнопку ENTER. Рядом с путевой - Страница 23 из 105
Основы работы Меню опций путевой точки 4. Нажмите на кнопку MENU для вызова меню опций. 5. Выберите опцию Project Waypoint (проекция путевой точки) и нажмите на кнопку ENTER. На экране появится страница проекции путевой точки (Project Waypoint). 6. Введите значения расстояния и азимута в - Страница 24 из 105
Основы работы Поле радиуса Пиктограмма “Proximity” (путевые точки с зоной сигнализации). Строка для ввода новой позиции Окошко метки сигнализации вхождения в зону вокруг путевой точки Для добавления путевой точки с зоной сигнализации: 1. Дважды нажмите на кнопку MENU для вызова главного меню. 2. - Страница 25 из 105
Основы работы Для удаления одной или всех точек из списка путевых точек с зоной сигнализации: Для удаления или просмотра одной точки нажмите на кнопку ENTER. Или Для удаления всех путевых точек из списка нажмите на кнопку MENU, выделите опцию Remove All (удалить все) и нажмите на кнопку ENTER. - Страница 26 из 105
Основы работы иск по символу; используется только для путевых точек), “Change Reference” (изменение точки отсчета путем перемещения курсора в новое местоположение), “Nearest Containing” (поиск ближайших объектов, в названии которых содержится введенное Вами ключевое слово), “Select Category” (выбор - Страница 27 из 105
Основы работы 2. Или… выделите пиктограмму Recent Finds (недавно най денные объекты) и нажмите на кнопку ENTER. На экране появится страница недавно найденных объектов. странице показано три кнопки. Названия этих кнопок меняются в зависимости от того, с какой целью Вы выбрали объект из списка - Страница 28 из 105
Основы работы Change Reference (изменение опорной точки) – укажите новое местоположение на странице карты, используя курсор. Set Proximity (ввод зоны сигнализации вокруг объекта) – позволяет задать окружность сигнализации определенного радиуса вокруг объекта. Add To Route (добавить в маршрут) – - Страница 29 из 105
Основы работы Пиктограмма «Путевые точки» Поиск путевой точки На странице путевых точек содержится список всех сохраненных путевых точек. Эти точки расположены в списке в алфавитном порядке. Кроме того, каждой путевой точке присвоен графический символ. Для поиска путевой точки: 1. Нажмите на - Страница 30 из 105
Основы работы 3. С помощью кнопки ROCKER выберите нужный тайник из списка и нажмите на кнопку ENTER. На экране появится информационная страница. 4. Для начала навигации к местоположению тайника выделите поле Go To и нажмите на кнопку ENTER. Во время навигации на экране вместо страницы компаса - Страница 31 из 105
Основы работы Для поиска выезда с шоссе: 1. Нажмите на кнопку FIND для вызова меню поиска. 2. Выделите пиктограмму Exits (выезды с шоссе) и нажмите на кнопку ENTER. На экране появится страница выездов с шоссе (Exits) со списком выездов, расположенных рядом с Вашим текущим местоположением. 3. С - Страница 32 из 105
Основы работы 2. Выделите пиктограмму Addresses (адреса) и нажмите на кнопку ENTER. На экране появится страница адресов. Если Ваш прибор рассчитал координаты местоположения, то в поле <Enter Region> (введите регион) будет показан регион, в котором Вы находитесь. Вам не обязательно вводить - Страница 33 из 105
Основы работы (введите город), поскольку в базе данных содержится информация для всего региона. Если Вы хотите уменьшить количество совпавших перекрестков, введите название города. 4. Выделите поле <Enter Street 1> (введите название первой улицы) и нажмите на кнопку ENTER. 5. С помощью показанной - Страница 34 из 105
Основы работы Использование траекторий Или Нажмите на кнопку MENU для вызова меню опций, с помощью которого Вы можете сузить Ваш поиск. 4. Выделите в списке нужный объект и нажмите на кнопку ENTER для вызова информационной страницы объекта. Если Вы проводите поиск ресторана, входящего в - Страница 35 из 105
Основы работы Для удаления активной траектории: 1. Дважды нажмите на кнопку MENU для вызова главного меню. 2. Выберите пиктограмму Tracks (траектории) и нажмите на кнопку ENTER. На экране появится страница траекторий. 3. Выделите поле Clear (удалить) и нажмите на кнопку ENTER. На экране появится - Страница 36 из 105
Основы работы 3. Выделите поле Save (сохранить) и нажмите на кнопку ENTER. На экране появится сообщение, в котором Вас спросят, хотите ли Вы сохранить всю активную траекторию целиком. 4. Выберите опцию Yes и нажмите на кнопку ENTER для сохранения траектории. На экране появится сообщение “Saving - Страница 37 из 105
Основы работы С помощью опции Area Calculation (расчет площади) Вы можете рассчитать площадь траектории. Для расчета площади траектории: 1. Находясь на странице активной траектории (Track Log), нажмите на кнопку MENU. При этом запись активной траектории должна быть включена (On). 2. Выделите - Страница 38 из 105
Основы работы Во время прокрутки профиля в верхней части страницы будет показана высота в каждой точке профиля, а в нижней части страницы – расстояние от начальной и от конечной точки траектории. 3. Для просмотра положения любой точки профиля на карте нажмите на кнопку ENTER. 4. Нажав на кнопку - Страница 39 из 105
Основы работы 4. Поверните в указанном направлении. Когда Вы доберетесь до первого поворота, на экране появится направление к следующему повороту и т.д. до тех пор, пока Вы не достигнете пункта назначения. 5. Для выхода нажмите на кнопку MENU и выберите опцию Stop Navigation (остановка - Страница 40 из 105
Основы работы Пиктограмма «Маршруты» Создание маршрута 5. С помощью меню поиска выберите точку маршрута из любой группы объектов поиска. Затем откройте информационную страницу для выбранного объекта (путевой точки, города, выезда с шоссе и т.д.) 6. Чтобы добавить выбранную точку в маршрут, - Страница 41 из 105
Основы работы Для навигации по сохраненному маршруту: 1. Дважды нажмите на кнопку MENU для вызова главного меню. 2. Выделите пиктограмму Routes (маршруты) и нажмите на кнопку ENTER. На экране появится страница маршрутов. 3. Выделите сохраненный маршрут и нажмите на кнопку ENTER для вызова - Страница 42 из 105
Основы работы 2. Выделите пиктограмму Routes (маршруты) и нажмите на кнопку ENTER. На экране появится страница маршрутов. 3. Выберите маршрут, название которого Вы хотите изменить, и нажмите на кнопку ENTER. 4. Выделите поле названия маршрута, расположенное в верхней части страницы маршрута, и - Страница 43 из 105
Основы работы 3. Выберите нужный маршрут и нажмите на кнопку ENTER. 4. Находясь на странице маршрута, выделите интересующую Вас точку и нажмите на кнопку ENTER. На экране появится меню опций. 5. Выделите опцию Review (просмотр) и нажмите на кнопку ENTER. На экране появится информационная - Страница 44 из 105
Основы работы Выбрав опцию Distance, введите настройку расстояния. Когда Вы приблизитесь к текущей точке маршрута на заданное расстояние, прибор GPSMAP 60CSx направит Вас к следующей точке маршрута. При выборе опции Manual Вы сможете переключаться на следующую точку маршрута в любое время. Copy - Страница 45 из 105
Основные страницы ОСНОВНЫЕ СТРАНИЦЫ В приборе GPSMAP 60CSx имеется шесть основных страниц – страница спутников, страница путевого компьютера, страница карты, страница компаса, страница альтиметра и страница главного меню. Для прокрутки последовательности основных страниц используйте кнопку PAGE или - Страница 46 из 105
Основные страницы На странице спутников показано состояние GPS-приемника, расположение спутников, мощность спутниковых сигналов и текущее местоположение приемника (если устройство приняло сигналы как минимум от трех спутников). Состояние приемника Координаты местоположения Расположение спутников - Страница 47 из 105
Основные страницы за текущие границы экрана. При нажатии на кнопку ROCKER прибор GPSMAP 60CSx переходит в режим курсора. В этом режиме карта прокручивается таким образом, чтобы курсор карты (белая стрелка) не выходил за текущие границы экрана. В режиме курсора Вы можете перемещать курсор по карте и - Страница 48 из 105
Основные страницы Опции поля данных 4. С помощью кнопки ROCKER выберите нужную опцию и нажмите на кнопку ENTER. 5. Используя кнопку ROCKER, выделите следующее поле и повторите шаги 3 и 4. Использование дополнительной картографии Дополнительные диски с картографией MapSource позволяют повысить - Страница 49 из 105
Основные страницы В нижнем левом углу страницы карты показано значение масштаба. Если Вы выбрали настолько крупный масштаб, что он превышает разрешение данных карты, то под масштабной шкалой появится надпись “overzoom”. При использовании подробной картографии MapSource под масштабной шкалой - Страница 50 из 105
Основные страницы Навигационные инструкции Во время навигации к пункту назначения в верхней части страницы карты будут показаны подсказки, содержащие полезную информацию. Текст подсказки Для разрешения индикации навигационных инструкций: 1. Нажмите на кнопку MENU для вызова меню опций страницы - Страница 51 из 105
Основные страницы страницы имеется подменю общих опций. Для вызова этого подменю вызовите нужную страницу настройки и нажмите на кнопку MENU. Настройка карты – страница “Tracks” (траектории) Страница настройки траекторий “Tracks” содержит следующие позиции: Настройка карты – страница общих настроек - Страница 52 из 105
Основные страницы объекты. Настройки выбираются отдельно для точек карты (Map Points), путевых точек пользователя (User Waypoints), обозначений улиц (Street Label) и покрытия суши (Land Cover). Вы можете отключить индикацию объектов (Off), выбрать автоматический режим (Auto) или ввести значение - Страница 53 из 105
Основные страницы Spot Soundings – Служит для включения или отключения индикации отметок глубины на странице карты. Light Sectors – Управляет индикацией световых секторов (Off, On или Auto). Symbol Set – Позволяет выбрать набор символов (Auto, Garmin, NOAA, International). Маркер в виде - Страница 54 из 105
Основные страницы скорость, расстояние до следующей точки маршрута и оценочное время прибытия. Стрелка азимута Карта с отключенной функцией разгрузки Карта с включенной функцией разгрузки Восстановление заводских настроек по умолчанию Опция Restore Defaults позволяет Вам восстановить заводские - Страница 55 из 105
Основные страницы Шкала Стрелка курса показывает Ваш курс и расстояние, на которое Вы отклонились от курса Стрелка курса Стрелка азимута всегда показывает направление Вашего движения Стрелка азимута компас. Когда Вы начнете движение и достигнете заданной скорости, компас будет использовать данные - Страница 56 из 105
Основные страницы Настройка скорости и времени для автоматического включения/отключения компаса: 1. Дважды нажмите на кнопку MENU для вызова главного меню. 2. Выделите опцию Setup (настройка) и нажмите на кнопку ENTER. На экране появится меню настройки. 3. Выделите пиктограмму Heading - Страница 57 из 105
Основные страницы Держите прибор ровно и поворачивайте медленно Меню опций страницы компаса С помощью сообщений “Just Right” (верная скорость), “Too Fast” (слишком быстро) и “Too Slow” (слишком медленно) прибор будет информировать Вас о том, соблюдаете ли Вы необходимую скорость вращения. Не - Страница 58 из 105
Основные страницы Restore Defaults (восстановление настроек по умолчанию) – возврат страницы компаса к заводским настройкам. Навигация “Sight ‘N Go” Опция “Sight’N Go” позволяет Вам определить азимут точки, которая находится в зоне видимости. Для использования опции “Sight’N Go” (определение - Страница 59 из 105
Основные страницы 7. Выделите поле Go To и нажмите на кнопку ENTER для вызова страницы карты и начала навигации к проекции путевой точки. Во время навигации пользуйтесь стрелкой азимута на странице компаса. вен, если во время движения Вам нужно обходить препятствия (озера, частную собственность и - Страница 60 из 105
Основные страницы Поля данных На странице компаса может быть показано три или четыре поля данных. Scale Стрелка курса показывает Ваш курс относительно первоначального местоположения, а также расстояние, на которое Вы отклонились от курса Для выбора стрелки курса или стрелки азимута: 1. Нажмите на - Страница 61 из 105
Основные страницы 2. Выделите опцию Change Data Fields (изменить поля данных) и нажмите на кнопку ENTER. Первое поле будет выделено. 3. Нажмите на кнопку ENTER, и на экране появится список имеющихся типов навигационных данных. 4. С помощью кнопки ROCKER выделите нужную опцию и нажмите на кнопку - Страница 62 из 105
Основные страницы Опции страницы альтиметра Меню опций страницы альтиметра позволяет Вам выполнить настройку этой страницы. Находясь на странице альтиметра, нажмите на кнопку MENU. На экране появится меню опций. Меню опций страницы альтиметра Имеются следующие опции: Plot Over Time (Plot Over - Страница 63 из 105
Основные страницы Для просмотра графика высоты или давления: 1. С помощью кнопки ROCKER выделите нужную опцию в меню опций страницы альтиметра. Затем нажмите на кнопку Диапазоны масДиапазоны масштабирования для штабирования для ENTER. На экране графика давления графика высоты в появится соответв - Страница 64 из 105
Основные страницы Красные пересекающиеся линии графике. Совместите красные пересекающиеся линии с интересующей Вас точкой графика, и на экране появится информация об этой точке: высота или давление, а также время и дата создания точки. Просмотр информации о точке графика высоты Просмотр информации - Страница 65 из 105
Основные страницы 3. С помощью кнопки ROCKER выделите нужную опцию сброса, а затем нажмите на кнопку ENTER, чтобы поставить галочку в окошке метки рядом с выбранной опцией. Вы можете обнулить следующие показания альтиметра: минимальную высоту, все данные спуска и подъема или максимальную высоту. - Страница 66 из 105
Основные страницы 2. Выделите опцию Change Data Fields (изменить поля данных) и нажмите на кнопку ENTER. 3. С помощью кнопки ROCKER выделите нужное поле данных и нажмите на кнопку ENTER. На экране появится список имеющихся типов информации. 4. Нажимая на верхнюю или нижнюю часть кнопки ROCKER, - Страница 67 из 105
Основные страницы ГЛАВНОЕ МЕНЮ Страница главного меню обеспечивает доступ ко всем функция устройства, не вошедшим в последовательность основных страниц и подменю. В нижней части страницы главного меню показаны время и дата. Чтобы вызвать главное меню, дважды нажмите на кнопку MENU. Для выбора - Страница 68 из 105
Основные страницы 3. Выделите поле Setup (настройка) и нажмите на кнопку ENTER. На экране появится страница настройки активной траектории “Track Log Setup”. Страница маршрутов С помощью страницы маршрутов Вы можете создать маршрут к пункту назначения. Опции страницы траектории Страница дороги Для - Страница 69 из 105
Главное меню жмите на кнопку ENTER. Ваш путь будет показан в виде графической схемы. 2. Нажмите на кнопку MENU для вызова меню опций. На экране появятся опции, с помощью которых Вы можете выполнить следующее: остановить навигацию, выбрать три или четыре поля данных с навигационными инструкциями, - Страница 70 из 105
Главное меню точки) – позволяет включить (On) или отключить (Off) сигнализацию, срабатывающую при вхождении в зону вокруг точки. Пиктограмма «Системная настройка» GPS – позволяет выбрать режим работы GPS-приемника: Normal (нормальный режим), Battery Saver (режим экономии батарей), GPS Off - Страница 71 из 105
Главное меню переключаться с дневного режима на ночной в момент захода Солнца и обратно в момент восхода Солнца. Daytime Color Scheme (цветовая схема в дневное время) / Nighttime Color Scheme (цветовая схема в ночное время) – выбор цветовой схемы для дневного и ночного режима дисплея. Backlight - Страница 72 из 105
Главное меню Для вызова страницы настройки звуковых сигналов: 1. Находясь на странице меню настройки, выделите пиктограмму Tones (звуковые сигналы) и нажмите на кнопку ENTER. 2. Выберите настройку “Message Beep” (звуковой сигнал, оповещающий о сообщении), “Key Beep” (звуковой сигнал при нажатии - Страница 73 из 105
Главное меню Для использования страницы настройки расчета маршрутов: 1. Находясь на странице меню настройки, выделите пиктограмму Routing (расчет маршрутов) и нажмите на кнопку ENTER. 2. Выделите поле Follow Road Options (опции следования по дорогам). На экране появится страница, с помощью - Страница 74 из 105
Главное меню Опции для расчета маршрутов, проходящих по дорогам Off Route Recalculation – эта опция позволяет Вам определить, будет ли устройство уведомлять Вас о проведении пересчета Вашего маршрута (Prompted) или проводить пересчет автоматически в случае отклонения от маршрута (Automatic). Также - Страница 75 из 105
Главное меню Настройка морских типов сигнализации Страница “Marine Setup” позволяет Вам настраивать параметры, определяющие срабатывание сигнализации, используемой на море. Для вызова страницы настройки морских типов сигнализации: Находясь на странице меню настройки, выделите пиктограмму Marine - Страница 76 из 105
Главное меню Для вызова страницы настройки времени: Находясь на странице меню настройки, выделите пиктограмму Time (время) и нажмите на кнопку ENTER. Для вызова страницы настройки единиц измерения: Находясь на странице меню настройки, выделите пиктограмму Units (единицы измерения) и нажмите на - Страница 77 из 105
Главное меню Distance and Speed (расстояние и скорость) – выбор единиц измерения скорости и расстояния. Elevation (Vert. Speed) (высота (вертикальная скорость)) – выбор единиц измерения для индикации высоты: Feet (ft/min) – футы (футы/мин.), Meters (m/min.) – метры (м/мин.) или Meters (m/sec) – - Страница 78 из 105
Главное меню Калибровка Эта страница позволяет Вам провести калибровку компаса и альтиметра для повышения точности навигации. Для калибровки компаса: 1. Находясь на странице меню настройки, выделите пиктограмму Calibration (калибровка) и нажмите на кнопку ENTER. На экране появится сообщение “Which - Страница 79 из 105
Главное меню Для ручной калибровки альтиметра: 1. Выделите поле Calibrate Altimeter (калибровка альтиметра) и нажмите на кнопку ENTER. Вы можете провести калибровку альтиметра с использованием одного из трех методов: Введите точное значение высоты Вашего текущего местоположения, полученное из - Страница 80 из 105
Главное меню Сообщение на странице-приветствии Настройка функции “ Jumpmaster” Функция “Jumpmaster” предназначена для опытных парашютистов. Для вызова функции Jumpmaster: Находясь на странице меню настройки, выделите пиктограмму Jumpmaster и нажмите на кнопку ENTER. 80 Страница настройки - Страница 81 из 105
Главное меню падения (не менее 1,000 футов). Для прыжков типа HAHO высота выхода из самолета совпадает с высотой раскрывания парашюта. Обычно диапазон высоты выхода из самолета составляет 12,000 – 24,000 футов над уровнем земли. Для прыжков HALO требуется та же информация, что для прыжков HAHO, - Страница 82 из 105
Главное меню опцию Clear All (удалить все). Введите пары значений «скорость ветра – направление ветра». Если в какой-либо строке будут стоять прочерки (_ _ _), эти данные не будут учитываться в расчетах. Настройка постоянных величин Страница настройки постоянных величин (“Constant Setup”) позволяет - Страница 83 из 105
Главное меню Более опытные парашютисты предпочитают использовать меньшие значения этой настройки. Настройка Safety Factor (коэффициент безопасности) используется в прыжках типа HAHO для задания границ или ошибки прыжка. Обычно в качестве коэффициента безопасности фигурируют целые числа не менее - Страница 84 из 105
Главное меню Парашютисты часто используют следующие термины: Drop Altitude – высота, на которой парашютист покидает самолет, измеренная относительно уровня земли. Forward Throw Horizontal – определяет расстояние, пройденное по направлению вперед за счет скорости самолета. HAHO – тип прыжка (прыжок - Страница 85 из 105
Главное меню нажмите на кнопку ENTER. Выбранная точка будет помещена на страницу календаря. 6. Если Вы хотите удалить точки со страницы календаря, на жмите на кнопку MENU и выберите опцию Remove Points (удалить точки). Нажмите на кнопку ENTER. На экране появится список опций удаления точек. 7. - Страница 86 из 105
Главное меню Для использования функции времени круга: После запуска секундомера выделите поле Lap (круг) и нажмите на кнопку ENTER. Для сброса показаний секундомера: После остановки секундомера выделите поле Reset (сброс) и нажмите на кнопку ENTER. Для регистрации времени прохождения круга заданной - Страница 87 из 105
Главное меню 4. Чтобы просмотреть информацию для другого местоположения, выделите поле Location и нажмите на кнопку ENTER. На экране появится меню опций “New Location” (новое местоположение). Выберите нужную опцию. Нажмите для запуска анимации фаз Луны Нажмите для остановки анимации Нажмите для - Страница 88 из 105
Главное меню 5. Для возврата к текущей дате нажмите на кнопку MENU, выделите опцию Use Current Date (использовать текущую дату) и нажмите на кнопку ENTER. Страница охоты и рыбалки Меню игр Меню игр содержит шесть различных игр (Memory Race – гонки по памяти, Virtua Maze – виртуальный лабиринт, - Страница 89 из 105
Главное меню экране появится список опций. Выберите нужную опцию и нажмите на кнопку ENTER. 2. Для начала игры выделите команду Start и нажмите на кнопку ENTER. 3. Для возврата в центр игрового поля выделите команду Re-Center и нажмите на кнопку ENTER. Игра “Virtua Maze” (виртуальный лабиринт) В - Страница 90 из 105
Главное меню Вами растет «хвост». Вы можете перемещаться по всему экрану, не наступая при этом на свой «хвост», иначе Вы потеряете попытку. В качестве дополнительного задания Вам следует избегать «черепов», которые охотятся за Вами. Игра “Gekoids” В эту GPS-игру Вы можете играть и с выключенным - Страница 91 из 105
Главное меню 3. Выберите нужную опцию: Extended (расширенная видимость) или Limited (ограниченная видимость). Для начала игры нажмите на кнопку ENTER. 4. Для перепрыгивания с платформы на платформу используйте кнопку ROCKER. Если Вы оказываетесь на заштрихованной платформе, то дракон находится от - Страница 92 из 105
Приложение ПРИЛОЖЕНИЕ Технические характеристики Физические характеристики Размер: 6.1” (В) х 2.4” (Д) х 1.3” (Ш) Вес: 213 г с батарейками Дисплей: Цветной transreflective дисплей (256 цветов), 1.5” (Д) х 2.2” (В), 160 х 240 пикселей, с подсветкой Корпус: Прочный, полностью защищен ный, - Страница 93 из 105
Характеристики питания Источник питания: Две батареи типа АА 1.5 В, питание USB, адаптер 12 В пост. тока или внешний источник до 36 В пост. тока. Срок службы батарей: До 18 часов (при типовом режиме эксплуатации)* *При низких температурах щелочные батареи теряют значительную часть своего заряда. - Страница 94 из 105
Приложение Опции полей данных USB-порт под защитной крышкой Последовательный порт под защитной крышкой Используйте USB-кабель, входящий в комплектацию, или дополнительный кабель питания/данных для последовательного порта с вспомогательным адаптером переменного тока или кабель питания/ данных для - Страница 95 из 105
Приложение Barometer (барометр) – Калиброванное текущее давление. Bearing (азимут) – Направление по компасу от Вашего текущего местоположения к пункту назначения. Course (курс) – Желаемый путь следования от начальной точки к пункту назначения. Depth (глубина) – Глубина, полученная от внешнего - Страница 96 из 105
Приложение Speed – Overall Avg. (общая средняя скорость) – Средняя скорость, рассчитанная за время движения и время остановок. Sunrise (восход Солнца) – Время восхода Солнца для текущей даты и местоположения. Sunset (заход Солнца) – Время захода Солнца для текущей даты и местоположения. Time To - Страница 97 из 105
Приложение Дополнительные аксессуары Компания Garmin разработала несколько дополнительных аксессуаров, которые позволяют расширить возможности Вашего прибора GPSMAP 60CSx. По вопросам приобретения запасных деталей и дополнительных аксессуаров обращайтесь к Вашему дилеру Garmin или в отдел поддержки - Страница 98 из 105
Приложение ПРИМЕЧАНИЕ: Перед подключением кабеля USB к компьютеру необходимо провести инсталляцию программного обеспечения MapSource Trip & Waypoint Manager. Следуйте инструкциям по инсталляции и эксплуатации, прилагаемым к программному обеспечению. Для подключения прибора GPSMAP 60CSx к - Страница 99 из 105
Приложение районах Аляски. Эти данные помещены на сайт Федерального управления гражданской авиации. WAAS и EGNOS – это два провайдера услуг, которые соответствуют стандарту MOPS (Minimum Operational Performance Standard – минимальные рабочие стандарты качества) для глобальных спутниковых систем - Страница 100 из 105
Приложение та/ долгота. Поэтому прибор можно использовать для навигации к точке с координатами в формате TD в любой части Земного шара. Для создания местоположения LORAN TD Вы должны знать Ваш номер GRI цепи и вторичные станции. Если Вам необходима дополнительная информация по Loran TD, то Вы - Страница 101 из 105
Подпись ____________________ 6 месяцев 12 месяцев Печать продающей организации 12 месяцев Гарантийный период: Гарантийный период: Серийный номер: Серийный номер: Дата продажи: Дата продажи: Модель: Модель: 6 месяцев Печать продающей организации Подпись ______________________ Внимание! • бедитесь, - Страница 102 из 105
Если в течение гарантийного периода в изделии появляется дефект по причине его несовершенной конструкции, недостаточной квалификации изготовления или некачественных материалов, мы гарантируем выполнение бесплатного гарантийного ремонта (замены) дефектного изделия (части или частей дефектного - Страница 103 из 105
Приложение Сервисные центры Полный список сервис-центров можно посмотреть на сайте по адресу: http://garmin.ru/support/service/ Название компании Область, край Регион Навиком Московская область Центральный Ассоциация — 27 Московская область Центральный Тропоход МСК Московская область Центральный - Страница 104 из 105
Приложение Сталкер Ленинградская область Северо-Западный Навилайн Ленинградская область Северо-Западный Тропоход Ленинградская область Северо-Западный Ньюком Системы GPS навигации Вологдская область Северо-Западный “Навиком” Калининград Калининградская область Северо-Западный Навигатор Иркутск - Страница 105 из 105
-
Page 1
GPSMAP 60CSx ® with sensors and maps owner’s manual… -
Page 2
Garmin. Garmin hereby grants permission to download a single copy of this manual onto a hard drive or other electronic storage medium… -
Page 3: About This Manual
Thank you for choosing the Garmin 60CSx. The GPSMAP 60CSx uses the proven performance of Garmin GPS and full-featured mapping to create an unsurpassed portable GPS receiver. Compare the contents of this package with the packing list on the box. If any pieces are missing, contact your Garmin dealer immediately.
-
Page 4: Table Of Contents
Software License Agreement … v Product Registration … v Contact Garmin …v Tell Us What You Think …v Caring for the GPSMAP 60CSx … vi Cleaning the Case … vi Cleaning the Screen … vi Storage … vi Water Immersion … vi Warning …
-
Page 5
Guidance Text …42 Setting up the Map Page …43 Measuring Distance …46 Turning Declutter On or Off …47 Restoring Defaults …47 GPSMAP 60CSx Owner’s Manual ntroductIon Compass Page … 48 Using the Electronic Compass …49 Compass Page Options …51 Sight ‘N Go Navigation …51 Using the Course Pointer or Bearing Pointer …53… -
Page 6
Power …91 Interfacing … 92 Data Field Definitions … 93 Optional Accessories … 95 Connecting Your GPSMAP 60CSx to a … Computer … 96 What Is WAAS/EGNOS? … 97 Map Datums and Location Formats … 99 What Are Map Datums? …99 What Is a Location Format? …99… -
Page 7: Software License Agreement
Software License Agreement BY USING THE GPSMAP 60CSx, YOU AGREE TO BE BOUND BY THE TERMS AND CONDITIONS OF THE FOLLOWING SOFTWARE LICENSE AGREEMENT. PLEASE READ THIS AGREEMENT CAREFULLY. Garmin grants you a limited license to use the software embedded in this device (the “Software”) in binary executable form in the normal operation of the product.
-
Page 8: Caring For The Gpsmap 60Csx
Avoid chemical cleaners and solvents that may damage plastic components. Cleaning the Screen Clean the GPSMAP 60CSx screen using a soft, clean, lint-free cloth. Use water, isopropyl alcohol, or eyeglass cleaner if needed. If these are used, apply the liquid to the cloth, and then gently wipe the screen with the moistened cloth.
-
Page 9: Warning
This Notice is provided in accordance with California’s Proposition 65. See com/prop65 for more information. GPSMAP 60CSx Owner’s Manual sources, including information from street signs, visual sightings, and maps. For safety, always resolve any discrepancies or questions before continuing navigation and defer to posted road signs.
-
Page 10: Important Information
Other Garmin dashboard or friction mounting options should be used. Garmin does not take any responsibility for any fines, penalties, or damages that may be incurred as a result of disregarding this notice or as a result of any other state or local law or ordinance relating to use of the unit.
-
Page 11: Getting Started
Unit Overview Power key display screen GPSmap 60CSx GPSMAP 60CSx Owner’s Manual ettInG tarted Auxiliary GPS antenna connector (under weather cap) USB connector port (under weather cap) Carry lanyard attachment slot Keypad ettIng tArted vervIew Internal antenna External Data/ Auxiliary Power Port…
-
Page 12: Installing The Batteries
Installing the Batteries The GPSMAP 60CSx operates on two AA batteries (not included), which are located in the back of the unit. You can use Alkaline or NiMH batteries. See page 67 for information on setting the battery type.
-
Page 13: Using The Gpsmap 60Csx Keypad
Using the GPSMAP 60CSx Keypad POWER Key • Press and hold to turn the unit on or off. • Press and release to adjust the backlighting. IN/OUT Zoom Keys • Press to zoom in or out on the Map Page.
-
Page 14: Turning On The Gpsmap 60Csx
1. Press and hold the POWER key. When the unit turns on, a tone sounds and the Introduction Page appears, followed by the Satellite Page. 2. To turn off the GPSMAP 60CSx, press and hold the POWER key again. Welcome Page Satellite Page…
-
Page 15: Initializing The Gps Receiver
Initializing the GPS Receiver The first time you turn on your GPSMAP 60CSx, the GPS receiver must collect satellite data and establish its current location. To ensure proper initialization, the GPSMAP 60CSx is shipped from the factory in AutoLocate mode, which allows the receiver to “find itself”…
-
Page 16: Using The Gpsmap 60Csx
Using the GPSMAP 60CSx This section explains how to enter and select information with the GPSMAP 60CSx. Understanding Terms As you progress through this owner’s manual, you are directed to press a specific key or highlight a field on the screen.
-
Page 17: Selecting Options And Entering Data
Using the Status Bar At the top of each page, the status bar provides status information for several unit features. Status Bar GPSMAP 60CSx Owner’s Manual ettIng tArted • Power to the unit is provided by either batteries or from an auxiliary source (AC, DC or USB Adapter).
-
Page 18: On-Screen Messages
Map data transfer requires the USB Interface Cable provided with the unit to transfer MapSource data from a PC to the microSD card in the GPSMAP 60CSx. To transfer data to the microSD card you can use the USB Mass Storage feature explained on You can purchase high capacity microSD cards at your electronics supplier.
-
Page 19: Transferring Data To A Microsd Card
1. Lift the weather cover from the USB port on the upper back of the unit. It recommended that you use the USB port rather than the Serial Connection port for faster data transfer. GPSMAP 60CSx Owner’s Manual ettIng tArted 2. Connect the USB cable provided with the unit to the USB port on your PC and to the mini- USB port on the back of the unit.
-
Page 20: Basic Operation
This section explains some of the more common operations you can perform with your GPSMAP 60CSx including creating and using waypoints, using the Find Menu, and how to create and use tracks and routes. Creating and Using Waypoints Waypoints are locations or landmarks you record and store in your GPS.
-
Page 21: Creating Waypoints Using The Map
4. To change any information on the Waypoint Page, highlight the appropriate field, and press ENTER to open the on-screen keypad. After entering and confirming your changes, highlight OK, and press ENTER. GPSMAP 60CSx Owner’s Manual AsIc PerAtIon Information page for a Information page for a…
-
Page 22: Editing Waypoints
3. Select the waypoint you want to delete, and press ENTER. The Waypoint Page opens. 4. Highlight the Delete button, and press ENTER. A confirmation message appears. 5. Highlight Yes, and press ENTER to delete the waypoint. Note: When you delete a waypoint, you cannot recover it from the unit. GPSMAP 60CSx Owner’s Manual…
-
Page 23: Averaging The Waypoint’s Location
ENTER. Original location Moving a waypoint GPSMAP 60CSx Owner’s Manual Averaging the Waypoint’s Location You can average a new waypoint location over time to produce a more accurate location. Note: You must have a GPS Satellite fix before you can average a waypoint’s location.
-
Page 24: Projecting A Waypoint
6. Enter the distance and bearing to the projected waypoint in the appropriate fields at the bottom of the page, and press QUIT when finished. Enter bearing distance Project Waypoint Projected waypoint Page GPSMAP 60CSx Owner’s Manual on the map…
-
Page 25: Proximity Waypoints
4. Select a waypoint from the Waypoints List or from any other group of map points, and press ENTER to open the information page for the item. GPSMAP 60CSx Owner’s Manual 5. With the Use button highlighted, press ENTER to add the point to the list on the Proximity Waypoints Page.
-
Page 26: Man Overboard (Mob)
MOB point. Using the Find Menu Use the Find Menu to search for waypoints, cities, and exits included in the GPSMAP 60CSx basemap. You can also find saved waypoint and geocache points. Additional icons appear depending on the optional BlueChart or MapSource data loaded to the unit.
-
Page 27: Find By Name
To search the entire database, select the All Points of Interest icon, and press ENTER. 3. Press MENU, highlight Find By Name, and press ENTER. GPSMAP 60CSx Owner’s Manual AsIc PerAtIon 4. Use the ROCKER and ENTER key to operate the on-screen keypad and enter the name of the location you want to find.
-
Page 28: Recent Finds
• Average Location—sample a waypoint location over time and average the result for a more accurate location reference. See for more information. • Project Waypoint—create a new waypoint referencing another location by entering page 13 GPSMAP 60CSx Owner’s Manual…
-
Page 29
• Map Information—shows the name of the map from which the map item originated. GPSMAP 60CSx Owner’s Manual To find an item near another item: 1. Press FIND to open the Find Menu. 2. Select an icon on the Find Menu, and press ENTER. -
Page 30: Finding A Waypoint
Finding a Geocache Use the Geocache icon to view the list of geocache locations created using your GPSMAP 60CSx or downloaded from your computer. A geocache location is a waypoint with a special geocache symbol assigned to give special significance and to allow it to be separated from others on the waypoints list.
-
Page 31: Finding A City
When a geocache is found, the unit marks the cache as found, logs an entry into the calendar, and provide an option that, when activated, shows the nearest cache. GPSMAP 60CSx Owner’s Manual AsIc PerAtIon Finding a City Use the Cities icon on the Find Menu to find any city listed in the mapping database (either in the basemap or from downloaded detailed mapping data).
-
Page 32: Finding An Interstate Exit
If you downloaded optional detailed mapping data, use the Addresses icon on the Find Menu to find an address. When you enter the street number, street name, and city, the find feature matches that data with addresses in database. GPSMAP 60CSx Owner’s Manual Available services the map…
-
Page 33
Addresses icon Addresses Page GPSMAP 60CSx Owner’s Manual AsIc PerAtIon 3. Highlight the <Enter Number> field, and press ENTER. 4. Type the street number using the on-screen keypad. -
Page 34: Finding An Intersection
Searching for a Point of Interest If you downloaded optional MapSource detailed mapping, you can use the All Points of Interest icon on the Find Menu to locate a nearby restaurant, lodging, landmark, public building, and so on. GPSMAP 60CSx Owner’s Manual…
-
Page 35: Poi Loader & Custom Points Of Interest
Options Menu. POI Loader & Custom Points of Interest You can create your own category for points of interest by using the Garmin POI Loader utility, downloadable from the Garmin Web site: garmin.com/products/poiloader/. Follow the Help instructions to use the POI Loader.
-
Page 36: Using Tracks
1. Press MENU twice to open the Main Menu. 2. Select the Tracks icon, and press ENTER to open the Tracks Page. 3. Highlight the Setup button, and press ENTER to open the Track Log Setup Page. Percentage of memory used Data Card Option GPSMAP 60CSx Owner’s Manual…
-
Page 37
Track logs on the data card are .gpx GPS position data files, and are not used by your unit. To learn more about .gpx files, search the Web for subjects titled GPX or GPS Exchange Format. GPSMAP 60CSx Owner’s Manual AsIc PerAtIon To save the entire track log: 1. -
Page 38
Recording continues until the card is filled. Because these track logs share card space with MapSource mapping data, space for additional map storage is reduced. GPSMAP 60CSx Owner’s Manual Options Menu… -
Page 39
USB Mass Storage feature as explained on page 68. You can open the track logs using Garmin MapSource or another .gpx file- compatible application. 4. To delete these track logs from the microSD card, highlight individual logs, and then press ENTER. -
Page 40: Track Profiles
When these types of maps are available, a Use Map Data — Use Track Data option menu appears when you select Profile. Refer to the Garmin Web site, www.garmin.com/cartography/ontheTrail/, for more information about MapSource U.S. Topo 24K maps.
-
Page 41: Navigating A Saved Track
TracBack. The Map Page opens with directions to the first turn on the track at the top of the page. GPSMAP 60CSx Owner’s Manual AsIc PerAtIon 4. Move in the direction of the first turn. When…
-
Page 42: Creating And Using Routes
PerAtIon Creating and Using Routes a Route is a sequence of intermediate waypoints that lead you to your final destination. The GPSMAP 60CSx lets you store 50 routes with up to 250 points each. Routes icon Setting up a route…
-
Page 43: Navigating A Route
5. To stop navigating, press MENU, select Stop Navigation, and press ENTER. Using the Follow Roads option on the Routing Setup Page increases the number of turns and shows an GPSMAP 60CSx Owner’s Manual AsIc PerAtIon Active Route Page with a list of turns. If you selected the Off Road option, you can view only the list of points for a route from the Active Route Page.
-
Page 44: Editing A Route
1. Press MENU twice to open the Main Menu. 2. Highlight the Routes icon, and press ENTER to open the Routes Page. 3. Select a saved route, and press ENTER. Route Page GPSMAP 60CSx Owner’s Manual Enter a new route name…
-
Page 45
Distance) when advancing to the next point. Select Distance to enter a radius so that when you are within the entered distance, the 60CSx leads you to the next point on your route. Select Manual to transition to the next waypoint anytime while navigating a route. -
Page 46: Vertical Profiles Of Routes
Menu key. 2. Select Profile and press ENTER to display the route profile, answer the “use data” prompt and press ENTER. Note: Profiles are available only if Garmin MapSource U.S. Topo 24K map data is used. Options Menu Options Menu Route Vertical Route Vertical Profile using U.S.
-
Page 47: Main
The GPSMAP 60CSx has six main pages: Satellite Page, Trip Computer Page, Map Page, Compass Page, Altimeter Page, and the Main Menu. You can cycle through these pages by pressing the PAGE key to move forward or pressing the QUIT key to reverse. Add more pages from the Main Menu. (See Route Page appears only when you are actively navigating.
-
Page 48: Satellite Page
New Location—use if you have moved the unit more than 600 miles and you are having trouble locking onto satellite signals. GPS Elevation— your GPS determined elevation. GPSMAP 60CSx Owner’s Manual…
-
Page 49: Map Page
Map Page The GPSMAP 60CSx comes with a built-in basemap that includes a database of cities, interstates, state and county highways, exit information, and lake and river outlines. The standard basemap can be enhanced using MapSource or BlueChart data. Two map operating modes, position mode and pan mode, determine what cartography is shown on the map display.
-
Page 50: Using Additional Map Data
Appendix. Using Additional Map Data Optional MapSource mapping data enhances the versatility of your GPSMAP 60CSx. With MapSource data, you can view listings of nearby restaurants, lodging, shopping centers, attractions, and entertainment, and you can retrieve addresses and phone numbers for any listed location.
-
Page 51: Changing The Zoom Range
“overzoom” appears under the zoom range. When using MapSource maps, “mapsource” appears below the scale. Map ranges GPSMAP 60CSx Owner’s Manual Map Orientation There are two map orientation options: North Up orients the map like a paper map. Track Up orients the map in the direction of travel.
-
Page 52: Guidance Text
If you select Always Show, a message of some type always appears whether or not you are navigating. If you select Show When Navigating, a guidance message appears until you select Stop Navigation from the Options Menu. Guidance text GPSMAP 60CSx Owner’s Manual…
-
Page 53: Setting Up The Map Page
Each Map Setup Page has a sub- menu of general options. To access this menu, press the MENU key while viewing the page. GPSMAP 60CSx Owner’s Manual Map Setup – General Page The Map Setup – General Page contains the settings for Orientation, Below, Auto Zoom, Detail, and Lock On Road.
-
Page 54
Use the Map Setup – Points Page to set the map scale at which Map Points, User Waypoints, Street Label, and Land Cover appear on the Map Page. Select Auto, Off, or a specific zoom level. Map Setup – Points Page GPSMAP 60CSx Owner’s Manual… -
Page 55
ENTER to show it on the map display or turn it off. Map Setup – Information Page GPSMAP 60CSx Owner’s Manual Press MENU to view options for showing maps. Map Setup – Marine Page Use the Map Setup – Marine Page to customize… -
Page 56: Measuring Distance
The distance between the two points is shown in the upper-right corner of the Map Page. 5. Press QUIT to cancel. Push pin indicating the beginning point of the measurement GPSMAP 60CSx Owner’s Manual Measured distance End point of measurement labeled REF…
-
Page 57: Turning Declutter On Or Off
2. Highlight Turn Declutter On, and press ENTER. To turn Declutter off, press MENU, select Turn Declutter Off, and press ENTER. GPSMAP 60CSx Owner’s Manual Map with Declutter off Map with Declutter on Restoring Defaults Use the Restore Defaults option to return the map settings to factory settings.
-
Page 58: Compass Page
The Compass ring moves to indicate North Course Pointer orientation. The bearing pointer indicates the direction to your destination. The course pointer indicates your course of travel and the distance you drift off course. Bearing Pointer GPSMAP 60CSx Owner’s Manual…
-
Page 59: Using The Electronic Compass
When it is turned off, the unit uses the GPS receiver for navigation. 2. Hold the GPSMAP 60CSx level to get an accurate electronic compass reading. (You obtain the most accurate reading if the compass has been recently calibrated.
-
Page 60: Calibrating The Electronic Compass
ENTER to set the time delay from the time options list. Calibrating the Electronic Compass When you first use the GPSMAP 60CSx or after you install new batteries, you have to calibrate the electronic compass outdoors. If not held level or you…
-
Page 61: Compass Page Options
• Course or Bearing Pointer—toggles between the course pointer and the bearing pointer. GPSMAP 60CSx Owner’s Manual • Data Fields—allows you to select from 2, 3 or 4 data fields that appear on the Compass Page. • Change Data Fields—allows you to select the type of data you want to show in the data fields.
-
Page 62
Map Page and begin navigation to the projected waypoint. The Compass Page shows a bearing pointer for guidance. To stop navigation: 1. Press MENU to open the Map Page Options Menu. 2. Highlight Stop Navigation, and press ENTER. GPSMAP 60CSx Owner’s Manual… -
Page 63: Using The Course Pointer Or Bearing Pointer
(right or left) according to the scale shown at the edge of the compass ring. GPSMAP 60CSx Owner’s Manual The bearing pointer always indicates the direction to your destination from your current location. Move to the right or left to get back on course. This is most efficient if you are navigating on water or where there are no major obstacles in your path.
-
Page 64: Data Fields
1. Press MENU to open the Compass Page Options Menu. 2. Highlight Data Field, and press ENTER. The Show sub-menu appears. 3. Select the number of data fields you want to show on the Compass Page and press ENTER. 4 Data Fields GPSMAP 60CSx Owner’s Manual…
-
Page 65: Altimeter Page
1. Press MENU to open the Compass Page Options Menu. 2. Highlight Restore Defaults, and press ENTER to return the page to factory settings. GPSMAP 60CSx Owner’s Manual Ages Altimeter Page The Altimeter Page shows you the current elevation, rate of ascent or descent, a profile of elevation changes over distance or time, or a profile of pressure changes over time.
-
Page 66: Altimeter Page Options
• Calibrate Altimeter—If you know the correct elevation for your location, you can increase the accuracy of the altimeter using the “Calibrate Altimeter” option. • Restore Defaults—clears recorded data from the page and begins recording new data. GPSMAP 60CSx Owner’s Manual…
-
Page 67: Plot Over Time Or Distance
Elevation over Pressure over Distance plot GPSMAP 60CSx Owner’s Manual View Pressure or Elevation Plots Select the View Elevation Plot option to plot a profile of elevation changes that occur as you navigate over a set distance or period of time. Select View Pressure Plot to view a record of changes in barometric pressure for a set period of time.
-
Page 68: Zoom Ranges
Pressing up or down on the ROCKER while a plot is displayed switches the screen to the Zoom Range mode. 3. Press ENTER to return to the Plot Page. Time plot GPSMAP 60CSx Owner’s Manual…
-
Page 69: View Points
Red crosshairs View point for an View point for a altitude plot pressure plot GPSMAP 60CSx Owner’s Manual Ages To use the View Points option: 1. Press MENU to open the Altimeter Page Options Menu. 2. Select View Pressure Plot or View Elevation Plot, and press ENTER to open the Plot Page.
-
Page 70: Resetting Data
5. Highlight Apply, and press ENTER to reset the selected options. 6. To reset all categories shown on the page, highlight Select All, and press ENTER. Then repeat step 5 above. GPSMAP 60CSx Owner’s Manual…
-
Page 71: Calibrating The Altimeter
Calibrating the Altimeter Because the GPSMAP 60CSx relies on the barometric pressure to determine the elevation, and the pressure at any given elevation can fluctuate, you can calibrate the altimeter to increase its accuracy. You must know the elevation or pressure at your current location.
-
Page 72: Changing The Data Fields
ENTER to view a list of available data field options. 4. Press up or down on the ROCKER to highlight an option, and press ENTER to place it in the data field. Data field options 93.) Data fields GPSMAP 60CSx Owner’s Manual…
-
Page 73: Trip Computer Page
Map Page. (See page 40 for details.) GPSMAP 60CSx Owner’s Manual Ages Trip Computer Page Options Menu Press MENU to view the following options: • Reset—because you want to record new data for each trip, a Reset option is available.
-
Page 74: Main Menu
1. Press MENU twice to open the Main Menu. 2. Select the Tracks icon, and press ENTER. 3. Highlight the Setup button, and press ENTER to open the Track Log Setup Page. Tracks Page Track Log Setup GPSMAP 60CSx Owner’s Manual GPSMAP 60CSx Owner’s Manual…
-
Page 75: Route Page
Use the In and Out keys to change the five scale settings for zooming in or out on the highway. GPSMAP 60CSx Owner’s Manual To navigate using the Highway Page: 1. While navigating, press the PAGE key to cycle…
-
Page 76: Setup Menu Page
(Stay On) or turns off (Turn Off) when external power is removed from the unit. • Proximity Alarms—indicates whether custom points of interest (POI’s) proximity alarms are on or off. page 97 for WAAS information). GPSMAP 60CSx Owner’s Manual…
-
Page 77: Display Setup
Display icon, and press ENTER. • Display Mode—sets the display to Day, Night, or Auto mode. Select Auto to automatically GPSMAP 60CSx Owner’s Manual switch from day to night at sunset and change back at sunrise. • Daytime Color Scheme/Nighttime Color Scheme—sets the color scheme to use when…
-
Page 78: Interface Setup
USB cable. 2. Highlight the on-screen USB Mass Storage button and press ENTER. 3. Observe an illustration of the GPSMAP 60CSx connected to a computer and an Unplug or Eject icon shown on a PC’s system tray or a storage device icon for the microSD on a Macintosh 4.
-
Page 79
GPSMAP 60CSx removable storage device. 4. Select Edit > Paste. The file appears in the list of files on the GPSMAP 60CSx microSD card. 5. For a Macintosh, click and drag the desired file into the microSD card directory. -
Page 80: Tones Setup
ENTER. Select Insert, then select a page from the list, and press ENTER. 3. To remove a page, highlight the page and press ENTER. Select Remove, and press ENTER. Map Page Setup The Map Page Setup information is located on page GPSMAP 60CSx Owner’s Manual…
-
Page 81: Routing Setup
Routing Setup Page Follow Road Options • Guidance Method—allows the unit to calculate routes using the preferences below: GPSMAP 60CSx Owner’s Manual Prompted—prompts you to select a preference before the route is calculated. Follow Road—creates a route that overlays the roads shown on the map.
-
Page 82: Geocache Setup
Geocache Setup Use the Geocache Setup Page to find and record items hidden at geographic locations. See the Garmin Web site (www.garmin.com) for details and how to download geocache locations from the Internet. Note: Before setting up and placing physical…
-
Page 83: Marine Setup
ENTER. • Time Format—sets 12 or 24 hour format. • Time Zone—sets the time zone for your city so the GPSMAP 60CSx shows the correct local time. Select Other to manually enter a Universal Time Coordinate. etuP…
-
Page 84: Units Setup
Fathoms, or Meters) to show water depth. (Requires interface to other devices or marine chart data) • Temperature—sets the unit of measurement (Fahrenheit or Celsius) to show temperature. • Pressure—sets the unit of measurement (Inches, Millibars, or Hectopascals) to show pressure. GPSMAP 60CSx Owner’s Manual page…
-
Page 85: Heading Setup
On the Setup Menu Page, highlight the Heading icon, and press ENTER. • Display—sets the value (Cardinal Letters, Degrees, or Mils) to show your heading. GPSMAP 60CSx Owner’s Manual eAdIng etuP • North Reference—provides headings based on a true, magnetic, grid, or specific user value north reference.
-
Page 86: Altimeter Setup
Enter the correct elevation: this requires a reliable source for determining the elevation for your current location. Enter the correct pressure: this requires a reliable source to determine the accurate barometric pressure at your current location. GPSMAP 60CSx Owner’s Manual…
-
Page 87: Welcome Setup
Welcome Setup Use the Welcome Setup Page to insert a message, such as ownership information, that appears when you turn on your GPSMAP 60CSx. Welcome message Welcome message GPSMAP 60CSx Owner’s Manual To access the Welcome Setup Page: On the Setup Menu Page, highlight the Welcome Message icon, and press ENTER.
-
Page 88: Jumpmaster
A desired impact point (DIP) must be set for all jumps. This is a waypoint that you have previously marked or another location from the Find Menu where you want to land. GPSMAP 60CSx Owner’s Manual…
-
Page 89
(DZSTL) monitoring the course of a Pilot Balloon (PiBal) released from the ground at the DIP and wind streamers dropped from aircraft once the HARP is calculated. GPSMAP 60CSx Owner’s Manual Jumpmaster is capable of handling doglegs in wind direction. Wind Setup… -
Page 90
K-open and K-freefall. Static jumps use K-static. K-values are based on the parachute canopy rating. Each parachute should be labeled with a K value. Common values may range from 3.0 for K-freefall to 48.0+ for HAHO K-open. Constant Setup Constant Setup GPSMAP 60CSx Owner’s Manual… -
Page 91
Select Restore Defaults from the Option Menu of this page to reset the values. GPSMAP 60CSx Owner’s Manual The following is a list of abbreviations and acronyms commonly used and relate specifically to this feature: AGL—(Above Ground Level) indicates the altitude measurement. -
Page 92: Proximity Waypoints
2. Select the Calendar icon, and press ENTER. The Calendar Page opens with the current week shown. 3. Use the ROCKER to highlight the day you want to add waypoints to, and press ENTER to show the Page for that day. page GPSMAP 60CSx Owner’s Manual…
-
Page 93: Calculator
ROCKER to make your choice. GPSMAP 60CSx Owner’s Manual Calculator Select the Calculator icon to use your GPSMAP 60CSx as a calculator. You can select either a standard or scientific calculator and degrees or radians from the for details on Options Menu.
-
Page 94: Stopwatch
Stopwatch Select the Stopwatch icon to use the GPSMAP 60CSx as a stopwatch, which includes a lap timer. You can also have the unit record the lap time based on distance. To access the stopwatch: 1. Press MENU twice to open the Main Menu.
-
Page 95: Sun And Moon
The button to the left animates the display of the sun and moon. The center button GPSMAP 60CSx Owner’s Manual animates more rapidly, showing the phases of the moon. The right button stops animation.
-
Page 96: Hunt And Fish
ENTER. The Location field now shows the name of the find item. 5. To return to the current date, press the MENU key, and then press ENTER. Hunt and Fish Page Hunt and Fish Page GPSMAP 60CSx Owner’s Manual…
-
Page 97: Games Menu
2. Select the Games icon, and press ENTER. 3. Use the ROCKER to highlight a game, and press ENTER. A brief description of each game appears. GPSMAP 60CSx Owner’s Manual 4. Press the QUIT key, and highlight Yes, when prompted, to stop playing. WaRNiNg: When playing any of the virtual…
-
Page 98: Virtua Maze
60 yards by 90 yards (about the size of an American football field). The difficulty levels are: Easy, Normal and Hard. These levels determine how often gekos appear. The pace quickens and values vary as difficulty levels increase. GPSMAP 60CSx Owner’s Manual…
-
Page 99: Nibbons
The map is stationary and north is always up. Orient map “Ship GPSMAP 60CSx Owner’s Manual Up” rotates the virtual world around your ship. Your ship always points up. Press ENTER to start, and blast away.
-
Page 100
5. To defeat the dragon, press ENTER to place an arrow in a shaded platform. Use the ROCKER to point, and press ENTER to shoot. Game Symbols Game Symbols Pit Warning Pit Warning Player Player Dragon Near Dragon Near Dragon Dragon Arrow Arrow GPSMAP 60CSx Owner’s Manual… -
Page 101: Appendix
Rugged, fully gasketed, water resistant, IEC-529, IPX7 Temp Range: 5 to 158 F (-15 to 70 *The temperature rating of the GPSMAP 60CSx may exceed the usable range of some batteries. Some batteries can rupture at high temperatures. Performance Receiver:…
-
Page 102: Interfacing
Use the USB data cable provided with the product or optional power/data serial port cable with auxiliary AC power adapter or power/data serial port of Lat/Lon minutes. cable with bare wire leads. Refer to the Garmin Web site: www.garmin.com/products/gpsmap60csx/ Optional Power/Data Serial Port Cable with bare wire leads…
-
Page 103: Data Field Definitions
Descent — Maximum—the maximum descent rate in feet per minute. Descent — Total—the total distance descended. Distance — To Next—the distance to the next point on a route. GPSMAP 60CSx Owner’s Manual PPendIx Distance — To Destination—the entire distance to the end of a route.
-
Page 104
Water Speed—the measurement of speed over water from interfaced devices. Water Temperature—the measurement of water tempera- ture from interfaced devices. Waypoint—At Destination—the last point on a route; your destination. Waypoint—At Next—the next point on your route. GPSMAP 60CSx Owner’s Manual… -
Page 105: Optional Accessories
Bicycle Handlebar Mount—allows installation on a bicycle handlebar. Battery Pack—rechargeable, NiMH, AA-battery kit, USA type receptacle. Retractable Lanyard—retains unit on a tether. For a complete list of available accessories for use with the GPSMAP 60CSx, refer to the Garmin Web site: www.garmin.com/products/gpsmap60csx/. PtIonAl ccessorIes www.garmin.
-
Page 106: Connecting Your Gpsmap 60Csx To A
MapSource Trip and Waypoint Manager software that came with your GPSMAP 60CSx. When you initially connect the GPSMAP 60CSx to a USB port, your computer might prompt you to locate the destination of the drivers for the device. The default directory is c:Garmin.You only need to install the…
-
Page 107: What Is Waas/Egnos
SBAS system should be capable of providing your GPS unit with increased accuracy at any location in the world. Currently, enabling WAAS on your GPSMAP 60CSx in regions that are not supported by ground stations may not improve accuracy, even when receiving signals from an SBAS satellite.
-
Page 108: Loran Td Setup
You must know your GRI chain number and secondary stations to create a LORAN TD position. For more information, read our LORAN TD Position Format Handbook, available on the Garmin Web site, at www.garmin.com/support/userManual.jsp. Loran TD Setup Page Loran TD Setup Page…
-
Page 109: Map Datums And Location Formats
Every chart has a map datum reference and the GPSMAP 60CSx can be set to match most commonly used datum data. If you are navigating and comparing the GPS…
-
Page 110: Fcc Compliance
Hereby, Garmin declares that this GPSMAP 60CSx is in compliance with the essential requirements and other relevant provisions of Directive 1999/5/EC. To view the full Declaration of Conformity, see the Garmin Web site for your Garmin product: www.garmin.com/products/gpsmap60csx/. Click Manuals and then select the Declaration of Conformity link.
-
Page 111: Limited Warranty
PRODUCT OR FROM DEFECTS IN THE PRODUCT. Some states do not allow the exclusion of incidental or consequential damages, so the above limitations may not apply to you. Garmin retains the exclusive right to repair or replace the unit GPSMAP 60CSx Owner’s Manual PPendIx or software or offer a full refund of the purchase price at its sole discretion.
-
Page 112
States, Canada, or Taiwan for service. The Garmin GPSMAP 60CSx has no user-serviceable parts. Should you ever encounter a problem with your unit, please take it to an authorized Garmin dealer for repairs. The GPSMAP 60CSx is fastened shut with screws. -
Page 113
GPSMAP 60CSx Owner’s Manual editing waypoints elevation, GPS entering data ENTER key fields, data find by name information pages recent finds… -
Page 114
Sight ‘N Go software license agreement status bar stop (resume) navigation storage sun and moon system setup terminology time setup tracks 26, area calculation clearing GPSMAP 60CSx Owner’s Manual… -
Page 115
& waypoint manager units setup unit overview using the keypad WAAS/EGNOS warnings waypoints averaging a location creating editing Man Overboard moving projecting GPSMAP 60CSx Owner’s Manual ndex… -
Page 116
For the latest free software updates (excluding map data) throughout the life of your Garmin products, visit the Garmin Web site at www.garmin.com. © 2005-2007 Garmin Ltd. or its subsidiaries Garmin International, Inc. 1200 East 151 Street, Olathe, Kansas 66062, U.S.A.