BLOOD GLUCOSE
MONITORING SYSTEM
USER GUIDE
Before You Begin
PLEASE READ THIS BEFORE USING.
The following basic safety precautions should always be taken.
1. Close supervision is necessary when the device is used by, on, or near children,
handicapped persons or invalids.
2. Use the device only for the intended use described in this User Guide.
3. Do not use test strips and control solutions which are not supplied by the
manufacturer.
4. Do not use the device if it is not working properly, or if it has suffered any damage.
5. Before using any product to test your blood glucose, read all instructions
thoroughly and practice the test. Do all quality control checks as directed and
consult with a diabetes healthcare professional.
6. KEEP THIS USER GUIDE WITH YOU.
Intended Use
The system is intended for use outside the body (in vitro diagnostic use only).
It should be used only for testing blood glucose (blood sugar) and only with fresh
capillary whole blood samples. The system is intended for use in the home and in
clinical settings. It should not be used for the diagnosis of diabetes or for the testing of
newborns.
Principle of Measurement
Blood glucose is measured by an electrical current that is produced when a blood
1.
Getting To Know Your System
The Medicare Blood Glucose Monitoring System-LiS
The Medicare System-LiS system uses the latest technology to provide you with
easy and comfortable testing. The system requires only a 0.3 μL of blood sample to
complete the testing in only 6 seconds.
STRIP SLOT :
METER LABEL:
Insert the test strip here. The meter will
turn on automatically.
Each meter has its unique number on it. It can be
used when you want to obtain warranty service.
Please do not alter or tear the label off.
DISPLAY :
The large, easy to
read display shows
test results, messages,
test results stored in
memory.
Model Name: BG-101
MC14EL005001
OK Biotech Co., Ltd.
Hsinchu, Taiwan
M BUTTON:
BATTERY COMPARTMENT :
Main button, press button to turn the meter on
Holds one 3V Lithium battery (CR2032).
or perform other functions described in this User
Guide.
Meter
TEST STRIP HANDLE :
Hold this part to insert the test strip
into the meter slot.
A B S O R B E N T
CHANNEL:
Apply a drop of
blood here.
CONFIRMATION WINDOW:
This is where we confirm if enough blood is applied for the
test. Ensure that it is fully covered with blood sample.
Test Strip
2
.
Prepare For Blood Sampling
Adjustable Lancing Device
Your lancing device and lancets are used for obtaining
capillary blood samples from the puncture site.
Depth Selector
Lancing
Release Button
Device Cap
Lancet Holder
Lancet Ejector
For In vitro diagnostic use
Please consult instructions for use
Do not reuse
BG — 101
Lot number
Keep dry
Humidity limitation
This product fulfils the requirements of Directive 98/79/EC in vitro diagnostic medical device.
Performance Characteristics:
Accuracy: ≧ 95% of the individual glucose results fell within ± 15 mg/dL(0.83 mmol/L) at glucose concentration <
75 mg/dL(or 4.2 mmol/L) and within ± 20% at glucose concentration ≧ 75 mg/dL(or 4.2 mmol/L), compared with
glucose analyzer YSI 2300.
PRECISION: CVs (%) of intermediate precision and repeatability were less than 5%.
L-Tac MediCare Pte Ltd
25 Mandai Estate #07-11
Innovation Place Tower 1
Singapore 729930
Tel: +65 6334 2273
Fax: +65- 6863 8190
www.medicare-l-tac.com.sg
samples mixes with the reagent (special chemicals) of the test strip. The electrical
current changes with the amount of glucose in the blood sample. The Medicare System-
LiS meter measures the strength of the electrical current, calculates your blood glucose
level and then displays your result in either milligrams of glucose per deciliter (mg/dL) or
millimoles of glucose per liter (mmol/L).
Caution
1. The user should not take any decision of medical relevance without first consulting
his or her medical practitioner.
2. Call your doctor immediately if you experience symptoms that are not consistent with
your blood glucose test results.
3. High altitudes above than 3,402 meter (11,161 ft) may affect the test results.
4. Temperatures outside the range of 5°C to 45°C (41°F to 113°F) may affect the test
results. Do not test beyond of temperature range.
IMPORTANT HEALTH-RELATED INFORMATION
1. Apply only capillary whole blood sample to test your blood glucose. Applying other
substances or plasma, serum will cause wrong results.
2. Severe dehydration and excessive water loss may cause false low results. If
you believe you are suffering from severe dehydration, consult your healthcare
professional immediately.
3. Test results below 60 mg/dL (3.3 mmol/L)*1 indicates low blood glucose
(hypoglycemia). Test results greater than 240 mg/dL (13.3 mmol/L)*2 indicates high
blood glucose (hyperglycemia).If your results are below 60 mg/dL (3.3 mmol/L) or
above 240 mg/dL (13.3 mmol/L), repeat the test, and if the results are still below
60 mg/dL (3.3 mmol/L) or above 240 mg/dL (13.3 mmol/L), consult your healthcare
professional immediately.
2
10
9
8
7.
UNIT OF MEASURE: Appears with the test result either in mg/dL or mmol/L.
8.
BATTERY SYMBOL: Appears when battery is weak.
9.
BLOOD DROP SYMBOL: Flashes when sample should be applied.
10. STRIP SYMBOL: Appears when the meter is turned on and waiting for inserting a
test strip.
REPLACING THE BATTERY
SET BUTTON:
Located in
1.The meter comes with ONE Lithium battery (battery type CR2032).
the battery
2.Battery life will vary depending on usage, so always keep a spare battery on hand.
compartment; press
button to enter
The battery should last about 1000 tests or 12 months when testing 3 times a day.
10-62-3463-0003
V1-JUL11
meter setting. Refer
3.When the battery symbol appears on the meter display, battery is getting low. You will
to «SETTING YOUR
still be able to test with low battery, but you should replace it as soon as possible.
METER» section of
this user guide for
4.When battery symbol appears together with E-b on the display, the meter will no
details.
longer give results and you must replace the battery immediately. Please always have
J7
one spare battery with you to ensure that you can replace the battery anytime.
How to replace the battery
J7
J7
J7
CONTACT BARS:
Insert this end into strip slot.
NOTE:
1. Replacing the battery does not affect the test result stored in memory. However the
time and date may need to re-set.
2. As with all small objects, the battery should be kept away from small children as a
safety precaution. If the battery is swallowed, see medical assistance immediately.
3. Batteries might leak chemicals if not used for a long time. Remove the batteries if
you are not going to use the device for 3 months or more.
4.
Please discard the product or the batteries properly according to the regulations
of your country.
Lancet
Protective cap
Important Lancing Device and Lancets Information
1.
Lancet is for single use only.
2. Keep lancing device and lancets clean.
Sliding Barrel
3. Use caution when removing the used lancet from the device and when disposing the
used lancet.
The meter and lancing device are for single patient use.
IMPORTANT :
Do NOT share them with anyone including other family members !
Do NOT use on multiple patients !
Temperature limitation / Store at
Use by /Expiry date
Manufacturer
Caution, consult accompanying document
Keep away from sunlight
EU representative.
10-62-3412-0003 V2-JUL15
OK Biotech Co., Ltd.
No. 91, Sec. 2, Gongdao 5th Road,
30070 Hsinchu City, TAIWAN
www.okbiotech.com
MDSS GmbH
Schiffgraben 41, 30175 Hannover, GERMANY
1
1. DATE: Display year, month and date.
2. TIME: The meter is programmed for a 12
hour period format.
3. AVERAGE: Appears when the meter is in the
memory mode while recalling 7/14/28 day test
3
averages.
4
4. MEMORY SYMBOL: Appears when in the
memory mode.
5
5. THERMOMETER SYMBOL: Appears when
6
ambient temperature is above or below the
acceptable range needed for testing.
7
6. CONTROL SOLUTION TEST SYMBOL:
Appears when you are in Control Solution
Mode. Your test result will not be stored in
meter memory.
1. Make sure the meter is turned off. Let the front of the meter
rest in the palm of your hand. Press the buckle on the battery
cover and lift up to open the cover. Remove the battery.
2. With the plus (+) side up, place the battery (battery type
CR2032) in the compartment and slide it upwards until it is
locked into place. You should hear a beep to indicate the
battery installed correctly. If not, please replace the battery
correctly.
3. Close battery cover.
A :
1
. Getting To Know Your System
SIDE
2. Prepare For Blood Sampling
B :
3. Performing Blood Test
SIDE
4. Understanding Your Test Result
5. Memory Recall
6. Control Solution Testing
7. Caring For Your Meter And Test Strip
8. System Specifications
9. Display Messages And Problem-Solving Guide
4. Inaccurate results may occur in severely hypotensive individuals or patients
in shock. Inaccurate low results may occur for individuals experiencing a
hyperglycemic-hyperosmolar state, with or without ketosis. Critically ill patients
should not be tested with blood glucose meters.
5. Abnormal red blood cell counts (hematocrit level below 20% or above 60%) may
cause false results. Please consult your healthcare professional if you do not know
your hematocrit level.
6. Interference: Reducing substances occurring in the blood naturally (uric acid,
bilirubin) or from therapeutic treatments (ascorbic acid, acetaminophen) will
not significantly affect Medicare System-LiS test results. However, elevated
concentrations of these substances may affect test results. The compounds listed
in the tables were found to have no affect at the concentration indicated.
Compounds
Highest concentrations
Compounds
tested at which no
≦ 8.0 mg/dL (0.53 mmol/L)
interference occured
≦ 5.0 mg/dL (0.28 mmol/L)
Acetaminophen
Gentisic Acid
≦ 60 mg/dL (3.33 mmol/L)
Ascorbic Acid
Hydroxyurea
≦ 90 mg/dL (1.54 mmol/L)
Aspirin
L-dopa
≦ 500 mg/dL (12.9 mmol/L) Methyldopa
Bilirubin
Maltose
≦ 5.0 mg/dL (0.44 mmol/L)
Cholesterol
≦ 2.0 mg/dL (0.11 mmol/L)
Creatinine
Tolbutamide
≦ 900 mg/dL (50 mmol/L)
Dopamine
Triglycerides
Galactose
Uric Acid
REFERENCE:
* 1: Kahn, R. and Weir, G.: Joslinis Diabetes Mellitus, 13thed Philadelphia : Lea and Febiger (1994), 489.
* 2: Krall, L.P. and Beaser, R. S.: Joslin Diabetes Manual. Philadelphia : Lea and Febiger(1989), 261-263.
SETTING YOUR METER
Please install battery first and set to correct settings before you begin to test.
STEP 1. Enter Setting Mode
Start with the meter off. Open the battery compartment, and press SET
J7
BUTTON. The meter will turn on and enter the setting mode.
STEP 2. Set the Year
The year appears with the number flashing. Press and release the M
BUTTON to obtain the desired year. Press SET BUTTON to confirm
and move to next MONTH setting.
STEP 3. Set the Month
The month appears with the number flashing. Press and release the M
BUTTON to obtain the desired month. Press SET BUTTON to confirm
and move to next DATE setting.
STEP 4. Set the Date
The date appears with the number flashing. Press and flash the M
BUTTON to obtain the desired date. Press SET BUTTON to confirm
and move to next HOUR setting.
STEP 5. Set the Hour
The hour appears with the number flashing. Press and release the M
BUTTON to obtain the desired hour. Press SET BUTTON to confirm
and move to next minutes setting.
STEP 6. Set the Minute
The minute appears with the number flashing. Press and release the M
BUTTON to obtain the desired minute. Press SET BUTTON to confirm
and the meter will enter to next unit setting.
STEP 7. Set the Unit of Measurement
The existing unit (for example mg/dL) will appear and flash. You can
choose to reset measurement unit. If you do not want to change unit,
press SET BUTTON to skip this step. If you want to change unit, press
and hold the M BUTTON for 3 seconds to change the unit to mmol/L.
Press SET BUTTON to confirm and the meter will enter to next setting.
STEP 8. Delete Memory
When the dEL symbol and the flashing memory symbol appear on the
display, you can choose to clear the memory. If you do not want to clear
the memory, press the SET BUTTON again to skip this step. If you want
to clear ALL memory, press and hold M BUTTON for 4 seconds. The «—
-» image will appear on the LCD screen to indicate that all memory has
been deleted.
STEP 9. Complete Setting
After delete memory, the meter will display «OFF» before shut down.
The meter setting is now completed
IMPORTANT :
1.
The time, date and unit of measurement can ONLY be changed in the setting mode.
Therefore, when you perform a blood glucose testing, it is not possible to change those
parameters.
2.
Your meter displays 7, 14 and 28-day averages which you can access from the meter
memory. These averages are calculated from your latest result obtained during the last 7,
14 and 28 days.
3.
Your meter can display test result in milligram per deciliter (mg/dL) or millimoles per liter
(mmol/L). The mg/dL unit is standard in the United States. The mmol/L unit is standard
in Canada and European countries. Your meter has been preset at the factory with the
standard unit measurement used where you live. When you turn off the meter or replace
the battery, the unit will not be changed.
4.
Use of the wrong unit of measure may cause you to misinterpret your blood glucose
level, and may lead to incorrect treatment. Please always consult with your healthcare
professionals before you reset the unit of measure.
Setting your Lancing Device
1. Screw off the cap of lancing device. Insert a
lancet into the lancet holder and push down until
it is fully seated.
2. Twist off the protective cap until it separates from
the lancet.
3 . Replace the lancing device cap and set the
puncture depth to the desired number.
NOTE: THE DEPTH SELECTOR OFFERS 5 LEVELS OF SKIN
PENETRATION:
1-2 FOR SOFT OR THIN SKIN
3 FOR AVERAGE SKIN
4-5 FOR THICK OR CALLOUSED SKIN
4. Pull back the sliding barrel until it makes a click,
and then release. If it does not click, the device
may have been cocked when the lancet was
inserted.
Highest concentrations tested
at which no interference
≦ 5.0 mg/dL (0.32 mmol/L)
occured
≦ 3.0 mg/dL (0.39 mmol/L)
≦ 10 mg/dL (0.51 mmol/L)
≦ 900 mg/dL (26.3 mmol/L)
≦ 3.0 mg/dL (0.13 mmol/L)
≦ 400 mg/dL (14.8 mmol/L)
≦ 2,000 mg/dL (22.6 mmol/L)
≦ 8.0 mg/dL (0.48 mmol/L)
Адрес и график работы
Адрес
210009
г. Витебск
пр-т Фрунзе, 71В
E-mail
voed@vitebsk.by
info@voedvit.by
Время работы диспансера
Понедельник—пятница: 07:00–20:00
Суббота: 08:00–16:12
Время приема врачей
Понедельник—пятница: 08:00–20:00
Суббота: 08:00–16:00
Время работы лаборатории
Понедельник—пятница: 07:30–20:00 (забор крови 8.00-10.00)
Время забора анализов
Понедельник—пятница: 08:00–10:00
Телефоны для записи на прием
Предварительная запись на приём к врачу по телефону
8-0212-33-13-64 (регистратура)
с 08:00 до 19:00 кроме выходных и праздничных дней.
Предварительная запись на УЗИ (платно) по телефону
8-0212-33-13-67 (касса)
с 13:00 до 16:00 кроме выходных и праздничных дней.
Приём пациентов осуществляется по направлениям из поликлиник.
При обращении пациентов без направления прием и обследования осуществляются платно.
При обращении пациентов в диспансер при себе иметь документ, удостоверяющий личность (паспорт).
Всех приветствую!
В последнее время я стала очень заботиться о своем здоровье. Раньше я никогда не интересовала глюкоза. А как начались проблемы, то стала очень часто интересоваться этим и стала очень часто бегать по больницам для того, чтобы измерить уровень глюкозу. И порой я так уставала бегать по больницам и мне в голову пришло приобрести глюкометр. Я взяла себе самый бюджетный глюкометр MediCare BG-101.
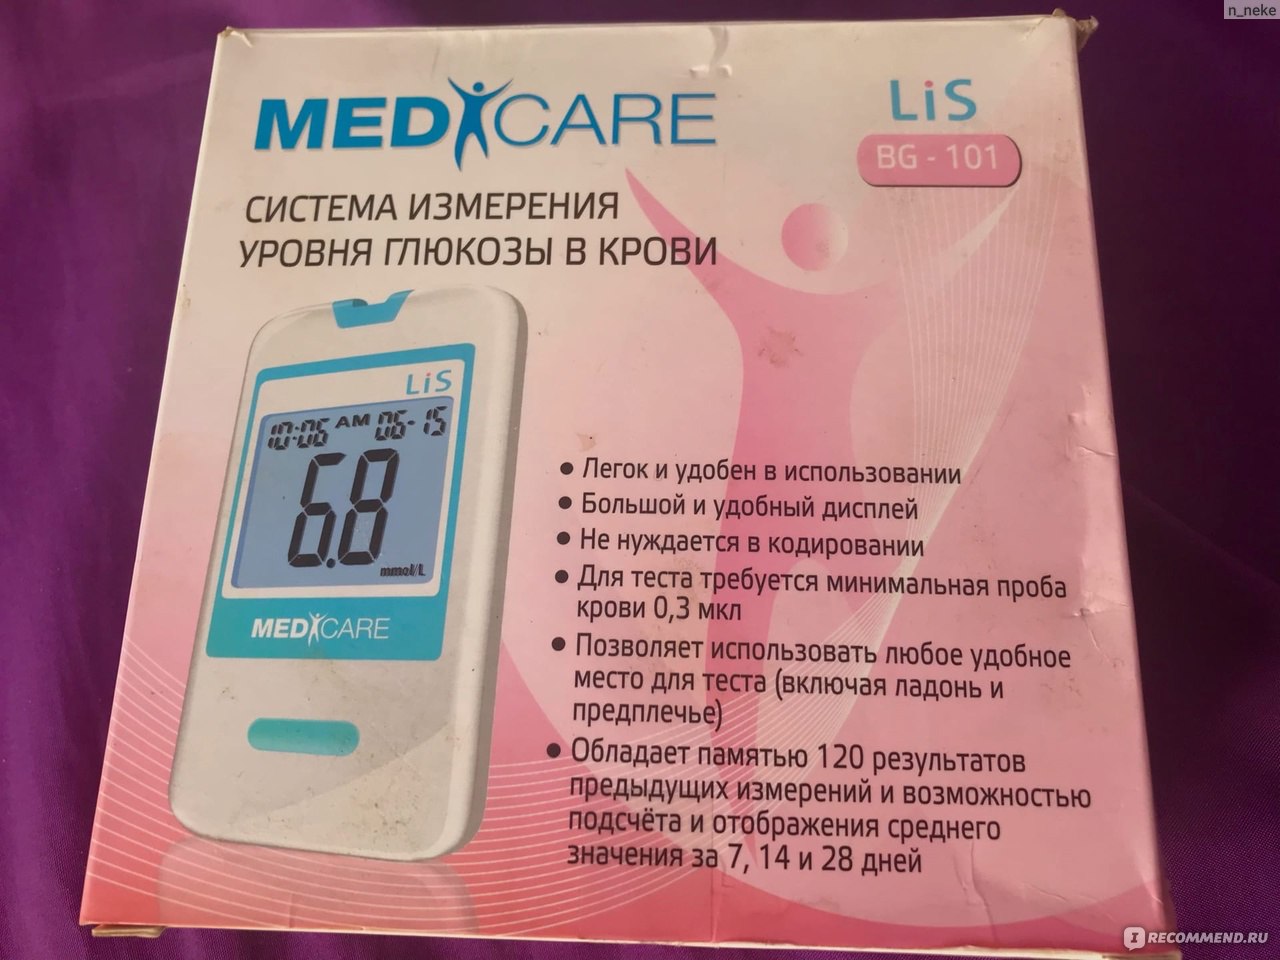
Глюкометр MediCare BG-101
Общие характеристики
- Тип прибора — глюкометр
- Время теста — 6 с
- Объем крови на одно измерение — 3 мкл
- Место приобретения — интернет-магазин OZON
- Цена — 552 рубля
- Назначение — для измерения уровня глюкозы
О приборе
Система измерения уровня глюкозы в крови Медикеа-Лис (MediCare – Lis) использует новейшие технологии, чтобы обеспечить Вам легкое и удобное измерение. Для проведения измерения и получения результата , требуется , всего 0,3 мкл крови и 6 секунд времени.
То есть этот прибор направлен исключительно на измерение глюкозы в крови. Кстати, меня очень удивило, что для определения результата необходимо всего 6 секунд, для меня это очень быстро.
О внешнем виде
Глюкометр находится в коробочке. Коробочка прямоугольная, представлена в розовом цвете. На этом глюкометре находятся его преимущества.

Глюкометр MediCare BG-101
К преимуществам относят:
— легкое и удобное использование
— обладает памятью 120 результатов
— позволяет использовать любое место для теста
— большой и удобный дисплей

Глюкометр MediCare BG-101
Нижняя часть коробки представлена условиями хранения системы, условиями эксплуатациями и условиями утилизации. Вся эта информация указана на желтом фоне.

Глюкометр MediCare BG-101
Боковая часть коробки представлена розовым цветом. На этой части расположена информация о приборах, которые входят в данный глюкометр. А также здесь указаны меры предосторожности этого глюкометра.

Глюкометр MediCare BG-101
А другая боковая часть представлена информацией о производителе этого глюкометра, а также информацией о применении.

Глюкометр MediCare BG-101
При открытии этого глюкометра можно заметить книжечку желтого цвета с инструкцией. Сама по себе крышечка небольшая, прямоугольной формы.
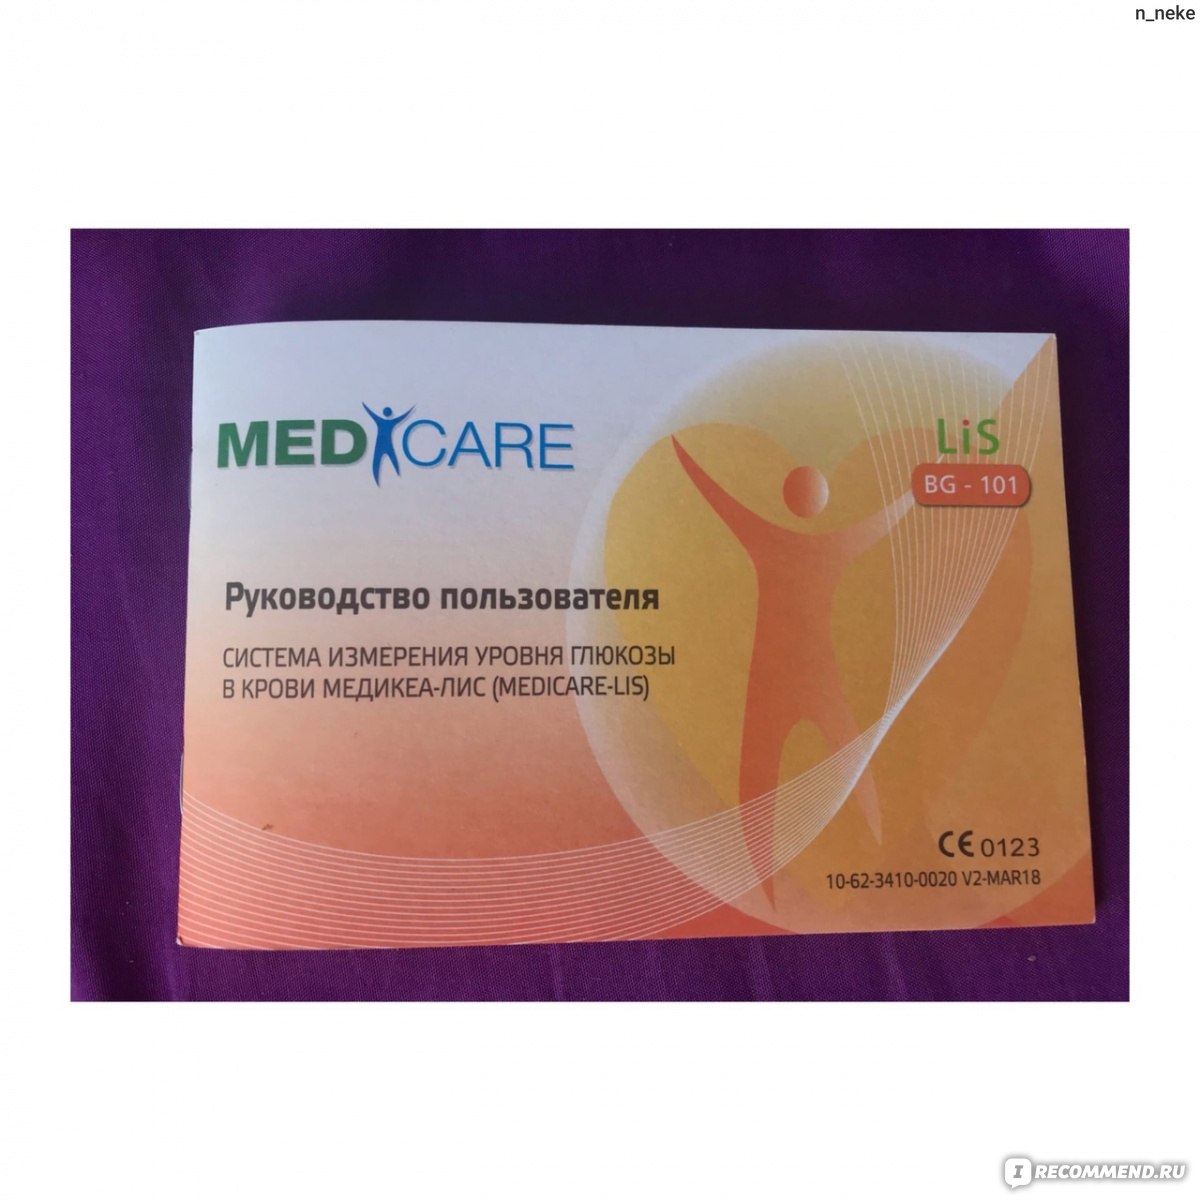
Инструкция
Также можно увидеть небольшой черный чемоданчик, в котором располагаются все составляющие глюкометра. Здесь находится 3 важных составляющих. Сам чемоданчик небольшой, внутри он тоже черный.

Глюкометр MediCare BG-101
Рассмотрим каждую составляющую глюкометра.
Баночка с тест-полосками. Представлена в черном цвете. На самой баночке находится белая этикетка с информацией. Здесь указана информация о названии данных полосок, о мерах предосторожности, а также об утилизации.

Баночка с тест-полосками


Тест-полоски
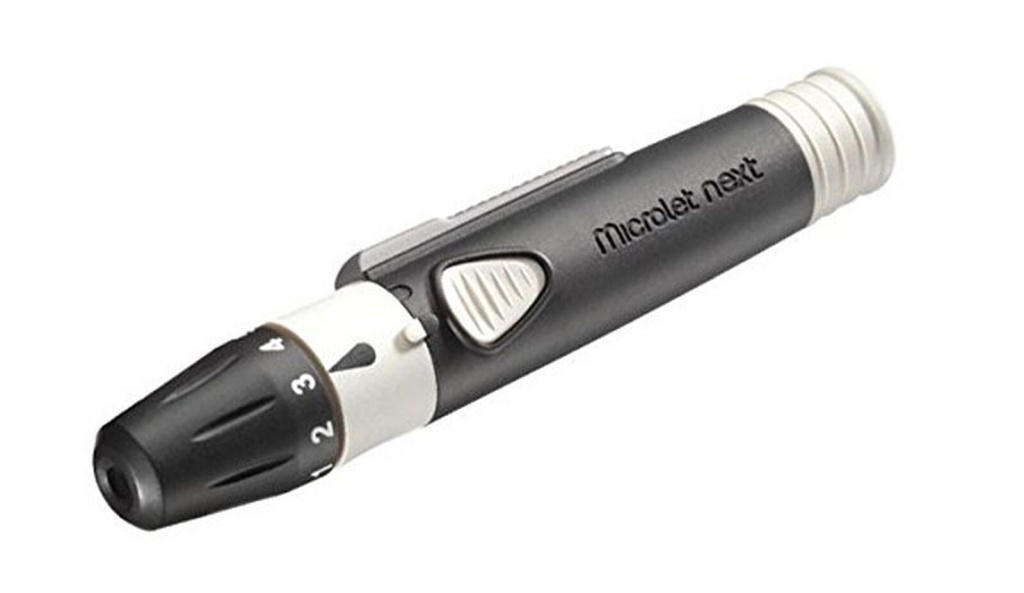
Шприц. Он представлена в белом и голубом цветах. Сам по себе пластиковый. Выглядит вполне себе стандартно. На этом шприце находятся цифры. Цифры указаны от 1 до 5.

Шприц

Сам глюкометр очень маленький по размеру. Экранчик небольшой, сам он цифровой. А еще на этом глюкометре располагается небольшая зеленая кнопочка. Данный глюкометр очень легко помещается в ладонь.

Глюкометр MediCare BG-101
А еще есть небольшой пакетик с синими штучками внутри.

Что я жду от глюкометра?
- Точного измерения глюкозы в крови
- Отсутствие ошибок
- Быстрый результат
- Долгое использование
- Удобство использования
Как я использую данный глюкометр?
- Перед непосредственным использованием глюкометра я мою руки с мылом. Затем я очень хорошо высушиваю руки и согреваю пальцы для прилива крови.
- После этого я извлекаю тест-полоску из упаковки (обязательно новую) и помещаю эту полоску в разъем глюкометра. После этого прибор сам включается. Хочу отметить, когда начинает мигать символ, то можно начинать работу.
- Затем я беру шприц и выбираю место прокола и нажимаю кнопку спуска ланцета.

- Потом я аккуратно массирую палец (для того, чтобы получить достаточное количество крови)
- Наношу кровь на тест полоску. Результат показывается через 6 секунд.
- На приборе спустя 6 секунд появляется результат.
- После всей процедуры я извлекаю тест-полоску из прибора (чтобы выключить его)
- И, конечно же, утилизирую использованный ланцет.


Уход за прибором, условия хранения и срок службы системы


Мои впечатления от использования
Данный глюкометр показывает результат действительно через 6 секунд после использования. Показывает все с точностью. Чтобы убедиться в точности результата я сначала проверяла в больнице а затем с помощью этого средства и все, конечно же, совпало.
Также мне понравилось удобное использование. Пользоваться этим прибором действительно очень даже удобно, не составляет никакой проблемы.
Вот только само прокалывание для меня было очень больно. Я тот человек, который резко на это реагирует. В первые разы у меня очень сильно кружилась голова и темнело в глазах (это все из-за того, что я пользовалась этим средством на голодный желудок). Даже в больницах у меня частенько был обморок после взятия крови.
А еще у этого глюкометра очень хорошая память, результат держится очень долго. Мне это очень понравилось. Можно сравнивать прежние результаты с нынешними.
Достоинства
- Быстрый результат
- Очень бюджетная цена
- Хорошая и долгая память
- Удобно брать с собой
Недостатки
- Может быть обморок
- Не всем легко будет пользоваться
Вывод
Данный глюкометр влюбил меня с первого применения! Благодаря этому глюкометру я могу узнавать свой результат в домашних результатах. Этот прибор очень экономит время и деньги. Так бы мне пришлось постоянно ездить в больницу и платить деньги за измерение глюкозы. Я считаю, что этот глюкометр самый лучший. У него хорошая память, а также очень бюджетная стоимость. Так что обязательно рекомендую!
SIDE
1 2
Before You Begin
PLEASE READ THIS BEFORE USING.
The following basic safety precautions should always be taken.
1. Close supervision is necessary when the device is used by, on, or near children,
handicapped persons or invalids.
2. Use the device only for the intended use described in this User Guide.
3. Do not use test strips and control solutions which are not supplied by the
manufacturer.
4. Do not use the device if it is not working properly, or if it has suffered any damage.
5. Before using any product to test your blood glucose, read all instructions
thoroughly and practice the test. Do all quality control checks as directed and
consult with a diabetes healthcare professional.
6. KEEP THIS USER GUIDE WITH YOU.
Intended Use
The system is intended for use outside the body (in vitro diagnostic use only).
It should be used only for testing blood glucose (blood sugar) and only with fresh
capillary whole blood samples. The system is intended for use in the home and in
clinical settings. It should not be used for the diagnosis of diabetes or for the testing of
newborns.
Principle of Measurement
Blood glucose is measured by an electrical current that is produced when a blood
Getting To Know Your System
The Medicare Blood Glucose Monitoring System-LiS
The Medicare System-LiS system uses the latest technology to provide you with
easy and comfortable testing. The system requires only a 0.3 μL of blood sample to
complete the testing in only 6 seconds.
samples mixes with the reagent (special chemicals) of the test strip. The electrical
current changes with the amount of glucose in the blood sample. The Medicare System-
LiS meter measures the strength of the electrical current, calculates your blood glucose
level and then displays your result in either milligrams of glucose per deciliter (mg/dL) or
millimoles of glucose per liter (mmol/L).
Caution
1. The user should not take any decision of medical relevance without rst consulting
his or her medical practitioner.
2. Call your doctor immediately if you experience symptoms that are not consistent with
your blood glucose test results.
3. High altitudes above than 3,402 meter (11,161 ft) may affect the test results.
4. Temperatures outside the range of 5°C to 45°C (41°F to 113°F) may affect the test
results. Do not test beyond of temperature range.
IMPORTANT HEALTH-RELATED INFORMATION
1. Apply only capillary whole blood sample to test your blood glucose. Applying other
substances or plasma, serum will cause wrong results.
2. Severe dehydration and excessive water loss may cause false low results. If
you believe you are suffering from severe dehydration, consult your healthcare
professional immediately.
3. Test results below 60 mg/dL (3.3 mmol/L)*1 indicates low blood glucose
(hypoglycemia). Test results greater than 240 mg/dL (13.3 mmol/L)*2 indicates high
blood glucose (hyperglycemia).If your results are below 60 mg/dL (3.3 mmol/L) or
above 240 mg/dL (13.3 mmol/L), repeat the test, and if the results are still below
60 mg/dL (3.3 mmol/L) or above 240 mg/dL (13.3 mmol/L), consult your healthcare
professional immediately.
4. Inaccurate results may occur in severely hypotensive individuals or patients
in shock. Inaccurate low results may occur for individuals experiencing a
hyperglycemic-hyperosmolar state, with or without ketosis. Critically ill patients
should not be tested with blood glucose meters.
5. Abnormal red blood cell counts (hematocrit level below 20% or above 60%) may
cause false results. Please consult your healthcare professional if you do not know
your hematocrit level.
6. Interference: Reducing substances occurring in the blood naturally (uric acid,
bilirubin) or from therapeutic treatments (ascorbic acid, acetaminophen) will
not significantly affect Medicare System-LiS test results. However, elevated
concentrations of these substances may affect test results. The compounds listed
in the tables were found to have no affect at the concentration indicated.
Compounds Highest concentrations
tested at which no
interference occured
Compounds Highest concentrations tested
at which no interference
occured
Acetaminophen
≦
8.0 mg/dL (0.53 mmol/L) Gentisic Acid
≦
5.0 mg/dL (0.32 mmol/L)
Ascorbic Acid
≦
5.0 mg/dL (0.28 mmol/L) Hydroxyurea
≦
3.0 mg/dL (0.39 mmol/L)
Aspirin
≦
60 mg/dL (3.33 mmol/L) L-dopa
≦
10 mg/dL (0.51 mmol/L)
Bilirubin
≦
90 mg/dL (1.54 mmol/L) Maltose
≦
900 mg/dL (26.3 mmol/L)
Cholesterol
≦
500 mg/dL (12.9 mmol/L) Methyldopa
≦
3.0 mg/dL (0.13 mmol/L)
Creatinine
≦
5.0 mg/dL (0.44 mmol/L) Tolbutamide
≦
400 mg/dL (14.8 mmol/L)
Dopamine
≦
2.0 mg/dL (0.11 mmol/L) Triglycerides
≦
2,000 mg/dL (22.6 mmol/L)
Galactose
≦
900 mg/dL (50 mmol/L) Uric Acid
≦
8.0 mg/dL (0.48 mmol/L)
REFERENCE:
* 1: Kahn, R. and Weir, G.: Joslinis Diabetes Mellitus, 13thed Philadelphia : Lea and Febiger (1994), 489.
* 2: Krall, L.P. and Beaser, R. S.: Joslin Diabetes Manual. Philadelphia : Lea and Febiger(1989), 261-263.
1. DATE: Display year, month and date.
2. TIME: The meter is programmed for a 12
hour period format.
3. AVERAGE: Appears when the meter is in the
memory mode while recalling 7/14/28 day test
averages.
4. MEMORY SYMBOL: Appears when in the
memory mode.
5. THERMOMETER SYMBOL: Appears when
ambient temperature is above or below the
acceptable range needed for testing.
6. CONTROL SOLUTION TEST SYMBOL:
Appears when you are in Control Solution
Mode. Your test result will not be stored in
meter memory.
7. UNIT OF MEASURE: Appears with the test result either in mg/dL or mmol/L.
8. BATTERY SYMBOL: Appears when battery is weak.
9. BLOOD DROP SYMBOL: Flashes when sample should be applied.
10. STRIP SYMBOL: Appears when the meter is turned on and waiting for inserting a
test strip.
1.
A
1
. Getting To Know Your System
2. Prepare For Blood Sampling
3. Performing Blood Test
4. Understanding Your Test Result
5. Memory Recall
6. Control Solution Testing
7. Caring For Your Meter And Test Strip
8. System Specifications
9. Display Messages And Problem-Solving Guide
SIDE
A :
SIDE
B :
Test Strip
ABSORBENT
CHANNEL:
Apply a drop of
blood here.
CONTACT BARS:
Insert this end into strip slot.
TEST STRIP HANDLE :
Hold this part to insert the test strip
into the meter slot.
CONFIRMATION WINDOW:
This is where we conrm if enough blood is applied for the
test. Ensure that it is fully covered with blood sample.
For
In vitro
diagnostic use Temperature limitation / Store at
Please consult instructions for use
Use by /Expiry date
Do not reuse
Manufacturer
Lot number
Caution, consult accompanying document
Keep dry Keep away from sunlight
Humidity limitation EU representative.
This product fulls the requirements of Directive 98/79/EC in vitro diagnostic medical device.
Performance Characteristics:
Accuracy:
≧
95% of the individual glucose results fell within ± 15 mg/dL(0.83 mmol/L) at glucose concentration <
75 mg/dL(or 4.2 mmol/L) and within ± 20% at glucose concentration
≧
75 mg/dL(or 4.2 mmol/L), compared with
glucose analyzer YSI 2300.
PRECISION: CVs (%) of intermediate precision and repeatability were less than 5%.
12
3
4
5
6
7
9
8
10
REPLACING THE BATTERY
1.The meter comes with ONE Lithium battery (battery type CR2032).
2.Battery life will vary depending on usage, so always keep a spare battery on hand.
The battery should last about 1000 tests or 12 months when testing 3 times a day.
3.When the battery symbol appears on the meter display, battery is getting low. You will
still be able to test with low battery, but you should replace it as soon as possible.
4.When battery symbol appears together with E-b on the display, the meter will no
longer give results and you must replace the battery immediately. Please always have
one spare battery with you to ensure that you can replace the battery anytime.
How to replace the battery
J7
1. Make sure the meter is turned off. Let the front of the meter
rest in the palm of your hand. Press the buckle on the battery
cover and lift up to open the cover. Remove the battery.
J7
2. With the plus (+) side up, place the battery (battery type
CR2032) in the compartment and slide it upwards until it is
locked into place. You should hear a beep to indicate the
battery installed correctly. If not, please replace the battery
correctly.
J7
3. Close battery cover.
NOTE:
1. Replacing the battery does not affect the test result stored in memory. However the
time and date may need to re-set.
2. As with all small objects, the battery should be kept away from small children as a
safety precaution. If the battery is swallowed, see medical assistance immediately.
3. Batteries might leak chemicals if not used for a long time. Remove the batteries if
you are not going to use the device for 3 months or more.
4.
Please discard the product or the batteries properly according to the regulations
of your country.
SETTING YOUR METER
Please install battery rst and set to correct settings before you begin to test.
J7
STEP 1. Enter Setting Mode
Start with the meter off. Open the battery compartment, and press SET
BUTTON. The meter will turn on and enter the setting mode.
STEP 2. Set the Year
The year appears with the number ashing. Press and release the M
BUTTON to obtain the desired year. Press SET BUTTON to confirm
and move to next MONTH setting.
STEP 3. Set the Month
The month appears with the number ashing. Press and release the M
BUTTON to obtain the desired month. Press SET BUTTON to conrm
and move to next DATE setting.
STEP 4. Set the Date
The date appears with the number flashing. Press and flash the M
BUTTON to obtain the desired date. Press SET BUTTON to confirm
and move to next HOUR setting.
STEP 5. Set the Hour
The hour appears with the number ashing. Press and release the M
BUTTON to obtain the desired hour. Press SET BUTTON to confirm
and move to next minutes setting.
STEP 6. Set the Minute
The minute appears with the number ashing. Press and release the M
BUTTON to obtain the desired minute. Press SET BUTTON to conrm
and the meter will enter to next unit setting.
STEP 7. Set the Unit of Measurement
The existing unit (for example mg/dL) will appear and ash. You can
choose to reset measurement unit. If you do not want to change unit,
press SET BUTTON to skip this step. If you want to change unit, press
and hold the M BUTTON for 3 seconds to change the unit to mmol/L.
Press SET BUTTON to conrm and the meter will enter to next setting.
STEP 8. Delete Memory
When the dEL symbol and the ashing memory symbol appear on the
display, you can choose to clear the memory. If you do not want to clear
the memory, press the SET BUTTON again to skip this step. If you want
to clear ALL memory, press and hold M BUTTON for 4 seconds. The “—
-“ image will appear on the LCD screen to indicate that all memory has
been deleted.
STEP 9. Complete Setting
After delete memory, the meter will display “OFF” before shut down.
The meter setting is now completed
IMPORTANT :
1.
The time, date and unit of measurement can ONLY be changed in the setting mode.
Therefore, when you perform a blood glucose testing, it is not possible to change those
parameters.
2.
Your meter displays 7, 14 and 28-day averages which you can access from the meter
memory. These averages are calculated from your latest result obtained during the last 7,
14 and 28 days.
3.
Your meter can display test result in milligram per deciliter (mg/dL) or millimoles per liter
(mmol/L). The mg/dL unit is standard in the United States. The mmol/L unit is standard
in Canada and European countries. Your meter has been preset at the factory with the
standard unit measurement used where you live. When you turn off the meter or replace
the battery, the unit will not be changed.
4.
Use of the wrong unit of measure may cause you to misinterpret your blood glucose
level, and may lead to incorrect treatment. Please always consult with your healthcare
professionals before you reset the unit of measure.
BLOOD GLUCOSE
MONITORING SYSTEM
BG — 101
USER GUIDE
J7
MC14EL005001
Model Name: BG-101
OK Biotech Co., Ltd.
Hsinchu, Taiwan
10-62-3463-0003
V1-JUL11
Meter
DISPLAY :
The large, easy to
read display shows
test results, messages,
test results stored in
memory.
STRIP SLOT :
Insert the test strip here. The meter will
turn on automatically.
METER LABEL:
Each meter has its unique number on it. It can be
used when you want to obtain warranty service.
Please do not alter or tear the label off.
M BUTTON:
Main button, press button to turn the meter on
or perform other functions described in this User
Guide.
SET BUTTON:
Located in
the battery
compartment; press
button to enter
meter setting. Refer
to “SETTING YOUR
METER” section of
this user guide for
details.
BATTERY COMPARTMENT :
Holds one 3V Lithium battery (CR2032).
Protective cap
Lancet
Important Lancing Device and Lancets Information
1. Lancet is for single use only.
2. Keep lancing device and lancets clean.
3. Use caution when removing the used lancet from the device and when disposing the
used lancet.
IMPORTANT :
The meter and lancing device are for single patient use.
Do NOT share them with anyone including other family members !
Do NOT use on multiple patients !
Setting your Lancing Device
1. Screw off the cap of lancing device. Insert a
lancet into the lancet holder and push down until
it is fully seated.
2. Twist off the protective cap until it separates from
the lancet.
4
5
3.Replace the lancing device cap and set the
puncture depth to the desired number.
NOTE: THE DEPTH SELECTOR OFFERS 5 LEVELS OF SKIN
PENETRATION:
1-2 FOR SOFT OR THIN SKIN
3 FOR AVERAGE SKIN
4-5 FOR THICK OR CALLOUSED SKIN
1
2
4. Pull back the sliding barrel until it makes a click,
and then release. If it does not click, the device
may have been cocked when the lancet was
inserted.
Prepare For Blood Sampling
Adjustable Lancing Device
Your lancing device and lancets are used for obtaining
capillary blood samples from the puncture site.
2
.
Lancet Holder
Lancing
Device Cap
Depth Selector
Release Button
Lancet Ejector
Sliding Barrel
OK Biotech Co., Ltd.
No. 91, Sec. 2, Gongdao 5th Road,
30070 Hsinchu City, TAIWAN
www.okbiotech.com
MDSS GmbH
Schiffgraben 41, 30175 Hannover, GERMANY
L-Tac MediCare Pte Ltd
25 Mandai Estate #07-11
Innovation Place Tower 1
Singapore 729930
Tel: +65 6334 2273
Fax: +65- 6863 8190
www.medicare-l-tac.com.sg
10-62-3412-0003 V2-JUL15
SIDE
Display Messages And Problem-Solving Guide
9
.
Control Solution Testing
If your Medicare control solution did not come with an Medicare control solution
Instruction, the following information shall take the place of the instruction.
Medicare control solutions contain a pre-set amount of glucose that reacts with
OKmeter test strips. By testing your control solution and comparing the test results
with the expected range printed on the test strip vial label, you can make sure that the
meter and the test strips are working properly together as a system and that you are
performing the test correctly.
Why perform a control solution test?
1. To ensure that your meter and test strip are working properly together.
2. To allow you to practice testing without using your own blood.
When should the control solution test be performed?
1. Whenever you suspect that the meter or test strips are not working properly.
2. When your blood glucose test results are not consistent with how you feel, or
when you think your results are not accurate.
3. When test strips are exposed to extreme environmental conditions.
4. If you drop the meter.
5. After changing the battery.
Important Control Solution Information
1. Check the expiration date on the control solution bottle. Do not use if expired.
2. Control solution, meter, and test strips should come to room temperature (68-
77 ºF/20-25ºC) before testing.
3. Shake the bottle before use, discard the first drop of control solution after
squeezing, wipes off the dispenser tip to avoid contaminations. These steps
ensure you will get a good sample and an accurate result.
4. Record the discard date on the bottle when you open a new bottle of control
solution.
NOTE :
1. There are two levels of control solution (normal and high) available to purchase.
Please contact with your local distributor when required.
2. The control solution range printed on the test strip vial is for Medicare control solution
only. It is used to test meter and strip performance. It is not recommended range for
your blood glucose level.
Composition:
1. D-Glucose
2. Polyvinyl acetate (aqueous emulsion)
3. Fumed silica
4. Sodium Benzoate
5. Disodium EDTA
6. Food Pigment Red No.6
7. Antifoaming agent
(Polyethylene Glycol 4000)
How to Perform a Control Test
NOTE :
1. Be sure that you are in Control Solution Mode so that the test result will not be stored
in themeter memory.
2. DO NOT APPLY THE CONTROL SOLUTION DIRECTLY TO THE TEST STRIP!
Overdosed solution may give inaccurate result.
3. Repeat test if test result falls outside the control range stated on the test strip label. If
subsequent test remains to produce unacceptable result, the meter or test strip may
be faulty. DO NOT use the system. Contact us or your local distributor for help.
1. Insert Test Strip : Insert a new test strip into the strip slot,
the meter will activate.
2. Mark as a Control Solution Test : After the blood
symbol(
) appears, press M BUTTON and a CONTROL
SOLUTION TEST SYMBOL(
) shows up, now you are in
the Control Solution Mode. The meter will not store your
test result in the memory when you preset the test as a
control solution test. If you decide not to perform a control
solution test, press M BUTTON again and the CONTROL
SOLUTION TEST SYMBOL (
) will disappear.
3. Squeeze a drop of Control Solution : Shake control
solution bottle well. Remove the cap. Squeeze bottle,
discard the rst drop and wipe off the dispenser tip with
a clean tissue paper or cotton swab. Squeeze a drop on
clean bottle cap/ngertip /non-absorbent surface.
4. Apply Control Solution : Apply the drop to the opening
of the strip absorbent channel until the confirmation
window is lled. The meter begins to count down.
5. Check if the test result is in range: After the meter
counts down, the test result shows up. Compare the test
result with the range printed on the test strip vial. The
result should fall within the printed range.
6
.
The following is a summary of some display messages and symbols. These messages
help to identify certain problems but do not appear in all cases when a problem has
occurred.
Improper use may cause an inaccurate result without producing an error message.
In the event of a problem, refer to information under ‘‘action to take’’
DISPLAY DESCRIPTION ACTION TO TAKE
Display check
If some parts of the display are not
working. Contact your local distributor
for help.
Moving Strip
The meter is waiting for test strip to be
inserted.
Blinking Blood
The meter is ready for blood applying
into test strip.
Deleting memory Deleting is complete.
Test result is higher than
600 mg/dL (33.3 mmol/L).
If this is not conrmed by the way you
feel, review proper testing procedure
and perform a control test. Repeat blood
test, if the display still appears, please
call medical assistance immediately.
Test result is lower than
20 mg/dL (1.1 mmol/L).
If this is not conrmed by the way you
feel, review proper testing procedure
and perform a control test. Repeat blood
test, if the display still appears, please
call medical assistance immediately.
B
System Specifications
Model Name BG-101
Assay Method Electrochemical biosensor
Test Sample Capillary Whole Blood
Test Result Referenced to plasma glucose value
Alternative Site Testing YES (palm, forearm)
Sample Size 0.3 μL
Measuring Time 6 seconds
Measuring Range 20 – 600 mg/dL (1.1 – 33.3 mmol/L)
Acceptable Hematocrit Range 20~60%
Operating Condition 10°C~40°C (50°F~104°F), between 10-85% R. H.
Storage/Transportation Condition
4°C~40°C (39°F~104°F), between 10-85% R. H.
Memory Capacity 120 test results with time and date
Average Calculation 7, 14, and 28 days
Power Supply One 3-volt Lithium Battery (battery type CR2032)
Battery Life Approximately 1,000 tests
Automatic shut-off In 2 minutes
Dimensions 80 mm(L)x 48 mm(W) x 15 mm(H)
Weight 37 g
Memory Recall
The Medicare System-LiS automatically stores 120 test results, letting you review
them in order from the most recent to the oldest. The meter also calculates and
displays 7, 14 and 28-day averages. You can review the individual or average test
result by entering the memory mode.
STEP 1. Enter the Memory Mode
While the meter is turned off, press M BUTTON to turn on the
meter. When the strip symbol blinks in the display, press M
BUTTON again to enter memory mode.
STEP 2. Recalling Average Test Results
When entering the memory mode, the 7-day average will
appear. If you continue to press the M BUTTON, the 14-day
and 28-day averages will appear in order.
STEP 3. Recalling Individual Test Results
After 28-day average, the most recent test result with date
and time will be shown. Press M BUTTON once and the next
most recent test result will appear. Each time you press and
release the M BUTTON, the meter will recall up to your last
120 test results in order. When the memory is full, the oldest
result is dropped as the newest is added. After reaching the
last set of result, the meter will turn off automatically.
STEP 4. Exit the Memory Mode
If you want to exit the memory mode before reaching the last
result, press and hold M BUTTON for three (3) seconds to
turn off the meter.
NOTE :
1.
The control solution results are NOT stored in the memory if you preset the
control test correctly. (Please refer to the “CONTROL SOLUTION TEST” Section
for details). The list of past results and the result average are for blood glucose
results only.
2.
When using the meter for the rst time, ‘‘—-‘’ is displayed. When you recall the
test results or review the average result, it means that there is no test result in
memory.
3.
The averages are calculated from your latest result obtained during the last 7, 14
and 28 days.
4.
Anytime in memory mode, you can press M BUTTON for three (3) seconds to
exit and turn off the meter.
5.
While in the memory mode, if you leave the meter alone without any action for
one (1) minute, the meter will turn off automatically.
5
.
Understanding Your Test Result
The normal blood glucose range is below 100 mg/dL (5.6 mmol/L) for a
fasting, non-diabetic adult, but less than 140 mg/dL (7.8 mmol/L) two hours
after meals.* Consult your healthcare professional to nd out your target blood
glucose value.
If your blood glucose result seems unusually high or low, or inconsistent with
your previous results, check the following:
1. Was the blood sample applied immediately to the test strip after removing it
from the vial?
2. Was the volume of the blood sample sufcient?
3. Was the test strip vial cap tightly sealed?
4. Was the test strip used before the expiration date?
5. Were the test strips stored away from extreme temperatures in very cold or
hot weather or from areas of high humidity?
Then run a control test with Medicare control solution. If the control test result
is within the acceptable range, review testing procedure and repeat your blood
glucose test with a new test strip. If your blood glucose value is still inconsistent
with your previous results, glucose trend, or how you feel, contact your doctor
immediately for help.
REFERENCE:
*American Diabetes Association (http://www.diabetes.org/diabetes-basics/prevention/pre-diabetes/diagnosis.html)
4
.
DISPLAY DESCRIPTION ACTION TO TAKE
Battery is weak. Replace battery soon.
Battery is dead. Replace battery now.
Maybe:
1. Used strip or
moistened strip is
inserted.
2. Meter is defective.
You have to:
1. Repeat test with a new test strip.
2. Contact your local distributor for
help.
Temperature is out of the
operating range.
The meter is not working. Move to an
area with temperature between 10ºC to
40ºC (50ºF — 104ºF) and wait at least 30
minutes. Do not articially heat or cool
the meter.
No responses
when strip is
inserted into
the meter
Maybe:
1. Battery is dead.
2. Wrong strip be
inserted.
3. Meter is defective.
You have to:
1. Replace battery.
2. Insert the test strip correctly.
3. Contact your local distributor for
help.
No responses
when blood
sample is
applied to the
strip
Maybe:
1. Blood sample is not
sufcient.
2. Meter is defective.
You have to:
1. Repeat test with sufcient
sample.
2. Contact your local distributor for
help.
Performing Blood Test
1. Wash Your Hands and the Puncture Site : Wash
your hands in warm, soapy water. Rinse and dry
completely. Warm your ngers to increase blood ow.
2. Insert Test Strip : Remove a new test strip from vial.
Be sure to tightly replace vial cap after removing test
strips. Insert test strip immediately into strip slot as
illustrated. The meter turns on automatically. When the
blood symbol blinking, you are ready to perform a test.
3. Select and Lance a Puncture Site
*For Fingertip
Hold the prepared lancing device firmly against the
side of your ngertip. Press release button.
*For AST
Please refer to the “About Alternative Site Testing
(AST)” Section. Please consult your healthcare
professional before obtaining blood from site other
than your ngertip.
4. Obtain a Blood Sample : Gently massage your nger
or puncture site to obtain the required blood volume.
To perform the test, you need only 0.3 μL of blood
sample. Do not smear the blood sample. To obtain
best accurate result, wipe off the rst drop of blood and
gently squeeze another drop of blood.
5. Apply Blood Sample : Apply the blood sample to the
opening of absorbent channel of test strip until the
conrmation window is fully covered with blood. Then
the meter begins to count down.
6. Read Your Result :
The meter will display your blood glucose value after 6
seconds.
7. Remove Strip to Turn Meter Off :
Your blood glucose result is automatically stored in the
meter memory. Turn the meter off by removing the test
strip.
8.
Secure the Used Lancet
: Twist off the lancing device
cap, and push the exposed tip of the lancet into its
protective cap.
9.
Discard the Used Lancet :
Slide the lancet ejector
forward and dispose the lancet. Discard the lancet
according to your safety regulations.
* Do not reuse lancets.
Incorrect
Correct
3
.
90°
To avoid the meter and test strips getting dirt, dust or other contaminants, please
wash and dry your hands thoroughly before use.
Cleaning
Your meter does not require special maintenance. As long as no blood or control
solution comes in direct contact with the meter, there is no special cleaning
required.
To clean the meter exterior, wipe with a cloth moistened with tap water or a mild
cleaning agent, then dry the device with a soft and dry cloth. Do not flush with
water.
Do not use organic solvents to clean the meter. Your meter is a precision
instrument. Please handle it with care.
Storage
1. Meter Storage
* Storage condition: -20ºC~50ºC (-4ºF~122ºF), below 90% relative humidity.
* Avoid dropping and strong impact.
* Avoid direct sunlight and humidity.
2. Strip Storage
* Storage condition: 4°C~40°C (39°F~104°F), and 10~85% relative humidity. Do
not freeze.
* Store your test strips in their original vial only. Do not transfer to other
container.
* Store test strip packages in a cool and dry place. Keep away from direct
sunlight and heat.
* After removing a test strip from the vial, immediately replace the vial cap and
close it tightly.
* You may touch the test strip anywhere with clean, dry hands when removing it
from the vial or inserting it into the meter.
* Use each test strip immediately after removing it from the vial.
* Do not bend, cut, or alter a test strip in any way.
* Keep the strip vial away from children since the cap and the test strip can be
a potential choking hazard. If swallowed, please seek medical assistance
immediately.
3. Control solution storage
* Store the control solution in a cool, dry place between 4°C (39°F) and 30°C
(86°F).
Caring For Your Meter And
Test Strip
8
.
7
.
4 5
3
.
Performing Blood Test
1. Wash Your Hands and the Puncture Site : Wash
your hands in warm, soapy water. Rinse and dry
completely. Warm your fingers to increase blood flow.
2. Insert Test Strip : Remove a new test strip from vial.
Be sure to tightly replace vial cap after removing test
strips. Insert test strip immediately into strip slot as
illustrated. The meter turns on automatically. When the
blood symbol blinking, you are ready to perform a test.
3. Select and Lance a Puncture Site
*For Fingertip
Hold the prepared lancing device firmly against the
side of your fingertip. Press release button.
*For AST
Please refer to the «About Alternative Site Testing
(AST)» Section. Please consult your healthcare
professional before obtaining blood from site other
than your fingertip.
4. Obtain a Blood Sample : Gently massage your finger
or puncture site to obtain the required blood volume.
To perform the test, you need only 0.3 μL of blood
sample. Do not smear the blood sample. To obtain
best accurate result, wipe off the first drop of blood and
gently squeeze another drop of blood.
5. Apply Blood Sample : Apply the blood sample to the
opening of absorbent channel of test strip until the
confirmation window is fully covered with blood. Then
the meter begins to count down.
6. Read Your Result :
The meter will display your blood glucose value after 6
seconds.
6
.
Control Solution Testing
If your Medicare control solution did not come with an Medicare control solution
Instruction, the following information shall take the place of the instruction.
Medicare control solutions contain a pre-set amount of glucose that reacts with
OKmeter test strips. By testing your control solution and comparing the test results
with the expected range printed on the test strip vial label, you can make sure that the
meter and the test strips are working properly together as a system and that you are
performing the test correctly.
Why perform a control solution test?
1. To ensure that your meter and test strip are working properly together.
2. To allow you to practice testing without using your own blood.
When should the control solution test be performed?
1. Whenever you suspect that the meter or test strips are not working properly.
2. When your blood glucose test results are not consistent with how you feel, or
when you think your results are not accurate.
3. When test strips are exposed to extreme environmental conditions.
4. If you drop the meter.
5. After changing the battery.
Important Control Solution Information
1. Check the expiration date on the control solution bottle. Do not use if expired.
2. Control solution, meter, and test strips should come to room temperature (68-
77 ºF/20-25ºC) before testing.
3. Shake the bottle before use, discard the first drop of control solution after
squeezing, wipes off the dispenser tip to avoid contaminations. These steps
ensure you will get a good sample and an accurate result.
4. Record the discard date on the bottle when you open a new bottle of control
solution.
NOTE : 1. There are two levels of control solution (normal and high) available to purchase.
Please contact with your local distributor when required.
2. The control solution range printed on the test strip vial is for Medicare control solution
only. It is used to test meter and strip performance. It is not recommended range for
your blood glucose level.
Composition:
1. D-Glucose
5. Disodium EDTA
2. Polyvinyl acetate (aqueous emulsion)
6. Food Pigment Red No.6
3. Fumed silica
7. Antifoaming agent
4. Sodium Benzoate
(Polyethylene Glycol 4000)
9
.
Display Messages And Problem-Solving Guide
The following is a summary of some display messages and symbols. These messages
help to identify certain problems but do not appear in all cases when a problem has
occurred.
Improper use may cause an inaccurate result without producing an error message.
In the event of a problem, refer to information under »action to take»
DISPLAY
DESCRIPTION
If some parts of the display are not
Display check
working. Contact your local distributor
for help.
The meter is waiting for test strip to be
Moving Strip
inserted.
The meter is ready for blood applying
Blinking Blood
into test strip.
Deleting memory
Deleting is complete.
If this is not confirmed by the way you
feel, review proper testing procedure
Test result is higher than
and perform a control test. Repeat blood
600 mg/dL (33.3 mmol/L).
test, if the display still appears, please
call medical assistance immediately.
If this is not confirmed by the way you
feel, review proper testing procedure
Test result is lower than
and perform a control test. Repeat blood
20 mg/dL (1.1 mmol/L).
test, if the display still appears, please
call medical assistance immediately.
4
.
The normal blood glucose range is below 100 mg/dL (5.6 mmol/L) for a
fasting, non-diabetic adult, but less than 140 mg/dL (7.8 mmol/L) two hours
after meals.* Consult your healthcare professional to find out your target blood
Incorrect
Correct
glucose value.
If your blood glucose result seems unusually high or low, or inconsistent with
your previous results, check the following:
1. Was the blood sample applied immediately to the test strip after removing it
from the vial?
2. Was the volume of the blood sample sufficient?
3. Was the test strip vial cap tightly sealed?
90°
4. Was the test strip used before the expiration date?
5. Were the test strips stored away from extreme temperatures in very cold or
hot weather or from areas of high humidity?
Then run a control test with Medicare control solution. If the control test result
is within the acceptable range, review testing procedure and repeat your blood
glucose test with a new test strip. If your blood glucose value is still inconsistent
with your previous results, glucose trend, or how you feel, contact your doctor
immediately for help.
REFERENCE:
*American Diabetes Association (http://www.diabetes.org/diabetes-basics/prevention/pre-diabetes/diagnosis.html)
How to Perform a Control Test
NOTE :
1. Be sure that you are in Control Solution Mode so that the test result will not be stored
in themeter memory.
2. DO NOT APPLY THE CONTROL SOLUTION DIRECTLY TO THE TEST STRIP!
Overdosed solution may give inaccurate result.
3. Repeat test if test result falls outside the control range stated on the test strip label. If
subsequent test remains to produce unacceptable result, the meter or test strip may
be faulty. DO NOT use the system. Contact us or your local distributor for help.
DISPLAY
Battery is weak.
ACTION TO TAKE
Battery is dead.
Maybe:
1. Used strip or
2. Meter is defective.
Temperature is out of the
operating range.
Maybe:
No responses
1. Battery is dead.
when strip is
2. Wrong strip be
inserted into
the meter
3. Meter is defective.
No responses
Maybe:
when blood
1. Blood sample is not
sample is
applied to the
2. Meter is defective.
strip
7. Remove Strip to Turn Meter Off :
Your blood glucose result is automatically stored in the
meter memory. Turn the meter off by removing the test
strip.
8. Secure the Used Lancet : Twist off the lancing device
cap, and push the exposed tip of the lancet into its
protective cap.
9. Discard the Used Lancet : Slide the lancet ejector
forward and dispose the lancet. Discard the lancet
according to your safety regulations.
* Do not reuse lancets.
1. Insert Test Strip : Insert a new test strip into the strip slot,
the meter will activate.
2. Mark as a Control Solution Test : After the blood
symbol( ) appears, press M BUTTON and a CONTROL
SOLUTION TEST SYMBOL( ) shows up, now you are in
the Control Solution Mode. The meter will not store your
test result in the memory when you preset the test as a
control solution test. If you decide not to perform a control
solution test, press M BUTTON again and the CONTROL
SOLUTION TEST SYMBOL ( ) will disappear.
3. Squeeze a drop of Control Solution : Shake control
solution bottle well. Remove the cap. Squeeze bottle,
discard the first drop and wipe off the dispenser tip with
a clean tissue paper or cotton swab. Squeeze a drop on
clean bottle cap/fingertip /non-absorbent surface.
4. Apply Control Solution : Apply the drop to the opening
of the strip absorbent channel until the confirmation
window is filled. The meter begins to count down.
5. Check if the test result is in range: After the meter
counts down, the test result shows up. Compare the test
result with the range printed on the test strip vial. The
result should fall within the printed range.
DESCRIPTION
ACTION TO TAKE
Replace battery soon.
Replace battery now.
You have to:
1. Repeat test with a new test strip.
moistened strip is
2. Contact your local distributor for
inserted.
help.
The meter is not working. Move to an
area with temperature between 10ºC to
40ºC (50ºF — 104ºF) and wait at least 30
minutes. Do not artificially heat or cool
the meter.
You have to:
1. Replace battery.
2. Insert the test strip correctly.
inserted.
3. Contact your local distributor for
help.
You have to:
1. Repeat test with sufficient
sample.
sufficient.
2. Contact your local distributor for
help.
5
.
Memory Recall
The Medicare System-LiS automatically stores 120 test results, letting you review
them in order from the most recent to the oldest. The meter also calculates and
displays 7, 14 and 28-day averages. You can review the individual or average test
result by entering the memory mode.
STEP 1. Enter the Memory Mode
While the meter is turned off, press M BUTTON to turn on the
meter. When the strip symbol blinks in the display, press M
BUTTON again to enter memory mode.
STEP 2. Recalling Average Test Results
When entering the memory mode, the 7-day average will
appear. If you continue to press the M BUTTON, the 14-day
and 28-day averages will appear in order.
STEP 3. Recalling Individual Test Results
After 28-day average, the most recent test result with date
and time will be shown. Press M BUTTON once and the next
most recent test result will appear. Each time you press and
release the M BUTTON, the meter will recall up to your last
120 test results in order. When the memory is full, the oldest
result is dropped as the newest is added. After reaching the
last set of result, the meter will turn off automatically.
STEP 4. Exit the Memory Mode
If you want to exit the memory mode before reaching the last
result, press and hold M BUTTON for three (3) seconds to
turn off the meter.
NOTE :
1.
The control solution results are NOT stored in the memory if you preset the
control test correctly. (Please refer to the «CONTROL SOLUTION TEST» Section
for details). The list of past results and the result average are for blood glucose
results only.
2.
When using the meter for the first time, »—-» is displayed. When you recall the
test results or review the average result, it means that there is no test result in
memory.
3.
The averages are calculated from your latest result obtained during the last 7, 14
and 28 days.
4.
Anytime in memory mode, you can press M BUTTON for three (3) seconds to
exit and turn off the meter.
5.
While in the memory mode, if you leave the meter alone without any action for
one (1) minute, the meter will turn off automatically.
7
.
Caring For Your Meter And
To avoid the meter and test strips getting dirt, dust or other contaminants, please
wash and dry your hands thoroughly before use.
Cleaning
Your meter does not require special maintenance. As long as no blood or control
solution comes in direct contact with the meter, there is no special cleaning
required.
To clean the meter exterior, wipe with a cloth moistened with tap water or a mild
cleaning agent, then dry the device with a soft and dry cloth. Do not flush with
water.
Do not use organic solvents to clean the meter. Your meter is a precision
instrument. Please handle it with care.
Storage
1. Meter Storage
* Storage condition: -20ºC~50ºC (-4ºF~122ºF), below 90% relative humidity.
* Avoid dropping and strong impact.
* Avoid direct sunlight and humidity.
2. Strip Storage
* Storage condition: 4°C~40°C (39°F~104°F), and 10~85% relative humidity. Do
not freeze.
* Store your test strips in their original vial only. Do not transfer to other
container.
* Store test strip packages in a cool and dry place. Keep away from direct
sunlight and heat.
* After removing a test strip from the vial, immediately replace the vial cap and
close it tightly.
* You may touch the test strip anywhere with clean, dry hands when removing it
from the vial or inserting it into the meter.
* Use each test strip immediately after removing it from the vial.
* Do not bend, cut, or alter a test strip in any way.
* Keep the strip vial away from children since the cap and the test strip can be
a potential choking hazard. If swallowed, please seek medical assistance
immediately.
3. Control solution storage
* Store the control solution in a cool, dry place between 4°C (39°F) and 30°C
(86°F).
8
.
System Specifications
Model Name
BG-101
Assay Method
Electrochemical biosensor
Test Sample
Capillary Whole Blood
Test Result
Referenced to plasma glucose value
Alternative Site Testing
YES (palm, forearm)
Sample Size
0.3 μL
Measuring Time
6 seconds
Measuring Range
20 – 600 mg/dL (1.1 – 33.3 mmol/L)
Acceptable Hematocrit Range 20~60%
Operating Condition
10°C~40°C (50°F~104°F), between 10-85% R. H.
Storage/Transportation Condition 4°C~40°C (39°F~104°F), between 10-85% R. H.
Memory Capacity
120 test results with time and date
Average Calculation
7, 14, and 28 days
Power Supply
One 3-volt Lithium Battery (battery type CR2032)
Battery Life
Approximately 1,000 tests
Automatic shut-off
In 2 minutes
Dimensions
80 mm(L)x 48 mm(W) x 15 mm(H)
Weight
37 g
Test Strip
Как пользоваться глюкометром
Статью подготовил Кривогуз И.М., семейный врач, инфекционист.
Специально для сайта medprostor.by
Содержание:
- Что такое глюкометр, принцип действия?
- Как правильно настроить глюкометр?
- Как правильно пользоваться глюкометром?
- Краткое описание
Любые нарушения обмена углеводов, включая сахарный диабет 1 или 2 типа, требуют контроля уровня глюкозы в крови. Для этого применяется прибор глюкометр. Как пользоваться полосками и самим аппаратом, калибровать его для получения достоверных результатов указано в инструкции. В целом большинство приборов имеют сходства в принципе определения глюкозы и использовании.

Что такое глюкометр, принцип действия?
Глюкометр – это прибор, при помощи которого проводится определение уровня глюкозы в крови. Все современные приборы осуществляют измерения, основываясь на 3 принципах действия:
-
Фотометрия – по силе изменения цвета реагента после контакта с кровью определяется концентрация глюкозы.
-
Биосенсорное измерение – кровь наносится на полоску, глюкоза реагирует с определенным соединением, что приводит к изменению электрического потенциала, который регистрируется прибором.
-
Электрохимическое определение (кулонометрия) – анализ концентрации глюкозы осуществляется за счет подсчета общего заряда электронов после реакции крови с определенными соединениями.
Для получения достоверного результата важно правильно использовать глюкометр. Инструкция по применению содержит всю информацию об этапах определения глюкозы в крови, а также калибровки прибора.
Как правильно настроить глюкометр?
Перед первым использованием каждый прибор должен быть правильно настроен. Практически во всех глюкометрах, независимо от принципа действия и производителя, базовые настройки включают следующие параметры:
-
Дата и время.
-
Язык экранного меню.
-
Единицы измерения сахара (в большинстве случаев устанавливается измерение в единицах ммоль/л).
-
Диапазон измерения с установкой граничной нижней и верхней концентрации сахара, которые задаются индивидуально для каждого человека – если во время измерения прибор определяет, что концентрация глюкозы выше или ниже установленных граничных уровней, то он подает звуковой сигнал, а затем выводит показатель на дисплей.
-
Калибровка прибора – большинство моделей включают в комплект специальную калибровочную жидкость с определенным уровнем сахара. Ее наносят на тест-полоску, после чего сверяют результат на дисплее со значением, которое дает инструкция по эксплуатации глюкометра.
Правильная настройка, проведенная перед тем, как использовать глюкометр, дает возможность получать достоверные результаты измерений в будущем.
Как правильно пользоваться глюкометром?
Алгоритм действий, который определяет, как правильно использовать глюкометр, зависит от модели прибора. Для большинства представителей особенности применения имеют сходства:
-
Для увеличения притока крови к пальцам встряхивают рукой.
-
Тщательно вымывают кисти, палец обрабатывают раствором антисептика (70% раствор спирта).
-
В специальное отверстие на приборе вставляют тест-полоску до упора (обычно слышен характерный щелчок).
-
Осуществляют прокол пальца специальным скарификатором или автоматической ручкой-прокалывателем.
-
Каплю крови наносят на тест полоску.
-
Дожидаются появления результата на дисплее (в зависимости от модели глюкометра следует подождать от 5 до 40 секунд).
-
Извлекают использованную тест-полоску и утилизируют ее.
Нюансы и отличия в отношении того, как пользоваться глюкометром, указаны в инструкции к каждой конкретной модели.
О том, какой лучше задать диапазон допустимых значений сахара, лучше проконсультироваться с лечащим врачом. В некоторых инструкциях о том, как правильно пользоваться глюкометром, есть видео на диске. Это удобно, так как после просмотра риск ошибок становится минимальным.
Краткая инструкция по применению глюкометра
- Перед его применением необходимо установить базовые настройки (дата и время, язык устройства, ед. измерения).
- Затем необходимо указать диапазон измерения (нижнее и верхнее значение концентрации сахара) и провести первичную калибровку глюкометра (калибровочной жидкостью).
- для каждого прибора есть свои правила указанные инструкции, но общие положения необходимо выполнять, такие как гигиена рук, они должны быть чистыми, прокол пальца осуществляется специальным скарификатором, тест полоску вставляют в прибор до упора (после использования необходимо утилизировать), результаты использования глюкометра происходят в диапазоне от 5 до 40 секунд.
Для пациентов с нарушением эндокринной системы большое значение имеет скорость замеров и точность показаний уровня глюкозы. Приобрести глюкометр могут не только диабетики, но и здоровые люди, которые контролируют и поддерживают нужный уровень сахара.

Ассортимент измерительных аппаратов
Изготовители устройств для измерения сахара в крови производят огромный ассортимент товара. Функционируют приборы по-разному, есть преимущества и недостатки.
Аппарат бывает:
- Лазерный. На кожном покрове делается прокол лазером. Цена выше 10 тысяч рублей.
- Электрохимический. В работе используются тестовые полоски.
- Фотометрический. Уровень глюкозы определяется с помощью окрашивания тестируемой зоны.
- Романовский. Глюкоза выделяется после спектроскопии кожи.
- Бесконтактный. Делается быстро, прокалывание кожи не требуется.


Выбирая измеритель для домашнего пользования, необходимо учитывать, что большая часть приборов приемлема для первого типа сахарного диабета. При втором типе необходимо чаще проводить замеры.
Больные диабетом 2 типа имеют право на получение бесплатного глюкометра, а тестовые полоски бесплатно выдают на месяц по рецепту врача в аптеке (3 штуки в день).
Подбирая глюкометр, следует подсчитать нужное количество расходного материала и его стоимость.

Анализ устройств
Анализируя различные модели приборов и отзывы на них, внимание уделялось функциональности аппарата:
- точный замер;
- скорость получения информации;
- получение результатов об артериальном давлении, кетоновых телах, холестерине и других показателях;
- вывод и передача данных на ноутбук;
- звуковое оповещение;
- объем памяти и количество измерений;
- подсветка дисплея.
Также для оценочного критерия немаловажно:
- удобство эксплуатации, особенно для пациентов с нарушениями моторики или с плохим зрением;
- стоимость глюкометра и цена расходников;
- наличие тестовых полосок в продаже;
- сроки хранения расходных материалов;
- количество жалоб на брак;
- наличие сумки-чехла для сохранности прибора;
- внешний вид.

Чтобы было легче выбрать глюкометр для дома, мы составили рейтинг лучших аппаратов от известных производителей.
Фотометрические глюкометры
К лучшим фотометрическим глюкометрам относятся аппараты Accu-Chek. Производитель Roche Diagnostics добился отличного результата. Благодаря инновационным технологиям, глюкометром Акку Чек выдается погрешность до 15%. Согласно стандартам, допускается неточность 20%.

Accu Chek Active
Практичный в использовании измеритель делает замер за 5 секунд. Информация хорошо читается на большом экране. Достоинства популярной модели Accu-Chek Active:
- четкость изображения;
- простота пользования;
- 350 измерений;
- вывод средних значений глюкозы;
- результаты до и после принятия пищи;
- автовключение при входе полоски;
- передача результатов на носитель.

К технике прилагается аппарат для проколов, 10 полосок и столько же ланцетов, батарейка, сумка-переноска и инструкция. К недостаткам можно отнести:
- высокую стоимость расходного материала;
- отсутствие автоматического забора крови;
- отсутствие звука и подсветки;
- небольшой заряд батарейки;
- может выдавать ошибку, если капля крови попала не в центр.

Согласно отзывам, данная модель практичная, удобная, подходит для пожилых людей с ослабленным зрением, но расходники обойдутся дороже самого аппарата. Стоимость измерителя 600 руб., а тестовые полоски обойдутся в 900 руб.
Accu Chek Mobile
Относится к лучшим фотометрическим глюкометрам. Фирма Roche дает гарантию высокотехнологичному устройству на 50 лет. Аппарат объединил в себе самое необходимое. В данной модели используются тест-кассеты, что исключает порчу расходных материалов.
Плюсы:
- безболезненный забор крови;
- отличная точность измерений;
- скорость 5 сек.;
- в набор входит также прибор для прокола и тест-кассета;
- неоднократное использование ланцета (если его использует один человек);
- большая память;
- не требуется установка ПО для передачи сведений на компьютер;
- меню на русском.

Итак, пользователи отмечают точность, удобство в пользовании, высокую скорость и безболезненное прокалывание, после которого выступает минимум крови.
Минусы:
- цена 3500 рублей;
- жужжащий звук.

Согласно мнениям потребителей, Accu-Chek Mobile покупали бы чаще, если бы цена измерительного устройства была ниже.
Accu Chek Compact Plus
Хорошие отзывы получила модель Accu-Chek Compact Plus. Принимая во внимание критику пользователей, разработчики уменьшили время анализа и сократили его до 5 секунд. Автоматическое управление доставляет удобство пользователю, которому практически не нужно нажимать кнопки.
Преимущества:
- широкий экран;
- индикатор замеров;
- простота замены игл;
- ручка для прокалывания регулируется;
- память сохраняет 100 измерений;
- передача информации на персональный компьютер;
- сумка-чехол;
- гарантия 3 года.

Недостатки:
- трудности с покупкой барабана с лентами;
- жужжание при перемотке;
- высокая цена (3 500 рублей).

Несмотря на высокую стоимость и сложность в поисках лент, модель пользуется популярностью среди покупателей.
Accu-Chek Performa Nano
Модель отличает современный дизайн и портативные размеры. Удобство пользования обеспечивает широкий экран с подсветкой.
Преимущества:
- точность результатов;
- скорость 5 секунд;
- компактность;
- большая память;
- высвечивается время, дата и будильник, оповещающий время анализа.

К минусам можно отнести только дорогие расходники. Цена самого глюкометра от компании Roche 1500 рублей, что намного ниже стоимости фотометрических устройств этого производителя.
Электрохимические устройства
Такие приборы применяются в стационарах, когда в результате реакции крови и реактивов образуется ток, и тест-полоска реагирует, выявляя уровень глюкозы. Немецкий производитель Bayer выпускает инновационные биоанализаторы, которые пользуются спросом.

Bayer Contour TS
Самым надежным прибором по точности считается модель Bayer Contour TS, которая с успехом используется больше 10 лет. Немецкий бренд производит высококачественную и надежную технику, а сборку устройства производят в Японии.
Название модели переводится как «абсолютно просто», характеризуя прибор, как легкую в пользовании модель.
Преимущества:
- высокая точность измерений;
- дизайн и портативность;
- регулировка глубины прокола;
- немецкий концерн часто устраивает акции на расходники;
- уходит минимум крови;
- 250 замеров;
- сведения переносятся в компьютер;
- длительность процедуры 5 секунд;
- опция гематокрит;
- сорбент в боксе с тест-полосками увеличивает срок их хранения;
- гарантийный срок 5 лет.

В комплектации идет 10 ланцетов, батарея, устройство для прокола, инструкция.
Минусы:
- царапается дисплей;
- полоску нужно вставлять точно по центру, что не всегда получается;
- неудобство при доставании тестовых полосок.

Стоимость аппарата составляет 500-700 рублей, цена расходного материала колеблется в таком же диапазоне.
One Touch Select
К популярным электрохимическим аппаратам относится также модель One Touch Select, производя замер сахара за несколько секунд.
Плюсы:
- легкость использования;
- скорость анализа 5 секунд;
- удобный экран с четким изображением цифр;
- расчет среднего результата;
- минимум крови;
- доступность полосок;
- одной батареи хватает на 1500 замеров;
- удобство эксплуатации;
- крепление сумки на поясе;
- передача данных на ПК;
- бессрочная гарантия.

К минусам можно отнести погрешность измерений. Если аппарат включен и в него была помещена полоска, то кровь необходимо наносить быстро, так как материал может испортиться.
Несмотря на недостатки, отзывы об этой модели позитивные.
Стоимость 50 полосок равняется стоимости самого аппарата, поэтому приходится искать упаковки с большим количеством материала для анализов.

Результаты измерений при правильном применении отлично подходят для контроля уровня глюкозы дома.
One Touch Select Simple
Современная модель имеет закругленные углы и смотрится стильно. На передней панели One Touch Select Simple расположен только дисплей и 2 индикатора для разных уровней глюкозы. Измеритель изготовлен из высококачественного пластика, имеет небольшой вес и портативные размеры. Устройство легко помещается в руке, что является жизненно важным для пожилого человека с нарушением зрения.
Достоинства:
- компактные размеры;
- простота и комфортное пользование;
- стоимость 1000 рублей.

К недостаткам можно отнести дорогие расходные материалы.
One Touch Select Plus
Модель One Touch Select Plus представляет собой портативный прибор, на экране которого имеется трехцветный индикатор для контроля диабета, который показывает, в каком диапазоне находится уровень сахара.
Достоинства:
- простое управление;
- широкий экран с подсветкой;
- скорость 5 секунд, доступно 500 измерений;
- цветной индикатор;
- антискользящее покрытие корпуса;
- твердый защитный чехол;
- бессрочная гарантия.

В дополнение прилагается инструкция, скарификатор, 10 полосок и столько же ланцетов.
Недостатки:
- отсутствие звуковых оповещений;
- высокая стоимость расходников.

Стоимость аппарата колеблется от 750 до 900 рублей, сами же тест-полоски стоят 1200 — 1900 рублей.
Elta Sattelit Express
Российский производитель Элта сделал все, чтобы облегчить самоконтроль диабетиков и сделать его доступным. Дешевый аппарат Элта Сателлит Экспресс ПКГ 03 не уступает иностранным аналогам по точности, но намного экономнее по стоимости.
Преимущества:
- легкость пользования устройством;
- большой дисплей с четким изображением;
- скорость 7 секунд;
- небольшая цена техники и полосок;
- кровь для биоанализа берется в минимальном количестве;
- 60 замеров.

В комплектации идет футляр, 25 игл и столько же полосок, а также регулируемая ручка.
Минусы:
- не синхронизируется с ПК;
- замеры могут иметь отличия от исследований в лаборатории, что не подходит больным с тяжким течением диабета.
Если правильно следовать инструкции, Elta Sattelit Express предоставляет точные данные. Претензии к неточности могут быть связаны с тем, что потребители не кодируют новые тестовые полоски.

Bioptik Technology Easy Touch
Лучший прибор среди биохимических глюкометров. Кроме анализа крови на глюкозу, показывает данные о гемоглобине и холестерине. Подходит пациентам с различными заболеваниями.
Достоинства:
- широкий экран с подсветкой;
- скорость измерения 6 секунд;
- в комплекте прилагаются тестовые полоски.
Недостатки:
- дороговизна (3000 рублей);
- дорогие тестовые полоски.

Модель Bioptik Technology Easy Touch подойдет тем, кому жизненно необходимо проводить анализ важных показателей дома.
Обратите внимание, что данные биоанализа будут с небольшой погрешностью.
Неинвазивные приборы
Производство высокотехнологичных приборов с использованием инновационных научных разработок позволило выйти на новый уровень. Аппараты нового поколения не требуют забора крови. Стоимость их высока, производство ведется небольшими партиями. Немногочисленные отзывы говорят о совершенстве выпускаемой техники.

Omelon B-2
Российская компания Омелон вместе с Московским университетом разработала уникальный глюкометр, который не имеет аналогов. Принцип его работы основан на связи уровня сахара с сердечным и мышечным тонусом. Инновационный глюкометр от лучших специалистов рассчитывает уровень глюкозы, основываясь на замерах пульса, давления и сосудов.
Преимущества:
- безболезненные замеры без взятия крови и кожных проколов;
- больной может также держать под контролем давление и пульс;
- удобнее, чем инвазивные измерители;
- гарантийный срок 2 года.

Минусы:
- большие габариты не позволяют переносить его в кармане;
- правильные данные зависят от состояния пациента и движений во время измерения.
Стоимость глюкометра Омелон В-2 6900 рублей на сайте производителя, но высокая цена компенсируется, так как отпадает необходимость в приобретении расходных материалов.
Какой измеритель лучше
Если выбирать устройство по ценовой политике, то ориентироваться лучше стоит на цену тестовых полосок. Здесь однозначно выгодной будет покупка российского глюкометра фирмы Элта.
Таблица сравнения глюкометров
| Модель | Время измерения (сек.) | Память | Цена прибора (руб.) | Стоимость тестовых полосок |
| Accu-Chek Active | 5 сек. | 350 замеров | 600 руб. | 900-1200 руб. |
| Accu-Chek Mobile | 5 | 250 | 3500 | 500 |
| Accu-Chek Compact Plus | 10 | 100 | 3500 | 500 |
| Accu-Chek Performa Nano | 5 | 500 | 1500 | 1000 |
| Bioptik Technoloqy Easy Touch | 6 | 300 | 3000 | 500 |
| Bayer Contour TS | 5 | 350 | 500-700 | 500 |
| One touch select simple | 5 | 300 | 1000 | 600 |
| One Touch Select Plus | 5 | 500 | 750-900 | 1200 (50 шт.), 1900 (100 шт.) |
| Elta Sattelit Express | 7 | 60 | 1000 | 1350 |

Многие потребители выбирают продукцию производителей One Touch и Bayer. Если вы сторонник новейших технологий, хотите получить точнее информацию и готовы платить за удобство, то выбирайте аппараты Accu-Chek и Омелон.
По данным Международной диабетической организации в мире 537 млн человек страдают от диабета. В России недуг диагностирован у 5.1 млн людей. Если болезнь уже пришла, самое главное, говорят врачи, – справиться с паникой, осознать серьезность своего положения и постараться обрести над недугом контроль. Для этого необходимо наладить правильное питание, изменить образ жизни и, конечно, регулярно следить за уровнем сахара в крови с помощью глюкометра. Как же выбрать свой первый глюкометр? Найти ответ на этот вопрос нам помогут российские производители медицинской техники и медики.
На вопросы ФармМедПрома ответили Владимир Жувак, директор по развитию ООО «Медтехсервис», Юрий Глухов, генеральный директор компании «ЭЛТА», а также Наталья Ковалева, врач эндокринолог-диетолог сети центров репродукции и генетики Нова Клиник, и фармацевт Наталья Бричкина.
Какие бывают глюкометры?
Рассказывает Владимир Жувак: «Основные типы глюкометров — электрохимические и фотометрические. Электрохимический действует так: в процессе измерения глюкозы в крови образуется электрический ток, количество которого пропорционально количеству глюкозы. Прибор измеряет силу тока и переводит это значение в цифры, которые и выводятся пользователю на дисплей. У фотометрических глюкометров принцип другой: в процессе измерения глюкозы происходит реакция окисления глюкозы с образованием перекиси водорода, в результате которой вещество-хромоген в тест-полоске меняет свой цвет. По степени изменения цвета и определяется уровень глюкозы в крови. Уровень освещения того места, где производится измерение, может повлиять на правильность полученных значений».
Также глюкометры могут быть откалиброваны (то есть, настроены на выдачу показаний по…) по плазме венозной крови и капиллярной крови, хотя и для тех, и для других кровь берется преимущественно из пальца. Владимир Жувак объясняет, что в условиях стационара, лаборанты берут для исследования кровь у обследуемого из вены. Поэтому, врачам-эндокринологам удобнее работать с глюкометрами, калиброванными по плазме венозной крови. Стоит отметить, что количество глюкозы, содержащейся в плазме венозной крови выше, чем в капиллярной на 11%. Например, глюкометр Gmate Life измеряет содержание глюкозы капиллярной крови, взятой из пальца больного, с помощью программного обеспечения пересчитывает полученные значения и делает подобной концентрации глюкозы, содержащейся в плазме венозной крови.
Какой глюкометр — качественный?
Юрий Глухов призывает обратить внимание на точность: «Каждый глюкометр должен соответствовать международному стандарту точности ISO. Точность измерений — ключевой критерий, и он напрямую зависит от правильного использования прибора. Важно помнить о внимательном изучении инструкции и соблюдении правил гигиены в процессе измерений. Соблюдение этих правил сделает ваш результат точным».
Владимир Жувак согласен: ««Прежде всего глюкометр должен быть качественным и безопасным, то есть соответствовать всем современным международным и российским стандартам. Глюкометр относится к медицинским изделиям, на основании показаний которых, например, больные с сахарным диабетом принимают решение о вводимой дозе инсулина и объеме принимаемых лекарств. В случае некорректного использования глюкометра и несоблюдения условий хранения тест-полосок на дисплее может отобразиться неточная информация. А неточный результат измерения в свою очередь может привести к введению неадекватного количества инсулина и — как следствие! — к гипогликемической коме. Поэтому нужно внимательно ознакомиться с инструкцией к прибору и изучить рекомендации производителя».
«Качество глюкометра крайне важно, потому что из-за неточных данных человек может ввести себе неправильную дозу инсулина или, напротив, пропустить важный укол. А это в свою очередь может привести к очень нежелательным последствиям вплоть до гипогликемической комы. С другой стороны, эта опасность довольно низкая, потому что сегодня все глюкометры отвечают международным стандартам ISO. На рынке сегодня есть множество глюкометров разных производителей как иностранных, так и российских. Они могут отличаться программным обеспечением, какими-то дополнительными функциями, например, системой оповещения родственников в экстренных случаях. Но в целом разница между ними невелика.»
Наталья Ковалева, врач эндокринолог-диетолог сети центров репродукции и генетики Нова Клиник
Не забываем про память!
Эксперт компании «Элта» считает память глюкометра одним из важных параметров: «Важно, чтобы прибор запоминал результат, дату и время анализа. Например. наш «Сателлит Экспресс» хранит до 60 последних результатов. Для лечащего врача, да и самого диабетика, очень важно иметь возможность делать статистический анализ измерений, а также систематизировать данные для дальнейшего наблюдения показателей. Это дает возможность в какой-то степени прогнозировать события и принимать важные решения, связанные с коррекцией лечения».
А что кроме глюкометра понадобится?
Приобрести сам глюкометр — это половина дела. Для измерения уровня глюкозы нужны также и другие компоненты: ручка-прокалыватель, ланцеты,они же скарификаторы (картриджи для прокалывания кожи, которые вставляются в ручку-прокалыватель) и тест-полоски. Разброс в стоимости тест-полосок в упаковке из 50 штук в зависимости от производителя варьирует от 480 до 1500 рублей за упаковку. Больным сахарным диабетом 1 типа в месяц требуется 150-180 тест-полосок, 2 типа чуть меньше. На первые дни хватит тест-полосок, включенных в комплект вместе с глюкометром.
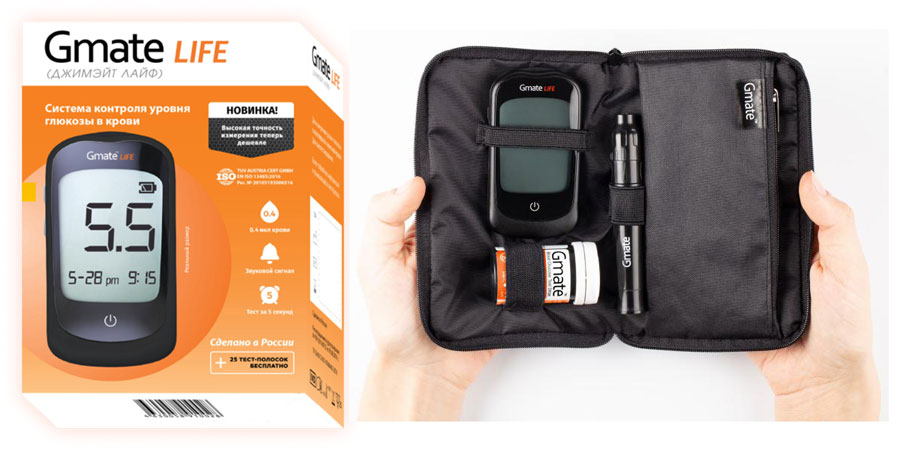
Если ручку-прокалыватель и подходящие к нему ланцеты можно выбрать по своему вкусу и кошельку, то к каждому глюкометру для точности измерений подходят только определенные полоски того же самого производителя, универсальных для всех моделей нет, поэтому выбор глюкометра повлияет на то, сколько денег вы будете тратить на тест-полоски. Учтите, что докупать расходники придется достаточно часто в любом случае.
Удобная ручка-прокалыватель должна иметь разные режимы глубины прокола, так как кожа взрослых людей, пожилых и детей отличается по толщине и требует разной силы прокалывания, напоминают производители.
Надо заметить, что первичные комплекты, сопровождающие глюкометр, у разных производителей практически не отличаются.
Владимир Жувак рассказывает о собственной продукции:«В комплект с нашими глюкометрами Gmate Life, имеющим пожизненную гарантию, позволяющим сохранить 500 измерений и обладающим функцией автокодировки, входят также чехол, 25 тест-полосок, ручка-прокалыватель, десять одноразовых ланцетов для прокалывания и инструкция по применению».
В комплект «Сателлит Экспресс», по словам Юрия Глухова, входит сам прибор с элементом питания, контрольная полоска, которая позволяет пользователю самостоятельно провести диагностику глюкометра, чтобы убедиться в его исправности, футляр, тест-полоски (25 шт) с кодовой полоской, ручка-прокалыватель, одноразовые скарификторы (25 шт), инструкция.
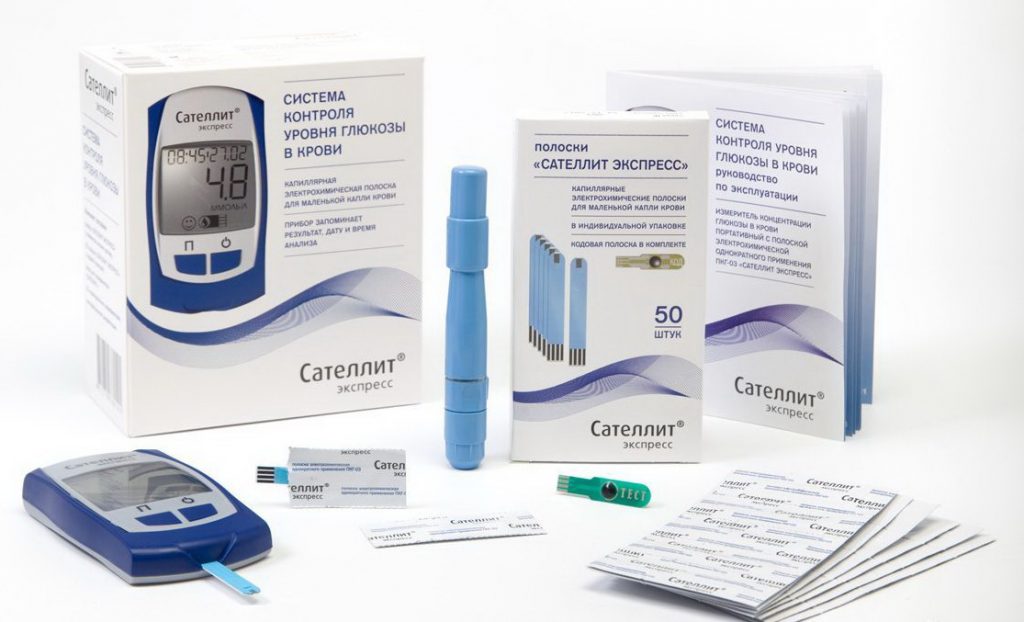
«В нашей аптеке, как и в большинстве других, представлены и отечественные, и зарубежные глюкометры. Покупатели пока чаще берут все-таки иностранные, но принципиальной разницы между ними я не вижу. Российские глюкометры с каждым годом все больше завоевывают рынок. Они дешевле, но при этом практически не уступают в качестве. Немаловажным аргументом в поддержку наших глюкометров является то, что пациенты, стоящие на учете у эндокринолога в городских поликлиниках, могут получать к ним бесплатные тест-полоски. К импортным их также выдают, но к нашим значительно чаще и больше».
Наталья Бричкина, фармацевт
У всех производителей свои «фишки»
Несмотря на то, что все глюкометры выполняют одну и ту же задачу, и функции их похожи, все же каждый производитель старается привнести в прибор что-то свое. И выбирая прибор, стоит обращать на это внимание.
У компании «ЭЛТА» все тест-полоски в индивидуальной упаковке, благодаря чему они имеют большой срок годности в широком температурном диапазоне, гарантируют стерильность, а следовательно, точность показаний.
Специалисты «Медтехсервиса» также выделят точность своих полосок, но за счет других показателей. «Система мониторинга крови не должна реагировать на различные интерферирующие вещества, содержащиеся в крови. – рассказыват Владимир Жувак. — Дело в том, что они могут быть восприняты прибором в качестве глюкозы, и из-за этого результат измерения будет ложно завышен. Наша «фишка» в том, что у наших тест-полосок интерферирующие вещества на конечный результат измерений практически не влияют. Секрет заключается в применяемом ферменте. Тест-полоски хранятся в специальном тубусе, крышка которого состоит из комбинации поглощающих веществ, обеспечивающих требуемые условия хранения».
Тонкости выбора
Тип заболевания при выборе глюкометра неважен. Прибор является универсальным средством измерения как для 1, так и 2 типа диабета. Но есть другие тонкости!
Рассказывает Владимир Жувак: «Тем людям, кто страдает от диабета и при этом имеет высокую лекарственную нагрузку, в чьей диете присутствуют сахарозаменители, не в порядке биохимический состав крови, не рекомендуется выбирать глюкометры, в инструкциях которых написано, что для этого вида глюкометра характерны случаи влияния интерферирующих веществ. Если вы используете бренды глюкометров, на работу которых влияет кислород, то вам надо учитывать, что чем меньше кислорода, тем менее интенсивно будет проходить химическая реакция в крови, как следствие – показания, отображаемые на дисплее глюкометра, будут занижены. И наоборот. Особенно актуальна эта информация для людей, перемещающихся ниже-выше уровня моря, совершающих восхождение на гору или, наоборот, спуск на местность в низине, имеющих заболевания органов дыхания. Любой пользователь перед приобретением устройства должен ответственно подойти к изучению информации, предоставляемой производителем».
Мнение Юрия Глухова: «Есть много нюансов, которые необходимо учитывать при выборе глюкометра. Прибор должен соответствовать международному стандартному точности, быть простым в использовании, быстро выдавать результат, требовать небольшой объем крови для анализа. Крайне желательно длительное гарантийное обслуживание (в нашем случае оно бессрочное). Важен также диапазон измерений — необходимо, чтобы глюкометр мог выявить как очень низкий, так и высокий показатель глюкозы крови. Как правило, этот диапазон составляет от 0,6 до 35 ммоль/л. Еще отмечу, что крайне важно, чтобы прибор давал сигнал о необходимости скорой замены батареи. Это нужно, чтобы человек не оказался в самый неподходящий момент с неработающим глюкометром».
В заключение еще один совет. Не забывайте проверять свой глюкометр каждые три года — таков стандартный срок поверки. Делается это в гарантийном сервисе производителя или в специальных лабораториях. Например, в Москве это делают в центре по проверке глюкометров ЭНЦ (улица Москворечье, 1).
Для справки:
«Медтехсервис» — российский производитель полного цикла диабетических тест-полосок к глюкометрам Gmate Life, созданный в рамках реализации Национального проекта «Здравоохранение». Компания запустила свое производство в середине 2019 г., закрепилась на отечественном рынке и в 2022 году планирует выйти на экспорт.
«ЭЛТА» — первый в России производитель средств экспресс-измерения уровня глюкозы в крови. Продукция компании — исключительно собственные оригинальные разработки. Экспортирует глюкометры в Казахстан, Узбекистан, Кыргызстан, Беларусь.
Текст: Лидия Громека
Post Views:
20 600