- Manuals
- Brands
- Honda Manuals
- Motorcycle
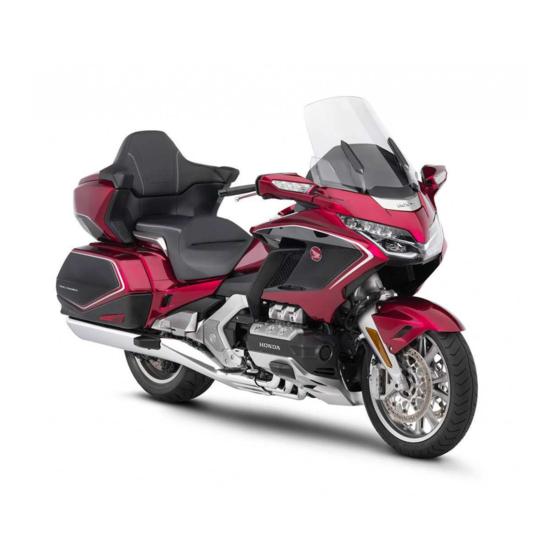
- Gold Wing 2021
- Manual
-
Contents
-
Table of Contents
-
Troubleshooting
-
Bookmarks
Quick Links
Contents
P. 2
P. 18
P. 152
P. 185
P. 215
P. 244
2021 Gold Wing (GL1800/B/BD/D/DA)
MOM 17609 (2009)
31MKC630
Related Manuals for Honda Gold Wing 2021
Summary of Contents for Honda Gold Wing 2021
-
Page 1: Table Of Contents
Contents Vehicle Safety P. 2 Operation Guide P. 18 Maintenance P. 152 Troubleshooting P. 185 Information P. 215 Specifications P. 244 2021 Gold Wing (GL1800/B/BD/D/DA) MOM 17609 (2009) 31MKC630…
-
Page 2
Welcome Congratulations on your purchase of a new When service is required, remember that Honda vehicle. Your selection of a Honda your Honda dealer knows your vehicle best. makes you part of a worldwide family of If you have the required mechanical satisfied customers who appreciate “know-how”… -
Page 3
A Few Words About Safety Your safety, and the safety of others, is very You will find important safety information Other important information is important. Operating this vehicle safely is in a variety of forms, including: provided under the following ●… -
Page 4: Vehicle Safety
Vehicle Safety This section contains important information for safe riding of your vehicle. Please read this section carefully. Vehicle Safety Safety Guidelines ……..P. 3 Safety Labels ……….P. 6 Safety Precautions ……… P. 10 Riding Precautions ……… P. 13 Accessories &…
-
Page 5: Safety Guidelines
Safety Guidelines Safety Guidelines Always Wear a Helmet Take Time to Learn & Practice It’s a proven fact: helmets and protective Even if you have ridden other vehicles, Follow these guidelines to enhance your apparel significantly reduce the number practice riding in a safe area to become safety: and severity of head and other injuries.
-
Page 6
Make yourself more visible, especially at crash. night, by wearing bright reflective clothing, Keep Your Honda in Safe Condition positioning yourself so other drivers can see If you decide to continue riding, first turn you, signaling before turning or changing It’s important to keep your vehicle properly… -
Page 7
Safety Guidelines Emergency Shut-down Procedure for Carbon Monoxide Hazard WARNING WARNING Vehicles Equipped with Dual Clutch Exhaust contains poisonous carbon Transmission Running the engine of your vehicle monoxide, a colorless, odorless gas. while in an enclosed or even GL1800BD/D/DA Breathing carbon monoxide can cause loss partially enclosed area can cause a Unlike standard vehicles, or its manual of consciousness and may lead to death. -
Page 8: Safety Labels
Safety Labels Safety Labels GL1800/D/DA Safety and information labels on your vehicle provide important safety information and may warn you of potential hazards that could cause serious injury. Read these labels carefully and don’t remove them. If a label comes off or becomes hard to read, contact your dealer for a replacement.
-
Page 9
Safety Labels GL1800DA GL1800/D GL1800/D GL1800DA GL1800DA continued… -
Page 10
Safety Labels GL1800B/BD… -
Page 11
Safety Labels… -
Page 12: Safety Precautions
Safety Precautions ❙ ❙ Safety Precautions Helmet Gloves Should be safety-standard certified, high- Full-finger leather gloves with high ● Ride cautiously and keep your hands on visibility, and correct size for your head abrasion resistance the handlebars and feet on the footpegs. ●…
-
Page 13
Safety Precautions ● The airbag might deploy in a severe angled There are several situations in which the vehicle Airbag System frontal collision, or in a sideswipe, or if the airbag should not deploy. Four of the more GL1800DA vehicle underrides the rear of another common situations are discussed here. -
Page 14
Safety Precautions ❙ ● Finally, if the vehicle is involved in a Important Safety Precautions sideswipe with a stationary object, such as ● Do not install or temporarily attach any a concrete median barrier, or with another items, such as a map holder, over the vehicle traveling in the same direction, as airbag cover or in the area between the illustrated here, the airbag should not… -
Page 15: Riding Precautions
Riding Precautions ❙ Riding Precautions Combined ABS Brakes Your vehicle is equipped with a brake Observe the following guidelines: system that distributes the braking force Break-in Period ● Avoid excessively hard braking and between the front and rear brakes. downshifting. During the first 300 miles (500 km) of The distribution of the braking force is Sudden braking can reduce the…
-
Page 16
Riding Precautions ❙ Engine Braking Riding in Bad Weather Engine braking helps slow your vehicle If you decide to ride your vehicle in the rain, down when you release the throttle. For fog, or other bad-weather conditions, ride further slowing action, downshift to a carefully. -
Page 17
( P. 55) and leave tank. down on the tip of the center stand with your vehicle while taking the Honda your right foot and, simultaneously, pull SMART Key with you. Deactivate the up and back. Honda SMART Key system if necessary. -
Page 18
Honda Selectable Torque Control rough road conditions or rapid throttle GL1800/D/DA operation. Always consider road and When the Honda selectable torque control weather conditions, as well as your skills (Torque Control) detects rear wheel spin and condition, when applying throttle. -
Page 19: Accessories & Modifications
● Avoid carrying an excessive load and Honda or make modifications to your keep within specified load limits. vehicle from its original design. Doing so Follow all instructions in this owner’s Maximum weight capacity / can make it unsafe.
-
Page 20: Operation Guide
Operation Guide Parts Location GL1800/D/DA Seat Throttle grip (P179) Front brake fluid reservoir (P174) Windscreen (P150) Front brake lever (P180) Rear brake fluid reservoir (P174) Fairing pocket (P143) (P171) Engine oil level gauge (P168) Right cylinder head side cover (P169) Right fog light cover Rear brake pedal Center stand…
-
Page 21
GL1800/D/DA (P180) Clutch lever GL1800 Clutch fluid reservoir (P178) GL1800 (P145) Shelter case GL1800/D Airbag (P64) GL1800DA (P141) Fuel lid Travel trunk (P142) Left engine side cover (P169) Left side cover (P170) Battery (P167) / Fuse boxes (P213) (P145) Helmet holder (P148) Passenger seat heater switch (P172) -
Page 22
Parts Location (Continued) GL1800B/BD Seat Throttle grip (P179) Front brake fluid reservoir (P174) Windscreen (P150) Front brake lever (P180) (P174) Rear brake fluid reservoir (P143) Fairing pocket Engine oil level gauge (P171) (P168) Right cylinder head side cover (P169) Right fog light cover Rear brake pedal (P170) Right side cover… -
Page 23
GL1800B/BD Clutch lever (P180) GL1800B (P178) Clutch fluid reservoir GL1800B (P145) Shelter case Fuel lid (P141) (P169) Left engine side cover (P172) Coolant reserve tank Helmet holder (P145) Battery (P167) / Fuse boxes (P213) (P170) Left side cover (P173) Engine oil fill cap Left saddlebag (P142) Tool kit… -
Page 24
Instruments (P23) Multi-information display Tachometer NOTICE Do not operate the engine in the tachometer red zone. Excessive engine speed can adversely affect engine life. Speedometer Shows riding speed in miles Tachometer red zone per hour (mph) and kilometer (excessive engine rpm range) per hour (km/h). -
Page 25
❙ Multi-information Display Audio Source Your vehicle is equipped with a multi- Enters the current audio mode. (P71) information display that presents various ❙ functions and settings. Vehicle Setting • Certain manual functions and settings Enters the vehicle setting menu screen. (P28) are disabled or inoperable while the vehicle is in motion. -
Page 26
Instruments (Continued) Basic Operations To operate with the 4-way key switch on You can operate and set the various the left handlebar: Press to select the functions of your vehicle using the interface available choices. Some menus will only use dial and buttons on the center panel and/or the up and down function. -
Page 27
Information Bar To change the current audio source In the following cases, the information bar Displays various information (current audio information or vehicle information, press will appear or change from the current source info., vehicle info., help info., or INFO button until the desired information indication. -
Page 28
Instruments (Continued) ❙ Vehicle Information When “—.-” is displayed except for the Elapsed Time above-mentioned cases, go to your dealer Displays operating time since the engine for service. was started. (hours : minutes) Average Fuel Mileage (Trip A/Trip B) [Fuel Consumption (Avg.)] To change the unit: (P30) Displays the average fuel mileage since the… -
Page 29
System Information Indication Explanation Remedy Appears when communication between your vehicle Refer to “When the Honda SMART Key System Does and Honda SMART Key is interrupted after turning on Not Operate Properly.” (P197) the electrical system. Appears when the battery of Honda SMART Key is Refer to “Replacing the Honda SMART Key Battery.”… -
Page 30
Instruments (Continued) ❙ Vehicle Setting • [Auto Dimmer Meter Illumination] (P32) Idling Stop GL1800BD/D/DA Canada model only You can configure the vehicle settings. • [Day / Night] (P32) You can enable/disable the Idling Stop The vehicle settings are enabled with the (P33) •… -
Page 31
❙ Suspension Preload The rear suspension adjustment provides GL1800/D/DA You can automatically adjust the rear the following settings. suspension spring preload according to the Status icon Riding condition riding conditions by selecting from the four pre-programmed settings. Rider only (Minimum preload) The rear suspension spring preload Rider and luggage adjustment can be changed only when… -
Page 32
Instruments (Continued) ❙ Units Return to the previous screen or the The units for the cruise control set speed (P24) You can change the units used for fuel Home screen. ), odometer [TOTAL], tripmeter A/B consumption, distance, temperature and [TRIP A/B] and available driving distance The units for average fuel mileage [Fuel air pressure. -
Page 33
❙ ❙ To Change the Unit for Tire Pressure HSTC (Honda Selectable Torque Control) Auto Dimmer Meter Illumination Gauge [Air pressure] You can select the backlight brightness. GL1800/D/DA GL1800/D/DA You can enable/disable the HSTC function. Select [Units], and then press switch. -
Page 34
Instruments (Continued) Return to the previous screen or the Changing of Setting Value Select [Day / Night], and then press Home screen. (P24) switch. When the setting of [Auto dimmer meter Rotate or press on the 4-way illumination] is [Auto]: Setting range: Level 1 to 8 or [AUTO] key switch to select [Hold day mode], If you set to a higher value, the screen will… -
Page 35
❙ ❙ ❙ Ext. Amp EQ1/EQ2 (Equalizer) Head Light Opening You can enable/disable audio output when You can select from two equalizer curves You can enable/disable the headlight an external amplifier is connected. according to the specifications of your vehicle. startup lighting when the ignition switch is If you want to install an external amplifier, •… -
Page 36
Instruments (Continued) INFO 1 Display • Available driving distance GL1800/D/DA GL1800/D/DA [RANGE] & Tire pressure gauge [ Odometer & Tripmeter display (P37) Odometer & Tripmeter display RR] display Cruise control set speed & Available driving distance GL1800B/BD Cruise control set speed & Air temperature gauge display (P37) [RANGE] display… -
Page 37
❙ Cruise Control Set Speed ( ) & Air Cruise Control Set Speed ( GL1800B/BD temperature Gauge [AIR] Display The speed set for the cruise control is displayed. To select cruise control set speed or Air Cruise control set speed & If the cruise control set speed does not temperature gauge, Press button… -
Page 38
Instruments (Continued) ❙ ❙ Odometer [TOTAL] & Tripmeter [TRIP A/B] Press button to move the cursor to To Reset the Tripmeter and Average Display the odometer, tripmeter A and Fuel Mileage To select Odometer or Tripmeter A or B, tripmeter B display. To reset tripmeter A and average fuel Press button when the cursor is at the… -
Page 39
❙ Available Driving Distance [RANGE] & Tire Press button to move the cursor to Available Driving Distance [RANGE] Pressure Gauge [ FR/RR] Display the available driving distance and tire Displays the estimated distance you can travel on the remaining fuel. pressure gauge display. -
Page 40
Instruments (Continued) ❙ Tire Pressure Gauge [ FR/RR] The indicated tire pressures may fluctuate Fuel Gauge when riding because the tire pressure varies Remaining fuel when only 1st (E) segment GL1800/D/DA Displays tire pressure for the selected tire. according to the temperature. starts flashing: approximately 0.92 US gal The system does not monitor the tire The tire pressure shown on the display may… -
Page 41
❙ INFO 2 Display Gear Position Indicator u“ ” flashes when the engine stop switch position is changed from D (AT MODE) indicator (Run) to (Stop) position with the Gear position Riding mode indicator ignition switch in ON. indicator u“ ”… -
Page 42
Instruments (Continued) ❙ ❙ Riding Mode Indicator Walking Speed Mode Indicator ( GL1800/B Refer to «Riding Mode» (P134) GL1800BD/D/DA Indication Gear position Comes on when in Walking Speed mode. 1st gear ❙ D (AT MODE) Indicator ( 2nd gear Walking Speed Mode: (P131) GL1800BD/D/DA 3rd gear… -
Page 43
❙ INFO 3 Display • Travel Trunk & Saddlebags GL1800/D/DA GL1800/D/DA Rider seat heater indicator ( (P42) Open Indicator Travel trunk & Saddlebags • The segment(s) of open component(s) GL1800/D/DA open indicator flashes with the «OPEN» indicator when Passenger seat heater indicator ( Passenger seat heater your vehicle’s travel trunk and/or (P43) -
Page 44
Instruments (Continued) ❙ ❙ ❙ Side Stand Indicator Handle Grip Heater Indicator ( Rider Seat Heater Indicator ( The side stand segment flashes with the Comes on when the handle grip heater is GL1800/D/DA «STAND» when the side stand is put down. on and indicates the selected heater level. -
Page 45
❙ ❙ Passenger Seat Heater Indicator ( Suspension Preload Indicator ( GL1800/D/DA GL1800/D/DA Comes on when the passenger seat heater Shows selected rear suspension spring is on. preload. The indicator flashes while transitioning Passenger seat heater indicator ( between setting modes. When the indicator flashes except for the above mentioned cases, go to your dealer for service. -
Page 46
Indicators If one of these indicators does not come on when it should, have your dealer check for problems. Left turn signal indicator Low tire pressure indicator Comes on briefly when the ignition switch is turned ON. If the indicator comes on or flashes: (P190) TPMS indicator Comes on briefly when the ignition switch… -
Page 47
Honda SMART Key indicator Comes on briefly when the ignition switch is turned ON. When the Honda SMART Key Indicator Flashes: (P189) AIRBAG indicator GL1800DA Steering lock indicator Comes on briefly when the ignition switch is turned Comes on briefly while the steering lock is activating. -
Page 48
Indicators (Continued) Torque Control indicator Right turn signal indicator GL1800/D/DA • Comes on when the ignition switch is turned ON. Goes off when your speed reaches Hill start assist (HSA) indicator approximately 3 mph (5 km/h) to indicate Comes on in white to amber when the ignition Torque Control is ready to work. -
Page 49
Combined ABS indicator Comes on when the ignition switch is turned ON. Goes off when your speed Parking brake indicator reaches approximately 3 mph (5 km/h). GL1800BD/D/DA If the indicator comes on while riding: Comes on as a reminder that you have not (P188) (P60) released the parking brake lever. -
Page 50
Switches Center Panel Interface dial ( ENTER • Rotate (Interface dial) or move in the eight possible directions to select the available choices. • Press (Enter) to set your selection. Basic Operations: (P24) (Home) button Press to return to the Home (P24) screen. -
Page 51
Ignition switch Switches the electrical system on/off, locks the steering. Make sure that the Honda SMART Key is activated (P56) (Lock) and enter the operating range. (P57) (Lock) (P55) Locks steering. Turns engine off. Turns electrical system on for starting/riding. -
Page 52
Switches (Continued) Left handlebar 4-way key/ switch Shift up switch (+) (P130) • Press the 4-way key switch in the • Pull to shift up a gear. GL1800BD/D/DA directions to select the available choices. • Pull to move the vehicle forward Headlight dimmer switch •… -
Page 53
4-way key/ switch GL1800/B • Press the 4-way key switch in the directions Headlight dimmer switch to select the available choices. • : High beam • Press switch to set your selection. (P24) • : Low beam Windscreen adjusting lever Push up or down to adjust the •… -
Page 54
Switches (Continued) Right handlebar button MODE GL1800BD/D/DA (P134) Changes the riding mode. Engine stop switch/ Start button A/M switch Should normally remain in the Shifts between AT MODE (Run) position. (P130) and MT MODE. In an emergency, switch to the (Stop) position to stop the engine. -
Page 55
GL1800/B button MODE Engine stop switch/ Start Changes the riding mode. (P134) button Should normally remain in the (Run) position. In an emergency, switch to the (Stop) position to stop the engine. Press the start button to start the (P126) engine. -
Page 56
Switches (Continued) Passenger seat Honda SMART Key ON/OFF button This button is used to activate or deactivate the Honda SMART Key system and also to confirm the activation status. (P56) The LED informs you of current status of the Honda SMART (P56) Key System. -
Page 57
Locking Unlocking Lock the steering when parked to help a Turn the ignition switch to OFF. (P49) Make sure that the Honda SMART Key prevent theft. b Turn the handlebars all the way to the is activated (P56) and enter the… -
Page 58
The system runs a two-way authentication To Switch the Honda SMART Key between the vehicle and the Honda SMART System to Activation or Deactivation Key to verify it is the registered Honda Press and hold the ON/OFF button for more SMART Key. than 1 second. -
Page 59
Anyone can operate the ignition switch and The Honda SMART Key system uses low- Honda SMART Key is within the shaded start the engine if your Honda SMART Key area shown in the illustration. is within operating range of your vehicle, intensity radio waves. -
Page 60
Key on your person when you get on and Does Not Work Properly (P197) off the vehicle or while riding. Honda SMART Key Do not place the Honda SMART Key in the travel trunk ( ), saddlebags, GL1800/D/DA shelter case (… -
Page 61
Press and hold the answer back button on immobilizer is active and you press and the Honda SMART Key. hold the answer back button on the Honda The answer back system will not function SMART Key with the ignition switch OFF or when the ignition switch is ON. -
Page 62
Parking Brake Parking Brake Lever Parking Front brake lever GL1800BD/D/DA brake lever Be sure the parking brake is applied when parked and warming up the engine. Make sure the parking brake lever is released before riding. Squeeze To apply the parking brake: Squeeze the front brake lever and pull the parking brake lever back to lock the rear Apply:… -
Page 63
Idling Stop System GL1800BD/D/DA Canada model only Start/Idling Stop button The Idling Stop system is designed to help Idling Stop indicator reduce fuel consumption and noise by stopping the engine from idling when stopped, such as when waiting at an intersection. -
Page 64
Idling Stop System (Continued) Activating the Idling Stop System While the engine is stopped by the Idling Safety Precautions for the Idling Stop The Idling Stop system becomes ready to Stop system, if you press the start/Idling System stop the engine and the Idling Stop Stop button, the Idling Stop system is Do not go away from the vehicle while the indicator comes on when the following… -
Page 65
❙ Restarting the Engine To restart the engine when the Idling Engine Does Not Start Even If the Check that the Idling Stop indicator is Throttle is Opened: (P196) Stop indicator not flashing, shift the flashing, and then open the throttle. transmission into neutral and press the The engine will not restart if the rider is not start/Idling Stop button. -
Page 66
Airbag System • In a 30 mph (50 km/h), head-on crash • A crash into a solid barrier at 30 mph (50 GL1800DA The Airbag System can help cushion the into the side of a stationary car, the km/h) may not seem very serious, but for impact force to the rider’s head and upper vehicle will come to a stop in about 1/ the rider it would be similar to falling… -
Page 67
Airbag System Components Your vehicle airbag system includes: Airbag An airbag that is stored forward of the rider’s seat, under a cover marked AIRBAG The impact sensors that measure the rate of deceleration during a frontal impact are located on the left and right of the main frame under the rider seat. -
Page 68
However, you must As the rider’s head and upper body press have your vehicle checked by a Honda into the airbag, the bag immediately begins dealer if: deflating, through vents located at the •… -
Page 69
Audio System About Your Audio System • In no event shall Honda be liable for any The audio system features AM/FM/ damages or troubles that occur in the SiriusXM radio. use of audio devices and USB flash ® It can also play USB flash drives and iPod ®… -
Page 70
Audio System (Continued) Audio System Component Locations iPhone/Android iPod/USB digital iPhone/Android phone/ Bluetooth ® phone/Mobile audio player/USB Mobile phone/ phone, etc. flash drive, etc. audio device, etc. Rear speakers Except GL1800B/BD Bluetooth (P84) ® connection Radio antenna Main Bluetooth ® antenna Center panel Front speakers… -
Page 71
Basic Operations (Interface dial): Rotate or move (Home) button: Select to go to the You can operate and set the various in the eight possible directions to select home screen. the available choices. Press to set your (Back) button: Press to go return the functions of the audio system using the selection. -
Page 72
Audio System (Continued) Left Handlebar [2] 4-way key switch: Press right, left, up or (Source/Private Mode) switch: down to select a menu item. Press to change the audio mode. Cycles lever [2] 4-way key switch • When listening to the radio through the audio modes as follows: [FM] [AM]… -
Page 73
❙ ❙ To Change the Audio Mode • [USB] (P108) To Adjust the Volume Press switch to change the audio • [iPod] (P108) You can adjust the volume settings for the mode. Cycles through the audio modes on (P108) speakers and headsets separately. •… -
Page 74
Audio System (Continued) When you push lever up or down, To resume the volume: Operate lever the volume control level appears on the while volume is muted. information bar. lever Information bar To mute the volume: Press and hold switch. To increase the volume: push lever uA diagonal line appears in the audio… -
Page 75
❙ Audio Setting Sound Setting Bass From this screen, you can go to various You can adjust the sound to fit your Adjusts lower-frequency sound level. setup options for the audio system. preferences. Rotate or press on the 4-way key switch to select a setting menu. Press switch to set your selection. -
Page 76
Audio System (Continued) Treble Bass Boost Fader Adjusts higher-frequency sound level. Enables/disables bass boost. Adjusts the front and rear speaker output balance. Select [Treble], and then press Select [Bass boost], and then press Select [Fader], and then press switch. switch to select (enable) or switch. -
Page 77
On models equipped Auto Volume (Speaker) Auto Volume (Headset) GL1800B/BD with the front speakers only, setting Selects the volume setting to automatically Selects the volume setting to automatically increase volume from the speakers as the increase volume from the headsets as the the fader level to a negative level speed of the vehicle increases. -
Page 78
Audio System (Continued) Navi Auto Volume (Speaker) Navi Auto Volume (Headset) Volume Selects the volume setting to automatically Selects the volume setting to automatically Adjusts the volumes in the following modes increase volume of navigation from the increase volume of navigation from the individually. -
Page 79
Each volume can also be adjusted in CB Roger Beep (P71) individual modes. Roger Beep is a beep sound that is sent to notify you of the end of transmission. This function is optional. Contact your dealer for details. Rotate or press on the 4- way key switch to select your preferred… -
Page 80
Audio System (Continued) ❙ General Setting Beep Language Configures system settings. Enables/disables the beep sound when Changes the system language. operating keys. Rotate , or press on the 4-way key switch to select a setting menu. Press switch to set your selection. -
Page 81
TTS Language Clock To adjust the clock manually: Changes the TTS (text-to-speech) The audio system receives signals from GPS language. satellites, updating the clock automatically. You can also adjust the clock manually. Select [Manual setting], and then press switch. Select [TTS language], and then press The month section is selected. -
Page 82
Audio System (Continued) Rotate or press on the 4- Time Zone way key switch until the desired hour is Selects the offset of local time from UTC Sets the DST (Daylight Saving Time). (Coordinated Universal Time). This function is disabled when [Manual displayed. -
Page 83
System Information Apple CarPlay/iPod Playing an audio: (P108) Shows various information of the audio Selects whether Apple CarPlay connection system. or iPod (USB) connection is used when connecting your iPhone to the system with a USB cable. To change the connection setting, disconnect the USB cable from your iPhone once, change the setting menu, and then connect the USB cable to your iPhone again. -
Page 84
Audio System (Continued) System Reset Restore Apple CarPlay Settings Resets the audio system to the factory Resets your selection on the Apple CarPlay defaults. All settings including preset data disclaimer screen. will be reset default values. Select [Restore Apple CarPlay settings], Select [System reset], and then press and then press switch. -
Page 85
Restore Android Auto Settings Return to the previous screen or the Return to the previous screen or the Resets your selection on the Android Auto Home screen. (P24) Home screen. (P24) disclaimer screen. Android Auto: Apple CarPlay: (P111) (P114) Select [Restore Android Auto settings], and then press switch. -
Page 86
Audio System (Continued) ❙ Bluetooth Bluetooth Setting Supported ® version/profiles You can connect with your iPhone, Bluetooth ® version Bluetooth 2.1 + EDR Android phone or other mobile phone and/ Bluetooth ® profiles HFP (Hand Free Profile) ver. 1.5 or Bluetooth ®… -
Page 87
Select [Phone pairing], and then press : Phone Tap “Honda Goldwing (default name)” switch to enter the setting : Music on the Bluetooth ® setting menu of the menu. -
Page 88
Audio System (Continued) [Inquiry] The names of the devices detected are (Bluetooth ® icon) and (device displayed on the background screen. icon) appear on the upper part of the Press switch to exit the screen, and icons of available functions search mode. -
Page 89
To Connect the Paired Device Manually (Bluetooth ® icon) and (device To Reconnect a Paired Device Icon status: icon) appear on the upper part of the Automatically (light blue) : phone function connected When the ignition switch is turned ON or screen, and icons of available functions ACC, the system reconnects with : phone function unconnected… -
Page 90
Audio System (Continued) To Delete the Paired Device A confirmation message appears on the To Connect/Disconnect Available screen. Select [YES], and then press Functions Individually Select [Bluetooth setting], and then Depending on the connected device, this switch. press switch. function may not be able to establish a Select [Phone pairing], [Rider HS pairing] connection. -
Page 91
To connect functions: To disconnect functions: [Phone pairing] [Phone pairing] Select [Connect as phone] or [Connect Select [Disconnect as phone] or as music], and [Disconnect as music], then press and then press switch switch [Rider HS pairing] / [Passenger HS pairing] [Rider HS pairing] / [Passenger HS pairing] Select [Disconnect], and Select [Connect], and… -
Page 92
Audio System (Continued) Rider HS Pairing/Passenger HS Pairing Select [Inquiry], and then press Select a target device name, and then This function is disabled while the vehicle is switch. press switch. in motion. uThe system searches for a target When the pairing is complete, a Enable the Bluetooth function on your ®… -
Page 93
To Edit the System Name System default name: Honda Goldwing You can edit the system name to be Headset default name: Honda Rider HS / displayed on a target device. Honda Passenger HS Select [OK], and then press switch. Select [System name:], and then press switch. -
Page 94
Audio System (Continued) ❙ Phone Setting Private Mode You can configure the phone settings. Enables/disables a call with the passenger’s headset. Rotate or press on the 4-way key switch to select a setting menu item. Select [Private mode], and then press Press switch to set your switch to select (enable) or… -
Page 95
Mic. Level Adjusts the microphone volume. Select [Mic. level], and then press switch. Rotate or press on the 4- way key switch to select your preferred level. Return to the previous screen or the Home screen. (P24) Available setting range: Level -7 to +7 Default: Level 0… -
Page 96
Audio System (Continued) ❙ Playing the FM/AM Radio Screen Information Select Station The audio system features FM/AM radio. [1] Band You can tune the radio frequency one step Press (Source/Private Mode) switch to [2] Preset number at a time. select to FM/AM radio. (P71) [3] Current frequency The FM frequency moves in 200 kHz steps. -
Page 97
❙ Preset Stations To Store a Station Automatically: To Select a Preset Station: To Store a Station Manually: If you are traveling far from home and can Move or press on the no longer receive the stations you preset, You can store the frequencies of your 4-way key switch to select a preset you can use the auto select function to find favorite radio stations. -
Page 98
Audio System (Continued) SiriusXM ® Radio Your vehicle is capable of receiving SiriusXM ® Radio anywhere in the United States, except Hawaii, Alaska and Puerto Rico. SiriusXM ® is a registered trade mark of SiriusXM ® Radio, Inc. Radio ID SiriusXM ®… -
Page 99
The SiriusXM ® satellites are in orbit over the • There may be other geographic situations, parking conditions, and also equator; therefore, objects south of the installing metallic or metalized vehicle may cause satellite reception accessories near the windscreen could interruptions. -
Page 100
Display Message Status Display Message 1. In SXM main screen: Channel, Artist, Category and Song meta data shall be blank. Channel meta data shall Check Tuner be displayed as “Check Tuner”. 2. In Travel Link screen: Popup shall be displayed. Popup screen remains on screen until tuner fixed. 3. -
Page 101
❙ Playing the SiriusXM ® Radio Replay Selecting a channel from the list To listen to SiriusXM ® Radio, press The system can record the current Press switch to display the switch to select to [SXM]. The last channel broadcasting channel so you can rewind list screen in the SiriusXM ®… -
Page 102
Preset List Favorite Artist or Songs Remove favorite: To remove the registered artist or song: Channel name Number Favorite alert Select [Favorite Songs] screen. Press on the 4-way key switch Channel to select [Remove Favorites], then press switch. Remove favorite You can store 18 channels in the preset list. -
Page 103
To enable/disable an alert message: Channel List View categories: You can select a channel within a category You can display an alert message when the You can select a channel list. (Jazz, Rock, Classical, etc.). registered artist or song is broadcasting. To select the category: Select [Favorite Songs] screen. -
Page 104
Category scan: Game Zone To remove the favorite team: While listening to other channels, you can You can listen to each channel on the Press on the 4-way key switch receive sports alerts such as scores from the selected category list for 10 seconds. to select [Remove Teams], then press games of your favorite teams. -
Page 105
To enable/disable an alert message: Press to select [Alert Settings], then press switch. Press switch to add/remove [Game Starts] check box. An alert message will be displayed when the registered team’s game is broadcasting. You can check the game information or change to the broadcast channel. -
Page 106
Audio System (Continued) ❙ Connecting your iPhone/iPod/An- Compatible Devices droid Phone/USB device iPhone, iPod, Android phone and other devices compatible with your audio system are: You can connect your iPhone/iPod/Android USB flash drive Standard USB 2.0/3.0 phone/USB device using a certified cable to File systems FAT32 (recommendation), the USB connector or connect a USB flash… -
Page 107
❙ Audio Files on Device MP3/WMA/WAV files in your device can be played on the following specifications. Standard MPEG1 Audio Layer 3 File extension .mp3 Sample rate 32/44.1/48 (kHz) Bit rates (kbps) 32/40/48/56/64/80/96/112/128/160/ 192/224/256/320/VBR Available tags ID3v2 (v2.2/v2.3/v2.4) ID3v1 (v1.0/v1.1) Standard Windows Media Audio Version 7/8/9 File extension… -
Page 108
Audio System (Continued) ❙ To Connect Your iPhone/iPod/Android After connecting, the USB icon appears iPhone/iPod/Android GL1800DA Phone/USB Device on the screen. phone/USB device USB 1 connector (1.5A) USB 1 connector USB icon • To prevent any potential issues, be sure to use an Apple MFi Certified Lightning Connector for Apple CarPlay, and for Android Auto, the USB cables should be… -
Page 109
USB 2 connector (1.0A) After connecting, the USB icon appears • Do not leave your device in the vehicle • Apple CarPlay/Android Auto cannot be on the screen. (travel trunk, shelter case or saddlebag used with USB connection via USB 2 etc.). -
Page 110
Audio System (Continued) ❙ Playing Audio Screen Information To Play a Track The audio system can play music stored on The information displayed on the screen Connect the device you want to play a device connected via USB or Bluetooth ®… -
Page 111
❙ ❙ ❙ To Pause a Track To Change a Track To Select the Play Mode Push and hold switch to pause a track To skip to the next track, move You can select repeat and random modes. and mute the volume. press on the 4-way key switch. -
Page 112
Audio System (Continued) ❙ • Repeat all play mode: Repeats all To Select a Track from the Playlist • Available operating functions may differ tracks in the current playlist ([Artists], You can select a track from various playlists depending on the connected device and depending on the connected device. -
Page 113
Apple apps. where Apple CarPlay is available, as well CarPlay performance or functionality. • In no event shall Honda be liable for any as information pertaining to function, damages or troubles that occur in the refer to the Apple homepage. -
Page 114
Audio System (Continued) ❙ ❙ To Setup Apple CarPlay When the disclaimer message appears Apple CarPlay Menu Use of Apple CarPlay will result in the on the screen, select [Enable once] or Apple CarPlay menu screen transmission of certain user and vehicle [Always enable], and then press Music Messages… -
Page 115
Siri is a trademark of Apple Inc. Check and reply to text messages, or have Say a voice command through the messages read to you. paired headset. HONDA Go back to the Home screen. Go back to the Apple CarPlay menu screen. -
Page 116
• Google, Android, Google Maps, Google The use and handling of user and vehicle • In no event shall Honda be liable for any Play Google assistant and Android Auto information transmitted to /from your damages or troubles that occur in the are trademarks of Google LLC. -
Page 117
❙ To Setup Android Auto When the disclaimer message appears To appear App launcher screen, select When you connect an Android phone to on the screen, select [Enable once] or and then press switch. the unit via the 1.5A USB port, Android [Always enable], and then press Auto is automatically initiated. -
Page 118
Audio System (Continued) ❙ App launcher screen Maps (Navigation) Go to App launcher screen Display Google Maps and use the The app launcher opens. App launcher screen navigation function just as you would with your Android phone. When the vehicle is in Phone Exit Go back to… -
Page 119
Below are examples of commands you can give with voice recognition: • Reply to text. • Call my wife. • Navigate to Honda. • Play my music. • Send a text message to my wife. Press and hold switch on the left •… -
Page 120
Audio System (Continued) ❙ ❙ Bluetooth Using ® Handsfree Call- Preparation Making a Call You can make calls by inputting any phone Connect with the paired mobile phone. number or by using the imported Bluetooth ® handsfree calling allows you to (P84) make and receive phone calls using your phonebook, call history or speed dial… -
Page 121
To Make a Call Using a Phone Number To end the call, press and hold To Make a Call Using a Speed Dial Entry [Dial by number] (Voice control) switch on the left [Speed dial] This function is disabled while the vehicle is You can make a call using the speed dial handlebar. -
Page 122
Audio System (Continued) To Store a Phone Number in the Speed From [Speed Dial]: From [Call history]/[Phonebook]: Dial List Select [Speed dial]. Select [Call history] or [Phonebook]. Speed dial numbers can be stored in three Select [Add speed dial], and then press Select the phone number you want to ways. -
Page 123
To Rearrange the Order of the Speed Rotate or press on the 4- To Delete a Stored Speed Dial Number Dial List way key switch to change the order of Select [Speed dial]. Select [Speed dial], and then press and Select the phone number you want to the speed dial list. -
Page 124
Audio System (Continued) To Make a Call Using the Imported To Make a Call Using the Call History Phonebook [Phonebook] [Call history] This function is disabled while the vehicle is You can make a call using the call history in motion. while the vehicle is in motion. -
Page 125
❙ Receiving a Call To Receive a Call To Reject a Call When there is an incoming call, an audible When a call comes in, press switch on When a call comes in, press and hold the left handlebar to receive the call. switch on the left handlebar to reject a call. -
Page 126
Audio System (Continued) ❙ Making Multiple Calls enter a phone number in [Dial by To End a Call in Progress You can handle multiple calls at the same number]. Press and hold switch on the left time if the connected mobile phone handlebar to end the second call. -
Page 127
❙ Sending DTMF tones during a call During a call, select [Touch tones], and You can send DTMF (Dual Tone Multi then press switch. Frequency) tones during a call. To send a DTMF tone, select a number This is useful when you call a menu-driven key, and then press switch. -
Page 128
!b!c Make sure the engine stop switch is in This vehicle is equipped with a Honda (Run) position. SMART Key system. Always keep Honda (P55) Unlock the steering. SMART Key on you when you ride the Turn the ignition switch to ON. -
Page 129
Make sure the parking brake lever is Neutral ( indicator comes on). released before riding. Make sure the status of the Honda Turn the ignition switch to OFF. SMART Key is active (P56) and enter If you turn the… -
Page 130
Shifting Gears ❙ Recommended Shift Points GL1800BD/D/DA GL1800/B Your vehicle is equipped with an Shifting Up Your vehicle transmission has 6 forward automatically controlled 7-speed From 1st to 2nd 12 mph (20 km/h) gears in a one-down, five-up shift pattern. transmission. -
Page 131
When you can change between GL1800BD/D/DA Press the D side of the N-D switch Dual Clutch Transmission Neutral (N) and AT MODE (D): Press the A/M switch In order to respond to rider demands in a Vehicle is stopped and the engine is Press the N side of the N-D switch broad range of situations, the transmission idling. -
Page 132
Shifting Gears (Continued) Changing between Neutral and AT Riding in MT MODE Gear shift operation MODE/MT MODE Shift up and down with the shift up switch Shifting Up: (+) and shift down switch (-). Press the shift up switch (+) e ). -
Page 133
Walking Speed Mode Press the Walking Speed mode switch GL1800BD/D/DA Gear position indicator The Walking Speed mode assists the rider while applying the brake lever or pedal. with getting the vehicle into or out of tight The Walking Speed mode indicator is areas by maneuvering the vehicle at slow displayed. -
Page 134
Walking Speed Mode (Continued) To move the vehicle backward, press While in Walking Speed mode, do To stop the vehicle, apply the brake and hold the shift down switch (-), and not press the engine stop switch lever or pedal. then release the brakes. -
Page 135
Moving in Reverse Release the Reverse button, and the GL1800 and GL1800B Canada model Your vehicle’s reverse system allows you to vehicle will stop. back out of a parking space at slow speed. After your vehicle has stopped, press Make sure there are no obstacles or people the Reverse mode switch to turn off the in the direction of travel. -
Page 136
Riding Mode You can change the riding mode. SPORT mode: Selecting the Riding Mode The following parameters change SPORT mode has a quicker and more GL1800BD/D/DA according to each riding mode. powerful engine feel, harder braking feel, Press the MODE button while the throttle •… -
Page 137
GL1800/B Press one of the MODE buttons ( while the throttle is fully closed. The riding mode indicator blinks until the riding mode is changed. The riding mode does not change until the throttle is fully closed. Each time the ignition switch is turned to ON, the riding mode will automatically be set to mode. -
Page 138
Honda Selectable Torque Control (Torque Control) Torque Control mode (on/off) cannot be GL1800/D/DA Toque Control will limit the amount of changed while riding. torque applied to the rear wheel when the Stop the vehicle first and select the system detects the rear wheel spin during Torque Control mode (on/off) in the acceleration. -
Page 139
Cruise Control The cruise control system allows you to WARNING WARNING CRUISE MAIN indicator maintain a steady speed within specified range. Improper use of the cruise control The available speed setting range and can lead to a crash in which you operating gear are listed below: could be seriously hurt or killed. -
Page 140
Cruise Control (Continued) To Change the Set Speed To Change the Set Speed Continuously To Manually Increase the Set Speed To Fine Tune the Set Speed • To increase the set speed: push and hold Use the throttle to accelerate until you Display the cruise control set speed on the the cruise control lever to [RES/+] side. -
Page 141
To Temporarily Disengage the System To resume cruise control: • If you are still over 20 GL1800BD/D/DA Perform one of the following operations mph (30 km/h), push and release the to disengage the system temporarily. cruise control lever to [RES/+] side. (CRUISE SET indicator temporarily goes If you are still over 30 mph GL1800/B… -
Page 142
Hill Start Assist ❙ The Hill Start Assist (HSA) temporarily keeps Activating the HSA Hill start assist (HSA) indicator the vehicle from rolling backward (or To activate the HSA, squeeze the brake forward) if the brake lever or pedal is lever quickly until the Hill start assist (HSA) released when stopped on an incline such indicator comes on in white and hold the… -
Page 143
Refueling Opening the Fuel Fill Cap WARNING WARNING Lower edge of Open the fairing pocket. (P143) filler neck Gasoline is highly flammable and Slide the fuel lid opener to open the fuel explosive. You can be burned or lid. seriously injured when handling Turn the fuel fill cap counterclockwise fuel. -
Page 144
Storage Equipment ❙ Travel Trunk, Saddlebags and To Open the Travel Trunk and Saddlebags Make sure the Honda SMART Key is activated (P56) , and then enter the operating range Fairing Pocket The travel trunk and saddlebags are for with the Honda SMART Key. -
Page 145
To Open the Fairing Pocket GL1800/D/DA To close a compartment, place your hands You can store rider and passenger helmets Make sure the Honda SMART Key is in the travel trunk. flat on the edges of its lid and press down activated… -
Page 146
When the 30 days have passed after the washing your vehicle. ignition switch is turned to OFF or after the who does not have the Honda SMART Key. buttons of the Honda SMART Key is operated, the remote transmitter will no longer operate. -
Page 147
Shelter Case Helmet Holder Insert the helmet holder hanger into the Except GL1800DA The shelter case is for lightweight items. The helmet holder is located on the left helmet D-ring. Cargo should not exceed: grab rail. Helmet D-ring 6.6 lb (3.0 kg) Use the helmet holder only when parked. -
Page 148
Storage Equipment (Continued) Insert the helmet holder hanger in the Tool Kit , Owner’s Canada model only WARNING WARNING direction shown into the slit on the left Manual and Helmet Holder Hanger grab rail. The tool kit (Canada model only), owner’s Riding with a helmet attached to the manual and helmet holder hanger are To lock the helmet holder, push the… -
Page 149
Comfort & Convenience Adjustment ❙ Handle Grip Heater To Operate the Handle Grip Heater This vehicle is equipped with a handle grip Start the engine. (P126) (blank) heater that warms up your hands during Level 5 Press the handle grip heater button. The ride. -
Page 150
Comfort & Convenience Adjustment (Continued) ❙ Seat Heater To Operate the Rider Seat Heater GL1800/D/DA This vehicle is equipped with the seat (P126) Start the engine. (blank) heaters that warms up the rider’s seat and Press the rider seat heater button. The Level 5 passenger’s seat for comfortable riding on rider seat heater is on. -
Page 151
❙ Passenger Seat Heater Switch Do not use the seat heater with the engine The passenger seat heater switch is located at idle for a long time. It may result in a low (or dead) battery. on the left saddlebag. Do not use the seat heater when the seat is The passenger seat heater switch has 6 torn, cut or damaged as you can get… -
Page 152
Comfort & Convenience Adjustment (Continued) Adjustable Windscreen Turning the ignition switch to OFF will Windscreen adjusting lever You can adjust your windscreen height automatically lower the windscreen to its original position. higher or lower according to your preference. To keep the windscreen raised after turning If possible, you should adjust your off the electrical system, such as when windscreen height to below eye level for… -
Page 153
❙ Windscreen Ventilation Louver To Close the Windscreen Ventilation You can utilize the windscreen ventilation Louver louver to direct the flow of fresh air. Push the center of the louver until the louver is firmly closed. ❙ To Operate the Windscreen Ventilation Louver Press the release button, then the windscreen ventilation louver pops-up. -
Page 154: Maintenance
Please read “Importance of Maintenance” and “Maintenance Fundamentals” carefully before attempting any maintenance. Refer to “Specifications” for service data. An optional larger tool kit may be available. Check with your Honda dealer’s parts department. Maintenance Importance of Maintenance ….P. 153 Final Drive Oil ……..
-
Page 155: Maintenance
Importance of Maintenance For information about the exhaust emission Importance of Maintenance Maintenance Safety and noise emission requirements of the Keeping your vehicle well-maintained is Always read the maintenance instructions U.S. Environmental Protection Agency absolutely essential to your safety and to before you begin each task, and make sure (EPA), the California Air Resources Board protect your investment, obtain maximum…
-
Page 156: Maintenance Schedule
If you sell your vehicle, these service documents should be transferred Maintenance work should be performed in with the vehicle to the new owner. accordance with Honda’s standards and specifications by properly trained and equipped technicians. Your dealer meets all of these requirements. All scheduled…
-
Page 157
1,000 km 1.0 12.8 19.2 25.6 32.0 38.4 Procedures are provided in an official Honda Service Manual. Fuel Line – (2 P. 237) Throttle Operation : Technical. In the interest of safety, have your vehicle serviced Air Cleaner –… -
Page 158
Maintenance Record Distance Odometer Date Performed By: Notes 600 miles (1,000 km) 4,000 miles (6,400 km) 8,000 miles (12,800 km) 12,000 miles (19,200 km) 16,000 miles (25,600 km) 20,000 miles (32,000 km) 24,000 miles (38,400 km) 28,000 miles (44,800 km) 32,000 miles (51,200 km) 36,000 miles (57,600 km) 40,000 miles (64,000 km) -
Page 159: Maintenance Fundamentals
Maintenance Fundamentals Check the following items before you get Check the following items after you get on Pre-ride Inspection on your vehicle: your vehicle: To ensure safety, it is your responsibility to ● ● Tire tread wear and air pressures are Throttle action moves smoothly without perform a pre-ride inspection and make within limits.
-
Page 160
Maintenance Fundamentals Periodic Checks Check the air pressure ( P. 164), examine tread for wear and Tires and wheels damage ( P. 164), and check the wheels for damage. You should also perform other periodic maintenance checks at least once a month Check the engine oil level ( P. -
Page 161
Maintenance Fundamentals Replacing Parts WARNING WARNING Always use Honda Genuine Parts or their Installing non-Honda parts may equivalents to ensure reliability and safety. make your vehicle unsafe and cause When ordering colored components, a crash in which you can be seriously specify the model name, color and code hurt or killed. -
Page 162
Maintenance Fundamentals ❙ What to do in an emergency Battery WARNING WARNING If any of the following occur, immediately Your vehicle has a maintenance-free type see your doctor. The battery gives off explosive battery. You do not have to check the ●… -
Page 163
30 days using a charger designed NOTICE 3. If the terminals are heavily corroded, specifically for your Honda, which can be Jump starting using an automobile battery can damage clean and polish the terminals with a purchased from your dealer. Read the your vehicle’s electrical system and is not… -
Page 164
P. 244, 246 Blown fuse Conserving” or “Resource Conserving” on the circular API service symbol. If you use non-Honda engine oil, check the label to make sure that the oil satisfies all of the following standards: ● JASO T 903 standard* : MA ●… -
Page 165
Recommended Coolant NOTICE Pro Honda HP Coolant is a pre-mixed If the drain tube overflows, the air filter Brake fluid can damage plastic and painted surfaces. solution of antifreeze and distilled water. -
Page 166
Maintenance Fundamentals ❙ Even if the direction of the valve stem is Inspecting for Abnormal Wear Tires (Inspecting/Replacing) changed, do not return it to the original Inspect the tires for ❙ Checking the Air Pressure position. Have your vehicle inspected by signs of abnormal Even though your vehicle is equipped with your dealer. -
Page 167
WARNING WARNING or TWI range. ● Have the wheel balanced with Honda Installing improper tires on your Genuine balance weights or equivalent vehicle can adversely affect handling after the tire is installed. and stability, and can cause a crash Wear indicator ●… -
Page 168
Maintenance Fundamentals ❙ Tire Identification Number (TIN) Tire Service Life The tire identification number (TIN) is a The service life of your tires is dependent on group of numbers and letters located on many factors, including, but not limited to, the sidewall of the tire. -
Page 169: Removing & Installing Body Components
Removing & Installing Body Components Battery 6. Remove the battery holder from the GL1800BD/D/DA Canada model hook. Positive + terminal ❙ Removal 7. Remove the battery taking care not to drop the terminal nuts. Make sure the ignition switch is turned to OFF.
-
Page 170: Cylinder Head Side Cover
Removing & Installing Body Components u Cylinder Head Side Cover ❙ Installation Cylinder Head Side Cover The right and left cylinder head side cover can be removed in the same way. Install the parts in the reverse order of removal. Always connect the positive + ❙…
-
Page 171: Fog Light Cover
Removing & Installing Body Components u Fog Light Cover Fog Light Cover Left Engine Side Cover Bosses Screws Tabs Fog light cover Left engine side cover The right and left fog light cover can be removed in the same way. ❙…
-
Page 172: Side Cover
Removing & Installing Body Components u Side Cover ❙ Side Cover Installation Install the parts in the reverse order of removal. Bosses Side cover The right and left side cover can be removed in the same way. ❙ Removal 1. Open the saddlebag. P.
-
Page 173: Engine Oil
Engine Oil Checking the Engine Oil 6. Check that the oil level is between the Oil fill cap upper level and lower level marks on the dipstick. GL1800BD/D/DA Canada model Check the engine oil with the Idling Stop 7. Securely install the dipstick. system disabled.
-
Page 174: Coolant
Coolant Checking the Coolant Adding Coolant WARNING WARNING Check the coolant level in the reserve tank If the coolant level is below the LOWER Removing the radiator cap while the while the engine is cold. level mark, add the recommended coolant engine is hot can cause the coolant 1.
-
Page 175: Final Drive Oil
Final Drive Oil Checking the Final Drive Oil 1. Pour the final drive oil into the oil fill hole until it reaches the lower edge of 1. Hold the vehicle upright on firm level the opening. ground. Do not over fill above the lower edge 2.
-
Page 176: Brakes
Brakes Checking Brake Fluid If the brake fluid level in either reservoir is Front Front brake below the LWR mark or the brake lever and fluid reservoir 1. Place your vehicle in an upright position pedal freeplay becomes excessive, inspect on a firm, level surface.
-
Page 177
Brakes u Inspecting the Brake Pads Inspecting the Brake Pads If necessary have the pads replaced by your Front dealer. Wear Brake pads indicators Check the condition of the brake pad wear Always replace both left and right brake indicators. pads at the same time. -
Page 178
Brakes u Checking the Parking Brake Checking the Parking Brake Adjusting the Brake Light Switch GL1800D/BD/DA Place your vehicle on a firm, level surface. Check the operation of the brake light Stop the engine and push your vehicle switch. while set the parking brake to check the efficacy of the parking brake. -
Page 179: Side Stand
Side Stand Checking the Side Stand GL1800/B Start the engine, pull the clutch lever in, and shift the transmission into gear. GL1800D/BD/DA Start the engine and press the D side of N-D switch to switch the transmission into AT MODE (D). 5.
-
Page 180: Clutch
Clutch Checking Clutch Fluid 1. Place your vehicle in an upright position on a firm, level surface. 2. Check that the clutch fluid reservoir is GL1800/B horizontal and that the fluid level is Clutch fluid above the LWR mark. reservoir If the fluid level is low or if you find fluid leaks, or deterioration or cracks in the hoses and fittings, have the clutch system…
-
Page 181: Throttle
Throttle Checking the Throttle With the engine off, check that the throttle rotates smoothly from fully closed to fully open. If the throttle does not move smoothly, close automatically, have the vehicle inspected by your dealer. Throttle…
-
Page 182: Other Adjustments
Other Adjustments Adjusting the Clutch and Brake lever Forward Brake Levers Adjuster Brake lever You can adjust the distances between the tip of the clutch lever ( ) and GL1800/B handle grip, and between the tip of the brake lever and handle grip. ❙…
-
Page 183: Gl1800/D/Da
Other Adjustments u Selecting the Electrical Adjustable Suspension Selecting the Electrical NOTICE Adjustable Suspension The front and rear shock absorber damper units contain high pressure nitrogen gas. Do not attempt to disassemble, service, or improperly dispose of the GL1800/D/DA damper. See your dealer. The electrical adjustable suspension allows the preload of the rear suspension to be adjusted in four levels according to riding…
-
Page 184: Gl1800B/Bd
Other Adjustments u Adjusting the Rear Suspension ❙ Adjusting the Rear Spring Preload Suspension Remove the right side cover. P. 170 Turn the adjuster clockwise to increase spring preload (hard), or turn the adjuster GL1800B/BD You can adjust the spring preload of the counterclockwise to decrease spring rear suspension to suit the load or the road preload (soft).
-
Page 185: Other Replacement
Honda SMART Key Do not pry the built-in key forcibly. If the Honda SMART Key indicator flashes 5 Do not touch the circuit or terminal. times when the ignition switch is turned This may cause problems.
-
Page 186
Other Replacement u Replacing the Honda SMART Key Battery 4. Replace the old battery with a new one WARNING WARNING with the positive side facing up. 5. Assemble the parts in the reverse order Chemical Burn Hazard: do not of disassembly. -
Page 187: Troubleshooting
Troubleshooting Troubleshooting Engine Will Not Start……P. 186 Low Tire Pressure Indicator….P. 190 When the Honda SMART Key System Does Overheating (High coolant temperature TPMS Indicator……..P. 191 Not Operate Properly ……P. 197 indicator is on) ……..P. 187 AIRBAG Indicator ….
-
Page 188: Engine Will Not Start
Engine Will Not Start Starter Operates But Engine Starter Does Not Operate Does Not Start Check the following items: ● Check the correct engine starting Check the following items: sequence P. 126 ● Check the correct engine starting ● Check for a blown fuse P.
-
Page 189: Overheating (High Coolant Temperature Indicator Is On)
Overheating (High coolant temperature indicator is on) The engine is overheating when the 2. Check that the radiator fan is operating, following occurs: and then turn the ignition switch to OFF. ● High coolant temperature indicator If the fan is not operating: comes on.
-
Page 190: Warning Indicators On Or Flashing
Warning Indicators On or Flashing Low Oil Pressure Indicator PGM-FI (Programmed Fuel The combined ABS indicator may flash if: ● The front wheel leaves the ground for Injection) Malfunction If the low oil pressure indicator comes on, 1 second or more Indicator Lamp (MIL) pull safely to the side of the road and stop ●…
-
Page 191: Torque Control Indicator
Indicator does not go off at speeds above when communication between your 3 mph (5 km/h). If you do not have the Honda SMART Key, vehicle and Honda SMART Key stops after Even when the Torque Control indicator is the electrical system can be activated by turning on the ignition switch.
-
Page 192: Clutch Temperature Indicator
Warning Indicators On or Flashing u Clutch Temperature Indicator Clutch Temperature Indicator Low Tire Pressure Indicator If the low tire pressure indicator does not go off after inflating the tires to the If the low tire pressure indicator flashes, specified values, have your dealer to check GL1800BD/D/DA The clutch temperature indicator flashes if check your tires as soon as possible.
-
Page 193: Tpms Indicator
Warning Indicators On or Flashing TPMS Indicator and cause the low tire pressure indicator to AIRBAG Indicator Hill Start Assist (HSA) turn on. Or, if you check and adjust your Indicator tire pressure in cooler conditions, and ride GL1800DA The AIRBAG indicator comes on if there is a into extremely hot conditions, the tire may If the Hill start assist (HSA) indicator comes problem with the airbag system.
-
Page 194: Other Warning Indications
Other Warning Indications Fuel Gauge Failure Indication Handle Grip Heater Failure Indication If the fuel system has an error, the fuel gauge segments will be displayed as shown If the handle grip heater system has an in the illustration. error, the handle grip heater indicator will If this occurs, see your dealer as soon as blink.
-
Page 195: Seat Heaters Failure Indication
Other Warning Indications Seat Heaters Failure Indication Seat Heaters Failure Indication Coolant Temperature Gauge Failure Indication GL1800/D/DA If the seat heater system has an error, the If the cooling system has an error, all seat heater indicator will blink. segments will blink as shown in the If this occurs, see your dealer as soon as illustration.
-
Page 196: If The «-» Is Blinking In The Gear Position Indicator While Riding (Gl1800Bd/D/Da)
If the “-” is Blinking in the Gear Position Indicator While Riding (GL1800BD/D/DA) If the “-” is blinking in the gear position If you can shift from N to D range: indicator while riding, you may have a When a gear position is shown in the gear serious problem with the Dual Clutch position indicator, you can ride in that gear.
-
Page 197: When The Idling Stop System Does Not Operate Properly (Gl1800Bd/D/Da Canada Model)
When the Idling Stop System Does Not Operate Properly (GL1800BD/D/DA Canada model) Idling Stop Indicator Does Not Engine is Not Stopped by the If PGM-FI malfunction indicator lamp (MIL) lights: When the PGM-FI malfunction indicator Come On Idling Stop System While the lamp (MIL) lights, the Idling Stop system Idling Stop Indicator is On does not operate for protection of the…
-
Page 198
When the Idling Stop System Does Not Operate Properly (GL1800BD/D/DA Canada model) u Engine Does Not Start Even If the Throttle is Opened Engine Does Not Start Even If If the start/Idling Stop button is operated: While the engine is stopping by the Idling the Throttle is Opened Stop system, if you press the start/Idling Stop button, the Idling Stop system will be… -
Page 199: When The Honda Smart Key System Does Not Operate Properly
When the Honda SMART Key System Does Not Operate Properly When the Honda SMART Key system does When the Honda SMART Key comes not work properly, perform the following. into contact with or is covered by ● Check that the Honda SMART Key metal objects.
-
Page 200: Activating The Electrical System In An Emergency
Activating the Electrical System in an Emergency The electrical system can be activated by The ID number is input according to the Example: inputting the ID number. number of times the fairing pocket opener • To input “0”, press the start button is pressed.
-
Page 201
Activating the Electrical System in an Emergency ID number input success: ID number input failure: ID number input cancel After the last digit of the ID number is If the ID number is not authenticated after If you input the wrong number, you can inputted and the start button is pressed, inputting, the steering cannot be unlocked cancel ID number input by not pressing the… -
Page 202: If The Saddlebags Or Travel Trunk Won’t Open
Emergency Key battery becomes weak. clockwise to open the left saddlebag. If you lose the Honda SMART Key, the left 1. Remove the rear center lid by using a flat Left saddlebag opener saddlebag can be unlocked using the head screwdriver covered with a emergency key.
-
Page 203
If the Saddlebags or Travel Trunk Won’t Open To Open the Travel Trunk Emergency 4. Release the right saddlebag opener from To Open the Travel Trunk 3. Install the travel trunk opener onto the the prong in the left saddlebag. Pull the prong before closing the right Emergency right saddlebag opener to open the… -
Page 204: Tire Puncture
If We recommend you have this type of you have a tire professionally repaired at a non-Honda service performed by your dealer. facility, we recommend that you have the work checked by your dealer.
-
Page 205: Audio System Trouble
Audio System Trouble Symptom Cause/remedy Some Bluetooth ® devices and application software you use may be incompatible with the audio system and/or the operable functions may be limited. Check that the audio system and Bluetooth ® device are both in the pairing mode. P.
-
Page 206
Audio System Trouble Symptom Cause/remedy Some Bluetooth ® devices and application software you use may not connect automatically. For connecting, follow the instructions in the instruction manual of your Bluetooth ® device. The Bluetooth ® devices that can be connected at the same time are limited to one Bluetooth ®… -
Page 207
Audio System Trouble Symptom Cause/remedy Presence of another Bluetooth ® device or a device that emits electromagnetic waves such as communication equipment in the vicinity sometimes affects the communication. Due to the characteristics of Bluetooth ® , though in rare cases, the system operation may become unstable. -
Page 208
Audio System Trouble Symptom Cause/remedy Depending on the audio device and the audio file, nothing may be displayed or the display may be inaccurate in some cases. Check the information on available tags. P. 105 When the information in an audio file such as the artist name and track title is in a non-compliant tag format, it may be indicated by “.”… -
Page 209
Audio System Trouble Symptom Cause/remedy Connected Bluetooth ® device may be unsupported device. Check the supported Bluetooth ® version/profiles. P. 84 Bluetooth ® handsfree calling When the Bluetooth ® connection is unstable due to surrounding conditions or radio wave cannot be available. conditions, the handsfree calling functions may not be available. -
Page 210
Audio System Trouble Symptom Cause/remedy Connected iPhone may be unsupported model. Check the compatible model with Apple CarPlay. P. 111 Connected iPhone may be unsupported iOS version. Update the iPhone to the newer version. To use Apple CarPlay, a headset connection is necessary. Connect a paired headset. P. -
Page 211
Audio System Trouble Symptom Cause/remedy Connected Android phone may be unsupported model. Check the compatible model with Android Auto. P. 114 Connected Android phone may be unsupported Android version. Update the Android phone to the newer version. To use Android Auto, a headset connection is necessary. Connect a paired headset. P. -
Page 212
Audio System Trouble Symptom Cause/remedy You cannot operate Apple CarPlay/Android Auto by the center panel switches/Interface dial while Connected, but does not operate the vehicle is in motion. Operate with the left handlebar switches or park your vehicle in a safe Apply CarPlay/Android Auto. -
Page 213
Audio System Trouble Symptom Cause/remedy Certain manual functions and settings are disabled or inoperable while the vehicle is in motion. Audio system cannot operate. You cannot select a grayed-out menu until the vehicle is stopped. In [Vehicle setting], certain items cannot be selected and display information is limited when the Set menu in [Vehicle setting] does ignition switch is in ACC. -
Page 214: Electrical Trouble
Electrical Trouble Battery Goes Dead Burned-out Light Bulb Charge the battery using a motorcycle All light bulbs on the vehicle are LEDs. battery charger. If there is an LED which is not turned on, Remove the battery from the vehicle before see your dealer for servicing.
-
Page 215: Blown Fuse
Electrical Trouble Blown Fuse Blown Fuse GL1800D/DA USA model GL1800BD USA model External Fuse box cover Fuse box cover External Before handling fuses, see “Inspecting and amplifier fuse amplifier fuse Replacing Fuses.” P. 162 Spare fuses Spare fuses ❙ Fuse Box Fuses 1.
-
Page 216
Electrical Trouble u Blown Fuse ❙ Ignition Main Fuse & ACC Main GL1800 NOTICE Fuse If a fuse fails repeatedly, you likely have an electrical External Fuse box cover problem. Have your vehicle inspected by your dealer. amplifier fuse Ignition main fuse Spare fuses ACC main fuse Fuse puller… -
Page 217: Information
Authorized Manuals ……P. 237 Android Auto………. P. 222 Warranty Coverage and Service ..P. 238 Caring for Your Vehicle……P. 224 Honda Contacts ……..P. 240 Storing Your Vehicle ……P. 227 Customer Support ………P. 241 Transporting Your Vehicle ….P. 228 Reporting Safety Defects …..P.
-
Page 218: Keys
Releasing the fairing pocket in the Honda SMART Key. P. 200 The ID number of the Honda SMART Key is To make a duplicate key, take the key and on the ID tag. You can also unlock the key tag to your dealer or a locksmith.
-
Page 219
If the circuits are damaged, the Honda SMART Key, wipe it off system normally lasts about 2 years. Honda SMART Key will not allow you to immediately to avoid cracking or To get add additional Honda SMART Key, perform any operations. -
Page 220: Instruments, Controls, & Other Features
Instruments, Controls, & Other Features Instruments, Controls, & Tripmeter Automatic Brightness Control Other Features The tripmeters return to 0.0 when each The backlight brightness of the meter will read-out exceeds 9,999.9. be controlled automatically when “AUTO” Ignition Switch is selected on the brightness setting. Leaving the ignition switch in ON or ACC Ambient brightness is detected by the Owner’s Manual…
-
Page 221
Instruments, Controls, & Other Features conjunction with any other antenna or Antenna types not included in the report, Audio System transmitter. Installers must ensure that having a gain greater than the maximum The audio systems on your vehicle emit 20 cm separation distance will be gain indicated for that type, are strictly radio waves when in operation. -
Page 222
Honda SMART Key System This device complies with Industry Canada’s air pressure of a tire becomes significantly The Honda SMART Key system on your applicable licence-exempt RSSs. low while riding, the sensor in that tire vehicle emit radio waves when in… -
Page 223
Instruments, Controls, & Other Features Canada Assist-slipper Clutch System Airbag System This device complies with Industry Canada GL1800/B GL1800DA licence-exempt RSS standard(s). Operation ❙ The assist-slipper clutch system helps to Event Data Recorders is subject to the following two conditions: prevent the rear tire from locking up when Your vehicle is equipped with one or more (1) this device may not cause interference,… -
Page 224: Legal Information On Apple Carplay/Android Auto
DISCONTINUED, STRICTLY LIMIT APPLE WITH ALL FAULTS AND WITHOUT EXAMPLE, VEHICLE LOCATION, VEHICLE AND ITS SERVICE PROVIDERS’ OTHER WARRANTY OF ANY KIND, AND HONDA SPEED, AND VEHICLE STATUS) BEING LIABILITIES, DESCRIBE THE KINDS OF USER HEREBY DISCLAIMS ALL WARRANTIES GATHERED AND STORED BY GOOGLE AND…
-
Page 225
ACCURACY OF DIRECTIONS, ESTIMATED TO THE EXTENT NOT PROHIBITED BY LAW, REQUIRED BY APPLICABLE LAW IN CASES TRAVEL TIME, SPEED LIMITS, ROAD IN NO EVENT SHALL HONDA OR ITS INVOLVING PERSONAL INJURY) EXCEED CONDITIONS, NEWS, WEATHER, TRAFFIC, AFFILIATES BE LIABLE FOR PERSONAL THE AMOUNT OF FIVE DOLLARS ($5.00). -
Page 226: Caring For Your Vehicle
Frequent cleaning and polishing is ● cloth. Do not use high-pressure washers: important to ensure the life of your Honda. 4. After the vehicle dries, lubricate any High-pressure water cleaners can A clean vehicle makes it easier to spot moving parts.
-
Page 227
Caring for Your Vehicle ● Do not direct water near the headlight. Aluminum Components Windscreen The headlight’s inside lens may fog Aluminum will corrode from contact with Keep the windscreen raised after turning temporarily after washing or while dirt, mud, or road salt. Clean aluminum parts off the electrical system to make it easy to riding in the rain. -
Page 228
Caring for Your Vehicle Instrument Panel Exhaust Pipe and Muffler The instrument panel is coated with a The exhaust pipe and muffler are stainless special surface treatment to prevent steel but may become stained by mud or reflection and glare. dust. -
Page 229: Storing Your Vehicle
If you won’t be riding for an extended For more information about storage, period, follow these guidelines: refer to the Honda Winter Storage Guide, ● Wash your vehicle and wax all painted available from your dealer.
-
Page 230: Transporting Your Vehicle
Transporting Your Vehicle Transporting Your Vehicle Remove both left and right saddlebag Tie-down Method guard covers by removing the clips to If your vehicle needs to be transported, it 1. Remove both sides of the cylinder head expose the saddlebag guards. Secure the vehicle using a buckle or ratchet should be carried on a motorcycle trailer or side covers.
-
Page 231: You & The Environment
You & the Environment You & the Environment Recycle Wastes Put oil and other toxic wastes in approved Owning and riding a vehicle can be containers and take them to a recycling enjoyable, but you must do your part to center.
-
Page 232: Vehicle Identification Number
Vehicle Identification Number Vehicle Identification Number The VIN and engine serial number uniquely identify your vehicle and are required in order to register your vehicle. They may also be required when ordering replacement parts. To check the VIN, remove the cover by releasing the clip.
-
Page 233: Tire Pressure Monitoring System (Tpms) Explanation
Tire Pressure Monitoring System (TPMS) Explanation Tire Pressure Monitoring fuel efficiency and tire tread life, and may signal low tire pressure as intended. affect the vehicle’s handling and stopping System (TPMS) Explanation TPMS malfunctions may occur for a variety ability. of reasons, including the installation of Both tires should be checked monthly Please note that the TPMS is not a…
-
Page 234: Emission Control Systems
Canada when operated and maintained according Vehicle emission control to the instructions provided. information label Compliance with the terms of the Distributor’s Warranties for Honda Motorcycle Emission Control Systems is necessary in order to maintain a valid emissions system warranty.
-
Page 235
Emission Control Systems ❙ Catalytic Converters Noise Emission Requirements Exhaust Emission Control System The exhaust system contains one or more The EPA requires that vehicles built after The exhaust emission control system catalytic converters. Catalytic converters January 1, 1983 comply with applicable includes the following components that use a catalyst to convert most of the noise emission standards for one year or… -
Page 236
Emission Control Systems ● Removing or disabling any emissions Evaporative Emission Control System Noise Emission Control System compliance component, or replacing any ❙ TAMPERING WITH THE NOISE CONTROL 50 STATE (meets California) compliance component with a non- An evaporative emissions control system SYSTEM IS PROHIBITED: compliant component. -
Page 237: Catalytic Converter
A replacement unit engine. Have your vehicle serviced as must be an original Honda part or soon as possible. equivalent.
-
Page 238: Oxygenated Fuels
Oxygenated Fuels Oxygenated Fuels The following fuel blends have been If you accidentally fill your fuel tank with an approved for use in your vehicle: oxygenated fuel containing higher ● Ethanol (ethyl alcohol) up to 10% by percentages, you may experience Some conventional fuels blended with volume.
-
Page 239: Authorized Manuals
Monday — Friday 8:00 AM — 6:00 PM EST authorized manuals. Also available, but not necessary to service Description your model, is the Honda Common Service 2021 GL1800/B/BD/D/DA Service Manual Manual, which explains basic service Common Service Manual (61CSM00) information for various systems on Honda motorcycles, scooters, and ATV.
-
Page 240: Warranty Coverage And Service
Aftermarket and Recycled Parts are explained in the Warranties Booklet otherwise covered under warranty before given to you by your Honda dealer at the New Jersey denying warranty coverage. Additionally, The Magnuson-Moss Warranty Act, 15 time of purchase.
-
Page 241
If you believe you have a problem with your vehicle, call the service department of your Honda dealer. Make an appointment for an inspection and diagnosis. You will be asked to authorize that inspection, and your dealer will return the results of the inspection. -
Page 242: Honda Contacts
Name, address, and telephone number of your warranty coverage. American Honda Motor Co., Inc. ● Product model, year, and VIN If you wish to contact Honda directly to Your Honda dealer can also supply ● Date of purchase comment on your experiences with your information about, riding events, and ●…
-
Page 243: Customer Support
Customer Support Customer Support Honda Customer Support You may contact Honda Customer Service, Motorcycle Division, American Honda Motor Co., Inc., P.O. Box 2200, mailstop: 100-4C-7B, Torrance, CA 90509-2200. Telephone: (866) 784-1870. Audio/Navigation System Software and Map Software Upgrades Honda is continually expanding the scope of the Map software and the Audio/ Navigation System software.
-
Page 244: Reporting Safety Defects
Administrator, NHTSA, National Highway Traffic Safety 1200 New Jersey Avenue, SE., Administration (NHTSA) in addition Washington, DC 20590. to notifying American Honda Motor Co., Inc. You can also obtain other information about motor vehicle If NHTSA receives similar complaints, safety from: it may open an investigation, and if it http://www.safercar.gov.
-
Page 245
However, Transport Canada cannot become involved in individual problems between you, your dealer, or Honda Canada Inc. -
Page 246: Specifications
SAE 10W-30, JASO T 903 Canada model engine oil 1.304 standard MA, Pro Honda GN4 4-stroke oil GL1800DA 1.038 (USA & Canada) or Honda 4-stroke oil, or an 855 lb (388 kg) Gear ratio USA model equivalent motorcycle oil 0.820 GL1800DA 4.6 US qt (4.4 liters)
-
Page 247
5.9 lbf·ft (8 N·m, 0.8 kgf·m) After draining 4.7 US oz (140 cm Final drive oil capacity After disassembly 5.4 US oz (160 cm Recommended Honda DOT 4 Brake Fluid brake fluid Cooling system 3.06 US qt (2.90 liters) capacity Recommended Pro Honda HP Coolant coolant ■… -
Page 248
Canada model engine oil standard MA, Pro Honda GN4 4-stroke oil GL1800 423 lb (192 kg) Maximum weight (USA & Canada) or Honda 4-stroke oil, or an capacity* GL1800B 421 lb (191kg) equivalent motorcycle oil 3.7 US qt (3.5 liters) -
Page 249
4.7 US oz (140 cm 5.9 lbf·ft (8 N·m, 0.8 kgf·m) Final drive oil capacity After disassembly 5.4 US oz (160 cm Recommended brake (clutch) Honda DOT 4 Brake Fluid fluid Cooling system 3.06 US qt (2.90 liters) capacity Recommended Pro Honda HP Coolant coolant ■… -
Page 250
Information Record Engine No. Color Label & Code Owner’s Name Address City/State Phone Dealer’s Name Address City/State Phone Service Manager… -
Page 251
California Proposition 65 Warning WARNING: Operating, servicing and maintaining a passenger vehicle or off-highway motor vehicle can expose you to chemicals including engine exhaust, carbon monoxide, phthalates, and lead, which are known to the State of California to cause cancer and birth defects or other reproductive harm.
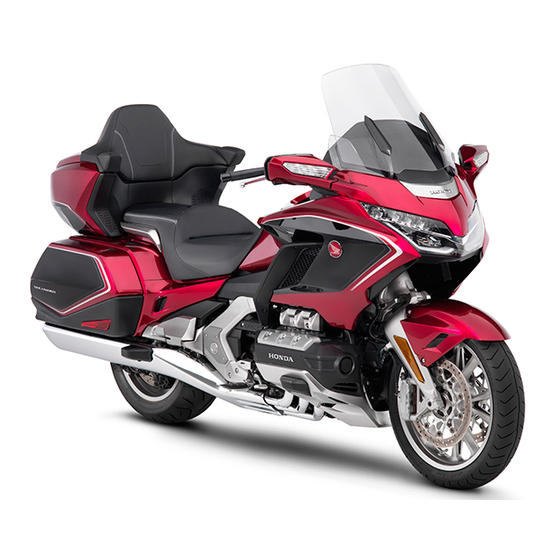
- Manuals
- Brands
- Honda Manuals
- Motorcycle
- Gold Wing 2018
- Owner’s manual
-
Contents
-
Table of Contents
-
Troubleshooting
-
Bookmarks
Quick Links
Contents
P. 2
P. 18
P. 136
P. 172
P. 207
P. 233
P. 238
Gold Wing (GL1800)
MOM 16400 (1708)
31MKC600
Related Manuals for Honda Gold Wing 2018
Summary of Contents for Honda Gold Wing 2018
-
Page 1
Contents Motorcycle Safety P. 2 Operation Guide P. 18 Maintenance P. 136 Troubleshooting P. 172 Information P. 207 Specifications P. 233 Index P. 238 Gold Wing (GL1800) MOM 16400 (1708) 31MKC600… -
Page 2
This manual should be considered a permanent part of the motorcycle and should remain with the motorcycle when it is resold. This publication includes the latest production information available before printing. Honda Motor Co., Ltd. reserves the right to make changes at any time without notice and without incurring any obligation. -
Page 3
When service is required, remember that Honda motorcycle. Your selection of a your Honda dealer knows your motorcycle Honda makes you part of a worldwide best. If you have the required mechanical family of satisfied customers who “know-how” and tools, you can purchase appreciate Honda’s reputation for building… -
Page 4
A Few Words About Safety Your safety, and the safety of others, is very You will find important safety information Other important information is important. Operating this motorcycle safely in a variety of forms, including: provided under the following ● is an important responsibility. -
Page 5: Table Of Contents
Motorcycle Safety This section contains important information for safe riding of your motorcycle. Please read this section carefully. Safety Guidelines ……..P. 3 Safety Labels ……….P. 6 Safety Precautions ……… P. 10 Riding Precautions ……… P. 13 Accessories & Modifications….P. 17 Loading ………..
-
Page 6: Safety Guidelines
Safety Guidelines Safety Guidelines Before Riding Take Time to Learn & Practice Make sure that you are physically fit, Even if you have ridden other motorcycles, Follow these guidelines to enhance your mentally focused and free of alcohol and practice riding in a safe area to become safety: drugs.
-
Page 7
Make yourself more visible, especially at Keep Your Honda in Safe Condition crash. night, by wearing bright reflective clothing, positioning yourself so other drivers can see It’s important to keep your motorcycle… -
Page 8
Safety Guidelines Emergency Shut-down Procedure for Carbon Monoxide Hazard WARNING WARNING Motorcycles Equipped with Dual Exhaust contains poisonous carbon Clutch Transmission Running the engine of your monoxide, a colorless, odorless gas. motorcycle while in an enclosed or GL1800BD/D/DA Breathing carbon monoxide can cause loss even partially enclosed area can Unlike standard motorcycles, or its manual of consciousness and may lead to death. -
Page 9: Safety Labels
Safety Labels Safety Labels GL1800/D/DA Safety and information labels on your motorcycle provide important safety information and may warn you of potential hazards that could cause serious injury. Read these labels carefully and don’t remove them. If a label comes off or becomes hard to read, contact your dealer for a replacement.
-
Page 10
Safety Labels GL1800DA GL1800/D GL1800/D GL1800DA GL1800DA continued… -
Page 11
Safety Labels GL1800B/BD… -
Page 12
Safety Labels… -
Page 13: Safety Precautions
Safety Precautions ❙ ❙ Safety Precautions Helmet Gloves Should be safety-standard certified, high- Full-finger leather gloves with high ● Ride cautiously and keep your hands on visibility, and correct size for your head abrasion resistance the handlebars and feet on the footpegs. ●…
-
Page 14
Safety Precautions ● The airbag might deploy in a severe angled There are several situations in which the Airbag System frontal collision, or in a sideswipe, or if the motorcycle airbag should not deploy. Four of the GL1800DA motorcycle underrides the rear of another more common situations are discussed here. -
Page 15
Safety Precautions ❙ ● Finally, if the motorcycle is involved in a Important Safety Precautions sideswipe with a stationary object, such as ● Do not install or temporarily attach any a concrete median barrier, or with another items, such as a map holder, over the vehicle traveling in the same direction, as airbag cover or in the area between the illustrated here, the airbag should not… -
Page 16: Riding Precautions
Riding Precautions ❙ Riding Precautions Combined ABS Brakes Your motorcycle is equipped with a brake Observe the following guidelines: system that distributes the braking force Break-in Period ● Avoid excessively hard braking and between the front and rear brakes. downshifting. During the first 300 miles (500 km) of The distribution of the braking force is Sudden braking can reduce the…
-
Page 17
Riding Precautions ❙ Engine Braking Riding in Bad Weather Engine braking helps slow your motorcycle If you decide to ride your motorcycle in the down when you release the throttle. For rain, fog, or other bad-weather conditions, further slowing action, downshift to a ride carefully. -
Page 18
4. Turn the ignition switch to (Lock). P. 55 Then, leave your motorcycle while taking the Honda SMART Key with you. Deactivate the Honda SMART Key system if necessary. P. 56 continued… -
Page 19
(TPMS) GL1800/D/DA operation. Always consider road and Your motorcycle is equipped with a tire When the Honda selectable torque control weather conditions, as well as your skills pressure monitoring system (TPMS) that (Torque Control) detects rear wheel spin and condition, when applying throttle. -
Page 20: Accessories & Modifications
Always ride at a safe speed for the load designed or approved for your motorcycle killed. you are carrying. by Honda or make modifications to your ● Avoid carrying an excessive load and motorcycle from its original design. Doing Follow all instructions in this owner’s keep within specified load limits.
-
Page 21: Parts Location
Operation Guide Parts Location GL1800/D/DA Seat Throttle grip (P165) Front brake fluid reservoir (P160) Windscreen (P134) Front brake lever (P167) Rear brake fluid reservoir (P160) (P127) Fairing pocket (P154) Engine oil level gauge Right cylinder head side cover (P151) Right fog light cover (P151) Rear brake pedal (P15)
-
Page 22
GL1800/D/DA (P167) Clutch lever GL1800 Clutch fluid reservoir (P164) GL1800 (P129) Shelter case GL1800/D Airbag (P64) GL1800DA Fuel lid (P125) (P126) Travel trunk (P152) Left engine side cover (P152) Left side cover (P129) Helmet holder (P132) Passenger seat heater switch Coolant reserve tank (P158) Engine oil fill cap… -
Page 23
GL1800B/BD Seat Throttle grip (P165) Front brake fluid reservoir (P160) Windscreen (P134) (P167) Front brake lever (P160) Rear brake fluid reservoir (P127) Fairing pocket Engine oil level gauge (P154) (P151) Cylinder head side cover Fog light cover (P151) Rear brake pedal Side cover (P152) Rear suspension spring preload… -
Page 24
GL1800B/BD Clutch lever (P167) GL1800B (P164) Clutch fluid reservoir GL1800B (P129) Shelter case Fuel lid (P125) Left engine side cover (P152) Helmet holder (P129) Coolant reserve tank (P158) (P152) Left side cover (P155) Engine oil fill cap Left saddlebag (P126) (P130) Tool kit Canada model only… -
Page 25
Instruments (P23) Multi-information display Tachometer NOTICE Do not operate the engine in the tachometer red zone. Excessive engine speed can adversely affect engine life. Speedometer Shows riding speed in miles Tachometer red zone per hour (mph) and kilometer (excessive engine rpm range) per hour (km/h). -
Page 26
❙ Multi-information Display Audio Source Your motorcycle is equipped with a multi- Enters the current audio mode. (P71) information display that presents various ❙ functions and settings. Navigation • Certain manual functions and settings Displays the navigation screen. (Refer to the are disabled or inoperable while the Navigation System manual.) vehicle is in motion. -
Page 27
Basic Operations To operate with the 4-way key switch on You can operate and set the various the left handlebar: Press to select the functions of your motorcycle using the available choices. Some menus will only use interface dial and buttons on the center the up and down function. -
Page 28
Information Bar To change the current audio source In the following cases, the information bar Displays various information (current audio information or vehicle information, press will appear or change from the current source info., vehicle info., help info., or INFO button until the desired information indication. -
Page 29
Instruments (Continued) ❙ Vehicle Information When “—.-” is displayed except for the Elapsed Time above-mentioned cases, go to your dealer Displays operating time since the engine for service. was started. (hours : minutes) Average Fuel Mileage (Trip A/Trip B) [Fuel Consumption (Avg.)] To change the unit: (P30) Displays the average fuel mileage since the… -
Page 30
System Information Indication Explanation Remedy Appears when communication between your Refer to “When the Honda SMART Key System Does motorcycle and Honda SMART Key is interrupted after Not Operate Properly.” (P184) turning on the electrical system. Appears when the battery of Honda SMART Key is Refer to “Replacing the Honda SMART Key Battery.”… -
Page 31
Instruments (Continued) ❙ Vehicle Setting • [Auto Dimmer Meter Illumination] (P32) Idling Stop GL1800D/DA Canada model only You can configure the vehicle settings. • [Day / Night] (P32) You can enable/disable the Idling Stop The vehicle settings are enabled with the (P33) •… -
Page 32
❙ Suspension Preload The rear suspension adjustment provides GL1800/D/DA You can automatically adjust the rear the following settings. suspension spring preload according to the Status icon Riding condition riding conditions by selecting from the four pre-programmed settings. Rider only (Minimum preload) The rear suspension spring preload Rider and luggage adjustment can be changed only when… -
Page 33
Instruments (Continued) ❙ Units Return to the previous screen or the The units for the cruise control set speed (P24) You can change the units used for fuel Home screen. ), odometer [TOTAL], tripmeter A/B consumption, distance, temperature and [TRIP A/B] and available driving distance The units for average fuel mileage [Fuel air pressure. -
Page 34
❙ ❙ To Change the Unit for Tire Pressure HSTC (Honda Selectable Torque Control) Auto Dimmer Meter Illumination Gauge [Air pressure] You can select the backlight brightness. GL1800/D/DA GL1800/D/DA You can enable/disable the HSTC function. Select [Units], and then press switch. -
Page 35
Instruments (Continued) ❙ Return to the previous screen or the Day / Night Select [Day / Night], and then press Home screen. (P24) You can select the timing for changing the switch. map color to improve the visibility of the Rotate or press on the 4-way… -
Page 36
❙ ❙ ❙ Ext. Amp EQ1/EQ2 (Equalizer) Head Light Opening You can enable/disable audio output when You can select from two equalizer curves You can enable/disable the headlight an external amplifier is connected. according to the specifications of your startup lighting when the ignition switch is If you want to install an external amplifier, vehicle (equipped with 4 speakers or 2 turned ON. -
Page 37
Instruments (Continued) INFO 1 Display • Available driving distance GL1800/D/DA GL1800/D/DA [RANGE] & Tire pressure gauge [FR/RR] Odometer & Tripmeter display (P37) Odometer & Tripmeter display display Cruise control set speed & Available driving distance GL1800B/BD Cruise control set speed & Air temperature gauge display (P37) [RANGE] display… -
Page 38
❙ Cruise Control Set Speed ( ) & Air Cruise Control Set Speed ( GL1800B/BD temperature Gauge [AIR] Display The speed set for the cruise control is displayed. To select cruise control set speed or Air Cruise control set speed & If the cruise control set speed does not temperature gauge, Press button… -
Page 39
Instruments (Continued) ❙ ❙ Odometer [TOTAL] & Tripmeter [TRIP A/B] Press button to move the cursor to To Reset the Tripmeter and Average Display the odometer, tripmeter A and Fuel Mileage To select Odometer or Tripmeter A or B, tripmeter B display. To reset tripmeter A and average fuel Press button when the cursor is at the… -
Page 40
❙ Available Driving Distance [RANGE] & Tire Press button to move the cursor to Available Driving Distance [RANGE] Pressure Gauge [ FR/RR] Display the available driving distance and tire Displays the estimated distance you can travel on the remaining fuel. pressure gauge display. -
Page 41
Instruments (Continued) ❙ Tire Pressure Gauge [ FR/RR] The indicated tire pressures may fluctuate Fuel Gauge when riding because the tire pressure varies Remaining fuel when only 1st (E) segment GL1800/D/DA Displays tire pressure for the selected tire. according to the temperature. starts flashing: approximately 0.92 US gal The system does not monitor the tire The tire pressure shown on the display may… -
Page 42
❙ INFO 2 Display Gear Position Indicator u“ ” flashes when the engine stop switch position is changed from D (AT MODE) indicator (Run) to (Stop) position with the Gear position Riding mode indicator ignition switch in ON. indicator u“ ”… -
Page 43
Instruments (Continued) ❙ ❙ Riding Mode Indicator Walking Speed Mode Indicator ( GL1800/B Refer to «Riding Mode» (P118) GL1800BD/D/DA Indication Gear position Comes on when in Walking Speed mode. 1st gear ❙ D (AT MODE) Indicator ( 2nd gear Walking Speed Mode: (P115) GL1800BD/D/DA 3rd gear… -
Page 44
❙ INFO 3 Display • Travel Trunk & Saddlebags GL1800/D/DA GL1800/D/DA INFO 3 display contains the following: Rider seat heater indicator ( (P42) Open Indicator • The segment(s) of open component(s) GL1800/D/DA Travel trunk & Saddlebags flashes with the «OPEN» indicator when Passenger seat heater indicator ( open indicator your motorcycle’s travel trunk and/or… -
Page 45
Instruments (Continued) ❙ ❙ ❙ Side Stand Indicator Handle Grip Heater Indicator ( Rider Seat Heater Indicator ( The side stand segment flashes with the Comes on when the handle grip heater is GL1800/D/DA «STAND» when the side stand is put down. on and indicates the selected heater level. -
Page 46
❙ ❙ Passenger Seat Heater Indicator ( Suspension Preload Indicator ( GL1800/D/DA GL1800/D/DA Comes on when the passenger seat heater Shows selected rear suspension spring is on. preload. The indicator flashes while transitioning Passenger seat heater indicator ( between setting modes. When the indicator flashes except for the above mentioned cases, go to your dealer for service. -
Page 47
Indicators If one of these indicators does not come on when it should, have your dealer check for problems. Left turn signal indicator Low tire pressure indicator Comes on briefly when the ignition switch is turned ON. If the indicator comes on or flashes: (P177) TPMS indicator Comes on briefly when the ignition switch… -
Page 48
Honda SMART Key indicator Comes on briefly when the ignition switch is turned ON. When the Honda SMART Key Indicator Flashes: (P176) AIRBAG indicator GL1800DA Steering lock indicator Comes on briefly when the ignition switch is turned Comes on briefly while the steering lock is activating. -
Page 49
Indicators (Continued) Torque Control indicator Right turn signal indicator GL1800/D/DA • Comes on when the ignition switch is turned ON. Goes off when your speed reaches Hill start assist (HSA) indicator approximately 3 mph (5 km/h) to indicate Comes on in white to amber when the ignition Torque Control is ready to work. -
Page 50
Combined ABS indicator Comes on when the ignition switch is turned ON. Goes off when your speed Parking brake indicator reaches approximately 3 mph (5 km/h). GL1800BD/D/DA If the indicator comes on while riding: (P175) Comes on as a reminder that you have not released the parking brake lever. -
Page 51
Switches Center Panel Interface dial ( ENTER • Rotate (Interface dial) or move in the eight possible directions to select the available choices. • Press (Enter) to set your selection. (P24) Basic Operations: (Home) button Press to return to the Home (P24) screen. -
Page 52
Ignition switch Switches the electrical system on/off, locks the steering. Make sure that the Honda SMART Key is activated (P56) (Lock) and enter the operating range. (P57) (Lock) (P55) Locks steering. Turns engine off. Turns electrical system on for starting/riding. -
Page 53
Switches (Continued) Left handlebar 4-way key/ switch Shift up switch (+) (P114) • Press the 4-way key switch in the • Pull to shift up a gear. GL1800BD/D/DA directions to select the available choices. • Pull to move the motorcycle Headlight dimmer switch •… -
Page 54
4-way key/ switch • Press the 4-way key switch in the directions GL1800/B to select the available choices. Headlight dimmer switch • Press switch to set your selection. (P24) • : High beam Windscreen adjusting lever • : Low beam Push up or down to adjust the •… -
Page 55
Switches (Continued) Right handlebar button MODE GL1800BD/D/DA (P118) Changes the riding mode. Engine stop switch/ Start button A/M switch Should normally remain in the Shifts between AT MODE (Run) position. (P114) and MT MODE. In an emergency, switch to the (Stop) position to stop the engine. -
Page 56
GL1800/B button MODE Engine stop switch/ Start Changes the riding mode. (P118) button Should normally remain in the (Run) position. In an emergency, switch to the (Stop) position to stop the engine. Press the start button to start the (P110) engine. -
Page 57
Switches (Continued) Passenger seat Honda SMART Key ON/OFF button This button is used to activate or deactivate the Honda SMART Key system and also to confirm the activation status. (P56) The LED informs you of current status of the Honda SMART Key System. -
Page 58
Locking Unlocking Lock the steering when parked to help a Turn the ignition switch to OFF. (P49) Make sure that the Honda SMART prevent theft. b Turn the handlebars all the way to the is activated (P56) and enter the… -
Page 59
System Status equipment such as a cardiac pacemakers. Press the ON/OFF button for less than 1 ON/OFF button second. The LED of the Honda SMART Key will show the status. When the LED of the Honda SMART Key: Honda SMART Key… -
Page 60
Anyone can operate the ignition switch and The Honda SMART Key system uses low- Honda SMART Key is within the shaded start the engine if your Honda SMART Key area shown in the illustration. is within operating range of your intensity radio waves. -
Page 61
Key on your person when you get on and Does Not Work Properly (P184) off the motorcycle or while riding. Honda SMART Key Do not place the Honda SMART Key in the travel trunk ( ), saddlebags, GL1800/D/DA shelter case (… -
Page 62
Press and hold the answer back button on press and hold the answer back button on the Honda SMART Key. the Honda SMART Key with the ignition The answer back system will not function switch OFF or (Lock), your motorcycle when the ignition switch is ON. -
Page 63: Parking Brake
Parking Brake Parking Brake Lever Parking Front brake lever GL1800BD/D/DA brake lever Be sure the parking brake is applied when parked and warming up the engine. Make sure the parking brake lever is released before riding. Squeeze To apply the parking brake: Squeeze the front brake lever and pull the parking brake lever back to lock the rear Apply:…
-
Page 64
Idling Stop System GL1800D/DA Canada model only Start/Idling Stop button The Idling Stop system is designed to help Idling Stop indicator reduce fuel consumption and noise by stopping the engine from idling when stopped, such as when waiting at an intersection. -
Page 65
Idling Stop System (Continued) Activating the Idling Stop System While the engine is stopped by the Idling Safety Precautions for the Idling Stop The Idling Stop system becomes ready to Stop system, if you press the start/Idling System stop the engine and the Idling Stop Stop button, the Idling Stop system is Do not go away from the motorcycle while indicator comes on when the following… -
Page 66
❙ Restarting the Engine To restart the engine when the Idling Engine Does Not Start Even If the Check that the Idling Stop indicator is Throttle is Opened: (P183) Stop indicator not flashing, shift the flashing, and then open the throttle. transmission into neutral and press the The engine will not restart if the rider is not start/Idling Stop button. -
Page 67
Airbag System • In a 30 mph (50 km/h), head-on crash • A crash into a solid barrier at 30 mph (50 GL1800DA The Airbag System can help cushion the into the side of a stationary car, the km/h) may not seem very serious, but for impact force to the rider’s head and upper motorcycle will come to a stop in about the rider it would be similar to falling… -
Page 68
Airbag System Components Your motorcycle airbag system includes: Airbag An airbag that is stored forward of the rider’s seat, under a cover marked AIRBAG The impact sensors that measure the rate of deceleration during a frontal impact are located on the left and right of the main frame under the rider seat. -
Page 69
However, you must As the rider’s head and upper body press have your motorcycle checked by a Honda into the airbag, the bag immediately begins motorcycle dealer if: deflating, through vents located at the •… -
Page 70: Audio System
Audio System About Your Audio System • In no event shall Honda be liable for any The audio system features AM/FM radio. damages or troubles that occur in the It can also play USB flash drives and iPod, use of audio devices and USB flash iPhone and Bluetooth ®…
-
Page 71
Audio System (Continued) Audio System Component Locations iPod/USB digital iPhone/Mobile ® audio player/USB phone/Bluetooth iPhone/Mobile flash drive, etc. audio device, etc. phone, etc. Rear speakers (P81) Bluetooth ® connection Radio antenna Main Bluetooth ® antenna Center panel Front speakers USB connection (P92) Multi-information USB connector… -
Page 72
Basic Operations (Interface dial): Rotate or move (Home) button: Select to go to the You can operate and set the various in the eight possible directions to select home screen. the available choices. Press to set your (Back) button: Press to go return the functions of the audio system using the selection. -
Page 73
Audio System (Continued) Left Handlebar [2] 4-way key switch: Press right, left, up or (Source/Private Mode) switch: down to select a menu item. Press to change the audio mode. Cycles lever [2] 4-way key switch • When listening to the radio through the audio modes as follows: [FM] [AM]… -
Page 74
❙ ❙ ❙ To Change the Audio Mode To Select the Audio Output Device To Adjust the Volume Press switch to change the audio You can switch the audio output between You can adjust the volume settings for the mode. Cycles through the audio modes on the paired Bluetooth ®… -
Page 75
Audio System (Continued) To increase the volume: push lever uTo increase the volume rapidly, push up and hold lever. To decrease the volume: push lever down. uTo decrease the volume rapidly, push down and hold lever. Audio output status icon VOLUME level range: Level 0 to 30 To resume the volume: Operate lever… -
Page 76
❙ Audio Setting Sound Setting Bass From this screen, you can go to various You can adjust the sound to fit your Adjusts lower-frequency sound level. setup options for the audio system. preferences. Rotate or press on the 4-way key switch to select a setting menu. Press switch to set your selection. -
Page 77
Audio System (Continued) Treble Bass Boost Fader Adjusts higher-frequency sound level. Enables/disables bass boost. Adjusts the front and rear speaker output balance. Select [Treble], and then press Select [Bass boost], and then press switch. switch to select (enable) or Select [Fader], and then press switch. -
Page 78
On models equipped Auto Volume (Speaker) Auto Volume (Headset) GL1800B/BD with the front speakers only, setting Selects the volume setting to automatically Selects the volume setting to automatically increase volume from the speakers as the increase volume from the headsets as the the fader level to a negative level speed of the motorcycle increases. -
Page 79
Audio System (Continued) ❙ CB Roger Beep General Setting Beep Roger Beep is a beep sound that is sent to Configures system settings. Enables/disables the beep sound when notify you of the end of transmission. operating keys. Rotate , or press on the 4-way key switch to select a setting menu. -
Page 80
Language TTS Language Clock Changes the system language. Changes the TTS (text-to-speech) The audio system receives signals from GPS language. satellites, updating the clock automatically. You can also adjust the clock manually. Select [Language], and then press switch. Select [TTS language], and then press To enable/disable GPS adjustment function: switch. -
Page 81
Audio System (Continued) To adjust the clock manually: Rotate or press on the 4- Time Zone way key switch until the desired hour is Selects the offset of local time from UTC (Coordinated Universal Time). displayed. Move or press This function is disabled when [Manual the 4-way key switch to set the hour. -
Page 82
System Information Apple CarPlay/iPod Sets the DST (Daylight Saving Time). Shows various information of the audio Selects whether Apple CarPlay connection This function is disabled when [Manual system. or iPod (USB) connection is used when setting] is selected. If you are in an area connecting your iPhone to the system with outside the range of the navigation map, a USB cable. -
Page 83
Audio System (Continued) System Reset Select [YES] to reset the settings. Select [YES] to reset your Apple CarPlay Resets the audio system to the factory uAfter selecting [YES], the system will setting. defaults. All settings including preset data reboot. will be reset default values. Return to the previous screen or the Restore Apple CarPlay Settings Home screen. -
Page 84
❙ Supported Bluetooth Bluetooth Setting ® version/profiles You can connect with your iPhone or other Bluetooth ® version Bluetooth 2.1 + EDR mobile phone and/or Bluetooth ® headsets HFP (Hand Free Profile) ver. 1.5 Bluetooth ® profiles via Bluetooth ® (For iPhone, mobile A2DP (Advanced Audio Distribution Profile) ver. -
Page 85
: Phone Select [Phone pairing], and then press : Music Tap “Honda Goldwing (default name)” switch to enter the setting Return to the previous screen or the on the Bluetooth ® setting menu of the menu. -
Page 86
[Inquiry] The names of the devices detected are (Bluetooth ® icon) and (device displayed on the background screen. icon) appear on the screen, and icons of Press switch to exit the available functions next to the name of search mode. the device turn on. -
Page 87
Audio System (Continued) To Connect the Paired Device Manually To Reconnect a Paired Device Select the paired device, and then press Automatically switch. When the ignition switch is turned ON or Select [Delete pairing], and then press ACC, the system reconnects with switch. -
Page 88
To Connect/Disconnect Available When the function is unavailable: When the function is unavailable: Functions Individually Select [Connect as phone] or [Connect Select [Disconnect as phone] or Depending on the connected device, this as music], and then press [Disconnect as music], and then press function may not be able to establish a switch. -
Page 89
Audio System (Continued) Rider HS Pairing/Passenger HS Pairing Select [Inquiry], and then press The names of the devices detected are This function is disabled while the switch. displayed on the background screen. motorcycle is in motion. Press switch to exit the search mode. -
Page 90
To Edit the System Name System default name: Honda Goldwing You can edit the system name to be Headset default name: Honda Rider HS / displayed on a target device. Honda Passenger HS Select [OK], and then press switch. Select [System name:], and then press switch. -
Page 91
Audio System (Continued) ❙ Phone Setting Private Mode You can configure the phone settings. Enables/disables a call with the passenger’s headset. Rotate or press on the 4-way key switch to select a setting menu item. Select [Private mode], and then press Press switch to set your switch to select (enable) or… -
Page 92
Mic. Level Adjusts the microphone volume. Select [Mic. level], and then press switch. Rotate or press on the 4- way key switch to select your preferred level. Return to the previous screen or the Home screen. (P24) Available setting range: Level -7 to +7 Default: Level 0… -
Page 93
Audio System (Continued) ❙ Playing the FM/AM Radio Screen Information Select Station The audio system features FM/AM radio. [1] Band You can tune the radio frequency one step Press (Source/Private Mode) switch to [2] Preset number at a time. select to FM/AM radio. (P71) [3] Current frequency The FM frequency moves in 200 kHz steps. -
Page 94
❙ Preset Stations To Store a Station Automatically: To Select a Preset Station: To Store a Station Manually: If you are traveling far from home and can Move or press on the no longer receive the stations you preset, You can store the frequencies of your 4-way key switch to select a preset you can use the auto select function to find favorite radio stations. -
Page 95
Audio System (Continued) ❙ Connecting your iPhone/iPod/USB Compatible Devices device iPhone, iPod and other devices compatible with your audio system are: You can connect your iPhone/iPod/USB USB flash drive Standard USB 2.0/3.0 device using a certified cable to the USB File systems FAT32 (recommendation), connector or connect a USB flash drive, etc. -
Page 96
❙ Audio Files on Device MP3/WMA/WAV files in your device can be played on the following specifications. Standard MPEG1 Audio Layer 3 File extension .mp3 Sample rate 32/44.1/48 (kHz) Bit rates (kbps) 32/40/48/56/64/80/96/112/128/160/ 192/224/256/320/VBR Available tags ID3v2 (v2.2/v2.3/v2.4) ID3v1 (v1.0/v1.1) Standard Windows Media Audio Version 7/8/9 File extension… -
Page 97
Audio System (Continued) ❙ ❙ To Connect Your iPhone/iPod/USB Device To Disconnect Your iPhone/iPod/USB GL1800DA Open the travel trunk. (P126) Device GL1800DA iPhone/iPod/USB device You can disconnect your iPhone/iPod/USB Except GL1800DA (P129) Open the shelter case. device at any time. Make sure to follow the USB connector Connect your iPhone/iPod/USB device device’s instructions on how to disconnect… -
Page 98
• Do not leave your device in the vehicle (travel trunk or shelter case, etc.). High heat will damage it. • Read precaution statements on the provided instructions of your device. • Some USB flash drives (such as devices with security lockout features, etc.) may not be used or restricted to its function. -
Page 99
Audio System (Continued) ❙ Playing Audio Screen Information To Play a Track The audio system can play music stored on The information displayed on the screen Connect the device you want to play a device connected via USB or Bluetooth ®… -
Page 100
❙ ❙ ❙ To Pause a Track To Change a Track To Select the Play Mode Push and hold switch to pause a track To skip to the next track, move You can select repeat and random modes. and mute the volume. press on the 4-way key switch. -
Page 101
Audio System (Continued) ❙ For USB device playback To Select a Track from the Playlist • Available operating functions may differ • Repeat play mode: You can select a track from various playlists depending on the connected device and -When playing from the [Folders] playlist, depending on the connected device. -
Page 102
• For details on countries and regions CarPlay performance or functionality. • In no event shall Honda be liable for any where Apple CarPlay is available, as well damages or troubles that occur in the as information pertaining to function, It is possible to use 3rd party apps if they use of iPhone. -
Page 103
Audio System (Continued) ❙ ❙ To Setup Apple CarPlay When the disclaimer message appears Apple CarPlay Menu Use of Apple CarPlay will result in the on the screen, select [Enable once] or Apple CarPlay menu screen transmission of certain user and vehicle [Always enable], and then press Music Messages… -
Page 104
Pair a Bluetooth headset. (P86) ® messages read to you. Press and hold switch on the left handlebar. HONDA Say a voice command through the Go back to the Home screen. paired headset. Go back to the Apple CarPlay menu screen. -
Page 105
Audio System (Continued) ❙ ❙ Using Bluetooth ® Handsfree Call- Preparation Making a Call You can make calls by inputting any phone Connect with the paired mobile phone. number or by using the imported Bluetooth ® handsfree calling allows you to (P81) make and receive phone calls using your phonebook, call history or speed dial… -
Page 106
To Make a Call Using a Phone Number To end the call, press and hold To Make a Call Using a Speed Dial Entry [Dial by number] (Voice control) switch on the left [Speed dial] This function is disabled while the You can make a call using the speed dial handlebar. -
Page 107
Audio System (Continued) To Store a Phone Number in the Speed From [Speed Dial]: From [Call history]/[Phonebook]: Dial List Select [Speed dial]. Select [Call history] or [Phonebook]. Speed dial numbers can be stored in three Select [Add speed dial], and then press Select the phone number you want to ways. -
Page 108
To Rearrange the Order of the Speed Rotate or press on the 4- To Delete a Stored Speed Dial Number Dial List way key switch to change the order of Select [Speed dial]. Select [Speed dial], and then press and Select the phone number you want to the speed dial list. -
Page 109
Audio System (Continued) To Make a Call Using the Imported To Make a Call Using the Call History Phonebook [Phonebook] [Call history] This function is disabled while the You can make a call using the call history motorcycle is in motion. while the motorcycle is in motion. -
Page 110
❙ Receiving a Call To Receive a Call To Reject a Call When there is an incoming call, an audible When a call comes in, press switch on When a call comes in, press and hold the left handlebar to receive the call. switch on the left handlebar to reject a call. -
Page 111
Audio System (Continued) ❙ Making Multiple Calls Enter a phone number in [Dial by To End a Call in Progress You can handle multiple calls at the same number]. Press and hold switch on the left time if the connected mobile phone handlebar to end the second call. -
Page 112
❙ Sending DTMF tones during a call During a call, select [Touch tones], and You can send DTMF (Dual Tone Multi then press switch. Frequency) tones during a call. To send a DTMF tone, select a number This is useful when you call a menu-driven key, and then press switch. -
Page 113: Starting The Engine
(Run) position. Unlock the steering. (P55) This motorcycle is equipped with a Honda Turn the ignition switch to ON. (P49) SMART Key system. Always keep Honda Shift the transmission to Neutral ( SMART Key on you when you ride the indicator comes on).
-
Page 114
Make sure the parking brake lever is brake indicator to come on). released before riding. Make sure the status of the Honda Make sure the engine stop switch is in SMART Key is active (P56) and enter (Run) position. -
Page 115: Shifting Gears
Shifting Gears ❙ Recommended Shift Points Dual Clutch Transmission GL1800/B Shifting Up GL1800BD/D/DA Your motorcycle transmission has 6 Your motorcycle is equipped with an From 1st to 2nd 12 mph (20 km/h) forward gears in a one-down, five-up shift automatically controlled 7-speed From 2nd to 3rd 19 mph (30 km/h) pattern.
-
Page 116
In order to respond to rider demands in a When you can change between Press D switch broad range of situations, the transmission Neutral (N) and AT MODE (D): Press A/M switch is equipped with two operating modes, AT Motorcycle is stopped and the engine is Press N switch MODE (D) (automatic shift for regular idling. -
Page 117
Shifting Gears (Continued) Changing between Neutral and AT Riding in MT MODE Gear shift operation MODE/MT MODE Shift up and down with the shift up switch Shifting Up: (+) and shift down switch (-). Press the shift up switch (+) e ). -
Page 118
Walking Speed Mode Press the Walking Speed mode switch GL1800BD/D/DA Gear position indicator The Walking Speed mode assists the rider while applying the brake lever or pedal. with getting the motorcycle into or out of The Walking Speed mode indicator is tight areas by maneuvering the motorcycle displayed. -
Page 119
Walking Speed Mode (Continued) To move the motorcycle backward, While in Walking Speed mode, do To stop the motorcycle, apply the brake press and hold the shift down switch (-), not press the engine stop switch lever or pedal. and then release the brakes. except in an emergency. -
Page 120
Moving in Reverse Release the Reverse button, and the GL1800 and GL1800B Canada model Your motorcycle’s reverse system allows motorcycle will stop. you to back out of a parking space at slow After your motorcycle has stopped, speed. press the Reverse mode switch to turn Make sure there are no obstacles or people off the system. -
Page 121: Riding Mode
Riding Mode You can change the riding mode. SPORT mode: Selecting the Riding Mode The following parameters change SPORT mode has a quicker and more GL1800BD/D/DA according to each riding mode. powerful engine feel, harder braking feel, Press the MODE button while the throttle •…
-
Page 122
GL1800/B Press one of the MODE buttons ( while the throttle is fully closed. The riding mode indicator blinks until the riding mode is changed. The riding mode does not change until the throttle is fully closed. Each time the ignition switch is turned to ON, the riding mode will automatically be set to mode. -
Page 123
Honda Selectable Torque Control (Torque Control) Torque Control mode (on/off) cannot be GL1800/D/DA Toque Control will limit the amount of changed while riding. torque applied to the rear wheel when the Stop the motorcycle first and select the system detects the rear wheel spin during Torque Control mode (on/off) in the acceleration. -
Page 124: Cruise Control
Cruise Control The cruise control system allows you to WARNING WARNING CRUISE MAIN indicator maintain a steady speed within specified range. Improper use of the cruise control The available speed setting range and can lead to a crash in which you operating gear are listed below: could be seriously hurt or killed.
-
Page 125
Cruise Control (Continued) To Change the Set Speed To Change the Set Speed Continuously To Manually Increase the Set Speed To Fine Tune the Set Speed • To increase the set speed: push and hold Use the throttle to accelerate until you Display the cruise control set speed on the the cruise control lever to [RES/+] side. -
Page 126
To Temporarily Disengage the System To resume cruise control: • If you are still over 20 GL1800BD/D/DA Perform one of the following operations mph (30 km/h), push and release the to disengage the system temporarily. cruise control lever to [RES/+] side. (CRUISE SET indicator temporarily goes If you are still over 30 mph GL1800/B… -
Page 127
Hill Start Assist ❙ The Hill Start Assist (HSA) temporarily keeps Activating the HSA Hill start assist (HSA) indicator the motorcycle from rolling backward (or To activate the HSA, squeeze the brake forward) if the brake lever or pedal is lever quickly until the Hill start assist (HSA) released when stopped on an incline such indicator comes on in white and hold the… -
Page 128
Refueling Opening the Fuel Fill Cap WARNING WARNING Lower edge of Open the fairing pocket. (P127) filler neck Gasoline is highly flammable and Slide the fuel lid opener to open the fuel explosive. You can be burned or lid. seriously injured when handling Turn the fuel fill cap counterclockwise fuel. -
Page 129
Storage Equipment ❙ Travel Trunk, Saddlebags and To Open the Travel Trunk and Saddlebags Make sure the Honda SMART Key is activated (P56) , and then enter the operating range Fairing Pocket The travel trunk and saddlebags are for with the Honda SMART Key. -
Page 130
To Open the Fairing Pocket To close a compartment, place your hands in the travel trunk. Make sure the Honda SMART Key is Store helmets as shown in the illustration. flat on the edges of its lid and press down… -
Page 131
When the 30 days have passed after the washing your motorcycle. ignition switch is turned to OFF or after the who does not have the Honda SMART Key. buttons of the Honda SMART Key is operated, the remote transmitter will no longer operate. -
Page 132
Shelter Case Helmet Holder Insert the helmet holder hanger into the Except GL1800DA The shelter case is for lightweight items. The helmet holder is located on the left helmet D-ring. Cargo should not exceed: grab rail. Helmet D-ring 6.6 lb (3.0 kg) Use the helmet holder only when parked. -
Page 133
Storage Equipment (Continued) Insert the helmet holder hanger in the Tool Kit , Owner’s Canada model only WARNING WARNING direction shown into the slit on the left Manual and Helmet Holder Hanger grab rail. The tool kit (Canada model only), owner’s Riding with a helmet attached to the manual and helmet holder hanger are To lock the helmet holder, push the… -
Page 134
Comfort & Convenience Adjustment ❙ Handle Grip Heater To Operate the Handle Grip Heater This motorcycle is equipped with a handle Start the engine. (P110) (blank) grip heater that warms up your hands Level 5 Press the handle grip heater button. The during ride. -
Page 135
Comfort & Convenience Adjustment (Continued) ❙ Seat Heater To Operate the Rider Seat Heater GL1800/D/DA This motorcycle is equipped with the seat (P110) Start the engine. (blank) heaters that warms up the rider’s seat and Press the rider seat heater button. The Level 5 passenger’s seat for comfortable riding on rider seat heater is on. -
Page 136
❙ Passenger Seat Heater Switch Do not use the seat heater with the engine The passenger seat heater switch is located at idle for a long time. It may result in a low (or dead) battery. on the left saddlebag. Do not use the seat heater when the seat is The passenger seat heater switch has 6 torn, cut or damaged as you can get… -
Page 137
Comfort & Convenience Adjustment (Continued) Adjustable Windscreen Turning the ignition switch to OFF will Windscreen adjusting lever You can adjust your windscreen height automatically lower the windscreen to its original position. higher or lower according to your preference. To keep the windscreen raised after turning If possible, you should adjust your off the electrical system, such as when windscreen height to below eye level for… -
Page 138
❙ Windscreen Ventilation Louver To Close the Windscreen Ventilation You can utilize the windscreen ventilation Louver louver to direct the flow of fresh air. Push the center of the louver until the louver is firmly closed. ❙ To Operate the Windscreen Ventilation Louver Press the release button, then the windscreen ventilation louver pops-up. -
Page 139
Please read “Importance of Maintenance” and “Maintenance Fundamentals” carefully before attempting any maintenance. Refer to “Specifications” for service data. An optional larger tool kit may be available. Check with your Honda dealer’s parts department. Maintenance Importance of Maintenance ….P. 137 Final Drive Oil …….. -
Page 140: Importance Of Maintenance
Importance of Maintenance For information about the exhaust emission Importance of Maintenance Maintenance Safety and noise emission requirements of the Keeping your motorcycle well-maintained Always read the maintenance instructions U.S. Environmental Protection Agency is absolutely essential to your safety and to before you begin each task, and make sure (EPA), the California Air Resources Board protect your investment, obtain maximum…
-
Page 141: Maintenance Schedule
If you sell the motorcycle, these receipts should be transferred with the Maintenance work should be performed in motorcycle to the new owner. accordance with Honda’s standards and specifications by properly trained and equipped technicians. Your dealer meets all of these requirements. Keep an accurate record of maintenance to help ensure that your motorcycle is properly maintained.
-
Page 142
1,000 km 1.0 12.8 19.2 25.6 32.0 38.4 Procedures are provided in an official Honda Service Manual. Fuel Line – (2 P. 228) Throttle Operation : Technical. In the interest of safety, have your motorcycle Air Cleaner –… -
Page 143: Maintenance Fundamentals
Maintenance Fundamentals Check the following items before you get Check the following items after you get on Pre-ride Inspection on your motorcycle: your motorcycle: To ensure safety, it is your responsibility to ● ● Tire tread wear and air pressures are Throttle action moves smoothly without perform a pre-ride inspection and make within limits.
-
Page 144
Maintenance Fundamentals Periodic Checks Check the air pressure ( P. 147), examine tread for wear and Tires and wheels damage ( P. 147), and check the wheels for damage. You should also perform other periodic maintenance checks at least once a month Check the engine oil level ( P. -
Page 145
Maintenance Fundamentals Replacing Parts WARNING WARNING Always use Honda Genuine Parts or their Installing non-Honda parts may equivalents to ensure reliability and safety. make your motorcycle unsafe and When ordering colored components, cause a crash in which you can be specify the model name, color and code seriously hurt or killed. -
Page 146
Maintenance Fundamentals ❙ What to do in an emergency Battery WARNING WARNING If any of the following occur, immediately Your motorcycle has a maintenance-free see your doctor. The battery gives off explosive type battery. You do not have to check the ●… -
Page 147
30 days using a charger designed NOTICE 3. If the terminals are heavily corroded, specifically for your Honda, which can be Jump starting using an automobile battery can damage clean and polish the terminals with a purchased from your dealer. Read the your motorcycle’s electrical system and is not… -
Page 148
P. 233, 235 Blown fuse Conserving” or “Resource Conserving” on the circular API service symbol. If you use non-Honda engine oil, check the label to make sure that the oil satisfies all of the following standards: ● JASO T 903 standard* : MA ●… -
Page 149
Recommended Coolant NOTICE Pro Honda HP Coolant is a pre-mixed If the drain tube overflows, the air filter Brake fluid can damage plastic and painted surfaces. solution of antifreeze and distilled water. -
Page 150
Maintenance Fundamentals ❙ Even if the direction of the valve stem is Inspecting for Abnormal Wear Tires (Inspecting/Replacing) changed, do not return it to the original Inspect the tires for ❙ Checking the Air Pressure position. Have your motorcycle inspected signs of abnormal Even though your motorcycle is equipped by your dealer. -
Page 151
WARNING WARNING or TWI range. ● Have the wheel balanced with Honda Installing improper tires on your Genuine balance weights or equivalent motorcycle can adversely affect after the tire is installed. handling and stability, and can cause Wear indicator ●… -
Page 152
Maintenance Fundamentals ❙ Tire Identification Number (TIN) Tire Service Life Air Cleaner The tire identification number (TIN) is a The service life of your tires is dependent on This motorcycle is equipped with a viscous group of numbers and letters located on many factors, including, but not limited to, type air cleaner element which cannot be the sidewall of the tire. -
Page 153
Removing & Installing Body Components Battery 6. Remove the battery holder from the GL1800D/DA Canada model hook. Positive + terminal ❙ Removal 7. Remove the battery taking care not to drop the terminal nuts. Make sure the ignition switch is turned to OFF. -
Page 154
Removing & Installing Body Components u Cylinder Head Side Cover Cylinder Head Side Cover The right and left cylinder head side cover Fog Light Cover can be removed in the same way. Grommet ❙ Removal Screw B 1. Remove the fog light cover. P. -
Page 155: Side Cover
Removing & Installing Body Components u Left Engine Side Cover ❙ Left Engine Side Cover Side Cover Installation Install the parts in the reverse order of removal. Bosses Bosses Side cover Left engine side cover The right and left side cover can be ❙…
-
Page 156: Spark Plug
Spark Plug Changing Spark Plug 3. Disconnect the connectors from the 9. Install the parts in the reverse order of direct ignition coils. removal. For the recommended spark plugs, see 4. Remove the bolts and direct ignition When reinstalling, make sure the wire “Specifications.”…
-
Page 157: Engine Oil
Engine Oil Checking the Engine Oil 6. Check that the oil level is between the Oil fill cap upper level and lower level marks on the dipstick. GL1800D/DA Canada model Check the engine oil with the Idling Stop 7. Securely install the dipstick. system disabled.
-
Page 158
Remove the oil fill GL1800BD/D/DA Use a new Honda Genuine oil filter or cap, drain bolt A, drain bolt B, drain equivalent specified for your model. bolt C and sealing washers to drain the oil. -
Page 159
Engine Oil u Changing Engine Oil & Filter 6. Remove the oil filter with a filter Install new sealing 10. Fill the crankcase with the GL1800BD/D/DA wrench and let the remaining oil drain washers onto the drain bolt A, drain recommended oil ( P. -
Page 160
8. Apply a thin coat of engine oil to the GL1800BD/D/DA Clutch Use a new Honda Genuine clutch oil filter rubber seal of a new engine oil filter. oil filter or equivalent specified for your model. P. 156 “OUT-SIDE”… -
Page 161: Adding Coolant
Coolant Checking the Coolant Adding Coolant WARNING WARNING Check the coolant level in the reserve tank If the coolant level is below the LOWER Removing the radiator cap while the while the engine is cold. level mark, add the recommended coolant engine is hot can cause the coolant 1.
-
Page 162: Final Drive Oil
Final Drive Oil Checking the Final Drive Oil 1. Pour the final drive oil into the oil fill Oil fill hole cap hole until it reaches the lower edge of O-ring 1. Hold the motorcycle upright on firm the opening. level ground.
-
Page 163
Brakes Checking Brake Fluid If the brake fluid level in either reservoir is Front Front brake below the LWR mark or the brake lever and fluid reservoir 1. Place your motorcycle in an upright pedal freeplay becomes excessive, inspect position on a firm, level surface. the brake pads for wear. -
Page 164
Brakes u Inspecting the Brake Pads Inspecting the Brake Pads If necessary have the pads replaced by your Front dealer. Wear Brake pads indicators Check the condition of the brake pad wear Always replace both left and right brake indicators. pads at the same time. -
Page 165
Brakes u Checking the Parking Brake Checking the Parking Brake Adjusting the Brake Light Switch GL1800D/BD/DA Place your motorcycle on a firm, level Check the operation of the brake light surface. Stop the engine and push your switch. motorcycle while set the parking brake to check the efficacy of the parking brake. -
Page 166: Side Stand
Side Stand Checking the Side Stand GL1800/B Start the engine, pull the clutch lever in, and shift the transmission into gear. GL1800D/BD/DA Start the engine and press the D switch to switch the transmission into AT MODE (D). 5. Lower the side stand all the way. The engine should stop as you lower the side stand.
-
Page 167: Checking Clutch Fluid
Clutch Checking Clutch Fluid 1. Place your motorcycle in an upright position on a firm, level surface. 2. Check that the clutch fluid reservoir is GL1800/B horizontal and that the fluid level is Clutch fluid above the LWR mark. reservoir If the fluid level is low or if you find fluid leaks, or deterioration or cracks in the hoses and fittings, have the clutch system…
-
Page 168
Throttle Checking the Throttle With the engine off, check that the throttle rotates smoothly from fully closed to fully open. If the throttle does not move smoothly, close automatically, have the motorcycle inspected by your dealer. Throttle… -
Page 169: Crankcase Breather
Crankcase Breather Cleaning the Crankcase Breather 1. Remove the left fog light cover. P. 151 2. Remove the left cylinder head side cover. P. 151 3. Place a suitable container under the crankcase breather tube. 4. Remove the crankcase breather tube Crankcase breather tube plug plug from the tube.
-
Page 170
Other Adjustments Adjusting the Headlight Aim Adjusting the Clutch and Brake lever Forward Brake Levers Adjuster Brake lever You can adjust vertical aim of the headlight for proper alignment. Turn the adjusting You can adjust the distances between the knob in or out as necessary. tip of the clutch lever GL1800/B only Obey local laws and regulations. -
Page 171
Other Adjustments u Selecting the Electrical Adjustable Suspension Selecting the Electrical NOTICE Adjustable Suspension The front and rear shock absorber damper units contain high pressure nitrogen gas. Do not attempt to disassemble, service, or improperly dispose of the GL1800/D/DA damper. See your dealer. The electrical adjustable suspension allows the preload of the rear suspension to be adjusted in four levels according to riding… -
Page 172: Adjusting The Rear Suspension
Other Adjustments u Adjusting the Rear Suspension ❙ Adjusting the Rear Spring Preload Suspension Turn the adjuster clockwise to increase spring preload (hard), or turn the adjuster counterclockwise to decrease spring GL1800B/BD You can adjust the spring preload of the preload (soft).
-
Page 173
Honda SMART Key Do not pry the built-in key forcibly. If the Honda SMART Key indicator flashes 5 Do not touch the circuit or terminal. times when the ignition switch is turned This may cause problems. -
Page 174
Other Replacement u Replacing the Honda SMART Key Battery 4. Replace the old battery with a new one WARNING WARNING with the positive side facing up. 5. Assemble the parts in the reverse order Chemical Burn Hazard: do not of disassembly. -
Page 175: Troubleshooting
Troubleshooting Engine Will Not Start……P. 173 Low Tire Pressure Indicator….P. 177 When the Honda SMART Key System Does Overheating (High coolant temperature TPMS Indicator……..P. 178 Not Operate Properly ……P. 184 indicator is on) ……..P. 174 AIRBAG Indicator ….
-
Page 176
Engine Will Not Start Starter Operates But Engine Starter Does Not Operate Does Not Start Check the following items: ● Check the correct engine starting Check the following items: sequence P. 110 ● Check the correct engine starting ● Check for a blown fuse P. -
Page 177
Overheating (High coolant temperature indicator is on) The engine is overheating when the 2. Check that the radiator fan is operating, following occurs: and then turn the ignition switch to OFF. ● High coolant temperature indicator If the fan is not operating: comes on. -
Page 178: Low Oil Pressure Indicator
Warning Indicators On or Flashing Low Oil Pressure Indicator PGM-FI (Programmed Fuel The combined ABS indicator may flash if: ● The front wheel leaves the ground for Injection) Malfunction If the low oil pressure indicator comes on, 1 second or more Indicator Lamp (MIL) pull safely to the side of the road and stop ●…
-
Page 179
Indicator is Flashing While the ● Indicator does not go off at speeds above If you do not have the Honda SMART Key, Electrical System is On 3 mph (5 km/h). the electrical system can be activated by… -
Page 180: Low Tire Pressure Indicator
Warning Indicators On or Flashing Clutch Temperature Indicator Clutch Temperature Indicator Low Tire Pressure Indicator If the low tire pressure indicator does not go off after inflating the tires to the If the low tire pressure indicator flashes, specified values, have your dealer to check GL1800BD/D/DA The clutch temperature indicator flashes if check your tires as soon as possible.
-
Page 181
Warning Indicators On or Flashing u TPMS Indicator and cause the low tire pressure indicator to AIRBAG Indicator Hill Start Assist (HSA) turn on. Or, if you check and adjust your Indicator tire pressure in cooler conditions, and ride GL1800DA The AIRBAG indicator comes on if there is a into extremely hot conditions, the tire may If the Hill start assist (HSA) indicator comes… -
Page 182
Other Warning Indications Fuel Gauge Failure Indication Handle Grip Heater Failure Indication If the fuel system has an error, the fuel gauge segments will be displayed as shown If the handle grip heater system has an in the illustration. error, the handle grip heater indicator will If this occurs, see your dealer as soon as blink. -
Page 183
Other Warning Indications u Seat Heaters Failure Indication Seat Heaters Failure Indication Coolant Temperature Gauge Failure Indication GL1800/D/DA If the seat heater system has an error, the If the cooling system has an error, all seat heater indicator will blink. segments will blink as shown in the If this occurs, see your dealer as soon as illustration. -
Page 184
If the “-” is Blinking in the Gear Position Indicator While Riding (GL1800BD/D/DA) If the “-” is blinking in the gear position If you can shift from N to D range: indicator while riding, you may have a When a gear position is shown in the gear serious problem with the Dual Clutch position indicator, you can ride in that gear. -
Page 185
When the Idling Stop System Does Not Operate Properly (GL1800D/DA Canada model) Idling Stop Indicator Does Not Engine is Not Stopped by the If PGM-FI malfunction indicator lamp (MIL) lights: When the PGM-FI malfunction indicator Come On Idling Stop System While the lamp (MIL) lights, the Idling Stop system Idling Stop Indicator is On does not operate for protection of the… -
Page 186
When the Idling Stop System Does Not Operate Properly (GL1800D/DA Canada model) Engine Does Not Start Even If the Throttle is Opened Engine Does Not Start Even If If the start/Idling Stop button is operated: While the engine is stopping by the Idling the Throttle is Opened Stop system, if you press the start/Idling Stop button, the Idling Stop system will be… -
Page 187
When the Honda SMART Key System Does Not Operate Properly When the Honda SMART Key system does When the Honda SMART Key comes not work properly, perform the following. into contact with or is covered by ● Check that the Honda SMART Key metal objects. -
Page 188
Activating the Electrical System in an Emergency The electrical system can be activated by The ID number is input according to the Example: inputting the ID number. number of times the fairing pocket opener • To input “0”, press the start button is pressed. -
Page 189
Activating the Electrical System in an Emergency u Engine Does Not Start Even If the Throttle is Opened ID number input success: ID number input failure: ID number input cancel After the last digit of the ID number is If the ID number is not authenticated after If you input the wrong number, you can inputted and the start button is pressed, inputting, the steering cannot be unlocked… -
Page 190
Emergency Key battery becomes weak. clockwise to open the left saddlebag. If you lose the Honda SMART Key, the left 1. Remove the rear center lid by using a flat Left saddlebag opener saddlebag can be unlocked using the head screwdriver covered with a emergency key. -
Page 191
If the Saddlebags or Travel Trunk Won’t Open u To Open the Travel Trunk Emergency 4. Release the right saddlebag opener from To Open the Travel Trunk 3. Install the travel trunk opener onto the the prong in the left saddlebag. Pull the prong before closing the right Emergency right saddlebag opener to open the… -
Page 192: Repair Kit
If remove a wheel in order to repair a We recommend you have this type of you have a tire professionally repaired at a non-Honda puncture. service performed by your dealer.
-
Page 193
Tire Puncture u Removing Wheels ❙ Front Wheel 3. Cover both sides of the front wheel 4. Remove the bolt and wheel speed and brake calipers with protective tape sensor. Removal or cloth. 5. On the left side, remove the mounting GL1800/D/DA bolts and remove the brake caliper. -
Page 194
Tire Puncture Removing Wheels 6. On the right side, remove the 7. Remove the front axle bolt. Front axle shaft Right side collar mounting bolts and remove the brake 8. Loosen the left axle pinch bolts. caliper. Left side collar Front axle bolt Support the brake caliper assembly so that it doesn’t hang from the… -
Page 195
Tire Puncture u Removing Wheels 8. Install the right brake caliper and 10. Install the wheel speed sensor and tighten the mounting bolts. tighten the bolt securely. 11. Lower the front wheel on the ground. Surface of Torque: 31 lbf·ft (42.5 N·m, 4.3 kgf·m) fork leg 12. -
Page 196
Tire Puncture Removing Wheels ❙ Rear Wheel 5. Remove the bolt C and pull the left Connector muffler inner cover forward to release Removal the hooks. GL1800/D/DA 6. Remove the left muffler inner cover. Place your motorcycle on its center Tabs stand on a firm, level surface. -
Page 197
Tire Puncture u Removing Wheels Installation GL1800/D/DA Support your motorcycle securely and 1. To install the rear wheel, reverse the removal procedure. raise the rear wheel off the ground 2. Install the rear wheel and tighten the using the center stand or a hoist. rear wheel nuts equally in the crisscross GL1800B/BD Support your motorcycle securely and… -
Page 198
Audio System Trouble Symptom Cause/remedy Some Bluetooth ® devices and application software you use may be incompatible with the audio system and/or the operable functions may be limited. Check that the audio system and Bluetooth device are both in the pairing mode. P. -
Page 199
Audio System Trouble Symptom Cause/remedy Some Bluetooth ® devices and application software you use may not connect automatically. For connecting, follow the instructions in the instruction manual of your Bluetooth ® device. The Bluetooth devices that can be connected at the same time are limited to one Bluetooth ®… -
Page 200
Audio System Trouble Symptom Cause/remedy Presence of another Bluetooth ® device or a device that emits electromagnetic waves such as communication equipment in the vicinity sometimes affects the communication. Due to the characteristics of Bluetooth , though in rare cases, the system operation may become ®… -
Page 201
Audio System Trouble Symptom Cause/remedy Depending on the audio device and the audio file, nothing may be displayed or the display may be inaccurate in some cases. Check the information on available tags. P. 93 When the information in an audio file such as the artist name and track title is in a non-compliant tag format, it may be indicated by “.”… -
Page 202
Audio System Trouble Symptom Cause/remedy Connected Bluetooth ® device may be unsupported device. Check the supported Bluetooth ® version/profiles. P. 81 Bluetooth handsfree calling When the Bluetooth connection is unstable due to surrounding conditions or radio wave ® ® cannot be available. conditions, the handsfree calling functions may not be available. -
Page 203
Audio System Trouble Symptom Cause/remedy Connected iPhone may be unsupported model. Check the compatible model with Apple CarPlay. P. 99 Connected iPhone may be unsupported iOS version. Update the iPhone to the newer version. To use Apple CarPlay, a headset connection is necessary. Connect a paired headset. P. -
Page 204
Audio System Trouble Symptom Cause/remedy You cannot operate Apple CarPlay by the center panel switches/Interface dial while the Connected, but does not operate motorcycle is in motion. Operate with the left handlebar switches or park your motorcycle in a Apply CarPlay. safe place, then operate. -
Page 205
Audio System Trouble Symptom Cause/remedy Certain manual functions and settings are disabled or inoperable while the vehicle is in motion. Audio system cannot operate. You cannot select a grayed-out menu until the vehicle is stopped. In [Vehicle setting], certain items cannot be selected and display information is limited when the Set menu in [Vehicle setting] does ignition switch is in ACC. -
Page 206
Electrical Trouble ❙ Battery Goes Dead Burned-out Light Bulb Front Turn Signal Light Charge the battery using a motorcycle All light bulbs on the motorcycle are LEDs. battery charger. If there is a LED which is not turned on, see Remove the battery from the motorcycle your dealer for servicing. -
Page 207
Electrical Trouble u Burned-out Light Bulb ❙ ❙ Brake light/Taillight/Rear Turn License Plate Light Signal Light Brake lights License plate light Rear turn signal lights The license plate light uses a LED. If there is a LED which is not turned on, see Taillights your dealer for servicing. -
Page 208
Electrical Trouble Blown Fuse Blown Fuse GL1800D/DA USA model GL1800BD External Fuse box cover Fuse box cover External Before handling fuses, see “Inspecting and amplifier fuse amplifier fuse Replacing Fuses.” P. 145 Spare fuses Spare fuses ❙ Fuse Box Fuses 1. -
Page 209
Electrical Trouble u Blown Fuse ❙ Ignition Main Fuse & ACC Main GL1800B NOTICE Fuse If a fuse fails repeatedly, you likely have an electrical External Fuse box cover problem. Have your motorcycle inspected by your amplifier fuse Spare fuses Ignition main fuse dealer. -
Page 210
Legal Information on Apple CarPlay … P. 214 Warranty Coverage and Service ..P. 229 Caring for Your Motorcycle ….P. 216 Honda Contacts ……..P. 230 Storing Your Motorcycle…… P. 219 Customer Support ………P. 231 Transporting Your Motorcycle …. P. 219 Reporting Safety Defects …P. -
Page 211
Releasing the fairing pocket in the Honda SMART Key. P. 187 The ID number of the Honda SMART Key is To make a duplicate key, take the key and on the ID tag. You can also unlock the key tag to your dealer or a locksmith. -
Page 212
If the circuits are damaged, the Honda SMART Key, wipe it off system normally lasts about 2 years. Honda SMART Key will not allow you to immediately to avoid cracking or Do not keep mobile phones or other radio perform any operations. -
Page 213: Other Features
Instruments, Controls, & Other Features Instruments, Controls, & Tripmeter Automatic Brightness Control Other Features The tripmeters return to 0.0 when each The backlight brightness of the meter will read-out exceeds 9,999.9. be controlled automatically when “AUTO” Ignition Switch Also average fuel mileage and current fuel is selected on the brightness setting.
-
Page 214
Instruments, Controls, & Other Features conjunction with any other antenna or Antenna types not included in the report, Audio System transmitter. Installers must ensure that having a gain greater than the maximum The audio systems on your vehicle emit 20 cm separation distance will be gain indicated for that type, are strictly radio waves when in operation. -
Page 215
Canada Honda SMART Key System This device complies with Industry Canada’s Changes or modifications not expressly The Honda SMART Key system on your applicable licence-exempt RSSs. approved by the party responsible for vehicle emit radio waves when in Operation is subject to the following two compliance could void the user’s authority… -
Page 216
Instruments, Controls, & Other Features Assist-slipper Clutch System Airbag System GL1800/B GL1800DA ❙ The assist-slipper clutch system helps to Event Data Recorders prevent the rear tire from locking up when Your motorcycle is equipped with one or the deceleration of your motorcycle more devices commonly referred to as produces a strong engine braking effect. -
Page 217
AND ITS SERVICE PROVIDERS’ OTHER APPLICATION DATA, WHICH MAY BE LOST LIABILITIES, DESCRIBE THE KINDS OF USER WARRANTIES AND CONDITIONS WITH AT ANY TIME; HONDA DOES NOT INFORMATION (INCLUDING, FOR RESPECT TO THE APPLICATIONS AND GUARANTEE THAT THE APPLICATIONS OR… -
Page 218
DAMAGES (OTHER THAN AS MAY BE TO THE EXTENT NOT PROHIBITED BY LAW, REQUIRED BY APPLICABLE LAW IN CASES IN NO EVENT SHALL HONDA OR ITS INVOLVING PERSONAL INJURY) EXCEED AFFILIATES BE LIABLE FOR PERSONAL THE AMOUNT OF FIVE DOLLARS ($5.00). -
Page 219
Do not use high-pressure washers: Frequent cleaning and polishing is 4. After the motorcycle dries, lubricate any High-pressure water cleaners can important to ensure the life of your Honda. moving parts. damage moving parts and electrical A clean motorcycle makes it easier to spot Make sure that no lubricant spills onto parts, rendering them inoperable. -
Page 220
Caring for Your Motorcycle ● Do not direct water near the headlight. Aluminum Components Windscreen The headlight’s inside lens may fog Aluminum will corrode from contact with Keep the windscreen raised after turning temporarily after washing or while dirt, mud, or road salt. Clean aluminum parts off the electrical system to make it easy to riding in the rain. -
Page 221
Caring for Your Motorcycle Instrument Panel Exhaust Pipe and Muffler The instrument panel is coated with a The exhaust pipe and muffler are stainless special surface treatment to prevent steel but may become stained by mud or reflection and glare. dust. -
Page 222: Storing Your Motorcycle
For more information about storage, it should be carried on a motorcycle trailer If you won’t be riding for an extended refer to the Honda Winter Storage Guide, or a flatbed truck or trailer that has a period, follow these guidelines: available from your dealer.
-
Page 223
You & the Environment You & the Environment Recycle Wastes Put oil and other toxic wastes in approved Owning and riding a motorcycle can be containers and take them to a recycling enjoyable, but you must do your part to center. -
Page 224
Vehicle Identification Number Vehicle Identification Number The VIN and engine serial number uniquely identify your motorcycle and are required in order to register your motorcycle. They may also be required when ordering replacement parts. To check the VIN, remove the cover by releasing the clip. -
Page 225
Tire Pressure Monitoring System (TPMS) Explanation Tire Pressure Monitoring fuel efficiency and tire tread life, and may signal low tire pressure as intended. affect the vehicle’s handling and stopping System (TPMS) Explanation TPMS malfunctions may occur for a variety ability. of reasons, including the installation of Both tires should be checked monthly Please note that the TPMS is not a… -
Page 226: Emission Control Systems
Canada when operated and maintained according Vehicle emission control to the instructions provided. information label Compliance with the terms of the Distributor’s Warranties for Honda Motorcycle Emission Control Systems is necessary in order to maintain a valid emissions system warranty.
-
Page 227
Emission Control Systems ❙ Catalytic Converters Noise Emission Requirements Exhaust Emission Control System The exhaust system contains one or more The EPA requires that motorcycles built The exhaust emission control system catalytic converters. Catalytic converters after January 1, 1983 comply with includes the following components that use a catalyst to convert most of the applicable noise emission standards for one… -
Page 228
Emission Control Systems ● Removing or disabling any emissions Evaporative Emission Control System Noise Emission Control System compliance component, or replacing any ❙ TAMPERING WITH THE NOISE CONTROL 50 STATE (meets California) compliance component with a non- An evaporative emissions control system SYSTEM IS PROHIBITED: compliant component. -
Page 229: Catalytic Converter
A replacement unit properly, stop riding and turn off the must be an original Honda part or engine. Have your motorcycle serviced as equivalent. soon as possible.
-
Page 230: Oxygenated Fuels
Oxygenated Fuels Oxygenated Fuels The following fuel blends are EPA- If you accidentally fill your fuel tank with an approved and have been approved for use oxygenated fuel containing higher in your motorcycle: percentages, you may experience Some conventional fuels blended with ●…
-
Page 231: Authorized Manuals
Monday — Friday 8:00 AM — 6:00 PM EST authorized manuals. Also available, but not necessary to service Publication Item No. Description your model, is the Honda Common Service 61MKC00 2018 GL1800/B/BD/D/DA Service Manual Manual, which explains basic service 61CSM00…
-
Page 232
Warranties Booklet inspection. If a problem exists and is given to you by your Honda dealer at the covered under warranty, your dealer will time of purchase. Always keep your Honda perform the warranty repairs. -
Page 233
Name, address, and telephone number of your warranty coverage. American Honda Motor Co., Inc. ● Product model, year, and VIN If you wish to contact Honda directly to Your Honda dealer can also supply ● Date of purchase comment on your experiences with your information about, riding events, and ●… -
Page 234
Customer Support Customer Support Honda Customer Support You may contact Honda Customer Service, Motorcycle Division, American Honda Motor Co., Inc., P.O. Box 2200, mailstop: 100-4C-7B, Torrance, CA 90509-2200. Telephone: (866) 784-1870. Audio/Navigation System Software and Map Software Upgrades Honda is continually expanding the scope of the Map software and the Audio/ Navigation System software. -
Page 235
1200 New Jersey Avenue, SE., National Highway Traffic Safety Washington, DC 20590. Administration (NHTSA) in addition to notifying American Honda Motor You can also obtain other Co., Inc. information about motor vehicle safety from: If NHTSA receives similar complaints, http://www.safercar.gov. -
Page 236: Specifications
GL1800DA standard MA, Pro Honda GN4 4-stroke oil 844 lb (383 kg) Reduction ratio Canada model (USA & Canada) or Honda 4-stroke oil, or an (primary / 1.795 / 0.972 / 2.615 GL1800BD 421 lb (191 kg) equivalent motorcycle oil…
-
Page 237
Engine oil drain bolt B 22 lbf·ft (30 N·m, 3.1 kgf·m) Engine oil drain bolt C 22 lbf·ft (30 N·m, 3.1 kgf·m) Recommended Honda DOT 4 Brake Fluid brake fluid Final drive oil fill hole 5.9 lbf·ft (8 N·m, 0.8 kgf·m) Cooling system 3.06 US qt (2.90 liters) -
Page 238
Canada model engine oil standard MA, Pro Honda GN4 4-stroke oil GL1800 423 lb (192 kg) Maximum weight (USA & Canada) or Honda 4-stroke oil, or an capacity* GL1800B 421 lb (191kg) equivalent motorcycle oil After draining 3.7 US qt (3.5 liters) Travel trunk 20.0 lb (9.0 kg) -
Page 239
Final drive oil fill hole 5.9 lbf·ft (8 N·m, 0.8 kgf·m) Recommended brake (clutch) Honda DOT 4 Brake Fluid Final drive oil drain bolt 9 lbf·ft (12 N·m, 1.2 kgf·m) fluid Front wheel axle bolt 44 lbf·ft (59 N·m, 6.0 kgf·m) Cooling system 3.06 US qt (2.90 liters) -
Page 240
Information Record Engine No. Color Label & Code Owner’s Name Address City/State Phone Dealer’s Name Address City/State Phone Service Manager… -
Page 241
Index A/M Switch ……..52, 113 Back Button ……….48 Caring for Your Motorcycle ….216 Accessories ……….17 Back Switch ……..50, 51 Catalytic Converter ……226 Adjustable Windscreen …… 134 Battery ………143, 150 Clock ……….23, 77 Air Cleaner ………. 149 Bluetooth ®… -
Page 242
Environment ……..220 Gasoline ……….125 Properly ……….184 Equipment Gear Position Indicator ……39 Honda SMART Key Indicator ..45, 176 Gear Shift Operation ……114 Fairing Pocket ……..127 Honda SMART Key System ..56, 212 Helmet Holder ……..129 Horn Button ……..50, 51 Helmet Holder Hanger ….129… -
Page 243
Idling Stop Button …….. 52 Maintenance Odometer ……….36 Idling Stop Indicator ……46 Fundamentals ……..140 Idling Stop OFF Indicator ….. 40 Importance ……..137 Engine ……..145, 154 Idling Stop System ……28, 61 Safety ……….137 Final Drive …….. 146, 159 Ignition Cut-off System Schedule ………..138 Overheating …….. -
Page 244
Tool Kit ……….130 Radio Safety Guidelines ……..3 Travel Trunk ……..126 FM/AM ……….90 Safety Labels ………. 6 Storing Your Motorcycle ….219 Rear Suspension ……168, 169 Safety Precautions ……. 10 Suspension Preload Recommended Seat Heater ……..132 Adjustment ……29, 168, 169 Brake Fluid ……..146 Seat Heater Indicator …. -
Page 245
Audio Files ………. 93 Compatible Devices ……92 USB Connection ……..94 USB Device ……….92 USB Flash Drive ……..92 Vehicle Identification Number ..221 Voice Control Switch …… 50, 51 VOL Lever ……..50, 51 Walking Speed Mode ……115 Walking Speed Mode Indicator … -
Page 246
California Proposition 65 Warning Operating, servicing and maintaining a passenger vehicle or off-road vehicle can expose you to chemicals including engine exhaust, carbon monoxide, phthalates, and lead, which are known to the State of California to cause cancer and birth defects or other reproductive harm. To minimize exposure, avoid breathing exhaust, do not idle the engine except as necessary, service your vehicle in a well-ventilated area and wear gloves or wash your hands…
Материал из BikesWiki — энциклопедия японских мотоциклов
Перейти к: навигация, поиск

Honda GL1800 Gold Wing
Ниже представлены прямые ссылки на скачку сервисной документации.
Для Honda GL1800 Gold Wing
- Каталог запчастей (микрофиши) на Honda GL1800 Gold Wing (2001-2004)
- Каталог запчастей (микрофиши) на Honda GL1800 Gold Wing (2005-2008)
- Сервисный мануал (Service Manual) на Honda GL1800 Gold Wing
- Руководство пользователя (Owners Manual) на Honda GL1800 Gold Wing (на русском)
Обзор модели
- Honda GL1800 Gold Wing
Источник — «https://bikeswiki.ru/index.php?title=Honda_GL1800_Gold_Wing:_мануалы&oldid=9498»
Категория:
- Сервисная документация

Руководство на английском языке по эксплуатации и техническому обслуживанию мотоциклов Honda GL1000 1978 года выпуска.
- Издательство: Honda Motor Co., Ltd.
- Год издания: 1977
- Страниц: 69
- Формат: PDF
- Размер: 25,0 Mb

Сборник руководств на английском языке по эксплуатации и техническому обслуживанию мотоциклов Honda GL1100/GL1100 Aspencade/GL1100 Interstate 1981-1983 годов выпуска.
- Издательство: Honda Motor Co., Ltd.
- Год издания: 1980-1982
- Страниц: —
- Формат: PDF
- Размер: 47,5 Mb
Руководство на английском языке по эксплуатации и техническому обслуживанию мотоциклов Honda GL1200 Gold Wing Aspencade 1985 года выпуска.
- Издательство: Honda Motor Co., Ltd.
- Год издания: 1984
- Страниц: 62
- Формат: PDF
- Размер: 9,0 Mb

Руководство на английском языке по эксплуатации и техническому обслуживанию мотоциклов Honda GL1500 Gold Wing.
- Издательство: Honda Motor Co., Ltd.
- Год издания: 1989
- Страниц: 114
- Формат: PDF
- Размер: 2,9 Mb

Руководство на английском языке по эксплуатации и техническому обслуживанию мотоциклов Honda Gold Wing GL1500 SE/GL1500 Aspencade.
- Издательство: Honda Motor Co., Ltd.
- Год издания: 1994
- Страниц: 152
- Формат: PDF
- Размер: 4,3 Mb
Сборник руководств на английском языке по эксплуатации и техническому обслуживанию мотоциклов Honda Gold Wing GL1800 2002-2009 годов выпуска.
- Издательство: Honda Motor Co., Ltd.
- Год издания: 2001/-
- Страниц: 192/296
- Формат: PDF
- Размер: 9,3 Mb
Руководство на английском языке по эксплуатации и техническому обслуживанию мотоциклов Honda Gold Wing F6B.
- Издательство: Honda Motor Co., Ltd.
- Год издания: 2013
- Страниц: 195
- Формат: PDF
- Размер: 6,8 Mb

Руководство на английском языке по техническому обслуживанию и ремонту мотоциклов Honda GL500 Interstate и GL650 Interstate 1983 года выпуска.
- Издательство: Honda Motor Co., Ltd.
- Год издания: 1982
- Страниц: 336
- Формат: PDF
- Размер: 62,9 Mb

Руководство на английском языке по техническому обслуживанию мотоциклов Honda GL1000 1978 года выпуска.
- Издательство: Honda Motor Co., Ltd.
- Год издания: 1978
- Страниц: 121
- Формат: PDF
- Размер: 22,9 Mb
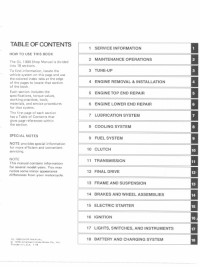
Руководство на английском языке по техническому обслуживанию и ремонту мотоциклов Honda GL1000.
- Издательство: Honda Motor Co., Ltd.
- Год издания: 1978
- Страниц: 326
- Формат: PDF
- Размер: 188,0 Mb
Руководство на английском языке по техническому обслуживанию и ремонту мотоциклов Honda GL1000/GL1100 1975-1983 годов выпуска.
- Издательство: Clymer
- Год издания: —
- Страниц: 295
- Формат: PDF
- Размер: 76,8 Mb

Руководство на английском языке по техническому обслуживанию и ремонту мотоциклов Honda GL1100 Gold Wing.
- Издательство: —
- Год издания: —
- Страниц: 356
- Формат: PDF
- Размер: 215,8 Mb
Руководство на английском языке по техническому обслуживанию и ремонту мотоциклов Honda GL1200 Gold Wing 1984-1987 годов выпуска.
- Издательство: Haynes Publishing
- Год издания: —
- Страниц: 202
- Формат: PDF
- Размер: 32,4 Mb

Руководство на немецком языке по техническому обслуживанию и ремонту мотоциклов Honda GL1500C F6C.
- Издательство: Honda Motor Co., Ltd.
- Год издания: 1996
- Страниц: 415
- Формат: PDF
- Размер: 41,0 Mb
Руководство на английском языке по техническому обслуживанию и ремонту мотоциклов Honda GL1800.
- Издательство: Honda Motor Co., Ltd.
- Год издания: 2007
- Страниц: 1520
- Формат: PDF
- Размер: 255,7 Mb

Руководство по эксплуатации и техническому обслуживанию мотоциклов Honda GL1800 Gold Wing.
- Издательство: Honda Motor Co., Ltd.
- Год издания: 2012
- Страниц: 234
- Формат: PDF
- Размер: 10,2 Mb

Руководство по эксплуатации и техническому обслуживанию мотоциклов Honda GL1800B Gold Wing F6B 2013 года выпуска.
- Издательство: Honda Motor Co., Ltd.
- Год издания: 2012
- Страниц: 252
- Формат: PDF
- Размер: 5,6 Mb

Руководство по эксплуатации и техническому обслуживанию мотоциклов Honda GL1800C.
- Издательство: Honda Motor Co., Ltd.
- Год издания: 2013
- Страниц: 126
- Формат: PDF
- Размер: 2,1 Mb
