- Manuals
- Brands
- Husqvarna Viking Manuals
- Sewing Machine
- Viking E20
- User manual
H-class
-
Contents
-
Table of Contents
-
Bookmarks
Quick Links
Related Manuals for Husqvarna Viking Viking E20
Summary of Contents for Husqvarna Viking Viking E20
-
Page 1
USER’S GUIDE… -
Page 2: Important Safety Instructions
This household sewing machine is designed to comply with IEC/EN 60335-2-28 and UL1594 IMPORTANT SAFETY INSTRUCTIONS When using an electrical appliance, basic safety precautions should always be followed, including the following: Read all instructions before using this household sewing machine. DANGER — To reduce the risk of electric shock: •…
-
Page 3
CONTENTS ………………….4 ……………………6 …………..7 …………8 ………………….9 …………….10 ………….10 ………………..11 …………………12 ………………..13 ………….14 ……………..15 ………………16 …………….17 ……….18 ………………….19 ……………..19 ………………..19 ………………..19 …………….20 ……………21 ………………….22 …………23 …………………24 ……………………25 ………………..26 ……….27 …………………..28 …………………..29 ………………30 ………………..31 ………………………32 ………………………33 …………………….34 ……………….35… -
Page 4: Principal Parts
PRINCIPAL PARTS Thread tension dial Presser foot pressure Thread take-up lever Thread cutter 12. Reverse sewing lever Presser foot Needle plate Accessory box…
-
Page 5
16. Handle 19. Handwheel 20. Pattern selector dial 21. Power switch 24. Upper thread guide 25. Presser foot lever… -
Page 6
ACCESSORIES All purpose foot L-screwdriver Zipper foot 10. Pack of needles Quilting foot… -
Page 7: Slide On The Snap-In Accessory Box
SLIDE ON THE SNAP-IN ACCESSORY BOX Hold the snap-in accessory box horizontal, and push it in the direction of the arrow. (1) To open, lift up at the point of the arrow. (2)
-
Page 8: Connecting The Machine To Power Source
CONNECTING THE MACHINE TO POWER SOURCE Caution: Always make sure that the machine is unplugged from power source and the main switch is on “O”. when the machine is not in use and before inserting or removing parts. Connect the machine to a power source as illustrated (1/2). To start the machine, press on the foot control (3).
-
Page 9: Changing The Bulb
CHANGING THE BULB Caution: Make sure to disconnect the electrical supply plug from wall outlet before changing light bulb. Replace bulb with same type rated: 10 watts (110-120V) 15 watts (220-240V) Loosen screw (A) as illustrated. (1) Unscrew the bulb and put in a new one (C). Replace the cover and tighten screw.
-
Page 10: Two-Step Presser Foot Lever
TWO-STEP PRESSER FOOT LEVER When sewing several layers or thick fabrics, the presser foot can be raised a second stage for easy positioning of the work. (A) ADJUSTING THE PRESSER FOOT PRESSURE The presser foot pressure of the machine has been fabrics (light-or-heavy weight).
-
Page 11: Presser Foot Shank
PRESSER FOOT SHANK Attention: Turn power switch to “O” before carrying out any of the operations below. Attaching the presser foot shank: Raise the needle to its highest position and raise the presser foot lever. Attach the presser foot shank (b) to the presser foot bar (a).
-
Page 12: Winding The Bobbin
WINDING THE BOBBIN Place spool on spool pin with spool pin felt underneath (a). Take the thread from the spool around the bobbin winder tension disc clockwise. (1) Thread bobbin as illustrated and place it on the spindel. Push the bobbin to the right towards the bobbin winding position.
-
Page 13: Inserting The Bobbin
INSERTING THE BOBBIN Attention: Turn power switch to “O” before inserting or removing the bobbin. When inserting or removing the bobbin, the needle must be fully raised. Hold the bobbin case with one hand. Insert the bobbin so that the bobbin runs in a clockwise direction (arrow). (2) Pull the thread through the slot, down and to the left until it enters the delivery eyelet (rectangular opening) under the tension spring.
-
Page 14
CHANGING THE NEEDLE (SYSTEM 130/705H) Caution: Turn power switch to “O” before inserting or removing the needle. thread breakage or skipped stitches. needle for the fabric to be sewn. Turn the hand wheel towards you until the needle is at highest position. Loosen the needle clamp screw (A) and tighten again after inserting the new needle. -
Page 15: Threading The Upper Thread
THREADING THE UPPER THREAD Caution: Before threading, turn power switch to “O”. Raise the needle bar to its exactly the numbered illustrated below. If you skip a step or fail to properly engage the thread in any of the thread guides, the machine will not sew properly.
-
Page 16: Built-In Needle Threader
BUILT-IN NEEDLE THREADER The needle must be in the up position to use the built-in needle threader. We also recommend lowering the presser foot. 1a. Use the handle to pull the needle threader down, catching the thread under the guide. 1b.
-
Page 17: Bringing Up The Bobbin Thread
BRINGING UP THE BOBBIN THREAD Hold the upper thread with your left hand. Turn the handwheel towards you with your right hand until the needle goes down and comes up again to the highest position. (1) Pull the upper thread to bring up the bobbin thread.
-
Page 18
THREAD TENSION / RAISE OR LOWER THE FEED DOG Upper thread tension To increase the tension, turn the dial up to a higher number. To reduce the tension, turn the dial to a lower number. A. Normal thread tension — upper and bobbin thread join in fabric. -
Page 19: Reverse Sewing
REVERSE SEWING Reverse sewing is used for locking the end of seams and where reinforcement is needed. At the end of seam, press down the reverse sewing lever and touch the foot control machine will sew forward again (A). CHANGING SEWING DIRECTIONS directions with the needle in the fabric.
-
Page 20: How To Choose Your Pattern
HOW TO CHOOSE YOUR PATTERN with pattern selector dial (4). Adjust the stitch length with the stitch any needle position, by turning the stitch width dial (1). with pattern selector dial (4). Adjust the stitch length (2) and stitch width (1) according to the fabric being used.
-
Page 21: Matching Needle / Fabric / Thread
MATCHING NEEDLE / FABRIC / THREAD Needle, fabric, thread selection guide THREAD Lightweight fabrics-thin cottons, voile, silk , muslin, interlocks, cotton Light-duty thread in cotton, nylon or 9-11(65-75) knits, tricots, jerseys, crepes, woven polyester. polyester, shirt & blouse fabrics. 12(80) kettleclote, sailcloth, double knits, lightweight woollens.
-
Page 22: Zig Zag Sewing
ZIG ZAG SEWING Function of stitch width dial The maximum zigzag stitch width for zigzag stitching is Function of stitch length dial while zigzaging The density of zigzag stitches increase as the setting Satin stitch decorative stitches. Sewing thin fabrics When sewing very thin fabrics, it is suggested that you use stabilizer on the wrong side of the fabric.
-
Page 23: Straight Stitching And Needle Position
STRAIGHT STITCHING AND NEEDLE POSITION Turn the pattern selector dial so that the stitch display shows the straight stitch position (A). the fabric, thread and needle, the longer the stitch should be. Choose your needle position, from center position to left needle position by changing the stitch Pattern selector dial Reverse sewing lever…
-
Page 24: Overlock Stitches
OVERLOCK STITCHES Seams, overcasting, visible hems. The stitch width can be adjusted to suit the fabric. Double overlock stitch: Standard overlock: Stretch overlock: overcasting edges in one step. When overcasting, the needle should just go over the edge of the fabric.
-
Page 25: Blind Hem
BLIND HEM Note: It takes practice to sew blind hems. Always make a test on scraps. Place the fabric under the foot. Turn the handwheel towards you by hand until the needle swings fully to the left. It should just pierce the fold of the fabric.
-
Page 26: One Step Buttonholes
ONE STEP BUTTONHOLES Always sew a practice buttonhole on a sample of your fabric and interfacing. Making a Buttonhole Using tailor’s chalk, mark the position of the buttonhole on the fabric. Attach the buttonhole foot and set the pattern selector dial to . .
-
Page 27: Left And Right Side Balance For Buttonhole
Hook the heavy thread onto the back of the buttonhole foot, then bring the two heavy thread ends to the front of the foot, insert them into the grooves and temporarily tie them there. Lower the presser foot and start sewing. off the excess.
-
Page 28: Zippers And Piping
ZIPPERS AND PIPING fabric). The zipper foot can be snapped onto the right or left of the shank/ ankle, depending on which side of the zipper you are going to sew. To sew past the zipper pull, lower the needle into the fabric, raise the presser foot and push the zipper pull behind the presser foot.
-
Page 29
3-STEP ZIG-ZAG Place patch in position. The stitch length can be shortened to produce very close stitches. (1) When mending tears, it is advisable to use a piece of backing fabric to reinforce. The stitch density can be varied by adjusting the stitch Depending on the type of fabric and damage, sew between 3 and 5 rows. -
Page 30: Stretch Stitch Selection
STRETCH STITCH SELECTION Triple straight stitch: (1/3) The machine sews two stitches forwards and one stitch backwards. This gives triple reinforcement. Triple zig-zag: (2/4) seams. corduroy, etc.
-
Page 31: Free Motion Darning
FREE MOTION DARNING dogs. (1) Remove the presser foot shank. (2) Attach the darning foot to the presser foot bar. The lever (A) should oversew. A darning hoop is recommended for easier sewing and better results.
-
Page 32
DARNING Turn stitch length dial to the desired length. Turn stitch selector to straight stitch, center needle position. Position the fabric to be darned under the presser foot with the underlay fabric. Lower the presser foot and alternately sew forward and reverse using the reverse lever. -
Page 33
QUILTING you desired. along on the previous row of stitching. -
Page 34: Maintenance
MAINTENANCE Caution: Always make sure the machine is unplugged from the power source and the main switch is on “O” before inserting or removing any parts and before cleaning. Remove the stitch plate: Turn the handwheel until the needle is fully raised. plate screw with the screw driver.
-
Page 35: Troubleshooting Guide
TROUBLESHOOTING GUIDE Problem Cause Correction Upper thread 1.The machine is not threaded correctly 1. Rethread the machine breaks 2.The thread tension is too tight 2. Reduce the thread tension (lower number) 3.The thread is too thick for the needle 4.The needle is not inserted correctly towards the back) 5.The thread is wound around the spool holder pin…
-
Page 36
www.husqvarnaviking.com…
Производитель: Husqvarna
9 обзоров:
4.9 (Отличный товар)
Электромеханическая швейная машина Хускварна E 20 H|Class
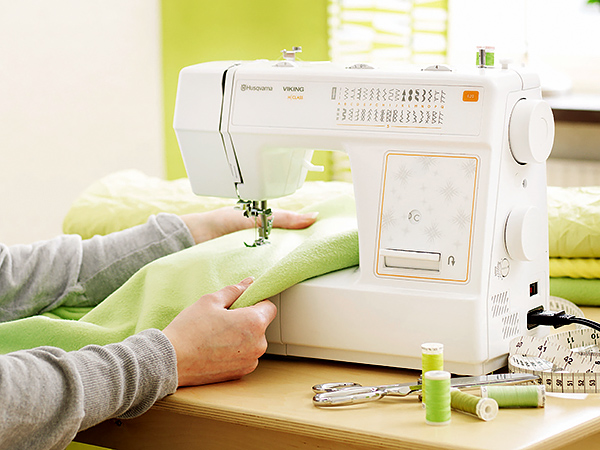
Эта классическая электромеханическая машина станет хорошим выбором для тех, кто планирует регулярно заниматься шитьем, в то же время не превращая это занятие в серьезное хобби или профессию. Husqvarna Viking H | Class E20 оснащена традиционным качающимся челноком, имеет очень большой набор рабочих и декоративных строчек, а также позволяет выметывать прямую бельевую петлю в автоматическом режиме.
Особенности:
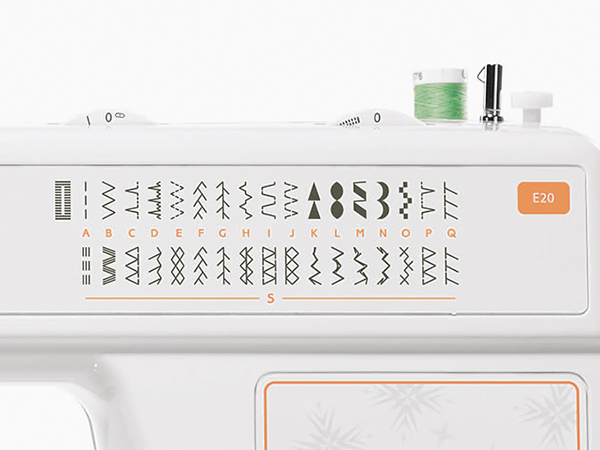
32 строчки
Увеличенный набор строчек по сравнению с моделью E10 дает вам больший простор для творчества, ведь здесь вы найдете еще больше декоративных строчек. Вы сможете не только шить, но и украшать изделия необычными деталями.
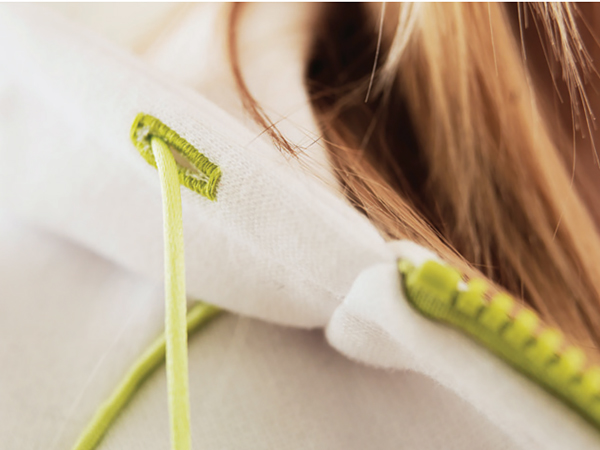
Автоматическая петля
Еще одно преимущество модели E20 — возможность выполнения прямой петли в автоматическом режиме без поворота ткани.
Регулировка ширины и давления лапки
У вас также будет возможность изменять ширину любой строчки до 5 мм, а функция регулировки давления лапки позволит добиться максимально хороших результатов при шитье как легких, так и тяжелых тканей, а также при квилтинге или выполнении эластичных швов.
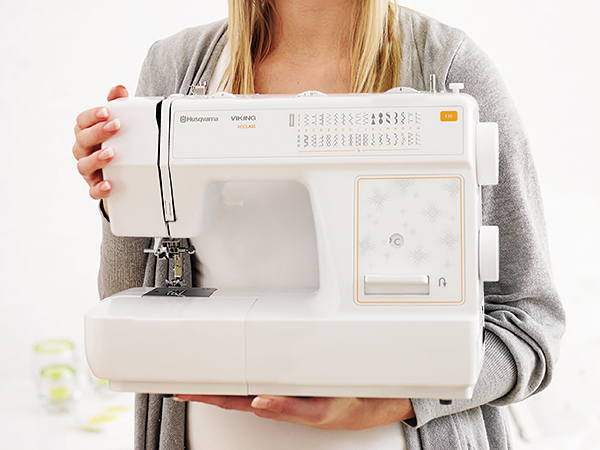
Легкая и компактная
Небольшой вес 7 кг модели E20 позволит без труда переносить машину, брать ее с собой на обучающие курсы и мастер-классы. Отличный вариант для тех, кто только начался заниматься шитьем.
Опускание зубцов транспортера
Вы сможете шить в технике свободного перемещения ткани, просто опустив зубцы транспортера с помощью специального переключателя. Нет необходимости устанавливать пластину для штопки.
Быстрый тест Husqvarna Viking E20
Инструкции для Husqvarna Viking E20:
Инструкция по эксплуатации Husqvarna Viking H | Class E20 (PDF, 10MB, рус)
Характеристики Husqvarna Viking E20:
- Диапазон прошиваемых материалов
- Очень легкие – 4
Легкие – 5
Средние и умеренно тяжелые – 5
Тяжелые – 4
Трикотаж – 3 - Тип челнока
- Вертикальный качающийся челнок
- Максимальная ширина строчки
- 5 мм
- Максимальная длина стежка
- 4 мм
- Количество строчек
- 32
- Режим вымётывания петли
- Автоматическое выметывание прямой бельевой петли под размер пуговицы
- Верхний транспортёр
- нет
- Длина платформы
- 15 см
- Размеры рукавной платформы (длина/обхват)
- 9/28 см
- Ширина гребёнки транспортера
- 14 мм
- Высота подъема лапки (нормальная/максимальная)
- 6/12
- Электронный стабилизатор усилия прокола
- нет
- Регулятор (ограничитель) максимальной скорости
- нет
- Программируемая остановка иглы в верхнем/нижнем положении
- нет
- Нитевдеватель
- есть
- Горизонтальное расположение катушки
- нет
- Регулятор давления лапки
- есть
- Потребляемая мощность
- 70 Вт
- Тип освещения
- Светодиодное
- Органайзер
- нет
- Автостоп при намотке нитки на шпульку
- есть
- Линейка на корпусе
- нет
- Чехол
- Мягкий
- Швейный советник
- нет
- Стандарт игл
- 130/705H
- Страна разработки
- Швеция
- Страна производства
- Китай
- Гарантия
- 3 года
- Вес без упаковки
- 6,4 кг
- Вес с упаковкой
- 7,9 кг
Строчки Husqvarna Viking E20:
Комплектация
- Педаль
- Мягкий чехол
- Стандартная лапка
- Лапка для молнии
- Лапка для декоративных швов
- Лапка для петли
- Лапка для квилтинга
- Лапка для штопки
- Лапка для невидимой подгибки
- Отвертка для игольной пластины
- Распарыватель/щетка
- Набор игл
- Шпульки
- Линейка-направитель
- Фетровые прокладки
Популярные аксессуары для Husqvarna Viking E20
Наличие:
есть
Наличие:
есть
Наличие:
есть
Наличие:
есть
Наличие:
есть
Наличие:
есть
Наличие:
есть
Наличие:
есть
Наличие:
есть
Наличие:
есть
Обратите внимание!
«Швейный Мир» является официальным дистрибьютором швейных машин фирмы Husqvarna Viking. Покупая продукцию Husqvarna Viking в наших магазинах, Вы получите качественную машину, обеспеченную гарантийным и сервисным обслуживанием.
Отзывы о товаре Husqvarna Viking E20
-
Гончарова Наталья Михайловна20 Май ’21
-
Отличный товар
Машинка действительно отличная! Благодарю магазин и производителя!
-
Николай (Консультант)8 Май ’21
-
Отличный товар
— отзыв эксперта
Роза, зубцы транспортера поднимутся после первого полного оборота маховика. Просто переведите переключатель в положение поднятых зубцов и начните шить. А чтобы машина в начале строчки не путала нитки, надо придерживать длинные кончики нитей пальцами.
-
Роза Загидуллина8 Май ’21
-
Отличный товар
Здравствуйте. Купила данную машинку совсем недавно, в марте) Спасибо, очень классная, все нравится.
Но у меня возникла проблема с переключателем зубцов транспортера. Он опускает транспортер, а обратно уже не поднимает, как будто не захватывает его и он остается внизу даже если я его вернула в верхнее положение. Что делать при такой ситуации?
и еще бывает когда только начинаю шить, строчу медленно то нижнюю нить он зажевывает. От чего такое может происходить? натяжение нити плохое или что? Спасибо. -
Aleshka18 Июл ’20
-
Отличный товар
Здравствуйте. Получили заказ быстро. Машинка качественная, без дефектов. Шьет тихо. Брал жене в подарок. Она не на радуется на нее. Спасибо большое.
-
Овчарова Елена Петровна15 Июл ’20
-
Хороший товар
-
Усенко Евгения Анатольевна25 Мар ’20
-
Отличный товар
Очень хорошая машинка. Я новичок,мне шьётся легко. Всем советую.
-
lana16 Фев ’20
-
Хороший товар
— отзыв покупателя
-
Оксана С.10 Сен ’19
-
Отличный товар
Отличная машина. Проста в управлении, мягкий ход, удобна в использовании. Всё продумано. Шить одно удовольствие! Рекомендую для начинающих и уверенных пользователей швейных машин.
-
Надежда С.8 Июл ’19
-
Отличный товар
Замечательная машинка! Лет 8 служит верой и правдой! Ни одной поломки за это время.
Отзывы о товаре могут оставлять только зарегистрированные покупатели.
Выберите свой регион
Мы покажем вам актуальные контакты и цены на доставку
Купить курс могут только авторизованные пользователи
- Состав курса
- Отзывы
- Вопросы
- Состав курса
- Отзывы
- Вопросы
Оставить отзыв
Видео инструкция Husqvarna Viking E20
Загрузить изображения
Можно перетащить с помощью Drag’n’drop
Спасибо!
Видео инструкция Husqvarna Viking E20
Ваш отзыв отправлен! Скоро мы опубликуем его на сайте
- Состав курса
- Отзывы
- Вопросы
Задать вопрос о товаре
Видео инструкция Husqvarna Viking E20
Спасибо!
Видео инструкция Husqvarna Viking E20
Ваш вопрос отправлен! Мы ответим на вопрос и опубликуем его на сайте.
-
Page 1
USER’S GUIDE… -
Page 2: Important Safety Instructions
This household sewing machine is designed to comply with IEC/EN 60335-2-28 and UL1594 IMPORTANT SAFETY INSTRUCTIONS When using an electrical appliance, basic safety precautions should always be followed, including the following: Read all instructions before using this household sewing machine. DANGER — To reduce the risk of electric shock: •…
-
Page 3
CONTENTS ………………….4 ……………………6 …………..7 …………8 ………………….9 …………….10 ………….10 ………………..11 …………………12 ………………..13 ………….14 ……………..15 ………………16 …………….17 ……….18 ………………….19 ……………..19 ………………..19 ………………..19 …………….20 ……………21 ………………….22 …………23 …………………24 ……………………25 ………………..26 ……….27 …………………..28 …………………..29 ………………30 ………………..31 ………………………32 ………………………33 …………………….34 ……………….35… -
Page 4: Principal Parts
PRINCIPAL PARTS Thread tension dial Presser foot pressure Thread take-up lever Thread cutter 12. Reverse sewing lever Presser foot Needle plate Accessory box…
-
Page 5
16. Handle 19. Handwheel 20. Pattern selector dial 21. Power switch 24. Upper thread guide 25. Presser foot lever… -
Page 6
ACCESSORIES All purpose foot L-screwdriver Zipper foot 10. Pack of needles Quilting foot… -
Page 7: Slide On The Snap-In Accessory Box
SLIDE ON THE SNAP-IN ACCESSORY BOX Hold the snap-in accessory box horizontal, and push it in the direction of the arrow. (1) To open, lift up at the point of the arrow. (2)
-
Page 8: Connecting The Machine To Power Source
CONNECTING THE MACHINE TO POWER SOURCE Caution: Always make sure that the machine is unplugged from power source and the main switch is on “O”. when the machine is not in use and before inserting or removing parts. Connect the machine to a power source as illustrated (1/2). To start the machine, press on the foot control (3).
-
Page 9: Changing The Bulb
CHANGING THE BULB Caution: Make sure to disconnect the electrical supply plug from wall outlet before changing light bulb. Replace bulb with same type rated: 10 watts (110-120V) 15 watts (220-240V) Loosen screw (A) as illustrated. (1) Unscrew the bulb and put in a new one (C). Replace the cover and tighten screw.
-
Page 10: Two-Step Presser Foot Lever
TWO-STEP PRESSER FOOT LEVER When sewing several layers or thick fabrics, the presser foot can be raised a second stage for easy positioning of the work. (A) ADJUSTING THE PRESSER FOOT PRESSURE The presser foot pressure of the machine has been fabrics (light-or-heavy weight).
-
Page 11: Presser Foot Shank
PRESSER FOOT SHANK Attention: Turn power switch to “O” before carrying out any of the operations below. Attaching the presser foot shank: Raise the needle to its highest position and raise the presser foot lever. Attach the presser foot shank (b) to the presser foot bar (a).
-
Page 12: Winding The Bobbin
WINDING THE BOBBIN Place spool on spool pin with spool pin felt underneath (a). Take the thread from the spool around the bobbin winder tension disc clockwise. (1) Thread bobbin as illustrated and place it on the spindel. Push the bobbin to the right towards the bobbin winding position.
-
Page 13: Inserting The Bobbin
INSERTING THE BOBBIN Attention: Turn power switch to “O” before inserting or removing the bobbin. When inserting or removing the bobbin, the needle must be fully raised. Hold the bobbin case with one hand. Insert the bobbin so that the bobbin runs in a clockwise direction (arrow). (2) Pull the thread through the slot, down and to the left until it enters the delivery eyelet (rectangular opening) under the tension spring.
-
Page 14
CHANGING THE NEEDLE (SYSTEM 130/705H) Caution: Turn power switch to “O” before inserting or removing the needle. thread breakage or skipped stitches. needle for the fabric to be sewn. Turn the hand wheel towards you until the needle is at highest position. Loosen the needle clamp screw (A) and tighten again after inserting the new needle. -
Page 15: Threading The Upper Thread
THREADING THE UPPER THREAD Caution: Before threading, turn power switch to “O”. Raise the needle bar to its exactly the numbered illustrated below. If you skip a step or fail to properly engage the thread in any of the thread guides, the machine will not sew properly.
-
Page 16: Built-In Needle Threader
BUILT-IN NEEDLE THREADER The needle must be in the up position to use the built-in needle threader. We also recommend lowering the presser foot. 1a. Use the handle to pull the needle threader down, catching the thread under the guide. 1b.
-
Page 17: Bringing Up The Bobbin Thread
BRINGING UP THE BOBBIN THREAD Hold the upper thread with your left hand. Turn the handwheel towards you with your right hand until the needle goes down and comes up again to the highest position. (1) Pull the upper thread to bring up the bobbin thread.
-
Page 18
THREAD TENSION / RAISE OR LOWER THE FEED DOG Upper thread tension To increase the tension, turn the dial up to a higher number. To reduce the tension, turn the dial to a lower number. A. Normal thread tension — upper and bobbin thread join in fabric. -
Page 19: Reverse Sewing
REVERSE SEWING Reverse sewing is used for locking the end of seams and where reinforcement is needed. At the end of seam, press down the reverse sewing lever and touch the foot control machine will sew forward again (A). CHANGING SEWING DIRECTIONS directions with the needle in the fabric.
-
Page 20: How To Choose Your Pattern
HOW TO CHOOSE YOUR PATTERN with pattern selector dial (4). Adjust the stitch length with the stitch any needle position, by turning the stitch width dial (1). with pattern selector dial (4). Adjust the stitch length (2) and stitch width (1) according to the fabric being used.
-
Page 21: Matching Needle / Fabric / Thread
MATCHING NEEDLE / FABRIC / THREAD Needle, fabric, thread selection guide THREAD Lightweight fabrics-thin cottons, voile, silk , muslin, interlocks, cotton Light-duty thread in cotton, nylon or 9-11(65-75) knits, tricots, jerseys, crepes, woven polyester. polyester, shirt & blouse fabrics. 12(80) kettleclote, sailcloth, double knits, lightweight woollens.
-
Page 22: Zig Zag Sewing
ZIG ZAG SEWING Function of stitch width dial The maximum zigzag stitch width for zigzag stitching is Function of stitch length dial while zigzaging The density of zigzag stitches increase as the setting Satin stitch decorative stitches. Sewing thin fabrics When sewing very thin fabrics, it is suggested that you use stabilizer on the wrong side of the fabric.
-
Page 23: Straight Stitching And Needle Position
STRAIGHT STITCHING AND NEEDLE POSITION Turn the pattern selector dial so that the stitch display shows the straight stitch position (A). the fabric, thread and needle, the longer the stitch should be. Choose your needle position, from center position to left needle position by changing the stitch Pattern selector dial Reverse sewing lever…
-
Page 24: Overlock Stitches
OVERLOCK STITCHES Seams, overcasting, visible hems. The stitch width can be adjusted to suit the fabric. Double overlock stitch: Standard overlock: Stretch overlock: overcasting edges in one step. When overcasting, the needle should just go over the edge of the fabric.
-
Page 25: Blind Hem
BLIND HEM Note: It takes practice to sew blind hems. Always make a test on scraps. Place the fabric under the foot. Turn the handwheel towards you by hand until the needle swings fully to the left. It should just pierce the fold of the fabric.
-
Page 26: One Step Buttonholes
ONE STEP BUTTONHOLES Always sew a practice buttonhole on a sample of your fabric and interfacing. Making a Buttonhole Using tailor’s chalk, mark the position of the buttonhole on the fabric. Attach the buttonhole foot and set the pattern selector dial to . .
-
Page 27: Left And Right Side Balance For Buttonhole
Hook the heavy thread onto the back of the buttonhole foot, then bring the two heavy thread ends to the front of the foot, insert them into the grooves and temporarily tie them there. Lower the presser foot and start sewing. off the excess.
-
Page 28: Zippers And Piping
ZIPPERS AND PIPING fabric). The zipper foot can be snapped onto the right or left of the shank/ ankle, depending on which side of the zipper you are going to sew. To sew past the zipper pull, lower the needle into the fabric, raise the presser foot and push the zipper pull behind the presser foot.
-
Page 29
3-STEP ZIG-ZAG Place patch in position. The stitch length can be shortened to produce very close stitches. (1) When mending tears, it is advisable to use a piece of backing fabric to reinforce. The stitch density can be varied by adjusting the stitch Depending on the type of fabric and damage, sew between 3 and 5 rows. -
Page 30: Stretch Stitch Selection
STRETCH STITCH SELECTION Triple straight stitch: (1/3) The machine sews two stitches forwards and one stitch backwards. This gives triple reinforcement. Triple zig-zag: (2/4) seams. corduroy, etc.
-
Page 31: Free Motion Darning
FREE MOTION DARNING dogs. (1) Remove the presser foot shank. (2) Attach the darning foot to the presser foot bar. The lever (A) should oversew. A darning hoop is recommended for easier sewing and better results.
-
Page 32
DARNING Turn stitch length dial to the desired length. Turn stitch selector to straight stitch, center needle position. Position the fabric to be darned under the presser foot with the underlay fabric. Lower the presser foot and alternately sew forward and reverse using the reverse lever. -
Page 33
QUILTING you desired. along on the previous row of stitching. -
Page 34: Maintenance
MAINTENANCE Caution: Always make sure the machine is unplugged from the power source and the main switch is on “O” before inserting or removing any parts and before cleaning. Remove the stitch plate: Turn the handwheel until the needle is fully raised. plate screw with the screw driver.
-
Page 35: Troubleshooting Guide
TROUBLESHOOTING GUIDE Problem Cause Correction Upper thread 1.The machine is not threaded correctly 1. Rethread the machine breaks 2.The thread tension is too tight 2. Reduce the thread tension (lower number) 3.The thread is too thick for the needle 4.The needle is not inserted correctly towards the back) 5.The thread is wound around the spool holder pin…
-
Page 36
www.husqvarnaviking.com…
Посмотреть инструкция для Husqvarna Viking H-Class E20 бесплатно. Руководство относится к категории Швейные машины, 18 человек(а) дали ему среднюю оценку 8.5. Руководство доступно на следующих языках: английский. У вас есть вопрос о Husqvarna Viking H-Class E20 или вам нужна помощь? Задайте свой вопрос здесь
Главная
| Husqvarna | |
| Viking H-Class E20 | VIKING H|CLASS E20 | |
| Швейная машина | |
| 2099000237330, 7393033079123 | |
| английский | |
| Руководство пользователя (PDF) |
Свойства
| Тип петли | 1 шаг |
| Количество видов стежка | 32 |
| Регулируемая длинна стежка | Да |
| Цвет товара | Белый |
| Тип | — |
| Функции швейной машины | Шитье |
| Свободный рукав | — |
| Автоматическое выметывание петли | — |
| Количество программ | — |
| Длинна стежка | 4 мм |
| Автоматический нитевдеватель | Да |
| Ширина стежка | 5 мм |
Энергопитание
Содержимое упаковки
| Футляр для транспортировки | Да |
| Аксессуары швейной машины | Blind stitch foot, Buttonhole foot, Zipper foot |
| Дополнительные принадлежности | All purpose foot, Satin stitch foot, Quilting foot, Free-Motion/Darning foot, L-screwdriver, Seam ripper/ brush, Oil bottle, Pack of needles, Bobbins (3x), Seam guide, Spool pin felt (2x) |
Вес и размеры
показать больше
Не можете найти ответ на свой вопрос в руководстве? Вы можете найти ответ на свой вопрос ниже, в разделе часто задаваемых вопросов о Husqvarna Viking H-Class E20.
Какой вес Husqvarna Viking H-Class E20?
Какой размер иглы лучше всего использовать?
Какой срок службы у швейной иглы?
Что может повредить иглу при шитье?
Инструкция Husqvarna Viking H-Class E20 доступно в русский?
Не нашли свой вопрос? Задайте свой вопрос здесь


