Manuals
AXE I/O Solo Documentation and Manuals
- AXE I/O Solo User Manual
SPECIAL OFFERS5 THIS MONTH
x
We use cookies and other tracking technologies to improve your browsing experience on our site, show personalized content and targeted ads, analyze site traffic, and understand where our audience is coming from.
To find out more or to opt-out, please read our Cookie Policy. To learn more, please read our Privacy Policy.
Click below to consent to our use of cookies and other tracking technologies, make granular choices or deny your consent.
-
Bookmarks
Quick Links
Compact audio interface with
advanced guitar tone shaping
USER MANUAL
English
日本語
Related Manuals for IK Multimedia AXE I/O SOLO
Summary of Contents for IK Multimedia AXE I/O SOLO
-
Page 1
Compact audio interface with advanced guitar tone shaping USER MANUAL English 日本語… -
Page 2
Compact audio interface with advanced guitar tone shaping USER MANUAL… -
Page 3
Contents Table of Contents Contents English AXE I/O SOLO Register your AXE I/O SOLO Front panel Rear panel 1 Installation and setup 1.1 Software installation 1.2 Setup 2 Dedicated guitar features 2.1 Direct amplifier output & Re-Amplification 2.2 JFET / PURE input (only for Instrument Input 1) 2.3 Pick-Up selector (only for Instrument Input 1) -
Page 4
• USB cable AXE I/O SOLO is the most compact interface in the AXE I/O family, with 2 inputs and 3 outputs. As with the original AXE I/O, it has been created from the ground-up with the goal of designing the best possible interface for guitar players, and sports a series of features that can’t be found individually or combined in any… -
Page 5
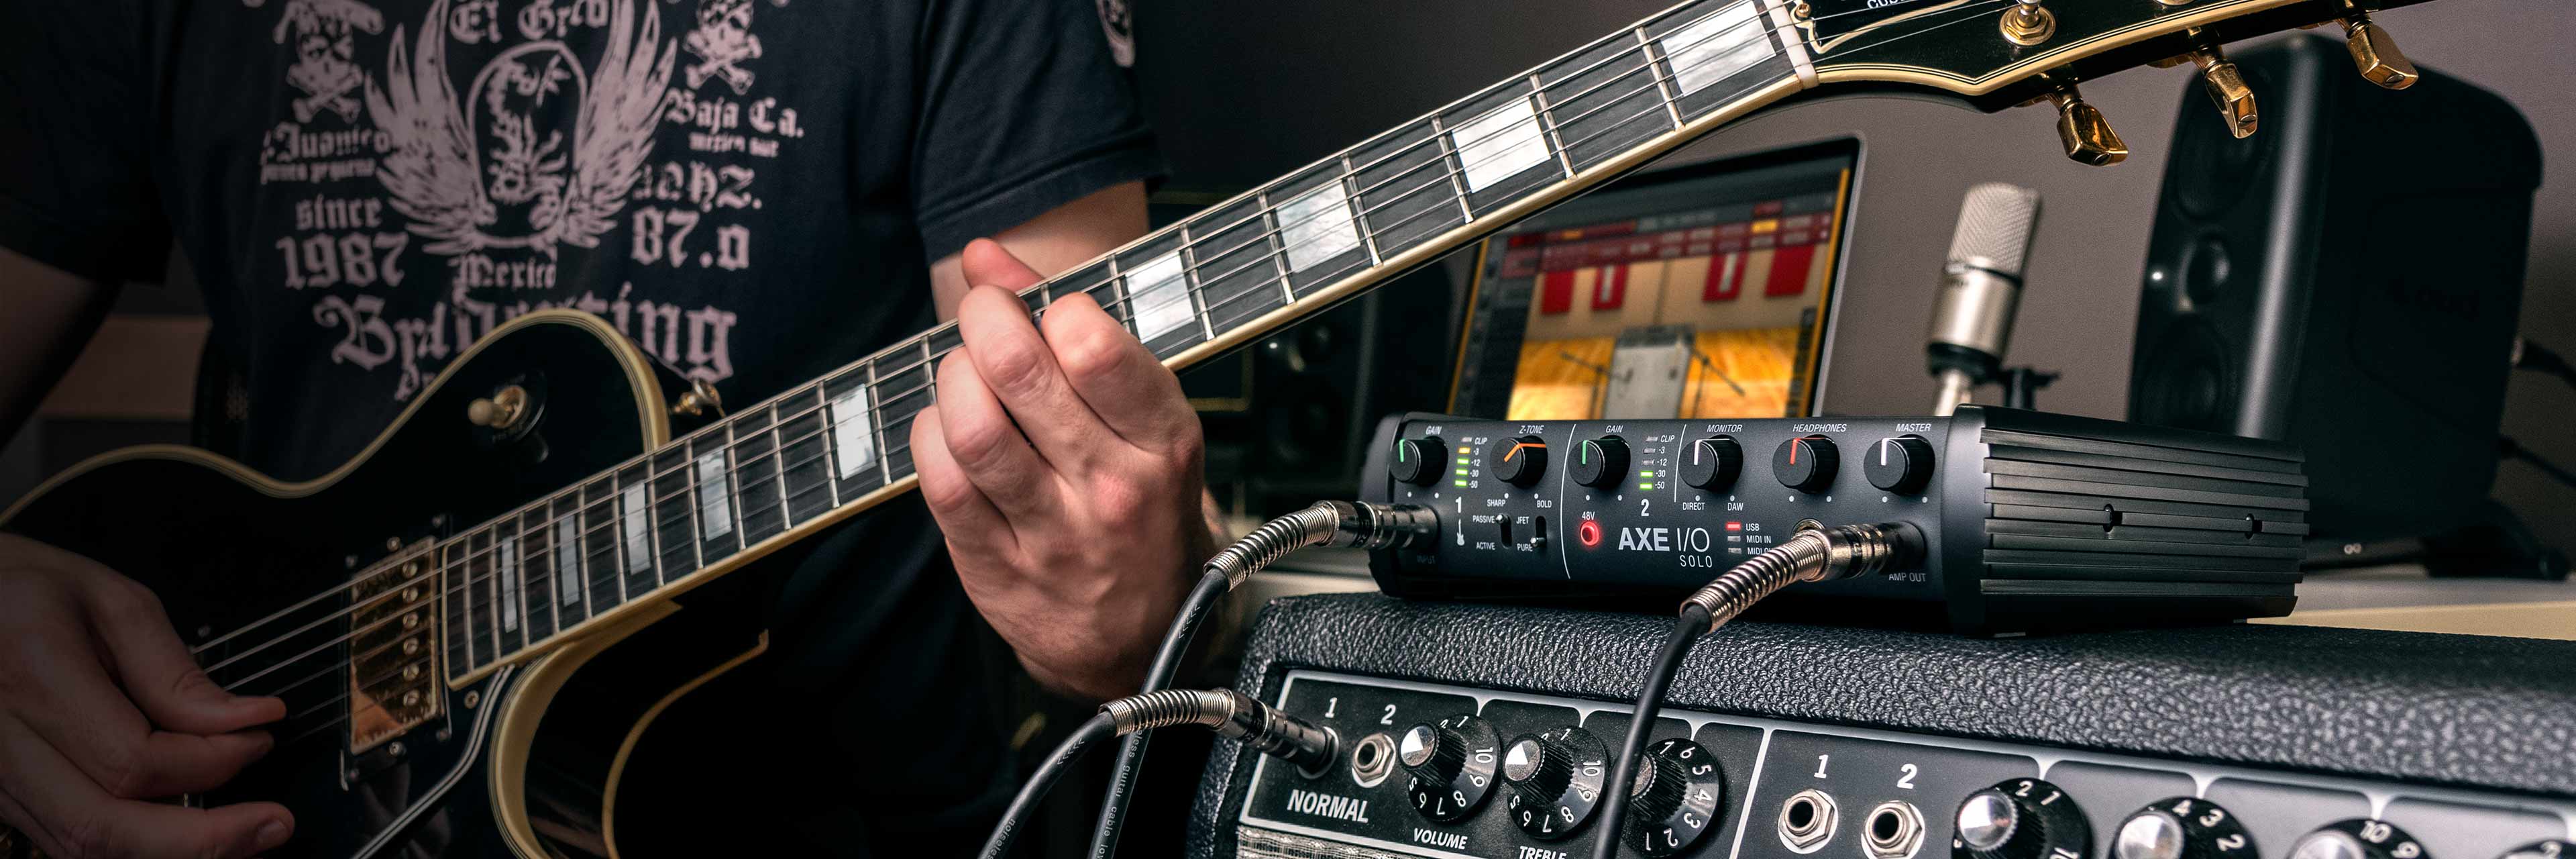
English Front panel 1. Instrument input 1 — 1/4” (6.35mm) jack type — Connect your instrument here (e.g., guitar). 2. GAIN 1 and GAIN 2 — adjust the input gain for the signals at Inputs 1 and 2 respectively. 3. Peak Meters — each input has a dedicated 5-segments peak meter, with 1-second hold on CLIP , that indicates the level of the input signal. -
Page 6
2. MIDI IN/OUT — standard 5-pin DIN sockets for connection of external MIDI equipment. 3. USB 2.0 port — Type B connector — connect the AXE I/O SOLO to your computer with the supplied cable. 4. EXTERNAL CONTROL — use these 1/4” (6.35mm) jacks to connect external controller pedals (single or dual switches, continuous expression pedals). -
Page 7
English 1 Installation and setup 1.1 Software installation All software required by the AXE I/O SOLO is available for download from the IK Multimedia website (www. ikmultimedia.com/products/axeiosolo). By downloading the “AXE I/O SOLO Drivers and Control Software” you’ll find: MAC users: the installer contains the AXE I/O SOLO Control App. -
Page 8
English 2. Connect the AXE I/O SOLO to your computer with the supplied USB cable. 3. You can connect instrument signal to the front Jack 1/4” Instrument input 1, or microphone and line level signal to the back combo XLR input 2. -
Page 9
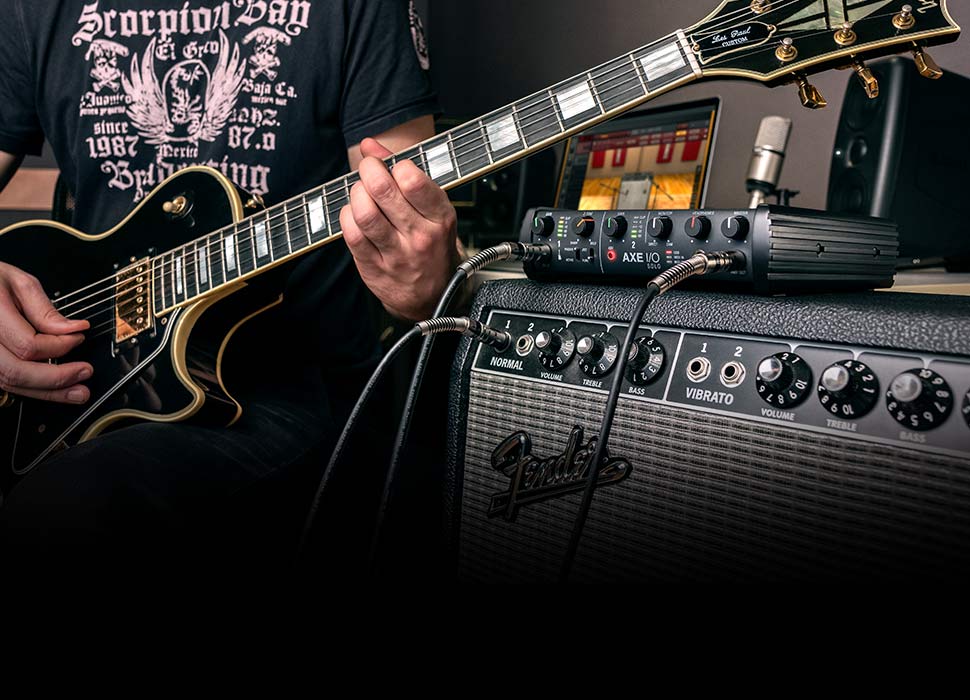
MIC RE-AMPLIFICATION Among the features that make AXE I/O SOLO the definitive guitarist interface is the Re-Amplification feature. The “AMP OUT” is a third physical output which is independent from main Output 1-2. With this output, you can feed a DI recorded guitar to external analogue stomps or a real amplifier, still being able to monitor the session from main Output (1-2). -
Page 10
English 2.2 JFET / PURE input (only for Instrument Input 1) Thanks to the front panel selector it is possible to select two different preamp topologies for your connected instrument: JFET preamp type and Pure preamp type. The discrete JFET (field-effect transistor) circuitry adds a tiny bit of color and harmonics to the signal, giving your instruments a bit of added warmth. -
Page 11
“worse” than the other: indeed they have different behaviors. To properly couple this diversity of guitar pickups in the most musically pleasing manner, AXE I/O SOLO offers a pickup selector that allows the artist to select between Active (when using an active pickup) and Passive (when using a passive pickup). -
Page 12
English Note: AXE I/O SOLO is very useful for feeding analogue stomp boxes from DAW tracks using the AMP output. The best way to get the Stomp signal back into the DAW is by using Instrument input 1. This way the Z-TONE circuit will also be very useful because most vintage stomps can actually change the way they sound depending on the load impedance, so experimentation in this usage is very welcome as well. -
Page 13
Please refer to your DAW’s documentation (or Help files) if you are unsure where to select the ASIO/Core Audio driver. Once the AXE I/O SOLO is set as the preferred Audio Device in your DAW, all 2 inputs and 3 outputs will appear in your DAW’s Audio I/O preferences. -
Page 14
English 5 Connecting instrument INSTRUMENT Connect your guitar, bass or any other mono instruments to the instrument input on AXE I/O SOLO using an 1⁄4” plug unbalanced (TS or “mono”) guitar cable. Please refer to Section 2 of this manual for the complete description of features dedicated to the instrument input. NOTE: In your audio software, select the Input 1 as the source of the track you will be recording to. Adjust the channel gain knob until you have a sufficient audio signal without clipping. -
Page 15
For this reason these outputs are also ideal for use onstage, when directly feeding the FOH without any need for isolators or DI boxes. The AXE I/O SOLO has a solid strong signal free from ground loops that will work perfectly in these situations. -
Page 16
This delay, called latency, is caused by the computer processing required to process the audio. Since this delay can be distracting, AXE I/O SOLO provides a direct monitoring path from the inputs to the outputs, and this is controlled by the Monitor knob. The Monitor knob allows you to blend your input signals with the playback streams from your computer. -
Page 17
State: This LED shows when an AXE I/O SOLO unit is connected and active. MIDI IN, OUT: these LEDs shows when there is MIDI activity on the AXE I/O SOLO physical MIDI ports. Sample Rate: Here you can set the working sample rate for the AXE I/O SOLO unit, from 44.1 to 192 kHz. -
Page 18
Depending on what else is connected to the AXE I/O SOLO and what grounding scheme is implemented in the setup the amp connection can be cleaner with GND LIFT active or not active. -
Page 19
English 8.2 Controller tab The CONTROLLER tab gives you control over the 2 controller inputs. Set behavior, MIDI channel, MIDI CC#, minimum and maximum values, and more, to dial in the best settings for whatever application you want to control. -
Page 20
English 9 Specifications Common AD and DA Resolution: 24-bit Sampling Rate: 44.1 kHz, 48 kHz, 88.2 kHz, 96 kHz, 176.4 kHz and 192 kHz Host Connection: USB Type-B receptacle. USB 2.0 (High Speed). Line Outputs 1-2 (Monitor) Configuration: Electronically balanced and floating, automatically compensates level when connection is balanced or unbalanced, tip hot. -
Page 21
English THD, PURE mode: 0.002 % (-1dBFS input) THD, JFET mode: 0.5 % Mic Input Configuration: Class-A discrete differential microphone preamp, pin 2 hot Input impedance: 4 kOhms differential Input level, min gain: 0 dBFS is obtained with a +9 dBu signal at the XLR input Input level, max gain: 0 dBFS is obtained with a -44 dBu signal at the XLR input Frequency response: From 7 Hz to 32 kHz within 0.5 dB (96 kHz sample rate) Dynamic Range: 116 dB(A) -
Page 22
AXE I/O SOLO, AmpliTube and SampleTank® are trademarks property of IK Multimedia Production Srl. All other product names and images, trademarks and artists names are the property of their respective owners, which are in no way associated or affiliated with IK Multimedia. iPad, iPhone, iPod touch Mac and Mac logo are trademarks of Apple Computer, Inc., registered in the U.S. and other countries. -
Page 23
Compact audio interface with advanced guitar tone shaping USER MANUAL 日本語版… -
Page 24
2.2JFET/PURE入力 (InstrumentInput1のみ) 2.3ピックアップセレクター (InstrumentInput1のみ) 2.4入力インピーダンス(Z-TONE)を調整する 2.6外部コン トロール (Externalcontrol) 3 DAW設定 4 マイクロフォンの接続 4.1コンデンサー型マイクロフ ォン 4.2ダイナミ ック型マイクロフ ォン 4.3リボン型マイクロフ ォン 5 楽器の接続 6 モニタースピーカーとヘッドフォンの接続 7 ダイレクト・モニタリング 8 AXE I/O SOLO Control Panel 8.1インターフェイスビュー (INTERFACE) 8.2コン トローラータブ (CONTROLLER) 9 製品仕様 保証 サポートおよびその他の情報 Regulatory… -
Page 25
日本語 AXE I/O SOLO この度は、 AXEI/OSOLOをお求めいただき、 誠にありがとうございます。 以下、 パッケージ同梱物になります : AXEI/OSOLO本体 • USBケーブルx1本 • AXEI/OSOLOは2イン/3アウ トのオーディ オ ・ インターフ ェイスで、 AXEI/Oシリーズでもっとも小さな製品となっ ています。 AXEI/Oと同じ く 、 ギタリス トの為に一から設計され、 他のオーディ オ ・ インターフ ェイスで見ない快適で素晴らしい機能を搭載され ています。 そのすべてがこの小型ボディ でできています。 AXEI/OSOLOは、 一般的なオーディ オ ・ インターフ ェイスとしても優れたものに仕上がっ ています。 192kHzのサンルレートと24bit の分解能によるダイナミ… -
Page 26
日本語 フロントパネル 1. 楽器入力 (INPUT 1) : 楽器 (ギターなど) を接続する為の1/4” ( 6.35mm) 標準プラグを装着する為のジャ ックです。 2. ゲイン (GAIN 1と2) :入力信号レベル (ゲイン) を適切に設定する為のノ ブです。 3. ピークメーター : 適切な入力レベルを設定する為の5セグメン トピークメーターです。 入力信号過多が発生した場合、 一番上 のCLIPインジケーターが、 1秒以上点灯しそのことを示します。 4. Z-TONE™ : フロン トパネルコン トロールのZ-TONE™-バリアブルインピーダンスコン トロールは、 INPUT1のみに用意された 可変インピーダンスコン トロールで、 接続したに最適な入力インピーダンス設定を行います。 この機能により、 楽器本来の音 色、… -
Page 27
日本語 リアパネル 1. Kensingtonセキュリティロックポート : AXEI/OSOLOの盗難防止をする為のKensington (ケンジン トン) 規格のロック ワイヤーを接続します。 2. MIDI入出力 (MIDI IN/OUT) : 他のMIDI機器と接続をする為のDIN5ピン仕様の標準MIDI入力と出力ポートです。 3. USB 2.0ポート : 付属のUSBケーブルを使用して、 AXEI/OSOLOとコンピューターを接続する為のTypeBコネクターです。 4. 外部コントロール (EXTERNAL CONTROL) : コン トロールペダル (シングルまたはデュアルスイ ッチ、 エクスプレッシ ョ ン ペダル) を接続する為の1/4” ( 6.35mm) ジャ ックです。 ここで扱うMIDIコン トロール情報は、 専用のソ フ トウェア : “Controlapp”で行います。… -
Page 28
3. コンピューターにダウンロードをしました“AXEI/OSOLODriversandControlSoftware” ( MacまたはWindows) を起動し て、 画面の指示に従っ てインス トールを完了します。 4. インス トールを全て完了しましたら、 コンピューターを再起動します。 5. コンピューターの再起動後、 付属のUSBケーブルを使用して、 AXEI/OSOLOとコンピューターを接続します。 1.2設定 1. 上記にて解説しました通り、 AXEI/OSOLOのドライバー (Driver) とコン トロール ・ ソ フ トウェア (ControlSoftware) を ダウンロードし、 インス トールをします。 AXE I/O SOLO Control Software AmpliTubeDeluxe 10T-RackSplug-ins AbletonLiveLite 無料ダウンロード ikdownloads.com/axeiosolo… -
Page 29
日本語 2. AXEI/OSOLOとコンピューターを付属のUSBケーブルで接続します。 3. ギター、 ベースなどの楽器をフロン トパネルの楽器入力 (INSTRUMENTINPUT) を1に接続します。 マイクロフ ォン (XLRケーブ ル) 、 ライン出力機器 (1/4″プラグのケーブル) リアパネルのXLRコンボ入力 (MIC/LINEIN) のに接続します。 4. パワード ・ スピーカー、 アンプなどの再生機器を、 AXEI/OSOLOリアパネルのバランス ・ アウ トに接続します。 5. 必要に応じて、 リアパネルのMIDIINとOUTと、 MIDI機器を標準のMIDIケーブル (DIN-5) を接続します。… -
Page 30
日本語 2 ギターに特化した機能 2.1アンプへの直接出力とリアンプ infromMIC RE-AMPLIFICATION AXEI/OSOLOには、 ギタリス トのスタジオレコーディ ングで一般的に行われているリアンプ (Re-Amplification) と呼ばれる行為に 特化した機能が備えられています : 3番目の出力として用意された“AMPOUT”はその為のもので、 メイン出力の1-2とは独立し、 特別な仕様になっ ています。 この出力を用いることで、 既にコンピューターソ フ トウェアでライン収録したトラックを実際のギターア ンプやギター用のス トンプエフ ェク トを直接繋いて、 ギターサウンドを再形成することが可能です。 勿論、 その間、 メイン出力1-2で、 セッシ ョ ンのモニターを行いながら、 アンプやス トンプを通したサウンドの再収録が可能です。 また、 AMPOUTを用いることで、 新た にリアンプをする為のデバイスを用意する必要が無くなります。 AXEI/OSOLOのAMPOUTは、… -
Page 31
日本語 2.2JFET/PURE入力 (InstrumentInput1のみ) AXEI/OSOLOフロン トパネルの楽器入力1には、 2つのプリアンプ技術 : JFETとPUREが用意され、 スイ ッチ切り替えをすることが 可能です。 JFET (field-effecttransistor) モードは、 ディ スクリート回路で構成されたプリアンプで、 信号に対してほんの少し倍音と彩りを加 えます。 このことにより、 楽器の音色に少しだけ温もりを与えます。 PUREモードは、 クリーンなシグナルパスを目指した回路で、 リニアなレスポンスと透明感のあるサウンドに適しています。 いずれのプリアンプモードも、 現代の業務スタジオでワークやステージパフ ォーマンスでの使用を想定した品質と特性が高いレベ ルで確保された仕様に仕上がっ ています。 注意 : JET/PUREス イ ッチは、 ピ ックア ップセ レクター (Pickupselector) と連動し、 Passiveポジシ ョ ンに設定した際のみ、 機能します 。 2.3ピックアップセレクター… -
Page 32
日本語 AXEI/OSOLOはまた、 ギター入力に対しての妥協はありません。 エレキギターのパッシブピックアップ (Passive) とプリアンプを装 備したアクテ ィ ブピックアップ (Active) 入力に対する最適な入力回路もそれぞれ独立して用意され、 切り替えることが可能です。 パ ッシブピックアップのエレキギターは、 アクテ ィ ブピックアップよりも高出力インピーダンスで、 AXEI/OSOLOのPASSIVEモードは その名の通り、 パッシブピックアップ出力に最適化されています。 ACTIVEモードは、 プリアンプ (電池駆動する) 出力を持ったエレキ ギターに最適化したモードです。 パッシブとアクテ ィ ブ、 どちらが素晴らしいということではなく 、 それぞれの魅力と特徴があり、 AXEI/Oのこの2つのモード切り替え もそれに習います。 従いまして、 設定は必ずしも、 ピックアップの仕様に合わせるのではなく 、 実際に耳にして頂き、 音楽的に適した 方をお選び下さい。 また、… -
Page 33
日本語 このノ ブの操作にルールや決まりはありません。 心赴く まま、 耳に心地よい響になるように、 ご自由に操作をして下さい ! インピー ダンスを下げて (右方向に回して) 膨よかな響にしたり、 インピーダンスを上げて (左方向に回して) キレのある鋭い音色にしたり、 最適な設定を見つけまし ょ う。 例えばハイゲインサウンドを入力した際、 荒々し過ぎると感じた場合、 真ん中付近に設定してみて下さい。 Z-TONEは、 魔法を掛け たように程よ く落ち着かせます。 エレキベース (パッシブピックアップ) を入力した際、 薄いと感じた場合、 同様に真ん中に設定しまし ょ う。 即座にソ リ ッ ドな感じを残 しつつ、 肉厚で、 大き く 鳴ることでし ょ う。 このノ ブの操作の要点は、 とにかく 試すことです ! ご自身の楽器、 そして目的のサウンドに 合わせて、… -
Page 34
日本語 3 DAW設定 AXEI/OSOLOは、 ASIOに対応したWindowsベースのDAW、 およびmacOS標準のCoreAudioに対応したMacベースのDAWでご 利用頂けます。 AXEI/OSOLOControlSoftwareのインス トール後、 コンピューターと接続することで、 これらのDAWのオーディ オ 入出力として、 AXEI/OSOLOが使用可能になります。 可能性として、 ご利用のDAWが自動で、 AXEI/OSOLOを規定のオーディ オ入出力デバイスとして設定されない場合があります。 そ の際、 手動でDAWのオーディ オ設定画面を開いて、 設定をする必要があります。 設定箇所がご不明な場合、 ご利用のDAWのマニュ アル (あるいはヘルプフ ァイル) のASIO/ASIO/CoreAudioドライバー設定、 あるいはオーディ オ入出力デバイス設定に関する項目 をご覧下さい。 AXEI/OSOLOが、 DAWのオーディ オデバイスとして正し く設定されますと、 2イン、 3アウ トのデバイスとして扱うことが可能になり ます。 4 マイクロフォンの接続… -
Page 35
日本語 5 楽器の接続 INSTRUMENT ギターやベース、 あるいはその他のモノ ラルの楽器の出力は、 フロン トパネルのINPUTを使用します。 この際、 1/4″TS (モノ) プラグ ののアンバランスケーブルを使用します。 一般的なギターケーブルがこれに該当します。 楽器入力に関する詳細は、 このマニュアルの第2章に記載しています。 ノート : オーディ オソ フ トウェアで録音先のトラックの入力として入力1を選択します。 適切なレコーディ ングレベルの為に、 CLIPイ ンジケーターが点灯しない程度のレベルに調節をして下さい。… -
Page 36
日本語 6 モニタースピーカーとヘッドフォンの接続 リアパネルのメイン出力1/Lと2/Rは、 1/4″TRSプラグのバランスケーブルを使用して、 アクテ ィ ブ仕様 (パワーアンプ内蔵型の) モニ タースピーカーと繋ぐ ことが可能です。 パワーアンプを装備しないパッシブ型のスピーカーをご利用の場合、 AXEI/OSOLOの入力 をスピーカーを鳴らす為のステレオアンプの入力と接続をします。 AXEI/OSOLOの出力1/Lと2/Rは、 電子バランスのフローテ ィ ング仕様ですので、 アンバランス接続にも対応します。 この仕様によ り、 ステージ用途においてFOHに信号を送る際に、 DIボックスやアイソレーターを用いることなく 、 ミキサーに直接繋ぐ ことが出来 ます。 AXEI/OSOLOは、 グランドループから切り離された、 ノイズに強い安定したデバイスとしてこの用途に適しています。 ヘッ ドフ ォンを使用される際、 1/4″ ( 6.35mm) の標準ステレオプラグのステレオヘッ ドフ ォンをAXEI/OSOLOフロン トパネルの HEADPHONESジャ… -
Page 37
重要 : マイクロフ ォンを接続して使用される際は、 MONITORノ ブをDAW側一杯に設定されることをお勧めします。 これは、 コンピ ューターの再生に関わらず、 モニタースピーカーから発した音声をマイクロフ ォンで拾い、 不要なフ ィードバックを起こす現象を防 ぐ為の措置です。 特にDIRECT一杯にした際、 マイクロフ ォンの音声がそのままモニタースピーカーに流れますので、 十分にご注意 下さい。 8 AXE I/O SOLO Control Panel AXEI/OSOLOControlPanelは、 AXEI/OSOLOの全機能をmacOSおよびWindowsコンピューター上で扱う為の専用ソ フ トウェ アです。 また、 このソ フ トウェアを通じて、 AXEI/OSOLOに関する追加情報も確認できます。 ここでは、 出力レベル、 サンプルレート、 MIDI設定、 およびその他のAXEI/OSOLOに関する重要な設定が行えます。… -
Page 38
日本語 8.1インターフ ェイスビュー (INTERFACE) INTERFACEビューの各項目は以下の通りです : HARDWAREセクション : State : AXEI/OSOLO本体と正し く接続されている場合、 ConnectedLEDが緑色に点灯し、 そのことを示します。 MIDI InとOut : AXEI/OSOLO本体のMIDIポートのMIDI情報受信 (In) と送信 (Out) 状況に合わせて、 LED点灯します。 CONFIGURATIONセクション : Sample Rate : AXEI/OSOLOのサンプルレート (オーディ オ品位) を44.1から192kHzの間で設定をします。 サンプルレート設定は通常、 DAWなどのホス トアプリケーシ ョ ンで行います。 ご利用のオーディ オソ フ トウェアによ っ ては、 それらの ソ… -
Page 39
日本語 “Channel2”モードでは、 入力2のみをモニター信号として扱い、 左右の両チャンネルの両方で同じ信号を聴く ことが出来ます。 Channelモードは、 特定のチャンネル1つのみをモニターする際に使用します。 もう片方の使用しないチャンネルの接続をそのまま にして、 不要な音声やノイズなく モニターする際に便利です。 TO AMP OUT:ONにすると、 InstrumentInput1の信号をAMPOUTに直接ゼロ ・ レイテンシーで出力します。 AMPOUTに接続し た外部アンプ、 ス トンプ ・ ボックスの出力をInput2に接続すれば、 Input1のクリーンなDIトーンと、 Input2のアンプ、 ス トンプ ・ ボッ クス経由の信号を同時に録音することができます。 Audio Inputセクション : 入力チャンネルの細かく 精度の高い入力レベル、 有効なソース (INSTruments、 MICまたはLINE) を表示します。 ここでは、 フ ァンタム電源 (48V) のオンオフも行えます。 フ ァンタム電源の設定は2つのチャンネル一括で行います。 個別設定は出来 ません。… -
Page 40
日本語 8.2コン トローラータブ (CONTROLLER) CONTROLLERタブは、 フロン トパネルのプリセッ トノ ブとリアパネルの2つのコン トローラー入力で扱うMIDIチャンネル、 動作モー ド、 MIDI情報 (CC#) 、 操作時の最大値と最小値などを設定します。 コン トロール情報の受け手となるソ フ トウェア側のパラメーター に合わせて、 設定をします。… -
Page 41
日本語 9 製品仕様 定格 : AD/DA解像度 : 24-bit サンプリングレート : 44.1kHz,48kHz,88.2kHz、 96kHz、 176.4kHzおよび192kHz デバイス接続 : USBType-Bコネクター、 USB2.0 ( HighSpeed) 準拠 ライン出力 1-2 (Monitor) 構成 : 1/4”TRSバランスコネクター、 電子バランスフローテ ィ ング出力、 アンバランスモード時の自動レベル補正機能を装備、 Top: ホッ ト 出力インピーダンス : 150Ωバランス、 75Ωアンバランス 出力レベル : +13.5dBu@0dBFS 周波数特性… -
Page 42
日本語 楽器入力 1 構成 : ルチ トポロジーインス トゥルメン トプリアンプ 入力インピーダンス@PASSIVEモード : 1MΩから2.2kΩ可変 入力インピーダンス@ACTIVEモード : 10kΩ 入力レベル@最小ゲイン : +12.5dBu@0dBFS、 TS入力 入力レベル@最大ゲイン : -19dBudBu@0dBFS、 TS入力 周波数特性 : 6Hz-42kHz(0.5dB以内)@96kHzサンプルレート ダイナミ ックレンジ : 117dB(A) THD (高調歪率) @PUREモード : 0.002% THD (高調歪率) @JFETモード : 0.5% マイクロフォン入力… -
Page 43
Regulatory FCCstatement ThisdevicecomplieswithPart15.107and15.109ClassBoftheFCCRulesCFR47: October2010. Operationissubjecttothefollowingtwoconditions: 1.Thisdevicemaynotcauseharmfulinterference. 2.Thisdevicemustacceptanyinterferencereceived,includinginterferencethat maycauseundesiredoperation. Changesormodificationsnotexpresslyapprovedbythepartyresponsiblefor compliancecouldvoidtheuser’sauthoritytooperatetheequipment. USER’SMANUALREVISIONNOTE: v1.0(2020/05/05):InitialRelease AXEI/OSOLO,AmpliTubeandSampleTank®aretrademarkspropertyofIKMultimediaProductionSrl.Allotherproductnamesandimages,trademarksandartistsnamesarethepropertyof theirrespectiveowners,whichareinnowayassociatedoraffiliatedwithIKMultimedia.iPad,iPhone,iPodtouchMacandMaclogoaretrademarksofAppleComputer,Inc.,registeredinthe U.S.andothercountries.LightningisatrademarkofAppleInc.AppStoreisaservicemarkofAppleInc. AXE I/O SOLO, AmpliTubeおよびSampleTank®は、 IK Multimedia Production Srlの登録商標です。 その他の製品名、 画像、 アーティ ス ト名はその権利帰属者の所有物であり、 IK Multimediaとは協賛または 契約関係にはありません。 iPad,iPhone,iPodtouchMacとMaclogoは米国およびその他の国で登録されたAppleComputer,Inc.,の商標です。 LightningはAppleInc.の商標です。 AppStoreはAppleInc.サ ービスマークです。 2020/05/05…
инструкцияIK Multimedia AXE I/O Solo

English
日本語
Compact audio interface with
advanced guitar tone shaping
USER MANUAL
Посмотреть инструкция для IK Multimedia AXE I/O Solo бесплатно. Руководство относится к категории Hi-Fi системы, 1 человек(а) дали ему среднюю оценку 7.5. Руководство доступно на следующих языках: английский. У вас есть вопрос о IK Multimedia AXE I/O Solo или вам нужна помощь? Задайте свой вопрос здесь
- English
- Japanese (日本語)
Главная
Не можете найти ответ на свой вопрос в руководстве? Вы можете найти ответ на свой вопрос ниже, в разделе часто задаваемых вопросов о IK Multimedia AXE I/O Solo.
Когда звук считается слишком громким?
Могут ли устройства разных марок подключаться друг к другу при помощи Bluetooth?
Как лучше всего выполнять чистку Hi-Fi система?
Инструкция IK Multimedia AXE I/O Solo доступно в русский?
Не нашли свой вопрос? Задайте свой вопрос здесь
English
AXE I/O SOLO
Thank you for purchasing AXE I/O SOLO.
Your package contains:
X1
• AXE I/O SOLO
• USB cable
X1
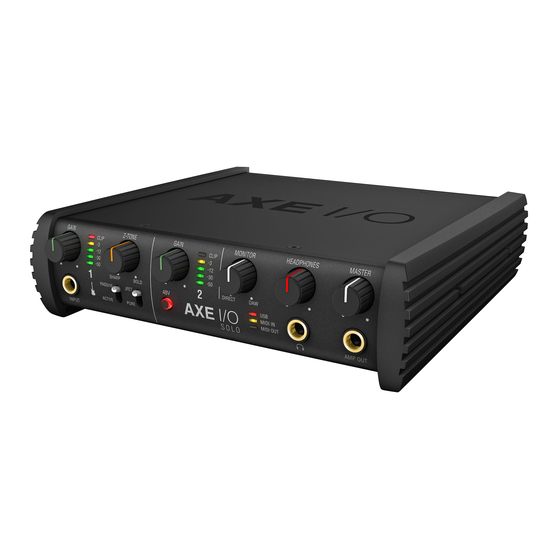
AXE I/O SOLO is the most compact interface in the AXE I/O family, with 2 inputs and 3 outputs.
As with the original AXE I/O, it has been created from the ground-up with the goal of designing the best possible
interface for guitar players, and sports a series of features that can’t be found individually or combined in any
other competitive audio interface today. All of this in a very compact housing.
AXE I/O SOLO is a superior all-round audio interface too, thanks to the 192kHz sampling resolution at 24bit, the
outstanding dynamic range and the asynchronous USB audio, for ultra low conversion jitter for premium audio
performance.
Register your AXE I/O SOLO
By registering, you can access technical support, activate your warranty and receive free JamPoints™ which will
be added to your account. JamPoints™ allow you to obtain discounts on future IK purchases! Registering also
keeps you informed of all the latest software updates and IK products.
Register at: www.ikmultimedia.com/registration
3
Table of Contents for IK Multimedia AXE I/O SOLO:
-
日本語 4 フロントパ ネル 1 4 65 7 9 8 2 2 10 12 11 3 3 13 1. 楽器入力(INPUT 1):楽器(ギターなど)を接続する為の1/4”(6.35mm)標準プラグを装着する為のジャックです。 2. ゲイン(GAIN 1と2):入力信号レベル(ゲイン)を適切に設定する為のノブです。 3. ピー クメー ター:適切な入力レベルを設定する為の5セグメントピークメーターです。入力
-
English 16 8.1 Interface view INTERFACE view: Configuration section: State: This LED shows when an AXE I/O SOLO unit is connected and active. MIDI IN, OUT: these LEDs shows when there is MIDI activity on the AXE I/O SOLO physical MIDI ports. Sample Rate: Here you can set the working sample rate for the AXE I/O SOLO unit, from 44.1 to 192 kHz. Remember than in most cases, DAWS and host applications will likely control this value by the
-
日本語 1 2 3 DAW設定 AXEI/OSOLOは、ASIOに対応したWindowsベースのDAW、およびmacOS標準のCoreAudioに対応したMacベースのDAWでご 利用頂けます。AXEI/OSOLOControlSoftwareのインストール後、コンピューターと接続することで、これらのDAWのオーディオ 入出力として、AXEI/OSOLOが使用可能になります。 可�
-
English 20 THD, PURE mode: 0.002 % (-1dBFS input) THD, JFET mode: 0.5 % Mic Input Configuration: Class-A discrete differential microphone preamp, pin 2 hot Input impedance: 4 kOhms differential Input level, min gain: 0 dBFS is obtained with a +9 dBu signal at the XLR input Input level, max gain: 0 dBFS is obtained with a -44 dBu signal at the XLR input Frequency response: From 7 Hz to 32 kHz within 0.5 dB (96 kHz sample rate) Dynamic Range: 116 dB(A) THD+N: -104 dB(A) at -10 dBFS
-
English 日本語 Compact audio interface with advanced guitar tone shaping USER MANUAL
-
English 5 Rear panel 1 2 6 3 5 4 1. Kensington security lock — secure your AXE I/O SOLO to a suitable structure if desired. 2. MIDI IN/OUT — standard 5-pin DIN sockets for connection of external MIDI equipment. 3. USB 2.0 port — Type B connector — connect the AXE I/O SOLO to your computer with the supplied cable. 4. EXTERNAL CONTROL — use these 1/4” (6.35mm) jacks to connect external controller pedals (single or dual switches, continuous expression pedals). MIDI messages sent are freely assignable from the “Control app”. 5. LINE OUTPUT
-
English 10 AXE I/O SOLO works perfectly with both Passive and Active guitar or bass pickups, having independent circuitry that suits perfectly both topologies. Passive electric guitar pickups exhibit significantly higher output impedance than the active counterpart, among other significant tone differences, but neither of the two is “better” or “worse” than the other: indeed they have different behaviors. To properly couple this diversity
-
日本語 7 2. AXEI/OSOLOとコンピューターを付属のUSBケーブルで接続します。 3. ギター、ベースなどの楽器をフロントパネルの楽器入力(INSTRUMENTINPUT)を1に接続します。マイクロフォン(XLRケーブ ル)、ライン出力機器(1/4″プラグのケーブル)リアパネルのXLRコンボ入力(MIC/LINEIN)のに接続します。 4. パワード・スピーカー、アンプなどの再生機器を、AXEI/O�
-
日本語 1 5 7 ダイレクト・モニタリング ダイレクト・モニタリングは、オーディオソフトウェアを用いた録音をする際、よく耳にする用語の1つです。例えば、ギターをDAWの トラックにレコーディングする際、しばしコンピューターを通じて自身で演奏した音が遅れて聴こえてくる場合があ�
-
English 11 Note: AXE I/O SOLO is very useful for feeding analogue stomp boxes from DAW tracks using the AMP output. The best way to get the Stomp signal back into the DAW is by using Instrument input 1. This way the Z-TONE circuit will also be very useful because most vintage stomps can actually change the way they sound depending on the load impedance, so experimentation in this usage is very welcome as well. 2.6 External control Connect up
-
日本語 2 0 楽器入力 1 構 成:ルチトポロ ジーインストゥルメントプリアンプ 入力インピーダンス@PASSIVEモード:1MΩから2.2kΩ可変 入力インピーダンス@ACTIVEモード:10kΩ 入力レベル@最小ゲイン:+12.5dBu@0dBFS、TS入力 入力レベル@最大ゲイン:-19dBudBu@
-
English 4 Front panel 1 4 65 7 9 8 2 2 10 12 11 3 3 13 1. Instrument input 1 — 1/4” (6.35mm) jack type — Connect your instrument here (e.g., guitar). 2. GAIN 1 and GAIN 2 — adjust the input gain for the signals at Inputs 1 and 2 respectively. 3. Peak Meters — each input has a dedicated 5-segments peak meter, with 1-second hold on CLIP, that indicates the level of the input signal. 4. Z-TONE™ — Variable impedance control — the front control named Z-TONE™ allows you to change the input impedance on the instrument input 1 allowing for a unique poss
Questions, Opinions and Exploitation Impressions:
You can ask a question, express your opinion or share our experience of IK Multimedia AXE I/O SOLO device using right now.