- Manuals
- Brands
- IME-DC Manuals
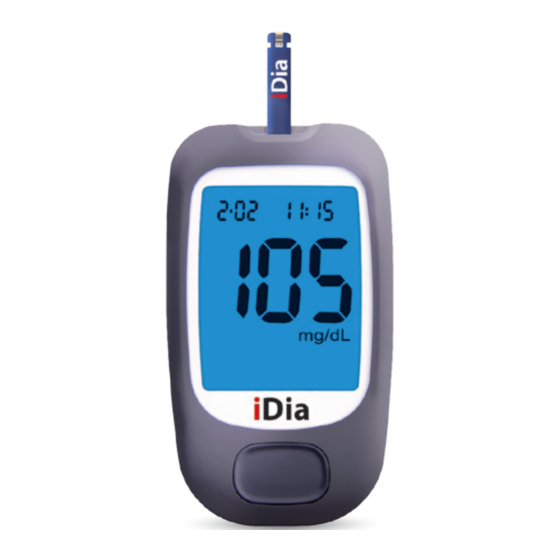
- Blood Glucose Meter
- iDia
- User manual
-
Contents
-
Table of Contents
-
Bookmarks
Quick Links
TABLE OF CONTENTS
NO CODING
USER GUIDE
BLOOD GLUCOSE MONITORING SYSTEM
Related Manuals for IME-DC iDia

Summary of Contents for IME-DC iDia
-
Page 1
TABLE OF CONTENTS NO CODING USER GUIDE BLOOD GLUCOSE MONITORING SYSTEM… -
Page 3: Table Of Contents
TABLE OF CONTENTS TABLE OF CONTENTS INTRODUCTION ���������������������������������������������������������������������������5 DESCRIPTION OF SYSTEM COMPONENTS �������������������������������������7 ■ User interface ■ Light button and data port ■ Battery compartment ■ Test strips CONFIGURATION �����������������������������������������������������������������������11 ■ Configuration ■ Date and time ■ Test reminder SYMBOL DEFINITIONS����������������������������������������������������������������16 ■…
-
Page 4
TABLE OF CONTENTS TABLE OF CONTENTS LANCING DEVICE������������������������������������������������������������������������30 BLOOD LANCET �������������������������������������������������������������������������31 USING THE LANCING DEVICE ������������������������������������������������������32 DETERMINATION OF BLOOD GLUCOSE LEVEL �����������������������������34 BLOOD GLUCOSE VALUES FOR ADULTS ��������������������������������������36 SYMPTOMS OF LOW BLOOD SUGAR ��������������������������������������������37 SYMPTOMS OF HIGH BLOOD SUGAR �������������������������������������������38 POTENTIAL INFLUENCES ON THE MEASUREMENT READINGS �����39 TECHNICAL SPECIFICATIONS –… -
Page 5: Introduction
Blood glucose meter and following accessories: iDia Blood glucose test strips 1 IME-DC Lancing device 10 IME-DC UNIVERSAL Blood lancets 1 Kit-Case The scope of supply of the blood glucose monitoring system (see outer package) can vary depending on state.
-
Page 6
INTRODUCTION Before taking your first measurement, please take note of the following important information. iDia ■ The blood glucose monitoring system is an in vitro diagnos- tic tool that is suitable for self-testing. It enables people with diabetes and specialist medical staff to determine blood glucose values. -
Page 7: Description Of System Components
DESCRIPTION OF SYSTEM COMPONENTS USER INTERFACE Test strip slot Display Main button…
-
Page 8: Light Button And Data Port
DESCRIPTION OF SYSTEM COMPONENTS LIGHT BUTTON AND DATA PORT Light button Data port Pressing the light button when the blood glucose monitoring system is switched on will activate the display’s blue background lighting. This makes it possible to take and read measurements correctly even in low light conditions.
-
Page 9: Battery Compartment
DESCRIPTION OF SYSTEM COMPONENTS BATTERY COMPARTMENT Battery Set button Battery…
-
Page 10: Test Strips
Measurement contacts Insert the test strip into the test strip slot, with the measurement contacts first. NOTE iDia You can touch the measurement field of the test strips freely with clean, dry hands. The test result will not be affected.
-
Page 11: Configuration
CONFIGURATION CONFIGURATION Set button First remove the battery cover and check that the required 3 V lith- ium batteries (type CR 2032) have been inserted. If this is not the case, you will need new batteries (see page 46). Then set the current date and correct time. To do this, press the set button (using a pen, for example), and then press the main button (this changes the flashing value on the display).
-
Page 12: Date And Time
CONFIGURATION DATE AND TIME NOTE The figures needing adjustment flash on and off (shown in white in the illustrations). Set button pressed once: The blood glucose meter switches itself on. ‘Year’ setting Set button pressed second time: ‘Month’ setting Set button pressed third time: ‘Day’…
-
Page 13: Test Reminder
CONFIGURATION TEST REMINDER – Set button pressed sixth to tenth times: ‘Test reminder’ setting: up to five different test reminder times can be set (see page 14). Set button pressed eleventh time: The blood glucose meter switches itself off. Finally, place the battery cover on the device. NOTE If you change settings using the set button and main button, you will need to go through all of the settings until the blood glucose…
-
Page 14
(after pressing the set button for the last time). Your changes will only be saved after this step. iDia Your blood glucose monitoring system can issue an alarm tone five times a day to remind you to check your blood glucose level. -
Page 15
CONFIGURATION When the test reminder function is activated, you will be prompted to enter the first of your preferred times. Press the set button and then use the main button to set the desired hour ( ) and minute ( and confirm by pressing the set button again. -
Page 16: Symbol Definitions
SYMBOL DEFINITIONS ‘INSERT TEST STRIP’ NOTIFICATION iDia After the blood glucose monitoring system has been switched on with the main button, the test strip symbol will appear in the display. You should now insert the test strip into the device’s test strip slot. Correct insertion of the test strip will be confirmed by an audio signal.
-
Page 17: Measurement Period
SYMBOL DEFINITIONS MEASUREMENT PERIOD Measurement begins once the test area of the test strip is sufficiently filled with blood, and lasts only 7 seconds. During the measurement, an hourglass animation is visible on the display.
-
Page 18: Test Result
SYMBOL DEFINITIONS TEST RESULT 7 seconds after the start of the measurement, the blood glucose value will be displayed and automatically saved, together with the date and time ( MEASUREMENT UNIT This will be displayed together with the measurement reading…
-
Page 19: Hi’ Notification
SYMBOL DEFINITIONS ‘HI’ NOTIFICATION This will appear if the measured blood glucose value exceeds 600 mg/dL or 33.3 mmol/L ( ‘LO’ NOTIFICATION This will appear if the measured blood glucose value is below 10 mg/dL or 0.6 mmol/L ( NOTE If you receive a ‘HI‘…
-
Page 20: Memory Display
SYMBOL DEFINITIONS MEMORY DISPLAY iDia blood glucose meter can save up to 900 blood glucose measurements, along with the date and time of each. Blood glu- cose measurements and control solution measurements are stored separately. If the user exceeds the memory capacity, each addi- tional measurement will automatically overwrite the oldest saved blood glucose value.
-
Page 21: Test Reminder
SYMBOL DEFINITIONS TEST REMINDER If the test reminder function is activated, this will be indicated by an alarm symbol on the display when the blood glucose moni- toring system is switched on (see also page 15). KETONE NOTIFICATION If the measured blood glucose value exceeds 300 mg/dL or 16.7 mmol/L, the ketone notification will be automatically dis- played, which warns you of a potential ketoacidosis.
-
Page 22: Error Definitions And Rectification
ERROR DEFINITIONS AND RECTIFICATION The following errors will be shown on the display with an ‘Err‘ or ‘EEE‘ notification: Err + battery symbol ■ Not enough battery power Change the battery (see page 46 onwards). Err + thermometer symbol ■ The ambient temperature is outside the acceptable temperature range.
-
Page 23
ERROR DEFINITIONS AND RECTIFICATION ■ Electronic error In this case, please contact IME-DC customer service. Service hotline: +49 9281 | 85 01 6-0 Err + test strip symbol ■ Test strip malfunction ■ Used test strip ■ Not enough blood absorbed ■… -
Page 24: Average Calculation Of Measurements
AVERAGE CALCULATION OF MEASUREMENTS iDia Your blood glucose meter allows you to call up and display the average values of the last 24 hours and the past 7, 14, 21, 28, 60 and 90 days. To do this, please activate the memory display ( ) (see page 20).
-
Page 25
AVERAGE CALCULATION OF MEASUREMENTS… -
Page 26: Control Solution
CONTROL SOLUTION USING THE CONTROL SOLUTION Test measurement with the iDia control solution is used to check that the blood glucose monitoring system is functioning correctly. This procedure is recommended in the following cases: ■ For teaching and training purposes ■…
-
Page 27: Testing With The Control Solution
CONTROL SOLUTION TESTING WITH THE CONTROL SOLUTION iDia Insert an test strip into the test strip slot. The blood glucose monitoring system will switch itself on automatically. The display will now prompt you to take a blood sample. Press the main button and hold it for approximately 2 seconds until the control solution symbol appears in the display.
-
Page 28
CONTROL SOLUTION Next, rotate the control solution bottle 3 – 4 times. Please don’t shake it! After opening the bottle, put a drop of control solution on a clean, dry surface (for example, the lid of the test strip contain- er), at a distance of approximately 2 cm. -
Page 29
(as shown on the test strip container), repeat the measurement. If an error message ap- pears again or if the measurement is again outside the target range, please contact IME-DC customer service. Service hotline: +49 9281 | 85 01 6-0… -
Page 30: Device
TABLE OF CONTENTS LANCING DEVICE Lancing device cap Lancing device regulator (can be adjusted individually) Slot Activation button Spring clip…
-
Page 31: Blood Lancet
TABLE OF CONTENTS BLOOD LANCET Protective cap Lancet Lancet body…
-
Page 32: Using The Lancing Device
USING THE LANCING DEVICE Unscrew the lancing device cap. Insert the lancet into the slot. Twist off the lancet protection cap. Screw the lancing device cap back on. Set your personal puncture depth (minimum 1, maximum 5). Load the lancing device by pulling the spring clip back.
-
Page 33
USING THE LANCING DEVICE Press the tip of the lancing device against your finger and press the activation button. The blood drop obtained can be used for the measurement procedure. Unscrew the lancing device cap. Press the lancet into the protective cap. Slide the spring clip forward sharply, to eject the lancet. -
Page 34: Determination Of Blood Glucose Level
TABLE OF CONTENTS DETERMINATION OF BLOOD GLUCOSE LEVEL iDia iDia Only use test strips for the blood glucose meter� Wash your hands with warm water and dry them well before taking a measurement. iDia Insert the test strip into the test strip slot on the blood glucose meter.
-
Page 35
DETERMINATION OF BLOOD GLUCOSE LEVEL TABLE OF CONTENTS iDia Position the application area of the test strip to the blood drop ). The blood will be absorbed automatically. An audio signal will confirm that measurement has started. After 7 seconds, the measurement reading will be displayed and… -
Page 36: Blood Glucose Values For Adults
TABLE OF CONTENTS BLOOD GLUCOSE VALUES FOR ADULTS Blood glucose values for adults (Reference sample type: venous plasma) without diabetes with diabetes ≤ 100 mg/dL ≥ 126 mg/dL Empty stomach ≤ 5.6 mmol/L ≤ 7.0 mmol/L ≤ 140 mg/dL ≥ 200 mg/dL 2 hours after a meal ≤…
-
Page 37: Symptoms Of Low Blood Sugar
SYMPTOMS OF LOW BLOOD SUGAR TABLE OF CONTENTS If possible, take an immediate measurement of your blood glucose value if any of the following symptoms occur (possible high or low blood sugar). Contact your specialist physician immediately (or have somebody contact them for you) for instructions on what actions to take.
-
Page 38: Symptoms Of High Blood Sugar
TABLE OF CONTENTS SYMPTOMS OF HIGH BLOOD SUGAR Symptoms of high blood sugar (hyperglycaemia): ■ Fatigue ■ Listlessness ■ Frequent urination and thirst ■ Weight loss ■ Weak muscles, leg cramps ■ Itchiness ■ Dizziness, vomiting, stomach ache ■ Acetone odour (like nail polish remover) in exhaled air ■…
-
Page 39: Potential Influences On The Measurement Readings
Endogenous substances in the human body such as bilirubin, uric acid, glutathione, triacylglycerol and cholesterol, in addition to the medical substances shown in the table, do not have a significant iDia effect on the blood glucose monitoring results from the blood glucose meter if they do not exceed normal concentrations orth- erapeutic dosages.
-
Page 40
If haematocrit values are more than 70 %, it is possible that an inaccurately low blood glucose value is displayed. iDia When measuring EDTA-treated blood samples with the blood glucose meter, the blood glucose values recorded may differ from those of an untreated blood sample. -
Page 41
POTENTIAL INFLUENCES ON THE MEASUREMENT READINGS TABLE OF CONTENTS NOTE Our IME-DC customer service department is happy to answer any questions you may have. Other information ■ Please do not make any medically significant decisions without consulting your specialist physician first. -
Page 42: Technical Specifications — Blood Glucose Meter
90 × 52 × 15 mm Weight: 58 g Power supply: 2 × 3 V lithium battery (CR 2032) iDia blood glucose meter is suitable for Device type: long-term use Measurement range: 10 – 600 mg/dL or 0.6 – 33.3 mmol/L…
-
Page 43: Technical Specifications — Test Strips
TECHNICAL SPECIFICATIONS – TEST STRIPS Dimensions: 30 × 6 mm Material: Measurement method: Electrochemical/dynamic Enzyme: GDH-FAD Required blood volume: 0.7 µL Fresh capillary blood, venous blood, Sample type: arterial blood or neonatal blood Calibration: Plasma equivalent 20 ‒ 70 % Haematocrit range: Measurement temperature: +10 °C to +40 °C…
-
Page 44: Data Transfer
If the blood glucose meter is not yet listed there, please contact IME-DC customer service. If data transfer is still not possible e ven when your computer does recognise your device, this could be due to missing drivers.
-
Page 45: List Of Items | Quality Standards
LIST OF ITEMS | QUALITY STANDARDS TABLE OF CONTENTS List of items EAN code iDia IME-DC blood glucose monitoring system set (mg/dL) 4260155930171 iDia IME-DC blood glucose monitoring system set (mmo/L) 4260155930201 iDia IME-DC blood glucose test strips 4260155930188 iDia…
-
Page 46: Battery Replacement
BATTERY REPLACEMENT If the display shows the error message ‘Err + Battery symbol’, or if the device no longer switches itself on, the battery needs to be changed ( Remove the battery cover. To remove the battery, lightly press it towards the right until the battery is no longer held by the two plastic tabs on the left-hand side.
-
Page 47
BATTERY REPLACEMENT TABLE OF CONTENTS To fit a new battery, first slide it (plus icon up) underneath the metal brackets (from left to right). Using your thumb, insert the battery with light pressure towards the left. The battery should now be held by all four tabs. Close the battery cover. -
Page 48: Cleaning And Maintenance
TABLE OF CONTENTS CLEANING AND MAINTENANCE ■ Use a soft cloth to clean the blood glucose monitoring system. ■ Do not use any strong cleaning agents for cleaning the device. ■ The outer surfaces of the blood glucose monitoring system may be disinfected using standard disinfectant wipes.
-
Page 49: Safety And Disposal
SAFETY AND DISPOSAL TABLE OF CONTENTS BLOOD GLUCOSE METER ■ Do not use the blood glucose meter in close proximity to other electrical devices, in order to avoid possible electromagnetic interference. ■ Used blood glucose meters may have traces of blood on them and therefore potentially represent infectious hazard.
-
Page 50: Warranty
5-YEAR WARRANTY iDia IME-DC GmbH hereby guarantees correct functioning of the blood glucose meter for a period of 5 years, starting from the date the device is activated. If any faults occur during this warranty period, you will be provided with a new device at no extra cost.
-
Page 51: Explanation Of Symbols
EXPLANATION OF SYMBOLS Article number Lot number Serial number In vitro diagnostic tool Follow user instructions Can be used until Manufacturer Date of manufacture Do not reuse Temperature limits Keep dry Keep away from sunlight Important: read product documentation This product meets the requirements of the IVD Directive in accordance with 98/79/EC Class II device in accordance with Standard 60601-1 Applied Part Type B…
-
Page 52: Personal Notes
TABLE OF CONTENTS PERSONAL NOTES…
-
Page 53
TABLE OF CONTENTS PERSONAL NOTES… -
Page 54
TABLE OF CONTENTS PERSONAL NOTES… -
Page 56
IME-DC GmbH International Medical Equipment — Diabetes Care Fuhrmannstrasse 11 95030 Hof | Germany Tel.: +49 9281 | 85 01 6-0 Fax: +49 9281 | 85 01 6-100 E-mail: info@imedc.de Website: www.imedc.de…
This manual is also suitable for:
Dextra
Адрес и график работы
Адрес
210009
г. Витебск
пр-т Фрунзе, 71В
E-mail
voed@vitebsk.by
info@voedvit.by
Время работы диспансера
Понедельник—пятница: 07:00–20:00
Суббота: 08:00–16:12
Время приема врачей
Понедельник—пятница: 08:00–20:00
Суббота: 08:00–16:00
Время работы лаборатории
Понедельник—пятница: 07:30–20:00 (забор крови 8.00-10.00)
Время забора анализов
Понедельник—пятница: 08:00–10:00
Телефоны для записи на прием
Предварительная запись на приём к врачу по телефону
8-0212-33-13-64 (регистратура)
с 08:00 до 19:00 кроме выходных и праздничных дней.
Предварительная запись на УЗИ (платно) по телефону
8-0212-33-13-67 (касса)
с 13:00 до 16:00 кроме выходных и праздничных дней.
Приём пациентов осуществляется по направлениям из поликлиник.
При обращении пациентов без направления прием и обследования осуществляются платно.
При обращении пациентов в диспансер при себе иметь документ, удостоверяющий личность (паспорт).
Содержание
- 1 Функции глюкометра IME-DC
- 2 Технические характеристики
- 3 Принцип работы
- 4 Инструкция по применению
Получить точные данные по сахару в крови, вовремя проконтролировать уровень вещества поможет глюкометр IME-DC Prince, который легко использовать в домашней обстановке. Точность прибора — не ниже 96%. Для определения в измерителе используется фермент глюкозоксидаза. Чтобы провести этот тест дома, потребуется проба крови, нанесенная на полоску. Глюкоза, которая содержится в крови, окисляется, возникает электропроводность, по которой и определяется конечная цифра. Ланцетом, который входит в набор, удобно пробить кожу пальца и получить капиллярную кровь для анализа.

Для людей с проблемами зрения этот прибор будет легок в использовании — здесь большой жидкокристаллический экран, а само устройство управляется он одной кнопкой.
Глюкометр «ИМЕ ДС», дополнительно к контролю сахара, имеет полезную функцию сохранения данных последних 100 измерений. В наборе каждого измерительного устройства есть чип-ключ. Он необходим для активации прибора. Для работы аппарата по измерению сахара используют технологию «invitro», что означает «в стекле». То есть, тестирование и анализ живой материи происходит отдельно от организма, «в пробирке». Современные глюкометры просты в использовании и состоят из следующих частей:

- прибор;
- батарея;
- ланцет (инструмент для прокалывания кожи);
- тест-полоски.
Вернуться к оглавлению
Технические характеристики
Глюкометр отличается такими параметрами работы:
- Применяется электрохимический тип определения работы.
- Результат готов за 10 секунд.
- Объем памяти последних 100 результатов с точной датой и временем их забора.
- Время автоматического отключения — 1 минута.
- Сигнал, если температурный режим не подходит для точного измерения.
- Обратный отчет времени (для точности результата).
- Диапазон измерений: 1,1—33,3 ммоль/л или от 20 до 600 мг/дл.
- Выход для соединения с компьютером.
- Программное обеспечение: iDiaLog (опция).
- Имеется электронный ключ активации, информативный и удобный ЖК-монитор.
- Работает при высокой влажности (до 85%) и при высокой температуре (до 40*С).
Вернуться к оглавлению
Принцип работы

Для глюкометра IME-DC характерен электрохимический принцип работы. При помощи малых электротоков реагент соединяется с каплей крови на тест-полоске, вычисляя концентрацию сахара. Домашние анализаторы дают максимально точный результат, то есть погрешность результатов минимальна. Глюкометр — это немецкое качество, незаменимый прибор для самоконтроля и выявления повышенных значений глюкозы в крови.
Вернуться к оглавлению
Инструкция по применению
Перед тем как использовать глюкометр в домашних условиях, нужно обязательно ознакомиться с прилагающейся к нему инструкцией по применению. Порядок действий:
- Вымыть руки с антибактериальным мылом и насухо вытереть.
- Вставить одну тест-полоску в измеритель.
- Проколоть палец, нанести каплю крови на тест-полоску, набрав необходимое количество для анализа.
- Подождать указанное время для получения результата (обычно 10 секунд).
- Обработать место прокола дезинфицирующим средством.
Инструмент для прокалывания кожи пальца (ланцет) хранить плотно закрытым для предупреждения заражения иголки.
Чтобы приобрести глюкометр, не нужно специальных рецептов и назначений. Приборы продаются на официальных сайтах фирм-производителей и их представителей, в аптеках или интернет-магазинах, специализирующихся на продаже медтехники и препаратов. Домашний глюкометр незаменим для больных сахарным диабетом и для людей, которые заботятся о своем здоровье.

Какими критериями характеризуется прибор немецкого производства? В чем заключаются его преимущества перед другим медицинским товаром?
Что нужно знать об устройстве
В пластиковый футляр прибор помещен вместе с ланцетом (устройство для прокола эпителиальной ткани). Глюкометр удобно носить при себе, в небольшой сумке или даже в кармане. Ланцет устроен по типу авторучки. Для него потребуются уголки. Диабетики со стажем утверждают, что в индивидуальном порядке могут пользоваться одной штукой в течение нескольких измерений.
На внешней стороне глюкометра находятся основные элементы:
- продольное отверстие, в которое вставляются тест-полоски;
- экран (табло), на нем высвечивается результат анализа, надписи (о замене батарейки, готовности прибора к работе, время и дата измерения);
- большие кнопки.
Воспользовавшись одной из них, прибор можно включить и выключить. Другая кнопка для того, чтобы выставить код конкретной партии тест-полосок. При помощи нажатия прибор переключается в режим использования текста на русском языке, других вспомогательных функций. С нижней внутренней стороны имеется крышка для отсека с батарейками. Обычно 1 раз в год их следует менять. За некоторое время до этого момента на табло появляется предупреждающая запись.
Весь расходный материал для прибора
Для того чтобы управляться с глюкометром, потребуется минимум определенных навыков. Если при измерении произошла техническая ошибка, возникла неисправность (было недостаточно крови, погнулся индикатор, упал прибор), то процедуру придется повторить от начала до конца.
Расходным материалом для проведения глюкометрии являются:
- тест-полоски;
- батарейки;
- иглы для ланцета.
Полоска предназначена для единственного анализа. После использования она подвергается утилизации.
Среди широкого ассортимента глюкометров модель ime dc обладает явными преимуществами
Ещё по теме:


Тест-полоски для глюкометра ime dc продаются отдельно от прибора, в упаковках по 25 шт., 50 шт. Расходный материал других фирм или моделей не подходит. Нанесенный на индикатор химический реактив может отличаться даже у одной модели. Для точности анализа каждую партию обозначают кодовым номером.
Перед использованием конкретной партии полосок устанавливают на глюкометре определенное значение, например, КОД 5 или КОД 19. Как это выполнить, указано в прилагаемой методике по эксплуатации. Кодовая тест-полоска внешне отличается от остальных. Сохранять ее необходимо до тех пор, пока не закончится вся партия. Ланцеты, батарейки – универсальные приспособления. Они могут быть использованы для других моделей измерительных приборов.
Процедура анализа крови с помощью глюкометра
1-ый этап. Подготовительный
Необходимо достать глюкометр из футляра, разместить на ровной поверхности. Приготовить ручку-ланцет и упаковку с тест-полосками. Устанавливается соответствующий код. В немецком приборе ланцет для пробивания кожи производит забор крови безболезненно. Достаточно совсем небольшой капли.
Далее следует вымыть руки с мылом водой комнатной температуры и вытереть насухо полотенцем. Чтобы не давить на палец для получения капли крови, можно несколько раз энергично встряхнуть кистью. Согревание необходимо, с холодных конечностей труднее взять образец для анализа.
Инструкция по применению глюкометра гласит, что тест-индикатор открывать и вставлять нужно, не прикасаясь к «точке теста». Полоску открывают непосредственно перед измерением. Длительное взаимодействие с воздухом может также исказить результаты анализа. Экспериментально установлено, что точность измерений ime dc достигает 96%.
Читайте также: как выбрать самый точный глюкометр?
2-ой этап. Проведение исследования
При нажатии кнопки начинает высвечиваться окошко дисплея. В модели прибора ime dc европейского качества он яркий и четкий. Жидкокристаллический дисплей высокого уровня контрастности, что немаловажно для людей, больных диабетом с ослабленным зрением.
На дисплее указаны время и дата измерения, они также сохраняются в памяти прибора
После вставки тест-полоски в отверстие и нанесение крови на отведенный участок, в течение 5 секунд глюкометр выдает результат. Время ожидания высвечивается на дисплее. Показание результата сопровождается звуковым сигналом.
Простота и удобство не последние критерии измерительных устройств. Больной диабетом с поврежденной нервной системой должен максимально испытывать комфорт в борьбе с болезнью. Так, при близком поднесении пальца с каплей крови к выступающему концу индикатора происходит «всасывание» биоматериала.
В памяти прибора сохраняются 50 результатов последних измерений. При необходимости (консультации с врачом-эндокринологом, сравнительном анализе) легко восстановить хронологию глюкометрического анализа. Получается вариант электронного дневника диабетика.
Многофункциональная модель позволяет сопровождать результаты записями глюкометрии (натощак, перед обедом, ночью). Цена модели колеблется в диапазоне 1400-1500 руб. Индикаторные тест-полоски не входят в стоимость прибора.