Электрическая точилка для ножей и ножниц
Обычная цена
$150.00
Цена за единицу товара
на

Электрическая точилка для ножей и ножниц
Сушилка iSottcom компактная напольная для белья имеет складывающееся основание, что позволяет хранить ее в сложенном виде за дверьми и в других узких нишах, это так удобно! Разработана в Германии и изготовлена под контролем немецкой компании Vymana GmbH из высококачественных материалов. Свежее сухое белье — легко с сушилкой iSottcom!
КЛЮЧЕВЫЕ ОСОБЕННОСТИ
Премиальная электрическая точилка для ножей iSottcom — оптимальный вариант для тех, кому нужны идеально острые ножи. Заточка выделяется компактностью и стильным дизайном, который легко впишется в современную кухню.
Ножеточка выполнена из высококачественных материалов. Электроточилка работает в двух режимах:
- Лезвие обрабатывает диск с алмазным напылением;
- Нож доводит и полирует керамический стержень.
Острые ножи — это безопасность и удовольствие от использования! При работе с точилкой iSottcom не нужно специальных навыков, кухонное оборудование затачивается под нужным углом без лишних усилий со стороны владельцев. Точило можно установить на столе, для удобства пользователей он оснащен прорезиненными ножками и надежно фиксируется на поверхности. Основные преимущества:
- Качество товара, соблюдаемое во всём, начиная от материалов и заканчивая технологией заточки;
- Точилка для ножниц;
- Контейнер для сбора металлической стружки, которая так сильно раздражает после процесса заточки.
- Аккумулятор, дает возможность брать точило с собой на дачу или природу.
Все наши качества товара вместе способны превращать недорогие ножи в сверхострые, как бритва, инструменты профессионалов!
ХАРАКТЕРИСТИКИ
- Тип: Ножеточка электрическая
- товарная марка: isottcom
- гарантия: 2 года
- Длина шнура, м: 0,5
- Размеры, мм: 220 x 66 x 77
- Вес товара, г: 600
- Конструктивные особенности: Автовыключение
- Материал корпуса: ABS пластик, Сталь
- Материал абразива: Корунд
- Мощность, Вт: 8
- Страна-изготовитель: Китай
- Цвет: Серебристый, черный
Комплектация
- Электрическая точилка для ножей и ножниц
- Микро USB кабель
- Инструкция
- Гарантийный талон
FAQs
Открыть вкладку
КАК РАЗМЕСТИТЬ ЗАКАЗ?
Мы принимаем к оплате кредитные и дебетовые карты (VISA, MasterCard, American Express, Discover), а также PayPal!
1) Посетите наш сайт www.isottcom.com и найдите товар, который хотите заказать.
2) Щелкните элемент, после чего вы попадете на страницу его продукта.
3) Выберите нужный цвет и размер в раскрывающемся меню.
4) Нажмите кнопку «Добавить в корзину».
5) Просто повторяйте шаги 1–4 выше, пока не добавите все, что хотите заказать, в свою виртуальную корзину.
6) Нажмите «Оформить заказ» в правом верхнем углу страницы.
7) Следуйте инструкциям, чтобы ввести адрес доставки, а затем свои платежные реквизиты. Убедитесь, что вы выполнили весь процесс, нажав «Оплатить сейчас» или «Завершить заказ», прежде чем закрыть веб-сайт. Если ваш заказ будет успешным, вы увидите страницу с вашим номером заказа.
НАСКОЛЬКО БЕЗОПАСЕН ВАШ САЙТ?
Все платежи обрабатываются PayPal — очень надежной и безопасной платформой. Мы не храним и не имеем доступа к каким-либо данным вашей кредитной или дебетовой карты или паролям. Платежи на 100% проверяются и обрабатываются PayPal. Кроме того, не пропустите нашу страницу в Instagram @make_sushi_at_home, где у нас более 400 преданных поклонников и последователей! Тысячи клиентов заказали у нас и остались довольны нашим уровнем обслуживания и качеством.
КОГДА БУДЕТ ДОСТАВЛЕН МОЙ ЗАКАЗ?
Время обработки заказа составляет 1-3 рабочих дня и используется для проверки вашего заказа на предмет обеспечения качества, упаковки, печати транспортных этикеток и отправки его в нашу транспортную компанию для отправки. Как только заказ будет обработан, он будет отправлен, и вам будет предоставлен номер для отслеживания.
ПРИ ВОЗВРАТЕ
Мы не несем ответственности за посылки, которые не могут быть доставлены по адресу, потому что вы указали неправильное имя или адрес при размещении заказа. Мы оставляем за собой право взимать плату за пополнение запасов и доставку в размере 30-50% от стоимости товара, если это произойдет. Поэтому, пожалуйста, не забудьте внимательно проверить свой адрес при размещении заказа.
ВЫ ПРИНИМАЕТЕ ВОЗВРАТ, ЕСЛИ ТОВАР НЕ ПОДХОДИТ ИЛИ МНЕ НЕ НРАВИТСЯ?
Если вы недовольны своей покупкой, напишите нам по электронной почте в течение 14 дней с момента получения заказа. Если вы все же решите вернуть его нам, вам будет предоставлен кредит магазина или разрешено обменять возвращенный товар на другой предмет такой же или меньшей стоимости.
Для получения дополнительной информации о нашей политике возврата / обмена посетите нашу страницу «Возврат и доставка», щелкнув «Политика возврата и доставки» внизу любой страницы на isottcom.com.
Не нашли ответ на свой вопрос? Не волнуйтесь! Просто напишите нам по адресу support@isottcom.com, и мы постараемся ответить вам как можно скорее!
Сегодня расскажу о хорошей точилке для ножей. Фирма Isottcom, модель у них одна, купила, точнее заказала на всеми известном Wildberries. Цена на данный момент 809 рублей.

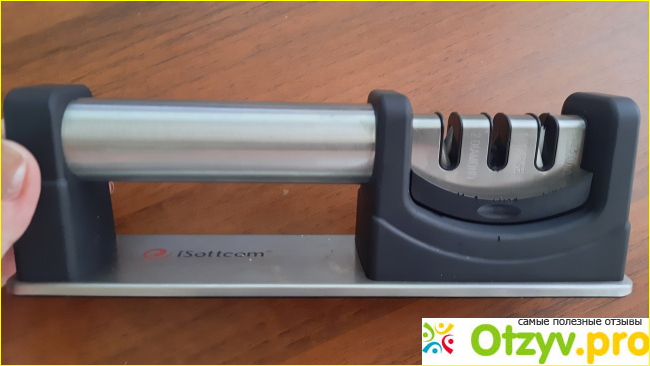
Первое, что стоит отметить — нескользящее дно-основание у точилки. Поставила ее и намертво стоит.

Для удобства есть ручка: можно ее поставить справа или слева, поэтому удобно будет как правшам, так и левшам.

Второе удобство — три слота для заточки ножей.

Одного слота, как я поняла по прошлым точилкам, недостаточно. С этой точилкой я довожу ножи до уровня профессиональных. Быстро и легко. До ножей Ивлева мне конечно далеко, но я буду стараться и практиковаться. Какие мои годы.

Третий момент — на точилке iSottcom можно восстановить поврежденное лезвие.

А теперь немного обрисую этапы заточки ножей.
* COARSE. Грубая правка поврежденных лезвий. По сути это выравнивание лезвия.
* DIAMOND. Этот этап придает ровный профиль режущего лезвия, то есть V- образный.
* CERAMIC. На этом этапе лезвия доводятся до окончательной тонкой полировки, убираются все заусенцы на ножах.

Все этапы на точилке подписаны.
Только мой совет — не проверяйте ножи после заточки на пальцах. Не надо. Раны будут заживать. Проверяйте на колбасе и сыре, зелени. Они все переживут.
В общем, отличная точилка для ножей и на этом все сказано.
Вечная точилка для ножей и очень удобная. Точилка для ножей Isottcom
С помощью точилки для ножей isottcom я заточила ножи дома до состояния новых.

Это не вызвало у меня никаких затруднений. Да, я тот самый уникальный человек, который читает инструкцию, хотя в России принято читать ее только тогда, когда в туалете больше ничего читать, либо же достаем ее и читаем, когда уже все разломали. Я умею читать и могу и мне это нравится.

Точилка isottcom и правда уникальная, по сути она просто вечная.

Чтобы заточить нож, нужно пройти 3 этапа заточки (грубая, тонкая и шлифовка).
Основание у точилки устойчивое, оно не скользит, его можно придерживать как правой, так и левой рукой.

Каких либо ситуаций, опасных для здоровья, у меня не случалось, нож не соскальзывал при затачивании. Да и усилий к заточке я прикладываю минимум, не сильно надрываюсь))
Дизайн мне показался что-то в стиле hi-tech (а может это он и есть). Смотрится красиво. По весу она ооочень легкая. Прям очень!
Стоит на Валдберис она 879 рублей (возможно это с моей личной скидкой). Такую можно позволить купить себе домой, родителям, к примеру, чтобы не ехать в гости с пустыми руками.
Джух-джух она делает не громко, пока дети спят я могу и нож для мяса наточить и с таким же успехом мясо накромсать.
Получаю ли я удовольствие от заточенных и острых ножей? Да! Рекомендую ли я к покупке? Конечно!
Достоинства: 3 этапа заточки, устойчивое основание, не скользит, можно придерживать рукой
Недостатки: нет
Видео обзор
| Все(5) |
|---|
Время использования: несколько месяцев
Стоимость: 879 руб.
Год выпуска/покупки: 2022
Общее впечатление: Вечная точилка для ножей и очень удобная
Рекомендую друзьям: Да
Тэги: отзыв
![]()
Download Article
![]()
Download Article
There is nothing more frustrating than trying to chop vegetables for your dinner, only to find that your knife is too dull and is smashing rather than slicing. You can easily remedy this problem by using a manual or electric knife sharpener, and it shouldn’t take you more than several minutes to restore your knife’s sharp edge. If you don’t have a manual or electric sharpener, you could explore using a whetstone, a honing rod, or even sending your knives off to a professional.
-

1
Test your knife by running it through a piece of paper. You may already know that your knife is dull, but if you aren’t sure, fold a piece of newspaper in half (or just use a single sheet of computer paper), hold it up in the air, and bring your knife down to cut through it. If your knife doesn’t slice through the paper, it’s time to sharpen it.[1]
- The knife should continuously cut through the paper without stopping if it is sharp and in good shape.
-
2
Use the “coarse” setting for very blunt knives that need to be reshaped. Most manual sharpeners have at least 2 settings: 1 labeled “coarse,” and 1 labeled “fine.” The coarse setting will actually remove steel from the blade to resharpen the edge, while the fine setting is used for everyday knife maintenance.[2]
- These settings are the same on electrical sharpeners, though an electric sharpener may have an additional slot between “coarse” and “fine.”
Advertisement
-
3
Pull the blade through from its base to its tip 3 to 6 times. Insert the blade into the manual sharpener at the base, which is where the blade meets the handle. Use gentle force, pushing the blade down as you pull it through the slot, toward your body. Repeat this action 3 to 6 times, 3 for a mildly-dull blade, or more for a severely-dull blade.[3]
- This action resets the blade, restoring it to its original sharpness.
- Use enough force when you pull the blade through that you hear an audible grinding sound. If you’re using an electric sharpener, you won’t need to press down—the whirring mechanisms will take care of everything for you.
-
4
Move the blade so you’re following its contour as you pull it through. Each time you bring the knife through the sharpener, you won’t just pull it straight through. Instead, follow the curve of the knife so that the handle comes up and is higher at the end than it was at the beginning. This way, the entirety of the blade will get sharpened.[4]
- If you’re pressing down, you’ll be able to tell by the sound and feel that you’re moving the blade the right way. If you no longer hear the grinding noise or feel the resistance of the blade, you probably aren’t following the contour closely enough.
-
5
Run the blade through the fine setting 1 to 2 times to finish the process. After you’ve finished pulling the blade through the “coarse” setting, you need to give it a few finishing touches to refine its edge. You don’t need to use as much force with the “fine” setting, and the grinding sound won’t be nearly as loud as it was in the “coarse” setting.[5]
- If your sharpener has more than one setting, pass the knife through each in-between setting 1 to 2 times, making sure that you end at the “fine” setting. These additional settings are just gradations of grinding and help fine-tune your knife even more.
-
6
Rinse the knife off and dry it with a lint-free towel. Use warm, soapy water to rinse away any lingering steel remnants before using your knife again.[6]
Feel free to use a sponge or dishtowel to give the knife a quick wipe down. Dry the knife off completely to prevent it from rusting, and return it to its knife block or similar storage space.[7]
- Avoid running your knives through the dishwasher. They can get banged up or damaged by other items.
-
7
Maintain the knife by running it through the “fine” setting daily. The general rule of thumb is to pull your knife through the fine setting once for every 2 hours of use. Depending on how often you cook, you may not need to do this every day, but keep it in mind as a helpful way to keep your knife sharp.[8]
- If you do a daily or semi-weekly pass through the manual sharpener, chances are you won’t need to do much more to keep your knives sharp.


Advertisement
-
1
Invest in an electric sharpener if you cook often with expensive knives. Electric sharpeners themselves are more expensive than manual sharpeners, running about $40 to $100, depending on the brand you get. They’re more intuitive, though, and are really easy to use as they will just pull the blade through for you. It takes less time and effort to sharpen your knives than the other manual methods require.[9]
- Make sure to do your research before ordering your electric sharpener. Some brands are meant for specific kinds of knives, and some include extra features, like a lifetime warranty.
-
2
Buy a pull-through or handheld sharpener for a nice at-home option. This is a really nice choice for your everyday home cook who doesn’t spend more than an hour or 2 in the kitchen every day. They’re smaller than the electric versions, making them easier to store, and they’re fantastic to use for daily touchups or for grinding a dull blade back to sharpness. They cost anywhere from $10 to $60, depending on the brand you choose.[10]
- There’s something to be said for the feeling of manually sharpening your own knife, too. Lots of cooks enjoy the physicality of taking care of their knives and you do get more control over your movements with a manual sharpener than you would with an electric sharpener.
-
3
Opt for a whetstone for a gentle, temperature-controlled sharpener. Whetstones are generally just a small block of material that you’ll run your knife down to sharpen its blade. Always soak it in water for at least 5 to 10 minutes before you use it. Hold the knife at a 22-degree angle and slide it forward down the whetstone, with the blade touching the stone.[11]
Repeat the movement 5 to 10 times to sharpen your knife.[12]
- The cold-water soak keeps your knife from overheating as it’s being sharpened. If a knife gets too hot, it’s chemistry can change and the blade can become brittle and warped.
- Do double-check the instructions before wetting your whetstone. While the majority of them do need to be soaked beforehand, there are a few brands and types of stones that aren’t meant to get wet.
-
4
Use a honing rod to quickly realign the edges of the blade. A honing rod is also often called a sharpening steel, and they often come along with a block-knife set. Honing doesn’t actually remove any steel from the knife and doesn’t technically sharpen it, but it does push out-of-line edges back into place, which in turn makes your cuts sharper and more precise.[13]
It doesn’t require much pressure, and it’s something you can use on a daily basis to keep your blades sharp.[14]
- Don’t use a honing rod in lieu of sharpening your knives with an alternative method from time to time. It can bend the edge over time, making it hazardous to use.
-
5
Take your knives to a professional if you can’t do it yourself at home. It costs about $1.50 to $2.25 per inch to have your knives sharpened by a professional.[15]
Some companies allow you to ship your knives to them if you don’t live nearby (you’ll need to pay the shipping costs, though).[16]
- Check out your warranty! Some knife brands offer free sharpening for life, so that might be something you could take advantage of, too.


Advertisement
Ask a Question
200 characters left
Include your email address to get a message when this question is answered.
Submit
Advertisement
Video
-
While knife sharpeners typically work best for kitchen knives, many can also be used for other blades, including pocket knives and field knives used by hunters and fishermen. For these blades, however, manual knife sharpeners are typically easier to carry and more effective than electric versions.
Advertisement
References
About This Article
Article SummaryX
Before you sharpen a knife with a manual sharpener, try holding up a folded sheet of paper and slicing down through it with the knife. If the knife can’t cut through the paper without stopping, insert it into the “coarse” slot on a manual sharpener. Pull the blade of the knife through the slot 3 to 6 times, following the contour of the blade and moving from base to tip. Next, pull the knife through the “fine” slot once or twice to refine the edge. When you’re done, rinse the knife and dry it with a clean towel before putting it away. For more tips, including how to sharpen knives with an electric sharpener or a whetstone, keep reading!
Did this summary help you?
Thanks to all authors for creating a page that has been read 219,335 times.
Reader Success Stories
-

«I just bought a manual knife sharpener from Amazon. It came in a typical box with color graphics and advertising…» more