*Оплату банковскими картами международных платёжных систем Visa, MasterCard и МИР обеспечивает Сбербанк. Услуга оплаты через интернет осуществляется в соответствии с Правилами международных платежных систем на принципах соблюдения конфиденциальности и безопасности совершения платежа, для чего используются самые современные методы проверки, шифрования и передачи данных по закрытым каналам связи.
![]()
Для корректной оплаты необходимо внимательно и точно, соблюдая последовательность цифр и букв, ввести данные так, как они указаны на вашей карте:
- Номер карты, указан на лицевой стороне банковской карты и состоит из 16 цифр. Например: 0123 4567 8901 2345;
- Срок действия карты, указан на лицевой стороне банковской карты: месяц и год, до которого действительна карта.
- CVV2 или CVC2 код карты (как правило, указан на обратной стороне банковской карты и состоит из 3-х цифр. Например: 123.
Случаи отказа в совершении платежа:
- банковская карта не предназначена для совершения платежей через интернет, о чем можно узнать, осведомившись в вашем банке
- недостаточно средств для оплаты на банковской карте. Подробнее о наличии средств на банковской карте вы можете узнать, обратившись в банк, выпустивший банковскую карту
- данные банковской карты введены неверно
- истек срок действия банковской карты. Срок действия карты, как правило, указан на лицевой стороне карты (это месяц и год, до которого действительна карта). Подробнее о сроке действия карты вы можете узнать, обратившись в банк, выпустивший банковскую карту
- превышен установленный лимит операций за день. Сумма ежедневного лимита для всех операций определяется банком-партнером.
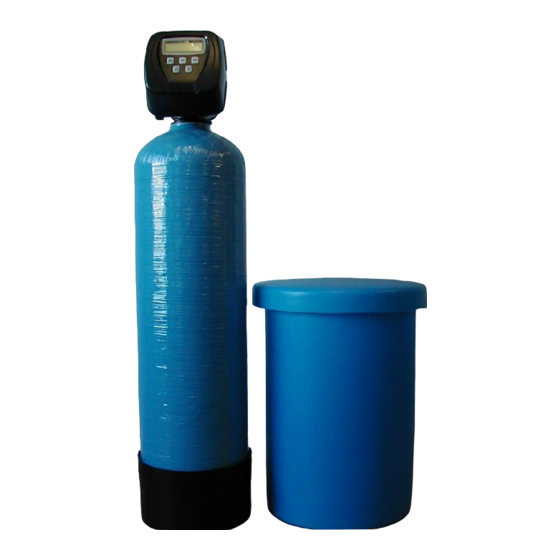
Количество
—
+
Ожидается поступление
| Аква 100 (Одинцово) | Ожидается поступление |
| Центральный склад | Ожидается поступление |
| Магазин в Питере | Уточнить по наличию |
| Магазин в Челябинске | Уточнить по наличию |
| Магазин в Екатеринбурге | Уточнить по наличию |
Дата последнего поступления 12.09.2019
Уточнить сроки поставки
Производитель:
Clack
Артикул: CCV1CIBTZ-03
Тип позиции: Складская
Единица измерения: шт
Дата обновления информации: 25.04.2023 21:58
| Вес, кг | 1.8 |
| Поток номинальный (Service), м3/ч | 6 |
| Регенерация по времени — длительность таймера | 1-99 |
| Порты присоединения (вход/выход, дренаж) | 1″/1″/3/4″ |
Все характеристики
- Manuals
- Brands
- Clack Manuals
- Control Unit
- WS CI Series
- Installation, operation, maintenance manual
-
Contents
-
Table of Contents
-
Troubleshooting
-
Bookmarks
Quick Links
Installation, Operation
& Maintenance Guide
Clack WS CI
Simplex Regenerating Systems
Including:
Softener
Crystal Right
(Iron & Manganese Removal)
Nitrate Removal
Colour Removal
(Organic Scavenger)
AquaMulti
Manual 017.4
Related Manuals for Clack WS CI Series
Summary of Contents for Clack WS CI Series
-
Page 1
Installation, Operation & Maintenance Guide Clack WS CI Simplex Regenerating Systems Including: Softener Crystal Right (Iron & Manganese Removal) Nitrate Removal Colour Removal (Organic Scavenger) AquaMulti Manual 017.4… -
Page 2
Contents Unpacking Instructions Installation Pre-installation checks Fitting the distribution system Adding the media Fitting the valve Brine tank connections Hydraulic connections DLFC (drain line flow control) Injector Electrical Connections Quickstart Programming the valve Your System Identifying your system Softener setting sheet Crystal Right CR100 setting sheet Crystal Right CR200 setting sheet Nitrate Removal setting sheet… -
Page 3
Thank you for purchasing this system. We are sure that it will provide you with trouble free service for many years to come. Please use the following pages to assist you with the assembly and installation of your new system. 1. -
Page 4: Pre-Installation Checks
Note. Smaller Nitrate removal units are in self contained cabinets, these have been assembled in the factory and do not require any assembly. (see note after 2.1) 2. Installation Please observe the local regulations concerning the installation of your system. Check that you have allowed space for access to the unit for possible future maintenance.
-
Page 5
2.3 Adding the Media Block the top of the riser tube to stop media getting down the tube.(see fig A.3). Add about 1/3 by volume of water to the vessel so when the media is poured in it doesn’t damage the bottom distribution system. -
Page 6: Hydraulic Connections
2.5 Brine Tank Connections. Attach the brine line tubing to the brine tank and valve using the connectors fitted to the brine tank (fig A.7), and valve (fig A.8). Fig A.7 Fig A.8 Sizes may vary depending on the valve used, please note to use the poly insert if provided with your specific valve.
-
Page 7: Electrical Connections
2.8 Injector The injector is another important item in the functioning of the system, please check that it is fitted in the DN position and that the UP position has been plugged. The injector colour will vary depending on the size of the system, this should be listed on the items list.
-
Page 8
You can now make connections to the PCB board. Connect NHWB here marked Drive if used. Connect power here marked 12V DC When all connections have been made the power can be turned on and programming can take place. Quick Start 2.10 Programming the Valves. -
Page 9
2.11 Programming the Valves in case of memory loss. Should the programming have been lost in transit the following instructions in conjunction with the relevant setting sheet will allow you to re set them. When the power has been connected the valve will display the software number and initialise itself and then display TIME;… -
Page 10: Identifying Your System
3. Your System. 3.1 Identifying your System. Your System will have an identification label fixed to the control valve, this will look similar to the picture shown here. The information listed can be read as follows: Stock Number: Manufacturers part number. 4202035013 Serial No: Serial No.
-
Page 11
3.2 Softener. Clack CI Valves Set up as SIMPLEX Softeners. Software version from 332.2 Please apply the settings in the following sequence Selections are made using the UP & DOWN buttons until the required setting is displayed, After each setting press NEXT to continue or press REGEN to go back one stage. -
Page 12
3.3 Crystal Right 100. Clack CI Valves Set up as SIMPLEX CR100. Software version from 332.2 All figures based on a calculated hardness of 100ppm using CR100 Crystal-Right Please apply the settings in the following sequence Selections are made using the UP & DOWN buttons until the required setting is displayed, After each setting press NEXT to continue or press REGEN to go back one stage. -
Page 13
3.4 Crystal Right 200. Clack CI Valves Set up as SIMPLEX CR200 Software version from 332.2 All figures based on a calculated hardness of 100ppm using CR200 Crystal-Right Please apply the settings in the following sequence Selections are made using the UP & DOWN buttons until the required setting is displayed, After each setting press NEXT to continue or press REGEN to go back one stage. -
Page 14
3.5 Nitrate Removal. Clack CI Valves Set up as SIMPLEX Nitrate Software version from 332.2 Capacities based on 20g No3 removal per litre of resin, Please apply the settings in the following sequence Selections are made using the UP & DOWN buttons until the required setting is displayed, After each setting press NEXT to continue or press REGEN to go back one stage. -
Page 15
3.6 Colour Removal (Organic Scavenger). Clack CI Valves Set up as SIMPLEX Colour Removal Software version from 332.2 Please apply the settings in the following sequence Selections are made using the UP & DOWN buttons until the required setting is displayed, After each setting press NEXT to continue or press REGEN to go back one stage. -
Page 16
3.7 AquaMulti Clack CI Valves Set up as SIMPLEX Aqua Multi Software version from 332.2 Capacity based on 37 grams per litre @ 300ppm CaCO3 Please apply the settings in the following sequence Selections are made using the UP & DOWN buttons until the required setting is displayed, After each setting press NEXT to continue or press REGEN to go back one stage. -
Page 17
Notes: Notes for CI valves software version 332.2 Starting a manual Regeneration Press and hold the REGEN button until the motor starts. Set a delayed regeneration Press the REGEN button (REGEN TODAY) will flash on screen) press the REGEN button again to clear. Advancing through a regeneration Press the REGEN button to move to the next stage of regeneration. -
Page 18: Commissioning The System
4. Commissioning the System 4.1 Introduction. With the system fully plumbed and the valve programmed commissioning can start. 4.2 Regeneration. When the system is fully functional the regeneration will happen at the pre-set time (see programming the valve section). However, running a manual regeneration during commissioning is the best way of removing air from the system, bedding in the resin and flushing the system through.
-
Page 19: Routine Maintenance
5.Routine Maintenance Your system is designed to run with the minimum of maintenance and does not normally require much adjustment. Weekly Check the salt level (this may need to be done more regularly dependant on consumption) The salt level should always be above the water level. Check there is no sign of damage or leaks, Check the quality of the treated water.
-
Page 20
Soda Ash Shock Treatment The Soda Ash is prepared in the same way and to the same strength as the routine procedure, the difference being during the shock procedure it is drawn direct from the container it is prepared in. The easiest way to do this is to disconnect the regular brine draw tube from the brine elbow, re-connect a piece of flexible tube to the elbow the other end of which is put into the Soda Ash solution. -
Page 21: Troubleshooting
6. Troubleshooting On the following pages you will find a guide as to the most common problems that may arise; please consult this section before contacting your supplying dealer as most problems are easily cured using the troubleshooting information.
-
Page 25: Typical Installation Layout
Typical Installation Layout. Drain line Brine Line Typical bypass setup using three isolation valves plus a non return valve. Isolation Valve Softener Outlet Bypass Valve Isolation Valve Softener Inlet Non return valve Hard water supply Standard Hydraulic Connections (BSP). Valve WS1 CI WS1.25 CI WS1.5 CI…
-
Page 26
Notes: Manual 017.4…