Читайте наши статьи

Эксплуатация кофемашины в зимний период
Что происходит с кофемашиной при длительном нахождении в помещении с низкой температурой? Перевозили кофемашину в багажнике — что теперь от неё ожидать?

Скидка на ремонт кофемашины
Получите 20% скидку на ремонт или обслуживание вашей кофемашины, а также при заказе кофе «Coffee-Everyday» у нас.

Уход за кофемашиной: рекомендации и советы
Как увеличить срок экслуатации вашей кофемашины или кофеварки? Как влияет качество воды на долговечность системы? Как правильно определить момент обсуживания?
-
Contents
-
Table of Contents
-
Troubleshooting
-
Bookmarks
Available languages
-
EN
-
IT
Quick Links
ISTRUZIONI PER L’USO
OPERATING INSTRUCTIONS
GEBRAUCHSANWEISUNG
MODE D’EMPLOI
INSTRUCCIONES DE USO
GEBRUIKSAANWIJZING
INSTRUCÇOES E MODO DE EMPREGO
TIT
TIT
ANIUM
ANIUM
TIT ANIUM
ANIUM
TIT
TIT
ANIUM
Related Manuals for Gaggia Titanium
Summary of Contents for Gaggia Titanium
-
Page 1
ISTRUZIONI PER L’USO OPERATING INSTRUCTIONS GEBRAUCHSANWEISUNG MODE D’EMPLOI INSTRUCCIONES DE USO GEBRUIKSAANWIJZING INSTRUCÇOES E MODO DE EMPREGO TIT ANIUM ANIUM ANIUM ANIUM ANIUM… -
Page 2
Ci congratuliamo per la vostra scelta! Grazie a questa macchina potrete gustare un delizioso caffè o cappuccino nel comfort della vostra casa. Congratulations on your choice! As the proud owner of the machine, you can now experience the taste of a delicious cup of espresso or cappuccino in the comfort of your own home. -
Page 3: Coffee Maker Overview
25 26 • 3 •…
-
Page 4
• 4 •… -
Page 5
• 5 •… -
Page 6: Precauzioni Importanti
ITALIANO PRECAUZIONI IMPORTANTI Durante l’utilizzo di elettrodomestici, è consigliabile prendere alcune precauzioni per limitare il rischio di incendi, scosse elettriche e/o incidenti. 1 Leggere attentamente tutte le istruzioni ed informazioni riportate in questo manuale e in qualsiasi altro opuscolo contenuto nell’imballo prima di avviare od utilizzare la macchina espresso.
-
Page 7: Dati Tecnici
GENERALITÀ La macchina da caffè è indicata per la preparazione di caffè espresso impiegando sia caffè in grani sia caffè in polvere ed è dotata di un dispositivo per l’erogazione del vapore e dell’acqua calda. Il corpo della macchina, dall’elegante design, è stato progettato per uso domestico e non è…
-
Page 8
ITALIANO misure in millimetri • 8 •… -
Page 9: Norme Di Sicurezza
NORME DI SICUREZZA Mai mettere a contatto dell’acqua le parti sotto corrente: perico- lo di cortocircuito! Il vapore surriscaldato e l’acqua calda posso- no provocare scottature! Mai dirigere il getto di vapore o del- l’acqua calda verso parti del corpo, toccare con precauzione il beccuccio vapore / acqua calda: pericolo di scottature! Destinazione d’uso — La macchina per caffè…
-
Page 10: Installazione
ITALIANO DESCRIZIONE COMPONENTI: Fig.01 Contenitore caffè in grani Coperchio mobile contenitore caffè in grani (salva aroma) Pomello regolazione macinatura Pomello regolazione dose Coperchio dosatore caffè in polvere Piano scaldatazze Interruttore generale (ON/OFF) Coperchio serbatoio acqua Serbatoio acqua Cassetto raccogli fondi Cavo alimentazione Vasca raccogli gocce + griglia Erogatore caffè…
-
Page 11: Erogazione Caffé
caffè (Fig.07), dopo essersi assicurati che l’interruttore generale (7) sia in posizione (O). Inserire la spina dell’altro capo del cavo in una presa a parete di corrente adeguata. • La macchina si presenta con l’interruttore generale in posizione (O); per accenderla è sufficiente premere il pulsante (Fig.08); la mac- china comincia a scaldarsi e sul display appare: RISCIACQUO ATTENDERE …
-
Page 12
ITALIANO • Prima di erogare caffè verificare che il serbatoio acqua ed il serba- toio caffè siano pieni e che sul display sia visualizzato: SELEZIONARE FUNZIONE PRONTO X L’USO • Posizionare 1 o 2 tazze sotto ai beccucci dell’erogatore; potete re- golare l’altezza dell’erogatore spostandolo manualmente verso l’alto o verso il basso (Fig.12), in modo che si adatti alle vostre tazzine. -
Page 13: Erogazione Acqua Calda
EROGAZIONE ACQUA CALDA Attenzione: all’inizio possono verificarsi brevi spruzzi di acqua calda: pericolo di scottature. Il tubo d’erogazione dell’acqua calda può raggiungere temperature elevate: evitare di toccarlo direttamente con le mani. • Prima di erogare acqua calda verificare che sul display sia visualizzato.
-
Page 14
ITALIANO • Serrare la ghiera in modo adeguato. Nota: se la ghiera non viene serrata nel modo adegua- to, il cappuccinatore potrebbe sfilarsi durante il suo uti- lizzo. Acqua calda col cappuccinatore Per l’erogazione dell’acqua calda col cappuccinatore si deve procedere come descritto a par.8; l’acqua cal- da uscirà… -
Page 15: Pulizia E Manutenzione
Per la pulizia procedere come segue: • Allentare la ghiera del cappuccinatore. • Sfilare il cappuccinatore dal tubo vapore. • Estrarre il copro del cappuccinatore. • Smontare il coperchio, lo spinotto ed il tubo di aspirazione • Pulire accuratamente il cappuccinatore in tutte le sue parti utiliz- zando acqua corrente potabile.
-
Page 16
ITALIANO 5. Posizionare un contenitore di adeguate capacità sotto al tubo va- pore ed aprire in senso antiorario il pomello acqua calda (16). La macchina inizia un ciclo automatico di decalcificazione inter- vallato con pause prestabilite dal costruttore e gestite automatica- mente dalla macchina. -
Page 17
13.3 Descrizione delle funzioni programmabili RISPARMIO ENERGIA Quando l’apparecchio viene utilizzato poco, può essere commutato sulla posizione di RISPARMIO ENERGIA. Con questa funzione si riducono i costi energetici. Si consiglia tuttavia di spegnere completamente l’ap- parecchio, mediante l’interruttore di rete (7), se questo rimane inutilizzato a lungo;… -
Page 18
ITALIANO Avvertenza: decalcificare l’apparecchio quando si è rag- giunta la quantità relativa alla durezza dell’acqua. Sul display appare la scritta . DECALCIFICAZIONE PRONTO X L’USO SCALDATAZZE Questa funzione permette d’attivare lo scaldatazze presente nella co- pertura della macchina. SCALDATAZZE • In modalità programmazione, con il tasto “∧ ∧ ∧ ∧ ∧ “ o “∨ ∨ ∨ ∨ ∨ “ selezionare la funzione ed attivarla con il tasto “MENU/OK”. -
Page 19
• In modalità programmazione, con il tasto “∧ ∧ ∧ ∧ ∧ “ o “∨ ∨ ∨ ∨ ∨ “selezionare la funzione TOTALE CAFFE’ attivarla con il tasto “MENU/OK”. Appare la scritta, p. es. TOTALE CAFFE’ TEMPORIZZATORE Nella presente macchina da caffè è stata inserita una nuova funzione per consentire un risparmio d’energia quando questa non viene utiliz- zata per un lungo periodo. -
Page 20
ITALIANO • Se si vuole disattivare la funzione , con il tasto “∧ ∧ ∧ ∧ ∧ “ o “∨ ∨ ∨ ∨ ∨ “ sce- gliere INDICARE IMPOS. OROL. DISATTIVATA e memorizzare con il tasto “MENU/OK”. Per regolare l’accensione e lo spegnimento La macchina può… -
Page 21: Informazioni Di Carattere Giuridico
display appare: CICLO DI LAVAGGIO La macchina eroga circa metà del contenuto del serbatoio acqua dall’erogatore. Successivamente il ciclo viene terminato automaticamente; a questo punto sul display appare: SELEZIONARE FUNZIONE PRONTO X L’USO REGOLAZIONI FABBRICA Questa funzione permette di ripristinare i parametri di funzionamento della macchina impostati dalla ditta costruttrice.
-
Page 22
ITALIANO VUOTARE FONDI • Aprire lo sportello (15), estrarre il cassetto raccogli fondi (10) e svuotare i fondi in un contenitore idoneo. Nota importante: il cassetto raccogli fondi deve essere vuotato solo quando la macchina è accesa. Il cassetto deve essere estratto per almeno 5 secondi. Lo svuotamento del cassetto a macchina spenta non permette l’erogazione del caffè… -
Page 23: Problemi, Cause E Rimedi
PROBLEMI, CAUSE E RIMEDI è f f è è f f t è è f f è c r i à t i è a t i ò r t s è f f è f ’ l l l l e e ’…
-
Page 24: Important Safeguards
4 Never clean with scouring powders or hard implements. Simply use a soft cloth dampened with water. 5 To avoid your coffee maker scaling up, use purified or bottled water. INSTRUCTIONS FOR THE POWER SUPPLY CORD A A short power-supply cord is provided to reduce risks of getting tangled up or tripping over a longer cord.
-
Page 25
GENERALITIES This coffee maker is designed to make espresso coffee using both coffee beans and ground coffee; it is also equipped with a device for supplying steam and hot water. This elegantly designed appliance has been designed for household use and is not suitable for continuous, professional-type use. -
Page 26
ENGLISH sizes in millimeter • 26 •… -
Page 27: Safety Standards
— This coffee maker is intended for household use only. — Do not make technical changes and use the appliance inappropriately: damage/injury hazard! — The coffee maker must only be used by adults who are in full control of their mental and physical capacities. Power Supply — Connect the coffee maker to a suitable outlet only.
-
Page 28: Installing The Coffee Maker
We recommend you keep it for future needs. 4.2 Preliminaries • Remove the coffee maker from the packaging and position it in a suitable location that meets the requirements specified and described in the safety rules (chap.3). • Open the machine door, take the drip tray (12) from the package, and fit the dregs box (10);…
-
Page 29: Adjusting The Coffee Dose
on just press the button (Fig.08); the machine will begin to heat up and the display will show: RINSING WARMING UP … When the machine reaches the right temperature, it will carry out a rinse cycle. • To load the circuit, direct the steam pipe (Fig.01-pos.14) over the drip tray, place a cup or other suitable receptacle below the steam nozzle and press the button (26);…
-
Page 30: Dispensing Hot Water
ENGLISH the display will indicate (for example) 1 SMALL COFFEE Dispense 1 coffee, place a single cup beneath the coffee spouts and press the button (22, 23 or 24) only once; to dispense 2 coffees, place two cups beneath the coffee spouts and press the button (22, 23 or 24) twice;…
-
Page 31: Optional Accessories
displayed in turn: SELECT PRODUCT HOT WATER READY FOR USE READY FOR USE • Place a cup and/or receptacle beneath the hot water/steam pipe (Fig.15). • Turn the knob anticlockwise as shown in Fig.15. • Dispense the desired quantity of hot water; to stop the flow of hot water turn the knob clockwise.
-
Page 32: Cleaning And Maintenance
ENGLISH While hot water is being dispensed, the silicone tube inside the cappuccinatore must be inserted into the grating of the drip tray. Make sure the silicone tube cannot slip out while the machine is in use. Note: Insert the tube into the grating, so that to avoid any contact with dirty water or ground coffee residues;…
-
Page 33: Descaling
the dishwasher. • Do not use abrasives or aggressive chemicals (solvents) for cleaning. • Do not dry the machine and/or any of its parts using a microwave and/or conventional oven. • We recommend that you clean the water tank and change the water daily.
-
Page 34: Function Programming
ENGLISH RINSE MACHINE OPEN KNOB 10 Turn the steam knob (16) anticlockwise to empty out the contents of the water tank MACHINE IS RINSING 11 When the machine rinse cycle is completed the display will show: RINSING FINISHED CLOSE KNOB 12 Close the tap, reload the circuit and let the machine heat up If you use a product other than the recommended one, you should follow the manufacturer’s directions on the…
-
Page 35
“∨ ∨ ∨ ∨ ∨ ” to select the function: RINSING and enable it by pressing “MENU/OK”. The following message will appear: RINSING Now press “∧ ∧ ∧ ∧ ∧ ” or “∨ ∨ ∨ ∨ ∨ ”to select RINSING RINSING and store the selection by pressing “MENU/OK”. -
Page 36
“MENU/OK”. The display will show, for example: TOTAL COFFEES TIMER This coffee maker features a new function that allows you to save energy in case of long periods of quiescence. This function, which is factory set, automatically switches the machine from the SELECT PRODUCT… -
Page 37
function and activate it by pressing “MENU/OK”. The display will show: STANDBY AFTER: 3:00 • Press “∧ ∧ ∧ ∧ ∧ ” or “∨ ∨ ∨ ∨ ∨ ”to select the desired setting and press “MENU/OK” to store it. Note: if ON/OFF times have been activated through the “CLOCK”… -
Page 38: Legal Information
• This instruction book contains the information you need in order to use and upkeep your appliance correctly. • The information should be viewed as a guideline for using and upkeeping your coffee maker in safety. The information is not • 38 •…
-
Page 39: Display Indications
exhaustive. For additional information or for information on topics not covered or inadequately covered in this instruction book, please contact an authorized service centre or the manufacturer directly. • In addition, it should be noted that these instructions do not form part of a previous or existing agreement, legal contract or similar and that the information is not changed by any other document.
-
Page 40: Troubleshooting
ENGLISH TROUBLESHOOTING a i l y t r t t i c » » a r c ( a i l r e t e l z s t i y t r t i l a i l . n i a t i i l a i v r…
-
Page 41
ENGLISH NOTE ___________________________________________________________ ___________________________________________________________ ___________________________________________________________ ___________________________________________________________ ___________________________________________________________ ___________________________________________________________ ___________________________________________________________ ___________________________________________________________ ___________________________________________________________ ___________________________________________________________ ___________________________________________________________ ___________________________________________________________ ___________________________________________________________ ___________________________________________________________ ___________________________________________________________ ___________________________________________________________ ___________________________________________________________ ___________________________________________________________ ___________________________________________________________ ___________________________________________________________ ___________________________________________________________ ___________________________________________________________ ___________________________________________________________ ___________________________________________________________ ___________________________________________________________ ___________________________________________________________ ___________________________________________________________ ___________________________________________________________ ___________________________________________________________ ___________________________________________________________ ___________________________________________________________ ___________________________________________________________ ___________________________________________________________ ___________________________________________________________ ___________________________________________________________ ___________________________________________________________ • 41 •… -
Page 42
GAGGIA S.p.A. 20087 Robecco sul Naviglio — MI — Italia Tel. +039 02 94 99 31 Fax +039 02 94 70 888 Internet: www.gaggia.it E-mail: gaggia@gaggia.it…
- Форум о кофемашинах — ремонт, обслуживание, использование кофемашин, выбор кофе и кофемашины
рейтинг кофемашин » Gaggia
| Обзор кофемашины | |
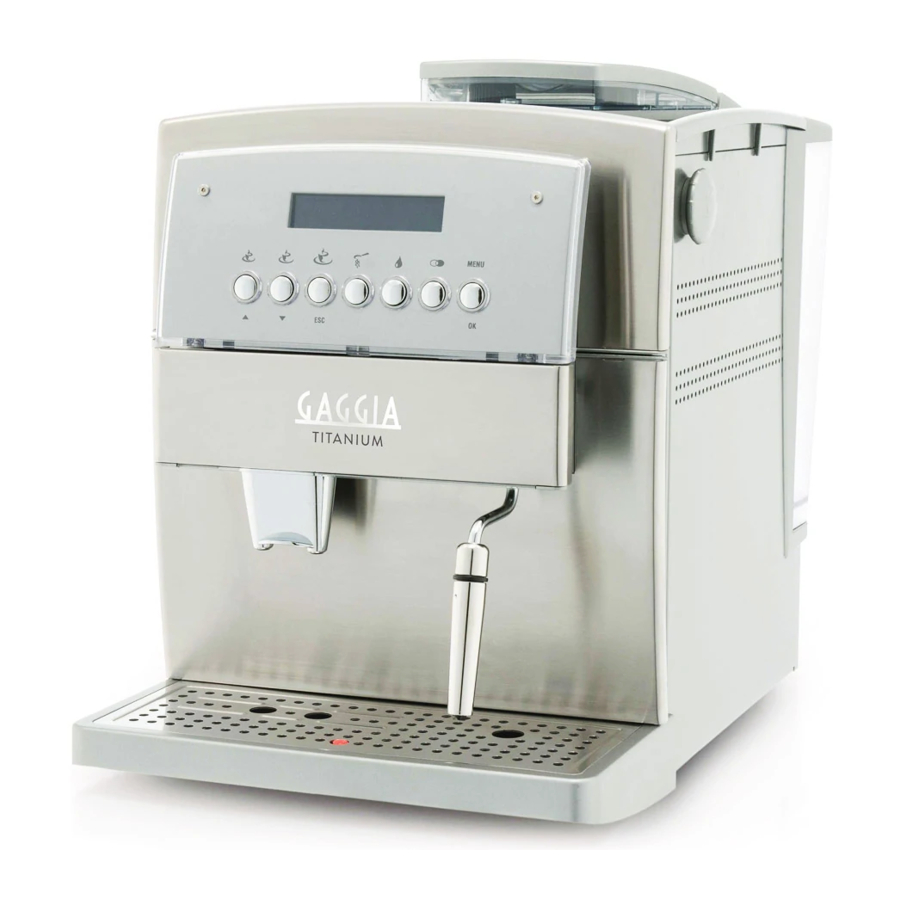
Кофемашина Gaggia Titanium Характеристики и функцииНастройкиТехническое обслуживание и уходОсновные компонентыТехнические условияДругоеДизайн и ценаОписание |
|

| Руководство пользователя, инструкция схемы для Кофемашина Gaggia Titanium | |||
| Имя файла | Тип файла | Размер файла | |
|
|
Инструкция для кофемашины Gaggia Titanium |
|
907.3 KB |
|
|
Схема гидросистемы кофемашин Gaggia |
|
1583.5 KB |
|
|
Схема кофемашины Gaggia Titanium |
|
4212.7 KB |
|
|
Электрическая схема Gaggia Titanium 120V |
|
171.1 KB |
|
|
Электрическая схема Gaggia Titanium 230V |
|
214.7 KB |


| Вопросы для голосования | Пользователи | Специалисты | |
| Качество приготовления кофе |
|
|
Для оценки этой машины, пожалуйста, авторизуйтесь. Впервые на сайте? Зарегистрируйтесь сейчас, бесплатно! |
| Внешний вид, дизайн |
|
|
|
| Сервисное обслуживание и уход |
|
|
|
| Надежность и ремонтопригодность кофемашины |
|
|
|
| Рекомендуете купить? |
|
|
|
| Цена кофемашины |
|
|
| Новый отзыв |

|

|
Опубликовано в Gaggia
 С богатыми возможностями настроек этой кофемашины можно быстро разобраться только при помощи инструкции для Gaggia Titanium. С ее помощью вы можете наслаждаться настоящим итальянским эспрессо, нежным капучино, а также сможете готовить горячий шоколад, какао, чай и другие напитки.
Стоит обратить внимание на то, что если кофемашина не использовалась длительное время или емкость для воды была опустошена, следует провести дренаж для удаления воздуха из внутренних контуров и бойлеров и заполнения их водой.
О необходимости дренажа указывает также сообщение “VENTILATE”, появившееся на диалоговом дисплее кофеварки. Модельный ряд кофемашин Gaggia Titanium представлен еще модификацией Titanium Plus (эта модель, оснащенная системой регулировки насыщенности кофе E-Plus, снята с производства), а также кофемашиной Gaggia Titanium Office, отличающейся увеличенным объемом емкостей для кофе в зернах, воды и отработанного кофе.
Совет для тех, у кого предупреждение о необходимости почистить лоток для отработанного кофе (Dregdrawer Full), высвечивается чаще обычного. Лоток надо чистить обязательно при ВКЛЮЧЕННОЙ кофеварке. Также необходимо тщательно чистить зоны соответствия коробки для жмыха и поддона – там где клеточки и пупырышки – кофемашина будет лучше понимать, что все чисто и уже можно варить вкусный кофе.
Ссылки на скачивание/чтение инструкции для кофемашины Gaggia Titanium / Titanium Office на русском языке
Инструкция для Gaggia Titanium
Небольшой видео-обзор кофемашины Gaggia Titanium
Видео-инструкция: чистка и калибровка Gaggia Titanium