
- Manuals
- Brands
- Lexus Manuals
- Automobile
- HS 250h 2010
- Owner’s manual, quick manual
-
Contents
-
Table of Contents
-
Bookmarks
Quick Links
Related Manuals for Lexus HS 250h 2010
Summary of Contents for Lexus HS 250h 2010
-
Page 3: Table Of Contents
Headlights ………………………….33 Head-up Display……………………..30 Hybrid System ……………………….10 Hybrid transmission ……………………..19 Intuitive Parking Assist ……………………32 Keys…………………………..14 Lexus Enform with Safety Connect ………………..76 LKA (Lane-Keeping Assist)………………….29 Moon Roof …………………………79 Multi-information Display…………………….22 Navigation System Register home ……………………..41 Destination input — Search by address ………………42 Destination input — Search points of interest by name…………44…
-
Page 4
Overview Instrument Panel EV drive mode switch P.21 Eco mode switch P.20 Power mode switch P.20 Power (ignition) switch P.17 Windshield wiper and Multi-information washer switch P.36 display P.22 Headlight switch P.33 See P.6 Automatic high ∗ beam P.35 Turn signal lever P.24 Fog light switch See P.7… -
Page 5
Trunk opener main switch Audio system P.53, 62 See P. 5 ∗ Remote Touch P.38 See P.8 Tire pressure warning reset switch ∗ OPEN CLOSE switch ∗ TILT switch ∗ : If equipped : Refer to “Owner’s Manual”. : Refer to “Navigation System Owner’s Manual”. -
Page 6
Overview Instrument Panel Without navigation system conditioning system P. 65 Rear window and outside rear view mirror defogger Emergency flasher switch switch With navigation system Navigation system P.41 Emergency flasher switch Air conditioning system P. 57 Rear window and outside rear view mirror defogger switch… -
Page 7
∗ Talk switch ∗ Telephone switches Audio remote control Multi-information switches switches P.57, 64 P. 22 ∗ Horn Distance switch P. 26 LKA (Lane Keeping ∗ Assist) switch P. 29 ∗ Cruise control switch P. 25 ∗ Dynamic radar cruise control switch P. -
Page 8
Overview Instrument Panel Instrument panel light control switches Outside rear view HUD (Head-up Display) mirror switches ∗ main switch P. 30 ∗ Headlight cleaner switch HUD (Head-up Dis- play) contrast adjust- ∗ ment switch P. 30 HUD (Head-up Dis- play) position ∗… -
Page 9
∗ Seat heater switches ∗ Seat heater/ventilator switches ∗ : If equipped : Refer to “Owner’s Manual”. : Refer to “Navigation System Owner’s Manual”. : For vehicles with a navigation system, refer to the “Navigation System Owner’s Manual”. -
Page 10
Overview Roof ∗ Garage door opener switches P.72 Moon roof switches P.79 “SOS” button P.74 Interior light Interior light Personal light Vanity lights ∗ Garage door opener switches P.72 ∗ : If equipped : Refer to “Owner’s Manual”. : Refer to “Navigation System Owner’s Manual”. -
Page 11: Hybrid System
Hybrid System Your vehicle is a hybrid vehicle. It has characteristics different from conventional vehicles. Be sure you are closely familiar with the characteristics of your vehicle, and operate with care. The hybrid system combines the use of a gasoline engine and an electric motor (traction motor) according to driving conditions, improving fuel efficiency and reducing exhaust emissions.
-
Page 12: Energy Monitor
■ Sounds and vibrations specific to a hybrid vehicle There may be no engine sounds or vibration even though the vehicle is able to move. Always change the shift position to P when parked. The following sounds or vibrations may occur when the hybrid system is operating and are not a malfunction: ●…
-
Page 13
● The flow of energy is displayed on the navigation system screen. Amber: gasoline energy Yellow: electrical energy Green: energy recovery A green arrow appears when regen- erative braking occurs. ● The flow of energy is indicated by the movement of the arrows on the multi- information display. -
Page 14
■ Past record (with navigation system) Press the “MENU” button and select “Info. Phone”, after that select “Fuel consumption” and press the “ENTER” button. If the “Past Record” screen does not appear, select “Past Record” and press the “ENTER” button. Best past fuel consumption Average fuel consumption Displays the average fuel consumption… -
Page 15: Keys
Pressing the button again within 3 seconds unlocks the other doors. Opens the windows and moon roof (press and hold)* Unlocks the trunk (press and hold) Sounds the alarm (press and hold) *: This setting must be customized at your Lexus dealer.
-
Page 16: Smart Access System With Push-Button Start
Smart Access System with Push-button Start The following operations can be performed simply by carrying the electronic key (including the card key) on your person, for example in your pocket. For details on starting the hybrid system, see page 17. ■…
-
Page 17: Theft Deterrent System
Theft Deterrent System ■ Immobilizer system Without navigation system The indicator light flashes after the “POWER” switch has been turned off to indicate that the system is operating. With navigation system ■ Alarm The system sounds the alarm and flashes the lights when forced entry is detected. To set the alarm: Close the doors, trunk and hood, and lock all the doors using the entry function or wireless remote control.
-
Page 18: Power (Ignition) Switch
Power (Ignition) Switch Performing the following operations when carrying the electronic key on your person starts the hybrid system or changes “POWER” switch modes. ■ Starting the hybrid system Check that the parking brake is set. Firmly depress the brake pedal. The “POWER”…
-
Page 19
■ Changing “POWER” switch modes Modes can be changed by pressing the “POWER” switch with the brake pedal released. (The mode changes each time the switch is pressed.) The emergency flashers can be used. ACCESSORY mode Some electrical components such as the audio system can be used. -
Page 20: Hybrid Transmission
Hybrid transmission ■ Shifting the shift lever Shift lever Operate the shift lever gently and ensure correct shifting operation. When shifting to the D or R positions, move the shift lever along the shift gate. To shift to the N position, slide the shift lever to the left and hold it.
-
Page 21
■ P position switch The shift position can be changed to P through use of the P position switch. Fully stop the vehicle and keep depressing the brake pedal, and then press the P posi- tion switch. When the shift position is changed to P, the switch indicator comes on. -
Page 22: Ev Drive Mode
■ EV drive mode In EV drive mode, the electric motor (traction motor), powered by the hybrid battery (trac- tion battery), is used to drive the vehicle. This mode allows you to drive in residential areas late at night, or in indoor parking lots etc. without concern for noises and exhaust gas emissions.
-
Page 23: Multi-Information Display
Multi-information Display The multi-information display presents the driver with a variety of driving-related data including the current outside air temperature. ■ Multi-information switches Menu switch Changes modes to electronic feature control mode (if equipped), customiza- tion mode or back to normal display mode.
-
Page 24
Electronic features control contents Setting electronic feature controls →P. 34 AFS (if equipped) Refer to “Navigation System Owner’s Intuitive parking assist (if equipped) Manual” Display order may vary depending on vehicle condition. Other contents Details Settings of functions such as the door lock Customization and light illumination time can be changed Dynamic radar cruise control… -
Page 25: Turn Signal Lever
Eco Driving Indicator Light Environment-friendly driving During environment-friendly acceleration operation (Eco driving), Eco Driving Indica- tor Light will turn on. When the accelerator pedal is depressed excessively, and when the vehicle is stopped, the light turns off. The Eco Driving Indicator Light will operate when the vehicle is being driven with the shift position in D.
-
Page 26
Cruise Control (If Equipped) Use the cruise control to maintain a set speed without depressing the accelerator pedal. Indicators Cruise control switch ■ Setting the vehicle speed Press the “ON-OFF” button to activate the cruise control. Press the button again to deactivate the cruise control. -
Page 27
■ Adjusting the set speed Increases the speed Decreases the speed Hold the lever until the desired speed setting is obtained. Fine adjustment of the set speed can be made by lightly pushing the lever up or down and releasing it. ■… -
Page 28
■ Selecting cruise mode Selecting vehicle-to-vehicle distance con- trol mode: Press the “ON-OFF” button to activate the cruise control. Press the button again to deactivate the cruise control. Selecting conventional constant speed con- trol mode: Press the “ON-OFF” button to activate the cruise control. -
Page 29
■ Adjusting the set speed Increases the speed Decreases the speed Hold the lever until the desired speed setting is displayed. Fine adjustment of the set speed can be made by lightly pushing the lever up or down and releasing it. ■… -
Page 30: Lka (Lane-Keeping Assist)
LKA (Lane-Keeping Assist) (If Equipped) While driving on a freeway or motor highway that has lane markers, this system recog- nizes the lanes using a camera as a sensor to assist the driver with staying in the lane. The LKA system has two functions. Lane departure warning function If the system judges that the vehicle may deviate from its lane, it alerts the driver using rapid beeping, indications on the multi-information display, and a sensory warning given…
-
Page 31: Head-Up Display
■ Indication on the multi-information display While the LKA system is on, the lane line display and steering wheel display (in case of lane keeping assist function) are shown on the multi-information display to inform that the LKA system is on. Steering wheel display The lane keeping assist function is active.
-
Page 32
■ Head-up display contents In addition to the vehicle speed display (standard display), the following information will be displayed: Vehicle speed display (standard display) Displays the vehicle speed. Audio display Displays audio information for approximately 3 seconds when the audio system is operated. Dynamic radar cruise control (if equipped) Displays the approach warning message. -
Page 33: Intuitive Parking Assist
Intuitive Parking Assist (If Equipped) The distance to obstacles measured by the sensors is communicated via the display and a buzzer when parallel parking or maneuvering into a garage. Always check the sur- rounding area when using this system. For details, refer to the “Navigation System Owner’s Manual”. ■…
-
Page 34: Headlights
Headlights U.S.A. Turn off the daytime running light system. The headlights, parking lights and so on turn on and off auto- matically (when the “POWER” switch is in ON mode). The side marker, parking, tail, license plate and instrument panel lights turn on. The headlights and all the lights listed above turn on.
-
Page 35
With the headlights on, push the lever away from you to turn on the high beams. When the light switch is in “AUTO” posi- tion, the Automatic High Beam system will be activated. Pull the lever toward you to the center position to turn the high beams off. -
Page 36
Automatic High Beam (If Equipped) The Automatic High Beam uses an in-vehicle camera sensor to assess the brightness of streetlights, the lights of oncoming and preceding vehicles, etc., and automatically turns high beam on or off as necessary. Turn the headlight switch to the “AUTO” position. -
Page 37: Windshield Wipers And Washer
Windshield Wipers and Washer ■ Intermittent windshield wipers with interval adjuster (if equipped) Intermittent windshield wiper operation Low speed windshield wiper operation High speed windshield wiper operation Temporary operation Increases the intermittent windshield wiper frequency Decreases the intermittent windshield wiper frequency Washer/wiper dual operation The wipers will automatically operate a couple of times after the washer squirts.
-
Page 38
■ Rain-sensing windshield wipers (if equipped) Rain-sensing wiper operation Low speed wiper operation High speed wiper operation Temporary operation Increases the sensitivity Decreases the sensitivity Washer/wiper dual operation The wipers will automatically operate a couple of times after the washer squirts. (After operating several times, the wip- ers operate one more time after a short delay to prevent dripping.) -
Page 39: Remote Touch
Remote Touch (If Equipped) The Remote Touch can be used to operate the navigation screens and configure settings. ■ Basic operation Remote Touch knob Use this knob to move the cursor and select items on the screen. Feedback force, pointer shape, and on or off of selection sounds can be changed. Refer to the “Navigation System Owner’s Manual”.
-
Page 40
■ Start Push the “MENU” button on the Remote Touch to display the “Start” screen. Destination Info.Phone Setup Climate (→P.57) Audio (→P.53) ■ Display Push the “DISP” button on the Remote Touch to show the “Display” screen. Displays the screen in “Day Mode” with the headlight switch on Turns the screen off Adjust contrast… -
Page 41: Screen Scroll Operation
■ Screen scroll operation To scroll over the map, place the pointer in a position near the desired destination and then press and hold the “ENTER” button of the Remote Touch. Indicates the street name, city name, etc. for the selected point Displays various information for the selected point (if available) Indicates the distance from the current…
-
Page 42: Navigation System
Navigation System (If Equipped) ■ Register home Push the “MENU” button on the Remote Touch. Please refer to P.38 for the Remote Touch operation. Select “Setup”. Select “Navi. ” . Select “Home”. Select “Set Home”. Select “Address”. Select “City”. Input a city name and select “OK”. Select the button of the desired city name from the displayed list.
-
Page 43: Destination Input — Search By Address
Destination input Search by address ■ Select by city name Push the “MENU” button on the Remote Touch. Please refer to P.38 for the Remote Touch operation. Select “Destination”. Select “Address”. Select “City”. Input a city name and select “OK”. Select the button of the desired city name from the displayed list.
-
Page 44
Destination input Search by address ■ Select by street address Push the “MENU” button on the Remote Touch. Please refer to P.38 for the Remote Touch operation. Select “Destination”. Select “Address”. Select “Street Address”. Input a house number and select “OK”. Input the street name and select “OK”. -
Page 45: Destination Input — Search Points Of Interest By Name
Destination input Search points of interest by name ■ Push the “MENU” button on the Remote Touch. Please refer to P.38 for the Remote Touch operation. Select “Destination”. Select “Point of Interest”. Select “Name”. Input the name of the point of interest and select “OK”.
-
Page 46: Destination Input — Search Points Of Interest By Category
Destination input Search points of interest by category ■ Push the “MENU” button on the Remote Touch. Please refer to P.38 for the Remote Touch operation. Select “Destination”. Select “Point of Interest”. Select “Category”. Select “Near a Destination”. Select the button of the desired destina- tion and set the search point.
-
Page 47: Destination Input — Search Points Of Interest By Telephone Number
Destination input Search points of interest by telephone number ■ Push the “MENU” button on the Remote Touch. Please refer to P.38 for the Remote Touch operation. Select “Destination”. Select “Point of Interest”. Select “Phone #”. Input a telephone number and select “OK”.
-
Page 48: Hands-Free System For Cellular Phone (With Navigation System) Bluetooth ® Phone Pairing
Compatible Bluetooth -equipped phones can be connected to the vehicle, enabling hands-free operation. Please refer to the cellular phone manufacturer’s user guide for pair- ing procedures, or go to “www.lexus.com/bluetooth” for more phone information. ® To use a Bluetooth phone, it is necessary to first register it in the system.
-
Page 49: Phonebook Transfer
■ Phonebook transfer Push the “MENU” button on the Remote Touch. Please refer to P.38 for the Remote Touch operation. Select “Setup”. Select “Phone”. Select “Phonebook”. Select “Manage Contacts”. Select “Transfer Contacts”. Transfer the phonebook data to the sys- tem using the cellular phone. Refer to the cellular phone user’s manual for cellular phone operation.
-
Page 50: Registering A Voice Tag
■ Registering a voice tag Push the “MENU” button on the Remote Touch. Please refer to P.38 for the Remote Touch operation. Select “Setup”. Select “Phone”. Select “Phonebook”. Select “Manage Voice Tags”. Select “New Voice Tag”. Select the data you want to register. Select “REC”, and record a voice tag.
-
Page 51: Registering A Speed Dial
■ Registering a speed dial Push the “MENU” button on the Remote Touch. Please refer to P.38 for the Remote Touch operation. Select “Setup”. Select “Phone”. Select “Phonebook”. Select “Manage Speed Dials”. Select “New Speed Dial”. Select the data you want to register. Select the desired phone number.
-
Page 52: Calling By Name
■ Calling by name You can call by saying a voice tag registered in the phonebook. For setting the voice recog- nition, refer to the “Navigation System Owner’s Manual”. Only when English is selected as the system language can you call by saying a name registered in the phonebook without registering any voice tags beforehand.
-
Page 53: Calling By Speed Dial
■ Calling by speed dial Press Select “Speed Dials”. Select the desired number to call.
-
Page 54: Receiving A Call
■ Receiving a call When a call is received, this screen is displayed with a sound. Push on the steering wheel to talk on the phone. To ignore the call, push on the steer- ing wheel. Audio System (with navigation system) ■…
-
Page 55
■ Basic operation Sound quality modes Audio sources ⋅ FM: AM radio/FM radio SAT: Satellite radio DISC: DVD player (if equipped) CD: CD player (if equipped) AUX: Auxiliary audio device/ USB memory player/ ® ® iPod player /Bluetooth audio Power/Volume ■… -
Page 56
■ DVD player/CD player ■ Playing an audio CD Disc select Repeat play Random playback Search playback Disc load Track select/rewind/fast-forward Eject ■ Playing a CD with MP3/WMA files Disc select Repeat play Random playback Search playback Folder select Disc load File select Eject… -
Page 57
■ Playing a DVD (DVD player only) Disc select DVD operation Image display (full screen) Disc load Chapter select Eject ■ Loading a disc Press the “LOAD” button. When the indicator changes from flashing amber to green, insert a disc after the disc slot door opens. -
Page 58
■ Remote control (steering wheel switches) The audio system can be operated using the remote control located on the steering wheel. Volume Power on/change mode: press Power off: press and hold Radio mode: radio tuner DVD mode: track/chapter/disc select CD mode: disc/track/file (MP3/WMA) select … -
Page 59
Compatible Bluetooth -equipped phones can be connected to the vehicle, enabling hands-free operation. Please refer to the cellular phone manufacturer’s user guide for pair- ing procedures, or go to“www.lexus.com/bluetooth” for more phone information. ® To use a Bluetooth phone, it is necessary to first register it in the system. -
Page 60
■ Calling by number Press and say “Dial by num- ber”. Press and say the phone num- ber. Dialing a. Press b. Press and say “Dial”. ■ Calling by name You can call by saying a voice tag registered in the phonebook. For setting the voice recog- nition, refer to the “Owner’s Manual”. -
Page 61
Press the desired preset button. Press ■ Phonebook transfer Press Press and say “Phone book”. Press and say “Add entry”. Press and say “By phone”. Press and say “Confirm”. Transfer the phonebook data to the sys- tem using the cellular phone. Refer to the cellular phone user’s manual for cellular phone operation. -
Page 62
■ Changing the registered name Press Press and say “Phone book”. Press and say “Change name”. Press and say the desired name. Press and say “Confirm”. Press and say the new name. Press and say “Confirm”. : Pressing this switch turns the voice command system on. Say a command after the beep. -
Page 63
Audio System (without navigation system) ■ Basic operation Power/Volume Audio sources ⋅ FM: AM radio/FM radio SAT: Satellite radio CD•AUX: CD player/Auxiliary audio device/USB mem- ory/iPod /Bluetooth audio Sound quality modes ■ Radio Text messages Station presets Traffic information Radio tune RDS genre select Scanning radio stations… -
Page 64
■ CD player ■ Playing an audio CD Eject Text information Random playback Repeat play Pause/Playback Disc load Disc select Search playback Track select/rewind/fast-forward ■ Playing a CD with MP3/WMA files Eject Text information Random playback Repeat play Pause/Playback Folder select Disc load File select Disc select… -
Page 65
■ Loading multiple CDs Press and hold the “LOAD” button until you hear a beep. “WAIT” is shown on the display. Insert a CD when the indicators on the slot turn from amber to green. The display changes from “WAIT” to “LOAD”. The indicators on the slot turn to amber when the CD is inserted. -
Page 66
Air Conditioning System (without navigation system) Passenger side temperature display Fan speed control button Dual mode button “OFF” button Passenger side temperature control Automatic mode button Windshield defogger Driver side temperature control Outside air/recirculated air mode Cooling and dehumidification function button on/off button Air outlet selector button… -
Page 67: Voice Command System
Voice Command System NOTE:When inputting voice commands you must wait until after the beep to speak. ■ Basic operation Press on the steering wheel. — If you know the command: Press again. — If you do not know the command: Follow the voice guidance to learn the command and then press again.
-
Page 68: Command List
■ Command list All vehicles PHONE “Dial by Name” NOTE: You To Operate a can also make “Dial by Number” Bluetooth “Phone” and a call by simply “Redial” Connected then SAY: saying: “Call “Call Back” Phone/Make XXX-555- Calls, SAY: “Mute” 5555”…
-
Page 69
GENERAL NAVIGATION COMMANDS “Map” “Dual Map” To Change the Map Screen, SAY: “Single Map” “Compass Mode” “Zoom In” “Zoom Out” “Right Map Zoom In” To Change the Map Scale/ “Right Map Zoom Out” Size, SAY: “North Up” “Heading Up” “Map Direction” “Right Map North Up”… -
Page 70: Phone
GENERAL NAVIGATION COMMANDS “Route Overview” “Next Destination Map” “First Destination Map” “Second Destination Map” To Review the Route, SAY: “Third Destination Map” “Fourth Destination Map” “Fifth Destination Map” “Final Destination Map” “Delete Next Destination” To Delete the Destination, SAY: “Delete Final Destination” “Delete All Destinations”…
-
Page 71: Audio
AUDIO “Audio ON” To Turn Audio On or Off, SAY: “Audio OFF” FM, AM, Radio, Satellite Radio, Auxiliary, CD, CD Changer, DVD, To Change the Audio DVD Changer, Mode, SAY: ® Bluetooth Audio, ® iPod , USB Audio “Track Up”, “Track To Change to a different Down”…
-
Page 72: Portable Audio Device Adapters
“XM Stocks” and follow (English only) SAY: the prompts “Information” and then “Lexus Insider” and To Operate Lexus Insider, SAY: SAY: follow the prompts CLIMATE CONTROL/AIR CONDITIONING “Automatic Climate Control” To Turn On and Adjust setting for Climate Control and “Raise Temperature”…
-
Page 73
Garage Door Opener The garage door opener can be programmed to operate garage doors, gates, entry doors, door locks, home lighting systems, security systems, and other devices. The garage door opener (HomeLink Universal Transceiver) is manufactured under license from HomeLink … -
Page 74: Programming Homelink
Programming other devices For U.S.A. owners: To program an entry gate, see the Owner’s Manual. To program other devices, contact your Lexus dealer. For Canadian owners: To program all other devices, follow the same procedure as for garage door programming.
-
Page 75: Safety Connect
Safety Connect is a subscription-based telematics service that uses Global Positioning System (GPS) data and embedded cellular technology to provide safety and security features to subscribers. Safety Connect is supported by Lexus’ designated response center, which operates 24 hours per day, 7 days per week.
-
Page 76
After you have signed the Telematics Subscription Service Agreement and are enrolled, you can begin receiving services. A variety of subscription terms is available for purchase. Contact your Lexus dealer, call 1- 800-25-LEXUS (1-800-255-3987) or push the “SOS” button in your vehicle for further… -
Page 77: Lexus Enform With Safety Connect
Your locations can be organized into up to 20 personalized folders. You must first go online at www.lexus.com and go to the “Owners” section where you will need to register and log in. After this, you can create your personalized folders contain- ing the locations you wish to send to your vehicle.
-
Page 78
Potential Lexus Insider subjects might include, for example, Lexus vehicle technology tips, updates on regional Lexus events, or audio excerpts from Lexus Magazine articles. Up to 20 articles can be stored at a time. ● Voice Command The voice command system enables you to operate the navigation system, audio system and hands-free system by giving a command. -
Page 79
Door Locks The vehicle can be locked and unlocked using the entry function, wireless remote control or door lock switch. For details the entry function or wireless remote control (→P.14, 15) ■ Door lock switches Locks all the doors Unlocks all the doors ■… -
Page 80: Moon Roof
Power Windows ■ Power window switches Closing One-touch closing* Opening One-touch opening* *: Pushing the switch in the opposite direc- tion will stop window travel partway. ■ Window lock switch Press the switch down to lock the passen- ger window switches. The indicator will come on.
-
Page 81
■ Tilting up and down Tilts the moon roof up* Tilts the moon roof down* *: Lightly press either of the moon roof switches to stop the moon roof part- way. Fuel Tank Cap ■ Before refueling the vehicle Turn the “POWER” switch off and close all the doors and windows. ■… -
Page 82
What to do if… List of Warning/Indicator Lights Stop the vehicle immediately. Continuing to drive the vehicle may be dangerous. (U.S.A.) Brake system warning light (red indicator) (Canada) Stop the vehicle immediately. Charging system warning light High engine coolant temperature warning light (flashes or comes on) Have the vehicle inspected immediately. -
Page 83
What to do if… Follow the correction procedures. Front passenger’s seat belt Open door warning light reminder light (On the center panel) Master warning light Low fuel level warning light Driver’s seat belt reminder Tire pressure warning light light (On the instru- (Illuminate no ment cluster) flashing) -
Page 84
Unlocks the door Turning the key rearward unlocks the driver’s door. Turning the key once again unlocks the other doors. Opens the windows and moon roof (turn and hold)* *: This setting must be customized at your Lexus dealer. -
Page 85
In the event that the hybrid system still cannot be operated, contact your Lexus dealer. If the electronic key battery becomes depleted, replace it with a new battery. For instruc- tions on replacing the battery, refer to the Owner’s Manual. If you need further assistance,… -
Page 86
Make sure that the correct operating procedures have been followed. Make sure that the brake pedal is firmly Brake pedal depressed when attempting to start the hybrid system. If the hybrid system still does not start, see the Owner’s Manual for more information or contact your Lexus dealer.
Посмотреть инструкция для Lexus HS 250h (2011) бесплатно. Руководство относится к категории Автомобили, 2 человек(а) дали ему среднюю оценку 7. Руководство доступно на следующих языках: английский. У вас есть вопрос о Lexus HS 250h (2011) или вам нужна помощь? Задайте свой вопрос здесь
Не можете найти ответ на свой вопрос в руководстве? Вы можете найти ответ на свой вопрос ниже, в разделе часто задаваемых вопросов о Lexus HS 250h (2011).
Как перевести мили в километры?
Где я могу узнать идентификационный номер транспортного средства Lexus?
Что такое идентификационный номер транспортного средства (VIN)?
Когда транспортному средству Lexus требуется техническое обслуживание?
Когда следует заменять тормозную жидкость на Lexus?
В чем разница между топливом E10 и E5?
Одна или несколько дверей не открываются изнутри. Что мне делать?
Автомобильный радиоприемник не включается, что делать?
Инструкция Lexus HS 250h (2011) доступно в русский?
Не нашли свой вопрос? Задайте свой вопрос здесь
-
Contents
-
Table of Contents
-
Bookmarks
Quick Links
Gasoline-Electric
Hybrid Synergy Drive
ANF10 Series
Related Manuals for Lexus HS 250h
Summary of Contents for Lexus HS 250h
-
Page 1
Gasoline-Electric Hybrid Synergy Drive ANF10 Series… -
Page 2
Foreword This guide was developed to educate and assist dismantlers in the safe handling of Lexus HS250h gasoline-electric hybrid vehicles. HS250h dismantling procedures are similar to other non-hybrid Lexus vehicles with the exception of the high voltage electrical system. It is important to recognize and understand the high voltage electrical system features and specifications of the Lexus HS250h, as they may not be familiar to dismantlers. -
Page 3: Table Of Contents
HS250h Identification (Continued) ………………….4 Interior…………………………..4 Engine Compartment ……………………….5 Hybrid Component Locations & Descriptions………………6 Specifications …………………………7 Lexus Hybrid Drive Operation…………………….8 Vehicle Operation……………………….8 Hybrid Vehicle (HV) Battery Pack and Auxiliary Battery…………..9 HV Battery Pack……………………….9 Components Powered by the HV Battery Pack…………………9 HV Battery Pack Recycling …………………….10 Auxiliary Battery ……………………….10…
-
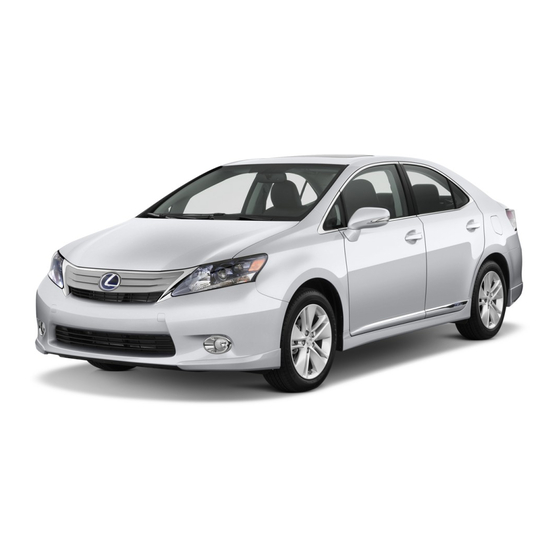
Page 5: About The Hs250H
The HS250h sedan joins the LS 600h L, RX 450h and GS 450h as a hybrid model for Lexus. Lexus Hybrid Drive means that the vehicle contains a gasoline engine and an electric motor for power. The two hybrid power sources are stored on board the vehicle: Gasoline stored in the fuel tank for the gasoline engine.
-
Page 6: Hs250H Identification
HS250h Identification In appearance, the 2010 model year HS250h is a 4-door sedan. Exterior, interior, and engine compartment illustrations are provided to assist in identification. The alphanumeric 17 character Vehicle Identification Number (VIN) is provided in the front windshield cowl, driver door pillar, and engine compartment. JTHBB1BAA82020211 Example VIN: An HS250h is identified by the first 8 alphanumeric characters…
-
Page 7: Exterior
HS250h Identification (Continued) Exterior logo on the back door. logo on the rear door moldings. Exterior Driver Side View Exterior Front and Rear View Exterior Rear and Driver Side View…
-
Page 8: Hs250H Identification (Continued)
HS250h Identification (Continued) Interior Instrument cluster (speedometer, power meter, READY light, shift position indicators, warning lights) located in the dash behind the steering wheel. Hint: If the vehicle is shut off, the instrument cluster gauges will be “blacked out”, not illuminated.
-
Page 9: Engine Compartment
HS250h Identification (Continued) Engine Compartment 2.4-liter aluminum alloy gasoline engine. LEXUS HYBRID DRIVE logo on the plastic engine cover. Orange colored high voltage power cables. Engine Compartment View Power Cables…
-
Page 10: Hybrid Component Locations & Descriptions
Hybrid Component Locations & Descriptions Component Location Description 12 Volt Auxiliary Trunk Passenger A lead-acid battery that supplies power to the low Battery Side voltage devices. Trunk Area, 244.8 Volt Nickel Metal Hydride (NiMH) battery pack Mounted to consisting of 34 low voltage (7.2 Volt) modules Hybrid Vehicle Cross Member…
-
Page 11: Specifications
Hybrid Component Locations & Descriptions (Continued) Specifications Gasoline Engine: 147 hp (110 kW), 2.4-liter Aluminum Alloy Engine Electric Motors 141 hp (105 kW), Permanent Magnet Motor Transmission: Automatic Only (electrically controlled continuously variable transaxle) HV Battery: 244.8 Volt Sealed NiMH Battery Curb Weight: 3,770 lbs/1,710 kg Fuel Tank: 14.5 Us.gals/55.0 liters Frame Material: Steel Unibody…
-
Page 12: Lexus Hybrid Drive Operation
Lexus Hybrid Drive Operation Once the READY indicator is illuminated in the instrument cluster, the vehicle may be driven. However, the gasoline engine does not idle like a typical automobile and will start and stop automatically. It is important to recognize and understand the READY indicator provided in the instrument cluster.
-
Page 13: Hybrid Vehicle (Hv) Battery Pack And Auxiliary Battery
Hybrid Vehicle (HV) Battery Pack and Auxiliary Battery The HS250h features a high voltage Hybrid Vehicle (HV) battery pack that contains sealed Nickel Metal Hydride (NiMH) battery modules. HV Battery Pack • The HV battery pack is enclosed in a metal case and is rigidly mounted to the cabin area floor pan cross member under the second row rear seat.
-
Page 14: Hv Battery Pack Recycling
Hybrid Vehicle (HV) Battery Pack and Auxiliary Battery (Continued) HV Battery Pack Recycling • The HV battery pack is recyclable. Contact either your Lexus Distributor as mentioned on HV battery Caution Label (see page 30) or the nearest Lexus dealer. Auxiliary Battery •…
-
Page 15: High Voltage Safety
High Voltage Safety The HV battery pack powers the high voltage electrical system with DC electricity. Positive and negative orange colored high voltage power cables are routed from the battery pack, under the vehicle floor pan, to the inverter/converter. The inverter/converter contains a circuit that boosts the HV battery voltage from 244.8 to 650 Volts DC.
-
Page 16: Service Plug Grip
High Voltage Safety (Continued) Service Plug Grip • The high-voltage circuit is cut by removing the service plug grip (see page 15). High Voltage Safety System – Vehicle Shut Off (READY-OFF) High Voltage Safety System – Vehicle On and Operational (READY-ON)
-
Page 17: Precaution To Be Observed When Dismantling The Vehicle
Precaution to be observed when dismantling the vehicle WARNING: ・ The high voltage system may remain powered for up to 10 minutes after the vehicle is shut off or disabled. To prevent serious injury or death from severe burns or electric shock, avoid touching, cutting, or opening any orange high voltage power cable or high voltage component.
-
Page 18: Spills
Spills The HS250h contains the same common automotive fluids used in other non-hybrid Lexus vehicles, with the exception of the NiMH electrolyte used in the HV battery pack. The NiMH battery electrolyte is a caustic alkaline (pH 13.5) that is damaging to human tissues. The electrolyte, however, is absorbed in the cell plates and will not normally spill or leak out even if a battery module is cracked.
-
Page 19: Dismantling The Vehicle
Dismantling the vehicle The following 2 pages contain general instructions for use when working on an HS250h. Read these instructions before proceeding to the HV battery removal instructions on page 18. WARNING: ・ The high voltage system may remain powered for up to 10 minutes after the vehicle is shut off or disabled.
-
Page 20
Instead, wash the eye(s) with a dilute boric acid solution or a large amount of water and seek medical care. 10. With the exception of the HV battery, remove parts by following procedures which are similar to conventional Lexus vehicles. For the removal of the HV battery, refer to the following pages. -
Page 22: Removal Of Hv Battery
Removal of HV battery WARNING: ・ Be sure to wear insulated gloves when handling high-voltage parts. ・ Even if the vehicle is shut off and the relays are off, be sure to remove the service plug grip before performing any further work.
-
Page 23
Remove the service plug grip. HV Battery Disengage the 2 clips and 2 guides, and remove the battery service hole cover. (2) Slide the handle of the service plug grip to the left. Service Plug Grip Caution: Wear insulated gloves for the following 3 steps. (3) Raise the release handle of the service plug grip as shown in the illustration below. -
Page 24
7. Remove the 2 bolts and connector cover assembly. 8. Check the voltage at the terminals in the inspection point in the power control unit. Caution: Wear insulated gloves. To prevent serious injury or death, do not proceed with dismantling of the HV system until the voltage at the terminals in the inspection point is 0 V. -
Page 25
10. Disengage the claw to open the 3 caps of the rear seat shoulder belt guide. 11. Remove the rear seatback assembly. (1) Remove the 4 bolts. (2) Disengage the 3 hooks and remove the rear seatback assembly. 12. Remove the tool with stay box sub-assembly from the trunk. -
Page 26
13. Remove the rear floor finish plate. (1) Remove the 3 clips. Disengage the 4 clips and 2 guides, and remove the rear floor finish plate. 14. Remove the No. 1 luggage compartment light assembly Using a screwdriver, disengage the claw and guide.. -
Page 27
16. Remove the rope hook. 17. Remove the inner luggage compartment trim cover. Remove the 3 clips and inner luggage compartment trim cover.. 18. Remove the auxiliary battery. Loosen the nut and separate the positive (+) battery terminal. Remove the nut and battery clamp. -
Page 28
19. Remove the battery cooling blower assembly. Remove the 2 clips and No. 1 HV battery intake duct. Remove the clip and No. 4 HV battery intake duct. Remove the clip and No. 2 HV battery intake duct with the No. 3 HV battery intake duct. -
Page 29
20. Disconnect the frame wire. Disconnect the 2 clamps and frame wire. Clamp 21. Remove the No. 4 hybrid battery shield panel. Caution: Wear insulated gloves for the following 2 steps. (1) Using the service plug grip, remove the battery cover lock striker Hint: Insert the projecting part of the service plug grip and turn the button of the battery cover… -
Page 30
24. Remove the No. 3 hybrid battery exhaust duct. Disconnect the 2 clips. 25. Remove the No. 2 hybrid battery exhaust duct Remove the clip and No. 2 hybrid battery exhaust duct. 26. Remove the No. 1 hybrid battery exhaust duct. -
Page 31
Remove the 2 bolts and child restraint seat anchor bracket sub-assembly RH 29. Remove the HV battery Caution: Wear insulated gloves. Notice: Insulate the terminals of the removed frame wire with insulating tape. (1) Disconnect the frame wire clamp. Disconnect the battery room ventilation hose Disconnect the battery pack wire connector and clamp… -
Page 32
Remove the 4 bolts from the HV battery Turn the luggage compartment floor mat over Use a tire lever from the cabin side to lift the HV battery up over the tabs on the body… -
Page 33
Using a tire lever to hold up the HV battery, insert a wooden block or equivalent as shown in the illustration Pull the HV battery together with the cardboard toward the rear of the vehicle (10) Disconnect the clamp as shown in the illustration (11) Using a suitable adaptor such as a rope,… -
Page 34: Hv Battery Caution Label
HV Battery Caution Label For U.S.A. For CANADA…
Смотреть руководство для Lexus HS 250h (2012) ниже. Все руководства на ManualsCat.com могут просматриваться абсолютно бесплатно. Нажав кнопку «Выбор языка» вы можете изменить язык руководства, которое хотите просмотреть.

MANUALSCAT | RU
Вопросы и ответы
У вас есть вопрос о Lexus HS 250h (2012), но вы не можете найти ответ в пользовательском руководстве? Возможно, пользователи ManualsCat.com смогут помочь вам и ответят на ваш вопрос. Заполните форму ниже — и ваш вопрос будет отображаться под руководством для Lexus HS 250h (2012). Пожалуйста, убедитесь, что вы опишите свои трудности с Lexus HS 250h (2012) как можно более детально. Чем более детальным является ваш вопрос, тем более высоки шансы, что другой пользователь быстро ответит на него. Вам будет автоматически отправлено электронное письмо, чтобы проинформировать вас, когда кто-то из пользователей ответит на ваш вопрос.
1) Как настроить часы на Lexus hs250h 2010 года, сборка Япония, то есть всё меню на японском?
2) возможно ли настроить английский язык в место японского?
Алексей 2019-09-04
Задать вопрос о Lexus HS 250h (2012)
- Бренд:
- Lexus
- Продукт:
- Автомобили
- Модель/название:
- HS 250h (2012)
- Тип файла:
- Доступные языки:
- английский
Сопутствующие товары Lexus HS 250h (2012)
Note for Owners:
Guidesimo.com webproject is not a service center of Lexus trademark and does not carries out works for diagnosis and repair of faulty Lexus HS 250h equipment. For quality services, please contact an official service center of Lexus company. On our website you can read and download documentation for your Lexus HS 250h device for free and familiarize yourself with the technical specifications of device.
-
Jeep Grand Cherokee WK2 2014
2014 — Vehicle Quick Reference/Maintenance Schedules/DescriptionMAINTENANCE SCHEDULES — LATIN AMERICA — GASOLINE The Scheduled Maintenance services listed in this manual must be done at the times or mileages specified to protect your vehicle warranty and ensure the best vehicle performance and reliability. More frequent maintenance may be needed for vehicles in severe operating conditions, such as …
Grand Cherokee WK2 2014 Automobile, 5
-
Buick 2005 Rendezvous
Seats and Restraint Systems……………………… 1-1Front Seats……………………………………….. 1-3Rear Seats……………………………………….. 1-8Safety Belts……………………………………… 1-20Child Restraints………………………………… 1-43Airbag System………………………………….. 1-67Restraint System Check……………. …
2005 Rendezvous Stereo System, 480
-
Subaru 2008 IMPREZA WRX
SUBARU.COM This brochure is printed in the U.S.A. on recycled paper.©2007 Subaru of America, Inc. 08.IMPWRX.SRB.525 (S-6871, 98,150, 9/07, CG)Ready for action. | It’s what makes a Subaru, a Subaru.SUBARU.COM2008 | IMPREZA WRX …
2008 IMPREZA WRX Automobile, 18
-
Buick 2014 Enclave
Review this Quick Reference Guide for an overview of some important features in your Buick Enclave. More detailed information can be found in your Owner Manual. Some optional equipment described in this guide may not be included in your vehicle. If you have additional questions about the features and controls in your vehicle, press the blue OnStar button to speak with a customer assistance represe …
2014 Enclave Automobile, 16
-
Chevrolet kodiak 2004
Seats and Restraint Systems……………………… 1-1Front Seats……………………………………….. 1-2Rear Seats……………………………………….. 1-7Safety Belts………………………………………. 1-8Child Restraints………………………………… 1-27Air Bag System………………………………… 1-48Restraint System Check…………….. …
kodiak 2004 Automobile, 366
-
Lexus RX450h
TABLE OF CONTENTSRX450h_EE11Before drivingInformation on the hybrid system and adjusting and op-erating features such as door locks, mirrors, and steer-ing column.2When drivingDriving, stopping and safe-driving information.3Interior featuresAir conditioning and audio systems, as well as other in-terior features for a comfortable driving experience.4Maintenance and careCleaning and protecting your …
RX450h Automobile, 717
-
Volvo V70
V70/XC70 (Y285/Y381); 9; 3 2008-03-25T08:19:58+01:00; Page 1henrikrosenqvistVOLVO V70 & XC70Owners ManualKdakd8Vg8dgedgVi^dcIE&%%*(:ca^h]!6I%-‘%!Eg^ciZY^cHlZYZc!<iZWdg’%%-!8deng^]i’%%%»‘%%-Kdakd8Vg8dgedgVi^dc …
V70 Automobile, 298
-
Yamaha G11A
OWNER’S/OPERATORSMANUALYAMAHA MOTORMANUFACTURING CORP.OF AMERICAUTILITYCARG11APrinted in U.S.A.KCCYamaha Motor Corp., USACypress, Californiamade in01/10/01LIT196261197USA*LIT196261197*1PC — G11A O/MLIT-19626-11-97JR3-F8199-10 …
G11A Automobile, 48