Краткое содержание страницы № 1
ThinkPad SL410, L410, SL510, and L510
Hardware Maintenance Manual
Краткое содержание страницы № 2
Краткое содержание страницы № 3
ThinkPad SL410, L410, SL510, and L510 Hardware Maintenance Manual
Краткое содержание страницы № 4
Note Before using this information and the product it supports, be sure to read the general information under “Notices” on page 177. First Edition (September 2009) © Copyright Lenovo 2009. LENOVO products, data, computer software, and services have been developed exclusively at private expense and are sold to governmental entities as commercial items as defined by 48 C.F.R. 2.101 with limited and restricted rights to use, reproduction and disclosure. LIMITED AND RESTRICTED RIGHTS NOTICE: If prod
Краткое содержание страницы № 5
Contents No-beep symptoms………..65 About this manual……….v LCD-related symptoms ………66 Intermittent problems……….67 Safety information……….1 Undetermined problems………67 General safety…………..2 Electrical safety ………….3 Status indicators ……….69 Safety inspection guide………..5 Handling devices that are sensitive to electrostatic discharge ……………6 Fn key combinations ……..71 Grounding requirements ……….6 Safety notices (multilingu
Краткое содержание страницы № 6
Windows Vista Business (32 bit) DVDs….170 Parts list ………….141 Windows 7 Home Basic (32 bit) DVDs….171 Overall ……………142 Windows 7 Home Premium (32 bit) DVDs . . 172 LCD FRUs …………..158 Windows 7 Home Premium (64 bit) DVDs . . 173 Keyboard……………164 Windows 7 Professional (32 bit) DVDs….174 Miscellaneous parts ………..165 Windows 7 Professional (64 bit) DVDs….175 AC adapters…………..166 Common service tools ……….176 Power cords…………..167
Краткое содержание страницы № 7
About this manual This manual contains service and reference information for the following ® ThinkPad Notebook products. ThinkPad SL410 Machine Type (MT) 2842 and 2874 ThinkPad L410 MT 2931 ThinkPad SL510 MT 2847 and 2875 ThinkPad L510 MT 2873 Use this manual along with the advanced diagnostic tests to troubleshoot problems. Important: This manual is intended only for trained service technicians who are familiar with ThinkPad Notebook products. Use this manual along with the advanced diagnostic
Краткое содержание страницы № 8
vi ThinkPad SL410, L410, SL510, and L510 Hardware Maintenance Manual
Краткое содержание страницы № 9
Safety information This chapter presents following safety information that you need to be familiar with before you service a ThinkPad Notebook. v “General safety” on page 2 v “Electrical safety” on page 3 v “Safety inspection guide” on page 5 v “Handling devices that are sensitive to electrostatic discharge” on page 6 v “Grounding requirements” on page 6 v “Safety notices (multilingual translations)” on page 7 v “Laser compliance statement (multilingual translations)” on page 28 © Copyright Leno
Краткое содержание страницы № 10
General safety Follow these rules to ensure general safety: v Observe good housekeeping in the area of the machines during and after maintenance. v When lifting any heavy object: 1. Make sure that you can stand safely without slipping. 2. Distribute the weight of the object equally between your feet. 3. Use a slow lifting force. Never move suddenly or twist when you attempt to lift. 4. Lift by standing or by pushing up with your leg muscles; this action removes the strain from the muscles in you
Краткое содержание страницы № 11
Electrical safety Observe the following rules when working on electrical equipment. Important: Use only approved tools and test equipment. Some hand tools have handles covered with a soft material that does not insulate you when working with live electrical currents. Many customers have, near their equipment, rubber floor mats that contain small conductive fibers to decrease electrostatic discharges. Do not use this type of mat to protect yourself from electrical shock. v Find the room emergency
Краткое содержание страницы № 12
v Do not touch live electrical circuits with the reflective surface of a plastic dental mirror. The surface is conductive; such touching can cause personal injury and machine damage. v Do not service the following parts with the power on when they are removed from their normal operating places in a machine: – Power supply units – Pumps – Blowers and fans – Motor generators – Similar units to listed above This practice ensures correct grounding of the units. v If an electrical accident occurs: –
Краткое содержание страницы № 13
Safety inspection guide The purpose of this inspection guide is to assist you in identifying potentially unsafe conditions. As each machine was designed and built, required safety items were installed to protect users and service technicians from injury. This guide addresses only those items. You should use good judgment to identify potential safety hazards due to attachment of non-ThinkPad features or options not covered by this inspection guide. If any unsafe conditions are present, you must d
Краткое содержание страницы № 14
Handling devices that are sensitive to electrostatic discharge Any computer part containing transistors or integrated circuits (ICs) should be considered sensitive to electrostatic discharge (ESD.) ESD damage can occur when there is a difference in charge between objects. Protect against ESD damage by equalizing the charge so that the machine, the part, the work mat, and the person handling the part are all at the same charge. Notes: 1. Use product-specific ESD procedures when they exceed the re
Краткое содержание страницы № 15
Safety notices (multilingual translations) The safety notices in this section are provided in the following languages: v English v Arabic v Brazilian Portuguese v French v German v Hebrew v Japanese v Korean v Spanish v Traditional Chinese Safety information 7
Краткое содержание страницы № 16
DANGER Before the computer is powered on after FRU replacement, make sure all screws, springs, and other small parts are in place and are not left loose inside the computer. Verify this by shaking the computer and listening for rattling sounds. Metallic parts or metal flakes can cause electrical shorts. DANGER Some standby batteries contain a small amount of nickel and cadmium. Do not disassemble a standby battery, recharge it, throw it into fire or water, or short-circuit it. Dispose of the bat
Краткое содержание страницы № 17
DANGER To avoid shock, do not remove the plastic cover that protects the lower part of the inverter card. DANGER Though the main batteries have low voltage, a shorted or grounded battery can produce enough current to burn personnel or combustible materials. DANGER Unless hot swap is allowed for the FRU being replaced, do as follows before removing it: power off the computer, unplug all power cords from electrical outlets, remove the battery pack, and disconnect any interconnecting cables. Safety
Краткое содержание страницы № 18
10 ThinkPad SL410, L410, SL510, and L510 Hardware Maintenance Manual
Краткое содержание страницы № 19
Safety information 11
Краткое содержание страницы № 20
PERIGO Antes de ligar o computador após a substituição da FRU, certifique-se de que todos os parafusos, molas e outras peças pequenas estejam no lugar e não estejam soltos dentro do computador. Verifique isso sacudindo o computador e procurando ouvir sons de peças soltas. Peças metálicas ou lascas de metal podem causar curto-circuito. PERIGO Algumas baterias reserva contêm uma pequena quantidade de níquel e cádmio. Não desmonte uma bateria reserva, recarregue-a, jogue-a no fogo ou na água, ou de
Посмотреть инструкция для Lenovo ThinkPad SL510 бесплатно. Руководство относится к категории Ноутбуки, 2 человек(а) дали ему среднюю оценку 7.6. Руководство доступно на следующих языках: английский. У вас есть вопрос о Lenovo ThinkPad SL510 или вам нужна помощь? Задайте свой вопрос здесь
Не можете найти ответ на свой вопрос в руководстве? Вы можете найти ответ на свой вопрос ниже, в разделе часто задаваемых вопросов о Lenovo ThinkPad SL510.
От чего зависит скорость загрузки в Интернете?
Каковы размеры экрана Ноутбук?
Как лучше всего выполнять чистку Ноутбук?
Как почистить клавиатуру?
Какой размер экрана Lenovo ThinkPad SL510?
Какое разрешение экрана дисплея Lenovo ThinkPad SL510?
Инструкция Lenovo ThinkPad SL510 доступно в русский?
Не нашли свой вопрос? Задайте свой вопрос здесь
В представленном списке руководства для конкретной модели Ноутбуку — Lenovo THINKPAD SL510. Вы можете скачать инструкции к себе на компьютер или просмотреть онлайн на страницах сайта бесплатно или распечатать.
В случае если инструкция на русском не полная или нужна дополнительная информация по этому устройству, если вам нужны
дополнительные файлы: драйвера, дополнительное руководство пользователя (производители зачастую для каждого
продукта делают несколько различных документов технической помощи и руководств), свежая версия прошивки, то
вы можете задать вопрос администраторам или всем пользователям сайта, все постараются оперативно отреагировать
на ваш запрос и как можно быстрее помочь. Ваше устройство имеет характеристики:Тип: ноутбук, Операционная система: Win 7 Home Premium / Win 7 Home Basic / DOS / Win 7 Professional / Без ОС, Тип процессора: Core 2 Duo / Pentium / Celeron, Код процессора: P7450 / T4500 / T3300 / P7570 / T5870 / T3500 / T6600 / T6570 / T6670 / T3000 / T4300 / 900 / T4400, Частота процессора: 1800…2300 МГц, Количество ядер процессора: 1 / 2, полные характеристики смотрите в следующей вкладке.
Для многих товаров, для работы с Lenovo THINKPAD SL510 могут понадобиться различные дополнительные файлы: драйвера, патчи, обновления, программы установки. Вы можете скачать онлайн эти файлы для конкретнй модели Lenovo THINKPAD SL510 или добавить свои для бесплатного скачивания другим посетителями.
Если вы не нашли файлов и документов для этой модели то можете посмотреть интсрукции для похожих товаров и моделей, так как они зачастую отличаются небольшим изменениями и взаимодополняемы.
Обязательно напишите несколько слов о преобретенном вами товаре, чтобы каждый мог ознакомиться с вашим отзывом или вопросом. Проявляйте активность что как можно бльше людей смогли узнать мнение настоящих людей которые уже пользовались Lenovo THINKPAD SL510.

Кондрашов Сергей Васильевич
2019-11-08 18:01:28
все нормально
наталья
2020-05-13 12:52:00
работает уже много лет, все нормально
наталья
2020-05-13 12:53:10
все ок
Основные и самые важные характеристики модели собраны из надежных источников и по характеристикам можно найти похожие модели.
| Тип | |
| Тип | ноутбук |
| Операционная система | Win 7 Home Premium / Win 7 Home Basic / DOS / Win 7 Professional / Без ОС |
| Процессор | |
| Тип процессора | Core 2 Duo / Pentium / Celeron |
| Код процессора | P7450 / T4500 / T3300 / P7570 / T5870 / T3500 / T6600 / T6570 / T6670 / T3000 / T4300 / 900 / T4400 |
| Частота процессора | 1800…2300 МГц |
| Количество ядер процессора | 1 / 2 |
| Объем кэша L2 | / 1 Мб / 2 Мб / 3 Мб |
| Частота системной шины | / 1066 МГц / 800 МГц |
| Память | |
| Размер оперативной памяти | 2…4 Гб |
| Тип памяти | DDR3 |
| Частота памяти | 1066 МГц |
| Экран | |
| Размер экрана | 15.6 « |
| Разрешение экрана | 1366×768 |
| Широкоформатный экран | есть |
| Сенсорный экран | нет |
| Мультитач-экран | нет |
| Светодиодная подсветка экрана | нет |
| Поддержка 3D | нет |
| Видео | |
| Тип видеоадаптера | / встроенный / дискретный |
| Видеопроцессор | / Intel GMA 4500MHD / ATI Mobility Radeon HD 4570 / Intel GMA 4500M |
| Два видеоадаптера | нет |
| Размер видеопамяти | 512 Мб |
| Устройства хранения данных | |
| Размещение оптического привода | внутренний |
| Оптический привод | DVD-RW |
| Объем накопителя | 160…500 Гб |
| Тип жесткого диска | HDD |
| Интерфейс жесткого диска | Serial ATA |
| Слоты расширения | |
| Слот ExpressCard | есть |
| Стандарт ExpressCard | ExpressCard/34 |
| Карты памяти | |
| Устройство для чтения флэш-карт | есть |
| Поддержка Compact Flash | нет |
| Поддержка Memory Stick | есть |
| Поддержка SD | есть |
| Поддержка SDHC | нет |
| Поддержка SDXC | нет |
| Поддержка miniSD | нет |
| Поддержка microSD | нет |
| Поддержка microSDHC | нет |
| Поддержка microSDXC | нет |
| Поддержка SmartMedia | нет |
| Поддержка xD-Picture Card | есть |
| Беспроводная связь | |
| Wi-Fi | есть |
| Стандарт Wi-Fi | / 802.11g / 802.11n |
| Поддержка WiDi | нет |
| Bluetooth | опционально |
| Версия Bluetooth | / 2.0 EDR |
| LTE | нет |
| WiMAX | опционально |
| Поддержка GSM/GPRS | нет |
| Поддержка 3G (UMTS) | нет |
| Поддержка EDGE | нет |
| Поддержка HSDPA | нет |
| Подключение | |
| Встроенная сетевая карта | есть |
| Макс. скорость адаптера LAN | 1000 Мбит/с |
| Встроенный факс-модем | нет |
| Количество интерфейсов USB 2.0 | 4 |
| Интерфейс USB 3.1 (USB-C) | нет |
| Интерфейс FireWire | нет |
| Интерфейс FireWire 800 | нет |
| Интерфейс eSATA | нет |
| Инфракрасный порт (IRDA) | нет |
| Интерфейс LPT | нет |
| COM-порт | нет |
| Интерфейс PS/2 | нет |
| Выход VGA (D-Sub) | есть |
| Выход mini VGA | нет |
| Выход DVI | нет |
| Выход HDMI | есть |
| Выход micro HDMI | нет |
| Выход DisplayPort | нет |
| Выход Mini DisplayPort | нет |
| Вход TV-in | нет |
| Выход TV-out | нет |
| Подключение к док-станции | нет |
| Вход аудио | нет |
| Вход микрофонный | нет |
| Выход аудио/наушники | нет |
| Вход микрофонный/выход на наушники Combo | нет |
| Выход аудио цифровой (S/PDIF) | нет |
| Питание | |
| Время работы | 3 ч |
| Тип аккумулятора | Li-Ion |
| Устройства ввода | |
| Устройства позиционирования | PointStick and Touchpad |
| Подсветка клавиатуры | нет |
| Звук | |
| Наличие колонок | есть |
| Наличие сабвуфера | нет |
| Наличие микрофона | есть |
| Дополнительно | |
| GPS | нет |
| ГЛОНАСС | нет |
| Веб-камера | нет |
| Сканер отпечатка пальца | нет |
| ТВ-тюнер | нет |
| Пульт ДУ | нет |
| Кенсингтонский замок | нет |
| Стилус | нет |
| Металлический корпус | нет |
| Ударопрочный корпус | нет |
| Влагозащищенный корпус | нет |
| Длина | 380 мм |
| Ширина | 247 мм |
| Толщина | 32 мм |
| Вес | 2.56 кг |
| Дополнительная информация | существует модификация с Intel GMA 4500MHD |
Здесь представлен список самых частых и распространенных поломок и неисправностей у Ноутбуков. Если у вас такая поломка то вам повезло, это типовая неисправность для Lenovo THINKPAD SL510 и вы можете задать вопрос о том как ее устранить и вам быстро ответят или же прочитайте в вопросах и ответах ниже.
| Название поломки | Описание поломки | Действие |
|---|---|---|
| Залипание Клавиатуры | ||
| Темный Экран | ||
| Выход Из Строя Блока Питания | ||
| Не Работает Без Блока Питания | ||
| Замена Матрицы Экрана | ||
| Кулер Охлаждения | При Включении Ноутбука Кулер Работает Несколько Секунд, После Чего Останавливается, Не Смотря На То, Что Температура Процессора Постепенно Повышается До 100 Градусов. Далее Ноутбук Выключается. | |
| Не Включается | Работал. Выключился И Не Включается. Индикатор Не Светится. С Адаптера Напряжение Поступает. Причина? | |
| Проблемы Во Время Перезагрузки | Во Время Перезагрузки, После Завершения Сеанса, Завершения Работы И Выключения Экрана, Ноутбук Не Запускается Автоматически. Требуется Выключать, А Затем Включать Его При Помощи Кнопки Питания. | |
| Адаптер | Не Дает Полную Зарядку | |
| Не Вводится Пароль | Не Переключается С Рус На Англ | |
| Звук | Пропал Звук. В Виндовс Все Ок. Дрова Обновил, Вирусов Нет, Ошибка Только Вин,Медиа Плеер. Звука Нет Как В Самом Так И На Наушниках. | |
| Перешел На Win7 — Wifi Не Видит Сети | Долго Копал Тему На Форумах. Решение: На Wifi Адаптаре Заклеил Скотчем 20-Пин И О Чудо Сети Появились. |
В нашей базе сейчас зарегестрированно 18 353 сервиса в 513 города России, Беларусии, Казахстана и Украины.

NANOПРОГРЕСС
⭐
⭐
⭐
⭐
⭐
Адресс:
Шарикоподшипниковская ул. 13 стр.3
Телефон:
79257944721
Сайт:
n/a
Время работы
Время работы не указано
ASUS
⭐
⭐
⭐
⭐
⭐
Адресс:
улица Декабристов, д.10 к.3
Телефон:
74999630187
Сайт:
n/a
Время работы
Время работы не указано
HP
⭐
⭐
⭐
⭐
⭐
Адресс:
Большая Тульская улица, 50
Телефон:
74996540392
Сайт:
n/a
Время работы
Время работы не указано
Сеть сервисных центров «РУКИ ИЗ ПЛЕЧ»
⭐
⭐
⭐
⭐
⭐
Адресс:
ул. Пятницкая, д. 18, стр. 4
Телефон:
74951202639
Сайт:
n/a
Время работы
Будни: с 0900 до 2100
Суббота: с 1000 до 2000
Воскресенье: с 1000 до 2000
ТЕРАБИТ
⭐
⭐
⭐
⭐
⭐
Адресс:
ул. Новодмитровская, дом 5а стр 3
Телефон:
74952720744
Сайт:
n/a
Время работы
Время работы не указано
-
Lenovo SL510 — page 1
T hinkP a d SL4 1 0 , L4 1 0 , SL5 1 0 , a n d L5 1 0 Hard w ar e M a i nte n a n c e M a n ua l …
-
Lenovo SL510 — page 2
…
-
Lenovo SL510 — page 3
T hinkP a d SL4 1 0 , L4 1 0 , SL5 1 0 , a n d L5 1 0 Hard w ar e M a i nte n a n c e M a n ua l …
-
Lenovo SL510 — page 4
Note Before using this information and the pr oduct it supports, be sure to read the general information under “Notices” on page 177. First Edition (September 2009) © Copyright Lenovo 2009. LENOVO products, data, computer softwar e, and services have been developed exclusively at private expense and are sold to governmental entities as commer …
-
Lenovo SL510 — page 5
Contents About this manual ………. v Safety information ………. 1 General safety ………….. 2 Electrical safety …………. 3 Safety inspection guide ……….. 5 Handling devices that are sensitive to electr ostatic discharge …………… 6 Grounding r equirements ………. 6 Safety notices (multilingual translations) ….. 7 Lase …
-
Lenovo SL510 — page 6
Parts list …………. 1 4 1 Overall …………… 1 4 2 LCD FRUs ………….. 1 5 8 Keyboard …………… 1 6 4 Miscellaneous parts ……….. 1 6 5 AC adapters ………….. 1 6 6 Power cords ………….. 1 6 7 Recovery discs …………. 1 6 8 W indows XP Pr ofessional (32 bit) DVDs . . . 168 W indows V ista Home Basic (32 bit) DVD …
-
Lenovo SL510 — page 7
About this manual This manual contains service and refer ence information for the following ThinkPad ® Notebook products. ThinkPad SL410 Machine T ype (MT) 2842 and 2874 ThinkPad L410 MT 2931 ThinkPad SL510 MT 2847 and 2875 ThinkPad L510 MT 2873 Use this manual along with the advanced diagnostic tests to troubleshoot problems. Important: This manu …
-
Lenovo SL510 — page 8
vi ThinkPad SL410, L410, SL510, and L510 Hardwar e Maintenance Manual …
-
Lenovo SL510 — page 9
Safety information This chapter presents following safety information that you need to be familiar with before you service a ThinkPad Notebook. v “General safety” on page 2 v “Electrical safety” on page 3 v “Safety inspection guide” on page 5 v “Handling devices that are sensitive to electr ostatic discharge” on page 6 v “Groundin …
-
Lenovo SL510 — page 10
General safety Follow these rules to ensur e general safety: v Observe good housekeeping in the area of the machines during and after maintenance. v When lifting any heavy object: 1. Make sure that you can stand safely without slipping. 2. Distribute the weight of the object equally between your feet. 3. Use a slow lifting force. Never move suddenl …
-
Lenovo SL510 — page 11
Electrical safety Observe the following rules when working on electrical equipment. v Find the room emer gency power-off (EPO) switch, disconnecting switch, or electrical outlet. If an electrical accident occurs, you can then operate the switch or unplug the power cord quickly . v Do not work alone under hazardous conditions or near equipment that …
-
Lenovo SL510 — page 12
v Do not touch live electrical circuits with the r eflective surface of a plastic dental mirror . The surface is conductive; such touching can cause personal injury and machine damage. v Do not service the following parts with the power on when they are r emoved from their normal operating places in a machine: – Power supply units – Pumps – B …
-
Lenovo SL510 — page 13
Safety inspection guide The purpose of this inspection guide is to assist you in identifying potentially unsafe conditions. As each machine was designed and built, requir ed safety items were installed to pr otect users and service technicians from injury . This guide addresses only those items. Y ou should use good judgment to identify potential s …
-
Lenovo SL510 — page 14
Handling devices that are sensitive to electrostatic discharge Any computer part containing transistors or integrated circuits (ICs) should be considered sensitive to electr ostatic discharge (ESD.) ESD damage can occur when there is a dif ference in charge between objects. Pr otect against ESD damage by equalizing the charge so that the machine, t …
-
Lenovo SL510 — page 15
Safety notices (multilingual translations) The safety notices in this section are pr ovided in the following languages: v English v Arabic v Brazilian Portuguese v French v German v Hebrew v Japanese v Korean v Spanish v T raditional Chinese Safety information 7 …
-
Lenovo SL510 — page 16
DANGER Before the computer is powered on after FRU replacement, make sure all screws, springs, and other small parts are in place and are not left loose inside the computer . V erify this by shaking the computer and listening for rattling sounds. Metallic parts or metal flakes can cause electrical shorts. DANGER Some standby batteries contain a sma …
-
Lenovo SL510 — page 17
DANGER T o avoid shock, do not remove the plastic cover that protects the lower part of the inverter card. DANGER Though the main batteries have low voltage, a shorted or grounded battery can produce enough current to burn personnel or combustible materials. DANGER Unless hot swap is allowed for the FRU being replaced, do as follows before removing …
-
Lenovo SL510 — page 18
10 ThinkPad SL410, L410, SL510, and L510 Hardwar e Maintenance Manual …
-
Lenovo SL510 — page 19
Safety information 11 …
-
Lenovo SL510 — page 20
PERIGO Antes de ligar o computador após a substituição da FRU, certifique-se de que todos os parafusos, molas e outras peças pequenas estejam no lugar e não estejam soltos dentro do computador . V erifique isso sacudindo o computador e procurando ouvir sons de peças soltas. Peças metálicas ou lascas de metal podem causar curto-circuito. PER …
-
Lenovo SL510 — page 21
PERIGO Para evitar choque elétrico, não remova a capa plástica que protege a parte inferior da placa inversora. PERIGO Embora as principais baterias possuam baixa voltagem, uma bateria em curto-circuito ou aterrada pode produzir corrente o bastante para queimar materiais de pessoal ou inflamáveis. PERIGO A menos que uma hot swap seja permitida …
-
Lenovo SL510 — page 22
DANGER A vant de remettre l’ordinateur sous tension après remplacement d’une unité en clientèle, vérifiez que tous les ressorts, vis et autres pièces sont bien en place et bien fixées. Pour ce faire, secouez l’unité et assurez-vous qu’aucun bruit suspect ne se produit. Des pièces métalliques ou des copeaux de métal pourraient caus …
-
Lenovo SL510 — page 23
DANGER Afin d’éviter tout risque de choc électrique, ne retirez pas le cache en plastique protégeant la partie inférieure de la carte d’alimentation. DANGER Bien que le voltage des batteries principales soit peu élevé, le court-circuit ou la mise à la masse d’une batterie peut produire suffisamment de courant pour brûler des matériau …
-
Lenovo SL510 — page 24
VORSICHT Bevor nach einem FRU-Austausch der Computer wieder angeschlossen wird, muß sichergestellt werden, daß keine Schrauben, Federn oder andere Kleinteile fehlen oder im Gehäuse vergessen wurden. Der Computer muß geschüttelt und auf Klappergeräusche geprüft werden. Metallteile oder-splitter können Kurzschlüsse erzeugen. VORSICHT Die Ber …
-
Lenovo SL510 — page 25
VORSICHT Die Leuchtstoffröhre im LCD-Bildschirm enthält Quecksilber . Bei der Entsorgung die örtlichen Bestimmungen für Sondermüll beachten. Der LCD-Bildschirm besteht aus Glas und kann zerbrechen, wenn er unsachgemäß behandelt wird oder der Computer auf den Boden fällt. W enn der Bildschirm beschädigt ist und die darin befindliche Flüssi …
-
Lenovo SL510 — page 26
18 ThinkPad SL410, L410, SL510, and L510 Hardwar e Maintenance Manual …
-
Lenovo SL510 — page 27
Safety information 19 …
-
Lenovo SL510 — page 28
20 ThinkPad SL410, L410, SL510, and L510 Hardwar e Maintenance Manual …
-
Lenovo SL510 — page 29
Safety information 21 …
-
Lenovo SL510 — page 30
22 ThinkPad SL410, L410, SL510, and L510 Hardwar e Maintenance Manual …
-
Lenovo SL510 — page 31
Safety information 23 …
-
Lenovo SL510 — page 32
PELIGRO Antes de encender el sistema despues de sustituir una FRU, compruebe que todos los tornillos, muelles y demás piezas pequeñas se encuentran en su sitio y no se encuentran sueltas dentro del sistema. Compruébelo agitando el sistema y escuchando los posibles ruidos que provocarían. Las piezas metálicas pueden causar cortocircuitos eléct …
-
Lenovo SL510 — page 33
PELIGRO Para evitar descargas, no quite la cubierta de plástico que rodea la parte baja de la tarjeta invertida. PELIGRO Aunque las baterías principales tienen un voltaje bajo, una batería cortocircuitada o con contacto a tierra puede producir la corriente suficiente como para quemar material combustible o provocar quemaduras en el personal. PEL …
-
Lenovo SL510 — page 34
26 ThinkPad SL410, L410, SL510, and L510 Hardwar e Maintenance Manual …
-
Lenovo SL510 — page 35
Safety information 27 …
-
Lenovo SL510 — page 36
Laser compliance statement (multilingual translations) The laser compliance statements in this section are pr ovided in the following languages: v English v Arabic v Brazilian Portuguese v French v German v Hebrew v Japanese v Korean v Spanish v T raditional Chinese Some models of ThinkPad Notebook are equipped fr om the factory with an optical sto …
-
Lenovo SL510 — page 37
Safety information 29 …
-
Lenovo SL510 — page 38
Alguns modelos de computador ThinkPad são equipados na fábrica com um dispositivo de armazenamento ótico, como uma unidade de CD-ROM ou de DVD-ROM. T ais dispositivos também são vendidos separadamente como opcionais. Se uma dessas unidades estiver instalada, ela é certificada nos Estados Unidos em conformidade com os requisitos do Department …
-
Lenovo SL510 — page 39
Certains modèles d’ordinateur ThinkPad sont équipés d’origine d’une unité de stockage optique telle qu’une unité de CD-ROM ou de DVD-ROM. Ces unités sont également vendues séparément en tant qu’options. Si l’une de ces unités est installée, elle est certifiée conforme, aux Etats-Unis, aux normes indiquées dans le sous-chapi …
-
Lenovo SL510 — page 40
Einige ThinkPad-Modelle sind werkseitig mit einem CD-ROM- oder DVD-ROM-Laufwerk ausgestattet. CD- und DVD-Laufwerke können auch gesondert als Zusatzeinrichtung erworben werden. Die Laufwerke erfüllen die Anforder ungen gemäß IEC 60825-1 (International Electrotechnical Commission) und gemäß CENELEC EN 60825-1 für Laserprodukte der Klasse 1. B …
-
Lenovo SL510 — page 41
Safety information 33 …
-
Lenovo SL510 — page 42
34 ThinkPad SL410, L410, SL510, and L510 Hardwar e Maintenance Manual …
-
Lenovo SL510 — page 43
Safety information 35 …
-
Lenovo SL510 — page 44
Algunos modelos de sistemas ThinkPad están equipados de fábrica con un dispositivo de almacenamiento óptico, como una unidad de CD-ROM o de DVD-ROM. Estas unidades también se venden por separado como opciones. Si está instalada alguna de dichas unidades, se certifica que en los Estados Unidos cumple los requisitos del Department of Health and …
-
Lenovo SL510 — page 45
Safety information 37 …
-
Lenovo SL510 — page 46
38 ThinkPad SL410, L410, SL510, and L510 Hardwar e Maintenance Manual …
-
Lenovo SL510 — page 47
Important service information This chapter presents following important service information that applies to all machine types supported by this manual: v “Strategy for replacing FRUs” – “Strategy for replacing a har d disk drive” on page 40 – “Important notice for replacing a system boar d” on page 40 – “How to use error message …
-
Lenovo SL510 — page 48
Use the following strategy to prevent unnecessary expense for r eplacing and servicing FRUs: v If you are instructed to replace a FRU but the replacement does not correct the problem, reinstall the original FRU before you continue . v Some computers have both a processor boar d and a system board. If you are instructed to r eplace either the proces …
-
Lenovo SL510 — page 49
Strategy for replacing FRUs for CT O, CMV , and GA V Product definition Dynamic Configure T o Order (CTO) This provides the ability for a customer to configur e an IBM ® or a Lenovo solution from an eSite, and have this configuration sent to fulfillment, wher e it is built and shipped directly to the customer . The machine label, Product Entitleme …
-
Lenovo SL510 — page 50
v Business Partners using Eclaim will access PEW when performing Entitlement Lookup. Business Partners will enter Loc ID, MT and Serial, and the key commodities will be returned in the Eclaim r ecord under SYSTEM DET AILS. v Authorized IBM Business Partners can access Eclaim at the following W eb site: https://wca.eclaim.com Using eSupport For Key …
-
Lenovo SL510 — page 51
General checkout This chapter presents following information: v “What to do first” on page 44 v “Checkout guide” on page 45 – “Diagnostics using PC-Doctor for DOS” on page 45 – “Lenovo ThinkV antage T oolbox (Lenovo System T oolbox)” on page 48 – “PC-Doctor for Rescue and Recovery” on page 48 – “FRU tests” on page 49 …
-
Lenovo SL510 — page 52
What to do first When you do return a FRU, you must include the following information in the parts exchange form or parts return form that you attach to it: __ 1. Name and phone number of service technician __ 2. Date of service __ 3. Date on which the machine failed __ 4. Date of purchase __ 5. Failure symptoms, err or codes appearing on the displ …
-
Lenovo SL510 — page 53
Checkout guide Use the following procedur es as a guide in identifying and correcting problems with the ThinkPad Notebook. Note: The diagnostic tests are intended to test only ThinkPad pr oducts. The use of non-ThinkPad products, pr ototype cards, or modified options can lead to false indications of errors and invalid system r esponses. 1. Identify …
-
Lenovo SL510 — page 54
T esting the computer Note: The PC-Doctor diagnostic CD does not support any optical drives connected through USB devices or any others. It supports only the internal optical drive of the ThinkPad Notebook. T o run the test, do as follows: 1. T urn off the computer . 2. Make sure that the internal optical drive that is supported as a startup device …
-
Lenovo SL510 — page 55
The options on the test menu are as follows: Diagnostics Interactive T ests v Run Normal T est v Run Quick T est v CPU/Coprocessor v System board v V ideo Adapter v Serial Ports v Fixed Disks v Diskette Drives v Other Devices v W ireless LAN v Advanced Memory T ests v Keyboard v V ideo v Internal Speaker v Mouse v Diskette v System Load v Optical D …
-
Lenovo SL510 — page 56
v V iew T est Log v Print Log v Save Log v Full Erase Hard Drive v Quick Erase Hard Drive Lenovo ThinkV antage T oolbox (Lenovo System T oolbox) Lenovo ThinkV antage ® T oolbox (Lenovo System T oolbox in W indows V ista ® and W indows ® XP) is a diagnostic program that works thr ough the W indows operating system. It enables you to view symptoms …
-
Lenovo SL510 — page 57
FRU tests The following table shows the test for each FRU. T able 1. FRU tests FRU Applicable test System board 1. Diagnostics —> CPU/Coprocessor 2. Diagnostics —> Systemboard 3. Place the computer on a horizontal surface, and run Diagnostics —> ThinkPad Devices —> HDD Active Protection T est . Note: Do not apply any physical shock …
-
Lenovo SL510 — page 58
T able 1. FRU tests (continued) FRU Applicable test T rackPoint or pointing device If the T rackPoint does not work, check the configuration as specified in the BIOS Setup Utility . If the T rackPoint is disabled, select Automatic to enable it. After you use the T rackPoint, the pointer may drift on the screen for a short time. This drift can occur …
-
Lenovo SL510 — page 59
Power system checkout T o verify a symptom, do the following: 1. T urn off the computer . 2. Remove the battery pack. 3. Connect the ac adapter . 4. Check that power is supplied when you turn on the computer . 5. T urn off the computer . 6. Disconnect the ac adapter and install the charged battery pack. 7. Check that the battery pack supplies power …
-
Lenovo SL510 — page 60
Perform operational charging. If the battery status indicator or icon does not turn on, remove the battery pack and let it r eturn to room temperature. Reinstall the battery pack. If the charge indicator or icon still does not turn on, r eplace the battery pack. If the charge indicator still does not turn on, r eplace the system board. Then reinsta …
-
Lenovo SL510 — page 61
4. Remove the backup battery (see “1 130 Backup battery” on page 102). 5. Measure the voltage of the backup battery . See the following figure. Red (+) Black (-) W ire V oltage (V dc) Red +2.5 to +3.2 Black Ground v If the voltage is correct, r eplace the system board. v If the voltage is not correct, r eplace the backup battery . v If the back …
-
Lenovo SL510 — page 62
54 ThinkPad SL410, L410, SL510, and L510 Hardwar e Maintenance Manual …
-
Lenovo SL510 — page 63
Related service information This chapter presents following information: v “Restoring the factory contents by using Recovery Disc Set” v “Passwords” on page 56 v “Power management” on page 60 v “Symptom-to-FRU index” on page 62 Restoring the factory contents by using Recovery Disc Set When the hard disk drive is r eplaced because of …
-
Lenovo SL510 — page 64
1. Make the CD/DVD drive the first startup device in the startup sequence using the following procedur e: a. Press and hold down the F1 key , and then turn on the computer . When the logo screen is displayed or if you hear r epeating beeps, release the F1 key . The Setup Utility program opens. b. Use the arrow keys to select Startup → Boot . c. S …
-
Lenovo SL510 — page 65
Exception: If only an SVP is installed, the passwor d prompt does not appear when the operating system is booted. Power-on password A power-on password (POP) pr otects the system from being power ed on by an unauthorized person. The password must be enter ed before an operating system can be booted. For how to remove the POP , see “How to remove …
-
Lenovo SL510 — page 66
After the POST ends, the password pr ompt does not appear . The POP has been removed. 5. Reinstall the backup battery and the battery pack. (B) If an SVP has been set and is known by the service technician: 1. T urn on the computer . 2. When the ThinkPad logo comes up, immediately press F1 to enter BIOS Setup Utility . For models supporting the Pas …
-
Lenovo SL510 — page 67
7. T ype the current master HDP in the Enter Current Password field. then leave the Enter New Password field blank, and press Enter twice. 8. Press F10. 9. Select Ye s in the Setup Configuration window . Both user HDP and master HDP will have been removed. Related service information 59 …
-
Lenovo SL510 — page 68
Power management T o reduce power consumption, the computer has thr ee power management modes: screen blank, sleep (standby in W indows XP), and hibernation. Screen blank mode If the time set on the “T urn off monitor” timer in the operating system expir es, the LCD backlight turns off. T o put the computer into screen blank mode, do as follows …
-
Lenovo SL510 — page 69
Also, in either of the following events, the computer automatically returns fr om sleep (standby) mode and resumes operation: v The ring indicator (RI) is signaled by a serial device or a PC Card device. v The time set on the resume timer elapses. Note: The computer does not accept any input immediately after it enters sleep (standby) mode. W ait a …
-
Lenovo SL510 — page 70
Symptom-to-FRU index This section contains following information: v “Numeric error codes” v “Error messages” on page 65 v “No-beep symptoms” on page 65 v “LCD-related symptoms” on page 66 v “Intermittent problems” on page 67 v “Undetermined problems” on page 67 The symptom-to-FRU index in this section lists symptoms and erro …
-
Lenovo SL510 — page 71
T able 2. Numeric error codes (continued) Symptom or error (beeps, if any) FRU or action, in sequence 021 1 Keyboard err or (two short beeps) Run interactive tests of the keyboard and the auxiliary input device. 0230 Shadow RAM error—Shadow RAM fails at offset nnnn. (two short beeps) System board. 0231 System RAM error—System RAM fails at offse …
-
Lenovo SL510 — page 72
T able 2. Numeric error codes (continued) Symptom or error (beeps, if any) FRU or action, in sequence 02F0 CPU ID:xx Failed. 1. CPU. 2. System board. 02F5 DMA test failed. (two short beeps) 1. DIMM. 2. System board. 02F6 Software NMI failed (two short beeps) 1. DIMM. 2. System board. 02F7 Fail-safe timer NMI failed (two short beeps) 1. DIMM. 2. Sys …
-
Lenovo SL510 — page 73
Error messages T able 3. Error messages Symptom or error (beeps, if any) FRU or action, in sequence Bad CRC2. Enter BIOS Setup Utility , and load Setup defaults. (two short beeps) Press F1 to enter BIOS Setup Utility . Press F9, and Enter to load the default setting. Then save the current setting by pressing F10, and restart the computer . Fan erro …
-
Lenovo SL510 — page 74
LCD-related symptoms T able 5. LCD-related symptoms Symptom or error FRU or action, in sequence No beep, power-on indicator on, and a blank LCD during POST . System board . v LCD backlight not working. v LCD too dark. v LCD brightness cannot be adjusted. v LCD contrast cannot be adjusted. 1. Reseat the LCD connectors . 2. LCD assembly . 3. System b …
-
Lenovo SL510 — page 75
Intermittent problems Intermittent system hang problems can be due to a variety of causes that have nothing to do with a hardwar e defect, such as cosmic radiation, electrostatic discharge, or softwar e errors. FRU replacement should be consider ed only when a problem r ecurs. When analyzing an intermittent problem, do the following: 1. Run the dia …
-
Lenovo SL510 — page 76
68 ThinkPad SL410, L410, SL510, and L510 Hardwar e Maintenance Manual …
-
Lenovo SL510 — page 77
Status indicators This chapter presents the system status indicators that show the status of the computer . 2 1 3 4 5 6 7 8 T able 6. Status indicators Indicator Meaning 1 Numeric lock By default, when the numeric lock is on, the indicator is displayed on the screen. 2 Power on Green: The computer is on and ready to use. The power switc …
-
Lenovo SL510 — page 78
T able 6. Status indicators (continued) Indicator Meaning 5 Device access Data is being read from or written to the har d disk drive. When this indicator is on, do not put the computer into sleep (standby) mode or turn off the computer . Note: Do not move the computer while this indicator is on. Sudden physical shock could cause drive errors. …
-
Lenovo SL510 — page 79
Fn key combinations The following table shows the function of each combination of Fn with a function key . T able 7. Fn key combinations Key combination Description Fn+F1 Reserved. Fn+F2 Lock the computer . Fn+F3 Select a power plan (in W indows XP , power scheme) that has been created by Power Manager , or adjust the power level by using the slide …
-
Lenovo SL510 — page 80
T able 7. Fn key combinations (continued) Key combination Description Fn+F7 Apply a presentation scheme dir ectly , with no need to start Presentation Dir ector . T o disable this function and use the Fn+F7 key combination for switching a display output location, start Presentation Dir ector , and change the settings. Note: If the computer is a win …
-
Lenovo SL510 — page 81
T able 7. Fn key combinations (continued) Key combination Description Fn+ScrLk Enable or disable the numeric keypad. The indicator of numeric lock will be displayed on the screen. Fn+Pause Has the same function as the Break key . Fn+cursor keys These key combinations work with W indows Media Player . Fn+down arrow key works for the Play or Pause bu …
-
Lenovo SL510 — page 82
74 ThinkPad SL410, L410, SL510, and L510 Hardwar e Maintenance Manual …
-
Lenovo SL510 — page 83
FRU replacement notices This chapter presents notices r elated to removing and replacing parts. Read this chapter carefully befor e replacing any FRU. Screw notices Loose screws can cause a r eliability problem. In the ThinkPad Notebook, this problem is addr essed with special nylon-coated screws that have the following characteristics: v They main …
-
Lenovo SL510 — page 84
Retaining serial numbers This section includes the following descriptions: v “Restoring the serial number of the system unit” v “Retaining the UUID” v “Reading or writing the ECA information” on page 77 Restoring the serial number of the system unit When the computer was manufactured, the EEPROM on the system boar d was loaded with the …
-
Lenovo SL510 — page 85
The algorithm that generates the number is designed to provide unique IDs until the year A.D. 3400. No two computers in the world have the same number . When you replace the system boar d, you must set the UUID on the new system board as follows: 1. Install the LENOVO ThinkPad Hardwar e Maintenance Diskette V ersion 1.76 or later , and restart the …
-
Lenovo SL510 — page 86
78 ThinkPad SL410, L410, SL510, and L510 Hardwar e Maintenance Manual …
-
Lenovo SL510 — page 87
Removing and replacing a FRU This chapter presents dir ections and drawings for use in removing and replacing a FRU. Be sure to observe the following general r ules: 1. Do not try to service any computer unless you have been trained and certified. An untrained person runs the risk of damaging parts. 2. Before r eplacing any FRU, review “FRU repla …
-
Lenovo SL510 — page 88
1010 Battery pack T able 8. Removal steps of battery pack Unlock the battery latch 1 . Holding the battery lock lever in the unlocked position 2 , remove the battery pack in the dir ection shown by arrow 3 . 3 2 1 When installing: Install the battery pack along the slide rails of the slot. Then make sure that the battery r elease …
-
Lenovo SL510 — page 89
1020 ExpressCard blank bezel and Media Card blank bezel T able 9. Removal steps of ExpressCard blank bezel When you press the Expr essCard blank bezel 1 , it pops out 2 . 1 2 When installing: Make sure that the bezel is corr ectly oriented as shown in this figure. Removing and replacing a FRU 81 …
-
Lenovo SL510 — page 90
T able 10. Removal steps of Media Card blank bezel When you press the Media Car d blank bezel 1 , it pops out 2 . 1 2 When installing: Make sure that the bezel is corr ectly oriented as shown in this figure. 82 ThinkPad SL410, L410, SL510, and L510 Hardwar e Maintenance Manual …
-
Lenovo SL510 — page 91
1030 Optical drive or travel cover For access, remove this FRU: v “1010 Battery pack” on page 80 T able 1 1. Removal steps of optical drive or travel cover 1 Step Screw (quantity) Color T orque 1 M2 × 8 mm, wafer-head, nylon-coated (1) Black 0.167 Nm (1.7 kgfcm) 3 2 Removing and replacing a FRU 83 …
-
Lenovo SL510 — page 92
1040 Thermal cover For access, remove this FRU: v “1010 Battery pack” on page 80 T able 12. Removal steps of thermal cover Note: Loosen the screws 1 , but do not r emove them. 1 1 1 1 1 1 2 Attention: Do not touch or apply any excessive force to the fan motor located in the slot. It might cause damage to the fan assembly or the computer t …
-
Lenovo SL510 — page 93
1050 Hard disk drive (HDD) assembly For access, remove these FRUs in or der: v “1010 Battery pack” on page 80 v “1040 Thermal cover” on page 84 T able 13. Removal steps of HDD assembly 1 When installing: Make sure that the HDD connector is attached firmly . Attention: v Do not drop the drive or apply any physical shock to it. The drive is s …
-
Lenovo SL510 — page 94
T able 13. Removal steps of HDD assembly (continued) 2 a When installing: Do not apply excessive force to the HDD bracket a .T od o so, you might bend or break it. 86 ThinkPad SL410, L410, SL510, and L510 Hardwar e Maintenance Manual …
-
Lenovo SL510 — page 95
1060 DIMM For access, remove these FRUs in or der: v “1010 Battery pack” on page 80 v “1040 Thermal cover” on page 84 T able 14. Removal steps of DIMM 1 1 2 Note: If only one DIMM is used on the computer you are servicing, the car d must be installed in SLOT -0 ( a : lower slot), but not in SLOT -1 ( b : upper slot). b a When in …
-
Lenovo SL510 — page 96
1070 Fan assembly For access, remove these FRUs in or der: v “1010 Battery pack” on page 80 v “1040 Thermal cover” on page 84 Attention: v Do not handle the fan roughly . Improper handling of the fan can cause distortion or deformation and imperfect contact with components. v Do not touch or apply any excessive force to the fan motor . It m …
-
Lenovo SL510 — page 97
T able 15. Removal steps of fan assembly (continued) Note: Loosen the screws 2a to 2f in or der , but do not r emove them. When you attach the fan, secure the scr ews in order . For ThinkPad SL510 and L510: 2a 3 2d 2c 2b 2f 2e For ThinkPad SL410 and L410: 2a 2d 2c 2b 2e 2f Note: Step 3 is only for the models with 15.6-inch widescr …
-
Lenovo SL510 — page 98
T able 15. Removal steps of fan assembly (continued) 4 90 ThinkPad SL410, L410, SL510, and L510 Hardwar e Maintenance Manual …
-
Lenovo SL510 — page 99
T able 15. Removal steps of fan assembly (continued) When installing: Before you attach the fan assembly to the computer , apply thermal grease, at an amount of 0.2 grams, on the parts marked a as in the following figures. Either too much or too less application of gr ease can cause a thermal problem due to imperfect contact with a component. …
-
Lenovo SL510 — page 100
1080 CPU For access, remove these FRUs in or der: v “1010 Battery pack” on page 80 v “1040 Thermal cover” on page 84 v “1070 Fan assembly” on page 88 Attention: CPU is extremely sensitive. When you service the CPU, avoid any kind of rough handling. T able 16. Removal steps of CPU Rotate the head of the screw in the dir ection shown by a …
-
Lenovo SL510 — page 101
1090 SIM slot cover For access, remove this FRU: v “1010 Battery pack” on page 80 T able 17. Removal steps of SIM slot cover Note: Loosen the screw 1 , but do not r emove it. 1 2 Removing and replacing a FRU 93 …
-
Lenovo SL510 — page 102
T able 17. Removal steps of SIM slot cover (continued) Some models of ThinkPad SL410, L410, SL510, and L510 might have the SIM card that the customer has been installed. If the computer you are servicing has the SIM car d, remove it before you start the servicing. After you finish the servicing, make sure that you insert the car d back into the slo …
-
Lenovo SL510 — page 103
1 100 Wireless W AN slot cover and PCI Express Mini Card for wireless WA N For access, remove this FRU: v “1010 Battery pack” on page 80 T able 18. Removal steps of wireless WAN slot cover and PCI Express Mini Card for wireless WAN Note: Loosen the screw 1 , but do not r emove it. 1 2 Removing and replacing a FRU 95 …
-
Lenovo SL510 — page 104
T able 18. Removal steps of wireless WAN slot cover and PCI Express Mini Card for wireless WAN (continued) In step 3a and 3b , unplug the jacks by using the removal tool antenna RF connector (P/N: 08K7159) or pick the connectors with your fingers and gently unplug them in direction of the arr ow . 4 4 3a 3b When installing: Plug the red …
-
Lenovo SL510 — page 105
1 1 10 Palm rest assembly with cables For access, remove these FRUs in or der: v “1010 Battery pack” on page 80 v “1030 Optical drive or travel cover” on page 83 T able 19. Removal steps of palm rest assembly with cables 2 2 2 2 2 1 1 2 2 Step Screw (quantity) Color T orque 1 M2 × 8 mm, wafer-head, nylon-coated (1) Black 0.167 Nm (1. …
-
Lenovo SL510 — page 106
T able 19. Removal steps of palm rest assembly with cables (continued) 3 3 4 5 6 7 6 8 7 98 ThinkPad SL410, L410, SL510, and L510 Hardwar e Maintenance Manual …
-
Lenovo SL510 — page 107
T able 20. Installation of palm rest assembly with cables When installing: 1. Attach the cables to the system board firmly . 2. Attach the palm rest so that the two small pr ojections of the palm rest ( a ) firmly fit into the guide holes of the keyboard bezel as shown in this figur e. a a 3. Push the front side of the palm r est until it cli …
-
Lenovo SL510 — page 108
1 120 PCI Express Mini Card for wireless LAN For access, remove these FRUs in or der: v “1010 Battery pack” on page 80 v “1030 Optical drive or travel cover” on page 83 v “1 1 10 Palm r est assembly with cables” on page 97 T able 21. Removal steps of PCI Express Mini Card for wireless LAN In step 1a and 1b , unplug the jacks …
-
Lenovo SL510 — page 109
T able 21. Removal steps of PCI Express Mini Card for wireless LAN (continued) 3 When installing: Plug the gray cable into the jack labeled MAIN , and the black cable into the jack labeled AUX on the card. Removing and replacing a FRU 101 …
-
Lenovo SL510 — page 110
1 130 Backup battery For access, remove these FRUs in or der: v “1010 Battery pack” on page 80 v “1030 Optical drive or travel cover” on page 83 v “1 1 10 Palm r est assembly with cables” on page 97 DANGER Use only the battery specified in the parts list for your computer . Any other battery could ignite or explode. T able 22. Removal s …
-
Lenovo SL510 — page 111
1 140 Bluetooth daughter card (BDC-2) For access, remove these FRUs in or der: v “1010 Battery pack” on page 80 v “1030 Optical drive or travel cover” on page 83 v “1 1 10 Palm r est assembly with cables” on page 97 T able 23. Removal steps of BDC-2 1 2 Step Screw (quantity) Color T orque 1 M2 × 3 mm, wafer-head, nylon-coated (1) …
-
Lenovo SL510 — page 112
1 150 Media Card Reader slot board and Media Card Reader cable assembly For access, remove these FRUs in or der: v “1010 Battery pack” on page 80 v “1020 ExpressCar d blank bezel and Media Card blank bezel” on page 81 v “1030 Optical drive or travel cover” on page 83 v “1090 SIM slot cover” on page 93 v “1 1 10 Palm r est assembly …
-
Lenovo SL510 — page 113
T able 24. Removal steps of Media Card Reader slot board and Media Card Reader cable assembly (continued) 2 2 3 Step Screw (quantity) Color T orque 2 M2 × 3 mm, wafer-head, nylon-coated (2) Black 0.167 Nm (1.7 kgfcm) Removing and replacing a FRU 105 …
-
Lenovo SL510 — page 114
1 160 Keyboard For access, remove these FRUs in or der: v “1010 Battery pack” on page 80 v “1030 Optical drive or travel cover” on page 83 v “1 1 10 Palm r est assembly with cables” on page 97 T able 25. Removal steps of keyboard 1 Step Screw (quantity) Color T orque 1 M2 × 5 mm, wafer-head, nylon-coated (1) Black 0.167 Nm (1.7 k …
-
Lenovo SL510 — page 115
T able 25. Removal steps of keyboard (continued) 2 4 2 3 5 6 7 Step Screw (quantity) Color T orque 6 M2 × 3 mm, wafer-head, nylon-coated (1) Black 0.167 Nm (1.7 kgfcm) 7 M2 × 2 mm, wafer-head, nylon-coated (1) Silver 0.167 Nm (1.7 kgfcm) 8 Removing and replacing a FRU 107 …
-
Lenovo SL510 — page 116
When installing the keyboard, do as follows: T able 26. Installation of the keyboard 1. Attach the connectors. 2. Attach the keyboard so that the keyboar d edges are under the frame as shown in this figure. 3. T o make sure that the fr ont side of the keyboard is housed firmly , gently press the keys with your thumbs and try to slide the keyboar d …
-
Lenovo SL510 — page 117
1 170 Keyboard bezel For access, remove these FRUs in or der: v “1010 Battery pack” on page 80 v “1030 Optical drive or travel cover” on page 83 v “1070 Fan assembly” on page 88 v “1 100 W ir eless W AN slot cover and PCI Express Mini Card for wir eless W AN” on page 95 v “1 1 10 Palm r est assembly with cables” on page 97 v “ …
-
Lenovo SL510 — page 118
T able 27. Removal steps of keyboard bezel (continued) 4 4 7 5 6 5 6 Step Screw (quantity) Color T orque 4 M2 × 3 mm, wafer-head, nylon-coated (2) Black 0.167 Nm (1.7 kgfcm) When installing: Make sure that the connectors ar e attached firmly to the system board. 8 8 11 0 ThinkPad SL410, L410, SL510, and L510 Hardwar e Maintenance Manual …
-
Lenovo SL510 — page 119
1 180 LCD unit For access, remove these FRUs in or der: v “1010 Battery pack” on page 80 v “1030 Optical drive or travel cover” on page 83 v “1 100 W ir eless W AN slot cover and PCI Express Mini Card for wir eless W AN” on page 95 v “1 1 10 Palm r est assembly with cables” on page 97 v “1 120 PCI Express Mini Car d for wireless L …
-
Lenovo SL510 — page 120
T able 28. Removal steps of LCD unit (continued) 2 2 3 When installing: Make sure that the connectors ar e attached firmly to the system board. 11 2 ThinkPad SL410, L410, SL510, and L510 Hardwar e Maintenance Manual …
-
Lenovo SL510 — page 121
T able 28. Removal steps of LCD unit (continued) In step 4 , release wir eless antenna cables from the cable guides. For ThinkPad SL510 and L510: 4 4 4 4 4 4 4 4 4 4 4 For ThinkPad SL410 and L410: 4 4 4 4 4 4 4 4 4 4 4 4 4 4 4 4 4 When installing: Make sure that the cables ar e attached to the cable guides firmly . Attention: When you route t …
-
Lenovo SL510 — page 122
T able 28. Removal steps of LCD unit (continued) For ThinkPad SL510 and L510: 5 5 5 5 For ThinkPad SL410 and L410: 5 5 5 5 Step Screw (quantity) Color T orque 5 M2.5 × 6.5 mm, wafter-head, nylon-coated (4) Black 0.392 Nm (4 kgfcm) 11 4 ThinkPad SL410, L410, SL510, and L510 Hardwar e Maintenance Manual …
-
Lenovo SL510 — page 123
T able 28. Removal steps of LCD unit (continued) 6 6 Removing and replacing a FRU 11 5 …
-
Lenovo SL510 — page 124
1 190 T op shielding assembly For access, remove these FRUs in or der: v “1010 Battery pack” on page 80 v “1030 Optical drive or travel cover” on page 83 v “1 100 W ir eless W AN slot cover and PCI Express Mini Card for wir eless W AN” on page 95 v “1 1 10 Palm r est assembly with cables” on page 97 v “1 120 PCI Express Mini Car d …
-
Lenovo SL510 — page 125
T able 29. Removal steps of top shielding assembly (continued) For ThinkPad SL410 and L410: 2 1 1 2 2 2 3 Step Screw (quantity) Color T orque 1 M2 × 3 mm, wafer-head, nylon-coated (2) Black 0.167 Nm (1.7 kgfcm) 2 M2 × 5 mm, wafer-head, nylon-coated (4) Black 0.167 Nm (1.7 kgfcm) Removing and replacing a FRU 11 7 …
-
Lenovo SL510 — page 126
1200 System board assembly Important notices for handling the system board: When handling the system board, bear the following in mind. v The system board has an acceler ometer , which can be br oken by applying several thousands of G-forces. Note: Dropping a system boar d from a height of as little as 6 inches so that it falls flat on a hard bench …
-
Lenovo SL510 — page 127
T able 30. Location of major sensitive components on the system board Following components soldered on the top side of the system boar d are extremely sensitive. When you service the system boar d, avoid any kind of rough handling. a GMCH (Integrated video chip) b CPU c ICH (I/O Controller Hub) d V ideo chip (only for discre …
-
Lenovo SL510 — page 128
T able 30. Location of major sensitive components on the system board (continued) For ThinkPad SL410 and L410 discrete models: c d a b For ThinkPad SL510 and L510 integrated models: a b c For ThinkPad SL510 and L510 discrete models: c d a b 120 ThinkPad SL410, L410, SL510, and L510 Hardwar e Maintenance Manual …
-
Lenovo SL510 — page 129
T able 31. Removal steps of system board assembly For ThinkPad SL510 and L510: 1 1 1 1 Step Screw (quantity) Color T orque 1 M2 × 5 mm, wafer-head, nylon-coated (4) Black 0.167 Nm (1.7 kgfcm) For ThinkPad SL410 and L410: 1 1 Step Screw (quantity) Color T orque 1 M2 × 5 mm, wafer-head, nylon-coated (2) Black 0.167 Nm (1.7 kgfcm) Removi …
-
Lenovo SL510 — page 130
T able 31. Removal steps of system board assembly (continued) For ThinkPad SL510 and L510: 2 2 3 For ThinkPad SL410 and L410: 2 2 3 When installing: Make sure that the connectors ar e attached firmly to the system board. 122 ThinkPad SL410, L410, SL510, and L510 Hardwar e Maintenance Manual …
-
Lenovo SL510 — page 131
1210 USB connector board and USB cable assembly For access, remove these FRUs in or der: v “1010 Battery pack” on page 80 v “1040 Thermal cover” on page 84 v “1050 Hard disk drive (HDD) assembly” on page 85 v “1 100 W ir eless W AN slot cover and PCI Express Mini Card for wir eless W AN” on page 95 v “1 1 10 Palm r est assembly wi …
-
Lenovo SL510 — page 132
T able 32. Removal steps of USB connector board and USB cable assembly (continued) Cable routing: Route the USB cable assembly as shown in these figures. For ThinkPad SL510 and L510: For ThinkPad SL410 and L410: 124 ThinkPad SL410, L410, SL510, and L510 Hardwar e Maintenance Manual …
-
Lenovo SL510 — page 133
1220 DC-in cable and base cover For access, remove these FRUs in or der: v “1010 Battery pack” on page 80 v “1020 ExpressCar d blank bezel and Media Card blank bezel” on page 81 v “1030 Optical drive or travel cover” on page 83 v “1040 Thermal cover” on page 84 v “1050 Hard disk drive (HDD) assembly” on page 85 v “1060 DIMM” …
-
Lenovo SL510 — page 134
T able 33. Removal steps of DC-in cable and base cover (continued) For ThinkPad SL410 and L410: 3 1 2 Step Screw (quantity) Color T orque 1 M2 × 5 mm, wafer-head, nylon-coated (1) Black 0.167 Nm (1.7 kgfcm) 126 ThinkPad SL410, L410, SL510, and L510 Hardwar e Maintenance Manual …
-
Lenovo SL510 — page 135
T able 33. Removal steps of DC-in cable and base cover (continued) Cable routing: Route the cable as shown in these figures. For ThinkPad SL510 and L510: For ThinkPad SL410 and L410: Removing and replacing a FRU 127 …
-
Lenovo SL510 — page 136
Note: Applying labels to the base cover The new base cover FRU is shipped with a kit containing labels of several kinds. When you replace the base cover , you need to apply the following labels: 4 Battery word label 6 Homologation label Following labels need to be peeled off fr om the old base cover , and need to be put on the new base …
-
Lenovo SL510 — page 137
(continued) For ThinkPad SL410 and L410: 2 3 5 6 7 8 9 10 12 11 4 1 Removing and replacing a FRU 129 …
-
Lenovo SL510 — page 138
2010 LCD front bezel For access, remove these FRUs in or der: v “1010 Battery pack” on page 80 v “1 100 W ir eless W AN slot cover and PCI Express Mini Card for wir eless W AN” on page 95 v “1 1 10 Palm r est assembly with cables” on page 97 v “1 120 PCI Express Mini Car d for wireless LAN” on page 100 v “1 160 Keyboard” on page …
-
Lenovo SL510 — page 139
2020 Speaker assembly For access, remove these FRUs in or der: v “1010 Battery pack” on page 80 v “1 100 W ir eless W AN slot cover and PCI Express Mini Card for wir eless W AN” on page 95 v “1 1 10 Palm r est assembly with cables” on page 97 v “1 120 PCI Express Mini Car d for wireless LAN” on page 100 v “1 160 Keyboard” on pag …
-
Lenovo SL510 — page 140
2030 Integrated camera For access, remove these FRUs, in or der: v “1010 Battery pack” on page 80 v “1 100 W ir eless W AN slot cover and PCI Express Mini Card for wir eless W AN” on page 95 v “1 1 10 Palm r est assembly with cables” on page 97 v “1 120 PCI Express Mini Car d for wireless LAN” on page 100 v “1 160 Keyboard” on p …
-
Lenovo SL510 — page 141
2040 Antenna assembly For access, remove these FRUs in or der: v “1010 Battery pack” on page 80 v “1 100 W ir eless W AN slot cover and PCI Express Mini Card for wir eless W AN” on page 95 v “1 1 10 Palm r est assembly with cables” on page 97 v “1 120 PCI Express Mini Car d for wireless LAN” on page 100 v “1 160 Keyboard” on pag …
-
Lenovo SL510 — page 142
T able 37. Removal steps of antenna assembly (continued) For ThinkPad SL410 and L410: 1 1 1 1 1 1 When installing: Route the cables as shown in this figure. When you r oute the cables, make sure that they ar e not subjected to any tension. T ension could cause the cables to be damaged by the cable guides, or a wire to be br oken. 2 2 2 2 2 134 Thin …
-
Lenovo SL510 — page 143
2050 Hinges, LCD panel, LCD cable, and LCD rear cover assembly For access, remove these FRUs, in or der: v “1010 Battery pack” on page 80 v “1 100 W ir eless W AN slot cover and PCI Express Mini Card for wir eless W AN” on page 95 v “1 1 10 Palm r est assembly with cables” on page 97 v “1 120 PCI Express Mini Car d for wireless LAN” …
-
Lenovo SL510 — page 144
T able 38. Removal steps of hinges, LCD panel, LCD cable, and LCD rear cover assembly (continued) For ThinkPad SL410 and L410: 1 1 Step Screw (quantity) Color T orque 1 M2 × 5 mm, wafer-head, nylon-coated (2) Black 0.167 Nm (1.7 kgfcm) 2 136 ThinkPad SL410, L410, SL510, and L510 Hardwar e Maintenance Manual …
-
Lenovo SL510 — page 145
T able 38. Removal steps of hinges, LCD panel, LCD cable, and LCD rear cover assembly (continued) 3 3 4 3 3 4 Step Screw (quantity) Color T orque 3 M2 × 3 mm, small-head, nylon-coated (4) Black 0.167 Nm (1.7 kgfcm) 7 5 6 When installing: Make sure that the LCD connector is attached firmly . Removing and replacing a FRU 137 …
-
Lenovo SL510 — page 146
138 ThinkPad SL410, L410, SL510, and L510 Hardwar e Maintenance Manual …
-
Lenovo SL510 — page 147
Locations This chapter presents the location of ThinkPad SL410, L410, SL510, and L510 features and har dware. Front view 1 Integrated camera 2 Built-in microphone 3 Built-in stereo speakers 4 Power switch 5 AC power connector 6 ThinkV antage button 7 System status indicators Note: For the description of eac …
-
Lenovo SL510 — page 148
Rear view 1 Stereo headphone jack 2 Microphone jack 3 HDMI port 4 RJ-45 (Ethernet) connector 5 eSA T A/USB combo connector 6 External monitor connector 7 Security keyhole 8 USB connector 2 3 4 1 7 8 5 6 Bottom view 1 Battery pack 2 Battery pack latch 3 Thermal slot (DIMM, hard disk d …
-
Lenovo SL510 — page 149
Parts list This chapter contains following lists of the service parts. v “Overall” on page 142 v “LCD FRUs” on page 158 v “Keyboard” on page 164 v “Miscellaneous parts” on page 165 v “AC adapters” on page 166 v “Power cords” on page 167 v “Recovery discs” on page 168 v “Common service tools” on page 176 Notes: v Each …
-
Lenovo SL510 — page 150
Overall 1 2 3 4 5 8 7 6 10 9 11 12 28 27 26 23 24 25 22 21 20 19 18 17 16 15 13 14 142 ThinkPad SL410, L410, SL510, and L510 Hardwar e Maintenance Manual …
-
Lenovo SL510 — page 151
T able 39. Parts list—Overall No. FRU (Overall) FRU no. CRU ID 1 LCD unit (see “LCD FRUs” on page 158.) 2 Keyboard bezel assembly 14W v 2842-all v 2874-all v 2931-all 60Y4138 N 2 Keyboard bezel assembly 15W v 2847-all v 2873-all v 2875-all 60Y4140 N 3 T op shielding assembly 14W v 2842-all v 2874-all v 2931-all 60Y4359 N 3 T op shielding asse …
-
Lenovo SL510 — page 152
T able 39. Parts list—Overall (continued) No. FRU (Overall) FRU no. CRU ID 4 4-GB DDR3-1066 SDRAM SO-DIMM (PC2-8500) card v 2842-CTO, 3Wx, 3Xx, 3Yx, 3Zx, 7Kx, 7Lx, 7Mx, 7Nx v 2847-CTO, 23x, 36x, 5Ax, 5Bx v 2873-CTO v 2874-CTO v 2875-CTO v 2931-CTO 55Y3714 ** 5 Media Card Reader boar d assembly 60Y5644 N 6 Media Card Reader slot blank bezel 60Y434 …
-
Lenovo SL510 — page 153
T able 39. Parts list—Overall (continued) No. FRU (Overall) FRU no. CRU ID 10 Battery pack, 6 cell Li-ion (2.4 Ah) v 2842-CTO, 22x, 24x, 33x, 34x, 35x, 36x, 37x, 38x, 39x, 3Ax, 3Bx, 3Dx, 3Ex, 3Fx, 3Gx, 3Hx, 3Jx, 3Kx, 3Lx, 3Mx, 3Nx, 3Px, 3Qx, 3Rx, 3Sx, 3Tx, 3Ux, 3Vx, 3Wx, 3Xx, 3Yx, 3Zx, 42x, 43x, 44x, 45x, 46x, 47x, 48x, 49x, 4Ax, 4Bx, 4Cx, 4Dx, 4 …
-
Lenovo SL510 — page 154
T able 39. Parts list—Overall (continued) No. FRU (Overall) FRU no. CRU ID 10 Battery pack, 6 cell Li-ion (2.4 Ah) v 2842-CTO, 22x, 24x, 33x, 34x, 35x, 36x, 37x, 38x, 39x, 3Ax, 3Bx, 3Dx, 3Ex, 3Fx, 3Gx, 3Hx, 3Jx, 3Kx, 3Lx, 3Mx, 3Nx, 3Px, 3Qx, 3Rx, 3Sx, 3Tx, 3Ux, 3Vx, 3Wx, 3Xx, 3Yx, 3Zx, 42x, 43x, 44x, 45x, 46x, 47x, 48x, 49x, 4Ax, 4Bx, 4Cx, 4Dx, 4 …
-
Lenovo SL510 — page 155
T able 39. Parts list—Overall (continued) No. FRU (Overall) FRU no. CRU ID 10 Battery pack, 6 cell Li-ion (2.6 Ah) v 2842-CTO v 2847-CTO v 2873-CTO v 2874-CTO v 2875-CTO v 2931-CTO 42T4737 * 10 Battery pack, 9 cell Li-ion (10.4 Wh) v 2842-CTO v 2847-CTO, 23x v 2873-CTO v 2874-CTO v 2875-CTO v 2931-CTO, 22x 42T4710 * 10 Battery pack, 9 cell Li-ion …
-
Lenovo SL510 — page 156
T able 39. Parts list—Overall (continued) No. FRU (Overall) FRU no. CRU ID 12 DVD-RAM/R W drive v 2842-all v 2847-CTO, 22x, 24x, 25x, 26x, 27x, 28x, 29x, 2Ax, 2Bx, 2Cx, 2Dx, 2Ex, 2Fx, 2Gx, 2Hx, 2Jx, 2Kx, 2Lx, 2Mx, 2Nx, 2Px, 2Qx, 2Rx, 2Sx, 2Tx, 2Ux, 2Vx, 33x, 34x, 35x, 36x, 37x, 38x, 39x, 3Dx, 3Ex, 3Kx, 3Lx, 3Mx, 3Nx, 3Px, 3Qx, 3Tx, 3Ux, 42x, 43x, …
-
Lenovo SL510 — page 157
T able 39. Parts list—Overall (continued) No. FRU (Overall) FRU no. CRU ID 15 Thermal cover with screw 15W v 2847-all v 2873-all v 2875-all 60Y4189 * 16 SA T A hard disk drive, 160 GB, 5,400 rpm v 2842-CTO, 23x, 3Cx, 4Sx, 53x, 54x, 57x, 5Ex v 2847-CTO, 24x, 28x, 29x, 2Ax, 33x, 34x, 3Kx, 3Lx, 5Ex, 5Fx, 5Gx, 5Hx, 5Mx, 5Nx, 5Px, 5Qx, 5Ux, 5Vx v 2873 …
-
Lenovo SL510 — page 158
T able 39. Parts list—Overall (continued) No. FRU (Overall) FRU no. CRU ID 16 SA T A hard disk drive, 250 GB, 5,400 rpm v 2842-CTO, 38x, 39x, 3Jx, 3Nx, 3Qx, 3Zx, 46x, 4Ax, 4Bx, 4Cx, 4Dx, 4Hx, 4Nx, 4Px, 4Qx, 4Rx, 4Vx, 4Wx, 5Cx, 5Fx, 5Hx, 65x, 66x, 6Bx, 6Cx, 6Hx, 6Nx, 6Px, 6Ux, 6Vx, 72x, 77x, 7Ax, 7Cx, 7Dx, 7Fx, 7Mx v 2847-CTO, 2Dx, 2Ex, 2Fx, 2Gx, …
-
Lenovo SL510 — page 159
T able 39. Parts list—Overall (continued) No. FRU (Overall) FRU no. CRU ID 16 SA T A hard disk drive, 320 GB, 5,400 rpm v 2842-CTO, 22x, 24x, 33x, 34x, 35x, 36x, 37x, 3Ax, 3Bx, 3Dx, 3Ex, 3Gx, 3Hx, 3Kx, 3Lx, 3Mx, 3Px, 3Rx, 3Tx, 3Ux, 3Vx, 3Wx, 3Xx, 42x, 43x, 44x, 45x, 47x, 48x, 4Fx, 4Jx, 4Kx, 4Lx, 4Tx, 4Ux, 4Xx, 4Yx, 4Zx, 52x, 55x, 56x, 58x, 59x, 5 …
-
Lenovo SL510 — page 160
T able 39. Parts list—Overall (continued) No. FRU (Overall) FRU no. CRU ID 17 Qualcomm ® UNDP1 — W ireless W AN car d v 2842-CTO v 2847-CTO v 2873-CTO v 2874-CTO v 2875-CTO v 2931-CTO 42T0961 ** 17 Ericsson F3507g USA — W ireless W AN card v 2842-CTO, 22x, 4Ax, 4Dx v 2847-CTO v 2873-CTO v 2874-CTO v 2875-CTO v 2931-CTO 43Y6537 ** 17 Ericsson F35 …
-
Lenovo SL510 — page 161
T able 39. Parts list—Overall (continued) No. FRU (Overall) FRU no. CRU ID 21 ThinkPad 1 1b/g/n W ireless LAN Mini-PCI Expr ess Adapter II v 2842-CTO, 22x, 23x, 3Ax, 44x, 45x, 46x, 48x, 49x, 4Ax, 4Bx, 4Cx, 4Fx, 4Gx, 4Nx, 4Px, 4Qx, 4Rx, 4Sx, 4Tx, 4Ux, 53x, 54x, 55x, 56x, 57x, 62x, 63x, 66x, 67x, 68x, 69x, 6Ax, 6Bx, 6Cx, 6Dx, 6Ex, 6Fx, 6Gx, 6Hx, 6J …
-
Lenovo SL510 — page 162
T able 39. Parts list—Overall (continued) No. FRU (Overall) FRU no. CRU ID 22 CPU assembly , Intel Celer on processor T3100 (1.9 GHz) R-0 v 2842-CTO v 2847-CTO v 2873-CTO v 2874-CTO, 34x, 36x, 39x, 3Bx, 3Ex, 3Kx, 3Mx, 3Px, 49x, 4Cx, 4Hx, 4Kx, 4Mx, 4Px v 2875-CTO, 36x, 3Nx, 46x, 4Dx, 4Ex, 4Mx, 4Px v 2931-CTO 45M2815 N 22 CPU assembly , Intel Celer …
-
Lenovo SL510 — page 163
T able 39. Parts list—Overall (continued) No. FRU (Overall) FRU no. CRU ID 22 CPU assembly , Intel Cor e 2 Duo mobile processor T6670 (2.2 GHz) E-0 v 2842-CTO, 22x, 24x, 33x, 34x, 35x, 36x, 37x, 3Dx, 3Hx, 3Jx, 3Kx, 3Lx, 3Vx, 3Wx, 3Yx, 43x, 46x, 47x, 48x, 4Gx, 4Jx, 4Kx, 4Nx, 4Qx, 53x, 54x, 5Cx, 5Dx, 5Gx, 5Nx, 5Px, 5Qx, 5Rx, 5Sx, 5Tx, 5Yx, 5Zx, 65x …
-
Lenovo SL510 — page 164
T able 39. Parts list—Overall (continued) No. FRU (Overall) FRU no. CRU ID 24 System board assembly , PM45 (B3/GigabitEthernet) AMD 256 MB 14W v 2842-CTO, 3Ax, 3Bx, 3Hx, 3Xx, 3Yx, 3Zx, 42x, 43x, 44x, 46x, 4Dx, 4Ex, 4Fx, 4Gx, 4Hx, 4Jx, 4Kx, 4Lx, 4Mx, 4Nx, 4Px, 4Zx, 52x, 58x, 59x, 5Ax, 5Bx, 5Jx, 5Kx, 5Mx, 5Nx, 5Px, 5Qx, 5Rx, 62x, 65x, 6Mx, 6Nx, 6Px …
-
Lenovo SL510 — page 165
T able 39. Parts list—Overall (continued) No. FRU (Overall) FRU no. CRU ID 26 Palm rest assembly without fingerprint r eader 15W v 2847-CTO, 23x, 2Fx, 2Jx, 2Mx, 2Px, 2Qx, 44x, 47x, 49x, 4Bx, 4Lx, 4Mx, 4Nx, 4Px, 4Qx, 4Rx, 4Sx, 4Wx, 4Xx, 57x, 58x, 5Bx, 5Ex v 2873-CTO v 2875-CTO, 22x, 32x, 33x, 35x, 39x, 3Ax, 3Mx, 3Nx, 3Px, 3Wx, 3Xx, 42x, 43x, 44x, …
-
Lenovo SL510 — page 166
LCD FRUs In ThinkPad SL410, L410, SL510, and L510, there ar e following types of LCDs. v 14.0-inch HD LED-backlight LCD (T able 40 on page 159) v 15.6-inch HD LED-backlight LCD (T able 41 on page 160) v 15.6-inch HD+ LED-backlight LCD (T able 42 on page 162) 1 3 4 5 6 7 8 9 2 158 ThinkPad SL410, L410, SL510, and L510 Hardwar e Maintenance Manual …
-
Lenovo SL510 — page 167
T able 40. Parts list—14.0-inch HD LCD No. FRU (14.0-inch HD LCD) FRU no. CRU ID 1 LCD front bezel 14W v 2842-all v 2874-all v 2931-all 60Y4351 N 2 Integrated camera with microphone (0.3M) v 2842-CTO, 22x, 3Ex, 3Fx, 3Gx, 4Qx, 5Jx, 5Kx, 5Lx, 5Mx, 76x, 77x v 2874-CTO, 37x, 39x v 2931-CTO, 23x 60Y3325 N 2 Integrated camera with microphone (2.0M) v 2 …
-
Lenovo SL510 — page 168
T able 40. Parts list—14.0-inch HD LCD (continued) No. FRU (14.0-inch HD LCD) FRU no. CRU ID 6 Speaker assembly 60Y3333 N 7 LCD cable, HD, T eflon 14W v 2842-CTO v 2874-CTO v 2931-CTO 45M2855 N 7 LCD cable, HD, Coaxial 14W v 2842-CTO v 2874-CTO v 2931-CTO 45M2856 N 8 LCD module, 14.0-inch HD glair v 2842-all v 2874-all 42T0670 N 8 LCD module, 14. …
-
Lenovo SL510 — page 169
T able 41. Parts list—15.6-inch HD LCD (continued) No. FRU (15.6-inch HD LCD) FRU no. CRU ID 2 Microphone v 2847-CTO, 24x, 33x, 34x, 39x, 3Dx, 3Ex, 3Kx, 3Lx, 56x, 5Ux, 5Vx v 2873-CTO v 2875-CTO, 22x, 32x, 3Ax, 3Wx, 3Xx, 42x, 43x, 44x, 46x, 47x, 49x, 4Ax, 4Cx, 4Dx, 4Ex, 4Fx, 4Gx, 4Kx, 4Mx, 4Nx, 4Px, 4Qx, 4Rx 60Y3329 N 3 W ireless W AN antenna set …
-
Lenovo SL510 — page 170
T able 41. Parts list—15.6-inch HD LCD (continued) No. FRU (15.6-inch HD LCD) FRU no. CRU ID 8 LCD module, 15.6-inch HD anti-glair v 2847-CTO, 4Tx, 4Ux, 4Vx, 4Yx, 4Zx, 55x, 56x, 57x, 58x, 59x, 5Dx, 5Ex, 5Fx, 5Gx, 5Hx, 5Jx, 5Kx, 5Lx, 5Mx, 5Nx, 5Px, 5Qx, 5Rx, 5Sx, 5Tx, 5Ux, 5Vx, 5Wx, 5Xx, 5Yx, 5Zx, 62x, 63x, 64x, 65x, 66x, 67x v 2873-all 42T0650 N …
-
Lenovo SL510 — page 171
T able 42. Parts list—15.6-inch HD+ LCD (continued) No. FRU (15.6-inch HD+ LCD) FRU no. CRU ID 5 LCD cover kit Paint 15W (with logo) v 2847-all v 2873-all v 2875-all 60Y4346 N 6 Speaker assembly 60Y3333 N 7 LCD cable, HD+, T eflon 15W v 2847-CTO v 2873-CTO v 2875-CTO 45M2859 N 7 LCD cable, HD+, Coaxial 15W v 2847-CTO v 2873-CTO v 2875-CTO 45M2860 …
-
Lenovo SL510 — page 172
Keyboard T able 43. Parts list—Keyboard Language FRU no. CRU ID Arabic 45N2288 45N2358 45N2428 N Belgian 45N2289 45N2359 45N2429 Brazilian Portuguese 45N2287 45N2357 45N2427 Bulgarian 45N2290 45N2360 45N2430 Canadian French (058) 45N2285 45N2355 45N2425 Canadian French (Acnor) 45N2284 45N2354 45N2424 Czech 45N2291 45N2361 45N2431 Danish 45N2292 4 …
-
Lenovo SL510 — page 173
Miscellaneous parts T able 44. Parts list—Miscellaneous parts FRU FRU no. CRU ID Screw kit (including nylon-coated scr ews): v M2 × 3 mm (silver), small head (35) v M2 × 4 mm (black), bind head (15) v M2 × 4 mm (black), small head (4) v M2 × 6 mm (black), bind head (25) v M2 × 3 mm tamper proof (4) v Shoulder screw M2 (4) v Hex stud (4) v Se …
-
Lenovo SL510 — page 174
AC adapters T able 45. Parts list—2-pin AC adapters FRU FRU no. CRU ID 2-pin (65 W , 20 V) adapter (models CTO, xxE, xxF , xxJ, xxL, xxP , xxS, xxU, xxY) 42T5282 * 2-pin (65 W , 20 V) adapter (models CTO, xxE, xxF , xxJ, xxL, xxP , xxS, xxU, xxY) 42T4423 2-pin (65 W , 20 V) adapter (models CTO, xxE, xxF , xxJ, xxL, xxP , xxS, xxU, xxY) 42T4419 2- …
-
Lenovo SL510 — page 175
Power cords A ThinkPad power cord for a specific country or region is usually available only in that country or region: T able 47. Parts list—2-pin power cords Country or region FRU no. CRU ID Argentina v models -CTO, xxY 42T5020 42T5105 * Brazil v models -CTO, xxP 42T5180 42T5183 Canada, U.S. v models -CTO, xxF , xxL, xxS, xxU 42T5008 42T5093 Ja …
-
Lenovo SL510 — page 176
Recovery discs Windows XP Professional (32 bit) DVDs W indows XP Pr ofessional (32 bit) is preinstalled as the operating system in the following models: v 2842-CTO, 33x, 35x, 36x, 3Dx, 3Kx, 3Mx, 3Nx, 3Qx, 3Rx, 3Sx, 3Tx, 4Rx, 55x, 56x, 59x, 5Ax, 5Dx, 5Ex, 5Fx, 5Gx, 5Hx, 5Sx, 5Tx, 5Ux, 5Vx, 6Lx, 75x, 77x, 78x, 79x, 7Dx, 7Ex, 7Fx, 7Gx, 7Hx, 7Jx, 7Kx, …
-
Lenovo SL510 — page 177
Windows V ista Home Basic (32 bit) DVDs W indows V ista Home Basic (32 bit) is pr einstalled as the operating system in the following models: v 2842-CTO, 24x, 39x, 3Ax, 3Cx, 47x, 48x, 49x, 4Ax, 4Bx, 4Cx, 4Dx, 4Ex, 4Fx, 4Gx, 4Hx, 4Jx, 4Kx, 4Lx, 4Mx, 4Nx, 4Px, 4Wx v 2847-CTO, 24x, 2Dx, 2Ex, 2Fx, 2Mx, 2Nx, 2Px, 2Qx v 2873-CTO v 2874-CTO, 33x, 3Lx, 3Nx …
-
Lenovo SL510 — page 178
Windows V ista Home Premium (64 bit) DVDs W indows V ista Home Pr emium (64 bit) is preinstalled as the operating system in the following models: v 2842-CTO v 2847-CTO v 2873-CTO v 2874-CTO v 2875-CTO v 2931-CTO T able 52. Parts list—Windows Vista Home Premium (64 bit) recovery DVDs Language P/N CRU ID English 58Y3196 * Spanish 58Y3195 Windows V …
-
Lenovo SL510 — page 179
Windows 7 Home Basic (32 bit) DVDs W indows 7 Home Basic (32 bit) is preinstalled as the operating system in the following models: v 2842-CTO, 4Sx, 4Tx, 53x, 5Wx, 5Yx, 64x, 65x, 66x, 67x, 68x, 69x, 6Ax, 6Bx, 6Cx, 6Dx, 6Ex, 6Fx, 6Gx, 6Hx, 6Jx, 6Kx, 6Mx, 6Nx, 6Px, 6Qx, 6Rx, 6Sx, 6Tx, 6Ux, 6Vx, 6Wx, 6Xx, 6Yx, 6Zx, 72x, 73x, 74x v 2847-CTO, 2Vx, 33x, 3 …
-
Lenovo SL510 — page 180
Windows 7 Home Premium (32 bit) DVDs W indows 7 Home Premium (32 bit) is pr einstalled as the operating system in the following models: v 2842-CTO, 4Ux, 4Yx, 4Zx, 52x, 54x, 5Jx, 5Kx, 5Nx, 5Qx v 2847-CTO, 34x, 35x v 2873-CTO v 2874-CTO, 49x, 4Ax, 4Fx v 2875-CTO, 4Ax v 2931-CTO T able 55. Parts list—Windows 7 Home Premium (32 bit) recovery DVDs Lan …
-
Lenovo SL510 — page 181
Windows 7 Home Premium (64 bit) DVDs W indows 7 Home Premium (64 bit) is pr einstalled as the operating system in the following models: v 2842-CTO, 4Ux, 4Yx, 4Zx, 52x, 54x, 5Jx, 5Kx, 5Nx, 5Qx v 2847-CTO, 3Tx, 3Ux, 4Tx, 5Wx, 63x v 2873-CTO v 2874-CTO, 3Sx v 2875-CTO, 47x v 2931-CTO T able 56. Parts list—Windows 7 Home Premium (64 bit) recovery DVD …
-
Lenovo SL510 — page 182
Windows 7 Professional (32 bit) DVDs W indows 7 Professional (32 bit) is pr einstalled as the operating system in the following models: v 2842-CTO, 4Vx, 4Xx, 57x, 58x, 5Bx, 5Cx, 5Lx, 5Mx, 5Px, 5Rx, 5Xx, 5Zx, 62x, 63x, 76x, 7Ax, 7Bx, 7Cx, 7Lx, 7Mx v 2847-CTO, 36x, 37x, 3Dx, 3Kx, 3Px, 3Qx, 42x, 43x, 44x, 45x, 46x, 47x, 48x, 4Vx, 4Zx, 55x, 56x, 57x, 5 …
-
Lenovo SL510 — page 183
Windows 7 Professional (64 bit) DVDs W indows 7 Professional (64 bit) is pr einstalled as the operating system in the following models: v 2842-CTO v 2847-CTO, 62x v 2873-CTO v 2874-CTO v 2875-CTO v 2931-CTO T able 58. Parts list—Windows 7 Professional (64 bit) recovery DVDs Language P/N CRU ID Brazilian Portuguese 58Y3515 * Czech 58Y3518 Danish 5 …
-
Lenovo SL510 — page 184
Common service tools T able 59. Parts list—Common service tools T ool P/N Screwdriver kit 95F3598 1/4 ″ drive spinner handle 1650840 1/4 ″ Sq. to 1/4 ″ hex torx adapter 93F2838 TR7-TR-10 tamper resistant torx bits 00P6967 Removal tool antenna RF connector 08K7159 USB 2.0 CD-R W/DVD-ROM combo drive II 40Y8687 USB cable 40Y8704 USB floppy dis …
-
Lenovo SL510 — page 185
Notices Lenovo may not offer the pr oducts, services, or features discussed in this document in all countries. Consult your local Lenovo repr esentative for information on the products and services curr ently available in your area. Any refer ence to a Lenovo product, program, or service is not intended to state or imply that only that Lenovo produ …
-
Lenovo SL510 — page 186
vary significantly . Some measurements may have been made on development-level systems and there is no guarantee that these measur ements will be the same on generally available systems. Furthermore, some measur ements may have been estimated through extrapolation. Actual results may vary . Users of this document should verify the applicable data f …
-
Lenovo SL510 — page 187
…
-
Lenovo SL510 — page 188
Part Number: 60Y3635 (1P) P/N: 60Y3635 …
- Manuals
- Brands
- Lenovo Manuals
- Laptop
- ThinkPad SL510
Manuals and User Guides for Lenovo ThinkPad SL510. We have 46 Lenovo ThinkPad SL510 manuals available for free PDF download: Hardware Maintenance Manual, Manual De Déploiement, Implementierungshandbuch, Deployment Manual, Guida Alla Distribuzione, Guía De Despliegue, Troubleshooting Manual, User Manual, Service And Troubleshooting Manual, Brochure, Setup Manual, Guia De Configuração, Инструкции По Начальной Установке
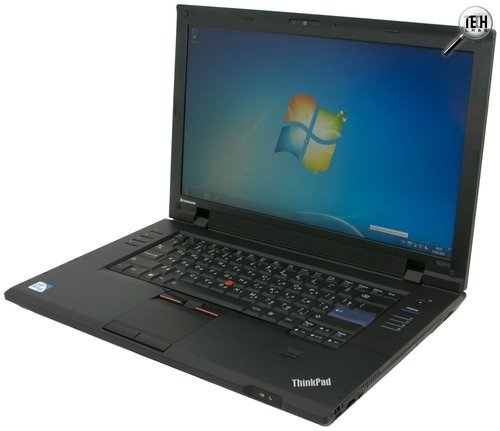
Lenovo ThinkPad SL510. Внешний вид
Для этого инженеры несколько упростили конструкцию, что никоим образом не отразилось на качественных характеристиках предлагаемого решения. Конечно, SL510 выглядит несколько скромнее на фоне самых прославленных ThinkPad’ов, однако перед нами все равно продуманная и заряженная бизнес-машина без лишних украшательств и глянца. Матрица обладает самым популярным размером 15.6 дюйма, при этом масса новинки не превышает 2.56 кг. Внутри находятся двухъядерный процессор Intel, память DDR3, емкий винчестер и продвинутая графика ATI Mobility Radeon HD 4570. К слову, такая начинка позволяет модели выступать не только в роли бизнес-ноутбука, но и стать прекрасной заменой домашнего ПК. Ведь, по сути, мы получаем возможности и производительность среднестатистического десктопа с дискретной графикой начального уровня. Что ж, давайте познакомимся с SL510 более детально, воспользовавшись нашей методикой.
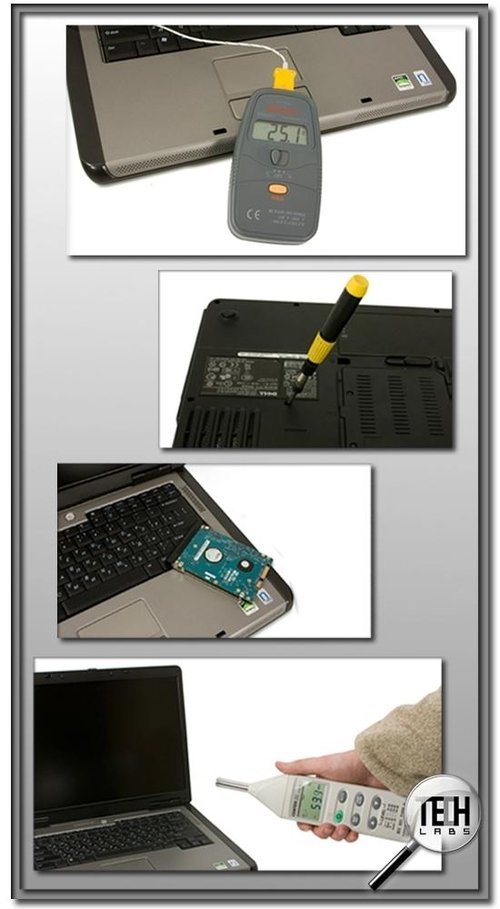
Lenovo ThinkPad SL510. тестирование

Lenovo ThinkPad SL510. Упаковка
Устройство продается в картонной коробке, изготовленной из переработанной бумаги, внутри которой можно обнаружить:
- ноутбук;
- батарею для него;
- внешний адаптер питания;
- набор инструкций.
Отрадно, что вся документация представлена на русском языке.
Lenovo ThinkPad SL510. Инструкции
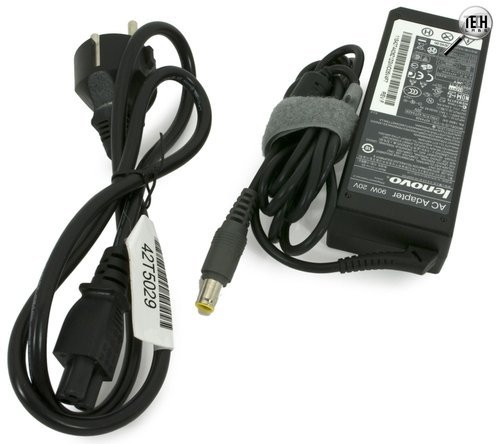
Lenovo ThinkPad SL510. Блок питания
Технические характеристики
Все основные ТТХ сведены в таблицу, как и всегда, они получены при помощи специализированных утилит. Стандартно данные ноутбуки поставляются с предустановленной ОС Windows 7, в наше же распоряжение попал экземпляр без операционной системы, поэтому ее пришлось установить самостоятельно.
|
Формфактор |
Двухшпиндельный ноутбук |
|
Тип |
Бизнес-ноутбук |
|
ОС |
Не установлена |
|
Центральный процессор |
Intel Pentium T4500 (два ядра с частотой 2.3 ГГц, кэш первого уровня 2х32 + 2х32 KB, кэш второго уровня 1 МB) |
|
Набор системной логики |
Intel GM45 |
|
Оперативная память |
2 GB памяти DDR3-1066, установлена одной планкой Micron Technology 16JSF25664HZ-1G1F1 |
|
Видеоадаптер |
ATI Mobility Radeon HD 4570 256 MB |
|
Экран |
Диагональ – 15.6″ Формат — 16:9 Разрешение 1366×768 |
|
Жесткий диск |
Жесткий диск Western Digital WD3200BEVS-08VAT2 емкостью 320 GB со скоростью вращения шпинделя 5400 об/мин, 8 MB буфером и интерфейсом SATA-II |
|
Коммуникации |
Адаптер локальной сети: Realtek RLT8168D/8111D PCI-E Gigabit Ethernet Adapter |
|
Беспроводные коммуникации |
Адаптер беспроводной сети: Realtek RLT8191SE Wireless LAN 802.11n PCI-E Network Adapter |
|
Порты ввода-вывода |
3 x USB 2.0 1 x eSATA/USB 2.0 1 x VGA D-Sub (выход на внешний монитор) 1 x RJ-45 (сеть) 1 x HDMI 1 x выход для наушников 1 х вход для микрофона 1 х картридер 1 x ExpressCard/34 |
|
Аудио |
Realtek ALC269 @ Intel 82801IB ICH9 – HAD Controller |
|
Мультимедиа |
Встроенная веб-камера Встроенный микрофон |
|
Устройства ввода |
Клавиатура Сенсорная панель Трэкпоинт |
|
Аккумулятор |
Шестиэлементный, емкостью 4400 мАч, 48 Втч Li-ion |
|
Габариты |
380x247x36-32 мм |
|
Вес |
2.56 кг |
Начинка рассматриваемой модели достаточно серьезная. В качестве центрального чипа используется Intel Pentium T4500, два ядра которого работают на частоте 2.3 ГГц. Кэш второго уровня составляет 1 МВ. Процессор сделан по 45-нм техпроцессу, а максимальный TDP составляет 35 Вт.
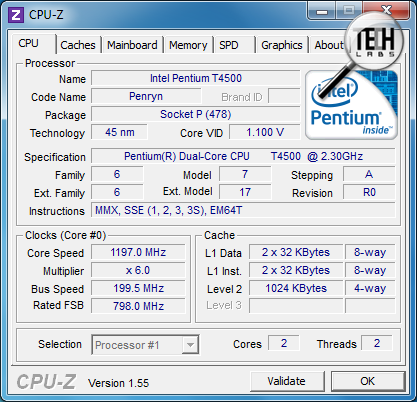
Lenovo ThinkPad SL510. платформа
Набор системной логики представлен Intel GM45, поддерживающим аппаратное декодирование видео в формате Blu-ray, двухканальную память DDR3 и DDR2, графический интерфейс PCI Express x16, интерфейсы PCI Express x1, а также интерфейс Serial ATA и высокоскоростной интерфейс USB 2.0. Кроме этого, данный набор микросхем может похвастаться интегрированным видео Intel Graphics Media Accelerator 4500MHD, обеспечивающим вполне приемлемую для работы производительность.
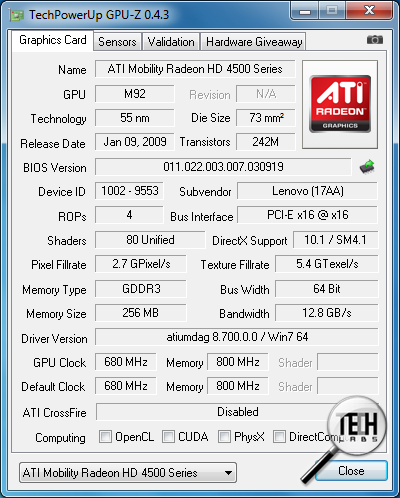
Lenovo ThinkPad SL510. платформа
Однако в нашем случае все же установлено видео ATI Mobility Radeon HD 4570, представляющее собой разогнанную версию Mobility Radeon 4530. Карточка поддерживает все современные технологии и оснащена памятью GDDR3. Технология Avivo HD позволяет решать все видеозадачи при помощи графического чипа, разгрузив при этом центральный процессор. Кроме того, присутствует совместимость с интерактивной технологией BD-Live.
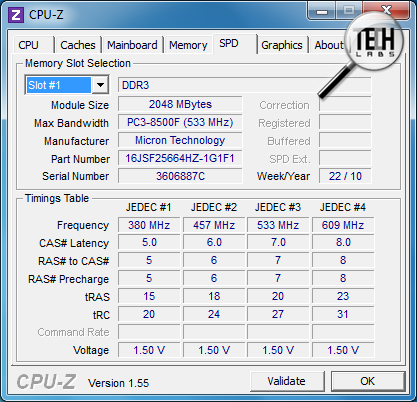
Lenovo ThinkPad SL510. платформа
Память установлена одной планкой DDR3-1066 Micron Technology 16JSF25664HZ-1G1F1 объемом 2 GB. Максимальный же объем ОЗУ может составлять 8 GB.
Сетевые возможности представлены наличием стандартной гигабитной карты Realtek RLT8168D/8111D, беспроводным адаптером Realtek RLT8191SE и, конечно же, Bluetooth.
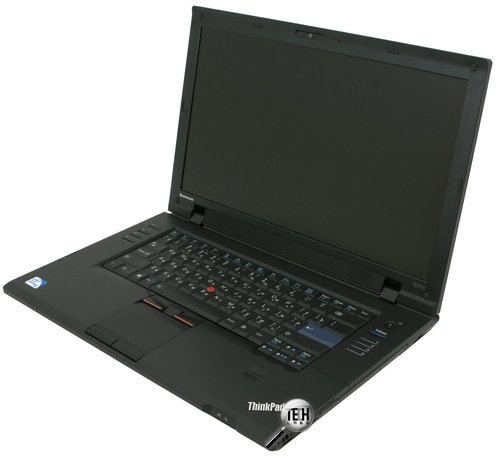
Lenovo ThinkPad SL510. Внешний вид
Внешний вид модели SL510 сделан в консервативных традициях компании Lenovo. Никакого глянца и шика. Зато традиционно использованы качественные материалы и достаточно продуманный подход.
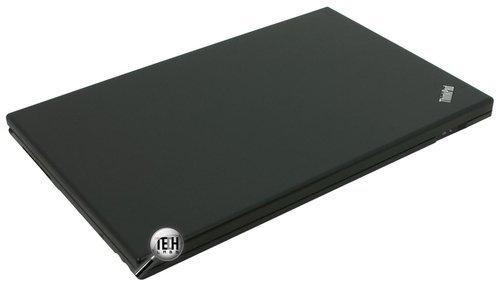
Lenovo ThinkPad SL510. Вид сверху
Верхняя крышка максимально простая, лишь в одном из ее углов красуется логотип линейки ThinkPad. Рамка вокруг матрицы снабжена многочисленными резиновыми демпферами, которые пружинят при закрытии. Кстати, для ее фиксации уже традиционно не используется никаких защелок. Чтобы открытие было более удобным, в правой части расположена выемка для пальца. Стоит отметить, что крышка хотя и обладает хорошей жесткостью, но в момент открытия она все же немного перекашивается.
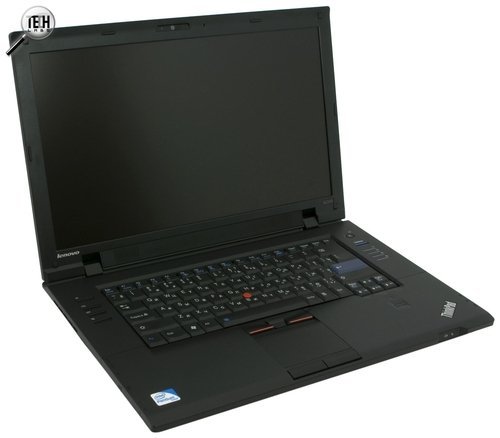
Lenovo ThinkPad SL510. Внешний вид
Основное рабочее пространство реализовано весьма нетипично. Во-первых, производитель отказался от полноразмерной клавиатуры, хотя место для нее есть. Во-вторых, индикаторы и кнопки сделаны очень крупными. Снизу находятся стандартные заглушки для изменения конфигурации и извлечения основных устройств.
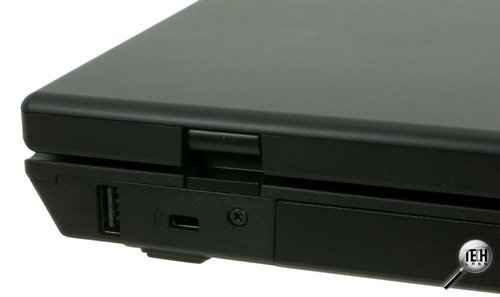
Lenovo ThinkPad SL510. Вид сзади
В целом качество предложенного решения нам понравилось. Конечно, конструкция немного упрощена, но все равно корпус достаточно жесткий и ударостойкий. Маркость находится на низком уровне, следы от пальцев остаются, но последствия прикосновений минимальны.
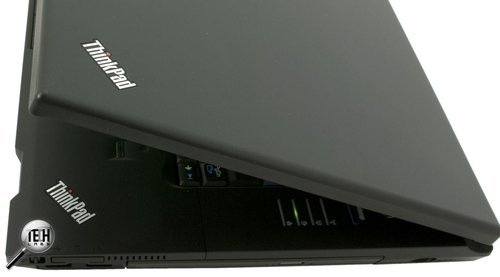
Lenovo ThinkPad SL510. Вид сбоку
Устройства ввода и индикаторы
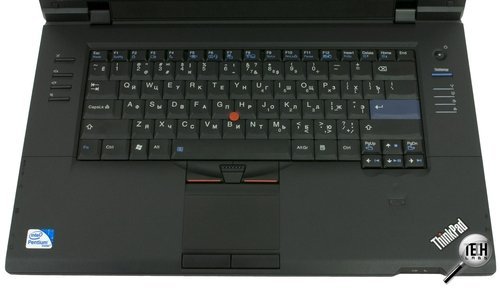
Lenovo ThinkPad SL510. Клавиатура
Итак, клавиатура. Как мы уже успели отметить, она не полноразмерная, хотя дополнительные цифровые клавиши для многих бизнес-пользователей были бы нелишними. Здесь лишь остается отметить, что такая клавиатура доступна как опция. Сами же кнопки обладают большой плоскостью и нажимаются четко. Печатать вполне удобно, сперва напрягает лишь тот факт, что клавиши слишком удалены от переднего края нижней панели. Раскладка для Lenovo вполне типичная. Ctrl и Fn поменяли местами. Shift, Enter и Space большие, кроме того, кнопка ввода выделена цветом. Стоит также отметить, что, по утверждениям производителя, установленная клавиатура влагозащищенная. Конечно, проверять мы не стали, но и преувеличивать не в традициях Lenovo. Снизу даже расположены отверстия для слива жидкости!
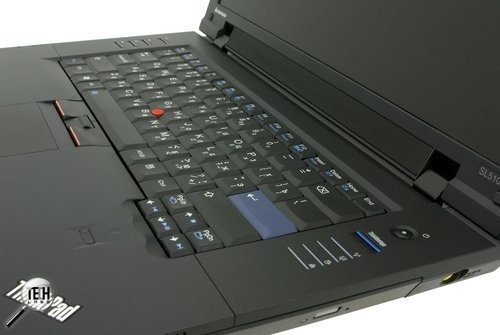
Lenovo ThinkPad SL510. Клавиатура

Lenovo ThinkPad SL510. Клавиатура
Тачпад обладает большой площадью и удобной шероховатой поверхностью. Кнопки нажимаются легко и характеризуются большими ходами. Нельзя не отметить и фирменный набор мультитач, который реализован при помощи дополнительного стикпоинта с набором отдельных кнопок.
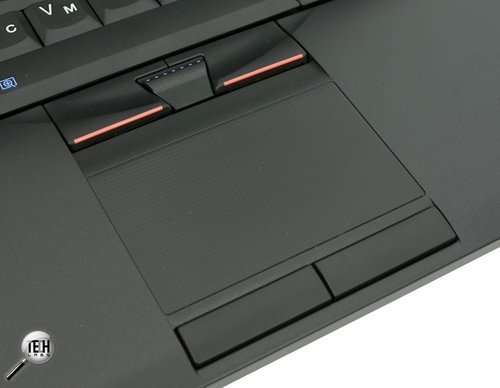
Lenovo ThinkPad SL510. Тачпад
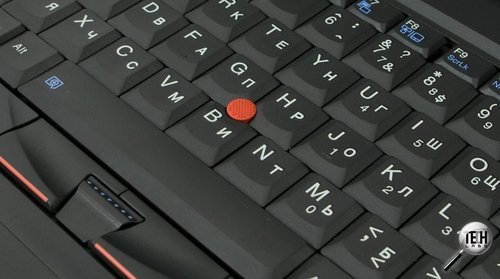
Lenovo ThinkPad SL510. Кнопки
Справа также можно увидеть сканер отпечатков пальцев. Данная штука для бизнес-моделей является нелишней, т.к. при использовании соответствующего ПО можно полностью защитить важную информацию.
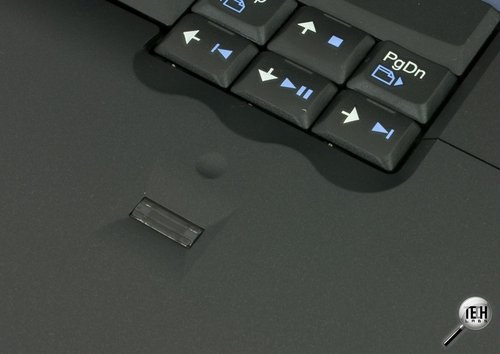
Lenovo ThinkPad SL510. Сканер отпечатка пальца
Индикаторов немного, однако их вполне хватает для нормальной работы. С закрытой крышкой мы видим только два светодиода, показывающих режим работы АКБ и ожидание. При открытии становятся видны еще четыре индикатора вытянутой прямоугольной формы. Они служат для индикации беспроводных соединений, активности диска и работы CapsLock.
Lenovo ThinkPad SL510. Индикаторы
Слева находятся несколько кнопок, сделанных в том же стиле, служащих для отключения микрофона и динамиков, а также для регулировки звука.
Lenovo ThinkPad SL510. Кнопки
Включается ноутбук небольшой кнопкой с неяркой подсветкой. Расположенная рядом клавиша ThinkVantage служит для запуска диагностического ПО Lenovo ThinVantage Toolbox (Lenovo System Toolbox).

Слоты и коммуникационные разъемы
Набор разъемов данной модели заслуживает уважения, т.к. представлены практически все современные интерфейсы, нет только еще не распространившегося USB 3.0.

Lenovo ThinkPad SL510. Вид сбоку
На правом торце можно увидеть разъем для подключения питания, два интерфейса USB 2.0 и слот для картридера. Небольшой переключатель рядом с картридером служит для активации беспроводного соединения с другими устройствами. Кстати, разъем питания сделан по фирменной «качающейся» технологии.

Lenovo ThinkPad SL510. Вид сбоку
Слева расположены универсальный разъем eSATA/USB 2.0, гигабитный сетевой интерфейс, выход для монитора, выход HDMI и два стандартных аудиоразъема.
Третий USB 2.0 находится на задней панели, здесь же расположено и отверстие для замка Кенсингтона.

Lenovo ThinkPad SL510. Вид сзади
В целом местоположение всех разъемов можно оценить как продуманное. По нашему субъективному мнению, хотелось бы только перенести вход для внешнего питания на заднюю панель, так было бы слегка удобнее при работе без стола.
Система охлаждения и температурный режим

Lenovo ThinkPad SL510. Система вентиляции
Охлаждение реализовано достаточно стандартно. Забор холодного воздуха происходит через перфорационные решетки на нижних панелях. Затем он прогоняется через нагретые «внутренности» и выдувается наружу вентилятором с вертикальными лопастями. Корпус, естественно, нагревается, но нагрев этот минимальный. Температура панелей рядом с клавиатурой не превышает 32 градусов даже при значительных нагрузках. Низ греется до 32…33 градусов. Тепло ощущается, но никакого дискомфорта при работе нет.

Lenovo ThinkPad SL510. тестирование
Температура основных внутренних компонентов при этом находится в норме, жесткий диск не перегревается. Говоря о шумности системы охлаждения, можно сказать, что она умеренная. Вентилятор включается достаточно часто, однако шуршание воздуха особых неудобств не доставляет, хотя при расположении на столе его услышит любой.
Мультимедийные возможности
Тестовый образец оказался оборудован качественной камерой. Встроенные динамики расположены под матрицей и закрыты металлической сеткой. При таком расположении достигается высокая мощность звучания, т.к. звук направлен прямо на пользователя, а не отражается от стола или любой иной поверхности.
Lenovo ThinkPad SL510. Вебкамера
Матрица обладает удобным для работы форматом и размером. Ее поверхность матовая, из-за чего не наблюдается посторонних бликов и отражений.
Верность цветопередачи находится на посредственном уровне, ноутбук все же остается ноутбуком, и требовать от него качества профессионального монитора бессмысленно.
Равномерность подсветки неидеальна, но и явно пересвеченных областей не наблюдается. Запас яркости нормальный.
Гамма-кривые слегка «расползлись» от идеала.

Время оклика находится на типовом уровне. В общем, перед нами самая обычная среднестатистическая матрица без особых изысков

Lenovo ThinkPad SL510. тестирование
В данном случае накопителю уделено достаточно большое внимание, т.к. бизнес-ноутбук, по логике вещей, часто может перемещаться с места на место и даже падать. Во-первых, винчестер установлен в специальном защитном боксе. Во-вторых, SL510 оснащен акселерометром и специальным программным обеспечением. ПО все время контролирует положение и ускорение корпуса, а также позволяет задать порог, при котором будет задействована защита. Фактически ноутбук можно даже уронить, а поверхность плаcтин диска при этом не повредится.
К слову, производителем использован накопитель Western Digital WD3200BEVS-08VAT2 емкостью 320 GB со скоростью вращения шпинделя 5400 об/мин, 8 MB буфером и интерфейсом SATA-II. Скорость линейного чтения составляет порядка 53.9 MB/s. Время случайного доступа традиционно велико – 16.8 мс.
Lenovo ThinkPad SL510. тестирование
Файловый бенчмарк не выявляет никаких нареканий. Винчестер работает шустро, а скорость чтения практически всегда больше скорости записи.
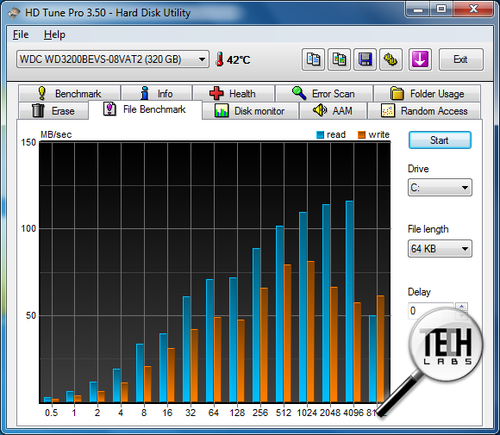
Lenovo ThinkPad SL510. тестирование

Lenovo ThinkPad SL510. тестирование
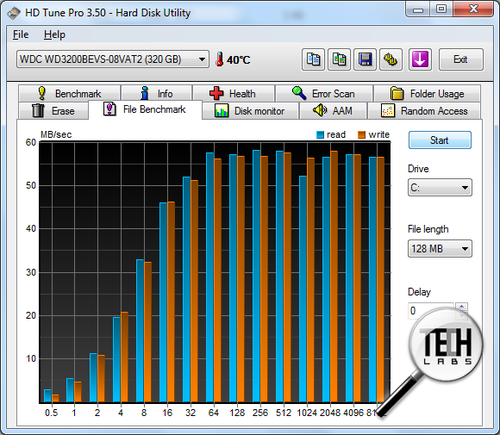
Lenovo ThinkPad SL510. тестирование
Оптический привод HL GT30N предназначен для работы с любыми CD- или DVD-дисками. Поддерживаются чтение и запись. К слову, для SL510 доступен и другой опциональный привод – Blu-ray.
Ноутбук оснащен достаточно мощным блоком питания и среднестатистической аккумуляторной батареей емкостью 4400 мА-ч (Li-ion). Время автономной работы при этом находится на достойном уровне. Можно сказать, что значения типовые. При использовании классического режима программы BatteryEater модель «тянет» порядка 98 минут. Неплохо для имеющейся начинки. В режиме чтения время увеличивается до 250 минут, видео – 193 минуты. В общем, практически не хуже и не лучше, чем у основных конкурентов.
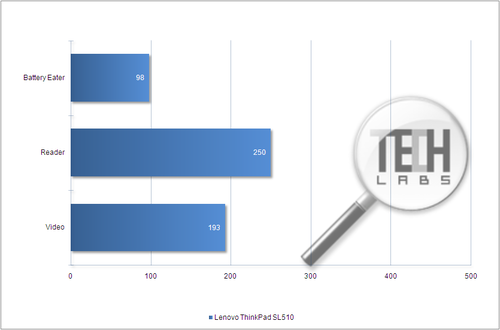
Lenovo ThinkPad SL510. тестирование
Тестирование производительности
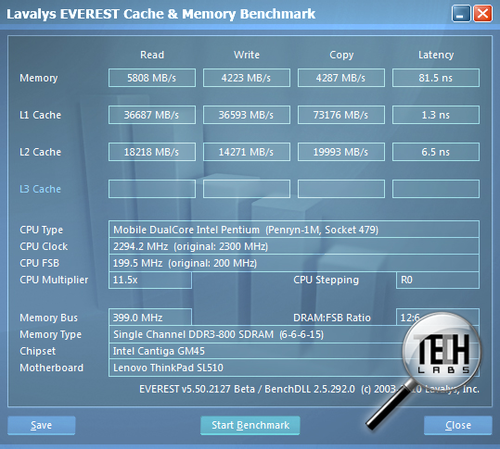
Lenovo ThinkPad SL510. тестирование
Итак, пришло время изучить производительность рассматриваемого ThinkPad’а. Для примера сравним его с моделью Lenovo G560 (Intel Core i3-350M, NVIDIA GeForce 310M 512 MB, 3 GB памяти DDR3-1066) и MSI CR620 (Intel Core i3-330M, Mobile Intel HD Graphics, 4 GB памяти DDR3-1066). Даже без тестов видно, что G560 противник достаточно мощный, а CR620 явно проигрывает по видеосоставляющей. Однако цифры все же более красноречивы. Начнем с памяти и кэша процессора.
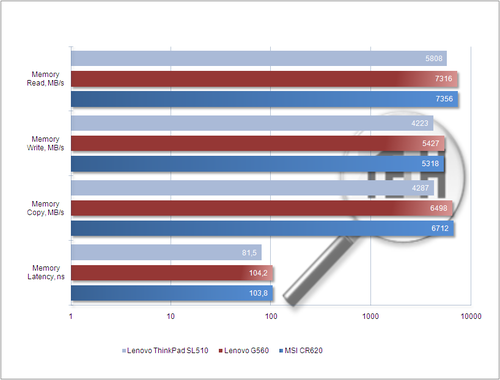
Lenovo ThinkPad SL510. тестирование
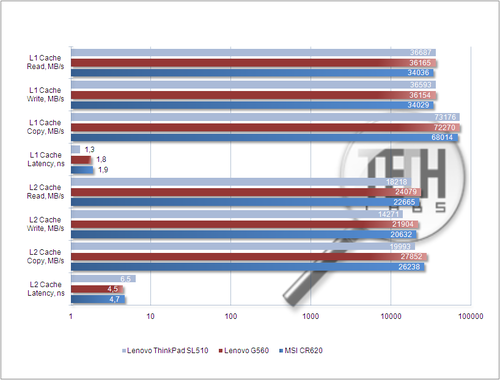
Lenovo ThinkPad SL510. тестирование
Видно, что в нашем случае память работает несколько медленнее, то же самое можно сказать и про кэш второго уровня. Все же представленный набор системной логики слегка проигрывает Intel Core i3-350M + HM55.
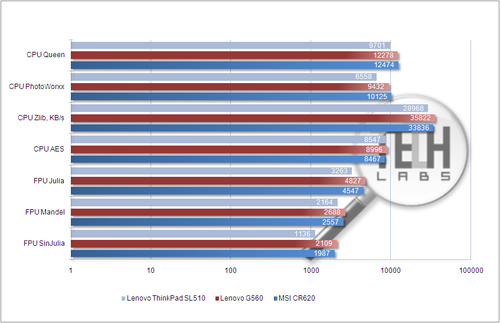
Lenovo ThinkPad SL510. тестирование
При моделировании различных математических задач тоже видно явное отставание Intel Pentium T4500 от Core i3-350M. Абсолютные цифры в целом неплохие, но среднестатистическая разница около 20…30% очевидна. Опасаться этого стоит едва ли, т.к. даже так работа с ноутбуком нареканий не вызывает. Операционная система работает быстро, да и основные программы не подтормаживают.
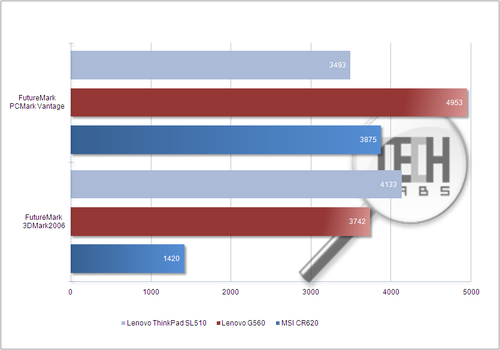
Lenovo ThinkPad SL510. тестирование
Наконец, рассмотрим результаты тестовых пакетов Futuremark. В PCMark Vantage модель SL510 получает достаточно скромную оценку – 3493 балла. MSI CR620 здесь имеет слегка больший результат, а G560 уверенно лидирует. Зато по результатам 3DMark ThinkPad обходит и MSI и G560. Хорошая графика все же дает о себе знать. В современные 3D-игры, конечно, не поиграешь, но вот в более классические игрушки – без проблем. О HD-контенте не стоит и говорить, работа с ним нареканий не вызывает. Кстати, глядя на достигнутый результат, можно сказать, что если ноутбук будет использоваться только для работы, то установленное видео окажется лишним. Поэтому пользователь может значительно сэкономить, купив конфигурацию с интегрированным Intel GMA 4500MHD.
Lenovo ThinkPad SL510. тестирование
Lenovo ThinkPad SL510. тестирование
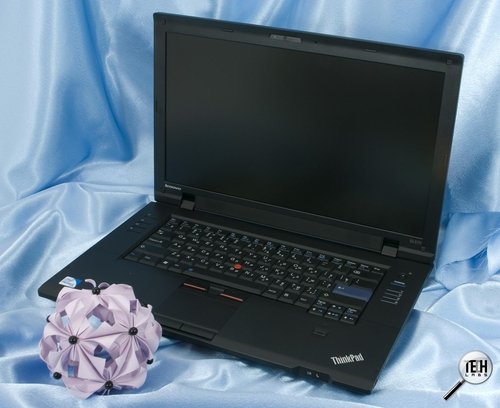
Lenovo ThinkPad SL510. Внешний вид
По итогам сегодняшнего тестирования смело можно констатировать тот факт, что Lenovo ThinkPad SL510 представляет собой отличный вариант бизнес-ноутбука, который, кроме того, может использоваться и как универсальный домашний компьютер. Рассмотренная модель обладает хорошим и прочным корпусом, матовой матрицей и влагостойкой клавиатурой. В дополнение к этому присутствуют фирменная технология мультитач, сканер отпечатка пальца и акселометр. Производительности решения хватит для любых повседневных задач, а с графическим адаптером ATI Mobility Radeon HD 4570 даже более. Кстати, если столь мощное видео не нужно, то можно приобрести значительно более дешевую конфигурацию с Intel GMA 4500MHD. Спорным моментом остается лишь классический строгий дизайн времен IBM, хотя и это достаточно привычная фишка модельного ряда ThinkPad.
Автор: Василий Запотылок
Ваше
имя:
_________________________
Название
организации:
_________________________
Номер
модели:
_________________________
Серийный
номер:
_________________________
Сервисная
служба
организации
или
продавца:
_________________________
Web-сайт
сервисной
службы
IBM:
_________________________
Номер
сервисной
службы
IBM:
_________________________
Товарные
знаки
Следующие
названия
являются
товарными
знаками
корпорации
IBM
в
Соединенных
Штатах
Америки
и/или
других
странах:
IBM
ThinkPad
TrackPoint
Microsoft
и
Windows
являются
товарными
знаками
корпорации
Microsoft
в
Соединенных
Штатах
Америки
и/или
других
странах.
Примечания:
10