-
Bookmarks
Quick Links
UK
Subject to change
Document Ref:
FLZ-275/18772/PMR28/Issue 1/April 02
Copyright ©
These instructions are the sole property of Ferm-Omega Tools and may not be reproduced
Ferm BV • P.O. Box 134 • 8280 AC Genemuiden • NL • www.ferm.com
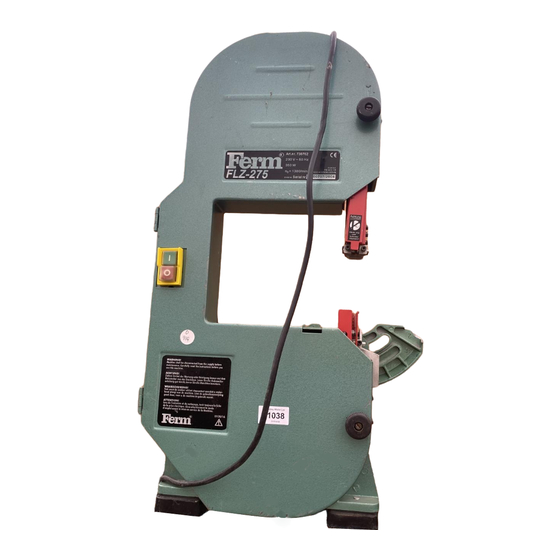
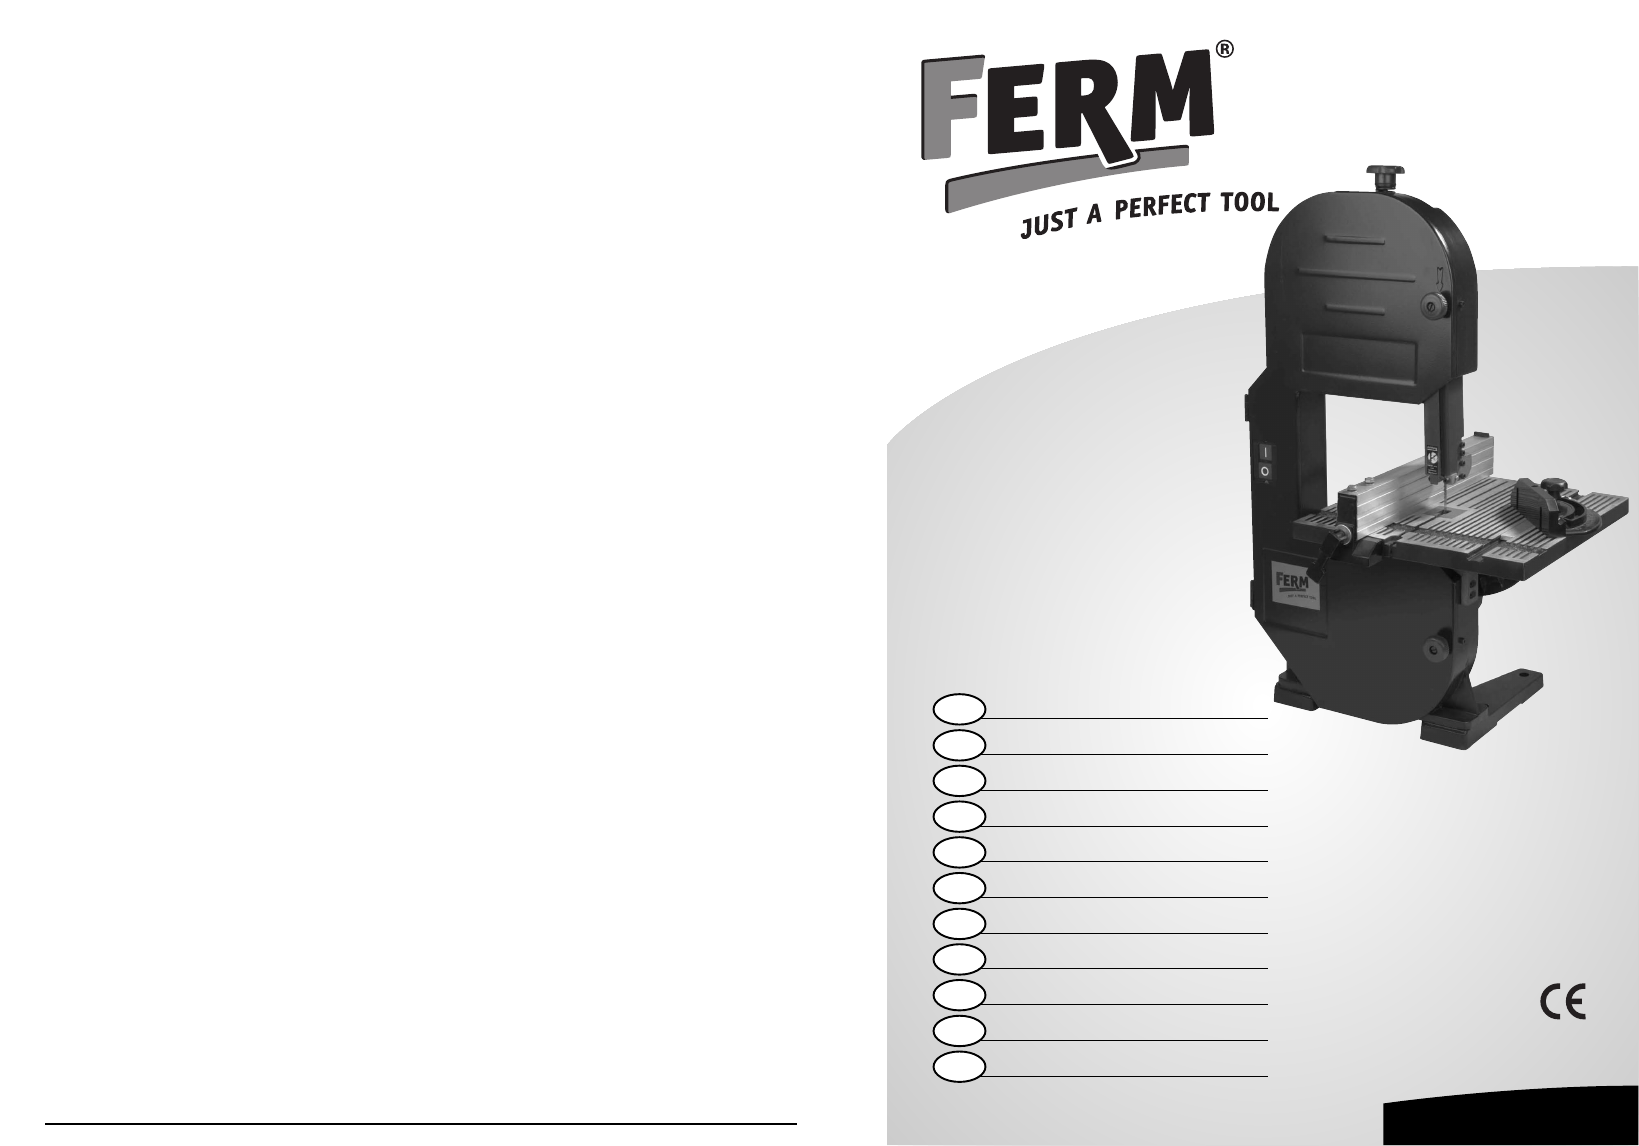
Ferm Band Saw
FLZ-275
0210/24
USER’S MANUAL
Art.nr. 730762
Screwfix Art.nr. 18772
Related Manuals for Ferm FLZ-275
Summary of Contents for Ferm FLZ-275
-
Page 1
Subject to change USER’S MANUAL Document Ref: FLZ-275/18772/PMR28/Issue 1/April 02 Copyright © These instructions are the sole property of Ferm-Omega Tools and may not be reproduced Ferm Band Saw FLZ-275 Art.nr. 730762 Screwfix Art.nr. 18772 Ferm BV • P.O. Box 134 • 8280 AC Genemuiden • NL • www.ferm.com… -
Page 2: Safety Instructions
PRODUCT INFORMATION manual and the enclosed documentation with the machine. Ferm products are manufactured to high quality standards, they are safe and fit for purpose at time of sale, but all tools can be dangerous if the correct precautions are not taken.
-
Page 3
Warning! This machine can produce fine dust, switch. Check that the switch is off before plugging in to REF NR DESCRIPTION FERM NR which is harmful to your health – always wear a sui- socket. table dust mask and other protection equipment as approp- CAPACITOR (8 µF) -
Page 4
• If it isn’t square, from under the table loosen the adjusting screw lock nut. Loosen the clamp (B) then adjust the table angle by turning the table adjusting Ferm Ferm… -
Page 5
Refer to Fig 8 above. bearing. way: Refer to parts illustration and Figs 5/8 below. • Open the band saw cover unscrewing the bolts Take to your Ferm dealer for repair. BLUE • Neutral When changing blades make sure that the blade slot, •… -
Page 6: Using The Saw
The blade cuts on a continuously downward • The carbon brushes are worn; take to your Ferm SELECTING SAW BLADES To fit and adjust the mitre guide stroke.
-
Contents
-
Table of Contents
-
Bookmarks
Quick Links
UK
Subject to change
D
Änderungen vorbehalten
NL
Wijzigingen voorbehouden
F
Sous réserve de modifications
E
Reservado el derecho de modificaciones
técnicas
P
Reservado o direito a modificações
I
Con reserva di modifiche
S
Ändringar förbehålles
SF
Pidätämme oikeuden muutoksiin
N
Rett till endringer forbeholdes
DK
Ret til ændringer forbeholdes
Ferm BV • P.O. Box 30159 • 8003 CD Zwolle • NL • www.ferm.com
UK
USERS MANUAL
D
GEBRAUCHSANWEISUNG
NL
GEBRUIKSAANWIJZING
F
MODE D’EMPLOI
E
MANUAL DE INSTRUCCIONES
P
ISTRUÇÕN A USAR
I
MANUALE UTILIZZATI
S
BRUKSANVISNING
SF
KÄYTTÖOHJE
N
BRUKSANVISNING
DK
BRUGERVEJLEDNING
0507-04.1
Art.nr. BSM1009
FLZ-275
04
09
15
20
26
31
36
42
47
52
57
www.ferm.com
Summary of Contents for Ferm FLZ-275
Ferm BV • P.O. Box 30159 • 8003 CD Zwolle • NL • www.ferm.com 0507-04.1
UK Subject to change
D Änderungen vorbehalten
NL Wijzigingen voorbehouden
F Sous réserve de modifications
E Reservado el derecho de modificaciones
técnicas
P Reservado o direito a modificações
I Con reserva di modifiche
S Ändringar förbehålles
SF Pidätämme oikeuden muutoksiin
N Rett till endringer forbeholdes
DK Ret til ændringer forbeholdes
www.ferm.com
Art.nr. BSM1009
FLZ-275
UK
D
NL
F
E
P
I
S
SF
N
DK
USERS MANUAL 04
GEBRAUCHSANWEISUNG 09
GEBRUIKSAANWIJZING 15
MODE D’EMPLOI 20
MANUAL DE INSTRUCCIONES 26
ISTRUÇÕN A USAR 31
MANUALE UTILIZZATI 36
BRUKSANVISNING 42
KÄYTTÖOHJE 47
BRUKSANVISNING 52
BRUGERVEJLEDNING 57
Table of Contents for Ferm FLZ-275:
-
BAND SAW THE NUMBERS IN THE FOLLOWING TEXT CORRESPOND WITH THE PICTURES AT PAGE 2 SAFETY AND OPERATING INSTRUCTIONS For your own safety and for the safety of others, please read these instructions carefully before using this appliance. It will help you understand your product more easily and avoid unnecessary risks. Keep this instruction manual in a safe place for future use. CONTENTS 1. Machine data 2. Safety instructions 3. Ins
-
ENTRETIEN Lors de l’entretien et du nettoyage, tenir toujours la fiche de la prise électrique (la boîte de contact murale). Ne jamais utiliser de l’eau ou d’autres liquides pour le nettoyage de la scie à ruban. Nettoyer la scie à ruban à l’aide d’une brosse. Les machines Ferm ont été conçues pour fonctionner sur une longue période avec un minimum d’entretien. Un fonctionnement satisfaisant continu dépend d’un bon entretien de la machi
-
REGOLAZIONE DELLA GUIDA DELLA LAMA Fig.9 • La guida della lama (A) (vedere figura 9) deve essere sempre piazzato il più vicino possibile al di sopra del pezzo da lavorare. Svitando il bottone (B) , è possibile regolare l’altezza della guida della lama. REGOLAZIONE DELLA GUIDA DELLA LAMA SUPERIORE E DELSUPPORTO DI REGOLAZIONE Fig.10 • Svitare il bullone (A) (vedere figura 10) e spingere con l’aiuto di un cacciavite
-
• The blade is properly tensioned and aligned. • The base of the band saw machine must be placed on or secured to a solid and level surface or bench. • Never apply sideward pressure on the blade as this may cause the blade to break. • Be careful when cutting wood with knots, nails or cracks in it and/or dirt on it, as these can cause the blade to get stuck. • Never leave the band saw machine unattended. • The teeth of the blade must point downwards. WHEN USING THE MACHINE: • Clamp the workpiece to the
-
BANDSÄGEMASCHINE DIE NUMMERN IM NACHFOLGENDEN TEXT KORRESPONDIEREN MIT DEN ABBILDUNGEN AUF SEITE 2 SICHERHEITSVORSCHRIFTEN UND BEDIENUNGSANLEITUNG Lesen Sie diese Anleitung im Hinblick auf Ihre eigene Sicherheit und die Sicherheit anderer bitte vor der Benutzung dieses Geräts gründlich durch. Dadurch verstehen Sie Ihr Produkt besser und vermeiden unnötige Risiken. Bewahren Sie diese Anleitung zum künftigen Gebrauch an einer sicheren Stelle auf. INHALT: 1. Gerätedaten 2. Sicherheitsvorschriften 3. Installation 4. Gebrauch 5. Wartun
-
Ferm BV • P.O. Box 30159 • 8003 CD Zwolle • NL • www.ferm.com 0507-04.1 UK Subject to change D Änderungen vorbehalten NL Wijzigingen voorbehouden F Sous réserve de modifications E Reservado el derecho de modificaciones técnicas P Reservado o direito a modificações I Con reserva di modifiche S Ändringar förbehålles SF Pidätämme oikeuden muutoksiin N Rett till endringer forbeholdes DK Ret til ændringer forbeholdes www.ferm.com Art.nr. BSM1009 FLZ-275 UK D NL F E P I S SF
-
MASKINEN SKAL SLUKKES ØJEBLIKKELIGT, NÅR: • Båndsavmaskinen er overophedet. • Stikket eller netledningen er defekt, eller hvis ledningen er beskadiget. • Afbryderen er defekt. • Der er røg eller det lugter af svedet isolation. 3. MONTAGEFORSKRIFTER MONTERING AF BUNDPLADEN • Sørg for, at de dele på bundpladen, som stikker frem, er fastgjort på siden af motoren. • Skru bundpladen fast på maskinens bund med fire skruer. INSTALLATION AF BÅNDSAVMASKINEN Båndsavmaskin
-
3. INSTALLATION MONTIEREN DER GRUNDPLATTE • Vergewissern Sie sich, dass die vorstehenden Teile der Grundplatte an der Seite des Motors befestigt sind. • Befestigen Sie die Grundplatte mit vier Schrauben am Boden der Maschine. INSTALLATION DER BANDSÄGE: Bitte stellen Sie die Bandsägemaschine auf einer festen Stellen. Die Bandsägemaschine soll gut befestigd werden auf einem ebenen Untergrund, z.B. ein Werkbank. Bitte sorgen Sie für genügend Platz rundum die Maschine um gut arbeiten zu können. • Stellen Sie die B
-
66 Ferm Fig.6 Fig.8 Fig.10 Fig.12 Fig.7 Fig.9 Fig.11 ABB B A C 7 B A A B A Ferm 3 SPARE PARTS LIST REF NR DESCRIPTION FERM NR 09 STOPPING LEVER 403460 13 SPARE SAW BLADE (1.425 X 8 X 0,3 MM) BSA1004 13 SPARE SAW BLADE (1.425 X 6 X 0,3 MM) BSA1006 13 SAW BLADE (1.425 X 6 X 0,3 MM) 330797 15 GUIDING WHEEL 403468 16 RUBBER BAND 403461 17 DRIVING WHEEL 403462 19 — 25 PRESSED HANDLE (COMPLETE, PART 19, 20, 21, 22, 23, 24 + 25) 403463 21 SCREW 403464 33 + 35 BALL BEARING 6200 ZZ 806200 36 MAGNET
-
5. MANUTENZIONE Durante la manutenzione e la pulizia , tenere sempre la spina della corrente staccata. Non usare mai dell’acqua o altri liquidi per la pulizia della sega a nastro . Pulire la sega a nastro con l’aiuto di una spazzola. Gli apparecchi Ferm sono stati progettati per funzionare per un lungo periodo con il minimo di manutenzione. Il loro funzionamento continuo e soddisfacente dipende da una corretta e regolare manutenzione/pulizia dell’apparecc
-
det bytas ut direkt. • är bandsågbladets spänning riktig och är det rätt riktat. • Bandsågen skall stå stadigt med hela foten på ett plant och jämnt underlag eller på ett arbetsbord (monteras). • Utöva aldrig tryck sidledes mot bandsågbladet som då kan brytas av. • Var försiktig vid sågning i arbetsstycken med knastar, spik, sprickor eller smutsbeläggning. Att såga sådant virk
-
4. FUNCTIONAMIENTO • La sierra de cinta tiene que estar enchufada en una red de 230V (220V) con el cable y el enchufe entregados. • La sierra de cinta debe estar solidamente colocada en un banco de trabajo llano. • La cinta de sierra sierra con una retrogración continua. • Empuje lentamente y con una presión mínima la pieza para serrar. • Se obtienen los mejores resultados con madera de un espesor máximo de 12 mm. • Mantenga la pieza solidamente con las
Questions, Opinions and Exploitation Impressions:
You can ask a question, express your opinion or share our experience of Ferm FLZ-275 device using right now.
- Home
- Brands
- Ferm
- Saw
- FLZ-275
- Operation & User’s Manual
Manual for Ferm FLZ-275 Saw (34 pages)
Specifications:
|
Ferm FLZ-275: Read PDF Manual Online
Accompanying Data:
Ferm FLZ-275 Saw PDF Operation & User’s Manual (Updated: Monday 7th of November 2022 02:30:39 AM)
Rating: 4.2 (rated by 80 users)
Compatible devices: FRTC-600, TSM1035, FZB-205/800N, FRS-600N, FPCS-1800, TSM1033, MSM1032, JSM1014.
Recommended Documentation:
Ferm FLZ-275: Text of Operation & User’s Manual
(Ocr-Read Version Summary of Contents, UPD: 07 November 2022)
-
4, BAND SAW THE NUMBERS IN THE FOLLOWING TEXT CORRESPOND WITH THE PICTURES AT PAGE 2 SAFETY AND OPERATING INSTRUCTIONS For your own safety and for the safety of others, please read these instructions carefully before using this appliance. It will help you understand your product more easily and avoid unnecessary risks. Keep this instruction manual in a safe place for future use. CONTE…
-
5, • The blade is properly tensioned and aligned. • The base of the band saw machine must be placed on or secured to a solid and level surface or bench. • Never apply sideward pressure on the blade as this may cause the blade to break. • Be careful when cutting wood with knots, nails or cracks in it and/or dirt on it, as these can cause the blade to get stuck. �…
-
3, 66 Ferm Fig.6 Fig.8 Fig.10 Fig.12 Fig.7 Fig.9 Fig.11 ABB B A C 7 B A A B A Ferm 3 SPARE PARTS LIST REF NR DESCRIPTION FERM NR 09 STOPPING LEVER 403460 13 SPARE SAW BLADE (1.425 X 8 X 0,3 MM) BSA1004 13 SPARE SAW BLADE (1.425 X 6 X 0,3 MM) BSA1006 13 SAW BLADE (1.425 X 6 X 0,3 MM) 330797 15 GUIDING WHEEL 403468 16 RUBBER BAND 403461 17 DRIVING WHEEL 403462 19 — 25 PRESS…
-
12, Vi erklærer på eget ansvar at dette produktet er i samsvar med følgende standarder eller standardiserte dokumenter. EN61029-1, prEN61029-2-5 EN55014-1, EN61000-3-2, EN61000-3-3, EN55014-2 i samsvar med bestemmelsene. 98/37/EEC 73/23/EEC 89/336/EEC fra 01-03-2004 ZWOLLE NL W. Kamphof Kvalitetsavdelingen BÅNDSAVMASKINE TALLENE I DEN FØLGENDE TEKST KORRES- PONDERER MED AFBILDNINGERNE…
-
34, • Os dentes da corrente da serrra estão desafiados ou partidos. Experimente com uma nova corrente. • Coloque as guias da serra de uma forma correcta Veja as instruções de montagem. 4. A corrente da serra não consegue serrar ou serra devagar. • Os dentes da corrente estão desafiados em contacto com metais duros ou devido ao longo uso. Substitua a corrente. Use…
-
13, 2. Trotz drehenden Motors bewegt sich das Sägeband nicht. • Der Spannungsverriegelungsknopf ist nicht festgedreht. Stellen Sie den Motor ab und drehen Sie den Spannungsverriegelungsknopf fest. • Das Sägeband ist von einem der Räder gerutscht. Entfernen Sie die Frontplatte und kontrollieren Sie dies. • Das Sägeband ist gebrochen. Setzen Sie ein neues Sägeblatt…
-
30, REGOLAZIONE DELLA GUIDA DELLA LAMA Fig.9 • La guida della lama (A) (vedere figura 9) deve essere sempre piazzato il più vicino possibile al di sopra del pezzo da lavorare. Svitando il bottone (B) , è possibile regolare l’altezza della guida della lama. REGOLAZIONE DELLA GUIDA DELLA LAMA SUPERIORE E DELSUPPORTO DI REGOLAZIONE Fig.10 • Svitare il bullone (A) (vedere figur…
-
20, SAHAN TERÄN SUUNTAUS Kuva 6-7 • Irrota terän suojus työntämällä kaksi nuppia (A) ylös (ks. kuva 6). • Kierrä toista kahdesta pyörästä (ks. kuva 7) oikealle ja tarkista, pysyykö terä suunnilleen pyörien keskellä. Jos terä kulkee liikaa edessä tai takana, tilanne voidaan korjata seuraavasti. Terä kulkee liikaa edessä Kuva 8 • Kierrä nuppia (A) (ks. …
-
18, 5. HUOLTO Ennen huoltotöiden aloittamista pistoke on aina ensin irrotettava pistorasiasta. Älä koskaan puhdista konetta vedellä tai muilla nesteillä. Puhdista kone harjalla. Ferm-laitteet on suunniteltu toimimaan pitkän aikaa mahdollisimman vähällä huollolla. Jotta laite toimisi jatkuvasti hyvin, sitä on hoidettava hyvin ja se on puhdistettava säännöllisesti. MÄ�…
-
1, Ferm BV • P.O. Box 30159 • 8003 CD Zwolle • NL • www.ferm.com 0507-04.1 UK Subject to change D Änderungen vorbehalten NL Wijzigingen voorbehouden F Sous réserve de modifications E Reservado el derecho de modificaciones técnicas P Reservado o direito a modificações I Con reserva di modifiche S Ändringar förbehålles SF Pidätämme oikeuden muutoksiin N Rett till endringer f…
-
33, 3. INSTALAÇÃO MONTAR A PRANCHA DA MESA • Solte o botõa (A) • Monte a mesa num ângulo que desejar e aperte o botão (A). • O ângulo de inclinação pode ser lido no indicador da graduaação. INSTALAÇÃO DA SERRA MECÂNICA A serra mecânica tem que estar colocada num lugar fixo. A serra mecânica deve extar fixada numa base plana por exemplo num banco de trabalho. Deix…
-
15, LINTZAAGMACHINE DE NUMMERS IN DE NU VOLGENDE TEKST VERWIJZEN NAAR DE AFBEELDINGEN OP PAGINA 2 VEILIGHEIDSINSTRUCTIES EN BEDIENINGSVOORSCHRIFTEN Voor uw eigen veiligheid en die van anderen raden wij u aan deze gebruikershandleiding zorgvuldig door te lezen, voordat u dit apparaat in gebruik neemt. Hierdoor zult u het functioneren van het apparaat beter begrijpen en kunt u onnodige risico’s voor…
-
31, SERRA MECÂNICA OS NÚMEROS CONSTANTES NO TEXTO QUE SE SEGUE TÊM CORRESPONDÊNCIA NAS FIGURAS PRESENTES NA PÁGINA 2 INSTRUÇÕES DE SEGURANÇA E FUNCIONAMENTO Para a sua própria segurança e para a segurança dos outros, leia cuidadosamente estas instruções antes de utilizar este aparelho. Vai ajudá-lo a compreender o produto mais facilmente e a evitar riscos desnecessários. Guarde…
DOC-38da04a:
Ferm FLZ-275: Recommended Instructions
JP676J, CBM-909PC SERIES, ATT-0232, IR-EK2, TRB-2000


-
TABLE SAW MODEL: TS-1040E 30 & 50 © 2012 Baileigh Industrial, Inc. REPRODUCTION OF THIS MANUAL IN ANY FORM WITHOUT WRITTEN APPROVAL OF BAILEIGH INDUSTRIAL, INC. IS PROHIBITED. Baileigh Industrial, Inc. does not assume and hereby disclaims any liability for any damage or loss caused by an omission or error in this Operator’s Manual, resulting from accident, negligence, or o …
TS-1040E 30 52
-
IAN 322849_1901DEKUPIERSÄGE PDS 120 B2 SCROLL SAW PDS 120 B2SCIE À CHANTOURNER PDS 120 B2CHATDEKUPIERSÄGEBedienungs- und SicherheitshinweiseOriginalbetriebsanleitungDEBEDECOUPEERZAAGBedienings- en veiligheidsinstructiesVertaling van de originele handleidingNLSCROLL SAWOperating and Safety InstructionsTranslation of Original Operating ManualGB IEBESCIE À CHAN …
PDS 120 B2 96
-
PipeCut 280ESystemEN Operating Instructions patents: US 7,257,895, JP 4010941, EP 1301311, FI 108927, KR 10-0634113Exact Tools OySärkiniementie 5 B 6400210 HELSINKIFINLANDTel + 358 9 4366750FAX + 358 9 [email protected] …
PipeCut 280E System 16
-
INSTRUCTION MANUALMANUEL D’INSTRUCTIONMANUAL DE INSTRUCCIONESCircular SawScie CirculaireSierra Circular5402NAIMPORTANT: Read Before Using.IMPORTANT : Lire avant usage.IMPORTANTE: Lea antes de usar. …
5402NA 32
-
SAVE THIS MANUAL FOR FUTURE REFERENCEOPERATOR’S MANUAL16 in. (406 mm) Variable SpeedSCROLL SAWModel SC163VS03015THANK YOU FOR BUYING A RYOBI SCROLL SAW.Your new Scroll Saw has been engineered and manufactured to Ryobi’s high standards for dependability, ease of operation,and operator safety. Properly cared for, it will give you years of rugged, trouble …
SC163VS 20
-
iQMS362-CE 420mm Masonry SawOperator’s ManualUse QR Code to download the iQMS362 Operator’s Manual in your language. Please read the operator’s manual carefully and make sure you understand the instructions before using the machine.Utilisez le code QR pour télécharger le manuel d’utilisation de l’iQMS362 dans votre langue. Utilizzare il codice QR per scaricare i …
iQMS362-CE 40
-
Robert Bosch GmbHGeschäftsbereich ElektrowerkzeugeD–70745 Leinfelden-EchterdingenGermanywww.bosch-pt.com2 609 932 632 (2008.07) O / 85 ASIAGSA 18 V-LI Professionalus Original operating instructionscn 正本使用说明书tw 正本使用說明書ko 사용 설명서 원본th หนังสือคู่มือการใช้งานฉบับต้� …
GSA 18 V-LI 84
-
www.metabo.com TS 254de Originalbetriebsanleitung 4en Original instructions 14fr Instructions d’utilisation originales 23nl Originele gebruikaanwijzing 33it Manuale d’uso originale 43es Traducción del manual de instrucciones original 53pt Manual de instruções original 63sv Original bruksanvisning 73fi Alkuperäiskäyttöohje 82no Original bruksanvisning 91da Orig …
TS 254 152
-
HS004G ENCordless Circular Saw INSTRUCTION MANUAL 10PLAkum. Ręczna pilarka tarczowaINSTRUKCJA OBSŁUGI 23HUAkkumulátoros körfűrész HASZNÁLATI KÉZIKÖNYV 38SKAkumulátorová kotúčová píla NÁVOD NA OBSLUHU 53CSAkumulátorová ruční okružní pilaNÁVOD K OBSLUZE 66UKБездротова циркулярна пилаІНСТРУКЦІЯ З ЕКСПЛУАТАЦІЇ79ROFerăstrău circu …
HS004G 124
-
Specifications, descriptions and illustrative material in this literature are as accurate as known at the time of publication, but are subject to change without notice. Illustrations may include optional equipment and accessories, and may not include all standard equipment.Instruction ManualX7503274701© 8/2015 ECHO Inc.x7722271404 / x772000164340sCHAIN SAWBurn HazardThe muffler …
340s 44
Additional Information:
Popular Right Now:
Operating Impressions, Questions and Answers:
-
Page 1
Ferm bv • p.O. Box 134 • 8280 ac genemuiden • nl • www.Ferm.Com 0210/24 ferm band saw flz-275 user’s manual art.Nr. 730762 screwfix art.Nr. 18772 uk subject to change document ref: flz-275/18772/pmr28/issue 1/april 02 copyright © these instructions are the sole property of ferm-omega tools and may n…
-
Page 2
Ferm band saw flz-275 users manual technical specifications product information 1. Base 2. On/off switch 3. Saw blade 4. Saw blade guard 5. Blade guide adjusting knob 6. Frame 7. Blade tension knob 8. Adjustment knob 9. Sawdust outlet 10. Blade guides 11. Table 12. Table tilt groove 13. Graduated sc…
-
Page 3
10 ferm spare parts list aaa-000 ref nr description ferm nr — capacitor (8 µf) 311048 13 spare saw blade (1.425 x 6 x 0,3 mm) 330795 16 rubber band 403461 19 pressed handle (complete, part 19, 20, 21, 22, 23, 24 + 25) 403463 36 magnetic switch 403469 50 motor 403471 79 saw guide (complete, part 79, …
-
Page 4
Guarantee the guarantee conditions can be found on the separately enclosed guarantee card. We declare under our sole responsibility that this product is in conformity with the following standards or standardized documents en61029-1, pren61029-2-5 en55014-1, en61000-3-2, en61000-3-3, en55014-2 in acc…
-
Page 5
Fitting/removing and tensioning saw blades make sure the saw is switched off and unplugged from mains. Refer to parts illustration and figs 5/8 below. When changing blades make sure that the blade slot, chamber, wheels etc are free from sawdust and debris. • open the band saw cover by unscrewing bot…
-
Page 6
Using the saw before operating • check the voltage on the saw corresponds with your power supply voltage and that the plug and lead are in good condition. • check you have the correct type of saw blade for the machine and that it is mounted correctly. Do not use parts other than supplied with the ma…
UK
Subject to change
USER’S MANUAL
Document Ref:
FLZ-275/18772/PMR28/Issue 1/April 02
Copyright ©
These instructions are the sole property of Ferm-Omega Tools and may not be reproduced
Ferm Band Saw
FLZ-275
Art.nr. 730762
Screwfix Art.nr. 18772
Ferm BV • P.O. Box 134 • 8280 AC Genemuiden • NL • www.ferm.com
0210/24
8. Adjustment knob
9. Sawdust outlet
10. Blade guides
11. Table
12. Table tilt groove
13. Graduated scale
14. Pointer
15. Table locking knob
FERM BAND SAW FLZ-275
USERS MANUAL
TECHNICAL SPECIFICATIONS
Voltage
Frequency
Power input
No load speed
Discharge
Max. Cutting capacity 90°
Table dimensions
Weight
Lpa (sound pressure)
Lwa (acoustic power)
Vibration
|
|
|
|
|
|
|
|
|
|
|
SAFETY INSTRUCTIONS
230 V~
50 Hz
350 W
1300/min
190
85 mm
290 x 290 mm
17 kg
76.8 dB(A)
87.56 dB(A)
5.0 m/s2
PRODUCT INFORMATION
7
4
3
8
5
10
11
14
9
1.
2.
3.
4.
5.
6.
7.
2
Base
On/off switch
Saw blade
Saw blade guard
Blade guide adjusting knob
Frame
Blade tension knob
Denotes risk of personal injury, loss of life or
damage to the tool in case of non-observance of the
instructions in this manual.
Denotes risk of electric shock.
Carefully read this manual before using the machine. Make
sure that you know how the machine functions and how to
operate it. Maintain the machine in accordance with the
instructions to make sure it functions properly. Keep this
manual and the enclosed documentation with the machine.
Warning! When using electric tools, basic safety precautions should always be followed to reduce the risk of
fire, electric shock and personal injury. Read all these instructions
before attempting to operate this product. Save these instructions
for future reference.
1
13
The following pictograms are used in these instructions for
use:
Ferm products are manufactured to high quality standards,
they are safe and fit for purpose at time of sale, but all tools
can be dangerous if the correct precautions are not taken.
Always follow these instructions, do not carry out the operation until you are sure you can do so in safety. Remember
to consider the work environment for safe operation as well
as safety for tool use.
6
2
EXPLODED VIEW
PERSONAL SAFETY
Use Personal Protection Safety Equipment
Protect eyes with safety glasses or goggles note: the use
of safety protective eyewear without the CE mark can
lead to serious injury if the lens breaks. A suitable dust
mask should be worn if cutting, drilling or sanding is
dusty, in particular chipboard or MDF.
Approved safety footwear and headgear should worn as
appropriate, for example on building works or when
heavy weights are involved. Wear suitable gloves and
apron to protect against sparks/debris. Wear earplugs
or ear defenders.
Dress properly
Do not wear loose clothing or jewellery. It can get caught
in moving parts. Non-skid footwear is recommended
when working out doors. Wear protective hair covering
to contain long hair.
Stay alert
Watch what you are doing Use common sense. Do not
operate tools when tired or after taking alcohol or prescription/ non-prescription drugs.
Ferm
Ferm
11
SPARE PARTS LIST AAA-000
REF NR
13
16
19
36
50
79
105
112
120
130
DESCRIPTION
CAPACITOR (8 µF)
SPARE SAW BLADE (1.425 X 6 X 0,3 MM)
RUBBER BAND
PRESSED HANDLE (COMPLETE, PART 19, 20, 21, 22, 23, 24 + 25)
MAGNETIC SWITCH
MOTOR
SAW GUIDE (COMPLETE, PART 79, 80, 81 + 82)
INLAY TABLE
OPERATING HANDLE (COMPLETE, PART 111 - 114)
ANGLE GUIDE (COMPETE, PART 115 - 120)
BASEMENT
OPERATIONAL SAFETY
FERM NR
311048
330795
403461
403463
403469
403471
403483
403486
403497
403493
403496
Warning! This machine can produce fine dust,
which is harmful to your health – always wear a suitable dust mask and other protection equipment as appropriate. Use dust extraction
Concentrate
Routine and repetition can lead to mistakes. Remember
that a slight lack of concentration can result in serious
injuries in a split second.
Keep work area clean
Cluttered areas and benches invite injuries
Avoid unintentional starting
Do not carry plugged in tools with your finger on the
switch. Check that the switch is off before plugging in to
socket.
Connect a dust extraction device
Whenever there are facilities for fitting a dust of fume
extraction system, make sure it is connected and used.
Use recommended accessories
The use of any other accessory or attachment other than
recommended in the instructions or catalogue may present a risk of personal injury. Use extension cables suitable for the power input of the saw (minimum cable size
1.5mm2). When using a cable reel unwind the cable fully.
Consider the work environment
Do not expose power tools to rain or use them in damp
or wet locations. Keep work area well lit. Do not use
power tools in the presence of flammable liquids, vapours or gases.
Guard against electric shock
This unit contains dangerous voltages. Use a RCD (residual current device) to provide protection against electrical shock. Prevent body contact with grounded surfaces (e.g. pipes, radiator, ranges or refrigerators).
Keep children and pets away
Do not let children or pets come into contact with the
tool, extension cable or work area.
Do not force the tool
It will work better and safer at the rate for which it was
intended.
Use the right tool
Do not force small tools or attachments to do the job of a
heavy-duty tool. Do not use tools for purposes for which
they were not intended; for example do not use a circular
saw for cutting trees or logs.
Do not abuse cable
Never carry the tool by the cable or pull it to disconnect
it from the power socket. Keep the cable away from heat,
oil and sharp edges. Do not touch the metal plug pins
when connecting or removing the plug.
Do not over-reach
Keep a proper footing and balance at all times.
Disconnect tools from power supply
When not in use, before servicing and when changing
accessories such as blades, bits and cutters.
Always switch off and unplug the saw from the
power supply before making adjustments or changing blades .
Remove adjusting keys and wrenches
Ensure that they are removed from the tool before switching on.
10
Ferm
Ferm
3
BEFORE USING THE BAND SAW
The saw is for bench use only. Do not use outdoors.
This saw is intended for use on wood, wood derived
products, plastics and soft materials/metals.
This saw must be fully assembled before use.
ASSEMBLING/MOUNTING THE BAND SAW
Make sure the saw is switched OFF and unplugged
from mains.
•
•
screw with the 3mm wrench as shown in Fig 3.
Tighten clamp lever (B) and check the angle again –
readjust a necessary.
When the table is set at 90 degrees to the blade tighten the table clamp and set the red quadrant indicator
finger by loosening its screw then lining it up with the
0 degrees mark on the table quadrant (C in Fig 3). The
angles indicated on the quadrant are for indication
only, always check setting by cutting and measuring
on scrap before cutting the job.
GUARANTEE
The guarantee conditions can be found on the separately
enclosed guarantee card.
CEı
(UK)
We declare under our sole responsibility that this
product is in conformity with the following
standards or standardized documents
Refer to parts illustration.
EN61029-1, prEN61029-2-5
EN55014-1, EN61000-3-2,
EN61000-3-3, EN55014-2
Installing the foot
• Fasten the foot to the band saw base with the four M8
nuts/bolts and washers provided.
• Make sure the long legs of the foot are on the motor
side. Tighten the bolts securely.
Fixing the band saw
The saw should be placed on a level stable non-slip surface; make sure there is enough room round the machine
to operate and service it easily.
• Position the machine and mark the fixing holes with a
pencil. Drill suitable diameter holes.
• Secure the machine with suitable bolts/nuts/washers
through the four holes in the footplate.
• Route the mains cable well away from the saw, ensure that it cannot get caught in moving parts or the
workpiece.
DECLARATION OF CONFORMITY
in accordance with the regulations:
A
B
98/37/EEC
73/23/EEC
89/336/EEC
C
from 01-05-2001
GENEMUIDEN NL
W. Kamphof
Quality department
A
Installing the band saw table
Make sure the saw is switched OFF and unplugged
from mains.
Refer to figs 1,2,3 below
• Remove the nut and butterfly bolt from the end of the
saw slot in the table.
• Put the table onto the saw as shown in Fig 1. Make
sure the groove on the back of the quadrant (C in Fig
1)) fits onto the raised curved lug on the saw body.
• Take the adjusting lever assembly (A in Fig 2)) and
remove the Allen screw and spring with the 4mm
wrench supplied, remove the laver.
• Screw the bolt part of the adjusting lever assembly
with the large washer attached into the threaded
hole in the saw body - hand tight.
• Reassemble the lever, bolt and spring and tighten
with the wrench.
• Tighten the table adjusting screw fully with the lever.
A
C
B
Note: The lever can be pulled out and turned to set it in
the best operating position
Reinstall and tighten the bolt and butterfly nut in the saw
table.
Check the table is square
With the blade guard (4 in parts illustration) raised,
check the angle of the blade to the table with a small setsquare.
• If it isn’t square, from under the table loosen the
adjusting screw lock nut. Loosen the clamp (B) then
adjust the table angle by turning the table adjusting
4
Ferm
Ferm
9
Sawdust builds up inside the saw
• Clean saw chamber regularly.
• Connect a dust extractor to the port beside motor.
The blade cannot be positioned on the wheels
• The wheels are out of alignment due to a faulty
bearing.
Take to your Ferm dealer for repair.
• Adjust tracking as previously described.
There are no user serviceable/repairable parts in this
unit. Qualified service engineers must carry out repair
and servicing.
MAINTAIN TOOLS WITH CARE
Keep the tool clean for better and safer performance.
Store the blades properly in accordance with the
maker’s instructions.
Follow instructions for changing accessories. Inspect
tool and extension cables periodically and if damaged,
have them repaired by a qualified person or authorised
service body. Keep handles free from oil or grease. Keep
the ventilation slots clean to prevent the motor overheating.
Check for damaged parts
Do not use a tool with damaged parts, before further use
a damaged tool must be carefully checked by a qualified
person to determine that it will operate properly. Check
for alignment of moving parts, binding or breakage of
parts, mounting and other conditions that may affect its
operation.
A damaged part or guard should be properly repaired by
an authorised service centre, unless indicated otherwise
in the instruction manual. Have defective switches
replaced by an authorised service centre. Do not use a
tool if the switch does not turn on and off.
Have your tool repaired by an expert
This appliance is manufactured in accordance with relevant safety standards. Only experts must carry out repairing of electrical appliances, otherwise considerable danger for the user may result.
Storing tools
When not in use tools should be stored in the dry, out of
reach of children.
Lubrication
The machine does not require user lubrication.
8
ELECTRICAL INFORMATION
This product is complete with a pre-wired mains plug.
If the plug needs replacing follow these instructions.
Wire correctly
The wires in the mains lead are coloured in the following
way:
BLUE
• Neutral
BROWN
• Live
EARTH
• Yellow/Green
Green & Yellow
(Earth)
Blue
(Neutral)
Fuse
(5 Amp)
Brown
(Live)
Securing wires
Secure wires carefully and firmly to the correct terminals. Secure the mains cable in the plug cord grip firmly
Fit a 5-amp fuse. If a 13amp (BS1363) plug is used a (BS
1362) ASTA approved 5-amp fuse must be fitted.
If in doubt always consult a qualified electrician.
Recycle/Dispose of old plug and cable
Prevent inadvertent connection to socket and risk of
electric shock
ENVIRONMENT
Recycle the packaging according to the identification
marks on it.
At the end of the product or its accessories life please
recycle where facilities exist - phone the Helpline for
current advice on recycling.
FITTING/REMOVING AND TENSIONING
SAW BLADES
Make sure the saw is switched OFF and unplugged
from mains.
Refer to parts illustration and Figs 5/8 below.
When changing blades make sure that the blade slot,
chamber, wheels etc are free from sawdust and debris.
• Open the band saw cover by unscrewing both slot
head bolts (A in fig 5) with a flat blade screwdriver
(not supplied) anticlockwise as shown in Fig 5.
• Remove the bolt and butterfly nut from the saw table
to allow the blade to be fitted/removed.
• Set the upper blade guard (A) half way up the blade as
shown in Fig 8 by slackening knob (B) and moving the
guard as required, tighten the knob.
• Slacken the blade tension by turning blade tension
knob (indicated in Fig 5) anticlockwise.
• If changing or replacing blades remove the old one.
Wear suitable gloves- saw blades are sharp!
• Clean the inside of the saw chamber with a brush.
Wear dust mask.
• Fit new blade with the teeth facing towards the front
of the saw/downwards towards saw table, twist the
blade side ways slightly to get it through the blade
guards.
• Check that the blade is on both wheels and in
between the blade guides.
• After you have changed blades you may need to align
(track) the blade and adjust the thrust bearings and
blade guides. See next sections.
• If not, tension blade by rotating the blade tension
knob until the spring begins to compress, then rotating two further turns.
• Close and secure the band saw cover.
A
Helpline
For any questions relating to operational or safety
matters contact:
Ferm Customer Helpline on:
0115 966 1199
Monday-Friday
8am – 6pm
Saturday
9am – 1 pm
Ferm
A
Ferm
ALIGNING (TRACKING) THE SAW BLADE
Make sure the saw is switched OFF and unplugged
from mains.
Refer to Fig 8 above.
• Open the band saw cover unscrewing the bolts
• Rotate one of the saw wheels by hand; the blade
should run in the middle of both wheels, if it does not
adjust it as below.
• Slack off the tracking knob locknut with a suitable
spanner.
• Turn the tracking adjustment knob while rotating the
upper wheel by hand. Watch the saw band running on
the wheel and adjust with the knob until the saw band
is running in the centre of the wheel.
• Lock the setting by tightening the tracking knob lock
nut.
• Close and secure the band saw cover.
ADJUSTING THE BLADE GUIDES AND
THRUST BEARINGS
Make sure the saw is switched OFF and unplugged
from mains.
Refer to Figs 9and10 below.
• Remove the saw table. It’s a lot easier to see to adjust
the bearing and guides.
To adjust the upper thrust bearing
• Loosen the Allen bolt (A in Fig 9) with the 3mm
wrench supplied.
• Use a screwdriver to push the bearing towards the
back of the blade until the bearing face just touches it.
The bearing has a eccentric adjustment to allow for
different blade widths. Put the screwdriver blade in
the slot on the end of the bearing rod and turn to get
the bearing face fully behind the blade.
• Retighten the Allen bolt to lock the adjustment.
To adjust the lower thrust bearing
• Loosen the two Allen bolts holding the lower bearing
plate (shown below)
• Move the lower bearing plate until the lower bearing
just touches the blade.
• Tighten the bolts with the wrench to lock the adjustment.
5
It is important that these adjustments are correct. The
upper/lower thrust bearing support the blade and the
saw will only work efficiently when the blade is supported by both of them.
To adjust the blade guides
• Loosen the Allen bolts (A in Fig 10) with the 3mm
wrench.
• Move both guides (B) evenly towards the blade –
make sure they are as close as possible without
touching the blade.
• Tighten the bolts to secure.
• Replace saw table as previously described.
USING THE SAW
ADJUSTING THE UPPER BLADE GUARD
Do not use this machine without the guards mounted.
Make sure the saw is switched OFF and unplugged
from mains.
Refer to parts illustration below.
• Loosen knob B shown in Fig 8.
• Slide the guard to the desired position.
Note: The guard should be as close as possible to the
workpiece but not touching it.
•
Tighten the knob to secure.
FITTING THE FENCE AND MITRE GUIDE
To fit the fence
OPERATION
Plug into a suitable mains supply and switch on.
Make sure the saw is switched OFF and unplugged
from mains.
•
•
•
•
B
A
B
Take the fence assembly and undo the adjustment by
revolving the clamp lever.
Fit the fence by hooking the rear claw over the rear
edge of the table.
With the fence flat on the surface of the table and
parallel to the blade adjust the clamping action by
revolving the clamp one turn at a time then clamping
the fence until it grips tightly against the front edge of
the table.
The clamp adjustment is correct when the fence is
tightly clamped and cannot be moved sideways easily.
Note: Both parts of the front claw must engage with the
front edge of the table for the fence to be secure.
SELECTING SAW BLADES
The saw takes a 1425mm (56") continuous blade - 6mm
(1/4") wide, and 0.4mm (1/64") thick. The choice of blade
depends on the dimension and material being cut.
In general choose thinner (front to back) for tight turns
and thicker for straight cutting.
To fit and adjust the mitre guide
• Fit the mitre guide by sliding it into the dovetail groves on either side of the table.
• To adjust the angle, loosen the knob and rotate the
guide to the desired angle (maximum 45o either
side).
Broadly there are three tooth forms available:
Hook/Raker
Removes material quickly
Standard
Gives clean cuts but will clog more easily.
Skip
Fast cutting in soft materials
Note: The angle on the guide is for indication
only. For accurate angles test on a piece of scrap first and
readjust as necessary.
They all have various sets and TPI (teeth per inch) depending on the use.
The band saw is a very versatile saw which can undertake
a broad range of cutting jobs, for this reason it is very
important to use the right blade for the job – consult the
Helpline or a blade supplier for advice on specific requirements. With the right adjustments and blade it is a very
successful tool.
6
BEFORE OPERATING
• Check the voltage on the saw corresponds with your
power supply voltage and that the plug and lead are in
good condition.
• Check you have the correct type of saw blade for the
machine and that it is mounted correctly. Do not use
parts other than supplied with the machine to make the
blade fit properly.
• Check you have a blade suitable for the material being cut
and that it is in good condition.
• Check the band saw cover is closed and secured.
• Run idle for 30 seconds - if there is any abnormal vibration or other fault. Switch off, inspect and rectify before
continuing
Ferm
To switch the saw ON
Push in the green button.
To switch OFF
Push in the red button.
Note: This saw has an NVR (no volt release) switch and will
automatically switch off if the mains supply is interrupted or
disconnected.
CUTTING
The saw will give best results cutting up to 85mm (3.3") thickness. Do not cut workpieces thicker than this.
• Place the workpiece on the table without the blade
touching it and switch ON.
• Using gentle pressure, move the workpiece along the
line of cut, keep the workpiece in firm contact with the
table. The blade cuts on a continuously downward
stroke.
• Let the saw do the cutting, undue pressure will overload
the saw resulting in overheating and broken blades.
• When the cut is finished, switch off and withdraw the
workpiece when the blade has stopped moving.
DURING USE
• Push the workpiece gently onto the blade.
• Tight radius cuts require narrow saw blades.
• Check material for foreign bodies. For example check
for pins, nails screws etc.
• Apply suitable lubricant, when cutting metal.
• Do not use water as a lubricant/coolant.
• Keep the workpiece on the surface of table.
• Use constant gentle pressure.
• If the blade seizes in the cut, switch off and open the cut
with a suitable tool before pulling the workpiece out.
Never switch the saw on with the blade jammed.
• Regularly inspect the blade during use (switch off first) for
signs of damage or wear and replace when required.
• Keep the band saw cover closed. Never operate this saw
with the cover open or unsecured.
• Switch the machine off before removing the plug from
the mains socket.
• Wear personal protection equipment. Use a suitable
dust mask and glasses plus other items as required.
• Be careful. Keep your hands away from the blade.
Ferm
MAINTENCE, CARE AND REPAIR
Switch off and unplug the machine before carrying
out any cleaning, adjusting or changing blades.
CLEANING
Do not use flammable liquids to clean the saw, they will
damage the casing and are a fire risk.
Clean with a soft brush or a cloth.
FAULTS
Switch OFF immediately at the mains plug and
remove the plug when:
• The plug or cable is damaged.
• The switch on the machine is defective.
• The motor runs hot.
• You smell or see smoke caused by scorched insulation in the machine.
The saw overheats
• Use less pressure.
• Clean ventilation slots.
• Defective motor.
Take to your Ferm dealer.
The saw does not work when switched on
• Damaged/faulty plug, switch or power lead.
Take to your Ferm dealer for repair.
The saw wanders off the cut line
• Worn blade.
Replace blade.
• Blade tension wrong.
Readjust.
The saw makes a lot of noise and does not run
smoothly
• The carbon brushes are worn; take to your Ferm
dealer for replacement.
The blade does not move with the motor running
• Blade tension wrong.
Readjust.
• Blade off the wheels.
Reinstall blade.
• Broken blade.
Replace.
The blade does not cut in a straight line
• Blunt blade.
Replace.
• Blade guides need adjusting.
Adjust as described.
• Put less feed pressure on the workpiece.
The blade does not cut or cuts very slowly
• Blunt blade.
Replace blade.
• Wrong type of blade for the material being cut.
See ‘selecting blades’.
• Blade installed the wrong way round.
Reverse blade direction.
7

Тема: Ленточнопильный станок ferm flz 275 (Прочитано 15161 раз)
0 Пользователей и 1 Гость просматривают эту тему.
Кто пользовал его?
как у Ферма этого с ленточками?
по весу чугуний.
массово распускать 50-ку не буду 
в магазе у нас стоит за 3,5т.р.
везде 5 и более
?

Записан
bonch
Ленточнопильный станок по цене лобзика?
Записан
Записан
Ленточнопильный станок по цене лобзика?
Это маленький настольный станочек, они все примерно так стоят (Корвет, Jet, Einhell, безымянные в разных Оби и Мерленах). По теме сказать ничего не могу…
Записан
любитель
Записан
« Последнее редактирование: Декабря 29, 2008, 06:31:11 pm от sirota0 »
Записан
Записан
Весьма похож на Корвет-31. Внешний вид чуть другой, характеристики те же, вес у К-31 всего на 2 кг меньше. Так что чугуна там нет.
На К-31 были жалобы на малую жесткость конструкции, как следствие, проблемы с натяжением ленты и вибрациями, и, соответственно, с чистотой распила. Скорее всего у этого Ferm-а будет примерно то же самое.
Записан
Ферм, Профи, Метабо, Прома, Корвет….всё это братья — близнецы, может и делаются на одном заводе. Различаются качеством сборки, качеством комплектующих и ценой. То что перечислил, лично работал, кроме Корвета, но его видел.
Записан
Записан
Ленточная пила JET JWBS-9 тож сильно похожа
Записан
JWBS-9 отличается от К-31 только наличием ременного привода, остальное один в один.
Записан
Prokop
Ленточки должны подойти проксоновские.
Записан
Ленточки должны подойти проксоновские.
============
Это которые?
Записан
- Мастеровой »
- Инструмент, приспособления и мастерская »
- Станки »
- Ленточные пилы (Модератор: Klausss) »
- Ленточнопильный станок ferm flz 275