-
Contents
-
Table of Contents
-
Bookmarks
Quick Links
HOOK-X Series
Operation manual
ENGLISH
HOOK-4x
HOOK-5x
HOOK-7x
lowrance.com
Related Manuals for Lowrance HOOK-4x
Summary of Contents for Lowrance HOOK-4x
-
Page 1
HOOK-X Series Operation manual ENGLISH HOOK-4x HOOK-5x HOOK-7x lowrance.com… -
Page 2
Part 15.103 of the FCC rules • complies with CE under EMC directive 2004/108/EC • complies with the requirements of level 2 devices of the Radiocommunications (Electromagnetic Compatibility) standard 2008 For more information please refer to our website: www.lowrance.com. -
Page 3
Connect the equipment into an outlet on a circuit different from that of the receiver • Consult the dealer or an experienced technician for help NOTE: This manual covers HOOK-4x, HOOK-5x and HOOK-7x units. As a result, screenshots of menus and dialogs may not match the look of your unit. -
Page 4: Table Of Contents
Table of contents Cursor ………… 11 Introduction ……..6 Advanced mode ……..11 Unit controls……….6 Restore defaults ……..11 Basic operation…….. 7 Pages ……….12 Setup wizard ……….7 Sonar page ……….12 Pages …………7 DownScan page ……..12 Selecting pages ……..
-
Page 5
Colorline ……….17 Settings ………. 30 Range ………… 17 Settings menu……..30 Frequency ……….18 System……….. 30 Ping speed……….19 Set language ……… 31 Fish ID ……….20 Audio …………. 31 DownScan options……… 20 Alarms ……….31 Sonar settings……..22 Units ………… -
Page 6: Introduction
Introduction Unit controls Getting started LIGHT/POWER: controls backlight To turn on/off the unit, press and Turn unit level and turns unit on/off hold the LIGHT/POWER key for on/off three seconds. KEYPAD: controls cursor & selects items on menus Adjusting This unit has 10 backlight levels. Press the LIGHT/POWER key to : allows you to select a page to PAGES…
-
Page 7: Basic Operation
Basic operation Selecting pages To select a page, press the keypad in the direction Setup wizard of the desired page and press ENTER. The Setup wizard will appear when the unit is turned on for the first time. To choose your own Page menus settings, do not run the setup wizard.
-
Page 8: Accessing The Settings Menu
Accessing the Settings menu Sonar page Sonar menu Accessing menu items Combo pages The keypad and ENTER key are used to select menu items and open submenus. Use the keypad to highlight the desired item and press ENTER. Horizontal panel Two-panel page Press the PAGES key twice to switch active panels.
-
Page 9: Working With Menus
Working with menus NOTE: Press the MENU key to Exit There are several menu types used to make menus. adjustments to options and settings, including scrollbars, on/off features and dropdown menus. Dialogs Dialogs are used for user input Scrollbars or for presenting information to Select the scrollbar and press the the user.
-
Page 10: Fishing Modes
Fishing modes Fishing mode options (Conventional sonar only) General Use 1000 ft or less Coastal Fishing modes enhance the performance of your Shallow 60 ft or less Shallow weedy bottoms unit by providing preset packages of sonar settings Water geared to specific fishing conditions. Fresh Water 400 ft or less Inland/Near coastal…
-
Page 11: Cursor
Cursor Standby mode The keypad moves the cursor around the display, Lowers power consumption by turning off sonar allowing you to scroll the map, select map items and the display. and review sonar history. Press the PWR/LIGHT key to Press MENU and select Return to vessel or Exit access the Backlight dialog.
-
Page 12: Sonar Page
Pages Surface Clutter Fish arches Fish Surface clutter Structure Bottom Range scale Range scale DownScan page Sonar page The Downscan page shows the water column moving from right to left. You can overlay Displays the water column moving from right to downscan sonar on the conventional sonar page left on your unit’s screen.
-
Page 13: Combo Pages
Combo pages Customizing combo pages You can adjust the panel size of combo pages and This unit has two pre-configured combo pages. control how the pages will be arranged on the screen: vertically (side) or horizontally (over). To make adjustments to combo page panels, select a combo page from the Pages carousel and Sonar/DownScan Sonar/DownScan…
-
Page 14: Overlay Data
Overlay data Used to select data shown on the Sonar and Struc- ture pages. To add overlay data: 1. From the Sonar or DownScan page, press MENU. 2. Select Overlay data and press ENTER. 3. Select Configure and press ENTER. Overlay data Show 4.
-
Page 15: Sonar Operation
This results in better image quality, better target separation and greater depth penetration. This unit supports High CHIRP, Medium CHIRP and Low CHIRP, depending on the transducer. CHIRP can be used with Lowrance conventional sonar transducers. • 50/200 kHz (Low/High CHIRP) •…
-
Page 16: Trackback
Trackback You can review your recent sonar history by mov- ing the cursor to the left until the screen starts to move in reverse. Blue sonar history bar (Only active with Downscan overlay Sonar menu turned on) (Advanced mode) Move the sonar history bar all the way to the right to resume normal sonar scrolling, or press MENU and select Exit cursor mode.
-
Page 17: Sensitivity
Sensitivity NOTE: You can make minor (+/-40%) Controls the level of detail shown on the display. changes to sensitivity with Auto Too much detail will clutter the screen. If Sensi- Sensitivity turned on. You will have to turn tivity is set too low, desired echoes may not be it off to make significant adjustments.
-
Page 18: Frequency
Sonar frequencies Best depth penetration with 50 kHz lower resolution Wider cone angle provides more Custom range menu 83 kHz bottom coverage and easy lure tracking Highest sensitivity and best tar- NOTE: When using a custom range, 200 kHz get separation in shallow water you may not receive any digital depth Provides the best depth pene- readings, or you may receive incorrect…
-
Page 19: Ping Speed
Sonar options Ping speed Controls the rate the transducer uses to send so- nar waves into the water. Ping speed adjustments can help reduce interference from other trans- ducers. When using fishing modes, ping speed settings are optimized for the selected fishing conditions, so in most cases, adjustments are not necessary.
-
Page 20: Fish Id
Surface clarity Amplitude scope Amplitude Surface Clarity reduces Displays the amplitude of the scope most recent echo. surface clutter by decreasing the sensitivity of the receiver near the Surface Clutter Fish ID surface. Displays fish echoes as fish sym- bols instead of fish arches. Split zoom and Split flasher Switches the sonar display from full screen sonar to a split screen view.
-
Page 21
Overlay data Allows you to select data to be displayed on top of the Sonar page. Overlay data setup is covered DownScan options menu Overlay data in the Pages section. NOTE: The DownScan options menu will only be available when DownScan overlay is enabled. -
Page 22: Sonar Settings
Sonar settings Restricts unit’s digital depth search Turns on/off capability Dowsncan overlay display Sonar Settings Menu Conventional settings/DownScan settings You can adjust settings for both Conventional sonar and DownScan sonar modes from the Sonar Settings menu. Manual mode Only adjustments made to conventional sonar Restricts digital depth capability, so the unit will settings will be visible on the sonar page.
-
Page 23: Installation
Installation When the unit is in manual mode, you may not receive any depth readings, or you may receive incorrect depth information. Fishing mode Enhances the performance of your unit by providing preset packages Installation menu of sonar settings geared to specific fishing conditions.
-
Page 24
Reset water distance Reset Water Distance to zero. Transducer type Transducer Selects the type of transducer model attached to your unit. A: Keel offset (e.g. -1 foot) If, for example, the distance is 1 foot, it will be input as (minus) –1 foot. Water speed calibration Calibrates a paddlewheel speed sensor. -
Page 25: Downscan Operation
DownScan operation DownScan menu Press MENU from the DownScan page to view the DownScan menu. Features described in this section are for DownScan sonar. Refer to the Sonar operation section for information on conventional sonar. Trackback You can review your sonar history by pressing the keypad to the left until the screen starts to move in reverse and the sonar history bar appears at the bottom of the screen.
-
Page 26
Adjust Range Accesses the Contrast adjustment Range settings display the section scrollbar, allowing you to adjust of the water column from the water contrast settings. surface to the selected depth range. NOTE: Auto range is the preferred Contrast setting for most fishing conditions. Adjusts the brightness ratio between light and dark areas on the screen, making it easier to distin- guish suspended objects from the background. -
Page 27: Ping Speed
DownScan options NOTE: When using a custom range, you may not receive any digital depth readings, or you may receive incorrect depth information. Frequency Controls the transducer frequency used by the unit. 800 kHz offers the best resolution, while 455 kHz has greater depth penetration.
-
Page 28
Surface clarity Color Surface Clarity reduces surface clutter by Allows you to select a color decreasing the sensitivity of the receiver near palette best suited to your the surface. fishing conditions. The white background palette works well for suspended targets. Purple is useful for viewing structure detail and determining bottom hardness. -
Page 29
Overlay data Allows you to select data to be displayed on top of the DownScan page. Overlay data setup is covered in the Pages section. Overlay data Settings Accesses the Settings menu. Refer to “Sonar settings” on page 22. DownScan operation | HOOK X series… -
Page 30: Settings
Settings System Adjusts unit settings like language, mute audio Settings menu and advanced mode. Accesses installation and configuration settings for your unit. Enables advanced features. Refer to “Ad- vanced mode” System menu on page 11. (Advanced mode Displays software Settings only) information menu…
-
Page 31: Set Language
About screen. Selects the language used on menus and dialogs. Lowrance periodically updates unit software to add features and improve functionality. To see the latest available software version go to Audio www.lowrance.com.
-
Page 32: Units
NMEA 0183 (HOOK-5x and HOOK-7x only) Alarms (optional Power/NMEA cable 000-0127-49) Sounds alarm when vessel enters water Shallow shallower than the selected shallow You can select the NMEA 0183 sentences the unit threshold will use when connected a NMEA 0183 device. Sounds alarm when a fish symbol (Fish ID) You can also adjust the Baud rate.
-
Page 33: Specifications
HOOK-5x: 5.4” H (136 mm) x 6.9” Voltage Input 10 to 17 V W (174 mm); 5.9” H (151 mm) with Typical: 1.1 A Current drain bracket HOOK-4x: (4.3” diagonal) 16-bit color Fuse type 3-amp Automotive TFT LCD Sonar Display HOOK-5x: (5” diagonal) 16-bit color 300 ft (91 m) 455/800 kHz Full color VGA Solar MAX™…
-
Page 34
HOOK -7x Sonar General 300 ft (91 m) 455/800 kHz Max depth 1000 ft (305 m) 83/200 kHz 5.3” H (234 mm) x 9.2” W (136 mm); Case Size 2500 ft (762 m) 50 kHz 5.9” H (151 mm) with bracket 455/800 kHz (7”… -
Page 35
Contact information Customer Service: AMER: 800-628-4487 EMEA: +44 1794 51 0010 APAC: 1300 628426 Ordering accessories US: http://store.navico.com Other countries: Visit your local dealer or distributor. Visit our website For additional regional support information: www.lowrance.com/technicalsupport… -
Page 36
www.lowrance.com…
Главная » СНИЖЕНИЕ » Руководство пользователя Lowrance HOOK-4x
Содержание скрывать
1
Руководство пользователя Lowrance HOOK-4x
2
Похожие сообщения
 Руководство пользователя Lowrance HOOK-4x

View Fullscreen
Похожие сообщения
-

Lowrance HOOK Series 4-5-7-9 Руководство пользователя
Lowrance HOOK Series 4-5-7-9 Руководство пользователя
-
Sumsung E-MANUAL Руководство пользователя
Sumsung E-MANUAL Руководство пользователя
-
РУКОВОДСТВО ПОЛЬЗОВАТЕЛЯ AMEYO
РУКОВОДСТВО ПОЛЬЗОВАТЕЛЯ AMEYO — Загрузить [оптимизировано] РУКОВОДСТВО ПОЛЬЗОВАТЕЛЯ AMEYO — Загрузить
-
Руководство пользователя Hydrow
Руководство пользователя Hydrow — Оригинальный PDF Руководство пользователя Hydrow — Оптимизированный PDF


Оставить комментарий
Ваш электронный адрес не будет опубликован. Обязательные поля помечены * *
КОММЕНТАРИЙ *
Имя и фамилия
Эл. адрес
Cайт
Сохраните мое имя, адрес электронной почты и веб-сайт в этом браузере для следующего комментария.
Решил сменить себе эхолот. Старую, модель с черно-белым экраном, отслужившую верой и правдой свыше 8 лет решил заменить новой с цветным дисплеем, в результате чего решил остановиться на этой модели американского производителя. Свои мысли и наблюдения попытаюсь систематизировать и изложить.
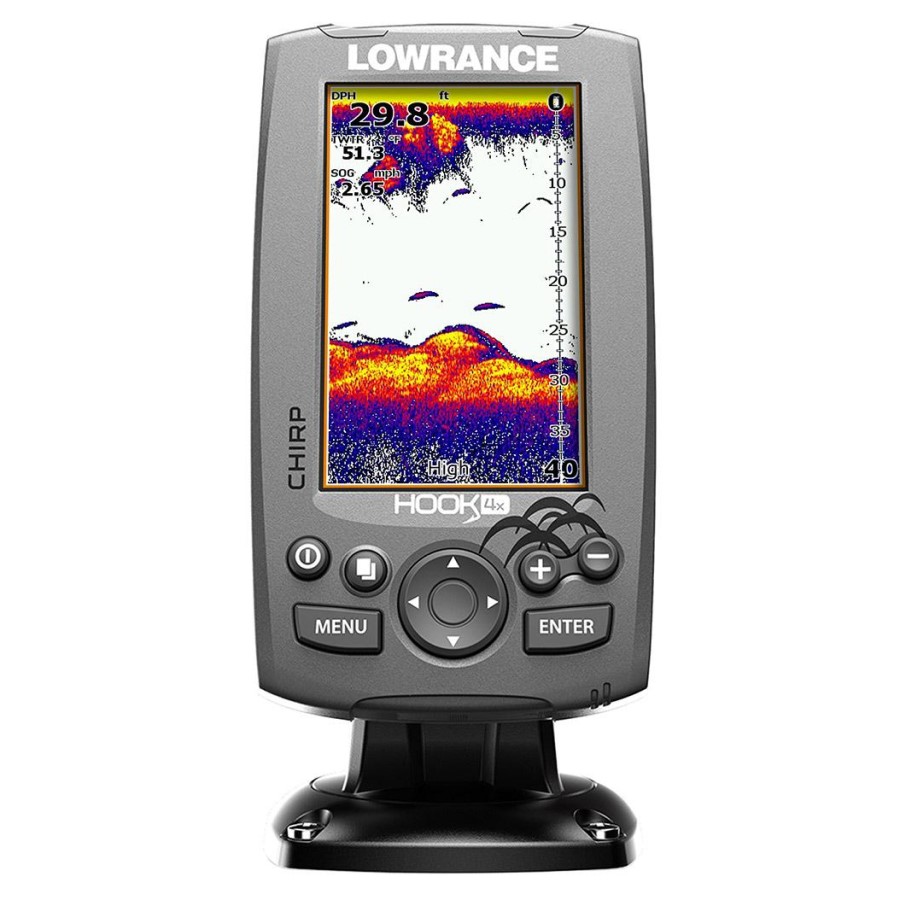
Эхолот Lowrance Hook 4x (Лоуренс Хук 4 Икс) будет интересен всем любителям рыбалки, которые используют для ловли рыбы лодку или катер. Разумеется, любителям морской рыбалки можно поискать более сложную модель, с большим количеством функций, но для наших водоемов (рек, озер, водохранилищ) этот эхолот подходит вполне. Эту модель я вычислил для себя в интернете.
Почему остановился именно на ней?
- Функционал прибора. Ранее я тоже использовал не самую сложную модель эхолота и решил и дальше придерживаться «стратегии разумного минимализма». Искал модель с максимальным количеством полезных, постоянно применяемых функций.
- Стоимость. Меня устроила достаточно адекватная цена прибора. При всем богатстве выбора по соотношению «цена/функционал/качество» этот эхолот как минимум в пятерке лучших.
- Производитель. Да простят меня патриоты, я знаю, что в России тоже умеют делать эхолот. Но производитель из США, известный во всем мире еще с 50-х годов прошлого века почему-то вызывает у меня больше доверия, чем малоизвестный отечественный, собирающий свои приборы из китайских запчастей. Да и к китайским производителям я продолжаю относиться настороженно.
Для меня было важно, чтобы прибор позволял:
- изучить особенности рельефа дна по пути следования лодки или непосредственно на месте лова;
- находить в водяной толще рыбу;
- определять местонахождение рыбы, расстояние до нее и глубину, на которой она находится.
Lowrance Hook 4x с этими задачами справляется.
Общее
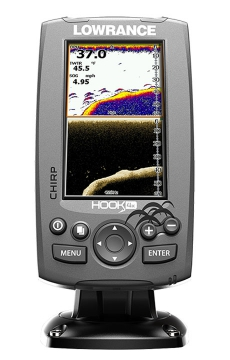
Многие рыболовы отмечают, что данная модель имеет почти полное сходство с предшествующей моделью того же производителя, которая имела маркировку Elite.
Внешнее сходство действительно феноменальное. Экраны имеют одинаковый размер, кнопки управления расположены идентично. Функциональные возможности приборов имеют абсолютное сходство. Вся внешняя разница – в размещении надписей и в их содержании.
Существуют два принципиальных различия между приборами:
— Серия Elite уже снята с производства, а серия Hook активно предлагается покупателям по всему миру;
— Приборы серии Elite имели меньшую цену.
Эхолот Lowrance Hook 4x появился на рынке в 2016 году и зарекомендовал себя, как простой в обращении, надежный прибор.
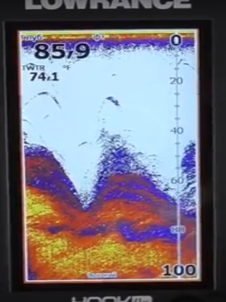
Видео обзор эхолота Lowrance Hook 4x
Технические детали
Экран: Диагональ 4.3″ дюйма, разрешение 480х272 пикселей , 16-бит цветной TFT, с 11-уровень подсветки LED
Сонар: широкополосный CHIRP и DownScan
Возможность Глубины:
— 1000 футов (305 м) эхолот CHIRP
— 300 футов. (91 м) для DownScan
Частота и охват:
— 200 кГц (20°) / 83 кГц (60°) для широкополосного сонара
— 455 кГц DownScan, вперед к корме. 4°, порт на правый борт 57°
— 800 кГц для передней DownScan в корме 2°, борта на борт 38°
Датчик 83/200: транцевый, парт.номер 000-0106-48
Датчик 83/200 и 455/800: транцевый, парт.номер 000-10976-001
Выходная мощность: 500 Вт (RMS)
Питание: 12 В постоянного тока (10-17 В постоянного тока мин/макс)
GPS: нет
Карты: нет
Маршруты, путевые точки, треки: нет

К сухим цифрам технических характеристик стоит добавить, что:
- Конструкция эхолота настолько проста, что собрать и подготовить прибор к работе можно, даже не заглядывая в инструкцию. Но тем, кто покупает прибор в первый раз, рекомендуется хотя бы бегло ее просмотреть.
- В предустановках монитора, на мой взгляд выставлена излишняя яркость, но все параметры экрана можно быстро и просто подстроить под свое световосприятие.
- В меню эхолота присутствует функция установки языка, единиц измерения. Не знаю, как другие, но я английским в совершенстве не владею, а английские меры длины остаются для меня темным лесом. Потому для меня это было важно.
- В целом меню простое и понятное. О незнакомых функциях можно почитать в той же инструкции. Кнопки переключений работают надежно, хотя на мой субъективный взгляд, слегка туговаты.
Плюсы и минусы прибора
Положительным техническим качествам эхолота можно отнести:
- В конструкции датчика прибора объединены технологии CHIRP Sonar и DownScan Imaging™. Использование этих технологий позволяет получать более подробную, четкую картинку происходящего под водой;
- В наличии функция DownScan Overlay™, объединять изображения, получаемые от двух сонаров. Это позволяет выделять движущиеся под водой объекты.
- Функция разделения экрана позволяет просматривать показания, полученные двумя различными способами.
- Историю показаний сонара позволяет просматривать Функция TrackBack™
.png)
Присутствуют у прибора и недостатки, отмечаемые рыболовами. К ним относят:
- Тип монитора. Мне показалось, что в погожие дни для того, чтобы рассмотреть изображение на экране монитора, зрение приходится напрягать. Поверхность экрана сильно бликует. Возможно, это с непривычки.
- Отсутствие навигатора GPS, характерного для функционала большинства эхолотов. На мой взгляд, функция необходимая, но в эхолотах не обязательная. GPS – навигатор, как отдельный прибор в наших условиях и удобнее и дешевле;
- Ограниченная влагозащита монитора прибора. Об этом пишут в отзывах многие рыболовы. Я пока этого не замечал, но на всякий случай слежу за тем, чтобы на дисплее было поменьше капель.

Цена
Я покупал эхолот со скидкой, и он обошелся мне в 15.500 RUR. В большинстве регионов России цена на эхолот колеблется в районе 16000 RUR.
Впечатления на практике
Испытал эхолот этим летом на водохранилище и готов поделиться впечатлениями.
- В условиях относительно небольших глубин (до 8 метров) прибор сработал идеально. Благодаря ему в короткое время я обнаружил небольшую стайку идущего на умеренной скорости в средних горизонтах карпа, затем место стоянки леща (которого немного и половил).
- Благодаря функции наложения изображений и возможности увеличивать изображение я уточнил место расположения затопленной неподалеку от моего любимого места коряги.
Общий вывод
В целом эхолот Lowrance Hook 4x соответствует современным требованиям к приборам этого класса. Главную свою функцию – помощь в поиске рыбы и изучении дна водоема он выполняет.
Покупкой я вполне доволен. Не уверен, что скоро буду менять этот эхолот на более новый, но следующий прибор тоже будет Lowrance. Считаю, что положительные отзывы на эхолот вполне соответствуют действительности. Рекомендую его тем рыболовам, кто умеет считать деньги и не гонится за количеством функций.
Отзывы покупателей
Миша
Lowrance HOOK-4x стоит своих денег. Пользовался и первоклассными моделями и простыми. Этот эхолот должен стоить значительно больше. Он чувствительный и простой в эксплуатации. При рыбалке он сразу выходил у меня на первый план. Несмотря на то, что он небольшого размера все показывает четко. Несколько раз его ронял. На мое удивление корпус оказался крепким.
***
Георгий Ниченков
После набора снастей этот эхолот теперь у меня самое главное место занимает в экипировке, спасибо молодому человеку, который мне целую обзорную экскурсию провел по телефону! Раньше у меня был простенький сонар, хотя и рыбалка с ним неплохая была, но сейчас даже не сравнить ни удовольствие от процесса, ни размеры улова нынешние. Желаю успехов вашему сайту с продажами и побольше хороших отзывов.
***
Михаил Алексеевич
Не думал, что с эхолотом рыбалка приобретает совсем другой характер! Рельеф дна под лодкой видно как на ладони. Можно ставить точки интересных мест. Но главное, конечно, то, что рыба очень точно выявляется. С HOOK-4x во время утреннего клева выловил судаков и окуней на 5 кило.
Посмотреть инструкция для Lowrance HOOK-4x бесплатно. Руководство относится к категории Эхолоты, 61 человек(а) дали ему среднюю оценку 7.9. Руководство доступно на следующих языках: английский. У вас есть вопрос о Lowrance HOOK-4x или вам нужна помощь? Задайте свой вопрос здесь
Не можете найти ответ на свой вопрос в руководстве? Вы можете найти ответ на свой вопрос ниже, в разделе часто задаваемых вопросов о Lowrance HOOK-4x.
Инструкция Lowrance HOOK-4x доступно в русский?
Не нашли свой вопрос? Задайте свой вопрос здесь
-
Contents
-
Table of Contents
-
Bookmarks
Quick Links
Hook2 X Series
Operator Manual
4x GPS, 4x Sonar, 5x GPS HDI, 7x GPS HDI
ENGLISH
www.lowrance.com
Related Manuals for Lowrance HOOK2 X series
Summary of Contents for Lowrance HOOK2 X series
-
Page 1
Hook2 X Series Operator Manual 4x GPS, 4x Sonar, 5x GPS HDI, 7x GPS HDI ENGLISH www.lowrance.com… -
Page 3
Navico Holding AS and its subsidiaries, branches and affiliates reserve the right to make changes to specifications without notice. Trademarks ® ® Lowrance and Navico are registered trademarks of Navico Holding Navico product references This manual refers to the following Navico product: •… -
Page 4: About This Manual
The requirements of level 2 devices of the Radio communications (Electromagnetic Compatibility) standard 2008 The relevant Declaration of Conformity is available in the product’s section at the following website: www.lowrance.com. About this manual This manual is a reference guide for operating the following Hook models: 4x GPS, 4x Sonar, 5x GPS HDI, and 7x GPS HDI.
-
Page 5
Warning: Used when it is necessary to warn personnel that they should proceed carefully to prevent risk of injury and/or damage to equipment/ personnel. Preface | Hook² X Series Operator Manual… -
Page 6
Preface | Hook² X Series Operator Manual… -
Page 7: Table Of Contents
Contents Introduction Front controls Application pages 11 Basic operation System Controls dialog Settings Turning the system on and off Display illumination Data Overlay Stop sonar 14 GPS plotter GPS plotter page Vessel symbol GPS plotter page scale Panning the GPS plotter image Positioning the vessel on the page Waypoints, Routes, and Trails Navigating…
-
Page 8
Customize the image settings Custom and Ice Fishing mode options Fish ID Sonar settings 26 Flasher The Flasher image Customize the image settings Custom and ice fishing mode options 28 DownScan The DownScan image Zooming the DownScan image Customize the image settings 30 Alarms Alarm system Alarms dialog… -
Page 9: Introduction
Introduction Front controls Pages — Press to toggle between available pages. Zoom in/out — Press to zoom the image. Press both keys simultaneous to create a MOB (Man Over Board) waypoint at the vessel’s position. Ú Note: Creating a MOB waypoint is not available on 4x Sonar only models.
-
Page 10: Application Pages
Application pages Application panel Menu — Panel specific menu. System Controls dialog — Quick access to basic system settings. Dialog — Information to or input from the user. Alarm message — Displayed if dangerous situations or system faults occur. Each application connected to the system is presented on panels. Introduction | Hook²…
-
Page 11: Basic Operation
Basic operation System Controls dialog The System Controls dialog provides quick access to basic system settings. You display the dialog by making a short press on the Power key. Settings Provides access to application and system settings. The system settings dialog available on models with GPS. The system settings dialog available on the 4x Sonar only models.
-
Page 12: Turning The System On And Off
Turning the system on and off You turn the system on and off by pressing and holding the Power key. You can also turn the unit off from the System Controls dialog. If the Power key is released before the shut-down is completed, the power off process is cancelled.
-
Page 13: Stop Sonar
Edit overlay data On models with GPS, you can have up to 3 data overlays on the GPS , sonar and DownScan (available on 5x and 7x models only) pages. Use the Edit overlay option on the System Controls dialog to: •…
-
Page 14: Gps Plotter
GPS plotter Ú Note: The GPS plotter page is not available on 4x Sonar only models. The GPS plotter page displays your vessel’s position. On the GPS plotter page you can plan and navigate routes, see your vessel’s trail, and place waypoints. GPS plotter page •…
-
Page 15: Vessel Symbol
* Optional items. You turn the optional items on/off individually from the GPS settings dialog. Vessel symbol When the system has a valid GPS position lock, the vessel symbol indicates vessel position. If no GPS position is available, the vessel symbol includes a question mark.
-
Page 16: Waypoints, Routes, And Trails
North up Displays the GPS plotter image with north upward. Course up The GPS plotter image direction is depending on if navigating or not: • when navigating: the desired course is oriented up • if not navigating: the direction the vessel is actually traveling (COG) is oriented up Look ahead Moves the vessel icon on the panel to maximize your view ahead of…
-
Page 17
Waypoints, Routes, and Trails • Waypoints — specifies whether waypoints are (ON) or are not (OFF) displayed on the GPS image. • Routes — specifies whether routes are (ON) or are not (OFF) displayed on the GPS image. • Trails — specifies whether trails are (ON) or are not (OFF) displayed on the GPS image. -
Page 18: Waypoints, Routes, And Trails
Waypoints, Routes, and Trails Ú Note: Waypoints, routes, and trails are not available on 4x Sonar only models. Waypoints, routes, and trails are available on the GPS plotter page. Waypoints, Routes, and Trails dialogs The Waypoints, Routes, and Trails dialogs give access to advanced edit functions and settings for these items.
-
Page 19: Waypoints
Waypoint options Routes options Trails options Waypoints A waypoint is a user generated mark positioned on the chart or GPS plotter panel. Each waypoint has an exact position with latitude and longitude coordinates. A waypoint is used to mark a position you later may want to return to.
-
Page 20: Routes
Routes A route consists of a series of routepoints entered in the order that you want to navigate them. Creating a new route on the page Select the new route option from the menu Press the Cursor/Waypoint key to activate the cursor on the panel Use the Arrow keys to position the cursor at the first routepoint on the panel…
-
Page 21
Waypoints, Routes, and Trails | Hook² X Series Operator Manual… -
Page 22: Navigating
Navigating Ú Note: Navigating is not available on 4x Sonar only models. The navigation function is available on the GPS page. The navigation function included in the system allows you to navigate to the cursor position, to a waypoint, or along a predefined route.
-
Page 23: Sonar
Sonar The Sonar function provides a view of the water and bottom beneath your vessel, allowing you to detect fish and examine the structure of the bottom. The Sonar image Fish arches Data overlay Range limit Bottom Sonar | Hook² X Series Operator Manual…
-
Page 24: Zooming The Image
Zooming the image You can zoom the image by using the Zoom keys. Customize the image settings By default the unit is set to Auto mode, and most settings are automated. It is recommended that only experienced sonar users use the customize settings to further customize the image. Select Auto in the menu and change to custom or ice fishing mode to customize image settings.
-
Page 25: Depth Offset
Depth offset All transducers measure water depth from the transducer to the bottom. As a result, water depth readings do not account for the distance from the transducer to the lowest point of the boat (for example; bottom of the keel, rudder, or skeg) in the water or from the transducer to the water surface.
-
Page 26: Flasher
Flasher The Flasher shows a digital flasher sonar view below your transducer. Digital flashers are most commonly used in scenarios such as ice fishing and vertical jigging where the angler does not care as much about the sonar history shown on a traditional sonar view, but is only interested in raw, live sonar returns.
-
Page 27: Customize The Image Settings
Water column activity (fish, bait fish, etc.) Depth Customize the image settings By default the unit is set to Auto mode, and most settings are automated. It is recommended that only experienced sonar users use the customize settings to further customize the sonar image. Select Auto in the menu and change to custom or ice fishing mode to customize image settings.
-
Page 28: Downscan
DownScan Ú Note: DownScan is available on 5x and 7x models only. DownScan provides detailed images of structure and fish directly below your boat, down to 91 m (300 ft) at 455 kHz and 46 m (150 ft) at 800 kHz. The DownScan image Data overlay Range limit…
-
Page 29
Custom mode options When the custom mode is selected the menu expands with more options. Use these menu options to customize the image. DownScan | Hook² X Series Operator Manual… -
Page 30: Alarms
Alarms Alarm system The system continuously checks for dangerous situations and system faults while the system is running. When an alarm situation occurs, an alarm message pops up on the screen. If you have enabled the siren, the alarm message is followed by an audible alarm.
-
Page 31: Maintenance
Maintenance Preventive maintenance The unit does not contain any field serviceable components. Therefore, the operator is required to perform only a very limited amount of preventative maintenance. It is recommended that you always fit the protective sun cover when the unit is not in use. Ú…
-
Page 32
Maintenance | Hook² X Series Operator Manual…