M-AUDIO T Track Solo Руководство пользователя

Введение
Комплектация
- М-Трек Соло
- Кабель USB-BtoUSB-A
- Карты загрузки программного обеспечения
- Руководство пользователя
- Руководство по безопасности и гарантии
Поддержка
Для получения последней информации об этом продукте (системные требования, информация о совместимости и т. Д.) И регистрации продукта посетите m-audio.com. Для дополнительной поддержки продукта,
посещение m-audio.com/support.
Быстрое начало
пользователи macOS: Для работы в соответствии с классом с MTrack Solo установка драйвера не требуется.
Пользователи iOS: Мощности устройства iOS недостаточно для питания M-Track Solo. Используйте комплект для подключения камеры Apple (продается отдельно), переходной USB-кабель (продается отдельно) и адаптер питания USB (продается отдельно), который обеспечивает дополнительный USB-разъем для питания M-Track Solo.
Пользователи Windows:
Перед подключением M-Track Solo к компьютеру установите драйверы:
- Перейдите на m-audio.com/drivers и загрузите последнюю версию драйвера M-Track Solo для вашей операционной системы.
- Откройте приложение file вы скачали и дважды щелкните установщик драйвера file
- Следуйте инструкциям на экране, чтобы установить драйверы.
Программного обеспечения:
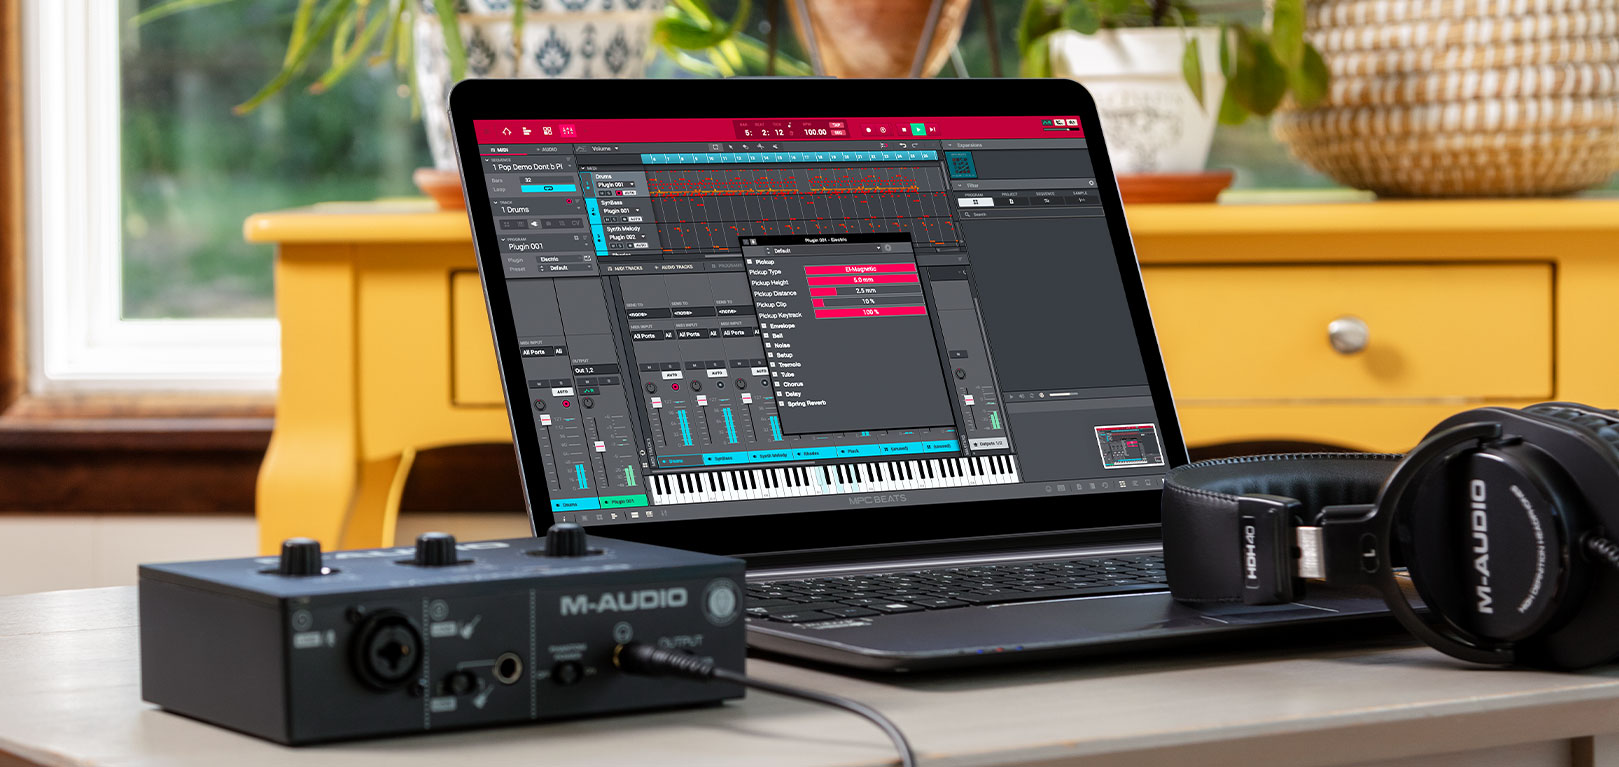
Мы включили Pro Tools | Первое издание M-Audio Edition и MPC Beats с вашим M-Track Solo, так что вы можете начать создавать музыку с помощью профессионального программного обеспечения прямо из коробки.
Зарегистрируйте свой M-Track Solo на m-audio.com/softwaredownload и следуйте инструкциям по установке в своей учетной записи.
Виртуальные инструменты:
Следуйте инструкциям в вашей учетной записи для установки прилагаемого виртуального инструмента. plugins. После установки большинство DAW не загружают виртуальный инструмент. plugins автоматически. Чтобы получить доступ к виртуальному инструменту plugins с Pro Tools | Сначала M-Audio Edition, вам нужно будет выбрать папку плагина для программного обеспечения для сканирования:
Профессиональные инструменты | Папки первого плагина M-Audio Edition (AAX):
Windows (32-битная):
C: Программа Files (x86) Общие FileПлагины sAvidAudio
Windows (64-битная):C: Программа FilesОбщий FileПлагины sAvidAudio
MacOS: Macintosh HD / Библиотека / Поддержка приложений / Avid / Аудио / Плагины Чтобы установить M-Track Solo в качестве устройства воспроизведения по умолчанию, следуйте приведенным ниже инструкциям в зависимости от операционной системы вашего компьютера.
Windows:
- Используйте прилагаемый USB-кабель для подключения M-Track Solo к компьютеру.
- На панели задач найдите значок «динамик» регулятора громкости. Щелкните динамик правой кнопкой мыши и откройте «Настройки звука»> «Звуки». Или перейдите в меню «Пуск»> «Система»> «Звук»> «Панель управления звуком».
- На панели управления звуком Windows выберите вкладку «Воспроизведение» и выберите «Аудиокодек USB» в качестве устройства по умолчанию.
- Щелкните вкладку «Запись» и выберите USB-аудиокодек в качестве устройства по умолчанию.
- Щелкните Свойства в правом нижнем углу.
- В новом окне щелкните вкладку «Дополнительно» и выберите 2-канальный, 16-битный, 48000 Гц (студийное качество) в качестве формата по умолчанию.
- Снимите оба флажка в разделе «Эксклюзивный режим».
- Щелкните OK, чтобы закрыть окно свойств.
- Щелкните OK, чтобы закрыть панель управления звуком.
MacOS:
- Используйте прилагаемый USB-кабель для подключения M-Track Solo к компьютеру.
- Перейдите в Приложения> Утилиты> Настройка Audio MIDI.
- В окне «Аудиоустройства» выберите «Аудиокодек USB» в левом столбце.
- Щелкните правой кнопкой мыши USB-аудиокодек и выберите «Использовать это устройство для ввода звука».
- Щелкните правой кнопкой мыши USB-аудиокодек и выберите «Использовать это устройство для вывода звука».
- Выйдите из настройки Audio MIDI.
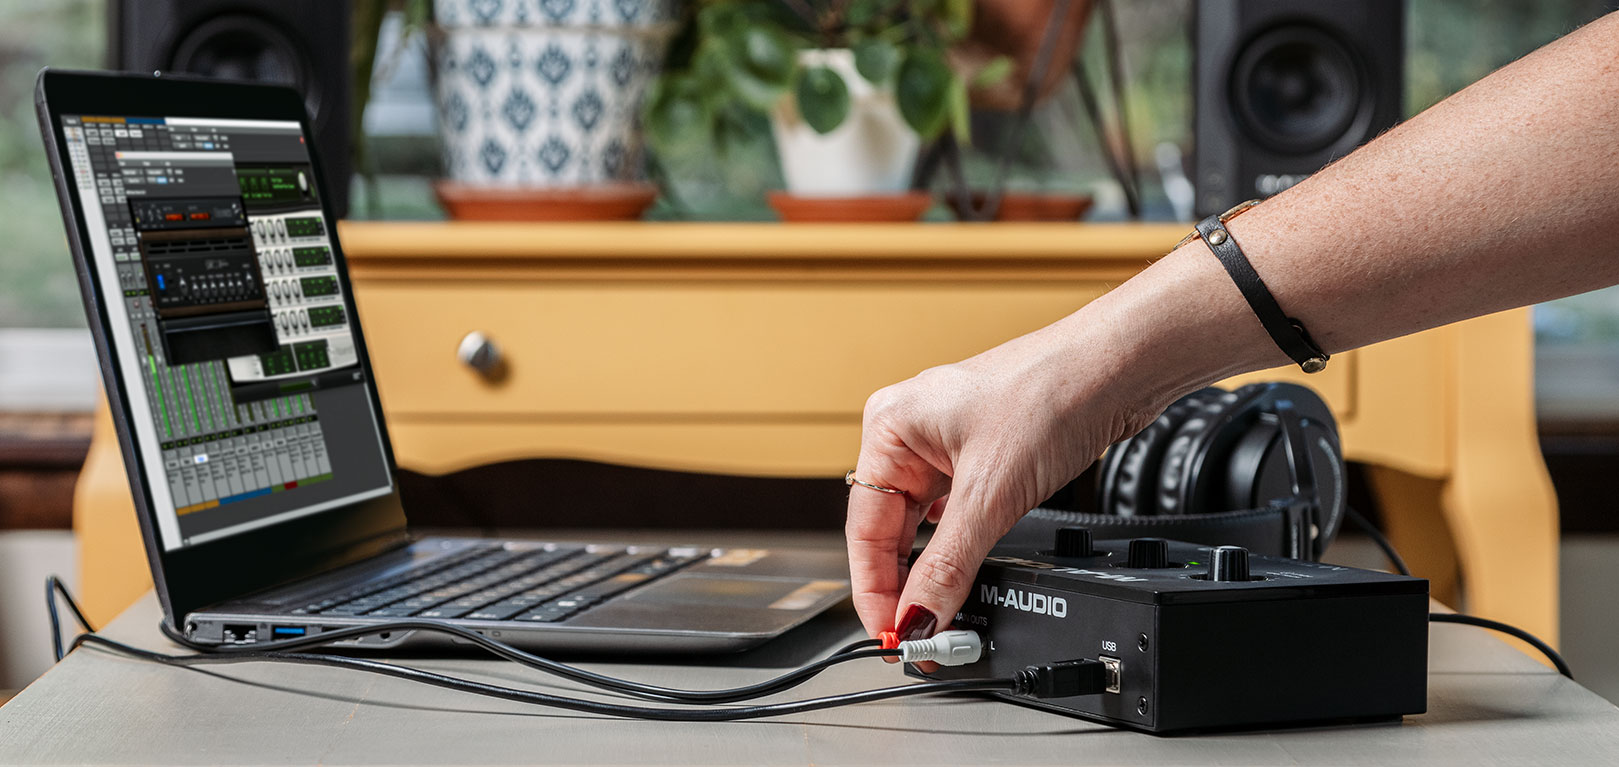
Схема подключения
Элементы, не указанные в разделе «Введение»> «Содержимое упаковки», продаются отдельно.

Примечание: Используйте переключатель + 48V (фантомное питание), только если микрофон требует фантомного питания. Для большинства динамических и ленточных микрофонов фантомное питание не требуется, но для большинства конденсаторных микрофонов требуется. Обратитесь к документации вашего микрофона, чтобы узнать, нужно ли ему фантомное питание.
Настройка M-Track Solo с вашим программным обеспечением
Настройка M-Track Solo с помощью Pro Tools | Первое издание M-Audio
- Используйте прилагаемый USB-кабель для подключения M-Track Solo к компьютеру.
- Open Pro Tools | Первое издание M-Audio.
- Перейдите в раздел «Настройка»> «Механизм воспроизведения…».
- Откройте раскрывающееся меню Playback Engine и выберите USB Audio Codec.
Примечание: Возможно, вам потребуется сохранить и перезапустить ваш проект. - Выберите свой Sample Rate, а затем нажмите OK, чтобы закрыть окно настройки. Теперь вы можете добавлять треки для отправки и получения звука от источников, подключенных к входам M-Track Solo, и передавать записанный звук обратно через выходы M-Track Solo.
Настройка M-Track Solo с помощью MPC Beats
- Используйте прилагаемый USB-кабель для подключения M-Track Solo к компьютеру.
- Откройте MPC Beats.
- Перейдите в Edit> Preferences….
- Для пользователей Windows: в окне «Аудио» выберите ASIO в поле «Тип аудиоустройства».
выпадающее меню. В раскрывающемся меню «Устройство» выберите M-Track Solo и Duo ASIO. Для пользователей MacOS: в окне «Аудио» выберите «Аудиокодек USB» в раскрывающихся меню «Выход» и «Вход». Примечание: вам может потребоваться сохранить и перезапустить ваш проект. - Выберите свой Sample Rate, а затем нажмите OK, чтобы закрыть окно настроек. Теперь вы можете добавлять треки для отправки и получения звука от источников, подключенных к входам M-Track Solo, и передавать записанный звук обратно через выходы M-Track Solo.
Особенности
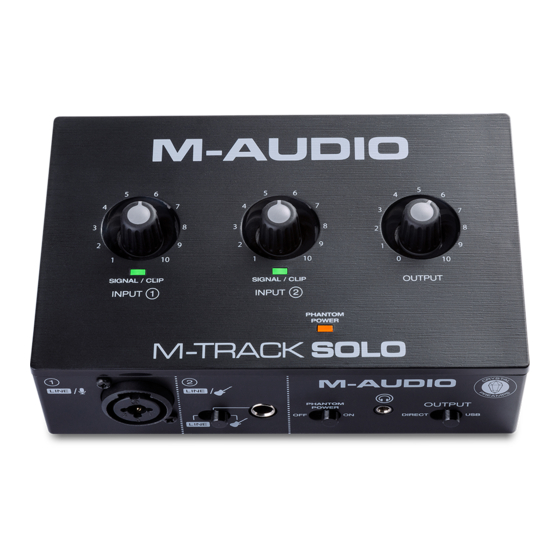
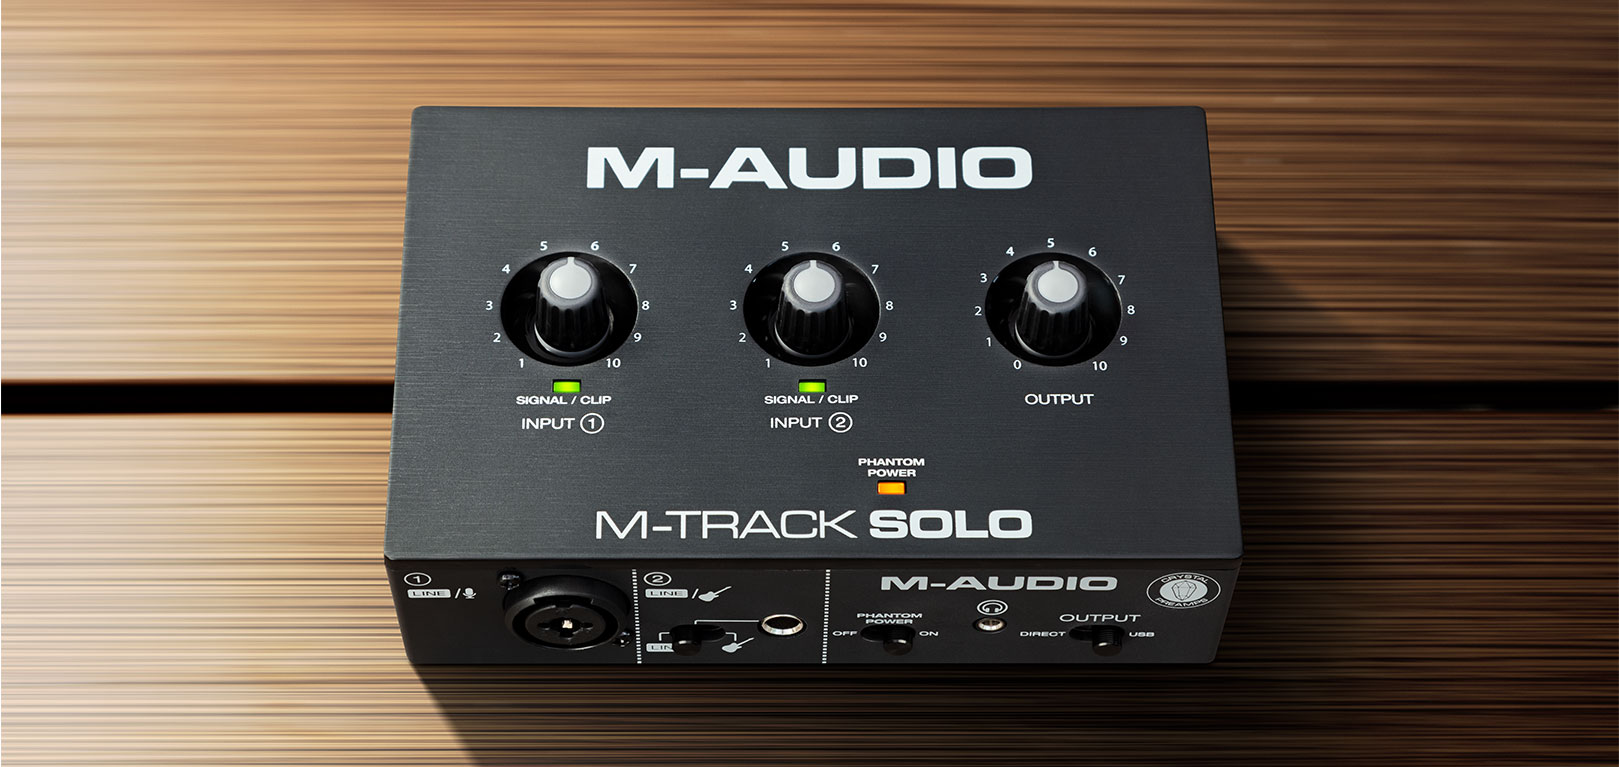
Верхняя панель
- Входное усиление: Регулирует уровень усиления входа. Установите этот регулятор так, чтобы соответствующий индикатор сигнала / ограничения (расположенный под регулятором) отображал «нормальный» уровень во время выступления, но не настолько высокий, чтобы индикатор «зажимал» или достигал пика, вызывая искажение звука.

- Светодиод сигнала / фиксации: Светодиод загорится зеленым при обнаружении входного сигнала. Светодиод загорится красным, если уровень сигнала слишком высок, что может вызвать искажение или «клиппирование». В этом случае уменьшите входное усиление и / или уменьшите выходной уровень вашего источника звука.
- Уровень монитора: Регулирует выходную громкость основных выходов, которые должны быть подключены к вашим активным мониторам или ampсистема Lifier и выход для наушников.
- Светодиод + 48В (фантомное питание): Загорается при включении фантомного питания для использования с комбинированным входом.

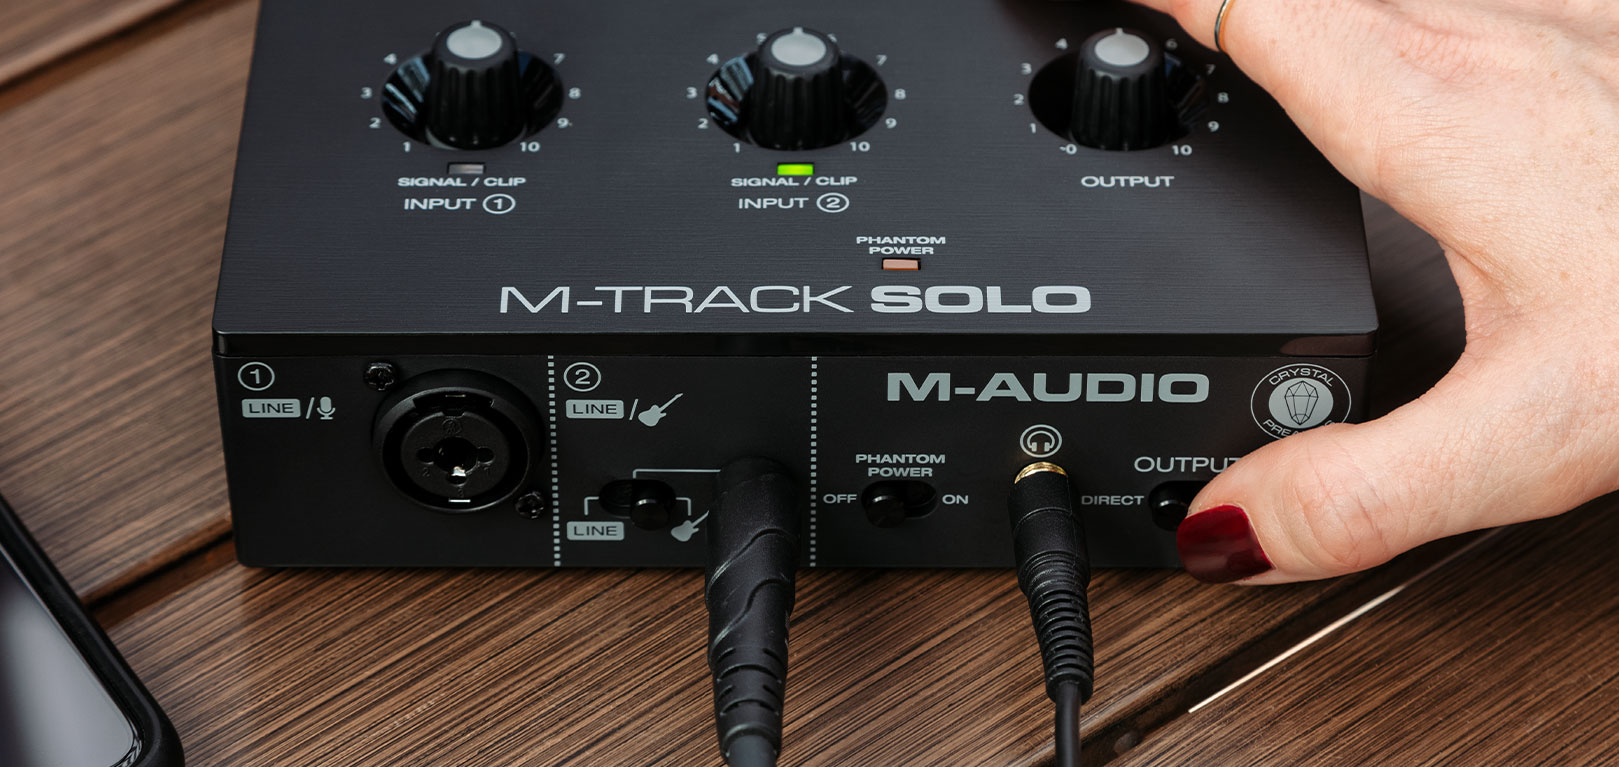
Задняя панель
- USB-порт (тип B): Это соединение позволит вам отправлять аудио на компьютер и с него. Используйте прилагаемый кабель USB-B-USB-A для подключения M-Track Solo к компьютеру. M-Track Solo требует подключения USB 2.0 (или выше).

- Основные выходы: Используйте стандартные кабели RCA для подключения этих выходов к активным мониторам, amplifier system и т. д. Микширование, которое вы слышите на этих выходах, будет определяться переключателем Direct / USB. Уровень этих выходов регулируется ручкой Monitor Level.

Передняя панель
- Комбинированный ввод: Подключите к этому входу микрофон, гитару или бас-гитару с активным звукоснимателем или устройство линейного уровня. Для микрофонов используйте кабель XLR или TRS-кабель 1/4 дюйма (6.35 мм). Для гитары или бас-гитары с активным звукоснимателем используйте стандартный кабель TS 1/4 дюйма (6.35 мм).

- 1/4 ″ Вход: Для сигналов линейного уровня используйте кабель TRS 1/4 дюйма (6.35 мм). Для гитары или бас-гитары с активным звукоснимателем используйте стандартный кабель TS 1/4 дюйма (6.35 мм).
- Переключатель линии / инструмента: Установите переключатель в положение Line при подключении микрофона или клавиатуры. Установите переключатель в положение «Инструмент» при подключении гитары или бас-гитары.
- Переключатель + 48 В (фантомное питание): Этот переключатель активирует и деактивирует фантомное питание. При активации (горит) фантомное питание подает +48 В на комбинированный вход. Обратите внимание, что для большинства динамических и ленточных микрофонов фантомное питание не требуется, в отличие от большинства конденсаторных микрофонов. Обратитесь к документации вашего микрофона, чтобы узнать, нужно ли ему фантомное питание.
- Выход на наушники: Подключите к этому выходу наушники TRS 1/8 дюйма (3.5 мм). Микширование, которое вы слышите на этом выходе, будет определяться переключателем Direct / USB. Уровень этого выхода регулируется ручкой Monitor Level.
- Прямой / USB: Этот переключатель управляет отправкой прямого входного сигнала или обратного сигнала USB-потока на выход для наушников и основной выход.

-
- Если установлено значение USB, будет слышно только воспроизведение звука USB с вашего компьютера.
- Установите переключатель в положение Direct, чтобы контролировать прямой входной сигнал, при этом все входы суммируются в моно и одинаково слышны с каждой стороны. Это полезно для мониторинга сигнала гитары или вокального микрофона. Этот переключатель не влияет на воспроизведение DAW или способ записи звука в DAW; он влияет только на то, как вы слышите входной сигнал в выходах для наушников и основных выходах.
Документы / Ресурсы
Рекомендации
- Manuals
- Brands
- M-Audio Manuals
- Accessories
- M-Track Solo
- User manual
-
Contents
-
Table of Contents
-
Bookmarks
Quick Links
User Guide
English ( 2 – 8 )
Guía del usuario
Español ( 9– 15 )
Guide d’utilisation
Français ( 16 – 22 )
Guida per l’uso
Italiano ( 23 – 29 )
Benutzerhandbuch
Deutsch ( 30– 36 )
Appendix
English ( 37 – 39 )
Related Manuals for M-Audio M-Track Solo
Summary of Contents for M-Audio M-Track Solo
-
Page 1
User Guide English ( 2 – 8 ) Guía del usuario Español ( 9– 15 ) Guide d’utilisation Français ( 16 – 22 ) Guida per l’uso Italiano ( 23 – 29 ) Benutzerhandbuch Deutsch ( 30– 36 ) Appendix English ( 37 –… -
Page 2: Box Contents
Introduction Box Contents M-Track Solo User Guide USB-B–to–USB-A Cable Safety & Warranty Manual Software Download Cards Support For the latest information about this product (system requirements, compatibility information, etc.) and product registration, visit m-audio.com. For additional product support, visit m-audio.com/support.
-
Page 3: Quick Start
After installation, most DAWs will not load virtual instrument plugins automatically. In order to access the virtual instrument plugins with Pro Tools | First M-Audio Edition, you will need to choose the plugin folder for the software to scan:…
-
Page 4
To set M-Track Solo as your default playback device, follow the directions below based on your computer’s operating system. Windows: 1. Use the included USB cable to connect the M-Track Solo to your computer. 2. In the Taskbar, locate the Volume Control «speaker» icon. Right-click the speaker and open Sound Settings >… -
Page 5: Connection Diagram
Connection Diagram Items not listed under Introduction > Box Contents are sold separately. Guitar Monitors Computer Microphone Headphones Rear Panel Front Panel Note: Use the +48V (Phantom Power) Switch only if a microphone requires phantom power. Most dynamic microphones and ribbon microphones do not require phantom power, but most condenser microphones do.
-
Page 6
Select your Sample Rate and then click OK to close the Setup window. You can now add tracks to send and receive audio from sources connected to M-Track Solo inputs and stream recorded audio back through the M-Track Solo outputs. -
Page 7: Top Panel
Use the included USB-B-to-USB-A cable to connect the M-Track Solo to a computer. The M-Track Solo requires a USB 2.0 connection (or higher). Main Outputs: Use standard RCA cables to connect these outputs to your powered monitors, amplifier system, etc.
-
Page 8: Front Panel
Front Panel Combo Input: Connect a microphone, a guitar or bass with an active pickup, or a line-level device to this input. For microphones, use an XLR or 1/4” (6.35 mm) TRS cable. For a guitar or bass with an active pickup, use a standard 1/4”…
-
Page 9: Contenido De La Caja
Manual sobre la seguridad y garantía Tarjetas de descarga de software Soporte Para obtener la información más completa acerca de este product (los requisitos del sistema, compatibilidad, etc) y registro del producto, visite m-audio.com. Para soporte adicional del producto, visite m-audio.com/support.
-
Page 10: Conexión Rápida
Siga las instrucciones de la pantalla para instalar los drivers. Software: Hemos incluido Pro Tools | First M-Audio Edition y MPC Beats con su M-Track Solo de modo que puede comenzar a hacer música con software profesional en cuanto lo saca de la caja.
-
Page 11
Windows: Utilice el cable USB incluido para conectar el M-Track Solo a su ordenador. Localice en la barra de tareas el icono del «altavoz» del control de volumen. Haga clic derecho en el altavoz y abierto Ajustes de sonido >… -
Page 12: Diagrama De Instalación
Diagrama de instalación Los elementos que no se enumeran en Introducción > Contenido de la caja se venden por separado. Guitarra Monitores alimentados Computadora Micrófono Auriculares Panel trasero Panel frontal Nota: Utilice el interruptor +48 V (potencia fantasma) solamente si un micrófono requiere potencia fantasma.
-
Page 13
Ahora puede añadir pistas para enviar y recibir audio desde las fuentes conectadas a las entradas del M-Track Solo y transmitir el audio grabado de regreso por las salidas del M-Track Solo. Instalación del M-Track Solo con MPC Beats Utilice el cable USB incluido para conectar el M-Track Solo a su ordenador. -
Page 14: Panel Superior
Utilice los cable USB-B–a–USB-A para conectar el M-Track Solo a un ordenador. El M-Track Solo requiere una conexión USB 2.0 (o superior). Salidas principales: Utilice cables RCA para conectar estas salidas a sus monitores alimentados, sistema de amplificación, etc.
-
Page 15: Panel Frontal
Panel frontal Entrada combinada: Conecte un micrófono, guitarra o bajo con captador activo o un dispositivo de nivel de línea a esta entrada. Para micrófonos, utilice un cable XLR o TRS de 6,35 mm (1/4 pulg.). Entrada de 1/4″: para señales de nivel de línea, use un cable TRS de 1/4″…
-
Page 16: Contenu De La Boîte
Cartes de téléchargement de logiciel Assistance Pour les dernières informations concernant ce produit (la configuration système minimale requise, la compatibilité, etc) et l’enregistrement du produit, veuillez visitez le site m-audio.com. Pour toute assistance supplémentaire, veuillez visiter le site m-audio.com/support.
-
Page 17
Logiciel : Nous avons inclus l’application Pro Tools | First M-Audio Edition et MPC Beats avec l’M-Track Solo afin que vous puissiez commencer à créer de la musique avec un logiciel de qualité professionnelle aussitôt que vous le sortez de la boîte. Veuillez enregistrer l’M-Track Solo sur le site m-audio.com/softwaredownload… -
Page 18
Pour définir le M-Track Solo comme périphérique de lecture par défaut, veuillez suivre les instructions ci-dessous, selon le système d’exploitation de votre ordinateur. Windows : Utilisez le câble USB inclus pour brancher le M-Track Solo à votre ordinateur. Dans la barre des tâches, recherchez l’icône de la commande de volume (haut-parleur). Faites un clic droit sur l’icône du haut-parleur et ouvrir Paramètres son>… -
Page 19: Schéma De Connexion
Schéma de connexion Les éléments qui ne figurent pas dans la section Présentation > Contenu de la boîte sont vendus séparément. Guitare Moniteurs amplifiés Casque Microphone Ordinateur d’écoute Panneau arrière Panneau avant Important : Utiliser la touche d’alimentation fantôme (+48V) uniquement lorsqu’un microphone nécessite une alimentation fantôme.
-
Page 20
Setup. Vous pouvez maintenant ajouter des pistes et recevoir un signal audio des sources branchées aux entrées de l’M-Track Solo et transmettre en continu des fichiers par le biais des sorties de l’M-Track Solo. Installation de M-Track Solo avec MPC Beats Utilisez le câble USB fourni pour brancher l’interface M-Track Solo à… -
Page 21: Caractéristiques
Utilisez le câble USB-B–vers–USB-A fourni pour brancher l’M- Track Solo à un ordinateur. L’M-Track Solo requiert une connexion USB 2.0 (ou version ultérieure). Sorties principales : Utilisez des câbles RCA pour relier ces sorties à vos moniteurs amplifiés, à…
-
Page 22: Panneau Avant
Panneau avant Entrée combo : Cette entrée permet de brancher un microphone, une guitare ou une basse avec un micro actif, ou un appareil à niveau ligne. Pour brancher un microphone, utilisez un câble XLR ou TRS 6,35 mm. Entrée 1/4″ : pour les signaux de niveau ligne, utilisez un câble TRS 1/4″…
-
Page 23: Contenuti Della Confezione
Schede di download del software Assistenza Per conoscere le ultime informazioni in merito a questo prodotto (i requisiti di sistema complete, compatibilità, ecc) e per la registrazione del prodotto, recarsi alla pagina m-audio.com. Per ulteriore assistenza, recarsi alla pagina m-audio.com/support.
-
Page 24: Inizio Rapido
2. Aprire il file scaricato e fare doppio clic sul file di installazione dei driver. 3. Seguire le istruzioni su schermo per installare i driver. Software: Con l’M-Track Solo abbiamo incluso il Pro Tools | First M-Audio Edition e MPC Beats in modo da consentirvi di iniziare immediatamente a fare musica con software professionale.
-
Page 25
Per configurare l’M-Track Solo come dispositivo di riproduzione predefinito, seguire le indicazioni seguenti, basandosi sul proprio sistema operativo. Windows: Servirsi del cavo USB in dotazione per collegare l’M-Track Solo al computer. Nella Barra delle applicazioni, individuare l’icona «Speaker» di controllo del Volume. Fare clic col tasto destro del mouse e aperto Impostazioni audio>… -
Page 26: Schema Dei Collegamenti
Schema dei collegamenti Elementi non elencati sotto Introduzione > Contenuti della confezione sono venduti separatamente. Chitarra Monitor Microfono Computer Cuffie Pannello posteriore Pannello anteriore Importante: Servirsi dell’interruttore +48V (l’alimentazione phantom) solo se un microfono richiede l’alimentazione phantom. La maggior parte microfoni dinamici e i microfoni a nastro non richiedono alimentazione phantom, mentre la maggior parte dei microfoni a condensatore sì.
-
Page 27
Per utenti Windows: Nella finestra Audio, selezionare ASIO nel menu a discesa Audio Device Type. Nel menu a discesa Device selezionare M-Track Solo and Duo ASIO. Per utenti MacOS: Nella finestra Audio, selezionare USB Audio Codec sotto i menu a discesa Output e Input. -
Page 28: Pannello Superiore
Servirsi dei cavo da USB-B–a–USB-A in dotazione per collegare l’M-Track Solo al computer. L’M-Track Solo richiede un collegamento USB 2.0 (o superiore). Uscite principali: servirsi di cavi RCA per collegare queste uscite a monitor, impianto di amplificazione, ecc.
-
Page 29: Pannello Anteriore
Pannello anteriore Ingresso combo: collegare un microfono, una chitarra o un basso con pickup attivo o un dispositivo a livello di linea a questo ingresso. Per i microfoni, servirsi di un cavo TRS XLR o da 1/4” (6,35 mm). Ingresso 1/4″: per segnali a livello di linea, utilizzare un cavo TRS da 1/4″…
-
Page 30
Benutzerhandbuch (Deutsch) Einführung Lieferumfang M-Track Solo Benutzerhandbuch USB-B-zu-USB-A Kabel Sicherheitshinweise undantieinformationen Software Download-Karten Kundendienst Für aktuelle Informationen diesem Produkt (Systemanforderungen, Informationen zur Kompatibilität etc.) und zur Produktregistrierung besuchen Sie m-audio.com. Um weitere Unterstützung zu Ihrem Produkt zu erhalten besuchen Sie… -
Page 31
Befolgen Sie die Anweisungen am Bildschirm, um die Treiber zu installieren. Software: Wir liefern M-Track Solo mit Pro Tools | First M-Audio Edition und MPC Beats aus, damit Sie Ihre Musikproduktion gleich mit professioneller Software starten können. Registrieren Sie Ihren M- Track Solo zuerst auf m-audio.com/softwaredownload… -
Page 32
Anweisungen je nach Betriebssystem Ihres Computers. Windows: Schließen Sie Ihr M-Track Solo mit dem mitgelieferten USB-Kabel an Ihren Computer an. Suchen Sie das Lautsprechersymbol für die Lautstärke in der Taskleiste. Klicken Sie mit der rechten Maustaste auf den Lautsprecher und öffnen Soundeinstellungen > Sounds. -
Page 33
Anschlussdiagramm Teile, die nicht unter Einführung > Lieferumfang angegeben sind, sind separat erhältlich. Gitarre Aktivemonitore Computer Mikrofon Kopfhörer Rückseite Vorderseite Wichtig: Verwenden Sie den +48V (Phantomspeisung)-Schalter nur dann, wenn ein Mikrofon eine Phantomspeisung benötigt. Die meisten dynamischen Mikrofone und Bändchenmikrofone benötigen keine Phantomspeisung. -
Page 34
Gehen Sie zu Edit > Preferences…. Für Windows-Anwender: Wählen Sie im Audio-Fenster die Option ASIO im Dropdown-Menü Audio Device Type aus. Im Dropdown-Menü Device wählen Sie die Option M-Track Solo and Duo ASIO. Für MacOS-Anwender: Wählen Sie im Audio-Fenster die Option USB Audio Codec unter den Output — und Input-Dropdown-Menüs aus. -
Page 35
Rückseite USB-Port (Typ B): Über diesen Anschluss können Sie Audio- an und vom Computer senden. Verwenden Sie die im Lieferumfang enthaltenen USB-B-auf-USB-A-Kabel, um Ihr M-Track Solo an einen Computer anzuschließen. M-Track Solo benötigt einen USB 2.0-Anschluss (oder höher). Hauptausgäng: Verwenden handelsübliche… -
Page 36
Vorderseite Combo-Eingang: Schließen Sie ein Mikrofon, eine Gitarre, einen Bass mit einem aktiven Pickup oder ein Line-Level-Gerät an diesen Eingang an. Für Mikrofone verwenden Sie ein XLR- oder 1/4″ (6,35 mm) TRS- Kabel. 1/4″ Eingang: Verwenden Sie für Signale mit Line- Pegel ein 6,35 mm (1/4″) TRS-Kabel. -
Page 37: Technical Specifications
Appendix (English) Technical Specifications All specifications are measured at 20 kHz bandwidth. Specifications are subject to change without notice. Mic Input (balanced XLR) Frequency Response 20 Hz – 20 kHz (+0.1 dB) Signal-to-Noise Ratio 109 dB (A-weighted) 0.003% (min. gain, 0 dBu out, A-weighted) THD+N -128 dBu (max.
-
Page 38
Instrument Input (unbalanced 1/4″ [6.35 mm] TS) 20 Hz – 20 kHz (+0.1 dB) Frequency Response THD+N 0.005% (min. gain, 0 dBu output, A-weighted) 1 MΩ Input Impedance Gain Range -10 dB to +44 dB RCA Outputs 20 Hz – 20 kHz (+0.1 dB) Frequency Response Signal-to-Noise Ratio 109 dB (A-weighted) -
Page 39: Trademarks And Licenses
Weight 0.66 lbs. / 0.30 kg Trademarks & Licenses M-Audio and MPC Beats are trademarks of inMusic Brands, Inc., registered in the U.S. and other countries. Windows is a registered trademark of Microsoft Corporation in the United States and other countries.
-
Page 40
Manual Version 1.4…
Посмотреть инструкция для M-Audio M-Track Solo бесплатно. Руководство относится к категории Hi-Fi системы, 1 человек(а) дали ему среднюю оценку 7.5. Руководство доступно на следующих языках: английский. У вас есть вопрос о M-Audio M-Track Solo или вам нужна помощь? Задайте свой вопрос здесь
Не можете найти ответ на свой вопрос в руководстве? Вы можете найти ответ на свой вопрос ниже, в разделе часто задаваемых вопросов о M-Audio M-Track Solo.
Когда звук считается слишком громким?
Могут ли устройства разных марок подключаться друг к другу при помощи Bluetooth?
Как лучше всего выполнять чистку Hi-Fi система?
Инструкция M-Audio M-Track Solo доступно в русский?
Не нашли свой вопрос? Задайте свой вопрос здесь
Table of Contents for M-Audio M-Track Solo:
-
9 Guía del usuario (Español) Introducción Contenido de la caja M-Track Solo Cable USB-B-a-USB-A Tarjetas de descarga de software Guía del usuario Manual sobre la seguridad y garantía Soporte Para obtener la información más completa acerca de este product (los requisitos del sistema, compatibilidad, etc) y registro del producto, visite m-audio.com. Para soporte adicional del producto, visite m-audio.com/support.
-
3 Quick Start macOS users: No driver installation is needed for class-compliant operation with M- Track Solo. iOS users: The power available from an iOS device is not sufficient to power M-Track Solo. Use the Apple Camera Connection Kit (sold separately), a USB break-out cable (sold separately), and a USB power adapter (sold separately) which will provide an additional USB connector to power M-Track Solo. Windows users: Before connecting M-Track Solo to your computer, install the drivers: 1. Go to m-audio.com/drivers and download the latest M-
-
34 Einrichten von M-Track Solo mit Ihrer Software So richten Sie den M-Track Solo mit Pro Tools | First M-Audio Edition 1. Schließen Sie Ihr M-Track Solo mit dem mitgelieferten USB-Kabel an Ihren Computer an. 2. Öffnen Sie Pro Tools | First M-Audio Edition. 3. Navigieren Sie zu Setup > Playback-Engine…. 4. Öffnen Sie das Dropdown-Menü der Playback-Engine und wählen Sie USB Audio Codec. Hinweis: Möglicherweise müss
-
13 Configuración del M-Track Solo con su software Para configurar el M-Track Solo con Pro Tools | First M-Audio Edition 1. Use el cable USB incluido para conectar el M-Track Solo a su ordenador. 2. Abra Pro Tools | First M-Audio Edition. 3. Vaya a Setup > Playback Engine… (Configuración > Motor de reproducción). 4. Abra el menú desplegable Playback Engine y seleccione USB Audio Codec. Nota: Es posible que tenga que guardar y reiniciar su pro
-
22 Panneau avant 1. Entrée combo : Cette entrée permet de brancher un microphone, une guitare ou une basse avec un micro actif, ou un appareil à niveau ligne. Pour brancher un microphone, utilisez un câble XLR ou TRS 6,35 mm. 2. Entrée 1/4″ : pour les signaux de niveau ligne, utilisez un câble TRS 1/4″ (6,35 mm). Pour une guitare ou une basse avec un micro actif, utilisez un câble TS 1/4” (6,
-
14 Características Panel superior 1. Ganancia de entrada: Ajusta el nivel de ganancia de la entrada. Ajuste esta perilla de manera que el LED de señal / clip correspondiente (ubicado debajo de la perilla) muestre un nivel «saludable» durante la ejecución—pero no tan alto que el LED «recorte» o llegue al pico, causando distorsiones en el audio. 2. LED de señal / clip: El LED se iluminará en verde cuando se detecte una señal de entrada. El LED se iluminará en rojo si el nivel de señal e
-
26 Schema dei collegamenti Elementi non elencati sotto Introduzione > Contenuti della confezione sono venduti separatamente. Importante: Servirsi dell’interruttore +48V (l’alimentazione phantom) solo se un microfono richiede l’alimentazione phantom. La maggior parte microfoni dinamici e i microfoni a nastro non richiedono alimentazione phantom, mentre la maggior parte dei
-
31 Schnellstart MacOS-Benutzer: Für den klassenkonformen Betrieb mit M-Track Solo ist keine Treiberinstallation erforderlich. iOS-Benutzer: Die von einem iOS-Gerät verfügbare Leistung reicht nicht aus, um M-Track Solo mit Strom zu versorgen. Verwenden Sie das Apple Camera Connection Kit (separat erhältlich), ein USB- Breakout-Kabel (separat erhältlich) und ein USB-Netzteil (separat erhältlich), über das ein zusätzlicher USB-Anschluss für die Stromversorgung bereitgestellt wird M-Track Solo. Windows Anwender: Installieren
-
5 Connection Diagram Items not listed under Introduction > Box Contents are sold separately. Note: Use the +48V (Phantom Power) Switch only if a microphone requires phantom power. Most dynamic microphones and ribbon microphones do not require phantom power, but most condenser microphones do. Consult your microphone’s documentation to find out whether it needs phantom power. Front Panel Rear Panel Monitors H
-
18 Pour définir le M-Track Solo comme périphérique de lecture par défaut, veuillez suivre les instructions ci-dessous, selon le système d’exploitation de votre ordinateur. Windows : 1. Utilisez le câble USB inclus pour brancher le M-Track Solo à votre ordinateur. 2. Dans la barre des tâches, recherchez l’icône de la commande de volume (haut-parleur). Faites un clic droit sur l’icône du haut-parleur et ouvrir Paramètres son>
-
8 Front Panel 1. Combo Input: Connect a microphone, a guitar or bass with an active pickup, or a line-level device to this input. For microphones, use an XLR or 1/4” (6.35 mm) TRS cable. For a guitar or bass with an active pickup, use a standard 1/4” (6.35 mm) TS cable. 2. 1/4″ Input: For line-level signals, use a 1/4″ (6.35 mm) TRS cable. For a guitar or bass with an active pickup, use a standard 1/4” (6.35 mm) TS cable. 3. Li
-
16 Guide d’utilisation (Français) Présentation Contenu de la boîte M-Track Solo Guide d’utilisation Câble USB-B-à-USB-A Cartes de téléchargement de logiciel Consignes de sécurité et informations concernant la garantie Assistance Pour les dernières informations concernant ce produit (la configuration système minimale requise, la compatibilité, etc) et l’enreg
-
User Guide English ( 2 – 8 ) Guía del usuario Español ( 9– 15 ) Guide d’utilisation Français ( 16 – 22 ) Guida per l’uso Italiano ( 23 – 29 ) Benutzerhandbuch Deutsch ( 30– 36 ) Appendix English ( 37 – 39 )
-
37 Appendix (English) Technical Specifications All specifications are measured at 20 kHz bandwidth. Specifications are subject to change without notice. Mic Input (balanced XLR) Frequency Response 20 Hz – 20 kHz (+0.1 dB) Signal-to-Noise Ratio 109 dB (A-weighted) THD+N 0.003% (min. gain, 0 dBu out, A-weighted) Preamp EIN -128 dBu (max. gain, 40 Ω source, A-weighted) Gain Range 0 dB to +54 dB Line Input (balance
-
20 Configuration de l’M-Track Solo pour votre logiciel Pour configurer l’M-Track Solo pour Pro Tools | First M-Audio Edition 1. Utilisez le câble USB fourni pour brancher l’M-Track Solo à votre ordinateur. 2. Lancez le logiciel Pro Tools | First M-Audio Edition. 3. Ouvrez le menu Setup > Playback Engine…. 4. Ouvrez le menu déroulant Playback Engine et sélectionnez USB Audio Codec. Remarque : Il se peut que vous ay
Questions, Opinions and Exploitation Impressions:
You can ask a question, express your opinion or share our experience of M-Audio M-Track Solo device using right now.
View a manual of the M-Audio M-Track Solo below. All manuals on ManualsCat.com can be viewed completely free of charge. By using the ‘Select a language’ button, you can choose the language of the manual you want to view.

MANUALSCAT | EN
Question & answers
Have a question about the M-Audio M-Track Solo but cannot find the answer in the user manual? Perhaps the users of ManualsCat.com can help you answer your question. By filling in the form below, your question will appear below the manual of the M-Audio M-Track Solo. Please make sure that you describe your difficulty with the M-Audio M-Track Solo as precisely as you can. The more precies your question is, the higher the chances of quickly receiving an answer from another user. You will automatically be sent an e-mail to inform you when someone has reacted to your question.
Ask a question about the M-Audio M-Track Solo
Page: 1
2
User Guide (English)
Introduction
Box Contents
M-Track Solo
USB-B–to–USB-A Cable
Software Download Cards
User Guide
Safety & Warranty Manual
Support
For the latest information about this product (system requirements, compatibility
information, etc.) and product registration, visit m-audio.com.
For additional product support, visit m-audio.com/support.
Page: 2
3
Quick Start
macOS users: No driver installation is needed for class-compliant operation with M-
Track Solo.
iOS users: The power available from an iOS device is not sufficient to power M-Track
Solo. Use the Apple Camera Connection Kit (sold separately), a USB break-out cable
(sold separately), and a USB power adapter (sold separately) which will provide an
additional USB connector to power M-Track Solo.
Windows users: Before connecting M-Track Solo to your computer, install the drivers:
1. Go to m-audio.com/drivers and download the latest M-Track Solo driver for your
operating system.
2. Open the file you downloaded and double-click the driver installer file.
3. Follow the on-screen instructions to install the drivers.
Software: We’ve included Pro Tools | First M-Audio Edition and MPC Beats with your
M-Track Solo so you can get started making music with professional software right out
of the box. Register your M-Track Solo on m-audio.com/softwaredownload, and
follow the install instructions in your User Account.
Virtual Instruments: Follow the instructions in your user account for installing the
included virtual instrument plugins. After installation, most DAWs will not load virtual
instrument plugins automatically. In order to access the virtual instrument plugins with
Pro Tools | First M-Audio Edition, you will need to choose the plugin folder for the
software to scan:
Pro Tools | First M-Audio Edition (AAX) plugin folders:
Windows (32-bit): C:Program Files (x86)Common FilesAvidAudioPlug-Ins
Windows (64-bit): C:Program FilesCommon FilesAvidAudioPlug-Ins
macOS: Macintosh HD/Library/Application Support/Avid/Audio/Plug-Ins
Page: 3
4
To set M-Track Solo as your default playback device, follow the directions below based
on your computer’s operating system.
Windows:
1. Use the included USB cable to connect the M-Track Solo to your computer.
2. In the Taskbar, locate the Volume Control «speaker» icon. Right-click the speaker
and open Sound Settings > Sounds.
Alternatively, go to Start Menu > System > Sound > Sound Control Panel.
3. In the Windows Sound control panel select the Playback tab and select USB
Audio Codec as the default device.
4. Click the Recording tab and select USB Audio Codec as the default device.
5. Click Properties in the lower right-hand corner.
6. In the new window, click the Advanced tab and select 2-channel, 16-bit, 48000 Hz
(Studio Quality) as the default format.
7. Uncheck both boxes under Exclusive Mode.
8. Click OK to close the Properties window.
9. Click OK to close the Sound control panel.
macOS:
1. Use the included USB cable to connect the M-Track Solo to your computer.
2. Go to Applications > Utilities > Audio MIDI Setup.
3. In the Audio Devices window, select USB Audio Codec in the left column.
4. Right-click USB Audio Codec, and select Use this device for sound input.
5. Right-click USB Audio Codec, and select Use this device for sound output.
6. Quit Audio MIDI Setup.
Page: 4
5
Connection Diagram
Items not listed under Introduction > Box Contents are sold separately.
Note: Use the +48V (Phantom Power) Switch only if a microphone requires phantom
power. Most dynamic microphones and ribbon microphones do not require phantom
power, but most condenser microphones do. Consult your microphone’s documentation
to find out whether it needs phantom power.
Front Panel
Rear Panel
Monitors
Headphones
Guitar
Computer Microphone
Page: 5
6
Setting Up M-Track Solo with Your Software
Setting Up M-Track Solo with Pro Tools | First M-Audio Edition
1. Use the included USB cable to connect the M-Track Solo to your computer.
2. Open Pro Tools | First M-Audio Edition.
3. Go to Setup > Playback Engine….
4. Open the Playback Engine dropdown menu and select USB Audio Codec.
Note: You may need to save and restart your project.
5. Select your Sample Rate and then click OK to close the Setup window.
You can now add tracks to send and receive audio from sources connected to M-Track Solo
inputs and stream recorded audio back through the M-Track Solo outputs.
Setting Up M-Track Solo with MPC Beats
1. Use the included USB cable to connect the M-Track Solo to your computer.
2. Open MPC Beats.
3. Go to Edit > Preferences….
4. For Windows Users: In the Audio window, select ASIO under the Audio Device Type
dropdown menu. In the Device dropdown menu, select M-Track Solo and Duo ASIO.
For MacOS Users: In the Audio window, select USB Audio Codec under the Output and
Input dropdown menus.
Note: You may need to save and restart your project.
5. Select your Sample Rate and then click OK to close the Preferences window.
You can now add tracks to send and receive audio from sources connected to M-Track
Solo inputs and stream recorded audio back through the M-Track Solo outputs.
Page: 6
7
Features
Top Panel
1. Input Gain: Adjusts the input’s gain level. Set this
knob so the corresponding Signal/Clip LED
(located below the knob) displays a «healthy» level
during performance—but not so high that the LED
«clips» or peaks, causing distortion in the audio.
2. Signal/Clip LED: The LED will light up green
when an input signal is detected. The LED will
light up red if the signal level is too high which
may cause distortion or “clipping”. If this occurs,
turn down the Input Gain and/or reduce the
output level from your sound source.
3. Monitor Level: Adjusts the output volume of the Main Outputs, which should be
connected to your powered monitors or amplifier system, and the Headphone Output.
4. +48V (Phantom Power) LED: This lights up when phantom power is engaged for use
with the Combo Input.
Rear Panel
1. USB Port (Type B): This connection will allow
you to send audio to and from a computer. Use
the included USB-B-to-USB-A cable to connect
the M-Track Solo to a computer. The M-Track
Solo requires a USB 2.0 connection (or higher).
2. Main Outputs: Use standard RCA cables to connect these outputs to your powered
monitors, amplifier system, etc. The mix you hear from these outputs will be determined
by the Direct/USB Switch. The level of these outputs is controlled by the Monitor Level
knob.
1
2
3
4
1
2
2
1
Page: 7
8
Front Panel
1. Combo Input: Connect a microphone,
a guitar or bass with an active pickup,
or a line-level device to this input. For
microphones, use an XLR or 1/4” (6.35
mm) TRS cable. For a guitar or bass
with an active pickup, use a standard
1/4” (6.35 mm) TS cable.
2. 1/4″ Input: For line-level signals, use a 1/4″ (6.35 mm) TRS cable. For a guitar or bass
with an active pickup, use a standard 1/4” (6.35 mm) TS cable.
3. Line/Instrument Switch: Set the switch to Line when connecting a microphone, or
keyboard. Set the switch to Instrument when connecting a guitar or bass.
4. +48V (Phantom Power) Switch: This switch activates and deactivates phantom power.
When activated (lit), phantom power supplies +48 volts to the Combo Input. Please note
that most dynamic microphones and ribbon microphones do not require phantom
power, while most condenser microphones do. Consult your microphone’s
documentation to find out whether it needs phantom power.
5. Headphone Output: Connect 1/8″ (3.5 mm) TRS headphones to this output. The mix
you hear from this output will be determined by the Direct/USB Switch. The level of this
output is controlled by the Monitor Level knob.
6. Direct/USB: This switch controls whether or not the direct input signal or the USB
stream return signal is sent to the Headphone Output and Main Outputs.
• When set to USB, only the USB audio playback from your computer will be heard.
• Set the switch to Direct to monitor the direct input signal with all inputs summed to
mono and heard equally on each side. This is useful for monitoring a guitar or vocal
mic signal. This switch does not affect the DAW playback or how your sound is
recorded into your DAW; it only affects how you hear the input signal in the
Headphone Output and Main Outputs.
1
3
5
1
4 6
2
Page: 8
37
Appendix (English)
Technical Specifications
All specifications are measured at 20 kHz bandwidth. Specifications are subject to change
without notice.
Mic Input (balanced XLR)
Frequency Response 20 Hz – 20 kHz (+0.1 dB)
Signal-to-Noise Ratio 109 dB (A-weighted)
THD+N 0.003% (min. gain, 0 dBu out, A-weighted)
Preamp EIN -128 dBu (max. gain, 40 Ω source, A-weighted)
Gain Range 0 dB to +54 dB
Line Input (balanced 1/4″ [6.35 mm] TRS)
Frequency Response 20 Hz – 20 kHz (+0.1 dB)
Sensitivity -43 dBu
THD+N 0.002% (min. gain, 0 dBu out, A-weighted)
Gain Range -10 dB to +44 dB
Page: 9
38
Instrument Input (unbalanced 1/4″ [6.35 mm] TS)
Frequency Response 20 Hz – 20 kHz (+0.1 dB)
THD+N 0.005% (min. gain, 0 dBu output, A-weighted)
Input Impedance 1 MΩ
Gain Range -10 dB to +44 dB
RCA Outputs
Frequency Response 20 Hz – 20 kHz (+0.1 dB)
Signal-to-Noise Ratio 109 dB (A-weighted)
THD+N 0.002% ( 0 dBu output, A-weighted)
Max Output Level +4 dBu
Headphone Output (1/8” [3.5 mm] TRS)
Power 60 mW/Ch, 32 Ω
Frequency Response 20 Hz – 20 kHz (+0.5 dB)
THD+N 0.02% (A-weighted)
Signal-to-Noise Ratio 100 dB (A-weighted)
Page: 10
39
General
Power USB-bus-powered
Dimensions
(width x depth x height)
6.4” x 4.5” x 2.1”
16.4 x 11.4 x 5.5 cm
Weight 0.66 lbs. / 0.30 kg
Trademarks & Licenses
M-Audio and MPC Beats are trademarks of inMusic Brands, Inc., registered in the U.S. and
other countries.
Windows is a registered trademark of Microsoft Corporation in the United States and other
countries.
Macintosh and macOS are trademarks of Apple Inc., registered in the U.S. and other
countries.
Avid and Pro Tools are registered trademarks of Avid Technology, Inc. in the U.S. and other
countries.
All other product or company names are trademarks or registered trademarks of their
respective owners.
Page: 11
Manual Version 1.5
- Brand:
- M-Audio
- Product:
- Hi-Fi systems
- Model/name:
- M-Track Solo
- Filetype:
- Available languages:
- English, German, French, Spanish, Italian
Related products M-Audio M-Track Solo
48-KHz, 2-channel USB Audio Interface with 1 Crystal Preamp, Phantom Power and Instrument Input

Crystal Clear Audio in a Compact Design
![]()
![]()
The M-Track Solo is the best, most portable recording interface in its class. It delivers 48 kHz audio resolution in a compact and easy to use format that is ideal for creating music on any Mac, PC or iOS device. This versatile interface works great for recording any type of sound source and features a single Combo Crystal Preamp with phantom power, plus a switchable Line / Instrument input making it compatible with any guitar or microphone. Plus, with M-Track Solo’s 2-channel recording you can use both line inputs simultaneously to capture digital pianos, drum machines or any other stereo 1/4″ device. M-track Solo is completely powered by USB, removing the need for an external power supply and making it perfectly portable for recording on-the-go. Throw it into your bag, grab a laptop, and create your next podcast, song, or mix anywhere you want!
Direct Monitoring & Headphone Connection
M-Track Solo offers zero-latency monitoring of the input signal through both the main RCA outputs and 1/8” headphone outputs. The USB/Direct switch adjusts the balance between the direct inputs and the playback from your computer software. This makes it easy to record new parts or add parts to an existing composition.
Start Recording Immediately
The M-Track Solo comes with a complete software package that has everything you need to get started right out of the box. Included is a great digital audio workstation (DAW)–MPC Beats. This DAW makes it easy and fun to create professional sounding podcasts, music, or beat productions on any Mac or PC.
80 Effect Plugins provided by AIR
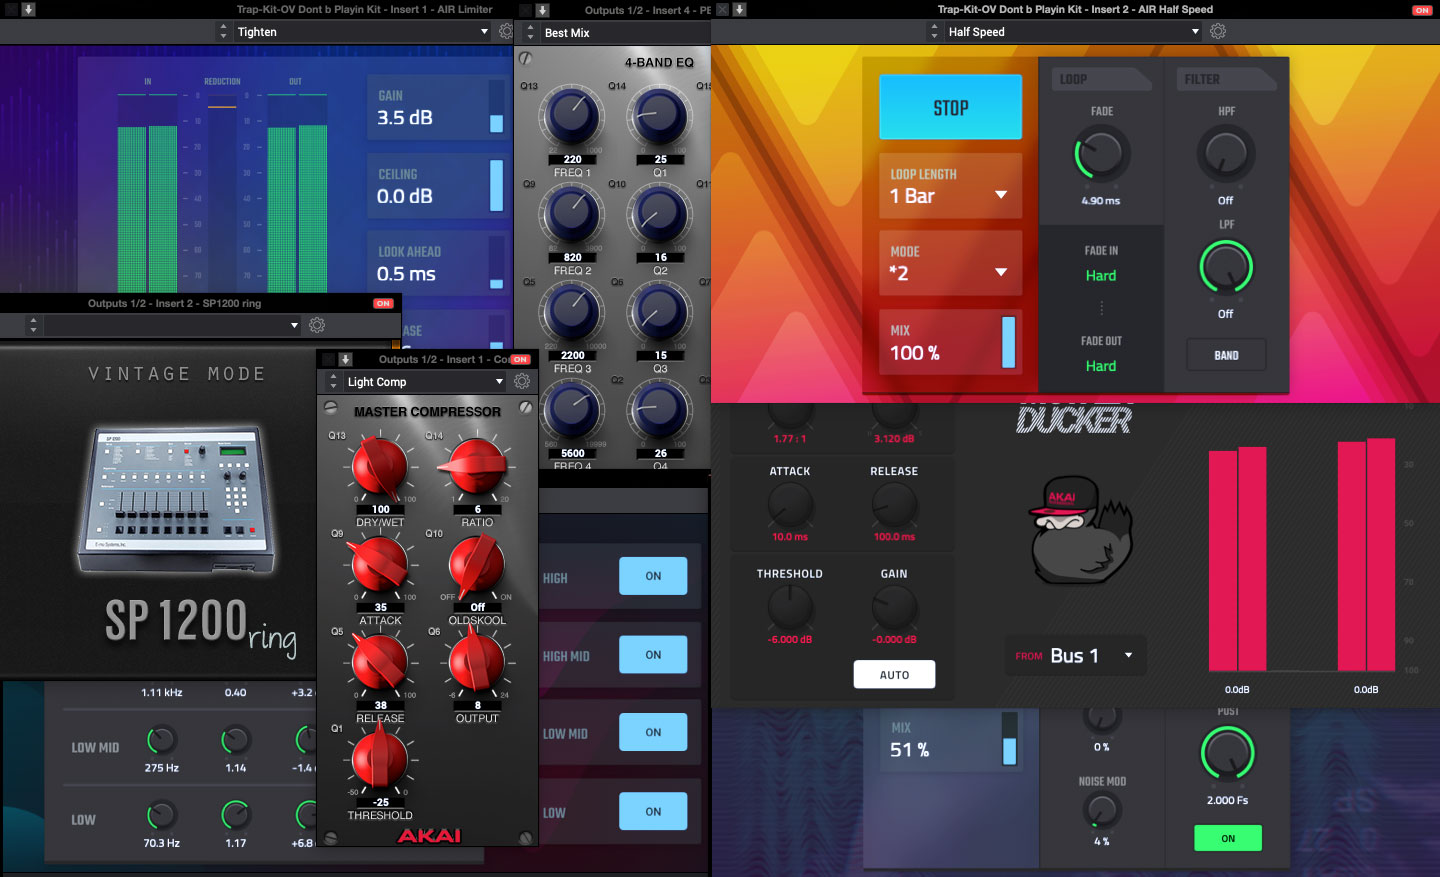
But that’s not all. Included are some extra goodies to help out any podcaster, guitarist, or producer. First on the list are 80 effect plugins provided by AIR. This exclusive and diverse collection delivers everything you need for creative production, mixing and mastering, including reverbs, equalizers, delays, filters and so much more.
World-Class Virtual Instruments — TubeSynth, Electric, and Bassline
The AIR TubeSynth plugin emulates the sound of vintage analog polyphonic synthesizers. Dive into a collection of warm pads, brass synths, and so much more in this massive collection of synthesizer presets.
AIR Electric plugin is your total electric piano collection on MPC. Choose from a wide collection of keyboards like Rhodes, Wurlitzers, FM keyboards, and more. Dedicated control sections provide deep virtual control over keyboard pickups, envelope, bell and noise settings, and much more.
The AIR Bassline plugin emulates the sound of classic monophonic synthesizers. Create your own unique synth patches with the integrated AIR effects sections
A New Standard For Guitar Amplifier Modeling Software
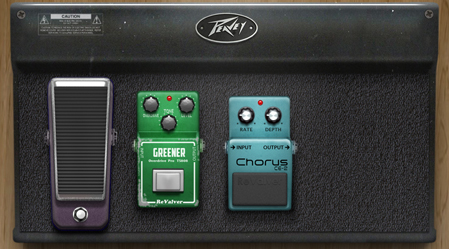
ReValver includes ValveKing® & Custom Lite Amp Modules, 3 x cabs, 3 x mics (with multiple selectable positions), and 3x effects.
Crystal™ Preamps, Pristine A/D Converters and Premium Components
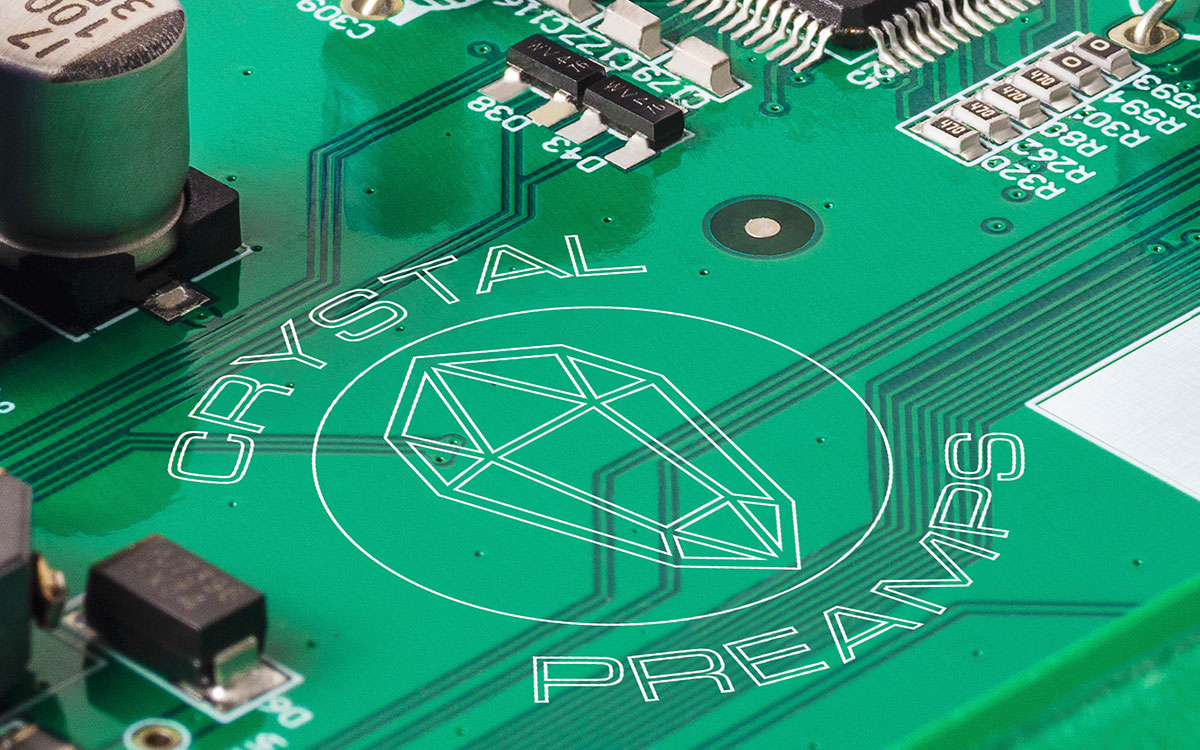
Our engineers designed Crystal Preamps to provide you with a transparent, low-noise preamp that guarantees the best sound from your microphones and captures your performance exactly the way you intended. The M-Track Solo incorporates pristine A/D converters for digital audio with explosive dynamic range that captures every nuance and subtlety of the performance.

Key Features
- 2-Channel USB recording interface for Mac and PC
- (1) Combo input with Crystal Preamp for amazing audio quality
- +48V phantom power for connecting studio condenser microphones
- Dedicated instrument input for guitar or bass
- Stereo line input for connecting digital piano, keyboard and more!
- 1/8” headphone and RCA stereo outputs provide easy monitoring
- USB/Direct switch for listening to the input signal or the computer signal
- Software bundle, including: MPC Beats, AIR Music Tech Electric, Bassline, and TubeSynth, Revalver guitar amp plugin and 80 AIR plugin effects
Technical Specifications
|
Mic Input (balanced XLR) |
|
|
Frequency Response |
20 Hz – 20 kHz (+0.1 dB) |
|
Signal-to-Noise Ratio |
109 dB (A-weighted) |
|
THD+N |
0.003% (min. gain, 0 dBu out, A-weighted) |
|
Preamp EIN |
-128 dBu (max. gain, 40 Ω source, A-weighted) |
|
Gain Range |
0 dB to +54 dB |
|
Line Input (balanced 1/4″ [6.35 mm] TRS) |
|
|
Frequency Response |
20 Hz – 20 kHz (+0.1 dB) |
|
Sensitivity |
-43 dBu |
|
THD+N |
0.002% (min. gain, 0 dBu out, A-weighted) |
|
Gain Range |
-10 dB to +44 dB |
|
Instrument Input (unbalanced 1/4″ [6.35 mm] TS) |
|
|
Frequency Response |
20 Hz – 20 kHz (+0.1 dB) |
|
THD+N |
0.005% (min. gain, 0 dBu output, A-weighted) |
|
Input Impedance |
1 MΩ |
|
Gain Range |
-10 dB to +44 dB |
|
RCA Outputs |
|
|
Frequency Response |
20 Hz – 20 kHz (+0.1 dB) |
|
Signal-to-Noise Ratio |
109 dB (A-weighted) |
|
THD+N |
0.002% ( 0 dBu output, A-weighted) |
|
Max Output Level |
+4 dBu |
|
Headphone Output (1/8” [3.5 mm] TRS) |
|
|
Power |
60 mW/Ch, 32 Ω |
|
Frequency Response |
20 Hz – 20 kHz (+0.5 dB) |
|
THD+N |
0.02% (A-weighted) |
|
Signal-to-Noise Ratio |
100 dB (A-weighted) |
What’s In The Box
M-Track Solo
USB-B–to–USB-A Cable
Software Download Cards
User Guide
Safety & Warranty Manual