Драйверы
Для выполнения подключения некоторых устройств к компьютеру может потребоваться драйвер. На этой вкладке вы найдете соответствующие драйверы для своего устройства или, в случае отсутствия драйверов, описание совместимости устройства с каждой операционной системой.
Полезная информация. Доступ к программному обеспечению, руководствам и другим материалам можно получить с помощью вкладок, расположенных выше.
Программное обеспечение
Программное обеспечение загружать необязательно, но оно обеспечивает дополнительные функции и позволяет максимально эффективно пользоваться возможностями устройства. На этой вкладке можно просмотреть и загрузить доступное программное обеспечение для вашего устройства.
Программное обеспечение
Программное обеспечение загружать необязательно, но оно обеспечивает дополнительные функции и позволяет максимально эффективно пользоваться возможностями устройства. На этой вкладке можно просмотреть и загрузить доступное программное обеспечение для вашего устройства.
Руководства пользователя
Руководства для вашего устройства или программного обеспечения перечислены ниже.
Приложения и функции
На этой вкладке можно посмотреть доступные приложения и функции, совместимые с вашим устройством.
Встроенное ПО
Встроенное ПО — это постоянное программное обеспечение, установленное на устройстве и обеспечивающее его корректную работу. Canon может периодически выпускать обновления для этого встроенного ПО, и если обновление доступно, его можно загрузить ниже.
FAQs
На этой вкладке вы найдете ответы на часто задаваемые вопросы и другую полезную информацию, которая поможет вам в решении вопросов и проблем.
Важная информация
На этой вкладке вы найдете подборку часто задаваемых вопросов, которые, на наш взгляд, будут вам интересны.
Коды ошибок
Код ошибки или сообщение об ошибке может появиться на устройстве по различным причинам. С помощью поля поиска можно найти полезную информацию о конкретном коде ошибки, где будут указаны причина ошибки и необходимые действия по ее устранению.
Технические характеристики
Ниже приведены все технические характеристики данного продукта.
-
Contents
-
Table of Contents
-
Troubleshooting
-
Bookmarks
Quick Links
Related Manuals for Canon Macro Ring Lite MR-14EX II
Summary of Contents for Canon Macro Ring Lite MR-14EX II
-
Page 1
English… -
Page 2: Introduction
Introduction The Canon Macro Ring Lite MR-14EX II is a flash unit for shooting close-ups with Canon EOS cameras, compatible with E-TTL II/E-TTL/ TTL autoflash systems. The flash unit is equipped with various functions suitable for a wide range of shooting objectives, from simple shooting to advanced shooting.
-
Page 3: Item Check List
Item Check List Before starting, check that all the following items are included with your MR-14EX II. If anything is missing, contact your dealer. Case Lens Cap MR-14EX II (p.16) * Be careful not to lose any of the above items.
-
Page 4: Conventions Used In This Manual
Functions of the camera, and the Custom Functions and Personal Functions of the MR-14EX II are at their default settings. All figures are based on the use of four AA/LR6 alkaline batteries and Canon’s testing standards. The operation procedures assume that a macro lens is used.
-
Page 5: Chapters
Chapters Introduction Getting Started with Macro Flash Shooting Preparations for macro flash shooting and basic shooting Setting Flash Functions with Camera Operations Setting the flash functions from the camera’s menu screen Wireless Multiple Flash Shooting Wireless multiple flash shooting using additional slave units with optical transmission Customizing the MR-14EX II Customizing with Custom Functions and Personal Functions…
-
Page 6: Table Of Contents
Contents Introduction Item Check List…………….. 3 Conventions Used in this Manual…………. 4 Chapters………………. 5 Nomenclature ………………. 8 Getting Started with Macro Flash Shooting Installing the Batteries …………..14 Attaching the Control Unit to the Camera ……..15 Attaching the Flash Unit to the Lens ……….16 Turning on the Power …………..
-
Page 7
Contents Wireless Multiple Flash Shooting : Wireless Multiple Flash Shooting……….44 Wireless Settings …………….47 a: Multiple Flash Shooting with Slave C Added ….. 49 a: Advanced Multiple Flash Shooting with Slave A, B, and C Added …………..53 q: Wireless Multiple Flash Shooting with Manual Flash Output ..55 Customizing the MR-14EX II C / >: Setting Custom and Personal Functions….. -
Page 8: Nomenclature
Nomenclature Flash Unit Front Connecting cord Release button (p.16) Focusing lamp (p.22) Flash tube B Lens cap/ Flash tube A Filter thread (p.16-17) Focusing lamp (p.22) Rear <h> Indicator <i> Indicator…
-
Page 9: Control Unit
Nomenclature Control Unit Function button 3 LCD panel Function button 2 Function button 4 Function button 1 <f> <d> Flash ratio setting/ Focusing lamp button Flash tube select button (p.22) (p.25, 32, 47, 49, 53, 55) <E> Power switch (p.18) Flash mode button <K>…
-
Page 10: Lcd Panel
Nomenclature LCD Panel E-TTL II/E-TTL/TTL autoflash (p.21) G : Battery indicator (p.18) c : High-speed sync (p.30, 40) r : Second-curtain a : E-TTL II/E-TTL sync (p.31, 40) autoflash b : TTL autoflash u: Custom Functions (p.61) j: Normal shooting t: Temperature increase (Firing Flash exposure level…
-
Page 11
Nomenclature Manual flash (p.32) q : Manual flash Manual flash output Firing group 4 : Fire A 5 : Fire B Wireless multiple flash shooting with optical transmission (p.43) M : Master : : Optical g : Wireless shooting transmission wireless shooting (master) * : Transmission… -
Page 12
Cautions for firing continuous flashes To avoid degrading and damaging the flash unit due to overheating, do not fire more than 20 continuous flashes. After 20 continuous flashes, allow a rest time of at least 10 min. If you fire 20 continuous flashes, and then fire the flash again repeatedly in short intervals, the safety function may activate and restrict flash firing. -
Page 13: Getting Started With Macro Flash Shooting
Getting Started with Macro Flash Shooting This chapter describes the preparations before starting macro flash shooting and the basic shooting operations. Conditions of the subject greatly influence the exposure when shooting close-ups. Therefore, it is recommended to shoot the same subject with different exposures (p.27) and check the exposure immediately after shooting.
-
Page 14: Installing The Batteries
Approx. 0.1 to 3.3 sec. Approx. 0.1 to 5.5 sec. Approx. 100 to 700 Based on new AA/LR6 alkaline batteries, both sides firing, and Canon’s testing standards. The Quick flash function enables flash shooting before the flash is fully charged (p.18).
-
Page 15: Attaching The Control Unit To The Camera
Attaching the Control Unit to the Camera When <!> is displayed, or the LCD panel display turns off during recycling, replace the batteries with new ones. Use a new set of four batteries of the same brand. When replacing the batteries, replace all four at one time.
-
Page 16: Attaching The Flash Unit To The Lens
Attaching the Flash Unit to the Lens Attach the flash unit to the front of the macro lens. Attach the flash unit to the front of the lens while holding down the release button. Make sure that the flash unit is securely attached.
-
Page 17: Using A Filter
Attaching the Flash Unit to the Lens Using a Filter A commercially-available filter can be used during flash shooting. A filter can be attached, using the two procedures described below. Filters may not be used together with some macro lenses. (1) Attach a 67 mm filter on the front face of the flash unit (see the above illustration).
-
Page 18: Turning On The Power
Turning on the Power Set the power switch to <K>. The flash recycling starts. During recycling, <G> is displayed on the LCD panel. When flash recycling is completed, this indicator disappears. Check that the flash is ready. The state of the flash-ready lamp changes from off to green (Quick flash ready) to red (fully charged).
-
Page 19: Lcd Panel Illumination
Turning on the Power Lock Function By setting the power switch to <a>, you can disable the flash’s buttons and dial operations. It is effective when you want to prevent the flash function settings from being accidentally changed after you set them.
-
Page 20: Fully Automatic Flash Shooting
Fully Automatic Flash Shooting When you set the camera’s shooting mode to <d> (Program AE) or a fully automatic mode, you can shoot in the E-TTL II/E-TTL fully automatic flash mode. Set the flash mode to <a>. Press the <E> button and set to <a>.
-
Page 21: Using E-Ttl Ii And E-Ttl Autoflash By Shooting Mode
Using E-TTL II and E-TTL Autoflash by Shooting Mode Simply set the camera’s shooting mode to <f> (aperture-priority AE) or <a> (manual exposure) and you can perform advanced macro flash shooting using E-TTL II/E-TTL autoflash. You can perform flash shooting while obtaining a standard exposure of both the main subject and background while considering the depth of field.
-
Page 22
Using E-TTL II and E-TTL Autoflash by Shooting Mode Focusing Lamp Press the <d> button to light the focusing lamp for 20 sec., making focusing easier. Press the button again to turn off the lamp. The focusing lamp turns off automatically when you press the shutter button on the camera completely. -
Page 23
Using E-TTL II and E-TTL Autoflash by Shooting Mode Modeling FlashN When the camera’s depth-of-field preview button is pressed, the flash fires continuously for 1 sec. This feature is called “modeling flash.” This is effective for checking shadow effects on the subject and the lighting balance. -
Page 24: Effective Flash Range (Reference)
Effective Flash Range (Reference) EF50mm f/2.5 Compact Macro EF100mm f/2.8 Macro/ EF100mm f/2.8 Macro USM/ ISO100 ISO400 EF100mm f/2.8L Macro IS USM ISO100 ISO400 0.33 0.5 0.7 1 0.33 0.5 0.7 Magnification 0.13 0.2 0.3 0.5 0.13 0.2 0.3 0.5 +Life-Size Converter EF 0.5 0.67 1 0.5 0.67 1…
-
Page 25: Setting The Flash Ratio
l Setting the Flash RatioN You can adjust the flash ratio between flash tubes A and B, or fire only one of them. This can create shadows on the subject to give a more sculptural look. The flash ratio can be set in half-stop increments as follows: 8:1 to 1:1 to 1:8 (13 settings).
-
Page 26
l Setting the Flash RatioN Single-side Firing Set <4> or <5>. Press the <,> button to display <_> and <4> or <_> and <5>. Flash tube Flash tube B only A only Flash ratio control is not available on the models listed below. Both sides will fire at the same flash output, or single-side firing will apply. -
Page 27: Flash Exposure Compensation
f Flash Exposure CompensationN In the same way as normal exposure compensation, you can set exposure compensation for flash. The flash exposure compensation amount can be set up to ±3 stops in 1/3-stop increments. Press the <@> button or <8>. Press function button 2 <@>…
-
Page 28: Feb
g FEBN You can take three shots while automatically changing the flash output. This is called “FEB (Flash Exposure Bracketing)”. The settable range is ±3 stops in 1/3-stop increments. Press the <E> button. Press function button 3 <E>. <g> is displayed. Set the FEB level.
-
Page 29: 7: Fe Lock
7: FE LockN FE (Flash Exposure) lock locks the correct flash exposure setting for any part of the scene. While <a> is displayed on the LCD panel, press the camera’s < > button. For cameras without a < > button, press the <A>…
-
Page 30: High-Speed Sync
c High-speed SyncN With high-speed sync, the flash can synchronize with all shutter speeds. This is convenient when you want to shoot in the aperture- priority AE (f) mode (open aperture) with background blur. Display <c>. Press function button 4 <Y> to display <c>.
-
Page 31: Second-Curtain Sync
r Second-curtain SyncN Shooting with a slow shutter speed and second-curtain sync captures the trajectory of the light source of a moving subject in a natural way. The flash fires right before the exposure finishes (shutter closes). Display <r>. Press function button 4 <Y> to display <r>.
-
Page 32: Q: Manual Flash
q: Manual FlashN You can set the flash output from 1/1 full output to 1/128 power in 1/3- stop increments. The flash can be fired in one of the following three ways: Flash tubes A and B fired at the same output, A and B fired at different outputs, Only A or B fired.
-
Page 33
q: Manual FlashN Firing Flash Tubes A and B at a Different Flash Output Set <4> and <5>. Press the <,> button to display <%>, <4>, and Select a flash unit. Press function button 3 <F> or <8> and turn <9> to select flash unit A or B. -
Page 34
q: Manual FlashN Single-side Firing Set <4> or <5>. Press the <,> button to display <_> and <4> or <_> and <5>. Flash tube Flash tube A only B only Set the flash output. Press function button 3 <@> or <8>. -
Page 35
q: Manual FlashN Metered Manual Flash Exposures When using an EOS-1D series camera, the flash exposure level can be manually set before shooting. This is convenient for shooting at a short distance from the subject. Use a 18% gray reflector (commercially available) and shoot as follows. -
Page 36: Clearing Mr-14Ex Ii Settings
Clearing MR-14EX II SettingsN You can return the settings of the MR-14EX II shooting functions and wireless multiple flash shooting settings to their default settings. Press function buttons 2 and 3 simultaneously for 2 seconds or longer. The MR-14EX II settings are cleared and the settings will return to normal shooting and <a>…
-
Page 37: Setting Flash Functions With Camera Operations
Setting Flash Functions with Camera Operations This chapter describes how to set the flash functions from the camera’s menu screen. When the camera’s shooting mode is set to a fully automatic mode or an Image Zone mode, the operations in this chapter are not available.
-
Page 38: Flash Control From The Camera’s Menu Screen
Flash Control from the Camera’s Menu Screen When using EOS DIGITAL cameras released since 2007, you can set flash functions or Custom Functions from the camera’s menu screen. For the camera operations, see the camera’s instruction manual. Flash Function Settings Select [External Speedlite control].
-
Page 39
Flash Control from the Camera’s Menu Screen Settings Available in the Flash Function Settings Screen The main settable functions from the Camera’s [Flash function settings] or [External flash func. setting] screen are as follows. The settings available vary by the camera used, flash mode, etc. For details, see the next page. -
Page 40
Flash Control from the Camera’s Menu Screen Flash firing To perform flash shooting, set to [Enable]. E-TTL II flash metering For normal exposures, set it to [Evaluative]. If [Average] is set, the flash exposure will be averaged for the entire scene metered by the camera. -
Page 41: Flash Custom Function Settings
Flash Control from the Camera’s Menu Screen Flash Custom Function Settings You can set Custom Functions for flash units from the camera’s menu screen. The details displayed vary by the camera. If C.Fn-22 is not displayed, set it by operating the flash unit. For the Custom Functions, see pages 61-64.
-
Page 42
Flash Control from the Camera’s Menu Screen Functions Which Cannot Be Set from the Flash Function Settings Screen Some of the following functions as in the tables below cannot be set from the camera’s flash function settings screen (p.38). In such a case, set it by operating the MR-14EX II. -
Page 43: Wireless Multiple Flash Shooting
Wireless Multiple Flash Shooting This chapter describes how to perform wireless multiple flash shooting with optical transmission, using an EX- series Speedlite (sold separately) equipped with wireless slave function. For the accessories required for wireless multiple flash shooting, see the system map on page 68. When the camera’s shooting mode is set to a fully automatic mode or an Image Zone mode, the operations in this chapter are not available.
-
Page 44: Wireless Multiple Flash Shooting
: Wireless Multiple Flash Shooting Using an EX-series Speedlite equipped with optical transmission wireless slave function, you can easily perform wirelessly-controlled photography lit with multiple flashes. The system is designed so that the settings of the MR-14EX II (master) attached to the camera are automatically applied to the slave flash unit. Therefore, you do not need to operate the slave unit while shooting.
-
Page 45
: Wireless Multiple Flash Shooting Advanced multiple flash shooting with slave A, B, and C added (p.53) This section describes multiple flash shooting with slave C where slave A and B are also added. Slave A is controlled to fire with flash tube A and slave B to fire with flash tube B as a group (as a single flash unit). -
Page 46
: Wireless Multiple Flash Shooting Slave Group Control Slave A is controlled to fire with flash tube A and slave B to fire with flash tube B as a group (as a single flash unit). Multiple units can be used as slave C. There is no limit for the number of units that can be used as slave A, B, or C. -
Page 47: Wireless Settings
Wireless Settings To perform wireless multiple flash shooting with E-TTL II/E-TTL autoflash, set the master unit and slave unit with the following procedure. Master Unit Setting Display <:> and <M>. Press the <,> button to display <:> (optical transmission wireless) and <…
-
Page 48
Wireless Settings Transmission Channel Setting To avoid interference with optical transmission wireless systems used by other photographers, you can change the transmission channel. Set the same channel for both the master unit and slave unit. Press function button 4. Press function button 4 <]> to display <C>… -
Page 49: A: Multiple Flash Shooting With Slave C Added
a: Multiple Flash Shooting with Slave C Added This section describes multiple flash shooting where slave C is added to flash tubes A and B. Set the flash mode to <a>. Press the <E> button and set to <a>. Set <l> and <6>. Press the <,>…
-
Page 50
a: Multiple Flash Shooting with Slave C Added Set the A:B flash ratio. Press function button 3 <F>, turn <9>, select <l>, then press <8>. Turn <9> to set the A:B flash ratio, then press <8>. Set the flash exposure compensation amount for slave C. -
Page 51
a: Multiple Flash Shooting with Slave C Added Shooting with firing group C pointed directly toward the main subject may result in overexposure. On the models listed below, wireless multiple flash shooting adding slave C is not available when the <a> mode is set (with C.Fn-15-0). When the <q>… -
Page 52
a: Multiple Flash Shooting with Slave C Added Multiple Flash Shooting Using Wireless Functions Flash exposure compensation and other settings set on the master unit will be automatically set to the slave unit(s). You do not need to operate the slave unit. Wireless multiple flash shooting with the following settings can be performed in the same way as normal flash shooting. -
Page 53: A: Advanced Multiple Flash Shooting With Slave A, B, And C Added
a: Advanced Multiple Flash Shooting with Slave A, B, and C Added When C.Fn-15 is set to 1 (p.63), multiple flash shooting can be performed not only with slave C but also with slave A and B. For an outline of controlling flash, see “Slave Group Control”…
-
Page 54: Take The Picture
a: Advanced Multiple Flash Shooting with Slave A, B, and C Added Take the picture. Set the flash ratio for the firing group (flash tube + slave) A:B and the flash exposure compensation amount for slave C, following the procedure described in “Multiple Flash Shooting with Slave C Added”…
-
Page 55: Q: Wireless Multiple Flash Shooting With Manual Flash Output
q: Wireless Multiple Flash Shooting with Manual Flash Output This section describes wireless multiple flash shooting using manual flash. You can shoot with a different flash output setting for each firing group. Set all the parameters on the master unit. Set the flash mode to <q>.
-
Page 56
q: Wireless Multiple Flash Shooting with Manual Flash Output Set the flash output. Press function button 3 <1> or <8>. Turn <9> to set the flash output, then press <8>. Repeat steps 3 and 4 to set the flash output for all groups. Take the picture. -
Page 57: Customizing The Mr-14Ex
Customizing the MR-14EX II This chapter describes how to customize the MR-14EX II with the Custom Functions (C.Fn) and Personal Functions (P.Fn). When the camera’s shooting mode is set to a fully automatic mode or an Image Zone mode, the operations in this chapter are not available.
-
Page 58: C / >: Setting Custom And Personal Functions
C / >: Setting Custom and Personal Functions You can customize the MR-14EX II features to suit your shooting preferences with Custom Functions and Personal Functions. Note that the Personal Functions provide you with customized settings unique to the MR-14EX II. C: Custom Functions Display the Custom Functions screen.
-
Page 59
C / >: Setting Custom and Personal Functions Custom Function List Number Function Page C.Fn-01 Auto power off C.Fn-02 Modeling flash p.61 C.Fn-03 FEB auto cancel C.Fn-04 FEB sequence C.Fn-05 Flash metering mode p.62 C.Fn-06 Quick flash with continuous shot C.Fn-07 Test firing with autoflash C.Fn-12… -
Page 60
C / >: Setting Custom and Personal Functions Clearing All the Custom/Personal Functions By pressing function button 2 <3> and then function button 1 <;> on the Custom Functions screen, you can clear the Custom Functions that have been set. Similarly, by performing the same operations on the Personal Functions screen, you can clear the Personal Functions that have been set. -
Page 61: C: Setting Custom Functions
C: Setting Custom Functions C.Fn-01: (Auto power off) When the MR-14EX II is not operated for approx. 90 seconds, the power turns off automatically to save energy. You can disable this function. 0: ON (Enabled) 1: OFF (Disabled) When the temperature of the flash unit rises due to continuous flash firing etc., the time until auto power off takes effect may become longer.
-
Page 62
C: Setting Custom Functions C.Fn-04: (FEB sequence) You can change the shooting order of the FEB sequence: 0: Standard exposure, -: Decreased exposure (darker) and +: Increased exposure (brighter). 0: 0 – 1: – C.Fn-05: (Flash metering mode) You can change the automatic flash metering mode for flash shooting. 0: E-TTL II/E-TTL 1: TTL When using an EOS DIGITAL camera or EOS REBEL T2/EOS 300X, do not… -
Page 63
C: Setting Custom Functions C.Fn-07: (Test firing with autoflash) You can change the flash output when firing the test flash in E-TTL II/ E-TTL/TTL autoflash mode. 0: 1/32 (1/32) 1: 1/1 (Full output) C.Fn-12: (Flash recycle with external power source) 0: 1 (External &… -
Page 64
C: Setting Custom Functions C.Fn-18: (Macro: Focusing lamp on/off) 0: LAMP (With focusing lamp button) Press the <d> button to turn on/off the focusing lamp. 1: J (Half press shutter button twice) Press the shutter button halfway twice quickly (double-click) to turn on/ off the focusing lamp. -
Page 65: Setting Personal Functions
>: Setting Personal Functions P.Fn-01: (Focusing lamp brightness) You can adjust the brightness of the focusing lamp in 5 levels. P.Fn-02: (LCD panel display contrast) You can adjust the contrast of the LCD panel in 5 levels. P.Fn-03: (LCD panel illumination color) You can select the color of the LCD panel illumination.
-
Page 66: Memory Function
Memory Function You can save the settings in the MR-14EX II and recall the settings later. The memory function can be used whenever <]> is displayed on the screen, such as when the settings are configured to wireless multiple flash shooting by pressing the <,> button, or during normal shooting when flash ratio control or single-side firing is set.
-
Page 67: 5 Reference
Reference This chapter provides a system map, FAQ, and a description of using the MR-14EX II with a Type-B camera.
-
Page 68: Mr-14Ex Ii System
An adapter to attach the flash unit to the lens (p.16). For external power source, use the Compact Battery Pack CP-E4. Using a non-Canon external power source may result in a malfunction. Speedlite units without the function to switch firing groups (A, B, and C) listed in $ can be used as slave A during wireless multiple flash shooting.
-
Page 69: Flash Firing Restriction Due To Temperature Increase
Flash Firing Restriction due to Temperature Increase When continuous flash or modeling flash is repeatedly fired in short intervals, the temperature of the MR-14EX II may increase. Repeated firings of the flash activates the flash firing restriction automatically to avoid degrading and damaging the flash unit due to overheating. While flash firing is restricted, the warning is displayed to indicate the increase in temperature, and the firing interval is automatically set to approx.
-
Page 70
Flash Firing Restriction due to Temperature Increase Even when Level 1 warning is not displayed, the firing interval will be extended as the flash unit begins to heat up. If Level 2 warning is displayed, allow a rest time for at least 15 min. For cautions on the number of flash firings, see page 12 (continuous flashes) or page 23 (modeling flash). -
Page 71: Troubleshooting Guide
Troubleshooting Guide If a problem occurs with the flash, first refer to this Troubleshooting Guide. If this Troubleshooting Guide does not resolve the problem, contact your dealer or nearest Canon Service Center. Normal Shooting The power does not turn on.
-
Page 72
Troubleshooting Guide The picture is very blurred. When the shooting mode is set to the aperture-priority AE (f) mode and the scene is dark, slow sync is enabled automatically (the shutter speed becomes slower). Use a tripod, or set the shooting mode to the program AE (d) or fully automatic mode (p.21). -
Page 73: Specifications
Specifications Type Type: E-TTL II/E-TTL/TTL autoflash Ring-type flash unit for close-ups Compatible cameras: Type-A EOS cameras (E-TTL II/E-TTL autoflash) Type-B EOS cameras (TTL autoflash) Flash Unit Guide No.: Both sides firing: Approx. 14/45.9 (ISO 100, in meters/feet) Single-side firing: Approx. 10.5/34.4 (ISO 100, in meters/feet) Flash coverage: Approx.
-
Page 74
Approx. 69.6 x 118.8 x 71.4 mm / 2.74 x 4.68 x 2.81 in. Weight: Approx. 455 g / 16.05 oz. (MR-14EX II only, excluding batteries) All specifications above are based on Canon’s testing standards. Product specifications and external appearance are subject to change without notice. -
Page 75
Specifications Guide Number (Approx., ISO 100, in meters/feet) Normal Flash High-speed Sync (at full output) Flash Both Sides Single-side Shutter Both Sides Single-side Output Firing Firing Speed Firing Firing 14.0 / 45.9 10.5 / 34.4 1/125 8.9 / 29.2 6.6 / 21.7 9.9 / 32.5 7.4 / 24.4 1/160… -
Page 76: Using Mr-14Ex Ii With A Type-B Camera
Using MR-14EX II with a Type-B Camera This section describes the functions that are available or unavailable when using the Macro Ring Lite MR-14EX II with a Type-B camera (EOS film camera supporting TTL autoflash). When the MR-14EX II is used with autoflash with a Type-B camera, <b>…
-
Page 77
This device complies with Part 15 of the FCC Rules. Operation is subject to the following two conditions: (1) This device may not cause harmful interference, and (2) this device must accept any interference received, including interference that may cause undesired operation. Do not make any changes or modifications to the equipment unless otherwise specified in the manual. -
Page 78
For more information about where you can drop off your waste equipment for recycling, please contact your local city office, waste authority, approved WEEE scheme or your household waste disposal service. For more information regarding return and recycling of WEEE products, please visit www.canon-europe.com/weee. -
Page 79
MEMO… -
Page 80
MEMO… -
Page 81: Index
Index Flash exposure level ….10, 35 4 sec., 6 sec., 8 sec., 10 sec., 16 sec. timer ……..4 Flash firing restriction ….. 69 Flash function settings….37 Auto power off……18, 61 Flash metering mode….40, 62 Av (Aperture-priority AE)….21 Flash mode……
-
Page 82
Index M (Manual exposure)……21 Second-curtain sync….31, 40 Macrolite Adapter……16, 68 Shutter speed……… 21 Manual flash ……32, 55 Shutter sync……..40 Flash output……32, 55 Single-side firing……. 26, 34 Single-side firing……34 Slave flash unit……. 43 Wireless multiple flash Battery check ……50 shooting……..55 Slave unit setting ……. -
Page 83
MEMO… -
Page 84
The cameras and accessories referred to in this Instructions booklet are current as of January 2014. For information on compatibility with the cameras and accessories marketed after this date, contact your nearest Canon Service Center. -
Page 85
CPA-L109-000 © CANON INC. 2014…
-
Bookmarks
Quick Links
Macro Ring Lite
MR-14EX II
Beautifully
and
everything
photograph
flowers
from
and
small items
to
and
easily
insects
people
!
Related Manuals for Canon MR-14EX II
Summary of Contents for Canon MR-14EX II
-
Page 1
Beautifully easily everything photograph flowers insects from Macro Ring Lite small items people MR-14EX II… -
Page 2
Browse through this guide to find a use that perfectly fits your style. Canon Macro Ring Lite MR-14EX II Photo captured with shoe-mount flash n t e n t s BASICS Four merits… -
Page 3
Get close to small flowers Flat light means when shooting fewer shadows Because light from this kind of flash is not obstructed Because the flash tubes are ring shaped, by the lens as happens with built-in or clip-on flashes, the overall subject is evenly illuminated you can feel comfortable getting close to subjects. -
Page 4
With a Macro Ring Lite flash you can… Basics Reduce shadows with flat lighting Easily and beautifully capture the details of trinkets and accessories Close-up shots Minimal shadows Flat lighting provides shadow-free images Macro Ring Lite flash and reproduces shapes and colors Shapes and colors as they appear to the naked eye are clear without… -
Page 5
MR-14EX II. portraits and candid images. -
Page 6
With a Macro Ring Lite flash you can… Basics Sharp and vivid from the foreground to background Vividly capture the natural, three- nail art dimensional feel of designs Close-up shots Minimal shadows Sharp fore and background The subject is brightly lit and in-focus Macro Ring Lite flash all the way to the background Sharply capture… -
Page 7
Basics Vividly capture the natural, three-dimensional feel of nail art designs Without the flash, the focus is shallow, and with the normal flash, strong shadows appear. When shooting without the flash and at wide lens apertures, the range of focus becomes shallow. A clip- on flash makes it easier for strong shadows to appear. -
Page 8
• EOS 5D Mark III, with EF 100mm f/2.8L IS USM macro lens just for close-ups, but is fully Because the MR-14EX II flash tubes • Manual exposure mode; E-TTL II flash • 1/60 sec. at f/16; ISO 800… -
Page 9
Basics With this single flash, you can shoot photos of a favorite accessory on its own or a shot of someone wearing it Details of a single enlarged section are perfectly captured Macro Ring Lite flash Simple Both close-ups and pulled back shots are quick and easy beautiful Because shadows are not… -
Page 10
With a Macro Ring Lite flash you can… Basics Blur-free shots even in dark locations Easily capture shots of small berries found close to the ground in a dark forest Close-up shots Reduced blur Reduce blur during shooting even Macro Ring Lite flash in difficult outdoor lighting conditions Capture bright, beautiful images of berries even… -
Page 11
Basics Easily capture shots of small berries found close to the ground in a dark forest Blurry and dull Annoying shadows are present This image was shot without a flash while Photos shot with the built-in flash end up with hand-holding the camera. -
Page 12
Techniques for more beautiful photos Advanced Effective lighting for daylight shooting Utilize the flash to supplement the ambient light portraits for more beautiful Actively use the flash as assist lighting for perfectly captured expressions The Macro Ring Lite flash is not limited to just macro (close-up) photography, but can also be used as a fill flash for portrait photography. -
Page 13
Advanced Utilize the flash to supplement the ambient light for more beautiful portraits Increase The Ring Lite flash photo quality is effective in bright locations In situations where the background is extremely bright and the subject is in shadow, people’s faces tend to turn out dark. -
Page 14
Techniques for more beautiful photos Advanced Utilize the flash mode for more realistic photos Depict everything from clothes the texture and feel of the weave of the fabric Skillfully use the A/B flash tubes Macro Ring Lite flash to bring out the feel of the subject Easily photograph different variations Not only can it be used for portraits,… -
Page 15
Advanced Depict everything from the texture and feel of clothes to the weave of the fabric Built-in flash Strong shadows appear on the folds of the clothing, the edge of the belt, and the beads almost looking like borders, detracting from the shot. Macro Ring Lite flash The decorations on the belt are sharp from the foreground to background. -
Page 16
Techniques for more beautiful photos Advanced Capture images with comfortable controls Beautifully record the delicate watch details of a collection Flash photography techniques Macro Ring Lite flash with a slow shutter A refined, three- dimensional finish When photographing a wristwatch, By lowering the shutter speed, and the surroundings often are reflected mixing flash with ambient light, the… -
Page 17
Because the shutter speed is slower, a tripod is often On the MR-14EX II, press the function necessary. Try adjusting flash button 2, the Set button, or turn exposure compensation for a… -
Page 18
Expand flash photography expressions with a filter Macro Ring Lite flash With polarizing filter Bright flowers and The MR-14EX II is compatible trees can be captured vividly while bright blue sky with 67mm diameter screw- maintaining the brightness of the in the background in filters. -
Page 19
Advanced Create impressive shots with vividly colored flowers and blue skies With polarizing filter The flowers are silhouettes Because this was shot near a shaded window, the flowers which are the central part of the shot ended up No polarizing filter No flash as silhouettes. -
Page 20
• EOS 7D, with EF 100mm f/2.8L IS USM macro lens be set to a high-speed 1/2000 to * Activated by flash Custom Function 06-1 • Manual exposure mode; E-TTL II flash on Macro Ring Lite MR-14EX II • 1/2000 sec. at f/4.5; ISO 640 — Hi-speed sync. -
Page 21
Flash output decreases, however, this is not available during Manual Flash. glance, after each shot is taken. effective for when you want to shorten the firing time. * Based on new AA/LR6 alkaline batteries, both sides firing, and Canon’s testing standards. -
Page 22: Major Features
Slave unit control Add «C» group slave unit(s), using A:B C ratio; Add «A» and «B» slave units when MR-14EX II C.Fn 15-1 is active, and A:B or A:B C is set wireless master Indoors: Approx. 0.66–16.4 ft. (0.2–5 m), at the front; Outdoors: Approx. 0.66–9.8 ft. (0.2–3 m) at the front.
-
Page 23
This is an index that shows the brightness of the Blending flash illumination with ambient light in developed by Canon. This feature controls flash flash. The higher the guide number, the greater a scene. It can be anything from bright sunlight…
Select your support content
-
Software to improve your experience with our products
-
Useful guides to help you get the best out of your product
-
Find the latest firmware for your product
-
Need help? Check out our frequently asked questions
-
Check out the latest news about your product
-
Read the technical specifications for your product
Left Right
You might also need…

Contact Us
Contact us for telephone or E-mail support

Canon ID
Register your product and manage your Canon ID account

Repair
Locate a repair centre and find other useful information regarding our repair process
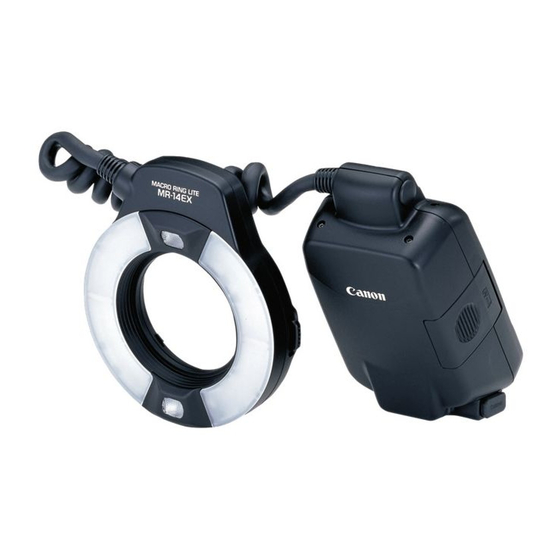
 Модель: Фотовспышка Canon Macro Ring Lite MR-14EX II
Год выпуска: 2014
Количество страниц: 340
Язык: немецкий, итальянский, нидерландский, русский
Формат: pdf
Размер: 8,5 Mb
Описание:
Кольцевая вспышка для макросъемки Canon Macro Ring Lite MR-14EX II представляет собой вспышку, предназначенную для макросъемки с камерами Canon EOS, совместимыми с системами автовспышки E-TTL II/E-TTL/TTL. Вспышка оснащена различными функциями, покрывающими широкий спектр типов съемки от простой съемки до съемки с использованием расширенных приемов. Она поддерживает функции управления соотношением мощностей ламп A и B, одностороннее срабатывание, съемку с использованием нескольких беспроводных вспышек с дополнительными ведомыми вспышками и съемку в режиме ручной вспышки.
Содержание
- Введение.
- Комплект поставки.
- Обозначения, используемые в настоящей инструкции.
- Элементы устройства и их назначение.
- Начало работы со вспышкой для макросъемки.
- Установка элементов питания.
- Установка блока управления на камеру.
- Установка вспышки на объектив.
- Включение питания.
- Полностью автоматическая съемка со вспышкой.
- Использование автовспышки E-TTL II и E-TTL в зависимости от режима съемки.
- Эффективная дальность действия вспышки (справочная информация).
- Установка соотношения мощностей.
- Компенсация экспозиции вспышки.
- Брекетинг экспозиции вспышки (FEB).
- Фиксация экспозиции вспышки.
- Высокоскоростная синхронизация.
- Синхронизация по второй шторке.
- Ручной режим вспышки.
- Сброс настроек вспышки MR-14EX II.
- Настройка функций вспышки с помощью камеры.
- Управление вспышкой через экран меню камеры.
- Съемка с несколькими беспроводными вспышками.
- Съемка с несколькими беспроводными вспышками.
- Настройка беспроводного управления.
- Съемка с несколькими вспышками с ведомым устройством C.
- Расширенные приемы съемки с несколькими вспышками с ведомыми устройствами A, B и C.
- Съемка с несколькими беспроводными вспышками с ручной установкой мощностей.
- Пользовательская настройка вспышки MR-14EX II.
- Настройка пользовательских и персональных функций.
- Настройка пользовательских функций.
- Настройка персональных функций.
- Функция памяти.
- Справочная информация.
- Система MR-14EX II.
- Ограничение частоты срабатывания вспышки вследствие перегрева.
- Поиск и устранение неполадок.
- Технические характеристики.
- Использование вспышки MR-14EX II с камерой типа B.
- Алфавитный указатель.
Скачать: disk.yandex.ru | mega.co.nz