
Комментарии
43
Войдите или зарегистрируйтесь, чтобы писать комментарии, задавать вопросы и участвовать в обсуждении.

Дружище, на BP9 OUTBACK есть на русском? Или ссылку может какую дашь?!

Я езжу на Subaru Forester (SF)
Приветствую скинь книгу про форестер 97


Добрая часть суток! Есть мануал для капиталки мотора субару FB20 на русском языке? В идеале Форестер 2011 года

Приветствую, нет такого, всё, что было тут выложил на последок

На легаси ВМ9 2010Г японец есть мануал на русском ?
мануал с названием 2010_SubLegSM на модели:
2010MY BM*****, BR***** но он на англ.
Да спасибо я видел открывал

На. Аутбек 07акпп, 2 -5есть?
многое подойдет из -LegSM07rus
сегодня вечером добавлю ссылок, вчера не успел, долго на яндекс диск грузится

Попой в премиуме, а душой в Субару)) спасибо за мануалы)))

книгу от форика можно у вас приобрести?)
я сейчас постепенно подгружу все на Яндекс диск, и в тексте будут ссылки, можно бедует скачать, уже несколько штук готово
будет очень хорошо) спасибо за труд!)

я если четно хз как это сделать…
у меня телефон даже кнопочный до сих пор )))))
ну, тут два пути :)))
мне кнопочный больше нравится
если есть желание разбираться
disk.yandex.ru/
чет закачивается, щас попробуем
AlexeiTitov
ну, тут два пути :)))
мне кнопочный больше нравится
если есть желание разбираться
disk.yandex.ru/
Все комментарии
- Manuals
- Brands
- Subaru Manuals
- Automobile
- 2007 Outback
Manuals and User Guides for Subaru 2007 Outback. We have 4 Subaru 2007 Outback manuals available for free PDF download: Owner’s Manual, Brochure & Specs, Service Bulletin
Subaru 2007 Outback Owner’s Manual (433 pages)
Brand: Subaru
|
Category: Automobile
|
Size: 21 MB
Table of Contents
-
Table of Contents
11
-
Seat, Seatbelt and SRS Airbags
3
-
Safety Warnings
4
-
Vehicle Symbols
5
-
Child Safety
7
-
Drinking and Driving
8
-
Driving with Pets
9
-
Tire Pressures
9
-
California Proposition 65
10
-
Table of Contents
11
-
-
-
Seatbelt Warning Light
26
-
Front Seats
27
-
Manual Seat
28
-
Power Seat (if Equipped)
29
-
Memory Function (Driver’s Seat Only, if Equipped)
30
-
Active Head Restraint
32
-
Head Restraint Adjustment
32
-
Lumbar Support (if Equipped)
33
-
-
Seat Heater (if Equipped)
33
-
Rear Seats
34
-
Folding down the Rear Seatback
34
-
Head Restraint Adjustment
35
-
-
Armrest (if Equipped)
36
-
Loading Long Objects (Sedan)
37
-
-
Seatbelts
38
-
Seatbelt Safety Tips
38
-
Emergency Locking Retractor (ELR)
39
-
Automatic/Emergency Locking Retractor (A/ELR)
39
-
Seatbelt Warning Light and Chime
39
-
Fastening the Seatbelt
41
-
Seatbelt Maintenance
48
-
-
Front Seatbelt Pretensioners
49
-
System Monitors
50
-
System Servicing
51
-
Precautions against Vehicle Modification
52
-
-
Child Restraint Systems
52
-
Where to Place a Child Restraint System
53
-
Choosing a Child Restraint System
55
-
Installing Child Restraint Systems with A/ELR Seatbelt
55
-
Installing a Booster Seat
58
-
Installation of Child Restraint Systems by Use of Lower and Tether Anchorages (LATCH)
60
-
Top Tether Anchorages
62
-
-
SRS Airbag (Supplemental Restraint System Airbag)
65
-
Vehicle with SRS Airbags and Lap/Shoulder Restraints for Driver, Front Passenger, and Window-Side Rear Passengers
65
-
Subaru Advanced Frontal Airbag System
70
-
SRS Airbag System Warn-
72
-
Seat, Seatbelt and SRS Airbags
77
-
SRS Side Airbag and SRS Curtain Airbag
80
-
SRS Airbag System Monitors
86
-
SRS Airbag System Servicing
88
-
Precautions against Vehicle Modification
89
-
-
-
-
-
Keys and Doors
90
-
Keys
91
-
Key Number
91
-
-
Immobilizer
92
-
Security ID Plate
92
-
Security Indicator Light
93
-
Key Replacement
93
-
-
Door Locks
94
-
Locking and Unlocking from the Outside
94
-
Locking and Unlocking from the Inside
95
-
Battery Drainage Prevention Function
95
-
-
Power Door Locking Switches
96
-
Key Lock-In Prevention Function
96
-
-
Remote Keyless Entry System
97
-
Locking the Doors
98
-
Unlocking the Doors
98
-
Unlocking the Trunk Lid/Rear Gate
98
-
Illuminated Entry
98
-
Vehicle Finder Function
99
-
Sounding a Panic Alarm
99
-
Selecting Audible Signal Operation
99
-
Replacing the Battery
99
-
Replacing Lost Transmitters
100
-
-
Alarm System
103
-
System Alarm Operation
103
-
Activating and Deactivating the Alarm System
104
-
If You Have Accidentally Triggered the Alarm System
104
-
Arming the System
104
-
Disarming the System
106
-
Valet Mode
106
-
Passive Arming
106
-
Tripped Sensor Identification
108
-
Shock Sensors (Dealer Option)
108
-
-
Child Safety Locks
108
-
Windows
109
-
Power Windows
109
-
-
Trunk Lid (Sedan)
111
-
To Open and Close the Trunk Lid from Outside
111
-
To Open the Trunk Lid from Inside
112
-
To Lock and Unlock the Trunk Lid Release Lever
112
-
Internal Trunk Lid Release Handle
112
-
-
Rear Gate (Station Wagon)
114
-
Moonroof (if Equipped)
115
-
Tilting/Sliding Moonroof (Sedan)
116
-
Sun Shade
117
-
Moonroof (Station Wagon)
117
-
-
-
-
Table of Contents
119
-
Ignition Switch
121
-
Lock
121
-
Acc
122
-
Start
122
-
Key Reminder Chime
123
-
Ignition Switch Light
123
-
-
Hazard Warning Flasher
123
-
Meters and Gauges (Turbo Models)
123
-
Speedometer
124
-
Tachometer
124
-
Fuel Gauge
124
-
Temperature Gauge
125
-
Low Fuel Warning Light
125
-
ECO Gauge
126
-
-
Multi-Information Display (Turbo Models)
126
-
Odometer and Trip Meter
127
-
Current and Average Fuel Consumption
128
-
Outside Temperature and Journey Time
130
-
Driving Range on Remaining Fuel
131
-
Clock (Vehicle with Navigation System)
132
-
SI-DRIVE Display
132
-
Warning Messages and Driver’s Information
133
-
-
Instruments and Controls
134
-
Meters and Gauges (Non-Turbo Models)
136
-
Combination Meter Illumination
136
-
Canceling the Function for Meter/Gauge Needle
136
-
Speedometer
136
-
-
Double Trip Meter
137
-
Tachometer
138
-
Fuel Gauge
138
-
Temperature Gauge
139
-
Warning and Indicator Lights
140
-
Seatbelt Warning Light and Chime
140
-
SRS Airbag System Warning Light
142
-
Front Passenger’s Frontal Airbag on and off Indicators
143
-
CHECK ENGINE Warning Light/Malfunction
143
-
Indicator Lamp
143
-
-
Charge Warning Light
144
-
Oil Pressure Warning Light
144
-
AT OIL Temperature Warning Light (at Vehicles)
144
-
Low Tire Pressure Warning Light (if Equipped)
144
-
ABS Warning Light
146
-
Brake System Warning Light
146
-
Low Fuel Warning Light
147
-
Door Open Warning Light
147
-
All-Wheel Drive Warning Light (at Vehicles)
148
-
Vehicle Dynamics Control Operation Indicator Light (if Equipped)
148
-
Vehicle Dynamics Control Warning Light
148
-
Equipped)/Vehicle Dynamics Control off
148
-
-
Security Indicator Light
149
-
SPORT Mode Indicator Light (if Equipped)
150
-
Shift-Up Indicator Light (MT Vehicles) (if Equipped)
150
-
Instruments and Controls
150
-
Selector Lever Position Indicator (at Vehicles) (if Equipped)
150
-
Gear Position Indicator (at Vehicles) (if Equipped)
150
-
Selector Lever and Gear Position Indicator (at Vehicles) (if Equipped)
151
-
Turn Signal Indicator Lights
151
-
High Beam Indicator Light
151
-
Cruise Control Set Indicator Light
151
-
-
Cruise Control Indicator
151
-
Headlight Indicator Light
151
-
Front Fog Light Indicator Light
151
-
-
Clock (Vehicle Without Navigation System)
152
-
Information Display (Non-Turbo Models Without Navigation System)
152
-
Outside Temperature Indicator
153
-
Current Fuel Consumption
154
-
Average Fuel Consumption
154
-
Driving Range on Remaining Fuel
155
-
Journey Time
156
-
-
Light Control Switch
157
-
Headlights
157
-
High/Low Beam Change (Dimmer)
157
-
Headlight Flasher
158
-
Daytime Running Light System
158
-
-
Turn Signal Lever
159
-
Illumination Brightness Control
159
-
Parking Light Switch
160
-
Front Fog Light Switch (if Equipped)
160
-
Wiper and Washer
161
-
Windshield Wiper and Washer Switches
162
-
Rear Window Wiper and Washer Switch (Station Wagon)
163
-
-
Windshield Wiper Deicer (if Equipped)
164
-
Rear Window Defogger Button
165
-
Climate Control
165
-
Mirrors
166
-
Inside Mirror
166
-
Auto-Dimming Mirror/Compass (if Equipped)
166
-
Outside Mirrors
168
-
-
Tilt Steering Wheel
169
-
Horn
170
-
-
-
Climate Control
171
-
Ventilator
172
-
Air Flow Selection
172
-
Climate Control
172
-
Center and Side Ventilators
173
-
-
Manual Climate Control System (if Equipped)
173
-
Control Panel
173
-
Heater Operation
175
-
Air Conditioner Operation
177
-
-
Automatic Climate Control System (if Equipped)
178
-
Control Panel
178
-
Temperature Sensors
181
-
Checking Air Conditioning System before Summer Season
182
-
Cooling and Dehumidifying in High Humidity and Low Temperature Weather Condition
182
-
Efficient Cooling after Parking in Direct Sunlight
182
-
Lubrication Oil Circulation in the Refrigerant Circuit
182
-
-
Operating Tips for Heater and Air Conditioner
182
-
Cleaning Ventilator Grille
182
-
Air Conditioner Compressor Shut-Off When Engine Is Heavily Loaded
183
-
-
Air Filtration System (if Equipped)
183
-
Refrigerant for Your Climate Control System
183
-
-
-
Audio
184
-
XM TM Satellite Radio Reception (if Equipped)
185
-
Antenna System
185
-
FM Reception
185
-
Printed Antenna
185
-
-
Installation of Accessories
187
-
Audio Set
188
-
Type a Audio Set (if Equipped)
188
-
Type B Audio Set (if Equipped)
189
-
-
-
Power and Sound Controls
190
-
Power Switch and Volume Control
190
-
Tone and Balance Control
190
-
Audio Effector Switching (Type B)
192
-
-
FM/AM Radio Operation
193
-
FM/AM Selection
193
-
Tuning
193
-
Station Preset
194
-
-
Satellite Radio Operation (if Equipped)
195
-
XM TM Satellite Radio
195
-
Satellite Radio Reception
195
-
Band Selection
195
-
Channel and Category Selection
196
-
Channel Preset
197
-
Display Selection
197
-
-
CD Player Operation
198
-
How to Insert a CD (Type A)
198
-
How to Insert a CD(S) (Type B)
198
-
How to Play Back a CD
200
-
To Select a Track from Its Beginning
200
-
Fast-Forwarding and Fast-Reversing
201
-
Repeating
202
-
Random Playback
203
-
Scan
204
-
Display Selection
205
-
Folder Selection
205
-
When the Following Messages Are Displayed
207
-
-
AUX Unit Operation
208
-
AUX Jack
208
-
AUX Inputs Selection Button
208
-
-
Audio Control Buttons (if Equipped)
209
-
MODE Button
209
-
-
Precautions to Observe When Handling a Compact Disc
210
-
-
Interior Equipment
212
-
Interior Light
213
-
Cargo Area Light (Station Wagon)
213
-
Dome Light
213
-
-
Map Light
213
-
Sun Visors
214
-
Sun Visor Extension Plate
214
-
Vanity Mirror with Light
215
-
-
Storage Compartment
215
-
Glove Box
216
-
Center Console Box
216
-
Center Panel Compartment (if Equipped)
217
-
Overhead Console (if Equipped)
218
-
-
Cup Holder
218
-
Front Passenger’s Cup Holder
219
-
Rear Passenger’s Cup Holder
219
-
-
Accessory Power Outlets
219
-
Coat Hook
221
-
Rear Passenger Area
221
-
-
Shopping Bag Hook
222
-
For Sedan Models
222
-
For Station Wagon Models
222
-
-
Floor Mat
223
-
Cargo Area Cover (Station Wagon)
223
-
Using the Cover
223
-
To Remove the Cover Housing
224
-
To Remove the Rear Gate Board
224
-
Stowage of the Cargo Area Cover and Rear Gate Board
224
-
To Install the Cover Housing
225
-
To Install the Rear Gate Board
226
-
-
Stowage Boxes (Station Wagon)
226
-
Convenient Tie-Down Hooks (if Equipped)
227
-
Sedan
228
-
Station Wagon
228
-
-
Homelink® Wireless Control System (if Equipped)
228
-
Garage Door Opener Programming in the U.S.A
229
-
Programming Rolling-Code-Protected Garage Door Openers in the U.S.A
230
-
Programming for Entrance Gates and Garage Door Openers in Canada
231
-
Programming Other Devices
232
-
Operating the Homelink® Wireless Control System
232
-
Button
232
-
In Case a Problem Occurs
232
-
-
-
Starting and Operating
234
-
Fuel
236
-
Fuel Requirements
236
-
Fuel Filler Lid and Cap
238
-
-
State Emission Testing (U.S. Only)
240
-
Preparing to Drive
242
-
Starting the Engine
242
-
Manual Transmission Vehicle
242
-
Automatic Transmission Vehicle
243
-
-
Remote Engine Start System (Dealer Option)
244
-
Starting Your Vehicle
245
-
Remote Start Safety Features
245
-
Entering the Vehicle While It Is Running Via Remote Start
245
-
Entering the Vehicle Following Remote Engine Start
245
-
Pre-Heating or Pre-Cooling the Interior of the Vehicle
246
-
Service Mode
246
-
Remote Transmitter Programming and Programmable Feature Option
246
-
System Maintenance
247
-
Shifting Speeds
248
-
-
Stopping the Engine
244
-
Manual Transmission – 5 Speeds
248
-
Driving Tips
249
-
Selecting Reverse Gear
250
-
Shifting Speeds
250
-
Driving Tips
251
-
-
Automatic Transmission — 4-Speed
251
-
Selector Lever
252
-
Selector Lever Reverse Inhibiting Function
253
-
Selection of Manual Mode
254
-
Maximum Speeds
255
-
Driving Tips
256
-
SPORT Mode
256
-
Shift Lock Release
256
-
-
Automatic Transmission — 5-Speed
257
-
Selector Lever
258
-
Selector Lever Reverse Inhibiting Function
259
-
Selection of Manual Mode
260
-
Maximum Speeds
262
-
Driving Tips
262
-
SPORT Mode (Non-Turbo Models)
263
-
Shift Lock Release
263
-
-
SI-DRIVE (Turbo Models)
264
-
Intelligent (I) Mode
264
-
Sport (S) Mode
265
-
Sport Sharp (S#) Mode
265
-
SI-DRIVE Selector
265
-
-
Rear Viscous Limited Slip Differential (LSD) (if Equipped)
266
-
Power Steering
266
-
Braking
267
-
Braking Tips
267
-
Brake System
267
-
Disc Brake Pad Wear Warning Indicators
267
-
-
ABS (Anti-Lock Brake System)
268
-
ABS System Self-Check
268
-
ABS Warning Light
268
-
-
Electronic Brake Force Distribution (EBD) System
269
-
Steps to Take if EBD System Fails
270
-
-
Vehicle Dynamics Control System (if Equipped)
271
-
Vehicle Dynamics Control System Monitor
272
-
Vehicle Dynamics Control off Switch
275
-
-
Tire Pressure Monitoring System (TPMS) (if Equipped)
276
-
Parking Your Vehicle
277
-
Cruise Control
279
-
To Temporarily Cancel the Cruise Control
280
-
To Turn off the Cruise Control
280
-
To Change the Cruising Speed
281
-
Cruise Control Indicator Light
282
-
Cruise Control Set Indicator Light
282
-
To Set Cruise Control
279
-
-
-
Driving Tips
284
-
Engine Exhaust Gas (Carbon Monoxide)
285
-
Fuel Economy Hints
285
-
New Vehicle Break-In Driving — the First 1,000 Miles (1,600 Km)
285
-
Catalytic Converter
286
-
Driving in Foreign Countries
287
-
Periodic Inspections
287
-
Driving Tips for AWD Vehicles
288
-
Off Road Driving
289
-
All AWD Models Except OUTBACK
289
-
Outback
289
-
-
Winter Driving
291
-
Operation During Cold Weather
291
-
Driving on Snowy and Icy Roads
292
-
Corrosion Protection
293
-
Snow Tires
293
-
Tire Chains
295
-
Rocking the Vehicle
296
-
-
Loading Your Vehicle
296
-
Vehicle Capacity Weight
297
-
GVWR and GAWR (Gross Vehicle Weight Rating and Gross Axle Weight Rating)
298
-
Roof Rail and Crossbar (if Equipped)
298
-
-
Trailer Hitch (if Equipped)
302
-
Connecting a Trailer
303
-
When You Do Not Tow a Trailer
304
-
-
Trailer Towing
304
-
Warranties and Maintenance
304
-
Maximum Load Limits
305
-
Trailer Hitches
308
-
Connecting a Trailer
309
-
Trailer Towing Tips
310
-
-
-
In Case of Emergency
313
-
Temporary Spare Tire
314
-
If You Park Your Vehicle in an Emergency
314
-
Flat Tires
316
-
Changing a Flat Tire
316
-
Tire Pressure Monitoring System (TPMS) (if Equipped)
321
-
-
Jump Starting
322
-
How to Jump Start
322
-
-
Engine Overheating
324
-
If Steam Is Coming from the Engine Compartment
324
-
If no Steam Is Coming from the Engine Compartment
324
-
-
Towing
325
-
Towing and Tie-Down Hooks
325
-
Using a Flat-Bed Truck
328
-
Towing with All Wheels on the Ground
328
-
-
Rear Gate (Station Wagon) — if the Rear Gate Cannot be Unlocked
329
-
Maintenance Tools
330
-
Jack
330
-
Jack Handle
330
-
Other Maintenance Tools
331
-
-
-
Appearance Care
332
-
Exterior Care
333
-
Washing
333
-
Cleaning Aluminum Wheels
334
-
Waxing and Polishing
334
-
-
Corrosion Protection
335
-
Most Common Causes of Corrosion
335
-
To Help Prevent Corrosion
335
-
-
Cleaning the Interior
336
-
Climate Control Panel, Audio Panel, Instrument Panel, Console Panel, Switches, Combination Meter, and Other Plastic Surface
336
-
Leather Seat Materials
336
-
Seat Fabric
336
-
Synthetic Leather Upholstery
336
-
-
-
Maintenance and Service
337
-
Maintenance Precautions
339
-
Before Checking or Servicing in the Engine Compartment
340
-
When You Do Checking or Servicing in the Engine Compartment While the Engine Is Running
340
-
-
Maintenance Schedule
339
-
Engine Hood
340
-
Engine Compartment Overview
342
-
Liter Non-Turbo Models
342
-
Liter Turbo Models
343
-
Liter Models
344
-
-
Fuse Box (Page
342
-
Engine Oil
345
-
Checking the Oil Level
345
-
Changing the Oil and Oil Filter
346
-
Recommended Grade and Viscosity
348
-
Recommended Grade and Viscosity under Severe Driving Conditions
349
-
-
Cooling System
349
-
Hose and Connections
350
-
Engine Coolant
350
-
-
Air Cleaner Element
353
-
Drive Belts
356
-
Liter Models
356
-
Liter Models
357
-
-
Spark Plugs
356
-
Recommended Spark Plugs
356
-
-
Manual Transmission Oil
357
-
Checking the Oil Level
357
-
Recommended Grade and Viscosity
358
-
-
Automatic Transmission Fluid
358
-
Checking the Fluid Level
358
-
Recommended Fluid
359
-
-
Front Differential Gear Oil (at Vehicles)
360
-
Checking the Oil Level
360
-
Recommended Grade and Viscosity
361
-
-
Rear Differential Gear Oil
361
-
Checking the Gear Oil Level
361
-
Recommended Grade and Viscosity
363
-
-
Power Steering Fluid
364
-
Checking the Fluid Level
364
-
Recommended Fluid
364
-
-
Brake Fluid
365
-
Checking the Fluid Level
365
-
Recommended Brake Fluid
365
-
-
Clutch Fluid (MT Vehicles)
366
-
Checking the Fluid Level
366
-
Recommended Clutch Fluid
366
-
-
Brake Booster
367
-
Brake Pedal
367
-
Checking the Brake Pedal Free Play
367
-
Checking the Brake Pedal Reserve Distance
367
-
-
Specifications
367
-
Clutch Pedal (Manual Transmission Vehicles)
368
-
Checking the Clutch Function
368
-
Checking the Clutch Pedal Free Play
368
-
-
Replacement of Brake Pad and Lining
368
-
Breaking-In of New Brake Pads and Linings
369
-
-
Parking Brake Stroke
369
-
Summer Tires
370
-
Tire Pressure Monitoring System (TPMS) (if Equipped)
370
-
Types of Tires
370
-
Tire Inspection
372
-
Tire Pressures and Wear
372
-
Wear Indicators
374
-
Wheel Balance
374
-
Tire Rotation
375
-
Tire Rotation Direction Mark
375
-
Tire Replacement
376
-
Wheel Replacement
376
-
-
Tires and Wheels
370
-
Aluminum Wheels
377
-
Windshield Washer Fluid
377
-
Replacement of Wiper Blades
378
-
Windshield Wiper Blade Assembly
379
-
Windshield Wiper Blade Rubber
379
-
Rear Window Wiper Blade
380
-
Rear Window Wiper Blade Rubber
381
-
-
Battery
382
-
Fuses
383
-
Installation of Accessories
385
-
Main Fuse
385
-
Replacing Bulbs
386
-
Parking Light
389
-
Front Turn Signal Light
389
-
Front Fog Light (if Equipped)
389
-
Rear Combination Lights
390
-
Backup Light (Station Wagon)
391
-
License Plate Light
392
-
Dome Light
392
-
Map Light
393
-
Door Step Light
393
-
Cargo Area Light (Station Wagon)
394
-
Trunk Light (Sedan)
394
-
High Mount Stop Light (Sedan)
395
-
Specifications
396
-
-
Dimensions
397
-
Specifications
397
-
Electrical System
398
-
Engine
398
-
Capacities
399
-
Tires
400
-
Wheel Alignment
400
-
Fuses and Circuits
401
-
Fuse Panel Located in the Passenger Compartment
401
-
Fuse Panel Located in the Engine Compartment
403
-
-
Bulb Chart
404
-
Specifications
405
-
Vehicle Identification
406
-
-
Advertisement
Subaru 2007 Outback Owner’s Manual (401 pages)
Brand: Subaru
|
Category: Automobile
|
Size: 12.67 MB
Table of Contents
-
Table of Contents
12
-
Safety Warnings
5
-
Vehicle Symbols
6
-
Seat, Seatbelt and SRS Airbags
7
-
Child Safety
8
-
Table of Contents
12
-
Door Lock (Page
18
-
Fog Light Switch (Page
19
-
Cargo Area
23
-
-
-
-
Table of Contents
26
-
Front Seats
27
-
Seat, Seatbelt and SRS Airbags
27
-
Power Seat
28
-
Memory Function (Driver’s Seat Only — if Equipped)
29
-
Head Restraint Adjustment
30
-
Active Head Restraint
31
-
Lumbar Support
31
-
-
Seat Heater (if Equipped)
32
-
Rear Seats (5-Seater Models)/Second-Row Seats (7-Seater Models)
32
-
Fore and Aft Adjustment
33
-
Reclining the Seatback
34
-
Folding down the Seatback
35
-
Head Restraint Adjustment
36
-
Armrest
37
-
-
Third-Row Seat (7-Seater Models)
37
-
Access to the Third-Row Seat
38
-
Folding down the Seatback
39
-
Head Restraint Adjustment
40
-
-
Seatbelts
41
-
Seatbelt Safety Tips
41
-
Emergency Locking Retractor (ELR)
42
-
Automatic/Emergency Locking Retractor (A/ELR)
42
-
Seatbelt Warning Light and Chime
43
-
Fastening the Seatbelt
44
-
Seatbelt Maintenance
52
-
-
Front Seatbelt Pretensioners
53
-
System Monitors
54
-
System Servicing
55
-
Precautions against Vehicle Modification
55
-
-
Child Restraint Systems
56
-
Where to Place a Child Restraint System
57
-
Choosing a Child Restraint System
59
-
Installing Child Restraint Systems with A/ELR Seatbelt
59
-
Installing a Booster Seat
63
-
Installation of Child Restraint Systems by Use of Lower and Tether Anchorages (LATCH)
64
-
Top Tether Anchorages
67
-
-
SRS Airbag (Supplemental Restraint System Airbag)
70
-
Your Vehicle’s SRS Configuration
70
-
Subaru Advanced Frontal Airbag System
75
-
SRS Side Airbag and SRS Curtain Airbag
85
-
SRS Airbag System Monitors
95
-
SRS Airbag System Servicing
96
-
Precautions against Vehicle Modification
97
-
-
-
Keys and Doors
98
-
Keys
99
-
Key Number Plate
99
-
-
Immobilizer
100
-
Security ID Plate
100
-
Security Indicator Light
101
-
Key Replacement
101
-
-
Door Locks
101
-
Locking and Unlocking from the Outside
101
-
Locking and Unlocking from the Inside
102
-
Battery Drainage Prevention Function
103
-
-
Power Door Locking Switches
103
-
Key Lock-In Prevention Function
104
-
-
Remote Keyless Entry System
105
-
Locking the Doors
106
-
Unlocking the Doors
106
-
Unlocking the Rear Gate
106
-
Illuminated Entry
106
-
Vehicle Finder Function
107
-
Sounding a Panic Alarm
107
-
Selecting Audible Signal Operation
107
-
Replacing the Battery
107
-
Replacing Lost Transmitters
108
-
-
Alarm System
111
-
System Operation
111
-
Activating and Deactivating the Alarm System
112
-
If You Have Accidentally Triggered the Alarm System
112
-
Arming the System
112
-
Disarming the System
113
-
Valet Mode
114
-
Passive Arming
114
-
Tripped Sensor Identification
115
-
Shock Sensors (Dealer Option)
115
-
-
Child Safety Locks
116
-
Windows
116
-
Power Windows
116
-
-
Rear Gate
119
-
Moonroof (if Equipped)
120
-
Tilt Function
121
-
Sliding Function
121
-
Anti-Entrapment Function
121
-
Sun Shade
122
-
-
-
Instruments and Controls
124
-
Ignition Switch
126
-
Lock
126
-
Acc
127
-
Start
127
-
Key Reminder Chime
128
-
Ignition Switch Light
128
-
-
Hazard Warning Flasher
128
-
Meters and Gauges
128
-
Combination Meter Illumination
128
-
Canceling the Function for Meter Needle
129
-
Sequential Illumination Upon Turning on the
129
-
Speedometer
130
-
Odometer
130
-
Double Trip Meter
130
-
Tachometer
131
-
Fuel Gauge
131
-
Temperature Gauge
132
-
-
Warning and Indicator Lights
132
-
Seatbelt Warning Light and Chime
133
-
SRS Airbag System Warning Light
134
-
Front Passenger’s Frontal Airbag on and off Indicators
135
-
CHECK ENGINE Warning Light/Malfunction Indicator Lamp
136
-
Charge Warning Light
136
-
Oil Pressure Warning Light
136
-
AT OIL Temperature Warning Light
137
-
Rear Differential Oil Temperature Warning Light
137
-
ABS Warning Light
139
-
Brake System Warning Light
139
-
Low Fuel Warning Light
140
-
Door Open Warning Light
140
-
Windshield Washer Fluid Warning Light
141
-
All-Wheel Drive Warning Light
141
-
Vehicle Dynamics Control Operation Indicator Light
141
-
Vehicle Dynamics Control Warning Light/Traction Control System off Indicator Light
141
-
Security Indicator Light
142
-
SPORT Mode Indicator Light
143
-
Selector Lever/Gear Position Indicator
143
-
Turn Signal Indicator Lights
143
-
High Beam Indicator Light
143
-
Cruise Control Set Indicator Light
144
-
Headlight Indicator Light
144
-
Front Fog Light Indicator Light
144
-
Daytime Running Light Indicator Light
144
-
-
Clock
144
-
Outside Temperature Indicator
145
-
Multi Function Display (Vehicle Without Navigation System)
146
-
Current Fuel Consumption
146
-
Average Fuel Consumption
147
-
Driving Range on Remaining Fuel
147
-
Journey Time
148
-
-
Light Control Switch
149
-
Headlights
149
-
High/Low Beam Change (Dimmer)
149
-
Headlight Flasher
150
-
Daytime Running Light System
150
-
-
Turn Signal Lever
150
-
Illumination Brightness Control
151
-
Parking Light Switch
151
-
Front Fog Light Switch
152
-
Wiper and Washer
152
-
Windshield Wiper and Washer Switches
153
-
Rear Window Wiper and Washer Switch
155
-
Climate Control
156
-
-
Rear Window Defogger Button
156
-
Windshield Wiper Deicer
156
-
Mirrors
157
-
Inside Mirror
157
-
Auto-Dimming Mirror/Compass (if Equipped)
158
-
Outside Mirrors
159
-
-
Horn
160
-
Tilt Steering Wheel
160
-
-
Climate Control
162
-
Ventilator
163
-
Air Flow
163
-
Climate Control
163
-
Ventilator
165
-
-
Automatic Climate Control System
166
-
Control Panel
166
-
Rear Air Conditioner (if Equipped)
170
-
Temperature Sensors
170
-
-
Operating Tips for Heater and Air Conditioner
171
-
Cleaning Ventilator Grille
171
-
Efficient Cooling after Parking in Direct Sunlight
171
-
Lubrication Oil Circulation in the Refrigerant Circuit
171
-
Checking Air Conditioning System before Summer Season
171
-
Cooling and Dehumidifying in High Humidity and Low Temperature Weather Conditions
171
-
Air Conditioner Compressor Shut-Off When Engine Is Heavily Loaded
171
-
Refrigerant for Your Climate Control System
171
-
-
Air Filtration System
172
-
Replacing the Air Filter
172
-
-
-
Audio
174
-
Antenna System
175
-
FM Reception
175
-
Printed Antenna
175
-
-
XM TM Satellite Radio Reception (if Equipped)
175
-
Installation of Accessories
177
-
Audio Set
177
-
Type a Audio Set
177
-
Type B Audio Set
177
-
-
Type a Audio Set (if Equipped)
178
-
Radio Operation
178
-
Compact Disc Player Operation
183
-
-
Type B Audio Set (if Equipped)
188
-
Radio Operation
188
-
Built-In CD Changer Operation
193
-
-
Audio Control Buttons
198
-
Audio Input Terminal
199
-
Precautions to Observe When Handling a Compact Disc
200
-
MP3 Audio
202
-
What Is MP3
202
-
Creating MP3 Files
202
-
Saving MP3 Files on a Disc
202
-
Supported File Systems
202
-
Compression Format
202
-
Numbers of Folders and Files
203
-
Copyright Issues
203
-
-
-
Interior Equipment
204
-
Interior Light
205
-
Cargo Area Light
205
-
Dome Light
205
-
-
Sun Visors
206
-
Sun Visor Extension Plate
207
-
Vanity Mirror with Light
207
-
-
Map Light
206
-
Rear Gate Light
206
-
-
Storage Compartment
208
-
Glove Box
208
-
Center Console Box
208
-
Rear Console
209
-
Overhead Console
209
-
-
Cup Holder
210
-
Front Passenger’s Cup Holder
210
-
Rear Seat (5-Seater Models)/Second-Row Seat (7-Seater Models) Passenger’s Cup Holder
211
-
Third-Row Seat Cup Holders (7-Seater Models)
211
-
-
Accessory Power Outlets
212
-
Coat Hook
213
-
Rear (5-Seater Models)/Second-Row (7-Seater Models) Passenger Area
213
-
-
Shopping Bag Hook
214
-
Cargo Area Cover (if Equipped)
215
-
Using the Cover
215
-
To Remove the Cover
216
-
To Install the Cover Housing
217
-
-
Floor Mat
215
-
Convenient Tie-Down Hooks
217
-
Under-Floor Storage Compartment
218
-
Homelink ® Wireless Control System (if Equipped)
219
-
Garage Door Opener Programming in the U.S.A
220
-
Programming Rolling-Code-Protected Garage Door Openers in the U.S.A
221
-
Programming for Entrance Gates and Garage Door Openers in Canada
222
-
Programming Other Devices
222
-
Operating the Homelink ® Wireless Control System
222
-
Reprogramming a Single Homelink ® Button
222
-
Erasing Homelink Button Memory
223
-
In Case a Problem Occurs
223
-
-
Rear View Camera (if Equipped)
223
-
Position of Rear View Camera
224
-
How to Use the Rear View Camera
224
-
Viewing Range on the Screen
225
-
Distance Marker (Help Line)
226
-
-
-
Starting and Operating
230
-
Fuel
231
-
Fuel Requirements
231
-
Fuel Filler Lid and Cap
232
-
-
State Emission Testing (U.S. Only)
234
-
Preparing to Drive
236
-
Starting the Engine
236
-
Remote Engine Start System (Dealer Option)
237
-
Starting Your Vehicle
238
-
Remote Start Safety Features
238
-
Entering the Vehicle While It Is Running Via Remote Start
238
-
Entering the Vehicle Following Remote Engine Start Shutdown
238
-
Pre-Heating or Pre-Cooling the Interior of the Vehicle
239
-
Service Mode
239
-
Remote Transmitter Programming and Programmable Feature Option
239
-
System Maintenance
240
-
-
Stopping the Engine
237
-
Automatic Transmission
241
-
Selector Lever
242
-
Selector Lever Reverse Inhibiting Function
243
-
Selection of Manual Mode
244
-
Maximum Speeds
245
-
Driving Tips
246
-
SPORT Mode
246
-
Shift Lock Release
247
-
-
Braking
248
-
Braking Tips
248
-
Brake System
248
-
Disc Brake Pad Wear Warning Indicators
249
-
-
Power Steering
248
-
ABS (Anti-Lock Brake System)
250
-
ABS System Self-Check
250
-
ABS Warning Light
250
-
-
Electronic Brake Force Distribution (EBD) System
251
-
Steps to Take if EBD System Fails
252
-
-
Vehicle Dynamics Control System
253
-
Vehicle Dynamics Control System Monitor
254
-
Traction Control System off Switch
256
-
-
Tire Pressure Monitoring System (TPMS)
257
-
Parking Your Vehicle
259
-
Cruise Control
260
-
To Set Cruise Control
260
-
To Temporarily Cancel the Cruise Control
261
-
To Turn off the Cruise Control
261
-
To Change the Cruising Speed
262
-
Cruise Control Indicator Light
263
-
Cruise Control Set Indicator Light
263
-
-
-
Driving Tips
264
-
Driving Tips
265
-
New Vehicle Break-In Driving — the First
265
-
Miles (1,600 Km)
265
-
-
Fuel Economy Hints
265
-
Engine Exhaust Gas (Carbon Monoxide)
265
-
Catalytic Converter
266
-
Periodic Inspections
267
-
Driving in Foreign Countries
267
-
Driving Tips for AWD Vehicles
267
-
On-Pavement and off Road Driving
268
-
Winter Driving
270
-
Operation During Cold Weather
270
-
Driving on Snowy and Icy Roads
272
-
Corrosion Protection
273
-
Snow Tires
273
-
Tire Chains
274
-
Rocking the Vehicle
274
-
-
Loading Your Vehicle
274
-
Vehicle Capacity Weight
275
-
GVWR and GAWR (Gross Vehicle Weight Rating and Gross Axle Weight Rating)
275
-
Crossbar (if Equipped)
276
-
-
Trailer Hitch (if Equipped)
277
-
Connecting a Trailer
278
-
When You Do Not Tow a Trailer
279
-
-
Trailer Towing
280
-
Warranties and Maintenance
280
-
Maximum Load Limits
280
-
-
-
-
In Case of Emergency
290
-
Spare Tire
291
-
Removing the Spare Tire
292
-
Re-Storage of Spare Tire
294
-
-
If You Park Your Vehicle in an Emergency
291
-
Temporary Spare Tire
295
-
Flat Tires
296
-
Changing a Flat Tire
296
-
-
Jump Starting
301
-
How to Jump Start
301
-
-
Engine Overheating
304
-
If Steam Is Coming from the Engine Compartment
304
-
If no Steam Is Coming from the Engine Compartment
304
-
-
Towing
305
-
Towing and Tie-Down Hooks
305
-
Using a Flat-Bed Truck
307
-
Towing with All Wheels on the Ground
308
-
-
Rear Gate — if the Rear Gate Cannot be Unlocked
308
-
Maintenance Tools
309
-
Jack and Jack Handle
309
-
In Case of Emergency
310
-
-
-
Appearance Care
312
-
Exterior Care
313
-
Washing
313
-
Cleaning Aluminum Wheels
314
-
-
Corrosion Protection
314
-
Most Common Causes of Corrosion
314
-
To Help Prevent Corrosion
315
-
Waxing and Polishing
314
-
-
Cleaning the Interior
315
-
Seat Fabric
315
-
Leather Seat Materials
315
-
Synthetic Leather Upholstery
316
-
-
-
Maintenance and Service
318
-
Maintenance Precautions
320
-
Before Checking or Servicing in the Engine Compartment
321
-
When You Do Checking or Servicing in the Engine Compartment While the Engine Is Running
321
-
-
Maintenance Schedule
320
-
Engine Hood
321
-
Engine Compartment Overview
323
-
Engine Oil
324
-
Checking the Oil Level
324
-
Changing the Oil and Oil Filter
324
-
Recommended Grade and Viscosity
326
-
Recommended Grade and Viscosity under Severe Driving Conditions
327
-
-
Cooling System
327
-
Hose and Connections
328
-
Engine Coolant
328
-
-
Air Cleaner Element
330
-
Replacing the Air Cleaner Element
330
-
-
Spark Plugs
331
-
Recommended Spark Plugs
331
-
-
Automatic Transmission Fluid
332
-
Checking the Fluid Level
332
-
Recommended Fluid
333
-
-
Drive Belts
332
-
Front Differential Gear Oil
333
-
Checking the Oil Level
333
-
Recommended Grade and Viscosity
334
-
-
Rear Differential Gear Oil
334
-
Checking the Gear Oil Level
334
-
Recommended Grade and Viscosity
335
-
-
Power Steering Fluid
336
-
Checking the Fluid Level
336
-
Recommended Fluid
336
-
-
Brake Fluid
337
-
Checking the Fluid Level
337
-
Recommended Brake Fluid
337
-
Specifications
338
-
-
Brake Booster
338
-
Brake Pedal
338
-
Checking the Brake Pedal Free Play
338
-
Checking the Brake Pedal Reserve Distance
338
-
-
Replacement of Brake Pad and Lining
339
-
Breaking-In of New Brake Pads and Linings
339
-
-
Parking Brake Stroke
340
-
Tires and Wheels
340
-
Types of Tires
340
-
Tire Pressure Monitoring System (TPMS)
340
-
Tire Inspection
342
-
Tire Pressures and Wear
342
-
Wheel Balance
344
-
Wear Indicators
344
-
Tire Rotation Direction Mark
345
-
Tire Rotation
345
-
Tire Replacement
346
-
Wheel Replacement
347
-
-
Aluminum Wheels
347
-
Chrome Plated Wheels (if Equipped)
348
-
Windshield Washer Fluid
349
-
Replacement of Wiper Blades
350
-
Windshield Wiper Blade Assembly
351
-
Windshield Wiper Blade Rubber
351
-
Rear Window Wiper Blade Assembly
352
-
Rear Window Wiper Blade Rubber
353
-
-
Battery
354
-
Fuses
355
-
Installation of Accessories
357
-
Main Fuse
357
-
Replacing Bulbs
358
-
Headlight
359
-
Parking Light
362
-
Front Turn Signal Light
362
-
Front Fog Light
362
-
Rear Combination Lights
363
-
Backup Light/Tail Light
363
-
Rear Gate Light
364
-
License Plate Light
364
-
Dome Light
365
-
Map Light
365
-
Door Step Light
366
-
Cargo Area Light
366
-
Specifications
369
-
-
Specifications
370
-
Engine
370
-
Electrical System
370
-
Capacities
370
-
Tires
370
-
Wheel Alignment
371
-
-
Fuses and Circuits
372
-
Fuse Panel Located in the Passenger Compartment
372
-
-
Specifications
373
-
Fuse Panel Located in the Engine Compartment
374
-
Bulb Chart
375
-
Vehicle Identification
376
-
-
Subaru 2007 Outback Brochure & Specs (19 pages)
Subaru 2007 Automobile Product Brochure
Brand: Subaru
|
Category: Automobile
|
Size: 2.48 MB
Advertisement
Subaru 2007 Outback Service Bulletin (2 pages)
Service Manual Corrections
Brand: Subaru
|
Category: Automobile
|
Size: 0.3 MB
Advertisement
Related Products
-
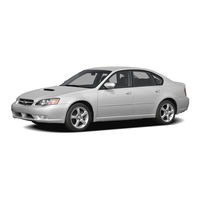
Subaru 2007 OUTBACK Sedan
-
Subaru 2007 OUTBACK Station wagon
-
Subaru 2007 Impreza
-
Subaru 2007 FORESTER 2.5 X
-
Subaru 2007 Legacy Sedan
-
Subaru 2007 Legacy Station wagon
-
Subaru 2007 Impreza 2.5i Special Edition Sedan
-
Subaru 2007 Impreza 2.5i Sport Wagon
-
Subaru 2007 Impreza WRX Sedan
-
Subaru 2007 Impreza WRX Limited Sedan
Subaru Categories
Automobile
Automobile Accessories
Engine
Car Navigation system
Portable Generator
More Subaru Manuals

Black plate (1,1)
一般Model «A2490GE-A» EDITED: 2012/ 4/ 13
Foreword
Congratulations on choosing a SUBARU vehicle. This Owner’s
Manual has all the information necessary to keep your SUBARU in
excellent condition and to properly maintain the emission control
system for minimizing emission pollutants. We urge you to read
this manual carefully so that you may understand your vehicle and
its operation. For information not found in this Owner’s Manual,
such as details concerning repairs or adjustments, we recommend
that you contact the SUBARU dealer from whom you purchased
your SUBARU or the nearest SUBARU dealer.
The information, specifications and illustrations found in this
manual are those in effect at the time of printing. FUJI HEAVY
INDUSTRIES LTD. reserves the right to change specifications and
designs at any time without prior notice and without incurring any
obligation to make the same or similar changes on vehicles
previously sold. This Owner’s Manual applies to all models and
covers all equipment, including factory installed options. Some
explanations, therefore may be for equipment not installed in your
vehicle.
Please leave this manual in the vehicle at the time of resale. The
next owner will need the information found herein.
NOTE: “SUBARU dealer” means an authorized SUBARU dealer
and/or repairer.
FUJI HEAVY INDUSTRIES LTD., TOKYO, JAPAN
is a registered trademark of FUJI HEAVY INDUSTRIES LTD.
*
C
Copyright 2012 FUJI HEAVY INDUSTRIES LTD.
This manual uses recycled paper.
We have 118 Subaru
OUTBACK manuals
covering a total of 35 years of production.
In the table below you can see 0
OUTBACK Workshop Manuals,0
OUTBACK Owners Manuals and 41 Miscellaneous
Subaru OUTBACK downloads.
Our most popular manual is the
2008 2009 Subaru Legacy Outback Factory Service Manual PDF
.
This (like all of our manuals) is available to download for free in PDF format.
How to download a Subaru OUTBACK
Repair Manual (for any year)
These OUTBACK manuals have been provided by our users,
so we can’t guarantee completeness. We’ve checked the years that the manuals cover
and we have Subaru OUTBACK repair manuals
for the following years; 1985, 1988, 1990, 1995, 1996, 1997, 1998, 1998, 1998, 1998, 1999, 2000, 2001, 2002, 2003, 2004, 2005, 2006, 2007, 2008, 2009, 2010, 2011, 2012, 2013, 2014, 2015, 2016, 2017, 2018, 2019 and 2020.
Go through the 118 different PDF’s that are displayed below,
for example this one. You’ll then be shown the first 10 pages of this specific
document, you can then scroll down and click ‘show full PDF’. Then you can click
download you’ve got a totally free car manual, forever!
What topics does the Subaru OUTBACK
Service/Repair Manual cover?
In total, that’s over 148394 pages of content dedicated to your
Subaru OUTBACK. Here’s a non exhaustive list
of what’s covered;
- Subaru OUTBACK service manual for roadside repairs
- Subaru OUTBACK owners manual covering weekly checks
- Subaru OUTBACK workshop manual covering Lubricants, fluids and tyre pressures
- Subaru OUTBACK service PDF’s covering routine maintenance and servicing
- Detailed Subaru OUTBACK Engine and Associated Service Systems (for Repairs and Overhaul) (PDF)
- Subaru OUTBACK Transmission data Service Manual PDF
- Subaru OUTBACK Brakes and suspension PDF
- Subaru OUTBACK Wiring Diagrams
Looking for a Free Subaru OUTBACK Haynes /
Subaru OUTBACK Chilton Manuals?
We get a lot of people coming to the site looking to get themselves a free
Subaru OUTBACK Haynes
manual. There are two things you need to know; firstly it’s illegal, and secondly —
there are much better ways of servicing and understanding your
Subaru OUTBACK engine than
the Haynes manual. That’s essentially what we’re here for — to give you an
alternative to the Haynes and Chilton, online and totally for free.
 Loading…
![]()
Maintenance and service
|
Maintenance schedule ………………………………… |
11-3 |
|
Maintenance precautions…………………………….. |
11-3 |
|
Before checking or servicing in the engine |
|
|
compartment……………………………………………. |
11-4 |
|
When you do checking or servicing in the engine |
|
|
compartment while the engine is running………. |
11-4 |
|
Engine hood ………………………………………………. |
11-4 |
|
Engine compartment overview…………………….. |
11-6 |
|
2.5-liter non-turbo models…………………………….. |
11-6 |
|
2.5-liter turbo models ………………………………….. |
11-7 |
|
3.0-liter models ………………………………………….. |
11-8 |
|
Engine oil…………………………………………………… |
11-9 |
|
Checking the oil level ………………………………….. |
11-9 |
|
Changing the oil and oil filter………………………. |
11-10 |
|
Recommended grade and viscosity ……………… |
11-12 |
|
Recommended grade and viscosity under severe |
|
|
driving conditions …………………………………… |
11-13 |
|
Cooling system ………………………………………… |
11-13 |
|
Hose and connections……………………………….. |
11-14 |
|
Engine coolant …………………………………………. |
11-14 |
|
Air cleaner element…………………………………… |
11-17 |
|
Replacing the air cleaner element ………………… |
11-17 |
|
Spark plugs ……………………………………………… |
11-20 |
|
Recommended spark plugs ………………………… |
11-20 |
|
Drive belts ……………………………………………….. |
11-20 |
|
2.5-liter models ………………………………………… |
11-20 |
|
3.0-liter models ………………………………………… |
11-21 |
|
Manual transmission oil ……………………………. |
11-21 |
|
Checking the oil level ………………………………… |
11-21 |
|
Recommended grade and viscosity ……………… |
11-22 |
|
Automatic transmission fluid…………………….. |
11-22 |
|
|
Checking the fluid level……………………………… |
11-22 |
|
|
Recommended fluid………………………………….. |
11-23 |
|
|
Front differential gear oil (AT vehicles)………. |
11-24 |
|
|
Checking the oil level ……………………………….. |
11-24 |
|
|
Recommended grade and viscosity……………… |
11-25 |
|
|
Rear differential gear oil……………………………. |
11-25 |
|
|
Checking the gear oil level…………………………. |
11-25 |
|
|
Recommended grade and viscosity……………… |
11-27 |
|
|
Power steering fluid …………………………………. |
11-28 |
|
|
Checking the fluid level……………………………… |
11-28 |
|
|
Recommended fluid………………………………….. |
11-28 |
|
|
Brake fluid……………………………………………….. |
11-29 |
|
|
Checking the fluid level……………………………… |
11-29 |
|
|
Recommended brake fluid …………………………. |
11-29 |
|
|
Clutch fluid (MT vehicles) …………………………. |
11-30 |
|
|
Checking the fluid level……………………………… |
11-30 |
|
|
Recommended clutch fluid…………………………. |
11-30 |
|
|
Brake booster ………………………………………….. |
11-31 |
|
|
Brake pedal ……………………………………………… |
11-31 |
|
|
Checking the brake pedal free play ……………… |
11-31 |
11 |
|
Checking the brake pedal reserve |
||
|
………………………………………………..distance |
11-31 |
|
|
Clutch pedal (Manual transmission |
||
|
vehicles) ……………………………………………….. |
11-32 |
|
|
Checking the clutch function………………………. |
11-32 |
|
|
Checking the clutch pedal free play……………… |
11-32 |
|
|
Replacement of brake pad and lining ………… |
11-32 |
|
|
Breaking-in of new brake pads and |
||
|
linings ………………………………………………….. |
11-33 |

Maintenance and service
|
Parking brake stroke…………………………………. |
11-33 |
|
Tires and wheels ………………………………………. |
11-34 |
|
Types of tires …………………………………………… |
11-34 |
|
Tire pressure monitoring system (TPMS) |
|
|
(if equipped)…………………………………………… |
11-34 |
|
Tire inspection …………………………………………. |
11-36 |
|
Tire pressures and wear …………………………….. |
11-36 |
|
Wheel balance………………………………………….. |
11-38 |
|
Wear indicators………………………………………… |
11-38 |
|
Tire rotation direction mark ………………………… |
11-39 |
|
Tire rotation …………………………………………….. |
11-39 |
|
Tire replacement ………………………………………. |
11-40 |
|
Wheel replacement……………………………………. |
11-40 |
|
Aluminum wheels……………………………………… |
11-41 |
|
Windshield washer fluid ……………………………. |
11-41 |
|
Replacement of wiper blades…………………….. |
11-42 |
|
Windshield wiper blade assembly ………………… |
11-43 |
|
Windshield wiper blade rubber ……………………. |
11-43 |
|
Rear window wiper blade assembly ……………… |
11-44 |
|
Rear window wiper blade rubber………………….. |
11-45 |
|
Battery …………………………………………………….. |
11-46 |
|
Fuses………………………………………………………. |
11-47 |
|
Main fuse…………………………………………………. |
11-49 |
|
Installation of accessories ………………………… |
11-49 |
|
Replacing bulbs……………………………………….. |
11-50 |
|
Headlight………………………………………………… |
11-51 |
|
Parking light……………………………………………. |
11-53 |
|
Front turn signal light ……………………………….. |
11-53 |
|
Front fog light (if equipped)………………………… |
11-53 |
|
Rear combination lights …………………………….. |
11-54 |
|
Backup light (Station wagon) ……………………… |
11-55 |
|
License plate light ……………………………………. |
11-56 |
|
Dome light………………………………………………. |
11-56 |
|
Map light ………………………………………………… |
11-57 |
|
Door step light…………………………………………. |
11-57 |
|
Cargo area light (Station wagon) …………………. |
11-58 |
|
Trunk light (Sedan) …………………………………… |
11-58 |
|
High mount stop light (Sedan)…………………….. |
11-59 |

Maintenance schedule
The scheduled maintenance items required to be serviced at regular intervals are shown in the “Warranty and Maintenance Booklet”.
For details of your maintenance schedule, read the separate “Warranty and Maintenance Booklet”.
Maintenance precautions
When maintenance and service are required, it is recommended that all work be done by an authorized SUBARU dealer.
If you perform maintenance and service by yourself, you should familiarize yourself with the information provided in this section on general maintenance and service for your SUBARU.
Incorrect or incomplete service could cause improper or unsafe vehicle operation. Any problems caused by improper maintenance and service performed by you are not eligible for warranty coverage.
 WARNING
. Testing of an All-Wheel Drive vehicle must NEVER be performed on a single two-wheel dynamometer or similar apparatus. Attempting to do so will result in transmission damage and in uncontrolled vehicle movement and may cause an accident or injuries to persons nearby.
. Always select a safe area when performing maintenance on your vehicle.
Maintenance and service 11-3
. Always be very careful to avoid injury when working on the vehicle. Remember that some of the materials in the vehicle may be hazardous if improperly used or handled, for example, battery acid.
. Your vehicle should only be serviced by persons fully competent to do so. Serious personal injury may result to persons not experienced in servicing vehicles.
. Always use the proper tools and make certain that they are well maintained.
. Never get under the vehicle supported only by a jack. Always use a safety stands to support the vehicle.
. Never keep the engine running in a poorly ventilated area, such as a garage or other closed areas.
. Do not smoke or allow open flames around the fuel or battery. This will cause a fire.
. Because the fuel system is under pressure, replacement of the fuel filter should be performed only by your SUBARU dealer.
. Wear adequate eye protection to
– CONTINUED –

11-4 Maintenance and service
guard against getting oil or fluids in your eyes. If something does get in your eyes, thoroughly wash them out with clean water.
. Do not tamper with the wiring of the SRS airbag system or seatbelt pretensioner system, or attempt to take its connectors apart, as that may activate the system or it can render it inoperative. The wiring and connectors of these systems are yellow for easy identification. NEVER use a circuit tester for these wiring.
If your SRS airbag or seatbelt pretensioner needs service, consult your nearest SUBARU dealer.
&Before checking or servicing in the engine compartment
 WARNING
. Always stop the engine and set the parking brake firmly to prevent the vehicle from moving.
. Always let the engine cool down. Engine parts become very hot when the engine is running and
remain hot for some time after the engine is stopped.
. Do not spill engine oil, engine coolant, brake fluid or any other fluid on hot engine components. This may cause a fire.
. Always remove the key from the ignition switch. When the ignition switch is in the “ON” position, the cooling fan may operate suddenly even when the engine is stopped.
&When you do checking or servicing in the engine compartment while the engine is running
 WARNING
A running engine can be dangerous. Keep your fingers, hands, clothing, hair and tools away from the cooling fan, belts and any other moving engine parts. Removing rings, watches and ties is advisable.
Engine hood
To open the hood:
1.If the wiper blades are lifted off the windshield, return them to their original positions.
2.Pull the hood release knob under the instrument panel.

3. Release the secondary hood release located under the front grille by moving the lever toward the left.
4. Lift up the hood, release the hood prop from its retainer and put the end of the hood prop into the slot in the hood.
To close the hood:
1.Lift the hood slightly and remove the hood prop from the slot in the hood and return the prop to its retainer.
2.Lower the hood until it approaches approximately 12 in (30 cm) from the closed position and let it drop.
3.After closing the hood, be sure the hood is securely locked.
If this does not close the hood, release it from a slightly higher position. Do not push the hood forcibly to close it. It could deform the metal.
Maintenance and service 11-5
 WARNING
Always check that the hood is properly locked before you start driving. If it is not, it might fly open while the vehicle is moving and block your view, which may cause an accident and serious bodily injury.

11-6 Maintenance and service
Engine compartment overview
& 2.5-liter non-turbo models
1)Power steering fluid reservoir (page 1128)
2)Manual transmission oil level gauge (MT) (page 11-21) or Differential gear oil level gauge (AT) (page 11-24)
3)Clutch fluid reservoir (page 11-30)
4)Automatic transmission fluid level gauge (page 11-22)
5)Brake fluid reservoir (page 11-29)
6)Fuse box (page 11-47)
7)Battery (page 11-46)
 Windshield washer tank (page 11-41)
9)Engine oil filler cap (page 11-9)
10)Engine coolant reservoir (page 11-14)
11)Radiator cap (page 11-14)
12)Engine oil level gauge (page 11-9)
13)Air cleaner element (page 11-17)

Maintenance and service 11-7
& 2.5-liter turbo models
1)Power steering fluid reservoir (page 1128)
2)Manual transmission oil level gauge (MT) (page 11-21) or Differential gear oil level gauge (AT) (page 11-24)
3)Clutch fluid reservoir (page 11-30)
4)Brake fluid reservoir (page 11-29)
5)Automatic transmission fluid level gauge (page 11-22)
6)Fuse box (page 11-47)
7)Battery (page 11-46)
Windshield washer tank (page 11-41)
9)Engine oil filler cap (page 11-9)
10)Engine coolant reservoir (page 11-14)
11)Engine oil level gauge (page 11-9)
12)Radiator cap (page 11-14)
13)Air cleaner element (page 11-17)
– CONTINUED –

11-8 Maintenance and service
& 3.0-liter models
1)Power steering fluid reservoir (page 1128)
2)Differential gear oil level gauge (AT) (page 11-24)
3)Automatic transmission fluid level gauge (page 11-22)
4)Brake fluid reservoir (page 11-29)
5)Fuse box (page 11-47)
6)Battery (page 11-46)
7)Windshield washer tank (page 11-41)
Engine oil filler cap (page 11-9)
9)Engine coolant reservoir (page 11-14)
10)Radiator cap (page 11-14)
11)Engine oil level gauge (page 11-9)
12)Air cleaner element (page 11-17)

Engine oil
& Checking the oil level
Check the engine oil level at each fuel stop.
1. Park the vehicle on a level surface and stop the engine.
2.5-liter models
1) Notch
2) Upper level
3) Lower level
2.Pull out the dipstick, wipe it clean, and insert it again.
3.Be sure the dipstick is correctly inserted until it stops with the graphic symbol “ ” on its top appearing as shown in the illustration.
Maintenance and service 11-9
3.0-liter models
1)Upper level
2)Lower level
4.Pull out the dipstick again and check the oil level on it. If it is below the lower level, add oil to bring the level up to the upper level.
 CAUTION
. Use only engine oil with the recommended grade and viscosity.
– CONTINUED –

11-10 Maintenance and service
. Be careful not to spill engine oil when adding it. If oil touches the exhaust pipe, it may cause a bad smell, smoke, and/or a fire. If engine oil gets on the exhaust pipe, be sure to wipe it off.
If you check the oil level just after stopping the engine, wait a few minutes for the oil to drain back into the oil pan before checking the level.
To prevent overfilling the engine oil, do not add any additional oil above the upper level when the engine is cold.
In 2.5-liter-engine models, the dipstick has a notch above the upper level.
Just after driving or while the engine is warm, the engine oil level reading may be in a range between the upper level and the notch mark. This is caused by thermal expansion of the engine oil.
& Changing the oil and oil filter
Change the oil and oil filter according to the maintenance schedule in the “Warranty and Maintenance Booklet”.
The engine oil and oil filter must be changed more frequently than listed in the maintenance schedule when driving on dusty roads, when short trips are frequently made, or when driving in
extremely cold weather.
1.Warm up the engine by letting the engine idle for approximately 10 minutes to ease draining the engine oil.
2.Park the vehicle on a level surface and stop the engine.
3.Remove the oil filler cap.
2.5-liter models
3.0-liter models
4. Drain out the engine oil by removing the drain plug while the engine is still warm. The used oil should be drained into an appropriate container and disposed of properly.
 WARNING
Be careful not to burn yourself with hot engine oil.
5. Wipe the seating surface of the drain plug with a clean cloth and tighten it securely with a new sealing washer after the oil has completely drained out.
![]()
2.5-liter models
3.0-liter models
6. Open the access cover by removing the clips and turning the access cover counterclockwise. The oil filter will be exposed.
2.5-liter models
3.0-liter models
7.Remove the oil filter with an oil filter wrench.
8.Before installing a new oil filter, apply a thin coat of engine oil to the seal.
Maintenance and service 11-11
9.Clean the rubber seal seating area of the bottom of engine and install the oil filter by hand turning. Be careful not to twist or damage the seal.
10.Tighten the oil filter by the amount indicated in the following table after the seal makes contact with the bottom of engine.
|
Model |
Oil filter |
Part |
Amount of |
|
|
color |
number |
rotation |
||
|
2.5-liter |
Black |
15208AA100 |
1 rotation |
|
|
White |
15208AA09A |
2/3 – 3/4 |
||
|
models |
||||
|
rotation |
||||
|
3.0-liter |
Black |
15208AA031 |
3/4 |
|
|
models |
rotation |
|||
 CAUTION
. Never over tighten the oil filter because that can result in an oil leak.
. Thoroughly wipe off any engine oil that has spilled over the exhaust pipe and/or under-cover. If left unremoved, the oil could catch fire.
11.Reinstall the cover under the oil filter.
12.Pour engine oil through the filler neck.
–CONTINUED –

11-12 Maintenance and service
Oil capacity (Guideline):
2.5-liter models: 4.2 US qt (4.0 liters, 3.5 Imp qt)
3.0-liter models: 5.8 US qt (5.5 liters, 4.8 Imp qt)
The oil quantity indicated above is only a guideline. The necessary quantity of oil depends on the quantity of oil that has been drained. The quantity of drained oil differs slightly depending on the temperature of the oil and the time the oil is left flowing out. After refilling the engine with oil, therefore, you must use the dipstick to confirm that the level is correct.
13.Start the engine and make sure that no oil leaks appear around the filter’s rubber seal and drain plug.
14.Run the engine until it reaches the normal operating temperature. Then stop the engine and wait a few minutes to allow the oil drain back. Check the oil level again and if necessary, add more engine oil.
&Recommended grade and viscosity
 CAUTION
Use only engine oil with the recommended grade and viscosity.
Oil grade:
ILSAC GF-4, which can be identified with the ILSAC certification mark (Starburst mark)
or API classification SM with the words “ENERGY CONSERVING”
These recommended oil grades can be identified by looking for either or both of the following marks displayed on the oil container.
ILSAC Certification Mark (Starburst Mark)
API Service label
1)Indicates the oil quality by API designations
2)Indicates the SAE oil viscosity grade
3)Indicates that the oil has fuel saving capabilities

In choosing an oil, you want the proper quality and viscosity, as well as one that will add to fuel economy. The following table lists the recommended viscosities and applicable temperatures.
When adding oil, different brands may be used together as long as they are the same API classification and SAE viscosity as those recommended by SUBARU.
SAE viscosity number and applicable temperature
*: 5W-30 is preferred.
Engine oil viscosity (thickness) affects fuel economy. Oils of lower viscosity provide better fuel economy. However, in hot weather, oil of higher viscosity is required to properly lubricate the engine.
&Recommended grade and viscosity under severe driving conditions
If the vehicle is used in desert areas, in areas with very high temperatures, or used for heavy-duty applications such as towing a trailer, use of oil with the following grade and viscosities is recommended.
API classification SM (or SL):
SAE viscosity No.:
30, 40, 10W-50, 20W-40, 20W-50
Maintenance and service 11-13
Cooling system
 WARNING
Never attempt to remove the radiator cap until the engine has been shut off and has cooled down completely. Since the coolant is under pressure, you may suffer serious burns from a spray of boiling hot coolant when the cap is removed.
 CAUTION
. The cooling system has been filled at the factory with a high quality, corrosion-inhibiting, year-around coolant which provides protection against freezing down to −338F (−368C). For adding, use genuine SUBARU coolant or an equivalent: a mixture of 50% soft water (or clear and drinkable water) and 50% phosphate or non-amine type coolant. Use of improper coolants may result in corrosion in the cooling system. It is important to maintain protection against freezing and corrosion, even if freezing
– CONTINUED –

11-14 Maintenance and service
temperatures are not expected. Never mix different kinds of coolant.
. Do not splash the engine coolant over painted parts. The alcohol contained in the engine coolant may damage the paint surface.
& Hose and connections
Your vehicle employs an electric cooling fan which is thermostatically controlled to operate when the engine coolant reaches a specific temperature.
If the radiator cooling fan does not operate even when the engine coolant temperature gauge exceeds the normal operating range, the cooling fan circuit may be defective. Check the fuse and replace it if necessary. If the fuse is not blown, have the cooling system checked by your SUBARU dealer.
If frequent addition of coolant is necessary, there may be a leak in the engine cooling system. It is recommended that the cooling system and connections be checked for leaks, damage, or looseness.
& Engine coolant
! Checking the coolant level
Check the coolant level at each fuel stop.
1.Check the coolant level on the outside of the reservoir while the engine is cool.
2.If the level is close to or lower than the “LOW” level mark, add coolant up to the “FULL” level mark. If the reserve tank is empty, remove the radiator cap and refill as required.
3. After refilling the reserve tank and the radiator, reinstall the caps and check that the rubber gaskets inside the radiator cap are in the proper position.
 CAUTION
. Be careful not to spill engine coolant when adding it. If coolant touches the exhaust pipe, it may cause a bad smell, smoke, and/or a fire. If engine coolant gets on the exhaust pipe, be sure to wipe it off.

. Do not splash the engine coolant over painted parts. The alcohol contained in the engine coolant may damage the paint surface.
! Changing the coolant
Always add genuine Subaru cooling system conditioner whenever the coolant is replaced.
Change the engine coolant and add genuine Subaru cooling system conditioner using the following procedures according to the maintenance schedule in the “Warranty and Maintenance Booklet”.
1. Remove the under cover.
2.5-liter models
1)Drain plug
3.0-liter models
1)Drain plug
Maintenance and service 11-15
2.Place a proper container under the drain plug and loosen the drain plug.
3.Loosen the radiator cap to drain the coolant from the radiator. Then drain the coolant from the reserve tank. Tighten the drain plug securely.
 WARNING
Never attempt to remove the radiator cap until the engine has been shut off and has cooled down completely. Since the coolant is under pressure, you may suffer serious burns from a spray of boiling hot coolant when the cap is removed.
4. Install the under cover.
– CONTINUED –

11-16 Maintenance and service
Non-turbo models
1)Fill up to here
Turbo models
1)Fill up to here
5.Slowly pour the coolant and fill up to just below the filler neck, allowing enough
room to add genuine Subaru cooling system conditioner in the radiator. Add genuine Subaru cooling system conditioner until the coolant level reaches the filler neck. Do not pour the coolant too quickly, as this may lead to insufficient air bleeding and trapped air in the system.
Coolant capacity (Guideline): 2.5-liter non-turbo models:
MT. 6.8 US qt (6.4 liters, 5.6 Imp qt) AT. 6.7 US qt (6.3 liters, 5.5 Imp qt)
2.5-liter turbo models:
MT. 7.7 US qt (7.3 liters, 6.4 Imp qt) AT. 7.6 US qt (7.2 liters, 6.3 Imp qt)
3.0-liter models:
7.6 US qt (7.2 liters, 6.3 Imp qt)
 CAUTION
. Be careful not to spill engine coolant when adding it. If coolant touches the exhaust pipe, it may cause a bad smell, smoke, and/or a fire. If engine coolant gets on the exhaust pipe, be sure to wipe it off.
. Do not splash the engine coolant over painted parts. The alcohol contained in the engine coolant
may damage the paint surface.
6. Pour the coolant and fill to the reservoir tank’s “FULL” level mark.
7. Put the radiator cap back on and tighten firmly. At this time, make sure that

the rubber gasket in the radiator cap is correctly in place.
8.Start and run the engine for more than five minutes at 2,000 to 3,000 rpm.
9.Stop the engine and wait until the coolant cools down (122 to 1408F [50 to 608C]). If there is any loss of coolant, add coolant to the radiator’s filler neck and to the reserve tank’s “FULL” level.
10.Put the radiator cap and reservoir cap back on and tighten firmly.
Air cleaner element
 WARNING
Do not operate the engine with the air cleaner element removed. The air cleaner element not only filters intake air but also stops flames if the engine backfires. If the air cleaner element is not installed when the engine backfires, you could be burned.
 CAUTION
When replacing the air cleaner element, use a genuine SUBARU air cleaner element. If it is not used, there is the possibility of causing a negative effect to the engine.
The air cleaner element functions as a filter screen. When the element is perforated or removed, engine wear will be excessive and engine life shortened.
The air cleaner element is a dry type. It is unnecessary to clean or wash the element.
Maintenance and service 11-17
&Replacing the air cleaner element
Replace the air cleaner element according to the maintenance schedule in the “Warranty and Maintenance Booklet”. Under extremely dusty conditions, replace it more frequently. It is recommended that you always use genuine SUBARU parts.
! Non-turbo models
1)Connector
2)Duct
3)Clamp
1.Unplug the connector that is attached to the top of the air cleaner case.
2.Remove the hose that is located at the bottom of the side surface of the air cleaner case.
–CONTINUED –

11-18 Maintenance and service
3.Undo the screw and pull the air duct out of the air cleaner case.
4.Unsnap the two clamps holding the air cleaner case cover.
5.Open the air cleaner case cover and remove the air cleaner element.
6.Clean the inside of the air cleaner cover and case with a damp cloth and install a new air cleaner element.
7. To install the air cleaner case cover, insert the three projections on the air cleaner case cover into the slits on the air cleaner case and then snap the two clamps on the air cleaner case cover.
! Turbo models
1. Use a screwdriver to undo the clips on the air intake duct, then remove the air intake duct.
2. Unplug the connector that is attached to the top of the air cleaner case.