- Manuals
- Brands
- Ford Manuals
- Automobile
- Fiesta 2008
- Owner’s handbook manual
-
Contents
-
Table of Contents
-
Troubleshooting
-
Bookmarks
Quick Links
Feel the difference
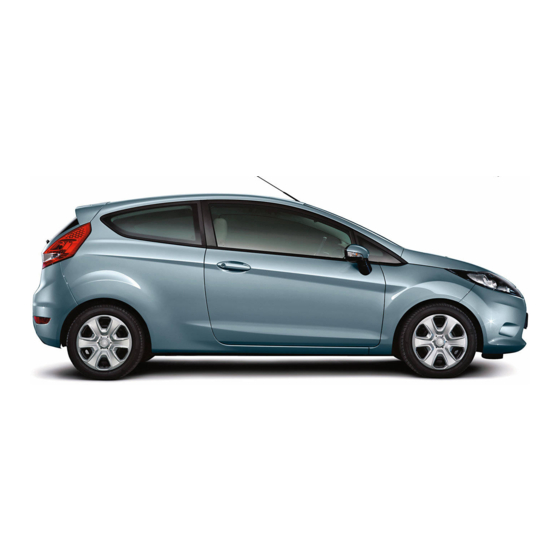
FordFiesta
Owner’s handbook
Related Manuals for Ford Fiesta 2008
Summary of Contents for Ford Fiesta 2008
-
Page 1
Feel the difference FordFiesta Owner’s handbook… -
Page 2
This publication, or part thereof, may not be reproduced nor translated without our approval. Errors and omissions excepted. © Ford Motor Company 2008 All rights reserved. Part number: 9V2J-19A321-ADA (CG3545en) 05/2008 20080618134945… -
Page 3: Table Of Contents
Table of contents Disarming the engine immobiliser..34 Introduction About this handbook……..5 Alarm Symbols glossary……..5 Principle of operation……35 Parts and accessories……5 Arming the alarm……..35 Disarming the alarm……..35 Quick start Quick start……….8 Steering wheel Adjusting the steering wheel….36 Child safety Audio control………..36 Child seats……….15 Voice control……….37 Child seat positioning……16…
-
Page 4
Table of contents Auto-dimming mirror……55 Starting the engine General information……..82 Instruments Keyless starting……..82 Gauges………….56 Steering wheel lock……..83 Warning lamps and indicators….56 Starting a petrol engine……83 Audible warnings and indicators..60 Starting a diesel engine……84 Diesel particulate filter (DPF)….85 Information displays General information………61 Fuel and refuelling Trip computer……….65 Safety precautions……..86… -
Page 5
Table of contents Using cruise control……..97 Engine compartment overview — 1.6L Duratorq-TDCi (DV) Diesel….120 Engine oil dipstick — 1.25L Duratec-16V Load carrying (Sigma)/1.4L Duratec-16V General information……..99 (Sigma)/1.6L Duratec-16V Ti-VCT (Sigma)……….121 Luggage covers……..99 Roof racks and load carriers….99 Engine oil dipstick — 1.4L Duratorq-TDCi (DV) Diesel/1.6L Duratorq-TDCi (DV) Diesel…………121 Towing… -
Page 6
Table of contents Audio introduction Audio troubleshooting Important audio information….147 Audio troubleshooting……163 Audio unit overview Telephone Audio unit overview…….148 General information……164 Telephone setup……..164 Audio system security Bluetooth setup……..165 Security code………152 Telephone controls…….165 Using the telephone……166 Audio unit operation Voice control On/off control………153 Bass/treble control……..153 Principle of operation……168… -
Page 7: Introduction
Ford parts are Ford parts Note: This handbook describes product features and options available throughout Your Ford has been built to the highest the range, sometimes even before they standards using high quality Ford Original are generally available. It may describe Parts.
-
Page 8
Introduction E102436 Exterior mirror E102435 Bumper and radiator grille • Radiator grille • Front and rear bumper E102437 Glass • Rear window • Side glass • Windscreen… -
Page 9
Introduction E89939 Lighting • Rear lamps • Headlamp E102438… -
Page 10: Quick Start
Quick start QUICK START Instrument panel overview Left-hand drive E102562…
-
Page 11
Quick start Right-hand drive E102559 Air vents. See Air vents (page 70). Multi-function lever: Direction indicators. See Direction indicators (page 46). Main beam. See Lighting control (page 43). See Voice control (page 37). See Trip computer (page 65). Instrument cluster. See Gauges (page 56). See Warning lamps and indicators (page 56). -
Page 12
Quick start Door lock button. See Locking and unlocking (page 29). Hazard warning flasher switch. See Hazard warning flashers (page 46). Climate controls. See Climate control (page 70). Parking aid warning lamp. See Using the parking aid (page 95). Passenger airbag deactivation warning lamp. See Disabling the passenger airbag (page 25). -
Page 13
Quick start Keyless entry Unlocking the vehicle E87384 E78276 Press a locking button once. Passive locking and unlocking requires a valid passive key to be located within one See Keyless entry (page 31). of the three external detection ranges. Keyless starting Locking the vehicle E85766 Press the start button once. -
Page 14
Quick start 1. Fully depress the clutch pedal. WARNING 2. Briefly press the start button. Make sure that you fully engage the locking lever when returning it to its See Keyless starting (page 82). original position. Soot overload warning lamp It will illuminate when a regeneration is due. -
Page 15
Quick start Autolamps Heating the interior quickly E102393 E70719 Cooling the interior quickly The headlamps will come on and go off automatically depending on the ambient light. See Lighting control (page 43). Direction indicators E102396 See Manual climate control (page 70). -
Page 16: Child Safety
Quick start Autowipers See Disabling the passenger airbag (page 25). E102034 Move the lever up one position. The rain sensor will continuously measure the amount of water on the windscreen and adjust the speed of the front wipers automatically. Adjust the sensitivity of the rain sensor using the rotary control.
-
Page 17: Child Safety
Child safety Only child restraints certified to CHILD SEATS ECE-R44.03 (or later) have been tested and approved for use in your vehicle. A choice of these are available from your Dealer. Child restraints for different mass groups Use the correct child restraint as follows: Baby safety seat E68916 WARNINGS…
-
Page 18: Child Seat Positioning
Child safety Child safety seat CHILD SEAT POSITIONING WARNINGS When using a child seat with a support leg, the support leg must rest securely on the floor. When using a child seat with a seat belt, make sure that the seat belt is not slack or twisted.
-
Page 19
Child safety UF¹ Suitable for universal category forward facing child seats approved for use in this mass group. However, we recommend that you secure children in a government approved child seat, in the rear seat. ISOFIX child seats Seating positions Mass group categories Up to 10 Up to 13… -
Page 20: Booster Cushions
Child safety Booster seat (Group 2) BOOSTER CUSHIONS WARNINGS Do not install a booster seat or a booster cushion with only the lap strap of the seat belt. Do not install a booster seat or a booster cushion with a seat belt that is slack or twisted.
-
Page 21: Isofix Anchor Points
Child safety Note: Where applicable, remove the ISOFIX ANCHOR POINTS luggage cover to ease installation. See Luggage covers (page 99). WARNING Use an anti-rotation device when using the ISOFIX system. We recommend the use of a top tether or support leg. Your vehicle is fitted with ISOFIX anchor points that accommodate universally approved ISOFIX child seats.
-
Page 22
Child safety E87145 5. Push the child seat back firmly to engage the ISOFIX lower anchor points. 6. Tighten the tether strap in line with the child seat manufacturer’s instructions. -
Page 23: Child Safety Locks
Child safety CHILD SAFETY LOCKS WARNING You cannot open the doors from inside if you have put the child safety locks on. E73697 Lock Unlock…
-
Page 24: Occupant Protection
Occupant protection Driver and front passenger PRINCIPLE OF OPERATION airbags Airbags WARNINGS Do not modify the front of your vehicle in any way. This could adversely affect deployment of the airbags. Original text according to ECE R94.01: Extreme Hazard! Do not use a rearward facing child restraint on a seat protected by an airbag in front of Wear a seat belt and keep sufficient…
-
Page 25: Occupant Protection
Occupant protection For item location: See Quick start Curtain airbags (page 8). Note: The knee airbag has a lower deployment threshold than the front airbags. During a minor collision, it is possible that only the knee airbag deploys. Side airbags E75004 Curtain airbags are fitted inside the trim panels over the front and rear side…
-
Page 26: Fastening The Seat Belts
Occupant protection WARNINGS Do not use a seat belt that is slack or twisted. Do not wear thick clothing. The seat belt must fit tightly around your body to achieve its optimum effect. Position the shoulder strap of the seat belt over the centre of your shoulder and position the lap strap tightly across your hips.
-
Page 27: Seat Belt Reminder
Occupant protection SEAT BELT REMINDER WARNING Position the seat belt correctly for WARNING your safety and that of your unborn child. Do not use only the lap strap Do not sit on top of a fastened seat or the shoulder strap. belt to prevent the seat belt reminder from coming on.
-
Page 28
Occupant protection Fitting the passenger airbag Enabling the passenger airbag deactivation switch WARNING WARNING Make sure that the passenger If you need to fit a child restraint on airbag is enabled when you are not using a child restraint on the front a seat protected by an operational passenger seat. -
Page 29: Keys And Remote Controls
Keys and remote controls GENERAL INFORMATION CHANGING THE REMOTE ON RADIO FREQUENCIES CONTROL BATTERY Remote control with a folding CAUTION key blade The radio frequency used by your remote control can also be used by other short distance radio transmissions (e.g. amateur radios, medical equipment, wireless headphones, remote controls and alarm systems).
-
Page 30
Keys and remote controls Remote control without a folding key blade E74385 3. Twist the screwdriver in the position shown to separate the two halves of the remote control. CAUTION E74386 Do not touch the battery contacts or the printed circuit board with the 1. -
Page 31: Locks
Locks Locking and unlocking the LOCKING AND UNLOCKING doors with the key Central locking You can only centrally lock the doors if they are all closed. Note: The driver s door can be unlocked with the key. This needs to be used if the remote control or keyless entry is not functioning.
-
Page 32
Locks Locking and unlocking the Closing the luggage compartment doors and the luggage compartment lid with the remote control E87379 Unlock Lock Luggage compartment lid E89132 unlock A recessed grip is incorporated inside the luggage compartment lid to facilitate Locking the doors and the luggage closing. -
Page 33: Keyless Entry
Locks Passive key KEYLESS ENTRY The vehicle can be locked and unlocked General information with the passive key. The passive key can also be used as a remote control. See WARNING Locking and unlocking (page 29). The keyless entry system may not Locking the vehicle function if the key is close to metal objects or electronic devices such…
-
Page 34
Locks Two short flashes of the direction One long flash of the direction indicators indicators confirms that all the doors and confirms that all the doors and the the luggage compartment lid have been luggage compartment lid have been locked and that the alarm has been unlocked and that the alarm has been armed. -
Page 35
Locks Locking and unlocking the doors with the key blade E87964 1. Carefully remove the cover. 2. Remove the key blade and insert it into the lock. Note: Only the driver’s door handle is fitted with a lock cylinder. -
Page 36: Engine Immobiliser
If you lose a key, you can obtain a replacement from your Ford Dealer. If possible, provide them with the key number from the tag provided with the original keys. You can also obtain additional keys from your Ford Dealer.
-
Page 37: Alarm
Alarm Automatic arming delay PRINCIPLE OF OPERATION The 12 seconds arming delay begins The alarm is a deterrent against when the bonnet, luggage compartment unauthorised access to your vehicle and all doors are closed. through the doors and the bonnet. It also protects the audio unit.
-
Page 38: Steering Wheel
Steering wheel ADJUSTING THE STEERING WARNING WHEEL Make sure that you fully engage the locking lever when returning it to its original position. WARNING Never adjust the steering wheel AUDIO CONTROL when the vehicle is moving. Note: Make sure that you are sitting in the correct position.
-
Page 39: Voice Control
Steering wheel Press and hold the seek button to: • tune the radio up or down the frequency band • seek through a CD track. VOICE CONTROL E102756 Press the button to select or deselect voice control. For further information See Voice control (page 168).
-
Page 40: Wipers And Washers
Wipers and washers Autowipers WINDSCREEN WIPERS E102034 WARNINGS Replace the wiper blades as soon as they begin to leave bands of water and smears or when they do not completely remove water from the E102032 windscreen. If the blades are not replaced, the rain sensor will continue to Single wipe detect water on the windscreen.
-
Page 41: Windscreen Washers
Wipers and washers Depending on the equipment fitted, when When the vehicle is slowed to walking the ignition is switched on with the lever speed or is brought to a standstill, the already in position B, the wipers will not wiper speed will automatically switch to cycle until water is detected on the the next lower wiper speed setting.
-
Page 42: Rear Window Wiper And Washers
Wipers and washers Rear window washer REAR WINDOW WIPER AND WASHERS Intermittent wipe E102053 WARNING Do not operate the washer for more E102052 than 10 seconds at a time, and Pull the lever towards the steering wheel. never when the reservoir is empty. Reverse gear wipe While the lever is pulled towards the steering wheel the washer will work in…
-
Page 43: Adjusting The Windscreen Washer Jets
Wipers and washers ADJUSTING THE CHANGING THE WIPER WINDSCREEN WASHER BLADES JETS Windscreen wiper blades E72899 1. Press the locking button. 2. Remove the wiper blade. Note: Make sure that the wiper blade locks into place. E73425 3. Install in the reverse order. The eye ball jets can be adjusted precisely using a pin.
-
Page 44: Wipers And Washers
Wipers and washers Note: Make sure that the wiper blade locks into place. 5. Install in the reverse order.
-
Page 45: Lighting
Lighting Main and dipped beam LIGHTING CONTROL Lighting control positions E101829 Pull the lever fully towards the steering wheel to switch between main and dipped beam. Headlamp flasher E70718 Pull the lever slightly towards the steering wheel. Side and tail lamps Home safe lighting Headlamps Switch the ignition off and pull the…
-
Page 46: Autolamps
Lighting AUTOLAMPS REAR FOG LAMPS E70720 WARNINGS Only use the rear fog lamps when E70719 visibility is restricted to less than 50 Note: If you have switched autolamps metres. on, you can only switch the main beam Do not use the rear fog lamps when on when autolamps has switched the it is raining or snowing and visibility headlamps on.
-
Page 47: Headlamp Levelling
Lighting HEADLAMP LEVELLING Raised headlamp beams Lowered headlamp beams You can adjust the level of the headlamp beams according to the vehicle load. E70722 Recommended headlamp levelling control positions Load Load in luggage Control position compartment Front seats Rear seats See Vehicle identification plate (page 142).
-
Page 48: Hazard Warning Flashers
Lighting HAZARD WARNING INTERIOR LAMPS FLASHERS Courtesy lamp E71943 For item location: See Quick start (page 8). DIRECTION INDICATORS E71945 Door contact If you set the switch to position B, the E102016 courtesy lamp will come on when you unlock or open a door or the luggage Note: Tap the lever up or down to make compartment lid.
-
Page 49: Removing A Headlamp
Lighting Reading lamps E71946 If you switch off the ignition, the reading lamps will go off automatically after some time to prevent the vehicle battery from E102590 discharging. To switch them back on, switch on the ignition for a short time. 3.
-
Page 50
Lighting 3. Turn the bulb holder anti-clockwise and remove it. 4. Remove the bulb. Headlamp main beam 1. Remove the headlamp. See Removing a headlamp (page 47). E102593 2. Remove the cover. 3. Turn the bulb holder anti-clockwise and remove it. 4. -
Page 51
Lighting E99398 2. Release the retaining clip. 3. Remove the bulb and bulb holder. Remove the bulb. E102596 2. Remove the cover. Front fog lamps 3. Pull the bulb holder and remove it. Note: The front fog lamps are not Remove the bulb. -
Page 52
Lighting Central high mounted brake lamp Note: The LED board is not a serviceable item, please consult your dealer if this fails. Number plate lamp E102620 2. Remove the wing nut. 3. Remove the rear lamp and unclip the E72789 bulb holder. -
Page 53: Bulb Specification Chart
Lighting Reading lamps Luggage compartment lamp E99453 1. Carefully prise out the lamp. 2. Turn the bulb holder anti-clockwise E72784 and remove it. 3. Remove the bulb. 1. Carefully prise out the lamp. 2. Remove the bulb. BULB SPECIFICATION CHART Lamp Specification Power (watt)
-
Page 54
Lighting Lamp Specification Power (watt) Interior lamp Reading lamp Information not avail- Luggage compartment lamp Information not available able… -
Page 55: Windows And Mirrors
Windows and mirrors ELECTRIC WINDOWS WARNING Do not operate the electric windows unless they are free from obstruction. Note: If you operate the switches often during a short period of time, the system might become inoperable for a certain time to prevent damage due to E70850 overheating.
-
Page 56: Exterior Mirrors
Windows and mirrors 2. Close the window a third time to the EXTERIOR MIRRORS resistance. The anti-trap function is disabled and you cannot close the Convex mirrors window automatically. The window will override the resistance and you can close it fully. 3.
-
Page 57: Electric Exterior Mirrors
Windows and mirrors Manual folding and unfolding ELECTRIC EXTERIOR MIRRORS E72184 INTERIOR MIRROR E66485 Left-hand mirror Right-hand mirror Mirror tilting positions E71272 Dip the mirror to reduce glare when driving at night. AUTO-DIMMING MIRROR E66486 Electric folding mirrors Automatic folding and unfolding Note: If the mirrors have been folded using the manual fold button they can only be unfolded using the manual fold button.
-
Page 58: Instruments
Instruments GAUGES E102660 Tachometer Information display Speedometer Fuel gauge Tripmeter reset button • Engine Fuel gauge • Frost The arrow adjacent to the fuel pump • Ignition symbol indicates on which side of the • Oil pressure vehicle the fuel filler cap is located. •…
-
Page 59
Instruments ABS warning lamp Coolant temperature warning lamp If it illuminates when driving, this indicates a malfunction. Have CAUTION the system checked by a Do not resume your journey if it properly trained technician. You will illuminates despite the level being continue to have normal braking (without correct. -
Page 60
Instruments Engine warning lamps Frost warning lamp Malfunction indicator lamp WARNING Even if the temperature rises to above +4ºC there is no guarantee that the road is free of hazards caused by inclement weather. Powertrain warning lamp It will illuminate and glow orange when the outside air temperature is between 4ºC All vehicles… -
Page 61
Instruments Main beam indicator Rear fog lamp indicator It will illuminate when you switch It will illuminate when you switch the headlamp main beam on. It the rear fog lamps on. will flash when you use the headlamp flasher. Seat belt reminder Maximum engine RPM warning When the vehicle s speed lamp… -
Page 62: Audible Warnings And Indicators
Instruments Seat belt reminder AUDIBLE WARNINGS AND INDICATORS WARNINGS The seat belt reminder remains in Automatic transmission stand-by mode when the front seat belts have been fastened. It will be If position P is not selected, a warning reactivated if either seat belt is chime will sound when the driver s door unfastened.
-
Page 63: Information Displays
Information displays Press the up and down arrow buttons GENERAL INFORMATION to scroll through and highlight the options within a menu. WARNING Press the right arrow button to enter a Do not operate the information sub-menu. display controls when the vehicle is moving.
-
Page 64: Information Displays
Information displays RADIO MODE MANUAL TUNE SCAN AUTOSTORE NORMAL CD MODE REPEAT SHUFFLE SCAN NORMAL MP3 CD MODE REPEAT SHUFFLE SCAN AVC LEVEL AUDIO MENU SOUND DSP OCCUPANCY DSP EQUALISER NEWS ALTERNATIVE FREQ. RDS REGIONAL POWERFOLD MIRRORS VEHICLE SETTINGS TURN INDICATOR AMBIENT LIGHTING WARNING CHIMES INFO CHIMES…
-
Page 65
Information displays Type 2 Use the MENU button and left arrow key to access the menus. Note: Phone menu depends on phone capabilities and call status etc. -
Page 66
Information displays Folder / Tracks Stations Radio Stations FM AST Stations AM AST Stations iPOD Playlists Artists Albums Songs Genres Folder / Tracks Line In Phone Dial Number Active Call Redial Phonebook Call Lists Missed Calls Incoming Calls Outgoing Calls Select Phone Bluetooth On Reject all Calls… -
Page 67: Trip Computer
Information displays Distance to empty TRIP COMPUTER Indicates the approximate distance the vehicle will travel on the fuel remaining in the tank. Changes in driving pattern may cause the value to vary. Average fuel consumption Indicates the average fuel consumption since the function was last reset.
-
Page 68: Information Messages
Information displays INFORMATION MESSAGES Doors open Message Warning lamp System Locks. Vehicle is moving. Stop the Driver door open vehicle as soon as safely possible and close. Locks. Vehicle is moving. Stop the Driver rear door open vehicle as soon as safely possible and close.
-
Page 69
Information displays Message Warning lamp System Key outside car amber Keyless system. Key battery low replace battery amber Locks. Turn ignition off use POWER amber Keyless system. button To start press brake Keyless system. To start press clutch Keyless system. Close boot or use spare key Keyless system. -
Page 70
Information displays Steering Message Warning lamp System Steering malfunction service now Steering Steering malfunction stop safely Steering Power steering. Full steering will be maintained but you will need Power steering malfunction to exert greater force on the amber service now steering wheel. -
Page 71
Information displays Stability control (ESP) Message Warning lamp System ABS malfunction service now amber Stability control (ESP). ESP malfunction next service Stability control (ESP). ESP off Stability control (ESP). Engine Message Warning lamp System Engine preheating amber Engine (Diesel only). Alarm Message Warning lamp… -
Page 72: Climate Control
Climate control Warming the interior PRINCIPLE OF OPERATION Direct the air towards your feet. In cold or Outside air humid weather conditions, direct some of the air towards the windscreen and the Keep the air intakes forward of the door windows. windscreen free from obstruction (snow, leaves etc.) to allow the climate control Cooling the interior…
-
Page 73: Climate Control
Climate control Ventilation Windscreen Face level Face level and footwell You can set the air distribution control to any position between the symbols. Blower E102394 Set the air distribution control, blower and air vents to suit your requirements. Air conditioning Switching the air conditioning on and off E102390…
-
Page 74
Climate control Cooling the interior quickly When the temperature is above 4°C (39°F), the air conditioning will switch on automatically. Make sure that the blower is on. The indicator in the switch will illuminate during defrosting and demisting. If you move the air distribution control to a position other than C, the A/C will remain on. -
Page 75: Automatic Climate Control
Climate control AUTOMATIC CLIMATE CONTROL E102705 Setting the temperature The system controls the temperature, amount and distribution of the air flow automatically and adjusts them according to the driving and weather conditions. Pressing the AUTO button once switches on the auto mode. Note: Avoid adjusting the settings when the vehicle interior is extremely hot or cold.
-
Page 76
Climate control Blower Windscreen defrosting and demisting E91392 Press the windscreen defrosting and demisting button. Outside air will flow into the vehicle. Air conditioning is E102731 automatically selected. As long as the air The blower setting is indicated in the distribution is set to this position, you display. -
Page 77: Heated Windows And Mirrors
Climate control Note: When the system is in auto mode and the interior and exterior temperatures are quite hot, the system selects recirculated air automatically to maximise cooling of the interior. Once the selected temperature is reached, the system will reselect outside air automatically.
-
Page 78: Seats
Seats • hold the steering wheel with your arms SITTING IN THE CORRECT slightly bent. POSITION • bend your legs slightly so that you can press the pedals fully. • position the shoulder strap of the seat belt over the centre of your shoulder and position the lap strap tightly across your hips.
-
Page 79: Manual Seats
Seats Adjusting the lumbar support MANUAL SEATS WARNINGS Do not use any accessory seat covers that are not specifically designed for seats with side airbags. These seat covers must be fitted by properly trained technicians. Do not adjust the seats while the vehicle is moving.
-
Page 80: Rear Seats
Seats Adjusting the angle of the WARNINGS seatback Make sure that the seats and the seatbacks are secure and fully engaged in their catches. CAUTION Do not remove the rear seat cushion. Folding the seatbacks down CAUTION Lower the head restraints. See Head restraints (page 76).
-
Page 81: Convenience Features
Convenience features Note: You can use the socket to power SUN VISORS 12 volt appliances that have a maximum current rating of 15 Amperes. Use only Ford accessory connectors or connectors specified for use with SAE standard sockets. E72973 CLOCK…
-
Page 82: Map Pockets
Convenience features TOLL READER E72980 MAP POCKETS E99272 On vehicles with an anti-heat windscreen, toll readers should be placed in the area as shown (all measurements shown in millimetres), otherwise communication performance with toll stations may be E74686 reduced. The toll reader should be placed on the GLASSES HOLDER passenger side to prevent the reader from obscuring the driver s vision (e.g.
-
Page 83: Auxiliary Input (Aux In) Socket
Convenience features AUXILIARY INPUT (AUX IN) SOCKET E102671 See Auxiliary input (AUX IN) socket (page 162). USB PORT E102670 See Connectivity (page 184).
-
Page 84: Starting The Engine
Starting the engine GENERAL INFORMATION General points on starting If the battery has been disconnected the vehicle may exhibit some unusual driving characteristics for approx. 8 kilometres (5 miles) after reconnecting the battery. E85766 This is because the engine management system must realign itself with the engine.
-
Page 85: Steering Wheel Lock
Starting the engine Failure to start 1. Remove the key from the ignition switch. The passive starting system will not 2. Turn the steering wheel. function if: • The passive key frequencies are Vehicles with keyless starting jammed. Your vehicle has an electronically •…
-
Page 86: Starting A Diesel Engine
Starting the engine 1. Select park or neutral. If the engine is cold then the idle speed will automatically be increased in order to 2. Fully depress the brake pedal. heat the catalytic converter as quickly as 3. Start the engine. possible.
-
Page 87: Diesel Particulate Filter (Dpf)
Starting the engine This process may have to be repeated. DIESEL PARTICULATE The warning lamp will go out when the FILTER (DPF) regeneration process is successful. The DPF forms part of the emissions reduction systems fitted to your vehicle. It filters harmful diesel particulates (soot) from the exhaust gas.
-
Page 88: Fuel And Refuelling
Fuel and refuelling SAFETY PRECAUTIONS CAUTION Do not add kerosene, paraffin or WARNINGS petrol to diesel. This could cause Stop refuelling after the fuel nozzle damage to the fuel system. stops the second time. Additional fuel will fill the expansion space in Note: We do not recommend the the fuel tank which could lead to fuel prolonged use of additives intended to…
-
Page 89: Catalytic Converter
Do not push-start or tow-start your the accessories fitted and towing etc. vehicle. Use booster cables. See Using booster cables (page 129). Your Ford dealer can give you advice on improving your fuel consumption. Do not switch the ignition off when driving.
-
Page 90: Technical Specifications
Fuel and refuelling TECHNICAL SPECIFICATIONS Fuel consumption figures CO2 emis- Urban Extra-urban Combined sions Variant l/100 km l/100 km l/100 km g/km (mpg) (mpg) (mpg) 1.25L Duratec (60 PS) — 7.3 (38.7) 4.3 (65.7) 5.4 (52.3) manual transmission 1.25L Duratec (80 PS) — 7.5 (37.7) 4.6 (61.4) 5.7 (49.6)
-
Page 91: Transmission
Transmission Selector lever positions MANUAL TRANSMISSION All vehicles CAUTIONS Do not engage reverse gear when the vehicle is moving. This can cause damage to the transmission. Do not apply any undue lateral force to the gear lever when changing from 5th to 4th gear.
-
Page 92
Transmission WARNINGS WARNING Apply the parking brake and Do not hold the selector lever select park before leaving permanently in – or +. your vehicle. Make sure that the selector lever is latched in position. Gears can be skipped by moving the selector lever repeatedly at short intervals. -
Page 93
Transmission Kickdown Press the accelerator pedal fully with the selector lever in the drive position to select the next lowest gear for optimum performance. Release the accelerator pedal when you no longer require kickdown. Emergency park position release lever E78322 Use the lever to move the selector lever from the park position in the event of an With a suitable object push down the… -
Page 94: Brakes
Brakes PRINCIPLE OF OPERATION PARKING BRAKE Disc brakes All vehicles Wet brake discs result in reduced braking WARNING efficiency. Dab the brake pedal when Vehicles with an automatic driving from a car wash to remove the film transmission should always be left of water.
-
Page 95: Stability Control
Stability control Stability control (ESP) warning PRINCIPLE OF OPERATION lamp Electronic stability programme The ESP warning lamp will flash when the (ESP) system is operating. See Warning lamps and indicators (page 56). WARNING Emergency brake assist ESP does not relieve you of your responsibility to drive with due care WARNING and attention.
-
Page 96: Parking Aid
Parking aid PRINCIPLE OF OPERATION USING THE PARKING AID — REAR PARKING AID WARNING The parking aid does not relieve you of your responsibility to drive with due care and attention. CAUTIONS The sensors may not detect objects in heavy rain or other conditions that E77927 cause disruptive reflections.
-
Page 97: Using The Parking Aid — Front And Rear Parking Aid
Parking aid You will hear an intermittent tone at a The parking aid is per default off. To distance of up to 180 centimetres switch the parking aid on, press the switch between the obstacle and rear bumper in the instrument panel or select reverse and 60 centimetres to the side.
-
Page 98: Parking Aid
Parking aid You will hear an intermittent tone at a distance of up to 180 centimetres (71 inches) between the obstacle and rear bumper, 80 centimetres (31 inches) between the obstacle and front bumper and 60 centimetres (24 inches) to the side.
-
Page 99: Cruise Control
Cruise control Press to store and maintain your current PRINCIPLE OF OPERATION speed. The cruise control indicator will illuminate. See Warning lamps and Cruise control allows you to control your indicators (page 56). speed using the switches on the steering wheel.
-
Page 100: Cruise Control
Cruise control Cancelling the set speed Switching cruise control off E102682 E102683 Press the brake pedal or the CAN RES The system will not retain the speed that switch. you previously set. The cruise control indicator will not illuminate. Note: The system will no longer control your speed.
-
Page 101: Load Carrying
Load carrying GENERAL INFORMATION ROOF RACKS AND LOAD CARRIERS WARNINGS Roof rack Use load securing straps to an approved standard, e.g. DIN. WARNINGS Make sure that you secure all loose If you use a roof rack, the fuel items properly. consumption of your vehicle will be higher and you may experience Place luggage and other loads as…
-
Page 102: Towing
Towing TOWING A TRAILER WARNING Do not exceed the maximum vehicle and trailer weight stated on the vehicle identification plate. See Vehicle identification plate (page 142). CAUTION The electrical system is not suitable for towing trailers with more than one rear fog lamp.
-
Page 103: Driving Hints
Driving hints RUNNING-IN Tyres WARNING New tyres need to be run-in for approximately 500 kilometres (300 miles). During this time, you may experience different driving characteristics. Brakes and clutch WARNING Avoid heavy use of the brakes and clutch if possible for the first 150 kilometres (100 miles) in town and for the first 1 500 kilometres (1 000 miles) on motorways.
-
Page 104: Emergency Equipment
Emergency equipment FIRST AID KIT Space is provided in the spare wheel well. WARNING TRIANGLE Space is provided in the spare wheel well.
-
Page 105: Status After A Collision
Status after a collision INSPECTING SAFETY SYSTEM COMPONENTS Seat belts Belts subjected to strain, as a result of an accident, should be renewed and the anchorages checked by a properly trained technician.
-
Page 106: Fuses
Fuses FUSE BOX LOCATIONS CHANGING A FUSE Engine compartment fuse box WARNINGS Do not modify the electrical system of your vehicle in any way. Have repairs to the electrical system and the replacement of relays and high current fuses carried out by properly trained technicians.
-
Page 107: Fuse Specification Chart
Fuses FUSE SPECIFICATION CHART Engine compartment fuse box Ampere Fuse Circuits protected rating ABS module ABS ESP module Cooling system fan high speed Cooling system fan Cooling system fan low speed Heater blower Passenger compartment fuse box supply (battery) Body control module (BCM) Passenger compartment fuse box supply (ignition) Glow plugs Heated windscreen…
-
Page 108
Fuses Ampere Fuse Circuits protected rating Not used Lighting control battery supply Front fog lamps Direction indicators Daytime running lamps Electric exterior mirrors switch, electric folding mirrors, power window (driver’s door) ABS module, ESP Air conditioning clutch Not used Not used Horn, battery saver, keyless vehicle module Heated rear window Fuel pump relay, diesel fuel heater… -
Page 109
Fuses Relay Circuits switched Dipped beam Daytime running lamps Engine cooling fan Starter Air conditioning clutch Front fog lamps Fuel pump, fuel heater Reverse lamp Heater blower Passenger compartment fuse box — Type 1 Fuse Ampere rating Circuits protected Ignition, rain sensor, heated windscreen Stop lamps Reversing lamp… -
Page 110
Fuses Fuse Ampere rating Circuits protected Ignition, electric power assisted steering (EPAS), instrument cluster, passive anti theft system (PATS), PCM, gear selector lever, fuel pump, Audio system, instrument cluster Heated exterior mirror Ignition switch Instrument Cluster Data link connector Multi functional display, clock, internal scanner, heating ventilating, air conditioning (HVAC) panel… -
Page 111
Fuses Passenger compartment fuse box — Type 2 Fuse Ampere rating Circuits protected Ignition, rain sensor, heated front screen Stop lamps Reversing lamp Headlamp levelling Windscreen wipers Rear window wiper Washer pump Trailer module Parking aid Heated seats Not used Airbag module Ignition, electric power assisted steering (EPAS),… -
Page 112
Fuses Fuse Ampere rating Circuits protected Audio system, Bluetooth Cigar lighter, front power point Trailer module Not used Power windows (front) Not used Not used Not used Not used Not used Power windows (rear) Heated windscreen, left- hand side Heated windscreen, right- hand side Keyless entry Keyless entry… -
Page 113
Fuses Fuse Ampere rating Circuits protected Not used Not used Not used Not used Not used Relay Circuits switched Ignition Power fold mirror 1 Power fold mirror 2 Not used Heated front screen Keyless entry (accessory) Keyless entry (ignition) Battery saver Not used Not used Not used… -
Page 114: Vehicle Recovery
Vehicle recovery TOWING POINTS TOWING THE VEHICLE ON FOUR WHEELS Front towing eye All vehicles WARNINGS Switch the ignition on when your vehicle is being towed. The steering lock will engage and the direction indicators and brake lamps will not work if you do not.
-
Page 115: Vehicle Recovery
Vehicle recovery CAUTIONS Select neutral when your vehicle is being towed.
-
Page 116: Maintenance
Tyre pressures (when cold). See help maintain its roadworthiness and Technical specifications (page resale value. There is a large network of 140). Ford Authorised Repairers that are there • Tyre condition. See Wheels and to help you with their professional tyres (page 131).
-
Page 117
Maintenance For item location: See Quick start (page 8). E87786 Open the bonnet and support it with the E102884 strut. Raise the bonnet slightly and move the Closing the bonnet catch towards the left-hand side of the vehicle. WARNING Make sure that the bonnet is closed properly. -
Page 118: Engine Compartment Overview — 1.25L Duratec-16V (Sigma)/1.4L Duratec-16V (Sigma)
Maintenance ENGINE COMPARTMENT OVERVIEW — 1.25L DURATEC-16V (SIGMA)/1.4L DURATEC-16V (SIGMA) E103505 Engine coolant reservoir : See Engine coolant check (page 122). : See Brake and clutch Brake and clutch fluid reservoir (right-hand drive) fluid check (page 122). Engine oil filler cap : See Engine oil check (page 121).
-
Page 119: Engine Compartment Overview — 1.6L Duratec-16V Ti-Vct (Sigma)
Maintenance Air cleaner: No maintenance necessary. Engine oil dipstick : See Engine oil check (page 121). The filler caps and the engine oil dipstick are coloured for easy identification. ENGINE COMPARTMENT OVERVIEW — 1.6L DURATEC-16V TI-VCT (SIGMA) E103507 Engine coolant reservoir : See Engine coolant check (page 122).
-
Page 120: Engine Compartment Overview — 1.4L Duratorq-Tdci (Dv) Diesel
Maintenance Brake and clutch fluid reservoir (left-hand drive) : See Brake and clutch fluid check (page 122). Engine compartment fuse box: See Fuses (page 104). Windscreen and rear window washer fluid reservoir : See Washer fluid check (page 122). Air cleaner: No maintenance necessary. : See Engine oil check (page 121).
-
Page 121
Maintenance Engine coolant reservoir : See Engine coolant check (page 122). Brake and clutch fluid reservoir (right-hand drive) : See Brake and clutch fluid check (page 122). Engine oil filler cap : See Engine oil check (page 121). Battery: See Vehicle battery (page 129). : See Brake and clutch Brake and clutch fluid reservoir (left-hand drive) fluid check (page 122). -
Page 122: Engine Compartment Overview — 1.6L Duratorq-Tdci (Dv) Diesel
Maintenance ENGINE COMPARTMENT OVERVIEW — 1.6L DURATORQ- TDCI (DV) DIESEL E103509 Engine coolant reservoir : See Engine coolant check (page 122). : See Brake and clutch Brake and clutch fluid reservoir (right-hand drive) fluid check (page 122). Engine oil filler cap : See Engine oil check (page 121).
-
Page 123: (Sigma)/1.4L Duratec-16V
Maintenance Air cleaner: No maintenance necessary. Engine oil dipstick : See Engine oil check (page 121). The filler caps and the engine oil dipstick are coloured for easy identification. ENGINE OIL DIPSTICK — ENGINE OIL CHECK 1.25L DURATEC-16V CAUTION (SIGMA)/1.4L DURATEC-16V Do not use oil additives or other (SIGMA)/1.6L DURATEC-16V engine treatments.
-
Page 124: Engine Coolant Check
Do not top up further than the MAX Unscrew the cap slowly. Any pressure mark. will escape slowly as you unscrew the cap. Top up with fluid that meets the Ford CAUTIONS specification. See Technical Do not spill coolant on any part of the specifications (page 123).
-
Page 125: Technical Specifications
Note: The brake and the clutch systems mark. are supplied from the same reservoir. If the level is at the MIN mark, top up Top up with fluid that meets the Ford immediately. specification. See Technical specifications (page 123). TECHNICAL SPECIFICATIONS…
-
Page 126
Maintenance Capacity in litres Variant Item (gallons) 1.25L Duratec-16V (Sigma)- Engine lubrication system — 3.8 (0.8) 60PS-Manual including the oil filter 1.25L Duratec-16V (Sigma)- Engine lubrication system — 3.5 (0.8) 60PS-Manual excluding the oil filter 1.25L Duratec-16V (Sigma)- Engine cooling system 5.5 (1.2) 60PS-Manual 1.25L Duratec-16V (Sigma)-… -
Page 127
Maintenance Capacity in litres Variant Item (gallons) 1.4L Duratec-16V (Sigma)- 91PS-automatic transmis- Fuel tank 42 (9.2) sion 1.6L Duratec-16V Ti-VCT Engine lubrication system — (Sigma)-115PS-manual 4.1 (0.9) including the oil filter transmission 1.6L Duratec-16V Ti-VCT Engine lubrication system — (Sigma)-115PS-manual 3.8 (0.8) excluding the oil filter transmission… -
Page 128
Maintenance Capacity in litres Variant Item (gallons) 1.6L Duratorq-TDCi (DV6) Diesel -90PS-manual trans- Fuel tank 40 (8.8) mission… -
Page 129: Vehicle Care
Vehicle care Cleaning the chrome trim CLEANING THE EXTERIOR CAUTION WARNING Do not use abrasives or chemical If you use a car wash with a waxing solvents. Use soapy water. cycle, make sure that you remove the wax from the windscreen. Body paintwork preservation CAUTIONS CAUTIONS…
-
Page 130: Repairing Minor Paint Damage
You should repair paintwork damage caused by stones from the road or minor scratches as soon as possible. A choice of products is available from your Ford Dealer. Read and follow the manufacturer s instructions.
-
Page 131: Vehicle Battery
Vehicle battery 1. Position the vehicles so that they do USING BOOSTER CABLES not touch one another. 2. Switch off the engine and any CAUTIONS electrical equipment. Connect batteries with only the same nominal voltage. 3. Connect the positive (+) terminal of vehicle B with the positive (+) terminal Always use booster cables with of vehicle A (cable C).
-
Page 132: Battery Connection Points
Vehicle battery BATTERY CONNECTION POINTS E102923 CAUTION Do not connect to the negative (–) terminal of the flat battery.
-
Page 133: Wheels And Tyres
Wheels and tyres Note: Vehicles with a tyre repair kit are GENERAL INFORMATION not equipped with a vehicle jack or a wheel brace. CAUTIONS It is recommended to use a workshop Use only approved wheel and tyre type hydraulic jack for changing between sizes.
-
Page 134: Wheels And Tyres
Wheels and tyres E102950 Emergency use only Maintenance…
-
Page 135
Wheels and tyres WARNINGS Make sure that the vehicle is on firm, level ground with the wheels pointing straight ahead. Switch off the ignition and apply the parking brake. If your vehicle has a manual E93184 transmission, select first or reverse Indentations in the sills A show the gear. -
Page 136
Wheels and tyres Note: Make sure that the cones on the wheel nuts are against the wheel. 1. Install the wheel. 2. Install the wheel nuts finger tight. E90922 2. Install the locking wheel nut key. 3. Fully extend the wheel brace. 4. -
Page 137: Tyre Repair Kit
Wheels and tyres • Drive with caution and avoid WARNING making sudden steering or Have the wheel nuts checked for driving manoeuvres, especially if tightness and the tyre pressure the vehicle is heavily loaded or you are checked as soon as possible. towing a trailer.
-
Page 138
Wheels and tyres • Leave the engine running while the kit WARNINGS is in use, but not if the vehicle is in an Do not stand directly beside the tyre enclosed or poorly ventilated area (for while the compressor is pumping. example, inside a building). -
Page 139
Wheels and tyres E102881 Label Sealant bottle Sealant bottle hose Bottle holder Pressure gauge Power plug with cable Compressor switch Repair kit hose Pressure relief valve 1. Remove the tyre repair kit from the wrapping. -
Page 140
Wheels and tyres 2. Peel off the label A showing the Quickly unscrew the hose C from maximum permissible speed of the tyre valve. Fasten the valve cap 80 km/h (50 mph) from the sealant again. bottle and attach it to the instrument Leave the sealant bottle B in the panel in the driver s field of view. -
Page 141: Tyre Care
Wheels and tyres 22. Leave hose C and H connected to To make sure the front and rear tyres of the sealant bottle B and store the kit your vehicle wear evenly and last longer, away safely. we recommend that you swap the tyres from front to rear and vice versa at regular 23.
-
Page 142: Technical Specifications
Wheels and tyres Only use snow chains on the front wheels. CAUTION If your vehicle is fitted with wheel Vehicles with stability control trims, remove them before fitting (ESP) snow chains. Vehicles with stability control (ESP) may exhibit some unusual driving Note: The ABS will continue to operate characteristics which can be avoided by normally.
-
Page 143
Wheels and tyres Normal load Full load Variant Tyre size Front Rear Front Rear bar (psi) bar (psi) bar (psi) bar (psi) All petrol engines 195/60 R15 2.1 (31) 1.8 (26) 2.4 (35) 2.6 (38) Only fit snow chains to specified tyres. Up to 160 km/h Normal load Full load… -
Page 144: Vehicle Identification
Vehicle identification VEHICLE IDENTIFICATION VEHICLE IDENTIFICATION PLATE NUMBER (VIN) E85610 E87496 Vehicle identification number The vehicle identification number is stamped into the floor panel on the Gross vehicle weight right-hand side, beside the front seat. It is Gross train weight also shown on the left-hand side of the instrument panel.
-
Page 145: Technical Specifications
Technical specifications TECHNICAL SPECIFICATIONS Vehicle dimensions 3-door and 5-door E101870 Item Dimension description Dimension in mm (inches) 3 950 — 3 958 (155.5 — Maximum length 155.8) Overall width — including exterior mirrors 1 973 (77.7)
-
Page 146
Technical specifications Item Dimension description Dimension in mm (inches) 1 433 — 1 481 (56.4 — Overall height at EC kerb weight 58.3) Wheelbase 2 489 (98) Front track 1 473 — 1 493 (58 — 58.8) 1 460 — 1 480 (57.5 — Rear track 58.3) -
Page 147
Technical specifications Towing equipment dimensions 3-door and 5-door E101872 Item Dimension description Dimension in mm (inches) Bumper – end of tow ball 124 (4.9) Attachment point – centre of tow ball 7 (0.3) Wheel centre – centre of tow ball 761 (29.9) Centre of tow ball –… -
Page 148
Technical specifications Item Dimension description Dimension in mm (inches) Centre of first attachment point – centre of second 267 (10.5) attachment point Centre of tow ball – centre of second attachment 584 (23) point… -
Page 149: Audio Introduction
Audio introduction IMPORTANT AUDIO INFORMATION WARNINGS Due to technical incompatibility, E66257 recordable (CD-R) and rewritable Disc labels (CD-RW) discs may not function correctly. Audio CD These CD radio units will play compact discs that conform to the International Red Book standard audio specification.
-
Page 150: Audio Unit Overview
Audio unit overview Note: Units have an integrated multi AUDIO UNIT OVERVIEW function display situated above the CD aperture. This shows important information regarding control of your audio unit. Additionally, there are various icons placed around the display screen which light up when a function is active (for example CD, Radio or Aux.) Type 1 E103293…
-
Page 151
Audio unit overview Station presets. See Station preset buttons (page 154). Seek up. CD track selection. See Station tuning control (page 153). See Track selection (page 158). On/off and volume control Seek down. CD track selection. See Station tuning control (page 153). See Track selection (page 158). -
Page 152
Audio unit overview E103294 CD eject. See Compact disc player (page 158). Navigation arrows CD aperture. See Compact disc player (page 158). Information Traffic announcement. See Traffic information control (page 154). Sound menu select. See Bass/treble control (page 153). See Balance/fade control (page 153). -
Page 153
Audio unit overview On/off and volume control Seek down. CD track selection. See Station tuning control (page 153). See Track selection (page 158). Function 2 Function 1 Menu select Phone select. See Telephone (page 164). Auxiliary, USB and iPod select. See Auxiliary input (AUX IN) socket (page 81). -
Page 154: Audio System Security
Audio system security SECURITY CODE Each unit incorporates a unique code that is linked to the vehicle identification number (VIN). The system will automatically check that the audio unit and vehicle match before allowing operation. If a security code message appears, please see your dealer.
-
Page 155: Audio Unit Operation
Audio unit operation The selector can also be used to return ON/OFF CONTROL to radio reception when you have been listening to another source. Press the on/off control. This will also operate the unit for up to one hour with Alternatively, press the left arrow button the ignition turned off.
-
Page 156: Station Preset Buttons
Audio unit operation Type 1 AUTOSTORE CONTROL • Press the MENU button. AutoStore can be used to store the • Select RADIO mode and then SCAN. stations with the strongest signals available, either from the AM or the FM • Use the arrow buttons to scan up or waveband.
-
Page 157
Audio unit operation • TA is turned off, then on again. • On certain models, the volume control is set to zero for four minutes after which the audio unit will retune to another traffic station. Traffic announcement volume Traffic announcements interrupt normal broadcasts at a preset minimum level that is usually louder than normal listening volumes. -
Page 158: Audio Unit Menus
Audio unit menus • Scroll to RDS REGIONAL and turn on AUTOMATIC VOLUME or off with the OK button. CONTROL • Press the MENU button to return. When available, automatic volume control (AVC) adjusts the volume level to ALTERNATIVE compensate for engine noise and road FREQUENCIES speed noise.
-
Page 159: News Broadcasts
Audio unit menus NEWS BROADCASTS Some audio units interrupt normal reception to broadcast news bulletins from stations on the FM waveband or radio data system (RDS) and enhanced other network (EON) linked stations, in the same way as traffic information is provided.
-
Page 160: Compact Disc Player
Compact disc player COMPACT DISC PLAYBACK SHUFFLE/RANDOM Note: During playback, the display Random track playback, also known as indicates the disc, track and time that has shuffle, plays all tracks on the CD in elapsed since the start of the track. random order.
-
Page 161: Compact Disc Track Scanning
Compact disc player Type 2 MP3 FILE PLAYBACK • Press function button 1. MP3 (MPEG 1 Audio Layer-3) is a • When an MP3 CD is playing, options standard technology and format for include REPEAT for the track, or to compressing audio data.
-
Page 162: Compact Disc Player
Compact disc player MP3 files playback order • CD-Extra: The format that records audio (audio CD data) as tracks on The playback order of the folders and files session 1, and records data as tracks is as shown. on session 2. Note: A folder that does not include an •…
-
Page 163: Mp3 Display Options
Compact disc player • When skipping a portion of ID3 tag When an MP3 disc is playing, certain ver.2 (at the beginning of the track), information encoded in each track can be sound is not output. Skip time displayed. Such information will normally changes depending ID3 tag ver.2 include: capacity.
-
Page 164: Auxiliary Input (Aux In) Socket
Auxiliary input (AUX IN) socket AUXILIARY INPUT (AUX IN) SOCKET Note: For optimum performance when using any auxiliary device set the volume on the device high. This will reduce audio interference when charging the device via the vehicle power supply socket. When fitted the Auxiliary input (AUX IN) socket permits an auxiliary device, such as an MP3 player, to be linked into the…
-
Page 165: Audio Troubleshooting
Audio troubleshooting AUDIO TROUBLESHOOTING Audio unit display Rectification PLEASE CHECK CD General error message for CD fault conditions, such as cannot read the CD, data-CD inserted, etc. Ensure disc is loaded correct way up. Clean and re-try, or replace disc with known music disc. If error persists contact your dealer.
-
Page 166: Telephone
Bluetooth. bonded to the system. This is referred to as a SIS file and will be Bluetooth phone available to download via the Ford website www.ford- After bonding a Bluetooth phone to the mobile-connectivity.com. system, this becomes the active phone.
-
Page 167: Bluetooth Setup
3. Search for audio device. accessible by using the phone list on the audio unit. 4. Select Ford Audio. Note: A maximum of six devices may be 5. Enter the code number shown on the bonded. If six Bluetooth devices have…
-
Page 168: Using The Telephone
Telephone Incoming calls can be accepted by Dialling a number using the pressing the MODE button once. Press telephone keypad the button again to end the call. If you have an audio unit with a telephone keypad (buttons 0-9, * and #): USING THE TELEPHONE 1.
-
Page 169
Telephone 3. Press the OK button. Press function button 1. Press the button once again to turn this function off. If you have an audio unit with a telephone keypad: Changing the active phone 1. Press the PHONE button. Note: Phones must be bonded to the 2. -
Page 170: Voice Control
Voice control Do not try to give any commands until the PRINCIPLE OF OPERATION beep tone has been heard. The voice control system will repeat each spoken CAUTION command back to you. Using the system with the engine off If you are not sure how to continue say will drain the battery.
-
Page 171: Audio Unit Commands
Voice control Name tag • phone: «MOBILE NAME», «DIAL NUMBER», «DIAL NAME», and The name tag functionality can support «REDIAL» the phone, audio and navigation features • automatic climate control: by using the «STORE NAME» function. You «TEMPERATURE», «AUTO MODE», can assign name tags to items such as «DEFROSTING/DEMISTING ON»…
-
Page 172
Voice control «CD PLAYER» «REPEAT OFF» * Can be used as a shortcut. ** Only available if the CD contains audio data files like MP3 or WMA. Track You can choose a track on your CD directly. Steps User says System answer «CD PLAYER»… -
Page 173
Voice control «RADIO» «FM» «TUNE NAME» «DELETE NAME» «DELETE DIRECTORY» «PLAY DIRECTORY» «STORE NAME» «PLAY» * Can be used as a shortcut. Tune frequency This function allows you to tune your radio by voice commands. Steps User says System answer «RADIO»… -
Page 174
Voice control Steps User says System answer «RADIO» «RADIO» «STORE NAME» «STORE NAME» «NAME PLEASE» «<name>» «REPEAT NAME PLEASE» «<name>» «STORING NAME» «<name> STORED» Tune name This function allows you to call up a stored radio station. Steps User says System answer «RADIO»… -
Page 175
Voice control Play directory This function allows you to let the system tell you all of the stored radio stations. Steps User says System answer «RADIO» «RADIO» «PLAY DIRECTORY» «PLAY <DIRECTORY>» Delete directory This function allows you to delete all stored radio stations at once. -
Page 176
Voice control «EXTERNAL DEVICE», «USB» «HELP» «PLAY» «TRACK» «PLAYLIST» «FOLDER» «SHUFFLE ALL» «SHUFFLE FOLDER» «SHUFFLE PLAYLIST» «SHUFFLE OFF» «REPEAT TRACK» «REPEAT FOLDER» «REPEAT OFF» * Can be used as a shortcut. ** Playlists and folders activated by voice control must be assigned special filenames. See General information (page 184). -
Page 177
Voice control Steps User says System answer «EXTERNAL DEVICE» «EXTERNAL DEVICE» «USB» «USB» «TRACK» «TRACK NUMBER PLEASE» «TRACK <number>» «<a number between 1 and 99>» * Additionally, numbers can be spoken as up to four single digits (for example «2», «4», «5»… -
Page 178: Telephone Commands
Voice control iPod Track You can choose a track off the all titles list of your iPod directly. Steps User says System answer «EXTERNAL DEVICE» «EXTERNAL DEVICE» «IPOD» «IPOD» «TRACK NUMBER PLEASE» «TRACK» «TRACK <number>» «<a number between 1 and 99>» * Can be used as a shortcut.
-
Page 179
Voice control «PHONE» «HELP» «MOBILE NAME» «DIAL NUMBER» «DIAL NAME» «DELETE NAME» «DELETE DIRECTORY» «PLAY DIRECTORY» «STORE NAME» «REDIAL» «ACCEPT CALLS» «REJECT CALLS» * Can be used as a shortcut. Create a phonebook Store name New entries can be stored with the «STORE NAME»… -
Page 180
Voice control Steps User says System answer «<phone number>» «<phone number>» «STORE» «STORING NUMBER» «<phone number>» «NUMBER STORED» Delete name Stored names can also be deleted from the directory. Steps User says System answer «PHONE» «PHONE» «DELETE NAME» «NAME PLEASE» «<name>»… -
Page 181
Voice control Steps User says System answer «CONFIRM YES OR NO» «YES» «DIRECTORY DELETED» «NO» «COMMAND CANCELLED» Phone functions Mobile name This function allows you to access phone numbers stored with a name tag in your mobile phone. Steps User says System answer «PHONE»… -
Page 182
Voice control Dial name Phone numbers can be dialled after giving the name tag voice command. Steps User says System answer «PHONE» «PHONE» «NAME PLEASE» «DIAL NAME» «<name>» «DIAL <name>» «CONFIRM YES OR NO» «YES» «DIALLING» «NO» «COMMAND CANCELLED» * Can be used as a shortcut. Redial This function allows you to redial the last dialled phone number. -
Page 183: Climate Control Commands
Voice control Main settings Calls can be set to be automatically rejected using voice control. Reject calls Steps User says System answer «PHONE» «PHONE» «REJECT CALLS» «REJECT CALLS» «ACCEPT CALLS» «ACCEPT CALLS» * use this command to turn the reject mode off Overview CLIMATE CONTROL The overview below shows the available…
-
Page 184
Voice control Steps User says System answer «CLIMATE» «CLIMATE» «FAN SPEED PLEASE» «‘FAN» «MINIMUM» «FAN MINIMUM» «<a number between 0 and 7>» «FAN <number>» «MAXIMUM» «FAN MAXIMUM» * Can be used as a shortcut. On vehicles fitted with an English language module the «FAN»… -
Page 185
Voice control Steps User says System answer «MAXIMUM» «TEMPERATURE MAXIMUM» * Can be used as a shortcut. Auto mode Steps User says System answer «CLIMATE» «CLIMATE» «AUTO MODE» «AUTO MODE» * Can be used as a shortcut. Can be deactivated by selecting a different temperature or fan speed. -
Page 186: Connectivity
MP3 players with USB connection socket in the vehicle. Cover the • iPod media players (refer to socket when not in use. www.ford-mobile Only use USB Mass-Storage device -connectivity.com for latest compliant devices. compatibility list). Always switch your audio unit to a The system is USB 2.0 full speed…
-
Page 187: Connecting An External Device
Plug in the device, and if necessary below: secure it to prevent movement within the • Create folders named with the vehicle. structure «Ford<*>» where <*> is a number 1-10. For example «Ford3» Connecting an iPod without an extension. For optimum convenience and audio •…
-
Page 188: Using An Ipod
Connectivity Track title Note: If you wish to jump to the top level of the USB device contents, press and E100027 hold the left arrow key. Information not available Audio control E100028 Press the seek up and down keys to skip backwards and forwards through tracks.
-
Page 189
Connectivity iPod genre To navigate the iPod contents, use the up/down arrow keys to scroll through lists, E100034 and the left/right keys to move up or down within the hierarchy. Once your iPod song desired track, playlist, album, artist or genre is highlighted, press the OK button E100035 to select playback. -
Page 190: Appendices
The Bluetooth word mark and logos are owned by the Bluetooth SIG, Inc. and any use of such marks by Ford Motor Company is under license. Other trademarks and trade names are those of their respective owners.
-
Page 191
Appendices E85998 Frequency Maximum output power Watt Antenna Positions Band MHz (Peak RMS) 1 – 30 50 W 3, 8 30 – 54 50 W 2, 3 68 – 87.5 50 W 1, 2, 3, 4, 5 142 – 176 50 W 1, 2, 3, 4, 5 380 –… -
Page 192
Appendices Note: After the installation of RF transmitters, check for disturbances from and to all electrical equipment in the vehicle, both in the standby and transmit modes. Check all electrical equipment: • with the ignition ON • with the engine running •… -
Page 193
Index Automatic climate control……73 Air distribution……….74 Blower…………74 Recirculated air……….74 See: Climate control……..70 Setting the temperature……73 About this handbook……..5 Switching off the automatic climate control…………75 See: Brakes………..92 Switching the air conditioning on and ABS driving hints off…………..74 See: Hints on driving with ABS….92 Windscreen defrosting and Accessories demisting………..74… -
Page 194
Index Cleaning the interior……127 Instrument cluster screens, LCD screens, radio screens……….128 Car wash Seat belts………….127 See: Cleaning the exterior……127 Climate control……..70 Catalytic converter……..87 Principle of operation……..70 Driving with a catalytic converter….87 Climate control commands….181 Parking…………87 Climate…………181 Changing a bulb……..47 Clock…………79 Central high mounted brake lamp….50 Coded keys……….34 Front fog lamps……….49… -
Page 195
Index Fuse specification chart…….105 Engine compartment fuse box….105 Passenger compartment fuse box — Type Electric exterior mirrors……55 1…………..107 Electric folding mirrors………55 Passenger compartment fuse box — Type Mirror tilting positions……..55 2…………..109 Electric windows……..53 Anti-trap function……….53 Driver’s door switches………53 Opening and closing the driver’s window Gauges………….56 automatically……….53 Fuel gauge………….56… -
Page 196
Index Instruments……….56 Load carrying………..99 Interior lamps………..46 General information……..99 Locking and unlocking……29 Courtesy lamp……….46 Reading lamps……….47 Automatic relocking……..30 Interior mirror………..55 Central locking……….29 Introduction……….5 Double locking……….29 ISOFIX anchor points…….19 Double locking the doors with the Attaching a child seat with top key…………..29 tethers…………19 Locking and unlocking confirmation..29 Top tether anchor points……19… -
Page 197
Parts and accessories……5 Seats…………76 Look for the Ford logo on the following Security code………152 parts ………….5 Shuffle/random……..158 Now you can be sure that your Ford parts Type 1…………158 are Ford parts……….5 Type 2…………158 Personalised settings……65 Sitting in the correct position….76 Chime deactivation……..65… -
Page 198
Index Stability control……..93 Toll reader……….80 Towing a trailer……..100 Principle of operation……..93 Stability control Steep gradients……….100 Towing points……….112 See: Using stability control……93 Starting a diesel engine……84 Towing the vehicle on four wheels..112 Cold or hot engine……..84 All vehicles…………112 Starting a petrol engine……83 Vehicles with automatic transmission..112 Towing………….100 Cold or hot engine……..83… -
Page 199
Index Using cruise control……..97 Cancelling the set speed……98 Changing the set speed……97 Warning lamps and indicators….56 Resuming the set speed……98 ABS warning lamp……..57 Setting a speed……….97 Airbag warning lamp……..57 Switching cruise control off……98 Brake system warning lamp…….57 Switching cruise control on……97 Coolant temperature warning lamp..57 Using seat belts during pregnancy..25 Cruise control indicator…….57… -
Page 202
Feel the difference…
This manual is also suitable for:
Fiesta
Ford Fiesta (Mark VII, B-car platform) с бензиновыми двигателями: SNJA/SNJB/STJA/STJB 1.25 л Duratec (1242 см³) 60-82 л.с./44-60 кВт, SPJA 1.4 л Duratec-16V (Sigma) (1388 см³) 96 л.с./71 кВт, HXJA/HXJB 1.6 л Duratec-16V Ti-VCT (Sigma) (1596 см³) 120 л.с./88 кВт и дизельными F6JD 1.4 л Duratorq-TDCi (DV) (1398 см³) 68-70 л.с./50-51 кВт, HHJD/HHJE 1.6 л Duratorq-TDCi (DV)/ECOnetic (1560 см³) 75-90-95 л.с./55-66-70 кВт; Руководство по эксплуатации, ремонт и техническое обслуживание. Технические характеристики, цветные электросхемы, устройство, диагностика. Производственно-практическое издание легковой автомобиль малого Б-класса Форд Фиеста с цельнометаллическими несущими кузовами пяти- и трехдверный хэтчбек, четырёхдверный седан переднеприводные модели шестого (седьмого в англии) поколения выпуска с октября 2008 по 2014 год
ЕСЛИ ВЫ ВИДИТЕ ОШИБКУ 406 Not Acceptable и не видите документ, то скорей всего у Вас IP РФ и его надо сменить, на любой другой страны, с помощью VPN ( Scribd и SlideShare блокируют посетителей с Российским IP).
Видео Ford Fiesta mk7 замена передних тормозных колодок, дисков и задних стоек амортизаторов, пружин, опор (Форд Фиеста 08-14)
Ford Fiesta Mark VII общая информация (Форд Фиеста 2008-2014)
Тормозные диски (передние тормозные механизмы) — проверка, снятие и установка
Примечание. Перед началом работ прочтите предупреждения о вредности и опасности тормозной жидкости и асбестовой пыли. Чтобы не нарушить баланс тормозных усилий, тормозные диски нужно заменять парой на одной оси, как и тормозные колодки, комплектом.
Проверка
1. Затяните стояночный тормоз, поднимите переднюю часть автомобиля домкратом и установите страховочные опоры. Снимите соответствующее колесо.
2. Отверните болт и освободите тормозной шланг от стойки подвески.
3. Отверните болты крепления опорного кронштейна суппорта к поворотному кулаку; снимите суппорт с кронштейном с поворотного кулака и тормозного диска. Подвесьте суппорт, подвязав его к пружине стойки, чтобы не нагружать тормозной шланг.
4 Наверните пару колесных гаек на диагонально расположенные шпильки (гайки располагайте плоской стороной к диску). Постепенно затяните гайки, чтобы зафиксировать диск.
5. Удалите с диска рыхлую ржавчину. Проворачивая диск, проверьте отсутствие трещин, температурного коробления, царапин и глубоких борозд. Измерьте микрометром толщину диска в нескольких местах. Минимально допустимая толщина диска приведена в Спецификациях. Небольшой износ допустим; при наличии глубоких борозд диск можно проточить на токарном станке, если позволяет его остаточная толщина. При обнаружении трещин или предельного износа диск подлежит безусловной замене.
6. Используя индикатор часового типа с магнитной опорой, проверьте биение тормозного диска на расстоянии 10 мм от наружного края; сравните результаты измерений с данными, приведенными в Спецификациях. Для проверки, укрепив опору индикатора, проворачивайте диск. Разница между минимальным и максимальным результатами измерений и будет биением диска.
7. Если биение превышает допустимое, проверьте толщину диска в нескольких местах. Для этого нанесите маркером по периметру диска (отступив от края 15 мм) 8 меток, разнесенных на угол 45° друг от друга. Если биение толщины диска превышает допустимое Спецификациями, замените оба тормозных диска.
8. Биение поверхности ступицы проверяется таким же способом. Снимите диск, как описано далее, укрепите магнитную опору, опустите ножку измерителя на поверхность ступицы и проверьте допустимость биения по Спецификациям. Если биение ступицы превышает допустимое, это можно исправить заменой ступичных подшипников, а затем вновь проверить биение тормозного диска.
Снятие
9. Сняв колесо и суппорт, отверните гайки, завернутые в соответствии.
10. Если диск предстоит устанавливать обратно, отметьте его положение на ступице. Снимите диск.
Установка
11. Очистите сопрягающиеся поверхности
ступицы и диска и установите диск на ступицу. Если устанавливаете прежний диск,
совместите нанесенные ранее метки.
12. Установите суппорт с опорным кронштейном на поворотный кулак, заверните болты крепления кронштейна, затянув их предписанным моментом.
13. Присоедините к стойке подвески кронштейн тормозного шланга, надежно затянув болт его крепления.
14. Установите нижний защитный кожух силового агрегата и опустите автомобиль. Затяните гайки крепления колеса предписанным моментом.
15. Перед выездом на общую дорогу убедитесь в исправности тормозов.

| № | Спецификация / Specs | Данные |
| Габариты (мм/mm) и масса (кг/kg) / Dimensions and Weight | ||
| 1 | Длина / Length | 3950 |
| 2 | Ширина (без/с зеркалами) / Width | 1722/1787 — со сложенными зеркалами/1973 |
| 3 | Высота (загружен/пустой) / Height | 1433-1481 |
| 4 | Колёсная база / Wheelbase | 2489 |
| 5 | Дорожный просвет (клиренс) / Ground clearance | 147 |
| 6 | Снаряжённая масса / Total (curb) weight | 1086 |
| Полная масса / Gross (max.) weight | 1540 | |
|
Двигатель / Engine |
||
| 7 | Тип / Engine Type, Code | Дизельный, жидкостного охлаждения, четырехтактный, F6JD Duratorq-TDCi (DV) |
| 8 | Количество цилиндров / Cylinder arrangement: Total number of cylinders, of valves | 4-цилиндровый, рядный, 8V, DOHC с верхним расположением одного распределительного вала |
| 9 | Диаметр цилиндра / Bore | 73.7 мм |
| 10 | Ход поршня / Stroke | 82.0 мм |
| 11 | Объём / Engine displacement | 1398 см³ |
| 12 | Система питания / Fuel supply, Aspiration | Непосредственный впрыск топлива Common Rail Siemens SID804 TDCi |
| Турбонаддув BorgWarner KP35 | ||
| 13 | Степень сжатия / Compression ratio | 18.0:1 |
| 14 | Максимальная мощность / Max. output power kW (HP) at rpm | 51 кВт (70 л.с.) при 4500 об/мин |
| 15 | Максимальный крутящий момент / Max. torque N·m at rpm | 160 Нм при 2000 об/мин |
|
Трансмиссия / Transmission |
||
| 16 | Сцепление / Clutch type | Однодисковое, сухое, с диафрагменной нажимной пружиной и гасителем крутильных колебаний, постоянно замкнутого типа |
| 17 | КПП / Transmission type | iB5 МКПП 5 пятиступенчатая механическая, двухвальная, с синхронизаторами на всех передачах переднего хода |
О Книге
- Название: Ford Fiesta 10/2008-2011 Ремонт и техническое обслуживание, руководство по эксплуатации
- Бензиновые двигатели: SNJA/SNJB/STJA/STJB 1.25 л Duratec (1242 см³) 60-82 л.с./44-60 кВт, SPJA 1.4 л Duratec-16V (Sigma) (1388 см³) 96 л.с./71 кВт, HXJA/HXJB 1.6 л Duratec-16V Ti-VCT (Sigma) (1596 см³) 120 л.с./88 кВт и дизельными F6JD 1.4 л Duratorq-TDCi (DV) (1398 см³) 68-70 л.с./50-51 кВт, HHJD/HHJE 1.6 л Duratorq-TDCi (DV)/ECOnetic (1560 см³) 75-90-95 л.с./55-66-70 кВт
- Выпуск с октября 2008 года
- Серия: «Ремонт Автомобилей»
- Год издания: 2012
- Автор: Коллектив авторов
- Издательство: «Ассоциация независимых издателей»
- Формат: PDF
- Страниц в книге: 330
- Размер: 252.69 МБ
- Язык: Русский
- Количество электросхем: 16
с бензиновыми двигателями 1.25 л Duratec (1241 см³) 82 л.с./60 кВт, 1.4 л Duratec-16V (Sigma) (1387 см³) 96 л.с./71 кВт, 1.6 л Duratec-16V Ti-VCT (Sigma) (1597 см³) 120-134 л.с./88-98 кВт и дизельными Duratorq-TDCI (DV) 1.4 л (1399 см³) 68-70 л.с./50-51 кВт, Duratorq-TDCI 1.6 л (1560 см³) 75-90-95 л.с./55-66-70 кВт. Инструкция пользователя Форд Фиеста переднеприводные (до рестайлинга 2013) модели шестого (седьмого с учетом 2000-2002, как отдельная модель) поколения выпуска с 2008 года читать онлайн, скачать
Ford Fiesta с 2008 руководство по эксплуатации, ремонт и обслуживание здесь
Форд Фиеста 2008-2014 Body Repair Manual/ руководство по ремонту кузова
Ford Fiesta 2010 Body Repair Manual/ руководство по ремонту кузова
Видео Ford Fiesta mk6 (7) замена моторного масла/ how to change the oil and filter и лампы задней фары/ стоп-сигнала (Форд Фиеста 08-12)
Ford Fiesta Mark VI (VII) общая информация (Форд Фиеста 2008-2012)


ПРОВЕРКА МОТОРНОГО МАСЛА
ПРЕДОСТЕРЕЖЕНИЕ
Не пользуйтесь добавками к моторному маслу или другими средствами для улучшения работы двигателя. При определенных условиях использование присадок может привести к повреждению двигателя.

ЩУП ДЛЯ ПРОВЕРКИ МОТОРНОГО МАСЛА — 1.25 Литра DURATEC-16V (SIGMA) /1.4 Литра DURATEC-16V (SIGMA) /1.6 Литра DURATEC-16V TI-VCT (SIGMA)

ЩУП ДЛЯ ПРОВЕРКИ МОТОРНОГО МАСЛА — 1.4 Литра DURATORQ-TDCI (DV) ДИЗЕЛЬ/1.6 Литра DURATORQTDCI (DV) ДИЗЕЛЬ
Примечание: Расход масла у новых двигателей достигает нормального значения после пробега приблизительно 5000 км (3000 миль).
Проверка уровня масла
ПРЕДОСТЕРЕЖЕНИЕ
Проверьте, чтобы уровень находился между отметками MIN и MAX.
Примечание: Проверяйте уровень перед тем, как запустить двигатель.
Примечание: Перед проверкой убедитесь, что автомобиль находится на ровной поверхности.
Примечание: При нагревании масло расширяется. Поэтому уровень может быть несколько выше отметки MAX.
Извлеките масляный щуп и вытрите его чистой безворсовой ветошью. Чтобы проверить уровень масла, установите щуп и извлеките его снова. Если уровень находится на отметке MIN, немедленно долейте, доведя его уровень до необходимого.
Доливка
ПРЕДУПРЕЖДЕНИЯ
Осуществляйте доливку только при холодном двигателе. Если двигатель горячий, то выждите 10 минут, пока его температура не понизится. Не снимайте крышку заливной горловины с работающего двигателя. Снимите крышку наливной горловины.
ПРЕДОСТЕРЕЖЕНИЕ
Не доливайте больше отметки MAX.
Доливайте рабочую жидкость, которая соответствует техническим требованиям и условиям компании Ford. См. Технические характеристики (стр. 156).
Установите крышку горловины.
Поворачивайте ее, пока не почувствуете сильное сопротивление.
| Деталь | Спецификации | Коэффициент вязкости | Рекомендуемая рабочая жидкость |
|---|---|---|---|
| Моторное масло для двигателя / Motor Oil | WSS-M2C913-C | SAE 5W-30 | Castrol/Motorcraft Formula E |
| Смазка для механической коробки передач / 5-Speed Manual transaxle fluid | WSS-M2C200-C | Motorcraft | |
| Жидкость усилителя рулевого управления | WSA-M2C 195-A. | Motorcraft | |
| Охлаждающая жидкость двигателя / Coolant | WSS-M97B44-D | Охлаждающая жидкость Motorcraft SuperPlus | |
| Тормозная жидкость / Brake Fluid | ESD-M6C 57-А. | Motorcraft Super DOT 4/Shell ESL DOT4 | |
| Жидкость омывателя ветрового стекла / Windshield Wash Concentrate | WSS-M14P19-A | Motorcraft Premium Windshield Wash Concentrate with Bitterant | |
| Смазка спрей / Grease Spray Door latch, hood Not applicable latch, trunk latch and seat tracks | ESB-M1C93-B | Motorcraft Multi-Purpose Grease Spray XL-5 or CRC SL3151ESB | |
| Хладагент для системы воздушного кондиционирования / Refrigerant | WSH-M17B19-A | Motorcraft R-134a Refrigerant YN-19 / CYN-16-R (Canada) | |
| Смазка для системы воздушного кондиционирования / Compressor Oil | WSH-M1C231-B | Motorcraft PAG Refrigerant Compressor Oil YN-12-D | |
| Смазка / Grease Lock cylinder | ESA-M1C75-B | Motorcraft Penetrating and Lock Lubricant XL-1 (U.S.) / Motorcraft Penetrating fluid CXC-51-A (Canada) | |
| Проникающая жидкость / Penetrating and Lock Lubricant | Penetrating and Lock Lubricant XL-1 |
| Заправочные объемы (л) / Capacity (qt) | 1.25 литра Duratec | 1.4 литра Duratec | 1.6 литра Duratec | 1.4 литра Duratorq | 1.6 литра Duratorq |
|---|---|---|---|---|---|
| Масло для двигателя / Engine lubrication system — с фильтром / including the oil filter — без фильтра / including the oil filter — для доливки между отметками MIN и MAX / top-up — raise the level on the dipstick from minimum to maximum |
3.8 литра 3.5 литра 0.8 литра |
3.8 литра 3.5 литра 0.8 литра |
4.0 литра 3.8 литра 0.8 литра |
3.8 литра 3.4 литра 1.6 литра |
3.9 литра 3.5 литра 1.6 литра |
| Ручная КП / 5-Speed Manual transaxle fluid | 2.5 литра | ||||
| Гидроусилитель руля | Между отметками MIN и MAX | ||||
| Система охлаждения / Engine cooling system | 5.5 литра | 6.1 литра | |||
| Система омывания стекол / Windshield washer fluid | 2.5 литра | ||||
| Бензобак / Fuel tank | 42 литров | 40 литров | |||
| Тормозная система | Между отметками MIN и MAX | ||||
| Свечи зажигания (Motorcraft) | AYFS 32 CJ | AYFS 22 С | EZD 40 | ||
| Межэлектродный зазор свечи зажигания | 1.3 мм | — — |


| № | Спецификация / Specs | Данные |
| Габариты (мм/mm) и масса (кг/kg) / Dimensions and Weight | ||
| 1 | Длина / Length | 3950-3953 |
| 2 | Ширина (без/с зеркалами) / Width | 1722/1787/1973 |
| 3 | Высота (загружен/пустой) / Height | 1433/1481 |
| 4 | Колёсная база / Wheelbase | 2489 |
| 5 | Дорожный просвет (клиренс) / Ground clearance | 140 |
| 6 | Снаряжённая масса / Total (curb) weight | 1092 |
| Полная масса / Gross (max.) weight | 1525 | |
|
Двигатель / Engine |
||
| 7 | Тип / Engine Type, Code | Бензиновый, жидкостного охлаждения, четырехтактный, Duratec (Sigma) |
| 8 | Количество цилиндров / Cylinder arrangement: Total number of cylinders, of valves | 4-цилиндровый, рядный, 16V, DOHC с верхним расположением двух распредвалов |
| 9 | Диаметр цилиндра / Bore | 79.5 мм |
| 10 | Ход поршня / Stroke | 80.5 мм |
| 11 | Объём / Engine displacement | 1387 см³ |
| 12 | Система питания / Fuel supply, Aspiration | Распределенный впрыск топлива SEFI |
| Атмосферный | ||
| 13 | Степень сжатия / Compression ratio | 9.8:1 |
| 14 | Максимальная мощность / Max. output power kW (HP) at rpm | 71 кВт (96 л.с.) при 5750 об/мин |
| 15 | Максимальный крутящий момент / Max. torque N·m at rpm | 125 Нм при 4200 об/мин |
|
Трансмиссия / Transmission |
||
| 16 | Сцепление / Clutch type | Гидротрансформатор |
| 17 | КПП / Transmission type | АКПП 4 Автоматическая, четырёхступенчатая, гидромеханическая, адаптивная |
О Книге
- Название: Ford Fiesta 2011 Руководство пользователя
- Бензиновые двигатели: 1.25 л Duratec (1241 см³) 82 л.с./60 кВт, 1.4 л Duratec-16V (Sigma) (1388 см³) 96 л.с./71 кВт, 1.6 л Duratec-16V Ti-VCT (Sigma) (1597 см³) 120-134 л.с./88-98 кВт и дизельными Duratorq-TDCI (DV) 1.4 л (1399 см³) 68-70 л.с./50-51 кВт, Duratorq-TDCI 1.6 л (1560 см³) 75-90-95 л.с./55-66-70 кВт
- Выпуск с 2008 года
- Серия: «Owner Guide»
- Год издания: Февраль 2011
- Автор: Коллектив авторов
- Издательство: «Ford Motor Company»
- Формат: PDF
- Страниц в книге: 260
- Размер: 50.31 МБ
- Язык: Русский
- Количество электросхем: 0

Руководство на английском языке по кузовному ремонту Ford Fiesta 2011 года выпуска.
- Автор: —
- Издательство: —
- Год издания: —
- Страниц: 730
- Формат: PDF
- Размер: 26,5 Mb
Руководство на английском языке по техническому обслуживанию и ремонту Ford Fiesta 1983-1989 годов выпуска с бензиновыми двигателями.
- Автор: —
- Издательство: Haynes Publishing
- Год издания: —
- Страниц: 166
- Формат: PDF
- Размер: 5,6 Mb
Руководство на английском языке по техническому обслуживанию и ремонту Ford Fiesta 2007 года выпуска.
- Автор: —
- Издательство: Ford Motor Company
- Год издания: 2007
- Страниц: 1226
- Формат: PDF
- Размер: 60,2 Mb
Руководство на английском и русском языках по техническому обслуживанию и ремонту Ford Fiesta 1989-1995 гоов выпуска с бензиновыми двигателями.
- Автор: —
- Издательство: Haynes Publishing
- Год издания: —
- Страниц: 296/491
- Формат: PDF
- Размер: 21,4 Mb
Руководство по техническому обслуживанию и ремонту Ford Fiesta, Ford Ka и Mazda 121 с 1996 года выпуска с бензиновыми и дизельными двигателями.
- Автор: —
- Издательство: ПОНЧиК
- Год издания: 2003
- Страниц: 139 из 256
- Формат: PDF
- Размер: 47,3 Mb
Руководство по техническому обслуживанию и ремонту Ford Fiesta 2008-2011 годов выпуска с бензиновыми и дизельными двигателями.
- Автор: —
- Издательство: Алфамер
- Год издания: —
- Страниц: 344
- Формат: —
- Размер: —
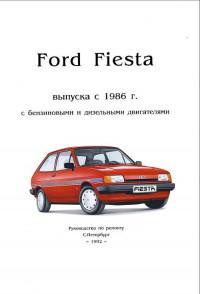
Руководство по ремонту Ford Fiesta с 1986 года выпуска с бензиновыми и дизельными двигателями.
- Автор: —
- Издательство: —
- Год издания: 1992
- Страниц: 129
- Формат: PDF
- Размер: 26,3 Mb

Руководство по эксплуатации, техническому обслуживанию и ремонту + каталог расходных запчастей автомобилей Ford Fiesta 2002-2008 и Ford Fusion 2002-2012 годов выпуска с бензиновыми и дизельными двигателями.
- Автор: —
- Издательство: Легион-Автодата
- Год издания: —
- Страниц: 406
- Формат: —
- Размер: —

Подборка руководств по эксплуатации Ford Fiesta 2008-2011 годов выпуска.
- Автор: —
- Издательство: Ford Motor Company
- Год издания: 2008/2009/2010/2011
- Страниц: 224/234/244/246
- Формат: PDF
- Размер: 27,4 Mb
Подборка руководств по эксплуатации Ford Fiesta 2012-2014 годов выпуска.
- Автор: —
- Издательство: Ford Motor Company
- Год издания: 2012/2013/2014
- Страниц: 324/368/382
- Формат: PDF
- Размер: 47,1 Mb
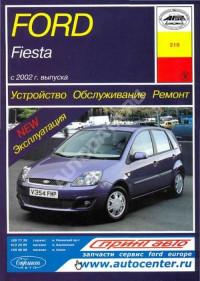
Руководство по техническому обслуживанию и ремонту Ford Fiesta с 2002 года выпуска.
- Автор: —
- Издательство: Арус
- Год издания: —
- Страниц: 276
- Формат: —
- Размер: —
