Материал из BikesWiki — энциклопедия японских мотоциклов
Перейти к: навигация, поиск

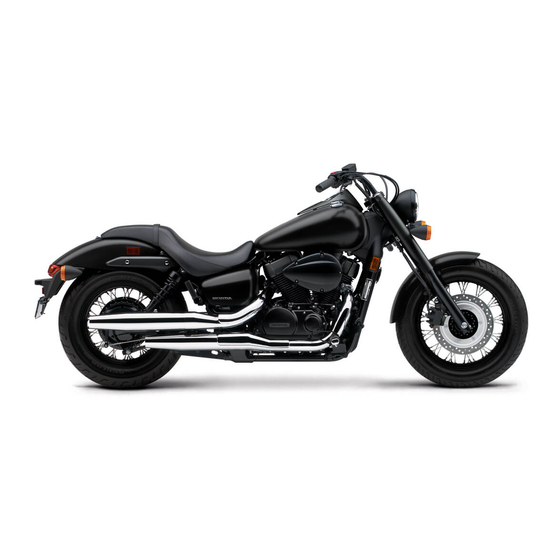
Honda Shadow 750
Ниже представлены прямые ссылки на скачку сервисной документации.
Для Honda Shadow 750 (VT750)
- Руководство пользователя на Honda Shadow 750 (на русском)
- Сервисный мануал (Service Manual) на Honda Shadow 750 (VT750C/CD)
- Сервисный мануал (Service Manual) на Honda Shadow 750 2001-2003 (VT750DC)
Обзор модели
- Honda Shadow 750
Источник — «https://bikeswiki.ru/index.php?title=Honda_Shadow_750:_мануалы&oldid=9529»
Категория:
- Сервисная документация
 02:02
02:02
500111 2015 Honda Shadow Phantom VT750C2B
 16:23
16:23
Обзор Honda Shadow 750 Phantom. Гимн универсальности.
 08:27
08:27
Honda Shadow 750 Black Spirit VT750C2B video 1
 08:16
08:16
Honda Shadow 750 Phantom 2011г. / ОБЗОР / ПРОДАЖА
 06:13
06:13
Honda Shadow Black Spirit VT750 C2B
 06:01
06:01
Honda Shadow 750 Black Spirit VT750C2B video 2 — 2011
 01:14
01:14
Honda vt 750 c2b severodvinsk
МОТОЦИКЛ HONDA VT750C2B/C2S
РУКОВОДСТВО ПО ЭКСПЛУАТАЦИИ

2
ВАЖНАЯ ИНФОРМАЦИЯ
ВОДИТЕЛЬ И ПАССАЖИР
•
Данный мотоцикл предназначен для перевозки водителя и одного пассажира. Никогда не превышайте
максимальную грузоподъёмность, указанную на оборудовании и табличке с характеристиками.
ЕЗДА ПО ДОРОГАМ
•
Данный мотоцикл предназначен только для дорог с искусственным покрытием.
ВНИМАТЕЛЬНО ПРОЧИТАЙТЕ ДАННОЕ РУКОВОДСТВО ПО ЭКСПЛУАТАЦИИ
•
Особое внимание обратите на информацию по безопасности, приводимую в различных местах данного
Руководства. Эта информация наиболее полно изложена в разделе “Информация по безопасности”, по-
мещённом перед страницей “Содержание”.
Данное Руководство должно рассматриваться как неотъемлемая часть мотоцикла и передаваться сле-
дующему владельцу при его продаже.

SРУКОВОДСТВО ПО ЭКСПЛУАТАЦИИ Все сведения в данном …
Страница 3
- Изображение
- Текст
3
Honda VT750C2B/C2S
РУКОВОДСТВО ПО ЭКСПЛУАТАЦИИ
Все сведения в данном “Руководстве” соответствуют состоянию выпускаемой продукции на дату подписания
документа в печать. Компания Honda Motor Co., Ltd оставляет за собой право в любое время вносить
изменения без предварительного предупреждения и без каких-либо обязательств со своей стороны.
Запрещается воспроизводить данное издание полностью или частично без письменного разрешения
правообладателя.

Следующими кодами в данном Руководстве обозначаются страны. …
Страница 5
- Изображение
- Текст
Следующими кодами в данном Руководстве обозначаются страны.
•
На иллюстрациях данного Руководства изображена версия VT750C2B ED.
•
VT750C2B
Е
Великобритания
F
Франция
ED
Прямые продажи на европейском рынке
EK
Ирландия Сингапур
VT750C2S
Е
Великобритания
IIE
Великобритания (Тип II)
F
Франция
IIF
Франция (Тип II)
ED
Прямые продажи на европейском рынке
IIIED
Прямые продажи на европейском рынке (Тип II)
Характеристики могут изменяться применительно к конкретной стране.
•

6
НЕСКОЛЬКО СЛОВ О БЕЗОПАСНОСТИ
Ваша безопасность и безопасность окружающих исключительно важны. Поэтому управление мотоциклом в
полном соответствии с правилами безопасности является вашей прямой обязанностью.
Соответствующая информация по мерам предосторожности, размещенная на предупреждающих табличках
на самом транспортном средстве и в Руководстве по эксплуатации, призвана облегчить задачу обеспечения
безопасности вождения. Эта информация служит для предупреждения о ситуациях, в которых существует
опасность причинения вреда вам и окружающим людям.
Конечно, невозможно предостеречь обо всех рисках, связанных с управлением или обслуживанием мото-
цикла. Поэтому в своих действиях в первую очередь необходимо руководствоваться здравым смыслом.
Важная информация, относящаяся к безопасности, будет встречаться вам в различном виде, включая:
• Предупреждающие таблички — на самом мотоцикле.
• Информация, относящаяся к безопасности — перед которой помещен символ внимания
и одно из трех
сигнальных слов: ОПАСНОСТЬ, ПРЕДОСТЕРЕЖЕНИЕ или ВНИМАНИЕ.
Эти сигнальные слова означают следующее:

ОПАСНОСТЬ Вы ПОГИБНЕТЕ или ПОЛУЧИТЕ ТЯЖЕЛЫЕ УВЕЧЬЯ, если …
Страница 7
- Изображение
- Текст
7
ОПАСНОСТЬ
Вы ПОГИБНЕТЕ или ПОЛУЧИТЕ ТЯЖЕЛЫЕ УВЕЧЬЯ, если будете
игнорировать данное предупреждение.
Вы можете ПОГИБНУТЬ или ПОЛУЧИТЬ СЕРЬЕЗНУЮ ТРАВМУ,
если не будете следовать инструкциям.
ВНИМАНИЕ
Вы МОЖЕТЕ БЫТЬ ТРАВМИРОВАНЫ, если не будете соблюдать
необходимых мер предосторожности.
Заголовки, относящиеся к безопасности
•
— такие, как важные предостережения или требования
осторожности.
Раздел “Безопасность”
•
— относящийся к безопасности, связанной с мотоциклом.
Инструкции,
•
объясняющие, как правильно и безопасно пользоваться данным мотоциклом.
Всё Руководство по эксплуатации насыщено важной информацией, имеющей отношение к безопасности.
Поэтому, пожалуйста, прочтите его внимательно.
ЭКСПЛУАТАЦИЯ
страница
страница
1
БЕЗОПАСНОСТЬ ЭКСПЛУАТАЦИИ
МОТОЦИКЛА
52
МЕХАНИЗМЫ И ОРГАНЫ УПРАВЛЕНИЯ
1
СВЕДЕНИЯ ПО МЕРАМ БЕЗОПАСНОСТИ
52
ЗАМОК ЗАЖИГАНИЯ
ИНФОРМАЦИЯ
53
КЛЮЧИ
2
ЗАЩИТНАЯ ЭКИПИРОВКА
55
СИСТЕМА ИММОБИЛАЙЗЕРА (HISS)
4
МАКСИМАЛЬНАЯ ДОПУСТИМАЯ
НАГРУЗКА И РЕКОМЕНДАЦИИ
58
ОРГАНЫ УПРАВЛЕНИЯ ПРАВОЙ РУЧКИ
РУЛЯ
8
ПИКТОГРАММЫ
59
ОРГАНЫ УПРАВЛЕНИЯ ЛЕВОЙ РУЧКИ
РУЛЯ
14
УЗЛЫ И ИХ РАСПОЛОЖЕНИЕ
19
ПРИБОРЫ И ИНДИКАТОРЫ
31
ОСНОВНЫЕ УЗЛЫ И АГРЕГАТЫ
(Информация, необходимая для управления
мотоциклом)
31
ПОДВЕСКА
32
ТОРМОЗА
37
СЦЕПЛЕНИЕ
39
ОХЛАЖДАЮЩАЯ ЖИДКОСТЬ
41
ТОПЛИВО
44
МОТОРНОЕ МАСЛО
45
МАСЛО ГЛАВНОЙ ПЕРЕДАЧИ
46
ШИНЫ

страница
страница
60
ПРОЧЕЕ ОБОРУДОВАНИЕ
(Не требуемое для работы мотоцикла)
66
ЭКСПЛУАТАЦИЯ
66
ОСМОТР ПЕРЕД ПОЕЗДКОЙ
60
ЗАМОК РУЛЯ
68
ПУСК ДВИГАТЕЛЯ
61
ДЕРЖАТЕЛЬ ШЛЕМА
71
ОБКАТКА
62
ПАКЕТ ДЛЯ ДОКУМЕНТОВ
72
ЕЗДА
63
БОКОВЫЕ ОБТЕКАТЕЛИ
74
ТОРМОЖЕНИЕ
64
СЕДЛО
78
СТОЯНКА
65
РЕГУЛИРОВКА НАПРАВЛЕНИЯ СВЕТА
ФАРЫ ПО ВЕРТИКАЛИ
79
РЕКОМЕНДАЦИИ ПО ЗАЩИТЕ
ОТ УГОНА

ТЕХНИЧЕСКОЕ ОБСЛУЖИВАНИЕ
страница
страница
80
80
81
82
83
86
88
89
90
95
96
98
99
100
101
ТЕХНИЧЕСКОЕ ОБСЛУЖИВАНИЕ
ВАЖНОСТЬ ТЕХНИЧЕСКОГО
ОБСЛУЖИВАНИЯ
МЕРЫ БЕЗОПАСНОСТИ ПРИ ПРОВЕДЕ-
НИИ ТЕХНИЧЕСКОГО ОБСЛУЖИВАНИЯ
ТЕХНИКА БЕЗОПАСНОСТИ
РЕГЛАМЕНТ ТЕХНИЧЕСКОГО
ОБСЛУЖИВАНИЯ
КОМПЛЕКТ ИНСТРУМЕНТОВ
СЕРИЙНЫЕ НОМЕРА
ЭТИКЕТКА С ОБОЗНАЧЕНИЕМ КРАСКИ
МОТОРНОЕ МАСЛО
САПУН КАРТЕРА
СВЕЧИ ЗАЖИГАНИЯ
МАСЛО ГЛАВНОЙ ПЕРЕДАЧИ
ФУНКЦИОНИРОВАНИЕ ДРОССЕЛЬНОЙ
ЗАСЛОНКИ
ОХЛАЖДАЮЩАЯ ЖИДКОСТЬ
ВОЗДУХООЧИСТИТЕЛЬ
103
104
105
119
122
125
130
131
137
141
141
143
144
145
151
ПРОВЕРКА ПЕРЕДНЕЙ И ЗАДНЕЙ
ПОДВЕСКИ
БОКОВОЙ УПОР
СНЯТИЕ КОЛЕСА
ИЗНОС ТОРМОЗНЫХ КОЛОДОК
АККУМУЛЯТОРНАЯ БАТАРЕЯ
ЗАМЕНА ПРЕДОХРАНИТЕЛЕЙ
РЕГУЛИРОВКА КОНЦЕВОГО ВЫ-
КЛЮЧАТЕЛЯ СТОП-СИГНАЛА
ЗАМЕНА ЛАМП
УХОД
РЕКОМЕНДАЦИИ ПО ХРАНЕНИЮ
ХРАНЕНИЕ
РАСКОНСЕРВАЦИЯ ПОСЛЕ ХРАНЕ-
НИЯ
ДЕЙСТВИЯ ПРИ НЕПРЕДВИДЕННЫХ
ОБСТОЯТЕЛЬСТВАХ
ТЕХНИЧЕСКИЕ ХАРАКТЕРИСТИКИ
КАТАЛИТИЧЕСКИЕ НЕЙТРАЛИЗАТОРЫ

Комментарии
- Manuals
- Brands
- Honda Manuals
- Motorcycle
- Shadow Aero VT750C 2022
- Owner’s manual
-
Contents
-
Table of Contents
-
Troubleshooting
-
Bookmarks
Quick Links
Owner’s Manual
2022
2022
VT750C/CS
Shadow Aero
Related Manuals for Honda Shadow Aero VT750C 2022
Summary of Contents for Honda Shadow Aero VT750C 2022
-
Page 1
Owner’s Manual 2022 2022 VT750C/CS Shadow Aero… -
Page 2
This publication includes the latest production information available before printing. Honda Motor Co., Ltd. reserves the right to make changes at any time without notice and without incurring any obligation. -
Page 3
Welcome Congratulations on your purchase of a new When service is required, remember that Honda vehicle. Your selection of a Honda your Honda dealer knows your vehicle best. makes you part of a worldwide family of If you have the required mechanical “know- satisfied customers who appreciate Honda’s how”… -
Page 4
A Few Words About Safety DANGER Your safety, and the safety of others, is very important. Operating this vehicle safely is an You WILL be KILLED or SERIOUSLY important responsibility. HURT if you don’t follow instructions. To help you make informed decisions about WARNING safety, we have provided operating procedures and other information on safety… -
Page 5: Table Of Contents
Contents Vehicle Safety P. 2 Operation Guide P. 16 Maintenance P. 31 Troubleshooting P. 72 Information P. 86 Specifications P. 110…
-
Page 6: Vehicle Safety
Vehicle Safety This section contains important information for safe riding of your vehicle. Please read this section carefully. Safety Guidelines ……….P. 3 Safety Labels…………P. 7 Safety Precautions……….P. 9 Riding Precautions ……….P. 10 Accessories & Modifications……P. 14 Loading …………..
-
Page 7: Safety Guidelines
Safety Guidelines Safety Guidelines Before Riding Make sure that you are physically fit, mentally Follow these guidelines to enhance your safety: focused and free of alcohol and drugs. Check Perform all routine and regular inspections ● that you and your passenger are both wearing specified in this manual.
-
Page 8
Safety Guidelines We recommend that all riders take a certified Make Yourself Easy to See course approved by the Motorcycle Safety Make yourself more visible, especially at night, Foundation (MSF) or a state approved training by wearing bright reflective clothing, positioning course. -
Page 9
If you decide to continue riding, first turn the Keep Your Honda in Safe Condition ignition switch to the OFF position, and evaluate It’s important to keep your vehicle properly the condition of your vehicle. Inspect for fluid maintained and in safe riding condition. -
Page 10
Safety Guidelines WARNING Carbon Monoxide Hazard Exhaust contains poisonous carbon monoxide, a Running the engine of your vehicle colorless, odorless gas. Breathing carbon while in an enclosed or even partially monoxide can cause loss of consciousness and enclosed area can cause a rapid build- may lead to death. -
Page 11: Safety Labels
Safety Labels Safety Labels serious injury. Read these labels carefully and don’t remove them. Safety and information labels on your vehicle If a label comes off or becomes hard to read, provide important safety information and may contact your dealer for a replacement. warn you of potential hazards that could cause Continued…
-
Page 12
Safety Labels… -
Page 13: Safety Precautions
Safety Precautions Safety Precautions Must fit comfortably but securely, with the ● chin strap fastened. Ride cautiously and keep your hands on the Face shield with unobstructed field of vision ● ● handlebar and feet on the footpegs. or other approved eye protection Keep passenger’s hands onto the seat strap ●…
-
Page 14: Riding Precautions
Riding Precautions Riding Precautions Boots or Riding Shoes Sturdy boots with non-slip soles and ankle protection Break-in Period Jacket and Pants During the first 300 miles (500 km) of running, follow these guidelines to ensure your vehicle’s Protective, highly visible, long-sleeved jacket future reliability and performance.
-
Page 15
Riding Precautions Exercise caution on low traction surfaces. Combined ABS ● The tires slip more easily on such VT750CS surfaces and braking distances are Your vehicle’s rear brake system is linked to the longer. front brake. This means that operating the rear Avoid continuous braking. -
Page 16
Riding Precautions Engine Braking Parking Engine braking helps slow your vehicle down Park on a firm, level surface. ● when you release the throttle. For further If you must park on a slight incline or loose ● slowing action, downshift to a lower gear. Use surface, park so that the vehicle cannot engine braking with intermittent use of the move or fall over. -
Page 17
Riding Precautions Parking with the Side Stand Refueling and Fuel Guidelines Stop the engine. Follow these guidelines to protect the engine, Push the side stand down. fuel system and catalytic converter: Slowly lean the vehicle to the left until its Use only unleaded gasoline. -
Page 18: Accessories & Modifications
We strongly advise that you do not add any seriously hurt or killed. accessories that were not specifically designed or approved for your vehicle by Honda or make Follow all instructions in this owner’s modifications to your vehicle from its original manual regarding accessories and design.
-
Page 19: Loading
Loading Loading WARNING Overloading or improper loading can Carrying extra weight affects your vehicle’s ● cause a crash and you can be seriously handling, braking and stability. hurt or killed. Always ride at a safe speed for the load you are carrying.
-
Page 20: Operation Guide
Parts Location Rear brake fluid reservoir VT750CS (P.59) Main fuse VT750C (P.83) Fuse box VT750C (P.82) Front brake fluid reservoir (P.59) Front brake lever Fuel fill cap (P.28) Throttle grip (P.70) Engine oil fill cap/dipstick (P.54) Coolant reserve tank (P.56)
-
Page 21
Clutch lever (P.67) Battery (P.50) Document bag (P.30) Main fuse VT750CS (P.85) Fuse box VT750CS (P.84) FI fuse VT750CS (P.85) Helmet holder (P.29) Rear suspension spring preload adjuster (P.71) Final drive oil fill hole cap (P.58) Seat (P.52) Side stand (P.66) Shift lever (P.27) -
Page 22
Instruments Odometer [ODO], Tripmeter [TRIP 1/2] & Clock (24-hour display) Select/Reset button switches between the odometer, tripmeters and clock. • Odometer: Total distance ridden. • Tripmeter: Distance ridden since tripmeter was reset (press and hold Select/Reset button to reset to 0.0). Odometer Select/Reset button Tripmeters… -
Page 23
Press the Select/Reset button until the To set the clock: desired minute is displayed. Turn the ignition switch to the ON position. Select the digital clock mode. Press and hold the Select/Reset button until Press and hold the Select/Reset button until the hour digits start flashing. -
Page 24
Indicators If one of these indicators does not come on when it should, have your dealer check for problems. ABS (Anti-lock Brake System) indicator VT750CS Comes on when the ignition switch is turned to the ON position. Goes off when your speed reaches approximately 6 mph (10 km/h) If it comes on while riding: (P.76) -
Page 25
Fuel reserve indicator Comes on briefly when the ignition switch is turned to the ON position. When this indicator comes on, remaining fuel is approximately 0.92 US gal (3.5 L). Turn signal indicator High beam indicator Neutral indicator Comes on when the transmission is in Neutral. -
Page 26
Switches Engine stop switch Should normally remain in the (Run) position. In an emergency, switch to the (Stop) position (the starter motor will not operate) to stop the engine. Horn button Start button Turn signal switch Headlight turns off when operating Pressing the switch turns the the starter motor. -
Page 27
Ignition switch Turns electrical system Switches the electrical system on/off. on for starting/riding. Key can be removed when in the OFF position. Turns engine off. Continued… -
Page 28
Switches (Continued) Steering Lock Locking Turn the handlebar all the way to the left. Lock the steering when parking to help Insert the key in the steering lock and turn it prevent theft. 180 degrees clockwise. A U-shaped wheel lock or similar device is Remove the key. -
Page 29
Starting the Engine Start your engine using the following NOTICE procedure, regardless of whether the engine • If the engine does not start within 5 seconds, is cold or warm. turn the ignition switch to the OFF position and wait 10 seconds before trying to start the engine again to recover battery voltage. -
Page 30
Starting the Engine (Continued) Press the start button with the throttle If the engine does not start: completely closed. Open the throttle fully and press the start If you cannot start the engine, open the button for 5 seconds. throttle slightly (about 0.1 in [3 mm], Repeat the normal starting procedure. -
Page 31
Shifting Gears Your vehicle transmission has 5 forward Recommended Shift Points gears in a one-down, four-up shift pattern. Shifting Up From 1st to 2nd 12 mph (20 km/h) From 2nd to 3rd 19 mph (30 km/h) From 3rd to 4th 25 mph (40 km/h) From 4th to 5th 31 mph (50 km/h) -
Page 32
Refueling Opening the Fuel Fill Cap Lock cover Open the lock cover, insert the ignition key, Fuel fill cap and turn it clockwise to open the fuel fill cap. Ignition key Lower edge of Closing the Fuel Fill Cap filler neck After refueling, align the fuel fill cap latch with the slot in the filler neck. -
Page 33
Storage Equipment Helmet holder is located on the left side Locking below the seat. Hang your helmet on the holder pin and push it in to lock. Helmet holder Remove the key. Use the helmet holder only when parked. WARNING Riding with a helmet attached to the holder can interfere with the rear wheel or suspension and could cause a crash… -
Page 34
Storage Equipment (Continued) Space to store a document bag is located The tool kit is located behind the left side cover. under the seat. VT750C The tool kit is in the compartment box. Document bag Insert the ignition key and turn it counterclockwise to unlock. -
Page 35: Maintenance
Please read “Importance of Maintenance” and “Maintenance Fundamentals” carefully before attempting any maintenance. Refer to “Specifications” for service data. An optional larger tool kit may be available. Check with your Honda dealer’s parts department. Importance of Maintenance ……P. 32 Throttle …………..P. 70 Maintenance Schedule……..
-
Page 36: Importance Of Maintenance
Importance of Maintenance For information about the exhaust emission and Importance of Maintenance noise emission requirements of the U.S. Keeping your vehicle well-maintained is Environmental Protection Agency (EPA), and the absolutely essential to your safety and to California Air Resources Board (CARB). P.
-
Page 37
Importance of Maintenance Follow these guidelines when performing Maintenance Safety maintenance. Always read the maintenance instructions Stop the engine and remove the key. ● before you begin each task and make sure that Place your vehicle on a firm, level surface ●… -
Page 38: Maintenance Schedule
Maintenance work should be performed in owner. accordance with Honda’s standards and specifications by properly trained and equipped Honda recommends that your dealer should technicians. Your dealer meets all of these road test your vehicle after each periodic requirements. All scheduled maintenance is maintenance is carried out.
-
Page 39
Replace mechanically skilled. Clean Procedures are provided in an official Honda Service Manual (2 P. 103). : Technical. In the interest of safety, have your vehicle serviced by your dealer. Continued… -
Page 40
Maintenance Schedule Odometer Reading Frequency × 1,000 mi Refer to Items page × 1,000 km 12.8 19.2 25.6 32.0 38.4 Final Drive Oil Brake Fluid Brake Shoes/Pads Wear (VT750C) 60, 64 Brake Pad Wear (VT750CS) Brake System Brake Light Switch Headlight Aim –… -
Page 41: Maintenance Record
Maintenance Record Distance Odometer Date Performed By: Notes 600 miles (1,000 km) 4,000 miles (6,400 km) 8,000 miles (12,800 km) 12,000 miles (19,200 km) 16,000 miles (25,600 km) 20,000 miles (32,000 km) 24,000 miles (38,400 km) 28,000 miles (44,800 km) 32,000 miles (51,200 km) 36,000 miles (57,600 km) 40,000 miles (64,000 km)
-
Page 42: Maintenance Fundamentals
Maintenance Fundamentals Check the following items after you get on your Pre-ride Inspection vehicle: To ensure safety, it is your responsibility to Throttle action moves smoothly without ● perform a pre-ride inspection and make sure binding P. 70 that any problem you find is corrected. A pre- Brake lever and pedal operate normally ●…
-
Page 43
Maintenance Fundamentals Periodic Checks You should also perform other periodic maintenance checks at least once a month regardless of how often you ride, or more often if you ride frequently. Also, check the odometer reading against the Maintenance Schedule and perform all maintenance that is due. -
Page 44
Maintenance Fundamentals Replacing Parts Color label Always use Honda Genuine Parts or their equivalents to ensure reliability and safety. When ordering colored components, specify the model name, color, and code mentioned on the color label. The color label is attached to the frame behind the left side cover. -
Page 45
Maintenance Fundamentals Electrolyte splashes into your mouth: Battery ● Rinse mouth thoroughly with water, and Your vehicle has a maintenance-free type do not swallow. battery. You do not have to check the battery WARNING electrolyte level or add distilled water. Clean the battery terminals if they become dirty or The battery gives off explosive corroded. -
Page 46
30 days using a charger designed specifically for If the terminals are heavily corroded, clean your Honda, which can be purchased from your and polish the terminals with a wire brush or dealer. Read the information that came with sandpaper. -
Page 47
Bump starting is also not ratings, see “Specifications.” P. 112 recommended. Blown fuse NOTICE Installing non-Honda electrical accessories can overload the electrical system, discharging the battery and possibly damaging the system. Fuses NOTICE Fuses protect the electrical circuits on your Replacing a fuse with one that has a higher vehicle. -
Page 48
“Specifications.” P. 111 oils, excluding oils marked as “Energy Conserving” or “Resource Conserving” on the circular API If you use non-Honda engine oil, check the service symbol. label to make sure that the oil satisfies all of the following standards:… -
Page 49
Recommended Coolant NOTICE Pro Honda HP Coolant is a pre-mixed solution Brake fluid can damage plastic and painted of antifreeze and distilled water. surfaces. Wipe up spills immediately and wash thoroughly. -
Page 50
Maintenance Fundamentals Inspecting for Damage Crankcase Breather Inspect the tires for Service more frequently when riding in rain, at cuts, slits, or cracks that full throttle, or after the vehicle is washed or expose fabric or cords, overturned. Service if the deposit level can be or nails or other seen in the transparent section of the drain foreign objects… -
Page 51
Maintenance Fundamentals WARNING Inspecting Tread Depth Inspect the tread wear indicators. If they Riding on tires that are excessively worn become visible, replace the tires immediately. or improperly inflated can cause a crash For safe riding, you should replace the tires in which you can be seriously hurt or when the minimum tread depth is reached. -
Page 52
Always use the size and type of tires and load range. recommended in this owner’s manual. Have the wheel balanced with Honda ● Genuine balance weights or equivalent after the tire is installed. -
Page 53
Maintenance Fundamentals Tire Identification Number (TIN) Tire Service Life The tire identification number (TIN) is a group The service life of your tires is dependent on of numbers and letters located on the sidewall many factors, including, but not limited to, of the tire. -
Page 54: Removing & Installing Body Components
Removing & Installing Body Components Battery Removal Make sure the ignition switch is in the OFF VT750C Screw position. Remove the seat. P. 52 Battery Remove the battery cover by removing Battery cover the screw. Disconnect the negative — terminal from the battery.
-
Page 55
Removing & Installing Body Components Battery Installation Install the parts in the reverse order of removal. Always connect the positive + terminal first. Make sure that bolts and nuts are tight. Tighten the battery cover screw. Torque: 0.7 lbf·ft (1 N·m, 0.1 kgf·m) Make sure the clock information is correct after the battery is reconnected. -
Page 56: Seat
Removing & Installing Body Components Seat Seat Removal Remove the seat mounting bolt A and Seat mounting bolt A bolts B. Pull the seat back and up. Seat Installation Frame cross Insert the tab into the frame cross member. member Tighten the seat mounting bolts B.
-
Page 57: Side Cover
Removing & Installing Body Components Side Cover Side Cover The right and left side covers can be removed in the same way. Grommets Removal Grasp the side cover. Remove the prongs from the grommets. Remove the side cover. Installation Install the parts in the reverse order of Side cover removal.
-
Page 58: Engine Oil
Engine Oil Checking the Engine Oil Oil fill cap/ dipstick If the engine is cold, idle the engine for 3 Upper to 5 minutes. level Turn the ignition switch to the OFF position and wait for 2 to 3 minutes. Place your vehicle in an upright position on a firm, level surface.
-
Page 59
Engine Oil Adding Engine Oil Adding Engine Oil NOTICE Overfilling with oil or operating with insufficient oil can cause damage to your engine. Do not mix If the engine oil is below or near the lower different brands and grades of oil. They may level mark, add the recommended engine oil. -
Page 60: Coolant
Coolant Checking the Coolant If the coolant level is dropping noticeably or the reserve tank is empty, you likely have a serious leak. Have your vehicle inspected by Check the coolant level in the reserve tank your dealer. while the engine is cold. Place your vehicle on a firm, level surface.
-
Page 61
Coolant Adding Coolant Adding Coolant Securely reinstall the reserve tank cap. WARNING If the coolant level is below the LOWER level Removing the radiator cap while the mark, add the recommended coolant engine is hot can cause the coolant to P. -
Page 62: Final Drive Oil
Final Drive Oil Checking the Final Drive Oil Adding Final Drive Oil Place your vehicle on the side stand on a If the final drive oil level is low, check for oil level surface. leaks. Add the recommended final drive oil Remove the oil fill hole cap and O-ring.
-
Page 63: Brakes
Brakes Checking Brake Fluid If the brake fluid level in either reservoir is below the LOWER level mark or the brake lever and pedal freeplay becomes excessive, Place your vehicle in an upright position inspect the brake pads for wear. on a firm, level surface.
-
Page 64
Brakes Inspecting the Brake Pads Inspecting the Brake Pads Inspect the brake pads from the Front bottom of the brake caliper. Inspect the brake pads Check the condition of the brake pad wear Rear (VT750CS) from the rear right of the vehicle. indicators. -
Page 65
Brakes Adjusting the Rear Brake Pedal Height Adjusting the Rear Brake Pedal Inspecting the Rear Brake Height Pedal Freeplay VT750C VT750C The stopper bolt is provided to allow Place your vehicle on its side stand on a adjustment of the pedal height. firm, level surface. -
Page 66
Brakes Adjusting the Rear Brake Pedal Freeplay Adjusting the Rear Brake Pedal Freeplay VT750C Decrease Make sure the cut-out on the adjusting nut is Brake Freeplay seated on the brake arm pin when adjusting arm pin the freeplay. Increase Brake arm pin Freeplay Adjusting nut Adjusting nut… -
Page 67
Brakes Adjusting the Rear Brake Pedal Freeplay Push the brake arm to confirm that there is a gap between the rear brake adjusting nut and brake arm pin. Brake arm Push Brake arm pin Adjusting nut After adjustment, confirm the freeplay of the brake pedal. -
Page 68
The rear brake is equipped with a brake wear See your dealer for this service. indicator. Brake When brake service is necessary, see your Arrow panel dealer. Use only Honda Genuine Parts or their equivalent. Reference mark Brake arm… -
Page 69
Brakes Adjusting the Brake Light Switch Adjusting the Brake Light Switch Check the operation of the brake light switch. Hold the brake light switch and turn the adjusting nut in the direction A if the switch operates too late, or turn the nut in the direction B if the switch operates too soon. -
Page 70: Side Stand
Side Stand Checking the Side Stand Sit on the vehicle, shift the transmission to Neutral, and raise the side stand. Start the engine, pull the clutch lever in, Side stand spring and shift the transmission into gear. Lower the side stand all the way. The engine should stop as you lower the side stand.
-
Page 71: Clutch
Clutch Checking the Clutch Check the clutch cable for kinks or signs of wear. If necessary, have it replaced by your Checking the Clutch Lever Freeplay dealer. Lubricate the clutch cable with a Check the clutch lever freeplay. commercially available cable lubricant to Freeplay at the clutch lever: prevent premature wear and corrosion.
-
Page 72
Clutch Adjusting the Clutch Lever Freeplay Adjusting the Clutch Lever Upper lock nut Freeplay – Upper Adjustment Attempt adjustment with the upper clutch cable adjuster first. Loosen the upper lock nut. Turn the upper clutch cable adjuster until Upper clutch cable adjuster the freeplay is 3/8 — 13/16 in (10 — 20 mm). -
Page 73
Clutch Adjusting the Clutch Lever Freeplay Loosen the upper lock nut and turn the Lower clutch cable adjusting nut upper clutch cable adjuster all the way in (to provide maximum freeplay). Tighten the upper lock nut. Loosen the lower lock nut. Turn the lower clutch cable adjusting nut –… -
Page 74: Throttle
Throttle Checking the Throttle Adjusting the Throttle Freeplay With the engine off, check that the throttle Slide the cable boot. rotates smoothly from fully closed to fully Loosen the lock nut. open in all steering positions and throttle Turn the adjuster until the freeplay is 1/16 freeplay is correct.
-
Page 75: Other Adjustments
Other Adjustments Adjusting the Rear Suspension Adjusting the suspension requires a pin spanner. We recommend that you have your vehicle serviced by your dealer. Spring Preload You can adjust the spring preload by the adjuster to suit the load or the road surface. Pin spanner Use the pin spanner to turn the adjuster.
-
Page 76: Troubleshooting
Troubleshooting Engine Will Not Start……..P. 73 Overheating (High coolant temperature indicator is on) ……….P. 74 Warning Indicators On or Flashing….P. 75 Low Oil Pressure Indicator …….. P. 75 PGM-FI (Programmed Fuel Injection) Malfunction Indicator Lamp (MIL)….P. 75 ABS (Anti-lock Brake System) Indicator ..
-
Page 77: Engine Will Not Start
Engine Will Not Start Starter Motor Operates But Starter Motor Does Not Engine Does Not Start Operate Check the following items: Check the following items: Check the correct engine starting Check the correct engine starting ● ● sequence. P. 25 sequence.
-
Page 78: Overheating (High Coolant Temperature Indicator Is On)
Overheating (High coolant temperature indicator is on) The engine is overheating when the following If the fan is not operating: occurs: Suspect a fault. Do not start the engine. High coolant temperature indicator Transport your vehicle to your dealer. ● comes on.
-
Page 79: Warning Indicators On Or Flashing
Warning Indicators On or Flashing Low Oil Pressure Indicator If the engine oil level goes down rapidly, your vehicle may have a leak or another serious problem. Have your vehicle inspected by If the low oil pressure indicator comes on, your dealer.
-
Page 80: Abs (Anti-Lock Brake System) Indicator
Warning Indicators On or Flashing ABS (Anti-lock Brake System) Indicator ABS (Anti-lock Brake System) The ABS indicator may flash if you turn the rear wheel while the rear wheel is lifted off Indicator the ground. In this case, turn the ignition switch to the OFF position, and then to the VT750CS ON position again.
-
Page 81: Tire Puncture
Tire Puncture WARNING Repairing a puncture or removing a wheel requires special tools and technical expertise. Riding your vehicle with a temporary We recommend you have this type of service tire or tube repair can be risky. If the performed by your dealer. temporary repair fails, you can crash After an emergency repair, always have the and be seriously injured or killed.
-
Page 82: Electrical Trouble
Electrical Trouble Battery Goes Dead Burned-out Light Bulb Charge the battery using a motorcycle Follow the procedure below to replace a battery charger. burned-out light bulb. Remove the battery from the vehicle before Turn the ignition switch to the OFF position. charging.
-
Page 83
Electrical Trouble Burned-out Light Bulb Headlight Bulb Remove the headlight bolts from the headlight case. Headlight bolts Gently pull the lower end of the headlight Headlight forward and remove the headlight. Disconnect the connector. Remove the seat rubber. Unhook the pin and remove the bulb. Install a new bulb and parts in the reverse order of removal. -
Page 84
Electrical Trouble Burned-out Light Bulb Brake Light/Taillight Bulb Front/Rear Turn Signal Bulb Taillight lens Screws Lens packing Turn signal lens Screw Bulb Bulb Remove the taillight lens by removing the Remove the turn signal lens and lens screws. packing by removing the screw. Slightly press the bulb in and turn it Slightly press the bulb and turn it counterclockwise. -
Page 85
Electrical Trouble Burned-out Light Bulb License Plate Light Bulb Remove the screws and license light cover. Pull the bulb out of the socket without turning it. Install a new bulb and parts in the reverse order of removal. After putting back the cover packing in place, install the license light cover. -
Page 86: Blown Fuse
Electrical Trouble Blown Fuse Blown Fuse Remove the right side cover. P. 53 Open the fuse box cover. Pull the fuses out one by one to check for Before handling fuses, see “Inspecting and a blown fuse. Always replace a blown fuse Replacing Fuses.”…
-
Page 87
Electrical Trouble Blown Fuse Main Fuse Remove the right side cover. P. 53 Disconnect the wire connector of the VT750C starter magnetic switch. Wire connector Pull the main fuse out and check for a blown fuse. Always replace a blown fuse with a spare fuse of the same rating. -
Page 88
Electrical Trouble Blown Fuse Fuse Box Fuses Remove the left side cover. P. 53 Remove the fuse box cover. VT750CS Pull the fuses out one by one to check for Fuse box cover a blown fuse. Always replace a blown fuse with a spare fuse of the same rating. -
Page 89
Electrical Trouble Blown Fuse Main Fuse & FI Fuse Remove the left side cover. P. 53 Remove the starter magnetic switch VT750CS cover. Starter magnetic switch cover Pull the main fuse and FI fuse out one by one and check for a blown fuse. Always replace a blown fuse with a spare fuse of the same rating. -
Page 90: Information
Vehicle Identification Number……. P. 95 Emission Control Systems ……. P. 96 Catalytic Converter ……… P. 101 Oxygenated Fuels……….P. 102 Authorized Manuals ……..P. 103 Warranty Coverage and Service ….P. 104 Honda Contacts ……….P. 107 Reporting Safety Defects ……P. 109…
-
Page 91: Keys
Keys Keys Ignition Key/Steering Lock Key Be sure to record the key number provided with the original keys. Store the spare key and key number in a safe location. To make a duplicate, take the spare key or the key number to your dealer. If you lose all ignition keys and the key number, the ignition switch assembly will probably have to be removed by your dealer to determine the…
-
Page 92: Instruments, Controls, & Other Features
Instruments, Controls, & Other Features Instruments, Controls, & Tripmeter Other Features Each tripmeter resets to 0.0 when the trip mileage exceeds 999.9. Ignition Switch Leaving the ignition switch in the ON position Document Bag with the engine stopped will drain the battery. The owner’s manual, registration, and insurance information can be stored in the plastic Do not turn the key while riding.
-
Page 93: Caring For Your Vehicle
Frequent cleaning and polishing is important to After the vehicle dries, lubricate any moving ensure the life of your Honda. A clean vehicle parts. makes it easier to spot potential problems.
-
Page 94
Caring for Your Vehicle Washing Precautions Do not direct water at the air cleaner: ● Water in the air cleaner can prevent the Follow these guidelines when washing: engine from starting. Do not use high-pressure washers: ● Do not direct water near the headlight: High-pressure water cleaners can ●… -
Page 95
Caring for Your Vehicle Aluminum Components Exhaust Pipe and Muffler Aluminum will corrode from contact with dirt, The exhaust pipe and muffler are stainless steel mud, or road salt. Clean aluminum parts but may become stained by mud or dust. regularly and follow these guidelines to avoid To remove mud or dust, use a wet sponge and scratches:… -
Page 96: Storing Your Vehicle
If you won’t be riding for an extended period, For more information about storage, refer to follow these guidelines: the Honda Winter Storage Guide, available from Wash your vehicle and wax all painted your dealer. ●…
-
Page 97: Transporting Your Vehicle
Transporting Your Vehicle Transporting Your Vehicle If your vehicle needs to be transported, it should be carried on a motorcycle trailer or a flatbed truck or trailer that has a loading ramp or lifting platform, and motorcycle tie-down straps. Never try to tow your vehicle with a wheel or wheels on the ground.
-
Page 98: You & The Environment
You & the Environment You & the Environment Recycle Wastes Put oil and other toxic wastes in approved Owning and riding a vehicle can be enjoyable, containers and take them to a recycling center. but you must do your part to protect the Call your local or state office of public works or environment.
-
Page 99: Vehicle Identification Number
Vehicle Identification Number Vehicle Identification Number The VIN and engine serial number uniquely identify your vehicle and are required in order to register your vehicle. They may also be required when ordering replacement parts. You should record these numbers and keep them in a safe place.
-
Page 100: Emission Control Systems
Emission Control Systems Emission Control Systems Engine number Your vehicle engine emits combustion byproducts, including carbon monoxide (CO), oxides of nitrogen (NOx), and hydrocarbons (HC). Gasoline evaporation also emits hydrocarbons. Controlling the production of NOx, CO, and HC is important for the environment.
-
Page 101
Noise Emission Requirements Compliance with the terms of the Distributor’s Warranties for Honda Motorcycle Emission The EPA requires that vehicles built after Control Systems is necessary in order to January 1, 1983 comply with applicable noise maintain a valid emissions system warranty. -
Page 102
Emission Control Systems Secondary Air Injection System Exhaust Emission Control System The secondary air injection system adds filtered The exhaust emission control system includes air into the exhaust gas to help improve the following components that should not need emission control performance. adjustment, although periodic inspection by your dealer is recommended. -
Page 103
Emission Control Systems Crankcase Emissions Control System Noise Emission Control System The engine is equipped with a closed crankcase TAMPERING WITH THE NOISE CONTROL system to prevent discharging crankcase SYSTEM IS PROHIBITED: emissions into the atmosphere. Blow-by gas is U. S. federal law prohibits the following acts or returned to the combustion chamber through the causing thereof: (1) The removal or the air cleaner and throttle body. -
Page 104
Emission Control Systems AMONG THOSE ACTS PRESUMED TO Problems Affecting Vehicle Exhaust CONSTITUTE TAMPERING ARE THE Emissions FOLLOWING ACTS: Have your vehicle inspected and repaired by Removal of, or puncturing the muffler, ● your dealer if you experience any of the baffles, header pipes or any other following symptoms: component which conducts exhaust gases. -
Page 105: Catalytic Converter
A defective catalytic converter contributes to air or otherwise not running properly, stop pollution and can impair your engine’s riding and turn off the engine. Have your performance. A replacement unit must be an vehicle serviced as soon as possible. original Honda part or equivalent.
-
Page 106: Oxygenated Fuels
Oxygenated Fuels Oxygenated Fuels If you accidentally fill your fuel tank with an oxygenated fuel containing higher percentages, Some conventional fuels blended with alcohol you may experience performance problems. To or an ether compound are available in some resolve the problem, have your dealer drain the locales to help reduce emissions to meet clean fuel tank and replace with the correct fuel.
-
Page 107: Authorized Manuals
However, if you possess The Service Manual used by your authorized the proper tools, observe the safety standards, dealer is available from your Honda dealer or and are mechanically capable, you should find Helm, Inc. them easy to use.
-
Page 108: Warranty Coverage And Service
Service workmanship of your Honda. Your warranty coverage does not apply to the normal wear Coverage and deterioration associated with use of the Your new Honda is covered by the following vehicle. warranties: Vehicle Limited Warranty ● Your warranty coverage is not voided if you Emission Control System Warranty ●…
-
Page 109
Warranty Coverage and Service authorized service provider caused damage to Statement on Warranty Coverage for another part of the vehicle otherwise covered Aftermarket and Recycled Parts under warranty before denying warranty The Magnuson-Moss Warranty Act, 15 U.S.C. s. coverage. Additionally, federal law allows a 2301 et seq., makes it illegal for motor vehicle manufacturer to void a motor vehicle warranty manufacturers to void a motor vehicle warranty… -
Page 110
If you believe you have a problem with your dealership or their designated representative. vehicle, call the service department of your Honda dealer. Make an appointment for an inspection and diagnosis. You will be asked to authorize that inspection, and your dealer will return the results of the inspection. -
Page 111: Honda Contacts
Dealer name and address ● or with your dealer, please send your comments using one of the following methods: We will likely ask your Honda dealer to respond, or possibly acknowledge your comments directly. Powersports Customer Relations American Honda Motor Co., Inc.
-
Page 112
Honda Contacts Your Honda Dealer The service department of your Honda dealer offers trained personnel to perform regular maintenance and unexpected repairs. It has the latest available service information from Honda and also handles warranty inspections and repairs. The parts department offers Honda Genuine… -
Page 113: Reporting Safety Defects
However, NHTSA cannot become involved in individual problems between you, your dealer, or American Honda Motor Co., Inc.
-
Page 114: Specifications
Specifications Main Components ■ Tank capacity 3.70 US gal (14.0 L) Overall length 98.8 in (2,510 mm) YTZ14S Battery Overall width 36.2 in (920 mm) 12 V-11.2 Ah (10 HR) Overall height 44.3 in (1,125 mm) 2.400 Wheelbase 64.6 in (1,640 mm) 1.550 Minimum ground Gear ratio…
-
Page 115
160/80-15M/C 74S Recommended SAE 10W-30, JASO T 903 standard MA, Pro Tire type bias-ply, tube engine oil Honda GN4 4-stroke oil (USA & Canada) or DUNLOP D404 FG Honda 4-stroke oil, or an equivalent Front BRIDGESTONE G701 motorcycle oil CHENG SHIN M6002… -
Page 116
Specifications Bulbs Torque Specifications ■ ■ Headlight 12 V-60/55 W Battery cover screw 0.7 lbf·ft (1 N·m, 0.1 kgf·m) Brake light/Taillight 12 V-21/5 W Seat mounting bolt B 19 lbf·ft (26 N·m, 2.7 kgf·m) Front turn signal 12 V-21/5 W x 2 Seat mounting bolt A 9 lbf·ft (12 N·m, 1.2 kgf·m) Rear turn signal… -
Page 117
Information Record Engine No. Color Label & Code Owner’s Name Address City/State Phone Dealer’s Name Address City/State Phone Service Manager… -
Page 118
California Proposition 65 Warning WARNING: Operating, servicing and maintaining a passenger vehicle or off-highway motor vehicle can expose you to chemicals including engine exhaust, carbon monoxide, phthalates, and lead, which are known to the State of California to cause cancer and birth defects or other reproductive harm. -
Page 119
31MJA630 00X31-MJA-6300 PRINTED IN USA…
МОТО СЕРВИС МАНУАЛ
Продолжается перевод мануала на мотоцикл Honda VT750C Shadow Aero (2003-2014)
В мануале 462 стр.
Переведено 260 стр. или 56%. «Экватор» прошли.
")
Комментарии:
 ВКонтакте
Андрей Вдовин
О нашей книге.

«Огромное спасибо!!! Мануал просто огонь!!! В нем я нашёл даже больше чем ожидал. Женя, ты сверхчеловек!!!!!»
Сергей Игнатов
О нашей книге.

«Женя, спасибо, книга блеск я счастлив как «слон»»
Димыч Дубов
О нашей книге.

«. . . Особенно понравились плакаты, хорошая шпаргалка в гараже. Рекомендую.«
Технические характеристики:
Год выпуска: 2009-2020
Рама: стальная трубчатая
Тип двигателя: 2-цилиндровый, 4-тактный, V-образный 52°
Рабочий объем: 745 см³
Диаметр цилиндра/ход поршня: 79,0 x 76,0 мм
Степень сжатия: 9.0:1
Охлаждение: жидкостное
Количество клапанов на цилиндр: SOHC, 3 клапана на цилиндр (с гидрокомпенсаторами)
Система подачи топлива: Впрыск топлива PGM-FI
Тип зажигания: цифровое транзисторное
Максимальная мощность: 44 л.с. при 5500 об/мин
Максимальный крутящий момент: 62 Нм (6,3 кг*м) при 4500 об/мин
Сцепление: Многодисковое в масляной ванне, тросовый привод
Коробка передач: 5-ступенчатая
Тип привода на заднее колесо: кардан
Размер передней шины: 90/90-R21 для Spirit , 120/90-R17 Aero/Phantom
Размер задней шины: 160/80-R15 (74S)
Передние тормоза: 1 диск, 296 мм, 2-поршневой суппорт
Задние тормоза: 1 диск, 2-поршневой суппорт
Передняя подвеска: Телескопическая вилка, 115-117 мм
Задняя подвеска: маятниковая с двумя амортизаторами, 80-90 мм
Колесная база: 1640/1655 мм
Высота по седлу: 655-660 мм
Минимальный дорожный просвет (клиренс): 130 мм
Разгон до 100 км/ч : 7.3 сек.
Максимальная скорость: 164 км/ч
Емкость бензобака: 14 литров (включая резерв – 3,6 л)
Масса мотоцикла (снаряженная): 246-263 кг