Материал из BikesWiki — энциклопедия японских мотоциклов
Перейти к: навигация, поиск

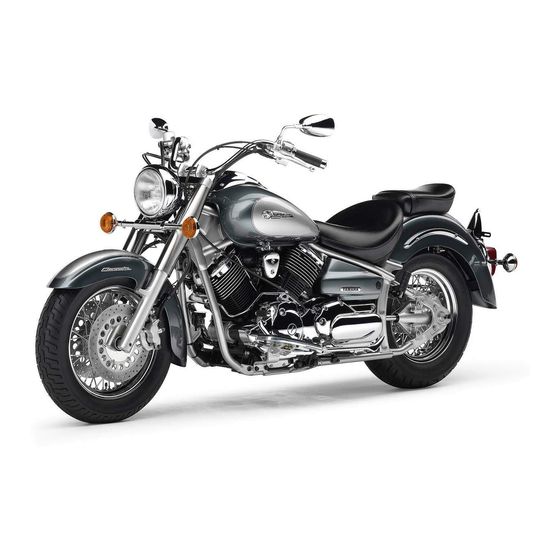
Yamaha XVS400 Drag Star (Custom)
Ниже представлены прямые ссылки на скачку сервисной документации.
Для Yamaha XVS400/XVS650 Drag Star
- Руководство пользователя (Owners Manual) для Yamaha XVS650 Drag Star (на русском)
- Сервисный мануал (Service Manual) для Yamaha XVS650 Drag Star
Обзор модели
- Yamaha XVS650 Drag Star
- Yamaha XVS400 Drag Star
Источник — «https://bikeswiki.ru/index.php?title=Yamaha_XVS400-650_Drag_Star:_мануалы&oldid=10111»
Категория:
- Сервисная документация
![]()
4-я Красноармейская, 2А
Санкт-Петербург, 190005
Email: info@lenmoto.ru
Телефон: +7 (921) 930-81-18
Телефон: +7 (911) 928-08-06
Компания ЛенМото
Запчасти, аксессуары, экипировка, тюнинг для мотоциклов, скутеров, квадроциклов, снегоходов, багги, гидроциклов, катеров и лодочных моторов.
Подпишитесь на наши новости
Подписаться

Руководство по эксплуатации и техническому обслуживанию мотоциклов Yamaha моделей XVS650 и XVS650A Drag Star.
- Издательство: Yamaha Motor Co., Ltd.
- Год издания: 2001
- Страниц: 112
- Формат: PDF
- Размер: 6,2 Mb

Руководство по эксплуатации и техническому обслуживанию мотоциклов Yamaha XVS950A Star.
- Издательство: Yamaha Motor Co., Ltd.
- Год издания: 2011
- Страниц: 83
- Формат: PDF
- Размер: 1,7 Mb

Руководство по эксплуатации и техническому обслуживанию мотоциклов Yamaha моделей XVS1100 и XVS1100A Drag Star.
- Издательство: Yamaha Motor Co., Ltd.
- Год издания: 2001
- Страниц: 110
- Формат: PDF
- Размер: 5,2 Mb
Руководство по эксплуатации и техническому обслуживанию мотоциклов Yamaha XVS1300A Midnight Star.
- Издательство: Yamaha Motor Co., Ltd.
- Год издания: 2010
- Страниц: 92
- Формат: PDF
- Размер: 1,8 Mb
Сборник руководств на английском языке по эксплуатации и техническому обслуживанию мотоциклов Yamaha моделей XVS11 Star, XVS13 V-Star, XVS65 V-Star, XVS125 Drag Star, XVS250 Drag Star, XVS650 V-Star (Drag Star), XVS950 Star (Midnight Star), XVS1100 V-Star (Drag Star) и XVS1300A Midnight Star различных модификаций.
- Издательство: Yamaha Motor Co., Ltd.
- Год издания: —
- Страниц: —
- Формат: PDF
- Размер: 233,4 Mb
Руководство на английском языке по ремонту мотоциклов Yamaha моделей XVS13AW, XVS13AWC, XVS13CTW и XVS13CTWC.
- Издательство: Yamaha Motor Co., Ltd.
- Год издания: 2006
- Страниц: 422
- Формат: PDF
- Размер: 12,3 Mb
Руководство на английском языке по ремонту мотоциклов Yamaha моделей XVS650AK и XVS650AKC.
- Издательство: Yamaha Motor Co., Ltd.
- Год издания: 1997
- Страниц: 360
- Формат: PDF
- Размер: 14,7 Mb
Руководство на английском языке по ремонту мотоциклов Yamaha моделей XVS1100 и XVS1100L 1999 года выпуска.
- Издательство: Yamaha Motor Co., Ltd.
- Год издания: 1998
- Страниц: 355
- Формат: PDF
- Размер: 7,3 Mb

Сборник руководств на английском, французском, немецком, испанском и итальянском языках по ремонту мотоциклов Yamaha моделей XVS650A, XVS1100A и др.
- Издательство: Yamaha
- Год издания: —
- Страниц: —
- Формат: ISO
- Размер: 1,7 Gb

-
Contents
-
Table of Contents
-
Troubleshooting
-
Bookmarks
Related Manuals for Yamaha Drag Star XVS650
Summary of Contents for Yamaha Drag Star XVS650
-
Page 1
OWNER’S MANUAL XVS650 XVS650A 4VR-28199-E3… -
Page 2
EAU00001 Welcome to the Yamaha world of motorcycling! As the owner of a XVS650/XVS650A, you are benefiting from Yamaha’s vast experi- ence in and newest technology for the design and the manufacture of high-quality prod- ucts, which have earned Yamaha a reputation for dependability. -
Page 3: Important Manual Information
This manual should be considered a permanent part of this motorcycle and should remain with it even if the motorcycle is subsequently sold. Yamaha continually seeks advancements in product design and quality. Therefore, while this manual contains the most current product information available at the time of printing, there may be minor discrepancies between your motorcycle and this manual.
-
Page 4
IMPORTANT MANUAL INFORMATION EW000002 WARNING PLEASE READ THIS MANUAL CAREFULLY AND COMPLETELY BEFORE OPERATING THIS MOTORCYCLE. -
Page 5
EAU00008 XVS650/XVS650A OWNER’S MANUAL 1999 by Yamaha Motor Co., Ltd. 1st Edition, May 1999 All rights reserved. Any reprinting or unauthorized use without the written permission of Yamaha Motor Co., Ltd. is expressly prohibited. Printed in Japan. -
Page 6: Table Of Contents
EAA30002 TABLE OF CONTENTS EAU00009 1 GIVE SAFETY THE RIGHT OF WAY 2 DESCRIPTION 3 INSTRUMENT AND CONTROL FUNCTIONS 4 PRE-OPERATION CHECKS 5 OPERATION AND IMPORTANT RIDING POINTS 6 PERIODIC MAINTENANCE AND MINOR REPAIR 7 MOTORCYCLE CARE AND STORAGE 8 SPECIFICATIONS 9 CONSUMER INFORMATION INDEX…
-
Page 8: Give Safety The Right Of Way
GIVE SAFETY THE RIGHT OF WAY GIVE SAFETY THE RIGHT OF WAY ……….1-1…
-
Page 9
GIVE SAFETY THE RIGHT OF WAY GIVE SAFETY THE RIGHT OF WAY EAU00021 Motorcycles are fascinating vehicles, which can give you an unsurpassed feeling of power and freedom. However, they also impose certain limits, which you must accept; even the best motorcycle does not ig- nore the laws of physics. -
Page 10: Description
DESCRIPTION Left view (XVS650) …………….2-1 Right view (XVS650) …………….2-2 Left view (XVS650A) …………….2-3 Right view (XVS650A) …………… 2-4 Controls/Instruments (XVS650/XVS650A)……… 2-5…
-
Page 11: Left View (Xvs650)
DESCRIPTION EAU00026 Left view (XVS650) 1. Shift pedal (page 3-5) 2. Fuel cock (page 3-8) 3. Starter (choke) “ ” (page 3-9) 4. Rear shock absorber spring preload adjusting ring (page 3-14) 5. Helmet holder (page 3-12) 6. Storage compartment (page 3-13) 7.
-
Page 12: Right View (Xvs650)
DESCRIPTION Right view (XVS650) 8. Oil filter (page 6-10) 9. Battery (page 6-26) 10. Fuses (page 6-27) 11. Main switch (page 3-1) 12. Air filter (page 6-12) 13. Rear brake pedal (page 3-6)
-
Page 13: Left View (Xvs650A)
DESCRIPTION Left view (XVS650A) 1. Shift pedal (page 3-5) 2. Fuel cock (page 3-8) 3. Starter (choke) “ ” (page 3-9) 4. Rear shock absorber spring preload adjusting ring (page 3-14) 5. Helmet holder (page 3-12) 6. Storage compartment (page 3-13) 7.
-
Page 14: Right View (Xvs650A)
DESCRIPTION Right view (XVS650A) 8. Oil filter (page 6-10) 9. Battery (page 6-26) 10. Fuses (page 6-27) 11. Main switch (page 3-1) 12. Air filter (page 6-12) 13. Rear brake pedal (page 3-6)
-
Page 15: Controls/Instruments (Xvs650/Xvs650A)
DESCRIPTION Controls/Instruments (XVS650/XVS650A) 14. Clutch lever (page 3-5) 15. Left handlebar switches (page 3-3) 16. Speedometer (page 3-2) 17. Fuel tank cap (page 3-6) 18. Right handlebar switches (page 3-4) 19. Throttle grip (page 6-15) 20. Front brake lever (page 3-5)
-
Page 16: Instrument And Control Functions
Fuel ………………..3-7 Fuel tank breather hose …………..3-7 Fuel cock……………….. 3-8 Starter (choke) “ ” …………….3-9 Seats (for XVS650) …………….3-9 Seats (for XVS650A)……………. 3-11 Helmet holder………………. 3-12 Storage compartment …………..3-13 Rear shock absorber adjustment …………. 3-14 Luggage strap holders …………..
-
Page 17: Main Switch/Steering Lock
INSTRUMENT AND CONTROL FUNCTIONS EAU00027 EAU00029 1. Push Main switch/Steering lock The key can be removed in this posi- 2. Turn tion. To lock the steering, turn the han- The main switch controls the ignition EAU00044 (Parking) dlebars all the way to the left. While and lighting systems.
-
Page 18: Indicator Lights
In such a case, take the motorcycle to 2. Turn indicator light “ ” 2. Speedometer 3. Neutral indicator light “ ” a Yamaha dealer to have the self-diag- 3. Odometer 4. Engine trouble indicator light “ ” 4. Trip odometer nostic systems checked.
-
Page 19: Antitheft Alarm (Optional)
Pass switch “ ” Press the switch to operate the pass- An antitheft alarm can be equipped to ing light. this motorcycle. Consult your Yamaha dealer to obtain and install the alarm. EAU00121 Dimmer switch Turn the switch to “…
-
Page 20: Instrument And Control Functions
INSTRUMENT AND CONTROL FUNCTIONS EAU00138 Engine stop switch The engine stop switch is a safety de- vice for use in an emergency such as when the motorcycle overturns or if trouble occurs in the throttle system. Turn the switch to “ ”…
-
Page 21: Clutch Lever
INSTRUMENT AND CONTROL FUNCTIONS EAU00152 EAU00157 EAU00158 Clutch lever Shift pedal Front brake lever The clutch lever is located on the left This motorcycle is equipped with a The front brake lever is located on the handlebar, and the ignition circuit cut- constant-mesh 5-speed transmission.
-
Page 22: Rear Brake Pedal
INSTRUMENT AND CONTROL FUNCTIONS EW000023 WARNING Be sure the cap is properly installed and locked in place before riding the motorcycle. EAU00162 EAU00167 Rear brake pedal Fuel tank cap The rear brake pedal is on the right To open side of the motorcycle. Press down on Insert the key and turn it 1/4 turn clock- the brake pedal to apply the rear wise.
-
Page 23: Fuel
INSTRUMENT AND CONTROL FUNCTIONS EAU00185 CAUTION: Always wipe off spilled fuel immedi- ately with a dry and clean soft cloth. Fuel may deteriorate painted sur- faces or plastic parts. EAU00191 1. Filler tube 1. Fuel tank breather hose Recommended fuel: 2.
-
Page 24: Fuel Cock
INSTRUMENT AND CONTROL FUNCTIONS Off position Normal position Reserve position 1. Arrow mark positioned over “OFF” 1. Arrow mark positioned over “ON” 1. Arrow mark positioned over “RES” EAU02969 Fuel cock With the fuel cock in this position, fuel This indicates reserve. If you run out of The fuel cock supplies fuel from the flows to the carburetors.
-
Page 25: Starter (Choke)
” 1. Nut EAU02973 EAU01889 Starter (choke) “ ” Seats (for XVS650) Starting a cold engine requires a richer Passenger seat air-fuel mixture. A separate starter cir- To remove cuit supplies this mixture. Remove the nut and pull the seat up- Move in direction a to turn on the ward.
-
Page 26
INSTRUMENT AND CONTROL FUNCTIONS XVS650 XVS650 1. Bolt ( 2) 1. Seat holder 2. Seat holder 2. Projection 3. Projection Rider seat To install To remove Insert the projection on the front of the 1. Remove the passenger seat. seat into the seat holder and install the 2. -
Page 27: Seats (For Xvs650A)
INSTRUMENT AND CONTROL FUNCTIONS XVS650A XVS650A XVS650A 1. Bolt 1. Seat holder 1. Bolt 2. Projection ( 2) EAU01888 Seats (for XVS650A) To install Rider seat Passenger seat Insert the projections on the front of the To remove To remove seat into the holder and install the bolt.
-
Page 28: Helmet Holder
INSTRUMENT AND CONTROL FUNCTIONS XVS650A 1. Seat holder 1. Helmet holder 2. Projection EAU00260 Helmet holder To install To open the helmet holder, insert the 1. Insert the projection on the front of key in the lock and turn it as shown. To the seat into the holder and install lock the helmet holder, replace the the bolt.
-
Page 29: Storage Compartment
INSTRUMENT AND CONTROL FUNCTIONS 1. Compartment cover 1. Storage compartment 2. Lock To open To close EAU01869 Slide the lock cover open, insert the Storage compartment Place the storage compartment cover key in the lock and turn it clockwise. The storage compartment is located in its original position as shown.
-
Page 30: Rear Shock Absorber Adjustment
Do not deform or damage the 1. Remove the passenger seat and cylinder in any way. Cylinder rider seat. (See page 3-9 for re- damage will result in poor moval procedures.) damping performance. Take your shock absorber to a Yamaha dealer for any service. 3-14…
-
Page 31: Luggage Strap Holders
5-1 for an explanation of this sys- resulting in a possible loss of con- tem.) trol. Yamaha has designed into this 1. Luggage strap holder ( 2) motorcycle a lockout system to as- EAU01172…
-
Page 32: Sidestand/Clutch Switch Operation Check
AND THE ENGINE STOP SWITCH TO EW000045 “ ”. WARNING If improper operation is noted, con- sult a Yamaha dealer immediately. TRANSMISSION IS IN GEAR AND SIDESTAND IS UP. PULL IN CLUTCH LEVER AND PUSH THE START SWITCH. ENGINE WILL START.
-
Page 34: Pre-Operation Checks
PRE-OPERATION CHECKS Pre-operation check list…………..4-1…
-
Page 35: Pre-Operation Check List
PRE-OPERATION CHECKS EAU01114 Owners are personally responsible for their vehicle’s condition. Your motorcycle’s vital functions can start to deteriorate quickly and unexpectedly, even if it remains unused (for instance, if it is exposed to the elements). Any damage, fluid leak or loss of tire pressure could have serious consequences.
-
Page 36
PRE-OPERATION CHECKS ITEM CHECKS PAGE • Make sure that all nuts, bolts and screws are properly tightened. Chassis fasteners — • Tighten if necessary. • Check fuel level. Fuel tank • Fill with fuel if necessary. Lights, signals and switches •… -
Page 38: Operation And Important Riding Points
OPERATION AND IMPORTANT RIDING POINTS Starting the engine…………….5-1 Starting a warm engine…………..5-4 Shifting ………………..5-4 Tips for reducing fuel consumption ………… 5-5 Engine break-in……………… 5-5 Parking ………………..5-6…
-
Page 39: Starting The Engine
Consult the following conditions: Yamaha dealer regarding any The transmission is in neutral. control or function that you do The sidestand is up, the transmis- not thoroughly understand. sion is in gear and the clutch is Never start your engine or let it disengaged.
-
Page 40
OPERATION AND IMPORTANT RIDING POINTS COPY CF-28ECF-28E TURN THE MAIN SWITCH TO “ON” AND THE ENGINE STOP SWITCH TO “ ”. IF TRANSMISSION IS IN NEUTRAL AND IF TRANSMISSION IS IN GEAR AND SIDESTAND IS DOWN, SIDESTAND IS UP, PUSH START SWITCH. PULL IN CLUTCH LEVER AND PUSH START ENGINE WILL START. -
Page 41
10 seconds on any one attempt. If the light does not come on, ask a 6. After starting the engine, move Yamaha dealer to inspect it. the starter (choke) to the halfway 4. Turn on the starter (choke) and position. -
Page 42: Starting A Warm Engine
OPERATION AND IMPORTANT RIDING POINTS EAU01258 EC000048 Starting a warm engine CAUTION: The starter (choke) is not required Do not coast for long periods when the engine is warm. with the engine off, and do not EC000046 tow the motorcycle a long dis- CAUTION: tance.
-
Page 43: Tips For Reducing Fuel Consumption
Turn off the engine instead of let- If any engine trouble should occur ting it idle for an extended length during the break-in period, consult of time, i.e. in traffic jams, at traffic a Yamaha dealer immediately. lights or railroad crossings.
-
Page 44: Parking
OPERATION AND IMPORTANT RIDING POINTS EAU00457 Parking When parking the motorcycle, stop the engine and remove the ignition key. Turn the fuel cock to “OFF” whenever stopping the engine. EW000058 WARNING The exhaust system is hot. Park the motorcycle in a place where pedes- trians or children are not likely to touch the motorcycle.
-
Page 46: Periodic Maintenance And Minor Repair
PERIODIC MAINTENANCE AND MINOR REPAIR Tool kit …………..6-1 Inspecting the brake fluid level……6-22 Periodic maintenance and lubrication ….6-2 Brake fluid replacement ……..6-22 Panel removal and installation……6-5 Cable inspection and lubrication……. 6-23 Panel A …………… 6-6 Throttle cable and grip lubrication…..
-
Page 47: Tool Kit
Consult a Yamaha dealer be- be considered strictly as a guide to of periodic maintenance. However, fore attempting any changes.
-
Page 48: Periodic Maintenance And Lubrication
PERIODIC MAINTENANCE AND MINOR REPAIR EAU00473 PERIODIC MAINTENANCE AND LUBRICATION EVERY 6,000 km 12,000 km Initial ITEM CHECKS AND MAINTENANCE JOBS (1,000 km) 6 months 12 months (whichever (whichever comes first) comes first) • Check fuel hoses for cracks or damage. Fuel line •…
-
Page 49
PERIODIC MAINTENANCE AND MINOR REPAIR EVERY 6,000 km 12,000 km Initial ITEM CHECKS AND MAINTENANCE JOBS (1,000 km) 6 months 12 months (whichever (whichever comes first) comes first) • Check swingarm pivoting point for play. • Correct if necessary. Swingarm •… -
Page 50
Final gear oil • Change oil at initial 1,000 km and thereafter every 24,000 km or 24 months (whichever comes first). Since these items require special tools, data and technical skills, they should be serviced by a Yamaha dealer. EAU02970 NOTE: The air filter needs more frequent service if you are riding in unusually wet or dusty areas. -
Page 51: Panel Removal And Installation
PERIODIC MAINTENANCE AND MINOR REPAIR XVS650 XVS650A 1. Panel A 1. Panel A 1. Panel B EAU01122 Panel removal and installation The panels illustrated need to be re- moved to perform some of the mainte- nance described in this chapter. Refer to this section each time a panel has to be removed or reinstalled.
-
Page 52: Panel A
PERIODIC MAINTENANCE AND MINOR REPAIR XVS650 XVS650A 1. Bolt ( 4) 1. Bolt ( 4) EAU01573 Panel A To remove Remove the bolts. To install Place the panel in its original position and install the bolts.
-
Page 53: Panel B
PERIODIC MAINTENANCE AND MINOR REPAIR 1. Bolt 1. Spark plug cap To install EAU00491 EAU01485 Place the panel in its original position Panel B Spark plugs and install the bolt. To remove Removal Remove the bolt and pull outward on 1.
-
Page 54
Do not attempt to diagnose such problems yourself. Instead, take the motorcycle to a Yamaha dealer. You should periodi-… -
Page 55: Engine Oil
PERIODIC MAINTENANCE AND MINOR REPAIR Tightening torque: Spark plug: 20 Nm (2.0 m·kg) NOTE: If a torque wrench is not available when you are installing a spark plug, a good estimate of the correct torque is 1. Maximum level mark 1.
-
Page 56
PERIODIC MAINTENANCE AND MINOR REPAIR 1. Engine oil filler cap 1. Cover 1. Bolt ( 5) 2. Bolt ( 3) 2. Oil filter cover Engine oil and oil filter element re- 4. Remove the cover and the oil filter 8. Install oil filter cover and cover, placement cover by removing the bolts. -
Page 57: Final Gear Oil
PERIODIC MAINTENANCE AND MINOR REPAIR 2. Remove the oil filler bolt and check the oil level. The oil level should be at the brim of the filler hole. Add the recommended oil if necessary. Oil replacement 1. Place an oil pan under the final gear case.
-
Page 58: Air Filter
PERIODIC MAINTENANCE AND MINOR REPAIR Final gear oil quantity: 0.19 L Recommended oil: SAE 80 API GL-4 Hypoid gear oil If desired, an SAE 80W90 hypoid gear oil may be used for all conditions. 1. Air filter case cover NOTE: 3.
-
Page 59: Carburetor Adjustment
The carburetors are important parts of the engine and require very sophisti- cated adjustment. Most adjustments should be left to a Yamaha dealer who has the professional knowledge and experience to do so. However, the idle speed may be adjusted by the owner 1.
-
Page 60: Idle Speed Adjustment
Standard idle speed: 1,150 ~ 1,250 r/min NOTE: If the specified idle speed cannot be obtained by performing the above ad- justment, consult a Yamaha dealer. 6-14…
-
Page 61: Throttle Cable Free Play Inspection
There should be a free play of 4 ~ long service, and safe operation, note 6 mm at the throttle grip. If the free play the following: is incorrect, ask a Yamaha dealer to make this adjustment. Tire air pressure Always check and adjust the tire pres- sure before operating the motorcycle.
-
Page 62
Properly adjust the suspen- sion for your load, and check the COPY CE-32ECE-32E condition and pressure of your XVS650 tires. NEVER OVERLOAD YOUR Maximum load* 180 kg MOTORCYCLE. Make sure the total Cold tire pressure… -
Page 63: Wheels
Failure to FRONT (XVS650A) wheel parts replacement have a wheel balanced can result Manufacturer Size Type should be left to a Yamaha Ser- in poor performance, adverse Bridgestone 130/90-16 67S G703 vice Technician. handling characteristics, Dunlop 130/90-16 67S…
-
Page 64: Clutch Lever Free Play Adjustment
PERIODIC MAINTENANCE AND MINOR REPAIR 1. Locknut 1. Adjusting nut 2. Adjusting bolt 2. Locknut c. Free play If the specified free play cannot be ob- EAU00694 tained, proceed with the following Clutch lever free play steps. adjustment 4. Loosen the locknut at the clutch The clutch lever free play should be lever.
-
Page 65: Front Brake Lever Free Play Adjustment
PERIODIC MAINTENANCE AND MINOR REPAIR accident. Have a Yamaha dealer inspect and bleed the system if necessary. 1. Locknut a. Free play 2. Adjusting bolt EW000099 EAU00696 WARNING Front brake lever free play Check the brake lever free play. adjustment…
-
Page 66: Rear Brake Pedal Height And Free Play Adjustment
Free play WARNING c. Tighten the locknut. The brake pedal free play should be It is advisable to have a Yamaha adjusted to 20 ~ 30 mm at the brake dealer make this adjustment. pedal end. Turn the adjusting nut on…
-
Page 67: Brake Light Switch Adjustment
EAU01119 If the indicator reaches the wear limit justed when the brake light comes on Front brake line, ask a Yamaha dealer to replace just before braking takes effect. To ad- Wear indicator grooves are provided the shoes. just the rear brake light switch, hold the on each brake pad.
-
Page 68: Inspecting The Brake Fluid Level
Brake fluid replacement brake fluid. Otherwise, the rubber The brake fluid should be replaced seals may deteriorate, causing only by trained Yamaha service per- leakage and poor brake perfor- sonnel. Have the Yamaha dealer re- mance. place the following components during…
-
Page 69: Cable Inspection And Lubrication
Lubricate the pivoting parts. Lubricate the cables and cable ends. If a suitable all-purpose grease. a cable does not operate smoothly, Recommended lubricant: ask a Yamaha dealer to replace it. Engine oil Recommended lubricant: Engine oil 6-23…
-
Page 70: Brake And Clutch Lever Lubrication
Lubricate the sidestand pivoting point and metal-to-metal contact surfaces. Lubricate the pivoting parts. Check that the sidestand moves up Recommended lubricant: and down smoothly. Engine oil Recommended lubricant: Engine oil EW000113 WARNING If the sidestand does not move smoothly, consult a Yamaha dealer. 6-24…
-
Page 71: Front Fork Inspection
If EC000098 any free play can be felt, ask a CAUTION: Yamaha dealer to inspect and adjust the steering. Inspection is easier if the If any damage or unsmooth move- front wheel is removed. ment is found with the front fork, consult a Yamaha dealer.
-
Page 72: Wheel Bearings
Therefore it is not and dangerous, causing severe smoothly, have a Yamaha dealer in- necessary to check the electrolyte or burns, etc. It contains sulfuric acid. spect the wheel bearings.
-
Page 73: Fuse Replacement
Substitution of a fuse of contact your Yamaha dealer. question. Install a new fuse of proper improper rating can cause exten- Always make sure the connec- amperage.
-
Page 74: Headlight Bulb Replacement
PERIODIC MAINTENANCE AND MINOR REPAIR Specified fuses: Main fuse: 30 A Ignition fuse: 10 A Signaling system fuse: 10 A Headlight fuse: 15 A Carburetor heater fuse: 15 A 1. Screw ( 2) 1. Bulb holder EAU00833 3. Turn the bulb holder counter- Headlight bulb replacement clockwise to remove it and re- This motorcycle is equipped with a…
-
Page 75: Turn Signal And Taillight Bulb Replacement
Turn signal and taillight bulb 5. Install the bulb cover, connectors Push the bulb inward and turn it replacement and headlight unit. Ask a Yamaha clockwise until it engages into the 1. Remove the screws and the lens. dealer to adjust the headlight socket.
-
Page 76: Supporting The Motorcycle
PERIODIC MAINTENANCE AND MINOR REPAIR EAU01579 XVS650A Supporting the motorcycle Since the Yamaha XVS650/XVS650A has no centerstand, follow these pre- cautions when removing the front and rear wheel or performing other mainte- nance requiring the motorcycle to stand upright. Check that the motor- cycle is in a stable and level position 1.
-
Page 77: Front Wheel Removal
It is advisable to have a a suitable stand under the en- gear unit are installed with the Yamaha dealer service the gine. projections meshed into the slots. wheel. 4. Remove the wheel axle and the 2.
-
Page 78: Rear Wheel Removal
20 Nm (2.0 m·kg) Rear wheel removal EW000122 7. Install the speedometer cable. WARNING It is advisable to have a Yamaha dealer service the wheel. Securely support the motor- cycle so there is no danger of it falling over. 6-32…
-
Page 79: Rear Wheel Installation
PERIODIC MAINTENANCE AND MINOR REPAIR 3. Insert the brake rod into the brake cam lever and install the brake pedal free play adjusting nut. 4. Install the brake torque rod bolt and tighten both bolts to the spec- ified tightening torque. Specified torque: Brake torque rod bolts: 1.
-
Page 80: Troubleshooting
If your motorcycle requires any repair, bring it to a Yamaha dealer. The skilled technicians at a Yamaha dealership have the tools, experience, and know- how to properly service your motor- cycle.
-
Page 81: Troubleshooting Chart
Remove spark plugs and check electrodes. Engine doesn’t start, go to battery Dry. Ask a Yamaha dealer to inspect. check. 4. Battery Engine turns over Battery good. quickly. Engine doesn’t start, ask a Yamaha Use the electric starter.
-
Page 82: Motorcycle Care And Storage
MOTORCYCLE CARE AND STORAGE EAU01010* Care ………………..7-1 Storage ………………..7-4…
-
Page 83: Motorcycle Care And Storage
MOTORCYCLE CARE AND STORAGE EAU01521 Care Before cleaning Cleaning 1. Cover up the muffler outlets with After normal use The exposure of its technology makes plastic bags. Remove dirt with warm water, a neutral a motorcycle charming but also vulner- 2.
-
Page 84
MOTORCYCLE CARE AND STORAGE ECA00010 Do not use any harsh chemical For motorcycles equipped with CAUTION: products on plastic parts. Be a windshield: Do not use strong Avoid using strong acidic sure to avoid using cloths or cleaners or hard sponges as wheel cleaners, especially on sponges which have been in they will cause dulling or… -
Page 85
6. Wax all painted surfaces. Avoid using abrasive polishing 7. Let the motorcycle dry completely compounds as they wear away before storing it or covering it. the paint. NOTE: Consult a Yamaha dealer for advice on what products to use. -
Page 86
MOTORCYCLE CARE AND STORAGE Storage Long-term c. Install the spark plug caps onto Before storing your motorcycle for sev- the spark plugs and place the Short-term eral months: spark plugs on the cylinder head Always store your motorcycle in a cool, 1. -
Page 87
MOTORCYCLE CARE AND STORAGE 7. Check and, if necessary, correct the tire air pressure, then raise the motorcycle so that both of its wheels are off the ground. Alter- natively, turn the wheels a little ev- ery month in order to prevent the tires from becoming degraded in one spot. -
Page 88: Specifications
SPECIFICATIONS Specifications………………8-1 HOW TO USE THE CONVERSION TABLE ……..8-6…
-
Page 89
SPECIFICATIONS EAU01038 Specifications Model XVS650/XVS650A Engine Dimensions Engine type Air-cooled 4-stroke, SOHC XVS650 Cylinder arrangement V type 2-cylinder Overall length 2,340 mm Displacement 649 cm Overall width 880 mm Bore stroke 63 mm Overall height 1,065 mm Compression ratio Starting system… -
Page 90
SAE80API “GL-4” Hypoid Gear 1.900 1.458 Quantity 0.19 L 1.166 Air filter Dry type element 0.966 Fuel Chassis Type Regular unleaded gasoline XVS650 Fuel tank capacity 16 L Frame type Double cradle Reserve amount Caster angle 35˚ Carburetor Trail 153 mm Type quantity… -
Page 91
Double cradle Type Tube Caster angle 35˚ Front Trail 145 mm Size 130/90-16 67S Tires Manufacturer/ model Bridgestone / G703 XVS650 Dunlop / D404F Type Tube Rear Front Size 100/90-19 57S Size 170/80-15 M/C 77S Manufacturer/ Manufacturer/ model Bridgestone / L309… -
Page 92
SPECIFICATIONS Wheels Suspension XVS650 Front Front Type Telescopic fork Type Spoke Rear Size MT2.50 Type Swingarm Rear Shock absorber Type Spoke Front Coil spring/oil damper Size 15M/C MT3.50 Rear Coil spring/gas-oil damper, spring preload adjustable XVS650A Wheel travel Front XVS650… -
Page 93
SPECIFICATIONS Headlight type Quartz bulb (halogen) Fuses Bulb voltage, wattage quantity Main fuse 30 A XVS650 Ignition fuse 10 A Headlight 12 V, 60/55 W Signaling system fuse 10 A Auxiliary light 12 V, 4 W 1 (except for GB) -
Page 94: How To Use The Conversion Table
SPECIFICATIONS EAU01064 HOW TO USE THE CONVERSION TABLE CONVERSION TABLE All specification data in this manual are listed in SI and METRIC TO IMPERIAL METRIC UNITS. Metric unit Multiplier Imperial unit Use this table to convert METRIC unit data to IMPERIAL m·kg 7.233 ft·lb…
-
Page 96: Consumer Information
CONSUMER INFORMATION Identification number records…………. 9-1 Key identification number …………..9-1 Vehicle identification number …………. 9-1 Model label………………9-2…
-
Page 97: Identification Number Records
Record the key identification number, vehicle identification number and mod- el label information in the spaces pro- vided for assistance when ordering spare parts from a Yamaha dealer or for reference in case the vehicle is sto- len. 1. Key identification number 1.
-
Page 98: Model Label
The model label is affixed to the frame under the seat. (See page 3-9 for seat removal procedures.) Record the infor- mation on this label in the space pro- vided. This information will be needed to order spare parts from your Yamaha dealer.
-
Page 99: Left View (Xvs650)
Cable inspection and lubrication ….6-23 Fuel tank cap ……….3-6 Carburetor adjustment ……6-13 Fuse replacement ……..6-27 Care …………7-1 Left view (XVS650) ……..2-1 Checking the front brake pads and Left view (XVS650A) ……..2-3 Give safety the right of way ……1-1 rear brake shoes ……..6-21 Lights switch ……….3-4…
-
Page 100
Tips for reducing fuel consumption ..5-5 Rear wheel installation ……6-33 Tires …………6-15 Rear wheel removal ……. 6-32 Tool kit …………6-1 Right view (XVS650) …….. 2-2 Troubleshooting ……..6-34 Right view (XVS650A) ……2-4 Troubleshooting chart ……6-35 Turn indicator light ……..3-2 Turn signal and taillight bulb Seats (for XVS650) …….. -
Page 101
YAMAHA MOTOR CO., LTD. PRINTED ON RECYCLED PAPER PRINTED IN JAPAN 99 · 5 — 0.6…
-
Contents
-
Table of Contents
-
Troubleshooting
-
Bookmarks
Quick Links
OWNER’S MANUAL
XVS250
5KR-28199-E2
Related Manuals for Yamaha Drag Star XVS250
Summary of Contents for Yamaha Drag Star XVS250
-
Page 1
OWNER’S MANUAL XVS250 5KR-28199-E2… -
Page 3
Yamaha a reputation for dependability. Please take the time to read this manual thoroughly, so as to enjoy all advantages of your XVS250. The owner’s manual does not only instruct you in how to operate, inspect and maintain your motorcycle, but also in how to safeguard yourself and others from trouble and injury. -
Page 4: Important Manual Information
This manual should be considered a permanent part of this motorcycle and should remain with it even if the motorcycle is subsequently sold. Yamaha continually seeks advancements in product design and quality. Therefore, while this manual contains the most current product information available at the time of printing, there may be minor discrepancies between your motorcycle and this manual.
-
Page 5
IMPORTANT MANUAL INFORMATION EAU10200 XVS250 OWNER’S MANUAL ©2003 by Yamaha Motor Co., Ltd. 1st edition, May 2003 All rights reserved. Any reprinting or unauthorized use without the written permission of Yamaha Motor Co., Ltd. is expressly prohibited. Printed in Japan. -
Page 6: Table Of Contents
TABLE OF CONTENTS SAFETY INFORMATION ….1-1 OPERATION AND IMPORTANT Adjusting the brake pedal RIDING POINTS……… 5-1 position and free play ….6-17 DESCRIPTION ……..2-1 Starting a cold engine ….5-1 Adjusting the rear brake Left view ……….2-1 Starting a warm engine ….5-2 light switch ……..
-
Page 7
TABLE OF CONTENTS Front wheel ……..6-32 Rear wheel ……..6-33 Troubleshooting ……6-35 Troubleshooting chart ….6-36 MOTORCYCLE CARE AND STORAGE ……….7-1 Care ……….7-1 Storage ………..7-3 SPECIFICATIONS ……8-1 CONSUMER INFORMATION…..9-1 Identification numbers ….9-1… -
Page 8: Safety Information
SAFETY INFORMATION EAU10250 AND/OR WHEN MADE NECES- • Ride where other motorists can SARY BY MECHANICAL CONDI- see you. Avoid riding in another MOTORCYCLES SINGLE TIONS. motorist’s blind spot. TRACK VEHICLES. THEIR SAFE USE Many motorcycle accidents in- AND OPERATION ARE DEPENDENT Safe riding volve inexperienced operators.
-
Page 9
Modifications made to this motorcycle other motorists can see you. the single most critical factor in the pre- not approved by Yamaha, or the re- The posture of the operator and vention or reduction of head injuries. moval of original equipment, may ren- passenger is important for proper Always wear an approved helmet. -
Page 10
Since Yamaha cannot should be kept to a minimum. 180 kg (397 lb). When loading within test all other accessories that may be •… -
Page 11
SAFETY INFORMATION Gasoline and exhaust gas • Do not park the motorcycle on a GASOLINE IS HIGHLY FLAMMA- slope or soft ground, otherwise it BLE: may fall over. • Always turn the engine off when • Do not park the motorcycle near refueling. -
Page 12: Description
DESCRIPTION EAU10410 Left view 1. Headlight (page 6-28) 2. Fuel cock (page 3-8) 3. Fuses (page 6-28) 4. Helmet holder (page 3-9) 5. Shock absorber assembly spring preload adjusting ring (page 3-10) 6. Shift pedal (page 3-5)
-
Page 13: Right View
DESCRIPTION EAU10420 Right view 1. Owner’s tool kit (page 6-1) 2. Battery (page 6-26) 3. Air filter element (page 6-10) 4. Main switch/steering lock (page 3-1) 5. Brake pedal (page 3-6) 6. Engine oil filter element (page 6-8) 7. Engine oil level check window (page 6-8) 8.
-
Page 14: Controls And Instruments
DESCRIPTION EAU10430 Controls and instruments 1. Clutch lever (page 3-5) 2. Left handlebar switches (page 3-4) 3. Speedometer unit (page 3-3) 4. Right handlebar switches (page 3-4) 5. Brake lever (page 3-6) 6. Throttle grip (page 6-12) 7. Fuel tank cap (page 3-6)
-
Page 15: Instrument And Control Functions
INSTRUMENT AND CONTROL FUNCTIONS EAU10460 EAU10680 To unlock the steering Main switch/steering lock LOCK The steering is locked, and all electrical systems are off. The key can be re- moved. To lock the steering 1. Push. 2. Turn. The main switch/steering lock controls the ignition and lighting systems, and is Push the key in, and then turn it to used to lock the steering.
-
Page 16: Indicator And Warning Lights
CAUTION: engine is defective. When this occurs, Do not use the parking position for have a Yamaha dealer check the self- an extended length of time, other- diagnosis system. 1. High beam indicator light “…
-
Page 17: Speedometer Unit
Yamaha dealer check the vehicle. ECA11170 CAUTION: To prevent engine damage, be sure 1. Speedometer to consult a Yamaha dealer as soon 2. Odometer as possible if this occurs. 3. Tripmeter 4. Tripmeter reset knob The speedometer unit is equipped with a speedometer, an odometer and a tripmeter.
-
Page 18: Handlebar Switches
INSTRUMENT AND CONTROL FUNCTIONS EAU12342 Right position. To cancel the turn signal Handlebar switches lights, push the switch in after it has re- turned to the center position. Left EAU12500 Horn switch “ ” Press this switch to sound the horn. EAU12590 Light switch “…
-
Page 19: Clutch Lever
INSTRUMENT AND CONTROL FUNCTIONS ECA10050 EAU12820 EAU12870 Clutch lever Shift pedal CAUTION: See page 5-1 for starting instruc- tions prior to starting the engine. 1. Clutch lever 1. Shift pedal The clutch lever is located at the left The shift pedal is located on the left handlebar grip.
-
Page 20: Brake Lever
INSTRUMENT AND CONTROL FUNCTIONS EAU12890 EAU12941 EAU13000 Brake lever Brake pedal Fuel tank cap 1. Brake lever 1. Brake pedal 1. Unlock. The brake lever is located at the right The brake pedal is on the right side of To remove the fuel tank cap handlebar grip.
-
Page 21: Fuel
Your Yamaha engine has been de- signed to use regular unleaded gaso- line with a research octane number of 91 or higher. If knocking (or pinging) oc-…
-
Page 22: Fuel Cock
INSTRUMENT AND CONTROL FUNCTIONS or premium unleaded fuel. Use of un- EAU13580 Fuel cock leaded fuel will extend spark plug life This model is equipped with a negative and reduce maintenance costs. pressure fuel cock. The fuel cock sup- plies fuel from the tank to the carburetor while also filtering it.
-
Page 23: Starter (Choke) Lever
INSTRUMENT AND CONTROL FUNCTIONS EAU13590 EAU14281 Starter (choke) lever “ ” Helmet holder 1. Pointed end positioned over “PRI” 1. Starter (choke) lever “ ” 1. Helmet holder This indicates prime. With the fuel cock 2. Unlock. Starting a cold engine requires a richer lever in this position, the engine can be To open the helmet holder, insert the air-fuel mixture, which is supplied by…
-
Page 24: Adjusting The Shock Absorber Assemblies
Spring preload setting: minimum settings. Yamaha’s ignition circuit cut-off Minimum (soft): system has been designed to assist the operator in fulfilling the respon- Standard:…
-
Page 25: Ignition Circuit Cut-Off System
INSTRUMENT AND CONTROL FUNCTIONS below and have a Yamaha dealer re- EAU15311 Ignition circuit cut-off system pair it if it does not function proper- The ignition circuit cut-off system (com- prising the sidestand switch, clutch switch and neutral switch) has the fol- lowing functions.
-
Page 26
5. Push the start switch. Does the engine start? The neutral switch may be defective. The motorcycle should not be ridden until checked by a Yamaha dealer. With the engine still running: 6. Move the sidestand up. 7. Keep the clutch lever pulled. -
Page 27: Pre-Operation Checks
PRE-OPERATION CHECKS EAU15591 The condition of a vehicle is the owner’s responsibility. Vital components can start to deteriorate quickly and unexpectedly, even if the vehicle remains unused (for example, as a result of exposure to the elements). Any damage, fluid leakage or loss of tire air pressure could have serious consequences.
-
Page 28: Pre-Operation Check List
• Make sure that operation is smooth. • Check cable free play. Throttle grip 6-12, 6-23 • If necessary, have Yamaha dealer adjust cable free play and lubricate cable and grip housing. • Make sure that operation is smooth. Control cables 6-23 •…
-
Page 29
Chassis fasteners — • Tighten if necessary. Instruments, lights, signals • Check operation. — and switches • Correct if necessary. • Check operation of ignition circuit cut-off system. Sidestand switch 3-10 • If system is defective, have Yamaha dealer check vehicle. -
Page 30: Operation And Important Riding Points
Become thoroughly familiar following conditions must be met: Yamaha dealer check the electrical cir- The transmission is in the neutral with all operating controls and cuit. position. their functions before riding.
-
Page 31: Starting A Warm Engine
EAU16640 EAU16671 Starting a warm engine Shifting engine, and have a Yamaha dealer Follow the same procedure as for start- check the self-diagnosis system. ing a cold engine with the exception 6. After starting the engine, move the that the starter (choke) is not required starter (choke) back halfway.
-
Page 32: Tips For Reducing Fuel Consumption
OPERATION AND IMPORTANT RIDING POINTS ECA10260 EAU16800 Shift up points: Tips for reducing fuel CAUTION: 1st → 2nd: 23 km/h (14 mi/h) consumption 2nd → 3rd: 36 km/h (22 mi/h) Even with the transmission in 3rd → 4th: 50 km/h (31 mi/h) Fuel consumption depends largely on the neutral position, do not 4th →…
-
Page 33: Engine Break-In
Do not park on a slope or on soft during the engine break-in period, tle operation or any condition that might ground, otherwise the vehicle immediately have a Yamaha dealer result in engine overheating must be may overturn. check the vehicle.
-
Page 34: Periodic Maintenance And Minor Repair
If you are not familiar with mainte- certain maintenance work correctly. nance work, have a Yamaha dealer do it for you. NOTE: If you do not have the tools or experi- ence required for a particular job, have a Yamaha dealer perform it for you.
-
Page 35: Periodic Maintenance And Lubrication Chart
The annual checks must be performed every year, except if a kilometer-based maintenance is performed in- stead. From 50000 km, repeat the maintenance intervals starting from 10000 km. Items marked with an asterisk should be performed by a Yamaha dealer as they require special tools, data and technical skills. ODOMETER READING (× 1000 km)
-
Page 36
PERIODIC MAINTENANCE AND MINOR REPAIR ODOMETER READING (× 1000 km) ANNUAL ITEM CHECK OR MAINTENANCE JOB CHECK • Check runout, spoke tightness and for damage. √ √ √ √ 9 * Wheels • Tighten spokes if necessary. • Check tread depth and for damage. •… -
Page 37
PERIODIC MAINTENANCE AND MINOR REPAIR ODOMETER READING (× 1000 km) ANNUAL ITEM CHECK OR MAINTENANCE JOB CHECK √ √ √ Engine oil filter element • Replace. √ 23 * Engine oil strainer • Clean. Front and rear brake √ √ √… -
Page 38: Removing And Installing Panels
PERIODIC MAINTENANCE AND MINOR REPAIR EAU18770 The panels shown above need to be re- Removing and installing moved to perform some of the mainte- panels nance jobs described in this chapter. Refer to this section each time a panel needs to be removed and installed. EAU19521 Panel A To remove the panel…
-
Page 39: Checking The Spark Plugs
PERIODIC MAINTENANCE AND MINOR REPAIR EAU19161 To install the panel EAU19543 Panel B Checking the spark plugs 1. Secure the front of the panel, and The spark plugs are important engine then push the rear of the panel in. To remove the panel components, which are easy to check.
-
Page 40
If any spark plug shows a distinctly dif- ferent color, the engine could be defec- tive. Do not attempt to diagnose such 1. Spark plug gap problems yourself. Instead, have a Yamaha dealer check the vehicle. Spark plug gap: 0.6–0.7 mm (0.024–0.028 in) -
Page 41: Engine Oil And Oil Filter Element
PERIODIC MAINTENANCE AND MINOR REPAIR EAU19751 2. Place an oil pan under the engine Engine oil and oil filter NOTE: to collect the used oil. The engine oil should be between the element 3. Remove the engine oil filler cap minimum and maximum level marks.
-
Page 42
PERIODIC MAINTENANCE AND MINOR REPAIR ECA11620 Tightening torque: CAUTION: Oil filter element cover bolt: In order to prevent clutch slip- 10 Nm (1.0 m·kgf, 7.2 ft·lbf) page (since the engine oil also lubricates the clutch), do not NOTE: mix any chemical additives. Do Make sure that the O-ring is properly not use oils with a diesel speci- seated. -
Page 43: Cleaning The Air Filter Element
PERIODIC MAINTENANCE AND MINOR REPAIR EAU20660 out with compressed air as shown. Cleaning the air filter element If the air filter element is damaged, The air filter element should be cleaned replace it. at the intervals specified in the periodic maintenance and lubrication chart.
-
Page 44: Adjusting The Carburetor
Therefore, most car- buretor adjustments should be left to a Yamaha dealer, who has the neces- sary professional knowledge and expe- rience. The adjustment described in the following section, however, may be ser- 1.
-
Page 45: Adjusting The Engine Idling Speed
Yamaha dealer make the adjustment. sary, have a Yamaha dealer adjust it. 2. Check the engine idling speed and, if necessary, adjust it to spec- ification by turning the throttle stop screw.
-
Page 46: Adjusting The Valve Clearance
175 kPa (25 psi) (1.75 kgf/cm²) Rear: from occurring, the valve clearance regarding the specified tires. 200 kPa (29 psi) (2.00 kgf/cm²) must be adjusted by a Yamaha dealer 90–180 kg (198–397 lb): at the intervals specified in the periodic Tire air pressure Front: maintenance and lubrication chart.
-
Page 47
Front tire: glass fragments in it, or if the sidewall is Size: cracked, have a Yamaha dealer re- 80/100-18M/C 47P place the tire immediately. Manufacturer/model: CHENG SHIN/C-916… -
Page 48: Spoke Wheels
If any dam- The replacement of all wheel- age is found, have a Yamaha and brake-related parts, includ- dealer replace the wheel. Do not ing the tires, should be left to a…
-
Page 49: Adjusting The Brake Lever Free Play
PERIODIC MAINTENANCE AND MINOR REPAIR 3. If the specified clutch lever free 7. Tighten the locknut at the clutch le- EAU22092 Adjusting the brake lever free play could be obtained as de- ver and the crankcase. play scribed above, tighten the locknut and skip the rest of the procedure, otherwise proceed as follows.
-
Page 50: Adjusting The Brake Pedal Position And Free Play
1. Brake pedal position adjusting bolt EWA10670 trol and an accident. WARNING 2. Locknut It is advisable to have a Yamaha 3. Tighten the locknut. dealer make these adjustments. EWA11230 WARNING After adjusting the brake pedal posi-…
-
Page 51: Adjusting The Rear Brake Light Switch
The brake pedal free play should mea- obtained as described, have a switch sure 20.0–30.0 mm (0.79–1.18 in) at Yamaha dealer make this ad- the brake pedal end. Periodically check justment. the brake pedal free play and, if neces- After adjusting the brake pedal sary, adjust it as follows.
-
Page 52: Checking The Front Brake Pads And Rear Brake Shoes
Observe these precautions: the wear indicator groove. If a brake the wear limit line, have a Yamaha pad has worn to the point that the wear dealer replace the brake shoes as a set.
-
Page 53: Changing The Brake Fluid
Changing the brake fluid make sure that the top of the mas- denly, have a Yamaha dealer Have a Yamaha dealer change the ter cylinder is level by turning the check the cause. brake fluid at the intervals specified in handlebars.
-
Page 54: Drive Chain Slack
PERIODIC MAINTENANCE AND MINOR REPAIR EAU22760 Drive chain slack The drive chain slack should be checked before each ride and adjusted if necessary. EAU22770 To check the drive chain slack 1. Place the motorcycle on a level surface and hold it in an upright po- sition.
-
Page 55: Lubricating The Drive Chain
PERIODIC MAINTENANCE AND MINOR REPAIR EAU23020 Tightening torques: Lubricating the drive chain Locknut: The drive chain must be cleaned and 16 Nm (1.6 m·kgf, 12 ft·lbf) lubricated at the intervals specified in Axle nut: the periodic maintenance and lubrica- 104 Nm (10.4 m·kgf, 75 ft·lbf) tion chart, otherwise it will quickly wear 4.
-
Page 56: Checking And Lubricating The Cables
If a cable is damaged periodic maintenance chart. or does not move smoothly, have a Yamaha dealer check or replace it. Recommended lubricant: Engine oil EWA10720 WARNING…
-
Page 57: Checking And Lubricating The Brake And Shift Pedals
Recommended lubricant: EWA10730 Lithium-soap-based grease (all-pur- Lithium-soap-based grease (all-pur- WARNING pose grease) pose grease) If the sidestand does not move up and down smoothly, have a Yamaha dealer check or repair it. Recommended lubricant: Lithium-soap-based grease (all-pur- pose grease) 6-24…
-
Page 58: Checking The Front Fork
Securely support the vehicle so that fork does not operate smoothly, damage and excessive oil leakage. there is no danger of it falling over. have a Yamaha dealer check or re- pair it. To check the operation 2. Hold the lower ends of the front 1.
-
Page 59: Checking The Wheel Bearings
If there is play in the wheel hub or if the wheel does not turn smoothly, have a Yamaha dealer check the wheel bearings. 1. Battery The battery is located behind panel A.
-
Page 60
To charge the battery burns. Avoid any contact with battery damage. Have a Yamaha dealer charge the bat- skin, eyes or clothing and al- To charge a sealed-type (MF) tery as soon as possible if it seems to… -
Page 61: Replacing The Fuses
7. Spare fuse 4. If the fuse immediately blows If a fuse is blown, replace it as follows. again, have a Yamaha dealer 1. Turn the key to “OFF” and turn off check the electrical system. the electrical circuit in question.
-
Page 62
6. Install the headlight unit by install- 4. Place a new headlight bulb into po- ing the screws. sition, and then secure it with the 7. Have a Yamaha dealer adjust the 1. Headlight bulb cover headlight beam if necessary. bulb holder. -
Page 63: Replacing The Tail/Brake Light Bulb
PERIODIC MAINTENANCE AND MINOR REPAIR EAU24131 EAU24210 Replacing the tail/brake light Replacing a turn signal light bulb bulb 1. Remove the tail/brake light lens by 1. Remove the turn signal lens by re- removing the screws. moving the screws. 1. Tail/brake light bulb 3.
-
Page 64: Supporting The Motorcycle
PERIODIC MAINTENANCE AND MINOR REPAIR EAU24350 a jack either under each side of the Supporting the motorcycle frame in front of the rear wheel or under Since this model is not equipped with a each side of the swingarm. centerstand, follow these precautions when removing the front and rear wheel or performing other maintenance requiring the motorcycle to stand up-…
-
Page 65: Front Wheel
To remove the front wheel jections mesh with the slots. EWA10820 WARNING It is advisable to have a Yamaha dealer service the wheel. Securely support the motor- cycle so that there is no danger 1. Front wheel axle pinch bolt of it falling over.
-
Page 66: Rear Wheel
Rear wheel EAU25430 To remove the rear wheel EWA10820 WARNING It is advisable to have a Yamaha dealer service the wheel. Securely support the motor- cycle so that there is no danger 1. Speedometer gear unit retainer of it falling over.
-
Page 67
PERIODIC MAINTENANCE AND MINOR REPAIR 2. Lift the rear wheel off the ground 7. Push the wheel forward, and then Tightening torque: according to the procedure on remove the drive chain from the Brake torque rod nut: page 6-31. rear sprocket. 23 Nm (2.3 m·kgf, 17 ft·lbf) 3. -
Page 68: Troubleshooting
However, should your motorcycle require any repair, take it to a Yamaha dealer, whose skilled technicians have the necessary tools, experience, and know-how to service the motorcycle properly.
-
Page 69: Troubleshooting Chart
Remove the spark plugs and check the electrodes. The engine does not start. Have a Yamaha dealer check the vehicle. Check the battery. 4. Battery The engine turns over The battery is good.
-
Page 70: Motorcycle Care And Storage
MOTORCYCLE CARE AND STORAGE EAU26040 ucts onto seals, gaskets, sprock- cleaning products, solvent or Care ets, the drive chain and wheel thinner, fuel (gasoline), rust re- While the open design of a motorcycle axles. Always rinse the dirt and de- movers or inhibitors, brake flu- reveals the attractiveness of the tech- greaser off with water.
-
Page 71
MOTORCYCLE CARE AND STORAGE After normal use ECA10790 4. To prevent corrosion, it is recom- CAUTION: Remove dirt with warm water, a mild mended to apply a corrosion pro- detergent, and a soft, clean sponge, tection spray metal, Do not use warm water since it in- and then rinse thoroughly with clean including chrome- and nickel-plat- creases the corrosive action of the… -
Page 72: Storage
NOTE: and spark plugs. To prevent corrosion, avoid Consult a Yamaha dealer for advice on b. Pour a teaspoonful of engine oil damp cellars, stables (because what products to use. into each spark plug bore.
-
Page 73
MOTORCYCLE CARE AND STORAGE EWA10950 than 30 °C (90 °F)]. For more in- WARNING formation on storing the battery, To prevent damage or injury from see page 6-26. sparking, make sure to ground the NOTE: spark plug electrodes while turning Make any necessary repairs before the engine over. -
Page 74: Specifications
SPECIFICATIONS Dimensions: Engine oil: Carburetor: Overall length: Type: Manufacturer: 2320 mm (91.3 in) SAE10W30 or SAE10W40 or SAE15W40 MIKUNI Overall width: or SAE20W40 or SAE20W50 Type x quantity: 910 mm (35.8 in) BDS26 x 1 Overall height: Spark plug(s): -20 -10 10 20 30 40 50 ˚C 1075 mm (42.3 in) Manufacturer/model:…
-
Page 75
SPECIFICATIONS 3rd: (Total weight of rider, passenger, cargo and Rear brake: 29/23 (1.261) accessories) Type: 4th: Tire air pressure (measured on cold Drum brake 26/26 (1.000) tires): Operation: 5th: Right foot operation Loading condition: 23/28 (0.821) Front suspension: 0–90 kg (0–198 lb) Chassis: Front: Type:… -
Page 76
SPECIFICATIONS Bulb voltage, wattage x quantity: Headlight: 12 V, 60 W/55.0 W × 1 Tail/brake light: 12 V, 5 W/21.0 W × 1 Front turn signal light: 12 V, 21.0 W × 2 Rear turn signal light: 12 V, 21.0 W × 2 Auxiliary light: 12 V, 4.0 W ×… -
Page 77: Consumer Information
Record the key identification number, vehicle identification number and mod- el label information in the spaces pro- vided below for assistance when ordering spare parts from a Yamaha dealer or for reference in case the vehi- cle is stolen. KEY IDENTIFICATION NUMBER: 1.
-
Page 78
EAU26460 Model label 1. Model label The model label is affixed to the loca- tion shown. Record the information on this label in the space provided. This in- formation will be needed when ordering spare parts from a Yamaha dealer. -
Page 79
INDEX Air filter element, cleaning ….6-10 Front fork, checking…….6-25 Rear brake light switch, adjusting ..6-18 Anti-theft alarm (optional) ……. 3-3 Fuel …………3-7 Fuel cock……….3-8 Safety information……..1-1 Fuel consumption, tips for reducing ..5-3 Battery ……….6-26 Self-diagnosis device……3-3 Fuel tank cap………..3-6 Brake and clutch levers, checking Shifting………… -
Page 80
INDEX Vehicle identification number ….9-1 Wheel bearings, checking….. 6-26 Wheel (front) ……… 6-32 Wheel (rear) ………. 6-33 Wheels ……….6-15… -
Page 82
YAMAHA MOTOR CO., LTD. PRINTED ON RECYCLED PAPER PRINTED IN JAPAN 2003.07-0.3×1 CR…