
Руководство по эксплуатации
Индикация аремени с момента за
пуска деигателя
Показывает время работы двигателя с
момента запуска. При переводе ключа
в замке зажигания в положение «АСС»
или «LOCK» время останавливается.
Для обнуления значения нажмите и
удерживайте кнопку «DISP» более 1
секунды.
Предупреждающие индикации мно
гофункционального дисплея
Индикация наличия открытой или не
плотно закрытой боковой двери. Ин
дикация показывает с какой стороны
дверь открыта.
&
Индикация наличия открытой или не
плотно
закрытой
задней
двери
(хэтчбек, универсал)/крышки багажни
ка (седан).
Индикация низкого давления моторно
го масла.
Индикация неисправности системы
управления двигателем или АКПП.
l y f M H
Индикация неисправности в системе
зарядке.
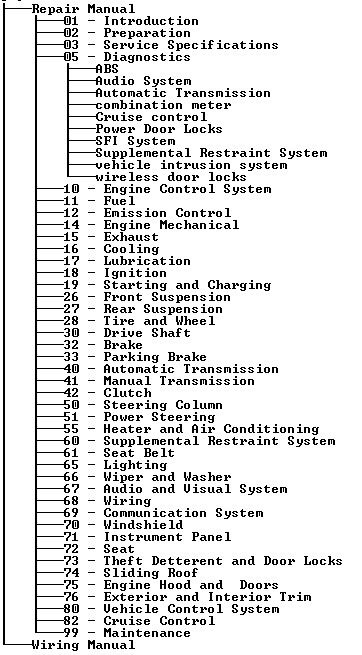
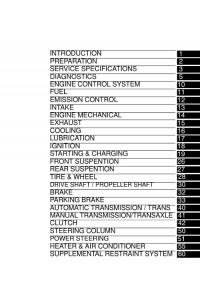
Таблица. Индикаторы комбинации приборов и звуковые сигналы.
Индикация невыключенного стояноч
ного тормоза при движении автомоби
ля со скоростью 5 км/ч или выше.
Индикаторы
комбинации приборов
1. Индикатор состояния стояночной
тормозной системы и низкого уровня
тормозной жидкости,
а) Индикатор загорается, если:
— включен стояночный тормоз;
ЕЗ
О
В
‘В’
шо
<><>
»
А
ж
ю
Индикатор состояния стоя
ночной тормозной системы
и низкого уровня тормозной
жидкости
Индикатор антиблокировоч-
ной системы тормозов (ABS)
Индикатор зарядки аккумуля
торной батареи
Индикатор низкого давления
моторного масла
Индикатор «проверь двига
тель» (CHECK ENGINE)
Индикатор низкого
уровня топлива
Индикатор открытой или
неплотно закрытой двери
Индикатор включения
дальнего света фар
Индикаторы указателей
поворота
Индикатор системы подушек
безопасности (SRS)
Индикатор непристегнутого
ремня безопасности водителя
Индикатор
включения габаритов
Индикатор включения
противотуманных фар
01
P/S
PRN
D2L
0/D
OFF
TRC
OFF
VSC
0
г
м
звук.
сигнал
Индикатор включения задних
противотуманных фонарей
Индикатор неисправности
системы усилителя рулевого
управления
Индикаторы положения
селектора АКПП
Индикатор выключения
повышающей передачи
Индикатор отключения
противобуксовечной системы
Индикатор системы VSC
Индикатор скольжения
Индикатор давления в шинах
Индикатор системы
иммобилайзера
И нди катор^сисгемы
автоматической коррекции
положения фар
Индикатор
включенной передачи
Индикатор режима ручного
переключения передач
Оставленный в замке ключ
зажигания или невыключен-
ные осветительные приборы
Индикация низкого уровня топлива.
При нажатии на кнопку «DISP» индика
ция исчезает.
— низкий уровень тормозной жидко
сти:
— неисправна электрическая цепь
индикатора.
б) Если во время движения загорел
ся индикатор, то необходимо замед
лить скорость, съехать с дороги и ос
торожно остановить автомобиль, За
медлить скорость можно торможени
ем двигателя и применением стоя
ночного тормоза, но не забудьте при
этом нажать на тормозную педаль
для включения стоп-сигналов, чтобы
предупредить о торможении водите
лей, едущих сзади.
Проверьте стояночный тормоз, воз
можно он включен. Если стояночный
тормоз выключен, а индикатор горит
после его выключения, то возникла
неист1равность в тормозной системе.
Проверьте уровень тормозной жид
кости в бачке.
— Если уровень тормозной жидкости
низок, долейте жидкость и в безо
пасном месте проверьте эффектив
ность торможения автомобиля. Если
вы считаете, что тормоза все еще
работают достаточно эффективно,
то осторожно доведите автомобиль
до ближайшего места ремонта. Если
тормоза не работают, то автомо
биль необходимо отбуксировать или
эвакуировать для ремонта.
Внимание: движение в автомобиле с
низким уровнем тормозной жидкости
опасно.
— Если уровень тормозной жидко
сти в норме, то, возможно, неис
правна электрическая цепь инди
катора.
2. Индикатор антиблокировочной сис
темы тормозов (АВЗ).
После включения зажигания индика
тор загорается на несколько секунд, а
затем гаснет. Если во время движения
загорается индикатор или индикатор
не загорается, или не гаснет при вклю
чении двигателя, то возможно наличие
неисправности в антиблокировочной
системе.
Внимание: многократное нажатие на
педаль тормоза может привести к
включению индикатора на несколько
секунд.
3. Индикатор зарядки аккумуляторной
батареи.
а) Индикатор загорается при пово
роте ключа в замке зажигания в по
ложение «ОМ» и должен погаснуть
после пуска двигателя.
б) Если во время движения загорел
ся „индикатор, то неисправна система
зарядки или ослаблен (оборван) ре
мень привода генератора. Однако
двигатель будет продолжать рабо
тать, пока аккумуляторная батарея
полностью не разрядится. Выключи
те дополнительное оборудование
{кондиционер, вентилятор, радио
приемник и др.) и двигайтесь к месту
ремонта.
Решил выложить всё что скопилось с разных источников, за почти 2 года эксплуатации своего авто, думаю будет полезно. Скажу заранее спасибо, если найдёте тут свои труды 
Всё на Яндекс.Диске
На русском:
Manual_Corolla_E12_Rus
Самое обычное руководство пользователя на русском, иногда полезно, чтобы не лазить в бардачок, PDF 2 части. yadi.sk/d/BOZDqBl-ntK9m
Corolla руководство по ремонту
Хорошая справка по ремонту и диагностике, судя по картинкам внутри — для дорестайла.
Внимание! Запускать по ярлычку «Запустить.bat» yadi.sk/d/BPQQr38FntK85
3zz-fe по русски

Очень годный мануал не только по 3zz, но и по подкапотке в целом, взят откуда-то с драйва.
yadi.sk/d/afrUWRKdntK69
На Английском:
2004 Corolla USA
Полное руководство по ремонту американской короллы, включая схемы эл. цепей
yadi.sk/d/d8pGQ_XVntKf6
SIL
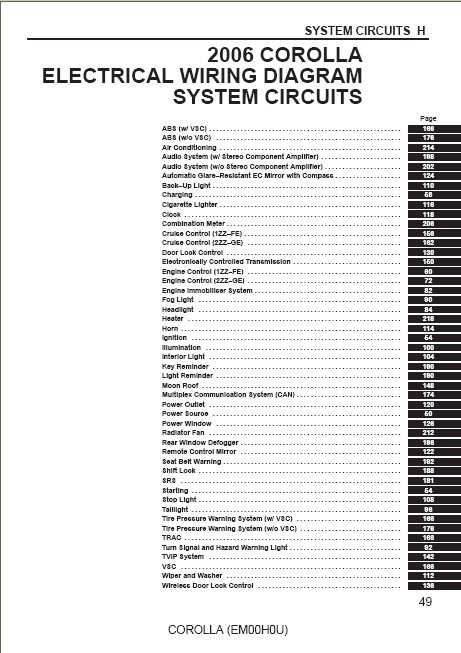
Схема электрики, pdf
yadi.sk/d/rTox__85ntKmw
Toyota Corolla models USA 2003 — 2008
Скан книги на английском, от весьма известного американского издателя книг по ремонту и обслуживанию (американская королла). yadi.sk/d/yBTIUaWUntL6n
Ссылки на каталоги з/ч
Удобно для поиска part-num. запчастей
www.japancats.ru/Toyota/
aes24.ru/?page=originalcats спасибо ssmitti
Если у кого-то есть что-то ещё — обязательно пишите, соберём всю коллекцию в одном месте!
Цена вопроса: 0 ₽
Пробег: 124 200 км
Toyota Corolla 2001 — 2006, кузов E120. Руководство пользователя
Время создания: 25.12.2015 11:12
Текстовые метки: Toyota Corolla, руководство, документация, пользователь, владелец, автомобиль
Раздел: Автомобиль — Toyota Corolla
Запись: xintrea/mytetra_syncro/master/base/1451031165atm7liw2wu/text.html на raw.github.com
|
|
Здесь размещена подготовленная мною к печати документация на Toyota Corolla 2001-2006 г. выпуска.
См. прикрепленный файл.
Полное название:
Руководство для владельца автомобиля
Toyota Corolla 2001-2006 г. E120 (седан и хетчбек)
с двигателем 3ZZ-FE и 4ZZ-FE
с автоматической и ручной коробкой передач — 320 стр.
Как делался этот вариант руководства: http://webhamster.ru/site/page/index/main/news/324
- Manuals
- Brands
- Toyota Manuals
- Automobile
- Corolla 2001
- Operating manual
-
Contents
-
Table of Contents
-
Bookmarks
Related Manuals for Toyota Corolla 2001
Summary of Contents for Toyota Corolla 2001
-
Page 1: Table Of Contents
’01 Corolla U (L/O 0005) SECTION – OPERATION OF INSTRUMENTS AND CONTROLS Overview of instruments and controls Instrument panel overview ……..Instrument cluster overview .
-
Page 2: Instrument Panel Overview
’01 Corolla U (L/O 0005) Instrument panel overview 1. Rear view mirror remote control levers 2. Side vents 3. Instrument cluster 4. Center vents 5. Electric moon roof switches 6. Personal light (with electric moon roof) 7. Personal lights (without electric moon roof) 8.
-
Page 3
’01 Corolla U (L/O 0005) 1. Power rear view mirror control switch 2. Headlight, turn signal and front fog light switches 3. Wiper and washer switches 4. Emergency flasher switch 5. Clock 6. Car audio 7. Rear window defogger switch 8. -
Page 4: Instrument Cluster Overview
’01 Corolla U (L/O 0005) Instrument cluster overview DType A 1. Service reminder indicators and 3. Fuel gauge 6. Odometer and two trip meters indicator lights 4. Speedometer 2. Engine coolant temperature gauge 5. Trip meter reset knob 2001MY_COROLLA_U (OM12720U)
-
Page 5: Corolla U (L/O
’01 Corolla U (L/O 0005) DType B 1. Service reminder indicators and 3. Speedometer 6. Odometer and two trip meters indicator lights 4. Fuel gauge 7. Outside temperature display 2. Tachometer 5. Trip meter reset knob 8. Engine coolant temperature gauge 2001MY_COROLLA_U (OM12720U)
-
Page 6
’01 Corolla U (L/O 0005) DType C 1. Service reminder indicators and 3. Speedometer 6. Odometer and two trip meters indicator lights 4. Fuel gauge 7. Outside temperature display 2. Tachometer 5. Trip meter reset knob 8. Engine coolant temperature gauge 2001MY_COROLLA_U (OM12720U) -
Page 7: Indicator Symbols On The Instrument Pane
’01 Corolla U (L/O 0005) Indicator symbols on the instrument panel Open door warning light Brake system warning light SRS warning light windshield washer fluid level warning Seat belt reminder light light Discharge warning light Headlight high beam indicator light Malfunction indicator lamp Turn signal indicator lights Low fuel level warning light…
-
Page 8
’01 Corolla U (L/O 0005) 2001MY_COROLLA_U (OM12720U) -
Page 9
’01 Corolla U (L/O 0005) SECTION – OPERATION OF INSTRUMENTS AND CONTROLS Keys and Doors Keys …………Side doors . -
Page 10: Keys
To unlock: Turn the key backward. trunk. need additional keys, duplicates can be Vehicles with power door lock system—All made by a Toyota dealer using the key To protect things locked in the trunk when the doors lock and unlock simultaneously number.
-
Page 11
’01 Corolla U (L/O 0005) With power windows (driver’s side) Without power windows LOCKING UNLOCKING WITH INSIDE LOCK BUTTON LOCKING UNLOCKING WITH Move the lock button. POWER DOOR LOCK SWITCH To lock: Push the button down. Push the switch. To unlock: Pull the button up. Vehicles with power windows—… -
Page 12: Power Windows
’01 Corolla U (L/O 0005) Power windows CAUTION Before driving, be sure that the doors closed locked, especially when small children are in the ve- hicle. Along with the proper use of seat belts, locking the doors helps prevent the driver and passengers from being thrown out from the ve- hicle during an accident.
-
Page 13
’01 Corolla U (L/O 0005) Window lock switch Automatic operation open only): OPERATING PASSENGERS’ Push the switch completely down and then WINDOWS release it. The window will fully open. To Use the switches on the passengers’ stop the window partway, lightly pull the doors. -
Page 14: Trunk Lid
’01 Corolla U (L/O 0005) Trunk lid— CAUTION CAUTION To avoid serious personal injury, you Keep the trunk lid closed while must do the following. driving. This not only keeps the luggage from being thrown out but Always make sure the head, hands also prevents exhaust gases from and other parts of the body of all entering the vehicle.
-
Page 15
’01 Corolla U (L/O 0005) —Lock release lever —Internal trunk release cancelling system handle —Lock release lever To open the trunk lid from the driver’s After closing the trunk lid, insert the If a person is locked in the trunk, pull seat, pull up on the lock release lever. -
Page 16: Hood
’01 Corolla U (L/O 0005) Hood To open the hood: 2. In front of the vehicle, pull up the 3. Hold the hood open by inserting the auxiliary catch lever and lift support rod into the slot. 1. Pull the hood lock release lever. The hood.
-
Page 17: Fuel Tank Cap
’01 Corolla U (L/O 0005) Fuel tank cap This indicates that the fuel filler door 1. To open the fuel filler door, pull the 2. To remove the fuel tank cap, turn is on the left side of your vehicle. lever up.
-
Page 18: Electric Moon Roof
To operate the moon roof, use the several times. If the indicator lamp does switches beside the personal light. not go off, contact your Toyota dealer as The moon roof works when the ignition soon as possible. switch is in the “ON” position.
-
Page 19
’01 Corolla U (L/O 0005) Tilting operation— Always make sure nobody places To tilt up: Push the switch on the “UP” his/her head, hands and other parts side. of the body in the roof opening be- To lower: Push the switch on the opposite fore you close the roof. -
Page 20
’01 Corolla U (L/O 0005) 2001MY_COROLLA_U (OM12720U) -
Page 21
’01 Corolla U (L/O 0005) SECTION – OPERATION OF INSTRUMENTS AND CONTROLS Seats, Seat belts, Steering wheel and Mirrors Seats …………Front seats . -
Page 22: Seats
Consult try sliding it forward and backward sengers stand move your Toyota dealer. to make sure it is locked in posi- around between seats. Severe inju- tion. Do not use accessories ries can occur in the event of emer-…
-
Page 23
’01 Corolla U (L/O 0005) —Adjusting front seats 1. SEAT POSITION ADJUSTING LEVER While adjusting the seat, do not put Pull the lever up. Then slide the seat your hands under the seat or near to the desired position with slight body the moving parts. -
Page 24: Fold-Down Rear Seat
’01 Corolla U (L/O 0005) Fold–down rear seat CAUTION When returning the seatback to the upright position: Make sure the seat belts are not twisted or caught in the seatback and are arranged in the proper position and are ready to use. Make sure the seatback is securely locked by pushing forward and rear- ward on the top of the seatback.
-
Page 25
’01 Corolla U (L/O 0005) CAUTION Disconnect the rear center seat belt only under the above mentioned cir- cumstances; do not disconnect it in other circumstances. (B) PREVENTING DAMAGE REAR (C) BEFORE RETURNING REAR SEAT CENTER SEAT BELT WEBBING Make sure shoulder belt… -
Page 26: Head Restraints
You will hear a click when the tab locks If the seat belt does not function into the buckle. normally, immediately contact your Toyota dealer. Rear 2001MY_COROLLA_U (OM12720U)
-
Page 27: Seat Belts
’01 Corolla U (L/O 0005) Seat belts— —Seat belt precautions For your safety and comfort, adjust the Toyota strongly urges that the driver and Do not allow the child to stand up or head restraint before driving. passengers in the vehicle be properly re- kneel on either rear or front seats.
-
Page 28
’01 Corolla U (L/O 0005) —Front and rear seat belts When using the seat belts, observe Replace the belt assembly (includ- the following: ing bolts) if it has been used in a severe impact. The entire assembly Use the belt for only one person at should be replaced even if damage a time. -
Page 29
If the seat belt does not function normally, immediately contact your Toyota dealer. Do not use the seat until the seat belt is fixed. It cannot protect an adult occupant or your child from injury. 2001MY_COROLLA_U (OM12720U) -
Page 30
’01 Corolla U (L/O 0005) CAUTION Take up slack High–positioned belts loose–fitting belts both could cause serious injuries due to sliding un- Too high der the lap belt during a collision or other unintended result. Keep the lap belt positioned as low on hips as possible. -
Page 31
’01 Corolla U (L/O 0005) CAUTION Make sure the both buckles are cor- rectly located and securely latched. Failure to properly match the buckle and tab may cause severe injury in case of an accident or a collision. REAR CENTER SEAT BELT (WITH… -
Page 32
Please contact your local Toyota dealer so nally intended for. that the dealer can order the proper re- quired length for the extender. Bring the heaviest coat you expect to wear for prop- er measurement and selection of length. -
Page 33
If the seat belt does not function normally, immediately contact your Toyota dealer. To connect the extender to the seat The driver and front passenger’s seat belt pretensioners are designed to be belt, insert the tab into the seat belt activated in response to a severe fron- buckle so that the “PRESS”… -
Page 34
’01 Corolla U (L/O 0005) When a seat belt pretensioner is acti- vated, an operating noise may be heard and a small amount of smoke–like gas may be released. This gas is harmless and does not indicate that a fire is occur- ring. -
Page 35
Repairs on or near the front seat belt retractor assemblies This front seat belt pretensioner system In the following cases, contact your Toyota r Modification of the suspension sys- has a service reminder indicator to inform dealer as soon as possible: the driver of operating problems. -
Page 36: Srs Driver And Front Passenger Airbags
Toyota strongly recommends that: The driver sit as far back as pos- The SRS (Supplemental Restraint Sys- This indicator comes on when the igni- sible from the steering wheel while tem) airbags are designed to provide tion key is turned to the “ACC”…
-
Page 37
’01 Corolla U (L/O 0005) However, this threshold velocity will be considerably higher if the vehicle strikes an object, such as a parked vehicle or sign pole, which can move or deform on impact, or if it is involved in an underride collision (e.g. -
Page 38
’01 Corolla U (L/O 0005) In a severe frontal impact, sensors detect deceleration and the system triggers the airbag inflators. Then a chemical reaction in the inflators quickly fills the airbags Hitting a curb, edge Falling into or with non–toxic gas to help restrain the of pavement or jumping over a forward motion of the occupants. -
Page 39
The front seat occupants can restraint system. Toyota strongly be killed or seriously injured by an recommends that all infants and inflating airbag if they do not wear children be placed in the rear seat the available seat belts. -
Page 40
’01 Corolla U (L/O 0005) instructions concerning installation of a child restraint sys- tem, see “Child restraint” in this section. Move seat fully back Never put a rear–facing child re- A forward–facing child restraint sys- straint system on the front seat be- tem should be allowed to be put on cause the force of the rapid infla- the front seat only when it is un-… -
Page 41
’01 Corolla U (L/O 0005) Do not sit on the edge of the seat Do not allow a child to stand up, Do not put objects or your pets on or lean over the dashboard when or to kneel on the front passenger or in front of the dashboard or the vehicle is in use. -
Page 42
Contact your winches or any other equipment to Toyota dealer as soon as possible to the front end service the vehicle. r Repairs made on or near the front… -
Page 43: Srs Side Airbags
Wear their seat belts. Remain properly seated with their In the following cases, contact your Toyota The SRS (Supplemental Restraint Sys- back upright and against the seat at dealer as soon as possible: tem) side airbags are designed to pro- all times.
-
Page 44
’01 Corolla U (L/O 0005) Collision from the rear Collision from the front Vehicle rollover This indicator comes on when the igni- The SRS side airbag system may not The SRS side airbags are not designed tion key is turned to the “ACC” or inflate if the vehicle is subjected to a to inflate if the vehicle is involved in a “ON”… -
Page 45
’01 Corolla U (L/O 0005) In a severe side impact, the side airbag CAUTION sensor triggers the side airbag inflators. Then a chemical reaction in the inflators The SRS side airbag system is de- quickly fills the airbags with non–toxic gas signed only as a supplement to the to help restrain the lateral motion of the primary… -
Page 46
An infant or child who is too small to use a seat belt should be properly secured using a child restraint system. Toyota strongly recommends that all infants and children be placed in the rear seat vehicle properly strained. -
Page 47
Contact your Toyota dealer as soon as possible to service the vehicle. The light does not come on when the ignition key is turned to the “ACC” or “ON”… -
Page 48: Child Restraint
’01 Corolla U (L/O 0005) Child restraint— —Child restraint precautions Toyota strongly urges the use of child NOTICE restraint systems children small enough to use them. Do not disconnect the battery cables before contacting your Toyota dealer. The laws of all fifty states in the U.S.A.
-
Page 49
’01 Corolla U (L/O 0005) —Child restraint system A child restraint system for a small Toyota strongly urges use of A forward–facing child restraint sys- child or baby must itself be properly proper child restraint system which tem should be allowed to be put on… -
Page 50
’01 Corolla U (L/O 0005) CAUTION After installing the child restraint system, make sure it is secured in Never put a rear–facing child re- place following the manufacturer’s straint system on the front seat. In instructions. If it is not restrained the event of an accident, the force securely, it may cause death or se- of the rapid inflation of the airbag… -
Page 51
’01 Corolla U (L/O 0005) —Built–in child restraint The built–in child restraint system mainly consists of a child seat integrated in the rear seat and 5–point seat belts. Refer to the illustration to become familiar with the parts of the system. This child restraint system conforms to U.S. -
Page 52
’01 Corolla U (L/O 0005) This child restraint is designed for use CAUTION Keep the belts clean and dry. If only by children who weigh between 10 they need cleaning, use a mild soap and 30 kg (22.1 and 66.1 pounds), and Make sure the child is securely re- solution or lukewarm water. -
Page 53
’01 Corolla U (L/O 0005) 1. Separate the fastener tapes under 2. Unlock and remove the head re- 3. While pulling the seat belt release the right rear seatback and fold the straint, then reinstall it facing back- strap (black), pull both shoulder… -
Page 54
’01 Corolla U (L/O 0005) 4. Compress the shoulder belt clip to 5. Pull down the seatback part of the 6. Press the removable pad against the separate the right and left shoulder removable pad. Make sure the child’s fastener tapes and install the pad to belts. -
Page 55
Contact your Toyota dealer immediately. Do not use the built–in child restraint until the seat belt is fixed. 7. Sit the child on the child seat. Place 8. Adjust the shoulder pads. a shoulder belt over each shoulder. -
Page 56
’01 Corolla U (L/O 0005) 9. Fasten the shoulder belt clip. 10. Pull the seat belt adjustment strap 11. To release the child from the seat (gray tab) firmly until the shoulder belts, separate the shoulder belts The purpose of the clip is to keep the belts are snugly adjusted around the then press the buckle release button. -
Page 57
’01 Corolla U (L/O 0005) —Types of child restraint system Child restraint systems are classified into the following 3 types depending on the child’s age and size. (A) Infant seat (B) Convertible seat (C) Booster seat Install the child restraint system following the instructions provided by its manufac- turer. -
Page 58
’01 Corolla U (L/O 0005) —Installation with 3–point type seat belt (A) Infant seat (C) Booster seat (A) INFANT SEAT INSTALLATION An infant seat is used in rear–facing position only. (B) Convertible seat 2001MY_COROLLA_U (OM12720U) -
Page 59
’01 Corolla U (L/O 0005) 1. Run the lap and shoulder belt through CAUTION Do not put a rear–facing child re- or around the infant seat following the straint system on the rear seat if it instructions provided by its manufactur- Never put a rear–facing child re- interferes with the lock mechanism er and insert the tab into the buckle… -
Page 60
2. Fully extend the shoulder belt to put it 3. While pressing the infant seat firmly Toyota dealer immediately. Do not in the lock mode. When the belt is against the seat cushion and seatback, use the seat until the seat belt is… -
Page 61
’01 Corolla U (L/O 0005) 4. To remove the infant seat, press the (B) CONVERTIBLE SEAT INSTALLATION CAUTION buckle–release button and allow the A convertible seat is used in forward– belt to retract completely. The belt will facing and rear–facing position depend- Push and pull the child restraint sys- move freely again and be ready to ing on the child’s age and size. -
Page 62
’01 Corolla U (L/O 0005) Move seat fully back CAUTION A forward–facing child restraint sys- Do not put a rear–facing child re- tem should be allowed to be put on straint system on the rear seat if it Never put a rear–facing child re- the front seat only when it is un- interferes with the lock mechanism straint system on the front seat be-… -
Page 63
1. Run the lap and shoulder belt through 2. Fully extend the shoulder belt to put it Toyota dealer immediately. Do not or around the convertible seat following in the lock mode. When the belt is use the seat until the seat belt is… -
Page 64
’01 Corolla U (L/O 0005) 3. While pressing convertible seat 4. To remove the convertible seat, press CAUTION firmly against the seat cushion and the buckle–release button and allow the seatback, let the shoulder belt retract belt to retract completely. The belt will Push and pull the child restraint sys- as far as it will go to hold the convert- move freely again and be ready to… -
Page 65
’01 Corolla U (L/O 0005) CAUTION A forward–facing child restraint sys- tem should be allowed to be put on the front seat only when it is un- avoidable. Always move the seat as far back as possible, because the force of a deploying airbag could cause death or serious injury to the child. -
Page 66
Contact your is positioned across the center of Toyota dealer immediately. Do not child’s shoulder. The belt should be use the seat until the seat belt is kept away from child’s neck, but fixed. not falling off child’s shoulder. Fail-… -
Page 67
’01 Corolla U (L/O 0005) —Using a top strap Anchor brackets 2. To remove the child restraint system, Follow the procedure below for a child Use the anchor bracket on the package press the buckle–release button and al- restraint system that requires the use tray behind the rear seat to attach the top low the belt to retract. -
Page 68
’01 Corolla U (L/O 0005) TO USE THE ANCHOR BRACKET: 2. Fix the child restraint system with 3. Outside anchor brackets only— the seat belt. Replace the head restraint. 1. Outside anchor brackets only— Remove the head restraint. Latch hook onto the anchor bracket and tighten the top strap. -
Page 69
’01 Corolla U (L/O 0005) —Installation with child restraint lower anchorages The lower anchorages for the child re- straint system interfaced with FMVSS225 specification are installed in the rear seat. The anchorages are installed in the clear- ance between the seat cushion and seat- back of both outside rear seats. -
Page 70: Tilt Steering Wheel
’01 Corolla U (L/O 0005) Tilt steering wheel CHILD RESTRAINT SYSTEM CAUTION INSTALLATION Type A— When using the lower anchorages 1. Widen the clearance between for the child restraint system, be seat cushion and seatback a little sure that there are no irregular ob- and confirm the position of the low- jects around the anchorages or that er anchorages below the tag in the…
-
Page 71: Outside Rear View Mirrors
’01 Corolla U (L/O 0005) —Rear view mirror remote control Outside rear view mirrors— CAUTION Do not adjust the mirror while the vehicle is moving. It may cause the driver to mishandle the vehicle and an accident may occur resulting in personal injuries.
-
Page 72: Anti-Glare Inside Rear View Mirro
’01 Corolla U (L/O 0005) —Power rear view mirror Anti–glare inside rear view control mirror NOTICE If ice should jam the mirror, do not operate the control or scrape the mir- ror face. Use a spray de–icer to free the mirror. To adjust a mirror, use the switches.
-
Page 73: Vanity Mirror
’01 Corolla U (L/O 0005) Vanity mirror CAUTION Do not adjust the mirror while the vehicle is moving. It may cause the driver to mishandle the vehicle and an accident may occur resulting in personal injuries. To use the vanity mirror for the driver, swing down the sun visor and slide the cover.
-
Page 74
’01 Corolla U (L/O 0005) 2001MY_COROLLA_U (OM12720U) -
Page 75
’01 Corolla U (L/O 0005) SECTION – OPERATION OF INSTRUMENTS AND CONTROLS Lights, Wipers and Defogger Headlights and turn signals ……..Emergency flashers . -
Page 76: Headlights And Turn Signals
’01 Corolla U (L/O 0005) Headlights and turn signals NOTICE To prevent the battery from being dis- charged, do not leave the lights on for a long period when the engine is not running. Daytime running light system The headlights turn on at reduced intensi- ty when the parking brake is released with the engine started, even with the light switch in the “OFF”…
-
Page 77: Emergency Flashers
’01 Corolla U (L/O 0005) Emergency flashers High–Low beams—For high beams, turn TURN SIGNALS To turn on the emergency flashers, the headlights on and push the lever away push the switch. To signal a turn, push the headlight/ from you (position 1). Pull the lever to- turn signal lever up or down to position All the turn signal lights will flash.
-
Page 78: Instrument Panel Light Control
’01 Corolla U (L/O 0005) Instrument panel light control Front fog lights NOTICE To prevent the battery from being dis- charged, do not leave the switch on longer than necessary when the en- gine is not running. To adjust the brightness of the instru- To turn on the front fog lights, twist ment panel lights, turn the knob.
-
Page 79: Interior Light
’01 Corolla U (L/O 0005) Interior light Ignition switch light Personal lights With electric moon roof To turn on the interior light, slide the For easy access to the ignition switch, switch. the ignition switch light comes on when any of the doors are opened. The interior light switch has the following positions: The light remains on for a certain time…
-
Page 80: Windshield Wipers And Washer
’01 Corolla U (L/O 0005) Windshield wipers and washer To turn on the personal light, push the To turn on the windshield wipers, move switch. To turn it off, push the switch the lever to the desired setting. once again. The key must be in the “ON”…
-
Page 81: Rear Window Defogger
’01 Corolla U (L/O 0005) Rear window defogger To squirt washer fluid, pull the lever Make sure you turn the defogger off when toward you. the window is clear. Leaving the defogger on for a long time could cause the battery With interval adjuster: If the windshield to discharge, especially during stop–and–…
-
Page 82
’01 Corolla U (L/O 0005) 2001MY_COROLLA_U (OM12720U) -
Page 83
’01 Corolla U (L/O 0005) SECTION – OPERATION OF INSTRUMENTS AND CONTROLS Gauges, Meters and Service reminder indicators Fuel gauge ……….Engine coolant temperature gaug . -
Page 84: Fuel Gauge
Fill the fuel tank immediately. The indicator lamp goes off after driving several times. If the indicator lamp does not go off, contact your Toyota dealer as soon as possible. Without tachometer Without tachometer 2001MY_COROLLA_U (OM12720U)
-
Page 85: Tachometer
’01 Corolla U (L/O 0005) Tachometer The gauge indicates the engine coolant _ Do not continue driving with an temperature when the ignition switch is overheated engine. See “If your ve- on. The engine operating temperature hicle overheats” in Section 4. will vary with changes in weather and engine load.
-
Page 86: Odometer And Two Trip Meters
B, then back to the odometer each and contact time you push. Toyota dealer. To reset the trip meter A to zero, dis- play the meter A reading, then push Fasten seat belt. and hold the knob until the meter is set to zero.
-
Page 87
Have your vehicle checked your Toyota dealer in the following case: Close all doors. The light does not come on even if the parking brake is applied when the igni- tion key is in the “ON” position. Take vehicle to Toyota dealer immediately. -
Page 88: Seat Belt Reminder Light
If it comes on while you are driving in CAUTION case c, have your vehicle checked/re- This light warns that the battery is being paired by your Toyota dealer as soon as discharged. If the light does not turn off even possible.
-
Page 89: Open Door Warning Light
Contact your system. Contact your Toyota dealer as warning light on—even for one block. Toyota dealer as soon as possible to soon as possible to service the vehicle. It may ruin the engine. service the vehicle.
-
Page 90
SRS warning light should come on. The “ABS” warning light goes off after a few seconds. If any service reminder indicator or warn- ing buzzer does not function as described above, have it checked by your Toyota dealer as soon as possible. 2001MY_COROLLA_U (OM12720U) -
Page 91
’01 Corolla U (L/O 0005) SECTION – OPERATION OF INSTRUMENTS AND CONTROLS Ignition switch, Transmission and Parking brake Ignition switch with steering lock ……. Automatic transmission . -
Page 92: Ignition Switch With Steering Lock
’01 Corolla U (L/O 0005) Ignition switch with steering lock You must push in the key to turn the key from “ACC” to the “LOCK” position. On vehicles with an automatic transmission, the selector lever must be put in the “P” position before pushing the key.
-
Page 93: Automatic Transmission
’01 Corolla U (L/O 0005) Automatic transmission D3–speed Your automatic transmission has a shift lock system to minimize the possibility of Lock release button incorrect operation. This means you can To prevent misshifting Selector lever only shift out of “P” position when the brake pedal is depressed (with the ignition switch in “ON”…
-
Page 94
’01 Corolla U (L/O 0005) (b) Normal driving Shift into the “L” position when the NOTICE vehicle speed is lower than 49 km/h 1. Start the engine as instructed in “How (30 mph). The transmission will down- r Be careful not to over–rev the en- to start the engine”… -
Page 95
’01 Corolla U (L/O 0005) (f) Parking NOTICE NOTICE 1. Bring the vehicle to a complete stop. Do not hold the vehicle on an up- If your rock your vehicle, observe the 2. Pull the parking brake lever up fully to grade with the accelerator pedal. -
Page 96
’01 Corolla U (L/O 0005) D4–speed Your automatic transmission has a shift lock system to minimize the possibility of Lock release button incorrect operation. This means you can To prevent misshifting only shift out of “P” position when the Selector lever brake pedal is depressed (with the ignition switch in “ON”… -
Page 97
’01 Corolla U (L/O 0005) Vehicles with cruise control—When the 3. Release the parking brake and brake cruise control is being used, even if you pedal. Depress the accelerator pedal downshift the transmission by pushing and slowly for smooth starting. releasing overdrive switch,… -
Page 98
’01 Corolla U (L/O 0005) For ways to decrease the vehicle speed, (g) Parking NOTICE see “Cruise control” in this section. 1. Bring the vehicle to a complete stop. r Be careful not to over–rev the en- 2. Pull the parking brake lever up fully to CAUTION gine. -
Page 99
’01 Corolla U (L/O 0005) (i) Rocking your vehicle if stuck r Do not race the engine and avoid CAUTION spinning the wheels. CAUTION Always keep your foot on the brake r If your vehicle remains stuck after pedal while stopped with the engine rocking the vehicle several times, your vehicle becomes… -
Page 100: Manual Transmission
’01 Corolla U (L/O 0005) Manual transmission Low altitude Downshift to the appropriate gear if accel- —1219 m (4000 ft.) or lower eration is needed when you are cruising gear km/h (mph) below the above downshifting speeds. 1 to 2 or 2 to 1 (15) Upshifting too soon or downshifting too 2 to 3 or 3 to 2…
-
Page 101: Parking Brake
’01 Corolla U (L/O 0005) Parking brake Good driving practice When parking, firmly apply the parking brake to avoid inadvertent creeping. If it is difficult to shift into reverse, put the transmission in neutral, release the To set: Pull up the lever. For better hold- clutch pedal momentarily, and then try ing power, first depress the brake pedal again.
-
Page 102: Cruise Control
’01 Corolla U (L/O 0005) Cruise control The cruise control allows you to cruise the vehicle at a desired speed over 40 km/h (25 mph) even with your foot off the accelerator pedal. Your cruising speed can be maintained up or down grades within the limits of engine performance, although…
-
Page 103
Toyota deal- switch, with the cruise control on, engine the set speed. When you release it, the er at the earliest opportunity. -
Page 104
The indicator light does not come on. The indicator light flashes again. The indicator light goes out after it comes on. If this is the case, contact your Toyota dealer and have your vehicle inspected. 2001MY_COROLLA_U (OM12720U) -
Page 105
’01 Corolla U (L/O 0005) SECTION – OPERATION OF INSTRUMENTS AND CONTROLS Car audio system Reference ……….Using your audio system . -
Page 106: Reference
’01 Corolla U (L/O 0005) Reference Type 1: AM·FM ETR radio Type 3: AM·FM ETR radio/cassette player Type 4: AM·FM ETR radio/compact disc (with compact disc auto changer control- player (with compact disc auto changer ler) controller) Type 2: AM·FM ETR radio/cassette player 2001MY_COROLLA_U (OM12720U)
-
Page 107: Using Your Audio System
This section describes some of the basic TONE AND BALANCE YOUR RADIO ANTENNA features on Toyota audio systems. Some For details about your system’s tone and To lower a manual antenna, carefully push information may not pertain to your sys- balance controls, see the description of it down.
-
Page 108
’01 Corolla U (L/O 0005) YOUR COMPACT DISC PLAYER NOTICE When you insert a disc, gently push it in Do not use an adaptor for compact with the label side up. (The player will disc singles—it could cause tracking automatically eject a disc if the label side errors or interfere with the ejection of is down.) The compact disc player will compact discs. -
Page 109
’01 Corolla U (L/O 0005) —Controls and features DType 1 Details of specific buttons, controls and features are described in the alphabetical listing that follows. 2001MY_COROLLA_U (OM12720U) -
Page 110
Turn the “BAL” knob with pulling to adjust Tuning tune in radio stations. the balance between the right and left Your Toyota has an electronic tuning radio speakers. To preset a station to a button: Tune in (ETR). Push and release the “ ” (up) or the desired station (see “TUNE”… -
Page 111
’01 Corolla U (L/O 0005) DType 2 Details of specific buttons, controls, and features are described in the alphabetical listing that follows. 2001MY_COROLLA_U (OM12720U) -
Page 112
’01 Corolla U (L/O 0005) 1 2 3 4 5 6 (Preset buttons) BAL (Balance) ST (Stereo reception) display These buttons are used to preset and Move the “BAL” ring around “TONE” to Your radio automatically changes to stereo tune in radio stations. adjust the balance between the right and reception when a stereo broadcast is re- left speakers. -
Page 113
’01 Corolla U (L/O 0005) TUNE Tuning Your Toyota has an electronic tuning radio (ETR). Push and release the “ ” (up) or “ ” (down) side of “TUNE” to step up or down the station band. (If you hear a beep, you held the button too long and the radio will go into the seek mode.) -
Page 114
’01 Corolla U (L/O 0005) DType 3 Details of specific buttons, controls, and features are described in the alphabetical listing that follows. 2001MY_COROLLA_U (OM12720U) -
Page 115
’01 Corolla U (L/O 0005) 1 2 3 4 5 6 (Preset buttons) (Reverse/Fast forward buttons) These buttons are used to preset and Push “AM” to switch the AM band. “AM” Cassette Player tune in radio stations. will appear on the display. Push the fast forward button to fast for- To preset a station to a button: Tune in If the audio system is off, you can turn… -
Page 116
If the malfunction is not rectified, take CONTROL / MODE” repeatedly until “BAL” er and automatic changer. your vehicle to your Toyota dealer. appears on the display. Then turn the If the player malfunctions, your audio sys- knob to adjust the left/right balance. -
Page 117
’01 Corolla U (L/O 0005) PROG (Program) RAND (Random) Dolbyr B NR Push “PROG” to select the other side of There are two random features—you can If you are listening to a tape that was a cassette tape. The display indicates either listen to the tracks on all the com- recorded with Dolbyr B Noise Reduction, pact discs in the magazine in random or-… -
Page 118
’01 Corolla U (L/O 0005) RPT (Repeat) SCAN Compact disc player There are two repeat features—you can Radio There are two scan features—you can ei- either replay a disc track or a whole com- ther scan the tracks on a specific disc or You can either scan all the frequencies on pact disc. -
Page 119
Your radio automatically changes to stereo Tuning reception when a stereo broadcast is re- Your Toyota has an electronic tuning radio ceived. “ST” appears on the display. If the (ETR). Push and release the “ ” (up) or signal becomes weak, the radio reduces “… -
Page 120
’01 Corolla U (L/O 0005) DType 4 Details of specific buttons, controls, and features are described in the alphabetical listing that follows. 2001MY_COROLLA_U (OM12720U) -
Page 121
’01 Corolla U (L/O 0005) 1 2 3 4 5 6 (Preset buttons) high–pitch tone adjustment, push (Reverse/Fast forward buttons) “AUDIO CONTROL / MODE” repeatedly These buttons are used to preset and If you want to fast forward or reverse until “TRE”… -
Page 122
If the malfunction is not rectified, take disc player and automatic changer. tracks in the magazine in random order. your vehicle to your Toyota dealer. To turn off the random feature, push the If the player malfunctions, your audio sys- DISC ”RAND”… -
Page 123
’01 Corolla U (L/O 0005) RPT (Repeat) SCAN Compact disc player There are two repeat features—you can Radio There are two scan features—you can ei- either replay a disc track or a whole com- ther scan the tracks on a specific disc or You can either scan all the frequencies on pact disc. -
Page 124: Car Audio System Operating Hints
Your radio automatically changes to stereo Tuning To ensure the correct audio system reception when a stereo broadcast is re- Your Toyota has an electronic tuning radio operation: ceived. “ST” appears on the display. If the (ETR). Push and release the “ ” (up) or…
-
Page 125
’01 Corolla U (L/O 0005) Here are some common reception prob- Use high–quality cassettes. lems that probably do not indicate a prob- Fading—AM broadcasts are reflected by Low–quality cassette tapes can cause lem with your radio: the upper atmosphere—especially at night. many problems, including poor sound, These reflected signals can interfere with inconsistent… -
Page 126
’01 Corolla U (L/O 0005) If moisture gets into your compact disc player, you may not hear any sound even though your compact disc player appears to be working. Remove the disc from the player and wait until it dries. CARING FOR YOUR COMPACT DISC PLAYER AND DISCS Use only compact discs labeled as… -
Page 127
’01 Corolla U (L/O 0005) Your compact disc player cannot play CAUTION special shaped or low–quality compact discs such as those shown here. Do Compact disc players use an invisible not use them as the player could be laser beam which could cause hazard- damaged. -
Page 128
’01 Corolla U (L/O 0005) 2001MY_COROLLA_U (OM12720U) -
Page 129
’01 Corolla U (L/O 0005) SECTION – OPERATION OF INSTRUMENTS AND CONTROLS Air conditioning system Controls ……….. Air flow selector settings . -
Page 130
’01 Corolla U (L/O 0005) Controls 1. Temperature Selector 2. Air Intake Selector 3. Air Flow Selector 4. “A/C” Button (on some models) 5. Fan Speed Selector 2001MY_COROLLA_U (OM12720U) -
Page 131
’01 Corolla U (L/O 0005) Fan speed selector This position allows the air intake to select FRESH automatically. This is to Turn the knob to adjust the fan speed—to clean up the front view more quickly. the right to increase, to the left to de- crease. -
Page 132
The air intake selector button is used to conditioning automatically switch the air intake FRESH mode that shuts off. If this happens, take your ve- draws outside air into the system and hicle to a Toyota dealer for service. RECIRCULATED mode that recirculates the air inside vehicle. -
Page 133
’01 Corolla U (L/O 0005) Air flow selector settings Operating tips To cool off your Toyota after it has been parked in the hot sun, drive with the windows open for a few minutes. This vents the hot air, allowing the air conditioning to cool the interior more quickly. -
Page 134
’01 Corolla U (L/O 0005) When driving on dusty roads, close all Heating Air conditioning windows. If dust thrown up by the ve- For best results, set controls to: For best results, set controls to: hicle is still drawn into the vehicle after closing the windows, it is recommended Fan speed—Any setting except “OFF”… -
Page 135
’01 Corolla U (L/O 0005) Defogging On humid days, do not blow cold air To heat the vehicle interior while de- on the windshield—the difference be- frosting windshield, choose The inside of the windshield tween the outside and inside tempera- floor/windshield air flow. -
Page 136
’01 Corolla U (L/O 0005) Side vents If air flow control is not satisfactory, check the side vents. The side vents may be opened or closed as shown. 2001MY_COROLLA_U (OM12720U) -
Page 137
’01 Corolla U (L/O 0005) SECTION – OPERATION OF INSTRUMENTS AND CONTROLS Other equipment Clock …………Outside temperature display . -
Page 138: Clock
“–E” or “E” will appear on the display. If “–E” or “E” appears on the display, contact your Toyota dealer. Centigrade display The digital clock indicates the time. The key must be in the “ACC” or “ON”…
-
Page 139: Cigarette Lighter And Ashtray
Do not hold the cigarette lighter pressed blown, do not use the electricity over the total vehicle capacity of 12 Use a Toyota genuine cigarette lighter or V/120W. equivalent for replacement. _ To prevent the battery from being…
-
Page 140: Glove Box
’01 Corolla U (L/O 0005) Glove box Auxiliary boxes _ Close the power outlet lid when the power outlet is not in use. Inserting a foreign object other than the ap- propriate plug that fits the outlet, or allowing any liquid into the out- let may cause electrical failure or short circuits.
-
Page 141: Cup Holders
’01 Corolla U (L/O 0005) Cup holders Type C Type A (front) Type C (rear) To use the box, do the following. The cup holder is designed for holding cups or drink–cans securely. Type A and type B: Pull on the handle. Type C: Open the center console box.
-
Page 142: Floor Mat
’01 Corolla U (L/O 0005) Floor mat CAUTION Do not place anything else other than cups or drink–cans on the cup holder, such items thrown about in the compartment and possibly injure people in the vehicle during sudden braking or in an accident.
-
Page 143
’01 Corolla U (L/O 0005) CAUTION Make sure the floor mat is properly placed on the floor carpet. If the floor slips and interferes with movement of the pedals during driv- ing, it may cause an accident. 2001MY_COROLLA_U (OM12720U) -
Page 144
’01 Corolla U (L/O 0005) 2001MY_COROLLA_U (OM12720U) -
Page 145
……. Your Toyota’s identification …….. -
Page 146: Break-In Period
To help prevent gas station mix–ups, your Use of unleaded fuel with an octane num- to the future economy and long life of Toyota has a smaller fuel tank opening. ber or rating lower than stated above will your vehicle: The special nozzle on pumps with un- cause persistent heavy knocking.
-
Page 147
Toyota does not recommend the use of is expected to be applied world wide. Toyota, be sure that it has an octane gasoline that contains MMT. If fuel con- The WWFC consists of three categories rating no lower than 87. -
Page 148: Fuel Pump Shut Off System
’01 Corolla U (L/O 0005) Fuel pump shut off system Operation in foreign countries The fuel pump shut off system stops sup- If you plan to drive your Toyota in NOTICE plying fuel to the engine to minimize the another country…
-
Page 149: Three-Way Catalytic Converter
_ Do not drive with an extremely low vehicle in for a check–up as soon fuel level; running out of fuel could as possible. Remember, your Toyota cause the engine to misfire, creat- dealer knows your vehicle and its ing an excessive load on the three–…
-
Page 150: Engine Exhaust Cautions
’01 Corolla U (L/O 0005) Facts about engine oil consumption Engine exhaust cautions FUNCTIONS OF ENGINE OIL CAUTION Keep the trunk lid closed while Engine oil has the primary functions of driving. An open or unsealed trunk lubricating and cooling the inside of the Avoid inhaling the engine exhaust.
-
Page 151: Iridium-Tipped Spark Plugs
More oil is consumed by high–speed driv- regularly. Toyota recommends that the oil ing and frequent acceleration and decel- level be checked every time you refuel Your engine is fitted with iridium–tipped eration.
-
Page 152: Brake System
’01 Corolla U (L/O 0005) Brake system The tandem master cylinder brake system Effective way to press the ABS brake CAUTION is a hydraulic system with two separate pedal: When the anti–lock brake system sub–systems. If either sub–system should function is in action, you may feel the Do not pump the brake pedal if the fail, the other will still work.
-
Page 153
’01 Corolla U (L/O 0005) You may hear a click or motor sound in CAUTION Driving on rough, gravel or snow– the engine compartment for a few seconds covered roads. when the engine is started or just after overestimate anti–lock the vehicle is started. -
Page 154
Contact your Toyota dealer as soon as possible to service the vehicle. The light does not come on when the ignition key is turned to the “ON” posi- tion, or remains on. -
Page 155: Brake Pad Wear Limit Indicators
Toyota Section 8. dealer as soon as possible. Expensive ro- Never allow anyone to ride in the tor damage can result if the pads are not enlarged trunk. It is not designed replaced when necessary.
-
Page 156: Your Toyota’s Identification
This number is on the left top of the instrument panel, and can be seen through the windshield from outside. This is the primary identification number for your Toyota. It is used in registering the ownership of your vehicle. 2001MY_COROLLA_U (OM12720U)
-
Page 157: Theft Prevention Labels
’01 Corolla U (L/O 0005) Theft prevention labels (except for Canada) Suspension and chassis Types of tires Your new vehicle carries theft preven- Determine what kind of tires your ve- CAUTION tion labels which are approximately 56 hicle is originally equipped with. mm (2.20 in.) by 16 mm (0.63 in.).
-
Page 158
’01 Corolla U (L/O 0005) CAUTION Do not mix summer and all season tires on your vehicle as this can cause dangerous handling charac- teristics, resulting in loss of con- trol. Do not use tires other than the manufacturer’s designated tires, and do not mix tires or wheels of the sizes different from the originally equipped tires and wheels. -
Page 159: Starting And Driving
’01 Corolla U (L/O 0005) SECTION STARTING AND DRIVING Before starting the engine ……..How to start the engine .
-
Page 160: Before Starting The Engine
’01 Corolla U (L/O 0005) How to start the engine— (a) Before cranking Before starting the engine (b) Starting the engine 1. Check the area around the vehicle be- 1. Apply the parking brake firmly. Before starting the engine, be sure to fol- fore entering it.
-
Page 161: Tips For Driving In Various Condition
If they still do not work safely, pull to the side of the road and call a Toyota dealer for assistance. 2001MY_COROLLA_U (OM12720U)
-
Page 162: Winter Driving Tips
“TOYOTA Long Life Coolant” or equivalent. harder starting. If you are not sure about Driving over 140 km/h (85 mph) may which oil to use, call your Toyota deal- See Section 7–2 for details about coolant result in tire failure, loss of control er—he will be pleased to help.
-
Page 163: Trailer Towing
Toyota Keep ice and snow from accumulating warranties do not apply to damage or under the fenders. malfunction caused by towing a trailer for…
-
Page 164
’01 Corolla U (L/O 0005) Trailer hitch assemblies have differ- The load on either the front or rear Total trailer weight Tongue load ent weight capacities established by axle resulting from distribution of the hitch manufacturer. Even though the gross vehicle weight on both the vehicle may be physically capa- axles must not exceed the Gross ble of towing a higher weight, the… -
Page 165
Never tow a trailer without using a of an Energy Absorbing Bumper, if so safety chain securely attached to Toyota recommends that you do not equipped. both the trailer and the vehicle. If tow a trailer with a new vehicle or a… -
Page 166
’01 Corolla U (L/O 0005) MAINTENANCE TRAILER TOWING TIPS Because stopping distance may be in- creased, vehicle–to–vehicle distance If you tow a trailer, your vehicle will When towing a trailer, your vehicle will should be increased when towing a require more frequent maintenance due handle differently than when not tow- trailer. -
Page 167
’01 Corolla U (L/O 0005) Remember that when making a turn, In order to maintain engine braking effi- 1. Apply the brakes and hold. the trailer wheels will be closer than ciency do not use fifth gear (manual 2. Have someone place wheel blocks un- the vehicle wheels to the inside of the transmission) or overdrive (automatic der both the vehicle and trailer wheels. -
Page 168: How To Save Fuel And Make Your Vehicle Last Longer, To
’01 Corolla U (L/O 0005) How to save fuel and make your vehicle last longer, too Getting more kilometers/mileage from a Avoid long engine idling. If you have CAUTION liter/gallon of fuel is easy—just take it a long wait and you are not in traffic, easy.
-
Page 169
’01 Corolla U (L/O 0005) Keep front wheels in proper CAUTION alignment. Avoid hitting the curb and slow down on rough roads. Improper Never turn off the engine to coast alignment not only causes faster tire down hills. Your power steering and wear but also puts an extra load on brake booster will not function with- the engine, which, in turn, wastes fuel. -
Page 170
’01 Corolla U (L/O 0005) 2001MY_COROLLA_U (OM12720U) -
Page 171: In Case Of An Emergency
’01 Corolla U (L/O 0005) SECTION IN CASE OF AN EMERGENCY If your vehicle will not start ……..If your engine stalls while drivin .
-
Page 172: If Your Vehicle Will Not Start
3. If the light is out, dim or goes out If the engine still will not start, it needs when the starter is cranked, the battery adjustment or repair. Call a Toyota dealer is discharged. You may try jump start- or qualified repair shop for assistance.
-
Page 173
’01 Corolla U (L/O 0005) (c) Jump starting To avoid serious personal injury and JUMP STARTING PROCEDURE The gas normally produced by a damage to your vehicle which might re- 1. If the booster battery is installed in battery will explode if a flame or sult from battery explosion, acid burns, another vehicle, make sure the vehicles spark is brought near. -
Page 174
’01 Corolla U (L/O 0005) Discharged battery Jumper cable Booster battery Positive terminal Discharged battery (“+” mark) Jumper cable Booster battery Negative terminal Positive terminal (“–” mark) (“+” mark) Connecting point 4. Make the cable connections in the or- c. Connect the clamp of the negative der a, b, c, d. -
Page 175: If Your Engine Stalls While Drivin
’01 Corolla U (L/O 0005) If your engine stalls while driving If your vehicle overheats 5. Start your engine in the normal way. If your engine stalls while driving… your engine coolant temperature After starting, run it at about 2000 rpm gauge indicates overheating, if you ex- 1.
-
Page 176: If You Have A Flat Tire
Park on a level system. You should have it checked as spot with firm ground. soon as possible at your Toyota dealer. CAUTION 2. Stop the engine and turn on your emergency flashers.
-
Page 177
’01 Corolla U (L/O 0005) Do not put any part of your body Use the jack only for lifting your under the vehicle supported by the vehicle during wheel changing. jack. Personal injury may occur. Do not raise the vehicle with some- Do not start or run the engine while one in the vehicle. -
Page 178
CAUTION The compact spare tire was de- signed especially for your Toyota. Vehicles with compact spare tire Do not use it on any other vehicle. Do not exceed 80 km/h (50 mph) -
Page 179
’01 Corolla U (L/O 0005) 1. Get the required tools and spare tire. Vehicles with compact spare tire 1. Jack handle 2. Wheel nut wrench 3. Jack 4. Spare tire Vehicles without compact spare tire 1. Spare tire 2. Jack handle 3. -
Page 180
’01 Corolla U (L/O 0005) —Blocking the wheel —Removing wheel ornament 3. Remove the wheel ornament. Pry off the wheel ornament, using the beveled end of the wheel nut wrench as shown. CAUTION Do not try to pull off the ornament by hand. -
Page 181
’01 Corolla U (L/O 0005) —Loosening wheel nuts —Positioning the jack —Raising your vehicle 4. Loosen all the wheel nuts. 5. Position the jack at the correct jack 6. After making sure that no one is in point as shown. the vehicle, raise it high enough so Always loosen the wheel nuts before rais- that the spare tire can be installed. -
Page 182
’01 Corolla U (L/O 0005) —Changing wheels CAUTION Never get under the vehicle when the vehicle supported jack alone. 7. Remove the wheel nuts and change Before putting on wheels, remove any cor- tires. rosion on the mounting surfaces with a wire brush or such. -
Page 183
’01 Corolla U (L/O 0005) —Reinstalling wheel nuts —Lowering your vehicle CAUTION When lowering the vehicle, make sure all portions of your body and all oth- er persons around will not be injured the vehicle is lowered to the ground. 8. -
Page 184
’01 Corolla U (L/O 0005) —Reinstalling wheel ornament —After changing wheels 10. Reinstall the wheel ornament. 11. Check the air pressure of the re- placed tire. 1. Put the wheel ornament into position. Adjust the air pressure to the specification On some models, align the cutout of the designed in Section 8. -
Page 185: If Your Vehicle Needs To Be Towe
If towing is necessary, we recommend (a) Towing with wheel lift type truck you to have it done by your Toyota From front—Release the parking brake. (a) Towing with wheel lift type truck— dealer or a commercial tow truck ser- —From front…
-
Page 186
(b) Using flat bed truck (c) Towing with sling type truck If towing is necessary, we recommend you to have it done by your Toyota NOTICE dealer or a commercial tow truck ser- vice. Do not tow with sling type truck, ei- If towing service is not available in an ther from the front or rear. -
Page 187: If You Cannot Shift Automatic Transmission Selector Leve
’01 Corolla U (L/O 0005) If you cannot shift automatic transmission selector lever NOTICE NOTICE Only specified towing eyelet; Use only a cable or chain specifically otherwise your vehicle may be dam- intended for use in towing vehicles. aged. Securely fasten the cable or chain to the towing eyelets provided.
-
Page 188: If You Lose Your Keys
’01 Corolla U (L/O 0005) If you lose your keys You can purchase a new key at your Toyota dealer if you can give them the key number. See the suggestion given in “Keys” in Section 1–2. If your keys are locked in the vehicle and…
-
Page 189
CORROSION PREVENTION AND APPEARANCE CARE Protecting your Toyota from corrosio ……Washing and waxing your Toyota . -
Page 190
Now, it is up to you. Proper more harm than good to simply wet the High ambient temperatures can cause care of your Toyota can help ensure long– mud and debris without removing them. corrosion to those components of the term corrosion prevention. -
Page 191
’01 Corolla U (L/O 0005) Washing and waxing your Toyota Check the interior of your vehicle. Wa- Washing your Toyota 1. Rinse off loose dirt with a hose. Re- ter and dirt can accumulate under the move any mud or road salt from the… -
Page 192
To prevent damage to the antenna, damage. low the manufacturer’s instructions and make sure it is retracted before driv- precautions. Be sure to polish and wax ing your Toyota through an automatic the chrome trim as well as the paint. 3. Rinse thoroughly—dried soap car wash. -
Page 193
’01 Corolla U (L/O 0005) Cleaning the interior Vinyl interior Carpets CAUTION The vinyl upholstery may be easily Use a good foam–type shampoo to cleaned with a mild soap or detergent clean the carpets. Vehicles with side airbags: and water. Begin by vacuuming thoroughly to remove Be careful not to splash water or First vacuum over the upholstery to re-… -
Page 194
Immediately clean any spill using the method mentioned above. If you have any questions about the cleaning of your Toyota, your local Toyota dealer will be pleased to answer them. 2001MY_COROLLA_U (OM12720U) -
Page 195
’01 Corolla U (L/O 0005) SECTION VEHICLE MAINTENANCE AND CARE Maintenance requirements ……..General maintenance . -
Page 196
Simple instructions for how to per- or if you prefer, your Toyota dealer will be dating this warranty. See “Owner’s War- form them are presented in Section 7. -
Page 197
Booklet” or “Owner’s Manual Supple- should investigate the cause or take your check the nuts for looseness. Tighten ment” for the details. vehicle to your Toyota dealer or a quali- them if necessary. fied service shop immediately. It is recom- Tire rotation… -
Page 198
’01 Corolla U (L/O 0005) Lights Accelerator pedal IN THE ENGINE COMPARTMENT Make sure the headlights, stop lights, tail Check the pedal for smooth operation and Items listed below should be checked lights, turn signal lights, and other lights uneven pedal effort or catching. from time to time, e.g. -
Page 199
If you notice any of these clues, take your Check the level through the reservoir. The mance, sounds, and visual tip–offs that vehicle to your Toyota dealer as soon as level should be in the “HOT” or “COLD” indicate service is needed. Some impor- possible. -
Page 200
’01 Corolla U (L/O 0005) 2001MY_COROLLA_U (OM12720U) -
Page 201
’01 Corolla U (L/O 0005) SECTION – DO–IT–YOURSELF MAINTENANCE Introduction Engine compartment overview ……. Fuse locations . -
Page 202
’01 Corolla U (L/O 0005) Engine compartment overview 1. Power steering fluid reservoir 2. Engine oil level dipstick 3. Engine oil filler cap 4. Brake fluid reservoir 5. Fuse blocks 6. Battery 7. Engine coolant reservoir 8. Electric cooling fans 9. -
Page 203
’01 Corolla U (L/O 0005) Fuse locations Spare fuses 2001MY_COROLLA_U (OM12720U) -
Page 204
Toyota Warranty statement for details and exhaust manifold and spark plug where you may be exposed to flying suggestions. boots, etc.—will be hot. So be care- or falling material, fluid spray, etc. -
Page 205
Remember all Toyota parts are de- could be damaged. Do not dispose of used oil and fil- signed in metric sizes, so your tools must ter in household trash, in sewers or r Do not drive with the air cleaner be metric. -
Page 206
Checking brake fluid Checking and replacing fuses Parts (if level is low): Parts (if replacement is necessary): SAE J1703 or FMVSS No.116 DOT 3 Genuine Toyota fuse or equivalent with brake fluid same amperage rating as original Tools: Adding washer fluid… -
Page 207
’01 Corolla U (L/O 0005) SECTION – DO–IT–YOURSELF MAINTENANCE Engine and Chassis Checking the engine oil level ……. . . Checking the engine coolant level . -
Page 208: Checking The Engine Oil Level
’01 Corolla U (L/O 0005) Checking the engine oil level If the oil level is below or only slightly Engine oil selection above the low level, add engine oil of Use API grade SJ, “Energy–Conserving” Low level Full level the same type as already in the engine. or ILSAC multigrade engine oil.
-
Page 209: Checking The Engine Coolant Level
Visually check the radiator, hoses, engine coolant filler cap, radiator cap and drain cock and water pump. If you can find no leak, have your Toyota dealer test the cap pressure and check for leaks in the cooling system. ILSAC certification mark…
-
Page 210: Checking Brake Fluid
’01 Corolla U (L/O 0005) Checking brake fluid We recommend to use 50% solution for CAUTION your Toyota, to provide protection down to about –35_C (–31_F). When it is extreme- To prevent burning yourself, do not ly cold, to provide protection down to remove the radiator cap when the en- about –50_C (–58_F), 60% solution is rec-…
-
Page 211: Checking Power Steering Fluid
’01 Corolla U (L/O 0005) Checking power steering fluid To check the fluid level, simply look at CAUTION the see–through reservoir. The level If hot O.K. If cold should between “MAX” Take care when filling the reservoir O.K. “MIN” lines on the reservoir. because brake fluid can harm your Open Close…
-
Page 212: Checking Tire Pressure
If a tire frequently needs refilling, have it Keep your tire pressures at the proper checked by your Toyota dealer. level. CAUTION The following instructions for checking The recommended cold tire pressures, tire…
-
Page 213: Checking And Replacing Tires
REPLACING YOUR TIRES The tires on your Toyota have built–in as soon as possible. tread wear indicators to help you know When replacing a tire, use only the when the tires need replacement.
-
Page 214: Rotating Tires
See “If you have a flat tire” in Section 4 Toyota recommends all four tires, or at for tire change procedure. least both front or rear tires be re- Vehicles with compact spare tire When rotating tires, check for uneven placed as a set.
-
Page 215: Installing Snow Tires And Chains
If you need snow tires, select the same TIRE CHAIN SELECTION lower. size, construction and load capacity as Use the tire chains of correct size and the original tires on your Toyota. Drive carefully avoiding bumps, type.
-
Page 216: Replacing Wheels
When using tire chains, be careful not When replacing wheels, care should be to damage the aluminum wheels. taken to ensure that the wheels are re- Use only the Toyota wheel nuts and placed by ones with the same load ca- wrench designed for your aluminum pacity, diameter, rim width, and offset.
-
Page 217
’01 Corolla U (L/O 0005) SECTION – DO–IT–YOURSELF MAINTENANCE Electrical components Checking battery condition ……..Battery recharging precautions . -
Page 218: Checking Battery Condition
’01 Corolla U (L/O 0005) Checking battery condition— —Precautions —Checking battery exterior CAUTION EMERGENCY MEASURES Ground cable Terminals If electrolyte gets in your eyes, BATTERY PRECAUTIONS flush your eyes with clean water The battery produces flammable and immediately immediate explosive hydrogen gas. medical attention.
-
Page 219: Battery Recharging Precautions
Charging necessary. Have battery Dark White checked by your NOTICE Toyota dealer. Clear or Have battery Never recharge the battery while the light checked by your engine is running. Also, be sure all yellow Toyota dealer.
-
Page 220: Checking And Replacing Fuses
’01 Corolla U (L/O 0005) Checking and replacing fuses Type A fuses can be pulled out by the pull–out tool. The location of the pull–out tool is shown in the illustration. Type A If you are not sure whether the fuse has blown, try replacing the suspected fuse with one that you know is good.
-
Page 221: Adding Washer Fluid
When replacing tem. Have your Toyota dealer correct it as light comes on, the washer tank may be a bulb, make sure the ignition switch and soon as possible.
-
Page 222
’01 Corolla U (L/O 0005) —Headlights Bulb Bulb Light bulbs Type Light bulbs Type Headlights Interior light — 9005 (high beam) Trunk light Headlights 9006 A: HB3 halogen bulbs (low beam) B: HB4 halogen bulbs — Front fog lights C: H3 halogen bulbs D: Single end bulbs Parking/front side E: Wedge base bulbs… -
Page 223
’01 Corolla U (L/O 0005) 2. LEFT–HAND HEADLIGHT: Remove the clip and take out the upper cover of the air cleaner duct unit from the lower base as shown in the illustra- tion. Remove and install the cover clip as shown in the following illustrations. -
Page 224
5. Install the bulb base by turning it to the front of the vehicle as shown. Install a new bulb. clockwise to the front of the vehicle. Aiming is not necessary after replacing the bulb. When aiming adjustment is nec- essary, contact your Toyota dealer. 2001MY_COROLLA_U (OM12720U) -
Page 225: 2001My_Corolla_U (Om12720U)
’01 Corolla U (L/O 0005) —Front fog lights 1. Loosen the retainer nut and take out 2. Turn the cover counterclockwise and 3. Disconnect the cords. the beam unit. remove it. 2001MY_COROLLA_U (OM12720U)
-
Page 226
’01 Corolla U (L/O 0005) —Parking/front side marker/ front turn signal lights Use a Phillips–head screwdriver. 4. Release the bulb retaining spring 5. Connect the cords and install the and remove the bulb. Install a new cover by turning it clockwise. bulb and the bulb retaining spring. -
Page 227
’01 Corolla U (L/O 0005) —Rear side maker, rear turn signal, and stop/tail lights Remove and install the clips as shown in Removing clips (type A): Use a flat–bladed the following illustrations. screwdriver or equivalent. Installing clips (type A) 2001MY_COROLLA_U (OM12720U) -
Page 228
’01 Corolla U (L/O 0005) Removing clips (type B): Use a Phillips– a: Stop/tail light head screwdriver. b: Rear turn signal light c: Rear side marker light Installing clips (type B) 2001MY_COROLLA_U (OM12720U) -
Page 229
’01 Corolla U (L/O 0005) —License plate lights (left side) —Back–up lights 2001MY_COROLLA_U (OM12720U) -
Page 230
’01 Corolla U (L/O 0005) —License plate lights (right side) 2001MY_COROLLA_U (OM12720U) -
Page 231
’01 Corolla U (L/O 0005) —High mounted stoplight 2001MY_COROLLA_U (OM12720U) -
Page 232
’01 Corolla U (L/O 0005) 2001MY_COROLLA_U (OM12720U) -
Page 233
’01 Corolla U (L/O 0005) SECTION SPECIFICATIONS Dimensions and weight ……..Engine . -
Page 234
’01 Corolla U (L/O 0005) Dimensions and weight Engine Fuel Overall length mm (in): 4420 (174.0) Model: Fuel type: 1ZZ–FE Unleaded gasoline, Octane Rating 87 Overall width mm (in): 1695 (66.7) (Research Octane Number 91) or higher Type: Overall height mm (in): 1385 (54.5) -
Page 235
Oil grade: IFR5A11 Coolant type: API grade SJ, “Energy–Conserving” or Spark plug gap, mm(in.): ILSAC multigrade engine oil is recom- “TOYOTA Long Life Coolant” or equiva- 1.1 (0.043) mended. lent Recommended oil viscosity (SAE): With ethylene–glycol type coolant for a… -
Page 236
’01 Corolla U (L/O 0005) CLUTCH Differential (3–speed type only) STEERING Pedal free play, mm (in.): Fluid capacity L (qt., Imp. qt.): Wheel free play: 5—15 (0.2—0.6) 1.4 (1.5, 1.2) Less than 30 mm (1.2 in.) Fluid type: Fluid type: Power steering fluid type: SAE J1703 or FMVSS No.116 DOT 3 Automatic transmission fluid D–II or… -
Page 237
’01 Corolla U (L/O 0005) Tires Fuses Tire size: Compact spare tire T115/70D14 T125/70D14 Except compact spare tire P175/65SR14 P185/65SR14 Tire pressure, kPa (kgf/cm or bar, psi): Compact spare tire 420 (4.2, 60) Except compact spare tire 210 (2.1, 30) Engine compartment Engine compartment Wheel size:… -
Page 238
’01 Corolla U (L/O 0005) 23. STOP 15 A: Stop lights, high mounted stoplight, anti–lock brake system, auto- matic transmission shift lock system, cruise control system, multiport fuel in- jection system/sequential multiport fuel injection system 24. TAIL 15 A: Tail lights, gauges and me- ters, instrument panel light control, cig- arette lighter, clock, car audio system, rear window defogger,… -
Page 239
’01 Corolla U (L/O 0005) 31. CIG 15 A: Car audio system, clock, cigarette lighter, power rear view mir- rors, SRS airbag system, seat belt pre- tensioners, automatic transmission shift lock system Fuses (type B) 32. HTR 50 A: Air conditioning system, “A/C”… -
Page 240
’01 Corolla U (L/O 0005) 2001MY_COROLLA_U (OM12720U) -
Page 241
’01 Corolla U (L/O 0005) SECTION REPORTING SAFETY DEFECTS FOR U.S. OWNERS AND UNIFORM TIRE QUALITY GRADING Reporting safety defects for U.S. owners ….. . Uniform tire quality grading . -
Page 242
Toyota Motor ington,D.C. 20590. You can also quality grading. Sales, U.S.A., Inc. obtain other information about mo- Your Toyota dealer will help answer any (Toll–free: 1–800–331–4331). tor vehicle safety from the Hotline. questions you may have as you read this information. -
Page 243
’01 Corolla U (L/O 0005) Treadwear—The treadwear grade Temperature A, B, C—The temperature comparative rating based on the wear rate grades are A (the highest), B, and C, of the tire when tested under controlled representing the tire’s resistance to the conditions on a specified government test generation of heat and its ability to dissi- course. -
Page 244
’01 Corolla U (L/O 0005) 2001MY_COROLLA_U (OM12720U) -
Page 245
’01 Corolla U (L/O 0005) eU−5 Quick index D If a service reminder indicator or warning buzzer comes on ..D If your vehicle will not start ……..D If your engine stalls while driving .
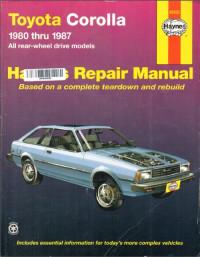
Руководство на английском языке по техническому обслуживанию и ремонту автомобиля Toyota Corolla 1980-1987 годов выпуска.
- Автор: —
- Издательство: Haynes Publishing
- Год издания: 1990
- Страниц: 339
- Формат: PDF
- Размер: 489 Mb
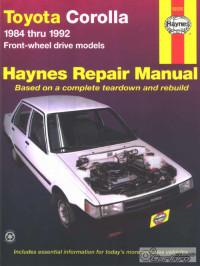
Руководство на английском языке по техническому обслуживанию и ремонту автомобиля Toyota Corolla 1984-1992 годов выпуска.
- Автор: —
- Издательство: Haynes Publishing
- Год издания: —
- Страниц: 291
- Формат: PDF
- Размер: 111,2 Mb
Руководство на английском языке по техническому обслуживанию и ремонту автомобиля Toyota Corolla 2003-2008 годов выпуска.
- Автор: —
- Издательство: Haynes Publishing
- Год издания: —
- Страниц: 244
- Формат: PDF
- Размер: 105,1 Mb

Руководство на английском языке по техническому обслуживанию и ремонту автомобиля Toyota Corolla 1997-2002 годов выпуска с бензиновыми двигателями.
- Автор: —
- Издательство: Haynes Publishing
- Год издания: 2006
- Страниц: 278
- Формат: PDF
- Размер: 33,9 Mb
Сборник руководств на английском языке по техническому обслуживанию и ремонту автомобиля Toyota Corolla 2004 года выпуска.
- Автор: —
- Издательство: Toyota Motor Corporation
- Год издания: —
- Страниц: —
- Формат: PDF
- Размер: 29,6 Mb
Сборник руководств на английском языке по техническому обслуживанию и ремонту автомобиля Toyota Corolla 2009-2010 годов выпуска.
- Автор: —
- Издательство: Toyota Motor Corporation
- Год издания: —
- Страниц: —
- Формат: PDF
- Размер: 272,4 Mb
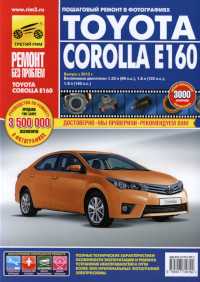
Руководство по эксплуатации, техническому обслуживанию и ремонту автомобилей Toyota Corolla с 2013 года выпуска с бензиновыми двигателями объемом 1,3/1,6/1,8 л.
- Автор: —
- Издательство: Третий Рим
- Год издания: —
- Страниц: 328
- Формат: —
- Размер: —
Руководство по эксплуатации, техническому обслуживанию и ремонту автомобиля Toyota Corolla 2002-2007 годов выпуска с бензиновыми и дизельными двигателями.
- Автор: —
- Издательство: Алфамер
- Год издания: —
- Страниц: 352
- Формат: —
- Размер: —
Мультимедийное руководство по эксплуатации и ремонту автомобиля Toyota Corolla 1992-1998 годов выпуска.
- Автор: —
- Издательство: —
- Год издания: —
- Страниц: —
- Формат: —
- Размер: 223,0 Mb
Руководство по эксплуатации и техническому обслуживанию автомобиля Toyota Corolla 2001-2006 годов выпуска.
- Автор: —
- Издательство: Toyota Motor Corporation
- Год издания: 2006
- Страниц: 320
- Формат: PDF
- Размер: 42,4 Mb
Руководство по эксплуатации и техническому обслуживанию автомобиля Toyota Corolla с 2007 года выпуска.
- Автор: —
- Издательство: Toyota Motor Corporation
- Год издания: 2006
- Страниц: 400
- Формат: PDF
- Размер: 33,6 Mb
Мультимедийное руководство по техническому обслуживанию и ремонту автомобиля Toyota Corolla с 2002 года выпуска.
- Автор: —
- Издательство: —
- Год издания: —
- Страниц: —
- Формат: CHM
- Размер: 293,8 Mb
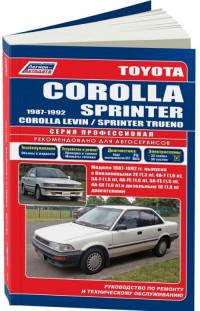
Руководство по техническому обслуживанию и ремонту автомобилей Toyota Corolla/Corolla Levin/Sprinter/Sprinter Trueno 1987-1992 годов выпуска с бензиновыми и дизельными двигателями.
- Автор: —
- Издательство: Легион-Автодата
- Год издания: —
- Страниц: 352
- Формат: —
- Размер: —
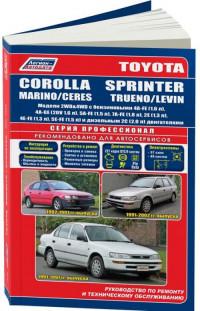
Руководство по эксплуатации, техническому обслуживанию и ремонту автомобилей Toyota Corolla/Corolla Levin/Corolla Ceres/Sprinter/Sprinter Marino/Sprinter Trueno 1991-2002 годов выпуска с бензиновыми и дизельными двигателями.
- Автор: —
- Издательство: Легион-Автодата
- Год издания: —
- Страниц: 544
- Формат: —
- Размер: —
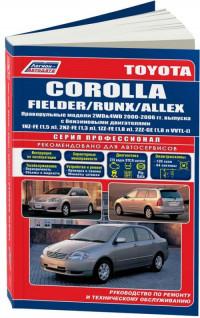
Руководство по эксплуатации, техническому обслуживанию и ремонту автомобилей Toyota Allex/Corolla/Corolla Fielder/Corolla Runx 2000-2006 годов выпуска с бензиновыми двигателями объемом 1,3/1,5/1,8 л.
- Автор: —
- Издательство: Легион-Автодата
- Год издания: —
- Страниц: 408
- Формат: —
- Размер: —
Руководство по техническому обслуживанию и ремонту автомобиля Toyota Corolla 2001-2006 годов выпуска с бензиновыми двигателями объемом 1,4/1,6/1,8 л.
- Автор: —
- Издательство: Легион-Автодата
- Год издания: —
- Страниц: 392
- Формат: —
- Размер: —
Руководство по эксплуатации, техническому обслуживанию и ремонту + каталог расходных запчастей автомобилей Toyota Auris 2007-2012 и Toyota Corolla 2006-2013 годов выпуска с бензиновыми двигателями объемом 1,3/1,4/1,6 л. В книге представлены модели с левым расположением руля.
- Автор: —
- Издательство: Легион-Автодата
- Год издания: —
- Страниц: 598
- Формат: —
- Размер: —
Руководство по эксплуатации, техническому обслуживанию и ремонту автомобилей Toyota Corolla Axio и Toyota Corolla Fielder 2006-2012 годов выпуска с бензиновыми двигателями объемом 1,5/1,8 л.
- Автор: —
- Издательство: Легион-Автодата
- Год издания: —
- Страниц: 424
- Формат: —
- Размер: —
Руководство по эксплуатации и ремонту автомобиля Toyota Corolla 2001-2006 годов выпуска с бензиновыми и дизельными двигателями.
- Автор: —
- Издательство: Монолит
- Год издания: —
- Страниц: 342
- Формат: —
- Размер: —
Руководство по эксплуатации, техническому обслуживанию и ремонту автомобилей Toyota Allex/Corolla/Corolla Fielder/Corolla Runx с 2001 года выпуска.
- Автор: —
- Издательство: Монолит
- Год издания: —
- Страниц: 260
- Формат: —
- Размер: —
Руководство по эксплуатации и ремонту автомобилей Toyota Auris и Toyota Corolla с 2007 года выпуска с бензиновыми и дизельными двигателями.
- Автор: —
- Издательство: Монолит
- Год издания: —
- Страниц: 464
- Формат: —
- Размер: —
Руководство по эксплуатации и ремонту автомобиля Toyota Corolla с 2013 года выпуска с бензиновыми и дизельными двигателями.
- Автор: —
- Издательство: Монолит
- Год издания: —
- Страниц: 618
- Формат: —
- Размер: —

Руководство по эксплуатации и ремонту автомобиля Toyota Corolla с 2013 года выпуска с бензиновыми и дизельными двигателями.
- Автор: —
- Издательство: Монолит
- Год издания: —
- Страниц: 628
- Формат: —
- Размер: —
Руководство по эксплуатации, техническому обслуживанию и ремонту автомобиля Toyota Corolla 1983-1992 годов выпуска с бензиновыми и дизельными двигателями.
- Автор: —
- Издательство: Машсервис
- Год издания: 1998
- Страниц: 166
- Формат: PDF
- Размер: 77,4 Mb
Руководство по эксплуатации и техническому обслуживанию автомобилей Toyota Auris/Corolla/Corolla Verso.
- Автор: —
- Издательство: За рулем
- Год издания: —
- Страниц: 214
- Формат: PDF
- Размер: 35,5 Mb
Руководство по эксплуатации, техническому обслуживанию и ремонту автомобиля Toyota Corolla 2000-2007 годов выпуска с бензиновыми и дизельными двигателями.
- Автор: —
- Издательство: Арго-Авто
- Год издания: —
- Страниц: 624
- Формат: —
- Размер: —
Руководство по эксплуатации, техническому обслуживанию и ремонту автомобилей Toyota Auris/Corolla/Corolla Axio/Corolla Fielder с 2006 года выпуска с бензиновыми и дизельными двигателями.
- Автор: —
- Издательство: Арго-Авто
- Год издания: —
- Страниц: 720
- Формат: —
- Размер: —
Руководство по техническому обслуживанию и ремонту автомобиля Toyota Corolla 1983-1992 годов выпуска.
- Автор: —
- Издательство: Аринас
- Год издания: 1995
- Страниц: 313
- Формат: PDF
- Размер: 124,0 Mb
Руководство по техническому обслуживанию и ремонту автомобилей Toyota Corolla/Corolla Levin/Sprinter/Sprinter Trueno 1995-2000 годов выпуска, праворульные модели с бензиновыми и дизельными двигателями.
- Автор: —
- Издательство: Легион-Автодата
- Год издания: —
- Страниц: 432
- Формат: —
- Размер: —
Руководство по техническому обслуживанию и ремонту автомобиля Toyota Corolla 1997-2001 годов выпуска, леворульные модели с бензиновыми двигателями объемом 1,3/1,4/1,6 л.
- Автор: —
- Издательство: Легион-Автодата
- Год издания: —
- Страниц: 480
- Формат: —
- Размер: —

Руководство по эксплуатации и ремонту автомобиля Toyota Corolla с 2019 года выпуска с бензиновым двигателем объемом 1,6 л.
- Автор: —
- Издательство: Монолит
- Год издания: —
- Страниц: 438
- Формат: —
- Размер: —
Руководство по эксплуатации, техническому обслуживанию и ремонту автомобилей Toyota Corolla с 2013 года выпуска с бензиновыми двигателями объемом 1,3/1,6/1,8 л.
- Автор: —
- Издательство: Третий Рим
- Год издания: —
- Страниц: 328
- Формат: —
- Размер: —
Руководство по эксплуатации, техническому обслуживанию и ремонту автомобилей Toyota Auris и Toyota Corolla с 2006 года выпуска.
- Автор: —
- Издательство: Мир Автокниг
- Год издания: —
- Страниц: 440
- Формат: —
- Размер: —

-
Contents
-
Table of Contents
-
Bookmarks
Quick Links
’01 Corolla U (L/O 0005)
Foreword
Welcome to the growing group of value–conscious people who drive Toyotas. We
are proud of the advanced engineering and quality construction of each vehicle we
build.
This Owner’s Manual explains the features of your new Toyota. Please read it and
follow the instructions carefully so that you can enjoy many years of safe motoring.
When it comes to service, remember that your Toyota dealer knows your vehicle
best and is interested in your complete satisfaction. He will provide quality mainte-
nance and any other assistance you may require.
Please leave this Owner’s Manual in this vehicle at the time of resale. The next
owner will need this information also.
All information and specifications in this manual are current at the time of
printing. However, because of Toyota’s policy of continual product improve-
ment, we reserve the right to make changes at any time without notice.
Please note that this manual applies to all models and explains all equipment,
including options. Therefore, you may find some explanations for equipment
not installed on your vehicle.
2000 TOYOTA MOTOR CORPORATION
All rights reserved. This material may not be reproduced or copied, in whole or in
part, without the written permission of Toyota Motor Corporation.
2001MY_COROLLA_U (OM12720U)
i
Chapters
Summary of Contents for Toyota 2001 Corolla
 19:23
19:23
Скучный обзор скучной Toyota Corolla в 120 кузове. 2001 г.в.
 29:52
29:52
Знакомство с Toyota Corolla 1.6 110. 300 тысяч и она ваша!
 07:27
07:27
Toyota Corolla 1998 Тойота Королла 1998 года осмотр перед продажей
 07:12
07:12
Тест — Обзор Toyota Corolla 120 (E120) 1.6 110 л.с. AT
 05:03
05:03
Toyota Corolla e110 рестайлинг обзор автомобиля
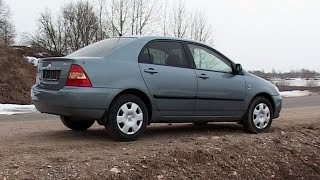 05:33
05:33
Toyota Corolla E120 дорестайлинг
 13:23
13:23
Обзор Toyota Corolla 2003 г.в. (Е120) 4WD
 23:49
23:49
Обзор Toyota Corolla zze112 1.6 3zzfe
Руководство по эксплуатации
Индикация аремени с момента за
пуска деигателя
Показывает время работы двигателя с
момента запуска. При переводе ключа
в замке зажигания в положение «АСС»
или «LOCK» время останавливается.
Для обнуления значения нажмите и
удерживайте кнопку «DISP» более 1
секунды.
Предупреждающие индикации мно
гофункционального дисплея
Индикация наличия открытой или не
плотно закрытой боковой двери. Ин
дикация показывает с какой стороны
дверь открыта.
&
Индикация наличия открытой или не
плотно
закрытой
задней
двери
(хэтчбек, универсал)/крышки багажни
ка (седан).
Индикация низкого давления моторно
го масла.
Индикация неисправности системы
управления двигателем или АКПП.
l y f M H
Индикация неисправности в системе
зарядке.
Таблица. Индикаторы комбинации приборов и звуковые сигналы.
Индикация невыключенного стояноч
ного тормоза при движении автомоби
ля со скоростью 5 км/ч или выше.
Индикаторы
комбинации приборов
1. Индикатор состояния стояночной
тормозной системы и низкого уровня
тормозной жидкости,
а) Индикатор загорается, если:
— включен стояночный тормоз;
ЕЗ
О
В
‘В’
шо
<><>
»
А
ж
ю
Индикатор состояния стоя
ночной тормозной системы
и низкого уровня тормозной
жидкости
Индикатор антиблокировоч-
ной системы тормозов (ABS)
Индикатор зарядки аккумуля
торной батареи
Индикатор низкого давления
моторного масла
Индикатор «проверь двига
тель» (CHECK ENGINE)
Индикатор низкого
уровня топлива
Индикатор открытой или
неплотно закрытой двери
Индикатор включения
дальнего света фар
Индикаторы указателей
поворота
Индикатор системы подушек
безопасности (SRS)
Индикатор непристегнутого
ремня безопасности водителя
Индикатор
включения габаритов
Индикатор включения
противотуманных фар
01
P/S
PRN
D2L
0/D
OFF
TRC
OFF
VSC
0
г
м
звук.
сигнал
Индикатор включения задних
противотуманных фонарей
Индикатор неисправности
системы усилителя рулевого
управления
Индикаторы положения
селектора АКПП
Индикатор выключения
повышающей передачи
Индикатор отключения
противобуксовечной системы
Индикатор системы VSC
Индикатор скольжения
Индикатор давления в шинах
Индикатор системы
иммобилайзера
И нди катор^сисгемы
автоматической коррекции
положения фар
Индикатор
включенной передачи
Индикатор режима ручного
переключения передач
Оставленный в замке ключ
зажигания или невыключен-
ные осветительные приборы
Индикация низкого уровня топлива.
При нажатии на кнопку «DISP» индика
ция исчезает.
— низкий уровень тормозной жидко
сти:
— неисправна электрическая цепь
индикатора.
б) Если во время движения загорел
ся индикатор, то необходимо замед
лить скорость, съехать с дороги и ос
торожно остановить автомобиль, За
медлить скорость можно торможени
ем двигателя и применением стоя
ночного тормоза, но не забудьте при
этом нажать на тормозную педаль
для включения стоп-сигналов, чтобы
предупредить о торможении водите
лей, едущих сзади.
Проверьте стояночный тормоз, воз
можно он включен. Если стояночный
тормоз выключен, а индикатор горит
после его выключения, то возникла
неист1равность в тормозной системе.
Проверьте уровень тормозной жид
кости в бачке.
— Если уровень тормозной жидкости
низок, долейте жидкость и в безо
пасном месте проверьте эффектив
ность торможения автомобиля. Если
вы считаете, что тормоза все еще
работают достаточно эффективно,
то осторожно доведите автомобиль
до ближайшего места ремонта. Если
тормоза не работают, то автомо
биль необходимо отбуксировать или
эвакуировать для ремонта.
Внимание: движение в автомобиле с
низким уровнем тормозной жидкости
опасно.
— Если уровень тормозной жидко
сти в норме, то, возможно, неис
правна электрическая цепь инди
катора.
2. Индикатор антиблокировочной сис
темы тормозов (АВЗ).
После включения зажигания индика
тор загорается на несколько секунд, а
затем гаснет. Если во время движения
загорается индикатор или индикатор
не загорается, или не гаснет при вклю
чении двигателя, то возможно наличие
неисправности в антиблокировочной
системе.
Внимание: многократное нажатие на
педаль тормоза может привести к
включению индикатора на несколько
секунд.
3. Индикатор зарядки аккумуляторной
батареи.
а) Индикатор загорается при пово
роте ключа в замке зажигания в по
ложение «ОМ» и должен погаснуть
после пуска двигателя.
б) Если во время движения загорел
ся „индикатор, то неисправна система
зарядки или ослаблен (оборван) ре
мень привода генератора. Однако
двигатель будет продолжать рабо
тать, пока аккумуляторная батарея
полностью не разрядится. Выключи
те дополнительное оборудование
{кондиционер, вентилятор, радио
приемник и др.) и двигайтесь к месту
ремонта.

10
Руководство по эксплуатации
4. Индикатор низкого давления мотор
ного масла.
а) Индикатор загорается при пово
роте ключа в замке зажигания в по
ложение «ON» и должен погаснуть
после пуска двигателя.
б) Индикатор загорается, если дав
ление моторного масла слишком
низкое.
в) Если во время движения индика
тор мигает или горит, то необходимо
съехать на обочину и выключить
двигатель.
— Индикатор может мигать после
резкого торможения или когда дви
гатель работает на холостом ходу.
Неисправность отсутствует, если
индикатор гаснет при небольшом
увеличении оборотов двигателя.
— Индикатор может загореться, ко
гда уровень масла в двигателе
слишком низок. Но данный индика
тор не предназначен для инфор
мирования о низком уровне масла,
поэтому периодически проверяйте
уровень с помощью щупа.
Проверьте уровень масла и убеди
тесь в отсутствии утечек.
— Если уровень масла находится в
допустимь(х пределах и утечки от
сутствуют, отб№сируйте или эва
куируйте автомобиль для ремонта.
— Если уровень масла ниже мини
мально допустимого и утечки от
сутствуют. долейте масло и запус
тите двигатель. Если индикатор
мигает или горит, то выключите
двигатель и отбуксируйте или эва
куируйте автомобиль для ремонта.
5.
Индикатор «проверь двигатель»
(CHECK ENGINE).
Индикатор загорается при повороте
ключа в замке зажигания в положение
«ON» на несколько секунд, а затем
гаснет, информируя водителя о про
верке системы управления двигате
лем. Если индикатор продолжает го
реть или загорается во время движе
ния, это свидетельствует о наличии
неисправностей в электронной систе
ме управления двигателем. В данном
случае необходимо двигаться к месту
ремонта и произвести диагностику
системы управления двигателем.
6. Индикатор низкого уровня топлива.
Индикатор загорается, когда ключ в
замке зажигания находится в положе
нии «ON», а количество топлива в баке
менее 8 литров. В зависимости от
комплектации автомобиля топлива
может хватить на 40-60 км пути по хо
рошей дороге. На склонах или при по
воротах индикатор может загораться
из-за колебаний топлива в баке.
Внимание: не ездите с очень низким
уровнем топлива в баке. Выработка
всего топлива может привести к по
вреждению
каталитического
ней
трализатора.
7. Индикатор открытой или неплотно
закрытой двери.
Индикатор остается включенным до
тех пор, пока все двери не будут плот
но закрыты.
8. Индикатор включения дальнего
света фар загорается при включении
дальнего света фар.
9. Индикаторы указателей поворотов.
Индикаторы мигают при включении
указателей поворотов или аварийной
сигнализации. Слишком частое мига
ние индикаторов указывает на плохое
соединение в цепи указателей пово
ротов или на отказ лампы указателя
поворота.
10. Индикатор системы подушек безо
пасности (SRS).
Индикатор загорается, когда ключ в
замке зажигания находится в положе
нии «ON». Через несколько секунд ин
дикатор погаснет. В случае, если инди
катор не загорелся или горит/мигает во
время движения, имеется неисправ
ность в компонентах системы SRS.
11. Индикатор непристегнутого ремня
безопасности водителя.
Индикатор загорается при включении
зажигания на несколько секунд, а за
тем гаснет, если водитель пристегнут.
В случае если водитель не пристегнут
ремнем безопасности, индикатор про
должает гореть.
12. Индикатор включения габаритов
загорается при включении габаритов.
13. Индикатор включения противоту
манных фар загорается при включе
нии противотуманных фар.
14. Индикатор включения задних про
тивотуманных фонарей загорается
при включении задних противотуман
ных фонарей.
15. Индикатор неисправности системы
усилителя рулевого управления
Индикатор загорается, когда ключ в
замке зажигания находится в положе
нии «ON». Через несколько секунд ин
дикатор погаснет. В случае, если ин
дикатор не загорелся или горит/мигает
во время движения, в системе имеет
ся неисправность.
16. Индикаторы положения селектора
АКПП («Р», «R», «N». «D», «2» или «L»).
При переводе селектора АКПП в лю
бое положение на комбинации прибо
ров загорается соответствующий ин
дикатор «Р». «R», «N». «D». «2» или «L».
17. Индикатор выключения повышаю
щей передачи «0/D OFF» информиру
ет водителя о запрещении использо
вания повышающей передачи АКПП.
Более подробное описание смотрите
в разделе «Управление автомобилем
с АКПП».
18. (Модификация) Индикатор отклю
чения противобуксовочной системы
(TRC OFF).
Индикатор загорается, когда ключ в
замке зажигания находится в поло
жении «ON». Через несколько секунд
индикатор гаснет. При нажатии на
выключатель «TRC OFF» работа сис
темы прекращается и загорается ин
дикатор. Если во время движения за
горается индикатор (выключатель
«TRC ÛFF» не нажат) или индикатор
не загорается, или не гаснет при
включении двигателя, то возможно на
личие неисправности в системах TRC,
VSC, ABS, ВА или ËFL Более подроб
ное описание смотрите в разделе
«Противобуксовочная система (TRC).
19. (Модификация) Индикатор систе
мы курсовой устойчивости автомоби
ля (VSC).
Индикатор загорается, когда ключ в
замке зажигания находится в положе
нии «ON». Через несколько секунд ин
дикатор гаснет. Индикатор загорается
при неисправности в системах TRC,
VSC, ABS, ВА или EFI. Более подроб
ное описание смотрите в разделе
«Система курсовой устойчивости ав
томобиля (VSC)».
20. (Модификация) Индикатор сколь
жения.
Индикатор загорается, когда замок за
жигания находится в положении «ON».
Через несколько секунд иадикатор гас
нет. Индикатор мигает при работе про
тивобуксовочной системы: (TRC), сис
темы курсовой устойчивости автомоби
ля (VSC) и при проскальзывании колес.
21. Индикатор системы контроля за
давлением в шинах загорается на не
сколько секунд при повороте ключа в
замке зажигания в положение «ON», а
затем гаснет. Если индикатор про
должает гореть или загорается во
время движения, это свидетельствует
о низком давлении в одной из шин.
Необходимо немедленно остановить
ся и отрегулировать давление в шине.
Более подробное описание смотрите
в разделе «Система контроля за дав
лением в шинах».
22. Индикатор системы иммобилайзера.
При вынимании ключа из замка зажи
гания на комбинации приборов начи
нает мигать индикатор системы иммо
билайзера.
Более подробное описание смотрите
в разделе «Блокировка дверей».
23. Индикатор системы автоматической
коррекции положения фар. Индикатор
загорается при повороте ключа в замке
зажигания в положение «ON» на не
сколько секунд, а затем гаснет. Если
индикатор загорается во время движе
ния, то остановитесь и выключите за
жигание. Повторно включите зажигание
и если индикатор загорелся и не гас
нет, это свидетельствует о наличии не
исправностей в системе автоматиче
ской коррекции положения фар.
24. Индикатор включенной передачи.
Индикатор показывает включенную
передачу при переводе селектора
АКПП в положения «D», «М», «2», «L».
При переводе селектора АКПП в по
ложения «Р», «R», «N» индикатор ничего
не показывает. Более подробное опи
сание смотрите в разделе «Управле
ние автомобилем с АКПП»,
25. Индикатор режима ручного пере
ключения передач загорается при пе
реводе селектора АКПП в положение
«М». Более подробное описание смот
рите в разделе «Управление автомо
билем с АКПП».
26. Звуковая сигнализация на автомо
биле (зуммер).
а) Звуковой сигнал срабатывает,
если дверь водителя открыта, когда
ключ зажигания установлен в поло
жение «LOCK» или «АСС“.
б) Звуковой сигнал срабатывает при
включенных фарах и извлеченном
из замка зажигания ключе, при от
крывании водительской двери. Дан
ный сигнал информирует водителя
о возможности разрядки аккумуля
торной батареи.
Стеклоподъемники
На моделях с электроприводом стек
лоподъемников регулировка положе
ния стекол дверей осуществляется
нажатием на соответствующий вы
ключатель. При этом ключ в замке за
жигания должен быть установлен в
положение «ON».

Руководство по эксплуатации
11
С панели двери водителя мо>га-10 управ
лять положением стекол всех дверей, а
также осуществлять их блокировку со
ответствующим выключателем.
1 — выключатель блокировки стек
лоподъемников, 2 — выключатель
стеклоподъемника двери водителя,
3 — выключатель стеклоподъемника
задней правой двери, 4 — выключа
тель стеклоподъемника передней
двери пассажира, 5 — выключатель
стеклоподъемника
задней
левой
двери.
На панели каждой пассажирской две
ри находится выключатель, нажатием
и удерживанием которого пассажир
может регулировать положение стекла
только со своей стороны.
При легком нажатии на выключатель
стеклоподъемника двери водителя
стекло будет опускаться вниз до тех
пор, пока выключатель будет удержи
ваться. Для поднятия стекла необхо
димо слегка потянуть за выключатель
вверх и удерживать в таком положе
нии, пока стекло полностью не подни
мется.
У выключателей стеклоподъемников
дверей есть дополнительная функция
— полное опускание и полное поднятие
стекла двери (AUTO), при котором нет
необходимости удерживать выключа
тель в соответствующем положении.
Положение ручки
QN1 ON2
Передние фары
О
Габариты
О
О
Подсветка номерного
знака
0
0
Подсветка комбинации
приборов
О
О
Для опускания стекла нужно нажать на
выключатель до конца его хода. При
необходимости остановки стекла в
приоткрытом положении кратковре
менно нажмите на выключатель вверх
и снова опустите. Для поднятия стек
ла необходимо потянуть выключатель
до конца хода вверх.
На панели управления стеклоподъем
никами находится выключатель бло
кировки стеклоподъемников «WINDOW
LOCK». При его нажатом положении
опускание стекол невозможно, кроме
стекла двери водителя.
Световая сигнализация
на автомобиле
1. Включение габаритов, фар, под
светки комбинации приборов и номер
ного знака.
Примочанив:
переключатель
сеета
фар и указателей поворота работа-
ет независимо от положения ключа в
замке зажигания.
а) При повороте ручки переключа
теля до первого щелчка (положение
«ONГ) включаются габариты, под
светка комбинации приборов и но
мерного знака. Работа габаритов
сопровождается высвечиванием на
комбинации приборов соответст
вующего индикатора.
б) При повороте ручки переключателя
до второго щелчка (положение «ОМ2»)
включается ближний свет фар.
4. Для включения указателя поворота
переведите переключатель вверх или
вниз (положение 1). Переключатель
автоматически вернется в исходное
положение после завершения поворо
та. Однако при смене полосы движе
ния, возможно, потребуется рукой
вернуть переключатель в нейтральное
положение.
Для включения сигнала смены полосы
переведите переключатель вверх или
вниз (положение 2) до момента воз
никновения сопротивления переме
щению и установите его в этом поло
жении. Работа указателей поворотов
сопровождается высвечиванием на
комбинации приборов соответствую
щего индикатора.
Внимание: во избежание разряда ак
кумуляторной батареи при выклю
ченном
двигателе
не
оставляйте
фары включенными на длительный
промежуток времени.
5.
(Модификация)
Автоматическое
включение/отключение фар.
Система работает, когда ключ в замке
зажигания находится в положении «ON».
При повороте ручки переключателя в
положение «AUTO» передние фары, га
бариты, подсветка комбинации прибо
ров и подсветка номерного знака авто
матически включаются/отключаются в
зависимости от освещенности окру
жающего пространства.
2. Для включения дальнего света фар
нажмите на переключатель от себя,
когда ручка переключателя находится
в положении «ОЫ2». Работа фар даль
него света сопровождается высвечи
ванием на комбинации приборов со
ответствующего индикатора.
Если выключить зажигание и открыть
дверь водителя, световая сигнализа
ция автоматически выключится. При
повороте ключа зажигания в положе
ние «ОМ» включится снова.
Примечание: не кладите посторон
ние предметы на датчик освещенно
сти. Расположение датчика показано
на рисунке.
Для выключения дальнего света фар
и включения ближнего света фар пе
реведите переключатель в исходное
положение; на себя.
3. Для кратковременного включения
дальнего света фар (сигнализация
дальним светом фар) потяните пере
ключатель на себя до упора, затем
отпустите. Система работает, даже
если ручка переключателя находится
в положении «OFF».

12
Руководство no эксплуатации
6. Передние противотуманные фары
работают, только если ручка переклю
чателя света фар находится в поло
жении ON1 или ON2.
Для включения передних противоту
манных фар переведите ободок ручки
переключателя света фар в положе
ние «ON», для выключения — в положе
ние «OFF». Работа передних противо
туманных фар сопровождается горе
нием индикатора на комбинации при
боров.
Загрузка
автомобиля
Положение
регулятора
Только водитель
0
Водитель + пассажир
на переднем сиденье
0
Водитель + все пассажиры
1,5 (между
1 и 2)
Водитель + все пассажиры
+ максимальная загрузка
багажного отделения
2
Водитель + максимальная
загрузка багажного
отделения
3
Фальшфейер
7. Задние противотуманные фонари
можно включить только при работе
передних противотуманных фар или
передних фар. Выключатель задних
противотуманных фар находится в
месте, показанном на рисунке. Работа
задних противотуманных фар сопро
вождается горением индикатора на
комбинации приборов.
8. Аварийная сигнализация включает
ся нажатием на выключатель, распо
ложенный, как показано на рисунке.
Система коррекции
положения фар
Корректировка направления пучка
Света фар осуществляется вращени
ем регулятора, расположенного, как
показано на рисунке. Необходимость
корректировки пучка света фар возни
кает в зависимости от загрузки авто
мобиля. Этой функцией можно пользо
ваться, только когда включен ближний
свет фар.
В Японии для информирования участ
ников дорожного движения о внезапно
возникшей поломке в сложных метео
рологических условиях (при ограни
ченной
видимости)
используется
фальшфейер.
Поимвчэние: по истечении срока год
ности фальшфейер следует утили
зировать, так как езо внезапное сра
батывание может повредить ваше
му здоровью и создать аварийную
ситуацию на дороге.
2. Для того чтобы закрыть капот, не
обходимо освободить стойку капота,
уложить ее в штатное место и закрыть
капот.
Крышка
багажника (седан)
1. Для открывания крышки багажника
снаружи вставьте ключ в замок и по
верните его вправо.
2. Для открывания крышки багажника
из салона автомобиля потяните вверх
за рычаг, расположенный с правой
стороны сиденья водителя.
Капот
1. Для открывания капота необходимо
произвести следующие процедуры:
а) Потяните вверх за рычаг привода
замка капота, как показано на рисунке.
Задняя дверь (хэтчбек,
универсал)
(Модификация) Задняя дверь откры
вается снаружи поворотом ключа вле
во. Потяните за ручку двери и подни
мите дверь вверх.
Примечание: на других моделях для
отпирания/запирания
задней
двери
см. раздел «Блокировка дверей».
б) Слега приподнимите капот и по
тяните рычаг блокировки замка ка
пота вверх.
Лючок
топливно-заливной
горловины
Для того чтобы открьть лючок топ
ливно-заливной горловины, потяните
вверх рычаг, расположенный с правой
стороны сиденья водителя.
в) Поднимите капот и зафиксируйте
его на стойке, как показано на ри
сунке.

Руководство по эксплуатации
13
Выверните крышку топливно-заливной
горловины топливного бака и уложите
ее на держатель.
Управление
стеклоочистителем
и омывателем
Переключатель управления стекло
очистителем и омывателем работает,
когда ключ зажигания находится в по
ложении «ОМ».
1. Для включения и остановки очисти
теля необходимо перевести переклю
чатель в одно из положений:
1- е положение — полная остановка;
2- е положение — прерывистый режим;
3- е положение — работа на низкой
скорости;
4- е положение — работа на высокой
скорости;
5- е положение — однократное сраба
тывание стеклоочистителя.
3. (Хэтчбек, универсал) Для включе
ния и остановки очистителя и омыва-
теля стекла задней двери необходимо
перевести ручку переключателя в од
но из положений.
1- е положение — разбрызгивание
жидкости омывателя и срабатыва
ние стеклоочистителя;
2- е положение — работа на низкой
скорости:
3- е положение — прерывистый режим
(через 10-15 сек):
4- е положение — полная приостановка;
5- е положение — разбрызгивание
жидкости омывателя и срабатыва
ние стеклоочистителя.
Примечание: если омыватель не сра
батывает, то не пытайтесь вклю
чить его снова, а проверьте насос
омывателя и наличие жидкости в
бачке омывателя.
Если поворачивать ободок, когда пере
ключатель находится в положении
прерывистого режима, то можно регу
лировать интервал работы стеклоочи
стителя в пределах от 3 до 12 секунд.
2. Для включения омывателя лобового
стекла потяните переключатель на
себя, и через 1 секунду включается
стеклоочиститель на 2 — 3 хода.
Примечание: если омыватель не сра
батывает, то не пытайтесь вклю
чить его снова, а проверьте насос
омывателя и наличие жидкости в
бачке
омывателя,
расположенного,
как показано на рисунке.
Выбор управления правым или левым
зеркалом осуществляется установкой
переключателя (1) в соответствующие
положение: «К» — правое зеркало; «1» —
левое зеркало. Дальнейшая регулиров
ка положения зеркала осуществляется
нажатием на соответствующий сектор
переключателя (2).
После того как отпустить ручку пере
ключателя, она автоматически вер
нется в исходное положение.
Регулировка положения
рулевого колеса
Для регулировки вертикального поло
жения рулевого колеса необходимо
потянуть рычаг блокировки вниз.
Дальнейшая регулировка производит
ся перемещением рулевого колеса по
вертикали, при этом рулевое колесо
стремится занять самое верхнее по
ложение, так как оно подпружинено.
Для фиксации выбранного положения
необходимо вернуть рычаг блокировки
в исходное положение.
После установки зеркал в необходи
мое положение переведите переклю
чатель выбора зеркала (1) в среднее
положение.
Автоматическое складывание зеркал
производится нажатием на выключа
тель <3). Для возвращения зеркал в
рабочее положение нажмите на вы
ключатель еще раз.
Сиденья
Увеличение пространства
багажного отделения
(Седан)
Снимите блокировку спинок сидений,
потянув за кнопки, как показано на ри
сунке, и сложите спинки сидений.
(Хэтчбек, универсал)
1. Сложите замки ремней безопасно
сти задних сидений, как показано на
рисунке.
Внимание: перед началом движения
убедитесь, что рулевое колесо на
дежно зафиксировано.
Управление зеркалами
Регулировка зеркал производится с
панели управления зеркал. При этом
ключ зажигания должен находиться в
положении «ON» или «АСС».

14
Руководство по эксплуатации
2. Выдвинете подушку заднего сиде
нья, потянув за лямки, как показано на
рисунке.
Крепления для детских
сидений ISOFIX
Для детских сидений предназначены
специальные дополнительные креп
ления ISOFIX для безопасности детей
во время движения. Крепления на
дежно фиксируют детские сиденья и
предотвращают их опрокидывание
при столкновение.
На задних сиденьях, оснащенных кре
плением для детских сидений ISOFIX,
находится ярлык, на одной стороне
которого написано «ISOFIX», а на дру
гой — «LATCH».
Крепления ISOFIX находятся между
подушкой и спинкой заднего сиденья,
как показано на рисунке.
Детские сиденья вставляются в креп
ления ISOFIX.
3. Поднимите вертикально вверх по
душку заднего сиденья, как показано
на рисунке.
4. Снимите подголовники и уложите их
в место, показанное на рисунке.
5. Снимите блокировку спинок сиде
ний, передвинув рычаг, как показано
на рисунке, и сложите спинки сидений.
Слегка вытяните ремень для регули
рования желаемого натяжения.
Внимание:
беременным
женщинам
рекомендуется
пользоваться
имею
щимися ремнями безопасности после
консультации с врачом. Это умень
шит
вероятность
травмирования
как самой женщины, так и ее буду
щего ребенка. Поясной ремень дол
жен
располагаться
возможно
ниже
под животом.
Ремни безопасности
Чтобы защитить вас и ваших пасса
жиров в случае дорожно-транс
портного происшествия рекомендует
ся, чтобы асе люди, находящиеся в
автомобиле, были пристегнуты рем
нями безопасности.
Внимание:
—
Не надевайте плечевую часть
ремня так, чтобы она проходила
под мышкой или располагалась в
каком-либо
другом
неправильном
положении.
— Следите за тем, чтобы ремень
не перекручивался.
—
Ремень обеспечивает наиболь
шую защиту, когда спинка сиденья
находится в вертикальном поло
жении. Когда спинка наклонена, по
вышается
опасность
того,
что
пассажир выскользнет из-под рем
ня, особенно при лобовом столкно
вении, и получит травму от ремня
или от удара о панель приборов
или спинку сиденья.
Для того чтобы пристегнуться, мед
ленно вытяните ремень, держа его за
планку. Вставьте планку в замок так,
чтобы раздался щелчок.
Примечание: если ремень заблокиро
ван и не выходит из катушки, сильно
потяните за ремень, после чего от
пустите его. Затем снова медленно
вытяните ремень.
Для отстегивания ремня, удерживая
планку, нажмите на кнопку в замке.
Примечание: так как ремень убира
ется
автоматически,
удерживайте
его за планку, чтобы втязивануе
ремня происходило не слишком бы
стро. Иначе вы можете повредить
автомобиль.
Регулирование высоты точки
крепления ремня
безопасности(передние
сиденья)
Для поднятия точки крепления ремня
передвиньте узел крепления ремня
безопасности вверх. Для опускания
точки крепления ремня нажмите на
стопорную кнопку и передвиньте узел
крепления ремня безопасности вниз в
положение, наиболее подходящее для
вас, и отпустите кнопку. Вы должны
услышать щелчок и убедиться, что
узел крепления ремня безопасности
прочно зафиксирован.
Внимание: при регулировке положения
точки крепления ремня располагайте
ее достаточно высоко так, чтобы
ремень
полностью контактировал
с
вашим плечом, но не касался шеи.

Руководство по эксплуатации
15
Детские сиденья
При перевозке в своем автомобиле
детей всегда следует использовать
удерживающие устройства того или
иного типа, в зависимости от веса и
возраста ребенка.
Внимание:
—
Рекомендуется перевозить де
тей только на заднем сиденье и
использовать для них удерживаю
щие устройства.
— Держание ребенка на руках не за
менит удерживающего устройства.
Предостережение от установки дет
ских сидений в автомобилях с по
душкой безопасности (SRS) перед
него пассажира
Знак, изображенный на рисунке, при
крепляется на автомобилях, имеющих
подушку безопасности для пассажира,
Вниманш
— Не устанавливайте детское си
денье на переднем пассажирском
сиденье, перед которым находится
подушка
безопасности,
спинкой
вперед. Усилие при срабатывании
подушки
безопасности
пассажира
может прижать детское сиденье к
спинке сиденья, что приведет к
серьезной травме.
—
Детские сиденья, обращенные
лицевой стороной вперед, должны
устанавливаться
на
задних
си
деньях.
■ — 6 случае установки детского си
денья на сиденье переднего пасса
жира отодвиньте последнее в
Когда детское сиденье не использует
ся, закрепите его ремнем безопасно
сти или уберите из автомобиля, чтобы
оно случайно не травмировало вас
или пассажира.
Примечание:
прежде
чем
покупать
детское сиденье проверьте, хорошо
ли оно устанавливается на заднем
сиденье. Иногда пряжки ремней безо
пасности, находящиеся на подушке
сиденья, могут затруднять надеж
ную
установку
некоторых
видов
детских сидений. Если детское сиде
нье после затягивания его ремня
можно сдвинуть вперед на подушке
сиденья, то выберите другое дет
ское сиденье.
Подростки
Дети, для которых детское сиденье
уже не годится, должны находиться на
заднем сиденье и надевать комбини
рованный поясной и плечевой ремень.
Поясная часть ремня должна плотно
охватывать бедра ребенка. В против
ном случае при аварии ремень может
врезаться в живот и нанести ребенку
травму.
Внимание:
дети,
не
пристегнутые
ремнями, в случав дорожно-транс
портного происшествия
могут быть
выброшены из автомобиля.
Система предупреждения
о непристегнутом ремне
безопасности пассажира
Индикатор непристегнутого ремня
безопасности переднего пассажира
мигает, когда ключ в замке зажигания
находится в положении «ОМ» и датчик
сиденья фиксирует наличие пассажи
ра, а ремень безопасности переднего
пассажира при этом не пристегнут.
Необходимо пристегнуться ремнем
безопасности переднего пассажира и
индикатор погаснет.
При установке детского сиденья руко
водствуйтесь инструкциями изготови
теля данного устройства. Несоблюде
ние этих инструкций может привести к
серьезной и даже смертельной травме
вашего ребенка.
Водителю и впереди сидящему пас
сажиру следует помнить, что если они
не будут надлежащим образом при
стегнуты ремнями безопасности, то
при срабатывании подушки безопас
ности они могут быть серьезно трав
мированы, причем не исключена воз
можность смертельного исхода. При
неожиданном
торможении
перед
столкновением водитель или впереди
сидящий пассажир, не пристегнутый
надлежащим образом ремнем безо
пасности, может податься вперед
близко к подушке безопасности, кото
рая может сработать при столкнове
нии. Для достижения максимального
предохранения во время аварии води
тель и все пассажиры в автомобиле
должны быть надлежащим образом
пристегнуты с помощью ремней безо
пасности.
Младенцы и дети, которые непра
вильно посажены или
пристегнуты,
могут быть убиты или серьезно трав
мированы при срабатывании подушки
безопасности.
Дети, которые слишком малы, чтобы
использовать для них ремни безопас
ности, должны быть надлежащим об
разом предохранены при помощи
удерживающих
устройств.
Фирма
«Toyota» настоятельно рекомендует,
чтобы все дети находились на заднем
сиденье автомобиля и были надежно
предохранены. Заднее сиденье явля
ется самым безопасным для детей,
Не в коем случае не устанавливайте
детское сиденье на переднем пасса
жирском сиденье спинкой вперед, пе
ред которым находится подушка безо
пасности. Усилие при срабатывании
подушки безопасности пассажира мо
жет прижать детское сиденье к спинке
сиденья, что приведет к серьезной
травме. Если в силу обстоятельств
вам необходимо установить детское
сиденье на переднем сиденье, ото
двиньте переднее сиденье макси
мально назад, и установите детское
сиденье спинкой назад.
Меры
предосторожности
при эксплуатации
автомобилей,
оборудованных
системой SRS
Подушки безопасности системы SRS
спроектированы только как дополне
ние к основной предохранительной
системе ремней безопасности на сто
роне водителя и- впереди сидящего
пассажира.
Не позволяйте ребенку вставать и
становиться на колени на переднем
сиденье. Подушка безопасности сра
батывает со значительной скоростью
и силой; ребенок может получить
серьезную травму. Не держите ребен
ка на коленях или на руках.

Открытие и закрытие люка, Приоткрывание люка, Управление отопителем и кондиционером
Страница 8
- Изображение
- Текст
16
Руководство по эксплуатации
Не сидите на краю сиденья и не на
клоняйтесь над панелью приборов при
движении автомобиля.
Не кладите предметы и ваших живот
ных на или напротив панели приборов
или накладки рулевого колеса, в кото
рых расположены подушки безопасно
сти. Они могут помешать срабатыва
нию подушки, либо привести к серьез
ной травме или смерти, так как будут
отброшены назад при срабатывании
подушки безопасности. Волее того,
водитель и впереди^ сидящий пасса
жир, не
должны
держать вещей в руках
или на коленях.
Не модифицируйте, не снимайте, не
ударяйте и не открывайте какие-либо
компоненты, как, например, накладку
рулевого колеса, рулевое колесо, ко
жух рулевой колонки, крышку подушки
безопасности переднего пассажира
или устройство датчиков подушки,
Подобные действия могут привести к
внезапному срабатыванию подушки
безопасности или выведению из строя
системы SRS.
Люк
Управление люком возможно, когда
ключ зажигания находится в положе
нии «ON». Люк может находиться в
двух различных открытых состояниях:
в сдвинутом и в открытом под углом.
Открытие и закрытие люка
Внимание: при закрывании и откры
вании
люка
будьте
внимательны,
чтобы не защемить руки. Будьте
особенно осторожны, когда вы везе
те детей.
Для открытия люка нажмите на пере
ключатель
«SLIDE»
со
стороны
«OPEN». Для остановки люка еще раз
нажмите на переключатель.
Для закрытия люка нажмите на пере
ключатель со стороны «CLOSE». Для
остановки люка в необходимом по
ложении нажмите на переключатель
еще раз.
Приоткрывание люка
1. Полностью откройте солнцезащит
ную щторку.
2. При нажатии на переключатель
«TILT» со стороны «UP» поднимается
задняя часть люка. Для остановки в
необходимом положении нажмите
еще
раз на
переключатель.
3. Для закрытия люка нажмите на пере
ключатель «TILT» со стороны «DOWN»,
и люк будет закрываться. Чтобы его ос
тановить в требуемом положении, на
жмите на переключатель еще раз.
При открытии люка автоматически- бу
дет открываться шторка люка. Шторку
люка также можно открывать и закры
вать вручную.
Также при открытии люка автоматиче
ски выдвигается дефлектор.
рости вращения вентилятора отопите
ля (6) из положения «О» сразу начнет
работать режим кондиционирования.
При повторном нажатии на выключа
тель «А/С» (1) выключится режим кон
диционирования и будет работать ото
питель. Отопитель работает, если от
ключен режим кондиционера.
3. Переключатель направления потока
воздуха (2) предназначен для измене
ния направления обдува.
(Модели с ручным управлением кон
диционером и отопителем)
Для переключения режима обдува пе
реведите переключатель в необходи
мое положение.
(Модели с автоматическим управле
нием кондиционером и отопителем)
Для переключения режима обдува на
жмите на кнопку «MODE», На инфор
мационном табло появится индикатор,
показывающий текущую схему обдува.
— В этой позиции поток воздуха на
правлен в район головы.
Управление
отопителем
и кондиционером
Управление работой кондиционера и
отопителя осуществляется с панели
управления {см. соответствующие
сборочные рисунки «Панель управле
ния кондиционером и отопителем»).
1. (Модели с автоматическим управ
лением кондиционером и отопите
лем) Для включения кондиционера
или отопителя необходимо нажать
выключатель «AUTO» {5). Для включе
ния кондиционера необходимо нажать
на выключатель «А/С» (1). При вклю
чении кондиционера на выключателе
загорается индикатор. Если режим
кондиционера был включен перед по
следним выключением, то при вклю
чении сразу начнет работать режим
кондиционирования.
Внимание: мигание индикатора в хо
де
работы
системы
кондиционирО’
вания означает нарушение работы
системы, при этом кондиционер ав
томатически выключается.
Для выключения кондиционера по
вторно нажмите на выключатель «А/С»
(1), в этом случае будет работать ото
питель. Если нажать на выключатель
«OFF» (4), то отопитель выключится.
2.
(Модели с ручным управлением
кондиционером и отопителем) Для
включения отопителя необходимо пе
ревести
переключатель
скорости
вращения вентилятора отопителя (6)
из положения «О» в любое другое. Для
включения кондиционера необходимо
нажать на выключатель кондиционера
«А/С» (1). При включении кондиционе
ра на выключателе загорается инди
катор.
Внимание: мигание индикатора в хо
де работы системы кондициониро
вания
означает
нарушение
работы
системы, при этом кондиционер ав
томатически выключается.
Если режим кондиционера был вклю
чен перед последним выключением, то
при перемещении переключателя скО
— В этой позиции поток воздуха на
правлен в район головы и пола од
новременно.
— В этой позиции поток воздуха на
правлен почти полностью на пол, на
некоторых моделях во время ото
пления более теплый воздух на
правлен на уровень пола, а более
холодный — в район головы.
— В этой позиции поток воздуха на
правлен на лобовое стекло, стекла
передних дверей, в район головы и
пола, на некоторых моделях в район
головы направляется менее подог
ретый поток воздуха.

Руководство по эксплуатации
17
— (Модели С ручным управлением
кондиционером
и
отопителем)
В
этой позиции поток воздуха направ
лен на лобовое стекло и использу
ется в случае запотевания лобового
стекла.
3. Переключатель регулировки забора
воздуха (вентиляция/рециркуляция)
(3) позволяет осуществлять забор
воздуха либо снаружи автомобиля,
либо из салона.
Примечание: если в течение дли
тельного периода времени работа
ет режим рециркуляция, то стекла
могут запотеть.
4. Управление силой потока воздуха
осуществляется переключателем (6).
5. Регулятор температуры {7J слуиадт
для задания значения температуры
воздуха нагрева или охлаждения в са
лоне автомобиля в пределах от 18° до
32°С.
(Модели с автоматическим управле—
нием кондиционером и отопителем)
На информационном табло появляет
ся индикация «МАХ COLD», если уста
новлен режим максимального охлаж
дения. И «МАХ НОТ» — режим макси
мального отопления.
6. (Модели с автоматическим управ
лением кондиционером и отопите
лем) Выключатель «AUTO» (5) предна
значен для автоматического управле
ния работой кондиционером и отопи
телем. В режиме «AUTO» автоматиче
ски регулируются сила потока и на
правление воздушного потока. При
работе в данном режиме возможно
задавать температуру поступающего
воздуха,
при
этом
кондицио-
нер/отопитель будет работать в ре
жиме «AUTO». Если нажать на любой
другой выключатель, то работа в ре
жиме «AUTO» прекратится.
7. (Модели с автоматическим управ
лением кондиционером и отопите
лем) При запотевании лобового стек
ла необходимо нажать на выключа
тель обдува лобового стекла (8). От
ключается обдув лобового стекла по
вторным нажатием на выключатель.
При включении обдува на выключате
ле загорается индикатор.
8. (Модели с автоматическим управ
лением кондиционером и отопителем)
При нажатии выключателя (3) на ин
формационном табло показывается
индикация температуры окружающего
воздуха (OUTSIDE TEMP). При нажатии
на выключатель (3) еще раз индикация
вернется в исходное положение.
Обогреватель
заднего стекла/стекла
задней двери
при запотевании заднего стекла/стекла
задней двери необходимо нажать на
Модели с автоматическим управлением кондиционером и отопителем.
Модели с ручным управлением кондиционером и отопителем.
Панель управления кондиционером и отопителем. 1 — выключатель кон
диционера «fiilC», 2 — переключатель направления потока воздуха, 3 — пе
реключатель регулировки забора воздуха (вентиляция/рециркуляция),
4 — выключатель кондиционера и отопителя «OFF», б — выключатель авто
матического режима работы кондиционера «AUTO», б — переключатель ско
рости вращения вентилятора отопителя, 7 — регулятор температуры, 8 — вы
ключатель обдува лобового стекла, 9 — выключатель режима индикации
температуры окружающего воздуха, 10 — информационное табло.
выключатель обогревателя заднего
стекла/стекла задней двери, располо
женный как показано на рисунке.
нием кондиционером и отопителем.
Модели с ручным управлением
кондиционером и отопителем.
при этом ключ в замке зажигания
должен быть установлен в положение
«ОЫ». Работа обогревателя сопровож
дается горением индикатора на вы
ключателе. Обогреватель работает в
течение 15 минут и автоматически от
ключается. Принудительно обогрева
тель отключается повторным нажати
ем на выключатель.
Внимание:
— Длительная работа обогревате
ля может привести к разрядке ак
кумуляторной батареи и к выходу
из строя самого обогревателя.
—
При очистке заднего стек
ла/стекла
задней
двери
изнутри
будьте аккуратны, чтобы не по
вредить нити обогревателя.
—
Обогреватель
заднего
стек
ла/стекла задней двери не предна
значен для удаления снега или льда
со стекла.
Магнитола — основные
моменты эксплуатации
Радио
Качество приема радиосигнала может
существенно изменяться во время
движения автомобиля из-за особенно
стей рельефа местности, погодных
условий и близости источников элек
тромагнитного излучения.
2-600

Магнитола, Радио, Магнитофон
Проигрыватель компакт-дисков (cd — changer)
- Изображение
- Текст
18
Руководствошо эксплуатаций’
поверхности диска и оптических эле
ментов проигрывателя возможны сбои
при воспроизведении. После норма
лизации влажности работа системы
восстанавливается. При сильной виб
рации возможны искажения и переры
вы воспроизведения. Это не является
неисправностью. Не рекомендуется
оставлять диски на открытом солнце.
Оберегайте поверхность диска от ца
рапин.
Магнитола
Включение и выключение аудио~
системы
Аудиосистема включается нажатием
кнопки (2) «PWR» (включится система,
работавшая до последнего выключе
ния). Также кассетный проигрыватель
автоматически включается при встав
лении кассеты. При выталкивании
кассеты аудиосистема вернется в ис
ходное состояние — выключится или
перейдет в режим радио.
Регулировка громкости
Регулировка громкости производится
при выдвинутом положении регулято
ра (2) и его вращением.
Регулировка тембра и баланса
Регулировка осуществляется враще
нием кнопки (11). Переключение меж
ду параметрами регулировки осуще
ствляется нажатием кнопки (11)
«MODE». При этом на дисплее высве
чивается название параметра и уста
новленное значение:
BAL (баланс между правыми, и ле
выми динамиками) — от BALL7 до
BAL R7.
FAD (баланс между передними и
задними динамиками) — от FAD F7
A
o
FADR7.
BAS (тембр низких частот) — от
BAS -5 до BAS +5.
TRE (тембр высоких частот) — от
TRE-5 до TRE+5.
Радио
Радио включается нажатием на кнопку
(14) «AM FM». Повторным нажатием на
эту кнопку переключается диапазон
«AM» и «FM».
Настройка радиостанций
Нажимайте на кнопку (4) «AUTO-P» до
звукового сигнала (включится автома
тический поиск радиостанций). Поиск
остановится при нахождении устойчи
вого сигнала, При слабом сигнале, ес
ли автоматический поиск не фиксиру
ет настройку, нажмите на кнопку на
стройки еще раз (автоматический по
иск отключится) и настраивайте вруч
ную по одному шагу. При стереофони
ческом приеме на дисплее высвечи
вается индикатор «ST».
Программирование настроек
Настройки наиболее часто слушаемых
радиостанций можно занести в па
мять. Для этого настройтесь на нуж
ную радиостанцию, затем нажмите и
удерживайте одну из кнопок ( 5 — 1 0 ) до
появления звукового сигнала. Пере
ключение на настроенную радиостан
цию осуществляется кратким нажати
ем на нужную кнопку.
Примечание:
при
продолжительном
отсутствии
аккумуляторных
бата
рей память магнитолы стирается и
устанавливаются
заводские
на
стройки.
Быстрый просмотр записи
При нажатии на кнопку (3) «TUNE» про
игрывается выбранная запись по по
рядку. При повторном нажатии на кноп
ку проигрывается следующая запись.
«Любимая радиостанция»
Можно настроить наиболее часто
слушаемую радиостанцию на отдель
ную кнопку (13). При нажатии на дан
ную кнопку сразу включается выбран
ная станция, независимо от того, ка
кое устройство работало до этого.
Примечание:
на
новых
магнитолах
настроена волна 1620 кГц.
Настройка «любимой радиостанции»
Кнопками настройки настройтесь на
нужную радиостанцию, затем нажмите
и удерживайте кнопку (13) до появле
ния звукового сигнала.
Примечание: ео время приема радио
станции
с
дорожной
информацией
кнопки настройки и выбора радио
станций не действуют, Вначале не
обходимо выключить прием повтор
ным нажатием на кнопку (13),
Магнитофон
Переключение магнитолы в режим
магнитофона производится нажатием
кнопки (12) «ТАРЕ». При вставлении
кассеты магнитола автоматически
переходит в режим магнитофона.
Для извлечения кассеты нажмите
кнопку (16).
Перемотка
^
‘
Для перемотки каОс^тЫ^’нажмите кноп
ку (перемотка назад^,(0Д7,1Ш «вперед
(7)). Для остановка’ пфемо’гкй^нажми-
те кнопку перегЙЬтт^’^’иШрра^ на
кнопку (12) «ТАРЕ».
Система
При прослушивании кассет, записан
ных с использованием а^темы шумо
понижения DOLBY NR®, нажмите
кнопку (10).
Реверс
Изменение направления воспроизве
дения кассеты производится нажати
ем на кнопку (5).
Пропуск пустых мест
Эта функция предназначена для пе
ремотки пустых мест на кассете. Для
включения нажмите кнопку (9) «SKIP»,
Для отключения функции нажмите
кнопку еще раз.
Примечание:
работа
этой
функции
может быть неправильной, если:
— Пауза между записями составля
ет менее 15 секунд.
— Между записями есть посторон
ние звуки,
— Начало и конец записи не могут
быть четко определены.
Повтор записи
Для циклического воспроизведения
текущей записи нажмите кнопку (6)
«RPT». Для отключения повтора на
жмите кнопку еще раз.
Примечание: если между записями
пауза менее 3 секунд или сущест
вуют
посторонние
звуки,
работа
этой функции может быть непра
вильной.
Проигрыватель
компакт-дисков (CD — changer)
Переключение на режим проигрыва
теля компакт-дисков осуществляется
кнопкой (15) «CD».
Выбор диска
Выбор дисков осуществляется с по
мощью кнопок (9) (выбор диска С
большим номером) и (10) (выбор дис
ка с меньшим номером).
Выбор
записи и ускоренное
воспроизведение
Для ускоренного воспроизведения те
кущей дорожки нажмите И удерживай
те кнопку 4 i (назад) или > ►
(вперед). Перемотка остановится, ес
ли отпустить кнопку.

Комментарии

’01 Corolla U (L/O 0005)
i
2001MY_COROLLA_U (OM12720U)
Foreword
Welcome to the growing group of value–conscious people who drive Toyotas. We
are proud of the advanced engineering and quality construction of each vehicle we
build.
This Owner’s Manual explains the features of your new Toyota. Please read it and
follow the instructions carefully so that you can enjoy many years of safe motoring.
When it comes to service, remember that your Toyota dealer knows your vehicle
best and is interested in your complete satisfaction. He will provide quality mainte—
nance and any other assistance you may require.
Please leave this Owner’s Manual in this vehicle at the time of resale. The next
owner will need this information also.
All information and specifications in this manual are current at the time of
printing. However, because of Toyota’s policy of continual product improve-
ment, we reserve the right to make changes at any time without notice.
Please note that this manual applies to all models and explains all equipment,
including options. Therefore, you may find some explanations for equipment
not installed on your vehicle.
2000 TOYOTA MOTOR CORPORATION
All rights reserved. This material may not be reproduced or copied, in whole or in
part, without the written permission of Toyota Motor Corporation.
Service, repair and owners manual for Toyota Corolla cars, as well as you can find and free download electrical wiring diagrams – total more than 100+ Toyota Corolla manuals!
See also: Toyota repair manuals
Toyota Corolla Service & repair manual
| Title | File Size | Download Link |
| Toyota Corolla 1983-1992 Service & repair manual [ru].rar – Manual in Russian for operation, maintenance and repair of Toyota Corolla 1983-1992 years of release with gasoline and diesel engines. | 77.4Mb | Download |
| Toyota Corolla 1984-1992 Repair Manual [en].rar – Manual in English for the maintenance and repair of Toyota Corolla 1984-1992 model years. | 111.2Mb | Download |
| Toyota Corolla 1991-2000 Service Manual.rar – Manual in Russian for operation, maintenance and repair of Toyota Corolla / Corolla Levin / Corolla Ceres / Sprinter / Sprinter Marino / Sprinter Trueno 1991-2000 years of release with gasoline and diesel engines. | 43.7Mb | Download |
| Toyota Corolla 1992-1998 Multimedia repair manual [en].rar | 223Mb | Download |
See also: Toyota engine repair manuals
| Toyota Corolla 1992-1998 Service Manual.rar – Multimedia manual in Russian on the operation and repair of Toyota Corolla 1992-1998 years of release. | 223Mb | Download |
| Toyota Corolla 1995-2000 Service Manual.rar – Manual in Russian for the maintenance and repair of Toyota Corolla / Corolla Levin / Sprinter / Sprinter Trueno 1995-2000 model years, right-hand drive models with petrol and diesel engines | 36.6Mb | Download |
| Toyota Corolla 1997-2001 Service Manual.rar | 330.5Mb | Download |
| Toyota Corolla 1997-2002 Owners workshop manual [en].pdf – Manual in English on the maintenance and repair of Toyota Corolla 1997-2002 years of release with gasoline engines. | 33.9Mb | Download |
| Toyota Corolla 2000 Service Manual.rar | 12Mb | Download |
| Toyota Corolla 2001-2006 Service & repair manual [ru].rar – Manual in Russian for operation and maintenance of Toyota Corolla 2001-2006 years of release. | 42.4Mb | Download |
| Toyota Corolla 2002 Multimedia repair manual [ru].rar – Multimedia guide in Russian on the maintenance and repair of Toyota Corolla since 2002 release. | 293.8Mb | Download |
| Toyota Corolla 2002 Repair Manual.rar | 293.8Mb | Download |
| Toyota Corolla 2003-2008 Repair Manual [en].rar – Manual in English for the maintenance and repair of Toyota Corolla 2003-2008 model years. | 105.1Mb | Download |
| Toyota Corolla 2004 Repair Manual [en].rar – Collection of manuals in English on the maintenance and repair of Toyota Corolla 2004 release. | 29.6Mb | Download |
| Toyota Corolla 2006 Service Manual.rar | 129.9Mb | Download |
| Toyota Corolla 2007 Service repair manual [ru].pdf – Manual in Russian for operation, maintenance and repair of Toyota Auris 2006 and Toyota Corolla 2007 release with gasoline engines of 1.3 / 1.4 / 1.6 l. | 57.5Mb | Download |
| Toyota Corolla 2009-2010 Repair Manual [en].rar – The collection of manuals in English for the maintenance and repair of the Corolla car 2009-2010 model years. | 272.4Mb | Download |
| Toyota Corolla Axio, Fielder 2006-2012 Service Manual.rar – Manual in Russian on the operation, maintenance and repair of Toyota Corolla Axio and Toyota Corolla Fielder 2006-2012 years of release with gasoline engines of 1.5 / 1.8 litres. | 422.7Mb | Download |
| Toyota Corolla Ceres 1991-2000 Service Manual.rar | 43.7Mb | Download |
| Toyota Corolla II 1990-1999 Service Manual.djvu – Manual in Russian for operation, maintenance and repair of Toyota Corolla II / Corsa / Tercel 1990-1999 years of release with gasoline and diesel engines. | 29.7Mb | Download |
| Toyota Corolla Levin 1991-2000 Service Manual.rar Manual in Russian for operation, maintenance and repair of Toyota Corolla / Corolla Levin / Corolla Ceres / Sprinter / Sprinter Marino / Sprinter Trueno 1991-2002 release with gasoline and diesel engines. | 43.7Mb | Download |
| Toyota Corolla Levin 1995-2000 Service Manual.rar – Manual in Russian for the maintenance and repair of Toyota Corolla / Corolla Levin / Sprinter / Sprinter Trueno 1995-2000 model years, right-hand drive models with petrol and diesel engines | 36.6Mb | Download |
| Toyota Corolla Matrix 2001 Service Manual.pdf | 135.2Mb | Download |
| Toyota Corolla Spacio 1997-2002 Service Manual [ru].pdf | 18.9Mb | Download |
| Toyota Corolla Spacio 2001 Service Manual.rar | 147.1Mb | Download |
| Toyota Corolla Verso 2004 Repair Manual [en].rar – Manual in English for the maintenance and repair of Toyota Corolla Verso 2004 release. | 20.5Mb | Download |
| Toyota Corolla Verso Multimedia repair manual [ru].rar – Multimedia guide in Russian for maintenance and repair of Toyota Corolla Verso. | 230.3Mb | Download |
| Toyota Corolla Verso Repair Manual.rar | 230.3Mb | Download |
Toyota Corolla Electrical Wiring Diagram
| Title | File Size | Download Link |
| Toyota Corolla 1996 wiring diagram overall.pdf | 806.3kb | Download |
| Toyota Corolla 2004 Electrical Wiring Diagram.pdf | 3.6Mb | Download |
| Toyota Corolla 2009-2010 Wiring Diagrams (EM12R1U).pdf | 5.4Mb | Download |
2004 Toyota Corolla Electrical Wiring Diagram
| Title | File Size | Download Link |
| Abbreviations.pdf | 3.6kb | Download |
| ABS system.pdf | 45.5kb | Download |
| Air conditioning.pdf | 39.9kb | Download |
| Back up light.pdf | 15.1kb | Download |
| Charging.pdf | 26.8kb | Download |
| Cigarette lightger.pdf | 7.7kb | Download |
| Clock.pdf | 19.2kb | Download |
| Combination meter.pdf | 68.2kb | Download |
| Connectors list.pdf | 162.3kb | Download |
| Cruise control.pdf | 53.7kb | Download |
| Door lock control.pdf | 48kb | Download |
| Electrical wiring routing.pdf | 200.8kb | Download |
| Electrochromic mirror.pdf | 8.4kb | Download |
| Electronically controlled transmisson.pdf | 60.7kb | Download |
| Engine control unit.pdf | 118.4kb | Download |
| Fog light.pdf | 20.5kb | Download |
| Glossary of terms and symbols.pdf | 23.3kb | Download |
| Grounding points.pdf | 58.6kb | Download |
| Headlight.pdf | 56.9kb | Download |
| Heater.pdf | 21.5kb | Download |
| Horn.pdf | 11.1kb | Download |
| Illumination.pdf | 33.6kb | Download |
| Interior light.pdf | 40.2kb | Download |
| Light and key reminder buzzer.pdf | 25.6kb | Download |
| Major Technical Specifications.pdf | 18.1kb | Download |
| Model codes & models lineup.pdf | 5.5kb | Download |
| Moon roof.pdf | 23.8kb | Download |
| New features – c59 manual transaxle.pdf | 40.1kb | Download |
| New features – maplight.pdf | 14kb | Download |
| Overall electrical wiring diagrams supplement.pdf | 63.4kb | Download |
| Overall electrical wiring diagrams.pdf | 671.6kb | Download |
| Part number of connectors.pdf | 21.4kb | Download |
| Power outlet.pdf | 14.8kb | Download |
| POWER SOURCE (Current Flow Chart).pdf | 52.8kb | Download |
| Power source.pdf | 58.7kb | Download |
| Power windows.pdf | 43.3kb | Download |
| Radiator fan.pdf | 17.3kb | Download |
| Radio and player.pdf | 21kb | Download |
| Rear window defogger.pdf | 13kb | Download |
| Relay locations.pdf | 195.5kb | Download |
| Remote control mirror.pdf | 17.2kb | Download |
| Routing.pdf | 262.7kb | Download |
| Seat belt warning.pdf | 22.7kb | Download |
| Shift Lock.pdf | 16.6kb | Download |
| SRS.pdf | 59kb | Download |
| Starting and ignition.pdf | 36.2kb | Download |
| Stop light.pdf | 13.9kb | Download |
| Tail light.pdf | 28.9kb | Download |
| Troubleshooting.pdf | 175.3kb | Download |
| Turn signal and hazard lights.pdf | 31.8kb | Download |
| TVIP.pdf | 67.7kb | Download |
| Wiper and washer.pdf | 25.6kb | Download |
| Wireless door lock control.pdf | 64.2kb | Download |
Toyota Corolla /Auris Electrical Wiring Diagram (EM04F1E)
| Title | File Size | Download Link |
| Connector List.Pdf | 707.2kb | Download |
| Ground Points.Pdf | 9.5Mb | Download |
| Overall Electrical Wiring Diagram.Pdf | 1.5Mb | Download |
| Relay Location.Pdf | 846.2kb | Download |
| System Circuit.Pdf | 1.6Mb | Download |
2006 Toyota Corolla Electrical Wiring Diagram
| Title | File Size | Download Link |
| Overall Wiring.Pdf | 842.9kb | Download |
| Relay Locations.Pdf | 184.6kb | Download |
| System Circuits – Em00h0u.Pdf | 1.2Mb | Download |
Manual operation and maintenance of Toyota Corolla cars.
| Title | File Size | Download Link |
| Toyota Corolla 2000 Owners manual.pdf | 3.5Mb | Download |
| Toyota Corolla 2001 Owners manual.pdf | 3.7Mb | Download |
| Toyota Corolla 2002 Owners manual.pdf | 3.7Mb | Download |
| Toyota Corolla 2003 Owners manual.pdf | 7Mb | Download |
| Toyota Corolla 2004 Owners manual.pdf | 7.3Mb | Download |
| Toyota Corolla 2005 Owners manual.pdf | 8.4Mb | Download |
| Toyota Corolla 2006 Owners manual.pdf | 8.2Mb | Download |
| Toyota Corolla 2007 Owners manual.pdf | 8.2Mb | Download |
| Toyota Corolla 2008 Owners manual.pdf | 4.3Mb | Download |
| Toyota Corolla 2009 Owners manual.pdf | 11.2Mb | Download |
| Toyota Corolla 2010 Owners manual.pdf | 11.1Mb | Download |
| Toyota Corolla 2011 Owners manual.pdf | 13Mb | Download |
| Toyota Corolla 2012 Owners manual.pdf | 11.9Mb | Download |
| Toyota Corolla 2013 Owners manual.pdf | 11.9Mb | Download |
| Toyota Corolla 2014 Owners manual.pdf | 14.3Mb | Download |
| Toyota Corolla 2015 Owners manual.pdf | 14.7Mb | Download |
| Toyota Corolla Axio Owners Manual.pdf | 9.8Mb | Download |
| Toyota Corolla Fielder Owners Manual.pdf | 8.8Mb | Download |
| Toyota Corolla Hatchback Owners Manual.pdf | 12.3Mb | Download |
| Toyota Corolla Hybrid Owners Manual.pdf | 19.3Mb | Download |
| Toyota Corolla iM Owners Manual.pdf | 6.7Mb | Download |
| Toyota Corolla Owners manual [ru].pdf | 35.5Mb | Download |
| Toyota Corolla Owners Manual.pdf | 16.9Mb | Download |
Detailed manual operation, repair, maintenance of Toyota Corolla cars.
The repair manual will also provide you with invaluable assistance in repairing the Toyota Corolla hatchback in the garage. It contains a detailed description of petrol engines with a displacement of 1.3 litres and a power of 101 hp, 1.4 and a capacity of 97 litres. with. and 1.6 litres per 124 litres. s., diesel engines for 2.0 and 1.4 litres. Using the proposed manual, you will disassemble, adjust and assemble the engine, components and assemblies of Toyota Corolla. Easily figure out the gearbox, even the manual transmission with the Shift system, although the automatic transmission Multi-Mode, where the clutch is automatically activated.
These manuals provide a detailed description of the device of all mechanisms, probable malfunctions and how to eliminate them. To help offer high-quality step-by-step photos, drawings, drawings, showing the sequence of all repair procedures. Because of this, you will not have difficulty repairing your hatchback. So to maintain in perfect condition the electrical system of Toyota Corolla, the manual presents the electrical circuits that will help to understand all the intricacies of the electricians of the car. The repair manual pays special attention to the security system, including ABS, equipped with an EBD system. Attention is also paid to systems of emergency braking, disc brakes, etc. The presented guide will help you not only prepare Toyota Corolla for maintenance, but also independently carry it out.

The service manuals offer a detailed plan for all maintenance operations, their sequence and volume. It also describes how to carry out a particular maintenance procedure. With this manual, you will be able to communicate on an equal footing with service workers, whom you will entrust the maintenance of your car.
Understanding that you have the necessary information, the service station workers do not dare to deceive you by offering unnecessary operations and replacing working parts, which, unfortunately, is still common. Therefore, in any case, you will win and save your hard-earned money.
The manual will be useful not only for beginners who have bought or are going to buy a Toyota Corolla but also for experienced drivers because Each car has its own characteristic features, which are wonderfully described in this book.
Without this manual, not do the professionals involved in the maintenance of Toyota Corolla: specialists of service stations and car services, auto repair mechanics, roadside service workers. The manuals will also be curious to all those who are interested in the world of technology, in particular, Toyota Corolla cars.
Attention! Clicking on the link “download” you agree, after reading, delete the downloaded file from your computer. All content on the site Carmanualsclub.com is taken from free sources and is also freely distributed. If you are the author of this material, then please contact us in order to provide users with a pleasant and convenient alternative, after reading, buying a quality “original” directly from the publisher. The site administration does not bear any responsibility for illegal actions, and any damage incurred by the copyright holders.