Комментарии
19
Войдите или зарегистрируйтесь, чтобы писать комментарии, задавать вопросы и участвовать в обсуждении.

Я езжу на Nissan Murano I
Народ добрый вечер. У кого сохранился файл PDF книга для NISSAN MURANO Z50 2006г. За ранее спасибо.
Я езжу на Nissan Murano I
Здравствуйте.В декабре прошлого года приобрёл NISSAN MURANO Z50 2006г. Не книги не инструкций к ней не было.Если есть возможность пришлите пожалуйста мануал. mudrats69@gmail.com

Здравствуйте, файл потерял, но можно с интернета скачать

Здравствуйте. Отправьте пожалуйста мануал мне тоже fad0110@mail.ru
Здравствуйте, не могу файл найти, как найду отправлю
Друзья попробуйте ещё раз, сейчас ссылка должна работать

Скачивается, но только там мануал на 51

Скинь на почту пожалуйста, a9266374477@ya.ru

и мне пожалуйста bg@orfey.ru

не получается зайти по ссылке
Я пробую, заходить.
Что показывает, загрузка не идёт?
ANDOVARAGYAN
Я пробую, заходить.
Что показывает, загрузка не идёт?

никак не заходит. Если не лень будет швырни сюда скачанный файл oootradzem@gmail.com

И мне тоже ip-eev2012@ya.ru

и мне тоже пожалуйста
demon-red96@mail.ru
Все комментарии
Мультимедийное руководство на английском языке по техническому обслуживанию и ремонту автомобиля Nissan Murano серии Z50.
- Автор: —
- Издательство: Nissan
- Год издания: —
- Страниц: —
- Формат: —
- Размер: 69,4 Mb

Мультимедийное руководство на английском языке по техническому обслуживанию и ремонту автомобиля Nissan Murano серии Z51.
- Автор: —
- Издательство: Nissan
- Год издания: 2008
- Страниц: —
- Формат: —
- Размер: 363,3 Mb
Сборник руководство на английском языке по техническому обслуживанию и ремонту автомобиля Nissan Murano серии Z50 2003-2007 годов выпуска.
- Автор: —
- Издательство: Nissan Motor Co., Ltd.
- Год издания: 2002-2006
- Страниц: —
- Формат: PDF
- Размер: 355,3 Mb
Сборник руководство на английском языке по техническому обслуживанию и ремонту автомобиля Nissan Murano серии Z51 2008-2014 годов выпуска.
- Автор: —
- Издательство: Nissan Motor Co., Ltd.
- Год издания: 2007-2013
- Страниц: —
- Формат: PDF
- Размер: 403,4 Mb

Руководство по эксплуатации и ремонту автомобиля Nissan Murano с 2008 года выпуска с бензиновым двигателем объемом 3,5 л.
- Автор: —
- Издательство: Монолит
- Год издания: —
- Страниц: 344
- Формат: —
- Размер: —
Руководство по эксплуатации и техническому обслуживанию автомобиля Nissan Murano серии Z51.
- Автор: —
- Издательство: Nissan International
- Год издания: 2010
- Страниц: 352
- Формат: PDF
- Размер: 3,4 Mb

Руководство по эксплуатации и техническому обслуживанию автомобиля Nissan Murano с 2008 года выпуска.
- Автор: —
- Издательство: Монолит
- Год издания: —
- Страниц: 370
- Формат: —
- Размер: —
Руководство по эксплуатации и техническому обслуживанию автомобиля Nissan Murano.
- Автор: —
- Издательство: Автонавигатор
- Год издания: —
- Страниц: 268
- Формат: —
- Размер: —

Руководство по эксплуатации, техническому обслуживанию и ремонту автомобиля Nissan Murano 2002-2008 годов выпуска с бензиновым двигателем объемом 3,5 л
- Автор: —
- Издательство: Автонавигатор
- Год издания: —
- Страниц: 544
- Формат: —
- Размер: —

Руководство по техническому обслуживанию и ремонту автомобиля Nissan Murano серии Z52 с 2016 года выпуска с бензиновым двигателем объемом 3,5 л.
- Автор: —
- Издательство: Автонавигатор
- Год издания: —
- Страниц: 502
- Формат: —
- Размер: —

Руководство по техническому обслуживанию и ремонту автомобиля Nissan Murano серии Z51 с 2008 года выпуска с бензиновым двигателем объемом 3,5 л.
- Автор: —
- Издательство: Автонавигатор
- Год издания: —
- Страниц: 304
- Формат: —
- Размер: —

Руководство по техническому обслуживанию и ремонту автомобиля Nissan Murano серии Z51 с 2008 года выпуска с бензиновым двигателем объемом 3,5 л.
- Автор: —
- Издательство: Автонавигатор
- Год издания: —
- Страниц: 510
- Формат: —
- Размер: —


Foreword
Welcome to the growing family of new NISSAN
owners. This vehicle is delivered to you with
confidence. It was produced using the latest
techniques and strict quality control.
This manual was prepared to help you under-
stand the operation and maintenance of your
vehicle so that you may enjoy many miles of
driving pleasure. Please read through this
manual before operating your vehicle.
A separate Warranty Information Booklet
explains details about the warranties cov-
ering your vehicle. The NISSAN Service
and Maintenance Guide explains details
about maintaining and servicing your ve-
hicle. Additionally, a separate Customer
Care/Lemon Law Booklet (U.S. only) will
explain how to resolve any concerns you
may have with your vehicle, as well as
clarify your rights under your state’s lemon
law.
Your NISSAN dealer knows your vehicle best.
When you require any service or have any
questions, he will be glad to assist you with the
extensive resources available to him.
READ FIRST — THEN DRIVE
SAFELY
Before driving your vehicle please read
your Owner’s Manual carefully. This will
ensure familiarity with controls and main-
tenance requirements, assisting you in the
safe operation of your vehicle.
WARNING
IMPORTANT SAFETY INFORMA-
TION
REMINDERS FOR SAFETY!
Follow these important driving rules to
help ensure a safe and comfortable trip
for you and your passengers!
쐌 Never drive under the influence of
alcohol or drugs.
쐌 Always observe posted speed limits
and never drive too fast for condi-
tions.
쐌 Always use your seat belts. Refer to
“Child safety” and “Child restraints”
in the “Seats, restraints and supple-
mental air bag systems” section for
precautions regarding children.
쐌 Always provide information about the
proper use of vehicle safety features
to all occupants of the vehicle.
쐌 Always review this Owner’s Manual
for important safety information.
MODIFICATION OF YOUR VEHICLE
This vehicle should not be modified. Modi-
fication could affect its performance,
safety or durability, and may even violate
governmental regulations. In addition,
damage or performance problems result-
ing from modification may not be covered
under NISSAN warranties.
WHEN READING THE MANUAL
This manual includes information for all
options available on this model. There-
fore, you may find some information that
does not apply to your vehicle.
All information, specifications and illustrations in
this manual are those in effect at the time of
printing. NISSAN reserves the right to change
specifications or design at any time without
notice.
墌 03.1.28/Z50-D/V5.0 墍
 Loading…
![]()
B ENGINE
SECTION EM
ENGINE MECHANICAL
CONTENTS
|
PRECAUTIONS ………………………………………………… |
3 |
|
Precautions for Drain Engine Coolant ………………… |
3 |
|
Precautions for Disconnecting Fuel Piping …………. |
3 |
|
Precautions for Removal and Disassembly ………… |
3 |
|
Precautions for Inspection, Repair and Replace- |
|
|
ment ……………………………………………………………… |
3 |
|
Precautions for Assembly and Installation ………….. |
3 |
|
Parts Requiring Angular Tightening …………………… |
3 |
|
Precautions for Liquid Gasket …………………………… |
4 |
|
REMOVAL OF LIQUID GASKET SEALING ……… |
4 |
|
LIQUID GASKET APPLICATION PROCEDURE….. |
4 |
|
PREPARATION …………………………………………………. |
5 |
|
Special Service Tools ………………………………………. |
5 |
|
Commercial Service Tools ………………………………… |
7 |
|
NOISE, VIBRATION AND HARSHNESS (NVH) |
|
|
TROUBLESHOOTING ……………………………………….. |
9 |
|
NVH Troubleshooting —Engine Noise ……………. ….. |
9 |
|
Use the Chart Below to Help You Find the Cause |
|
|
of the Symptom. ……………………………………………. |
10 |
|
DRIVE BELTS ………………………………………………….. |
11 |
|
Checking Drive Belts ………………………………………. |
11 |
|
Tension Adjustment ………………………………………… |
11 |
|
ALTERNATOR AND AIR CONDITIONER COM- |
|
|
PRESSOR BELT ………………………………………… |
12 |
|
POWER STEERING OIL PUMP BELT ………….. |
12 |
|
Removal and Installation ………………………………… |
12 |
|
REMOVAL …………………………………………………. |
12 |
|
INSTALLATION ………………………………………….. |
13 |
|
AIR CLEANER AND AIR DUCT ………………………… |
14 |
|
Removal and Installation ………………………………… |
14 |
|
REMOVAL …………………………………………………. |
14 |
|
INSTALLATION ………………………………………….. |
15 |
|
CHANGING AIR CLEANER FILTER ……………… |
15 |
|
INTAKE MANIFOLD COLLECTOR ……………………. |
16 |
|
Removal and Installation ………………………………… |
16 |
|
REMOVAL …………………………………………………. |
17 |
|
INSPECTION AFTER REMOVAL …………………. |
18 |
|
INSTALLATION ………………………………………….. |
18 |
|
INTAKE MANIFOLD ………………………………………… |
20 |
|
Removal and Installation ………………………………… |
20 |
|
REMOVAL …………………………………………………. |
20 |
|
INSPECTION AFTER REMOVAL …………………. |
20 |
|
INSTALLATION ………………………………………….. |
21 |
|
EXHAUST MANIFOLD AND THREE WAY CATA- |
|
|
LYST ………………………………………………………………. |
22 |
|
Removal and Installation ………………………………… |
22 |
|
REMOVAL …………………………………………………. |
22 |
|
INSPECTION AFTER REMOVAL …………………. |
24 |
|
INSTALLATION ………………………………………….. |
24 |
|
OIL PAN AND OIL STRAINER ………………………….. |
26 |
|
Removal and Installation ………………………………… |
26 |
|
REMOVAL …………………………………………………. |
26 |
|
INSPECTION AFTER REMOVAL …………………. |
31 |
|
INSTALLATION ………………………………………….. |
31 |
|
INSPECTION AFTER INSTALLATION …………… |
34 |
|
IGNITION COIL ……………………………………………….. |
35 |
|
Removal and Installation ………………………………… |
35 |
|
REMOVAL …………………………………………………. |
35 |
|
INSTALLATION ………………………………………….. |
35 |
|
SPARK PLUG (PLATINUM-TIPPED TYPE) ………… |
36 |
|
Removal and Installation ………………………………… |
36 |
|
REMOVAL …………………………………………………. |
36 |
|
INSPECTION AFTER REMOVAL …………………. |
36 |
|
INSTALLATION ………………………………………….. |
37 |
|
FUEL INJECTOR AND FUEL TUBE ………………….. |
38 |
|
Removal and Installation ………………………………… |
38 |
|
REMOVAL …………………………………………………. |
38 |
|
INSTALLATION ………………………………………….. |
40 |
|
INSPECTION AFTER INSTALLATION …………… |
42 |
|
ROCKER COVER ……………………………………………. |
43 |
|
Removal and Installation ………………………………… |
43 |
|
REMOVAL …………………………………………………. |
43 |
|
INSTALLATION ………………………………………….. |
44 |
|
FRONT TIMING CHAIN CASE ………………………….. |
46 |
|
Removal and Installation ………………………………… |
46 |
|
REMOVAL …………………………………………………. |
46 |
|
INSTALLATION ………………………………………….. |
48 |
|
Revision; 2004 April |
EM-1 |
2003 Murano |

|
TIMING CHAIN ………………………………………………… |
54 |
|
Removal and Installation ………………………………… |
54 |
|
REMOVAL …………………………………………………. |
55 |
|
INSPECTION AFTER REMOVAL ………………….. |
60 |
|
INSTALLATION …………………………………………… |
60 |
|
INSPECTION AFTER INSTALLATION …………… |
69 |
|
CAMSHAFT …………………………………………………….. |
70 |
|
Removal and Installation ………………………………… |
70 |
|
REMOVAL …………………………………………………. |
71 |
|
INSPECTION AFTER REMOVAL ………………….. |
72 |
|
INSTALLATION …………………………………………… |
74 |
|
Valve Clearance …………………………………………….. |
77 |
|
INSPECTION ……………………………………………… |
77 |
|
ADJUSTMENT …………………………………………… |
79 |
|
OIL SEAL ……………………………………………………….. |
81 |
|
Removal and Installation of Valve Oil Seal ………… |
81 |
|
REMOVAL …………………………………………………. |
81 |
|
INSTALLATION …………………………………………… |
81 |
|
Removal and Installation of Front Oil Seal ………… |
82 |
|
REMOVAL …………………………………………………. |
82 |
|
INSTALLATION …………………………………………… |
83 |
|
Removal and Installation of Rear Oil Seal …………. |
83 |
|
REMOVAL …………………………………………………. |
83 |
|
INSTALLATION …………………………………………… |
83 |
|
CYLINDER HEAD ……………………………………………. |
84 |
|
On-Vehicle Service ………………………………………… |
84 |
|
CHECKING COMPRESSION PRESSURE …….. |
84 |
|
Removal and Installation ………………………………… |
85 |
|
REMOVAL …………………………………………………. |
85 |
|
INSPECTION AFTER REMOVAL ………………….. |
86 |
|
INSTALLATION …………………………………………… |
86 |
|
Disassembly and Assembly …………………………….. |
88 |
|
DISASSEMBLY ………………………………………….. |
88 |
|
Inspection After Disassembly ………………………….. |
89 |
|
CYLINDER HEAD DISTORTION ………………….. |
89 |
|
VALVE DIMENSIONS ………………………………….. |
89 |
|
VALVE GUIDE CLEARANCE ……………………….. |
89 |
|
VALVE GUIDE REPLACEMENT …………………… |
90 |
|
VALVE SEAT CONTACT ……………………………… |
91 |
|
VALVE SEAT REPLACEMENT …………………….. |
92 |
|
VALVE SPRING SQUARENESS …………………… |
93 |
|
VALVE SPRING DIMENSIONS AND VALVE |
|
|
SPRING PRESSURE LOAD ………………………… |
93 |
|
ASSEMBLY ………………………………………………… |
93 |
|
ENGINE ASSEMBLY ……………………………………….. |
95 |
|
Removal and Installation ………………………………… |
95 |
|
REMOVAL …………………………………………………. |
96 |
|
INSTALLATION …………………………………………… |
99 |
|
INSPECTION AFTER INSTALLATION …………… |
99 |
|
CYLINDER BLOCK ………………………………………… |
100 |
|
Disassembly and Assembly …………………………… |
100 |
|
DISASSEMBLY ………………………………………… |
101 |
|
ASSEMBLY ……………………………………………… |
104 |
|
How to Select Piston and Bearing ………………….. |
110 |
|
DESCRIPTION …………………………………………. |
110 |
|
HOW TO SELECT PISTON ………………………… |
110 |
|
HOW TO SELECT CONNECTING ROD BEAR- |
|
|
ING ………………………………………………………….. |
111 |
|
HOW TO SELECT MAIN BEARING …………….. |
112 |
|
Inspection After Disassembly …………………………. |
115 |
|
CRANKSHAFT SIDE CLEARANCE …………….. |
115 |
|
CONNECTING ROD SIDE CLEARANCE …….. |
115 |
|
PISTON AND PISTON PIN CLEARANCE …….. |
115 |
|
PISTON RING SIDE CLEARANCE ……………… |
116 |
|
PISTON RING END GAP …………………………… |
116 |
|
CONNECTING ROD BEND AND TORSION …. |
116 |
|
CONNECTING ROD BEARING HOUSING |
|
|
DIAMETER (BIG END) ………………………………. |
117 |
|
CONNECTING ROD BUSHING OIL CLEAR- |
|
|
ANCE (SMALL END) …………………………………. |
117 |
|
CYLINDER BLOCK DISTORTION ………………. |
118 |
|
INNER DIAMETER OF MAIN BEARING HOUS- |
|
|
ING ………………………………………………………….. |
118 |
|
PISTON TO CYLINDER BORE CLEARANCE . 119 |
|
|
OUTER DIAMETER OF CRANKSHAFT JOUR- |
|
|
NAL …………………………………………………………. |
120 |
|
OUTER DIAMETER OF CRANKSHAFT PIN …120 |
|
|
OUT-OF-ROUND AND TAPER OF CRANK- |
|
|
SHAFT …………………………………………………….. |
120 |
|
CRANKSHAFT RUNOUT …………………………… |
121 |
|
OIL CLEARANCE OF CONNECTING ROD |
|
|
BEARING …………………………………………………. |
121 |
|
OIL CLEARANCE OF MAIN BEARING ………… |
122 |
|
CRUSH HEIGHT OF MAIN BEARING …………. |
122 |
|
CRUSH HEIGHT OF CONNECTING ROD |
|
|
BEARING …………………………………………………. |
122 |
|
OUTER DIAMETER OF MAIN BEARING CAP |
|
|
BOLT ……………………………………………………….. |
123 |
|
OUTER DIAMETER OF CONNECTING ROD |
|
|
BOLT ……………………………………………………….. |
123 |
|
SIGNAL PLATE …………………………………………. |
123 |
|
OIL JET ……………………………………………………. |
123 |
|
OIL JET RELIEF VALVE …………………………….. |
123 |
|
SERVICE DATA AND SPECIFICATIONS (SDS) …124 |
|
|
Standard and Limit ……………………………………….. |
124 |
|
GENERAL SPECIFICATIONS …………………….. |
124 |
|
INTAKE MANIFOLD COLLECTOR, INTAKE |
|
|
MANIFOLD AND EXHAUST MANIFOLD ……… |
124 |
|
DRIVE BELT …………………………………………….. |
125 |
|
SPARK PLUG …………………………………………… |
125 |
|
CYLINDER HEAD ……………………………………… |
125 |
|
VALVE ……………………………………………………… |
126 |
|
CAMSHAFT AND CAMSHAFT BEARING …….. |
130 |
|
CYLINDER BLOCK ……………………………………. |
130 |
|
PISTON, PISTON RING AND PISTON PIN …..131 |
|
|
CONNECTING ROD ………………………………….. |
132 |
|
CRANKSHAFT ………………………………………….. |
133 |
|
AVAILABLE MAIN BEARING ………………………. |
134 |
|
CONNECTING ROD BEARING …………………… |
134 |
|
BEARING CLEARANCE …………………………….. |
135 |
|
Tightening Torque ………………………………………… |
135 |
|
Revision; 2004 April |
EM-2 |
2003 Murano |

PRECAUTIONS
|
PRECAUTIONS |
PFP:00001 |
||
Precautions for Drain Engine Coolant |
A |
||
|
ABS004RJ |
|||
|
Drain engine coolant when engine is cooled. |
|||
|
EM |
|||
Precautions for Disconnecting Fuel Piping |
ABS004RK |
||
●Before starting work, make sure no fire or spark producing items are in the work area.
●Release fuel pressure before disassembly.
●After disconnecting pipes, plug openings to stop fuel leakage.
Precautions for Removal and Disassembly |
ABS004RL |
●When instructed to use special service tools, use the specified tools. Always be careful to work safely, avoid forceful or uninstructed operations.
● Exercise maximum care to avoid damage to mating or sliding surfaces.
● Cover openings of engine system with tape or the equivalent, if necessary, to seal out foreign materials. ● Mark and arrange disassembly parts in an organized way for easy troubleshooting and re-assembly.
● When loosening nuts and bolts, as a basic rule, start with the one furthest outside, then the one diagonally opposite, and so on. If the order of loosening is specified, do exactly as specified. Power tools may be used where noted in the step.
Precautions for Inspection, Repair and Replacement ABS004RM
Before repairing or replacing, thoroughly inspect parts. Inspect new replacement parts in the same way, and replace if necessary.
Precautions for Assembly and Installation |
ABS004RN |
●Use torque wrench to tighten bolts or nuts to specification.
●When tightening nuts and bolts, as a basic rule, equally tighten in several different steps starting with the ones in center, then ones on inside and outside diagonally in this order. If the order of tightening is specified, do exactly as specified.
●Replace with new gasket, packing, oil seal or O-ring.
●Thoroughly wash, clean, and air-blow each part. Carefully check engine oil or engine coolant passages for any restriction and blockage.
●Avoid damaging sliding or mating surfaces. Completely remove foreign materials such as cloth lint or dust. K Before assembly, oil sliding surfaces well.
●Release air within route when refilling after draining engine coolant.
● After repairing, start engine and increase engine speed to check engine coolant, fuel, engine oil, and L exhaust systems for leakage.
Parts Requiring Angular Tightening |
ABS004RO |
M |
●Use an angle wrench for the final tightening of the following engine parts:
–Cylinder head bolts
–Main bearing cap bolts
–Connecting rod cap nuts
–Crankshaft pulley bolt (No angle wrench is required as the bolt flange is provided with notches for angular tightening)
●Do not use a torque value for final tightening.
●The torque value for these parts are for a preliminary step.
●Ensure thread and seat surfaces are clean and coated with engine oil.
|
Revision; 2004 April |
EM-3 |
2003 Murano |

PRECAUTIONS
Precautions for Liquid Gasket
REMOVAL OF LIQUID GASKET SEALING
●After removing the mounting bolts and nuts, separate the mating surface using a seal cutter and remove the old liquid gasket sealing.
CAUTION:
Be careful not to damage the mating surfaces.
●In areas where the cutter is difficult to use, use a plastic hammer to lightly tap the areas where the liquid gasket is applied.
CAUTION:
If for some unavoidable reason a tool such as a flat-bladed screwdriver is used, be careful not to damage the mating surfaces.
LIQUID GASKET APPLICATION PROCEDURE
1.Using a scraper, remove the old liquid gasket adhering to the gasket application surface and the mating surface.
●Remove the liquid gasket completely from the groove of the gasket application surface, mounting bolts, and bolt holes.
2.Wipe the liquid gasket application surface and the mating surface with white gasoline (lighting and heating use) to remove adhering moisture, grease and foreign materials.
3.Attach the liquid gasket tube to the tube presser.
Use Genuine RTV silicone sealant or equivalent. Refer to GI-46, «RECOMMENDED CHEMICAL PRODUCTS AND SEALANTS» .
4.Apply the liquid gasket without breaks to the specified location with the specified dimensions.
●If there is a groove for the liquid gasket application, apply the liquid gasket to the groove.
●As for the bolt holes, normally apply the liquid gasket inside the holes. Occasionally, it should be applied outside the holes. Make sure to read the text of this manual.
●Within five minutes of gasket application, install the mating component.
●If the liquid gasket protrudes, wipe it off immediately.
●Do not retighten after the installation.
●After 30 minutes or more have passed from the installation, fill the engine oil and engine coolant.
CAUTION:
If there are specific instructions in this manual, observe them.
ABS004RP
PBIC0002E
PBIC0003E
EMA0622D
SEM159F
|
Revision; 2004 April |
EM-4 |
2003 Murano |

PREPARATION
|
PREPARATION |
PFP:00002 |
Special Service Tools |
ABS00325 |
The actual shapes of Kent-Moore tools may differ from those of special service tools illustrated here.
Tool number
(Kent-Moore No.) Description Tool name
|
ST0501S000 |
Disassembling and assembling |
|
|
( |
— |
) |
|
Engine stand assembly |
1.ST05011000 ( — ) Engine stand
2.ST05012000 ( — )
NT042
Base
KV10106500
( — ) Engine stand shaft
|
NT028 |
|
|
KV10117000 |
KV10117000 has been replaced with |
|
(J41262) |
KV10117001 (KV10117000 is no longer in |
|
Engine sub-attachment |
production, but it is usable). |
|
NT373 |
||
|
KV10117001 |
Installing on the cylinder block |
|
|
( |
— |
) |
|
Engine sub-attachment |
|
NT372 |
|||
|
ST10120000 |
Loosening and tightening cylinder head bolt |
||
|
(J24239-01) |
a: 13 (0.51) dia. |
||
|
Cylinder head bolt wrench |
b: 12 (0.47) |
||
|
c: 10 (0.39) |
|||
|
Unit: mm (in) |
|||
|
NT583 |
|||
|
KV10116200 |
Disassembling valve mechanism |
||
|
(J26336-B) |
|||
|
Valve spring compressor |
|||
|
1. KV10115900 |
|||
|
(J26336-20) |
|||
|
Attachment |
|||
|
2. KV10109230 |
|||
|
( |
— |
) |
PBIC1650E |
|
Adapter |
|||
A
EM
C
D
E
F
G
H
I
J
K
L
M
|
Revision; 2004 April |
EM-5 |
2003 Murano |

|
PREPARATION |
|
|
Tool number |
|
|
(Kent-Moore No.) |
Description |
|
Tool name |
|
|
KV10107902 |
Removing valve oil seal |
|
(J38959) |
|
|
Valve oil seal puller |
|
|
1. KV10116100 |
|
|
Valve oil seal puller adapter |
|
|
S-NT605 |
|
|
(J39386) |
Installing valve oil seal |
|
Valve oil seal drift |
|
NT024 |
|
|
EM03470000 |
Installing piston assembly into cylinder bore |
|
(J8037) |
|
|
Piston ring compressor |
|
NT044 |
|
|
ST16610001 |
Removing crankshaft pilot bushing |
|
(J23907) |
|
|
Pilot bushing puller |
|
NT045 |
|
|
KV10111100 |
Removing steel oil pan and rear timing chain |
|
(J37228) |
case |
|
Seal cutter |
|
NT046 |
||
|
WS39930000 |
Pressing the tube of liquid gasket |
|
|
( |
— |
) |
|
Tube presser |
|
NT052 |
|
|
KV10112100 |
Tightening bolts for bearing cap, cylinder |
|
(BT8653-A) |
head, etc. in angle |
|
Angle wrench |
NT014
|
Revision; 2004 April |
EM-6 |
2003 Murano |

PREPARATION
|
Tool number |
|
|
(Kent-Moore No.) |
Description |
|
Tool name |
|
|
KV10117100 |
Loosening or tightening heated oxygen |
|
(J3647-A) |
sensor |
|
Heated oxygen sensor wrench |
For 22 mm (0.87 in) width hexagon nut |
|
NT379 |
|
|
KV10117200 |
Loosening or tightening rear heated oxygen |
|
(J38365) |
sensor |
|
Heated oxygen sensor wrench |
a: 22 mm (0.87 in) |
|
NT636 |
|
|
— |
Removing fuel tube quick connectors in |
|
(J-45488) |
engine room |
|
Quick connector release |
(Available in SEC. 164 of PARTS CTALOG: |
|
Part No. 16441 6N210) |
|
PBIC0198E |
||
Commercial Service Tools |
ABS00326 |
|
|
(Kent-Moore No.) |
Description |
|
|
Tool name |
||
|
Power tool |
Loosening bolts and nuts |
|
PBIC0190E |
|
|
(BT3373-F) |
Checking drive belt tension |
|
Belt tension gauge |
|
AMA126 |
|
|
Spark plug wrench |
Removing and installing spark plug |
NT047
A
EM
C
D
E
F
G
H
I
J
K
L
M
|
Revision; 2004 April |
EM-7 |
2003 Murano |

|
PREPARATION |
|||
|
(Kent-Moore No.) |
Description |
||
|
Tool name |
|||
|
Valve seat cutter set |
Finishing valve seat dimensions |
||
|
NT048 |
|||
|
Piston ring expander |
Removing and installing piston ring |
||
|
NT030 |
|||
|
Valve guide drift |
Removing and installing valve guide |
||
|
Intake & Exhaust: |
|||
|
a = 9.5 mm (0.374 in) dia. |
|||
|
b = 5.5 mm (0.217 in) dia. |
|||
|
NT015 |
|||
|
Valve guide reamer |
Reaming valve guide with 1 or hole for |
||
|
oversize valve guide with 2 |
|||
|
Intake & Exhaust: |
|||
|
d1 |
= 6.0 mm (0.236 in) dia. |
||
|
d2 |
= 10.2 mm (0.402 in) dia. |
||
|
NT016 |
|||
|
(J-43897-18) |
Reconditioning the exhaust system threads |
||
|
(J-43897-12) |
before installing a new heated oxygen sensor |
||
|
Oxygen sensor thread cleaner |
(Use with anti-seize lubricant shown below.) |
||
|
a = J-43897-18 [18 mm (0.71 in) dia.] for |
|||
|
zirconia heated oxygen sensor |
|||
|
b = J-43897-12 [12 mm (0.47 in) dia.] for |
|||
|
titania heated oxygen sensor |
|||
|
AEM488 |
|||
|
Anti-seize lubricant (Permatex 133AR |
Lubricating heated oxygen sensor thread |
||
|
or equivalent meeting MIL |
cleaning tool when reconditioning exhaust |
||
|
specification MIL-A-907) |
system threads |
||
|
AEM489 |
|||
|
Revision; 2004 April |
EM-8 |
2003 Murano |

NOISE, VIBRATION AND HARSHNESS (NVH) TROUBLESHOOTING
|
NOISE, VIBRATION AND HARSHNESS (NVH) TROUBLESHOOTING |
PFP:00003 |
|||
NVH Troubleshooting —Engine Noise |
A |
|||
|
ABS00327 |
||||
|
EM |
||||
|
C |
||||
|
D |
||||
|
E |
||||
|
F |
||||
|
G |
||||
|
H |
||||
|
I |
||||
|
J |
||||
|
K |
||||
|
L |
||||
|
M |
SEM706G
|
Revision; 2004 April |
EM-9 |
2003 Murano |

NOISE, VIBRATION AND HARSHNESS (NVH) TROUBLESHOOTING
Use the Chart Below to Help You Find the Cause of the Symptom. |
ABS00328 |
1.Locate the area where noise occurs.
2.Confirm the type of noise.
3.Specify the operating condition of engine.
4.Check specified noise source.
If necessary, repair or replace these parts.
|
Operating condition of engine |
|||||||||||
|
Location |
Type of |
Source of |
Refer- |
||||||||
|
Before |
After |
When |
When |
When |
While |
Check item |
|||||
|
of noise |
noise |
noise |
ence page |
||||||||
|
warm- |
warm- |
start- |
|||||||||
|
idling |
racing |
driving |
|||||||||
|
up |
up |
ing |
|||||||||
|
Top of |
Ticking or |
C |
A |
— |
A |
B |
— |
Tappet |
Valve clearance |
EM-77 |
|
|
engine |
clicking |
noise |
|||||||||
|
Rocker |
|||||||||||
|
Camshaft |
Camshaft runout |
||||||||||
|
cover |
EM-72 |
||||||||||
|
Rattle |
C |
A |
— |
A |
B |
C |
bearing |
Camshaft journal clear- |
|||
|
Cylinder |
|||||||||||
|
EM-72 |
|||||||||||
|
noise |
ance |
||||||||||
|
head |
|||||||||||
|
Piston and piston pin |
|||||||||||
|
Slap or |
— |
A |
— |
B |
B |
— |
Piston pin |
clearance |
EM-115 |
||
|
knock |
noise |
Connecting rod bush- |
EM-117 |
||||||||
|
ing clearance |
|||||||||||
|
Piston-to-bore clear- |
|||||||||||
|
Crank- |
ance |
EM-119 |
|||||||||
|
Piston ring side clear- |
|||||||||||
|
Slap or |
Piston |
EM-116 |
|||||||||
|
shaft pul- |
|||||||||||
|
A |
— |
— |
B |
B |
A |
ance |
|||||
|
rap |
slap noise |
EM-116 |
|||||||||
|
ley |
|||||||||||
|
Piston ring end gap |
|||||||||||
|
EM-116 |
|||||||||||
|
Cylinder |
|||||||||||
|
Connecting rod bend |
|||||||||||
|
block |
|||||||||||
|
and torsion |
|||||||||||
|
(Side of |
|||||||||||
|
Connecting rod bush- |
|||||||||||
|
engine) |
Connect- |
||||||||||
|
ing clearance (Small |
|||||||||||
|
Oil pan |
|||||||||||
|
ing rod |
EM-117 |
||||||||||
|
Knock |
A |
B |
C |
B |
B |
B |
end) |
||||
|
bearing |
EM-121 |
||||||||||
|
Connecting rod bear- |
|||||||||||
|
noise |
|||||||||||
|
ing clearance (Big end) |
|||||||||||
|
Main |
Main bearing oil clear- |
EM-122 |
|||||||||
|
Knock |
A |
B |
— |
A |
B |
C |
bearing |
ance |
|||
|
EM-121 |
|||||||||||
|
noise |
Crankshaft runout |
||||||||||
|
Front of |
Timing |
Timing chain cracks |
|||||||||
|
engine |
chain and |
||||||||||
|
Tapping or |
and wear |
EM-60 |
|||||||||
|
Timing |
A |
A |
— |
B |
B |
B |
chain ten- |
||||
|
ticking |
Timing chain tensioner |
EM-54 |
|||||||||
|
chain |
sioner |
||||||||||
|
operation |
|||||||||||
|
cover |
noise |
||||||||||
|
Squeak- |
Drive belts |
||||||||||
|
(Sticking |
|||||||||||
|
ing or fizz- |
A |
B |
— |
B |
— |
C |
Drive belts deflection |
||||
|
or slip- |
|||||||||||
|
ing |
EM-11 |
||||||||||
|
ping) |
|||||||||||
|
Front of |
|||||||||||
|
Drive belts |
Idler pulley bearing |
||||||||||
|
engine |
Creaking |
A |
B |
A |
B |
A |
B |
||||
|
(Slipping) |
operation |
||||||||||
|
Squall |
Water |
CO-20, |
|||||||||
|
A |
B |
— |
B |
A |
B |
pump |
Water pump operation |
«WATER |
|||
|
Creak |
|||||||||||
|
noise |
PUMP» |
||||||||||
|
A: Closely related B: Related C: Sometimes related |
—: Not related |
|
Revision; 2004 April |
EM-10 |
2003 Murano |
![]()
DRIVE BELTS
DRIVE BELTS
Checking Drive Belts
WARNING:
Be sure to perform when the engine is stopped.
1.Inspect belts for cracks, fraying, wear and oil. If necessary, replace.
2.Inspect drive belt deflection or tension at a point on the belt midway between pulleys.
●Inspection should be done only when engine is cold, or over 30 minutes after engine is stopped.
●Measure belt tension with tension gauge (BT3373-F or equivalent) at points marked  shown in the figure.
●When measuring deflection, apply 98 N (10 kg, 22 lb) at the  marked point.
●Adjust if belt deflection exceeds the limit or if belt tension is not within specifications.
CAUTION:
PFP:02117
ABS00329
PBIC1161E
●When checking belt deflection or tension immediately after installation, first adjust it to the specified value. Then, after turning the crankshaft two turns or more, re-adjust to the specified
value to avoid variation in deflection between pulleys.
●Tighten idler pulley lock nut by hand and measure deflection or tension without looseness.
PBIC1162E
Belt Deflection and Tension
|
Deflection adjustment |
Unit: mm (in) |
Tension adjustment* |
Unit: N (kg, lb) |
||||
|
Used belt |
New belt |
Used belt |
New belt |
||||
|
Limit |
After adjustment |
Limit |
After adjustment |
||||
|
Alternator and |
4.2 — 4.6 |
3.7 — 4.1 |
730 — 818 |
838 — 926 |
|||
|
air conditioner |
7 (0.28) |
294 (30, 66) |
(74.5 — 83.5, |
(85.5 — 94.5, |
|||
|
(0.17 — 0.18) |
(0.15 — 0.16) |
||||||
|
compressor |
164 — 184) |
188 — 208) |
|||||
|
Power steering |
7.3 — 8 |
6.5 — 7.2 |
495 — 583 |
603 — 691 |
|||
|
11 (0.43) |
196 (20, 44) |
(50.5 — 59.5, |
(61.5 — 70.5, |
||||
|
oil pump |
(0.29 — 0.30) |
(0.26 — 0.28) |
|||||
|
111 — 131) |
135.6 — 155.4) |
||||||
|
Applied pushing |
98 N (10 Kg, 22 lb) |
— |
|||||
|
force |
|||||||
*: If belt tension gauge cannot be installed at check points shown, check drive belt tension at different location on the belt.
Tension Adjustment |
ABS0036V |
|
|
Portion |
Belt tightening method for adjustment |
|
|
Power steering oil pump belt |
Adjusting bolt on power steering oil pump |
|
|
Alternator and air conditioner compressor belt |
Adjusting bolt on idler pulley |
|
CAUTION:
●When belt is replaced with a new one, adjust it to value for “New belt” to accommodate for insufficient adaptability with pulley grooves.
|
Revision; 2004 April |
EM-11 |
2003 Murano |

DRIVE BELTS
●When deflection or tension of belt being used exceeds “Used belt limit”, adjust it to value for “After adjustment of used belt”.
●When checking belt deflection or tension immediately after installation, first adjust it to the specified value. Then, after turning the crankshaft two turns or more, re-adjust to the specified value to avoid variation in deflection between pulleys.
●When installing belt, make sure that it is correctly engaged with pulley groove.
●Keep oil and water away from belt.
●Do not twist or bend belt excessively.
ALTERNATOR AND AIR CONDITIONER COMPRESSOR BELT
1.Remove splash guard (RH).
2.Loosen idler pulley lock nut (A) and adjust tension by turning adjusting bolt (B).
●For specified belt tension, refer to EM-11, «Checking Drive Belts» .
3.Tighten lock nut (A).
 : 30.4 — 39.2 N·m (3.1 — 3.9 kg-m, 23 — 28 ft-lb)
4.Tighten adjusting bolt (B).
 : 3.9 — 6.9 N·m (0.4 — 0.7 kg-m, 35 — 61 in-lb)
PBIC1163E
POWER STEERING OIL PUMP BELT
1.Remove splash guard (RH).
2.Loosen adjusting bolt (C).
3.Loosen power steering oil pump mounting bolt (D).
●Bolt head (D) is engine rear side.
4.Adjust by turning adjusting bolt (E).
●For specified belt tension, refer to EM-11, «Checking Drive Belts» .
NOTE:
Adjusting bolt (E) is loosened with counter-clockwise rotation.
5.Tighten bolt (C), then bolt (D).
Tightening torque:
Bolt (C) : 24.5 — 31.4 N·m (2.5 — 3.2 kg-m, 18 — 23 ft-lb)
Bolt (D) : 36.3 — 50.0 N·m (3.7 — 5.1 kg-m, 27 — 36 ft-lb)
Removal and Installation |
ABS0036W |
REMOVAL
1.Remove splash guard (RH).
2.Fully loosen each belt by following the guidelines in EM-11, «Tension Adjustment» . Remove alternator and air conditioner compressor belt and then power steering oil pump belt.
CAUTION:
Grease is applied to idler pulley adjusting bolt. Be careful to keep grease away from the belt.
|
Revision; 2004 April |
EM-12 |
2003 Murano |

DRIVE BELTS
INSTALLATION
|
1. |
Install belts to pulley in reverse order of removal. |
A |
||
|
CAUTION: |
||||
|
● |
Make sure belt is correctly engaged with the pulley groove. |
|||
|
● |
Check for oil and engine coolant on belt and each pulley groove. |
EM |
||
|
2. |
Adjust belt tension. Refer to EM-11, «Tension Adjustment» . |
|||
|
3. |
Tighten each adjusting bolt and nut to the specified torque. |
C |
||
|
4. |
Make sure that tension of each belt is within the standard. |
|||
D
E
F
G
H
I
J
K
L
M
|
Revision; 2004 April |
EM-13 |
2003 Murano |

AIR CLEANER AND AIR DUCT
AIR CLEANER AND AIR DUCT
Removal and Installation
|
PBIC1806E |
|||||
|
1. |
Air cleaner case (lower) |
2. |
Air cleaner filter |
3. |
Air cleaner case (upper) |
|
4. |
Air duct assembly |
5. |
Harness bracket |
6. |
Mass air flow sensor |
|
7. |
O-ring |
8. |
PCV hose |
9. |
Clip |
|
10. |
Radiator cover grill (RH side) |
11. |
Air duct (inlet) |
12. |
Radiator cover grill (LH side) |
|
13. |
Resonator |
14. |
Bracket |
15. |
Grommet |
|
16. |
Bracket |
REMOVAL
1.Remove RH and LH both side radiator cover grills.
2.Remove air duct (inlet).
3.Disconnect harness connector from the mass air flow sensor.
4.Disconnect the tube clamp at the electric throttle control actuator and at the mass air flow sensor.
5.Remove PCV hose, air cleaner case (upper) with the mass air flow sensor attached.
6.Remove mass air flow sensor from air cleaner case (upper), as necessary.
CAUTION:
Handle mass air flow sensor with care.
●Do not shock it.
●Do not disassemble it.
●Do not touch its sensor.
7.Remove resonator in the fender, lifting left fender protector, as necessary.
|
Revision; 2004 April |
EM-14 |
2003 Murano |

AIR CLEANER AND AIR DUCT
INSTALLATION
Installation is in the reverse order of removal. A
CHANGING AIR CLEANER FILTER
1. Unhook the air cleaner case (lower) side clips and lift up the air cleaner case (upper).
EM
2. Remove the air cleaner filter.
C
D
E
PBIC1165E
F
G
H
I
J
K
L
M
|
Revision; 2004 April |
EM-15 |
2003 Murano |

INTAKE MANIFOLD COLLECTOR
INTAKE MANIFOLD COLLECTOR
Removal and Installation
|
PBIC1166E |
|||||
|
1. |
Electric throttle control actuator |
2. |
Gasket |
3. |
Intake manifold collector (upper) |
|
4. |
PCV hose |
5. |
Harness bracket |
6. |
Gasket |
|
7. |
Power valve |
8. |
VIAS control solenoid valve |
9. |
Vacuum tank |
|
10. |
Gasket |
11. |
Intake manifold collector (lower) |
12. |
EVAP canister purge volume control |
|
solenoid valve |
|||||
|
13. |
Gasket |
14. |
EVAP hose |
15. |
Support bracket |
|
Revision; 2004 April |
EM-16 |
2003 Murano |

INTAKE MANIFOLD COLLECTOR
REMOVAL
WARNING:
To avoid the danger of being scalded, never drain the coolant when the engine is hot.
1.Remove engine cover.
2.Drain engine coolant, or when water hose is disconnected, attach plug to prevent engine coolant leakage. Refer to CO-8, «Changing Engine Coolant» .
CAUTION:
Perform when engine is cold.
3.Remove air duct. Refer to EM-14, «AIR CLEANER AND AIR DUCT» .
PBIC1167E
4.Remove electric throttle control actuator.
● Loosen bolts in the reverse order of that shown in the figure.
CAUTION:
●Handle carefully to avoid any shock to the electric throttle control actuator.
●Do not disassemble.
SEM711G
5.Disconnect vacuum hose and water hose from intake manifold collector (upper and lower).
6.Disconnect EVAP canister purge volume control solenoid valve mounting bolt from intake manifold collec-
7.Remove VIAS control solenoid valve and vacuum tank.
8.Remove the RH windshield wiper arm and RH front cowl top cover. Refer to EI-21, «COWL TOP» .
9.Disconnect the power steering hose bracket.
10.Remove intake manifold collector support bracket.
11.Remove PCV hose [between intake manifold collector (upper) and RH rocker cover].
12.Loosen bolts in reverse order of illustration with power tool, and remove intake manifold collector (upper and lower) assembly with power tool.
SEM713G
|
Revision; 2004 April |
EM-17 |
2003 Murano |

INTAKE MANIFOLD COLLECTOR
13.Loosen bolts in reverse order of illustration to remove intake manifold collector (upper) with power tool.
SEM712G
14. Remove power valve in reverse order of illustration.
SEM714G
INSPECTION AFTER REMOVAL
Surface Distortion
●Using straightedge and feeler gauge, inspect the surface distortion of intake manifold collector (lower).
Limit : 0.1 mm (0.004 in)
●If it exceeds the limit, replace the intake manifold collector.
PBIC1168E
INSTALLATION
●Install in the reverse order of removal paying attention to the following.
Installation of Power Valve
●Tighten in numerical order as shown in the figure.
 : 17.6 — 21.6 N·m (1.8 — 2.2 kg-m, 13 — 15 ft-lb)
SEM714G
|
Revision; 2004 April |
EM-18 |
2003 Murano |

INTAKE MANIFOLD COLLECTOR
Installation of Intake Manifold Collector (Upper)
●Tighten in numerical order as shown in the figure.
 : 17.6 — 21.6 N·m (1.8 — 2.2 kg-m, 13 — 15 ft-lb)
Installation of Intake Manifold Collector (Lower)
●Tighten in numerical order as shown in the figure.
 : 17.6 — 21.6 N·m (1.8 — 2.2 kg-m, 13 — 15 ft-lb)
NOTE:
Tighten mounting bolts to secure gasket (lower), intake manifold collector (lower), gasket (upper).
Installation of Electric Throttle Control Actuator
●Install gasket with three protrusions for installation check facing any direction other than upward or down-
●Tighten in numerical order as shown in the figure.
|
: 7.2 — 9.6 N·m (0.74 — 0.97 kg-m, 64 — 84 in-lb) |
J |
●Perform the “Throttle Valve Closed Position Learning” when harness connector of the electric throttle control actuator is discon-
|
nected. Refer to EC-64, «Throttle Valve Closed Position |
K |
|
Learning» . |
●Perform the “Idle Air Volume Learning” and “Throttle Valve
|
Closed Position Learning” when the electric throttle control actu- |
L |
|
|
ator is replaced. Refer to EC-64, «Idle Air Volume Learning» . |
||
|
SEM711G |
||
|
M |
|
Revision; 2004 April |
EM-19 |
2003 Murano |

INTAKE MANIFOLD
INTAKE MANIFOLD
Removal and Installation
PBIC1169E
|
1. Intake manifold |
2. Gasket |
REMOVAL
1.Release fuel pressure. Refer to EC-66, «FUEL PRESSURE RELEASE» .
2.Remove intake manifold collector (upper and lower). Refer to EM-16, «INTAKE MANIFOLD COLLECTOR»
.
3.Remove fuel tube and fuel injector assembly. Refer to EM-38, «FUEL INJECTOR AND FUEL TUBE»
4.Loosen bolts and nuts in reverse order of illustration to remove intake manifold assembly with power tool.
PBIC0778E
INSPECTION AFTER REMOVAL
Surface Distortion
●Using straightedge and feeler gauge, inspect the surface distortion of each surface on intake manifold.
Limit : 0.1 mm (0.04 in)
●If it exceeds the limit, replace the intake manifold.
PBIC0870E
|
Revision; 2004 April |
EM-20 |
2003 Murano |
![]()
INTAKE MANIFOLD
INSTALLATION
Install in the reverse order of removal paying attention to the following.
Installation of Intake Manifold
●If stud bolts were removed, install them and tighten to the torque specified below.
 : 9.8 — 11.8 N·m (1.0 — 1.2 kg-m, 87 — 104 in-lb)
●Tighten all mounting bolts and nuts to specified torque in two or more steps in numerical order shown in figure.
 1st step
: 4.9 — 9.8 N·m (0.5 — 1.0 kg-m, 4 — 7 ft-lb)  2nd step and after
: 26.5 — 31.4 N·m (2.7 — 3.2 kg-m, 20 — 23 ft-lb)
A
EM
C
D
PBIC0778E E
F
G
H
I
J
K
L
M
|
Revision; 2004 April |
EM-21 |
2003 Murano |

EXHAUST MANIFOLD AND THREE WAY CATALYST
EXHAUST MANIFOLD AND THREE WAY CATALYST
Removal and Installation
|
PBIC1170E |
||||||
|
1. |
Heated oxygen sensor 1 (bank 1) |
2. |
Exhaust manifold cover |
3. |
Exhaust manifold (RH bank) |
|
|
4. |
Gasket |
5. |
Gasket |
6. |
Three way catalyst (manifold) (RH |
|
|
bank) |
||||||
|
7. |
Heated oxygen sensor 2 (bank 1) |
8. |
Support (RH) |
9. |
Three way catalyst heat shield |
|
|
10. |
Three way catalyst (manifold) (LH |
11. |
Heated oxygen sensor 2 (bank 2) |
12. |
Support (LH) |
|
|
bank) |
||||||
|
13. |
Exhaust manifold cover |
14. |
Exhaust manifold (LH bank) |
15. |
Heated oxygen sensor 1 (bank 2) |
REMOVAL
WARNING:
●Perform the work when the exhaust and cooling system have completely cooled down.
●When removing the engine mounting through bolts and nuts, lift the engine up slightly for safety with a transmission jack. Refer to EM-95, «ENGINE ASSEMBLY» .
1.Remove the exhaust front tube. Refer to EX-3, «Removal and Installation» .
2.Remove rear engine mount insulator (2WD models) (when RH exhaust manifold and three way catalyst is removed). Refer to EM-95, «ENGINE ASSEMBLY» .
3.Remove the RH windshield wiper arm and RH front cowl top cover (when RH exhaust manifold and three way catalyst is removed). Refer to EI-21, «COWL TOP» .
|
Revision; 2004 April |
EM-22 |
2003 Murano |

EXHAUST MANIFOLD AND THREE WAY CATALYST
4.Remove heated oxygen sensor 1 and 2 on both LH and RH bank.
a.Remove harness connector of each heated oxygen sensor, and disconnect the harness from the bracket and middle clamp.
b.Remove both heated oxygen sensors with heated oxygen sensor wrench [special service tool: KV10117100 (J3647-A) or KV10117200 (J38365)].
CAUTION:
●Be careful not to damage heated oxygen sensor.
●Discard any heated oxygen sensor which has been dropped from a height of more than 0.5 m (19.7 in) onto a
hard surface such as a concrete floor; replace with a new sensor.
5.Remove the exhaust manifold covers and the three way catalyst heat shields.
6.Remove bolts in the reverse order of illustration to remove three way catalyst supports (RH and LH).
7.Remove the three way catalyst (manifold) (RH bank) and three way catalyst (manifold) (LH bank) by loosening the bolts first and then removing the nuts.
8.Remove the exhaust manifolds.
● Loosen the nuts in the reverse order as shown.
PBIC1171E
|
Revision; 2004 April |
EM-23 |
2003 Murano |

EXHAUST MANIFOLD AND THREE WAY CATALYST
INSPECTION AFTER REMOVAL
Surface Distortion
●Use a reliable straightedge and feeler gauge to check the flatness of the exhaust manifold mating surfaces.
Limit : 0.3 mm (0.012 in)
●If it exceeds the limit, replace the exhaust manifold.
PBIC1173E
INSTALLATION
Installation is in the reverse order of removal paying attention to the following.
CAUTION:
●When using the heated oxygen sensor wrench [special service tool: KV10117200 (J38365)], tighten to the middle of specified torque range, because the length of the tool may increase the actual tightness. Do not tighten to the maximum specified torque range.
●Before installing a heated oxygen sensor, clean the threads on the exhaust manifold using the oxygen sensor thread cleaner tool (commercial service tool), and apply anti-seize lubricant.
●Do not over-torque the heated oxygen sensors. Doing so may cause damage to the heated oxygen sensors.
Exhaust Manifold
●Install the exhaust manifold nuts in the numerical order as shown.
PBIC1171E
PBIC1172E
|
Revision; 2004 April |
EM-24 |
2003 Murano |

EXHAUST MANIFOLD AND THREE WAY CATALYST
Three Way Catalyst Supports
|
Install in the numerical order as shown. |
A |
|
 : 19 — 25 N·m (2.0 — 2.5 kg-m, 14 — 18 ft-lb)
EM
C
D
PBIC1174E
E
F
G
H
I
J
K
L
M
|
Revision; 2004 April |
EM-25 |
2003 Murano |

OIL PAN AND OIL STRAINER
OIL PAN AND OIL STRAINER
Removal and Installation
PBIC1175E
|
1. |
Gasket |
2. |
Upper oil pan |
3. |
Baffle plate |
|
4. |
O-ring |
5. |
Oil pressure switch |
6. |
Relief valve |
|
7. |
Oil cooler |
8. |
Oil cooler connector |
9. |
Oil filter |
|
10. |
Gasket |
11. |
Oil strainer |
12. |
Gasket |
|
13. |
Drain plug |
14. |
Lower oil pan |
15. |
Rear cover plate |
|
16. |
Heated oxygen sensor (bank 2) har- |
17. |
Crankshaft position sensor (POS) |
||
|
ness clamp (2WD models) |
REMOVAL
2WD Model
WARNING:
Do not remove the oil pan until the exhaust system and cooling system have completely cooled off.
CAUTION:
When removing the upper oil pan from the engine, first remove the crankshaft position sensor (POS). Be careful not to damage sensor edges or signal plate teeth.
1.Remove splash guard (RH).
2.Remove the front RH road wheel and tire with power tool.
3.Drain engine oil. Refer to LU-8, «Changing Engine Oil» .
4.Drain engine coolant. Refer to CO-8, «Changing Engine Coolant» .
CAUTION:
●Perform when engine is cold.
●Do not spill engine coolant on the drive belts.
5.Remove oil filter. Refer to LU-9, «OIL FILTER» .
CAUTION:
Do not spill engine oil on the drive belts.
|
Revision; 2004 April |
EM-26 |
2003 Murano |

OIL PAN AND OIL STRAINER
6.Remove oil cooler and water pipes. Refer to LU-10, «OIL COOLER» .
7.Remove drive belts. Refer to EM-11, «DRIVE BELTS» .
8.Remove A/C compressor with piping connected, and temporarily secure it aside. Refer to ATC-151, «Components» .
9.Remove exhaust front tube. Refer to EX-3, «EXHAUST SYSTEM» .
10.Remove the heated oxygen sensor 2 (bank 2) and remove the three way catalyst (manifold) (bank 2) from the exhaust manifold. Refer to EM-22, «EXHAUST MANIFOLD AND THREE WAY CATALYST» .
11.Loosen lower oil pan bolts with power tool in reverse order of illustration to remove.
PBIC0782E
12.Insert a seal cutter (special service tool) between the lower oil pan and the upper oil pan.
CAUTION:
●Be careful not to damage the mating surface.
●Do not insert a screwdriver, this will damage the mating surfaces.
SEM365E
13.Slide seal cutter (special service tool) by tapping on the side of the tool with a hammer. Remove lower oil pan.
SEM960F
14. Remove oil strainer.
SEM575GA
15.Remove the oil pressure switch. Refer to LU-6, «Inspection» .
16.Remove crankshaft position sensor (POS).
A
EM
C
D
E
F
G
H
I
J
K
L
M
|
Revision; 2004 April |
EM-27 |
2003 Murano |

OIL PAN AND OIL STRAINER
CAUTION:
●Handle carefully to avoid dropping and shocks.
●Do not disassemble.
●Do not allow metal powder to adhere to magnetic part at sensor tip.
●Do not place sensors in a location where they are exposed to magnetism.
17.Remove the four engine-to-transaxle bolts.
SEM949G
18.Remove upper oil pan.
● Loosen bolts in reverse order as shown with power tool.
PBIC1636E
19.Insert an appropriate size tool into the notch of the upper oil pan as shown (1).
Pry off the upper oil pan by moving the tool up and down as shown (2).
SEM155F
20.Remove O-rings from the bottom of the cylinder block and oil pump body.
PBIC1144E
|
Revision; 2004 April |
EM-28 |
2003 Murano |

OIL PAN AND OIL STRAINER
21. Remove oil pan gaskets.
PBIC1145E
AWD Model
WARNING:
Do not remove the oil pan until the exhaust system and cooling system have completely cooled off.
CAUTION:
When removing the upper oil pan from the engine, first remove the crankshaft position sensor (POS). Be careful not to damage sensor edges or signal plate teeth.
1.Remove engine assembly from vehicle, and separate front suspension member, transaxle and transfer assembly from engine. Refer to EM-95, «Removal and Installation» .
2.Install engine slingers. Refer to EM-100, «CYLINDER BLOCK» .
3.install engine sub-attachment to right side of cylinder block, then lift engine, and mount it onto the engine stand. Refer to EM-100, «CYLINDER BLOCK» .
4.Drain engine oil. Refer to LU-8, «Changing Engine Oil» .
5.Remove oil filter. Refer to LU-9, «OIL FILTER» .
CAUTION:
Do not spill engine oil on the drive belt.
6.Remove oil cooler and water pipes. Refer to LU-10, «OIL COOLER» .
7.Remove the heated oxygen sensor 2 (bank 2) and remove the three way catalyst (manifold) (bank 2) from the exhaust manifold. Refer to EM-22, «EXHAUST MANIFOLD AND THREE WAY CATALYST» .
8.Loosen lower oil pan bolts with power tool in reverse order of illustration to remove.
PBIC0782E
9.Insert a seal cutter (special service tool) between the lower oil pan and the upper oil pan.
CAUTION:
●Be careful not to damage the mating surface.
●Do not insert a screwdriver, this will damage the mating surfaces.
SEM365E
A
EM
C
D
E
F
G
H
I
J
K
L
M
|
Revision; 2004 April |
EM-29 |
2003 Murano |

OIL PAN AND OIL STRAINER
10.Slide seal cutter (special service tool) by tapping on the side of the tool with a hammer. Remove lower oil pan.
11. Remove oil strainer.
12.Remove the oil pressure switch. Refer to LU-6, «Inspection» .
13.Remove upper oil pan.
● Loosen bolts in reverse order as shown with power tool.
14.Insert an appropriate size tool into the notch of the upper oil pan as shown (1).
Pry off the upper oil pan by moving the tool up and down as shown (2).
SEM960F
SEM575GA
PBIC1636E
SEM155F
|
Revision; 2004 April |
EM-30 |
2003 Murano |
![]()
OIL PAN AND OIL STRAINER
15.Remove O-rings from the bottom of the cylinder block and oil pump body.
16. Remove oil pan gasket.
INSPECTION AFTER REMOVAL
●Clean oil strainer if any object attached.
INSTALLATION
1.Install in the upper oil pan in the order below.
a.Use a scraper to remove old liquid gasket from mating surfaces.
●Also remove the old liquid gasket from mating surface of the cylinder block.
●Remove the old liquid gasket from the bolt holes and threads.
CAUTION:
Do not scratch or damage the mating surfaces when cleaning off the old liquid gasket.
b.Apply Genuine RTV Silicone Sealant or equivalent, to the front timing chain case gasket and the rear oil seal retainer gasket as shown. Refer to GI-46, «RECOMMENDED CHEMICAL PRODUCTS AND SEALANTS» .
A
EM
C
PBIC1144E
D
E
F
G
PBIC1145E
H
I
J
K
L
MEM108A
M
SEM964E
|
Revision; 2004 April |
EM-31 |
2003 Murano |

OIL PAN AND OIL STRAINER
●To install, align protrusion of oil pan gasket with notches of front timing chain case and rear oil seal retainer.
●Install oil pan gasket with smaller arc to front timing chain case side.
c.Install new O-rings on the cylinder block and oil pump side.
d.Apply a continuous bead of sealant to the cylinder block mating surface of the upper oil pan to a limited portion as shown.
Use Genuine RTV Silicone Sealant or equivalent. Refer to GI-46, «RECOMMENDED CHEMICAL PRODUCTS AND SEALANTS» .
CAUTION:
●For bolt holes with  marks (5 locations), apply liquid gasket outside the holes.
●Apply a bead of 4.5 to 5.5 mm (0.177 to 0.217 in) diameter to area “A”.
●Attaching should be done within 5 minutes after coating.
e.Install the upper oil pan.
●Tighten bolts in numerical order as shown.
●There are two types of mounting bolts. Refer to the following for locating bolts.
|
M8 × |
100 mm (3.97 in) |
: 5, 7, 8, 11 |
|
M8 × |
25 mm (0.98 in) |
: Except the above |
f.Install the four engine-to-transaxle bolts. (2WD models)
g.Install oil strainer to oil pump.
2.Install the lower oil pan in the order below.
PBIC1145E
PBIC1144E
KBIA1078E
PBIC1636E
|
Revision; 2004 April |
EM-32 |
2003 Murano |

OIL PAN AND OIL STRAINER
a.Use a scraper to remove old liquid gasket from mating surfaces.
●Also remove old liquid gasket from mating surface of upper oil pan.
b.Apply a continuous bead of sealant to the lower oil pan.
●Use Genuine RTV Silicone Sealant or equivalent. Refer to GI-46, «RECOMMENDED CHEMICAL PRODUCTS AND SEALANTS» .
●Be sure the sealant is 4.5 — 5.5 mm (0.177 — 0.217 in) wide.
●Attaching should be done within 5 minutes after coating.
c.Install lower oil pan.
● Tighten the bolts in the numerical order as shown.
A
EM
C
SEM958F
D
E
F
G
H
I
J
PBIC1146E
K
L
M
PBIC0782E
3.Install oil pan drain plug.
● Refer to illustration of components of former page for installation direction of washer.
4.Install in the reverse order of removal after this step.
At least 30 minutes after oil pan is installed, pour engine oil.
|
Revision; 2004 April |
EM-33 |
2003 Murano |

OIL PAN AND OIL STRAINER
INSPECTION AFTER INSTALLATION
●Before starting engine, check the levels of engine coolant, engine oil and working fluid. If less than required quantity, fill to the specified level.
●Use procedure below to check for fuel leakage.
–Turn ignition switch ON (with engine stopped). With fuel pressure applied to fuel piping, check for fuel leakage at connection points.
–Start engine. With engine speed increased, check again for fuel leakage at connection points.
●Run engine to check for unusual noise and vibration.
●Warm up engine thoroughly to make sure there is no leakage of engine coolant, engine oil and working fluid, fuel and exhaust gas.
●Bleed air from passages in pipes and tubes of applicable lines, such as in cooling system.
●After cooling down engine, again check amounts of engine coolant, engine oil and working fluid. Refill to specified level, if necessary.
|
Revision; 2004 April |
EM-34 |
2003 Murano |

IGNITION COIL
IGNITION COIL
Removal and Installation
PFP:22448
A
ABS0032I
EM
C
D
E
F
G
PBIC1176E
|
1. Ignition coil |
2. Spark plug |
3. Rocker cover (left bank) |
REMOVAL |
H |
1.Remove the engine cover. Refer to EM-16, «INTAKE MANIFOLD COLLECTOR» .
2.Disconnect the mass air flow sensor electrical connector and remove the air cleaner and air duct assem-
|
bly. Refer to EM-14, «Removal and Installation» . |
I |
3.Remove the RH windshield wiper arm and the RH front cowl top cover. Refer to EI-21, «COWL TOP» .
4.Remove the intake manifold collector (upper and lower), gasket, and electric throttle control actuator.
|
Refer to EM-16, «Removal and Installation» . |
J |
||
|
The intake manifold collector (upper) should be moved aside with water hoses connected. |
|||
|
5. |
Remove ignition coil. |
K |
|
INSTALLATION |
|||
|
1. |
Installation is in the reverse order of removal. |
L
M
|
Revision; 2004 April |
EM-35 |
2003 Murano |

SPARK PLUG (PLATINUM-TIPPED TYPE)
SPARK PLUG (PLATINUM-TIPPED TYPE)
Removal and Installation
REMOVAL
1.Remove engine cover. Refer to EM-16, «INTAKE MANIFOLD COLLECTOR» .
2.Remove ignition coil. Refer to EM-35, «IGNITION COIL» .
3.Remove spark plug using spark plug wrench (commercial service tool).
SEM294A
INSPECTION AFTER REMOVAL
●Use standard type spark plug for normal condition.
The hot type spark plug is suitable when fouling occurs with the standard type spark plug under conditions such as:
●Frequent engine starts
●Low ambient temperatures
The cold type spark plug is suitable when spark plug knock occurs with the standard type spark plug under conditions such as:
●Extended highway driving
●Frequent high engine revolution
|
Make |
NGK |
|
|
Standard type |
PLFR5A-11 |
|
|
Hot type |
PLFR4A-11 |
|
|
Cold type |
PLFR6A-11 |
|
|
Gap (Nominal) |
: 1.1 mm (0.043 in) |
CAUTION:
●Do not drop or shock spark plug.
●Do not use a wire brush for cleaning.
●If plug tip is covered with carbon, spark plug cleaner may be used.
Cleaner air pressure:
Less than 588 kPa (6 kg/cm2 , 85 psi)
Cleaning time:
Less than 20 seconds
SMA773C
|
Revision; 2004 April |
EM-36 |
2003 Murano |

SPARK PLUG (PLATINUM-TIPPED TYPE)
●Checking and adjusting plug gap is not required between
|
change intervals. |
A |
|
|
EM |
||
|
C |
||
|
SMA806CA |
INSTALLATION
●Install in the reverse order of removal.
|
Revision; 2004 April |
EM-37 |
2003 Murano |

FUEL INJECTOR AND FUEL TUBE
FUEL INJECTOR AND FUEL TUBE
Removal and Installation
PFP:16600
ABS0032K
PBIC1177E
|
1. |
Fuel tube |
2. |
Insulator |
3. |
Clip |
|
4. |
O-ring (black) |
5. |
Fuel injector |
6. |
O-ring (green) |
|
7. |
Fuel damper |
8. |
O-ring |
9. |
Fuel feed hose (with damper) |
|
10. |
Quick connector |
11. |
Quick connector cap |
CAUTION:
Do not remove or disassemble parts unless instructed as shown in the figure.
REMOVAL
WARNING:
To avoid the danger of being scalded, never drain the engine coolant when the engine is hot.
1.Remove the engine cover. Refer to EM-16, «INTAKE MANIFOLD COLLECTOR» .
2.Release the fuel pressure. Refer to EC-66, «FUEL PRESSURE RELEASE» .
3.Remove the RH windshield wiper arm and the RH cowl top cover. Refer toEI-21, «Removal and Installation» .
4.Remove radiator cover grille, air duct (inlet), air cleaner case, air duct assembly and mass air flow sensor. Refer to EM-14, «AIR CLEANER AND AIR DUCT» .
5.Disconnect electric throttle control actuator and engine coolant hoses.
CAUTION:
Handle carefully to avoid any shock to the electric throttle control actuator.
6.Disconnect vacuum hose, fuel injectors electrical connectors, and PCV hose.
CAUTION:
Cover any engine openings to avoid the entry of any foreign material.
7.Remove the vacuum tank from intake manifold collector (lower).
8.Disconnect the power steering hose bracket.
|
Revision; 2004 April |
EM-38 |
2003 Murano |

FUEL INJECTOR AND FUEL TUBE
9.Remove the intake manifold collector (upper and lower). Refer to EM-16, «INTAKE MANIFOLD COLLEC-
|
TOR» . |
A |
|
The intake manifold collector (upper) should be moved aside with water hoses connected. |
|
|
10. Remove fuel feed hose (with damper) from fuel tube. |
|
●While hoses are disconnected, plug them to prevent fuel from draining.
●Do not separate fuel damper and fuel feed hose.
11. Disconnect fuel feed hose (with damper) quick connector at vehicle piping side. When separating fuel C feed hose and centralized under-floor piping connection, disconnect quick connector with the following procedure.
a.Remove quick connector cap from quick connector.
b.Disconnect quick connector from centralized under-floor piping as follows:
CAUTION:
Disconnect quick connector by using quick connector release (special service tool: J-45488), not by picking out retainer tabs.
i.With the sleeve side of quick connector release facing quick connector, install quick connector release onto fuel tube.
PBIC1179E
ii.Insert quick connector release into quick connector until sleeve contacts and goes no further. Hold quick connector release on that position.
CAUTION:
Inserting quick connector release hard will not disconnect quick connector. Hold quick connector release where it contacts and goes no further.
iii.Draw and pull out quick connector straight from centralized under-floor piping.
|
CAUTION: |
|
|
● Pull quick connector holding “A” position as shown in |
PBIC1898E |
|
the figure. |
●Do not pull with lateral force applied. O-ring inside quick connector may be damaged.
●Prepare container and cloth beforehand as fuel will leak out.
●Avoid fire and sparks.
●Keep parts away from heat source. Especially, be careful when welding is performed around them.
●Do not expose parts to battery electrolyte or other acids.
●Do not bend or twist connection between quick connector and fuel hose (with damper) during installation/removal.
|
Revision; 2004 April |
EM-39 |
2003 Murano |

FUEL INJECTOR AND FUEL TUBE
●To keep clean the connecting portion and to avoid damage and foreign materials, cover them completely with plastic bags or something similar.
12.Remove harness connector from fuel injector.
13.Loosen mounting bolts in numerical order in the figure, and remove fuel tube and fuel injector assembly.
CAUTION:
Do not tilt it, or remaining fuel in pipes may flow out from pipes.
14. Remove fuel injector from fuel tube with following procedure.
a.Open and remove clip.
b.Remove fuel injector from the fuel tube by pulling straight.
CAUTION:
●Be careful with remaining fuel that may go out from fuel tube.
●Be careful not to damage injector nozzles during removal.
●Do not bump or drop fuel injectors.
●Do not disassemble fuel injectors.
15. Remove fuel damper from fuel tube.
INSTALLATION
1.Install fuel damper.
●When handling O-rings, be careful of the following:
CAUTION:
●Handle O-ring with bare hands. Never wear gloves.
●Lubricate O-ring with new engine oil.
●Do not clean O-ring with solvent.
●Make sure that O-ring and its mating part are free of foreign material.
PBIC1899E
SEC030D
SBIA0364E
|
Revision; 2004 April |
EM-40 |
2003 Murano |
![]()
FUEL INJECTOR AND FUEL TUBE
●When installing O-ring, be careful not to scratch it with tool or fingernails. Also be careful not to twist or stretch O-ring. If O-ring was stretched while it was being attached, do not insert it quickly into fuel tube.
●Insert fuel damper straight into fuel tube.
●Tighten mounting bolts evenly in turn.
● After tightening mounting bolts, make sure that there is no gap between flange and fuel tube.
2.Install O-rings to fuel injector paying attention to the items below.
CAUTION:
● Upper and lower O-ring are different. Be careful not to confuse them.
|
Fuel tube side |
: Black |
|
|
Nozzle side |
: Green |
|
|
● |
Handle O-ring with bare hands. Never wear gloves. |
|
|
● |
Lubricate O-ring with new engine oil. |
|
|
● |
Do not clean O-ring with solvent. |
|
|
● |
Make sure that O-ring and its mating part are free of foreign material. |
|
|
● |
When installing O-ring, be careful not to scratch it with tool or fingernails. Also be careful not to |
|
|
twist or stretch O-ring. If O-ring was stretched while it was being attached, do not insert it |
||
|
quickly into fuel tube. |
||
|
● |
Insert O-ring straight into fuel tube. Do not decenter or twist it. |
3. Install fuel injector to fuel tube with the following procedure.
a.Insert clip into clip mounting groove on fuel injector.
●Insert clip so that lug “A” of fuel injector matches notch “A” the clip.
CAUTION:
●Do not reuse clip. Replace it with a new one.
●Be careful to keep clip from interfering with O-ring. If interference occurs, replace O-ring.
b.Insert fuel injector into fuel tube with clip attached.
●Insert it while matching it to the axial center.
●Insert fuel injector so that lug “B” of fuel tube matches notch “B” of the clip.
●Make sure that fuel tube flange is securely fixed in flange fixing groove on clip.
c.Make sure that installation is complete by checking that fuel injector does not rotate or come off.
PBIC1021E
4.Tighten mounting bolts in two steps in numerical order shown in figure.
 1st step : 9.3 — 10.8 N·m (0.95 — 1.1 kg-m, 6.9 — 7.9 ft-lb)
 2nd step : 20.6 — 26.5 N·m (2.1 — 2.7 kg-m, 16 — 19 ft-lb)
CAUTION:
Be careful not to let tip of injector nozzle come in contact with other parts.
5. Connect fuel injector harness.
6. Install intake manifold collector (upper and lower). Refer to EM-
SEC999C
16, «INTAKE MANIFOLD COLLECTOR» .
A
EM
C
D
E
F
G
H
I
J
K
L
M
|
Revision; 2004 April |
EM-41 |
2003 Murano |
Хорошее руководство по эксплуатации
Законодательство обязывает продавца передать покупателю, вместе с товаром, руководство по эксплуатации Nissan Murano (2003). Отсутствие инструкции либо неправильная информация, переданная потребителю, составляют основание для рекламации в связи с несоответствием устройства с договором. В законодательстве допускается предоставлении руководства в другой, чем бумажная форме, что, в последнее время, часто используется, предоставляя графическую или электронную форму инструкции Nissan Murano (2003) или обучающее видео для пользователей. Условием остается четкая и понятная форма.
Что такое руководство?
Слово происходит от латинского «instructio», тоесть привести в порядок. Следовательно в инструкции Nissan Murano (2003) можно найти описание этапов поведения. Цель инструкции заключается в облегчении запуска, использования оборудования либо выполнения определенной деятельности. Инструкция является набором информации о предмете/услуге, подсказкой.
К сожалению немного пользователей находит время для чтения инструкций Nissan Murano (2003), и хорошая инструкция позволяет не только узнать ряд дополнительных функций приобретенного устройства, но и позволяет избежать возникновения большинства поломок.
Из чего должно состоять идеальное руководство по эксплуатации?
Прежде всего в инструкции Nissan Murano (2003) должна находится:
— информация относительно технических данных устройства Nissan Murano (2003)
— название производителя и год производства оборудования Nissan Murano (2003)
— правила обслуживания, настройки и ухода за оборудованием Nissan Murano (2003)
— знаки безопасности и сертификаты, подтверждающие соответствие стандартам
Почему мы не читаем инструкций?
Как правило из-за нехватки времени и уверенности в отдельных функциональностях приобретенных устройств. К сожалению само подсоединение и запуск Nissan Murano (2003) это слишком мало. Инструкция заключает ряд отдельных указаний, касающихся функциональности, принципов безопасности, способов ухода (даже то, какие средства стоит использовать), возможных поломок Nissan Murano (2003) и способов решения проблем, возникающих во время использования. И наконец то, в инструкции можно найти адресные данные сайта Nissan, в случае отсутствия эффективности предлагаемых решений. Сейчас очень большой популярностью пользуются инструкции в форме интересных анимаций или видео материалов, которое лучше, чем брошюра воспринимаются пользователем. Такой вид инструкции позволяет пользователю просмотреть весь фильм, не пропуская спецификацию и сложные технические описания Nissan Murano (2003), как это часто бывает в случае бумажной версии.
Почему стоит читать инструкции?
Прежде всего здесь мы найдем ответы касательно конструкции, возможностей устройства Nissan Murano (2003), использования отдельных аксессуаров и ряд информации, позволяющей вполне использовать все функции и упрощения.
После удачной покупки оборудования/устройства стоит посвятить несколько минут для ознакомления с каждой частью инструкции Nissan Murano (2003). Сейчас их старательно готовят или переводят, чтобы они были не только понятными для пользователя, но и чтобы выполняли свою основную информационно-поддерживающую функцию.
Need a manual for your Nissan Murano (2003)? Below you can view and download the PDF manual for free. There are also frequently asked questions, a product rating and feedback from users to enable you to optimally use your product. If this is not the manual you want, please contact us.
Is your product defective and the manual offers no solution? Go to a Repair Café for free repair services.
Manual

Rating
Let us know what you think about the Nissan Murano (2003) by leaving a product rating. Want to share your experiences with this product or ask a question? Please leave a comment at the bottom of the page.
Are you satisfied with this Nissan product?
Yes No
2 votes
Frequently Asked Questions
Our support team searches for useful product information and answers to frequently asked questions. If you find an inaccuracy in our frequently asked questions, please let us know by using our contact form.
My car has a timing chain, what is the replacement interval for it? Verified
With normal use, a timing chain should last the entire lifespan of the car and does not need to be replaced.
This was helpful (2216)
I can’t open one or more of the doors from the inside, why is that? Verified
The child safety lock is probably activated. This can often be deactivated with a mechanism in the door.
This was helpful (669)
How often should I change my oil? Verified
Almost every car has its own exact guideline, but in general it’s wise to change your oil every 10.000 to 15.000 kilometers or once every year. Polluted oil can cause serious damage to the engine over time.
This was helpful (568)
When should the airbag on the side of the passenger seat be switched off? Verified
When driving with a child in a car seat on the passenger seat, the airbag on that side should be switched off. This is also advisable for children up to 12 years old that take place in the passenger seat. This is to prevent injuries in case of an accident.
This was helpful (536)
The car keys won’t unlock the car from a distance anymore, why is that? Verified
Car keys that can unlock from a distance generally work with a battery. When it runs out, the key won’t work anymore. Replace the battery and try again.
This was helpful (497)
Will a lower tire pressure result in more grip when driving in the snow? Verified
No, although the tires will have more surface in contact with the road with a lower pressure, it will nevertheless result in less stability. Always drive with the correct tire pressure!
This was helpful (299)
I filled my car with the wrong fuel, what should I do? Verified
Do not drive! It does not matter wether you put diesel in a gasoline car or gasoline in a diesel car. In both cases it can cause damage to the enige and/or other parts of the car. Contact roadside assistance.
This was helpful (195)
Where can I find the VIN number of my car? Verified
This can vary between brands and models, but on many cars the VIN number can be found on the door jamb, under the hood or on the metal flooring at the front seat.
This was helpful (163)
How often should I replace the blades on my windscreen wipers? Verified
It’s advisable to replace the wiper blades at least once a year. Signs that the blades need to be replaced are streaking, leaving a haze, making noise or the rubber coming off.
This was helpful (148)
What is the VIN number? Verified
VIN stands for Vehicle Identification Number and is a unique number that every car has. This makes the car indentifyable after for example a crash or in the case of a recall. It also allows a car to be identified in the case the number plates are missing.
This was helpful (118)
How many miles is one kilometer? Verified
One kilometer equals 0,621 mile. Ten kilometers makes 6,21 miles. One mile equals 1,609 kilometer. Ten miles makes 16,09 kilometers.
This was helpful (117)
Can I use the windscreen wipers while there is ice on the windscreen? Verified
No, this is not advisable. Ice is sharp and can damage the rubber on the wiper blades.
This was helpful (115)
Nissan Murano 2003-2014 Factory Service Repair Manual PDF.
| Nissan Murano 2003 Service Manual 58 Mb Download |
| Nissan Murano 2004 Service Manual 73 Mb Download |
| Nissan Murano 2005 Service Manual 73 Mb Download |
| Nissan Murano 2006 Service Manual 62 Mb Download |
| Nissan Murano 2007 Service Manual 76 Mb Download |
| Nissan Murano 2009 Service Manual 85 Mb Download |
| Nissan Murano 2010 Service Manual 90 Mb Download |
| Nissan Murano 2011 Service Manual 40 Mb Download |
| Nissan Murano 2012 Service Manual 46 Mb Download |
| Nissan Murano 2013 Service Manual 48 Mb Download |
| Nissan Murano 2014 Service Manual 97 Mb Download |
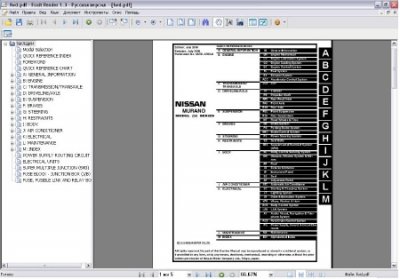
Nissan Murano Z50 2003-2007 Service Manual — дилерское руководство по ремонту и обслуживанию Nissan Murano Z50 2003-2007 годов выпуска предназначенных для рынков США и Канады. В технической документации рассмотрены автомобили, оборудованные бензиновыми двигателями 3.5л VQ35DE и коробками переключения передач CVT и M-CVT. В справочном издании рассмотрены технические характеристики автомобиля, присутствуют пошаговые руководства по ремонту двигателей, коробок переключения передач, подвески, рулевого механизма, кузова, электрооборудования и других узлов. Для наглядности в каждой инструкции присутствует множество иллюстраций каждого этапа работ, а также описан весь инструментарий, расходные материалы и запчасти. Для тех, кто хочет устранить неисправности с электрооборудованием, в руководстве представлены электрические схемы автомобиля. Техническая документация содержит информацию по диагностике электронных систем и исполнительных механизмов автомобиля с помощью специализированных программ для компьютера и специальных диагностических адаптеров. Вся информация в издании Nissan Murano Z50 2006-2007 Service Manual представлена только на английском языке.
Год выпуска: 2006
Жанр: Руководство по ремонту и эксплуатации
Формат: PDF
Качество: OCR без ошибок
Количество страниц: много