-
Contents
-
Table of Contents
-
Bookmarks
Quick Links
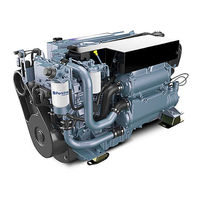
Perkins Phaser and 1000 Series
WORKSHOP MANUAL
Phaser
1000 Series
Publication TPD 1312E, Issue 1.
(c) Perkins Group Limited 1995, all rights reserved.
Published 1 April 1995 by Technical Publications,
Perkins International Limited, Peterborough PE1 5NA, England
Perkins Phaser/1000 Series, April 1995
4 and 6 cylinder diesel engines for
automotive applications
4 and 6 cylinder diesel engines for
agricultural and industrial application
Contents
Contents
EXIT
EXIT
Contents
Contents
EXIT
EXIT
00.01
Chapters
Summary of Contents for Perkins 1000 Series

Perkins Service and Parts Information System содержит каталоги запасных частей, руководства по диагностике, обслуживанию и ремонту двигателей Perkins общего и промышленного назначения, а так же двигателей для дизельных электростанций.
- Актуальность: 2018
- Система: Windows
- Интерфейс: Многоязычный (русский отсутствует)
- Формат: ISO
- Размер: 5,0 Gb
Руководство на английском языке по техническому обслуживанию и ремонту автомобильных двигателей Perkins Phaser и промышленных двигателей Perkins 1000-й серии.
- Автор: —
- Издательство: Perkins Engines Ltd.
- Год издания: 2002
- Страниц: 440
- Формат: PDF
- Размер: 27,7 Mb
Руководство на английском языке по техническому обслуживанию и ремонту автомобильных дизельных двигателей Perkins моделей 4.99/4.107/4.108.
- Автор: —
- Издательство: Perkins Engines Ltd.
- Год издания: 1983
- Страниц: 114
- Формат: PDF
- Размер: 5,3 Mb
Справочник на английском языке с техническими данными двигателей Perkins объемом до 8,85 л.
- Автор: —
- Издательство: Perkins Engines Ltd.
- Год издания: 1997
- Страниц: 66
- Формат: PDF
- Размер: 1,5 Mb
Руководство на английском языке по техническому обслуживанию и ремонту автомобильных дизельных двигателей Perkins моделей 4.99M/4.107M/4.108M.
- Автор: —
- Издательство: Perkins Engines Ltd.
- Год издания: 1978
- Страниц: 134
- Формат: PDF
- Размер: 9,2 Mb
Руководство по техническому обслуживанию и ремонту двигателя Perkins модели 1104D-E44TA.
- Автор: —
- Издательство: Терция
- Год издания: —
- Страниц: 110
- Формат: —
- Размер: —

Скидки от справочной
При упоминании АСС вы можете получить скидки на запчасти и услуги
- Manuals
- Brands
- Perkins Manuals
- Engine
ManualsLib has more than 269 Perkins Engine manuals
Click on an alphabet below to see the full list of models starting with that letter:
1
2
3
4
5
6
7
8
9
C
D
H
L
M
N
P
R
S
T
U
V
W
X
Popular manuals
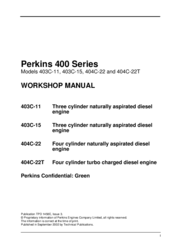
103 pages
3.152 Workshop Manual
115 pages
4.108 Workshop Manual
370 pages
New 1000 Series Workshop Manual

343 pages
1000 Series Workshop Manual

136 pages
1103 Disassembly And Assembly
220 pages
M190C Troubleshooting Manual
106 pages
1104D-E44T Operation And Maintenance Manual
40 pages
WK 1300 Series EDi User Handbook Manual
65 pages
4012 Manual

84 pages
2506 Operation And Maintenance Manual

144 pages
100 Series Workshop Manual
264 pages
1300 EDi Series Workshop Manual

224 pages
1104E Series Troubleshooting Manual
54 pages
1103 Series Workshop Manual
160 pages
T6.3544 Workshop Manual

159 pages
2800 Workshop Manual

290 pages
New 1000 Series Workshop Manual
128 pages
403C-11 Workshop Manual
129 pages
403C-11 Workshop Manual

180 pages
1106D Disassembly And Assembly
Models
Document Type
1
100 Series

Workshop Manual
1000 Series
Workshop Manual • User Handbook Manual
102-05
Workshop Manual
103-06
Workshop Manual
103-07
Workshop Manual
103-09
Workshop Manual
103-10
Workshop Manual • Workshop Manual
103-13
Workshop Manual
103-15
Workshop Manual
104-19
Workshop Manual
104-22
Workshop Manual
1103
Operation And Maintenance Manual • Disassembly And Assembly • Workshop Manual • Operation And Maintenance Manual • Operation And Maintenance Manual
1103AA-33G
Operation And Maintenance Manual
1103AA-33TG
Operation And Maintenance Manual
1103D Series
Systems Operation Testing And Adjusting • Operation And Maintenance Manual
1103D XK
Systems Operation Testing And Adjusting
1103D XL
Systems Operation Testing And Adjusting
1103D XM
Systems Operation Testing And Adjusting
1104
Operation And Maintenance Manual • Workshop Manual • Operation And Maintenance Manual • Operation And Maintenance Manual
1104AA-44TG
Operation And Maintenance Manual
1104D
Troubleshooting Manual • Operation And Maintenance Manual
1104D NH1
Systems Operation Testing And Adjusting
1104D NJ1
Systems Operation Testing And Adjusting
1104D-E44T
Operation And Maintenance Manual
1104D-E44TA
Operation And Maintenance Manual
1104E Series
Disassembly And Assembly • Systems Operation Testing And Adjusting • Troubleshooting Manual
1106 Series
Installation Manual • User Handbook Manual
1106A-70T
Operation And Maintenance Manual • Operation Manual
1106A-70TA
Operation And Maintenance Manual • Operation Manual
1106AA-70TAG2
Operation And Maintenance Manual
1106AA-70TAG3
Operation And Maintenance Manual
1106AA-70TG1
Operation And Maintenance Manual
1106C Genset
Operation And Maintenance Manual • Systems Operation Testing And Adjusting • Troubleshooting Manual
1106C Series
Disassembly And Assembly
1106C-70TA
Operation And Maintenance Manual • Operation And Maintenance Manual • Operation Manual
1106C-E70TA
Troubleshooting Manual
1106D
Disassembly And Assembly • Troubleshooting Manual • Troubleshooting Manual • Troubleshooting Manual • Operation And Maintenance Manual
1106D-70TA
Operation And Maintenance Manual • Operation And Maintenance Manual • Operation Manual
1106D-E70TA
Troubleshooting Manual
1106E Series
Troubleshooting Manual
1200F Series
Supplement Manual
1204E-E44TA
Operation And Maintenance Manual
1204E-E44TTA
Operation And Maintenance Manual
1204EA-E44TA
Operation And Maintenance Manual
1204F-E44TA
Supplement Manual • Operation And Maintenance Manual
1204F-E44TTA
Supplement Manual • Operation And Maintenance Manual
1206A-E70TTA
Operation And Maintenance Manual
1206D-E70TTA
Operation And Maintenance Manual
1206E-E66TA
Operation And Maintenance Manual
1206E-E70TTA
Operation And Maintenance Manual
1206F-E70TA
Operation And Maintenance Manual • Operation And Maintenance Instructional Manual
1206F-E70TTA
Operation And Maintenance Manual • Operation And Maintenance Instructional Manual
1300 EDi Series
Workshop Manual
1706EA-E93TA
Operation And Maintenance Manual
1706J-E93TA
Operation And Maintenance Manual • Operation And Maintenance Manual
2
2206-E13
Operation And Maintenance Manual • Troubleshooting Manual
2206F-E13TA
Operation And Maintenance Manual • Operation And Maintenance Manual
2206J-E13TA
Operation And Maintenance Manual
2506
Operation And Maintenance Manual
2506-15
Operation And Maintenance Manual
2506F-E15TA
Operation And Maintenance Manual • Operation And Maintenance Manual
2506J-E15TA
Operation And Maintenance Manual
2800 series
User Handbook Manual • Workshop Manual
2806C-E18TA
Operation And Maintenance Manual
2806D-E18TA
Operation And Maintenance Manual • Operation And Maintenance Manual
2806F-E18TA
Operation And Maintenance Manual
2806J-E18TA
Operation And Maintenance Manual
2806J-E18TTA
Operation And Maintenance Manual
3
3.152 Series
Service Data • Workshop Manual
3.1522
Workshop Manual
3.1524
Workshop Manual
3000 Series
User Handbook Manual
35943
User Handbook Manual
3HD46
Workshop Manual
4
4.107
Workshop Manual
4.107(M)
Handbook • Workshop Manual
4.108
Workshop Manual • Service Data
4.108(M)
Handbook • Handbook • Workshop Manual
4.10SM
Handbook
4.135
Workshop Manual
4.154
Workshop Manual • Operator’s Manual
4.154 M
Handbook
4.182
Workshop Manual
4.203 Series
Service Data
4.212
Workshop Manual • Workshop Manual
4.236 Series
Service Data • Workshop Manual • Operator’s Manual • Workshop Manual • User Handbook Manual
4.236(M)
Handbook
4.248
Workshop Manual • Workshop Manual • User Handbook Manual
4.2482
Workshop Manual • Workshop Manual • User Handbook Manual
4.4GM
Installation Manual • User Handbook Manual
4.4TGM
Installation Manual • User Handbook Manual
4.4TW2GM
Installation Manual • User Handbook Manual
4.4TWGM
Installation Manual • User Handbook Manual
4.99
Workshop Manual
4.99M
Workshop Manual
400 Series
User Handbook Manual • Operation And Maintenance Manual • Operation And Maintenance Manual • Operation And Maintenance Manual
4000 Series
User Handbook Manual
4006
User Handbook Manual
4006 TRS Gas
Operation And Maintenance Manual
4006-23
Operation And Maintenance Manual
4006-23TAG1A
User Handbook Manual
4006-23TAG2A
User Handbook Manual
4006-23TAG3A
User Handbook Manual
4006D-E23TA
Operation And Maintenance Manual
4008
User Handbook Manual
4008 TRS Gas
Operation And Maintenance Manual
4008-30
Operation And Maintenance Manual
4008-30 SD8
Systems Operation, Testing And Adjustment
4008D-E30TA
Operation And Maintenance Manual
400A Series
Operation And Maintenance Manual
400C
Operation And Maintenance Manual
400D Series
Operation And Maintenance Manual
4012
Manual
4012TESI Series
User Handbook Manual
4016
Manual
4016 TAG1
User Handbook Manual
4016 TAG2
User Handbook Manual
4016-61 TRG
Operation And Maintenance Manual • Operation And Maintenance Manual
4016-61TRS1
Operation And Maintenance Manual • Operation And Maintenance Manual
4016-61TRS2
Operation And Maintenance Manual • Operation And Maintenance Manual
4016-E61TRS
User Handbook Manual
4016TESI Series
User Handbook Manual
402C-05
Operation And Maintenance Manual • Operation And Maintenance Manual
402D
Operation And Maintenance Manual
402D-05
Operation And Maintenance Manual • Operation And Maintenance Manual
402F-05
Operation And Maintenance Manual
403C-07
Operation And Maintenance Manual • Operation And Maintenance Manual
403C-11
Workshop Manual • Workshop Manual • Operation And Maintenance Manual • Operation And Maintenance Manual
403C-15
Workshop Manual • Workshop Manual • Operation And Maintenance Manual • Operation And Maintenance Manual
403C-17
Operation And Maintenance Manual
403D
Operation And Maintenance Manual
403D-07
Operation And Maintenance Manual • Operation And Maintenance Manual
403D-11
Operation And Maintenance Manual • Operation And Maintenance Manual
403D-15
Operation And Maintenance Manual • Operation And Maintenance Manual
403D-15T
Operation And Maintenance Manual • Operation And Maintenance Manual
403D-17
Operation And Maintenance Manual • Operation And Maintenance Manual
403EA-11
Operation And Maintenance Manual
403EA-11T
Operation And Maintenance Manual
403EA-17
Operation And Maintenance Manual
403F-07
Operation And Maintenance Manual
403F-11
Operation And Maintenance Manual
403F-15
Operation And Maintenance Manual
403F-15T
Operation And Maintenance Manual
403F-E17T 404F-E22T
Operation And Maintenance Manual
403J-E17T
Operation And Maintenance Manual
404C-15
Operation And Maintenance Manual • Operation And Maintenance Manual
404C-22
Workshop Manual • Workshop Manual • Operation And Maintenance Manual • Operation And Maintenance Manual
404C-22T
Workshop Manual • Workshop Manual • Operation And Maintenance Manual • Operation And Maintenance Manual
404D Series
Operation And Maintenance Manual
404D-15
Operation And Maintenance Manual • Operation And Maintenance Manual
404D-22
Operation And Maintenance Manual • Operation And Maintenance Manual
404D-22T
Operation And Maintenance Manual • Operation And Maintenance Manual
404D-22TA
Operation And Maintenance Manual • Operation And Maintenance Manual
404EA-22
Operation And Maintenance Manual
404EA-22T
Operation And Maintenance Manual
404F-22
Operation And Maintenance Manual
404F-22T
Operation And Maintenance Manual
404F-E22TA
Operation And Maintenance Manual
404J-E22T
Operation And Maintenance Manual
404J-E22TA
Operation And Maintenance Manual
415GM
Installation Manual • User Handbook Manual
422GM
Installation Manual • User Handbook Manual
422TGM
Installation Manual • User Handbook Manual
4GM
User Handbook Manual • Installation Manual
4TGM
User Handbook Manual • Installation Manual
5
5006A-E23TA
Operation And Maintenance Manual
5006C-E23TA
Operation And Maintenance Manual
5008AE30TA
Operation And Maintenance Manual
5008C-E30TA
Operation And Maintenance Manual
6
6.354
Operator’s Manual
6.354(M)
Handbook
6.3544 Series
Service Data • Workshop Manual • User Handbook Manual
6.3724
Workshop Manual
6TG2AM
User Handbook Manual • Installation Manual
6TL2AM
User Handbook Manual
6TWGM
User Handbook Manual • Installation Manual
7
700 Series
User Handbook Manual • Workshop Manual
700GM
User Handbook Manual • Installation Manual
8
800D Series
Operation And Maintenance Manual
854E-E34TA
Operation And Maintenance Manual • Systems Operation Testing And Adjusting • Troubleshooting Manual
854F-E34
Operation And Maintenance Manual
854F-E34T
Operation And Maintenance Manual • Systems Operation Testing And Adjusting • Troubleshooting Manual
854F-E34TA
Operation And Maintenance Manual • Disassembly And Assembly • Systems Operation Testing And Adjusting
9
900 Series
Workshop Manual
904D-E28T
Operation And Maintenance Manual
904D-E36TA
Operation And Maintenance Manual
904F-E28T
Operation And Maintenance Manual
904J-E28T
Operation And Maintenance Manual • Operation And Maintenance Manual
904J-E28TA
Operation And Maintenance Manual • Operation And Maintenance Manual
904J-E36TA
Operation And Maintenance Manual • Operation And Maintenance Manual
C
CP
Workshop Manual
CR
Workshop Manual
D
D3.152
Workshop Manual
D3.152M
Workshop Manual
H
H6.354(M)
Handbook
HT6.354
Operator’s Manual
HT6.354(M)
Handbook
L
L4
Workshop Manual
M
M115T
User Handbook Manual • Installation Manual • User Handbook Manual
M135: M130C
Installation Manual
M185C
Installation Manual
M190C
Installation Manual • User Handbook Manual • Installation Manual • Troubleshooting Manual
M215C
Installation Manual
M216C
Installation Manual • User Handbook Manual • Installation Manual • Troubleshooting Manual
M225TI
Installation Manual
M250C
Installation Manual • User Handbook Manual • Installation Manual • Troubleshooting Manual
M265TI
Installation Manual
M300C
Installation Manual • User Handbook Manual • Installation Manual • Troubleshooting Manual
M300TI
Installation Manual
M65
Installation Manual • User Handbook Manual • User Handbook Manual
M85T
Installation Manual • User Handbook Manual • User Handbook Manual
M92
User Handbook Manual • Installation Manual • User Handbook Manual
M92B
User Handbook Manual • Installation Manual
N
New 1000 Series
Workshop Manual • Workshop Manual
NH Series
Troubleshooting Manual
NJ Series
Troubleshooting Manual
P
P3.152(M)
Handbook
Perama M25
Workshop Manual
Perama M30
Workshop Manual
Peregrine EDi
Workshop Manual
Peregrine EDi WK
Workshop Manual
Peregrine EDi WL
Workshop Manual
Peregrine EDi WM
Workshop Manual
Peregrine EDi WN
Workshop Manual
Peregrine EDi WP
Workshop Manual
Peregrine EDi WQ
Workshop Manual
Peregrine EDi WR
Workshop Manual
Peregrine EDi WS
Workshop Manual
peregrine wg
User Handbook Manual
peregrine wj
User Handbook Manual
Phaser Series
Workshop Manual
PJ Series
Troubleshooting Manual
R
RF11-Up
Troubleshooting Manual
RH11-Up
Troubleshooting Manual
RK11-Up
Troubleshooting Manual
S
SEBU9068-03
Operation And Maintenance Manual
T
T3.1524
Workshop Manual
T4.236
Workshop Manual • Workshop Manual • User Handbook Manual
T4.38
Workshop Manual • Workshop Manual
T6.354
Operator’s Manual
T6.354(M)
Handbook
T6.3544
Workshop Manual
T6.354MGT
Operator’s Manual
TU
User Handbook Manual
TV8.510
Operator’s Manual
TV8.510(M)
Handbook
TW
User Handbook Manual
TX
User Handbook Manual
U
UA
Manual • Workshop Manual
UB
Manual • Workshop Manual
UC
Manual • Workshop Manual
V
V8.510
Operator’s Manual
V8.510(M)
Handbook
V8.540 Series
Service Data
VK11-Up
Troubleshooting Manual
W
WK 1300 Series EDi
User Handbook Manual
WL 1300 Series EDi
User Handbook Manual
WM 1300 Series EDi
User Handbook Manual
WN 1300 Series EDi
User Handbook Manual
WP 1300 Series EDi
User Handbook Manual
WQ 1300 Series EDi
User Handbook Manual
WR 1300 Series EDi
User Handbook Manual
WS 1300 Series EDi
User Handbook Manual
X
XGA 1600 Series
Operation And Maintenance Manual
XGB 1600 Series
Operation And Maintenance Manual
XGD 1600 Series
Operation And Maintenance Manual
XGE 1600 Series
Operation And Maintenance Manual
XGF 1600 Series
Operation And Maintenance Manual
XGH 1600 Series
Operation And Maintenance Manual
-
Important Safety InformationMost accidents that involve product
operation, maintenance and repair are caused by failure toobserve
basic safety rules or precautions. An accident can often be avoided
by recognizing potentiallyhazardous situations before an accident
occurs. A person must be alert to potential hazards. Thisperson
should also have the necessary training, skills and tools to
perform these functions properly.Improper operation, lubrication, maintenance or repair of this
product can be dangerous andcould result in injury or death.Do not
operate or perform any lubrication, maintenance or repair on this
product, until you haveread and understood the operation,
lubrication, maintenance and repair information.Safety precautions
and warnings are provided in this manual and on the product. If
these hazardwarnings are not heeded, bodily injury or death could
occur to you or to other persons.The hazards are identified by the Safety Alert Symbol and
followed by a Signal Word such asDANGER, WARNING or CAUTION. The
Safety Alert WARNING label is shown below.The meaning of this safety alert symbol is as follows:
Attention! Become Alert! Your Safety is Involved.The message
that appears under the warning explains the hazard and can be
either written orpictorially presented.Operations that may cause product damage are identified by
NOTICE labels on the product and inthis publication.Perkins cannot anticipate every possible circumstance that might
involve a potential hazard. Thewarnings in this publication and on
the product are, therefore, not all inclusive. If a tool,
procedure,work method or operating technique that is not
specifically recommended by Perkins is used,you must satisfy
yourself that it is safe for you and for others. You should also
ensure that theproduct will not be damaged or be made unsafe by the
operation, lubrication, maintenance orrepair procedures that you
choose.The information, specifications, and illustrations in this
publication are on the basis of information thatwas available at
the time that the publication was written. The specifications,
torques, pressures,measurements, adjustments, illustrations, and
other items can change at any time. These changes canaffect the
service that is given to the product. Obtain the complete and most
current information beforeyou start any job. Perkins dealers or
Perkins distributors have the most current information
available.When replacement parts are required for thisproduct Perkins
recommends using Perkinsreplacement parts.Failure to heed this warning can lead to
prema-ture failures, product damage, personal injury ordeath.AndreP
-
3Table of Contents
Table of ContentsForeword
………………………………………………………..
4Safety SectionSafety Signs and Labels
………………………………….. 6General Hazard Information ……………………………..
8Burn Prevention
……………………………………………… 9Fire Prevention and Explosion Prevention ………… 10
Crushing Prevention and Cutting Prevention …….. 12
Before Starting Engine
…………………………………… 12Engine Starting
…………………………………………….. 12Engine Stopping
…………………………………………… 13Electrical System
………………………………………….. 13Product Information SectionModel Views
………………………………………………… 14Product Identification Information ……………………
19Operation SectionLifting and Storage
………………………………………… 21Gauges and Indicators ……………………………………
24Engine Starting
…………………………………………….. 25Engine Operation
………………………………………….. 28Engine Stopping
…………………………………………… 29Cold Weather Operation …………………………………
30Maintenance SectionLubricant Specifications
…………………………………. 34Fuel Specifications
………………………………………… 38Cooling System Specifications ………………………..
41Refill Capacities
……………………………………………. 47Maintenance Interval Schedule ……………………….
48Warranty SectionWarranty Information
…………………………………….. 69Index SectionIndex
……………………………………………………………
70 -
4Foreword
Foreword
Literature Information
This manual contains safety, operation instructions,lubrication
and maintenance information. Thismanual should be stored in or near
the engine areain a literatur e holder or literatur e storage area.
Read,study and keep it with the literatur e and
engineinformation.English is the prima ry language for all Perkinspublications.
The English used facilitates translationand consistency in electr
onic media deliver y.Some photographs or illustrations in this manualshow details or
attachments that may be differentfrom your engine. Guards and
covers may havebeen removed for illustrative purposes.
Continuingimprovement and advancement of product designmay have
caused changes to your engine which arenot included in this manual.
Whenever a questionarises regarding your engine, or this manual,
pleaseconsult with your Perkins dealer or your Perkins distributor
for the latest available information.Safety
This safety section lists basic safety precautions.In addition,
this section identifies hazardous,warning situations. Read and
understand the basicprecautions listed in the safety section
beforeoperating or per forming lubrication, maintenanceand repair
on this product.Operation
Operating techniques outlined in this manual arebasic. They
assist with developing the skills andtechniques requir ed to
operate the engine moreefficiently and economically . Skill and
techniquesdevelop as the operator gains knowledge of theengine and
its capabilities.The operation section is a reference for operators.Photographs
and illustrations guide the operatorthrough procedures of
inspecting, starting,operating and stopping the engine.Maintenance
The maintenance section is a guide to enginecare. The
illustrated, step-by-step instructions aregrouped by service hours
and/or calendar time maintenance intervals. Items in the
maintenance schedule are referenced to detailed instructions that
follow.Recommended service should be per formedat the appropriate
intervals as indicated inthe Maintenance Interval Schedule. The
actualoperating envir onment of the engine also gover nsthe
Maintenance Interval Schedule. Therefore,under extremely severe,
dusty, wet or freezing coldoperating conditions, more frequent
lubrication andmaintenance than is specified in the
MaintenanceInterval Schedule may be necessar y.The maintenance schedule items are organizedfor a preventive
maintenance managementprogram. If the preventive maintenance
programis followed, a periodic tune-up is not requir ed.The
implementation of a preventive maintenancemanagement program should
minimize operatingcosts through cost avoidances resulting
fromreductions in unscheduled downtime and failur es.Maintenance Intervals
Perform maintenance on items at multiplesof the original requi
rement. We recommend that the maintenance schedulesbe reproduced
and displayed near the engine asa convenient reminder. We also
recommend that amaintenance record be maintained as part of
theengines permanent record.Your authorized Perkins dealer or your Perkinsdistributor can
assist you in adjusting yourmaintenance schedule to meet the needs
of youroperating envir onment.Overhaul
Major engine overhaul details are not covered in theOperation
and Maintenance Manual except for theinterval and the maintenance
items in that interval.Major repairs should only be carried out by
Perkins authorized per sonnel . Your Perkins dealer oryour Perkins
distributor offer a variety of options regarding overhaul programs.
If you experience a major engine failure, there are also numerous
after failure overhaul options available .Consult your Perkins
dealer or your Perkins distributor for information regarding these
options. -
5Foreword
California Proposition 65 WarningDiesel engine exhaust and some
of its constituentsare known to the State of California to cause
cancer,birth defects, and other reproductive harm.Battery posts, terminals and related accessoriescontain lead and
lead compounds. Wash handsafter handling. -
6Safety SectionSafety Signs and Labels
Safety Sectioni01933317
Safety Signs and Labels
There may be several specific warning signs onan engine. The
exact location of the hazards andthe description of the hazards are
reviewed in thissection. Please become familiar with all
warningsigns.Ensure that all of the warning signs are legible.Clean the
warning signs or replace the warningsigns if the words cannot be
read or if the picturesare not visible. When the warning signs
arecleaned, use a cloth, water, and soap. Do not usesolvent,
gasoline, or other harsh chemicals to cleanthe warning signs.
Solvents, gasoline, or harshchemicals could loosen the adhesive
that securesthe warning signs. The warning signs that areloosened
could drop off of the engine.Replace any damaged warning signs or missingwarning signs. If a
warning sign is attached to apart of the engine that is replaced,
install a newwarning sign on the replacement part. Any
Perkinsdealer or any Perkins distributor can provide newwarning
signs.Do not work on the engine and do not operate theengine unless
the instructions and warnings in theOperation and Maintenance
Manual are understood.Proper care is your responsibility. Failure
to followthe instructions or failure to heed the warningscould
result in injury or in death.The warning labels that may be found on the engineare
illustrated and described. -
7Safety Section
Safety Signs and Labels
g01000440Illustration 1
-
8Safety SectionGeneral Hazard Information
Do Not Operate Before Reading theManual (1)This message is
located on the side of the valvecover.g00934493
Do not operate or work on this engine unless youhave read and
understand the instructions andwarnings in the Operation and
Maintenance Man-ual. Failure to follow the instructions or heed
thewarnings could result in injury or death. Contactany Perkins
dealer for replacement manuals.Proper care is your
responsibility.Starting Aid (2)The warning label for the starting aid is
located ontop of the air inlet manifold.g00283559
If equipped with an air inlet heater (AIH) for coldweather
starting, do not use aerosal types of start-ing aids such as ether.
Such use could result in anexplosion and personal injury.i01884947
General Hazard Information
g00104545Illustration 2
Attach a Do Not Operate warning tag or a similarwarning tag to
the start switch or to the controlsbefore you service the equipment
or before yourepair the equipment.g00702020Illustration 3
Wear a hard hat, protective glasses, and otherprotective
equipment, as required.Do not wear loose clothing or jewelry that can snagon controls
or on other parts of the engine.Make sure that all protective guards and all coversare secured
in place on the engine.Keep the engine free from foreign material. Removedebris, oil,
tools, and other items from the deck,from walkways, and from
steps.Never put maintenance fluids into glass containers.Drain all
liquids into a suitable container.Obey all local regulations for the disposal of liquids.
-
9Safety Section
Burn Prevention
Use all cleaning solutions with care. Report allnecessary
repairs.Do not allow unauthorized personnel on theequipment.
Unless you are instructed otherwise, performmaintenance on the
engine with the equipment inthe servicing position. Refer to the
OEM informationfor the procedure for placing the equipment in
theservicing position.Pressure Air and WaterPressurized air and/or water can cause
debrisand/or hot water to be blown out. This could resultin
personal injury.When pressurized air and/or water is used forcleaning, wear
protective clothing, protective shoes,and eye protection. Eye
protection includes gogglesor a protective face shield.The maximum air pressure for cleaning purposesmust be below 205
kPa (30 psi). The maximumwater pressure for cleaning purposes must
bebelow 275 kPa (40 psi).Fluid PenetrationPressure can be trapped in the hydraulic
circuitlong after the engine has been stopped. Thepressure can
cause hydraulic fluid or items suchas pipe plugs to escape rapidly
if the pressure isnot relieved correctly.Do not remove any hydraulic components or partsuntil pressure
has been relieved or personal injurymay occur. Do not disassemble
any hydrauliccomponents or parts until pressure has beenrelieved or
personal injury may occur. Refer tothe OEM information for any
procedures that arerequired to relieve the hydraulic pressure.g00687600Illustration 4
Always use a board or cardboard when you checkfor a leak.
Leaking fluid that is under pressure canpenetrate body tissue.
Fluid penetration can causeserious injury and possible death. A pin
hole leakcan cause severe injury. If fluid is injected into
yourskin, you must get treatment immediately. Seektreatment from a
doctor that is familiar with this typeof injury.Containing Fluid SpillageCare must be taken in order to ensure
that fluidsare contained during performance of
inspection,maintenance, testing, adjusting and repair of theengine.
Make provision to collect the fluid witha suitable container before
any compartment isopened or before any component is
disassembled.Only use the tools that are suitable for collectingfluids and
equipment that is suitable for collectingfluids.Only use the tools that are suitable for containingfluids and
equipment that is suitable for containingfluids.Obey all local regulations for the disposal of liquids.
i01480768
Burn Prevention
Do not touch any part of an operating engine.Allow the engine to
cool before any maintenanceis performed on the engine. Relieve all
pressurein the air system, in the hydraulic system, in
thelubrication system, in the fuel system, or in thecooling system
before any lines, fittings or relateditems are disconnected.CoolantWhen the engine is at operating temperature, theengine
coolant is hot. The coolant is also underpressure. The radiator and
all lines to the heaters orto the engine contain hot coolant.Any contact with hot coolant or with steamcan cause severe
burns. Allow cooling systemcomponents to cool before the cooling
system isdrained.Check the coolant level after the engine hasstopped and the
engine has been allowed to cool. -
10Safety SectionFire Prevention and Explosion Prevention
Ensure that the filler cap is cool before removingthe filler
cap. The filler cap must be cool enoughto touch with a bare hand.
Remove the filler capslowly in order to relieve pressure.Cooling system conditioner contains alkali. Alkalican cause
personal injury. Do not allow alkali tocontact the skin, the eyes,
or the mouth.OilsHot oil and hot lubricating components can causepersonal
injury. Do not allow hot oil to contact theskin. Also, do not allow
hot components to contactthe skin.BatteriesElectrolyte is an acid. Electrolyte can causepersonal
injury. Do not allow electrolyte to contactthe skin or the eyes.
Always wear protective glassesfor servicing batteries. Wash hands
after touchingthe batteries and connectors. Use of gloves
isrecommended.i01885715
Fire Prevention and ExplosionPrevention
g00704000Illustration 5
All fuels, most lubricants, and some coolant mixturesare
flammable.Flammable fluids that are leaking or spilled onto hotsurfaces or
onto electrical components can causea fire. Fire may cause personal
injury and propertydamage.A flash fire may result if the covers for the enginecrankcase
are removed within fifteen minutes afteran emergency shutdown.Determine whether the engine will be operated inan environment
that allows combustible gases to bedrawn into the air inlet system.
These gases couldcause the engine to overspeed. Personal
injury,property damage, or engine damage could result.If the application involves the presence ofcombustible gases,
consult your Perkins dealerand/or your Perkins distributor for
additionalinformation about suitable protection devices.Remove all flammable materials such as fuel, oil,and debris from
the engine. Do not allow anyflammable materials to accumulate on
the engine.Store fuels and lubricants in properly markedcontainers away
from unauthorized persons. Storeoily rags and any flammable
materials in protectivecontainers. Do not smoke in areas that are
used forstoring flammable materials.Do not expose the engine to any flame.
Exhaust shields (if equipped) protect hot exhaustcomponents from
oil or fuel spray in case of a line,a tube, or a seal failure.
Exhaust shields must beinstalled correctly.Do not weld on lines or tanks that contain flammablefluids. Do
not flame cut lines or tanks that containflammable fluid. Clean any
such lines or tanksthoroughly with a nonflammable solvent prior
towelding or flame cutting.Wiring must be kept in good condition. All electricalwires must
be properly routed and securelyattached. Check all electrical wires
daily. Repair anywires that are loose or frayed before you
operatethe engine. Clean all electrical connections andtighten all
electrical connections.Eliminate all wiring that is unattached orunnecessary. Do not
use any wires or cables thatare smaller than the recommended gauge.
Do notbypass any fuses and/or circuit breakers.Arcing or sparking could cause a fire. Secureconnections,
recommended wiring, and properlymaintained battery cables will help
to prevent arcingor sparking.Inspect all lines and hoses for wear or fordeterioration. The
hoses must be properly routed.The lines and hoses must have
adequate supportand secure clamps. Tighten all connections to
therecommended torque. Leaks can cause fires.Oil filters and fuel filters must be properly installed.The
filter housings must be tightened to the propertorque. -
11Safety Section
Fire Prevention and Explosion Prevention
g00704059Illustration 6
Use caution when you are refueling an engine. Donot smoke while
you are refueling an engine. Donot refuel an engine near open
flames or sparks.Always stop the engine before refueling.g00704135Illustration 7
Gases from a battery can explode. Keep any openflames or sparks
away from the top of a battery. Donot smoke in battery charging
areas.Never check the battery charge by placing a metalobject across
the terminal posts. Use a voltmeter ora hydrometer.Improper jumper cable connections can causean explosion that can
result in injury. Refer tothe Operation Section of this manual for
specificinstructions.Do not charge a frozen battery. This may causean explosion.
The batteries must be kept clean. The covers (ifequipped) must
be kept on the cells. Use therecommended cables, connections, and
batterybox covers when the engine is operated.Fire ExtinguisherMake sure that a fire extinguisher is
available. Befamiliar with the operation of the fire
extinguisher.Inspect the fire extinguisher and service the
fireextinguisher regularly. Obey the recommendationson the
instruction plate.Lines, Tubes and HosesDo not bend high pressure lines. Do not
strike highpressure lines. Do not install any lines that are bentor
damaged.Repair any lines that are loose or damaged. Leakscan cause
fires. Consult your Perkins dealer forrepair or for replacement
parts.Check lines, tubes and hoses carefully. Do notuse your bare hand
to check for leaks. Use aboard or cardboard to check for leaks.
Tighten allconnections to the recommended torque.Replace the parts if any of the following conditionsare
present:End fittings are damaged or leaking.
Outer coverings are chafed or cut.
Wires are exposed.
Outer coverings are ballooning.
Flexible part of the hoses are kinked.
Outer covers have embedded armoring.
End fittings are displaced.
Make sure that all clamps, guards, and heat shieldsare installed
correctly. During engine operation, thiswill help to prevent
vibration, rubbing against otherparts, and excessive heat. -
12Safety SectionCrushing Prevention and Cutting Prevention
i01359666
Crushing Prevention andCutting Prevention
Support the component properly when workbeneath the component is
performed.Unless other maintenance instructions are provided,never attempt
adjustments while the engine isrunning.Stay clear of all rotating parts and of all movingparts. Leave
the guards in place until maintenanceis performed. After the
maintenance is performed,reinstall the guards.Keep objects away from moving fan blades. Thefan blades will
throw objects or cut objects.When objects are struck, wear protective glasses inorder to
avoid injury to the eyes.Chips or other debris may fly off objects whenobjects are
struck. Before objects are struck, ensurethat no one will be
injured by flying debris.i01805780
Before Starting Engine
NOTICEFor initial start-up of a new or rebuilt engine, and
forstart-up of an engine that has been serviced, makeprovision to
shut the engine off should an overspeedoccur. This may be
accomplished by shutting off theair and/or fuel supply to the
engine.Overspeed shutdown should occur automatically.If automatic
shutdown does not occur, press theemergency stop button in order to
cut the fueland/or air to the engine.Inspect the engine for potential hazards.
Before starting the engine, ensure that no one is on,underneath,
or close to the engine. Ensure that thearea is free of
personnel.If equipped, ensure that the lighting system for theengine is
suitable for the conditions. Ensure that alllights work properly,
if equipped.All protective guards and all protective covers mustbe installed
if the engine must be started in orderto perform service
procedures. To help prevent anaccident that is caused by parts in
rotation, workaround the parts carefully.Do not bypass the automatic shutoff circuits. Do notdisable the
automatic shutoff circuits. The circuitsare provided in order to
help prevent personalinjury. The circuits are also provided in
order to helpprevent engine damage.See the Service Manual for repairs and foradjustments.
i01933350
Engine Starting
Do not use aerosol types of starting aids such asether. Such use
could result in an explosion andpersonal injury.If a warning tag is attached to the engine startswitch or to the
controls, DO NOT start the engineor move the controls. Consult with
the person thatattached the warning tag before the engine
isstarted.All protective guards and all protective covers mustbe installed
if the engine must be started in orderto perform service
procedures. To help prevent anaccident that is caused by parts in
rotation, workaround the parts carefully.Start the engine from the operators compartment orfrom the
engine start switch.Always start the engine according to the procedurethat is
described in the Operation and MaintenanceManual, Engine Starting
topic in the OperationSection. Knowing the correct procedure will
help toprevent major damage to the engine components.Knowing the
procedure will also help to preventpersonal injury.To ensure that the jacket water heater (if equipped)and/or the
lube oil heater (if equipped) is workingproperly, check the water
temperature gaugeand the oil temperature gauge during the
heateroperation. -
13Safety Section
Engine Stopping
Engine exhaust contains products of combustionwhich can be
harmful to your health. Always start theengine and operate the
engine in a well ventilatedarea. If the engine is started in an
enclosed area,vent the engine exhaust to the outside.Note: The engine is equipped with an automaticdevice for cold
starting for normal conditions ofoperation. If the engine will be
operated in verycold conditions, then an extra cold starting aid
maybe required. Normally, the engine will be equippedwith the
correct type of starting aid for your regionof operation.The 800 Series engine is equipped with a glow plugstarting aid
in each individual cylinder that heatsthe intake air in order to
improve starting.i01032808
Engine Stopping
To avoid overheating of the engine and acceleratedwear of the
engine components, stop the engineaccording to this Operation and
MaintenanceManual, Engine Stopping topic (OperationSection).Use the Emergency Stop Button (if equipped)ONLY in an emergency
situation. DO NOT use theEmergency Stop Button for normal engine
stopping.After an emergency stop, DO NOT start the engineuntil the
problem that caused the emergency stophas been corrected.On the initial start-up of a new engine or an enginethat has
been serviced, make provisions to stop theengine if an overspeed
condition occurs. This maybe accomplished by shutting off the fuel
supplyand/or the air supply to the engine.i01940471
Electrical System
Never disconnect any charging unit circuit or batterycircuit
cable from the battery when the charging unitis operating. A spark
can cause the combustiblegases that are produced by some batteries
to ignite.To help prevent sparks from igniting combustiblegases that are
produced by some batteries, thenegative jump start cable should be
connectedlast from the external power source to the negative
terminal of the starting motor. If the startingmotor is not
equipped with a negative terminal,connect the jump start cable to
the engine block.Check the electrical wires daily for wires that areloose or
frayed. Tighten all loose electrical wiresbefore the engine is
started. Repair all frayedelectrical wires before the engine is
started. Seethe Operation and Maintenance Manual for
specificstarting instructions.Grounding PracticesProper grounding for the engine electrical
systemis necessary for optimum engine performanceand reliability.
Improper grounding will result inuncontrolled electrical circuit
paths and in unreliableelectrical circuit paths.Uncontrolled electrical circuit paths can result indamage to
main bearings, to crankshaft bearingjournal surfaces, and to
aluminum components.Engines that are installed without engine-to-frameground straps
can be damaged by electricaldischarge.To ensure that the engine and the engine electricalsystems
function properly, an engine-to-frameground strap with a direct
path to the battery mustbe used. This path may be provided by way
of adirect engine ground to the frame.All grounds should be tight and free of corrosion.The engine
alternator must be grounded to thenegative — battery terminal with
a wire that isadequate to handle the full charging current of
thealternator. -
14Product Information SectionModel Views
Product InformationSection
Model Viewsi01933688
Model View Illustrations
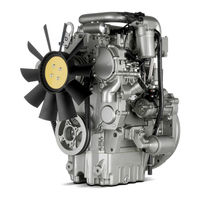
g00988037Illustration 8
-
15Product Information Section
Model Views
Left side view of naturally aspirated 800 Series engineThis view
is shown without one of the fuel injection nozzles for clarity.(1)
Fan(2) Water pump(3) Oil filler(4) Fuel injection pump(5) Oil
pressure switch(6) Oil drain plug(7) Relief valve(8) Oil filter(9) Flywheel
housing(10) Oil level gauge(11) Water drain plug(12) Lifting eye(13) Oil filler cap(14)
Glow plug(15) Fuel injection nozzleg00988038Illustration 9Right side view of a naturally aspirated
800 Series engine(15) Exhaust manifold(16) Starter(17) Crankshaft
vibration damper(18) V-Belt(19) Alternator(20) Thermostat(21) Lifting eye(22) Oil filler
cap -
16Product Information SectionModel Views
g00987267Illustration 10Left side view of turbocharged 800
Series engine(1) Oil cooler(2) Fan(3) Water pump(4) Oil filler(5)
Fuel injection pump(6) Oil pressure switch(7) Oil drain plug(8)
Relief valve(9) Oil filter(10) Flywheel housing(11) Water drain plug(12) Oil
level gauge(13) Crankcase breather(14) Inlet manifold(15) Glow
plug(16) Fuel injection nozzle -
17Product Information Section
Model Views
g00987270Illustration 11Right side view of turbocharged 800
Series engine(17) Lifting eye(18) Exhaust manifold(19) Starter(20) Crankshaft vibration damper(21) V-Belt(22) Alternator
(23) Thermostat(24) Lifting eye(25) Turbocharger
-
18Product Information SectionModel Views
i01933689
Engine Description
Table 1
Naturally Aspirated 800 Series SpecificationsType Four Stroke
CycleNumber of Cylinders 4 In-LineBore 94 mm (3.70 inch)Stroke 120
mm (4.72 inch)Aspiration Naturally AspiratedCompression ratio
22:1Displacement 3.33 L (203 in3)Firing Order 1-3-4-2Rotation that
is viewedfrom the flywheel CounterclockwiseValve Lash Setting (Inlet) 0.25 mm (0.0098 inch)Valve Lash
Setting(Exhaust) 0.25 mm (0.0098 inch)Table 2
Turbocharged 800 Series SpecificationsType Four Stroke
CycleNumber of Cylinders 4 In-LineBore 94 mm (3.70 inch)Stroke 120
mm (4.72 inch)Aspiration TurbochargedCompression ratio
19:1Displacement 3.33 L (203 in3)Firing Order 1-3-4-2Rotation that
is viewedfrom the flywheel CounterclockwiseValve Lash Setting (Inlet) 0.25 mm (0.0098 inch)Valve Lash
Setting(Exhaust) 0.25 mm (0.0098 inch)Engine Cooling and LubricationThe cooling system consists of the
followingcomponents:Gear-driven centrifugal water pump
Water temperature regulators which regulate theengine coolant
temperatureGear-driven oil pump (gear type)
Oil cooler
The engine lubricating oil is supplied by a geartype pump. The
engine lubricating oil is cooledand the engine lubricating oil is
filtered. Bypassvalves provide unrestricted flow of lubrication
oilto the engine parts when oil viscosity is high.Bypass valves can
also provide unrestricted flow oflubrication oil to the engine
parts if the oil coolershould become plugged or if the oil filter
elementshould become plugged.Engine efficiency, efficiency of emissioncontrols, and engine
performance depend onadherence to proper operation and
maintenancerecommendations. Engine performance andefficiency also
depend on the use of recommendedfuels, lubrication oils, and
coolants. Refer to theOperation and Maintenance Manual,
MaintenanceInterval Schedule for more information onmaintenance
items.Engine Service LifeEngine efficiency and maximum utilization of
engineperformance depend on the adherence to properoperation and
maintenance recommendations. Inaddition, use recommended fuels,
coolants andlubricants. Use the Operation and MaintenanceManual as
a guide for required engine maintenance.Expected engine life is generally predictedby the average power
that is demanded. Theaverage power that is demanded is based on
fuelconsumption of the engine over a period of time.Reduced hours
of operation at full throttle and/oroperating at reduced throttle
settings result in alower average power demand. Reduced hours
ofoperation will increase the length of operating timebefore an
engine overhaul is required. -
19Product Information Section
Product Identification Information
Product IdentificationInformation
i01933733
Engine Identification
Perkins engines are identified by a serial number.This number is
shown on a serial number plate thatis mounted on the left hand side
of the engine block.An example of an engine number is UEU090001H.
UE _________________________________________Type of engine
U __________________________Built in the United Kingdom
0900001 ________________________Engine Serial Number
H ____________________________________Year of Manufacture
Perkins dealers need all of these numbers in orderto determine
the components that were includedwith the engine. This permits
accurate identificationof replacement part numbers.i01933737
Serial Number Plate
g00994966Illustration 12Typical serial number plate(1) Temporary
Parts List number(2) Type(3) Serial number(4) List numberThe Serial Number Plate is located on the left sideof the
cylinder block.The following information is stamped on the SerialNumber Plate:
Engine serial number, Model, andArrangement number.i01892045
Reference Numbers
Information for the following items may be neededto order parts.
Locate the information for yourengine. Record the information on
the appropriatespace. Make a copy of this list for a record.
Keepthe information for future reference.Record for ReferenceEngine Model
______________________________________________Engine Serial No. __________________________________________
Engine Low Idle rpm _____________________________________
Engine Full Load rpm ____________________________________
Primary Fuel Filter No. ___________________________________
Water Separator Element No. __________________________
Secondary Fuel Filter Element No. ____________________
Lubrication Oil Filter Element No. _____________________
Auxiliary Oil Filter Element No. _________________________
Total Lubrication System Capacity ____________________
Total Cooling System Capacity ________________________
Air Cleaner Element No. _________________________________
Fan Drive Belt No. ________________________________________
Alternator Belt No. ________________________________________
i01933748
Emissions Certification Film
A typical example is shown.
-
20Product Information SectionProduct Identification
Informationg01002325Illustration 13
-
21Operation Section
Lifting and Storage
Operation Section
Lifting and Storagei01898037
Engine Lifting
g00103219Illustration 14
NOTICENever bend the eyebolts and the brackets. Only loadthe
eyebolts and the brackets under tension. Remem-ber that the
capacity of an eyebolt is less as the anglebetween the supporting
members and the object be-comes less than 90 degrees.When it is necessary to remove a component at anangle, only use
a link bracket that is properly rated forthe weight.Use a hoist to remove heavy components. Usean adjustable lifting
beam to lift the engine. Allsupporting members (chains and cables)
shouldbe parallel to each other. The chains and cablesshould be
perpendicular to the top of the objectthat is being lifted.Some removals require lifting the fixtures in order toobtain
proper balance and safety.To remove the engine ONLY, use the lifting eyes thatare on the
engine.Lifting eyes are designed and installed for specificengine
arrangements. Alterations to the lifting eyesand/or the engine make
the lifting eyes and thelifting fixtures obsolete. If alterations
are made,ensure that proper lifting devices are provided.Consult
your Perkins dealer for informationregarding fixtures for proper
engine lifting.i01942172
Engine Storage
If the engine will not be started for several weeks,the
lubricating oil will drain from the cylinder wallsand from the
piston rings. Rust can form on thecylinder walls. Rust on the
cylinder walls will causeincreased engine wear and a reduction in
engineservice life.Lubrication SystemTo help prevent excessive engine wear, use
thefollowing guidelines:Complete all of the lubrication recommendationsthat are listed
in this Operation and MaintenanceManual, Maintenance Interval
Schedule(Maintenance Section).If an engine is out of operation and if use of theengine is not
planned, special precautions shouldbe made. If the engine will be
stored for more thanone month, a complete protection procedure
isrecommended.Use the following guidelines :
Completely clean the outside of the engine.
Drain the fuel system completely and refillthe system with
preservative fuel.1772204POWERPART Lay-Up 1 can be mixed with
thenormal fuel in order to change the fuel intopreservative
fuel.If preservative fuel is not available, the fuel systemcan be
filled with normal fuel. This fuel mustbe discarded at the end of
the storage periodtogether with the fuel filter elements.Operate the engine until the engine reachesnormal operating
temperature. Stop any leaksfrom fuel, lubricating oil or air
systems. Stop theengine and drain the lubricating oil from the
oilpan.Renew the canister(s) of the lubricating oil filter.
-
22Operation SectionLifting and Storage
Fill the oil pan to the Full Mark on the dipstickwith new, clean
lubricating oil. Add 1762811POWERPART Lay-Up 2 to the oil in order
toprotect the engine against corrosion. If 1762811POWERPART Lay-Up
2 is not available, use apreservative of the correct specification
insteadof the lubricating oil. If a preservative is used,this must
be drained completely at the end of thestorage period and the oil
pan must be refilled tothe correct level with normal lubricating
oil.Cooling SystemTo help prevent excessive engine wear, use
thefollowing guidelines:NOTICEDo not drain the coolant while the engine is still hot
andthe system is under pressure because dangerous hotcoolant can be
discharged.If freezing temperatures are expected, check thecooling system
for adequate protection againstfreezing. See this Operation and
MaintenanceManual, General Coolant Information
(MaintenanceSection).NOTICETo prevent frost damage, ensure that all the coolant
isremoved from the engine. This is important if the sys-tem is
drained after it has been flushed with water, or ifan antifreeze
solution too weak to protect the systemfrom frost has been
used.g00987502Illustration 15
1. Ensure that the vehicle is on level ground.
2. Remove the filler cap of the cooling system.
3. Remove the drain plug (1) from the side of thecylinder block
in order to drain the engine.Ensure that the drain hole is not
restricted.4. Open the tap or remove the drain plug at thebottom of the
radiator in order to drain theradiator. If the radiator does not
have a tap or adrain plug, disconnect the hose at the bottomof the
radiator.5. Flush the cooling system with clean water.
6. Fit the drain plugs and the filler cap. Close thetap or
connect the radiator hose.7. Fill the cooling system with an approvedantifreeze mixture
because this gives protectionagainst corrosion.Note: Certain corrosion inhibitors could causedamage to some
engine components. Contact theService Department of Perkins for
advice.8. Operate the engine for a short period in orderto circulate
the lubricating oil and the coolantin the engine.9. Disconnect the battery. Put the battery into safestorage in a
fully charged condition. Before thebattery is put into storage,
protect the terminalsagainst corrosion.1734115 POWERPART Lay-Up3
can be used on the terminals.10. Clean the crankcase breather if one is installed.Seal the
end of the pipe.11. Remove the fuel injector nozzles and spray1762811 POWERPART
Lay-Up 2 for one or twoseconds into each cylinder bore with the
pistonat BDC.12. Slowly rotate the crankshaft for one completerevolution and
then replace the fuel injectornozzles.Induction System Remove the air filter assembly. If
necessary,remove the pipes that are installed betweenthe air filter
assembly and the turbocharger.Spray 1762811 POWERPART Lay-Up 2 into
theturbocharger. The duration of the spray is printedon the
container. Seal the turbocharger withwaterproof tape.Exhaust System Remove the exhaust pipe. Spray 1762811
POWERPART Lay-Up 2 into the turbocharger. Theduration of the
spray is printed on the container.Seal the turbocharger with
waterproof tape. -
23Operation Section
Lifting and Storage
General Items If the lubricating oil filler is installed on the
rockercover, remove the filler cap. If the lubricatingoil filler cap
is not installed on the rockercover, remove the rocker cover. Spray
1762811POWERPART Lay-Up 2 around the rocker shaftassembly. Replace
the filler cap or the rockercover.Seal the vent of the fuel tank or the fuel filler capwith
waterproof tape.Remove the alternator drive belts and put thedrive belts into
storage.In order to prevent corrosion, spray the enginewith 1734115
POWERPART Lay-Up 3. Do notspray the area inside the alternator.When the engine protection has been completed inaccordance with
these instructions, this ensures thatno corrosion will occur.
Perkins are not responsiblefor damage which may occur when an
engine is instorage after a period in service.Your Perkins dealer or your Perkins distributor canassist in
preparing the engine for extended storageperiods. -
24Operation SectionGauges and Indicators
Gauges and Indicatorsi01930356
Gauges and Indicators
Your engine may not have the same gauges or all ofthe gauges
that are described. For more informationabout the gauge package,
see the OEM information.Gauges provide indications of engine performance.Ensure that the
gauges are in good working order.Determine the normal operating
range by observingthe gauges over a period of time.Noticeable changes in gauge readings indicatepotential gauge or
engine problems. Problems mayalso be indicated by gauge readings
that changeeven if the readings are within specifications.Determine
and correct the cause of any significantchange in the readings.
Consult your Perkins dealeror your Perkins distributor for
assistance.NOTICEIf no oil pressure is indicated, STOP the engine.
Ifmaximum coolant temperature is exceeded, STOP theengine. Engine
damage can result.Engine Oil Pressure The oil pressureshould be greatest after a
cold engine isstarted. The typical engine oil pressurewith SAE10W30 is 207 to 413 kPa (30 to 60 psi) atrated rpm.
A lower oil pressure is normal at low idle. If the loadis stable
and the gauge reading changes, performthe following procedure:1. Remove the load.
2. Reduce engine speed to low idle.
3. Check and maintain the oil level.
Jacket Water Coolant Temperature Typical temperature range is 71
to 96C(160 to 205F). The maximum allowabletemperature with the pressurized cooling system at48 kPa (7 psi)
is 110C (230F). Higher temperaturesmay occur under certain
conditions. The watertemperature reading may vary according to
load.The reading should never exceed the boiling pointfor the
pressurized system that is being used.If the engine is operating above the normal rangeand steam
becomes apparent, perform the followingprocedure:1. Reduce the load and the engine rpm.
2. Inspect the cooling system for leaks.
3. Determine if the engine must be shut downimmediately or if
the engine can be cooled byreducing the load.Tachometer This gauge indicates enginespeed (rpm). When the
throttle controllever is moved to the full throttle positionwithout load, the engine is running at high idle. Theengine is
running at the full load rpm when thethrottle control lever is at
the full throttle positionwith maximum rated load.NOTICETo help prevent engine damage, never exceed thehigh idle
rpm. Overspeeding can result in seriousdamage to the engine. The
engine can be operatedat high idle without damage, but should never
beallowed to exceed high idle rpm.Ammeter This gauge indicates theamount of charge or discharge in
thebattery charging circuit. Operation of theindicator should be to the right side of 0(zero).
Fuel Level This gauge indicates the fuellevel in the fuel tank.
The fuel level gaugeoperates when the START/STOP switchis in the on position.
Service Hour Meter The gauge indicatesoperating time of the
engine. -
25Operation Section
Engine Starting
Engine Startingi01903008
Before Starting Engine
Before the engine is started, perform the requireddaily
maintenance and any other periodicmaintenance that is due. Refer to
the Operationand Maintenance Manual, Maintenance IntervalSchedule
for more information.For the maximum service life of the engine,make a thorough
inspection within the enginecompartment before the engine is
started. Lookfor the following items: oil leaks, coolant
leaks,loose bolts, and excessive dirt and/or grease.Remove any
excess dirt and/or grease buildup.Repair any faults that were
identified during theinspection.Inspect the cooling system hoses for cracks andfor loose
clamps.Inspect the alternator and accessory drive beltsfor cracks,
breaks, and other damage.Inspect the wiring for loose connections and forworn wires or
frayed wires.Check the fuel supply. Drain water from the waterseparator (if
equipped). Open the fuel supplyvalve (if equipped).NOTICEAll valves in the fuel return line must be open beforeand
during engine operation to help prevent high fuelpressure. High
fuel pressure may cause filter housingfailure or other damage.If the engine has not been started for severalweeks, fuel may
have drained from the fuel system.Air may have entered the filter
housing. Also, whenfuel filters have been changed, some air
pocketswill be trapped in the engine. In these instances,prime the
fuel system. Refer to the Operation andMaintenance Manual, Fuel
System — Prime formore information on priming the fuel system.Engine exhaust contains products of combustionwhich may be
harmful to your health. Always startand operate the engine in a
well ventilated areaand, if in an enclosed area, vent the exhaust
to theoutside.Do not start the engine or move any of thecontrols if there is a
DO NOT OPERATE warningtag or similar warning tag attached to the
startswitch or to the controls.Ensure that the areas around the rotating partsare clear.
All of the guards must be put in place. Check fordamaged guards
or for missing guards. Repairany damaged guards. Replace damaged
guardsand/or missing guards.Disconnect any battery chargers that are notprotected against
the high current drain thatis created when the electric starting
motor isengaged. Check electrical cables and check thebattery for
poor connections and for corrosion.Reset all of the shutoffs or alarm components (ifequipped).
Check the engine lubrication oil level. Maintainthe oil level
between the ADD mark and theFULL mark on the oil level
dipstick.Check the coolant level. Observe the coolantlevel in the header
tank (if equipped). Maintainthe coolant level to the FULL mark on
theheader tank.If the engine is not equipped with a header tankmaintain the
coolant level within 13 mm (0.5 inch)of the bottom of the filler
pipe. If the engine isequipped with a sight glass, maintain the
coolantlevel in the sight glass.Observe the air cleaner service indicator (ifequipped). Service
the air cleaner when theyellow diaphragm enters the red zone, or
whenthe red piston locks in the visible position.Ensure that any equipment that is driven by theengine has been
disengaged from the engine.Minimize electrical loads or remove any
electricalloads. -
26Operation SectionEngine Starting
i01934161
Starting the Engine
Do not use aerosol types of starting aids such asether. Such use
could result in an explosion andpersonal injury.NOTICEDo not crank the engine for more than 10 seconds.Allow the
starter motor to cool for 30 seconds beforecranking again. Do not
engage the starter when theflywheel is turning.Refer to the OEM Manual for your type of controls.
1. Remove any load from the engine. Disengageany driven
equipment.2. Crank the engine. Start the engine.
3. If the engine does not start, release the enginestart switch
and allow the electric starting motorto cool.4. If the ambient temperature is low, activate theglow plugs
according to Table 3.Table 3
Preheat Times
Temperature Preheat Time5 C (41 F) 10 seconds
5 C (23 F) to 4 C (40 F) 20 secondsLess than 5 C (23 F) 30
secondsContinuous Preheat 60 seconds maximum
5. Crank the engine. Start the engine.
6. Allow the engine to idle for 5 to 10 minutesbefore applying a
load to the engine. Checkthe oil pressure gauge. The oil pressure
gaugeshould be at the proper value.i01929012
Starting with Jump StartCables
Improper jump start cable connections can causean explosion
resulting in personal injury.Prevent sparks near the batteries.
Sparks couldcause vapors to explode. Do not allow jump startcable
ends to contact each other or the engine.Note: If it is possible, first diagnose the reasonfor the
starting failure. Make any necessaryrepairs. If the engine will not
start only due tothe condition of the battery, either charge
thebattery, or start the engine with jump start cables.The
condition of the battery can be recheckedafter the engine has been
switched OFF.NOTICEUsing a battery source with the same voltage as
theelectric starting motor. Use ONLY equal voltage forjump
starting. The use of higher voltage will damagethe electrical
system.Do not reverse the battery cables. The alternator canbe damaged.
Attach ground cable last and removefirst.When using an external electrical source to start theengine,
turn the engine control switch to the OFF po-sition. Turn all
electrical accessories OFF before at-taching the jump start
cables.Ensure that the main power switch is in the OFF posi-tion
before attaching the jump start cables to the en-gine being
started.1. Turn the start switch to the OFF position. Turn offall the
engines accessories.2. Connect one positive end of the jump start cableto the
positive cable terminal of the dischargedbattery. Connect the other
positive end of thejump start cable to the positive cable
terminalof the electrical source. -
27Operation Section
Engine Starting
3. Connect one negative end of the jump start cableto the
negative cable terminal of the electricalsource. Connect the other
negative end of thejump start cable to the engine block or to
thechassis ground. This procedure helps to preventpotential sparks
from igniting the combustiblegases that are produced by some
batteries.4. Start the engine.
5. Immediately after the stalled engine is started,disconnect
the jump start cables in reverse order.After jump starting, the alternator may not beable to fully
recharge batteries that are severelydischarged. The batteries must
be replaced orcharged to the proper voltage with a battery
chargerafter the engine is stopped. Many batteries whichare
considered unusable are still rechargeable.Refer to Operation and
Maintenance Manual,Battery — Replace and Testing and
AdjustingManual, Battery — Test.i01903609
After Starting Engine
Note: In temperatures from 0 to 60C (32 to 140F),the warm-up
time is approximately three minutes. Intemperatures below 0C (32F),
additional warm-uptime may be required.When the engine idles during warm-up, observethe following
conditions:Check for any fluid or for any air leaks at idle rpmand at
one-half full rpm (no load on the engine)before operating the
engine under load. This isnot possible in some applications.Operate the engine at low idle until all systemsachieve
operating temperatures. Check allgauges during the warm-up
period.Note: Gauge readings should be observed and thedata should be
recorded frequently while the engineis operating. Comparing the
data over time willhelp to determine normal readings for each
gauge.Comparing data over time will also help detectabnormal
operating developments. Significantchanges in the readings should
be investigated. -
28Operation SectionEngine Operation
Engine Operationi01903587
Engine Operation
Proper operation and maintenance are key factorsin obtaining the
maximum life and economy ofthe engine. If the directions in the
Operation andMaintenance Manual are followed, costs canbe minimized
and engine service life can bemaximized.The engine can be operated at the rated rpm afterthe engine
reaches operating temperature. Theengine will reach normal
operating temperaturesooner during a low engine speed (rpm)
andduring a low power demand. This procedure ismore effective than
idling the engine at no load.The engine should reach operating
temperature ina few minutes.Gauge readings should be observed and the datashould be recorded
frequently while the engine isoperating. Comparing the data over
time will helpto determine normal readings for each gauge.Comparing
data over time will also help detectabnormal operating
developments. Significantchanges in the readings should be
investigated.i01934633
Fuel Conservation Practices
The efficiency of the engine can affect the fueleconomy. Perkins
design and technology inmanufacturing provides maximum fuel
efficiencyin all applications. Follow the recommendedprocedures in
order to attain optimum performancefor the life of the engine.Avoid spilling fuel.
Fuel expands when the fuel is warmed up. The fuelmay overflow
from the fuel tank. Inspect fuel linesfor leaks. Repair the fuel
lines, as needed.Be aware of the properties of the different fuels.Use only the
recommended fuels.Avoid unnecessary idling.
Shut off the engine rather than idle for long periodsof
time.Observe the service indicator frequently. Keepthe air cleaner
elements clean.Maintain a good electrical system.
One damaged battery cell will overwork thealternator. This will
consume excess power andexcess fuel.Ensure that the belts are properly adjusted. Thebelts should be
in good condition.Ensure that all of the connections of the hosesare tight. The
connections should not leak.Ensure that the driven equipment is in goodworking order.
Cold engines consume excess fuel. Utilize heatfrom the jacket
water system and the exhaustsystem, when possible. Keep cooling
systemcomponents clean and keep cooling systemcomponents in good
repair. Never operate theengine without water temperature
regulators.All of these items will help maintain
operatingtemperatures. -
29Operation Section
Engine Stopping
Engine Stoppingi01935195
Stopping the Engine
NOTICEStopping the engine immediately after it has beenworking
under load, can result in overheating and ac-celerated wear of the
engine components.Avoid accelerating the engine prior to shutting it down.
Avoiding hot engine shutdowns will maximize tur-bocharger shaft
and bearing life.Note: Individual applications will have differentcontrol
systems. Ensure that the shutoff proceduresare understood. Use the
following generalguidelines in order to stop the engine.1. Remove the load from the engine. Reduce theengine speed (rpm)
to low idle. Perform thisprocedure for five to six minutes in order
to coolthe engine.2. Stop the engine after the cool down periodaccording to the
shutoff system on the engineand turn the ignition key switch to the
OFFposition. If necessary, refer to the instructionsthat are
provided by the OEM.i01903586
Emergency Stopping
NOTICEEmergency shutoff controls are for EMERGENCY useONLY. DO
NOT use emergency shutoff devices orcontrols for normal stopping
procedure.The OEM may have equipped the application withan emergency stop
button. For more informationabout the emergency stop button, refer
to the OEMinformation.Ensure that any components for the external systemthat support
the engine operation are secured afterthe engine is stopped.i01935215
After Stopping Engine
Note: Before you check the engine oil, do notoperate the engine
for at least 10 minutes in orderto allow the engine oil to return
to the oil pan.Check the crankcase oil level. Maintain the oillevel between the
MIN mark and the MAXmark on the oil level dipstick.If necessary, perform minor adjustments. Repairany leaks and
tighten any loose bolts.If the engine is equipped with a service hourmeter, note the
reading. Perform the maintenancethat is in the Operation and
Maintenance Manual,Maintenance Interval Schedule.Fill the fuel tank in order to help preventaccumulation of
moisture in the fuel. Do notoverfill the fuel tank.NOTICEOnly use antifreeze/coolant mixtures recommended inthe
Coolant Specifications that are in the Operationand Maintenance
Manual. Failure to do so can causeengine damage.Allow the engine to cool. Check the coolant level.
If freezing temperatures are expected, checkthe coolant for
proper antifreeze protection. Thecooling system must be protected
against freezingto the lowest expected outside temperature. Addthe
correct coolant/water mixture, if necessary.Perform all required periodic maintenance on alldriven
equipment. This maintenance is outlined inthe instructions from the
OEM. -
30Operation SectionCold Weather Operation
Cold Weather Operationi01903584
Cold Weather Operation
Perkins Diesel Engines can operate effectively incold weather.
During cold weather, the starting andthe operation of the diesel
engine is dependent onthe following items:The type of fuel that is used
The viscosity of the oil
The operation of the air inlet heater starting aid
Optional Cold starting aid
The purpose of this section will cover the
followinginformation:Explain potential problems that are caused bycold weather
operation.Suggest steps which can be taken in orderto minimize starting
problems and operatingproblems when the ambient air temperature
iscolder than 0 to 55 C (32 to 67 F).The operation and maintenance of an engine infreezing
temperatures is complex. This is becauseof the following
conditions: the unlimited differencesin weather conditions, engine
applications, andthe supplies that are available in your area.
Thesefactors and recommendations from your Perkinsdealer are based
on past proven practices. Theinformation that is contained in this
section shouldbe combined in order to provide guidelines for
coldweather operations.Hints for Cold Weather Operation If the engine will start,
operate the engine until aminimum operating temperature of 71 C (160 F)is achieved.
Achieving operating temperature willhelp prevent the intake valves
and exhaust valvesfrom sticking.The cooling system and the lubrication system forthe engine do
not lose heat immediately uponshutdown. This means that an engine
can be shutdown for a few hours and the engine can still havethe
ability to start readily. If the engine is shutdown for at least
eight hours, the engine shouldbe considered cooled to outside
temperature.Install the correct lubricant in each compartmentbefore the
beginning of cold weather.Check all rubber parts (hoses, fan drive belts,etc) weekly.
Check all electrical wiring and connections forany fraying or
damaged insulation.Keep all batteries fully charged and warm.
Fill the fuel tank at the end of each shift.
Check the air cleaners and the air intake daily.Check the air
intake more often when you operatein snow.Personal injury or property damage can resultfrom alcohol or
starting fluids.Alcohol or starting fluids are highly flammable andtoxic and if
improperly stored could result in injuryor property damage.Do not use aerosol types of starting aids such asether. Such use
could result in an explosion andpersonal injury.For jump starting with cables in cold weather,refer to the
Operation and Maintenance Manual,Starting with Jump Start Cables.
for instructions.Viscosity of the Engine LubricationOilProper engine oil
viscosity is essential. Oil viscosityaffects the amount of torque
that is needed tocrank the engine. Refer to the Operation
andMaintenance Manual, Lubricant Specifications forthe recommended
viscosity of oil.Recommendations for the CoolantProvide cooling system protection
for the lowestexpected outside temperature. Refer to theOperation
and Maintenance Manual, GeneralCoolant Information for the
recommended coolantmixture.In cold weather, check the coolant often for theproper glycol
concentration in order to ensureadequate freeze protection. -
31Operation Section
Cold Weather Operation
Engine Block HeatersEngine block heaters (if equipped) heat
theengine jacket water that surrounds the combustionchambers. This
provides the following functions:Startability is improved.
Warm up time is reduced.
An electric block heater can be activated oncethe engine is
stopped. An effective block heateris typically a 1250/1500 W unit.
Consult yourPerkins dealer or your Perkins distributor for
moreinformation.Idling the EngineWhen idling after the engine is started in
coldweather, increase the engine rpm from 1000 to 1200rpm. This
will warm up the engine more quickly.Maintaining an elevated low
idle speed for extendedperiods will be easier with the installation
of a handthrottle. The engine should not be raced in orderto speed
up the warm up process.While the engine is idling, the application of a lightload
(parasitic load) will assist in maintaining theminimum operating
temperature. The minimumoperating temperature is 71 C (160 F).Recommendations for CoolantWarm UpWarm up an engine that has
cooled below normaloperating temperatures due to inactivity. This
shouldbe performed before the engine is returned to fulloperation.
During operation in very cold temperatureconditions, damage to
engine valve mechanismscan result from engine operation for short
intervals.This can happen if the engine is started andthe engine is
stopped many times without beingoperated in order to warm up
completely.When the engine is operated below normaloperating temperatures,
fuel and oil are notcompletely burned in the combustion
chamber.This fuel and oil causes soft carbon deposits toform on the
valve stems. Generally, the deposits donot cause problems and the
deposits are burnedoff during operation at normal engine
operatingtemperatures.When the engine is started and the engine isstopped many times
without being operated inorder to warm up completely, the carbon
depositsbecome thicker. This will cause the followingproblems:Free operation of the valves is prevented.
Valves become stuck.
Pushrods are bent.
Other damage to valve train components canresult.
For this reason, when the engine is started,the engine must be
operated until the coolanttemperature is 71 C (160 F) minimum.
Carbondeposits on the valve stems will be kept at aminimum and the
free operation of the valves andthe valve components will be
maintained.In addition, the engine must be thoroughly warmedin order to
keep other engine parts in bettercondition and the service life of
the engine will begenerally extended. Lubrication will be
improved.There will be less acid and less sludge in the oil.This
will provide longer service life for the enginebearings, the piston
rings, and other parts. However,limit unnecessary idle time to ten
minutes in orderto reduce wear and unnecessary fuel
consumption.Purge Valve and Insulated Heater LinesThe engine is equipped
with a water temperatureregulator in order to allow the engine to
reach thecorrect operating temperature quickly. The
watertemperature regulator remains in the closed positionuntil the
jacket water coolant temperature hasreached the engines operating
temperature. Thejacket water circulates from the top of the
cylinderblock, to the water temperature regulator housing,and back
to the bottom of the cylinder block viathe bypass. The water
temperature regulator allowssome flow of water and/or air to pass
through thewater temperature regulator in order to ensure
acontinuous flow of coolant within the cylinder block.This is
achieved via a small jiggle valve in thewater temperature
regulator. The water temperatureregulator moves to the open
position when thejacket water coolant temperature has reachedthe
correct operating temperature. The watertemperature regulator moves
to the open position inorder to allow the passage of the coolant
throughthe radiator to dissipate excess heat.The above procedure is good for normal engineoperating
conditions in temperate climates. Duringperiods of operations in a
cold climate with a lightengine load, the coolant must bypass the
radiatorin order to help prevent excessive cooling of theengine.
Coolant that passes through the radiatormust be minimized in order
to maintain the engineoperating temperature in cold weather. -
32Operation SectionCold Weather Operation
Excessive cooling of the engine can be preventedby a valve that
allows unnecessary coolant flow tobe diverted from the water
temperature regulatorand back to the bottom of the engine block
withoutpassing through the radiator.Note: Perkins discourages the use of all airflowrestriction
devices such as radiator shutters.Restriction of the airflow can
result in the following:high exhaust temperatures, power loss,
excessivefan usage, and reduction in fuel economy.Cab heater lines for very cold weather are alsobeneficial. These
lines provide more available heatfrom the coolant to the cab. The
feed from theengine and the return lines from the cab should
beinsulated in order to reduce heat loss to the outsideair.Insulating the Air Inlet and EngineCompartmentWhen temperatures
below 18 C (0 F) will befrequently encountered, an air cleaner
inlet thatis located in the engine compartment may bespecified. An
air cleaner that is located in theengine compartment may also
minimize the entry ofsnow into the air cleaner. Also, heat that is
rejectedby the engine helps to warm the intake air.Additional heat can be retained around the engineby insulating
the engine compartment.i01935225
Fuel and the Effect from ColdWeather
Note: Only use grades of fuel that are recommendedby Perkins.
Refer to this Operation and MaintenanceManual, Fuel
Recommendations.The following fuels can be used for the Perkins 800Series
engine.Group 1
Group 2
Group 3
Special Fuels
Perkins prefer only Group 1 and Group 2 fuels foruse in 800
Series engines. Group 3 fuels includeLow Temperature Fuels and
Aviation KeroseneFuels.Note: Group 3 fuels reduce the life of the engine.The use of
Group 3 fuels is not covered by thePerkins warranty.Special fuels include Biofuel.
Group 1 fuels are the preferred Group of Fuels forgeneral use by
Perkins. Group 1 fuels maximizeengine life and engine performance.
Group 1fuels are usually less available than Group 2
fuels.Frequently, Group 1 fuels are not available in colderclimates
during the winter.Note: Group 2 fuels must have a maximum wearscar of 650
micrometers (HFRR to ISO 12156-1).Group 2 fuels are considered acceptable for issuesof warranty.
This group of fuels may reduce the lifeof the engine, the engines
maximum power, andthe engines fuel efficiency.When Group 2 diesel fuels are used the followingcomponents
provide a means of minimizingproblems in cold weather:Glow plugs, which are standard equipment onall 800 Series
enginesEngine coolant heaters, which may be an OEMoption
Fuel heaters, which may be an OEM option
Fuel line insulation, which may be an OEM option
There are three major differences between Group1 fuels and Group
2 fuels. Group 1 fuels have thefollowing different characteristics
to Group 2 fuels.A lower cloud point
A lower pour point
A higher rating of kJ (BTU) per unit volume of fuel
The cloud point is the temperature when a cloudof wax crystals
begins to form in the fuel. Thesecrystals can cause the fuel
filters to plug. Thepour point is the temperature when diesel fuel
willthicken. The diesel fuel becomes more resistant toflow through
fuel pumps and through the fuel lines.Be aware of these values when diesel fuel ispurchased. Consider
the average ambient airtemperature for the engines application.
Enginesthat are fueled in one climate may not operate well ifthe
engines are moved to another climate. Problemscan result due to
changes in temperature. -
33Operation Section
Cold Weather Operation
Before troubleshooting for low power or for poorperformance in
the winter, check the type of fuelthat is being used.Low temperature fuels may be available for engineoperation at
temperatures below 0 C (32 F). Thesefuels limit the formation of
wax in the fuel at lowtemperatures. Wax in the fuel may prevent the
flowof the fuel through the fuel filters.For more information on cold weather operation,see Operation and
Maintenance Manual, ColdWeather Operation and Fuel Related
Componentsin Cold Weather.i01903588
Fuel Related Components inCold Weather
Fuel TanksCondensation can form in partially filled fuel
tanks.Top off the fuel tanks after you operate the engine.Fuel tanks should contain some provision fordraining water and
sediment from the bottom of thetanks. Some fuel tanks use supply
pipes that allowwater and sediment to settle below the end of
thefuel supply pipe.Some fuel tanks use supply lines that take fueldirectly from the
bottom of the tank. If the engine isequipped with this system,
regular maintenance ofthe fuel system filter is important.Drain the water and sediment from any fuel storagetank at the
following intervals: weekly, oil changes,and refueling of the fuel
tank. This will help preventwater and/or sediment from being pumped
from thefuel storage tank and into the engine fuel tank.Fuel FiltersIt is possible that a primary fuel filter is
installedbetween the fuel tank and the engine fuel inlet. Afteryou
change the fuel filter, always prime the fuelsystem in order to
remove air bubbles from the fuelsystem. Refer to the Operation and
MaintenanceManual in the Maintenance Section for moreinformation on
priming the fuel system.The micron rating and the location of a primaryfuel filter is
important in cold weather operation.The primary fuel filter and the
fuel supply line arethe most common components that are affected
bycold fuel.Fuel HeatersNote: The OEM may equip the application with
fuelheaters. If this is the case, disconnect an electrictype of
fuel heater in warm weather in order toprevent overheating of the
fuel. If the type of fuelheater is a heat exchanger, the OEM should
haveincluded a bypass for warm weather. Ensure thatthe bypass is
operational during warm weather inorder to prevent overheating of
the fuel.For more information about fuel heaters (ifequipped), refer to
the OEM information. -
34Maintenance SectionLubricant Specifications
Maintenance Section
Lubricant Specificationsi01903582
Lubricant Information
General InformationBecause of government regulations
regardingthe certification of engine exhaust emissions,
thelubricant recommendations must be followed.Engine Manufacturers Association(EMA) OilsThe Engine
Manufacturers AssociationRecommended Guideline on Diesel Engine Oil
isrecognized by Perkins. For detailed informationabout this
guideline, see the latest edition of EMApublication, EMA DHD
-1.API OilsThe Engine Oil Licensing and Certification Systemby the
American Petroleum Institute (API) isrecognized by Perkins. For
detailed informationabout this system, see the latest edition of
the APIpublication No. 1509. Engine oils that bear the APIsymbol
are authorized by API.g00546535Illustration 16Typical API symbol
Diesel engine oils CC, CD, CD-2, and CE havenot been API
authorized classifications since 1January 1996. Table 4 summarizes
the status of theclassifications.Table 4
API ClassificationsCurrent Obsolete
CF-4, CG-4, CH-4 CECF CC, CD
CF-2(1) CD-2(1)(1) The classifications CD-2 and American
Petroleum InstituteCF-2 are for two-cycle diesel engines. Perkins does not
sellengines that utilize CD-2 and API CF-2 oils.TerminologyCertain abbreviations follow the nomenclature ofSAE
J754. Some classifications follow SAE J183abbreviations, and some
classifications followthe EMA Recommended Guideline on DieselEngine
Oil. In addition to Perkins definitions, thereare other definitions
that will be of assistance inpurchasing lubricants. Recommended oil
viscositiescan be found in this publication, Engine Oil
topic(Maintenance Section).i01903583
Engine Oil
Commercial OilsThe performance of commercial diesel engineoils
is based on American Petroleum Institute(API) classifications.
These API classifications aredeveloped in order to provide
commercial lubricantsfor a broad range of diesel engines that
operate atvarious conditions.Only use commercial oils that meet the
followingclassifications:EMA DHD-1 multigrade oil (preferred oil)
API CH-4 multigrade oil (preferred oil)
ACEAE3
In order to make the proper choice of a commercialoil, refer to
the following explanations: -
35Maintenance Section
Lubricant Specifications
EMA DHD-1 The Engine ManufacturersAssociation (EMA) has
developed lubricantrecommendations as an alternative to the API
oilclassification system. DHD-1 is a RecommendedGuideline that
defines a level of oil performancefor these types of diesel
engines: high speed, fourstroke cycle, heavy-duty, and light duty.
DHD-1 oilsmay be used in Perkins engines when the followingoils are
recommended: API CH-4, API CG-4, andAPI CF-4. DHD-1 oils are
intended to providesuperior performance in comparison to API
CG-4and API CF-4.DHD-1 oils will meet the needs of high performancePerkins diesel
engines that are operating in manyapplications. The tests and the
test limits thatare used to define DHD-1 are similar to the newAPI
CH-4 classification. Therefore, these oils willalso meet the
requirements of the low emissionsdiesel engines. DHD-1 oils are
designed to controlthe harmful effects of soot with improved
wearresistance and improved resistance to plugging ofthe oil
filter. These oils will also provide superiorpiston deposit control
for engines with eithertwo-piece steel pistons or aluminum
pistons.All DHD-1 oils must complete a full test programwith the base
stock and with the viscosity grade ofthe finished commercial oil.
The use of API BaseOil Interchange Guidelines are not appropriate
forDHD-1 oils. This feature reduces the variation inperformance
that can occur when base stocks arechanged in commercial oil
formulations.DHD-1 oils are recommended for use in extendedoil change
interval programs that optimize oil life.These oil change interval
programs are basedon oil analysis. DHD-1 oils are recommended
forconditions that demand a premium oil. Your Perkinsdealer or your
Perkins distributor has the specificguidelines for optimizing oil
change intervals.API CH-4 API CH-4 oils were developed inorder to meet the
requirements of the new highperformance diesel engines. Also, the
oil wasdesigned to meet the requirements of the lowemissions diesel
engines. API CH-4 oils are alsoacceptable for use in older diesel
engines andin diesel engines that use high sulfur diesel fuel.API
CH-4 oils may be used in Perkins engines thatuse API CG-4 and API
CF-4 oils. API CH-4 oils willgenerally exceed the performance of
API CG-4 oilsin the following criteria: deposits on pistons,
controlof oil consumption, wear of piston rings, valve trainwear,
viscosity control, and corrosion.Three new engine tests were developed for theAPI CH-4 oil. The
first test specifically evaluatesdeposits on pistons for engines
with the two-piecesteel piston. This test (piston deposit) also
measuresthe control of oil consumption. A second test isconducted
with moderate oil soot. The secondtest measures the following
criteria: wear of pistonrings, wear of cylinder liners, and
resistance tocorrosion. A third new test measures the
followingcharacteristics with high levels of soot in the oil:wear
of the valve train, resistance of the oil inplugging the oil
filter, and control of sludge.In addition to the new tests, API CH-4 oils havetougher limits
for viscosity control in applicationsthat generate high soot. The
oils also have improvedoxidation resistance. API CH-4 oils must
pass anadditional test (piston deposit) for engines that
usealuminum pistons (single piece). Oil performance isalso
established for engines that operate in areaswith high sulfur
diesel fuel.All of these improvements allow the API CH-4 oil toachieve
optimum oil change intervals. API CH-4 oilsare recommended for use
in extended oil changeintervals. API CH-4 oils are recommended
forconditions that demand a premium oil. Your Perkinsdealer or your
Perkins distributor has specificguidelines for optimizing oil
change intervals.Some commercial oils that meet the APIclassifications may
require reduced oil changeintervals. To determine the oil change
interval,closely monitor the condition of the oil and performa wear
metal analysis.NOTICEFailure to follow these oil recommendations can
causeshortened engine service life due to deposits and/orexcessive
wear.Total Base Number (TBN) and FuelSulfur Levels for Direct
Injection(DI) Diesel EnginesThe Total Base Number (TBN) for an oil
depends onthe fuel sulfur level. For direct injection engines
thatuse distillate fuel, the minimum TBN of the new oilmust be 10
times the fuel sulfur level. The TBN isdefined by ASTM D2896. The
minimum TBN ofthe oil is 5 regardless of fuel sulfur level.
Illustration17 demonstrates the TBN. -
36Maintenance SectionLubricant Specifications
g00799818Illustration 17(Y) TBN by ASTM D2896(X) Percentage of
fuel sulfur by weight(1) TBN of new oil(2) Change the oil when the
TBN deteriorates to 50 percent ofthe original TBN.
Use the following guidelines for fuel sulfur levelsthat exceed
1.5 percent:Choose an oil with the highest TBN that meetsone of these
classifications: EMA DHD-1 and APICH-4.Reduce the oil change interval. Base the oilchange interval on
the oil analysis. Ensure thatthe oil analysis includes the
condition of the oiland a wear metal analysis.Excessive piston deposits can be produced by anoil with a high
TBN. These deposits can lead to aloss of control of the oil
consumption and to thepolishing of the cylinder bore.NOTICEOperating Direct Injection (DI) diesel engines with
fuelsulphur levels over 0.5 percent will require shortenedoil
change intervals in order to help maintain adequatewear
protection.Table 5
Percentage of Sulfur in thefuel
Oil change interval
Lower than 0.5 Normal
0.5 to 1.0 0.75 of normal
Greater than 1.0 0.50 of normal
Lubricant Viscosity Recommendationsfor Direct Injection (DI)
Diesel EnginesThe proper SAE viscosity grade of oil is determinedby
the minimum ambient temperature duringcold engine start-up, and the
maximum ambienttemperature during engine operation.Refer to Table 6 (minimum temperature) in orderto determine the
required oil viscosity for startinga cold engine.Refer to Table 6 (maximum temperature) in order toselect the oil
viscosity for engine operation at thehighest ambient temperature
that is anticipated.Generally, use the highest oil viscosity thatis available to
meet the requirement for thetemperature at start-up.Table 6
Engine Oil ViscosityAmbient TemperatureEMA LRG-1
API CH-4Viscosity Grade Minimum Maximum
SAE 0W20 40 C (40 F) 10 C (50 F)SAE 0W30 40 C (40 F) 30 C (86
F)SAE 0W40 40 C (40 F) 40 C (104 F)SAE 5W30 30 C (22 F) 30 C (86
F)SAE 5W40 30 C (22 F) 40 C (104 F)SAE 10W30 20 C (4 F) 40 C (104
F)SAE 15W40 10 C (14 F) 50 C (122 F)i01903738
Synthetic Base Stock Oils
Synthetic base oils are acceptable for use inthese engines if
these oils meet the performancerequirements that are specified for
the engine.Synthetic base oils generally perform better thanconventional
oils in the following two areas:Synthetic base oils have improved flow at lowtemperatures
especially in arctic conditions.Synthetic base oils have improved oxidationstability especially
at high operating temperatures.Some synthetic base oils have performancecharacteristics that
enhance the service life of theoil. Perkins does not recommend the
automaticextending of the oil change intervals for any typeof
oil. -
37Maintenance Section
Lubricant Specifications
i01903742
Re-refined Base Stock Oils
Re-refined base stock oils are acceptable foruse in Perkins
engines if these oils meet theperformance requirements that are
specified byPerkins. Re-refined base stock oils can be
usedexclusively in finished oil or in a combination withnew base
stock oils. The US military specificationsand the specifications of
other heavy equipmentmanufacturers also allow the use of re-refined
basestock oils that meet the same criteria.The process that is used to make re-refined basestock oil should
adequately remove all wear metalsthat are in the used oil and all
the additives thatare in the used oil. The process that is used
tomake re-refined base stock oil generally involvesthe process of
vacuum distillation and hydrotreatingthe used oil. Filtering is
adequate for the productionof high quality, re-refined base stock
oil.i01903752
Cold Weather Lubricants
When an engine is started and an engine isoperated in ambient
temperatures below 20 C(4 F), use multigrade oils that are capable
offlowing in low temperatures.These oils have lubricant viscosity grades of SAE0W or SAE
5W.When an engine is started and operated in ambienttemperatures
below 30 C (22 F), use a syntheticbase stock multigrade oil with a
0W viscosity gradeor with a 5W viscosity grade. Use an oil with a
pourpoint that is lower than 50 C (58 F).The number of acceptable lubricants is limitedin cold weather
conditions. Perkins recommendsthe following lubricants for use in
cold weatherconditions:First Choice Use oil with an EMA DHD-1Recommended Guideline. Use
a CH-4 oil that hasan API license. The oil should be either SAE
0W20,SAE 0W30, SAE 0W40, SAE 5W30, or SAE 5W40lubricant viscosity
grade.Second Choice Use an oil that has a CH-4additive package.
Although the oil has not beentested for the requirements of the API
license, the oilmust be either SAE 0W20, SAE 0W30, SAE 0W40,SAE
5W30, or SAE 5W40.NOTICEShortened engine service life could result if secondchoice
oils are used.i01904027
Aftermarket Oil Additives
Perkins does not recommend the use of aftermarketadditives in
oil. It is not necessary to use aftermarketadditives in order to
achieve the engines maximumservice life or rated performance. Fully
formulated,finished oils consist of base oils and of
commercialadditive packages. These additive packages areblended
into the base oils at precise percentages inorder to help provide
finished oils with performancecharacteristics that meet industry
standards.There are no industry standard tests that evaluatethe
performance or the compatibility of aftermarketadditives in
finished oil. Aftermarket additives maynot be compatible with the
finished oils additivepackage, which could lower the performance of
thefinished oil. The aftermarket additive could fail tomix with the
finished oil. This could produce sludgein the crankcase. Perkins
discourages the use ofaftermarket additives in finished oils.To achieve the best performance from a Perkinsengine, conform to
the following guidelines:Select the proper oil, or a commercial oil thatmeets the EMA
Recommended Guideline onDiesel Engine Oil or the recommended
APIclassification.See the appropriate Lubricant Viscosities tablein order to find
the correct oil viscosity grade foryour engine.At the specified interval, service the engine. Usenew oil and
install a new oil filter.Perform maintenance at the intervals that arespecified in the
Operation and MaintenanceManual, Maintenance Interval Schedule. -
38Maintenance SectionFuel Specifications
Fuel Specificationsi01904061
Fuel Recommendations
To get the correct power and performance fromthe engine, use a
fuel of the correct quality. Therecommended fuel specification for
the Perkins1106 engine is shown below:Cetane number__________________________45 minimum
Viscosity___________2,0 to 4.5 cSt at 40 C (104 F)
Density________________________0.835 to 0.855 Kg/liter
Sulfur_______________________0.2% of mass, maximum
Distillation___________________85% at 350 C (662 F)
Lubricity______________________________460 micrometersmaximum
wear scar on ISO 12156 — 1Cetane number
This indicates the properties of ignition of the fuel.Fuel with
a low cetane number can be the rootcause of problems during cold
start. This will affectcombustion.Viscosity
This is the resistance to flow of a fluid. If thisresistance is
outside the limits, the engine and theengine starting performance
in particular can beaffected.Sulfur
High sulfur content of the fuel is not normally foundin Europe,
North America or Australasia. This cancause engine wear. When only
high sulfur fuels areavailable, it will be necessary that high
alkalinelubricating oil is used in the engine or that
thelubricating oil change interval is reduced.Distillation
This is an indication of the mixture of differenthydrocarbons in
the fuel. A high ratio of light weighthydrocarbons can affect the
characteristics ofcombustion.Lubricity
This is the capability of the fuel to prevent pumpwear.
Diesel engines have the ability to burn a widevariety of fuels.
These fuels are divided into fourgeneral groups:Group 1 (preferred fuels)
Group 2 (permissible fuels)
Group 3 (aviation kerosene fuels)
Other fuels
Group 1 (preferred fuels): SpecificationDERV to EN590
Note: Only use Arctic fuels when the temperature isbelow 0 C (32
F). Do not use Arctic fuels whenthe ambient temperature is above 0
C (32 F).To ensure that the time period between crankingthe engine
and first fire is kept to a minimum, onlyuse fuel of the correct
viscosity and at the correcttemperature.Gas oil to BS2869 Class A2
ASTM D975 — 91 Class 2D This can only be usedif the fuel has the
correct specification of lubricity.JIS K2204 (1992) Grades 1,2,3 and Special Grade3 This can only
be used if the fuel has the correctspecification of lubricity.Note: If low sulfur or low sulfur aromatic fuels areused, then
fuel additives can be used to increaselubricity.Group 2 (permissible fuels): SpecificationThese fuel
specifications are considered acceptablefor issues of warranty.
However,these fuels mayreduce the life of the engine, the engines
maximumpower and the engines fuel efficiency.ASTM D975 — 91 Class 1D
JP7, Mil T38219
NATO F63
NOTICEThese fuels should have a wear scar value of
650micrometers maximum HFRR to ISO 12156 — 1 andcan only be used on
VP30 24 volt specifications.Group 3 (aviation kerosene fuels): Specification
-
39Maintenance Section
Fuel Specifications
These fuels need additives to achieve lubricity of650
micrometers wear scar and the reliability ofthe fuel injection pump
will be reduced. The fuelinjection pump is not covered by a
warranty, evenwhen the additives are included.JP5 MIL T5624 (Avcat FSII, NATO F44
JP8 T83133 (Avtur FSII, NATO F34
Jet A
Jet A1, NATO F35, XF63
Low temperature fuels
Special fuels for use in cold weather may beavailable for engine
operation at temperaturesbelow 0 C (32 F). These fuels limit the
formationof wax in the fuel oil at low temperatures. If waxforms in
the fuel oil, this could stop the flow of fueloil through the
filter.Note: These fuels that lack lubricity may cause thefollowing
problems:Lo
Each Perkins engine has its own Operation and Maintenance Manual (RETO / OMM). This provides all the necessary information so that your engine runs normally day after day. It contains detailed
information on regular maintenance intervals along with technical data and instructions.
Perkins issues Operation and Maintenance Manuals (OMMs) for each engine type. Each manual is divided into four sections, which cover:
- security,
- product information,
- exploitation,
- maintenance — this part contains information on the capacity of refueling containers, recommendations for liquids, schedules for maintenance intervals and maintenance procedures
The first letters of the engine serial number are the engine family and type code. They can be found on the engine data plate or in the sales order confirmation.
Perkins is a subsidiary of Caterpillar and manufactures engines used in:
- agricultural machinery
- vehicles
- building
- electricity generation
- industry.
Perkins engines can be both diesel and gas.
Example: 1206E-E66TA (G)
1206E-E66TA (G) 12 = Series. (12 = 1200 series)
1206E-E66TA (G) 06 = Number of cylinders
1206E-E66TA (G) (Emissions Compliancy) Emission Compliance
1206E-E66TA (G) (Electronic Fuel Injection) Electronic Injector
1206E-E66TA (G) Capacity in liters. (6.6 liter)
1206E-E66TA (G) Supercharging: T = Turbo, A = Air — air cooling, W = Water — water cooling.
1206E-E66TA (G) Generator Set Rating
Perkins 2806D-E18TA
Industrial Engine – PDF Service Manual
Perkins 2806F-E18TA
Industrial Engine – PDF Service Manual
PERKINS 4-108 SHOP
MANUAL
Perkins 400 Series
4016-E61TRS (Models 403C-11, 403C-15, 404C-22 and 404C-22T)
Perkins 4000 Series
(4006-23 TAG1A, TAG2A and TAG3A Inline diesel engine)
Perkins 4000 Series Diesel
Engine – PDF Service Manual
Perkins 4000 Series Inline
diesel engine – PDF Service Manual
Perkins 4006 and 4008
Diesel engine – PDF Service Manual
Perkins 4006 TRS Gas and
4008 TRS Gas Industrial Engines – PDF Service Manua
Perkins 4006 TRS Gas and
4008 TRS GasIndustrial Engines Workshop Manual
Perkins 4006-23 and 4008-30
Industrial Engine – PDF Service Manual
Perkins 400A and 400D Industrial Engine – PDF Service Manual
Perkins 4012-46A Industrial
Engine – PDF Service Manual
Perkins 4016-61 TRG
Industrial Engine – PDF Service Manual
Perkins 4016-61TRS1 and
4016-61TRS2 Gas Engines – PDF Service Manual
Perkins 402D-403D-404D
Industrial Engine Disassembly and Assembly Manual
Perkins 402D-403D-404D
Industrial Engine PDF Service manual
Perkins 402F-05, 403F-07,
403F-11, and 403F-15 Industrial Engines – PDF Service Manual
Perkins 403F-15T, 404F-22
and 404F-22T Industrial Engines – PDF Service Manual.
Perkins 404A-22SG1 Gas
Industrial Engine – PDF Service Manual
Perkins 404F-E22T,
404F-E22TA and 403F-E17T Industrial Engines – PDF Service Manual
Perkins 800D Series
Industrial Engines – PDF Service Manual
Perkins 854E-E34TA and
854F-E34T Industrial Engine – PDF Service Manual
Perkins 854F-E34TA
Industrial Engine – PDF Service Manual
Perkins DIAG1300 User
manual.
Perkins Diesel Engine 4-154
Workshop Manual.
Perkins Engine Fault
Finding Guide.
Perkins Engine Number
Guide.
Perkins Phaser 4 – and
6-cylinder Workshop Manual
Perkins TIER2 DIESEL
ENGINES 1100 (VK) Workshop Manual
Perkins TPD1352 – PDF
Service Manual
The codes refer to the
model range of engines Perkins
Workshop Manual for Perkins
4.108, 4.107 and 4.99 diesel engines
Workshop Manual for Perkins
4.108M, 4.107M and 4.99M diesel engines