-
Contents
-
Table of Contents
-
Troubleshooting
-
Bookmarks
Related Manuals for Yamaha Thunderace YZF1000R
Summary of Contents for Yamaha Thunderace YZF1000R
-
Page 1
OWNER’S MANUAL YZF1000R 4SV-28199-E3… -
Page 2
EAU00001 Welcome to the Yamaha world of motorcycling! As the owner of a YZF1000R, you are benefiting from Yamaha’s vast experience in and newest technology for the design and the manufacture of high-quality products, which have earned Yamaha a reputation for dependability. -
Page 3
This manual should be considered a permanent part of this motorcycle and should remain with it even if the motorcycle is subsequently sold. Yamaha continually seeks advancements in product design and quality. Therefore, while this manual contains the most current product information available at the time of printing, there may be minor discrepancies between your motorcycle and this manual. -
Page 4: Important Manual Information
IMPORTANT MANUAL INFORMATION EW000002 WARNING PLEASE READ THIS MANUAL CAREFULLY AND COMPLETELY BEFORE OPERATING THIS MOTORCYCLE.
-
Page 5
IMPORTANT MANUAL INFORMATION EAU00008 YZF1000R OWNER’S MANUAL © 1999 by Yamaha Motor Co., Ltd. 1st Edition, August 1999 All rights reserved. Any reprinting or unauthorized use without the written permission of Yamaha Motor Co., Ltd. is expressly prohibited. Printed in Japan. -
Page 6: Table Of Contents
TABLE OF CONTENTS EAU00009 1 GIVE SAFETY THE RIGHT OF WAY 2 DESCRIPTION 3 INSTRUMENT AND CONTROL FUNCTIONS 4 PRE-OPERATION CHECKS 5 OPERATION AND IMPORTANT RIDING POINTS 6 PERIODIC MAINTENANCE AND MINOR REPAIR 7 MOTORCYCLE CARE AND STORAGE 8 SPECIFICATIONS 9 CONSUMER INFORMATION INDEX…
-
Page 8: Give Safety The Right Of Way
GIVE SAFETY THE RIGHT OF WAY GIVE SAFETY THE RIGHT OF WAY……….1-1…
-
Page 9
G IVE SAFETY THE RIGHT OF WAY EAU00021 Motorcycles are fascinating vehicles, which can give you an unsurpassed feeling of power and freedom. However, they also impose certain limits, which you must accept; even the best motorcycle does not ignore the laws of physics. Regular care and maintenance are essential for preserving your motorcycle’s value and operating condition. -
Page 10: Description
DESCRIPTION Left view ………………… 2-1 Right view………………. 2-2 Controls/Instruments …………….2-3…
-
Page 11
D ESCRIPTION EAU00026 Left view 1. Starter (choke) “ ” (page 3-13) 8. Rear shock absorber compression 2. Air filter (page 6-12) damping force adjusting screw (page 3-17) 3. Fuse box (page 6-28) 9. Main fuse (page 6-28) 4. Helmet holder (page 3-14) 10. -
Page 12
DESCRIPTION Right view 12. Tail/brake light (page 6-30) 19. Front fork rebound damping force 13. Passenger seat (page 3-14) adjusting screw (page 3-16) 14. Coolant reservoir tank (page 6-11) 20. Headlight (page 6-29) 15. Rider seat (page 3-13) 21. Rear brake pedal (page 3-11) 16. -
Page 13
DESCRIPTION Controls/Instruments 24. Clutch lever (page 3-9) 25. Left handlebar switches (page 3-8) 26. Speedometer (page 3-6) 27. Main switch/steering lock (page 3-1) 28. Tachometer (page 3-6) 29. Coolant temperature gauge (page 3-7) 30. Right handlebar switches (page 3-9) 31. Throttle grip (page 6-15) 32. -
Page 14: Instrument And Control Functions
INSTRUMENT AND CONTROL FUNCTIONS Main switch/steering lock……..3-1 Fuel tank cap …………. 3-11 Indicator lights …………3-2 Fuel …………..3-12 Oil level indicator circuit check……3-3 Fuel tank breather hose (for Germany only) ..3-13 Fuel indicator circuit check ……..3-5 Starter (choke) “ ”…
-
Page 15: Main Switch/Steering Lock
I NSTRUMENT AND CONTROL FUNCTIONS EAU00027 1. Push 2. Turn EAU00029* EAU00040 Main switch/steering lock LOCK EW000016 The steering is locked in this position WARNING The main switch controls the ignition and all electrical circuits are switched and lighting systems. Its operation is Never turn the key to “OFF”…
-
Page 16: Indicator Lights
INSTRUMENT AND CONTROL FUNCTIONS EAU00048 EAU00063 P (Parking) High beam indicator light “ ” The steering is locked in this position, This indicator comes on when the and the taillight and auxiliary light come headlight high beam is used. on but all other circuits are off. The key can be removed in this position.
-
Page 17: Oil Level Indicator Circuit Check
Oil level indicator light Oil level Oil level comes on. does not come on. is OK. is low. Ask a Yamaha dealer to Engine oil level and Supply inspect electrical circuit. electrical circuit are OK. engine oil. Go ahead with riding.
-
Page 18
INSTRUMENT AND CONTROL FUNCTIONS EAU01154 Fuel indicator light “ ” When the fuel level drops below ap- proximately 4.5 L, this light will come on. When this light comes on, fill the tank at the first opportunity. This light circuit can be checked by the proce- dure on page 3-5. -
Page 19: Fuel Indicator Circuit Check
Fuel indicator light Fuel indicator light Fuel level Fuel level comes on. does not come on. is OK. is low. Fuel level and electrical Ask a Yamaha dealer to Supply fuel. circuit are OK. inspect electrical circuit. Go ahead with riding.
-
Page 20: Speedometer
INSTRUMENT AND CONTROL FUNCTIONS 1. Speedometer 1. Tachometer 2. Odometer 2. Red zone 3. Trip odometer EAU00101 4. Reset knob Tachometer EAU00095 This model is equipped with an electric Speedometer tachometer so the rider can monitor the The speedometer shows riding speed. engine speed and keep it within the This speedometer is equipped with an ideal power range.
-
Page 21: Diagnosis Device
If the needle points to the red To prevent engine damage, be sure zone or higher, stop your motorcycle to consult a Yamaha dealer as soon and let the engine cool. (See page 6-11 as possible if the tachometer dis- for details.)
-
Page 22: Handlebar Switches
INSTRUMENT AND CONTROL FUNCTIONS EAU00127 Turn signal switch To signal a right-hand turn, push the switch to “ ”. To signal a left-hand turn, push the switch to “ ”. Once the switch is released it will return to the center position.
-
Page 23: Clutch Lever
INSTRUMENT AND CONTROL FUNCTIONS EAU00141 Start switch “ ” The starter motor cranks the engine when pushing the start switch. EC000005 CAUTION: See starting instructions prior to starting the engine. 1. Engine stop switch 1. Lever position adjusting dial 2. Lights switch 2.
-
Page 24: Shift Pedal
INSTRUMENT AND CONTROL FUNCTIONS To adjust the distance between the clutch lever and the handlebar grip, turn the clutch adjusting dial while pushing the lever forward. Make sure the setting on the clutch lever adjusting dial is aligned with the arrow mark. 1.
-
Page 25: Rear Brake Pedal
INSTRUMENT AND CONTROL FUNCTIONS NOTE: This tank cap cannot be closed unless the key is in the lock. The key cannot be removed if the cap is not locked properly. EW000023 WARNING Be sure the cap is properly installed and locked in place before riding the 1.
-
Page 26: Fuel
INSTRUMENT AND CONTROL FUNCTIONS EAU00186 EAU00191 CAUTION: Recommended fuel: Always wipe off spilled fuel im- Regular unleaded gasoline with a mediately with a dry and clean research octane number of 91 or soft cloth. Fuel may deteriorate higher. painted surfaces plastic Fuel tank capacity: parts.
-
Page 27: Fuel Tank Breather Hose (For Germany Only)
INSTRUMENT AND CONTROL FUNCTIONS 1. Fuel tank breather hose 1. Starter (choke) “ ” 1. Rider seat lock EAU00196 EAU02976 EAU01698* Fuel tank breather hose Starter (choke) “ ” Seats (for Germany only) Starting a cold engine requires a richer Rider seat air-fuel mixture.
-
Page 28: Helmet Holder
INSTRUMENT AND CONTROL FUNCTIONS 1. Projection 1. Projection 1. Helmet holder 2. Seat holder 2. Hook ( 2) EAU00264 3. Seat holder ( 3) Helmet holder To install Passenger seat The helmet holder is located under the Insert the projection on the front of the To remove rider’s seat.
-
Page 29: Storage Compartment
Front fork adjustment Adjusting spring preload Turn the adjusting bolt in direction a to This compartment is designed to store This front fork is equipped with spring a genuine Yamaha U-LOCK. (Other preload and damping force adjusters. increase spring preload direction b to decrease spring pre- locks may not fit.) Be sure the lock is…
-
Page 30
INSTRUMENT AND CONTROL FUNCTIONS EC000013 CAUTION: The grooves are provided to show the adjustment level. Always keep the adjustment level equal on both fork legs. CI-18E Stan- Hard Soft dard Adjusting 1. Rebound damping force adjusting screw 1. Compression damping force adjusting screw position Adjusting rebound damping force Adjusting compression damping… -
Page 31: Rear Shock Absorber Adjustment
INSTRUMENT AND CONTROL FUNCTIONS EC000015 Adjusting spring preload CAUTION: Turn the adjusting ring in direction a to Never attempt to turn an adjuster increase spring preload direction b to decrease spring pre- beyond the maximum or minimum setting. load. Make sure that the appropriate notch in NOTE: the adjusting ring is aligned with the po- Although the number of clicks between…
-
Page 32
Cylinder * From the fully turned-in position Maximum (hard): 24 clicks in* damage will result in poor * From the fully turned-out position damping performance. Take your shock absorber to a Yamaha dealer for any service. 3-18… -
Page 33: Luggage Strap Holders
Sidestand Powervalve) This model is equipped with an ignition circuit cut-off system. The motorcycle This model is equipped with Yamaha’s must not be ridden when the sidestand EXUP system within the exhaust pipe. is down. The sidestand is located on This valve is always activated by a the left side of the frame.
-
Page 34: Sidestand/Clutch Switch Operation Check
AND THE ENGINE STOP SWITCH TO WARNING “ ”. If improper operation is noted, con- sult a Yamaha dealer immediately. TRANSMISSION IS IN GEAR AND SIDESTAND IS UP. PULL IN CLUTCH LEVER AND PUSH THE START SWITCH. ENGINE WILL START.
-
Page 36: Pre-Operation Checks
PRE-OPERATION CHECKS Pre-operation check list…………..4-1…
-
Page 37: Pre-Operation Check List
P RE-OPERATION CHECKS EAU01114 Owners are personally responsible for their vehicle’s condition. Your motorcycle’s vital functions can start to deteriorate quickly and unexpectedly, even if it remains unused (for instance, if it is exposed to the elements). Any damage, fluid leak or loss of tire pressure could have serious consequences.
-
Page 38
PRE-OPERATION CHECKS ITEM CHECKS PAGE • Check for smooth operation. Sidestand pivot 6-25 • Lubricate if necessary. • Make sure that all nuts, bolts and screws are properly tightened. Chassis fasteners — • Tighten if necessary. • Check fuel level. Fuel 3-11 ~ 3-12 •… -
Page 40: Operation And Important Riding Points
OPERATION AND IMPORTANT RIDING POINTS Starting the engine…………….5-1 Starting a warm engine …………..5-4 Shifting ………………..5-4 Recommended shift points (for Switzerland only) ……5-5 Tips for reducing fuel consumption ………… 5-5 Engine break-in ……………… 5-5 Parking ………………..5-6…
-
Page 41: Starting The Engine
Consult The engine can be started only under Yamaha dealer regarding any one of the following conditions: control or function that you do The transmission is in neutral. not thoroughly understand. The sidestand is up, the transmis-…
-
Page 42: Operation And Important Riding Points
OPERATION AND IMPORTANT RIDING POINTS CF-28E TURN THE MAIN SWITCH TO “ON” AND THE ENGINE STOP SWITCH TO “ ”. IF TRANSMISSION IS IN NEUTRAL AND IF TRANSMISSION IS IN GEAR AND SIDESTAND IS DOWN, SIDESTAND IS UP, PUSH THE START SWITCH. PULL IN THE CLUTCH LEVER AND PUSH START ENGINE WILL START.
-
Page 43
(choke) turned off. Yamaha dealer to inspect it. is released. If the oil level indicator light flickers or remains on, immedi- 3. Turn on the starter (choke) and completely close the throttle grip. -
Page 44: Starting A Warm Engine
OPERATION AND IMPORTANT RIDING POINTS EAU01258 EC000048 Starting a warm engine CAUTION: The starter (choke) is not required Do not coast for long periods when the engine is warm. with the engine off, and do not EC000046 tow the motorcycle a long dis- CAUTION: tance.
-
Page 45: Recommended Shift Points (For Switzerland Only)
OPERATION AND IMPORTANT RIDING POINTS EAU02941 EAU00424 EAU00436 Recommended shift points Tips for reducing fuel Engine break-in (for Switzerland only) consumption There is never a more important period in the life of your motorcycle than the The recommended shift points are Your motorcycle’s fuel consumption period between zero and 1,000 km.
-
Page 46: Parking
If any engine trouble should oc- one set throttle position. motorcycle in a place where pedes- cur during the break-in period, trians or children are not likely to consult a Yamaha dealer imme- 150 ~ 500 km touch the motorcycle. Do not park diately. Avoid…
-
Page 48: Periodic Maintenance And Minor Repair
PERIODIC MAINTENANCE AND MINOR REPAIR Tool kit…………..6-1 Drive chain slack adjustment ……6-23 Periodic maintenance and lubrication….6-2 Drive chain lubrication……..6-24 Cowling removal and installation ……6-5 Cable inspection and lubrication ……6-24 Cowling A…………..6-5 Brake and shift pedal lubrication ……6-24 Cowling B…………..6-5 Brake and clutch lever lubrication ……
-
Page 49: Tool Kit
If you do not have necessary tools re- brication will keep your motorcycle in quired during a service operation, take the safest and most efficient condition your motorcycle to a Yamaha dealer for possible. Safety is an obligation of the service. motorcycle owner. The maintenance…
-
Page 50: Periodic Maintenance And Lubrication
PERIODIC MAINTENANCE AND MINOR REPAIR EAU00473 PERIODIC MAINTENANCE AND LUBRICATION CP-01E EVERY 6,000 km 12,000 km INITIAL ITEM CHECKS AND MAINTENANCE JOBS (1,000 km) 6 months 12 months (whichever (whichever comes first) comes first) • Check fuel hoses and vacuum hose for cracks or damage. Fuel line •…
-
Page 51
PERIODIC MAINTENANCE AND MINOR REPAIR EVERY 6,000 km 12,000 km INITIAL ITEM CHECKS AND MAINTENANCE JOBS (1,000 km) 6 months 12 months (whichever (whichever comes first) comes first) • Check bearing for looseness or damage. Wheel bearings • Replace if necessary. •… -
Page 52
Cooling system • Change coolant every 24,000 km or 24 months (whichever comes first). * Since these items require special tools, data and technical skills, they should be serviced by a Yamaha dealer. EAU02971* NOTE: The air filter needs more frequent service if you are riding in unusually wet or dusty areas. -
Page 53: Cowling Removal And Installation
PERIODIC MAINTENANCE AND MINOR REPAIR 1. Screw ( 13) 1. Screw ( 3) 2. Pull EAU01065 EAU00484* Cowling removal and Cowling A EAU00482 Cowling B installation To remove To remove Remove the screws and pull outward The cowlings indicated in the illustra- Remove the screws.
-
Page 54: Cowling C
PERIODIC MAINTENANCE AND MINOR REPAIR 1. Cowling C 1. Turn signal lead ( 2) 2. Bolt ( 14) To install To install EAU00483 Place in the original position and install Place in the original position, install the Cowling C the screws. bolts and connect the turn signal leads.
-
Page 55: Spark Plugs
Do not attempt to diagnose such prob- lems yourself. Instead, take the motor- cycle to a Yamaha dealer. You should periodically remove and inspect the spark plugs because heat and deposits will cause any spark plug to slowly break down and erode.
-
Page 56
PERIODIC MAINTENANCE AND MINOR REPAIR Tightening torque: Spark plug: 18 Nm (1.8 m·kg) NOTE: If a torque wrench is not available when you are installing a spark plug, a good estimate of the correct torque is 1/4 to 1/2 turn past finger tight. Have the a. -
Page 57: Engine Oil
PERIODIC MAINTENANCE AND MINOR REPAIR Left side view 1. Oil level window 1. Engine oil filler cap 1. Engine oil drain bolt 2. Maximum level mark 2. With the engine stopped, check Engine oil and oil filter cartridge re- 3. Minimum level mark the oil level through the level win- placement EAU01765*…
-
Page 58
Make sure the O-ring is seated proper- NOTE: An oil filter wrench is available at a When installing the oil filter, tighten it to nearby Yamaha dealer. the proper torque by using a torque wrench. 6. Reinstall the drain bolt and tighten it to the specified torque. -
Page 59: Coolant
The cool- mains on, immediately stop the en- the clutch and additives could ant level will vary with engine tempera- gine and consult with a Yamaha cause clutch slippage. ture. The coolant level is satisfactory if dealer.
-
Page 60: Air Filter
PERIODIC MAINTENANCE AND MINOR REPAIR EW000067 EW000071 WARNING WARNING Do not remove the radiator cap Support the fuel tank carefully when the engine is hot. during this procedure. Do not tilt the fuel tank too EC000080 much or pull it too hard because CAUTION: the fuel hose connections may Hard water or salt water is harmful…
-
Page 61
PERIODIC MAINTENANCE AND MINOR REPAIR 1. Screw 1. Air filter 2. Air filter case cover 7. Tap the air filter lightly to remove EC000082 5. Remove the screw holding the air CAUTION: most of the dust and dirt. Blow out filter case cover. -
Page 62: Carburetor Adjustment
Most adjustments aged at all. If any damage is should be left to a Yamaha dealer who found, it may result in a fuel has the professional knowledge and leak, so do not start the engine.
-
Page 63: Idle Speed Adjustment
1,000 to 2,000 r/min. Occasionally 7 mm at the throttle grip. If the free play rev the engine to 4,000 to is incorrect, ask a Yamaha dealer to 5,000 r/min. The engine is warm make this adjustment. when it quickly responds to the throttle.
-
Page 64: Valve Clearance Adjustment
Always check and adjust the tire pres- 290 kPa 290 kPa High speed riding (2.90 kg/cm (2.90 kg/cm Yamaha service technician. sure before operating the motorcycle. 2.90 bar) 2.90 bar) EW000082 * Load is the total weight of cargo, rider, passenger WARNING and accessories.
-
Page 65
Brakes, tires, and relat- your heaviest items close to the ed wheel parts replacement should 1. Side wall center of the motorcycle, and dis- be left to a Yamaha Service Techni- a. Tread depth tribute the weight evenly from side cian. Tire inspection to side. -
Page 66
Type After extensive tests, the tires Bridgestone 180/55 ZR17 BT50R mentioned below have been ap- Dunlop 180/55 ZR17 D204M proved by Yamaha Motor Co., MACADAM Michelin 180/55 ZR17 90XM Ltd. for this model. No guaran- Metzeler 180/55 ZR17 MEZ1 tee for handling characteristics… -
Page 67: Wheels
Never fail to use the specified normal condition exists in a wheel, tires in tire replacement. Other 1. Brake light switch consult a Yamaha dealer. Do not tires may have a danger of 2. Adjusting nut attempt even small repairs to the bursting at super high-speeds.
-
Page 68: Checking The Front And Rear Brake Pads
This indicator allows checking of brake pad wear without disassembling the brake. Apply the brake and inspect the wear indicator. If the indicator is AL- MOST in contact with the disc plate, ask a Yamaha dealer to replace the pads. 6-20…
-
Page 69: Inspecting The Brake Fluid Level
PERIODIC MAINTENANCE AND MINOR REPAIR Front brake Clutch Rear brake 1. Minimum level mark 1. Minimum level mark 1. Minimum level mark Observe these precautions: EAU01800 Inspecting the brake fluid Recommended brake fluid: DOT 4 When checking the fluid level, level make sure the top of the master Refill with the same type of brake…
-
Page 70: Brake Fluid Replacement
Original shape Brake fluid replacement The brake fluid should be replaced only by trained Yamaha service personnel. Have the Yamaha dealer replace the following components during periodic maintenance or when they are dam- aged or leaking: oil seals (every two years)
-
Page 71: Drive Chain Slack Check
PERIODIC MAINTENANCE AND MINOR REPAIR each side of the swingarm. Use these marks to align the rear wheel. EC000096 CAUTION: Too little chain slack will overload the engine and other vital parts. Keep the slack within the specified limits. a. Drive chain slack 1.
-
Page 72: Drive Chain Lubrication
Lubricate the pivoting parts. a Yamaha dealer to replace it. Wipe it dry, and thoroughly lubricate it with SAE 30 ~ 50W motor oil. Do not…
-
Page 73: Brake And Clutch Lever Lubrication
Lubricate the sidestand pivoting point and metal-to-metal contact surfaces. Lubricate the pivoting parts. Check that the sidestand moves up and down smoothly. Recommended lubricant: Engine oil Recommended lubricant: Engine oil EW000113 WARNING If the sidestand does not move smoothly, consult a Yamaha dealer. 6-25…
-
Page 74: Front Fork Inspection
If EC000098 any free play can be felt, ask a Yamaha CAUTION: dealer to inspect and adjust the steer- If any damage or unsmooth move- ing.
-
Page 75: Wheel Bearings
Therefore it is not dangerous, causing severe burns, smoothly, have a Yamaha dealer in- necessary to check the electrolyte or fill etc. It contains sulfuric acid. Avoid spect the wheel bearings.
-
Page 76: Fuse Replacement
B. (See page 6-5.) If any your Yamaha dealer. fuse is blown, turn off the main switch sibly a fire. Always make sure the connec- and the switch of the circuit in question.
-
Page 77: Headlight Bulb Replacement
PERIODIC MAINTENANCE AND MINOR REPAIR Specified fuse: Main fuse: 30 A Headlight fuse: 20 A Signaling system fuse: 15 A Fan fuse: 7.5 A Ignition fuse: 15 A 1. Connector 1. Bulb holder 2. Bulb holder cover 2. Unhook the bulb holder and re- EAU00827 move the defective bulb.
-
Page 78: Tail/Brake Light Bulb Replacement
5. Install the socket and turn it clock- tors. If the headlight beam adjust- wise. ment is necessary, ask a Yamaha 6. Install the passenger seat. dealer to make that adjustment. 6-30…
-
Page 79: Front Wheel Removal
EW000122 wheel hub and the speedometer and calipers. WARNING gear unit are installed with the pro- It is advisable to have a Yamaha NOTE: jections meshed into the slots. dealer service the wheel. Do not depress the brake lever when 2.
-
Page 80: Rear Wheel Removal
5. Turn the chain adjusting bolts fully WARNING Caliper bolt: outward. 40 Nm (4.0 m·kg) It is advisable to have a Yamaha 6. Push the wheel forward and re- dealer service the wheel. 6. Push down hard on the handle- move the drive chain.
-
Page 81: Rear Wheel Installation
PERIODIC MAINTENANCE AND MINOR REPAIR Tightening torque: Axle nut: 150 Nm (15.0 m·kg) Caliper bolt: 40 Nm (4.0 m·kg) 1. Caliper bracket EAU01246* NOTE: Rear wheel installation Do not depress the brake pedal 1. Install the wheel assembly, caliper when the caliper is off the disc as bracket and insert the axle.
-
Page 82: Troubleshooting
If your motorcycle requires any repair, bring it to a Yamaha dealer. The skilled technicians at a Yamaha dealership have the tools, experience, and know- how to properly service your motor- cycle.
-
Page 83: Troubleshooting Chart
Remove spark plugs and check electrodes. Engine doesn’t start, go to battery Dry. Ask a Yamaha dealer to inspect. check. 4. Battery Engine turns over Battery good. quickly. Engine doesn’t start, ask a Yamaha Use the electric starter.
-
Page 84: Engine Overheating
Restart the engine. If the engine overheats again, ask a Level is OK. Yamaha dealer to inspect and repair the cooling system. NOTE: If it is difficult to get the recommended coolant, tap water can be temporarily used, provided that it is changed to the recom- mended coolant as soon as possible.
-
Page 86: Motorcycle Care And Storage
MOTORCYCLE CARE AND STORAGE Care ………………..7-1 Storage………………..7-4…
-
Page 87
M OTORCYCLE CARE AND STORAGE EAU01516 Care Before cleaning Cleaning 1. Cover up the muffler outlet with a After normal use The exposure of its technology makes plastic bag. Remove dirt with warm water, a neutral a motorcycle charming but also vulner- 2. -
Page 88: Motorcycle Care And Storage
MOTORCYCLE CARE AND STORAGE ECA00010 Do not use any harsh chemical For motorcycles equipped with CAUTION: products on plastic parts. Be a windshield: Do not use strong Avoid using strong acidic wheel sure to avoid using cloths or cleaners or hard sponges as cleaners, especially on spoked sponges which have been in they…
-
Page 89
MOTORCYCLE CARE AND STORAGE 1. Clean your motorcycle with cold After cleaning EWA00001 WARNING water and soap after the engine 1. Dry the motorcycle with a chamois Make sure that there is no oil or wax has cooled down. or an absorbing cloth. on the brakes and tires. -
Page 90
NOTE: “OFF” position: Turn the fuel cock To prevent corrosion, avoid Consult a Yamaha dealer for advice on to “OFF”. damp cellars, stables (because what products to use. 4. Fill up the fuel tank and add fuel… -
Page 91
MOTORCYCLE CARE AND STORAGE a. Remove the spark plug caps and 6. Lubricate all control cables and 9. Remove the battery and fully spark plugs. the pivoting points of all levers and charge it. Store it in a cool, dry b. -
Page 92: Specifications
SPECIFICATIONS Specifications ………………8-1 HOW TO USE THE CONVERSION TABLE ……..8-5…
-
Page 93: Specifications
S PECIFICATIONS EAU01038 Specifications CS-01E Model YZF1000R Engine oil Dimensions Type -20˚ -10˚ 0˚ 10˚ 20˚ 30˚ 40˚ 50˚C Overall length 2,085 mm (except for CH, D, DK, SAE 10W/30 NL, S, SF) 2,170 mm (for CH, D, DK, NL, S,…
-
Page 94
SPECIFICATIONS Fuel 1.037 Type Regular unleaded gasoline Chassis Fuel tank capacity 20 L Frame type Diamond Reserve amount 4.5 L Caster angle Carburetor Trail 97 mm Type quantity BDSR38 Tire Manufacturer MIKUNI Front Spark plug Type Tubeless Manufacturer/type NGK / DR8EA or Size 120/70 ZR17 DENSO / X24ESR-U… -
Page 95
SPECIFICATIONS Maximum load* 196 kg Rear Air pressure (cold tire) Type Single disc brake up to 90 kg load* Operation Right foot operation Front 250 kPa (2.50 kg/cm , 2.50 bar) Fluid DOT 4 Rear 250 kPa (2.50 kg/cm , 2.50 bar) Suspension 90 kg load ~ maximum load* Front… -
Page 96
SPECIFICATIONS Headlight type Quartz bulb (halogen) Bulb voltage, wattage quantity Headlight 12 V, 60/55 W (except for GB) 12 V, 35/35 W 2 (for GB) Auxiliary light 12 V, 5 W Tail/brake light 12 V, 5/21 W Turn signal lights 12 V, 21 W Meter light 12 V, 1.7 W… -
Page 97: How To Use The Conversion Table
SPECIFICATIONS EAU01064 HOW TO USE THE CONVERSION TABLE CS-02E CONVERSION TABLE All specification data in this manual are listed in SI and METRIC TO IMPERIAL METRIC UNITS. Metric unit Multiplier Imperial unit Use this table to convert METRIC unit data to IMPERIAL m·kg 7.233 ft·lb…
-
Page 98: Consumer Information
CONSUMER INFORMATION Identification number records…………. 9-1 Key identification number …………..9-1 Vehicle identification number………….. 9-1 Model label………………9-2…
-
Page 99: Identification Number Records
Record the key identification number, vehicle identification number and mod- el label information in the spaces pro- vided for assistance when ordering spare parts from a Yamaha dealer or for reference in case the vehicle is sto- len. 1. Key identification number 1.
-
Page 100: Consumer Information
The model label is affixed to the frame under the seat. (See page 3-13 for seat removal procedures.) Record the infor- mation on this label in the space pro- vided. This information will be needed to order spare parts from your Yamaha dealer.
-
Page 101: Left View
I NDEX 1 0 — Engine stop switch……..3-9 EXUP (EXhaust Ultimate Powervalve)… 3-19 Air filter ……….6-12 Identification number records ….9-1 Idle speed adjustment ……6-15 Indicator lights……….3-2 Front brake lever ……..3-10 Battery ………..6-27 Fuel indicator light…….3-4 Front fork adjustment……3-15 Brake and clutch lever lubrication…6-25 High beam indicator light ….3-2 Front fork inspection ……
-
Page 102: Right View
INDEX Tires…………6-16 Tool kit ………… 6-1 Rear brake pedal ……..3-11 Troubleshooting ……..6-34 Rear shock absorber adjustment … 3-17 Troubleshooting chart ……6-35 Rear suspension lubrication….6-25 Turn indicator light……..3-2 Rear wheel installation……6-33 Turn signal light bulb replacement..6-30 Rear wheel removal…….
-
Page 103
YAMAHA MOTOR CO., LTD. PRINTED ON RECYCLED PAPER PRINTED IN JAPAN 99 · 8 — 0.6…
Материал из BikesWiki — энциклопедия японских мотоциклов
Перейти к: навигация, поиск

Yamaha YZF1000R Thunderace
Ниже представлены прямые ссылки на скачку сервисной документации.
Для Yamaha YZF1000R Thunderace
- Руководство пользователя (Owners Manual) для Yamaha YZF1000R Thunderace
- Сервисный мануал (Service Manual) для Yamaha YZF1000RJ/YZF1000RJC (1996)
- Руководство по ремонту и обслуживанию (Haynes Service & Repair Manual) для Yamaha YZF1000R Thunderace (1996-2000)
Обзор модели
- Yamaha YZF1000R Thunderace
Источник — «https://bikeswiki.ru/index.php?title=Yamaha_YZF1000R_Thunderace:_мануалы&oldid=10125»
Категория:
- Сервисная документация

Руководство по эксплуатации и техническому обслуживанию мотоциклов Yamaha YZF-R1.
- Издательство: Yamaha Motor Co., Ltd.
- Год издания: 2003
- Страниц: 120
- Формат: PDF
- Размер: 3,4 Mb

Руководство по эксплуатации и техническому обслуживанию мотоциклов Yamaha YZF-R1.
- Издательство: Yamaha Motor Co., Ltd.
- Год издания: 2011
- Страниц: 114
- Формат: PDF
- Размер: 4,9 Mb
Руководство по эксплуатации и техническому обслуживанию мотоциклов Yamaha YZF-R6.
- Издательство: Yamaha Motor Co., Ltd.
- Год издания: 2002
- Страниц: 140
- Формат: PDF
- Размер: 3,9 Mb

Руководство по эксплуатации и техническому обслуживанию мотоциклов Yamaha YZF-R6.
- Издательство: Yamaha Motor Co., Ltd.
- Год издания: 2007
- Страниц: 114
- Формат: PDF
- Размер: 2,9 Mb

Сборник руководств на английском языке по эксплуатации и техническому обслуживанию мотоциклов Yamaha моделей YZF600 Thundercat и YZF1000 Thunderace различных модификаций.
- Издательство: Yamaha Motor Co., Ltd.
- Год издания: —
- Страниц: —
- Формат: PDF
- Размер: 43,3 Mb

Сборник руководств на английском языке по эксплуатации и техническому обслуживанию мотоциклов Yamaha моделей YZF-R1, YZF-R6 и YZF-R125 различных модификаций.
- Издательство: Yamaha Motor Co., Ltd.
- Год издания: —
- Страниц: —
- Формат: PDF
- Размер: 213,3 Mb
Руководство на английском языке по техническому обслуживанию и ремонту мотоциклов Yamaha FZS600 Fazer и YZF600R Thundercat 1996-2003 годов выпуска.
- Издательство: Haynes Publishing
- Год издания: —
- Страниц: 219
- Формат: PDF
- Размер: 12,1 Mb
Руководство на английском языке по ремонту мотоциклов Yamaha YZF600RJ.
- Издательство: Yamaha Motor Co., Ltd.
- Год издания: 1996
- Страниц: 373
- Формат: PDF
- Размер: 66,3 Mb
Руководство по эксплуатации и ремонту мотоциклов Yamaha YZF750R/YZF750SP 1993-1998 и YZF1000 Thunderace 1996-2000 годов выпуска.
- Издательство: Монолит
- Год издания: 2011
- Страниц: 280
- Формат: PDF
- Размер: 195,4 Mb
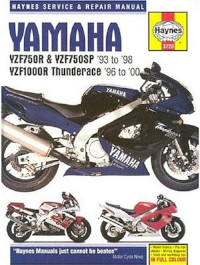
Руководство на английском языке по техническому обслуживанию и ремонту мотоциклов Yamaha YZF750R/YZF750SP 1993-1998 и YZF1000 Thunderace 1996-2000 годов выпуска.
- Издательство: Haynes Publishing
- Год издания: 2000
- Страниц: 147
- Формат: PDF
- Размер: 45,9 Mb
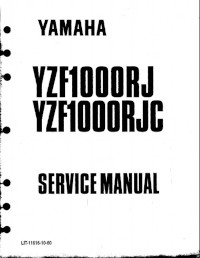
Руководство на английском языке по ремонту мотоциклов Yamaha моделей YZF1000RJ и YZF1000RJC.
- Издательство: Yamaha Motor Co., Ltd.
- Год издания: 1996
- Страниц: 407
- Формат: PDF
- Размер: 36,5 Mb
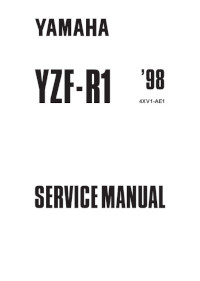
Сборник руководств на английском языке по ремонту мотоциклов Yamaha YZF-R1 различных модификаций 1998-2009 годов выпуска.
- Издательство: Yamaha Motor Co., Ltd.
- Год издания: 1997-2008
- Страниц: —
- Формат: PDF
- Размер: 85,7 Mb

Руководство на английском языке по установке комплекта гоночных запчастей для мотоциклов Yamaha YZF-R1 2009 года выпуска.
- Издательство: —
- Год издания: —
- Страниц: 81
- Формат: PDF
- Размер: 3,0 Mb
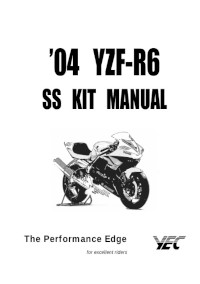
Руководство на английском языке по установке комплекта гоночных запчастей для мотоциклов Yamaha YZF-R6 2004 года выпуска.
- Издательство: —
- Год издания: —
- Страниц: 73
- Формат: PDF
- Размер: 3,6 Mb

Сборник руководств на английском языке по ремонту мотоциклов Yamaha YZF-R6 различных модификаций 1999-2008 годов выпуска.
- Издательство: Yamaha Motor Co., Ltd.
- Год издания: 1998-2007
- Страниц: —
- Формат: PDF
- Размер: 108,9 Mb

Руководство на английском языке по ремонту мотоциклов Yamaha YZF-R7.
- Издательство: Yamaha Motor Co., Ltd.
- Год издания: 1999
- Страниц: 381
- Формат: PDF
- Размер: 15,9 Mb

Руководство на английском языке по ремонту мотоциклов Yamaha YZF-R125.
- Издательство: MBK Industrie
- Год издания: 2008
- Страниц: 356
- Формат: PDF
- Размер: 10,4 Mb

Сборник руководств на английском, французском, немецком, испанском и итальянском языках по ремонту мотоциклов Yamaha моделей YZF-R1, YZF-R6 и др.
- Издательство: Yamaha
- Год издания: —
- Страниц: —
- Формат: ISO
- Размер: 1,7 Gb

(скачивание инструкции бесплатно)
Формат файла: PDF
Доступность: Бесплатно как и все руководства на сайте. Без регистрации и SMS.
Дополнительно: Чтение инструкции онлайн

Страница:
(1 из 407)
навигация

1

2

3

4

5

6

7

8

9

10

11

12

13

14

15

16

17

18

19

20

21

22

23

24

25

26

27

28

29

30

31

32

33

34

35

36

37

38

39

40

41

42

43

44

45

46

47

48

49

50

51

52

53

54

55

56

57

58

59

60

61

62

63

64

65

66

67

68

69

70

71

72

73

74

75

76

77

78

79

80

81

82

83

84

85

86

87

88

89

90

91

92

93

94

95

96

97

98

99

100

101

102

103

104

105

106

107

108

109

110

111

112

113

114

115

116

117

118

119

120

121

122

123

124

125

126

127

128

129

130

131

132

133

134

135

136

137

138

139

140

141

142

143

144

145

146

147

148

149

150

151

152

153

154

155

156

157

158

159

160

161

162

163

164

165

166

167

168

169

170

171

172

173

174

175

176

177

178

179

180

181

182

183

184

185

186

187

188

189

190

191

192

193

194

195

196

197

198

199

200

201

202

203

204

205

206

207

208

209

210

211

212

213

214

215

216

217

218

219

220

221

222

223

224

225

226

227

228

229

230

231

232

233

234

235

236

237

238

239

240

241

242

243

244

245

246

247

248

249

250

251

252

253

254

255

256

257

258

259

260

261

262

263

264

265

266

267

268

269

270

271

272

273

274

275

276

277

278

279

280

281

282

283

284

285

286

287

288

289

290

291

292

293

294

295

296

297

298

299

300

301

302

303

304

305

306

307

308

309

310

311

312

313

314

315

316

317

318

319

320

321

322

323

324

325

326

327

328

329

330

331

332

333

334

335

336

337

338

339

340

341

342

343

344

345

346

347

348

349

350

351

352

353

354

355

356

357

358

359

360

361

362

363

364

365

366

367

368

369

370

371

372

373

374

375

376

377

378

379

380

381

382

383

384

385

386

387

388

389

390

391

392

393

394

395

396

397

398

399

400

401

402

403

404

405

406

407
Оглавление инструкции
Document Outline
- Title Page
- Index
- Chp. 1 — General info
- Chp. 2 — Specifications
- Chp. 3 — Inspection and Adjustment
- Chp. 4 — Engine
- Chp. 5 — Cooling
- Chp. 6 — Carburetors
- Chp. 7 — Chassis
- Cpt. 8 — Electrical
- Cpt. 9 — Troubleshooting
Инструкции и руководства похожие на YAMAHA YZF1000 THUNDERACE (1996)
Другие инструкции и руководства из категории Мотоцикл
© 2023 manuals-help.ru, Все права защищены