Информация, представленная на Сайте, носит информационный характер и ни при каких условиях не является публичной
офертой, определяемой положениями статьи 437 Гражданского кодекса Российской Федерации. Все содержащиеся на
Сайте сведения носят исключительно информационный характер и не являются исчерпывающими. Все условия
приобретения мототехники, цены, спецпредложения и комлектации мототехники указаны с целью ознакомления.
Комплектации и цены действительны на момент публикации и могут быть изменены без предварительного оповещения.
Представленная на Сайте мототехника может быть укомплектована дополнительным оборудованием, не входящим в
стандартную версию, но доступным за дополнительную плату. Сведения о продукции, касающиеся объёмов поставки,
внешнего вида, характеристик, габаритов и веса, эксплуатационных затрат и т.д. не являются обязательными,
рассматриваются как приблизительные и указаны с условием того, что могут возникнуть ошибки при печати, настройке
и/или наборе текста. Такая информация может быть изменена без предварительного уведомления. Чтобы получить
полную информацию о продукции, услугах, дополнительном оборудовании и спецпредложениях, интересных для Вас,
обращайтесь к менеджерам Дилерского центра
В данном разделе вы можете скачать инструкции по эксплуатации для техники KTM в формате pdf.
Нажмите на ссылку с названием нужного мотоцикла, и вы будете перенаправлены на страницу для скачивания файла.
Для вашего удобства все модели рассортированы по годам выпуска, с 2012 по 2019.

2012
200 Duke
250 EXC-F
350 EXC-F
450/500 EXC
690 DUKE
690 ENDURO R
690 SMC R
2013
125/300 EXC
250 EXC-F
350 EXC-F
350 FREERIDE
390 DUKE
500 EXC
690 DUKE R
1190 ADVENTURE
1190 ADVENTURE R
2014
250 FREERIDE
50 SX
65 SX
85 SX
250 SX-F
350 SX-F
450 SX-F
690 ENDURO R
690 SMC R
1190 ADVENTURE
1290 SUPERDUKE R
125/300 EXC
350 EXC-F
450/500 EXC
2015
1290 SUPER ADVENTURE
RC200
RC390
2016
250 SX-F
350 SX-F
450 SX-F
690 DUKE
2017
125-250 SX
250 DUKE
250 EXC-F
250-300 EXC/125-300 XC-W
350 EXC-F
390 DUKE
450-500 EXC-F
1090 ADVENTURE
1090 ADVENTURE R
1290 ADVENTURE R
1290 ADVENTURE S
1290 ADVENTURE T
1290 SUPER DUKE GT
1290 SUPER DUKE R
RC 390
2018
250-300 EXC
2019
690 ENDURO R
690 SMC R
790 ADVENTURE R
790 ADVENTURE
790 DUKE
Popular manuals
362 pages
350 EXC-F EU Repair Manual
307 pages
250 sxf 2016 Repair Manual
96 pages
85 SX 19/16 Owner’s Manual

91 pages
65 SX Owner’s Manual

106 pages
250 SX-F EU Owner’s Manual

154 pages
300 EXC Owner’s Manual
448 pages
990 Adventure Repair Manual

91 pages
50 SX Owner’s Manual

191 pages
450 EXC-R EU Repair Manual

102 pages
350 SX-F Owner’s Manual
127 pages
150 SX Owner’s Manual
289 pages
250 EXC EU Repair Manual

267 pages
125 DUKE EU Repair Manual
159 pages
50 SX Repair Manual

387 pages
250 EXC TPI 2019 Repair Manual

90 pages
450 SX-F Owner’s Manual

91 pages
65 SX Owner’s Manual

136 pages
350 EXC-F EU Owner’s Manual

213 pages
1290 SUPERDUKE R Owner’s Manual

411 pages
890 Adventure R US 2021 Owner’s Manual
1
105 SX 2007

Owner’s Manual
105 SX 2008
Owner’s Manual
105 SX 2010
Owner’s Manual • Spare Parts Manual
105 XC 2008
Owner’s Manual
1050 Adventure
Owner’s Manual • Setup Instructions
1090 ADVENTURE 2017
Owner’s Manual
1090 Adventure R
Owner’s Manual
1090 Adventure R 2018
Setup Instructions
1190 Adventure 2016
Owner’s Manual
1190 Adventure AU 2016
Owner’s Manual
1190 Adventure AUS 2013
Setup Instructions
1190 Adventure AUS 2014
Owner’s Manual
1190 Adventure CN 2016
Owner’s Manual
1190 Adventure EU 2013
Setup Instructions
1190 Adventure EU 2014
Owner’s Manual
1190 Adventure EU 2016
Owner’s Manual
1190 Adventure FR 2013
Setup Instructions
1190 Adventure FR 2014
Owner’s Manual
1190 Adventure FR 2016
Owner’s Manual
1190 Adventure JP 2013
Setup Instructions
1190 Adventure JP 2014
Owner’s Manual
1190 Adventure JP 2016
Owner’s Manual
1190 ADVENTURE R
Owner’s Manual • Owner’s Manual
1190 Adventure R AU
Owner’s Manual
1190 Adventure R AUS
Owner’s Manual
1190 Adventure R CN
Owner’s Manual
1190 Adventure R EU
Owner’s Manual • Owner’s Manual • Owner’s Manual • Owner’s Manual • Owner’s Manual • Owner’s Manual
1190 Adventure R FR
Owner’s Manual • Owner’s Manual
1190 Adventure R JP
Owner’s Manual • Owner’s Manual
1190 Adventure R US
Owner’s Manual
1190 RC8
Owner’s Manual
1190 RC8 AUS
Owner’s Manual
1190 RC8 AUS 2008
Setup Instructions
1190 RC8 AUS/UK 2008
Repair Manual
1190 RC8 EU
Owner’s Manual
1190 RC8 EU 2008
Setup Instructions • Repair Manual
1190 RC8 FR
Owner’s Manual
1190 RC8 FR 2008
Setup Instructions • Repair Manual
1190 RC8 JP
Owner’s Manual
1190 RC8 JP 2008
Setup Instructions • Repair Manual
1190 rc8 r eu/db
Owner’s Manual
1190 RC8 R EU/UK 2009
Owner’s Manual • Owner’s Manual • Owner’s Manual • Owner’s Manual • Owner’s Manual • Repair Manual
1190 rc8 r fr
Owner’s Manual
1190 RC8 R FR 2013
Setup Instructions
1190 rc8 r jp
Owner’s Manual
1190 RC8 R Track
Owner’s Manual
1190 RC8 R USA
Owner’s Manual • Owner’s Manual
1190 RC8 R USA 2013
Setup Instructions
1190 RC8 UK
Owner’s Manual
1190 RC8 UK 2008
Setup Instructions
1190 RC8-R
Owner’s Manual
125
Owner’s Handbook Manual • Repair Manual
125 D-XC
Manual
125 Duke 2016
Setup Instructions
125 Duke 2017
Owner’s Manual
125 Duke DE
Owner’s Manual • Repair Manual
125 Duke DE 2012
Setup Instructions
125 DUKE EU
Owner’s Manual • Owner’s Manual • Owner’s Manual • Installation Instructions Manual • Owner’s Manual • Owner’s Manual • Owner’s Manual • Repair Manual • Setup Instructions • Setup Instructions
125 Duke EU 2012
Setup Instructions
125 Duke EU 2015
Owner’s Manual • Setup Instructions
125 ECX EU
Owner’s Manual
125 EXC
Owner’s Manual • Owner’s Manual • Owner’s Handbook Manual • Owner’s Manual • Owner’s Manual • Owner’s Handbook Manual • Owner’s Manual • Owner’s Manual • Manual • Owner’s Manual • Owner’s Manual
125 EXC 2001
Owner’s Handbook Manual
125 EXC 2004
Owner’s Manual
125 EXC 2006
Owner’s Manual
125 EXC 2008
Owner’s Manual
125 EXC 2015
Setup Instructions
125 EXC EU 2010
Owner’s Manual
125 EXC EU 2012
Setup Instructions
125 EXC EU 2013
Setup Instructions
125 EXC EU 2014
Setup Instructions
125 EXC EU 2016
Owner’s Manual
125 EXC Factory Edition
Owner’s Manual
125 EXC SIX DAYS
Owner’s Manual • Owner’s Manual
125 EXC SIX DAYS 2008
Owner’s Manual
125 EXC Six Days 2015
Setup Instructions
125 EXC Six days EU
Owner’s Manual • Owner’s Manual • Owner’s Manual
125 EXC SIX DAYS EU 2010
Owner’s Manual
125 EXC SIX DAYS EU 2012
Setup Instructions
125 EXC SIX DAYS EU 2013
Setup Instructions
125 EXC SIX DAYS EU 2014
Setup Instructions
125 EXC Six Days EU 2016
Owner’s Manual
125 EXE 2001
Owner’s Handbook Manual
125 LC2 1998
Owner’s Handbook Manual
125 MX
Manual
125 MXC 2001
Owner’s Handbook Manual
125 SUPERMOTO 2001
Owner’s Handbook Manual
125 SX
Owner’s Manual • Owner’s Manual • Owner’s Manual • Owner’s Manual • Owner’s Manual • Owner’s Handbook Manual • Owner’s Manual • Owner’s Handbook Manual • Owner’s Manual • Owner’s Manual • Owner’s Manual
125 SX 2001
Owner’s Handbook Manual
125 SX 2004
Owner’s Manual
125 SX 2006
Owner’s Manual
125 SX 2007
Owner’s Manual
125 SX 2008
Owner’s Manual • Spare Parts Manual
125 SX 2010
Owner’s Manual • Owner’s Manual
125 SX 2011
Setup Instructions
125 SX 2016
Setup Instructions
125 SX 2017
Setup Instructions
125 SX 2018
Owner’s Manual • Setup Instructions
125 SX EU 2013
Setup Instructions
125 SX EU 2015
Owner’s Manual
125 SX EU 2017
Setup Instructions
125 SX US 2015
Owner’s Manual
125 SX US 2017
Setup Instructions
125 SX USA
Owner’s Manual
125 SX USA 2013
Setup Instructions
125 XC-W 2018
Setup Instructions
125 XC-W EU 2017
Setup Instructions
125egs
Owner’s Manual • Owner’s Handbook Manual • Manual
125EXC 2004
Owner’s Manual
125MXC
Owner’s Handbook Manual • Owner’s Manual
1290 Super Adventure
Owner’s Manual • Owner’s Manual • Owner’s Manual • Owner’s Manual • Manual • Owner’s Manual
1290 SUPER ADVENTURE R 2017
Owner’s Manual • Setup Instructions
1290 SUPER ADVENTURE R 2018
Owner’s Manual
1290 Super Adventure R EU 2017
Setup Instructions
1290 Super Adventure R EU 2018
Setup Instructions
1290 Super Adventure R EU 2019
Setup Instructions
1290 Super Adventure R JP 2018
Setup Instructions
1290 Super Adventure R TKC AU 2017
Setup Instructions
1290 Super Adventure R TKC CN 2019
Setup Instructions
1290 Super Adventure R TKC EU 2017
Setup Instructions
1290 Super Adventure R TKC EU 2019
Setup Instructions
1290 Super Adventure R TKC JP 2017
Setup Instructions
1290 Super Adventure R TKC JP 2019
Setup Instructions
1290 Super Adventure R TKC US 2017
Setup Instructions
1290 Super Adventure R TKC US 2019
Setup Instructions
1290 Super Adventure S 2017
Setup Instructions • Owner’s Manual
1290 Super Adventure S 2018
Setup Instructions • Owner’s Manual
1290 SUPER ADVENTURE S 2021
Setup Instructions
1290 Super Adventure S AU 2017
Setup Instructions
1290 Super Adventure S CN 2017
Setup Instructions
1290 Super Adventure S CN F9903T4
Owner’s Manual
1290 Super Adventure S EU 2017
Setup Instructions
1290 Super Adventure S JP 2017
Setup Instructions
1290 Super Adventure T 2017
Setup Instructions
1290 Super Duke GT
Owner’s Manual • Owner’s Manual
1290 Super Duke GT 2018
Owner’s Manual • Setup Instructions
1290 Super Duke GT 2019
Setup Instructions
1290 Super Duke GT AU
Setup Instructions
1290 Super Duke GT CN 2017
Setup Instructions
1290 Super Duke GT CN 2018
Setup Instructions
1290 Super Duke GT CN 2019
Setup Instructions
1290 Super Duke GT EU
Setup Instructions
1290 Super Duke GT EU 2017
Setup Instructions
1290 Super Duke GT EU 2018
Setup Instructions
1290 Super Duke GT EU 2019
Setup Instructions
1290 Super Duke GT JP
Setup Instructions
1290 Super Duke GT JP 2017
Setup Instructions
1290 Super Duke GT JP 2018
Setup Instructions
1290 Super Duke GT JP 2019
Setup Instructions
1290 Super Duke GT Series
Setup Instructions
1290 Super Duke GT US
Setup Instructions
1290 Super Duke GT US 2017
Setup Instructions
1290 Super Duke GT US 2018
Setup Instructions
1290 Super Duke GT US 2019
Setup Instructions
1290 Super Duke R
Owner’s Manual • Setup Instructions
1290 Super Duke R 2016
Setup Instructions
1290 Super Duke R 2017
Owner’s Manual • Setup Instructions
1290 Super Duke R 2018
Owner’s Manual • Setup Instructions
1290 Super Duke R 2019
Setup Instructions
1290 SUPER DUKE R 2021
Owner’s Manual
1290 Super Duke R AU 2017
Owner’s Manual • Setup Instructions
1290 Super Duke R EU 2017
Owner’s Manual • Setup Instructions
1290 Super Duke R JP 2017
Owner’s Manual • Setup Instructions
1290 Super Duke R US 2017
Setup Instructions
1290 Super Duke R US 2020
Owner’s Manual
1290 SUPER DUKE RR 2021
Owner’s Manual
1290 SUPERDUKE R
Owner’s Manual
144 SX
Owner’s Manual
144 SX 2008
Owner’s Manual
150 EXC TPI 2021
Setup Instructions
150 SX
Owner’s Manual • Owner’s Manual • Owner’s Manual • Owner’s Manual • Owner’s Manual • Owner’s Manual
150 SX 2010
Owner’s Manual • Owner’s Manual
150 SX 2011
Setup Instructions
150 SX 2016
Setup Instructions
150 SX 2017
Setup Instructions
150 SX 2018
Owner’s Manual • Setup Instructions
150 SX EU 2013
Setup Instructions
150 SX EU 2015
Owner’s Manual
150 SX EU 2017
Setup Instructions
150 SX US 2015
Owner’s Manual
150 SX US 2017
Setup Instructions
150 SX USA
Owner’s Manual • Owner’s Manual
150 SX USA 2013
Setup Instructions
150 XC USA
Owner’s Manual • Owner’s Manual • Owner’s Manual • Owner’s Manual
150 XC USA 2010
Owner’s Manual
150 XC USA 2011
Setup Instructions
150 XC USA 2013
Setup Instructions
150 XC-W 2018
Setup Instructions
150 XC-W US 2017
Setup Instructions
1998 125 EGS
Owner’s Manual
1998 125 EXC
Owner’s Manual
1998 125 MXC
Owner’s Manual
1998 125 SX
Owner’s Manual
1998 125sx
Owner’s Manual
1998 200 EGS
Owner’s Manual
1998 200 EXC
Owner’s Manual
1998 200 MXC
Owner’s Manual
1998 200 SX
Owner’s Manual
1998 250 EGS
Owner’s Manual
1998 250 EXC
Owner’s Manual
1998 250 MXC
Owner’s Manual
1998 250 SX
Owner’s Manual
1998 300 EGS
Owner’s Manual
1998 300 EXC
Owner’s Manual
1998 300 MXC
Owner’s Manual
1998 300 SX
Owner’s Manual
1998 380 EGS
Owner’s Manual
1998 380 EXC
Owner’s Manual
1998 380 MXC
Owner’s Manual
1998 380 SX
Owner’s Manual
1998 400 R
Owner’s Handbook Manual
1998 400 RXCe
Owner’s Handbook Manual
1998 50 SXR Adventure
Owner’s Handbook Manual
1998 620 R
Owner’s Handbook Manual
1998 620 RXCe
Owner’s Handbook Manual
1998 SXC 400
Spare Parts Manual
1998 SXC 540
Spare Parts Manual
2
200
Owner’s Handbook Manual • Repair Manual
200 DUKE 2013 COL
Repair Manual
200 Duke 2014 COL
Setup Instructions
200 Duke 2016
Setup Instructions
200 Duke 2016 CO 2015
Setup Instructions
200 Duke 2017
Owner’s Manual
200 DUKE 2021
Owner’s Manual
200 Duke AR 2015
Owner’s Manual • Setup Instructions
200 Duke ASIA 2015
Owner’s Manual • Setup Instructions
200 Duke BR 2015
Owner’s Manual • Setup Instructions
200 Duke CN 2015
Owner’s Manual • Setup Instructions
200 DUKE EU
Owner’s Manual • Owner’s Manual • Installation Instructions Manual • Owner’s Manual • Owner’s Manual • Repair Manual • Setup Instructions
200 Duke EU 2012
Setup Instructions
200 Duke EU 2015
Owner’s Manual • Setup Instructions
200 DUKE MAL
Owner’s Manual • Setup Instructions
200 Duke MY 2015
Owner’s Manual • Setup Instructions
200 Duke US 2020
Owner’s Manual
200 EXC
Owner’s Manual • Owner’s Manual • Owner’s Handbook Manual • Owner’s Manual • Owner’s Manual • Owner’s Manual • Owner’s Handbook Manual • Owner’s Manual • Owner’s Manual • Owner’s Manual • Owner’s Manual
200 EXC 2001
Owner’s Handbook Manual
200 EXC 2004
Owner’s Manual
200 EXC 2006
Owner’s Manual
200 EXC 2008
Owner’s Manual
200 EXC 2015
Setup Instructions
200 EXC 2016
Setup Instructions
200 EXC AU 2016
Owner’s Manual
200 EXC AUS
Owner’s Manual • Owner’s Manual • Owner’s Manual
200 EXC AUS 2010
Owner’s Manual
200 EXC AUS 2012
Setup Instructions
200 EXC AUS 2013
Setup Instructions
200 EXC AUS 2014
Setup Instructions
200 EXC EU 2010
Owner’s Manual
200 EXC EU 2012
Setup Instructions
200 EXC EU 2013
Setup Instructions
200 EXC EU 2014
Setup Instructions
200 EXC EU 2016
Owner’s Manual
200 EXC2004
Owner’s Manual
200 MXC 2001
Owner’s Handbook Manual
200 SX
Owner’s Manual • Owner’s Handbook Manual • Owner’s Manual
200 SX 2001
Owner’s Handbook Manual
200 SX 2004
Owner’s Manual
200 XC
Owner’s Manual • Owner’s Manual
200 XC 2006
Owner’s Manual
200 XC 2008
Owner’s Manual
200 XC-W
Owner’s Manual • Owner’s Manual • Owner’s Manual • Owner’s Manual • Owner’s Manual • Owner’s Manual • Owner’s Manual
200 XC-W 2006
Owner’s Manual
200 XC-W 2008
Owner’s Manual
200 XC-W 2015
Setup Instructions
200 XC-W 2016
Setup Instructions
200 XC-W US 2016
Owner’s Manual
200 XC-W USA 2012
Setup Instructions
200 XC-W USA 2013
Setup Instructions
200 XC-W USA 2014
Setup Instructions
200 XC?W USA 2010
Owner’s Manual
2000 400 EXC RACING
Owner’s Handbook Manual
2000 400 SX RACING
Owner’s Handbook Manual
2000 520 EXC RACING
Owner’s Handbook Manual
2000 520 SX RACING
Owner’s Handbook Manual
2000 60 SX
Owner’s Manual
2000 640 Duke
Spare Parts Manual
2000 65 SX
Owner’s Manual
2000 LC4 ADVENTURE R 640
Owner’s Handbook Manual
2001 50 JR ADVENTURE
Owner’s Handbook Manual
2001 50 SX Pro Senior LC
Owner’s Handbook Manual
2002 200 EXC AUS
Owner’s Manual
2002 200 EXC EU
Owner’s Manual
2002 200 XC-W USA
Owner’s Manual
2002 250 EXC AUS
Owner’s Manual
2002 250 EXC EU
Owner’s Manual
2002 250 XC-W USA
Owner’s Manual
2002 300 EXC Aus
Owner’s Manual
2002 300 EXC EU
Owner’s Manual
2002 300 XC-W usa
Owner’s Manual
2002 400 EXC Racing
Owner’s Handbook Manual
2002 400 MXC
Owner’s Handbook Manual
2002 400 SX
Owner’s Handbook Manual
2002 50 SX PRO SENIOR LC
Owner’s Handbook Manual
2002 520 EXC Racing
Owner’s Handbook Manual
2002 520 MXC
Owner’s Handbook Manual
2002 520 SX
Owner’s Handbook Manual
2003 125 EXC
Owner’s Handbook Manual • Owner’s Handbook Manual
2003 125 MXC
Owner’s Handbook Manual • Owner’s Handbook Manual
2003 125 SX
Owner’s Handbook Manual • Owner’s Handbook Manual
2003 200 EXC
Owner’s Handbook Manual • Owner’s Handbook Manual
2003 200 MXC
Owner’s Handbook Manual • Owner’s Handbook Manual
2003 200 SX
Owner’s Handbook Manual • Owner’s Handbook Manual
2003 250 EXC
Owner’s Handbook Manual • Owner’s Handbook Manual
2003 250 MXC
Owner’s Handbook Manual • Owner’s Handbook Manual
2003 250 SX
Owner’s Handbook Manual • Owner’s Handbook Manual
2003 300 EXC
Owner’s Handbook Manual • Owner’s Handbook Manual
2003 300 MXC
Owner’s Handbook Manual • Owner’s Handbook Manual
2003 300 SX
Owner’s Handbook Manual • Owner’s Handbook Manual
2003 640 DUKE II
Owner’s Manual
2003 950 Super Enduro
Repair Manual
2003 950 SuperMoto
Repair Manual
2003 990 Adventure
Repair Manual
2003 990 Super Duke
Repair Manual
2004 105 SX
Spare Parts Manual
2004 250 EXC RACING
Owner’s Manual • Owner’s Manual
2004 450 EXC RACING
Owner’s Manual
2004 450 MXC
Owner’s Manual
2004 525 EXC RACING
Owner’s Manual
2004 525 MXC
Owner’s Manual
2004 640 DUKE II
Spare Parts Manual
2004 660 SMC
Spare Parts Manual
2004 950 Super Enduro
Repair Manual
2004 950 SuperMoto
Repair Manual
2004 990 Adventure
Repair Manual
2004 990 Super Duke
Repair Manual
2005 85 SX
Owner’s Manual
2005 950 Adventure
Owner’s Manual • Repair Manual
2005 950 Super Enduro
Repair Manual
2005 950 SuperMoto
Repair Manual
2005 990 Adventure
Repair Manual
2005 990 Super Duke
Repair Manual
2006 660 SMC
Owner’s Manual
2006 950 Super Enduro
Repair Manual
2006 950 SuperMoto
Repair Manual
2006 990 Adventure
Repair Manual
2006 990 Super Duke
Repair Manual
2007 250 EXC-F SIX DAYS
Owner’s Manual • Repair Manual
2007 505 SX-F
Repair Manual
2007 950 Super Enduro R
Owner’s Manual
2007 950 SUPERMOTO
Owner’s Manual
2007 990 ADVENTURE
Owner’s Manual
2007 990 Super Duke
Owner’s Manual
2007 SMR 450
Owner’s Manual
2007 SMR 560
Owner’s Manual
2008 1190 RC8 USA
Owner’s Manual
2008 690 Enduro
Repair Manual
2008 990 SUPER DUKE
Owner’s Manual
2008 990 SUPERMOTO
Owner’s Manual
2009 250 EXC-F SIX DAYS
Owenrs Manual
2009 250 SX-F
Owenrs Manual
2009 250 XC-F
Owenrs Manual
2009 250 XCF-W
Owenrs Manual
2009 400 EXC
Owner’s Manual
2009 400 XC-W
Owner’s Manual
2009 450 EXC SIX DAYS
Owner’s Manual
2009 450 SC-F USA
Owner’s Manual
2009 450 SX-F EU
Owner’s Manual
2009 450 SX-F USA
Owner’s Manual
2009 450 XC-W
Owner’s Manual
2009 530 EXC SIX DAYS
Owner’s Manual
2009 530 XC-W
Owner’s Manual
2009 550 SC-F USA
Owner’s Manual
2009 65 XC
Owner’s Manual
2009 690 DUKE EU
Owner’s Manual
2009 690 ENDURO EU
Owner’s Manual • Repair Manual
2009 690 Rally Factory Replica
Owner’s Manual
200egs
Owner’s Manual • Owner’s Handbook Manual
200MXC
Owner’s Handbook Manual • Owner’s Manual • Owner’s Handbook Manual
2010 1190 RC8
Owner’s Manual
2010 1190 RC8 R AUS
Owner’s Manual
2010 1190 RC8 R FR
Owner’s Manual
2010 1190 RC8 R JP
Owner’s Manual
2010 125 EXC EU
Owner’s Manual
2010 150 XC USA
Owner’s Manual
2010 200 EXC EU
Owner’s Manual
2010 200 XC-W USA
Owner’s Manual
2010 250 EXC EU
Owner’s Manual • Owner’s Manual
2010 250 EXC SixDays
Owner’s Manual
2010 250 EXC-F AUS
Owner’s Manual
2010 250 EXC-F EU
Owner’s Manual
2010 250 SX-F EU
Owner’s Manual
2010 250 XC-W USA
Owner’s Manual • Owner’s Manual
2010 250 XCF-W ZA
Owner’s Manual
2010 300 EXC EU
Owner’s Manual • Owner’s Manual
2010 300 EXC SixDays
Owner’s Manual
2010 300 SX
Owner’s Manual
2010 300 XC EU/USA
Owner’s Manual • Owner’s Manual
2010 300 XC-W USA
Owner’s Manual • Owner’s Manual
2010 400 EXC EU
Owner’s Manual
2010 400 XC-W USA
Owner’s Manual
2010 450 EXC EU
Owner’s Manual
2010 450 SX-F EU
Owner’s Manual
2010 450 SX-F USA
Owner’s Manual
2010 450 XC-W SIX DAYS USA
Owner’s Manual
2010 50 SX MINI
Owner’s Manual
2010 530 EXC EU
Owner’s Manual
2010 530 XC-W SIX DAYS USA
Owner’s Manual
2010 690 SMC AUS
Repair Manual
2010 690 SMC EU
Repair Manual • Setup Instructions
2010 690 SMC UK
Repair Manual
2010 990 Super Duke R
Owner’s Manual
2011 400 EXC Factory Edition
Owner’s Manual
2011 450 EXC Factory Edition
Owner’s Manual
2011 450 EXC SIX DAYS
Owner’s Manual
2011 450 XC-W SIX DAYS
Owner’s Manual
2011 530 EXC Factory Edition
Owner’s Manual
2011 530 EXC SIX DAYS
Owner’s Manual
2011 530 XC-W SIX DAYS
Owner’s Manual
2011 690 Duke R
Owner’s Manual
2011 690 SMC AUS
Repair Manual • Owner’s Manual
2011 690 SMC EU
Repair Manual • Owner’s Manual
2011 690 SMC UK
Repair Manual • Owner’s Manual
2011 990 Adventure
Owner’s Manual
2011 990 Supermoto T USA
Owner’s Manual • Owner’s Manual • Owner’s Manual
2012 125 DUKE
Owner’s Manual
2012 125 ECX EU
Owner’s Manual
2012 125 EXC Six days EU
Owner’s Manual
2012 125 SX
Owner’s Manual
2012 150 SX
Owner’s Manual
2012 150 XC
Owner’s Manual
2012 200 DUKE
Owner’s Manual
2012 250 EXC-F SIX DAYS
Owner’s Manual
2012 250 SX
Owner’s Manual
2012 250 SX-F
System Maintenance And Repair Manual
2012 250 XC
Owner’s Manual
2012 250 XCF-W
Owner’s Manual
2012 300 XC
Owner’s Manual
2012 350 EXC-F SIX DAYS
Owner’s Manual
2012 350 XCF-W
Owner’s Manual
2012 450 EXC SIX DAYS
Owner’s Manual
2012 450 SX-F EU
Owner’s Manual
2012 450 SX-F USA
Owner’s Manual
2012 450 XC-W
Owner’s Manual
2012 500 EXC SIX DAYS
Owner’s Manual
2012 500 XC-W
Owner’s Manual
2012 990 Adventure
Owner’s Manual
2013 1190 Adventure R
Owner’s Manual
2013 1190 RC8 R JP
Owner’s Manual • Setup Instructions
2013 125 DUKE
Owner’s Manual
2013 125 EXC SIX DAYS
Owner’s Manual
2013 125 SX
Owner’s Manual
2013 150 SX
Owner’s Manual
2013 150 XC
Owner’s Manual
2013 200 DUKE
Owner’s Manual
2013 200 EXC
Owner’s Manual
2013 200 XC-W
Owner’s Manual
2013 250 EXC SIX DAYS
Owner’s Manual
2013 250 SX
Owner’s Manual
2013 250 XC
Owner’s Manual
2013 250 XC-W
Owner’s Manual
2013 300 EXC SIX DAYS
Owner’s Manual
2013 300 XC
Owner’s Manual
2013 300 XC-W
Owner’s Manual
2013 450 EXC EU
Owner’s Manual
2013 450 Rally Factory Replica
Owner’s Manual
2013 450 SX-F EU
Owner’s Manual
2013 450 SX-F USA
Owner’s Manual
2013 450 SX-F USA Factory edition
Owner’s Manual
2013 450 XC-F USA
Owner’s Manual
2013 450 XC-W USA
Owner’s Manual
2013 500 EXC AUS
Owner’s Manual • Repair Manual • Setup Instructions
2013 500 EXC EU
Owner’s Manual
2013 500 XC-W USA
Owner’s Manual
2013 690 Duke R
Owner’s Manual
2013 690 SMC R EU
Owner’s Manual • Repair Manual
2013 990 SUPER DUKE R
Owner’s Manual
2013 990 SUPERMOTO T
Owner’s Manual
2014 1190 Adventure
Owner’s Manual
2014 125 EXC SIX DAYS
Owner’s Manual
2014 125 SX
Owner’s Manual
2014 1290 Super Duke R FR
Owner’s Manual
2014 150 SX
Owner’s Manual
2014 150 XC
Owner’s Manual
2014 200 EXC
Owner’s Manual
2014 200 XC-W
Owner’s Manual
2014 250 EXC SIX DAYS
Owner’s Manual
2014 250 SX
Owner’s Manual
2014 250 XC
Owner’s Manual
2014 250 XC-W
Owner’s Manual
2014 300 EXC SIX DAYS
Owner’s Manual
2014 300 XC
Owner’s Manual
2014 300 XC-W SIX DAYS
Owner’s Manual
2014 350 EXC-F SIX DAYS
Owner’s Manual
2014 350 XCF-W SIX DAYS
Owner’s Manual
2014 450 EXC SIX DAYS
Owner’s Manual
2014 450 XC-W
Owner’s Manual
2014 500 EXC SIX DAYS
Owner’s Manual
2014 500 XC-W
Owner’s Manual
2014 65 SX
Owner’s Manual • Setup Instructions
2014 690 Enduro R EU
Owner’s Manual
2014 690 SMC R EU
Owner’s Manual • Repair Manual
2014 Freeride 350
Owner’s Manual
2015 125 SX EU
Owner’s Manual • Setup Instructions
2015 150 SX EU
Owner’s Manual • Setup Instructions
2015 200 Duke
Owner’s Manual
2015 250 SX EU
Owner’s Manual • Setup Instructions
2015 250 XC EU/US
Owner’s Manual • Setup Instructions
2015 300 XC EU/US
Owner’s Manual • Setup Instructions
2015 450 Rally Factory Replica
Owner’s Manual
2015 450 SC-F USA
Owner’s Manual
2015 450 SX-F EU
Owner’s Manual
2015 450 SX-F USA
Owner’s Manual
2015 RC 390 ASIA
Owner’s Manual
2015 RC 390 AU
Owner’s Manual
2015 RC 390 BR
Owner’s Manual
2015 RC 390 CN
Owner’s Manual
2015 RC 390 EU
Owner’s Manual
2015 RC 390 JP
Owner’s Manual
2015 RC 390 MY
Owner’s Manual
2016 690 DUKE R
Owner’s Manual • Owner’s Manual
2016 RC 250
Owner’s Manual
2016 RC 390
Owner’s Manual
2018 50 SX
Owner’s Manual
25 EXC 2016
Setup Instructions
25 EXC Six Days
Owner’s Manual
250 AUS
Owner’s Manual
250 DUKE
Owner’s Manual
250 EXC
Repair Manual • Owner’s Manual • Owner’s Manual • Owner’s Manual • Owner’s Handbook Manual • Owner’s Manual • Owner’s Manual • Manual • Owner’s Handbook Manual • Owner’s Manual • Owner’s Manual • Owner’s Manual • Owner’s Manual
250 EXC 2001
Owner’s Handbook Manual
250 EXC 2006
Owner’s Manual
250 EXC 2008
Owner’s Manual
250 EXC 2015
Setup Instructions
250 EXC 2016
Setup Instructions
250 EXC 2018
Owner’s Manual
250 EXC AU 2016
Owner’s Manual
250 EXC AU 2017
Setup Instructions
250 EXC AUS
Owner’s Manual • Owner’s Manual • Repair Manual
250 EXC AUS 2010
Owner’s Manual
250 EXC AUS 2012
Setup Instructions
250 EXC AUS 2013
Setup Instructions
250 EXC AUS 2014
Setup Instructions
250 EXC EU
Owner’s Manual • Owner’s Manual • Owner’s Manual • Repair Manual
250 EXC EU 2010
Owner’s Manual
250 EXC EU 2012
Setup Instructions
250 EXC EU 2013
Setup Instructions
250 EXC EU 2014
Setup Instructions
250 EXC EU 2016
Owner’s Manual
250 EXC EU 2017
Setup Instructions
250 EXC Factory Edition
Owner’s Manual
250 EXC RACING 2003
Owner’s Manual
250 EXC RACING 2004
Owner’s Manual
250 EXC RACING 2005
Owner’s Manual • Owner’s Manual
250 EXC RACING 2006
Owner’s Manual
250 EXC Six Day TPI 2019
Setup Instructions
250 EXC SIX DAYS
Owner’s Manual • Owner’s Manual • Owner’s Manual
250 EXC SIX DAYS 2008
Owner’s Manual
250 EXC Six Days 2015
Setup Instructions
250 EXC Six days EU
Owner’s Manual • Owner’s Manual • Owner’s Manual • Repair Manual
250 EXC SIX DAYS EU 2010
Owner’s Manual
250 EXC SIX DAYS EU 2012
Setup Instructions
250 EXC SIX DAYS EU 2013
Setup Instructions
250 EXC SIX DAYS EU 2014
Setup Instructions
250 EXC Six Days EU 2016
Owner’s Manual
250 EXC Six Days EU 2017
Setup Instructions
250 EXC Six Days TPI
Owner’s Manual
250 EXC Six Days TPI 2019
Repair Manual
250 EXC Six Days TPI 2020
Owner’s Manual
250 EXC Six Days TPI EU 2018
Setup Instructions
250 EXC SIX DAYS TPI EU 2021
Setup Instructions
250 EXC TPI
Owner’s Manual
250 EXC TPI 2019
Repair Manual • Setup Instructions
250 EXC TPI 2020
Owner’s Manual
250 EXC TPI EU 2018
Setup Instructions
250 EXC TPI EU 2021
Setup Instructions
250 EXC-F 2017
Owner’s Manual
250 EXC-F 2018
Setup Instructions
250 EXC-F 2019
Setup Instructions
250 EXC-F AR 2019
Setup Instructions
250 EXC-F AU 2017
Owner’s Manual
250 EXC-F AU 2018
Owner’s Manual • Setup Instructions
250 EXC-F AU 2019
Setup Instructions
250 EXC-F AUS
Owenrs Manual • Owner’s Manual • Owner’s Manual
250 EXC-F AUS 2012
Setup Instructions
250 EXC-F BR 2017
Owner’s Manual
250 EXC-F BR 2018
Owner’s Manual • Setup Instructions
250 EXC-F BR 2019
Setup Instructions
250 EXC-F EU
Owenrs Manual • Owner’s Manual • Owner’s Manual • Setup Instructions
250 EXC-F EU 2010
Owner’s Manual • Owner’s Manual • Owner’s Manual • Owner’s Manual
250 EXC-F EU 2012
Setup Instructions
250 EXC-F EU 2015
Setup Instructions
250 EXC-F EU 2017
Owner’s Manual
250 EXC-F EU 2018
Owner’s Manual • Setup Instructions
250 EXC-F EU 2019
Setup Instructions
250 EXC-F Factory Edition
Owner’s Manual
250 EXC-F Factory Edition EU
Owner’s Manual
250 EXC-F Six Days
Owner’s Manual • Owner’s Manual
250 EXC-F Six Days 2018
Setup Instructions
250 EXC-F Six Days 2019
Setup Instructions
250 EXC-F Six Days EU
Owenrs Manual • Owner’s Manual • Setup Instructions
250 EXC-F SIX DAYS EU 2012
Setup Instructions
250 EXC-F SIX DAYS EU 2015
Setup Instructions
250 EXC-F Six Days EU 2017
Owner’s Manual
250 EXC-F Six Days EU 2018
Owner’s Manual • Setup Instructions
250 EXC-F Six Days EU 2019
Setup Instructions
250 EXC-F SIX DAYS EY
Owner’s Manual
250 EXC-F US 2018
Setup Instructions
250 EXC-F US 2019
Setup Instructions
250 EXC-W USA
Owner’s Manual • Owner’s Manual
250 MXC
Repair Manual • Owner’s Handbook Manual • Owner’s Manual • Owner’s Handbook Manual
250 MXC 2001
Owner’s Handbook Manual
250 SC
Owner’s Manual
250 SC-F USA
Owner’s Manual
250 sc-f usa 2014
Owner’s Manual
250 scf 2016
Repair Manual
250 SX
Repair Manual • Owner’s Manual • Owner’s Manual • Owner’s Manual • Owner’s Manual • Owner’s Handbook Manual • Owner’s Manual • Owner’s Manual • Owner’s Handbook Manual • Owner’s Manual • Owner’s Manual • Setup Instructions • Owner’s Manual
250 SX 2019
Owner’s Manual
250 SX 2001
Owner’s Handbook Manual
250 SX 2004
Owner’s Manual
250 SX 2006
Owner’s Manual
250 SX 2007
Owner’s Manual
250 SX 2008
Owner’s Manual
250 SX 2010
Owner’s Manual • Owner’s Manual
250 SX 2011
Setup Instructions
250 SX 2016
Setup Instructions
250 SX 2017
Setup Instructions
250 SX EU
Owner’s Manual • Owner’s Manual • Setup Instructions
250 SX EU 2013
Setup Instructions
250 SX EU 2015
Owner’s Manual
250 SX EU 2017
Setup Instructions
250 SX Series
Setup Instructions
250 SX US
Setup Instructions
250 SX US 2015
Owner’s Manual
250 SX US 2017
Setup Instructions
250 SX USA 2013
Setup Instructions
250 SX-F
Owner’s Manual • Owner’s Manual • Setup Instructions
250 SX-F 2006
Owner’s Manual • Repair Manual • Repair Manual
250 SX-F 2007
Owner’s Manual • Repair Manual
250 sx-f 2011
Repair Manual
250 SX-F 2016
Owner’s Manual
250 SX-F EU
Owenrs Manual • Owner’s Manual • Owner’s Manual • Setup Instructions
250 SX-F EU 2010
Owner’s Manual
250 SX-F EU 2012
Owner’s Manual • Owner’s Manual
250 sx-f eu 2014
Owner’s Manual
250 sx-f Musquin replica 2011
Repair Manual
250 SX-F ROCKZEN REPLICA EU 2012
Owner’s Manual
250 SX-F Roczen Replica EU
Owner’s Manual
250 SX-F ROCZEN REPLICA EU 2012
Owner’s Manual
250 SX-F US
Owner’s Manual
250 SX-F USA
Owenrs Manual • Owner’s Manual • Owner’s Manual
250 SX-F USA 2010
Owner’s Manual
250 SX-F USA 2012
Owner’s Manual • Owner’s Manual
250 sx-f usa 2014
Owner’s Manual
250 SX-FUSA
Owner’s Handbook Manual • Setup Instructions • Setup Instructions
250 sxf 2016
Repair Manual
250 SXF2012
Owner’s Manual
250 XC
Owner’s Manual • Owner’s Manual • Owner’s Manual • Owner’s Manual • Owner’s Manual
250 XC 2006
Owner’s Manual
250 XC 2008
Owner’s Manual
250 XC 2016
Setup Instructions
250 XC 2017
Setup Instructions
250 XC 2019
Owner’s Manual
250 XC EU
Owner’s Manual
250 XC EU 2011
Setup Instructions
250 XC EU 2015
Owner’s Manual
250 XC EU/USA 2010
Owner’s Manual • Owner’s Manual
250 XC Series
Setup Instructions
250 XC TPI
Owner’s Manual
250 XC US
Setup Instructions
250 XC US 2015
Owner’s Manual
250 XC US 2017
Setup Instructions
250 XC USA
Owner’s Manual
250 XC USA 2011
Setup Instructions
250 XC-F 2007
Owner’s Manual • Repair Manual
250 xc-f 2011
Repair Manual
250 XC-F 2016
Owner’s Manual
250 XC-F AU 2015
Setup Instructions
250 XC-F EU
Owner’s Manual
250 XC-F EU 2012
Owner’s Manual
250 XC-F USA
Owenrs Manual • Owner’s Manual
250 XC-F USA 2012
Owner’s Manual
250 XC-F, XCF-W, EXC-F, 400 XC-W, EXC RACING, 450 XC, XC-W, EXC RACING, 525 XC, XC-W, EXC RACING, 525 XC DESERT RACING
Owner’s Manual
250 XC-W
Owner’s Manual • Owner’s Manual • Owner’s Manual • Owner’s Manual • Owner’s Manual • Owner’s Manual • Owner’s Manual • Repair Manual
250 XC-W 2006
Owner’s Manual
250 XC-W 2008
Owner’s Manual
250 XC-W 2015
Setup Instructions
250 XC-W 2016
Setup Instructions
250 XC-W 2018
Owner’s Manual
250 XC-W TPI
Owner’s Manual
250 XC-W TPI 2019
Repair Manual • Setup Instructions
250 XC-W TPI 2020
Owner’s Manual
250 XC-W TPI US 2018
Setup Instructions
250 XC-W TPI US 2021
Setup Instructions
250 XC-W US 2016
Owner’s Manual
250 XC-W US 2017
Setup Instructions
250 XC-W USA 2012
Setup Instructions
250 XC-W USA 2013
Setup Instructions
250 XC-W USA 2014
Setup Instructions
250 XC?W USA 2010
Owner’s Manual
250 XCF-W 2007
Owner’s Manual • Repair Manual
250 XCF-W Six Days USA
Owner’s Manual
250 XCF-W US 2015
Setup Instructions
250 XCF-W USA
Owenrs Manual
250 XCF-W USA 2012
Setup Instructions
250 XCF-W ZA
Owenrs Manual
250 XCF-W ZA 2010
Owner’s Manual • Owner’s Manual • Owner’s Manual
250egs
Owner’s Manual • Manual • Owner’s Handbook Manual
250EXC 2004
Owner’s Manual
25370313211
Owner’s Manual
3
300
Owner’s Handbook Manual
300 ECX BR 2015
Setup Instructions
300 EXC
Repair Manual • Owner’s Manual • Owner’s Manual • Owner’s Handbook Manual • Owner’s Manual • Owner’s Manual • Owner’s Manual • Manual • Owner’s Handbook Manual • Owner’s Manual • Owner’s Manual • Owner’s Manual • Repair Manual • Owner’s Manual
300 EXC 2001
Owner’s Handbook Manual
300 EXC 2004
Owner’s Manual
300 EXC 2006
Owner’s Manual
300 EXC 2015
Setup Instructions
300 EXC 2016
Setup Instructions
300 EXC 2018
Owner’s Manual
300 EXC AU 2016
Owner’s Manual
300 EXC AU 2017
Setup Instructions
300 EXC AUS
Owner’s Manual • Owner’s Manual • Repair Manual
300 EXC AUS 2010
Owner’s Manual
300 EXC AUS 2012
Setup Instructions
300 EXC AUS 2013
Setup Instructions
300 EXC AUS 2014
Setup Instructions
300 EXC BR 2016
Owner’s Manual
300 EXC BR 2017
Setup Instructions
300 EXC Erzberg Edition TPI
Owner’s Manual
300 EXC EU 2010
Owner’s Manual
300 EXC EU 2012
Setup Instructions
300 EXC EU 2013
Setup Instructions
300 EXC EU 2014
Setup Instructions
300 EXC EU 2016
Owner’s Manual
300 EXC EU 2017
Setup Instructions
300 EXC Factory Edition
Owner’s Manual
300 EXC Six Day TPI 2019
Setup Instructions
300 EXC SIX DAYS
Owner’s Manual • Owner’s Manual • Owner’s Manual
300 EXC Six Days 2015
Setup Instructions
300 EXC Six days eu
Owner’s Manual • Owner’s Manual • Repair Manual
300 EXC SIX DAYS EU 2010
Owner’s Manual
300 EXC SIX DAYS EU 2013
Setup Instructions
300 EXC SIX DAYS EU 2014
Setup Instructions
300 EXC Six Days EU 2016
Owner’s Manual
300 EXC Six Days EU 2017
Setup Instructions
300 EXC Six Days TPI
Owner’s Manual
300 EXC Six Days TPI 2019
Repair Manual
300 EXC Six Days TPI 2020
Owner’s Manual
300 EXC SIX DAYS TPI CN
Setup Instructions
300 EXC Six Days TPI EU 2018
Setup Instructions
300 EXC SIX DAYS TPI EU 2021
Setup Instructions
300 EXC TPI
Owner’s Manual
300 EXC TPI 2019
Repair Manual • Setup Instructions
300 EXC TPI 2020
Owner’s Manual
300 EXC TPI ERZBERGRODED EU 2021
Setup Instructions
300 EXC TPI ERZBERGRODEO 2020
Owner’s Manual
300 EXC TPI EU 2018
Setup Instructions
300 EXC TPI EU 2021
Setup Instructions
300 EXC-E SIX DAYS 2008
Owner’s Manual
300 EXS SIX DAYS EU 2012
Setup Instructions
300 MXC
Repair Manual • Owner’s Manual • Spare Parts Manual • Owner’s Handbook Manual • Owner’s Manual • Owner’s Handbook Manual • Owner’s Manual
300 MXC 2001
Owner’s Handbook Manual
300 MXC 2004
Owner’s Manual
300 SC
Owner’s Manual
300 SX
Repair Manual • Owner’s Handbook Manual • Owner’s Handbook Manual • Owner’s Manual
300 SX 2001
Owner’s Handbook Manual
300 XC 2006
Owner’s Manual
300 XC 2008
Owner’s Manual
300 XC 2016
Setup Instructions
300 XC 2017
Setup Instructions
300 XC 2019
Owner’s Manual
300 XC EU
Owner’s Manual
300 XC EU 2011
Setup Instructions
300 XC EU 2013
Setup Instructions
300 XC EU 2015
Owner’s Manual
300 XC EU/USA
Owner’s Manual • Owner’s Manual • Owner’s Manual • Owner’s Manual • Owner’s Manual
300 XC Series
Setup Instructions
300 XC TPI
Owner’s Manual
300 XC US
Setup Instructions
300 XC US 2015
Owner’s Manual
300 XC US 2017
Setup Instructions
300 XC USA
Owner’s Manual
300 XC USA 2011
Setup Instructions
300 XC USA 2013
Setup Instructions
300 XC-W
Owner’s Manual • Owner’s Manual • Owner’s Manual • Owner’s Manual • Owner’s Manual • Owner’s Manual • Owner’s Manual • Repair Manual
300 XC-W 2006
Owner’s Manual
300 XC-W 2008
Owner’s Manual
300 XC-W 2015
Setup Instructions
300 XC-W 2016
Setup Instructions
300 XC-W 2018
Owner’s Manual
300 XC-W Six Day 2018
Owner’s Manual
300 XC-W Six Day TPI 2019
Setup Instructions
300 XC-W Six Days
Owner’s Manual • Owner’s Manual
300 XC-W Six Days 2015
Setup Instructions
300 XC-W Six Days TPI
Owner’s Manual
300 XC-W Six Days TPI 2019
Repair Manual
300 XC-W Six Days TPI 2020
Owner’s Manual
300 XC-W Six Days US 2016
Owner’s Manual
300 XC-W Six Days US 2017
Setup Instructions
300 XC-W SIX DAYS USA
Owner’s Manual • Repair Manual
300 XC-W SIX DAYS USA 2014
Setup Instructions
300 XC-W TPI
Owner’s Manual
300 XC-W TPI 2019
Repair Manual • Setup Instructions
300 XC-W TPI 2020
Owner’s Manual
300 XC-W TPI ERZBERGRODEO 2020
Owner’s Manual
300 XC-W TPI ERZBERGRODEO US 2021
Setup Instructions
300 XC-W TPI US 2021
Setup Instructions
300 XC-W US 2016
Owner’s Manual
300 XC-W US 2017
Setup Instructions
300 XC-W USA 2012
Setup Instructions
300 XC-W USA 2013
Setup Instructions
300 XC-W USA 2014
Setup Instructions
300 XC?W USA 2010
Owner’s Manual
300egs
Owner’s Manual • Manual • Owner’s Handbook Manual
3200 XC
Owner’s Manual
3213432
Setup Instructions
3213887en
Instruction Manual
3214300
Owner’s Manual
3214400en
Setup Instructions
3214445
Setup Instructions
350 EFC-F AUS
Owner’s Manual
350 EXC-F 2015
Owner’s Manual
350 EXC-F 2017
Owner’s Manual • Setup Instructions
350 EXC-F 2018
Owner’s Manual
350 EXC-F 2022
Owner’s Manual
350 EXC-F AU 2015
Setup Instructions
350 EXC-F AU 2018
Owner’s Manual
350 EXC-F AU 2019
Setup Instructions
350 EXC-F AUS
Owner’s Manual
350 EXC-F AUS 2012
Repair Manual
350 EXC-F AUS 2014
Setup Instructions
350 EXC-F BR 2018
Owner’s Manual
350 EXC-F BR 2019
Setup Instructions
350 EXC-F EU 2012
Repair Manual
350 EXC-F EU 2014
Setup Instructions
350 EXC-F EU 2015
Setup Instructions
350 EXC-F EU 2018
Owner’s Manual
350 EXC-F EU 2019
Setup Instructions
350 EXC-F Six Days 2017
Setup Instructions
350 EXC-F Six Days 2018
Owner’s Manual
350 EXC-F Six Days BR 2018
Owner’s Manual
350 EXC-F Six Days BR 2019
Setup Instructions
350 EXC-F SIX DAYS EU
Owner’s Manual • Owner’s Manual • Repair Manual • Owner’s Manual • Owner’s Manual • Setup Instructions
350 EXC-F SIX DAYS EU 2012
Repair Manual
350 EXC-F SIX DAYS EU 2014
Setup Instructions
350 EXC-F SIX DAYS EU 2015
Setup Instructions
350 EXC-F Six Days EU 2018
Owner’s Manual
350 EXC-F Six Days EU 2019
Setup Instructions
350 EXC-F US 2015
Setup Instructions
350 EXC-F US 2019
Setup Instructions
350 EXC-F US 2022
Owner’s Manual
350 EXC-F USA 2012
Repair Manual
350 EXC-F USA 2014
Setup Instructions
350 EXC-F WESS
Setup Instructions
350 EXC-Factory Edition
Owner’s Manual
350 SC-F
Owner’s Manual
350 SX-F 2011
Owner’s Manual
350 SX-F 2012
Owner’s Manual
350 SX-F 2013
Owner’s Manual
350 SX-F 2016
Setup Instructions
350 SX-F 2017
Setup Instructions
350 SX-F Cairoli replica
Owner’s Manual • Owner’s Manual • Owner’s Manual • Owner’s Manual • Setup Instructions
350 SX-F Cairoli Replica 2011
Owner’s Manual
350 SX-F EU 2011
Setup Instructions
350 SX-F EU 2017
Setup Instructions
350 SX-F US 2017
Setup Instructions
350 SX-F USA 2011
Setup Instructions
350 XC-F
Owner’s Manual • Owner’s Manual • Setup Instructions
350 XC-F 2012
Owner’s Manual
350 XC-F 2013
Owner’s Manual
350 XC-F 2016
Setup Instructions
350 XC-F 2017
Setup Instructions
350 XC-F US 2017
Setup Instructions
350 XC-F USA 2011
Setup Instructions
350 XCF-W SIX DAYS US 2015
Setup Instructions
350 XCF-W SIX DAYS USA 2014
Setup Instructions
350 XCF-W US 2015
Setup Instructions
350 XCF-W USA
Owner’s Manual • Owner’s Manual • Repair Manual • Owner’s Manual • Owner’s Manual • Setup Instructions
350 XCF-W USA 2012
Repair Manual
350 XCF-W USA 2014
Setup Instructions
380 EXC
Repair Manual • Owner’s Handbook Manual • Owner’s Manual • Owner’s Handbook Manual
380 EXC 2001
Owner’s Handbook Manual
380 MXC
Repair Manual • Owner’s Handbook Manual • Owner’s Manual • Owner’s Handbook Manual
380 MXC 2001
Owner’s Handbook Manual
380 SX
Repair Manual • Owner’s Handbook Manual • Owner’s Manual • Owner’s Handbook Manual
380 SX 2001
Owner’s Handbook Manual
380EGS
Owner’s Manual • Owner’s Handbook Manual
390 Adventure 2020
Owner’s Manual
390 ADVENTURE 2022
Setup Instructions
390 ADVENTURE AR 2022
Setup Instructions
390 ADVENTURE ASEAN 2022
Setup Instructions
390 ADVENTURE B.D. 2 EU 2022
Setup Instructions
390 ADVENTURE B.D. EU 2022
Setup Instructions
390 ADVENTURE CN 2022
Setup Instructions
390 ADVENTURE CO 2022
Setup Instructions
390 ADVENTURE EU 2022
Setup Instructions
390 ADVENTURE JP 2022
Setup Instructions
390 ADVENTURE PH 2022
Setup Instructions
390 ADVENTURE UK 2022
Setup Instructions
390 ADVENTURE US 2022
Setup Instructions
390 Duke 2014 COL 2013
Repair Manual
390 Duke 2015 COL
Owner’s Manual • Installation Instructions Manual • Owner’s Manual • Setup Instructions • Setup Instructions
390 DUKE 2017
Owner’s Manual
390 Duke AR
Owner’s Manual • Setup Instructions
390 Duke AR 2018
Setup Instructions
390 Duke AR 2019
Owner’s Manual
390 Duke ASIA
Setup Instructions
390 Duke AU
Owner’s Manual • Setup Instructions
390 Duke AU 2018
Setup Instructions
390 Duke AU 2019
Owner’s Manual
390 Duke AUS 2013
Repair Manual
390 DUKE B.D. 2 EU
Owner’s Manual
390 DUKE B.D. 3 EU
Owner’s Manual
390 DUKE B.D. EU
Owner’s Manual
390 Duke B.D. EU 2019
Owner’s Manual
390 DUKE BR
Owner’s Manual
390 Duke BR 2018
Setup Instructions
390 Duke BR 2019
Owner’s Manual
390 Duke CN
Owner’s Manual • Setup Instructions
390 Duke CN 2018
Setup Instructions
390 Duke CN 2019
Owner’s Manual
390 DUKE CO
Owner’s Manual
390 Duke CO 2018
Setup Instructions
390 Duke CO 2019
Owner’s Manual
390 Duke EU
Owner’s Manual • Setup Instructions
390 Duke EU 2013
Repair Manual
390 Duke EU 2018
Setup Instructions
390 Duke EU 2019
Owner’s Manual
390 Duke JP
Owner’s Manual • Setup Instructions
390 Duke JP 2018
Setup Instructions
390 Duke JP 2019
Owner’s Manual
390 Duke MAL 2013
Repair Manual
390 Duke MY
Owner’s Manual • Setup Instructions
390 Duke MY 2018
Setup Instructions
390 Duke MY 2019
Owner’s Manual
390 DUKE PH
Owner’s Manual
390 Duke PH 2018
Setup Instructions
390 Duke PH 2019
Owner’s Manual
390 Duke Series 2018
Setup Instructions
390 Duke Series 2019
Owner’s Manual
390 DUKE TH
Owner’s Manual
390 Duke TH 2018
Setup Instructions
390 Duke TH 2019
Owner’s Manual
390 Duke US
Setup Instructions
390 Duke US 2018
Setup Instructions
3CF6001G4EN
Manual
4
400 EGS
Owner’s Handbook Manual
400 EXC AUS
Owner’s Manual • Owner’s Manual • Repair Manual • Setup Instructions
400 EXC AUS 2009
Setup Instructions
400 EXC AUS 2010
Owner’s Manual
400 EXC AUS 2011
Repair Manual • Setup Instructions
400 EXC EU 2009
Repair Manual • Setup Instructions
400 EXC EU 2010
Owner’s Manual
400 EXC EU 2011
Repair Manual • Setup Instructions
400 EXC FACTORY EDITION EU
Owner’s Manual • Owner’s Manual • Repair Manual • Setup Instructions
400 EXC RACING
Owner’s Manual • Owner’s Manual • Owner’s Manual • Owner’s Manual • Owner’s Manual
400 EXC RACING 2000
Owner’s Handbook Manual
400 EXC RACING 2005
Owner’s Manual • Owner’s Manual
400 EXC RACING 2006
Owner’s Manual
400 EXC RACING 2007
Owner’s Manual
400 LC4-E
Owner’s Handbook Manual
400 LC4-E 2001
Owner’s Handbook Manual
400 LC4R
Owner’s Handbook Manual
400 LS-E/MIL
Owner’s Handbook Manual • Owner’s Handbook Manual • Owner’s Handbook Manual • Owner’s Manual
400 SC
Owner’s Handbook Manual
400 SX RACING 2000
Owner’s Handbook Manual • Owner’s Handbook Manual
400 SXC 1999
Owner’s Handbook Manual
400 XC-W 2007
Owner’s Manual
400 XC-W USA
Repair Manual • Setup Instructions
400 XC-W USA 2009
Repair Manual • Setup Instructions
400 XC-W USA 2010
Owner’s Manual • Owner’s Manual
400LC4
Owner’s Handbook Manual
450 ECX
Owner’s Manual
450 ESC USA 2011
Setup Instructions
450 EX-W AUS
Owner’s Manual
450 EX-W EU
Owner’s Manual
450 EXC 2003
Owner’s Manual
450 EXC AUS
Owner’s Manual • Owner’s Manual • Owner’s Manual • Repair Manual • Setup Instructions
450 EXC AUS 2009
Repair Manual • Setup Instructions
450 EXC AUS 2010
Owner’s Manual
450 EXC AUS 2011
Repair Manual • Setup Instructions
450 EXC AUS 2013
Repair Manual • Setup Instructions
450 EXC Champions EU
Setup Instructions
450 EXC Champions USA
Setup Instructions
450 EXC DAYS EU 2011
Setup Instructions
450 EXC EU
Owner’s Manual • Owner’s Manual • Owner’s Manual • Repair Manual • Setup Instructions
450 EXC EU 2009
Repair Manual • Setup Instructions
450 EXC EU 2010
Owner’s Manual
450 EXC EU 2011
Repair Manual • Setup Instructions
450 EXC EU 2013
Repair Manual • Setup Instructions
450 EXC RACING
Owner’s Manual
450 EXC RACING 2005
Owner’s Manual • Owner’s Manual
450 EXC RACING 2006
Owner’s Manual • Owner’s Manual • Owner’s Manual • Owner’s Manual • Owner’s Manual • Owner’s Manual • Owner’s Manual • Setup Instructions
450 EXC RACING 2007
Owner’s Manual
450 EXC SIX DAYS
Owner’s Manual • Setup Instructions
450 EXC SIX DAYS 2013
Owner’s Manual
450 EXC SIX DAYS EU
Owner’s Manual • Owner’s Manual • Owner’s Manual • Owner’s Manual • Repair Manual • Setup Instructions
450 EXC SIX DAYS EU 2009
Repair Manual • Setup Instructions
450 EXC SIX DAYS EU 2010
Owner’s Manual
450 EXC SIX DAYS EU 2011
Repair Manual
450 EXC SIX DAYS EU 2013
Repair Manual • Setup Instructions
450 EXC USA
Repair Manual • Setup Instructions
450 EXC USA 2009
Repair Manual • Setup Instructions
450 EXC USA 2011
Repair Manual
450 EXC-F 2020
Owner’s Manual • Setup Instructions
450 EXC-F 2022
Setup Instructions
450 EXC-F EU 2022
Setup Instructions
450 EXC-F SIX DAYS 2022
Setup Instructions
450 EXC-F SIX DAYS EU 2022
Setup Instructions
450 EXC-R AUS/UK
Repair Manual
450 EXC-R AUS/UK 2008
Owner’s Manual
450 EXC-R EU
Owner’s Manual • Repair Manual

Сборник руководств (92 штуки) на английском языке по эксплуатации и техническому обслуживанию мотоциклов KTM 2000-2014 годов выпуска.
- Издательство: KTM-Sportmotocycle AG
- Год издания: 1999-2013
- Страниц: —
- Формат: PDF
- Размер: 341,5 Mb

Руководство на английском языке по эксплуатации и техническому обслуживанию квадроциклов KTM 450 XC/525 XC 2008 года выпуска.
- Издательство: KTM-Sportmotocycle AG
- Год издания: 2007
- Страниц: 103
- Формат: PDF
- Размер: 6,6 Mb

Руководство на английском языке по эксплуатации и техническому обслуживанию квадроциклов KTM 525 XC 2012 года выпуска.
- Издательство: KTM-Sportmotocycle AG
- Год издания: 2011
- Страниц: 207
- Формат: PDF
- Размер: 3,9 Mb

Руководство на английском и немецком языках по техническому обслуживанию и ремонту мотоциклов KTM 250 GS/250 MX/250 MXC.
- Издательство: KTM-Motor-Fahrzeugbau KG
- Год издания: 1983
- Страниц: 63
- Формат: PDF
- Размер: 178,0 Mb

Руководство на английском языке по ремонту двигателей мотоциклов KTM 60 SX/65 SX.
- Издательство: KTM Sportmotocycle AG
- Год издания: —
- Страниц: 92
- Формат: PDF
- Размер: 3,2 Mb

Руководство на английском языке по ремонту двигателя мотоциклов KTM 85 SX.
- Издательство: KTM Sportmotocycle AG
- Год издания: —
- Страниц: 89
- Формат: PDF
- Размер: 3,1 Mb

Руководство на английском языке по ремонту двигателей KTM 125/200.
- Издательство: KTM Sportmotocycle AG
- Год издания: —
- Страниц: 92
- Формат: PDF
- Размер: 158,0 Mb

Руководство на английском языке по ремонту двигателя мотоциклов KTM 250 SX.
- Издательство: KTM Sportmotocycle AG
- Год издания: —
- Страниц: 80
- Формат: PDF
- Размер: 2,7 Mb

Руководство на английском языке по ремонту двигателя мотоциклов KTM 250 SX-F 2005-2006 годов выпуска.
- Издательство: KTM Sportmotocycle AG
- Год издания: —
- Страниц: 125
- Формат: PDF
- Размер: 7,3 Mb

Руководство на английском языке по ремонту двигателей мотоциклов KTM 250/300 SX/SXS/MXC/EXC/EXC Six Days/XC/XC-W 2004-2006 годов выпуска.
- Издательство: KTM Sportmotocycle AG
- Год издания: —
- Страниц: 159
- Формат: PDF
- Размер: 11,3 Mb

Руководство на английском языке по ремонту двигателей мотоциклов KTM 250/300/380 EXC, MXC, SX.
- Издательство: KTM Sportmotocycle AG
- Год издания: —
- Страниц: 153
- Формат: PDF
- Размер: 5,3 Mb

Руководство на английском языке по ремонту двигателей мотоциклов KTM 250-525 SX, MXC, EXC Racing.
- Издательство: KTM Sportmotocycle AG
- Год издания: —
- Страниц: 167
- Формат: PDF
- Размер: 26,3 Mb

Руководство на английском языке по ремонту двигателей мотоциклов KTM 250 EXC Racing, 400/450 SX, MXC, XC, EXC, SMR, SXS Racing, 520/525 SX, MXC, XC, EXC, SMR Racing, 540 SXS, 560 SMR, 640 Crate 2000-2006 годов выпуска.
- Издательство: KTM Sportmotocycle AG
- Год издания: —
- Страниц: 125
- Формат: PDF
- Размер: 12,2 Mb

Руководство на немецком языке по ремонту двигателей KTM 400/620 LC4/LC4e 1997 года выпуска.
- Издательство: KTM Sportmotocycle AG
- Год издания: —
- Страниц: 76
- Формат: PDF
- Размер: 10,2 Mb

Руководство на английском языке по ремонту двигателей KTM 400-660 LC4 2003 года выпуска.
- Издательство: KTM Sportmotocycle AG
- Год издания: —
- Страниц: 387
- Формат: PDF
- Размер: 18,4 Mb

Руководство на английском языке по ремонту двигателей мотоциклов KTM 950 Adventure 2003 года выпуска.
- Издательство: KTM Sportmotocycle AG
- Год издания: —
- Страниц: 185
- Формат: PDF
- Размер: 9,1 Mb

Руководство на английском языке по ремонту двигателей мотоциклов KTM 950 Adventure и 990 Super Duke 2003-2005 годов выпуска.
- Издательство: KTM Sportmotocycle AG
- Год издания: —
- Страниц: 273
- Формат: PDF
- Размер: 18,0 Mb

Руководство на английском языке по ремонту двигателей мотоциклов KTM 950/990 Adventure, 950 Super Enduro, 950 Supermoto, 990 Super Duke 2003-2006 годов выпуска.
- Издательство: KTM Sportmotocycle AG
- Год издания: —
- Страниц: 394
- Формат: PDF
- Размер: 24,4 Mb

Руководство на английском языке по ремонту двигателей мотоциклов KTM 950/990 Adventure, 950 Super Enduro, 950 Supermoto, 990 Super Duke 2003-2007 годов выпуска.
- Издательство: KTM Sportmotocycle AG
- Год издания: —
- Страниц: 394
- Формат: PDF
- Размер: 25,8 Mb

Руководство на английском языке по ремонту амортизаторов WP Suspension моделей 5018 DCC/5018 SXS/5018 SMR 2005-2006 годов выпуска.
- Издательство: KTM Sportmotocycle AG
- Год издания: —
- Страниц: 103
- Формат: PDF
- Размер: 5,1 Mb

Руководство на английском языке по ремонту амортизаторов WP Suspension Fork SXS/SMR 4860 MXMA 2005-2006 годов выпуска.
- Издательство: KTM Sportmotocycle AG
- Год издания: —
- Страниц: 123
- Формат: PDF
- Размер: 6,8 Mb

Руководство на английском языке по ремонту амортизаторов WP Suspension модели 4860 MXMA.
- Издательство: —
- Год издания: —
- Страниц: 51
- Формат: PDF
- Размер: 1,5 Mb

Руководство на английском языке по ремонту амортизаторов WP Suspension модели 5018 PDS 2003 года выпуска.
- Издательство: —
- Год издания: —
- Страниц: 99
- Формат: PDF
- Размер: 4,9 Mb
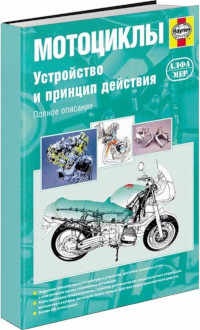
В руководстве представлена информация об устройстве и работе всех узлов и агрегатов мотоцикла.
- Издательство: Алфамер
- Год издания: —
- Страниц: 220
- Формат: —
- Размер: —

- Manuals
- Brands
- KTM Manuals
- Motorcycle
- 85 SX 2021
- Owner’s manual
-
Contents
-
Table of Contents
-
Troubleshooting
-
Bookmarks
Quick Links
OWNER’S MANUAL
2021
85 SX
Art. no. 3214206en
Related Manuals for KTM 85 SX 2021
Summary of Contents for KTM 85 SX 2021
-
Page 1
OWNER’S MANUAL 2021 85 SX Art. no. 3214206en… -
Page 3
KTM accepts no liability for delivery options, deviations from fig- ures and descriptions, misprints, and other errors. The models portrayed partly contain special equipment that does not belong to the regular scope of supply. -
Page 4: Table Of Contents
TABLE OF CONTENTS Running in the engine …… 21 TABLE OF CONTENTS MEANS OF REPRESENTATION …… 5 Preparing the vehicle for difficult Symbols used ……..5 riding conditions ……21 Formats used……..5 Preparing the vehicle for riding on dry sand………. 21 SAFETY ADVICE……….
-
Page 5
TABLE OF CONTENTS 10.14 Adjusting the compression damping 11.38 Checking the link fork ….67 of the fork ……..41 11.39 Checking the throttle cable routing ..67 10.15 Adjusting the rebound damping of 11.40 Checking the rubber grip ….68 the fork……….. -
Page 6
TABLE OF CONTENTS 15.2 Adjusting the throttle cable play ..97 15.3 Carburetor tuning……98 15.4 Carburetor — idle……100 Carburetor – adjusting the idle 15.5 speed ……..101 15.6 Emptying the carburetor float chamber ……..102 15.7 Plug-in connector of ignition timing map adjustment…… -
Page 7: Means Of Representation 1
All work marked with this symbol requires specialist knowledge and technical understanding. In the interest of your own safety, have these jobs performed by an authorized KTM workshop! Your motorcycle will be optimally cared for there by specially trained experts using the auxiliary tools required.
-
Page 8: Safety Advice
2 SAFETY ADVICE Use definition – intended use This vehicle has been designed and built to withstand the normal stresses and strains of racing. This vehicle com- plies with the currently valid regulations and categories of the top international motorsports organizations. Info Only operate this vehicle in closed-off areas remote from public road traffic.
-
Page 9: Tampering Warning
Only operate the vehicle when it is in perfect technical condition, in accordance with its intended use, and in a safe and environmentally compatible manner. The vehicle should only be used by trained persons. Have malfunctions that impair safety promptly eliminated by an authorized KTM workshop. Adhere to the information and warning labels on the vehicle.
-
Page 10: Protective Clothing
– When you ride a motorcycle, set an example for your child and wear suitable protective clothing. In the interest of your own safety, KTM recommends that you only operate the vehicle while wearing suitable pro- tective clothing. Work rules Unless specified otherwise, the ignition must be turned off during all work (models with ignition lock, models with remote key) or the engine must be at a standstill (models without ignition lock or remote key).
-
Page 11: Important Notes 3
Manufacturer warranty, implied warranty The work prescribed in the service schedule must only be carried out in an authorized KTM workshop and con- firmed in the KTM Dealer.net, as otherwise all warranty claims will be void. Damage or secondary damage caused by tampering with and/or conversions on the vehicle are not covered by the manufacturer warranty.
-
Page 12: View Of Vehicle
4 VIEW OF VEHICLE View of vehicle, front left (example) S04272-10 Hand brake lever ( p. 14) Clutch lever ( p. 14) Fuel tank filler cap Air filter box cover Shift lever ( p. 16) Choke ( p. 16) Fuel tap ( p.
-
Page 13: View Of Vehicle, Rear Right (Example)
VIEW OF VEHICLE 4 View of vehicle, rear right (example) S04273-10 Switch-off button ( p. 14) Throttle grip ( p. 14) Fork part number ( p. 12) Foot brake lever ( p. 17) Kick starter lever ( p. 17) Level viewer for brake fluid, rear…
-
Page 14: Serial Numbers
5 SERIAL NUMBERS Vehicle identification number The vehicle identification number is stamped on the right side of the steering head. 401945-10 Type label Type label is located on the front frame tube. 402154-10 Engine number The engine number is located on the left side of the engine under the engine sprocket.
-
Page 15: Shock Absorber Article Number
SERIAL NUMBERS 5 Shock absorber article number The shock absorber part number is stamped on the top of the shock absorber above the adjusting ring towards the engine side. H02222-10…
-
Page 16: Controls
6 CONTROLS Clutch lever Clutch lever is fitted on the left side of the handlebar. The clutch is hydraulically operated and self-adjusting. S04274-10 Hand brake lever The hand brake lever is fitted on the right side of the handle- bar. The front brake is engaged using the hand brake lever.
-
Page 17: Opening The Fuel Tank Filler Cap
CONTROLS 6 Opening the fuel tank filler cap Danger Fire hazard Fuel is highly flammable. The fuel in the fuel tank expands when warm and can escape if overfilled. – Do not fuel the vehicle in the vicinity of open flames or lit cigarettes. –…
-
Page 18: Fuel Tap
6 CONTROLS Fuel tap The fuel tap is on the left side of the fuel tank. Using the tap handle on the fuel tap, you can open or close the fuel supply to the carburetor. Possible states Fuel supply closed OFF – Fuel cannot flow from the fuel tank •…
-
Page 19: Kick Starter Lever
CONTROLS 6 The gear positions can be seen in the photograph. The neutral or idle position is between the first and second gears. 401950-11 6.10 Kick starter lever Kick starter lever is fitted on the right side of the engine. The kick starter lever can be swiveled.
-
Page 20: Service Hour Counter
6 CONTROLS 6.13 Service hour counter The service hour counter is attached below the seat. It shows the total number of service hours of the engine. The service hour counter begins counting when the engine is started and stops when the engine is switched off. Info The value indicated by the service hour counter cannot be cleared or adjusted.
-
Page 21: Preparing For Use 7
PREPARING FOR USE 7 Advice on preparing for first use Warning Danger of accidents A lack of physical and mental readiness on the part of the child poses a major risk. Children often underestimate or fail to recognize dangerous situations. – Your child must already be able to ride a bicycle.
-
Page 22
When using your motorcycle, remember that others may feel disturbed by excessive noise. – Make sure that the pre-sales inspection work has been carried out by an authorized KTM workshop. You will receive a delivery certificate when the vehicle is handed over. -
Page 23: Running In The Engine
PREPARING FOR USE 7 Running in the engine – During the running-in phase, do not exceed the specified engine performance. Guideline Maximum engine performance During the first 3 operating hours < 70 % During the first 5 operating hours < 100 % –…
-
Page 24
Air filter sand cover (79006922000) Info Observe the KTM PowerParts fitting instructions. M01105-01 – Adjust the carburetor jetting and setting. Info Your authorized KTM workshop can recommend the right carburetor tuning. – Clean the chain. Chain cleaner ( p. 124) –… -
Page 25: Preparing The Vehicle For Riding On Wet Sand
In the event of scalding, rinse the area affected immediately with lukewarm water. – Change the radiator cap. – Adjust the carburetor jetting and setting. Info Your authorized KTM workshop can recommend the right carburetor tuning. – Clean the chain. Chain cleaner ( p. 124) –…
-
Page 26: Preparing Vehicle For Rides On Wet And Muddy Circuits
– Make sure that no radiator covers ( p. 90) are installed. – Adjust the carburetor jetting and setting. Info Your authorized KTM workshop can recommend the right carburetor tuning. – Clean the motorcycle. ( p. 108) – Straighten bent radiator fins carefully.
-
Page 27: Preparing The Vehicle For Low Temperatures Or Snow
PREPARING FOR USE 7 Preparing the vehicle for low temperatures or snow – Adjust the carburetor jetting and setting. Info Your authorized KTM workshop can recommend the right carburetor tuning. M01107-01…
-
Page 28: Riding Instructions
8 RIDING INSTRUCTIONS Checks and maintenance measures when preparing for use Info Before every trip, check the condition of the vehicle and ensure that it is safe to operate. The vehicle must be in perfect technical condition when it is being operated. –…
-
Page 29: Starting Off
Make it clear to your child that he or she must not change into a low gear at high engine speed. Info If unusual noises occur while riding, stop immediately, switch off the engine and contact an authorized KTM workshop. First gear is used for starting off and for steep inclines. –…
-
Page 30: Applying The Brakes
Danger of accidents A spongy pressure point on the front or rear brake reduces braking efficiency. – Check the brake system and do not allow your child to continue riding until the problem is eliminated. (Your authorized KTM workshop will be glad to help.) Warning Danger of accidents Moisture and dirt impair the brake system.
-
Page 31: Transporting
RIDING INSTRUCTIONS 8 Significant damage may be caused if the vehicle rolls away or falls over. The components for parking the vehicle are designed only for the weight of the vehicle. – Park the vehicle on a firm and level surface. –…
-
Page 32
8 RIDING INSTRUCTIONS Warning Danger of poisoning Fuel is poisonous and a health hazard. – Avoid skin, eye and clothing contact with fuel. – Immediately consult a doctor if you swallow fuel. – Do not inhale fuel vapors. – In case of skin contact, rinse the affected area with plenty of water. –… -
Page 33: Service Schedule 9
Different service intervals may apply in your country, depending on the local operating conditions. Individual service intervals and scopes may change in the course of technical developments. The most up-to-date service schedule can always be found on KTM Dealer.net. Your authorized KTM dealer will be happy to advise you.
-
Page 34: Recommended Work
● ● Final check: Check the vehicle for operating safety and take a test ride. ○ ● ● ● Make a service entry in the KTM Dealer.net. ○ One-time interval ● Periodic interval Recommended work after every race Every 40 operating hours…
-
Page 35: Tuning The Chassis 10
TUNING THE CHASSIS 10 10.1 Checking the basic chassis setting with rider’s weight Info When adjusting the basic chassis setting, first adjust the shock absorber and then the fork. – For optimal motorcycle riding characteristics and to avoid damage to forks, shock absorbers, link fork and frame, the basic settings of the suspension components must match the rider’s weight.
-
Page 36: Compression Damping Of The Shock Absorber
The shock absorber is filled with highly compressed nitrogen. – Please follow the description provided. (Your authorized KTM workshop will be glad to help.) Info The effect of the low-speed compression adjuster can be seen in slow to normal compression of the shock absorber.
-
Page 37: Adjusting The High-Speed Compression Damping Of The Shock Absorber
The shock absorber is filled with highly compressed nitrogen. – Please follow the description provided. (Your authorized KTM workshop will be glad to help.) Info The effect of the high-speed compression adjuster can be seen in fast compression of the shock absorber.
-
Page 38: Measuring The Dimension Of The Rear Wheel Unloaded
10 TUNING THE CHASSIS Info Turn clockwise to increase the damping; turn counter- clockwise to reduce damping when the shock absorber rebounds. 10.7 Measuring the dimension of the rear wheel unloaded Preparatory work – Raise the motorcycle with a lift stand. ( p.
-
Page 39: Checking The Riding Sag Of The Shock Absorber
Risk of injury Parts of the shock absorber will move around if the shock absorber is detached incorrectly. The shock absorber is filled with highly compressed nitrogen. – Please follow the description provided. (Your authorized KTM workshop will be glad to help.) Preparatory work –…
-
Page 40: Adjusting The Riding Sag
10 TUNING THE CHASSIS Main work – Measure the full spring length while it is under tension and note down the value. – Loosen screw – Turn adjusting ring until the spring is no longer under ten- sion. Hook wrench (90129051000) –…
-
Page 41: Checking The Basic Setting Of The Fork
TUNING THE CHASSIS 10 Info The spring rate is shown on the outside of the spring. Smaller weight differences can be compensated by changing the spring preload. Finishing work – Install the shock absorber. p. 55) – Remove the motorcycle from the lift stand. ( p.
-
Page 42
A little air escapes from the fork leg when connecting. Info This is due to the volume of the hose and not due to a defect in the fork airpump or the fork. Read the accompanying KTM PowerParts instructions. – Adjust the air pressure as specified. Guideline… -
Page 43: Adjusting The Compression Damping Of The Fork
TUNING THE CHASSIS 10 10.14 Adjusting the compression damping of the fork Info The hydraulic compression damping determines the fork suspension behavior. – Take off protection cap – Turn adjusting screw clockwise all the way. Info The adjusting screw is located at the lower end of the right fork leg.
-
Page 44: Handlebar Position
10 TUNING THE CHASSIS Info Turn clockwise to increase the damping; turn counter- clockwise to reduce damping when the shock absorber rebounds. 10.16 Handlebar position On the upper triple clamp, there are 2 holes at a distance of each other. Hole distance A 15 mm (0.59 in) The holes on the handlebar supports are placed at a distance…
-
Page 45
TUNING THE CHASSIS 10 Guideline Screw, handlebar 20 Nm (14.8 lbf ft) clamp Info Make sure the gap widths are even. -
Page 46: 11 Service Work On The Chassis
11 SERVICE WORK ON THE CHASSIS 11.1 Raising the motorcycle with a lift stand Note Danger of damage The parked vehicle can roll away or fall over. – Park the vehicle on a firm and level surface. – Raise the motorcycle at the frame underneath the engine. Lift stand (78929955100) Neither wheel is in contact with the ground.
-
Page 47: Cleaning The Dust Boots Of The Fork Legs
SERVICE WORK ON THE CHASSIS 11 11.4 Cleaning the dust boots of the fork legs Preparatory work – Raise the motorcycle with a lift stand. ( p. 44) – Remove the fork protector. ( p. 47) Main work – Push dust boots of both fork legs downward.
-
Page 48: Installing The Fork Legs
11 SERVICE WORK ON THE CHASSIS – Loosen screws . Remove the left fork leg. – Loosen screws . Remove the right fork leg. V00873-10 11.6 Installing the fork legs – Position the fork legs. Air bleeder screw of the right fork leg is positioned to the front.
-
Page 49: Removing The Fork Protector
SERVICE WORK ON THE CHASSIS 11 – Position the brake caliper. – Mount and tighten screws Guideline Screw, front 25 Nm (18.4 lbf ft) Loctite ® 243™ brake caliper – Position the brake line and the clamp. Mount and tighten screws –…
-
Page 50: Removing The Lower Triple Clamp
11 SERVICE WORK ON THE CHASSIS 11.9 Removing the lower triple clamp Preparatory work – Raise the motorcycle with a lift stand. ( p. 44) – Remove the front wheel. p. 84) – Remove the fork legs. p. 45) – Remove the start number plate.
-
Page 51: Installing The Lower Triple Clamp
SERVICE WORK ON THE CHASSIS 11 11.10 Installing the lower triple clamp Main work – Clean the bearing and sealing elements, check for damage, and grease. High viscosity grease ( p. 124) – Insert the lower triple clamp with the steering stem. Mount upper steering head bearing –…
-
Page 52
11 SERVICE WORK ON THE CHASSIS – Tighten screws Guideline Screw, bottom triple 15 Nm (11.1 lbf ft) clamp S03454-10 – Tighten nut Guideline Nut, steering stem M20x1.5 10 Nm (7.4 lbf ft) S03419-10 – Position the fuel tank breather in the steering stem. –… -
Page 53: Checking The Steering Head Bearing Play
Danger of accidents Incorrect steering head bearing play impairs the handling characteristic and dam- ages components. – Correct incorrect steering head bearing play immediately. (Your authorized KTM workshop will be glad to help.) Info If the vehicle is operated for a lengthy period with play in the steering head bearing, the bearings and the bearing seats in the frame can become damaged over time.
-
Page 54: Adjusting The Steering Head Bearing Play
11 SERVICE WORK ON THE CHASSIS Main work – Move the handlebar to the straight-ahead position. Move the fork legs to and fro in the direction of travel. Play should not be detectable on the steering head bearing. » If there is detectable play: –…
-
Page 55: Greasing The Steering Head Bearing
SERVICE WORK ON THE CHASSIS 11 11.13 Greasing the steering head bearing – Remove the lower triple clamp. p. 48) – Install the lower triple clamp. p. 49) H02387-01 11.14 Removing the start number plate – Remove screw – Unhook the start number plate from the brake line and remove V00827-10 11.15 Installing the start number plate…
-
Page 56: Removing Front Fender
11 SERVICE WORK ON THE CHASSIS 11.16 Removing front fender Preparatory work – Remove the start number plate. ( p. 53) Main work – Remove screws – Remove screws . Take off the front fender. V00830-10 11.17 Installing front fender Main work –…
-
Page 57: Installing The Shock Absorber
SERVICE WORK ON THE CHASSIS 11 11.19 Installing the shock absorber Main work – Push splash protector to the side and position the shock absorber. Mount and tighten screw Guideline Screw, top 60 Nm (44.3 lbf ft) Loctite ® 2701™ shock absorber –…
-
Page 58: Removing The Air Filter Box Cover
11 SERVICE WORK ON THE CHASSIS 11.22 Removing the air filter box cover – Pull off the air filter box cover laterally in areas and take it off toward the front. A00045-10 11.23 Installing the air filter box cover – Attach the air filter box cover in areas and snap it into place in areas…
-
Page 59: Cleaning The Air Filter And Air Filter Box
SERVICE WORK ON THE CHASSIS 11 11.25 Cleaning the air filter and air filter box Note Environmental hazard Hazardous substances cause environmental damage. – Dispose of oils, grease, filters, fuel, cleaning agents, brake fluid, etc., correctly and in compliance with the applicable regulations. Info Do not clean the air filter with fuel or petroleum since these substances attack the foam.
-
Page 60: Removing The Main Silencer
11 SERVICE WORK ON THE CHASSIS – Insert the air filter and position top retaining pin in bush- The air filter is correctly positioned. – Secure the bottom retaining pin with holding tab Info If the air filter is not mounted correctly, dust and dirt may enter the engine and result in damage.
-
Page 61: Removing The Fuel Tank
SERVICE WORK ON THE CHASSIS 11 Info Over time, the fibers of the rock wool dissipate and the silencer “burns out”. Not only is the noise level higher, the performance characteristics change. Preparatory work – Remove main silencer. ( p. 58) Main work –…
-
Page 62
11 SERVICE WORK ON THE CHASSIS Warning Danger of poisoning Fuel is poisonous and a health hazard. – Avoid skin, eye and clothing contact with fuel. – Immediately consult a doctor if you swallow fuel. – Do not inhale fuel vapors. –… -
Page 63: Installing The Fuel Tank
SERVICE WORK ON THE CHASSIS 11 11.31 Installing the fuel tank Danger Fire hazard Fuel is highly flammable. The fuel in the fuel tank expands when warm and can escape if overfilled. – Do not fuel the vehicle in the vicinity of open flames or lit cigarettes. –…
-
Page 64: Checking For Chain Dirt Accumulation
11 SERVICE WORK ON THE CHASSIS – Mount and tighten screws Guideline Remaining screws, 10 Nm (7.4 lbf ft) chassis – Mount fuel hose. – Position the fuel tank breather in the steering stem. V00842-11 Finishing work – Mount the seat. ( p.
-
Page 65: Checking The Chain Tension
SERVICE WORK ON THE CHASSIS 11 Main work – Rinse off loose dirt with a soft jet of water. – Remove old grease residue with chain cleaner. Chain cleaner ( p. 124) – After drying, apply chain spray. Off-road chain spray ( p.
-
Page 66: Adjusting The Chain Tension
11 SERVICE WORK ON THE CHASSIS 11.35 Adjusting the chain tension Warning Danger of accidents Incorrect chain tension damages components and results in accidents. If the chain is tensioned too much, the chain, engine sprocket, rear sprocket, transmission and rear wheel bearings wear more quickly. Some components may break if overloaded. If the chain is too loose, the chain may fall off the engine sprocket or the rear sprocket.
-
Page 67: Checking The Chain, Rear Sprocket, Engine Sprocket, And Chain Guide
SERVICE WORK ON THE CHASSIS 11 11.36 Checking the chain, rear sprocket, engine sprocket, and chain guide Preparatory work – Raise the motorcycle with a lift stand. ( p. 44) Main work – Shift the transmission into neutral. – Check the chain, rear sprocket, and engine sprocket for wear. »…
-
Page 68
11 SERVICE WORK ON THE CHASSIS – Check the chain sliding guard for wear. » If the lower edge of the chain pins is in line with, or below, the chain sliding guard: – Change the chain sliding guard. – Check that the chain sliding guard is firmly seated. -
Page 69: Checking The Frame
– Change the link fork. Info Always replace a damaged link fork. Repairing the link fork is not authorized by KTM. V00857-01 11.39 Checking the throttle cable routing Warning Danger of accidents The throttle cable may slip out of the guide if routed incorrectly.
-
Page 70: Checking The Rubber Grip
11 SERVICE WORK ON THE CHASSIS Main work – Check the throttle cable routing. The throttle cable must be routed along the back of the handlebar, to the right of the frame, above the fuel tank bracket, and to the carburetor. »…
-
Page 71: Checking The Fluid Level Of The Hydraulic Clutch
SERVICE WORK ON THE CHASSIS 11 11.42 Checking the fluid level of the hydraulic clutch Info The fluid level rises with increasing wear of the clutch facing discs. – Move the hydraulic clutch fluid reservoir mounted on the han- dlebar into a horizontal position. –…
-
Page 72: Changing The Hydraulic Clutch Fluid
11 SERVICE WORK ON THE CHASSIS Brake fluid DOT 4 / DOT 5.1 ( p. 122) – Position the cover with the membrane. Mount and tighten the screws. Info Clean up overflowed or spilled brake fluid immediately with water. 11.44 Changing the hydraulic clutch fluid Warning Skin irritation Brake fluid causes skin irritation.
-
Page 73
SERVICE WORK ON THE CHASSIS 11 – Fill bleeding syringe with the appropriate hydraulic fluid. Syringe (50329050000) Brake fluid DOT 4 / DOT 5.1 ( p. 122) – On the clutch slave cylinder, remove bleeder screw mount bleeding syringe V00850-10 –… -
Page 74: 12 Brake System
Do not make any adjustments while riding. 12.3 Checking the brake discs Warning Danger of accidents Worn-out brake discs reduce the braking effect. – Make sure that worn-out brake discs are replaced immediately. (Your authorized KTM workshop will be glad to help.)
-
Page 75: Checking The Front Brake Fluid Level
– Make sure that brake fluid for the front and rear brake is changed in accordance with the service schedule. (Your authorized KTM workshop will be glad to help.) – Move the brake fluid reservoir mounted on the handlebar to a horizontal position.
-
Page 76: Adding The Front Brake Fluid
Danger of accidents Old brake fluid reduces the braking effect. – Make sure that brake fluid for the front and rear brake is changed in accordance with the service schedule. (Your authorized KTM workshop will be glad to help.) Note Environmental hazard Hazardous substances cause environmental damage.
-
Page 77: Checking The Front Brake Linings
Checking the front brake linings Warning Danger of accidents Worn-out brake linings reduce the braking effect. – Ensure that worn-out brake linings are replaced immediately. (Your authorized KTM workshop will be glad to help.) – Check the brake linings for minimum thickness ≥…
-
Page 78
Danger of accidents Brake linings which have not been approved alter the braking efficiency. Not all brake linings are tested and approved for KTM motorcycles. The structure and friction coefficient of the brake linings, and thus their brake power, may vary greatly from that of original brake linings. -
Page 79
BRAKE SYSTEM 12 – Remove cotter pin – Remove screws – Press back the brake linings by slightly tilting the brake caliper laterally on the brake disc. Carefully pull the brake caliper backward from the brake disc. – Press the brake piston back into the basic position and ensure that brake fluid does not flow out of the brake fluid reservoir, extracting some if necessary. -
Page 80: Checking The Free Travel Of Foot Brake Lever
12 BRAKE SYSTEM 12.8 Checking the free travel of foot brake lever Warning Danger of accidents The brake system fails in the event of overheating. If there is no free travel on the foot brake lever, pressure builds up in the brake system on the rear brake.
-
Page 81: Checking The Rear Brake Fluid Level
Danger of accidents Old brake fluid reduces the braking effect. – Make sure that brake fluid for the front and rear brake is changed in accordance with the service schedule. (Your authorized KTM workshop will be glad to help.) – Stand the vehicle upright.
-
Page 82: Checking The Rear Brake Linings
Clean up overflowed or spilled brake fluid immediately with water. A00047-10 12.12 Checking the rear brake linings Warning Danger of accidents Worn-out brake linings reduce the braking effect. – Ensure that worn-out brake linings are replaced immediately. (Your authorized KTM workshop will be glad to help.)
-
Page 83: Changing The Rear Brake Linings
Danger of accidents Brake linings which have not been approved alter the braking efficiency. Not all brake linings are tested and approved for KTM motorcycles. The structure and friction coefficient of the brake linings, and thus their brake power, may vary greatly from that of original brake linings.
-
Page 84
12 BRAKE SYSTEM Note Environmental hazard Hazardous substances cause environmental damage. – Dispose of oils, grease, filters, fuel, cleaning agents, brake fluid, etc., correctly and in compliance with the applicable regulations. Info Never use DOT 5 brake fluid. It is silicone-based and purple in color. Oil seals and brake lines are not designed for DOT 5 brake fluid. -
Page 85
BRAKE SYSTEM 12 – Add brake fluid to level Brake fluid DOT 4 / DOT 5.1 ( p. 122) – Mount the cover with the washer and membrane – Mount and tighten screws Info Use water to immediately clean up any brake fluid that has overflowed or spilled. -
Page 86: 13 Wheels, Tires
13 WHEELS, TIRES 13.1 Removing the front wheel Preparatory work – Raise the motorcycle with a lift stand. ( p. 44) Main work – Loosen screw by several rotations. – Loosen screws – Press on screw to push the wheel spindle out of the axle clamp.
-
Page 87: Removing The Rear Wheel
WHEELS, TIRES 13 – Check the wheel bearing for damage and wear. » If the wheel bearing is damaged or worn: – Change front wheel bearing. – Clean and grease shaft seal rings and contact surface of the spacers. Long-life grease ( p.
-
Page 88: Installing The Rear Wheel
13 WHEELS, TIRES Main work – Remove nut – Take off chain adjuster . Pull out wheel spindle enough to allow the rear wheel to be pushed forward. – Push the rear wheel forward as far as possible. Remove the chain from the rear sprocket.
-
Page 89: Checking The Tire Condition
Checking the tire condition Info Only mount tires approved and/or recommended by KTM. Other tires could have a negative effect on handling characteristics. The type, condition, and pressure of the tires all have a major impact on the handling characteristic of the motorcycle.
-
Page 90: Checking Tire Pressure
DOT number. The first two digits indicate the week of manufacture and the last two digits the year of manu- facture. KTM recommends that the tires be changed after 5 years at the latest, regardless of the actual state of H01144-01 wear.
-
Page 91: Checking Spoke Tension
Other spokes will become looser as a result. – Check spoke tension regularly, and in particular on a new vehicle. (Your authorized KTM workshop will be glad to help.) –…
-
Page 92: 14 Cooling System
14 COOLING SYSTEM 14.1 Cooling system Water pump in the engine circulates the coolant. The pressure resulting from the warming of the cooling system is regulated by a valve in radiator cap . This ensures that operat- ing the vehicle at the specified coolant temperature will not result in a risk of malfunctions.
-
Page 93
COOLING SYSTEM 14 – Remove screws – Remove right radiator shield – Remove screws – Remove left radiator shield V00886-10 – Position the corresponding radiator cover ( p. 90). The holding lugs point toward the frame. H02356-01 – Position left radiator shield –… -
Page 94: Removing The Radiator Cover
14 COOLING SYSTEM 14.4 Removing the radiator cover Info Only remove left radiator shield if both radiator covers are mounted. – Remove screws – Remove right radiator shield – Remove screws – Remove left radiator shield – Remove corresponding radiator cover. –…
-
Page 95: Checking The Coolant Level
COOLING SYSTEM 14 – Stand the motorcycle upright on a horizontal surface. – Remove the radiator cap. – Check the antifreeze in the coolant. −25 … −45 °C (−13 … −49 °F) » If the antifreeze in the coolant does not match the speci- fied value: –…
-
Page 96: Draining The Coolant
14 COOLING SYSTEM 14.7 Draining the coolant Warning Danger of scalding During motorcycle operation, the coolant gets very hot and is under pressure. – Do not open the radiator, the radiator hoses or other cooling system components if the engine or the cooling system are at operating temperature.
-
Page 97: Changing The Coolant
COOLING SYSTEM 14 Main work – Make sure that screw is tightened. – Position the motorcycle upright. – Take off radiator cap – Completely fill the radiator with coolant. Coolant ( p. 122) V00832-11 – Loosen screw until coolant escapes without bubbles. –…
-
Page 98
14 COOLING SYSTEM Warning Danger of poisoning Coolant is toxic and a health hazard. – Keep coolant out of the reach of children. – Do not allow coolant to come into contact with the skin, the eyes and clothing. – Consult a doctor immediately if coolant is swallowed. –… -
Page 99: Tuning The Engine 15
TUNING THE ENGINE 15 15.1 Checking throttle cable play – Check the throttle grip for smooth operation. – Move the handlebar to the straight-ahead position. Turn the throttle grip back and forth slightly and determine the play in throttle cable Throttle cable play 2 ……
-
Page 100: Carburetor Tuning
15 TUNING THE ENGINE – Turn barrel adjuster so that there is play in the throttle cable at the throttle grip. Guideline Throttle cable play 2 … 3 mm (0.08 … 0.12 in) – Tighten nut – Slide on sleeve 400192-11 Finishing work –…
-
Page 101
TUNING THE ENGINE 15 Idling jet IJ The idling jet has the greatest influence in the low to mid throttle slide range. If the engine stutters when idling or accelerating with a partially open throttle slide, a smaller idling jet must be used. -
Page 102: Carburetor — Idle
15 TUNING THE ENGINE 402797-01 Column 2 corresponds to a needle in the standard position. Column 1 corresponds to a needle which is half a clip leaner. Column 3 specifies the diameter of the first cylindrical part of the needle. The smaller the diameter of the first cylindrical part of the needle, the richer the mixture.
-
Page 103: Carburetor — Adjusting The Idle Speed
TUNING THE ENGINE 15 Carburetor – adjusting the idle speed 15.5 – Screw in idle air adjusting screw all the way and turn it to the specified basic setting. Guideline Idle air adjusting screw open 2 turns – Run the engine until warm. Guideline ≥…
-
Page 104: Emptying The Carburetor Float Chamber
15 TUNING THE ENGINE 15.6 Emptying the carburetor float chamber Danger Fire hazard Fuel is highly flammable. The fuel in the fuel tank expands when warm and can escape if overfilled. – Do not fuel the vehicle in the vicinity of open flames or lit cigarettes. –…
-
Page 105: Plug-In Connector Of Ignition Timing Map Adjustment
TUNING THE ENGINE 15 15.7 Plug-in connector of ignition timing map adjustment Plug-in connector of the ignition timing map adjustment is located on the frame under the fuel tank. Possible states Soft – The plug-in connector of the ignition timing map •…
-
Page 106
15 TUNING THE ENGINE – Clean gear teeth of the shift lever and shift shaft. – Mount the shift lever on the shift shaft in the required position and engage gearing. Info The range of adjustment is limited. The shift lever must not come into contact with any other vehicle components during the shift procedure. -
Page 107: Service Work On The Engine 16
SERVICE WORK ON THE ENGINE 16 16.1 Checking the gear oil level Condition The engine is cold. Preparatory work – Stand the motorcycle upright on a horizontal surface. Main work – Remove screw with the seal ring. – Check the gear oil level. Gear oil must not run out of the hole.
-
Page 108: Adding The Gear Oil
16 SERVICE WORK ON THE ENGINE Guideline Oil drain plug with 20 Nm (14.8 lbf ft) magnet – Remove filler plug with the O-ring, and fill up with gear oil. Gear oil 0.50 l Engine oil (0.53 qt.) (15W/50) p. 122) –…
-
Page 109
SERVICE WORK ON THE ENGINE 16 Danger Danger of poisoning Exhaust gases are toxic and inhal- ing them may result in unconsciousness and death. – Always make sure there is sufficient ventilation when running the engine. – Use effective exhaust extraction when starting or running the engine in an enclosed space. -
Page 110: 17 Cleaning, Care
17 CLEANING, CARE 17.1 Cleaning the motorcycle Note Material damage Components become damaged or destroyed if a pressure cleaner is used incorrectly. The high pressure forces water into the electrical components, connectors, throttle cables, and bearings, etc. Pressure which is too high causes malfunctions and destroys components. –…
-
Page 111
CLEANING, CARE 17 Info The heat produced causes water at inaccessible loca- tions in the engine and on the brake system to evapo- rate. – Push back the protection caps on the handlebar controls to allow water to evaporate. – After the motorcycle has cooled down, lubricate all moving parts and pivot points. -
Page 112: 18 Storage
102) – Store the vehicle in a dry location that is not subject to large fluctuations in temperature. Info KTM recommends jacking up the motorcycle. – Raise the motorcycle with a lift stand. ( p. 44) – Cover the vehicle with a tarp or similar cover that is permeable to air.
-
Page 113: Preparing For Use After Storage
STORAGE 18 18.2 Preparing for use after storage – Remove the motorcycle from the lift stand. ( p. 44) – Perform checks and maintenance measures when preparing for use. ( p. 26) – Take a test ride. 401059-01…
-
Page 114: 19 Troubleshooting
19 TROUBLESHOOTING Faults Possible cause Action – Engine turns but does not start Operating error Carry out the start procedure. p. 26) – Motorcycle was out of use for a Empty the carburetor float chamber. long time and there is old fuel p.
-
Page 115
TROUBLESHOOTING 19 Faults Possible cause Action – Engine stalls or is popping into Lack of fuel Turn handle of the fuel tap to the the carburetor ONposition. – Refuel. ( p. 29) – Engine takes in bad air Check intake flange and carburetor for tightness. -
Page 116: 20 Technical Data
20 TECHNICAL DATA 20.1 Engine Design 1-cylinder 2-stroke engine, water-cooled, with reed intake and exhaust control Displacement 84.93 cm³ (5.1828 cu in) Stroke 48.95 mm (1.9272 in) Bore 47 mm (1.85 in) Idle speed 1,400 … 1,500 rpm Crankshaft bearing 1 grooved ball bearing / 1 roller bearing Conrod bearing Needle bearing…
-
Page 117
TECHNICAL DATA 20 Screw, locking lever 6 Nm (4.4 lbf ft) Loctite ® 243™ Screw, power valve stop plate M5x12 6 Nm (4.4 lbf ft) Loctite ® 243™ Screw, water pump wheel 6 Nm (4.4 lbf ft) Loctite ® 243™ Coolant drain plug 8 Nm (5.9 lbf ft) Nut, adjusting screw, power valve… -
Page 118: Carburetor
20 TECHNICAL DATA 20.3 Carburetor Carburetor type KEIHIN PWK 28 Needle position 3rd position from top Idle air adjusting screw open 2 turns Main jet 142 (140, 145, 148) Jet needle NRKC (NRJC) Idling jet 48 (45, 50) Throttle slide Choke nozzle 20.3.1 Basic carburetor setting for sandy surfaces…
-
Page 119: Carburetor Tuning
TECHNICAL DATA 20 20.3.2 Carburetor tuning 402814-01 M/FT ASL Above sea level TEMP Temperature Open (rotations) idle air adjusting screw Idling jet Jet needle Needle position from top Main jet…
-
Page 120: Capacities
20 TECHNICAL DATA 20.4 Capacities 20.4.1 Gear oil Gear oil 0.50 l (0.53 qt.) Engine oil (15W/50) ( p. 122) 20.4.2 Coolant Coolant 0.8 l (0.8 qt.) Coolant ( p. 122) 20.4.3 Fuel Fuel tank capacity, approx. 5.2 l (1.37 US gal) Super unleaded (98 octane) mixed with 2-stroke engine oil (1:40) p.
-
Page 121: Tires
90/100 — 16 M/C 52M TT (85 SX 19/16) MAXXIS MAXX CROSS SI MAXXIS MAXX CROSS SI The tires specified represent one of the possible series production tires. Additional information is available in the Service section under: http://www.ktm.com 20.7 Fork Fork article number 43.18.8U.04 Fork…
-
Page 122: Chassis Tightening Torques
20 TECHNICAL DATA Standard 15 clicks Sport 12 clicks Spring preload 11 mm (0.43 in) Spring rate Weight of rider: < 45 kg (< 99 lb.) 35 N/mm (200 lb/in) Weight of rider: 45 … 55 kg (99 … 121 lb.) 40 N/mm (228 lb/in) Weight of rider: >…
-
Page 123
TECHNICAL DATA 20 Screw, subframe 35 Nm (25.8 lbf ft) Loctite ® 2701™ Screw, top triple clamp 17 Nm (12.5 lbf ft) Steering stem clamp screw 20 Nm (14.8 lbf ft) Engine carrying screw 45 Nm (33.2 lbf ft) Nut, foot brake lever 45 Nm (33.2 lbf ft) Loctite 243™… -
Page 124: 21 Substances
21 SUBSTANCES Brake fluid DOT 4 / DOT 5.1 Standard/classification – Guideline – Use only brake fluid that complies with the specified standard (see specifications on the container) and that exhibits the corresponding properties. Recommended supplier Castrol – REACT PERFORMANCE DOT 4 MOTOREX ®…
-
Page 125
SUBSTANCES 21 Recommended supplier MOTOREX ® – Cross Power 2T Fork oil (SAE 4) (48601166S1) Standard/classification – SAE ( p. 126) (SAE 4) Guideline – Use only oils that comply with the specified standards (see specifications on the container) and that exhibit the corresponding properties. -
Page 126: 22 Auxiliary Substances
22 AUXILIARY SUBSTANCES Air filter cleaner Recommended supplier MOTOREX ® – Racing Bio Dirt Remover Chain cleaner Recommended supplier MOTOREX ® – Chain Clean Fuel additive Recommended supplier MOTOREX ® – Fuel Stabilizer High viscosity grease Recommended supplier ® – LGHB 2 Long-life grease Recommended supplier…
-
Page 127
AUXILIARY SUBSTANCES 22 Rubber grip adhesive (00062030051) Recommended supplier KTM AG – GRIP GLUE Special cleaner for glossy and matte paint finishes, metal and plastic surfaces Recommended supplier MOTOREX ® – Quick Cleaner Special grease (00062010053) Recommended supplier Klüber Lubrication ®… -
Page 128: 23 Standards
23 STANDARDS JASO T903 MA2 Different technical development directions required a separate specification for motorcycles – the JASO T903 MA2 standard. Earlier, engine oils from the automobile industry were used for motorcycles because there was no separate motor- cycle specification. Whereas long service intervals are demanded for automobile engines, the focus for motorcycle engines is on high performance at high engine speeds.
-
Page 129: List Of Abbreviations 24
LIST OF ABBREVIATIONS 24 Art. no. Article number circa compare e.g. for example etc. et cetera i.a. inter alia number poss. possibly…
-
Page 130: Index
INDEX Chain tension INDEX adjusting ……64 Accessories ……9 checking .
-
Page 131
INDEX Fork legs basic setting, checking ….39 Link fork bleeding ……44 checking . -
Page 132
INDEX Seat Tire pressure mounting ……55 checking ……88 removing . -
Page 133
*3214206en* 3214206en 05/2020 KTM Sportmotorcycle GmbH 5230 Mattighofen/Austria Photo: Mitterbauer/KISKA/KTM http://www.ktm.com…