- Manuals
- Brands
- Medonic Manuals
- Laboratory Equipment
- CA620
- User manual
-
Contents
-
Table of Contents
-
Troubleshooting
-
Bookmarks
Quick Links
User´s Manual
Medonic CA620 + MPA + AD
Medonic CA620 + MPA
Medonic CA620
Medonic CA530 + MPA + AD
Medonic CA530 + MPA
Medonic CA530
Medonic CA620-CellGuard + MPA + AD
Medonic CA620-CellGuard + MPA
Summary of Contents for Medonic CA620
-
Page 1
User´s Manual Medonic CA620 + MPA + AD Medonic CA620 + MPA Medonic CA620 Medonic CA530 + MPA + AD Medonic CA530 + MPA Medonic CA530 Medonic CA620-CellGuard + MPA + AD Medonic CA620-CellGuard + MPA… -
Page 3: Table Of Contents
2.3 Short-List of Specifications……….14 2.4 Parameter Ranges ……………16 2.5 Reagents and Reagent Consumption ……17 2.6 Limitations …………….18 2.7 Differences between CA620 and CA530 (9,16,20 parameters)…………22 Measuring Principles ……. 25 RBC,WBC and PLT Concentration Detection ….25 3.2 Sizing RBC, WBC and PLT ……….27 3.3 Counting Time RBC &…
-
Page 4
7.2 Analysing the Sample (Open Tube) ……..54 7.3 Analyzing the Sample (Pre-Dilute)……..56 7.4 Analysing the Sample (Micro Pipette Adapter, MPA)..57 7.5 Analysing the Sample (Cap Piercing Device) ….58 7.6 Advanced User Options (CA620-CellGuard) ….60 User Interface ……….. 61 Sample Memory …………..61 8.2 Setup Menu…………….64 8.3 Setup Menu 2 ……………68… -
Page 5
11 QC and Blood Controls ……87 11.1 Introduction…………….87 11.2 Initializing the Levey-Jennings Plots and Functions ..87 11.3 Use of Blood Controls and Levey-Jennings Plots ..88 11.4 Initialization and Use of X-B Function…….. 89 11.5 Display of Blood Control Data……….91 12 Printer and Serial Output …… -
Page 6
03-11-24… -
Page 7: Preface
This manual describes: CA620, CA530 and CA620-CellGuard as well as the optional devices “Closed Tube Adapter” (Cap Percing Device) and MPA (Micro Pipette Adapter) Serial number of the instrument is found on the serial plate on the rear of the in- strument.
-
Page 8
Name and address of manufacturer: Boule Medical AB P.O. Box 42056 SE-126 13 Stockholm Sweden Telephone: +46 8 744 77 00 Fax: +46 8 744 77 20 e-mail: info@bm.boule.se Name and address of distributor Distributors are listed on: http.//www.boule.se Standards EN591:2001 IVD 98/79/EG SSEN 61010-2-101 (Low Voltage 73/23/EEC) -
Page 9: Safety Instruction
“Good Laboratory Practice”. The CA620-CellGuard is intended to be used especially in blood banks as pre do- nor screening as well as a quality control tool for PLT concentrates in a blood bank production facility.
-
Page 10: General Warnings
Safety Instruction If, under these prescribed conditions of operation and maintenance, an aberrant or abnormal result occurs, as defined by the laboratory protocol, laboratory per- sonnel should first make certain that the system is performing and is being oper- ated in accordance with the Product Labelling. The laboratory protocol should than be followed to advise the clinician in case a result appears to have deviated from the norms established by the laboratory.
-
Page 11: Emergency Procedure
Safety Instruction • When handling reagents. — If a reagent happens to enter your eye, wash it off immediately using plenty of water and take action to seek medical treatment at once. — If it happens to adhere to the hand or skin of other body parts, wash it off using plenty of water.
-
Page 12: Signs On Equipment
Safety Instruction Signs on Equipment Front/side view of the Instrument 1013.jpg Open door view of the Instrument 1022.jpg Back view of the Instrument 1040.jpg This label indicates that the safety instructions in the manual must be read before opening the front door of the instrument. This label indicates a potential bio hazard due to blood exposure or possible contaminated waste.
-
Page 13: Specifications
2 Specifications General The operator works with a menu from which the desired program is chosen, e.g. discriminator settings, calibration, cleaning etc. Two external reagent reservoirs are used: • Isotonic diluent. • Hemolyzing reagent. Whenever one of these external reservoirs is empty, this is indicated on the dis- play.
-
Page 14: Short-List Of Specifications
The instrument is fully automatic, which means that, the system is always pow- ered on and performs automatically preforms check- and cleaning cycles to min- imize user maintenance. Important Applicable for CA620- Note: CellGuard: PCT, LPCR, RDWa and PDWa are not established parameters. Their use should The MPA is intended to be be restricted to research or investigational use only.
-
Page 15
>350 samples CA620 Memory >200 samples and 600 control samples CA530 QC capability SD, CV, Xm CA620 QC capability SD, CV, Xm, Levey-Jennings plots and X-B with approx. 10.000 samples history HGB correction on high WBC counts Warning flags on parameter abnor-… -
Page 16: Parameter Ranges
0.5 — 9.99 55 — 130 30 — 999 0.5 — 55.0 PLT-Concentrate mode 30-6999 (RBC < 0.3 and measured on a Latex (applicable on CA620-Cellguard only) solution) Measuring range: 0 — 99.9 RBC (CA620-Cellguard) 0 — 13.99 RBC (CA620/530) 0 — 13.99…
-
Page 17: Reagents And Reagent Consumption
Diluent/Lyzer is 2:1 in case of 50 samples/day or more. Hence, using the instru- ment for less number of samples/day, less Diluent is consumed in relation to the lyzer Diluent consumption CA620 vs # samples Number of Blood_samples/Day 1014.eps Diluent Consumption…
-
Page 18: Limitations
Specifications Limitations Verification of any abnormal test result (including flagged results or results out- side of the normal range) should be performed using reference methods or other standard laboratory procedures for the conclusive verification of results. The sec- tion below list known limitations of automated blood cell counters in general as well as specific issues for cell counters using the impedance technology.
-
Page 19
HGB (hemoglobin) Turbidity of the blood sample due to any number of physiological and/or thera- peutic factors may produce falsely elevated HGB results. The CA620/530 how- ever is compensated for this effect with high WBC counts up to WBC approx. 60 10e3/µl. -
Page 20
Specifications RDW (Red Cell Distribution Width) The red cell distribution width is a function of the RBC count and derived from the RBC histogram. In most cases, any error introduced in the MCV may also cause the RDW to be erroneous. Especially blood transfusions may raise the RDW significantly due to the presence of bi-modal populations. -
Page 21
Specifications MPV (Mean Platelet Volume) Giant platelets Large platelets counted as RBCs will fall outside the PLT range and therefore lower the MPV. Small erythrocytes Very small RBCs might fall into the PLT region and might be counted as PLTs and therefore influence the MPV parameter. -
Page 22: Differences Between Ca620 And Ca530
The CA620-CellGuard can be configured as a donor screening device or as a tool to determine the PLT concentrations in PLT bags. In case the instru- ment is used for donor screening, it is fully identical to a CA620 16 param- eter machine.
-
Page 23: Plt
Specifications The menu numbering for the CA620, CA620-CellGuard and CA530 is identical. This user manual is therefore applicable for both type of instruments. The following table shows which parameters are available on the 9, 16 and 20 pa- rameter models:…
-
Page 24
Specifications 03-11-24 1001en01… -
Page 25: Measuring Principles
3 Measuring Principles RBC,WBC and PLT Concentration Detection Detection is accomplished using the electronic impedance principle and occurs in the orifice of the transducer. The blood is diluted to 1:400 (WBC & HGB) and 1:40000 (RBC & PLT) through a precise shear valve system. The shear valve (sampling valve, marked in the figure below) “cuts”…
-
Page 26
Measuring Principles electrical current electrodes cells Flow direction 1018.tif A=Aperture The PLT, RBC and WBC parameters are measured on a precise aliquot of the sample. The amount of sample measured is determined by the volume of a pre- cise glass column; called a metering tube. Two optical detectors are used to start and stop detection. -
Page 27: Sizing Rbc, Wbc And Plt
Measuring Principles All cells smaller than the upper PLT discriminator level will not be recognised as red cells. In case the user has selected a “floating” discriminator; RBC cells are counted from the set-point of this variable discriminator, which varies from sam- ple to sample between the volume limits set by the user.
-
Page 28: Counting Time Rbc & Wbc
Measuring Principles Counting Time RBC & WBC The microprocessor system checks the counting time for the RBC and PLT counting process. The counting time is defined as being the time needed for the sample to be drawn from the start- to the stop detector in the metering unit. See RBC,WBC and PLT Concentration Detection on page 25.
-
Page 29
Measuring Principles 4 hours old fixed discriminators fresh” blood LYMF GRAN Volume (fl) 1020.tif To overcome the above mentioned problem, the instrument utilizes a so-called mathematical differential, where the curves are analyzed within the software and 3 separate curves are built through a curve fitting method. Hence, the software of the instrument is building an artificial matching distribu- tion around the main populations. -
Page 30: Mcv (Mean Cell Volume Rbcs)
Measuring Principles MCV (Mean Cell Volume RBCs) The MCV parameter is derived from the RBC distribution curve. As the distribu- tion curve has a maximum volume range of 250fl, the maximum channel also contains clumps of cells that are larger than this volume. Therefore this channel is excluded from the MCV calculation.
-
Page 31: Mpv (Mean Platelet Volume)
RBC-PLT population. CA620-CellGuard PLT (Platelets) In case the CA620-CellGuard is programmed and used for PLT concentrates, the reproducibility is better than the stated CV figures above, as CV is a concentra- tion dependent parameter.
-
Page 32: Lpcr (Large Platelets)
Measuring Principles 3.12 LPCR (Large Platelets) The LPCR (Large Platelets Concentration Ratio) parameter is calculated from the PLT distribution curve. Platelets that are larger than 12 fl up to the (floating) dis- criminator are expressed in % of the total PLT count. The LPCR parameter is only valid if the MPV value is not zero.
-
Page 33: Parameter Flags
(WBC Differential Flags) on page 36. Red cells present in PLT Disregard PLT See RP (Red Cells concentrate (CA620-Cell- parameter result Present) on page 36. Guard only) Blood control expired Use new blood See EC (Expired con- control trol) on page 37.
-
Page 34: Tu (Time-Out Upper Detector)
Parameter Flags TU (Time-out Upper Detector) The error flag TU might be displayed on the following parameters: RBC, PLT and/or WBC. This error is related to the counting time. It means that the count- ing time is outside the limits and displayed as “HI” or “LO”. Note: The instrument performs an auto-clean of the orifice after a TU is displayed;…
-
Page 35: Fd (Floating Discriminator)
Parameter Flags FD (Floating Discriminator) If the discriminator, between the upper volume of PLT and the lowest volume of RBC, has been set as floating (see set-up menu) the instrument tries to find a min- imum on the PLT / RBC curve. At this point, the floating discriminator will be set.
-
Page 36: Se (Statistical Error Hgb)
4.13 RP (Red Cells Present) This flag is only displayed in case the CA620-CellGuard is used for PLT concen- trates. If the concentration of Red Blood Cells is > 0.3 in the PLT concentrate, both RBC and PLT are flagged with ‘RP’ to indicate that Red Cells are present and that the PLT value may not be correct.
-
Page 37: Ec (Expired Control)
Parameter Flags 4.14 EC (Expired control) This warning is displayed in case a Boule certified blood control is entered and the current date is more recent than the expiry date of the control. Note: The control must have been defined previously with the bar-code reader in menu 7.4.1.
-
Page 38
Parameter Flags 03-11-24 1002en01… -
Page 39: Installation
5 Installation Unpacking the Instrument The instrument is packed as standard in a especially designed protective box. Before the box is opened, check for any physical damages on the outside and no- tify your carrier immediately in case of such. Important The following procedures Unpack the instrument and check that the following items are included:…
-
Page 40
Installation Location The instrument should be placed on a clean and level table or work station. Avoid exposure to sunlight. Make sure that the instrument has access to proper ventila- tion and that at least ca. 10 cm free space must be left at the rear of the analyser, marked as “A”… -
Page 41: Mechanical Check And Set-Up
Installation Mechanical Check and Set-Up Recommendation Installation of the instrument should be carried out by the authorized distributor. Instrument installation Lift the instrument and place it on the chosen location as shown below. Be careful not to stress the front door of the instrument. 1023.tif Open the front door of the instrument.
-
Page 42
Installation Remove the grounding wire at the rear of the cover plate. 1025.tif Remove all transport guides at the pinch valves. These guides are red co- loured plastic clamps inserted in each valve. Save them for later use in case of a re-installation. -
Page 43
Installation Locate the reagent inlets at the rear of the instrument, see picture below. 1028.tif Connect the corresponding tubes from the reagent probes and the level de- tector cables as shown in the picture below. Caution 1029.tif Bio hazard Connect the waste outlet to a proper container or open drain. The end of the waste tube See Waste connection on page 40. -
Page 44: Front Panel And Command Keys
Installation Printer installation (optional) In case the DPU411-type II/DPU414 printer is used as supplied through Boule, connect the printer to the print outlet as shown below. 1030.tif Follow the instructions as shown in the DPU411-type II/DPU414 user manual how to insert paper and how to set the printer ‘on-line’ In case an IBM compatible printer Epson or HP printer is used, please refer to Printer and Serial Output on page 93.
-
Page 45
Installation Using the keyboard Numerical keys are used to enter ID, calibration factors, normal ranges and other entries that need numerical identification. always clears a previous entry unless the Enter validation key has been pressed. 1032.tif Print will send the sample data to either the printer and/or serial output, de- pending on how the instrument is configured by the end-user. -
Page 46: Filling The System With Reagents
Installation Note: Aspiration command keys are not located on the keyboard. Aspiration of a sam- ple is started by pressing the start-lever behind the aspiration needle. Filling the system with reagents After power-on, the instrument will perform a self-check which lasts for ca. 2 minutes.
-
Page 47: Initial System Configuration
6 Initial System Configuration CA620-CellGuard The CA620-CellGuard is configured as default in blood mode, in other words; as a pre-donor screening instrument. The end-user however, must decide if the CA620-CellGuard is used for pre-do- nor screening or if it is mainly used to monitor PLT concentrates. Default settings of the instrument can be printed out after the installation procedure by selecting menu 5.9.
-
Page 48: Setting Up The Ca620-Cellguard
“Normal Ranges”, “Floating Discriminator Settings” and “Units”. Default set- tings of the instrument can be printed out after the installation procedure by se- lecting menu 5.9. Menu 5.8 is set to ‘1’ as shown in Setting up the CA620-CellGuard for Pre- Donor Screening on page 47. 03-11-24…
-
Page 49: Setting Date And Time
Initial System Configuration Setting Date and Time Press [Menu] until the main menu is displayed and select menu 5. Scroll to line 5.5. Press [Enter] 1042en.gif 1043en.gif As seen on the LCD screen, 4 different date formats can be set. For EU, set date format 0, for the U.S.
-
Page 50
8 on the Main Menu. For detailed information regarding printers and printing options, please refer to section Printer setup menu CA620 on page 73 and Printer and Serial Output on page 93. For advanced printer options, refer to appendix 530-30-205 available from your distributor (in English only). -
Page 51: Select Language
Initial System Configuration Select Language The instrument can be programmed to show the displayed text in different lan- guages, e.g. English, German, Spanish etc. (depending on program version). To change language: Scroll to “Setup menu” from the main menu. Press [Enter] Scroll (up) to “Setup menu2”.
-
Page 52
Initial System Configuration Select number: HGB expr g/dl mmol/l g/dl g/dl HCT expr. /µl /µl g/dl mmol/l g/dl g/dl µm fmol MCHC g/dl mmol/l g/dl g/dl /µl µm RDW(CV) RDWa LPCR LYMF /µl GRAN /µl /µl LYMF% GRAN% MID% 03-11-24 1004en01… -
Page 53: Routine Operation
Note that the aspiration time of diluent will be ca. 10 sec- onds in case the CA620/530 is set up for normal use on blood specimen. The CA620/530 applies a blood detector, which is an optical device that stops the blood flow when blood is detected after the shear valve system.
-
Page 54: Analysing The Sample (Open Tube)
Routine Operation The background should not be higher than the figures below, assuming that at least 2 blanks are run after a sample. ( CGS units) (“Units =1”: 0.01 1052en.gif Analysing the Sample (Open Tube) Choose the operational mode with [Menu-Operate] so that the last run sample is displayed.
-
Page 55
ID field. In case the optional Bar-Code reader is installed, simply scan in the ID washing sequence of the barcode from the sample tube. aspiration needle. After approx. 30 seconds; the CA620 will switch to the INTRA mode as shown below: 1057en.gif Note: The INTRA… -
Page 56: Analyzing The Sample (Pre-Dilute)
Routine Operation Sample displayed after ca. 53 seconds from aspiration: Important The instrument is ready to accept the next sample af- ter the flashing display cur- sor in the upper left display 1059en.gif corner disappears. Entering the next sample Analyzing the Sample (Pre-Dilute) before the flashing cursor Any dilution rate between 1:200 and 1:250 can be used under the condition that disappears will result in er-…
-
Page 57: Analysing The Sample (Micro Pipette Adapter, Mpa)
Routine Operation Analysing the Sample (Micro Pipette Adapter, MPA) The Micro Pipette Adapter (MPA) is a device that allows the operator to use di- rect capillary samples without any pre-dilution. This is suitable in case the patient is nearby the instrument, like small care-stations or private doctor’s offices and especially when used as a pre-donor screening device at blood banks.
-
Page 58: Analysing The Sample (Cap Piercing Device)
MPA system in detail. Please put your browser to the following address and download the MPEG movie shots. The movie shot shows also how to clean the Micro Pipette before it is loaded into the MPA. www.medonic.se/MPA/ Analysing the Sample (Cap Piercing Device) The cap piercing device model 220 is an optional built-in unit that enables the in- strument to be used with several types of closed tubes.
-
Page 59
Routine Operation Push (rotate) the protection cover to the left and insert the tube up-side down. Caution Insert the sample tube with lid facing downwards. Ignoring this instruction may damage the aspiration needle. 1067.bmp Push (rotate) the protection cover to the right. Caution Avoid using the same tube more than twice in the cap… -
Page 60: Advanced User Options (Ca620-Cellguard)
It is possible however to switch between these 2 modes without altering menu 5.8. Suppose the following: In case the CA620-CellGuard was set up for “PLT concentrate mode” as default but it is required to analyze some whole blood samples. Proceed as follows.
-
Page 61: User Interface
8 User Interface This section describes the function of each available menu in the instrument that is not described in any other section of this manual. The service menu is described in the service manual and is available in English only to your authorized distributor.
-
Page 62
User Interface Question 1 (example): To-days date is 20 July 2003. We have a sample in memory tagged as ID = 1021. This sample was analyzed 9 times during this day. We want to determine the CV of this sample. Answer: Enter the “Sample Memory”. -
Page 63
The letter ‘M’ is displayed in the upper right corner to indicate that the display shows a sample in memory and not the last run. Question 3 (example) CA620-CellGuard We want to check the mean value of all PLT concentrate samples in memory. -
Page 64: Setup Menu
The instrument has the possibility to set 9 different normal range settings as- signed to PROG1-9. Within the CA620/530, PROG 1 is assigned to ‘human blood mode’ and PROG 8 is assigned to blood controls. PROG 3 to 9 (except
 are not assigned to any particular application but could be used to set “Normal…
 -
Page 65
PLT-H. The highest possible setting for the floating threshold between PLT and RBC in fl (=µm ). As default this value is set to 30 fl, which is the max- imum level available in this menu. Note: Applicable for CA620-CellGuard 1006en01 03-11-24… -
Page 66: Plt Concentrate Mode
User Interface PLT conc. mode is set to “0” as PROG 1 is assigned to “Blood mode” only. PLT concentrate mode The example below shows the default values set for PROG 2, which is assigned to “PLT concentrate mode”. Important Do not alter PLT conc.
-
Page 67
Detailed information of each printed value is listed in the CA620/CA530 Service Manual. The printed list is listed in the En- glish language only to simplify service, maintenance and failure reporting to the manufacturer. -
Page 68: Setup Menu 2
In case no blood is detected, the system will proceed anyhow. Setting this menu 5.10.4.1 to “0” will enable the blood detector function of the CA620/530. This means that if the instrument is used in “Blood mode”, the set- ting must be “0” at this line.
-
Page 69
User Interface Applicable for CA620 CellGuard Scroll down with the arrow key to menu line 5.10.4.2. In this menu line “Blood det. PLT-C” the aspiration time is set in seconds. As the Blood detector cannot detect PLT concentrate, this function is disabled and the aspiration of the sample is based on a time set in this menu. -
Page 70
User Interface PLT offs and High altitude comp In menu 5.10.7 the PLT background can be set. This entered value is subtracted from all PLT readings. This menu should be handled with care and only used if the diluent background on PLT is stable and not higher than 10. The menu 5.10.8 is used whenever the instrument is installed at levels higher than 1500 meter (4500 feet) above MSL (Medium Sea Level). -
Page 71
This menu is password protected and cannot be altered by the user. It should show “15” for the CA620-CellGuard and “11” for the CA620/530, in all cases. CA620/530 CA620-CellGuard 1014en.gif… -
Page 72
PROG1 or PROG2. Block parameters The CA620 allows the operator to block certain parameters to be displayed and printed. This is especially useful when the instrument is used for PLT concentrate control only. Several parameters are of no interest in such case, like HGB, HCT, MCHC etc. -
Page 73
Setting “0”, will block the parameter from the display and printout. In the above example it is seen that all parameters are blocked except RBC, PLT, MPV, WBC and LPCR whenever the CA620-CellGuard is used in PLT concen- trate mode. -
Page 74
User Interface In such a case, one must keep the pre-dilute start lever pressed for 5 seconds to start the pre-dilute aspiration. 1109en.gif Service menus Service menus, starting at line 6 of the main menu, are used by your authorized distributor to check and maintain the instrument. -
Page 75: Warning Displays
9 Warning Displays Warnings are displayed in clear text in case of any abnormal situation.This section shows the available texts if not mentioned in other sections of this manual. This section lists all available warning texts. Warnings Related to the MPA and Pre-Dilute Inlet 1110en.gif This is a normal warning and indicates that the MPA was pulled out.
-
Page 76: Stand-By Mode
Warning Displays The MPA was pulled out in a wrong mode (a menu was displayed). The MPA may only be pulled out in “Operational mode” where the last run sample is displayed. The operational mode is selected by pressing the [Menu/Operate] key. 1115en.gif The above warning indicates that the Pre dilute Sample inlet was activated but no sample was aspirated.
-
Page 77: Reagent Empty
Warning Displays In case one of the reagent containers are empty within the Stand-by mode, one of the above warnings will be displayed. It is essential that new reagent containers are installed, as the 4-hour checking cycle cannot be performed by the instru- ment.
-
Page 78: Printer And Serial Output
Warning Displays Printer and Serial Output 1124en.gif 1125en.gif The warning messages above are related to the connected printer. Either the printer is not connected or busy. 1126en.gif 1127en.gif The above warnings indicate that no printer is connected or no computer is avail- able on the serial output.
-
Page 79: Auxiliary Warnings/Messages
Warning Displays Auxiliary Warnings/Messages 1129en.gif 1130en.gif The above messages are displayed from the sample memory only. Printing of 19 samples is selected. The second warning shows a question in case a deletion of 19 samples is requested from memory. 1131en.gif The above is displayed during a [Power-On].
-
Page 80
Warning Displays 03-11-24 1008en01… -
Page 81: Calibration And Controls
This is done to match other analyzers, methods or applications in the laboratory. It is advisable that the performance of the CA620/530 system is checked daily (not calibrated) with a certified control blood. Special attention should be paid to the calculated MCHC parameter (MCHC = HGB/(MCV*RBC)).
-
Page 82: Calibration On A Known Sample
Calibration and controls In order not to contaminate the calibrator or control with cleaning solution, be sure to dry the aspiration pipette manually on the outside at each control blood run. Not following this discipline might give dropping values over time on the concentration parameters like RBC, HGB, WBC and PLT.
-
Page 83: Calibration Through A Certified Calibrator
RBC, WBC, MCV, HGB and PLT. strument using commer- cial controls or calibrators Use a Boule certified PLT-Concentrate calibrator to calibrate the CA620-Cell- with values given for other Guard for PLT concentrates on the PLT-C and MPV-C parameters. The proce- analyzers.
-
Page 84: Hgb
Calibration and controls The following calibration procedure is used for the CA620 and the CA620-Cell- Guard, using a Boule certified whole blood calibrator: Run the calibrator 5 times at the open tube inlet. Follow the guidelines shown in Use of Calibrators and Controls on page 81 above. Enter the ID 888+ for each run;…
-
Page 85: Calibration On Pre-Diluted Capillary Blood
Please point your browser to: www.medonic.se/MPA and down load the movie sequences how to operate the MPA with the Micro Lancet as supplied by Boule to minimize such pre-analytical errors.
-
Page 86: Calibration Of Rdw, Lymf And Gran
RDW calibration menu 5.1 so that the mean value of these 5 samples is 12.5-14%. If RDW values for the calibrator are available, set the RDW to the target value. An example of the CA620 display: 1142en.gif In the example above, the last sample showed RDW=13.8. The new target value is entered as 12.5%.
-
Page 87: Qc And Blood Controls
11 QC and Blood Controls 11.1 Introduction The CA620 is equipped with a QC memory capable of displaying and printing X- B and Levey-Jennings plots. The X_B algorithm is defined as the Bull’s weighted moving average model. Long term drift in the sample parameters MCV, MCH and MCHC are monitored.
-
Page 88: Use Of Blood Controls And Levey-Jennings Plots
Aspirate the control sample and wait for the re- tube against the upper sults. washing device. The CA620 will identify this ID and match the results with the previous defined Not following this disci- control data, see Initializing the Levey-Jennings Plots and Functions on pline might give dropping page 87 above.
-
Page 89: Initialization And Use Of X-B Function
11.4 Initialization and Use of X-B Function The X-B function in the CA620 follows strictly the Bull algorithm for the param- eters MCV, MCH and MCHC. The above parameters should not drift as a function of time within a large patient population.
-
Page 90
QC and Blood Controls Enter menu 7.4.4 to alter the expected mean values for the MCV, MCH and MCHC. It is recommended that at least the MCV and MCH parameters are set to the expected patient mean values with a range of +/- 3%. 1168en.gif 1167en.gif To display the X-B Plots, enter menu 7.3 see example below. -
Page 91: Display Of Blood Control Data
QC and Blood Controls 11.5 Display of Blood Control Data To display blood control data, enter menu 7.1 which is analogue to (main) menu 1 but exclusively for control blood. Use the left/right arrow key to display a de- fined control or type in the control ID manually and use the “+” sign as the ter- minator.
-
Page 92
QC and Blood Controls 03-11-24 1156en01… -
Page 93: Printer And Serial Output
12 Printer and Serial Output Following is a description of the printer and data outputs of the CA620/530 and the CA620-CellGuard analyzers. The system has 2 outputs. One is of a Centron- ics format and the second a serial output with RS232 specifications. A standard Centronics cable should be used and connected to a proper printer.
-
Page 94: The Serial Output Format
Preferably, use a computer in terminal mode connected to the instrument to vi- sualize the data and to get familiar with the format. Please put your browser at: http://www.medonic.se/user-support/CA620-530/dataformat. And download the available information, such as: Data format description Programming notes…
-
Page 95: Maintenance, Shut-Down & Transport
13 Maintenance, Shut-Down & Transport 13.1 Daily Maintenance The instrument has most of its cleaning procedures automated. This means that the user maintenance is kept to an absolute minimum. Daily user maintenance is therefore limited to a cleaning procedure only on the Warning outside of the instrument.
-
Page 96: Short Term Transport
Maintenance, Shut-Down & Transport 13.4 Short Term Transport The instrument can be transported over short distances without performing any special procedure. Just follow the daily cleaning procedure before the instrument is transported. Take care that the instrument is lifted at the base chassis. Do not stress the “front-door”.
-
Page 97: Permanent Shut-Down And Storing The Instrument
Maintenance, Shut-Down & Transport 13.6 Permanent Shut-Down and Storing the Instrument To store the instrument follow the packing instructions See Re-packaging and Long Term Transport on page 96. and the following conditions must be met: Temperature between 5 and 30 °C (41-86°F). Humidity should be less than 80%.
-
Page 98
Maintenance, Shut-Down & Transport 03-11-24 1011en01… -
Page 99: Trouble Shooting
14 Trouble Shooting This chapter gives hints to simplify trouble shooting of the instrument and to minimise external service actions. Also the user might trace a problem to a user- recoverable error or a case where an external service action might be necessary. 14.1 Counting Time HI (TU &…
-
Page 100: Hgb Value Flagged With Hi
Trouble Shooting The lamp voltage is usually ca. 4.5 Volts and the photometer output ca. 3.5 volts. These values are not critical as long as the photometer output voltage is between 3.2 and 3.8 volts. If the photometer output voltage is lower than 2.5 volt, a “LO” indication will follow on the HGB parameter value.
-
Page 101: Indication Number Xxx Displayed
Trouble Shooting In case the above does not help to reduce the PLT background to accept- able limits, contact your authorized distributor and request bulletin 000-80- 020 where instructions are given how to decontaminate the instrument. 14.7 Indication Number XXX Displayed In case an indication number is displayed, the sample memory can still be read.
-
Page 102: Cell Diff. Only On A Few Samples
Run one blank sample from the Cap Piercing device and connect a syringe as shown in the movie shots at the following address. www.medonic.se/cleaning Select movie shot 2 and 3 for down load. 03-11-24…
-
Page 103
Trouble Shooting Replacing the needle In case the needle needs to be removed or replaced, proceed as follows: Go to menu 6.2 and select 6.9.3 as shown below. Warning Contamination hazard if contaminated blood enters into open cut. Always wear protective gloves when handling 1144en.gif 1143en.gif… -
Page 104: Clogging In Aspiration Tube
To minimize these problems, inspect always the sample for visible clogs before aspiration. Warning Please go to www.medonic.se/cleaning/ and download the movie sequence #1 how to rinse the aspiration tube with a syringe. Pin hazard Switch off the instrument and open the front ‘door’.
-
Page 105: Index
PLT 14 floating discriminator 65 Print all settings 67 Floating discriminator RBC/ PLT 15 Printer 15 Floating Discriminator Settings 48 Printer setup menu CA620 73 Floating PLT/RBC discriminator settings 64 Fuse 12 QC memory 87 GRAN 21 Granulocytes 21 RBC 16…
-
Page 106
Sample Memory 61 SE 34 Serial port setup 69 Setup Menu 64 Stand-By Mode 76 Statistical calculations 61 storage conditions 7 TB 36 Thrombocytes 20 TL 34 TM 36 Transport 95 TU 34 tubing 102 Units 51 Warning flags 15 Warranty 9 Waste connection 40 waste container 97… -
Page 108
Boule Medical AB, P.O. Box 42056, SE-126 13 Stockholm, Sweden Telephone: +46 8 744 77 00, Telefax: +46 8 744 77 20 E-mail: mail@boule.se, Web: www.boule.se…
 are not assigned to any particular application but could be used to set “Normal…
 This manual is also suitable for:
Ca530
|
Анализатор гематологический Медоник М серии … |
||||||
|
||||||
|
||||||
|
||||||
|
||||||
|
||||||
|
||||||
|
||||||
|
||||||
|
||||||
|
||||||
|
||||||
|
||||||
|
||||||
|
||||||
|
||||||
|
||||||
|
||||||
|
||||||
|
||||||
|
||||||
|
||||||
|
||||||
|
||||||
|
||||||
|
||||||
|
||||||
|
||||||
|
||||||
|
||||||
|
||||||
|
||||||
|
||||||
|
||||||
|
||||||
|
||||||
|
||||||
|
||||||
|
||||||
|
||||||
|


Назначение
Описание
Программное обеспечение
Технические характеристики
Знак утверждения типа
Сведения о методах измерений
Нормативные документы
Назначение
Анализаторы гематологические автоматические Medonic (далее — анализаторы) предназначены для измерений счетной концентраций лейкоцитов, счетной концентраций эритроцитов и массовой концентрации гемоглобина в пробах крови пациента, используются для проведения in vitro диагностических тестов образцов крови в лабораторных условиях.
Описание
Анализаторы гематологические автоматические Medonic представлены серией М, моделью М20.
Принцип действия анализаторов основан на измерении импеданса (общего сопротивления) — для подсчета количества лейкоцитов, эритроцитов и спектрофотометрии на длине волны 535 нм — для определения массовой концентрации гемоглобина.
Анализатор состоит из блока с ЖК цветным сенсорным экраном. Забор проб крови (цельная кровь и предварительно разбавленные образцы) осуществляется с помощью аспирационных игл. Предусмотрена возможность считывания метки RFID (быстрая идентификация и прослеживаемость реагентов).
Общий вид средства измерений, схема маркировки и пломбировки от несанкционированного доступа представлены на рисунках 1 и 2.
Нанесение знака поверки не предусмотрено.
Заводской (серийный) номер анализатора наносится методом цифровой лазерной печати на шильдик, который изготавливается из поликарбоната, крепится на заднюю панель анализатора (рис. 2).
Программное обеспечение
Программное обеспечение (далее — ПО) предназначено для управления анализатором, обработки информации, полученной в процессе проведения измерений, хранения результатов измерений.
Уровень защиты ПО «высокий» в соответствии с Р 50.2.077 — 2014. Идентификационные данные (признаки) метрологически значимой части ПО анализаторов представлены в таблице 1.
Таблица 1 — Идентификационные данные ПО
|
Идентификационные данные (признаки) |
Значение |
|
Идентификационное наименование ПО |
Medonic |
|
Номер версии (идентификационный номер) ПО |
не ниже 3.1.1r |
|
Цифровой идентификатор ПО |
Данные являются собственностью производителя и являются защищёнными для доступа дилера и пользователей |
Технические характеристики
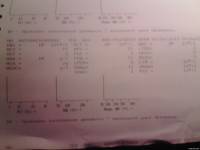
Таблица 2 — Метрологические характеристики
|
Наименование характеристики |
Значение |
|
Диапазон измерений: — счетной концентрации лейкоцитов, 109/л — счетной концентрации эритроцитов, 1012/л — массовой концентрации гемоглобина, г/л |
от 2,5 до 9,0 от 2,0 до 5,5 от 95 до 160 |
|
Пределы относительной погрешности измерений счетной концентраций лейкоцитов, эритроцитов и массовой концентрации гемоглобина, % |
±10 |
Таблица 3 — Основные технические характеристики
|
Наименование характеристики |
Значение |
|
Параметры электрического питания: — напряжение переменного тока, В — частота переменного тока, Гц |
от 100 до 240 50/60 |
|
Габаритные размеры (ШхГхВ), мм, не более |
410x290x460 |
|
Масса, кг, не более |
18 |
|
Условия эксплуатации: — температура окружающей среды, °С — относительная влажность воздуха, %, не более — атмосферное давление, кПа |
от + 18 до + 32 90 от 86 до 106 |
Знак утверждения типа
наносится на титульный лист руководства по эксплуатации анализаторов типографским способом.
Таблица 4 — Комплектность анализаторов
|
Наименование |
Обозначение |
Количество, не более |
|
Анализатор гематологический автоматический |
Medonic |
1 шт. |
|
Кабель питания |
— |
1 шт. |
|
Адаптер переменного тока |
— |
1 шт. |
|
Детектор уровня для лизирующего и изотонического растворов |
— |
2 шт. |
|
Трубка для слива |
— |
1 шт. |
|
Руководство по эксплуатации |
— |
1 шт. |
|
Пластиковая крышка для кубитейнера |
— |
2 шт. |
|
Считыватель штрих-кода |
— |
1 шт. |
|
Считыватель метки радиочастотной идентификации (RFID) |
— |
1 шт. |
Сведения о методах измерений
приведены в гл. 5 «Анализ пробы» руководства по эксплуатации на Анализатор гематологический автоматический Medonic.
Нормативные документы
Техническая документация Boule Medical AB, Швеция.