Time switch
MicroRex D22
NT 29 17 87 02
Safty notes
• Installation of these products should only be undertaken by a qualified electrician.
• The operational and electrical safety is only guaranteed, if the product is installed using its proper
accessories, in a position as specified in the installation instructions.
• Any interference with the product makes the guarantee void.
• If the time switch is mounted near equipment where heat produced raises the local ambient above 55°C. Then a space should be put
between the time switch and the equipment.
Function
The MicroRex D22 is a microprocessor controlled digital time switch. Eight programs of your choice can be stored and used to control the automatic operation of your electrical equipment. Each indi-
vidual weekday can have a separate program or you can have several days operating on the same „Block» program. To program the MicroRex D22 a „picture» is used and when this is complete the
chosen times are stored in the microprocessor memory. The MicroRex D22 makes available 2 separate switching channels. The summer-/winter changeover can be programmed for hand or automa-
tic operation.
Presentation
Liquid Crystal Display
Actual or „On» time
Weekday
Day number
„Off» time
Programming Buttons
Choose function
Summer- / winter
changeover
Setting the hours, minutes,
days and channels
Technical data
Supply voltage:
Consumption:
ca. 0,6W
2 changeover contact 10A 250V~µ cos ϕ = 1
Contact rating:
Parallel compensation: not allowed
Accuracy:
±2,5s/d
Terminal capacity:
single strand
4 mm
Program pictures:
8
Battery reserve:
100h
Storage ambient:
-10°C to +60°C
Working ambient:
-10°C to +55°C
Symbol for
„Set actual time»
1
State of output
1 2 3 4 5
6 7
2
= On
= Off
„Off» days
Delete
Hand switch
Channel 1
1
± 1h
C
Channel 2
S
OK
Fixing the hours, minutes,
2
days, channels and
R
continuous switching
230V 50/60Hz
120V 50/60Hz
multi strand
2
2
2,5 mm
1. Starting
Approximately 30 seconds after the supply voltage is connected the symbols
appear on the LCD.
Before any operations the complete memory must be reset.
2. Memory reset
+
press both at
S
OK
the same time
The time switch memory is completely clear.
3. Setting date and summer- / winter changeover
This can only be done after a Reset.
Summer- / winter changeover can be made manually or automatically if set.
If manual changeover is required choose no during the date input. Automatic changeover
depends on your country / area. Choose the appropriate setting for your country / area.
Connection
1
2
6 7 8
3 4
5
L
N
200W
200W
1600W
200W
1600W
900W
Code d
Press until the
S
correct day is set
Press once
OK
Press until the
S
correct month is set
Press once
OK
Press until the
S
correct year is set
Press once
OK
Choose
S
(See table below)
Choice
Summer
Summer
Country /
ends
begins
area
last Sunday
last Sunday
EU
E
in march
in October
1
ST
Sunday
last Sunday
only
A
in April
in October
North
America
last Sunday
4th Sunday
GB
in April
in October
Gb
No
No
no
changeover
changeover
Enter here the date for the beginning of
H
summer for your country / area as well as
the end of summertime. E.g. 31
ST
shown for the beginning of summertime. In
the following years it starts on the same day
irrespective of the date.
Setting of the beginning of summer
code 1
Set the day
S
Press once
OK
Set the month
S
Press once
OK
Set the year
S
Press once
OK
The start date is set.
End date setting code
code 0
Set the end date
as above
After setting the summer start
now set the actual time
Press
until
S
display is as shown
1 2 3 4 5
4. Setting actual time
Press once
Press until the correct
S
hour is shown
Press once
OK
Press until the correct
S
minute is shown
Press once
OK
The weekday will shown
automatically
Actual time is now set
5. Setting switching time
Each program has an On- and Off-time.
5.1 7 Day block program. Each day the same
Press until this
display appears
Set the On hour
S
Press once
OK
Set the On minutes
S
OK
Press once
March is
Set the Off hour
S
Press once
OK
Set the Off minutes
S
Press once
OK
If the times are O.K. for
OK
channel 1 & 2 press OK.
otherwise use
S
to set the channel
Press once
End of program
5.2 5 Day Monday to Friday program
Press until this
display appears
Set times as 5.1 above
5.3 Single day programs
Press until this
display appears
Set On hour
S
Press once
OK
Set On minute
S
OK
Press once
Set On Minute
S
OK
Set On day
6 7
Set other days
S
as required
OK
Press once
Press to change to off hour
Set off hour
S
1 2 3 4 5
6 7
Press once
OK
Set off minute
S
Press once
OK
If the clock is on the correct day press
OK
1
1 2 3 4 5
6 7
2
Otherwise use
to set another day
Press once
If the times are O.K. for
OK
channel 1 & 2 press OK.
Otherwise use
to set another day
Press once
End of program
1 2 3 4 5
6 7
6. Check switching times
Press once
Press several
times until correct
„picture» is shown
Press until the
actual time is shown
END
OK
1
1 2 3 4 5
6 7
2
7. Delete switching times
Press several times until
correct „picture» is shown
Press to delete program and set a new
C
programm or-
1 2 3 4 5
6 7
press until the
actual time is shown
1 2 3 4 5
6 7
8. On and Off manual operation
Press
or
Display 1
= On
or 2
= On
Display 1
= Off
or 2
= Off
The time switch will follow the next „On» or
only if it is
„Off» program
necessary
9. Continuous switching
The switch condition must first be chosen
Press 1 or 2 as required
Display 1
or 1
Display 2
or 2
Press once to either
OK
Display 1
S
OK
or
1
The time switch will remain in continuous
1 2 3 4 5
6 7
2
„On» or „Off» position until it is changed.
9.1 Terminating continuous switching
Press once
The time switch returns immediately to
S
OK
program mode
1
1 2 3 4 5
6 7
10. Continuous switching for a
2
chosen number of days
This function only applies to channel 1
The switch condition must first be chosen
Press to give desired function
Display 1
Display 1
1 2 3 4 5
6 7
S
Press
S
Press to choose the num-
ber of days
(d1 to d99)
Press once
OK
1
1 2 3 4 5
6 7
2
END
In the above example the time switch
stays „On» for 14 days. At 0:00 hours on
the 15th day the time switch returns to its
program mode.
1
1 2 3 4 5
6 7
2
10.1 Terminating continuous
switching
Press once
11. Summer-/ winter changeover
This function is only available if
chosen during date input for
summer- / winter selection (see 3)
±1h
Press until the actual time goes forward
1 hour (summer) or back 1 hour (winter)
1
1 2 3 4 5
6 7
2
12. Correcting mistakes
(only in the mode of programmation)
Press once
C
Press until actual
time is displayed
END
as required
13. Checking the date setting
This function is not available if
chosen during date input for
summer- / winter selection (see 3)
+
C
= On
= Off
= On
= Off
resp. 2
1
resp. 2
= On
1
= Off
1
1 2 3 4 5
6 7
2
1
1 2 3 4 5
6 7
2
no
was
1
1 2 3 4 5
6 7
2
no
was
Hold & Press
both buttons
together
END
Светодиодная лампа 8Вт=60Вт, Philips, A60, A60, 230B, 806 Лм, с цоколем Е27
Светодиодная лампа 10Вт=75Вт, Pled, A60, 230B, 1050 Лм, с цоколем Е27
Светодиодная лампа 13Вт=100Вт, Philips, A60, 230B, 1521 Лм, с цоколем Е27
Ремень для фиксации груза с быстроразъемной пряжкой 25мм/1м, SVPL2501P, Haklift
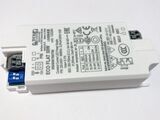
LED трансформатор 23,1-31,5Вт, 550-750мА, 30-42В, ECO FLAT 30W, TCI, 122284
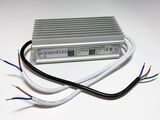
Электронный LED трансформатор 60 Вт, 12 В, Expoflex, VA-12060P
Изолента 19ммx24м, красная
Светодиодный модуль 33 Вт, Citizen, вместе с трансформатором
Светодиодный модуль 19 Вт, Samsung, LC019D2N930, SPHWHAHDNF27YZVMD2
Светильник OMS 4048, цвет золото
Светодиодный прожектор 30 Вт, TI-GC-FL30W, Pluvo
Светодиодный прожектор 30 Вт, NL-F-30W-I, Pluvo, с датчиком движения
Дроссель (балласт) 400 Вт, Helvar, H400TP
Термоусадочная трубка Ø17/7 мм, чёрная, Plastronic
Компрессор низкого давления 1-фазный 1,5кВт, 9A, SKH 250 EW, Hayward, Grino Rotamik
Ответвительный зажим SM1.11, Ensto
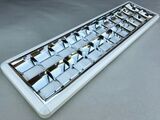
Светильник 2×36 Вт, Lenna, с зеркальным отражателем
Компактная-люминесцентная лампа 16 Вт, Luxram, 16W/GR8, 2-PIN
Плавкие ножевые предохранители 250A, PN02, OEZ Letohrad
Электронный трансформатор 12 В, 30-150 Вт, Onnline, TIP150, 4075063
Натриевая лампа 70Вт, LU70/90/MO/T/E27, General Electric
Металлогалогенная лампа 100 Вт, Osram Powerball HCI-T 100W/942 NDL PB UVS, G12
Натриевая лампа 150Вт, LU150/100/HO/T/E40, General Electric
Натриевая лампа 250Вт, LU250/XO/T/40, General Electric
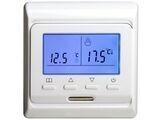
Терморегулятор Baden 8990 M6.716, (16А) 3680 Вт.
Медный провод 2×2,5 мм², FK Tvinnad, Draka, чёрный/оранжевый
Модульный автоматический выключатель 3-фазный, C 32A, Eaton, PLS6-C32/3-MW
Aвтомат тока утечки 1-фазный 25 A, 30мA(0,03A), Ex9L-N, Noark, 108314
- Home
- Brands
- LEGRAND
- Timer
- Lexic MicroRex D22
- Operating Instructions Manual
Manual for LEGRAND Lexic MicroRex D22 Timer (24 pages)
Specifications:
|
LEGRAND Lexic MicroRex D22: Read PDF Manual Online
Accompanying Data:
LEGRAND Lexic MicroRex D22 Timer PDF Operating Instructions Manual (Updated: Tuesday 20th of September 2022 04:52:32 AM)
Rating: 4.2 (rated by 29 users)
Compatible devices: LEXIC 037 09, Pass&Seymour RT1, LEXIC 037 05, 49730, PRO 21 781 50 Series, LEXIC RondoRex w21 Series, Wattstopper RT-20, LEXIC 037 25.
Recommended Documentation:
LEGRAND Lexic MicroRex D22: Text of Operating Instructions Manual
(Ocr-Read Version Summary of Contents, UPD: 20 September 2022)
-
1, 200W 200W 1600W 200W 1600W 900W Sicherheits- und Entsorgungshinweise • Einbau und Montage dieses Produktes dürfen nur durch eine Fachkraft erfolgen. • Die elektrische Sicherheit ist nur dann gewährleistet, wenn das Produkt in der jeweils produktspezifischen Installationsumgebung (Verteilereinbau) mit allem mitgeliefert…
-
16, OK Tämä toiminto ei ole voimassa vain, jos kesä/taviajan vaihdon päivämäärän syötössä valittiin no (Kohta 3.). 12. Syöttövirheiden korjaaminen Pidä nolennat painikteet sananaikaisesti painettuna. muussa tapauksessa paina ja haluamasi kanavan valitsemiseksi näyttö 1 tai vast. 2 tai 1 tai vast. 2 Kytkin pysyy valitun asetuksen mukaan joko PÄÄLLÄ tai PO…
-
10, OK Questa funzione non è possibile se si è scelta l’opzione no nella fase di regolazione della data e dell’ora estiva. Se necessario, regolare gli altri giorni Premere 1 volta 12. Correzione di una errata manovra (Solo nel modo di programmazione) Premere contemp- oraneamente e tenere premuto altrimenti con e agire separatamente sui canali 1 e 2. Indicazi…
-
18, OK Denne funksjonen er ikke tilgjengelig dersom nei ble valgt under innlegging av data for sommer-/vintervelgeren. 12. Korrigering feil Hold og press begge knapper samtidig Ellers trykk og for å velge kanal Display 1 tilsvarer 2 eller 1 tilsvarer 2 Bryteren vil forbli i vedvarende „På“ eller „Av“ posisjon inntil den er byttet. Trykk en gang Br…
-
13, 200W 200W 1600W 200W 1600W 900W Kontaktposition = inde = ude ± 1h C S OK R 1 2 Manuel omskifter Kanal 1 Kanal 2 Valg af funktion Sommer / vintertid Indstilling af timer, minutter, dage og kanaler Sletning Kvittering af timer minutter, dage og konstantkobling Tastefelt 1 2 1 2 3 4 5 6 7 Aktuelt klokkeslæt h.h.v. indkoblingstid Aktuel ugeda…
-
17, 200W 200W 1600W 200W 1600W 900W Tilstand på utgang = På = Av ± 1h C S OK R 1 2 Håndbryter Kanal 1 Kanal2 Velg funksjon Sommer/ vinter velger Velg minutt timer, dager og kanal Nullstiller Bestem minutter, timer, dager, kanaler og kontinulerlig omkobling Programmeringstaster 1 2 1 2 3 4 5 6 7 Aktuell eller „…
-
8, OK Deze mogelijkheid verschijnt niet indien bij 3 voor “no” is gekozen anders met en andere dagn kiezen 12. Verkeerd programma beide ingedrukt houden anders met en de afzonderlijke kanalen kiezen symbool 1 resp. 2 of 1 resp. 2 EINDE De klok blijft, al naar gelang Uw kreuze, blijvend aan of uit 1x drukken De klok werkt we…
-
20, OK Denna funktion är inte tillgängig om omkopplingsalternativet no är valt (se punkt 3). Tryck en gång för inställning av den kompletta programbilden. Bilden av den aktuella tiden kommer tillbaka. 12. Korringering av eventuell felinställning Tryck på båda knapparna samtidigt annars tryck och för den kanal som önskas Indikering 1 …
-
6, OK press until the actual time is shown 12. Correcting mistakes (only in the mode of programmation) Hold & Press both buttons together otherwise use to set the channel Display 1 resp. 2 or 1 resp. 2 The time switch will remain in continuous „On“ or „Off“ position until it is changed. Press once The time switch returns immediately to program mode…
-
4, OK Cette fonction n’est pas disponible si l’on a choisi no après la saisie de la date lors du réglage du changement heure été/hiver. appuyer plusieurs fois jusqu’au retour à l’heure actuelle FIN Faire les réglages pour les autres jours Appuyer 1x + Appuyer simultanément et maintenir enfoncé. Sinon avec et , régler séparément les canaux 1 et 2 Indicat…
-
21, 200W 200W 1600W 200W 1600W 900W Conselhos de segurança • A instalação deste produto deve ser assegurada por mão de obra especializada. • A fiabilidade de funcionamento e a segurança eléctrica não serão garantidas se o produto não for instalado nas condições especificadas (montagem em quadro de distribuição) e com todos os ace…
-
24, OK Πατήστε Tο πργραµµα που είχε επιλεγεί έχει σβηστεί Eπαναπρογραµµατίστε άλλουσ χρνουσ ή 12. ∆ιρθωση εσφαλµένου χειρισµού Πατήστε ταυτχρονα και κρατήστε τα πλήκτρα εάv xι µε και επιλέξτε τη…
DOC-22135846:
LEGRAND Lexic MicroRex D22: Recommended Instructions
PLBS 30, Scatter Beam, VGN-FW488J, CHM 604 MP3
-
Monotron 107Interrupteur horaireGuide d’utilisationMonotron 107 Monotron 107 est un interrupteur horaire qui vous per-met de piloter automatiquement un appareil ou circuitélectrique depuis votre tableau.Il est équipé de dix programmes pré-enregistrés (P0 àP9) dont sur certains (P2 à P9), vous pouvez modifier leshoraires selon vos besoins, en choisiss …
Monotron 107 4
-
1. Contents21. Contents Page2. Assembly, putting into operation, connection 33. Control elements 44. Display 45. Factory setting 56. Changing settings 66.1 Time and day of the week 66.2 Calendar month and day 76.2.1 AU = Automatic changeover 76.2.2 cHA = Weekday-related time change 8 — 96.2.3 no = no changeover 107. Standard switching commands 118. Weekday block formation 12 — 1 …
472 21
-
CONRAD IM INTERNET http://www.conrad.deCountdown TimerPage 2 — 10Countdown Timer-UhrSeite 11 — 21Item-No./ Best.-Nr.: 61 81 95DGBImprintThese operating instructions are published by Conrad Electronic GmbH, Klaus-Conrad-Straße 1,92240 Hirschau/GermanyNo reproduction (including translation) is permitted in whole or part e.g.photocopy, micro-filming or storage in el …
61 81 95 11
-
www.altronics.com.auPage 1Doc. PS1215A 1700 24 HourProgrammable Timer®Proudly Assembled in AustraliaOPERATING INSTRUCTIONSDistributed by Altronic Distributors Pty. Ltd. Perth. Western Australia.This simple to operate digital timer allows numerousvariations of ON/OFF cycles every 24 hours. It can beconfigured to 14 on cycles every day. Additionally , itmay b …
A 1700 4
-
SPECIFIERS GUIDE Time switch shall contain an OFF/ON manual override. For Carry-over: The time switchshall have a battery backup capable of over 7 days reserve carry-over.40 Amp Rated ContactsOne Minute IntervalsLCD Displayw/BacklightTimer KeyClock KeyGM40E Timer ModuleReset ButtonOverride KeyMinute (m+)KeyHour (h+) KeyDay KeyAmber and GreenLED Lights GM40E P …
GM40E 2
-
IAN 101036 RELOJ TEMPORIZADOR PRESA TEMPORIZZATA RELO J TEMPORIZADOR Instrucciones de utilización y de seguridad PRESA TEMPORIZZA TA Indicazioni per l’uso e per la sicurezza ZEITSCHALTUHR Bedienungs- und Sicherheitshinweise TEMPORIZADOR Instruções de utilização e de segurança TIMER SWITCH Operation and Safety Notes …
101036 149
-
VWR Collection Manual ver 3, rel 5 30.10.2013 VWR® Four-Channel Alarm Timer North American Catalog Number: 62344-641 European Catalogue Number: 609-0194 Version: 1 Issued: 9th April 2015 INSTRUCTION MANUAL …
62344-641 27
-
H3CR-Fᰬ䰪㔝⭫ಞශCJขᛒ⺑ᦠUK/USAINSTRUCTION MANUAL䉘֖䍣Ҧᵢ⅝嗏ӝȾᵢᢁ߂ѱ㾷ᨅ䘦ᰬ䰪㔝⭫ಞ൞ᆿ㻻ૂ㓵ᰬⲺ⌞ᝅӁ亯Ⱦֵ⭞ᵢӝҁࢃθ䈭Ԋ㓼䰻䈱ᵢᢁ߂θԛ㧭ޞ䶘ݻ䏩Ⲻӝ⸛䇼Ⱦᮢ䈭ؓ⮏ᵢᢁ߂ԛבᰛ৸㘹Ⱦࠝࡓࡠࡦຠࠍ߅⾈ߍߚߛ߈ࠅ߇ߣ߁ߏߑ߹ߔޕߎߩຠࠍోߦᱜߒ� …
H3CR-F — 2
-
QUASAR PROJECT KIT # 3148T9 — PROGRAMMABLE DOWN TIMER (UP TO 99 MIN 59 SEC) Page 1 of 2 This is a 4-digit programmable down timer with output and reset. The uC is marked T9. Timing is in minutes and seconds with a maximum programmable time of 100 minutes (00.00) which is 1 hour 40 minutes. It has five operating modes that control the output function when the timer reaches zero. …
3148T9 2
-
© Learning Resources, Inc., Vernon Hills, IL, US Learning Resources Ltd., Bergen Way, King’s Lynn, Norfolk, PE30 2JG, UK Please retain the package for future reference. Made in China. LRM6900-GUD Hecho en China. Conserva el envase para futuras consultas. Fabriqué en Chine. Veuillez conserver l’emballage. Hergestellt in China. Bitte Verpackung gut aufb …
Time Tracker 28
Additional Information:
Popular Right Now:
Operating Impressions, Questions and Answers:
KASTOR OY CT
2005
5/6
ИНСТРУКЦИЯ ДЛЯ НЕДЕЛЬНОГО ТАЙМЕРА
09/05 CT2 420
1. ОБЩЕЕ (ВВЕДЕНИЕ?)
Благодарим за проявленное Вами доверие к продукции KASTOR. Каменки KASTOR и блоки управления каменками
– это изделия, отличающиеся высоким качеством и длительным сроком службы. Советуем Вам и монтажнику
подробно ознакомиться с настоящей инструкцией. Инструкцию следует хранить в месте, где при необходимости ее
можно будет легко найти. После монтажа блока инструкция передается владельцу бани или лицу, ответственному за
работу бани. Таймер Kastor CT 2005 предназначен для работы с блоком управления Kastor CC50. Прежде чем
приступить к дальнейшим действиям, ознакомьтесь с инструкцией и особенно с пунктом
«ПРЕДУПРЕЖДЕНИЯ».
2. МОНТАЖ
2.1. Установка таймера Таймер монтируется на ровной поверхности с наружной стороны бани в сухом помещении. Крепление должно быть
надежным, а проемы для кабельной проводки должны быть выполнены тщательно.
2.2. Присоединение к электросети Подсоединение каменки и блока управления к электросети должно выполняться только квалифицированным
электриком. Питающее напряжение 230 В переменного тока подключается к клеммам N и L. Между таймером и
блоком управления СС прокладывается двухпроводный низковольтный кабель. Подсоединяемые клеммы 19 и 20
имеют одинаковую нумерацию в обоих блоках.
2.3 Таймер Legrand MicroRex D21/D22 Plus Инструкция по эксплуатации таймера дается отдельно и находится внутри кожуха таймера.
2.4 Многофункциональное реле времени TM 16
Длительность импульса установлена на заводе. Не изменять установку.
3. РАБОТА
Таймер в рабочем положении находится рядом с переключателем ВКЛ/ВЫКЛ блока управления СС. Когда установка
таймера включается, многофункциональное реле времени выдает импульс блоку управления СС. Соответственно, по
окончании установки многофункциональное реле выдает новый импульс блоку управления. Не превышать время
включения, установленное таймером на блоке управления СС. См. также инструкцию для CC50.
4. ОБСЛУЖИВАНИЕ
Обслуживание и ремонт электросистем блока управления должны выполняться только квалифицированным
электриком! При замене деталей необходимо использовать рекомендованные и одобренные изготовителем
компоненты. Если в течение гарантийного срока в отношении продукта возникнут проблемы или вопросы, свяжитесь
с изготовителем, прежде чем ремонтировать узлы.
ПРЕДУПРЕЖДЕНИЯ
Таймер KASTOR – CT 2005 предназначен для работы только с блоком управления KASTOR – CC50. Для иных
целей использовать его запрещено. Подсоединение к электросети должно выполняться только квалифицированным
электриком в соответствии с действующими правилами.
Не превышать время, установленное таймером на блоке управления CC50.
Не выключать каменку переключателем ВКЛ/ВЫКЛ. блока управления CC в режиме работы таймера.
Всегда перед включением каменки проверять помещение бани.

MicroRex D11 Basic 0 037 10• Interrupteur horaire • Time switch
L
N
230 V
max. 250 V AC
1 4
max. 16A
1200 W
60 VA
2500 VA
60 W 7 µF
+
c
R
1800 W
+
1800 W
2300 W
+
4000 W
200 W
• Validation de la sélection ou réutilisation des paramètres
• Confirm menu selection or adopt parameters
• Bestätigung der Auswahl oder Übernahme der Parameter
• Confirmación de la selección o incorporación de los parámetros
• Подтверждение выбора пункта меню или параметров.
•
• Sélection des rubriques du menu ou réglage des paramètres
• Select menu items or set parameters
• Auswahl der Menüpunkte oder Einstellen der Parameter
• Selección de los puntos de menú o ajuste de los parámetros
• Выбор пунктов меню или настройка параметров
•
• Sélection du menu, retour au menu, retour au menu principal par appui continu d‘environ >1 s
• Menu selection, back in menu, actuation > 1 s = back to status display
• Menüauswahl, Zurück in das Menu, Betätigung >1 s = Betriebsanzeige
• Selección de menú, Atrás en el menú, Activación > 1 s = indicación de servicio
• Выбор меню, возврат в меню, нажатие длительностью > 1 с = возврат к экрану индикации остояния
•
• Programmes
• Programs
• Programme
• Programas
•
Программ
•
± 1 s / • jour • day • Tag •
día •
сутки
• 天
230 V 50/60 Hz
16 A / 250 V~ µ cos ϕ = 1
0,9 W
M
1 … 4 mm
2
0,5 … 2,5 mm
2
8 mm
P
3 • ans • years • Jahre • años •
года
•
—
—
— 20 °C … +55 °C
— 20 °C … +60 °C
IP 20
a
• REGLAGE HEURE/DATE• SET TIME/DATE• EINSTELLEN ZEIT/DATUM• Regular a hora/data• НАСТРОЙКА ВРЕМЕНИ/ДАТЫ
•
WI
SU
b
SET SUmmerWInter-time
SET SUmmerWInter-time
• ETE• Summertime• Sommerzeit• Horario de verano• Летнее время
•
• HIV• Wintertime• Winterzeit• Hora de inverno• Зимнее время
•
•
•
Summertime
•
•
Wintertime
䆒㕂 SU
•
•
Summertime
•
•
Wintertime
䆒㕂 SU
‐WI
ހ
⹂䅸㦰䗝ᢽ㗙䞛⫼খ᭄䆒㕂
• Таймер программируемый •• Schaltuhr • Interruptor horario
28
3 V
N 290922/02
• Mode de fonctionnement:
Type 1.B. S. T.
IEC/EN 60730-1,
IEC/EN 60730-2-7
Montage: Montage dans coffret
de distribution
Degré d’encrassement: 2,
Sortie logique à contact sec
Tension de choc nominale: 4 kV
• Operating principle:
Typ 1.B. S. T.
IEC/EN 60730-1,
IEC/EN 60730-2-7
Montage: in distribution panel,
Degree of contamination: 2
Switch output, potential-free
Rated impulse voltage: 4 kV
• Wirkungsweise
Typ 1.B. S. T.
IEC/EN 60730-1,
IEC/EN 60730-2-7
Montage: Verteilereinbau
Verschmutzungsgrad: 2
Schaltausgang potentialfrei
Bemessungsstossspannung 4 kV
• Modo de acción: tipo 1.B. S. T.
IEC/EN 60730-1,
IEC/EN 60730-2-7
Montage: Montaje en cuadro de
distribución
Grado de suciedad: 2
Salida de conmutación sin tensión
Tensión impulsiva nominal: 4 kV
• Принцип работы: тип 1.B. S. T.
МЭК/EN 60730-1,
МЭК/EN 60730-2-7
Установка: встроенный распределитель
Степень защиты от проникновения
твердых тел: 2
Выход с беспотенциальным
коммутирующим контактом
Номинальное импульсное
напряжение: 4 kV
•
• PROG NOUV
• Prog NEW
• Prog NEU
• Programación• Прог Новая
•
ᮄᓎ
• Sélectionner le jour d‘activation 2
• Select switch-on day 2
• Einschalttag 2 auswählen
• Selección de día de conexión 2
• Выбрать день начала 2
•
• Sélectionner le jour désactivation 2
• Select switch-off day 2
• Ausschalttag 2 auswählen
• Selección de día de desconexión 2
• Выбрать день завершения 2
•
DAY
1 — 7
1 — 5
6 — 7
ANY
DAY
5x
• Programmation
Un programme = heure d‘activation + heure de désactivation +
jours d‘activation et de désactivation
Programmes avec jours prédéfinis d‘activation et de désactivation
• DAY 1-7 (LU-DI) • DAY 1-5 (LU-VE) • DAY 6-7 (SA et DI)
Les programmes d‘un canal sont reliés les uns aux autres par
un OU logique.
• Programación
Un programa = hora de conexión + hora de desconexión +
días de conexión y días de desconexión
Programas con días de conexión / desconexión predefinidos
• DIA 1 – 7 (LU – DO) • DIA 1 – 5 (LU – VIER) • DIA 6 – 7
(SA y DO)
Los programas de un canal disponen entre sí de un enlace
lógico O (OR).
• Programming
One program = switch-on time + switch-off time + switch-on and
switch-off days
Programs with predefined switch-on / switch-off days
• DAY 1-7 (MO-SU) • DAY 1-5 (MO-FR) • DAY 6-7 (SA and SU)
Programs for each channel are interlinked with OR logic.
• Программирование
Одна программа = время начала выполнения + время
завершения выполнения
+ дни начала и завершения.
Программы с заданными днями начала и завершения.
• ДЕНЬ 1-7 (ПН-ВС) • ДЕНЬ 1-5 (ПН-ПТ) • ДЕНЬ 6-7
(СБ и ВС)
Программы, заданные для одного канала, логически
связываются командой ИЛИ.
• Programmierung
Ein Programm = Einschaltzeit + Ausschaltzeit + Einschalt- und
Ausschalttage
Programme mit vordefinierten Ein- / Ausschalttagen
• DAY 1 — 7 (MO — SO) • DAY 1 — 5 (MO — FR) • DAY 6 — 7
(SA und SO)
Programme eines Kanals sind untereinander logisch ODER
verknüpft.
•
• Reset• Reset• Reset• Reposição• Сброс
•
• Attention!
Cette opération détruit toutes les données de réglage. Appuyer simultanément sur les quatre touches pendant environ
2 secondes et les relâcher.
L‘heure, la date, l‘heure d‘été / hiver, les heures de commutations doivent être à nouveau réglés.
• Note!
A reset clears the entire memory, which means that all previously set data will be lost. Press and hold all four keys together for
about 2 seconds, then release them. The time, date, summertime/wintertime and switching times will have to be re-entered.
• Hinweis!
Der Speicher wird gelöscht, alle eingestellten Daten gehen verloren. Alle Tasten gleichzeitig 2 Sekunden drücken und halten,
danach loslassen.
Uhrzeit, Datum, Sommer-/ Winterzeit und Schaltzeiten müssen neu eingestellt werden.
• ¡Nota!
La memoria se borra y todos los datos ajustados se pierden. Accionar todas las teclas a la vez durante aprox. 2 segundos y
soltarlas.
La hora, la fecha, el horario de verano / invierno y las horas de conmutación se tienen que volver a ajustar.
• Команда сброса выполняет удаление всех данных из памяти устройства, все ранее введенные данные будут утеряны.
Нажмите и удерживайте все 4 кнопка в течение 2 секунд, а затем отпустите их. После выполнения сброса необходимо
будет заново ввести время, дату, летнее / зимнее время и время коммутаций.
•
DAY
1 — 7
1 — 5
6 — 7
تيقوتلا طبض ةعاس •
•
•
•
4
•
•
•
ﻂﺒﺿ•ﻲﻔﻴﺼﻟﺍ ﺖﻴﻗﻮﺘﻟﺍ•ﻱﻮﺘﺸﻟﺍ ﺖﻴﻗﻮﺘﻟﺍ •ﺪﻳﺪﺠﻟﺍ ﺞﻣﺎﻧﺮﺒﻟﺍ •
•
•
•
••
•
OR.
ﻂﺒﻀﻟﺍ ﺓﺩﺎﻋﺇ •
!ةظوحلم •


