
Чистка и уход
52
При очистке от накипи гладильной
системы к ней не должны быть
подключены утюг или отпарива-
тель.
Во время процесса очистки и при
неподключенных утюге или отпа-
ривателе Вы можете оставлять
гладильную систему без присмот-
ра.
Оповещение о необходимости
очистки от накипи
Если до следующей очистки от наки-
пи остается еще прим. 2 рабочих ча-
са, то после включения гладильной
системы на дисплее появляется со-
общение
Скоро удал. накипи
.
С помощью меню установок можно
сразу начать очистку от накипи при-
бора в ненагретом состоянии (см.
главу «Досрочный запуск процесса
удаления накипи»), или нажатием
кнопки ОК можно подтвердить сооб-
щение и продолжить глажение как
обычно. Символ
будет продолжать
отображаться на дисплее до следую-
щей очистки от накипи.
По истечении оставшихся часов ра-
боты сначала следует провести
очистку от накипи, прежде чем снова
можно будет пользоваться гладиль-
ной системой.
Момент проведения очистки от на-
кипи можно спланировать индиви-
дуально и при необходимости за-
пустить очистку (см. главу «Досроч-
ный запуск процесса удаления на-
кипи»).
Вы можете прервать процесс очист-
ки от накипи, выключив гладильную
систему кнопкой
. После повторно-
го включения процесс очистки про-
должится с того этапа, на котором он
был прерван.
Вы будете видеть сообщения на дис-
плее в течение процесса удаления
накипи. Весь процесс очистки от на-
кипи длится прим. 90 минут.
Выполняйте необходимые действия
только при появлении соответству-
ющих сообщений на дисплее. После
начала процесса Ваше присутствие у
прибора понадобится прим. через
20 мин и спустя еще прим. 60 мин. В
течение остального времени очистки
от накипи гладильную систему можно
оставлять без присмотра.
Совет:
Лучше всего начинать про-
цесс очистки от накипи при остыв-
шем состоянии системы и сразу по-
сле ее включения. Таким образом Вы
избежите времени ожидания охлаж-
дения системы (до 3 часов).
-
Инструкции по эксплуатации
1

Miele B 2847 инструкция по эксплуатации
(84 страницы)
- Языки:Русский
-
Тип:
PDF -
Размер:
1.95 MB -
Описание:
Гладильная система
Просмотр
На NoDevice можно скачать инструкцию по эксплуатации для Miele B 2847. Руководство пользователя необходимо для ознакомления с правилами установки и эксплуатации Miele B 2847. Инструкции по использованию помогут правильно настроить Miele B 2847, исправить ошибки и выявить неполадки.
-
Contents
-
Table of Contents
-
Bookmarks
Quick Links
Operating instructions
Rotary ironer
B 995 D
en — GB
To avoid the risk of accidents
or damage to the appliance it is
essential to read these instructions
carefully before installing and
using it for the first time.
M.-Nr. 07 660 420
Related Manuals for Miele B 995 D
Summary of Contents for Miele B 995 D
-
Page 1: Operating Instructions
Operating instructions Rotary ironer B 995 D en — GB To avoid the risk of accidents or damage to the appliance it is essential to read these instructions carefully before installing and using it for the first time. M.-Nr. 07 660 420…
-
Page 2: Table Of Contents
Contents Guide to the appliance ……….4 Warning and Safety instructions .
-
Page 3
Contents Cleaning the water reservoir ……… 30 Ironing cover . -
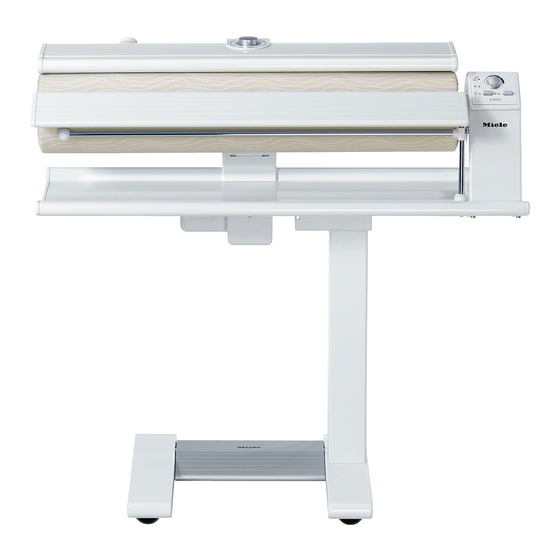
Page 4: Guide To The Appliance
Guide to the appliance a Temperature selector h Hanging bar b Emergency release i Feed-in table c Control panel j Roller d Release catch k Heater plate e Mains connection cable l Finger guard f Foot pedal m Water reservoir cap g Ironing table…
-
Page 5
Guide to the appliance Control panel e Q «Steam» indicator light a Roller speed selector b «On-Off» I-0 indicator light C «Temperature» indicator light c «On-Off» button I-0 «Water reservoir empty» indicator light d Q «Steam» button… -
Page 6: Warning And Safety Instructions
Keep these instructions in a safe If the supply cord is damaged, it must be replaced by a Miele approved place and ensure that new users are service technician to avoid a hazard. familiar with the content. Pass them on to any future owner.
-
Page 7
Wide sleeves, unforeseen dangers for the user, for apron straps, scarves and ties etc. which Miele cannot accept liability. could be taken in by the roller. Repairs should only be undertaken by a Miele approved service technician. -
Page 8
It is designed for hanging laundry on. Accessory parts may only be fitted After use it should be swung back out when expressly approved by Miele. If of the way. Take care not to press down spare parts or accessories from other on the bar when it is swung out. -
Page 9: Caring For The Environment
Caring for the environment Disposal of the packing Disposal of your old appliance material or machine The transport and protective packing Electrical and electronic appliances / has been selected from materials which machines often contain materials are environmentally friendly for disposal which, if handled or disposed of and can normally be recycled.
-
Page 10: Moving The Ironer
Moving the ironer Safety Do not remove the safety device until the ironer has been set up on its rollers. ^ To remove it simply pull it off. Store it in a safe place for future use. It should be fitted to the ironer again before moving it (e.g.
-
Page 11: Moving The Ironer
Moving the ironer The ironer is fitted with four rollers. ^ Hold the ironing table securely and pull on the release catch situated at ^ Hold the ironer by the ironing table to the back of the ironing table on the push it or to pull it towards you.
-
Page 12: Before Using For The First Time
Before using for the first time Dust cover Connection cable The mains connection cable is wound The dust cover which protects the roller round a hook underneath the ironing during transit has to be removed. table. ^ First remove the feed-in table by lifting it out of the right hand holder, Unwind the cable.
-
Page 13
Before using for the first time Then insert the plug in the socket and switch the ironer on. The heater plate will rise automatically. ^ An adhesive label for the temperature selector (see illustration) is supplied separately. Please stick this around the temperature selector. -
Page 14: Before Ironing
Before ironing Preparation of the working Preparing the laundry area Correct preparation of the laundry is essential for successful ironing. To ensure an even distrubution of steam make sure the ironer is level and Before ironing, the laundry should be: secure and that it cannot roll sideways.
-
Page 15: Checking The Effectiveness Of The Finger Guard
Before ironing Checking the effectiveness of Pulling into shape and smoothing the finger guard Pull the dampened laundry into shape The finger guard is a safety feature and as usual. should always be checked before the ironer is used. Smooth out ties, straps, seams and hems.
-
Page 16: Steam
Steam The ironer can also be used with steam Never use softened or distilled for ironing dry or slightly damp laundry. water on its own in this ironer as this will cause pitting corrosion in the Ironing with and without steam water reservoir.
-
Page 17: Emptying The Water Reservoir
Steam One reservoir is sufficient for approx. 40 minutes of ironing with steam. It takes approx. 4 minutes for the water to heat up to the correct temperature for steam ironing. The heating-up time may change as a result of limescale building up in the reservoir.
-
Page 18: Ironing
Ironing Switching on and off Material Dot symbol Temperature range ß Minimum iron / temperature Synthetics ßß Woollens / Medium Silks temperature ßßß Linen / High Cottons temperature 40 — 60°C The I-0 «On-Off» button is used for switching the ironer on and off. To switch on ^ Press the I-0 button in.
-
Page 19: Select The Temperature For Ironing (When Ironing With Steam)
Ironing Select the temperature for ironing Switching the steam on and off (when ironing with steam) Set the temperature to ßßß, before ^ Turn the temperature selector to selecting steam. ßßß Linen / Cottons (high The Q «Steam» button is used for temperature).
-
Page 20: Select The Roller Speed
Ironing Select the roller speed Ironing There are 5 roller speed settings, from The ironing process is controlled by the low (approx. 2 m/min) to high (approx. foot pedal which has three positions: 4.5 m/min). A low speed makes it easier to iron complicated articles such as shirts and blouses.
-
Page 21: Feeding Laundry In
Ironing Feeding laundry in Removing the feed-in table ^ Arrange laundry along the feed-in The feed-in table can be removed when table so that it is straight and smooth. ironing shaped garments, e.g. skirts. ^ First lift it out of the right hand holder, ^ Then carefully turn the roller by hand and then pull it out to the left of the until the laundry makes contact with…
-
Page 22: After Ironing
Ironing After ironing Useful tips ^ Switch the ironer off. If creases appear on items being ironed: ^ Switch off Q «Steam». Stop the roller and pull the item back ^ Set the temperature selector to I. slightly. Smooth it out and if necessary dampen it with a wet cloth.
-
Page 23: Power Cut
Ironing Power cut In the event of a power cut activate the emergency release. If there is a power cut whilst you are ironing the heater plate will stay in contact with the roller. This traps the laundry with the danger of it singeing. To free the laundry: ^ Pull the emergency release catch upwards.
-
Page 24: Ironing Tips
Ironing tips The following tips are intended as helpful suggestions to get you started. With practice you will probably find alternative ways of ironing which suit your style of working. Tea towels, hand towels, handkerchiefs, serviettes etc. Place on the ironing table with the straight grain of the fabric to the feed board.
-
Page 25: Duvet Covers
Ironing tips Duvet covers Pillow cases ^ First do up poppers and buttons and feed this end through the ironer first. Then iron the whole pillow case from both sides. Shirts Remove the feed-in table for ironing shirts. Iron in the following order: ^ Sleeves and cuffs ^ First do up poppers and buttons.
-
Page 26
Ironing tips Sleeves and cuffs Back / shoulder yoke ^ Pull sleeves smooth ready for ironing. Shirts with a shoulder yoke: Do not iron the cuff yet. ^ Fold the yoke along the back seam. ^ Iron the sleeves from the cuff seam to ^ Place the shirt side on to the roller the underarm seam. -
Page 27
Ironing tips Back Front Iron the back in two sections, from the The fronts are ironed in one pass middle to the side seams. together with the lower section of the back up to the armhole seam. ^ Start with the front left. ^ Pull the shirt over the roller as far as the yoke seam — or to the collar seam on shirts without a yoke — and smooth… -
Page 28
Ironing tips Collar Pyjamas Pyjamas tops should be ironed following instructions for shirts. Iron trouser legs on pyjamas separately. ^ Iron one leg from the front and the other from the back. ^ Iron from the top to the bottom. ^ Then pull into shape and iron to the waist. -
Page 29: Pressing Trousers
Ironing tips Pressing trousers ^ Press each leg separately. Let the top of the trousers hang over the edge of the roller. ^ Cover with a damp cloth and turn the roller by hand until the trouser leg is covered by the heater plate. ^ Press to iron, then do the same to the other trouser leg.
-
Page 30: Maintenance And Care
Maintenance and care Cleaning the water reservoir Disconnect the ironer from the Limescale deposits in the water reservoir, electricity supply by switching off at caused by hard water, can cause the the wall socket and withdrawing the steam jets to become blocked. Should plug before any cleaning and this happen, the limescale deposits can maintenance work.
-
Page 31: Ironing Cover
^ Undo the cords at each end of the unsightly, it can be replaced easily. roller cover. Replacement ironing covers are available from your Miele dealer or the Miele Spare Parts Department. ^ Unwind the cover.
-
Page 32
Maintenance and care ^ Completely unwind the cotton ^ Insert the raw edge of the new undercloth attached to the roller and ironing cloth into the retaining slot let it hang down smoothly. with the wrong side down. Leave the cords hanging free and smooth out the cloth. -
Page 33
Maintenance and care ^ Switch on the ironer. After the roller has gone through three or four revolutions and the end of the When the ironer is switched on, the ironing cover is under the heater plate: heater plate heats up immediately. ^ Switch off the ironer while keeping The temperature selector must be the foot pedal pressed down. -
Page 34: Problem Solving Guide
Problem solving guide With the help of the following notes, minor faults in the performance of the machine, some of which may result from incorrect operation, can be put right without contacting the Service Department. Repair work to electrical appliances should only be carried out by a suitably qualified person in strict accordance with current local and national safety regulations.
-
Page 35
Problem solving guide Problem Possible cause Remedy There is no steam. The water reservoir Fill the water reservoir. The Q «Steam» is empty. indicator light goes out during ironing and «Water reservoir empty» lights up red. The steam jets are Pure tap water has Empty and rinse out the water spitting. -
Page 36: After Sales Service
After sales service In the event of a fault, please contact: N.B. A call-out charge will be – your Miele dealer or applied for unnecessary service – the nearest Miele Service visits where the problem could have Department, (see address on the been rectified as described in this back page).
-
Page 37: Electrical Connection
Electrical connection Electrical connection U.K. Non-rewireable plugs BS 1363 All electrical work should be carried out The fuse cover must be refitted when by a suitably qualified and competent changing the fuse, and if the fuse cover person, in strict accordance with is lost, the plug must not be used until a current national and local safety suitable replacement is obtained.
-
Page 38: Technical Data
Technical data Height 95.9 (folded up 105.2) cm Width 98.5 (folded up 50) cm Depth 38.0 cm Weight 39 kg max. load 382 Newton Water reservoir capacity 0.8 litres Voltage see data plate Rated load see data plate Fuse rating see data plate Test certificates awarded Radio/TV suppressed, VDE…
-
Page 40
Alteration rights reserved/3009 M.-Nr. 07 660 420 / 00…