-
Contents
-
Table of Contents
-
Troubleshooting
-
Bookmarks
Related Manuals for Mindray BeneVision N1
Summary of Contents for Mindray BeneVision N1
-
Page 1
BeneVision N1 Patient Monitor Operator’s Manual… -
Page 3
© Copyright 2017-2019 Shenzhen Mindray Bio-Medical Electronics Co., Ltd. All rights reserved. Release time: March 2019 Revision: 5.0 WARNING • Federal Law (USA) restricts this device to sale by or on the order of a physician or other practitioner licensed by U.S. state law to use or order the use of this device. -
Page 4
SHENZHEN MINDRAY BIO-MEDICAL ELECTRONICS CO., LTD. (hereinafter called Mindray) owns the intellectual property rights to this Mindray product and this manual. This manual may refer to information protected by copyright or patents and does not convey any license under the patent rights or copyright of Mindray, or of others. -
Page 5
Service Mindray maintains a network of service representatives and factory-trained distributors. Prior to requesting service, perform a complete operational check of the instrument to verify proper control settings. If operational problems continue to exist. In North America contact the Service Department at (800) 288-2121, ext: 8116 for Technical Support or (201) 995-8000 for assistance in determining the nearest field service location. -
Page 6
Italic text is used in this manual to quote the referenced manuals, chapters, sections and formulas. Bold text is used to indicate the screen texts and names of hard keys. ■ → is used to indicate operational procedures. ■ BeneVision N1 Patient Monitor Operator’s Manual… -
Page 7: Table Of Contents
3 Getting Started ……………………………. 3 — 1 3.1 Equipment Preparation Safety Information ……………………….3 — 1 3.2 Unpacking and Checking ……………………………….3 — 1 3.3 Environmental Requirements …………………………….3 — 2 3.4 Setting Up the Equipment ……………………………..3 — 2 BeneVision N1 Patient Monitor Operator’s Manual…
-
Page 8
4.2.1 Entering the Minitrends Screen …………………………4 — 3 4.2.2 The Display of Minitrends Screen ………………………….4 — 4 4.2.3 Setting Minitrends Parameters …………………………4 — 4 4.2.4 Setting the Minitrend Length ………………………….4 — 4 4.2.5 Setting the Alarm Statistics Switch ………………………..4 — 4 BeneVision N1 Patient Monitor Operator’s Manual… -
Page 9
5.7 Discharging a Patient ………………………………5 — 3 6 Alarms ………………………………6 — 1 6.1 Alarm Introduction ………………………………..6 — 1 6.2 Alarm Safety Information ……………………………….6 — 1 6.3 Understanding the Alarms …………………………….6 — 1 6.3.1 Alarm Categories ………………………………6 — 1 BeneVision N1 Patient Monitor Operator’s Manual… -
Page 10
7.5.3 Changing ECG Wave Settings ………………………….7 — 7 7.5.4 Disabling the Smart Lead Off Function ………………………..7 — 8 7.5.5 Adjusting the QRS Volume …………………………..7 — 8 7.5.6 Adjusting the Minimum QRS Detection Threshold ………………….7 — 9 BeneVision N1 Patient Monitor Operator’s Manual… -
Page 11
8.7 Exiting the ECG 12-Lead Screen ……………………………8 — 3 9 Monitoring Impedance Respiration (Resp) ……………………9 — 1 9.1 Resp Introduction ………………………………..9 — 1 9.2 Impedance Resp Safety Information …………………………..9 — 1 9.3 Resp Display ………………………………….9 — 2 BeneVision N1 Patient Monitor Operator’s Manual… -
Page 12
11.5.2 Selecting the Temperature Label ……………………….11 — 2 11.5.3 Displaying the Temperature Difference ……………………..11 — 2 11.6 Temperature Troubleshooting …………………………..11 — 2 12 Monitoring Noninvasive Blood Pressure (NIBP) ………………….12 — 1 12.1 NIBP Introduction ……………………………….. 12 — 1 BeneVision N1 Patient Monitor Operator’s Manual… -
Page 13
13.6 PAWP (only available when the N1 is used with the independent external display) …………13 — 7 13.6.1 PAWP Equipment to Patient Connection ……………………… 13 — 8 13.6.2 Preparing to Measure PAWP …………………………13 — 8 13.6.3 Measuring PAWP …………………………….13 — 9 BeneVision N1 Patient Monitor Operator’s Manual… -
Page 14
15.2.8 Full Disclosure Review Page …………………………15 — 6 15.2.9 OxyCRG Review Page (only available when the N1 is used with the independent external display) ..15 — 7 15.2.10 12-Lead ECG Review Page …………………………15 — 8 BeneVision N1 Patient Monitor Operator’s Manual… -
Page 15
18.1 Supported Printer ……………………………….. 18 — 1 18.2 End Case Reports ………………………………… 18 — 1 18.2.1 Printing the End Case Report …………………………18 — 1 18.2.2 Setting a Report as An End Case Report ……………………..18 — 1 BeneVision N1 Patient Monitor Operator’s Manual… -
Page 16
21.2.4 Setting Patient Location Options for the Discharge Screen ………………21 — 2 21.2.5 Hiding Patient Name ……………………………. 21 — 2 21.2.6 Select Whether a Prompt is Required When Auto Deleting Discharged Patients ……….21 — 2 BeneVision N1 Patient Monitor Operator’s Manual… -
Page 17
21.10.2 Setting the Barcode Reader Information ……………………21 — 15 21.10.3 Identifying the Barcode Reader (for the non-Mindray Custom 2D Barcode Reader) ……..21 — 15 21.10.4 Selecting Patient Information Read by the Barcode Reader (for the Mindray Custom 2D Barcode Reader) 21 — 15 21.11 Configuring the Network ……………………………..21 — 15… -
Page 18
23.3 Cleaning and Disinfecting the Equipment and Mounting Kits ………………..23 — 2 23.3.1 Approved Cleaning and Disinfecting Agents ……………………23 — 2 23.3.2 Cleaning the Equipment and Mounting Kits ……………………23 — 3 23.3.3 Disinfecting the Equipment and Mounting Kits ………………….23 — 4 BeneVision N1 Patient Monitor Operator’s Manual… -
Page 19
25.3.4 Temp Probes Also Compatible …………………………. 25 — 7 25.4 NIBP Accessories ………………………………..25 — 7 25.4.1 NIBP Hoses Available for Purchase ……………………….25 — 7 25.4.2 Cuffs Available for Purchase …………………………25 — 7 25.5 IBP Accessories ………………………………..25 — 8 BeneVision N1 Patient Monitor Operator’s Manual… -
Page 20
A.14.4 PR Specifications …………………………….A — 14 A.14.5 Temp Specifications ……………………………..A — 15 A.14.6 NIBP Specifications …………………………….A — 15 A.14.7 IBP Specifications …………………………….A — 16 A.14.8 CO Specifications …………………………….A — 17 B EMC and Radio Regulatory Compliance ……………………..B — 1 BeneVision N1 Patient Monitor Operator’s Manual… -
Page 21
D.2.11 Technical Alarm Messages Related to Networked Monitoring ………………D — 8 D.2.12 Other System Technical Alarm Messages ……………………..D — 8 E SpO Sensor Accuracy …………………………. E — 1 E.1 The Accuracy of Masimo SpO Sensors …………………………E — 1 BeneVision N1 Patient Monitor Operator’s Manual… -
Page 22
E.2 The Accuracy of Nellcor SpO Sensors …………………………E — 3 F Units, Symbols and Abbreviations ……………………… F — 1 F.1 Units ………………………………………F — 1 F.2 Symbols ……………………………………F — 2 F.3 Abbreviations ………………………………….F — 3 BeneVision N1 Patient Monitor Operator’s Manual… -
Page 23: Safety
Do not touch the patient or metal parts in contact with the patient during defibrillation. Otherwise serious injury or death could result. • Do not open the equipment housings. All servicing and future upgrades must be carried out by trained and authorized personnel. BeneVision N1 Patient Monitor Operator’s Manual 1 — 1…
-
Page 24: Cautions
NOTE • The equipment software copyright is solely owned by Mindray. No organization or individual shall resort to modifying, copying, or exchanging it or to any other infringement on it in any form or by any means without due permission.
-
Page 25: Equipment Symbols
15° Battery indicator Computer network Direct current Alternating current DEFIBRILLATION-PROOF TYPE CF APPLIED DEFIBRILLATION-PROOF TYPE BF APPLIED PART PART Lock; tighten IBP zero key BeneVision N1 Patient Monitor Operator’s Manual 1 — 3…
-
Page 26
ISO Std. 80601-2-61 Certified to CAN/CSA Std. C22.2 No. 60601-1, No. 60601-1-6, No. 60601-1-8, No. 60601-2-25, No. 60601-2-26, No. 60601-2-27, No. 80601-2-30, No. 60601-2-34, No. 60601-2-49, No. 80601-2-55, No. 80601-2-56, and No. 80601-2-61 1 — 4 BeneVision N1 Patient Monitor Operator’s Manual… -
Page 27: Equipment Introduction
The arrhythmia detection and PAWP is intended for adult and pediatric patients only ■ The BeneVision N1 monitor is to be used in healthcare facilities. It can also be used during patient transport inside and outside of the hospital environment. It should be used by clinical professionals or under their guidance.
-
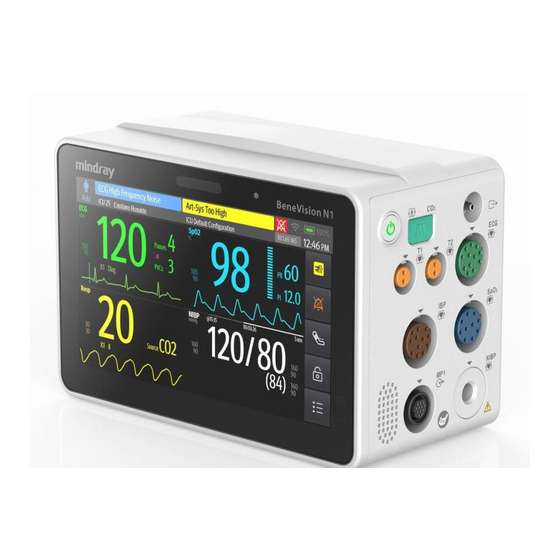
Page 28: Main Unit
Off: no battery is installed, or the monitor is powered off and no external power is connected. External power supply indicator: • On: when external power supply is connected. • Off: when external power supply is not connected. 2 — 2 BeneVision N1 Patient Monitor Operator’s Manual…
-
Page 29: Left View
Using forceps is recommended. • In the case of water spray, dry the Multi-pin connector of the N1 before connecting the N1 to the Modular Rack or Dock. BeneVision N1 Patient Monitor Operator’s Manual 2 — 3…
-
Page 30: Right View
Modular Rack The Modular Rack is used to connect an N1 and an external parameter module as well as providing bed rail mounting capability. It can also be connected to the Dock. 2 — 4 BeneVision N1 Patient Monitor Operator’s Manual…
-
Page 31: Left View
Pogo pin: used for communication between the Modular Rack and external parameter module. Infrared filter: used for communication between the Modular Rack and external parameter module. Contact: power input connector of the external parameter module. BeneVision N1 Patient Monitor Operator’s Manual 2 — 5…
-
Page 32: Dock
Multi-pin connector: power input and communication connector of the N1. Connection status indicator: it is on when the N1 is properly connected to the Dock. External power supply indicator: it is on when the external AC power supply is connected. 2 — 6 BeneVision N1 Patient Monitor Operator’s Manual…
-
Page 33: Rear View
Network connector: a standard RJ45 connector which connects the monitor to the CMS. It can also be used to transfer data.. External Parameter Modules The monitor can connect the following external parameter modules to perform CO monitoring through the Modular Rack. Sidestream CO module Microstream CO module BeneVision N1 Patient Monitor Operator’s Manual 2 — 7…
-
Page 34: Installation
Press and hold the latch at the bottom of the N1 or parameter module. If the external module is locked to the Modular Rack, unlock it first. Pull the N1 or parameter module out as indicated. 2 — 8 BeneVision N1 Patient Monitor Operator’s Manual…
-
Page 35: Installing The Modular Rack To The Dock
To prevent the Dock from falling off, do not press the release button while transporting the N1 with the Modular Rack and Dock. 2.8.5 Installing the N1 to the Dock The N1can also be installed directly to the Dock as shown below: BeneVision N1 Patient Monitor Operator’s Manual 2 — 9…
-
Page 36: Removing The N1 From The Dock
Insert the N1 to the host monitor’s module rack. Firmly push the N1 until an audible click is heard indicating that the clip (refer to 2.4.4 Bottom View) engaged the module rack. 2 — 10 BeneVision N1 Patient Monitor Operator’s Manual…
-
Page 37: Connecting The N1 To The Host Monitor Through The Satellite Module Rack (Smr)
To connect the N1 to the host monitor through the Dock, follow this procedure: Connect the N1 to the Dock. Connect the host monitor connector of the Dock with the SMR connector of the host monitor using the dock data cable. BeneVision N1 Patient Monitor Operator’s Manual 2 — 11…
-
Page 38: N1 In Use With The Transport Dock
Transport Dock. 2.11 Input Devices The monitor allows data entry through touchscreen, keyboard, mouse, and barcode reader. 2.12 Printing Devices Use only Mindray specified printers to output patient information and data. 2 — 12 BeneVision N1 Patient Monitor Operator’s Manual…
-
Page 39: Getting Started
Mindray. If the packing case is intact, open the package and remove the equipment and accessories carefully. Check all materials against the packing list and check for any mechanical damage. Contact Mindray in case of any problems. NOTE •…
-
Page 40: Environmental Requirements
• Always use the accompanying power cord delivered with the monitor. • Always use the AC adapter specified by Mindray. • Before connecting the equipment to the AC mains, check that the voltage and frequency ratings of the power line are the same as those indicated on the AC adapter and Dock.
-
Page 41: Connecting The Input Devices
The touchscreen is not used in 60 seconds when the N1 runs on battery and is not connected to an external display. ■ Select the Unlock quick key , and swipe the slider up as instructed. BeneVision N1 Patient Monitor Operator’s Manual 3 — 3…
-
Page 42: Using The On-Screen Keyboard
Clearing Old Data Formats (for the Mindray Custom 2D Barcode Reader) If using the Mindray custom 2D barcode reader (Model HS-1R or HS-1M), before using it for the first time, clear old data formats and configure the barcode reader.To do so, follow this procedure: Scan the engineering barcode to clear the previous data format.
-
Page 43: Screen Display
For more information, see 3.11.4Accessing Parameter Setup Dialogs. 3.6.1 On-screen Symbols The following table lists the on-screen symbols displayed on the system status information area: Symbol Description Symbol Description Adult, male Adult, female BeneVision N1 Patient Monitor Operator’s Manual 3 — 5…
-
Page 44: Dialogs
No battery is installed. Battery fault, battery communication fault, or battery charging fault. Contact service personnel for help. 3.6.2 Dialogs All dialogs have similar style and structure, see the figure below: 3 — 6 BeneVision N1 Patient Monitor Operator’s Manual…
-
Page 45: Quick Keys Of The N1
The monitor provides different operating modes. This section describes the monitoring mode and the standby mode. 3.7.1 Monitoring Mode The monitoring mode is the most frequently used clinical mode for patient monitoring. When the monitor is turned on, it automatically enters the monitoring mode. BeneVision N1 Patient Monitor Operator’s Manual 3 — 7…
-
Page 46: Module Mode
The monitor automatically exit the privacy mode in any of the following situations: The monitor disconnects from the CMS. ■ ■ The low battery alarm occurs. You can also operate the touchscreen, mouse, or keyboard to manually exit the privacy mode. 3 — 8 BeneVision N1 Patient Monitor Operator’s Manual…
-
Page 47: Night Mode
Stops all parameter measurements. Disables all the alarms and prompt messages, except for the battery low alarm. ■ ■ Turns screen brightness to the dimmest after entering the standby mode for 30 seconds. BeneVision N1 Patient Monitor Operator’s Manual 3 — 9…
-
Page 48: Outdoor Mode
If you want to use daylight saving time, switch on Daylight Saving Time. You can manually switch on or off the daylight saving time only when the auto daylight saving time function is disabled. For more information, see 21.7Enabling Auto Daylight Savings Time for details. 3 — 10 BeneVision N1 Patient Monitor Operator’s Manual…
-
Page 49: Adjusting The Screen Brightness
Select the Main Menu quick key → from the Parameters column select Parameters On/Off. Switch on or off desired parameters. When a parameter is switched off, the monitor stops data acquisition and alarming for this measurement. BeneVision N1 Patient Monitor Operator’s Manual 3 — 11…
-
Page 50: Displaying Parameter Numerics And Waveforms
Access Choose screen in either of the following ways: ◆ Select the Screen Setup quick key. Select the Main Menu quick key → from the Display column select Choose screen. ◆ Select the desired screen. 3 — 12 BeneVision N1 Patient Monitor Operator’s Manual…
-
Page 51: Selecting The Big Numerics Screen
In case of a temporary power failure, if the power is restored within 30 minutes, monitoring will resume with all active settings unchanged. If the monitor is without power for more than 30 minutes, it behaves the same as if it were normally turned off. BeneVision N1 Patient Monitor Operator’s Manual 3 — 13…
-
Page 52
This page intentionally left blank. 3 — 14 BeneVision N1 Patient Monitor Operator’s Manual… -
Page 53: Using The External Display
Remove the N1 from the Dock and reconnect it. Touchscreen failure Check that both ends of the USB cable accompanying the external display are connected properly to the Dock and the external display. BeneVision N1 Patient Monitor Operator’s Manual 4 — 1…
-
Page 54: Quick Keys Of The Independent External Display
Enters the ECG Lead/ dialog. Gain dialog. Remote View Opens the Remote View Minitrends Enters the Minitrends screen. screen. OxyCRG Opens the OxyCRG screen. ECG Full- Enters the 12-lead ECG Screen full screen. 4 — 2 BeneVision N1 Patient Monitor Operator’s Manual…
-
Page 55: Configuring The Displayed Quick Keys (Only Available When The N1 Is Used With The Independent External Display)
Select the Screen Setup quick key → Select the Choose Screen tab→ select Minitrends. ■ Select the Main Menu quick key → from the Display column select Choose Screen → select Minitrends. ■ BeneVision N1 Patient Monitor Operator’s Manual 4 — 3…
-
Page 56: The Display Of Minitrends Screen
The Minitrends screen can be configured to display the statistic number of physiological alarm in its lower half screen. To set the alarm statistics switch, follow this procedure: Enter the Minitrends screen. Select the Setup button. 4 — 4 BeneVision N1 Patient Monitor Operator’s Manual…
-
Page 57: Setting The Alarm Statistics Duration
Select the Main Menu quick key → from the Display column select Choose Screen → select OxyCRG. ■ 4.3.2 OxyCRG Events The following table lists the ABD events and their criteria: BeneVision N1 Patient Monitor Operator’s Manual 4 — 5…
-
Page 58: The Display Of The Abd Event Area
For neonatal patients, if you are only concerned with the patient’s SpO , you can use the SpO screen. The SpO screen displays SpO related data. It also displays realtime Temp and NIBP measurements. 4 — 6 BeneVision N1 Patient Monitor Operator’s Manual…
-
Page 59: Entering The Spo2 Screen
, PR, or PI, the dashboard, or Pleth waveform to enter the SpO2 menu. Select the Temp area to enter the Temp menu. ■ ■ Select the NIBP area to enter the NIBP menu. BeneVision N1 Patient Monitor Operator’s Manual 4 — 7…
-
Page 60: Remote View
4.5.2 About the Remote View The following figure shows the Remote View screen. Alarm watch area ◆ Displays all the monitored remote beds. ◆ Able to accommodate up to 12 beds. 4 — 8 BeneVision N1 Patient Monitor Operator’s Manual…
-
Page 61: Adding A Bed
In the Remote View screen, you can select a bed in the alarm watch area, then the main body of the Remote View screen will display the real time monitoring screen of the device. BeneVision N1 Patient Monitor Operator’s Manual 4 — 9…
-
Page 62: Saving A Manual Event
The main screen can display up to two alarm watch tiles, namely A-W1 and A-W2 . Each tile can accommodate up to six beds. The following figure shows the alarm watch tiles. 4 — 10 BeneVision N1 Patient Monitor Operator’s Manual…
-
Page 63: Freezing Waveforms
NOTE • You can view the frozen waveforms of up to 120 seconds. 4.6.3 Unfreezing Waveforms button upper right corner of the dialog. To unfreeze the frozen waveforms, select the Freeze BeneVision N1 Patient Monitor Operator’s Manual 4 — 11…
-
Page 64: Printing Frozen Waveforms
4.6.4 Printing Frozen Waveforms button at the upper left corner of the dialog. To print the frozen waveforms, select the Freeze 4 — 12 BeneVision N1 Patient Monitor Operator’s Manual…
-
Page 65: Managing Patients
Enter the Patient Management dialog. For more information, see5.2.1 Entering the Patient Management Dialog. Edit patient information as required. If a barcode reader is connected to the monitor, scanning the patient’s barcode will enter the patient’s information. BeneVision N1 Patient Monitor Operator’s Manual 5 — 1…
-
Page 66: Loading Patient Information From The Cms
For detailed information about patient data transfer, refer to the user manual of the host monitor. For the connection of N1 and the host monitor, refer to section 2.9 N1 in Use with a Host Monitor. 5 — 2 BeneVision N1 Patient Monitor Operator’s Manual…
-
Page 67: Exporting Patient Data
Select the Discharge Patient quick key (only available when the N1is used with the independent external display). Select the patient information area at the top left corner of the screen→ Discharge Patient. ■ BeneVision N1 Patient Monitor Operator’s Manual 5 — 3…
-
Page 68
Clear Patient Data: discharges the current patient and clears the waveform data. The monitor still uses the current configuration and does not go to the standby mode. The current patient becomes a discharged patient. 5 — 4 BeneVision N1 Patient Monitor Operator’s Manual… -
Page 69: Alarms
Technical alarm conditions may also be caused when an algorithm cannot classify or interpret the available data. Apart from the physiological and technical alarms, the monitor can also prompt with some messages describing the system status or patient status. BeneVision N1 Patient Monitor Operator’s Manual 6 — 1…
-
Page 70: Alarm Priorities
• Some physiological alarms, such as Asystole, are exclusive. They have identical alarm tones and alarm lights with normal high level physiological alarms, but their alarm messages are displayed 6 — 2 BeneVision N1 Patient Monitor Operator’s Manual…
-
Page 71: Alarm Status Symbols
Review dialog for the event created by this alarm. Changing Alarm Settings Alarms settings can be changed by selecting Main Menu and choosing from the list in the Alarm column. BeneVision N1 Patient Monitor Operator’s Manual 6 — 3…
-
Page 72: Setting Parameter Alarm Properties
Select the Alarm Setup quick key → select the Setup tab. ◆ Select the Main Menu quick key → from the Alarm column select Setup. Set the Auto Limits for New Patient switch. 6 — 4 BeneVision N1 Patient Monitor Operator’s Manual…
-
Page 73: Initiating Auto Alarm Limits
Same as the Same as the Same as the Same as the Same as the default alarm default alarm default alarm default alarm measurement range limit limit limit limit BeneVision N1 Patient Monitor Operator’s Manual 6 — 5…
-
Page 74
(whichever is Neonate: 25 to 100 greater) smaller) IBP: CVP/ IBP-M Mean × 0.75 Mean × 0.75 Mean × 1.25 Mean × 1.25 3 to 40 LAP/ (mmHg) RAP/ UVP/P1- (Venous pressure) 6 — 6 BeneVision N1 Patient Monitor Operator’s Manual… -
Page 75: Setting The Zero Rr Delay Time
For the configuration of the pause function, see section 21.3.3 Defining the Pause Function. When alarms are paused, the following rules are followed: ■ No physiological alarm will be presented. BeneVision N1 Patient Monitor Operator’s Manual 6 — 7…
-
Page 76: Pausing Alarm Sound
This capability is enabled by default. To prolong the audio pause time, follow this procedure: In the physiological alarm information area, select the alarm pause countdown. Select the alarm tone pause time. Options may include Pause 5 min, Pause 10 min, or Pause 15 min. 6 — 8 BeneVision N1 Patient Monitor Operator’s Manual…
-
Page 77: Resetting Alarms
If you “latch” physiological alarms, all visual and audible alarm indications remains (if configured) until the ■ alarms are reset. For latched alarms the time when the alarm is last triggered is displayed behind the alarm message. BeneVision N1 Patient Monitor Operator’s Manual 6 — 9…
-
Page 78: Cpb Mode
To exit the intubation mode, choose either of the following ways: From the bottom of the Resp or CO2 dialog, select Exit Intubation Mode. ■ Select the Main Menu quick key from the Alarm column → select Exit Intubation Mode. ■ 6 — 10 BeneVision N1 Patient Monitor Operator’s Manual…
-
Page 79: Testing Alarms
The monitor automatically performs a self test at startup. Check that an alarm tone is heard, the alarm lamp illuminates, one after the other, in red, yellow, and cyan. This indicates that the visible and audible alarm indicators functions correctly. BeneVision N1 Patient Monitor Operator’s Manual 6 — 11…
-
Page 80
This page intentionally left blank. 6 — 12 BeneVision N1 Patient Monitor Operator’s Manual… -
Page 81: Monitoring Ecg, Arrhythmia, St And Qt
Only use parts and accessories specified in this manual. Follow the instructions for use and adhere to all warnings and cautions. • Periodically inspect the electrode application sites to ensure skin integrity. If the skin quality changes, replace the electrodes or change the application site. BeneVision N1 Patient Monitor Operator’s Manual 7 — 1…
-
Page 82: Ecg Display
Dry the skin completely before applying electrodes. 7.4.2 Applying Electrodes and Connecting the Patient To connect ECG cables, follow this procedure: 7 — 2 BeneVision N1 Patient Monitor Operator’s Manual…
-
Page 83: Lead Wire Color Code
RA placement: directly below the clavicle and near the right shoulder. LA placement: directly below the clavicle and near the left ■ shoulder. LL placement: on the left lower abdomen. ■ BeneVision N1 Patient Monitor Operator’s Manual 7 — 3…
-
Page 84
V3R-V6R placement: on the right side of the chest in positions corresponding to those on the left. ■ NOTE • For the 5-leadwire and 6-leadwire placement, place the precordial electrode according to the physician’s preference. 7 — 4 BeneVision N1 Patient Monitor Operator’s Manual… -
Page 85: Choosing The Ecg Lead Type
To change the paced status, follow this procedure: Select the ECG numeric area or waveform area to enter the ECG dialog. Select the Pacer tab. Set Paced to Yes or No. BeneVision N1 Patient Monitor Operator’s Manual 7 — 5…
-
Page 86: Enabling Pacer Rejection
Alternately you can choose the desired screen configuration as follows: Select the Screen Setup quick key → Choose Screen or select the Main Menu quick key → from the Display column select Choose Screen. Select ECG Full-Screen, or ECG 12-Lead. 7 — 6 BeneVision N1 Patient Monitor Operator’s Manual…
-
Page 87: Setting Ecg Alarm Properties
Set Va and Vb according to the locations of the Va and Vb electrode sites. Default settings are Va and Vb. 7.5.3.4 Changing ECG Waveform Speed To change ECG waveform speed, follow this procedure: Select the ECG numeric area or waveform area to enter the ECG dialog. Select the Setup tab. BeneVision N1 Patient Monitor Operator’s Manual 7 — 7…
-
Page 88: Disabling The Smart Lead Off Function
Select the ECG numeric area or waveform area to enter the ECG dialog. Select the Setup tab. Set QRS Volume. When valid SpO measurements are available, the monitor adjusts the pitch of QRS tone based on the SpO value. 7 — 8 BeneVision N1 Patient Monitor Operator’s Manual…
-
Page 89: Adjusting The Minimum Qrs Detection Threshold
It is recommended to closely monitor patient condition during, and for several minutes after, the learning phase to allow the algorithm to reach optimal detection performance. 7.6.2 Arrhythmia Events This section lists all arrhythmia events and their criteria. BeneVision N1 Patient Monitor Operator’s Manual 7 — 9…
-
Page 90
, irregular RR interval change is greater than 12.5%) A-Fib (for adult only) P wave is absent and normal beat RR intervals are irregular. PVCs/min PVCs/min exceeds high limit. Pauses/min Pauses/min exceeds high limit. 7 — 10 BeneVision N1 Patient Monitor Operator’s Manual… -
Page 91: Displaying Arrhythmia Information
Asystole Delay to 10 sec. 7.6.4.3 Arrhythmia Threshold Range Arrhythmia Threshold Range Asystole Delay 3 sec to 10 sec Tachy (HR High) 60 bpm to 295 bpm Brady (HR Low) 16 bpm to 120 bpm BeneVision N1 Patient Monitor Operator’s Manual 7 — 11…
-
Page 92
If the number of consecutive PVCs is greater than or equal to the V-Brady PVCs limit (5), and PVC rate is ■ lower than the V Brady limit (40), a Vent Brady alarm is generated. 7 — 12 BeneVision N1 Patient Monitor Operator’s Manual… -
Page 93: Intelligent Arrhythmia Alarm
Alarm in high priority chain Alarm in medium priority chain During timeout period, alarm light and alarm tone are disabled. When the timeout period is reached, alarm light and alarm tone are reactivated. BeneVision N1 Patient Monitor Operator’s Manual 7 — 13…
-
Page 94: St Segment Monitoring
Select the ST tab→ select the Setup tab. Switch on ST Analysis. Reliable ST monitoring cannot be ensured under the following situations: ■ You are unable to get a lead that is not noisy. 7 — 14 BeneVision N1 Patient Monitor Operator’s Manual…
-
Page 95: Displaying St Deviation Numerics
Select Main Menu quick key → from the Display column select Tile Layout. Select the waveform area where you want to display the ST segments, and then select ECG→ ST Segment. BeneVision N1 Patient Monitor Operator’s Manual 7 — 15…
-
Page 96: Entering The St View
Entering the ST Graphic (only available when the N1 is used with the independent external display) To display ST Graphic, follow this procedure: Select the ECG numeric area or waveform area to enter the ECG dialog. Select the ST tab. Select ST Graphic. 7 — 16 BeneVision N1 Patient Monitor Operator’s Manual…
-
Page 97: Changing St Settings
Select the ECG numeric area or waveform area to enter the ECG dialog. Select the ST tab → select the Setup tab. Set ST Segment. You can select up to 3 leads. BeneVision N1 Patient Monitor Operator’s Manual 7 — 17…
-
Page 98: Adjusting St Measurement Points
(between the P and Q waves). The J point location is indicated relative to the R-wave peak. Position the J point at the end of the QRS ■ complex and the beginning of the ST segment. 7 — 18 BeneVision N1 Patient Monitor Operator’s Manual…
-
Page 99: Qt/Qtc Interval Monitoring
Select Main Menu quick key → from the Display column select Tile Layout . Click the parameter numeric area where you want to display the QT numerics, and then select ECG → QT/ QTc . BeneVision N1 Patient Monitor Operator’s Manual 7 — 19…
-
Page 100: Entering The Qt View
QT numerics area and the message “Cannot Analyze QT” is shown in the technical alarm area. Select the left or right arrow to switch leads, and the corresponding waveform will be highlighted. 7 — 20 BeneVision N1 Patient Monitor Operator’s Manual…
-
Page 101: Saving The Current Qtc As Baseline
If you suspect that false arrhythmia alarms are presented, you may need to manually initiate an ECG relearn. To do so, follow this procedure: Select the ECG numeric area or waveform area to enter the ECG dialog. BeneVision N1 Patient Monitor Operator’s Manual 7 — 21…
-
Page 102: Defibrillation Synchronization Pulse Output
2. Check that electrodes are not detached or dry. Perform skin preparation again as described in 7.4.1 Preparing the Patient Skin and apply fresh and moist electrodes. 3. Check that the patient cable or leadwires are not damaged. Change them if necessary. 7 — 22 BeneVision N1 Patient Monitor Operator’s Manual…
-
Page 103
For more information, see 7.4.1 Preparing the Patient Skin and 7.4.2 Applying Electrodes and Connecting the Patient . 3. Check for ECG filter setting. Set ECG Filter mode to Monitor to reduce baseline wander on the display. BeneVision N1 Patient Monitor Operator’s Manual 7 — 23… -
Page 104
This page intentionally left blank. 7 — 24 BeneVision N1 Patient Monitor Operator’s Manual… -
Page 105: Resting 12-Lead Ecg Analysis
ST-segment level. BDR is switched on by default. To set the BDR, follow this procedure: On the ECG 12-Lead screen, select the ECG numeric area or waveform area to enter the ECG dialog. BeneVision N1 Patient Monitor Operator’s Manual 8 — 1…
-
Page 106: Setting The 12-Lead Waveform Layout
Set Tachy and Brady . NOTE • The tachycardia threshold only applies to patients whose age exceeds 180 days. • The bradycardia threshold only applies to patients whose age exceeds 2191 days (6 years). 8 — 2 BeneVision N1 Patient Monitor Operator’s Manual…
-
Page 107: Setting The 12-Lead Interpretation Report
At the completion of 12-lead ECG interpretation, select Print to output the report via printer. Exiting the ECG 12-Lead Screen To exit the ECG 12-Lead screen, select Exit on the ECG 12-Lead screen. BeneVision N1 Patient Monitor Operator’s Manual 8 — 3…
-
Page 108
This page intentionally left blank. 8 — 4 BeneVision N1 Patient Monitor Operator’s Manual… -
Page 109: Monitoring Impedance Respiration (Resp)
CAUTION • Only use parts and accessories specified in this manual. • Impedance respiration monitoring is not for use on patients while they are active, as this can cause false alarms. BeneVision N1 Patient Monitor Operator’s Manual 9 — 1…
-
Page 110: Resp Display
Dry the skin completely before applying the electrodes. CAUTION • Proper skin preparation is necessary for good signal quality at the electrode site, as the skin is a poor conductor of electricity. 9 — 2 BeneVision N1 Patient Monitor Operator’s Manual…
-
Page 111: Placing The Electrodes
Store the electrodes at room temperature. Open the electrode package immediately prior to use. • Check that the electrode packages are intact and that the electrodes are not past the expiration date. Ensure the electrode gel is moist. BeneVision N1 Patient Monitor Operator’s Manual 9 — 3…
-
Page 112: Changing Resp Settings
Setting the Resp Waveform Speed To set the Resp waveform speed, follow this procedure: Select the Resp numeric area or waveform area to enter the Resp dialog. Select the Setup tab. Set Speed . 9 — 4 BeneVision N1 Patient Monitor Operator’s Manual…
-
Page 113: Setting The Auto Detection Switch
Once set, the detection level will not adapt automatically to different respiration depths. It is important to remember that if the depth of breathing changes, you may need to change the detection level. BeneVision N1 Patient Monitor Operator’s Manual 9 — 5…
-
Page 114
This page intentionally left blank. 9 — 6 BeneVision N1 Patient Monitor Operator’s Manual… -
Page 115: Monitoring Pulse Oxygen Saturation (Spo )
100%, which is equivalent to switching off the alarm. • is empirically calibrated in healthy adult volunteers with normal levels of carboxyhemoglobin (COHb) and methemoglobin (MetHb). BeneVision N1 Patient Monitor Operator’s Manual 10 — 1…
-
Page 116: Spo Measurement Limitations
Intravascular dyes (such as indocyanine green, methylene blue, indigo carmine, etc.) ◆ Dyes in the measure site, such as nail polish Environmental conditions: ■ ◆ Excessive ambient light ◆ Electrosurgery equipment 10 — 2 BeneVision N1 Patient Monitor Operator’s Manual…
-
Page 117: Spo Display
Connect the sensor to the extension cable. CAUTION • Do not apply sensor too tightly as this results in venous pulsation which may severely obstruct circulation and lead to inaccurate measurements. BeneVision N1 Patient Monitor Operator’s Manual 10 — 3…
-
Page 118: Changing The Spo Alarm Settings
3 seconds, and then to 84% (6 points) for 6 seconds. The resulting SatSeconds are: % SpO Seconds SatSeconds 2× 4× 6× Total SatSeconds= After approximately 11 seconds, a Sat-Second alarm would sound, because the limit of 50 SatSeconds would have been exceeded. 10 — 4 BeneVision N1 Patient Monitor Operator’s Manual…
-
Page 119: Setting Spo Sensitivity (For Masimo Spo )
Select the SpO numeric area or waveform area to enter the SpO2 dialog. Select the SpO2 Setup tab. Set Sensitivity to Maximum, Normal , or APOD . BeneVision N1 Patient Monitor Operator’s Manual 10 — 5…
-
Page 120: Changing Averaging Time
If the Alarm Source is set to PR , the QRS tone is derived from PR measurements. To set the QRS volume, follow this procedure: Select the SpO numeric area or waveform area to enter the SpO2 dialog. Select the PR Setup tab. 10 — 6 BeneVision N1 Patient Monitor Operator’s Manual…
-
Page 121: Setting The Pr Source
3.11.1 Switching On or Off a Parameter . 3. Check that the cable connections of the SpO sensor and the extension cable are tight. Replace the SpO sensor or the extension cable if needed. BeneVision N1 Patient Monitor Operator’s Manual 10 — 7…
-
Page 122: Masimo Information
Possession or purchase of this device does not convey any express or implied license to use the device with unauthorized replacement parts which would, alone, or in combination with this device, fall within the scope of one or more of the patents relating to this device. 10 — 8 BeneVision N1 Patient Monitor Operator’s Manual…
-
Page 123: Monitoring Temperature (Temp)
Plug the probe or temperature cable to the temperature connector. If using a disposable probe, connect the probe to the temperature cable. Follow the probe manufacturer’s instructions to connect the probe to the patient. BeneVision N1 Patient Monitor Operator’s Manual 11 — 1…
-
Page 124: Changing Temperature Settings
This section lists the problems that might occur. If you encounter the problems when using the equipment or accessories, check the table below before requesting service. If the problem persists, contact your service personnel. NOTE • For the physiological and technical alarm messages, see Appendix D Alarm Messages. 11 — 2 BeneVision N1 Patient Monitor Operator’s Manual…
-
Page 125
1. If using a disposable probe, check the connection between the numeric area probe and the temperature cable. 2. Try using a known good probe in case the sensor is damaged. BeneVision N1 Patient Monitor Operator’s Manual 11 — 3… -
Page 126
This page intentionally left blank. 11 — 4 BeneVision N1 Patient Monitor Operator’s Manual… -
Page 127: Monitoring Noninvasive Blood Pressure (Nibp)
• Do not modify or replace connectors of the NIBP air hose except with mindray-approved connectors. Use neonatal and infant cuffs with CM1901 hoses only. Use pediatric/adult cuffs with CM1903 hoses only.
-
Page 128: Nibp Measurement Limitations
STAT: continual rapid series of measurements over a five minute period. ■ ■ Sequence: continually automatic measurement at set durations and intervals. 12.5 NIBP Display The NIBP display shows only numerics. (11) (10) 12 — 2 BeneVision N1 Patient Monitor Operator’s Manual…
-
Page 129: Preparing For Nibp Measurements
Select an appropriate cuff by referring to the limb circumference marked on the cuff. The width of the cuff should be 40% (50% for neonates) of the limb circumference, or 2/3 of the length of the upper BeneVision N1 Patient Monitor Operator’s Manual 12 — 3…
-
Page 130: Starting And Stopping Nibp Measurements
Changing NIBP Settings 12.8.1 Setting the NIBP Alarm Properties To set the NIBP alarm properties, follow this procedure: Select the NIBP numeric area to enter the NIBP dialog. Select the Alarm tab. 12 — 4 BeneVision N1 Patient Monitor Operator’s Manual…
-
Page 131: Setting The Initial Cuff Inflation Pressure
NIBP sequence measurement can have up to five phases: A, B, C, D, and E. The duration and interval of each phase can be set individually. To set NIBP sequence, follow this procedure: Select the NIBP numeric area to enter the NIBP dialog. BeneVision N1 Patient Monitor Operator’s Manual 12 — 5…
-
Page 132: Setting The Nibp Display Format
This section lists the problems that might occur. If you encounter the problems when using the equipment or accessories, check the table below before requesting for services. If the problem persists, contact your service personnel. 12 — 6 BeneVision N1 Patient Monitor Operator’s Manual…
-
Page 133
For more information, see. 3.11.2 Displaying Parameter Numerics and Waveforms Check that if the NIBP parameter switch is enabled. If not, enable the NIBP measurement. For more information, see 3.11.1 Switching On or Off a Parameter . BeneVision N1 Patient Monitor Operator’s Manual 12 — 7… -
Page 134
This page intentionally left blank. 12 — 8 BeneVision N1 Patient Monitor Operator’s Manual… -
Page 135: Monitoring Invasive Blood Pressure (Ibp)
Mechanical shock to the invasive blood pressure transducer may cause severe shifts in zero balance and calibration, and cause erroneous readings. • The neutral electrode of the electro-surgery unit (ESU) shall properly contact the patient. Otherwise, burns may result. BeneVision N1 Patient Monitor Operator’s Manual 13 — 1…
-
Page 136: Preparing For Ibp Monitoring
Make sure that all the transducers are zeroed correctly before making IBP measurements. • Make sure that all air bubbles have been flushed from the IBP transducer system before making IBP measurements. 13 — 2 BeneVision N1 Patient Monitor Operator’s Manual…
-
Page 137: Zeroing The Ibp Transducer
Zero the Codman ICP transducer. For more information, see section 13.3.1 Zeroing the Codman ICP transducer . Disconnect the ICP transducer and ICP adapter cable. Follow the manufacturer’s instructions to apply the ICP transducer to the patient. Reconnect the ICP transducer and ICP adapter cable. BeneVision N1 Patient Monitor Operator’s Manual 13 — 3…
-
Page 138: Ibp Display
If monitors of different brands are used to zero the Codman ICP transducer, the zero reference values can be different. Use a Mindray monitor to Zero the Codman ICP transducer if you will take ICP measurement using a Mindray monitor. Otherwise the ICP measurement could be inaccurate.
-
Page 139: Changing Ibp Settings
To select the pressure label, follow this procedure: Select the IBP numeric area or waveform area to enter the corresponding pressure dialog. Select the Setup tab. BeneVision N1 Patient Monitor Operator’s Manual 13 — 5…
-
Page 140: Setting The Pressure Type For Display
Select the Setup tab. Set the following properties of the IBP waveform: ◆ Speed ◆ Scale : if Auto is selected, the size of the pressure’s waveform will be adjusted automatically. 13 — 6 BeneVision N1 Patient Monitor Operator’s Manual…
-
Page 141: Setting The Display Format Of Artery Pressure
PAWP (only available when the N1 is used with the independent external display) Pulmonary Artery Wedge Pressure (PAWP) values, used to assess cardiac function, are affected by fluid status, myocardial contractility, and valve and pulmonary circulation integrity. BeneVision N1 Patient Monitor Operator’s Manual 13 — 7…
-
Page 142: Pawp Equipment To Patient Connection
Connect the IBP transducer, the IBP cable and the module. For more information, see 13.2.2 Measuring an Invasive Blood Pressure . Follow the manufacturer’s instructions to connect the PA port of the thermodilution catheter and the patient end of the IBP transducer. 13 — 8 BeneVision N1 Patient Monitor Operator’s Manual…
-
Page 143: Measuring Pawp
If you need to start a new measurement, repeat step 3 to step 6. If the measurement fails or you need to adjust the PAWP value, you can use the following buttons to adjust the PAWP waveform and measurement. BeneVision N1 Patient Monitor Operator’s Manual 13 — 9…
-
Page 144: Setting The Waveforms Of The Pawp Screen
3. Check the connection of IBP cable, IBP transducer and module. 4. Check that the three-way valve is turned to the correct position. 5. Check that the IBP transducer has been zeroed. For more information, see 13.2.3 Zeroing the IBP transducer . 13 — 10 BeneVision N1 Patient Monitor Operator’s Manual…
-
Page 145
2. Perform zero calibration again. Do not sway the IBP transducer and tubing during zero calibration. For more information, see 13.2.3 Zeroing the IBP transducer . 3. If zero calibration still fails, replace the transducer. BeneVision N1 Patient Monitor Operator’s Manual 13 — 11… -
Page 146
This page intentionally left blank. 13 — 12 BeneVision N1 Patient Monitor Operator’s Manual… -
Page 147: Monitoring Carbon Dioxide (Co )
2.8.1 Installing the N1 or External Parameter Module into the Modular Rack . In sequence from left to right, the following are sidestream CO external module, microstream CO external module, and N1 monitor with internal CO module. BeneVision N1 Patient Monitor Operator’s Manual 14 — 1…
-
Page 148: Co Safety Information
Measurement accuracy of the microstream CO module may be affected by the breath rate. 14.5 Display The CO numeric and waveform areas provide FiCO measurement, EtCO measurement, awRR measurement, and a CO waveform. 14 — 2 BeneVision N1 Patient Monitor Operator’s Manual…
-
Page 149: Measuring Co 2 Using The Sidestream/Microstream Co 2 Module
CO adapter. Refer to the CO2 Adapter User Manual (PN: H-046-009994-00) for the connection of the CO adapter and the gas sampling line. BeneVision N1 Patient Monitor Operator’s Manual 14 — 3…
-
Page 150
CO module. CAUTION • Check the compatibility of the CO adapter and the sampling line before use. The CO adapter is intended for connecting an Oridion CO sampling line. 14 — 4 BeneVision N1 Patient Monitor Operator’s Manual… -
Page 151: Preparing To Measure Co Using The Microstream Co Module
After the CO module is connected to the N1, it enters measure mode by default and the monitor displays CO2 Sensor Warmup . CO can be measured after the start-up sequence is complete. BeneVision N1 Patient Monitor Operator’s Manual 14 — 5…
-
Page 152: Zeroing The Sidestream/Microstream Co Module
CO module. ■ The default operating mode is Measure . When not using the CO module, proceed as follows to enter the Standby mode: 14 — 6 BeneVision N1 Patient Monitor Operator’s Manual…
-
Page 153: Entering The Intubation Mode
Switch on for BTPS. ◆ Switch off for ATPD. 14.8 Changing O Settings (For Sidestream CO Module Integrating O 14.8.1 Changing O Alarm Settings To change the O alarm settings, follow this procedure: BeneVision N1 Patient Monitor Operator’s Manual 14 — 7…
-
Page 154: Setting The O Waveform
The alarm message “ CO2 Airway Occluded ” will appear on the screen. Continue to block the gas inlet for another one minute. Select the Main Menu quick key → from the System column select Maintenance → input the required password → select 14 — 8 BeneVision N1 Patient Monitor Operator’s Manual…
-
Page 155: Co Calibration
1. Check the patient status. 2. Check the sample line and connectors for leakage. 3. Ventilate the room if the environmental CO concentration is too high. 14.15 Oridion Information BeneVision N1 Patient Monitor Operator’s Manual 14 — 9…
-
Page 156
CO sampling consumables which would, alone, or in combination with this device, fall within the scope of one or more of the patents relating to this device and/or CO2 sampling consumable. 14 — 10 BeneVision N1 Patient Monitor Operator’s Manual… -
Page 157: Review
White: operation-related event Current screen time line: indicates the time length of the current screen. Waveform area: displays trend curves. The color of trend curves is consistent with the color of parameter labels. BeneVision N1 Patient Monitor Operator’s Manual 15 — 1…
-
Page 158: Symbols On Review
Events are displayed in a chronological order. The most recent event is displayed at the top. The number of asterisk symbols before an event indicates alarm priority as follows: ■ ***: high priority alarm 15 — 2 BeneVision N1 Patient Monitor Operator’s Manual…
-
Page 159: Tabular Trends Review Page
1 min, 5 min, 10 min, 15 min, 30 min, 1 hr, 2 hrs, or 3 hrs : select to view up to 120 hours of tabular trends at the selected interval. ◆ Select parameters, such as NIBP, or GCS, to view the tabular trends when these parameter measurements are acquired. BeneVision N1 Patient Monitor Operator’s Manual 15 — 3…
-
Page 160: Graphics Trends Review Page
Changing the Number of Waveforms To change the number of waveforms displayed on the trend review page, follow this procedure: Enter the graphic trends review page. Select and set Trends . 15 — 4 BeneVision N1 Patient Monitor Operator’s Manual…
-
Page 161: Events Review Page
Lock : manually lock the event. Locked events cannot be deleted. ◆ Note : enter comments for the event. ◆ Rename : allow renaming an event name. Only manual events and arrhythmia events can be renamed. BeneVision N1 Patient Monitor Operator’s Manual 15 — 5…
-
Page 162: Full Disclosure Review Page
Storing more waveforms may shorten the storage time to less than 48 hours. Please adjust the waveforms stored with this consideration. In case of alarms, the background of the compressed waveform is highlighted with a colored block during the alarm time: ■ Red: high alarm priority 15 — 6 BeneVision N1 Patient Monitor Operator’s Manual…
-
Page 163: Oxycrg Review Page (Only Available When The N1 Is Used With The Independent External Display)
Choose one of the following methods to enter the OxyCRG review page: Select the Review quick key → select the OxyCRG tab. ■ Select the Main Menu quick key → from the Review column select OxyCRG . ■ BeneVision N1 Patient Monitor Operator’s Manual 15 — 7…
-
Page 164: 15.2.10 12-Lead Ecg Review Page
15.2.10.3 Setting 12-Lead ECG Waveforms To set the 12-lead ECG waveforms on the review page, follow this procedure: Enter the 12-lead review page. Set Speed , Gain , and Layout . 15 — 8 BeneVision N1 Patient Monitor Operator’s Manual…
-
Page 165: Reviewing Discharged Patients
Management column select Discharged Patients . From the patient list select the desired patient. Select Detail . Select the icon to enter the Patient Management dialog box. Select OK to exit the Patient Management dialog box. BeneVision N1 Patient Monitor Operator’s Manual 15 — 9…
-
Page 166
This page intentionally left blank. 15 — 10 BeneVision N1 Patient Monitor Operator’s Manual… -
Page 167: Clinical Assistive Applications (Caa) (Only Available When The N1 Is Used With The Independent External Display)
MEWS and NEWS and NEWS2are intended for adult patients only. The patient category of the Custom Score is defined by the Mindray Clinical Score Configuration Tool. For more information, see Mindray Clinical Scoring Config Tool Instruction for Use (P/N: 046-012986-00).
-
Page 168: Accessing The Ews Screen
Select the Main Menu quick key → from the CAA column select EWS . ■ Take NEWS2 as an example, the EWS screen is shown as follows. Your screen may be slightly different due to the configuration. 16 — 2 BeneVision N1 Patient Monitor Operator’s Manual…
-
Page 169: Performing Ews Scoring
88–92% (for example, in Scale 2 : f patients with hypercapnic respiratory failure). Measure or manually enter other required parameters and observations. select the operator ID If enabled, BeneVision N1 Patient Monitor Operator’s Manual 16 — 3…
-
Page 170: Changing Ews Settings
NIBP : the monitor automatically starts scoring at the completion of each NIBP measurement. ◆ Alarm : the monitor automatically starts scoring when an alarm occurs to the parameter for scoring. ◆ If no option is selected, the monitor does not initiate auto scoring. 16 — 4 BeneVision N1 Patient Monitor Operator’s Manual…
-
Page 171: Glasgow Coma Scale (Gcs)
Select the parameter area where you want to display the GCS score, and then from the popup list select GCS . The following figure shows the GCS parameter area. The display may be configured to look slightly different. BeneVision N1 Patient Monitor Operator’s Manual 16 — 5…
-
Page 172: Accessing The Gcs Dialog
To perform scoring, follow this procedure: From the Eye Opening area, Verbal Response area, and Motor Response area, respectively select an item that represents the patient’s status. Select OK to accept the total score. 16 — 6 BeneVision N1 Patient Monitor Operator’s Manual…
-
Page 173: Setting Gcs Scoring Interval
16.2.5 Reviewing GCS Trend Data From the GCS dialog, select Review to enter the Review dialog and view the GCS trend data from the Tabular Trends . BeneVision N1 Patient Monitor Operator’s Manual 16 — 7…
-
Page 174
This page intentionally left blank. 16 — 8 BeneVision N1 Patient Monitor Operator’s Manual… -
Page 175: Calculation (Only Available When The N1 Is Used With The Independent External Display)
The drug calculations are based on the values input; it does not check the plausibility of the calculation performed. • Check that the entered values are correct and the calculated values are appropriate. Mindray assumes no responsibility for any consequences caused by wrong entries and improper operations. 17.3 Drug Calculations 17.3.1…
-
Page 176: Checking The Titration Table
Infusion Rate (weight based) ml/hr Infusion Rate = Weight × Dose/Concentration Dose Dose/hr Dose = Infusion Rate × Concentration Dose/min Dose (weight based) Dose/kg/hr Dose (weight based) = Infusion Rate × Concentration/Weight Dose/kg/min 17 — 2 BeneVision N1 Patient Monitor Operator’s Manual…
-
Page 177: Hemodynamic Calculations
SV (ml) = 1000× C.O. (L/min)/HR (bpm) stroke index ml/m SVI (ml/m ) = SV (ml)/BSA (m systemic vascular DS/cm SVR (DS/cm ) = 79.96 × [APMAP (mmHg) — resistance CVP (mmHg)]/C.O. (L/min) BeneVision N1 Patient Monitor Operator’s Manual 17 — 3…
-
Page 178: Oxygenation Calculations
Select Oxycont Unit , Hb Unit , and Pressure Unit . Then corresponding parameter values will be automatically converted and updated accordingly. ■ Select Range to show the normal range of each parameter. 17 — 4 BeneVision N1 Patient Monitor Operator’s Manual…
-
Page 179
(mmHg))] oxygen transport index ml/min/m DO2I (ml/min/m ) = CaO2 (ml/L) × (C.O. (L/ min)/BSA (m oxygen consumption ml/min/m VO2I (ml/min/m ) = C (a-v) O2 (ml/L) ×(C.O. (L/ min)/BSA (m BeneVision N1 Patient Monitor Operator’s Manual 17 — 5… -
Page 180: Ventilation Calculations
(mmHg) = 100 × PaO (mmHg)/FiO arterial to alveolar oxygen a/AO a/AO (%) = 100 × PaO (mmHg)/PAO ratio (mmHg) minute volume L/min MV (L/min) = [TV (ml) × RR (rpm)]/1000 17 — 6 BeneVision N1 Patient Monitor Operator’s Manual…
-
Page 181: Renal Calculations
URNa mmol/L urine Urine ml/24 hrs plasm osmolality Posm mOsm/kgH urine osmolality Uosm mOsm/kgH serum sodium SerNa mmol/L creatinine μmol/L urine creatinine μmol/L blood urea nitrogen mmol/L height Height weight Weight BeneVision N1 Patient Monitor Operator’s Manual 17 — 7…
-
Page 182: Calculated Parameters And Formulas For Renal Calculations
BUN/Cr* BUN/Cr = 1000 × BUN (mmol/L)/Cr (μmol/L) creatinine ratio urine-serum creatinine U/Cr None U/Cr (mmol/L) = Ucr (μmol/L)/Cr (μmol/L) ratio *: BUN/Cr is a ratio under the unit of mol. 17 — 8 BeneVision N1 Patient Monitor Operator’s Manual…
-
Page 183: Printing
For more details about the printer, refer to the document accompanying the printer. With product upgrades, the monitor may support additional printers without prior notice. If you have any doubts about the compatibility of the printer used with this monitor, contact Mindray. 18.2 End Case Reports 18.2.1…
-
Page 184: Setting The End Case Report Period
When a parameter alarm switch is set to on and an alarm is triggered for this parameter, you can set the monitor to automatically print a Print on Alarm Report. To do so, follow this procedure: 18 — 2 BeneVision N1 Patient Monitor Operator’s Manual…
-
Page 185: Stopping A Printing Task
ECG report displayed in 3 lines and 4 columns with 2.5 seconds of ECG data generated by auto for each column. measurement Simultaneous : Record simultaneous 12-lead ECG data. BeneVision N1 Patient Monitor Operator’s Manual 18 — 3…
-
Page 186: Configuring Realtime Reports
Note that Interval on Auto only limits the number of rows or columns for Time. The report may have multiple pages to accommodate the number of parameters. To limit the parameters, change the Trend Group . 18 — 4 BeneVision N1 Patient Monitor Operator’s Manual…
-
Page 187: Configuring Graphic Trends Reports
Ventilation Calculation Report (only available when the N1 is used with the independent external display) ◆ Renal Calculation Report (only available when the N1 is used with the independent external display) BeneVision N1 Patient Monitor Operator’s Manual 18 — 5…
-
Page 188
End Case Report ◆ End Case Report — Realtime Report ◆ End Case Report — ECG Report ◆ End Case Report — Tabular Trends Report ◆ End Case Report — Graphic Trends Report 18 — 6 BeneVision N1 Patient Monitor Operator’s Manual… -
Page 189: Using The On-Screen Timers
You cannot change timer settings, other than Reminder Volume when a timer is running. • You can set Direction, Run Time, and Reminder Volume only for normal, advanced, and cycled timers. BeneVision N1 Patient Monitor Operator’s Manual 19 — 1…
-
Page 190
This page intentionally left blank. 19 — 2 BeneVision N1 Patient Monitor Operator’s Manual… -
Page 191: Managing Configurations
Select the Main Menu quick key → from the Configuration column select Manage → input the required password → select Set Default Patient Category . 20.4 Setting Default Configuration The monitor will load the pre-set default configuration in the following cases: BeneVision N1 Patient Monitor Operator’s Manual 20 — 1…
-
Page 192: Saving Current Settings
Connect the N1 to the Dock. Connect the USB drive to the Dock’s USB port. Select the Main Menu quick key → from the Configuration column select Manage → input the required password → Select 20 — 2 BeneVision N1 Patient Monitor Operator’s Manual…
-
Page 193: Importing A Configuration
Select the Main Menu quick key → from the Configuration column select Manage → input the required password → Select Select Modify Password . Respectively input the old password and new password. Select OK . BeneVision N1 Patient Monitor Operator’s Manual 20 — 3…
-
Page 194
This page intentionally left blank. 20 — 4 BeneVision N1 Patient Monitor Operator’s Manual… -
Page 195: Password-Protected User Settings
If necessary, select the customized fields and input names for these fields. NOTE • If the monitor is connected with the CMS, the patient information items and customized fields are loaded from the CMS. BeneVision N1 Patient Monitor Operator’s Manual 21 — 1…
-
Page 196: Auto Discharging A Patient After Monitor Power Off
Select the Main Menu quick key → from the System column select Maintenance → input the required password → select Set the Review tab → Discharged Patients tab. Configure the alarms as needed: 21 — 2 BeneVision N1 Patient Monitor Operator’s Manual…
-
Page 197: Changing The Alarm Settings
◆ Off : if an alarm is not reset within the designated delay time after the alarm occurs, the volume of the alarm tone does not change. BeneVision N1 Patient Monitor Operator’s Manual 21 — 3…
-
Page 198: Setting Alarm Pausing And Resetting Properties
Select the Main Menu quick key → from the System column select Maintenance → input the required password → select Select the Alarm tab → Pause/Reset tab. Switch off Pause 5 min , Pause 10 min , or Pause 15 min . 21 — 4 BeneVision N1 Patient Monitor Operator’s Manual…
-
Page 199: Latching Physiological Alarms
Resetting Alarms for Remote Devices You can reset the alarms occurring on the remote devices that are viewed on the Remote View screen of the monitor. To enable this function, follow this procedure: BeneVision N1 Patient Monitor Operator’s Manual 21 — 5…
-
Page 200
To set the alarm tone pattern for the remote device alarms, follow this procedure: Select the Main Menu quick key → from the System column select Maintenance → input the required password → select 21 — 6 BeneVision N1 Patient Monitor Operator’s Manual… -
Page 201: Changing Alarm Priority Settings
To set the priority of the CMS and eGateway disconnection alarm, follow this procedure: Select the Main Menu quick key → from the System column select Maintenance → input the required password → select BeneVision N1 Patient Monitor Operator’s Manual 21 — 7…
-
Page 202: Changing Alarm Delay Settings
Set Alarm Delay . The setting of Alarm Delay is not applied to the zero respiration rate alarms and the ST alarms. You can set Zero RR Delay and ST Alarm Delay separately. 21 — 8 BeneVision N1 Patient Monitor Operator’s Manual…
-
Page 203: Adjusting The Alarm Light Brightness
The arrhythmia algorithm can disable alarm light and alarm tone for designated period of time when certain arrhythmia alarms are detected. To set the arrhythmia alarm timeout period, follow this procedure: BeneVision N1 Patient Monitor Operator’s Manual 21 — 9…
-
Page 204: Changing Caa Settings (Only Available When The N1 Is Used With The Independent External Display)
→ select Select the CAA tab → select EWS tab. From the Select Default Score area, set Default Adult Score , Default Ped Score , and Default Neo Score . 21 — 10 BeneVision N1 Patient Monitor Operator’s Manual…
-
Page 205: Setting Gcs Threshold For Each Consciousness Level
In that case, you need to calibrate the ECG module. To do so, follow this procedure: Select the Main Menu quick key → from the System column select Maintenance → input the required password → select BeneVision N1 Patient Monitor Operator’s Manual 21 — 11…
-
Page 206: Setting Parameter Measurement Timeout
If the Connection Type is set to Print Server , you need to set the report type: Select the Main Menu quick key → from the System column select Maintenance → i nput the required password → select Select the Print tab. 21 — 12 BeneVision N1 Patient Monitor Operator’s Manual…
-
Page 207: Setting Patient Information On General (Non-12-Lead) Reports
Select the Main Menu quick key → from the System column select Maintenance → input the required password → select Select the Print tab → Other tab. Enable or disable Second Mark (Printer) . BeneVision N1 Patient Monitor Operator’s Manual 21 — 13…
-
Page 208: Setting Parameter Unit
For the 2D barcode reader, you can change the scanner settings. 21.10.1 Establish the Relationship between Patient Demographics and 2D Barcode Fields (for the Mindray Custom 2D Barcode Reader) To configure 2D barcode reader, follow this procedure: Select the Main Menu quick key → from the System column select Maintenance → input the required password →…
-
Page 209: 21.10.2 Setting The Barcode Reader Information
Select the Scanner tab → Scanner Info. tab. Set Scanner Type : ◆ 1D Scanner : select this option when using a 1D scanner or a 2D scanner other than the Mindray custom 2D scanner. ◆ 2D Scanner : select this option when using the Mindray custom scanner.
-
Page 210: 21.11.1 Network Safety Information
Set WLAN Band to Auto , 5G , or 2.4G according to the band you are using. The default is Auto , which means the monitor can automatically identify the WLAN band. Select Auth Server Type to set the type of authentication server. Set BGN Channel . Set AN Channel . 21 — 16 BeneVision N1 Patient Monitor Operator’s Manual…
-
Page 211: 21.11.4 Managing Certifications
21.11.8 Sending Realtime Data, Waveforms and Alarms via HL7 Protocol You can send the realtime data, waveforms, and alarms from the monitor to the hospital servers via HL7 protocol. To do so, follow this procedure: BeneVision N1 Patient Monitor Operator’s Manual 21 — 17…
-
Page 212: 21.11.9 Selecting Data Encryption Type
Thus, patient information will not display in the remote device list. 21.12 MLDAP MLDAP refers to Mindray LDAP (Lightweight Directory Access Protocol). It is an independent process which can be installed on the eGateway or other application server (Windows). MLDAP provides user identity and authentication.
-
Page 213: 21.12.2 Testing Mldap Server Connection
Connecting the Monitor to the CMS To connect the monitor to the CMS, follow this procedure: Set the IP address , Subnet Mask , and Gateway. For more information, see section 21.11 Configuring the Network . BeneVision N1 Patient Monitor Operator’s Manual 21 — 19…
-
Page 214: 21.13.1 Setting The Cms
Location , Printer , or Authorization Setup tab from the Dock Setup page. 21.15.2 Setting the Net Setting Type To set the network setting type of the Dock, follow this procedure: 21 — 20 BeneVision N1 Patient Monitor Operator’s Manual…
-
Page 215: 21.15.3 Setting The Network Of The Dock
→ select Select the Dock Setup tab → select the Setup tab. Set the Work Mode to Host Mode . Select the IP tab, and set Network Type to WLAN . BeneVision N1 Patient Monitor Operator’s Manual 21 — 21…
-
Page 216: 21.15.4 Setting The External Display
The mouse sensitivity is adjustable. To do so, follow this procedure: Select the Main Menu quick key → from the System column select Maintenance → input the required password → select Select the Other tab. Set Mouse Sensitivity . 21 — 22 BeneVision N1 Patient Monitor Operator’s Manual…
-
Page 217: Setting The Spo Tone Mode
→ select Select the Other tab. Select Parameters On/Off . Enable or disable desired parameters. When a parameter is switched off, the monitor stops data acquisition and alarming for this measurement. BeneVision N1 Patient Monitor Operator’s Manual 21 — 23…
-
Page 218: 21.16.6 Setting If Setting Parameter Switches Is Protected
Manual : The monitor enters the outdoor mode by manually selecting the Main Menu quick key → from the Display column select Enter Outdoor Mode . ◆ Auto : The monitor enters the outdoor mode automatically if the strength of ambient light is greater than the threshold. 21 — 24 BeneVision N1 Patient Monitor Operator’s Manual…
-
Page 219: Battery
Remove the battery if it will not be used for an extended period of time. 22.3 Installing the Battery The battery must only be installed by service personnel trained and authorized by Mindray. To install the battery, contact your service personnel. The battery is installed when the monitor leaves the factory. 22.4…
-
Page 220: Battery Symbols
If the battery is aged, the Battery Service Required alarm is presented each time the monitor is turned on, indicating that the battery has reached its end of life. For more information on battery-related alarms, see D Alarm Messages . 22 — 2 BeneVision N1 Patient Monitor Operator’s Manual…
-
Page 221: Checking The Battery Information
40 – 60% for storage. NOTE • Battery operating time depends on equipment configuration and operation. For example, high display brightness or measuring NIBP repeatedly will shorten the battery operating time. BeneVision N1 Patient Monitor Operator’s Manual 22 — 3…
-
Page 222: Storing The Battery
• Do not open the battery, heat the battery above 60 °C, incinerate the battery, or short the battery terminals. They may ignite, explode, leak or heat up, causing personal injury. 22 — 4 BeneVision N1 Patient Monitor Operator’s Manual…
-
Page 223: Care And Cleaning
Avoid wetting the pins and metal parts of the equipments, mounting kits, or accessories during cleaning and disinfection. • Use only Mindray approved cleaners and disinfectants and methods listed in this chapter to clean or disinfect your equipment. Warranty does not cover damage caused by unapproved substances or methods.
-
Page 224: Cleaning And Disinfecting The Equipment And Mounting Kits
0.105%, n-Alkyl dimethyl ethylbenzyl ammonium chlorides 0.105% Rely+On™ Virkon® High Level Powder Used as 1% solution Surface Disinfectant Biocidal active: Pentapotassium bis (peroxymonosulphate) bis (sulphate)(500g/ kg), Contains dipotassium peroxodisulphate. 23 — 2 BeneVision N1 Patient Monitor Operator’s Manual…
-
Page 225: Cleaning The Equipment And Mounting Kits
23.3.1 Approved Cleaning and Disinfecting Agents only. Wipe off all the cleaning agent residue with a dry cloth. Dry your equipment in a ventilated, cool place. BeneVision N1 Patient Monitor Operator’s Manual 23 — 3…
-
Page 226: Disinfecting The Equipment And Mounting Kits
Never clean or disinfect the metalic connectors at either end of the accessories. • Use only Mindray approved cleaners and disinfectants and methods listed in this section to clean or disinfect the accessories. Warranty does not cover damage caused by unapproved substances or methods.
-
Page 227
VIRAGUARD® Hospital Surface Isopropanol 70%, Disinfectant Towelettle Other ingredients 30% The following table lists approved Masimo SpO cable cleaning and disinfecting agents: Product Name Product Type Active Ingredients Isopropanol Liquid Isopropanol 70% BeneVision N1 Patient Monitor Operator’s Manual 23 — 5… -
Page 228: Cleaning The Accessories
Cleaning the accessories before disinfecting is recommended. 23.5 Sterilization Sterilization is not recommended for this equipment, related products, accessories, or supplies unless otherwise indicated in the Instructions for Use that accompany the products, accessories or supplies. 23 — 6 BeneVision N1 Patient Monitor Operator’s Manual…
-
Page 229: Maintenance
The equipment and accessories shall not be serviced or maintained while in use on a patient. • If you discover a problem with any of the equipment, contact your service personnel or Mindray. • Use and store the equipment within the specified temperature, humidity, and altitude ranges.
-
Page 230: Maintenance And Testing Schedule
24.5.1 Performing Visual Inspection Visually inspect the equipment before its first use every day. If you find any signs of damage, remove the monitor from use and contact the service personnel. 24 — 2 BeneVision N1 Patient Monitor Operator’s Manual…
-
Page 231: Performing Power-On Test
24.6.2 NIBP Accuracy Test The NIBP accuracy test should be performed once every two years or when you doubt the NIBP measurements. The NIBP accuracy test should be performed by Mindray-qualified service personnel only. 24.7 Disposing of the Monitor Dispose of the monitor and its accessories when its service life is reached. Follow local regulations regarding the disposal of such product.
-
Page 232
This page intentionally left blank. 24 — 4 BeneVision N1 Patient Monitor Operator’s Manual… -
Page 233: Accessories
ECG electrode, 3M, pkg of 50 Disposable Pediatric 1050NPSMKittycat 0681-00-0098-01 NEO pre-wired electrode radio Disposable Neonate Opaque, pkg of 100 1051NPSMKittycat 0681-00-0098-02 NEO pre-wired electrode radio Disposable Neonate Translucent, pkg of 100 BeneVision N1 Patient Monitor Operator’s Manual 25 — 1…
-
Page 234: 12-Pin Trunk Cables Available For Purchase
Adult/Pediatric EY6305A 009-004772-00 3-Lead, N/T, AHA, clip, 36’’ Reusable Adult/Pediatric EY6310B 009-004777-00 3-Lead, N/T, AHA, snap, 24’’ Disposable Adult/Pediatric EY6310B 115-032954-00 3-Lead, N/T, AHA, snap, 24’’ , pkg of Disposable Adult/Pediatric 25 — 2 BeneVision N1 Patient Monitor Operator’s Manual…
-
Page 235: 3-Lead Ecg Leadwires Also Compatible
AAMI 0012-00-1503-03 5-Lead leadset, snap, 36″ (101.6 Reusable Adult/Pediatric cm), AAMI 0012-00-1514-02 5-Lead leadset, clip, 24″ (61.0 cm), Reusable Adult/Pediatric AAMI 0012-00-1514-03 5-Lead leadset, clip, 36″ (101.6 cm), Reusable Adult/Pediatric AAMI BeneVision N1 Patient Monitor Operator’s Manual 25 — 3…
-
Page 236: 6-Lead Ecg Leadwires Available For Purchase
4092 040-003426-00 LNCS to RD adapter, Masimo Reusable 25.2.2 Extension Cables and Adapter Cables Also Compatible Model Part No. Description Usage Applicable patient 582A 115-020768-00 8-pin SpO2 extension cable, Masimo Reusable 25 — 4 BeneVision N1 Patient Monitor Operator’s Manual…
-
Page 237: Rd Set Sensors Available For Purchase
SpO2 sensor, finger-clip Disposable Neonate (<1Kg) LNCS Neo-L 0600-00-0157 SpO2 sensor, 20 pcs/box Disposable Neonate /Adult (<3 kg or > 40 kg) LNCS Inf 0600-00-0158 SpO2 sensor, 20 pcs/box Disposable Infant (3-20 kg) BeneVision N1 Patient Monitor Operator’s Manual 25 — 5…
-
Page 238: Nellcor Spo 2 Sensors Also Compatible
PROBE,D TEMP,ES400-12 (box of 20) Disposable Adult 0206-03-0118-02 PROBE,D TEMP,ES400-18 (box of 20) Disposable Adult 0206-03-0209-02 PROBE,D TEMP,ER 400-9 (box of 20) Disposable Adult 0206-03-0212-02 PROBE,D TEMP,ER400-12 (box of 20) Disposable Adult 25 — 6 BeneVision N1 Patient Monitor Operator’s Manual…
-
Page 239: Temp Probes Also Compatible
CM1504 115-027566-00 Cuff, 33-47 cm, bladderless, pkg of Disposable Large adult CM1505 115-027560-00 Cuff, 46-66 cm, bladderless Disposable Adult thigh CM1505 115-027567-00 Cuff, 46-66 cm, bladderless, pkg of Disposable Adult thigh BeneVision N1 Patient Monitor Operator’s Manual 25 — 7…
-
Page 240: Ibp Accessories
IBP transducer, ICU Medical Disposable 42602 M90-000133— Mounting background and Reusable accessory for IBP transducer, ICU Medical 42394 M90-000134— Mounting clamp for IBP transducer Reusable (send with the cable), ICU Medical 25 — 8 BeneVision N1 Patient Monitor Operator’s Manual…
-
Page 241: Icp Accessories Available For Purchase
Watertrap, DRYLINE II, pkg of 10 Reusable Adult/Pediatric 100-000081-00 115-058734-00 Watertrap, DRYLINE II, pkg of 10 Reusable Neonatal 25.6.2 Microstream CO Accessories Intended for Sale Model Part No. Description Usage 045-003134-00 CO2 adapter Reusable BeneVision N1 Patient Monitor Operator’s Manual 25 — 9…
-
Page 242: Microstream Co Accessories Also Compatible
Microstream CO2 module, with accessories 25.8 Mount and Mounting Accessories Part No. Description 115-028320 -00 Monitor handle 115-048378-00 Modular Rack kit 115-054849-00 Dock and pole mount kit 115-054851-00 Modular Rack and folding hook kit 25 — 10 BeneVision N1 Patient Monitor Operator’s Manual…
-
Page 243: Miscellaneous Accessories
Wireless keyboard and mouse set 023-000525-00 Wired keyboard and mouse set 023-000247-00 Keyboard, wired USB connector, black 023-000248-00 Mouse, wired USB connector, black 115-039575-00 2D Barcode reader, HS-1M, JADAK 115-039635-00 2D Barcode reader, HS-1R, JADAK BeneVision N1 Patient Monitor Operator’s Manual 25 — 11…
-
Page 244
This page intentionally left blank. 25 — 12 BeneVision N1 Patient Monitor Operator’s Manual… -
Page 245: Monitor Safety Specifications
Microstream CO module 0.40 136.5 × 40 × 102 Sidestream CO module 0.64 136.5 × 40 × 102 with O Sidestream CO module 0.52 136.5 × 40 × 102 without O BeneVision N1 Patient Monitor Operator’s Manual A — 1…
-
Page 246: Environmental Specifications
The monitor is operated in normal use for a period not less than 20 minutes when moved from storage temperature (range from — 30 °C to 70 °C) to room temperature ( °C °C), and started up within 10 minutes ± 2 after the movement. A — 2 BeneVision N1 Patient Monitor Operator’s Manual…
-
Page 247: Power Supply Specifications
For the monitor with internal CO module: no more than 3 hours to 90% when the monitor is off. no more than 5 hours to 90% when the monitor is on. BeneVision N1 Patient Monitor Operator’s Manual A — 3…
-
Page 248: Display Specifications
1 (two color-coded: yellow and green) A.7.2 Dock Connection status LED 1 (green) External power supply LED 1 (green) A.7.3 Transport Dock Power-on LED 1 (green) A.7.4 AC Adapter Power-on LED 1 (green) A — 4 BeneVision N1 Patient Monitor Operator’s Manual…
-
Page 249: Audio Indicator
Multi-pin connector Infrared filter Pogo pin Contact A.9.3 Interface Specifications of the Dock Network connector Equipotential grounding terminal AC power input connector VGA connector Host monitor connector USB connector Multi-pin connector BeneVision N1 Patient Monitor Operator’s Manual A — 5…
-
Page 250: Signal Outputs Specifications
48 hours at maximum. The specific storage time depends on the waveforms stored and the number of stored waveforms. OxyCRG view 48 hours. Trend data is stored one dot per second and the waveform stored is a compressed waveform. A — 6 BeneVision N1 Patient Monitor Operator’s Manual…
-
Page 251: Out-Of-Hospital Transport — Standards Compliance
Magnetic Field emission according to MIL STD 461F, Chapter RE101: Radiated emissions, magnetic field, 30Hz to 100KHz. Limit class: Army. Magnetic Field susceptibility : Radiated susceptibility, magnetic field, 50 and 60 Hz, 30 A/m. ■ BeneVision N1 Patient Monitor Operator’s Manual A — 7…
-
Page 252: Wi-Fi Specifications
Wi-Fi devices. The monitoring network must support the following requirements: The total delay of data transmission from the monitor to the CMS: ≤ 2 seconds. ■ A — 8 BeneVision N1 Patient Monitor Operator’s Manual…
-
Page 253: Measurement Specifications
Monitor, surgical, and ST mode: notch filter turns on automatically Diagnostic mode and High Freq Cut-off: notch filter is turned on/off manually ≥5 M Ω Differential input impedance Input signal range ±8 mV (peak-to-peak value) BeneVision N1 Patient Monitor Operator’s Manual A — 9…
-
Page 254
12 RR intervals and then averaging the remaining 10 RR intervals. The HR value displayed on the monitor screen is updated no more than one second. A — 10 BeneVision N1 Patient Monitor Operator’s Manual… -
Page 255
Accuracy QT: ±30 ms Resolution QT: 4 ms QTc: 1 ms 12-lead ECG Interpretation Sampling rate 1000 samples/s (waveform) 500 samples/s (algorithm) Amplitude quantisation 24 bits Alarm limit Range Step BeneVision N1 Patient Monitor Operator’s Manual A — 11… -
Page 256: Resp Specifications
20 to (high limit — 5) A.14.3 Specifications Refer to Appendix E SpO for the clinical study results of SpO sensor accuracy. 2 Sensor Accuracy Alarm limit Range (%) Step (%) A — 12 BeneVision N1 Patient Monitor Operator’s Manual…
-
Page 257
±1%, to compensate for the theoretical effect on oximeter measurements of fetal hemoglobin in neonatal blood. BeneVision N1 Patient Monitor Operator’s Manual A — 13… -
Page 258: Pr Specifications
Resolution 1 bpm Accuracy ±3 bpm or ±3%, whichever is greater PR from IBP Measurement range 25 to 350 bpm Resolution 1 bpm Accuracy ±1 bpm or ±1%, whichever is greater A — 14 BeneVision N1 Patient Monitor Operator’s Manual…
-
Page 259: Temp Specifications
Pediatric: 80 to 210 Neonate: 60 to 140 Default initial cuff inflation pressure Adult: 160 (mmHg) Pediatric: 140 Neonate: 90 Software overpressure protection Adult: 297±3 mmHg Pediatric: 297±3 mmHg Neonate: 147±3 mmHg BeneVision N1 Patient Monitor Operator’s Manual A — 15…
-
Page 260: Ibp Specifications
Meets the requirements of IEC 60601-2-34: 2011. Technique Direct invasive measurement Measurement range -50 to 300 mmHg Resolution 1 mmHg Accuracy ±2% or ±1 mmHg, whichever is greater (excluding sensor error) Refresh rate ≤1s A — 16 BeneVision N1 Patient Monitor Operator’s Manual…
-
Page 261: Co Specifications
0% to (high limit — 2)% High (low limit + 2%) to 100% 18% to (high limit — 2)% Sidestream CO Module Standard Meets the requirements of ISO 80601-2-55: 2011 Measurement range 0 to 150mmHg BeneVision N1 Patient Monitor Operator’s Manual A — 17…
-
Page 262
Using the CO module without O sensor: Adult, pediatric: 120 ml/min Neonatal: 70 ml/min, 90 ml/min Sample flowrate tolerance ±15% or ±15 ml/min, whichever is greater. Start-up time 20s (typical), 90 s (maximum) A — 18 BeneVision N1 Patient Monitor Operator’s Manual… -
Page 263
≤750 ms@120 ml/min awRR measurement range 0 to 150 rpm awRR measurement precision <60 rpm: ±1 rpm 60 to 150 rpm: ±2 rpm awRR resolution 1 rpm Data sample rate 50 Hz BeneVision N1 Patient Monitor Operator’s Manual A — 19… -
Page 264
0 to 150 rpm awRR measurement accuracy 0 to 70 rpm: ±1 rpm 71 to 120 rpm: ±2 rpm 121 to 150 rpm: ±3 rpm awRR resolution 1 rpm Data sample rate 40 Hz A — 20 BeneVision N1 Patient Monitor Operator’s Manual… -
Page 265: B Emc And Radio Regulatory Compliance
IEC 61000-3-3: 2013 NOTE • The device needs special precautions regarding EMC and needs to be installed and put into service according to the EMC information provided below. BeneVision N1 Patient Monitor Operator’s Manual B — 1…
-
Page 266
50 Hz / 60 Hz 50 Hz / 60 Hz frequency typical commercial or hospital environment. magnetic fields IEC 61000-4-8: 2009 Note: U is the AC mains voltage prior to application of the test level. B — 2 BeneVision N1 Patient Monitor Operator’s Manual… -
Page 267
RF communications equipment (transmitters) and the device as recommended below, according to the maximum output power of the communication equipment. BeneVision N1 Patient Monitor Operator’s Manual B — 3… -
Page 268: Radio Regulatory Compliance
(1) this device may not cause harmful interference, and (2) this device must accept any interference received, including interference that may cause undesired operation. Any changes or modifications to this equipment not expressly approved by Mindray may cause harmful radio frequency interference and void your authority to operate this equipment.
-
Page 269: C Default Settings
General and OR: 2 Other department : 0 Baseline Drift Removal (for 12-lead only) Waveform Layout (for 12-lead only) Standard QRS Threshold 0.16 mV Paced Adult: Unspecified Pediatric/neonate: No Pacer Reject BeneVision N1 Patient Monitor Operator’s Manual C — 1…
-
Page 270: Arrhythmia Default Settings
Nonsus V-Tach CCU: On Other departments: Off Vent Rhythm CCU: On Other departments: Off Pause Irr Rhythm Prompt A-Fib Prompt PVCs/min CCU: On Other departments: Off Pauses/min CCU: On Other departments: Off C — 2 BeneVision N1 Patient Monitor Operator’s Manual…
-
Page 271: St Default Settings
ST Alarm Mode set to Alarm switch ST Single, High limit 0.1 mV ST Dual Low limit -0.1 mV Priority Alarm Outputs ST Analysis ST Segment Auto Show Marker ST Point J+60 Auto Adjust BeneVision N1 Patient Monitor Operator’s Manual C — 3…
-
Page 272: Qt Default Settings
Measurements Interpretation Interpretation Summary Respiration Default Settings Item Default Setting Alarm switch High limit Adult: 30 Pediatric: 30 Neonate: 100 Low limit Adult: 8 Pediatric: 8 Neonate: 30 Priority Alarm Outputs C — 4 BeneVision N1 Patient Monitor Operator’s Manual…
-
Page 273: Spo Default Settings
Pediatric: 100% Neonate: 95% Low limit Priority Alarm Outputs Desat Alarm switch Low limit Priority High Alarm Outputs Satsecond (for Nellcor SpO NIBP Simul Display PI (for Masimo SpO Speed 25 mm/s BeneVision N1 Patient Monitor Operator’s Manual C — 5…
-
Page 274: Temperature Default Settings
Item Default Setting NIBP-S Alarm switch High limit Adult: 160 mmHg Pediatric: 120 mmHg Neonate: 90 mmHg Low limit Adult: 90 mmHg Pediatric: 70 mmHg Neonate: 40 mmHg Priority Alarm Outputs C — 6 BeneVision N1 Patient Monitor Operator’s Manual…
-
Page 275
Alarm Outputs NIBP-M Extreme Alarm switch High limit Adult: 125 mmHg Pediatric: 100 mmHg Neonate: 75 mmHg Low limit Adult: 45 mmHg Pediatric: 40 mmHg Neonate: 20 mmHg Priority High Alarm Outputs BeneVision N1 Patient Monitor Operator’s Manual C — 7… -
Page 276: Ibp Default Settings
Pediatric and neonate: 60 mmHg Low limit • Art/Ao/UAP/BAP/FAP/LV/P1-P4 arterial pressure Adult: 90 mmHg Pediatric: 70 mmHg Neonate: 55 mmHg • Adult: 10 mmHg Pediatric and neonate: 24 mmHg Priority Alarm Outputs C — 8 BeneVision N1 Patient Monitor Operator’s Manual…
-
Page 277
Adult: 0 mmHg Pediatric and neonate: 12 mmHg • Adult: 0 cmH Pediatric and neonate: 0 cmH • ICP/RAP/LAP/UVP/P1-P4 venous pressure Adult: 0 mmHg Pediatric and neonate: 0 mmHg Priority Alarm Outputs BeneVision N1 Patient Monitor Operator’s Manual C — 9… -
Page 278
Neonate: 90 mmHg Low limit Adult: 50 mmHg Pediatric: 40 mmHg Neonate: 30 mmHg Priority Alarm Outputs Measure (for P1, P2) Measure (for P3, P4) Mean only Sensitivity Speed 25 mm/sec C — 10 BeneVision N1 Patient Monitor Operator’s Manual… -
Page 279: Co Default Settings
High limit Adult and pediatric: 50 mmHg Neonate: 45 mmHg Low limit Adult and pediatric: 25mmHg Neonate: 30mmHg Priority Alarm Outputs FiCO Alarm switch High limit 4 mmHg Priority Alarm Outputs BeneVision N1 Patient Monitor Operator’s Manual C — 11…
-
Page 280
Other departments: 21% O Compensation AG Compensation Auto Standby 60 min Operating Mode Measure C.7.3 Microstream CO Default Settings Item Default Setting BTPS Compen Maximum Hold 20 sec Auto Standby Operating Mode Measure C — 12 BeneVision N1 Patient Monitor Operator’s Manual… -
Page 281: Alarm Default Settings
Choose Screen Normal Screen Screen Lock Duration General, CCU: Permanent Other departments: 10 sec Display Brightness Key Volume Night Mode Brightness Alarm Volume QRS Volume Key Volume NIBP End Tone Stop NIBP BeneVision N1 Patient Monitor Operator’s Manual C — 13…
-
Page 282
This page intentionally left blank. C — 14 BeneVision N1 Patient Monitor Operator’s Manual… -
Page 283: D Alarm Messages
High Extreme Tachy High Extreme Brady High PVCs/min Pauses/min R on T Bigeminy Trigeminy Tachy Brady Multiform PVC Vent Rhythm Nonsus V-Tach Run PVCs Pause Couplet Prompt Prompt Irr Rhythm Prompt BeneVision N1 Patient Monitor Operator’s Manual D — 1…
-
Page 284: Resp Physiological Alarm Messages
Art-S/Art-D/Art-M High The Art value is lower than the Art Extreme alarm low limit. Check the patient’s Extremely Low condition and check if the alarm limit settings are correct. D — 2 BeneVision N1 Patient Monitor Operator’s Manual…
-
Page 285: Co Physiological Alarm Messages
Patient skin impedance is too high. Check ECG electrode application. ECG Learning Prompt ECG learning is manually or automatically triggered. Cannot Analyze QT Prompt Note: XX represents ECG lead name, for example RL, LL, V, Va, Vb, etc. BeneVision N1 Patient Monitor Operator’s Manual D — 3…
-
Page 286: Resp Technical Alarm Messages
2. Reposition the sensor if necessary. D.2.5 Temp Technical Alarm Messages Indication on Alarm message Default priority Cause and solution alarm reset T1/T2 Sensor Off Check the sensor connection and reconnect the sensor. D — 4 BeneVision N1 Patient Monitor Operator’s Manual…
-
Page 287: Nibp Technical Alarm Messages
If the alarm persists, contact your service personnel. Note: XX represents an IBP label, for example PA, CVP, FAP, P1, etc. BeneVision N1 Patient Monitor Operator’s Manual D — 5…
-
Page 288: Co Technical Alarm Messages
2. Replace the sample line. 3. Reinsert the module. 4. If the alarm persists, contact your service personnel. No Filterline Make sure that the filterline is connected. Calibration Required Perform a calibration. D — 6 BeneVision N1 Patient Monitor Operator’s Manual…
-
Page 289: Power Supply Technical Alarm Messages
The printer buffer is full. Wait untill the printer finishes the printing task. Printing Failed Prompt The printer ran out of paper or cannot be found on the network. Check the printer. BeneVision N1 Patient Monitor Operator’s Manual D — 7…
-
Page 290: Technical Alarm Messages Related To Networked Monitoring
The storage card failed or files are damaged. Shutdown and restart the monitor. Format the storage card (CAUTION: this will clear all patient data stored on this monitor). If the alarm persists, contact your service personnel. D — 8 BeneVision N1 Patient Monitor Operator’s Manual…
-
Page 291
3.11.2 Displaying Parameter Numerics and Waveforms . The patient data storage The storage space of the monitor is full. Delete space is nearly full. Please unnecessary earlier discharged patient. delete some discharged patients. BeneVision N1 Patient Monitor Operator’s Manual D — 9… -
Page 292
This page intentionally left blank. D — 10 BeneVision N1 Patient Monitor Operator’s Manual… -
Page 293: Sensor Accuracy
Sensor Accuracy The Accuracy of Masimo SpO Sensors Table information for the plots below show A values measured with Masimo SET Oximetry Technology in a clinical study. Adtx/Pdtx/4000/4001 Inf/Neo/NeoPt/4002/4003/4004/4005 BeneVision N Series Patient Monitor Operator’s Manual E — 1…
-
Page 294
DCI/DCIP/4050/4051 LNCS YI 4053 E — 2 BeneVision N Series Patient Monitor Operator’s Manual… -
Page 295: The Accuracy Of Nellcor Spo
The Accuracy of Nellcor SpO Sensors Accuracy for Nellcor Sensors vs. Co-Oximeters (Arms) Range 100% to 70% 100% to 90% 90% to 80% 80% to 70% DS-100A 1.64% 1.16% 1.67% 2.25% D-YS, OXI-P/I, OXI-A/N 2.41% 1.38% 2.50% 3.60% MAXAI, MAXPI, MAXII 1.62% 1.49% 1.57%…
-
Page 296
Modified Bland-Altman for SpO2 — D-YS, OXI-A/N, OXI-P/I Sensors: (SpO — SaO ) vs.SaO E — 4 BeneVision N Series Patient Monitor Operator’s Manual… -
Page 297: Units
°F Fahrenheit gram gigahertz gutta hour hertz inch kilo kilogram kilopascal litre pound meter milliampere hour mega byte microgram milli-equivalents milligram minute milliliter millimeter BeneVision N1 Patient Monitor Operator’s Manual F — 1…
-
Page 298: Symbols
+ plus = equal to < less than > greater than ≤ less than or equal to ≥ greater than or equal to ± plus or minus × multiply © copyright F — 2 BeneVision N1 Patient Monitor Operator’s Manual…
-
Page 299: Abbreviations
International Special Committee on Radio Interference CMOS complementary metal oxide semiconductor central monitoring system C.O. cardiac output carbon dioxide COHb carboxyhemoglobin Compl compliance cardiac power index cardiac power output central venous pressure direct current BeneVision N1 Patient Monitor Operator’s Manual F — 3…
-
Page 300
EVLW extravascular lung water ELWI extravascular lung water index Early Warning Score femoral arterial pressure Federal Communication Commission Food and Drug Administration fraction of inspired FiAA inspired anesthetic agent F — 4 BeneVision N1 Patient Monitor Operator’s Manual… -
Page 301
ITBI intrathoracic blood volume index ITBV intrathoracic blood volume left arm left atrial pressure liquid crystal display left cardiac work LCWI left cardiac work index BeneVision N1 Patient Monitor Operator’s Manual F — 5… -
Page 302
PAWP pulmonary artery wedge pressure pCVP central venous pressure pediatric PEEP positive end expiratory pressure peak expiratory flow pre-ejection period peak inspiratory flow peak inspiratory pressure Pleth plethysmogram F — 6 BeneVision N1 Patient Monitor Operator’s Manual… -
Page 303
Surviving Sepsis Campaign signal strength index systolic time ratio stroke volume stroke volume index systemic vascular resistance SVRI systemic vascular resistance index stroke volume variation venous oxygen saturation Sync synchronization BeneVision N1 Patient Monitor Operator’s Manual F — 7… -
Page 304
VEPT volume of electrically participating tissue velocity index ventricular premature beat per minute F — 8 BeneVision N1 Patient Monitor Operator’s Manual… -
Page 306
P/N:046-011405-00 (5.0)
![]()
Руководство пользователя монитора пациента Medtronic MyCareLink

Руководство пользователя монитора пациента Medtronic MyCareLink
Руководство для пациента Предостережение: Федеральный закон (США) ограничивает продажу этого устройства врачом или по его заказу. ![]() 0123 Следующий список включает товарные знаки или зарегистрированные товарные знаки Medtronic в США и, возможно, в других странах. Все остальные товарные знаки являются собственностью их соответствующих владельцев. Медтроник и MyCareLink Объяснение символов
0123 Следующий список включает товарные знаки или зарегистрированные товарные знаки Medtronic в США и, возможно, в других странах. Все остальные товарные знаки являются собственностью их соответствующих владельцев. Медтроник и MyCareLink Объяснение символов
| (Европейское соответствие). Этот символ означает, что устройство полностью соответствует европейским директивам. | |
| 0123 | Этот символ означает, что устройство полностью соответствует директиве AIMD 90/385/EEC (с поправками 2007/47/EC) (NB 0123) и R&TTE 1999/5/EC. |
| IP22 | (Считывающее устройство) Этот продукт соответствует международному классу электробезопасности IP22 в отношении попадания пыли, других посторонних предметов и воды в соответствии с требованиями IEC 60601-11. |
| IP21 | (Основание монитора) Этот продукт соответствует международному классу электробезопасности IP21 в отношении попадания пыли, других посторонних предметов и воды в соответствии с требованиями IEC 60601-11. |
 |
Держать сухим |
 |
Используйте только с прилагаемым блоком питания |
 |
Рабочая часть типа BF |
 |
Предупреждение |
 |
См. Инструкции по применению |
 |
Содержимое пакета |
 |
Домашний монитор |
 |
Документация по продукту |
| Аксессуары | |
 |
Монитор пациента MyCareLink |
 |
Неионизирующее электромагнитное излучение |
 |
Внимание! Федеральный закон (США) разрешает продажу этого устройства только врачам или по их указанию. |
 |
Не выбрасывайте этот продукт вместе с несортированными бытовыми отходами. Утилизируйте этот продукт в соответствии с местными правилами. Видеть http://recycling.medtronic.com для получения инструкций по правильной утилизации этого продукта. |
 |
Номер повторного заказа |
 |
Серийный номер |
 |
Ограничение температуры |
 |
Ограничение влажности |
 |
Только для аудитории в США |
 |
ПРОИЗВОДИТЕЛЬ |
 |
Дата производства |
 |
Уполномоченный представитель в европейском сообществе |
 |
Медицинское оборудование в отношении поражения электрическим током, пожара и механических опасностей, только в AAMI / ES 60601-1 (2006) / A2 (2010) и CSA 22.2 NO 60601-1 CAN / CSA: 2008 |
 |
Китай RoHS |
 |
USB-порт |
| Постоянный ток. 5 В 0.3 А | |
 |
См. Руководство по эксплуатации. |
Введение
Это руководство призвано помочь вам в использовании монитора пациента MyCareLink модели 24950. Если у вас есть какие-либо вопросы по настройке или использованию монитора, или если у вас возникли проблемы с монитором, обратитесь в компанию Medtronic. См. раздел «Как связаться с Medtronic» на стр. 40 или воспользуйтесь информацией, приведенной на задней обложке данного руководства. Если у вас есть вопросы о состоянии вашего здоровья, поговорите со своим врачом. Ваш врач знает вашу историю болезни.
О вашем мониторе
Монитор — это электронное устройство, с помощью которого врач может легко получить информацию о вашем сердечном устройстве. Монитор собирает эту информацию, чтобы ваш врач мог управлять вашим лечением.
То, как ваш монитор собирает информацию с вашего сердечного устройства, определяется типом сердечного устройства, которое у вас есть. Некоторые сердечные устройства связываются с вашим монитором по беспроводной сети. После того, как вы настроили монитор и выполнили начальную ручную передачу, монитор будет автоматически собирать информацию с имплантированного сердечного устройства. Эта автоматическая беспроводная связь между вашим сердечным устройством и монитором осуществляется в периоды времени, запланированные вашим врачом или клиникой. Отправка информации о кардиологических устройствах в вашу клинику с использованием беспроводной технологии не требует от вас взаимодействия с монитором. Процесс тихий и незаметный.
В клиниках обычно назначают автоматический процесс, когда вы спите. По этой причине монитор должен оставаться подключенным к розетке. Информация о сердечном устройстве отправляется в вашу клинику по сети сотовой связи.
Другие сердечные устройства требуют, чтобы вы использовали считыватель вашего монитора для сбора информации с сердечного устройства, чтобы ваш монитор мог отправлять информацию в вашу клинику.
Чтобы узнать, какое у вас устройство, см. Руководство для пациента с кардиопередатчиком или поговорите со своим врачом.
Монитор предназначен только для вашего использования. Он не будет работать с другими имплантированными устройствами и должен использоваться вами только по указанию врача. Несанкционированное использование имплантированных устройств другими лицами может нарушить предписанную работу их устройств.
Отправка информации по запросу вашего врача или клиники
Иногда вам нужно будет отправить информацию в другое время, чем запланировано вашим врачом или клиникой. Это время: • При завершении первоначальной настройки, чтобы разрешить автоматическую беспроводную связь между вашим монитором и кардиологическим устройством • По запросу вашего врача или клиники.
См. «Отправка информации с помощью монитора» на стр. 21 данного руководства.
Показания к применению
Монитор представляет собой внешнее электронное устройство, которое взаимодействует с имплантированными сердечными устройствами Medtronic и имеет телекоммуникационное соединение для передачи сохраненных данных имплантированного сердечного устройства врачу или клиницисту.
Противопоказания
Известных противопоказаний для монитора нет.
Предупреждения
Предупреждение: Если вы чувствуете себя плохо, немедленно обратитесь за медицинской помощью. Не используйте монитор без указаний врача. В случае возникновения чрезвычайной ситуации позвоните в местный номер службы экстренной помощи. Если ваш врач дал инструкции, следуйте им. Ожидание обращения за медицинской помощью может быть опасно для вашего здоровья.
Предупреждение. Чтобы обеспечить безопасную работу монитора и имплантированного сердечного устройства, следуйте этим инструкциям: Используйте монитор, как описано в данном руководстве. Сохраните это руководство. Используйте монитор только в то время, которое прописал врач.
Если вам нужна дополнительная помощь, обратитесь в Medtronic. См. «Как связаться с Medtronic» на стр. 40 или воспользуйтесь информацией на задней обложке данного руководства.
Предупреждение: Не используйте монитор, если он не работает, как описано в разделе «Отправка информации с помощью монитора» на странице 21. Чтобы обеспечить правильную работу имплантированного сердечного устройства, следуйте инструкциям в этом руководстве по размещению считывающего устройства над имплантированным сердцем. устройство. Если вы не будете следовать этим инструкциям, возможно, монитор не будет записывать или отправлять информацию с вашего имплантированного сердечного устройства. Если вам нужна дополнительная помощь, обратитесь в Medtronic. См. «Как связаться с Medtronic» на стр. 40 или воспользуйтесь информацией на задней обложке данного руководства.
Предупреждение: Не модифицируйте это оборудование. Изменения могут повлиять на эффективность монитора и отрицательно сказаться на вашей безопасности.
Предупреждение: Не прикасайтесь к открытым портам или заглушкам, не вставляйте пальцы или какие-либо предметы в открытые порты на мониторе. Попадание пальца или предметов в открытый порт может привести к поражению электрическим током.
Предупреждение: Важные инструкции по безопасности. При использовании монитора всегда следует соблюдать основные меры безопасности, чтобы снизить риск возгорания, поражения электрическим током и травм, в том числе следующих:
• Не используйте монитор рядом с водой, напримерample, рядом с ванной, умывальником, кухонной раковиной или ванной для стирки, во влажном подвале или рядом с бассейном. • Если вы подозреваете утечку газа, не используйте монитор и не пользуйтесь телефоном вблизи места утечки, чтобы сообщить об утечке газа.
Меры предосторожности
- Используйте с этим монитором только прилагаемый шнур питания. Использование другого шнура питания может повредить монитор и отрицательно сказаться на вашей безопасности.
- Не используйте монитор в пределах двух метров (шести футов) от телевизора, монитора или экрана компьютера или оборудования беспроводной связи, такого как устройства беспроводной домашней сети, мобильные телефоны, беспроводные телефоны и их базовые станции или рации. Использование монитора рядом с этими устройствами может помешать обмену данными между имплантированным сердечным устройством и монитором.
Содержимое упаковки монитора
Вы должны получить следующее:
- Одна база монитора пациента Medtronic MyCareLink, модель 24950
- Один съемный считыватель Medtronic MyCareLink, модель 24955
- Один шнур питания Medtronic MyCareLink, модель 24956
- Руководство для одного пациента
- Одно краткое руководство
- Один набор лейблов For Your Records
- Руководство по безопасности для одного сотового модема
О мониторе
 Рисунок 1: Основание монитора и съемный считыватель (передняя view) Монитор (Рисунок 2) состоит из трех компонентов: • Основание монитора • Съемный считыватель для сбора информации с имплантированного сердечного устройства • Шнур питания

Выбор места для установки монитора
При выборе места для установки монитора учитывайте следующие рекомендации:
- Разместите монитор рядом с местом, где вы спите, желательно на тумбочке или на столе. Ваш монитор может принимать сигналы от вашего сердечного устройства на расстоянии до 3 метров (10 футов), но вы должны проконсультироваться с руководством вашего сердечного устройства, чтобы узнать рекомендуемые расстояния для вашего устройства.
- Разместите монитор так, чтобы вам было удобно сидеть и видеть переднюю часть монитора.
- Разместите монитор в месте, которое принимает адекватный сотовый сигнал.
- Разместите монитор в пределах досягаемости от розетки и расположите его так, чтобы при необходимости его можно было отключить от розетки.
- Не размещайте монитор в местах, где он может намокнуть.
Настройка монитора
Перед использованием монитора вам необходимо включить его в розетку. Чтобы подключить монитор, найдите порт шнура питания на левой стороне основания монитора. Вставьте конец шнура питания в порт на стороне монитора, затем вставьте вилку в розетку. Предостережение. Используйте с этим монитором только шнур питания из комплекта поставки. Использование другого шнура питания может привести к повреждению монитора и отрицательно сказаться на вашей безопасности. Перед использованием монитора вам необходимо включить его в розетку. Чтобы подключить монитор, найдите порт шнура питания на левой стороне основания монитора. Вставьте конец шнура питания в порт на стороне монитора, затем вставьте вилку в розетку. Предостережение. Используйте с этим монитором только шнур питания из комплекта поставки. Использование другого шнура питания может привести к повреждению монитора и отрицательно сказаться на вашей безопасности. 
Отправка информации с помощью монитора
Используйте эту процедуру в следующих случаях:
- При выполнении первой настройки.
- По запросу вашего врача или поликлиники.
Перед использованием монитора:
- Выключите любой телевизор, компьютерный монитор или экран в пределах двух метров (шести футов) от монитора.
- Выключите или удалите любой сотовый телефон или другие беспроводные устройства, находящиеся в пределах двух метров (шести футов) от монитора.
Когда вы отправляете передачу, используя эту процедуру, на экране вашего монитора также будут отображаться пошаговые инструкции, которым вы должны следовать. Вы можете использовать эти экранные инструкции для выполнения этой процедуры. Внимание: Если во время этой процедуры на экране монитора отображается значок сообщения об ошибке, см. «Устранение неполадок с сообщениями об ошибках» на странице 31 настоящего руководства. Чтобы отправлять информацию с помощью монитора, выполните следующие действия:
- Если экран монитора темный, нажмите кнопку «Принять» на передней панели монитора, чтобы включить экран.
- По завершении пробуждения монитора на экране монитора появится изображение, указывающее, что монитор готов начать передачу.

- Нажмите кнопку «Принять». На экране монитора появится изображение, предлагающее вам взять считывающее устройство.

- Когда на экране монитора отображается изображение устройства чтения, которое помещается над устройством, удерживайте устройство чтения над имплантированным устройством. Вы можете плотно прижать ридер к одежде или к голой коже.

- Когда монитор начинает считывать данные с имплантированного устройства, на экране монитора отображается зеленая полоса прогресса, указывающая, что данные отправляются со считывающего устройства на базу монитора.
 — Пока монитор обменивается данными с имплантированным устройством, оставайтесь на месте и убедитесь, что считыватель монитора находится над имплантированным устройством. Обычно этот процесс занимает менее 3 минут, но может занять до 12 минут.
 - Когда монитор завершит обмен данными с имплантированным устройством, он издаст два коротких сигнала, а на экране монитора появится указание вернуть считыватель на основание монитора.

- Монитор отправит данные вашего имплантированного устройства в сеть CareLink. На экране монитора появится зеленый индикатор выполнения, указывающий, что данные отправляются.

- Ваша передача завершена, когда монитор издает два коротких сигнала, а на экране монитора отображается зеленая галочка.


 — Пока монитор обменивается данными с имплантированным устройством, оставайтесь на месте и убедитесь, что считыватель монитора находится над имплантированным устройством. Обычно этот процесс занимает менее 3 минут, но может занять до 12 минут.


Информация на стартовом экране
Когда ваш монитор активируется нажатием кнопки «Принять», на экране вашего монитора будет отображаться изображение состояния системы со следующей информацией: 
| Фото товара | Описание |
| 1 Значок статуса читателя | Эта область показывает статус читателя. Значок считывателя может показывать, что считыватель заряжается, отсутствует или имеет низкий заряд батареи. |
| 2 Значок сотового сигнала | Этот значок показывает состояние подключения монитора к сотовой сети. |
| 3 Последняя передача | Этот значок показывает дату вашей последней успешной передачи в сеть CareLink. Примечание. Формат даты, отображаемый на вашем мониторе, будет зависеть от страны, в которой вы находитесь. |
| 4 Значок запуска передачи | Этот значок означает, что монитор готов начать передачу. Нажмите кнопку «Принять», чтобы начать передачу. |
Светодиодные индикаторы считывателя
Считыватель монитора имеет три светодиодных индикатора, которые показывают состояние передачи, связь между считывателем и базой монитора, а также состояние батареи считывателя. 
| Индикатор | Описание |
| 1 зеленый индикатор | Зеленый световой индикатор показывает передачу данных между считывателем и базой монитора. Когда горит зеленый индикатор, считыватель передает данные на базу монитора. |
| 2 Синий индикатор | Синий индикатор показывает соединение между считывателем и основанием монитора. • Мигающий синий свет означает, что считыватель устанавливает соединение с базой монитора. • Синий свет означает, что считыватель и база монитора подключены. |
| 3 Индикатор желтого цвета | Желтый индикатор показывает уровень заряда батареи считывателя. Если горит желтый индикатор, батарея считывающего устройства разряжена. Поместите считыватель на основание монитора, чтобы зарядить аккумулятор считывателя. |
Когда вы помещаете считыватель на основание монитора, все три световых индикатора кратковременно мигают, показывая, что считыватель правильно состыкован с основанием монитора.
Сообщения об ошибках при поиске и устранении неисправностей
Используйте информацию в этом разделе для устранения неполадок при использовании вашего монитора. Вы можете найти информацию о следующих ошибках:
- Ошибка № 3230 — «Считыватель не обнаружен базой монитора» на стр. 33
- Ошибка № 3248 — «Состояние батареи считывателя» на стр. 34
- Ошибка № 5704 — «Нет сотового сигнала» на стр. 35
- «Позиция читателя» на стр. 36
- «Системные ошибки» на стр. 37
Если вы получили сообщение об ошибке во время использования монитора, на экране монитора появится значок ошибки с оранжевым фоном и 4-значным номером ошибки. Некоторые сообщения об ошибках могут содержать анимированную демонстрацию, помогающую устранить проблему. Следуйте этим инструкциям, чтобы устранить ошибку. В случае некоторых ошибок вам будет предложено связаться с Medtronic. См. раздел «Как связаться с Medtronic» на стр. 40 или воспользуйтесь информацией, приведенной на задней обложке данного руководства.
Считыватель не обнаружен базой монитора
Если база монитора не может связаться со считывателем, на экране монитора появится сообщение об ошибке № 3230 — Считыватель не обнаружен базой монитора.  Это может произойти, когда:
- Считыватель отключен от базы монитора и отключен.
- Считыватель отключен от базовой станции и разряжен аккумулятор.
- Считыватель находится вне зоны действия базы монитора.
Чтобы восстановить связь между считывателем и базой монитора, верните считыватель на подставку базы монитора и дождитесь исчезновения сообщения об ошибке. Если возвращение считывающего устройства к основанию монитора не устраняет ошибку, обратитесь в Medtronic. См. «Как связаться с Medtronic» на стр. 40 или воспользуйтесь информацией на задней обложке данного руководства. Состояние батареи считывателя Считыватель монитора включает перезаряжаемую батарею. Если аккумулятор считывателя необходимо подзарядить, на экране монитора появится сообщение об ошибке № 3248 — перезарядите считыватель. Кроме того, может гореть желтый светодиодный индикатор на головке считывателя.
- Чтобы зарядить считыватель, поместите его на основание монитора. Зарядка батареи считывателя займет около 20 минут.


Примечание. Считыватель монитора следует заменить, если аккумулятор вашего считывателя больше не заряжается или держит заряд только в течение короткого периода времени. Если вы не можете завершить передачу, не получив сообщение об ошибке Recharge Reader, обратитесь в Medtronic. См. «Как связаться с Medtronic» на стр. 40 или воспользуйтесь информацией на задней обложке данного руководства. Нет сотового сигнала Ваш монитор использует соединение сотового телефона для передачи данных об имплантированном устройстве вашему врачу. Если ваш монитор не имеет надлежащего подключения к сотовой сети, на экране монитора появится сообщение об ошибке № 5704 — нет сигнала сотовой связи. См. рис. 7.
- Измените ориентацию монитора, повернув основание монитора.
- Измените расположение монитора так, чтобы он находился рядом с окном или за внешней стеной. Помните, что ваш монитор следует размещать на расстоянии не более 3 метров (10 футов) от того места, где вы спите.
- Если вы не можете найти адекватный сотовый сигнал для своего монитора, обратитесь в Medtronic. См. «Как связаться с Medtronic» на стр. 40 или воспользуйтесь информацией на задней обложке данного руководства.
 Позиция читателя Считыватель должен быть правильно расположен над вашим имплантированным устройством для связи с ним. Если считыватель сместится во время передачи, вы услышите 3 коротких звуковых сигнала на своем мониторе и увидите на экране изображение проблемы с размещением считывателя. См. рис. 8.
- Переместите считыватель на имплантированное устройство.
- При правильном изменении положения ридера на экране монитора появится зеленый индикатор выполнения. Когда считыватель расположен правильно, монитор возобновит сбор данных. Удерживайте считывающее устройство на месте, пока ваша передача не будет завершена.
Системные ошибки Если на мониторе возникает системная ошибка, на экране монитора отображается значок системной ошибки и код сообщения об ошибке. Это изображение указывает на то, что в вашем мониторе произошла внутренняя ошибка, и это не означает, что возникла проблема с вашим имплантированным сердечным устройством.
В этом случае перезапустите монитор, отключив, а затем снова подключив источник питания.
Если перезапуск монитора не исправляет ошибку, обратитесь в Medtronic. См. «Как связаться с Medtronic» на стр. 40 или воспользуйтесь информацией на задней обложке данного руководства.
См. Код ошибки, отображаемый на экране монитора, чтобы помочь компании Medtronic определить проблему.

Путешествие с монитором
Примечание: ваш монитор будет работать в большинстве мест. Однако в некоторых местах сотовая связь может быть недоступна. Если вы планируете путешествовать со своим монитором, свяжитесь с Medtronic, чтобы подтвердить наличие страхового покрытия.
Замена блока питания или считывателя. Если блок питания или считыватель монитора утерян или поврежден, вы можете связаться с Medtronic, чтобы получить информацию о заказе замены. См. «Как связаться с Medtronic» на стр. 40 или воспользуйтесь информацией на задней обложке данного руководства.
Уход за монитором Не роняйте монитор или считывающее устройство на твердые поверхности. Падение монитора или считывающего устройства может привести к их повреждению и нарушению их нормальной работы. Если ваш монитор или считывающее устройство были повреждены, обратитесь в Medtronic. См. «Как связаться с Medtronic» на стр. 40 или воспользуйтесь информацией на задней обложке данного руководства.
Вы можете очистить монитор снаружи, используя чистую ткань и слегка смочив его водой, перекисью водорода, спиртом (метиловым, этиловым или изопропиловым) или мягким моющим средством.
Монитор не требует профилактического осмотра или обслуживания. Предупреждение: Не мочите монитор. Если вы намочили монитор, обратитесь в Medtronic. См. «Как связаться с Medtronic» на стр. 40 или воспользуйтесь информацией на задней обложке данного руководства.
Как связаться с Medtronic
Пациенты в США Чтобы поговорить напрямую со специалистом по обслуживанию пациентов, позвоните по номеру 1-800-929-4043. Наши сотрудники доступны с понедельника по пятницу с 8:00 до 5:00 (центральное стандартное время). Компания Medtronic стремится предоставить вам самую последнюю информацию о вашем мониторе. Webинформация сайта доступна 24 часа в сутки. • Медтроник webсайт: www.medtronic.com • Информация о сети Medtronic CareLink: www.medtronic.com/patients/carelink
Пациенты за пределами США Если у вас есть вопросы, не рассмотренные в данном руководстве, или вы хотите получить более подробную информацию о кардиомониторе, свяжитесь с Medtronic, используя информацию на задней обложке этого руководства.
Технические характеристики монитора
Программное обеспечение с открытым исходным кодом Операционная система для этого устройства включает программное обеспечение с открытым исходным кодом. Информацию о лицензировании программного обеспечения с открытым исходным кодом можно найти по адресу www.medtronic.com/mycarelink/monitor/software Стандарты (монитор соответствует следующим требованиям  ЭМС: CFR 47, часть 15 Безопасность пациентов: IP22 (основание монитора); IP21 (считыватель); IEC 60601-1, ETL, рабочая часть типа BF (считыватель), обычная, непрерывная работа, класс II, не подходит для использования в присутствии горючей смеси анестетиков с воздухом, кислородом или закисью азота.
Рекомендуемые условия окружающей среды при хранении и транспортировке
Температура: от -40 °C до 70 °C (от -40 °F до 158 °F) Относительная влажность: от 5% до 95%
Безопасен при хранении или транспортировке при температуре от -40 ° C без контроля относительной влажности до 70 ° C при относительной влажности от 5% до 95%, включая конденсацию.
Рекомендуемые условия эксплуатации
Температура: от 5 ° C до 40 ° C (от 41 ° F до 104 ° F) Безопасен при эксплуатации при температуре от 5 ° C до 40 ° C (от 41 ° F до 104 ° F) и относительной влажности от 15% до 93%, без конденсации.
Источник питания Чтобы обеспечить соответствие указанным стандартам, используйте только блок питания, поставляемый с монитором: номер модели Medtronic 24956. Номинальный объемtage 100–240 В переменного тока Номинальная частота сети 50–60 Гц Ток 0.5 А Макс. при входе 90 В переменного тока Источник питания должен использоваться для отключения от сети.
Ожидаемый срок службы Ожидаемый срок службы монитора — 5 лет. Распоряжение
Соблюдайте местные правила для правильной утилизации этого продукта. Не выбрасывайте этот продукт вместе с несортированными бытовыми отходами. Этот продукт содержит материалы, которые могут нанести вред окружающей среде. Видеть http://recycling.medtronic.com для получения инструкций по правильной утилизации этого продукта.
Тестирование Тестирование на электромагнитное соответствие (ЭМС) показывает, что монитор обеспечивает разумную защиту от вредных помех в типичной медицинской установке. Однако нет гарантии, что помехи не возникнут при конкретной установке. Если монитор действительно создает недопустимые помехи для других устройств или на него негативно влияют другие устройства, пользователю рекомендуется попытаться устранить помехи одним или несколькими из следующих способов:
• Переориентируйте или переместите устройства. • Увеличьте расстояние между устройствами. • Обратитесь за помощью в Medtronic.
Если у вас возникли проблемы с производительностью монитора MyCareLink модели 24950, попробуйте использовать его на расстоянии не менее двух метров (6 футов) от всех устройств беспроводной связи, таких как сотовые телефоны, телевизионные мониторы или экраны компьютеров.
Безопасность и технический осмотр Ежегодный технический осмотр монитора не требуется.
Информация для потребителей и требования
Декларация соответствия Medtronic заявляет, что этот продукт соответствует основным требованиям Директивы 1999/5 / EC по радио и телекоммуникационному оконечному оборудованию и Директивы 90/385 / EEC по активным имплантируемым медицинским устройствам.
Требования FCC Монитор был протестирован на соответствие требованиям Федеральной комиссии по связи. Любые изменения или модификации, явно не одобренные Medtronic, могут лишить пользователя права использовать монитор.
FCC ID LF524950 FCC ID LF524955 (содержит FCC ID T7V1315) Это устройство соответствует части 15 Правил FCC. Эксплуатация осуществляется при соблюдении следующих двух условий: (1) это устройство не должно создавать вредных помех, и (2) это устройство должно принимать любые получаемые помехи, включая помехи, которые могут вызвать нежелательную работу. Монитор был протестирован на соответствие требованиям FCC.
Любые изменения или модификации, прямо не одобренные Medtronic, могут лишить пользователя права использовать монитор.
Этот передатчик авторизован в соответствии с правилами Службы радиосвязи для медицинских устройств (в части 95 Правил FCC) и не может создавать помех станциям, работающим в диапазоне 400.15–406 МГц в вспомогательных метеорологических службах, метеорологических спутниковых службах и спутниковых службах исследования Земли (т. Е. передатчик и приемники, используемые для передачи данных о погоде) и должны принимать любые принимаемые помехи, включая помехи, которые могут вызвать нежелательную работу. Этот передатчик должен использоваться только в соответствии с правилами FCC, регулирующими службу радиосвязи для медицинских устройств. Аналоговая и цифровая голосовая связь запрещена. Хотя этот передатчик был одобрен Федеральной комиссией по связи, нет никаких гарантий, что он не будет принимать помехи или что какая-либо конкретная передача от этого передатчика будет свободна от помех.
Требования Министерства промышленности Канады IC ID 3408D-24950
IC ID 3408D ‐ 24955 (содержит IC ID 216Q ‐ 1315)
Эксплуатация возможна при соблюдении следующих двух условий: (1) это устройство не может создавать помехи и (2) это устройство должно принимать любые помехи, включая помехи, которые могут вызвать нежелательную работу устройства.
«Это устройство не может создавать помех станциям, работающим в диапазоне 400.150–406.000 МГц в вспомогательных метеорологических службах, метеорологической спутниковой службе и спутниковой службе исследования Земли, и должно принимать любые принимаемые помехи, включая помехи, которые могут вызвать нежелательную работу».
![]() ПРОИЗВОДИТЕЛЬ Medtronic, Inc. 710 Medtronic Parkway Minneapolis, MN 55432 USA www.medtronic.com Тел. +1 763 514 4000 Факс +1 763 514 4879 Medtronic USA, Inc. Информация для пациентов: Бесплатный номер +1 800 551 5544 (с 7:6 до 1:763, с понедельника по пятницу, по центральному времени) Факс +514 1855 XNUMX XNUMX Уполномоченный представитель Medtronic EC Medtronic BV Earl Bakkenstraat 10 6422 PJ Heerlen Нидерланды Тел. +31 45 566 8000 Факс +31 45 566 8668 Технические руководства: www.medtronic.com/manuals Европа/Африка/Ближний Восток Штаб-квартира Medtronic International Trading Sàrl Route du Molliau 31 Case Postale 84 CH-1131 Tolochenaz Switzerland Тел. +41 21 802 7000 Факс +41 21 802 7900 Австралия Medtronic Australasia Pty Ltd 97 Waterloo Road North Ryde, NSW 2113 Австралия Канада Medtronic of Canada Ltd. 99 Hereford Street Brampтонна Онтарио L6Y 0R3 Тел. +905 460 3800 Факс +905 826 6620 Бесплатный номер в Канаде +1 800 268 5346 © Medtronic, Inc., 2012 г.
ПРОИЗВОДИТЕЛЬ Medtronic, Inc. 710 Medtronic Parkway Minneapolis, MN 55432 USA www.medtronic.com Тел. +1 763 514 4000 Факс +1 763 514 4879 Medtronic USA, Inc. Информация для пациентов: Бесплатный номер +1 800 551 5544 (с 7:6 до 1:763, с понедельника по пятницу, по центральному времени) Факс +514 1855 XNUMX XNUMX Уполномоченный представитель Medtronic EC Medtronic BV Earl Bakkenstraat 10 6422 PJ Heerlen Нидерланды Тел. +31 45 566 8000 Факс +31 45 566 8668 Технические руководства: www.medtronic.com/manuals Европа/Африка/Ближний Восток Штаб-квартира Medtronic International Trading Sàrl Route du Molliau 31 Case Postale 84 CH-1131 Tolochenaz Switzerland Тел. +41 21 802 7000 Факс +41 21 802 7900 Австралия Medtronic Australasia Pty Ltd 97 Waterloo Road North Ryde, NSW 2113 Австралия Канада Medtronic of Canada Ltd. 99 Hereford Street Brampтонна Онтарио L6Y 0R3 Тел. +905 460 3800 Факс +905 826 6620 Бесплатный номер в Канаде +1 800 268 5346 © Medtronic, Inc., 2012 г.
Руководство пользователя монитора пациента Medtronic MyCareLink — Скачать [оптимизировано]
Руководство пользователя монитора пациента Medtronic MyCareLink — Скачать
FAQS
Это то же самое, что и medtronic my care monitor 24950j?
Это модель 24950 (без буквы «J»). Перед покупкой вам нужно будет уточнить у своего поставщика, совместим ли он.
Какие данные передаются?
Ничего личного. Только данные о вашем сердце.
В чем разница между 24950 и 24960?
24950 — домашний монитор, а 24960 — больничный монитор. 24950 не имеет возможности телеметрии и не имеет возможности передавать данные на компьютер. 24951 — это домашний монитор с возможностями телеметрии.
В чем разница между 24960 и 24951?
24960 и 24951 абсолютно одинаковы, за исключением одного. 24960 имеет микросхему энергонезависимой памяти, которая позволяет хранить данные за период до 7 дней. В 24951 этого чипа нет.
Какое программное обеспечение мне нужно использовать с моим MyCareLink?
Вам потребуется либо программное обеспечение CareLink от Medtronic, либо программное обеспечение CardioNet Cardiocap Data Manager. Обе эти программы доступны для бесплатной загрузки с веб-сайта Medtronic. webсайт.
Могу ли я использовать MyCareLink с другими устройствами, такими как принтер или ПК?
Нет, вы можете использовать MyCareLink только с программным обеспечением CareLink или Cardiocap Data Manager. Вы не можете напрямую подключить MyCareLink к какому-либо другому устройству, например принтеру или ПК.
Что делает монитор Medtronic?
Он обеспечивает легкий доступ к информации, которая позволяет вашему врачу: Управляйте состоянием своего сердца. Следите за своим имплантированным сердечным устройством. Получайте информацию от вашего имплантированного сердечного устройства по мере необходимости.
Что такое Медтроник CareLink?
Сегодня сеть CareLink™ ведущая система удаленного мониторинга, при этом 99.9% устройств Medtronic совместимы с сетью. 2. Сеть настраиваемая и гибкая, что позволяет перемещать важные данные на передний план и view критические передачи в первую очередь через уведомления CareAlert™.
Почему мой монитор Medtronic мигает синим цветом?
Зеленый световой индикатор показывает передачу данных между считывателем и базой монитора. Когда горит зеленый индикатор, считыватель передает данные на базу монитора. Синий индикатор показывает соединение между считывателем и основанием монитора..
Можно ли принимать душ с кардиомонитором?
Не снимайте холтеровское мониторирование — его необходимо носить в течение всего периода регистрации, даже во время сна. Вода может повредить монитор Холтера. Не плавайте, не принимайте душ и не купайтесь в течение всего времени, пока вы носите холтеровское мониторирование..
Что такое CareLink и как это работает?
Это финансовая программа, которая работает как кредитная карта в том смысле, что любые счета, которые вы накапливаете, пока вы являетесь частью CareLink, со временем вам придется оплачивать. Подарить тебе бывшегоample, предположим, что вы были в больнице с CareLink, и вы получаете больничный счет в размере 10,000 XNUMX долларов.
Сколько времени может потребоваться для обновления монитора Mycarelink?
Этот экран указывает на то, что монитор ищет или получает обновление программного обеспечения. Анимированный экран обновления программного обеспечения обычно отображается в течение примерно 10-15 минут перед перезагрузкой, но может отображаться в течение до 60 минут в зависимости от размера обновления.
Сколько времени может потребоваться для обновления монитора Mycarelink?
Издают ли кардиостимуляторы Medtronic звуковой сигнал?
Он создан для того, чтобы привлечь ваше внимание, а не напугать вас. Если вы слышите звуковой сигнал, просто обратитесь к врачу за инструкциями..
Что означают три линии на больничном мониторе?
Самые простые мониторы показывают ваши частота сердечных сокращений, артериальное давление и температура тела. Более продвинутые модели также показывают, сколько кислорода переносится вашей кровью или как быстро вы дышите.
Какие действия нельзя делать с кардиостимулятором?
Не занимайтесь чрезмерной физической активностью, включая такие движения, как опора на руки или вытягивание рук над головой или позади себя. Не трите область груди вокруг разреза или рядом с ним. Не поднимайте тяжелые предметы, в том числе тяжелую сумку, собаку или кошку, особенно сбоку от кардиостимулятора.
Что такое CareLink?
University Health заботится о каждом нашем пациенте, независимо от уровня дохода. Мы предлагаем программу финансовой помощи CareLink семьям округа Бексар, у которых нет медицинской страховки и которые не имеют права на другое покрытие.
Записывают ли кардиостимуляторы данные?
Эти кардиостимуляторы непрерывно собирать данные о сердечных событиях и проводить измерения, например,ampле, периодически измеряя ampуровень предсердных сигналов. Затем эта информация сохраняется в памяти кардиостимулятора для последующего извлечения и автоматического анализа функцией DO.
Что такое кардиомонитор Medtronic?
Встраиваемая система кардиомониторинга LINQ II™ самая точная в мире ICM,1-4 персонализированный в соответствии с образом жизни пациента и рабочим процессом врача. LINQ II ICM идеально подходит для пациентов с редкими симптомами, требующими длительного наблюдения или постоянного лечения.
![]()
www.medtronic.com
Предложите, как улучшить StudyLib
(Для жалоб на нарушения авторских прав, используйте
другую форму
)
Ваш е-мэйл
Заполните, если хотите получить ответ
Оцените наш проект
1
2
3
4
5
|
|||
|
Онлайн всего: 14 Гостей: 14 Пользователей: 0 |
|||
|
Хранилище файлов |
Правила добавления:
Внимание !!!
Перед тем как загрузить файл, убедитесь, что его нет в «Хранилище файлов» для этого воспользуйтесь поиском.
При добавлении файлов в поле «Название материала» указываем марку аппарата, так как на шильдике или по паспорту.
В поле «Краткое описание» пишем что-это: схема; сервис мануал; руководство по эксплуатации и т.д. Также напишите формат материала, какой программой он сделан.
За сохранность и работоспособность файлов(ссылок) загруженных на сторонние файловые хостинги, Администрация сайта ответственности не несет.
Для загрузки файлов в «Хранилище» воспользуйтесь архиватором WinRAR или 7-Zip, максимальный объем загружаемого файла должен быть не более 15Mb.
Администрация сайта оставляет за собой право удалять и редактировать файлы.