Порты и интерфейсы
| Количество HDMI портов | 4 |
| Версия HDMI | 1.4/2.0 |
| Количество входных портов HDMI | 3 |
| Количество выходных портов HDMI | 1 |
| Порт DVI | Нет |
| Количество входов VGA (D-Sub) | 1 |
| Количество портов DisplayPort | 1 |
| Входы DisplayPort | 1 |
| USB порт | Да |
| Количество портов USB | 10 |
| Версия USB | 2.0/3.2 Gen 1 (3.1 Gen 1) |
| Подключение Ethernet | Да |
| Количество портов Ethernet LAN ( RJ-45) | 2 |
| Wi-Fi | Да |
| Аудио (Л/П) выход | 1 |
| Линейный вход микрофона | Да |
| RS-232 интерфейс | Да |
| Гнездо входа постоянного тока (DC) | Да |
| Слот модуля OPS | Да |
| Аудиовход для ПК | Да |
| Количество HDMI портов | 3 |
| Версия HDMI | 1.4/2.0 |
| Количество портов DisplayPort | 1 |
| Количество портов Ethernet LAN ( RJ-45) | 2 |
| Подключение микрофона | 3,5 мм |
| Интерфейс | — |
| Количество портов USB 3.2 Gen 1 (3.1 Gen 1) Type-A | 1 |
| Количество портов USB 2.0 | 9 |
| Тип USB коннектора | USB тип-A |
| Порт выхода S/PDIF | Да |
| Линейный выход | Да |
| Вход линии | Да |
| Количество портов VGA (D-Sub) | 1 |
| Версия DisplayPort | 1.2 |
| слот OPS | 1 |
Компьютерная система
| Компьютерная система | Нет |
| Семейство процессоров | ARM Cortex |
| Модель процессора | A73 |
| Количество ядер процессора | 4 |
| Установленная операционная система | Android 8.0 |
| Оперативная память | 3 GB |
| Поддерживаемый видеоформат | AVS, AVS+, H.263, H.264, H.265, HEVC, HEVC/H.265, MPEG1, MPEG2, MPEG4, MVC, RV30, RV40, Sorenson H.263, VP8, VP9, WMV3 |
| Поддерживаемые операционные системы Windows | Windows 10, Windows 7, Windows 8, Windows 8.1, Windows Vista, Windows XP |
| Поддерживаемые операционные системы Mac | Да |
| Поддерживаемые форматы изображения | BMP, JPEG, PNG |
| Поддерживаемые форматы аудио | AAC-LC, AC3, Cook Codec, EAC3, FLAC, G.711, G.711 A-law, G.711 μ-law, HE-AAC, LBR, LC-AAC, LPCM, MS-ADPCM, Vorbis, WMA |
| Встроенный процессор | Да |
| Модель встроенного графического адаптера | ARM Mali-G51 MP2 |
| Количество ядер процессора | 4 |
| Установленная операционная система | Android 8.0 |
| Пользовательская память | 16 GB |
| Встроенный процессор | Да |
| Семейство графического адаптера | ARM |
| Видеокарта | Mali-G51 MP2 |
| Архитектура процессора | ARM Cortex A73 + ARM Cortex A53 |
| Емкость RAM | 3 GB |
- Manuals
- Brands
- NewLine Manuals
- Monitor
- rs+
- User manual
-
Contents
-
Table of Contents
-
Troubleshooting
-
Bookmarks
Quick Links
Related Manuals for NewLine rs+
Summary of Contents for NewLine rs+
-
Page 1
User Manual V2.0… -
Page 2: Table Of Contents
2.1 Safety Precautions …………………………18 2.2 Installation Precautions …………………………. 19 2.3 Installation ……………………………. 20 2.4 Installing the Internal PC (Optional) ……………………… 21 2.5 Installing Newline Assistant ……………………….23 3 Getting Started……………………..24 3.1 Power On …………………………….24 3.2 Power Off…………………………….25 3.3 Calibration …………………………….
-
Page 3
4.3.10 Input/Output Settings ……………………….. 42 4.3.11 Display & Theme Settings ……………………….. 43 4.3.12 Security Settings …………………………43 4.3.13 System …………………………….. 44 4.4 Windows …………………………….44 4.5 Screen Sharing …………………………..45 4.6 Whiteborad …………………………… 45 4.6.1 Whiteboard Functions ………………………… 48 4.6.2 Page Management …………………………57 4.6.3 Object Detection ………………………… -
Page 4
Welcome to the world of Newline Thank you for choosing the RS+ series Interactive Touch Screen. Please use this document to get the most out of your screen. This device complies with part 15 of the FCC Rules. Operation is subject to the following two conditions: (1) This device may not cause harmful interference, and (2) this device must accept any interference received, including interference that may cause undesired operation. -
Page 5
Energy Star Compliance. Signage Displays with Plug-in Module. As an ENERGY STAR Partner, Newline Interactive Inc., has followed the EPA’s enhanced Product qualification and certification process to ensure that the products marked with the ENERGY STAR logo are ENERGY STAR qualified per the applicable ENERGY STAR guidelines for energy efficiency. -
Page 6: About This Document
About This Document This document describes multiple functions, instructions, and notes about the product. Symbols are used in this document to indicate operations that need particular attention. The symbols are defined as follows: Provides additional information to supplement operation in the main text. Provides tips for operation.
-
Page 7: Safety Instruction
The voltage/current of the rear power output port is 5V/2A (maximum). Purchase the power code/AC adapter according to customer needs. The port can be used for the Newline X10D Android box. Please do not connect any products with different power requirement. Otherwise,…
-
Page 8
WARNING Do not put items on the top of the product. ⚫ Do not put items, such as a container for liquid (a vase, flowerpot, cosmetics, or liquid medicine) on the top of the product. ⚫ If any water or liquid is spilled on the product, the product may short circuit and cause fire or electric shock. -
Page 9
CAUTION ⚫ Do not install the product on carpet or cloth. ⚫ Do not use a cloth, such as table cloth, to cover the product. Keep the product away from the radio. The product complies with the international EMI standard to pervent radio interference. However, interference may still exists and causes noise in the radio. -
Page 10: Overview
The newline’s 4K Ultra High-Definition LED screen also provides a fluid writing experience. Annotate over anything on the screen, whether in the embedded whiteboard or while using any other device.
-
Page 11
Rear View ⚫ 65 inch: 75 inch/86 inch:… -
Page 12
Remote Control Receiver Speakers Power On/Off Power Supply Plug Light Sensor Power Switch Front Plate Cover Internal PC Port (OPS) Front Ports Rear Ports Front Buttons… -
Page 13: Ports
1.3 Ports Front Ports CAUTION Front USB ports and rear USB 3.0/USB 2.0 ports switch connections based on signal sources. If the current signal source is reading the data from an external product connecting to the port, please switch the signal source after the data reading is complete. Otherwise, the data or product may be damaged.
-
Page 14
The voltage/current of the rear power output port is 5V/2A (maximum). Purchase the power code/AC adapter according to customer needs. The port can be used for the Newline X10D Android box. Please do not connect any products with different power requirement. Otherwise… -
Page 16
Front Buttons Buttons Operations Functions Short press Power on/off ⚫ Steady red color: Display is in shut down mode ⚫ Steady white color: Display is on and working Home Short press Go to the home page Return Short press Return to the last menu/Exit Menu Short press Open the Settings menu… -
Page 17: Remote Control
1.4 Remote Control Carefully read the following instructions before using the remote control to avoid possible faults: Do not drop or damage the remote control. ⚫ Do not spill water or other liquids on the remote control. ⚫ Do not place the remote control on a wet object. ⚫…
-
Page 18
Buttons Operations View all Pre-installed Applications Switch Source to Internal PC Switch Source to Display Port HDMI Switch Source to HDMI Front FRONT HDMI 1 Switch Source to HDMI 1 HDMI 2 Switch Source to HDMI 2 Switch Source to VGA Autocorrection Screen Display (For VGA Signal Source) Open the Browser Application… -
Page 19: Installation Guide
Installation Guide 2.1 Safety Precautions Installation Environment Installation Direction…
-
Page 20: Installation Precautions
2.2 Installation Precautions Weight Loading Weight of the product: 161lb/ 72 kg (86 inch), 123lb/56 kg (75 inch), 97lb/ 44kg (65 inch) When using a mobile stand, ensure that the weight of the product is less than the loading ⚫ capacity of the mobile stand.
-
Page 21: Installation
Ventilation Ensure adequate ventilation and/or an air conditioned environment. We recommend keeping certain distances from the side of the product to the wall or panels. Ventilation requirements are shown in following figure: 2.3 Installation The dimensions of the four bracket mounting holes on the back panel are VESA MIS-F compliant (86 inch or 75 inch: 800 x 400 mm/31.50 x 15.75 in;…
-
Page 22: Installing The Internal Pc (Optional)
86 inch/75 inch: 65 inch: 2.4 Installing the Internal PC (Optional) The internal PC does not support hot plugging. Therefore, you must insert or remove the internal PC when the display is powered off. Otherwise, the display or internal PC may be damaged.
-
Page 23
You will need to purchase the internal PC separately. Perform the following steps to install the internal PC: Step 1 Unscrew the M3 screws by hand to remove the internal PC shielding cover. Step 2 Push the internal PC into the port at the rear of the screen from right to left. Step 3 Secure the internal PC to the display by using the M3 screws. -
Page 24: Installing Newline Assistant
2.5 Installing Newline Assistant Introduction The Newline Assistant is the tool used as a bridge between the embedded operating system and the Internal PC (OPS). It helps add Windows software shortcuts to the Home Page, as well as to protect USB data when switching between sources.
-
Page 25: Getting Started
Getting Started 3.1 Power On Step 1 Plug the power supply into the power outlet fully and plug the power connector into the side of the product. Ensure the power supply is in the range of 100V to 240V with frequency at 50 Hz/60 Hz ±…
-
Page 26: Power Off
Step 3 Press the power button on the front control panel or on the remote control. 3.2 Power Off Step 1 Press the power button on the front panel or the power button on the remote control. Step 2 Press the power button on the front panel or the power button on the remote control again, the power indicator will turn to red.
-
Page 27
Step 4 Select in the Tablet PC Settings window. -
Page 28
Step 5 Select Touch input from the option and start calibration. Step 6 Use your finger or a pencil to click and hold the center of the flickering cross . Do not release until moves to the next positioning point. Complete the calibration process as instructed. -
Page 29: Operating The Touch Screen
Operating the Touch Screen 4.1 Start Screen When the product is turned on, the product will show the Start Screen page, as shown in the following figure:…
-
Page 30: Home
4.2 Home Touch anywhere on the Start Screen to start a meeting, and the product will go to the Home page, as shown in the following figure: Shortcut for Display& Theme Settings Click the icon on the Home Page to enter the Display & Theme setting page to set the logo image and wallpaper.
-
Page 31
Shortcut for Clock Click the time icon on the Home age to start the clock application. Using the icons on the top left, you may switch from clock mode to alarm mode, or to timer and stopwatch mode. In the clock mode, you may click to add other time zones as shown in the following figure:… -
Page 32
Side Toolbar The Annotation Mode, Whiteboard, Home, Return, and Windows icons are displayed by default in the toolbar on both sides of the screen. You may hide one or both side toolbars in the Settings or move it up and down on the screen, shrink or expand by using touch gestures. You may double-tap the “=”… -
Page 33
Icon Functions Go to your favorite source. You can set favorite source in the “Tool bar” submenu in the system settings. Status Bar and Settings The upper right corner of the home page displays three working status icons (including USB drive(s), Ethernet, and Wi-Fi, system setting shortcut and return to the start screen page). -
Page 34: System Settings
Gadget displays all pre-installed applications, including Gallery, Browser, Music, Calculator, E-mail, File Viewer, Keyboard, Office Viewer and Newline Cast etc. Click the icon of an application to run the application. Click Add to customize the Home page. You can add up to 5 shortcuts to your favorite software, gadgets, or connections.
-
Page 35: Language And Input Settings
Hotspot & tethering: Click to set up Wi-Fi hotspot. ⚫ Wake on LAN: turn on/off LAN. ⚫ Proxy: The settings of the proxy server. ⚫ 4.3.2 Language and Input Settings Enter the Language & Input submenu to set the language and keyboard settings.
-
Page 36
Settings The default input method of the system is Kika Keyboard F, and the Physical keyboard must be enabled. If you want to switch to another language, switch the keyboard input method via Manage keyboards methods, in addition to switching the language. Setting a Language Click Languages on the Language &… -
Page 37: Storage
Adding an Input Method Click Manage keyboards on the Virtual Keyboard interface. On the Manage keyboards page, select the input methods you would like to use (multiple choices can be selected). 4.3.3 Storage Enter the Storage submenu to view space distribution of the internal storage.
-
Page 38: Applications
4.3.4 Applications Enter the Apps submenu to view all downloaded applications by type, running applications, and a summary of all applications. 4.3.5 Whiteboard Enter the Whiteboard submenu to set the version of whiteboard. 4.3.6 Smart Eye Protection Enter the Smart eye protection submenu to set Eye protection writing mode, Eye protection brightness control mode and the Bluelight filter.
-
Page 39: Date And Time Settings
4.3.7 Date and Time Settings Enter the Date & Time setting submenu to set the date and time. Before setting the date and time, users should click Select time zone to set everything to the local time zone. Date Settings You can automatically obtain the date.
-
Page 40
Time Settings You can automatically obtain the time. To automatically obtain the current time, select Automatic date & time. ⚫ To customize time and time format, set them in Set time and select Use 24-hour format. ⚫… -
Page 41: Power Settings
4.3.8 Power Settings Enter the Power setting submenu to set an automatic power on/off time and the time for the system to enter energy saving mode. ⚫ To set the automatic power on time, select Auto power on, and the time you want the display to turn on in Power on time, as shown in the following figure: ⚫…
-
Page 42: Tool Bar Settings
⚫ To set the energy saving time, click Energy saving. In the dialog box that is displayed, set a duration after which the screen enters the lock mode if the screen is left un-operated. After the screen is locked, if the user does not operate the screen within 120s, the screen enters the shut down mode.
-
Page 43: Input/Output Settings
Quick settings: Click to turn on/off the quick settings function. ⚫ 4.3.10 Input/Output Settings Enter the Input and output setting submenu to set the starting source, new input source, and resolution of image output through the HDMI port etc.. New input source: After the New input source function is enabled, the system can ⚫…
-
Page 44: Display & Theme Settings
4.3.11 Display & Theme Settings Enter the Display & Theme setting submenu to set the system theme, wallpaper, Home logo and lock screen logo. 4.3.12 Security Settings Enter the Security setting submenu to set Passkey lock, Whiteboard/Screenshot data clearance, Encryption & credentials, USB lock functions. Passkey lock: Click to set whether you need enter the password or modified password when going from the Start page to the Home page.
-
Page 45: System
USB lock: Click to turn on/off the USB lock function. 4.3.13 System Enter the System submenu to upgrade the system, perform a factory data reset, network settings reset, app preferences reset, view firmware information, embedded operating system version information or the display’s serial number. 4.4 Windows On the Home Page, click Windows to enter the Internal PC source, as shown in the following figure.
-
Page 46: Screen Sharing
Multiple devices can be cast wirelessly to the display through several casting modes (Airplay, Google Cast…). To cast: click Screen Sharing on the Home Page to enter Newline Cast. On screen directions will appear for you to follow in order to wirelessly cast to the display, as shown in the following figure: 4.6 Whiteborad…
-
Page 47
Discussion and screen annotation ⚫ On the whiteboard page, you can select pen type, width, and color to write or annotate on the screen. You can also erase selected content or clear all content on the screen. Page navigation ⚫ Preview or delete pages. -
Page 48
Icon Name Icon Function Mode Switch Click the icon to enter annotation mode. (See more detail in whiteboard mode section) Import Click the icon to insert picture. Insert Text Click and show the text window(Color/ Size) and the keyboard, then type in the text. Click and hold the icon for two seconds to set the default text setting. -
Page 49: Whiteboard Functions
Icon Name Icon Function Slide the turn on or off the object recognition function. Object recognition switch New Page Click to add a new page. Click and hold for two seconds to set the color and the pattern of the new page. Previous Page Click to back to the previous page.
-
Page 50
Click and hold for two seconds to set the color and the pattern of the new page, as shown in the figure below. Mode Switch Click in the lower left corner of the discussion mode to switch between whiteboard modes. Annotation mode ⚫… -
Page 51
Discussion mode ⚫ The background is a single color, as shown in the following figure. You can write content on the page as you wanted. Import On the Whiteboard, Click to import data from file management, you can import the pictures/ whiteboard data (PNG)/ screenshots (PNG) from system files, USB, network. -
Page 52
Insert Text On the Whiteboard, Click to insert text, and show the keyboard. Click and hold the icon for two seconds to set the default text setting. Insert Auto Shape On the Whiteboard, Click to insert the anto shape. Click and hold the icon for two seconds to set the shapes and color. -
Page 53
Pen Type On the Whiteboard, two types of pens are supported: Pen and highlighter. : used to write. ⚫ Highlighter : used to highlight. Characters covered by comments are still visible. ⚫ Line Size and Color On the Whiteboard, click and hold for two seconds to set the size and color. -
Page 54
Select On the Whiteboard, Click and user could choose the data on the page to move/ zoom in/ zoom out/ rotate by two fingers, and the icon turns into white. Click to expand the toolbar,users can copy or delete or cut the data or change the data color, such as the following figure: Icon Functions… -
Page 55
Click this icon to Post the selected items. Click this icon to Change color for the selected items. Paste (long press the screen around two seconds and the icon will appear only after one item copied or cut) Click this icon to Push to bottom layer. Click this icon to Delete the items. -
Page 56
Object recognition switch Press the setting icon, it will pop up a switch and let user to change the object recognition setting, slide to left to open the object recognition function, slide to right to turn it off. Screenshot In annotation mode, click to save the current slide as a picture. -
Page 57
Pictures saved through screenshots can be viewed and obtained using the following methods: Screenshots are saved on the Navigation page, as shown in the following figure: ⚫ Click on the home page and choose Internal storage > Pictures > Screenshots > ⚫… -
Page 58: Page Management
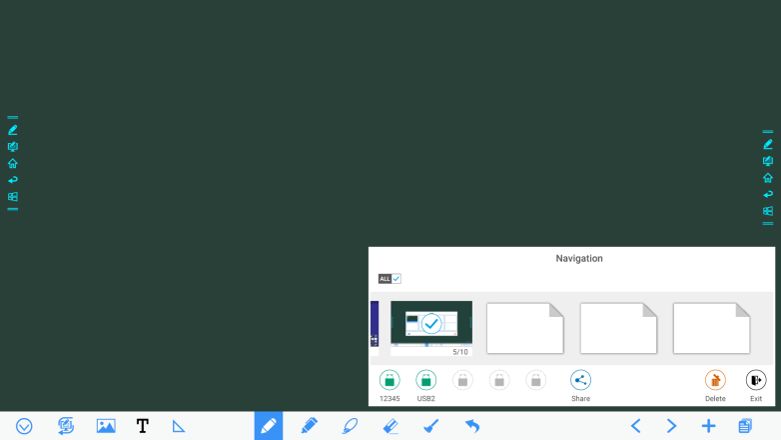
4.6.2 Page Management You can preview, select, share, save, and delete any created writing page. Page Preview Click on the lower right corner in the discussion mode. All pages will be displayed. Click one page to switch to that page for more operations, as shown in the following figure: Only 8 pages are displayed at once.
-
Page 59
Page Select Or Delete Page On the Navigation page, you can select or delete writing pages according to requirements, as shown in the following figure. Click to select all pages. ⚫ Click to share selected pages. ⚫ Click to delete selected pages. ⚫… -
Page 60: Object Detection
Page share Click the button on the Navigation page, click File Commander to save to local storage or to the cloud, or click AquaMail to share current the meeting files by email. Before sending by email, confirm that an email account is successfully set up in Settings. 4.6.3 Object Detection This product supports object recognition and produces different effects according to the diameter and size of the input objects.
-
Page 61
If the diameter or size of the input object is larger than 3mm or smaller than 8mm, there is a risk of identification failure. Keep the object vertical while writing. Object recognition: The system automatically remembers the settings selected for a fine pen and a thick pen. -
Page 62: Browser
4.7 Browser On the Home page, click Browser to view web page, as shown in the following figure: 4.8 File Management The product supports connection to USB flash memory. In File Viewer application, you can preview all files in the internal storage and storage devices connected via USB ports and select, copy, paste, delete and search for files.
-
Page 63: File Preview
4.8.2 File Preview Using the File Viewer application, you can click the submenu on the left side to preview what files are on internal storage, external storage devices connected via the USB ports, cloud stored files, FTP uploaded files, and local network files, as shown in the following figure. 4.8.3 File Search Enter the File Viewer application and click .
-
Page 64: File Filtering
4.8.4 File Filtering You can click the menu on the left side to display files by type, for example, whether the files is a document, a picture, music, a video, archived or was downloaded. The system supports two view modes: list and thumbnail. You can click on the top right ⚫…
-
Page 65: New Folder
4.8.5 New Folder Enter the File Viewer application, and click to create folder. as shown in the following figure. 4.8.6 File Operation Enter the File Viewer application. You can create folders according to requirements, select files by in the long pressing, and set wallpaper/copy/paste/delete. For details on other operation, click upper right corner for more operation.
-
Page 66: Gadget
screenshots and pages in the discussion mode. Depending on the screenshots mode, picture naming is different. Picture files are named in the following of prefix + creation file. Prefix name rule: WB (discussion mode page), AN (annotation page screenshot), and SS (remote control screenshot).
-
Page 67: Add Shortcut
Click this icon to enter the Office viewer application. In this application, you can view office files, including excel, word, power point, and PDF files. Newline Click this icon to enter the Newline Broadcast application. Broadcast E-mail Click this icon to enter the email application and send files.
-
Page 68
Click to view signal sources in Connection. ⚫ Click to view the Windows software shortcuts that the Newline Assistant uploads to the ⚫ embedded operating system. For details, see “Add Quick Start Windows Programs in Smart System”. Click to view all Gadget applications. -
Page 69: Add Quick Start Windows Programs In Smart System
4.10.2 Add Quick Start Windows Programs in Smart System Step 1 In Windows, run the Newline Assistant program and drag the software icons or folder shortcut icons that you want to add from the desktop or menu to the Newline Assistant window. The applications added or deleted through the Windows system will be automatically updated to the embedded operating system until the upload progress reaches 100%.
-
Page 70
The page for adding application programs will be displayed. Step 3 At the shortcut setting page, click icon to view all the Windows software shortcuts added by the Newline Assistant in Step 1. -
Page 71
By default, the Newline Assistant application is added on the tab. Step 4 Tap the icon and add the shortcut at the Home page. Tap again and remove it. Step 5 Return to Home page. Click the icon of an added Windows application to start the software. -
Page 72: Preview Window
4.11 Preview window On the Home page, signal source preview window including internal PC, HDMI Front, HDMI Rear (1 to 2), Display Port, and VGA. An icon without an active signal source connected will be gray, an icon with an active signal sources connected will be white, and the icon of the signal source currently being previewed will be blue.
-
Page 73: Quick Setting Menu
Quick Setting Menu Using two fingers to swipe up from the bottom of the screen, the Quick Settings menu will appear, as shown in the following figure.
-
Page 74
Icon Functions Drag the slider to adjust the brightness. Drag the slider to adjust the volume. Click the icon to return to Home page. Click the icon to enter the settings page. Click the icon to turn on/off the Smart system Wi-Fi. Click the icon to mute/unmute. -
Page 75: Serial Port Control
Serial Port Control Connect RS-232 port to the PC or controlling product. Enable RS-232 serial port connection and complete the following configuration. Port: COM1 (Set according to PC or controlling product’s port number) Baud rate 19200 Odd/even check None Data bits Stop bit The following tables list controlling codes, querying codes and return codes.
-
Page 76
Function Controlling codes Return codes 7F 08 99 A2 B3 C4 02 FF 01 54 7F 09 99 A2 B3 C4 02 FF 01 54 01 Internal PC 7F 08 99 A2 B3 C4 02 FF 01 38 7F 09 99 A2 B3 C4 02 FF 01 38 01 7F 08 99 A2 B3 C4 02 FF 01 56 7F 09 99 A2 B3 C4 02 FF 01 56 01 Page up… -
Page 77
Function Controlling codes Return codes Set display mode 7F 08 99 A2 B3 C4 02 FF 06 7F 09 99 A2 B3 C4 02 FF 06 XX XX CF 01 CF XX indicates the mode. 00 and 01 indicate standard and ECO modes respectively. -
Page 78
Function Controlling codes Return codes 7F 09 99 A2 B3 C4 02 FF 01 37 XX CF Power supply 7F 08 99 A2 B3 C4 02 FF 01 37 XX indicates the power on/off state. XX = 01: power on state ⚫… -
Page 79
Function Querying codes Return codes Backlight 7F 09 99 A2 B3 C4 02 FF 01 49 brightness XX CF 7F 08 99 A2 B3 C4 02 FF 01 49 CF XX indicates the value of backlight brightness (0 — 100), corresponding to the hexadecimal number system (00 — 64). -
Page 80: Faqs & Troubleshooting
FAQs & Troubleshooting Symptom Troubleshooting Methods The screen cannot be powered on or Check whether the power supply is connected. the power indicator light is off. Check whether the power supply plug is properly connected. Check whether the power outlet has electricity. Check whether the rocker switch is enabled.
-
Page 81
Symptom Troubleshooting Methods The touch function is abnormal or the Restart the screen. positioning is inaccurate. In the Windows system, recalibrate the screen. For details, see section «Calibration». The touch function is unavailable when Switch between different external signal sources. the external signal source channel is Ensure that the USB touch cable is connected to being used. -
Page 82
Symptom Troubleshooting Methods When the touch screen connects to Please use the remote control to start and turn off CEC facilities and powers down, touch the touch screen. Then you can use the CEC screen will stay in shut down mode facilities to recall it. -
Page 83: Specifications
Specifications Model TT-6519RS TT-7519RS TT-8619RS Display Backlight Display Area 56.24 x 31.63 in 64.97 in x 36.55 in 74.69 in x 42.05 in 1432 x 807mm 1652 x 930mm 1893 x 1069mm Active Screen Size 65 inch 75 inch 86 inch Display Ratio 16:9 Resolution…
-
Page 84
Model TT-6519RS TT-7519RS TT-8619RS Touch Touch Surface Anti-glare tempered glass Transparency Surface Hardness HID support 10 Points in Smart system Touch Points 20 Points in Windows Writing Tools Eraser, Stylus or Finger Scan Speed 10ms 10 ms 10 ms Center area 1.0 – 1.5 mm / Edge area 1.2 – 2.0 mm Positioning Accuracy Communication… -
Page 85
Flash 16GB build in + 32GB TF card Supports all major types of multi-media files Multimedia File Formats On Screen Annotation, Discussion Board, Gallery, Browser, Music, E-mail, Pre-installed File viewer, Keyboard, Office Viewer, Newline Cast, Newline Broadcast, applications Display Management… -
Page 86: More Information
More Information For More Information Please visit our website (www.newline-interactive.com) for detailed instruction manual. Contact Us for Support support@newline-interactive.com Please email us at Our company is devoted to product innovation and technology enhancement. Therefore, we may change product specification and information without notice. Product pictures in the…
Смотреть руководство для Newline TT-7519RS ниже. Все руководства на ManualsCat.com могут просматриваться абсолютно бесплатно. Нажав кнопку «Выбор языка» вы можете изменить язык руководства, которое хотите просмотреть.

MANUALSCAT | RU
Вопросы и ответы
У вас есть вопрос о Newline TT-7519RS, но вы не можете найти ответ в пользовательском руководстве? Возможно, пользователи ManualsCat.com смогут помочь вам и ответят на ваш вопрос. Заполните форму ниже — и ваш вопрос будет отображаться под руководством для Newline TT-7519RS. Пожалуйста, убедитесь, что вы опишите свои трудности с Newline TT-7519RS как можно более детально. Чем более детальным является ваш вопрос, тем более высоки шансы, что другой пользователь быстро ответит на него. Вам будет автоматически отправлено электронное письмо, чтобы проинформировать вас, когда кто-то из пользователей ответит на ваш вопрос.
Задать вопрос о Newline TT-7519RS
- Бренд:
- Newline
- Продукт:
- Мониторы
- Модель/название:
- TT-7519RS
- Тип файла:
- Доступные языки:
- английский
Сопутствующие товары Newline TT-7519RS
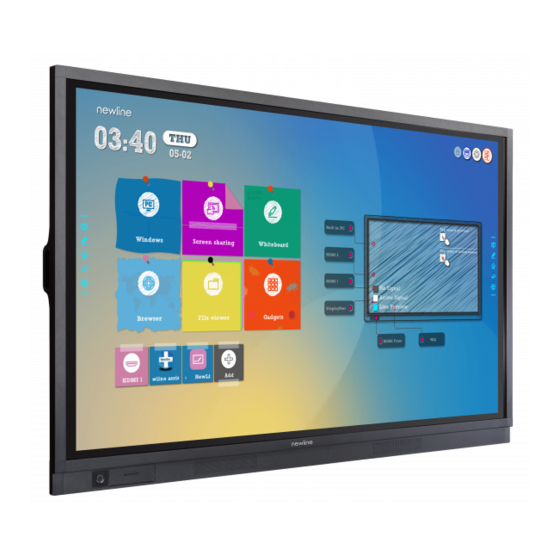
75-дюймовый интерактивный сенсорный дисплей Newline TruTouch TT-7519RS — это удобный инструмент для проведения бизнес-встреч, презентаций, различных тренингов, позволяющий использовать все новые интернет-технологии, повышающий процесс усвоения информации и оставляющий приятное впечатление от использования дисплея.
Разрешение экрана составляет внушительные 4К, что более чем достаточно для того, чтобы разглядеть все самые мелкие детали изображения и избежать зернистости. Увеличенная контрастность и яркость всячески способствуют тому, чтобы текст на интерактивном дипслее Newline TruTouch TT-7519RS не размывался и легко воспринимался слушателями. Модель поддерживает автонастройку яркости и фильтр свечения синего цвета, что гарантией сохранность зрения пользователей.
Панели серии RS распознают палец как интструмент написания, стилус/простой карандаш/шариковую ручку — как инструмент написания, а ладонь или кулак — как ластик. Таким образом, интерфейс взаимодействия максимально интуитивно понятен любому пользователю панели Newline.
Режим «белой доски» даст вам возможность использовать панель в качестве маркерной доски или электронного флипчарта. Такая возможность устройства концентрирует внимание слушателей. На панель стандартно установлена ОС Андроид, а если вы хотите установить, например, Windows, то придется приобрести дополнительно OPS-компьютер, разъем для которого также присутствует на корпусе панели Newline TruTouch TT-7519RS.
Благодаря функции Newline Cast, экран любого смартфона можно без проблем и без проводов транслировать на экран панели. А через другую функцию Newline Broadcast — можно сделать все наоборот: экран на панели транслировать на экраны ваших смартфонов и иных устройств.
NewlineTT-7519RS/RU – это первыеинтерактивные панели Newline, произведенные в Российской Федерации.
Сочетание уникальных технологий, широкого функционала, современного «железа» и продвинутого программного обеспечения, делают их универсальными, а очень доступная цена позволяет использовать новинки в самых различных организациях и условиях.
4К-дисплей
Все дисплеи NewlineTT-7519RS/RUоборудуются самыми современными ЖК-матрицами с разрешением 3840х2160 точек, высокой яркостью и контрастностью, что гарантирует максимальное качество изображения в любых условиях и сценариях использования. А автоматическая коррекция яркости и фильтр свечения синего цвета на уровне «железа» гарантируют сохранность зрения пользователей.
При этом, будучи уверенным в качестве матриц, установленных в дисплеи Newline, производитель распространяет на них политику нулевого количества битых пикселей – найдете хотя бы один битый пиксель – это гарантийный случай.
Распознавание объектов
Панели серии RS, как и все современные панели Newline распознают палец, как инструмент касания, стилус/простой карандаш/шариковую ручку – как инструмент написания, а ладонь или кулак – как стерку. Таким образом взаимодействие с панелью и контентом на ней не отличается от нашей повседневной жизни, где мы привыкли писать ручкой, взаимодействовать с планшетами/смартфонами пальцем, а стирать с доски тряпкой или стёркой.
Разъем IntelOPS
Все панели Newlineоборудованы стандартным разъемом IntelOPS 80 pin. Данный разъем используется для установки опционального или комплектного встраиваемого компьютера на базе обычного процессора, памяти и SSD-диска с полноценной ОСна борту, что превращает интерактивный дисплей Newlineв моноблок, в который может быть установлено любое привычное пользователю приложение, от образовательных программ до сложных систем просмотра и редактирования 3D-моделей.
Встроенное «железо» и ПО
Большинство интерактивных панелей Newline, в том числе и серия RSимеют встроенную операционную систему Android 8.0 и современную «начинку». Благодаря этому, уже «из коробки» они являются вполне самодостаточными устройствами, с которыми можно работать, просто воткнув их в розетку и не подключая дополнительных источников сигнала. А встроенное программное обеспечение и возможность установки стороннего ПО, позволяет расширить их функционал практически до бесконечности.
Встроенная «белая доска»
Привыкли работать на маркерной доске или флипчарте? Тогда встроенная «белая доска» — это то, что вам надо и даже больше. Меняйте фон, делайте записи (которые, если что, стираются ладонью как на доске), вставляйте изображения и фигуры, сохраняйте результаты в виде изображения или РЕДАКТИРУЕМОГО файла .iwb во встроенную память, на флешку или сетевой диск, либо же сразу отправляйте их по почте всем заинтересованным лицам. Никаких блокнотов, фотоаппаратов и других устройств. Всё встроено!
ВстроенныйNewlineCast
NewlineCast– это функция, позволяющая зеркалировать экран мобильных устройств на дисплей без проводов. По локальной сети или через интернет.
Любые мобильные девайсына ОС iOS, AndroidиWindowsможно транслировать на панель Newlineчерез бесплатное приложение, устанавливаемое на них, а ноутбуки на Linux — через плагин для браузера GoogleChrome.
Помимо трансляции, NewlineCastпозволяет аннотировать транслируемое изображение на панели и отправлять скриншоты на подключенные устройства.
Наконец, устройства Appleможно выводить на экран даже без приложения, посредством встроенной в них технологии AirPlay.
ВстроенныйNewlineBroadcast
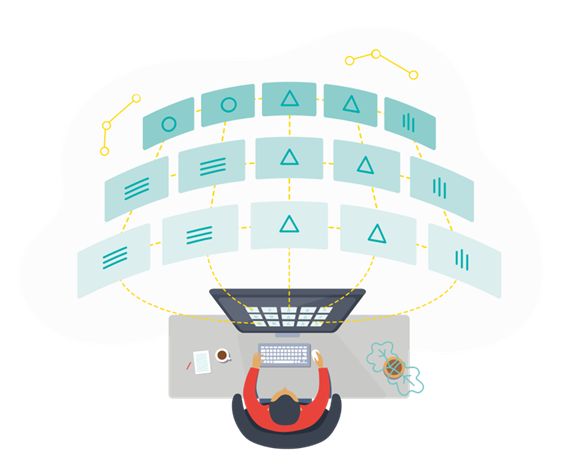
NewlineBroadcast – это возможность выводить всё происходящее на экране панели на 200 любых удаленных устройств, имеющих браузер и подключение к интернет. Неважно что, с какого источника и откуда вы демонстрируете, любой человек может увидеть ваши данные даже в отдаленном уголке планеты… Конечно, если вы дадите ему доступ.
Встроенный NewlineDisplayManagement
В парке организации много дисплеев Newlineи всего один системный администратор? Не беда! С NewlineDisplayManagementуправлять и отслеживать состояние всех устройств в организации можно с одного единственного ПК.
Привязывайте дисплеи к своему бесплатному эккаунту, управляйте ими, устанавливайте на них ПО, помогайте пользователям, меняйте настройки, и все это — не вставая из-за компьютера.
NewlineClassroomTools
Новые инструменты Newline для образования, призванные помочь преподавателю в проведении интересных и увлекательных уроков, уже предустановленны в панелях Q-серии.
Встроенный доступ к сетевым дискам и облачным хранилищам
Встроенный в панели Newlineфайловый менеджер позволяет открыть файлы из встроенной памяти панели, с подключенных к панели USB-носителей, с сетевых и даже облачных хранилищ. Даже внешний компьютер не нужен, всё под рукой.
Встроенный веб-браузер
С Newlineдоступ к миллионам веб-ресурсов возможен прямо «из коробки». Нужно сделать на чем-то акцент во время выступления и сохранить этот акцент на будущее? Один клик по экрану для заметок и еще один — для сохранения!
Встроенный просмотр фото и видео
Панели Newline умеют воспроизводить встроенными средствами практически любые изображения и видеофайлы. Что-то не открывается? Просто установите VLCMediaPlayer.
Встроенный редактор документов
Редактирование Word, Excelи PowerPointна-ходу, прямо во время совещания или презентации? Запросто! Нужно сделать заметку на PDF – тоже не проблема! Встроенный офисный редактор OfficeSuiteвсё это умеет.
Newline Engage
Мощнейший программный комплекс для создания и проведения интерактивных уроков! Огромное количество инструментов! Интуитивный интерфейс на русском языке! Возможность импортирования уроков в форматах .notebook, .iwb, .flipchart! Интеграция со встроенной белой доской Newline! Всё это — новое программное обеспечение NewlineEngage, бесплатно идущее со всеми панелями Newlineв комплекте.
Интеграция с MSWindows и Office
Привыкли работать в MicrosoftOffice? Мы тоже. С панелями Newlineнет необходимости устанавливать на компьютер, подключенный к панели, драйверы и учиться взаимодействию с ОС и документами MSOffice 365 или 2019.
Ваши пальцы – это инструменты касания, пролистывания, увеличения/уменьшения и других, привычных вам жестов, стилус, идущий в комплекте, простой карандаш или шариковая ручка – то, чем вы пишете в ваших документах от руки. А стираете вы это всё ладонью или кулаком. Ну как в школе. И всё это даже на гостевом ноутбуке, который впервые подключен кNewline.
Аналогично можно работать с PDF, изображениями и видеофайлами. Да-да, вы можете вносить и сохранять заметки прямо в видеороликах!
DynamicUSB
Любые клавиатуры, мышки, USB-флешки и другие устройства, подключенные к панели Newline,всегда автоматически коммутируются к выводимому на экран источнику сигнала. Встроенный Android, встраиваемый OPSPC, внешний ноутбук – вы всегда управляете ими одной и той же мышкой лежащей на столе, не переключая и не перетыкая ничего и никуда.
HDMI-выход
Одной из особенностей интерактивных дисплеев Newline серии RS является HDMI-выход, работающий как коммутатор. Иными словами, так же как и с NewlineBroadcast, абсолютно всё, что мы видим и делаем на экране панели, может быть протранслировано на HDMI-матрицу, проектор, огромную видеостену или в систему ВКС стандартными средствами панели, но уже не по сети, а через HDMI-кабель. Не важно в помещении какого размера мы работаем, с какого источника выводим сигнал на панель, будь-то встроенный Андроид, встраиваемый OPS, внешние ноутбуки или смартфоны, транслирующие сигнал без проводов –ваша аудитория увидит абсолютно всё.
Встроенные динамики
Благодаря двум встроенным в панели NewlineTT-7519RS/RU15-ваттным динамикам даже в достаточно больших помещениях нет необходимости устанавливать дополнительные колонки. А если встроенного звука все таки не хватит, то всегда есть выход SPDIFи MiniJackдля внешней мощной акустики.
Крепление в комплекте
Настенное крепление для интерактивных панелей NewlineTT-7519RS/RU с настенным креплениемпоставляется в комплекте, поэтому не нужно тратить деньги и время на его подбор и покупку.
Интерактивные дисплеи NewlineTT-7519RS/RU– это универсальные дисплеи для любых переговорных комнат, кабинетов, учебных аудиторий, школьных классов и других помещений, где необходимо отображение информации и взаимодействие с ней.
Они надежны как профессиональный дисплей, доступны почти как обычный телевизор, но гораздо функциональнее и удобнее их обоих.
Интерактивная LED панель Newline TruTouch TT-7519RS, 75 дюймов, 4K
Панель Newline TruTouch TT-7519RS серии RS – это новейшая панель для бизнеса и образования от одного из крупнейших в мире производителей интерактивных дисплеев.
Сочетание уникальных технологий, широкого функционала, современного «железа» и продвинутого программного обеспечения, делают их универсальными, а очень доступная цена позволяет использовать новинки в самых различных организациях и условиях.
4К-дисплей
Все дисплеи Newline серии RS оборудуются самыми современными ЖК-матрицами с разрешением 3840х2160 точек, высокой яркостью и контрастностью, что гарантирует максимальное качество изображения в любых условиях и сценариях использования. А автоматическая коррекция яркости и фильтр свечения синего цвета на уровне «железа» гарантируют сохранность зрения пользователей.
Распознавание объектов

Панели серии RS, как и все современные панели Newline распознают палец, как инструмент касания, стилус/простой карандаш/шариковую ручку – как инструмент написания, а ладонь или кулак – как стерку. Таким образом взаимодействие с панелью и контентом на ней не отличается от нашей повседневной жизни, где мы привыкли писать ручкой, взаимодействовать с палншетами/смартфонами пальцем, а стирать с доски тряпкой или стёркой.
Разъем Intel OPS
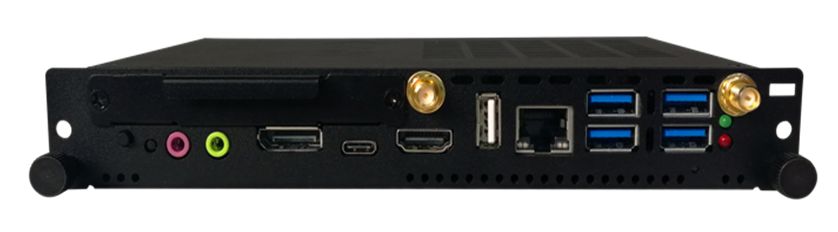
Все панели Newline оборудованы стандартным разъемом Intel OPS 80 pin. Данный разъем используется для установки опционального встраиваемого компьютера на базе обычного процессора, памяти и SSD-диска с Windows 10 на борту, что превращает интерактивный дисплей Newline в моноблок, в который может быть установлено любое привычное пользователю Windows-приложение, от образовательных программ до сложных систем просмотра и редактирования 3D-моделей.
Встроенное «железо» и ПО
Большинство интерактивных панелей Newline, в том числе и серия RS имеют встроенную операционную систему Android 8.0 и современную «начинку». Благодаря этому, уже «из коробки» они являются вполне самодостаточными устройствами, с которыми можно работать, просто воткнув их в розетку и не подключая дополнительных источников сигнала. А встроенное программное обеспечение и возможность установки стороннего ПО, позволяет расширить их функционал практически до бесконечности.
Встроенная «белая доска»
Привыкли работать на маркерной доске или флипчарте? Тогда встроенная «белая доска» — это то, что вам надо и даже больше. Меняйте фон, делайте записи (которые, если что, стираются ладонью как на доске), вставляйте изображения и фигуры, сохраняйте результаты в виде изображения во встроенную память, на флешку или сетевой диск, либо же сразу отправляйте их по почте всем заинтересованным лицам. Никаких блокнотов, фотоаппаратов и других устройств. Всё встроено!
Встроенный Newline Cast

Newline Cast – это функция, позволяющая зеркалировать экран мобильных устройств на дисплей без проводов. По локальной сети или через интернет.
Любые мобильные девайсы на ОС iOS, Android и Windows можно транслировать на панель Newline через бесплатное приложение, устанавливаемое на них, а ноутбуки на Linux — через плагин для браузера Google Chrome.
Помимо трансляции, Newline Cast позволяет аннотировать транслируемое изображение на панели и отправлять скриншоты на подключенные устройства.
Наконец, устройства Apple можно выводить на экран даже без приложения, посредством встроенной в них технологии AirPlay.
Встроенный Newline Broadcast

Newline Broadcast – это возможность выводить всё происходящее на экране панели на 200 любых удаленных устройств, имеющих браузер и подключение к интернет. Неважно что, с какого источника и откуда вы демонстрируете, любой человек может увидеть ваши данные даже в отдаленном уголке планеты… Конечно, если вы дадите ему доступ.
Встроенный Newline Display Management
В парке организации много дисплеев Newline и всего один системный администратор? Не беда! С Newline Display Management управлять и отслеживать состояние всех устройств в организации можно с одного единственного ПК.
Привязывайте дисплеи к своему бесплатному эккаунту, управляйте ими, устанавливайте на них ПО, помогайте пользователям, меняйте настройки, и все это — не вставая из-за компьютера.
Встроенный доступ к сетевым дискам и облачным хранилищам
Встроенный в панели Newline файловый менеджер позволяет открыть файлы из встроенной памяти панели, с подключенных к панели USB-носителей, с сетевых и даже облачных хранилищ. Даже внешний компьютер не нужен, всё под рукой.
Встроенный веб-браузер
С Newline доступ к миллионам веб-ресурсов возможен прямо «из коробки». Нужно сделать на чем-то акцент во время выступления и сохранить этот акцент на будущее? Один клик по экрану для заметок и еще один — для сохранения!
Встроенный просмотр фото и видео
Панели Newline умеют воспроизводить встроенными средствами практически любые изображения и видеофайлы. Что-то не открывается? Просто установите VLC Media Player.
Встроенный редактор документов
Редактирование Word, Excel и PowerPoint на-ходу, прямо во время совещания или презентации? Запросто! Нужно сделать заметку на PDF – тоже не проблема! Встроенный офисный редактор OfficeSuite всё это умеет.
Интеграция с MS Windows и Office
Привыкли работать в Microsoft Office? Мы тоже. С панелями Newline нет необходимости устанавливать на компьютер, подключенный к панели, драйверы и учиться взаимодействию с ОС и документами MS Office 365 или 2019.
Ваши пальцы – это инструменты касания, пролистывания, увеличения/уменьшения и других, привычных вам жестов, стилус, идущий в комплекте, простой карандаш или шариковая ручка – то, чем вы пишете в ваших документах от руки. А стираете вы это всё ладонью или кулаком. Ну как в школе. И всё это даже на гостевом ноутбуке, который впервые подключен к Newline.
Аналогично можно работать с PDF, изображениями и видеофайлами. Да-да, вы можете вносить и сохранять заметки прямо в видеороликах!
Dynamic USB
Любые клавиатуры, мышки, USB-флешки и другие устройства, подключенные к панели Newline, всегда автоматически коммутируются к выводимому на экран источнику сигнала. Встроенный Android, встраиваемый OPS PC, внешний ноутбук – вы всегда управляете ими одной и той же мышкой лежащей на столе, не переключая и не перетыкая ничего и никуда.
Кстати, встроенные в Newline RS микрофоны тоже автоматически переключаются между источниками. Пришли со своим ноутбуком в переговорную комнату? Контакты ваши, экран и микрофоны наши!
HDMI-выход
Одной из особенностей интерактивных дисплеев Newline серии RS является HDMI-выход, работающий как коммутатор. Иными словами, так же как и с Newline Broadcast, абсолютно всё, что мы видим и делаем на экране панели, может быть протранслировано на HDMI-матрицу, проектор, огромную видеостену или в систему ВКС стандартными средствами панели, но уже не по сети, а через HDMI-кабель. Не важно в помещении какого размера мы работаем, с какого источника выводим сигнал на панель, будь-то встроенный Андроид, встраиваемый OPS, внешние ноутбуки или смартфоны, транслирующие сигнал без проводов –ваша аудитория увидит абсолютно всё.
Встроенные динамики
Благодаря двум встроенным в панели Newline RS 15-ваттным динамикам даже в достаточно больших помещениях нет необходимости устанавливать дополнительные колонки. А если встроенного звука все таки не хватит, то всегда есть выход SPDIF и MiniJack для внешней мощной акустики.
Интерактивные дисплеи Newline серии RS – это универсальные дисплеи для любых переговорных комнат, кабинетов, учебных аудиторий, школьных классов и других помещений, где необходимо отображение информации и взаимодействие с ней.
Они надежны как профессиональный дисплей, доступны почти как обычный телевизор, но гораздо более функциональны и удобны их обоих.