OPEL CORSA
Инструкция по эксплуатации
Введение
3
Технические данные
автомобиля
Запишите параметры Вашего авто‐
мобиля на предыдущей странице
и храните их в легко доступном
месте. Найти эту информацию
можно в разделах «Техническое об‐
служивание» и «Технические дан‐
ные», а также на типовой табличке
автомобиля.
Введение
Ваш автомобиль — это оптимальное
сочетание передовой технологии,
безопасности, экологичности и эко‐
номии.
Настоящее Руководство пользова‐
теля содержит всю необходимую
для уверенного и эффективного
управления Вашим автомобилем
информацию.
Кроме Вас, и пассажиры тоже
должны знать о возможных при не‐
правильной эксплуатации автомо‐
биля несчастных случаях и трав‐
мах. Расскажите им об этом.
Обязательно выполняйте дей‐
ствующие законы и предписания
той страны, в которой находитесь.
Соответствующее законодатель‐
ство может отличаться от приве‐
денной в настоящем Руководстве
информации.
При необходимости посещения
станции техобслуживания, мы ре‐
комендуем обращаться к Автори‐
зованному сервисному центру
Opel. Для обслуживания автомоби‐
лей с газобаллонным оборудова‐
нием рекомендуется обращаться
на фирменные станции техниче‐
ского обслуживания Opel, автори‐
зованные для обслуживания газо‐
топливных систем.
Все Авторизованные сервисные
центры Opel предложат Вам пер‐
воклассный сервис по умеренным
ценам. Опытные специалисты,
прошедшие обучение на фирме
Opel, обслужат Ваш автомобиль,
руководствуясь оригинальными
технологическими инструкциям
компании.
Пакет с литературой для клиента
должен всегда находиться в авто‐
мобиле.
Как пользоваться
настоящим
Руководством
■ В настоящем руководстве опи‐
саны все опции и оборудование
данной модели. Описание
отдельных элементов и функций
меню может быть неприменимо
к вашему автомобилю ввиду
различия модификаций
и исполнений для разных
регионов, а также отсутствия или
наличия дополнительного
оборудования и аксессуаров.
■ Предварительный обзор Вы най‐
дете в главе «Коротко».
■ В содержании в начале данного
руководства и в каждом разделе
указано местоположение инфор‐
мации.
■ Конкретную информацию можно
найти с помощью Алфавитного
указателя.
Назад
к
обзору
4
Введение
■ В настоящем Руководстве поль‐
зователя описаны автомобили
с левым расположением руле‐
вого колеса. Обслуживание авто‐
мобилей с правым расположе‐
нием рулевого колеса выполня‐
ется аналогично.
■ В Руководстве пользователя ис‐
пользованы заводские обозначе‐
ния двигателя. Соответствую‐
щие торговые обозначения при‐
ведены в разделе «Технические
данные».
■ Указания направления, напри‐
мер, влево — вправо или вперед —
назад всегда приводятся относи‐
тельно направления движения.
■ На дисплеях информационной
системы автомобиля информа‐
ция может не отображаться на
вашем родном языке.
■ Отображаемые информацион‐
ной системой сообщения и над‐
писи в салоне автомобиля в тек‐
сте настоящего руководства вы‐
делены жирным шрифтом.
Опасность,
Предупреждение
и Внимание
9 Опасность
Текст, отмеченный
9 Опасность, содержит инфор‐
мацию, связанную с риском
смертельного исхода. Прене‐
брежение этими сведениями
может оказаться опасным для
жизни.
9 Предупреждение
Текст, помеченный
9 Предупреждение, содержит
информацию, связанную с рис‐
ком несчастного случая или
травмы. Пренебрежение этими
сведениями может стать причи‐
ной травмы.
Внимание
Текст, помеченный Внимание,
информирует о том, что автомо‐
биль может быть поврежден.
Пренебрежение этой информа‐
цией может привести к повреж‐
дению автомобиля.
Символы
Ссылки на страницы обозначаются
с помощью 3. 3 означает «см. стр.».
Желаем Вам счастливого пути.
Adam Opel AG
Назад
к
обзору
6
Коротко
Коротко
Исходные сведения,
необходимые при
вождении
Отпирание автомобиля
Поверните ключ в замке двери во‐
дителя по направлению к передней
части автомобиля, либо нажмите
на кнопку q, чтобы разблокиро‐
вать двери и багажный отсек. От‐
кройте двери, потянув за ручки.
Чтобы открыть заднюю багажную
дверь, потяните за кнопку под мол‐
дингом.
Пульт дистанционного управления
3
22, центральный замок 3 23,
багажное отделение 3 27.
Регулировка сидений
Установка сиденья
в требуемое положение
Потяните ручку, сдвиньте сиденье,
отпустите ручку.
Регулировка сиденья 3 40, поло‐
жение сиденья 3 39.
Назад
к
обзору
Коротко
7
9 Опасность
Чтобы избежать травмирования
во время срабатывания по‐
душки безопасности, не придви‐
гайтесь к рулевому колесу
ближе чем на 25 см.
Спинки сидений
Поверните рукоятку. Во время ре‐
гулировки не откидывайтесь на
спинку.
Регулировка сиденья 3 40, поло‐
жение сиденья 3 39, складыва‐
ние спинки сиденья переднего пас‐
сажира 3 41.
Высота сиденья
Для изменения высоты сиденья
выполните рычагом качающие дви‐
жения
вверх = поднять
вниз = опустить
Сиденья 3 40, положение си‐
денья 3 39.
Назад
к
обзору
8
Коротко
Регулировка
подголовника
Нажмите на разблокирующую
кнопку, отрегулируйте высоту, за‐
блокируйте подголовник.
Подголовники 3 38.
Ремень безопасности
Вытяните ремень безопасности
и зафиксируйте его в замке. Ре‐
мень безопасности не должен быть
перекручен и должен плотно при‐
легать к телу. Нельзя откидывать
спинку слишком далеко (не бо‐
лее 25°).
Для того чтобы снять ремень, на‐
жмите красную кнопку на его замке.
Ремни безопасности 3 43, по‐
душки безопасности 3 46, поло‐
жение сиденья 3 39.
Регулировка зеркал
Внутреннее зеркало
Для уменьшения риска ослепления
поверните рычаг в нижней части
зеркала.
Внутреннее зеркало 3 32, авто‐
матическое неослепляющее внут‐
реннее зеркало 3 33.
Назад
к
обзору
Коротко
9
Наружные зеркала
Настройка при помощи
четырехпозиционного
переключателя в системе с ручным
управлением положением зеркал
Сначала выберите зеркало, кото‐
рое нужно настроить, потом отре‐
гулируйте его положение с по‐
мощью ручки управления.
Настройка при помощи
четырехпозиционного
переключателя в системе
с электронным управлением
положением зеркал
Сначала выберите зеркало, кото‐
рое нужно настроить, потом отре‐
гулируйте его положение с по‐
мощью ручки управления.
Электронная регулировка 3 30,
выпуклые наружные зеркала
3
30, складывающиеся наружные
зеркала 3 31, наружные зеркала
с обогревом 3 32.
Регулировка положения
рулевого колеса
Отоприте рычаг, отрегулируйте ру‐
левое колесо, затем зафиксируйте
рычаг и убедитесь, что он полно‐
стью заблокирован. Выполняйте
регулировку только на стоящем ав‐
томобиле с разблокированным ру‐
левым колесом.
Подушки безопасности 3 46, по‐
ложения зажигания 3 125.
Назад
к
обзору
Opel Corsa

G73
Был 20 часов назад
Игорь живу за МКАДом, 44 года
Я езжу на Opel Vectra Две трубы, значит дизель (до этого — 8 машин)
Ульяновск, Россия

Opel Corsa D обслуживание и ремонт(изд. Арус)
346 стр, чб, качество хорошее.
3 декабря 2019
Метки: просто так
11
Ранее Помыл машину в праздник.
Далее Литература для скачки 2.Opel Corsa D.
Разместить рекламу
Реклама
Машины в продаже

Сальск
Opel Corsa, 2007
420 000 ₽

Шахты
Opel Corsa, 2014
675 000 ₽

Сальск
Opel Corsa, 2007
399 900 ₽

Сальск
Opel Corsa, 2008
519 900 ₽
Посмотреть больше машин на Дроме
Комментарии
11
Войдите или зарегистрируйтесь, чтобы писать комментарии, задавать вопросы и участвовать в обсуждении.
Войти
Зарегистрироваться

JMachikin
Я езжу на Opel Astra G
Благодарю!
2 года

G73
Автор
Я езжу на Opel Vectra C
О, у меня и такая есть?!
2 года

dentaku
Я езжу на Chevrolet Lacetti 5D
Хорошая книга.
3 года

Viorel077
Я езжу на Opel Corsa D
Красава.
А где можно найти такую же книгу только с дизельным двигателем?
3 года
G73
Автор
Я езжу на Opel Vectra C
она вроде на английском, завтра будет пост
3 года
Viorel077
Я езжу на Opel Corsa D
ооооооооооооо буду ждать
3 года
G73
Автор
Я езжу на Opel Vectra C
домашний интернет плоховат
3 года

Nikolai796
Я езжу на Opel Corsa D
🤝
Спасибо
3 года
G73
Автор
Я езжу на Opel Vectra C
Особо и не на чем.
3 года

AlgDandi
Я езжу на Opel Corsa D
Спасибо тебе добрый человек, я уже был близок к ее покупке =)
3 года
G73
Автор
Я езжу на Opel Vectra C
на днях будут ещё 3-ри книги. Интернет подвел, не смог загрузить их в «облако»
3 года
Руководство на английском языке по техническому обслуживанию и ремонту автомобилей Opel Corsa и Vauxhall Corsa 2006-2010 годов выпуска с бензиновыми и дизельными двигателями.
- Автор: John S. Mead
- Издательство: Haynes Publishing
- Год издания: 2010
- Страниц: 297
- Формат: PDF
- Размер: 184,5 Mb

Руководство на английском языке по техническому обслуживанию и ремонту автомобилей Opel Corsa и Vauxhall Corsa 1997-2000 годов выпуска с бензиновыми двигателями.
- Автор: John S. Mead
- Издательство: Haynes Publishing
- Год издания: 2002
- Страниц: 386
- Формат: PDF
- Размер: 905,9 Mb
Руководство на английском языке по техническому обслуживанию и ремонту автомобилей Opel Corsa и Vauxhall Corsa 2000-2003 годов выпуска с бензиновыми и дизельными двигателями.
- Автор: —
- Издательство: Haynes Publishing
- Год издания: 2004
- Страниц: 388
- Формат: PDF
- Размер: 99,2 Mb

Сборник руководств по эксплуатации и техническому обслуживанию автомобиля Opel Corsa D.
- Автор: —
- Издательство: Opel AG
- Год издания: —
- Страниц: —
- Формат: PDF
- Размер: 45,3 Mb
Руководство по техническому обслуживанию и ремонту автомобиля Opel Corsa 2003-2006 годjd выпуска с бензиновыми и дизельными двигателями.
- Автор: —
- Издательство: Алфамер
- Год издания: —
- Страниц: 384
- Формат: —
- Размер: —
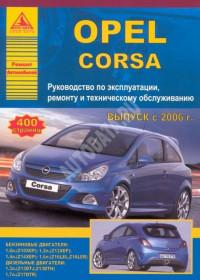
Руководство по техническому обслуживанию и ремонту автомобиля Opel Corsa с 2006 года выпуска с бензиновыми и дизельными двигателями.
- Автор: —
- Издательство: Алфамер
- Год издания: —
- Страниц: 320
- Формат: —
- Размер: —
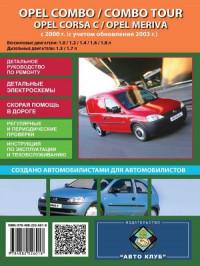
Руководство по эксплуатации, техническому обслуживанию и ремонту автомобилей Opel Corsa/Combo/Combo Tour/Meriva с 2000 года выпуска с бензиновыми и дизельными двигателями.
- Автор: —
- Издательство: Автоклуб
- Год издания: —
- Страниц: 222
- Формат: —
- Размер: —
Руководство по эксплуатации, техническому обслуживанию и ремонту автомобиля Opel Corsa с 2006 года выпуска с бензиновыми и дизельными двигателями.
- Автор: —
- Издательство: Арго-Авто
- Год издания: —
- Страниц: 400
- Формат: —
- Размер: —

Мультимедийное руководство по техническому обслуживанию и ремонту автомобилей Opel Combo/Corsa/Tigra 1993-2000 годов выпуска.
- Автор: —
- Издательство: —
- Год издания: —
- Страниц: —
- Формат: —
- Размер: 68,1 Mb
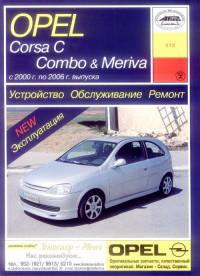
Руководство по эксплуатации, техническому обслуживанию и ремонту автомобилей Opel Combo/Corsa/Meriva 2000-2006 годов выпуска.
- Автор: —
- Издательство: Арус
- Год издания: —
- Страниц: 355
- Формат: PDF
- Размер: 32,8 Mb

Мультимедийное руководство по техническому обслуживанию и ремонту автомобиля Opel Corsa C.
- Автор: —
- Издательство: Новая версия
- Год издания: 2007
- Страниц: —
- Формат: —
- Размер: 276,6 Mb

инструкцияOpel Corsa (2013)

OPEL CORSA
Инструкция по эксплуатации
Посмотреть инструкция для Opel Corsa (2013) бесплатно. Руководство относится к категории Автомобили, 9 человек(а) дали ему среднюю оценку 8.4. Руководство доступно на следующих языках: русский. У вас есть вопрос о Opel Corsa (2013) или вам нужна помощь? Задайте свой вопрос здесь
Главная
Не можете найти ответ на свой вопрос в руководстве? Вы можете найти ответ на свой вопрос ниже, в разделе часто задаваемых вопросов о Opel Corsa (2013).
Как перевести мили в километры?
Где я могу узнать идентификационный номер транспортного средства Opel?
Что такое идентификационный номер транспортного средства (VIN)?
Когда транспортному средству Opel требуется техническое обслуживание?
Когда следует заменять тормозную жидкость на Opel?
В чем разница между топливом E10 и E5?
Одна или несколько дверей не открываются изнутри. Что мне делать?
Автомобильный радиоприемник не включается, что делать?
Инструкция Opel Corsa (2013) доступно в русский?
Не нашли свой вопрос? Задайте свой вопрос здесь
- Manuals
- Brands
- Opel Manuals
- Automobile
- CORSA
- Owner’s manual
-
Contents
-
Table of Contents
-
Bookmarks
Related Manuals for Opel CORSA E
Summary of Contents for Opel CORSA E
-
Page 1
OPEL CORSA Owner’s Manual… -
Page 3: Table Of Contents
Contents Introduction ……..2 In brief ……….6 Keys, doors and windows …. 22 Seats, restraints ……36 Storage ……..58 Instruments and controls ….. 76 Lighting ……..113 Climate control ……123 Driving and operating ….133 Vehicle care ……. 188 Service and maintenance ..
-
Page 4: Introduction
Introduction Introduction…
-
Page 5
Operation is Introduction prices. Experienced mechanics similar for right-hand drive trained by Opel work according to vehicles. Your vehicle is a designed specific Opel instructions. ● The Owner’s Manual uses the combination of advanced technology, The customer literature pack should engine identifier code. -
Page 6
We wish you many hours of Disregarding this information may pleasurable driving. endanger life. Adam Opel AG 9 Warning Text marked 9 Warning provides information on risk of accident or injury. Disregarding this information may lead to injury. -
Page 7
Introduction… -
Page 8: In Brief
In brief In brief Vehicle unlocking Initial drive information To open the tailgate, push the touchpad switch below the brand Press c to unlock the doors and load emblem. compartment. Open the doors by Radio remote control 3 23, Central pulling the handles.
-
Page 9
In brief Seat adjustment Backrest inclination Seat height Longitudinal adjustment Turn handwheel. Do not lean on Lever pumping motion backrest while adjusting. : seat higher Pull handle, slide seat, release Seat position 3 37, Seat adjustment down : seat lower handle. -
Page 10: Head Restraint Adjustment
In brief Head restraint adjustment Seat belt Mirror adjustment Interior mirror Press release button, adjust height, Pull out the seat belt and engage in engage. belt buckle. The seat belt must not be To adjust the mirror, move the mirror twisted and must fit close against the Head restraints 3 36.
-
Page 11: Steering Wheel Adjustment
In brief Exterior mirrors Steering wheel adjustment Select the relevant exterior mirror with Unlock the lever, adjust the steering the rocker switch and adjust the wheel, then engage the lever and mirror with the control :. ensure it is fully locked. Convex exterior mirrors 3 30, Do not adjust the steering wheel Electric adjustment 3 30, Folding…
-
Page 12
In brief Instrument panel overview… -
Page 13
In brief Turn and lane-change Parking assist ….. 160 20 Ignition switch with signals, headlight flash, steering wheel lock …. 134 Seat heating ……40 low beam and high beam ..118 21 Horn ……..78 Heated steering wheel ..77 Exit lighting …… -
Page 14
In brief… -
Page 15: Low Beam And High Beam
In brief Turn and lane-change Parking assist ….. 160 20 Ignition switch with signals, headlight flash, steering wheel lock …. 134 Seat heating ……40 low beam and high beam ..118 21 Horn ……..78 Heated steering wheel ..77 Exit lighting ……
-
Page 16
In brief Exterior lighting Light switch with automatic light Headlight flash, high beam and control low beam Light switch AUTO : automatic light control: headlight flash : pull lever Turn light switch: exterior lighting is switched high beam : push lever on and off automatically low beam : push or pull lever… -
Page 17
In brief Turn and lane-change signals Hazard warning flashers Horn lever up : right turn signal Operated by pressing ¨. Press j. lever down : left turn signal Hazard warning flashers 3 117. Turn and lane-change signals 3 118, Parking lights 3 119. -
Page 18: Washer And Wiper Systems
In brief Washer and wiper systems Windscreen washer Rear window wiper Windscreen wiper Pull lever. Press the rocker switch to activate the rear window wiper: Windscreen washer system 3 78, : fast Washer fluid 3 193, Wiper blade upper switch : continuous : slow replacement 3 196.
-
Page 19
In brief Rear window washer Climate control Demisting and defrosting the windows Heated rear window Push lever. ● Set air distribution control to l. Washer fluid is sprayed on the rear The heating is operated by pressing window and the wiper wipes a few ●… -
Page 20
In brief Transmission Automatic transmission Manual transmission automated Manual transmission R : reverse, engage only when P : park vehicle is stationary R : reverse Reverse: with the vehicle stationary, N : neutral N : neutral D : automatic mode depress clutch pedal and press the D : drive release button on the selector lever… -
Page 21: Starting Off
In brief Starting off Starting the engine ● Diesel engines: turn the key to position 2 for preheating and wait Check before starting off until control indicator ! extinguishes. ● Tyre pressure and condition ● Turn the key to position 2 for 3 211, 3 251.
-
Page 22
In brief Stop-start system Release the brake pedal or move Parking selector lever out of D to restart the engine. Control indicator D 9 Warning extinguishes. Stop-start system 3 136. ● Do not park the vehicle on an easily ignitable surface. The high temperature of the exhaust system could ignite the surface. -
Page 23
In brief set the selector lever to position Caution P before removing the ignition key. Turn the front wheels After running at high engine towards the kerb. speeds or with high engine loads, operate the engine briefly at a low ●… -
Page 24: Keys, Doors And Windows
Keys, doors and windows Keys, doors and Keys, locks Windows ……..32 Windscreen ……. 32 windows Keys Manual windows ……32 Power windows ……32 Heated rear window ….33 Caution Heated windscreen ….34 Keys, locks ……..22 Sun visors ……..34 Do not attach heavy or bulky items Keys ……….
-
Page 25: Car Pass
Keys, doors and windows Key with foldaway key section Radio remote control Fault If the central locking system cannot be operated with the radio remote control, it may be due to the following: ● The range is exceeded. ● The battery voltage is too low. ●…
-
Page 26: Memorised Settings
Keys, doors and windows Radio remote control battery Extend the key and open the unit The saved settings are automatically sideways. Replace the battery used the next time the memorised key replacement (battery type CR 2032), paying is inserted into the ignition switch and Replace the battery as soon as the attention to the installation position.
-
Page 27
Keys, doors and windows Unlocking Unlocking and opening the tailgate 3 27. Locking Close doors, load compartment and fuel filler flap. Press e to lock. Press c to unlock. Press c. Two settings are selectable in the Delayed door lock Info-Display: Switch off engine and remove key from the lock. -
Page 28: Automatic Locking
Keys, doors and windows Fault in radio remote control Fault in central locking system Additionally, it is configurable to unlock the driver’s door or all doors system Unlocking after the ignition is switched off and Unlocking Manually unlock the driver’s door by the ignition key is removed (manual turning the key in the lock.
-
Page 29: Doors
Keys, doors and windows Doors Closing Load compartment Tailgate Opening Using a key or suitable screwdriver, turn switch on rear door lock to the Use interior handle. horizontal position. The door cannot Do not press the touchpad switch be opened from inside. whilst closing as this will unlock the tailgate again.
-
Page 30: Vehicle Security
Keys, doors and windows Vehicle security Activating gases, which cannot be seen or smelled, could enter the vehicle. Anti-theft locking system This can cause unconsciousness and even death. 9 Warning Caution Do not use the system if there are people in the vehicle! The doors Before opening the tailgate, check cannot be unlocked from the overhead obstructions, e.g.
-
Page 31: Immobiliser
Keys, doors and windows Activation Status during the first 30 seconds of The alarm can be silenced by anti-theft alarm system activation: pressing any button on the radio ● Self-activated 30 seconds after remote control or by switching on the LED illuminates : test, arming delay locking the vehicle by pressing e ignition.
-
Page 32: Exterior Mirrors
Keys, doors and windows Exterior mirrors If the control indicator d flashes when Rocker switch in center position: no mirror is selected to be adjusted. the ignition is on, there is a fault in the system; the engine cannot be started. Convex shape Switch off the ignition and repeat the Folding mirrors…
-
Page 33: Heated Mirrors
Keys, doors and windows Interior mirrors Heated mirrors Automatic anti-dazzle Manual anti-dazzle Operated by pressing Ü. Dazzle from following vehicles at night is automatically reduced. Mirror heating works with the engine To reduce dazzle, adjust the lever on running. the underside of the mirror housing. It is switched off automatically after six minutes.
-
Page 34: Windows
To replacement is performed Retained power off 3 135. stop movement, operate switch once accurately according to Opel more. specifications. Otherwise, these systems may not work properly Close and there is a risk of unexpected Short pull: window closes in stages.
-
Page 35: Heated Rear Window
Keys, doors and windows Longer pull: window closes Fault Heated rear window automatically upto end position. To If the windows cannot be opened or stop movement, operate switch once closed automatically, activate the more. window electronics as follows: Safety function 1.
-
Page 36: Heated Windscreen
Keys, doors and windows Roof Heated windscreen The integral mirrors should be closed when driving. Sunroof A ticket holder is located on the backside of the sun visor. 9 Warning Take care when operating the sunroof. Risk of injury, particularly to children.
-
Page 37
Keys, doors and windows Close Overload Hold switch d depressed from any If the system is overloaded, the power supply is automatically cut-off for a position until sunroof is closed completely. Releasing the switch short time. The system is protected by fuses in the fuse box 3 205. -
Page 38: Seats, Restraints
Seats, restraints Seats, restraints Head restraints Adjustment Front head restraints, height Position adjustment Head restraints ……36 9 Warning Front seats ……..37 Seat position ……37 Only drive with the head restraint Seat adjustment ……38 set to the proper position. Seat folding …….
-
Page 39: Front Seats
Seats, restraints Front seats Rear head restraints, height adjustment Seat position 9 Warning Only drive with the seat correctly adjusted. 9 Danger Do not sit nearer than 25 cm from Press both catches, pull the head the steering wheel, to permit safe restraint upwards and remove.
-
Page 40: Seat Adjustment
Seats, restraints ● Sit with shoulders as far back Longitudinal adjustment against the backrest as possible. Set the backrest rake so that it is possible to easily reach the steering wheel with arms slightly bent. Maintain contact between shoulders and the backrest when turning the steering wheel.
-
Page 41: Seat Folding
Seats, restraints Backrest inclination Seat height Seat folding Standard seat folding Turn handwheel to adjust inclination. Lever pumping motion Do not lean on backrest while : seat higher adjusting. Pull release lever towards the front down : seat lower and fold backrest forwards. Then slide seat forwards to the stop.
-
Page 42: Heating
Seats, restraints Sport seat folding 9 Warning 9 Warning When folding up, ensure that the When folding up, ensure that the seat is securely locked in position seat is securely locked in position before driving. Failure to do so before driving. Failure to do so may result in personal injury in the may result in personal injury in the event of heavy braking or collision.
-
Page 43: Seat Belts
Seats, restraints Seat belts Activate seat heating by pressing ß Seat belts are designed to be used by for the respective front seat. only one person at a time. Child restraint system 3 50. The LED in the button illuminates to indicate activation.
-
Page 44: Three-Point Seat Belt
Seats, restraints Belt force limiters pretensioners. Do not make any modifications to belt pretensioner On the front seats and the rear components as this will invalidate outboard seats, stress on the body is the vehicle type approval. reduced by the gradual release of the Three-point seat belt belt during a collision.
-
Page 45
Seats, restraints Height adjustment Unfasten Adjust the height so that the belt lies across the shoulder. It must not lie 1. Pull belt out slightly. To release belt, press red button on across the throat or upper arm. belt buckle. 2. -
Page 46: Airbag System
Seats, restraints Airbag system Using the seat belt while pregnant necessary to have the steering wheel, the instrument panel, parts of the panelling, the door seals, The airbag system consists of a handles and the seats replaced. number of individual systems Do not make any modifications to depending on the scope of the airbag system as this will…
-
Page 47
Seats, restraints Child restraint systems on front FR: NE JAMAIS utiliser un siège DA: Brug ALDRIG en bagudvendt d’enfant orienté vers l’arrière sur un autostol på et forsæde med AKTIV passenger seat with airbag siège protégé par un COUSSIN AIRBAG, BARNET kan komme i systems GONFLABLE ACTIF placé… -
Page 48
Seats, restraints mesmo, poderá ocorrer a PERDA DE kullanmayınız. ÇOCUK ÖLEBİLİR SR: NIKADA ne koristiti bezbednosni VIDA ou FERIMENTOS GRAVES na veya AĞIR ŞEKİLDE sistem za decu u kome su deca CRIANÇA. YARALANABİLİR. okrenuta unazad na sedištu sa AKTIVNIM VAZDUŠNIM IT: Non usare mai un sistema di UK: НІКОЛИ… -
Page 49: Front Airbag System
Seats, restraints CS: NIKDY nepoužívejte dětský kaitstud iste, sest see võib zádržný systém instalovaný proti põhjustada LAPSE SURMA või směru jízdy na sedadle, které je TÕSISE VIGASTUSE. chráněno před sedadlem AKTIVNÍM MT: QATT tuża trażżin għat-tfal li AIRBAGEM. Mohlo by dojít k jħares lejn in-naħa ta’…
-
Page 50: Side Airbag System
Seats, restraints The inflated airbags cushion the Side airbag system impact, thereby reducing the risk of injury to the upper body and head of the front seat occupants considerably. 9 Warning Optimum protection is only provided when the seat is in the proper position.
-
Page 51: Curtain Airbag System
Seats, restraints Curtain airbag system 9 Warning The curtain airbag system consists of an airbag in the roof frame on each Keep the area in which the airbag side. The location is identified by the inflates clear of obstructions. word AIRBAG on the roof pillars. The hooks on the handles in the The curtain airbag system is triggered roof frame are only suitable for…
-
Page 52: Child Restraints
Child restraint systems Deactivate passenger airbag only system is not discernible, therefore in combination with the use of a We recommend Opel child restraint no person is allowed to occupy the child restraint system, subject to systems which are tailored front passenger seat.
-
Page 53
Seats, restraints Ensure that the child restraint system A child restraint system which has 9 Danger to be installed is compatible with the been subjected to stress in an vehicle type. Refer to the tables on accident must be replaced. If using a rear-facing child restraint the following pages, the instructions system on the front passenger… -
Page 54: Child Restraint Installation Locations
Seats, restraints Child restraint installation locations Permissible options for fastening a child restraint system with a three-point seat belt On front passenger seat Weight and age class activated airbag deactivated airbag On rear outboard seats On rear centre seat Group 0: up to 10 kg or approx.
-
Page 55
Seats, restraints : move seat height adjustment upwards as far as necessary and adjust seat backrest inclination as far as necessary to a vertical position to ensure that the belt is tight on the buckle side : move the respective front seat ahead of the child restraint system forwards as far as necessary : adjust the respective backrest to the rearmost position 3 68, adjust the respective headrest as necessary or remove if required 3 36 Permissible options for fitting an ISOFIX child restraint system… -
Page 56
Seats, restraints On front passenger seat On rear On rear Weight class Size class Fixture activated airbag deactivated airbag outboard seats centre seat Group II: 15 to 25 kg or approx. 3 to 7 years Group III: 22 to 36 kg or approx. -
Page 57
Seats, restraints ISOFIX size class and seat device A – ISO/F3 : forward-facing child restraint system for children of maximum size in the weight class 9 to 18 kg B – ISO/F2 : forward-facing child restraint system for smaller children in the weight class 9 to 18 kg B1 –… -
Page 58: Isofix Child Restraint Systems
Seats, restraints ISOFIX child restraint ISOFIX mounting brackets on the Top-tether fastening eyes rear seats are indicated by the systems In addition to the ISOFIX mounting, ISOFIX logo on the backrest. fasten the Top-tether strap to the Fasten vehicle-approved ISOFIX Open the flaps of the guides before Top-tether fastening eyes.
-
Page 59
Seats, restraints Top-tether fastening eye on front passenger seat An additional fastening point is located on the passenger seat rail in the rear foot well. -
Page 60: Storage
Storage Storage Storage compartments Pull lever to open the glovebox cover. The glovebox features a coin holder and an adapter for the locking wheel 9 Warning bolts. Storage compartments ….58 The glovebox should be closed whilst Glovebox ……..58 Do not store heavy or sharp driving.
-
Page 61: Front Storage
Storage A movable rubber strap is located in the storage compartment in front of the gear selector lever. Pull out the strap to fix a cup or ashtray. Front storage Additional bottleholders are located in the rear side panels. Flexible cupholder strap Storage compartments are located below the light switch, in the centre console, in the door pockets and in…
-
Page 62: Underseat Storage
Storage Underseat storage Rear carrier system There must not be any objects on the bicycles that could become loose during transportation. Caution Do not attach bicycles with carbon pedal cranks to bicycle carriers. The bicycles may get damaged. Extending Open the tailgate. 9 Warning Lift at recessed edge and pull out.
-
Page 63
Storage Completely pull out the rear carrier Install the tail lamps system until you hear it engage. Ensure that it is not possible to push in the rear carrier system without pulling the release lever again. 9 Warning It is only permissible to fit objects to the rear carrier system if the system has been correctly engaged. -
Page 64
Storage Open out the lamp support on the Swivel the left clamping lever (1) first, back of the tail lamp completely until followed by the right clamping lever it engages. (2) until they stop. Both clamping levers must point backwards, otherwise safe functionality is not guaranteed. -
Page 65
Storage Press the release lever and withdraw Prepare the bicycle for the wheel recesses. attachment Remove the pedal crank mounts from the pedal crank recesses. Push the release lever on the strap Adapting the rear carrier system Note retainer and remove the strap The maximum width for the pedal to a bicycle retainer. -
Page 66
Storage Attaching a bicycle to the rear Put on the bicycle. The pedal crank here must be placed in the pedal carrier system crank recess opening as shown in the illustration. Caution Make sure that the pedal does not touch the surface of the rear end carrier. -
Page 67
Storage Place the wheel recesses so that the bicycle is roughly horizontal. Here, the distance between the pedals and the tailgate should be at least 5 cm. Both bicycle tyres must be in the wheel recesses. Caution Ensure that the wheel recesses are pulled out as far as necessary to have both bicycle tyres placed in the recesses. -
Page 68
Storage The settings for the wheel recesses Hold on to the bicycle, loosen the and on the rotary lever on the pedal attachment screw for the pedal crank recess should be noted and bearing mount, then lift the pedal saved for each bicycle. Correct bearing mount to remove it. -
Page 69
Storage Press release lever and slide in wheel recesses all the way as far as they will Insert the strap retainer and pull Swivel first the right clamping lever tightly downwards as far as possible. (1) forwards, followed by the left clamping lever (2), until they can be engaged in their respective recesses. -
Page 70: Load Compartment
Storage Load compartment Push the clamping lever down and pull both lamp supports out of the recesses. Load compartment extension The rear backrest can be locked in two positions. When transporting bulky items, lock in an upright position. Push the release lever up and hold. Lift the system slightly and push it into the bumper until it engages.
-
Page 71
Storage Pull the release handle on both sides, Guide the seat belts through side If the vehicle is to be loaded via a rear pull the backrest forwards to the supports to protect them against door, take the seat belt out of the seat vertical position and engage. -
Page 72: Load Compartment Cover
Storage Load compartment cover Fitting 9 Warning Engage cover in side guides and fold Do not place any objects on the cover. downwards. Attach retaining straps to Only drive the vehicle when the tailgate. 3-door/5-door hatchback backrests are securely locked into position.
-
Page 73: Rear Floor Storage Cover
Storage Rear floor storage cover Rear floor cover To remove the three other segments ● directly above the cover for the (order 1 to 3) lift at the rear, spare wheel recess or the floor disengage, twist and remove. cover ●…
-
Page 74: Lashing Eyes
Storage In this position, if the rear seat Lashing eyes Delivery van backrests are folded forwards, an almost completely flat load bay is 3-door/5-door hatchback created. The double load-bay floor is able to withstand a load of no more than 100 kg.
-
Page 75: Warning Triangle
Storage Roof rack system Warning triangle First aid kit Roof rack For safety reasons and to avoid damage to the roof, the vehicle approved roof rack system is recommended. For further information contact your workshop. Follow the installation instructions and remove the roof rack when not in use.
-
Page 76: Loading Information
Storage Loading information Fitting on model with sunroof ● Secure loose objects in the load compartment to prevent them from sliding. ● When transporting objects in the load compartment, the backrests of the rear seats must not be angled forward. ●…
-
Page 77
Storage detrimental effect on vehicle 9 Warning handling due to the vehicle’s higher centre of gravity. Always make sure that the load in Distribute the load evenly and the vehicle is securely stowed. secure it properly with retaining Otherwise objects can be thrown straps. -
Page 78: Instruments And Controls
Instruments and controls Instruments and Control indicators …… 88 High beam assist ……. 96 Turn signal ……… 90 Fog light ……..96 controls Seat belt reminder ….. 91 Rear fog light ……96 Airbag and belt tensioners ..91 Cruise control ……96 Airbag deactivation ….
-
Page 79: Controls
Instruments and controls Controls Steering wheel controls Heated steering wheel Steering wheel adjustment Cruise control, Speed limiter, Activate heating by pressing *. Forward collision alert setting, Activation is indicated by the LED in Infotainment system and a connected the button. Unlock lever, adjust steering wheel, mobile phone can be operated via the then engage lever and ensure it is…
-
Page 80: Horn
Instruments and controls The highlighted grip areas of the Windscreen wiper/washer Adjustable wiper interval steering wheel are heated quicker and to a higher temperature than the Windscreen wiper other areas. Heating is operational when the engine is running and during an Autostop.
-
Page 81
Instruments and controls Automatic wiping with rain sensor Adjustable sensitivity of the rain sensor Keep the sensor free from dust, dirt and ice. INT : automatic wiping with rain sensor Turn the adjuster wheel to adjust the Windscreen washer sensitivity: The rain sensor detects the amount of low sensitivity : turn adjuster… -
Page 82: Rear Window Wiper/Washer
Instruments and controls Pull lever. Washer fluid is sprayed Outside temperature onto the windscreen and the wiper A drop in temperature is indicated wipes a few times. immediately and a rise in temperature Washer fluid 3 193 after a time delay. Temperatures below 3 °C flash on the display.
-
Page 83: Clock
Instruments and controls If outside temperature drops to 3 °C, Note a warning message is displayed in the For a detailed description of menu Driver Information Centre. operation, refer to the Infotainment manual. 9 Warning Set time The road surface may already be icy even though the display indicates a few degrees above 0 °C.
-
Page 84
Instruments and controls Set date RDS clock synchronization The RDS signal of most VHF transmitters automatically sets the time. RDS time synchronisation can take a few minutes. Some transmitters do not send a correct time signal. In such cases, it is recommended to switch off the automatic time synchronisation. -
Page 85: Power Outlets
Instruments and controls Set time and date Power outlets Do not connect any current-delivering accessories, e.g. electrical charging devices or batteries. Do not damage the outlet by using unsuitable plugs. Stop-start system 3 136. Cigarette lighter To adjust the time and date settings, A 12 Volt power outlet is located in the tap on the H and I screen buttons.
-
Page 86: Ashtrays
Instruments and controls Warning lights, gauges Ashtrays Odometer and indicators Caution Instrument cluster To be used only for ash and not for The needles of the instruments briefly combustible rubbish. rotate to the end position when the ignition is switched on. Speedometer The bottom line displays the recorded distance in km.
-
Page 87: Tachometer
Instruments and controls Midlevel display Uplevel display Tachometer To reset, press SET/CLR on the turn Two trip odometers are selectable for Displays the engine speed. signal lever for a few seconds different trips. Drive in a low engine speed range for 3 97.
-
Page 88: Fuel Gauge
Instruments and controls Fuel gauge During liquid gas operation, the LED off : petrol operation system automatically switches over to : checking conditions for petrol operation when gas tanks are flashes fuel transition to liquid empty 3 86. gas operation. Illuminates if conditions Never run the fuel tank dry.
-
Page 89: Engine Coolant Temperature Gauge
Instruments and controls Engine coolant temperature Caution gauge If engine coolant temperature is too high, stop vehicle, switch off engine. Danger to engine. Check coolant level. Service display The engine oil life system lets you know when to change the engine oil and filter.
-
Page 90: Control Indicators
Instruments and controls The remaining engine oil life duration Control indicators is displayed in percent in the Driver The control indicators described are Information Centre. not present in all vehicles. The description applies to all instrument Reset versions. Press SET/CLR on turn signal lever Depending on the equipment, the for several seconds to reset.
-
Page 91
Instruments and controls Control indicators in the instrument cluster… -
Page 92: Turn Signal
Instruments and controls Control indicators in the centre R Brake and clutch system Low fuel 3 95 console 3 93 Immobiliser 3 95 — Operate pedal 3 93 # Reduced engine power 3 95 u Antilock brake system (ABS) Autostop 3 96 3 93 8 Exterior light 3 96 Gear shifting 3 93…
-
Page 93: Seat Belt Reminder
Instruments and controls Flashes X in the Driver Information Centre k for front passenger seat illuminates or flashes red in the centre console flashes or illuminates. A turn signal or the hazard warning when the seat is occupied. flashers are activated. Illuminates Illuminates After having started the engine for a…
-
Page 94: Airbag Deactivation
Instruments and controls Deployment of the belt pretensioners Illuminates when the ignition is 9 Danger or airbags is indicated by continuous switched on and extinguishes shortly illumination of v. after the engine starts. Risk of fatal injury for a child using a child restraint system together Illuminates when the engine is 9 Warning…
-
Page 95: Brake And Clutch System
Instruments and controls Brake and clutch system On some versions, the operate pedal Power steering message is indicated in the Driver R illuminates red. c illuminates yellow. Information Display 3 103. The brake and clutch fluid level is too Illuminates with power steering low, when manual parking brake is Antilock brake system disabled…
-
Page 96: Ultrasonic Parking Assist
Instruments and controls Ultrasonic parking assist Flashes Preheating of diesel engine is activated. Only activates when r illuminates yellow. The system is actively engaged. outside temperature is low. Engine output may be reduced and Fault in system the vehicle may be braked Diesel particle filter automatically to a small degree.
-
Page 97: Tyre Pressure Monitoring System
Instruments and controls Tyre pressure monitoring Illuminates when the engine is Check oil level before seeking the assistance of a workshop 3 191. running system w illuminates or flashes yellow. Low fuel Caution Illuminates Y illuminates or flashes yellow. Engine lubrication may be Tyre pressure loss.
-
Page 98: Autostop
Instruments and controls The engine power is limited. Consult Fog light Speed limiter a workshop. > illuminates green. L illuminates in the Driver Information Centre when Speed The front fog lights are on 3 118. Autostop limiter is active. Set speed is indicated alongside L symbol.
-
Page 99: Information Displays
Instruments and controls Information displays ● Autostop indication 3 136 Uplevel display ● service information 3 92 Driver Information Centre Midlevel display The Driver Information Centre is located in the instrument cluster. Depending on the version and equipment, the Driver Information Centre is available as Midlevel display or Uplevel display.
-
Page 100
Instruments and controls Selecting menus and functions Vehicle and service messages are Trip odometer popped-up in the Driver Information Trip odometer displays the current The menus and functions can be Centre if required. Confirm messages distance since a certain reset. selected via the buttons on the turn by pressing SET/CLR. -
Page 101
Instruments and controls Average vehicle speed When the tank must be refuelled Outside temperature immediately, a warning message Display of average speed. The Display of current outside appears and remains on the display. measurement can be reset at any temperature. Additionally, control indicator Y time. -
Page 102
Instruments and controls Speed warning Remaining oil life Language Indicates an estimate of the oil’s Select preferred country language as useful life. The number in percentage the display language. means the current remaining oil life ECO information and indicates when to change the engine oil and filter 3 87. -
Page 103: Colour-Info-Display
Instruments and controls consumption in 5 km steps and shows Colour-Info-Display The type of information and how it is the effect of topography or driving displayed depends on the settings Depending on the vehicle behaviour on fuel consumption. made. configuration, the vehicle has a Graph can be reset by pressing Colour-Info-Display with touch screen Selecting menus and settings…
-
Page 104: Graphic-Info-Display
Instruments and controls Press ; to return to the homepage. ● electronic climate control settings Press BACK to exit a menu or setting 3 126 without changing or delete the last For further information, see character in a character sequence. Infotainment manual.
-
Page 105: Vehicle Messages
Instruments and controls Vehicle messages Vehicle messages on Midlevel No. Vehicle message display Turn steering wheel, start Messages are indicated mainly in the engine again Driver Information Centre, in some cases together with a warning and 12 Vehicle overloaded signal buzzer. 13 Compressor overheated 15 Centre high-mounted brake light failure…
-
Page 106
Instruments and controls No. Vehicle message No. Vehicle message No. Vehicle message 28 Right rear turn signal failure 57 Tyre pressure imbalance on 94 Shift to park before exiting rear axle 29 Check trailer brake light 95 Service airbag 58 Tyres without TPMS sensors 30 Check trailer reversing light 128 Bonnet open detected… -
Page 107: Warning Chimes
Instruments and controls ● brakes Vehicle messages on ● If the parking assist detects an object. Colour-Info-Display ● ride control systems ● If unintended lane change ● cruise control, speed limiter Some important messages appear occurs. additionally in the ● forward collision alert ●…
-
Page 108: Vehicle Personalisation
Instruments and controls Vehicle personalisation When the vehicle battery voltage is running low, a warning code 174 will appear in the Driver Information The vehicle’s behaviour can be Centre. personalised by changing the settings 1. Switch off immediately any in the Info-Display. electrical consumers which are Some of the personal settings for not required for a safe drive, e.g.
-
Page 109
Instruments and controls Auto rear demist: Activates Duration upon exit of vehicle: the driver’s door or the whole automatically the heated rear vehicle whilst unlocking. Activates or deactivates and window. changes the duration of exit Auto relock doors: Activates or ●… -
Page 110
Instruments and controls Select Settingsand then Vehicle Auto Rear Defog: Automatically Exit Lighting: Activates or settings. activates heated rear window. deactivates and changes the duration of exit lighting. ● Collision / Detection Systems ● Power Door Locks Park Assist: Activates or deactivates the ultrasonic Unlocked Door Anti Lock Out: parking assist. -
Page 111: Onstar
Instruments and controls OnStar the driver’s door or the whole ● Smartphone application vehicle whilst unlocking. ● Remote control, e.g. location of Relock Remotely Unlocked the vehicle, activation of horn and OnStar is a personal connectivity and Doors: Activates or deactivates lights, control of central locking service assistant with integrated the automatic relock function…
-
Page 112
Instruments and controls Privacy button OnStar services Note The Wi-Fi hotspot functionality is not Press and hold j until a message is General services available for all markets. heard to activate or deactivate the If you need any information transmission of the vehicle location. Up to seven devices may be concerning e.g. -
Page 113
Instruments and controls Smartphone app The following functions are available: On-demand diagnostics With the myOpel smartphone app, At any time e.g. if the vehicle displays ● Lock or unlock vehicle. some vehicle functions can be a vehicle message, press Z to ●… -
Page 114
Instruments and controls Destination download If the OnStar service is used on Note another vehicle, press Z and request The vehicle location always remains A desired destination can be directly accessible to OnStar in the case of that the account be transferred to the downloaded to the navigation system. -
Page 115: Lighting
Lighting Lighting Exterior lighting Exit lighting ……121 Battery discharge protection ..122 Light switch Exterior lighting ……113 Light switch ……113 Automatic light control ….. 114 High beam ……. 115 Headlight flash ……115 Headlight range adjustment ..115 Headlights when driving abroad ……..
-
Page 116: Automatic Light Control
Lighting Light switch with automatic light A status message in the Driver When the automatic light control Information Centre indicates the function is switched on and the control current status of the automatic light engine is running, the system control. switches between daytime running light and headlights automatically When switching on the ignition,…
-
Page 117: High Beam
Lighting High beam Headlight range adjustment Headlights when driving abroad Manual headlight range The asymmetrical headlight beam adjustment extends visibility at the edge of the road at the passenger side. However, when driving in countries where traffic drives on the opposite side of the road, adjust the headlights to prevent dazzling of oncoming traffic.
-
Page 118: Daytime Running Lights
Lighting set to right-hand traffic mode. Xenon lighting system It switches automatically to low beam Therefore, insert the key in the guide when: Xenon lighting system includes: as shown in the illustration. ● The camera in the windscreen ● xenon headlights for low and high Alternatively, a Phillips head detects the lights of oncoming or beam…
-
Page 119: Hazard Warning Flashers
Lighting The high beam assist is activated by Corner lighting Hazard warning flashers pushing the indicator lever twice at a speed above 40 km/h. The green control indicator l illuminates continuously when the assist is activated, the blue one 7 illuminates when high beam is on.
-
Page 120: Turn And Lane-Change Signals
Lighting Turn and lane-change With a trailer connected, turn signal Rear fog light flashes six times and tone frequency signals changes when pressing the lever until resistance is felt and then releasing. Move the lever to the resistance point and hold for longer indication. Switch the turn signal off manually by moving the lever to its original position.
-
Page 121: Parking Lights
Lighting Interior lighting Parking lights Reversing lights The reversing light comes on when Instrument panel the ignition is on and reverse gear is illumination control selected. Misted light covers The inside of the light housing may mist up briefly in poor, wet and cold weather conditions, in heavy rain or after washing.
-
Page 122: Interior Lights
Lighting On vehicles with automatic light Front courtesy light with reading Note control, the brightness can only be In the event of an accident with lights adjusted when the exterior lights are airbag deployment, the courtesy When opening a door, the courtesy on and the light sensor detects night lights are turned on automatically.
-
Page 123: Exit Lighting
Lighting Lighting features Dome light The following lights will additionally switch on when the driver’s door is Spotlight incorporated in the inside opened: Entry lighting mirror housing comes on when ● illumination of all switches headlights are switched on. Welcome lighting ●…
-
Page 124: Battery Discharge Protection
Lighting Activating The settings can be saved for the key Switching off electric lights being used 3 24. To prevent discharge of the vehicle battery when the ignition is switched Battery discharge protection off, some interior lights are switched off automatically after some time. Vehicle battery state of charge function The function guarantees longest…
-
Page 125: Climate Control
Climate control Climate control Climate control systems Temperature red : warm Heating and ventilation blue : cold system Climate control systems ….. 123 Heating will not be fully effective until Heating and ventilation system 123 the engine has reached normal Air conditioning system …
-
Page 126: Air Conditioning System
Climate control Demisting and defrosting the Air conditioning system Temperature windows red : warm blue : cold Heating will not be fully effective until the engine has reached normal operating temperature. Fan speed Adjust the air flow by switching the fan to the desired speed.
-
Page 127
Climate control Cooling n Activated cooling may inhibit humidity increases, so the Autostops. windows may mist up from inside. Stop-start system 3 136. The quality of the passenger compartment air deteriorates, Air recirculation system 4 which may cause the vehicle occupants to feel drowsy. -
Page 128: Electronic Climate Control
Climate control Demisting and defrosting the Note If air distribution mode l is selected windows l while engine is running, an Autostop will be inhibited until another air distribution is selected. If air distribution mode l is selected while the engine is in an Autostop, the engine will restart automatically.
-
Page 129
Climate control Controls for: Climate control settings are shown on ● Open all air vents to allow the Info-Display. Setting optimised air distribution in ● fan speed modifications are briefly popped-up, Automatic mode. ● temperature superimposed over the currently ● Press n to switch on optimal ●… -
Page 130
Climate control Demisting and defrosting the Note If V is pressed while the engine is windows V running, an Autostop will be inhibited until V is pressed again. If s is pressed with the fan switched on and the engine running, an Autostop will be inhibited until s is pressed again or until the fan is switched off. -
Page 131
Climate control Fan speed Z Air distribution Return to Automatic air distribution: press AUTO. Cooling n Turn right rotary knob for desired Turn left rotary knob to decrease or increase fan speed. The fan speed is adjustment. Setting is indicated in the indicated in the Info-Display. -
Page 132
Climate control If no cooling or drying is required, Air recirculation mode 4 compartment air deteriorates, switch off the cooling system for fuel which may cause the vehicle saving reasons. occupants to feel drowsy. When the cooling system is switched off, no engine restart will be In warm and very humid ambient air requested by the climate control… -
Page 133: Air Vents
Climate control Air vents Maintenance Adjustable air vents Air intake At least one air vent must be open while the cooling is on. Direct the flow of air by tilting and swivelling the slats. 9 Warning The air intake in front of the Do not attach any objects to the windscreen in the engine slats of the air vents.
-
Page 134: Air Conditioning Regular Operation
Climate control Air conditioning regular operation In order to ensure continuously efficient performance, cooling must be operated for a few minutes once a month, irrespective of the weather and time of year. Operation with cooling is not possible when the outside temperature is too low.
-
Page 135: Driving And Operating
Driving and operating Driving and Fuel for diesel engines …. 177 Manual transmission automa‐ Fuel for liquid gas operation ..177 ted ……….145 operating Refuelling …….. 179 Transmission display ….146 Fuel consumption — CO Starting the engine ….146 Emissions …….
-
Page 136: Driving Hints
Driving and operating Driving hints Starting and operating Use only floor mats, which fit properly and are fixed by the retainers on the driver side. Control of the vehicle New vehicle running-in Driving downhill Do not brake unnecessarily hard for Never coast with engine not the first few journeys.
-
Page 137: Retained Power Off
Driving and operating Steering wheel lock Starting the engine Remove key from ignition switch and turn steering wheel until it engages. Retained power off The following electronic systems are operable until the driver’s door is opened or at the latest for ten minutes after the ignition is switched off: ●…
-
Page 138: Overrun Cut-Off
Driving and operating Turn key briefly to position 3 and With temperatures below -30 °C, the Turbo engine warm-up release: an automatic procedure automatic transmission requires a Upon start-up, engine available operates the starter after a brief warming phase of approx. five torque may be limited for a short time, delay, until the engine is running.
-
Page 139
Driving and operating On vehicles with manual transmission Deactivate the stop-start system Indication automated, the engine is started manually by pressing eco. The automatically as soon as the brake deactivation is indicated when the pedal is released. LED in the button extinguishes. A vehicle battery sensor ensures that Autostop an Autostop is only performed if the… -
Page 140
Driving and operating ● The engine exhaust temperature Vehicle battery discharge protection Vehicles with manual transmission is not too high, e.g. after driving automated To ensure reliable engine restarts, with high engine load. Release the brake pedal or move several vehicle battery discharge selector lever out of D to restart the protection features are implemented ●… -
Page 141: Parking
Driving and operating ● The brake vacuum is not ● Always apply the parking steering wheel lock is felt to sufficient. brake. Activate the manual engage. ● The vehicle is driven at least at parking brake without pressing For vehicles with automatic walking speed.
-
Page 142: Engine Exhaust
Driving and operating Engine exhaust Note needs between seven and In the event of an accident with 12 minutes. Autostop is not available airbag deployment, the engine is and fuel consumption may be higher switched off automatically if the during this period. The emission of 9 Danger vehicle comes to a standstill within a smells and smoke during this process…
-
Page 143: Catalytic Converter
Driving and operating Automatic transmission % flashes when diesel particle filter Catalytic converter has reached the maximum filling The catalytic converter reduces the level. Start cleaning process The automatic transmission permits amount of harmful substances in the immediately to avoid damage to the automatic gearshifting (automatic exhaust gases.
-
Page 144: Selector Lever
Driving and operating In automatic mode, the driving P : park position, wheels are locked, Without brake pedal applied, control programme is indicated by D in the engage only when the vehicle is indicator j illuminates. Driver Information Centre. stationary and the parking brake If the selector lever is not in P when is applied In manual mode, M and the number…
-
Page 145: Manual Mode
Driving and operating Rocking the vehicle Move selector lever to position M. Electronic driving Press < on the selector lever to shift programmes Rocking the vehicle is only to a higher gear. permissible if the vehicle is stuck in ● Following a cold start, the Press ] on the selector lever to shift sand, mud or snow.
-
Page 146: Fault
Driving and operating Fault If the vehicle battery is not the cause of the fault, release the selector lever. In the event of a fault, control indicator 1. Apply the parking brake. g illuminates. Additionally, a message is displayed in the Driver Information Centre.
-
Page 147: Manual Transmission
Driving and operating Manual transmission Manual transmission Caution automated It is not advisable to drive with the hand resting on the selector lever. The automated manual transmission permits manual gearshifting (manual Gear shift indication 3 93. mode) or automatic gearshifting (automatic mode), both with Stop-start system 3 136.
-
Page 148: Transmission Display
Driving and operating Transmission display Transmission automatically shifts to When the engine is restarted, control N upon starting. There may be a slight indicator D extinguishes in the Driver delay. Information Centre. Starting is not possible if all brake The stop-start system will be disabled lights fail.
-
Page 149
Driving and operating : neutral position If neither the accelerator nor the Rocking the vehicle D/M : switch between automatic (D) brake pedal are depressed, no gear Rocking the vehicle is only and manual (M) shift mode. is engaged and D or R flashes for a permissible if the vehicle is stuck in The transmission display brief time in the display. -
Page 150: Manual Mode
Driving and operating Tyre pressure monitoring system When + or — is selected in automatic Kickdown mode, the transmission switches to To start the sensor matching process If the accelerator pedal is pressed manual mode and shifts accordingly. of the tyre pressure monitoring down completely in automatic mode, system, the selector lever must be Gear shift indication…
-
Page 151: Brakes
Driving and operating Brakes ABS starts to regulate brake pressure Fault as soon as a wheel shows a tendency to lock. The vehicle remains 9 Warning The brake system comprises two steerable, even during hard braking. independent brake circuits. ABS control is made apparent If there is a fault in the ABS, the If a brake circuit fails, the vehicle can through a pulse in the brake pedal…
-
Page 152: Parking Brake
Driving and operating Parking brake soon as the vehicle begins to To reduce the operating forces of accelerate or the two seconds holding the parking brake, depress the Manual parking brake time is over. brake pedal at the same time. The hill start assist is not active during an Autostop.
-
Page 153: Ride Control Systems
Driving and operating Ride control systems 9 Warning Traction Control system Do not let this special safety feature tempt you into taking risks The Traction Control system (TC) is a when driving. component of the Electronic Stability Control (ESC). Adapt speed to the road Control indicator k illuminates.
-
Page 154: Electronic Stability Control
Driving and operating Electronic Stability Control illuminate and status messages 9 Warning appear in the Driver Information Electronic Stability Control (ESC) Centre. improves driving stability when Do not let this special safety necessary, regardless of the type of feature tempt you into taking risks road surface or tyre grip.
-
Page 155: City Mode
Driving and operating Fault Activation Deactivation If there is a fault in the system, the Press B; LED in the button control indicator b illuminates extinguishes and a message pops-up continuously and a message or a in the Driver Information Centre. warning code appears in the Driver Each time the engine is started, City Information Centre.
-
Page 156: Driver Assistance Systems
Driving and operating Driver assistance off. In this case, switch on ignition and For safety reasons, the cruise control turn steering wheel once from lock to cannot be activated until the brake systems lock. pedal has been operated once. Activating in first gear is not possible. If control indicators c and b do not extinguish after calibration, seek the 9 Warning…
-
Page 157
Driving and operating Switching on Increase speed Deactivation With cruise control active, hold thumb Press y; control indicator m in wheel turned to RES/+ or briefly turn instrument cluster illuminates white. to RES/+ repeatedly: speed Cruise control is deactivated. Last increases continuously or in small stored speed remains in memory for increments. -
Page 158: Speed Limiter
Driving and operating Resume stored speed The preset speed limit is displayed in the Driver Information Centre when Turn thumb wheel to RES/+ at a the system is active. speed above 30 km/h. The stored speed will be obtained. Activation Switching off Change speed limit Press m, control indicator m in…
-
Page 159: Forward Collision Alert
Driving and operating Deactivation Forward collision alert A precondition is that forward collision alert is not deactivated by pressing The forward collision alert can help to Press y: speed limiter is deactivated avoid or reduce the harm caused by and the vehicle can be driven without front-end crashes.
-
Page 160
Driving and operating Press V, the current setting is shown Caution on the Driver Information Centre. Press V repeatedly to change the The colour lighting of this control alert sensitivity. The selected setting indicator does not correspond to is also displayed in the Driver local traffic laws on following Information Centre. -
Page 161: Following Distance Indication
Driving and operating Following distance approaching a vehicle ahead too indication rapidly, it may not provide you enough time to avoid a collision. The following distance indication The driver accepts full displays the distance to a preceding responsibility for the appropriate moving vehicle.
-
Page 162: Parking Assist
Driving and operating An illuminated LED in the parking Always check the surrounding assist button r indicates that the area while reversing and using the system is ready to operate. rear parking assist system. Indication The rear parking assist makes The system warns the driver with parking easier by measuring the acoustic signals against potentially…
-
Page 163
Driving and operating Deactivation Control indicator r illuminates in the instrument cluster 3 94 or a message is indicated in the Driver Information Centre. Front-rear parking assist 9 Warning The driver bears full responsibility for the parking manoeuvre. Always check the surrounding area when driving backwards or The system has four ultrasonic forwards while using parking… -
Page 164
Driving and operating Indication The system warns the driver with acoustic signals against potentially hazardous obstacles in front of the vehicle in a distance range up to 80 cm and against potentially hazardous obstacles behind the vehicle in a distance range up to 1.5 metres. Depending on which side of the vehicle is closer to an obstacle, you will hear acoustic warning signals in… -
Page 165
Driving and operating The distance to obstacles is shown on When using the trailer hitch change trajectory and automatically steers the Colour-Info-Display by coloured the configuration settings in the the vehicle into a parallel or zones in front of or behind the vehicle vehicle personalisation menu in the perpendicular parking slot. -
Page 166
Driving and operating Parking assist button D and ● If only advanced parking assist is operation logic active and the system is in park guiding mode, a brief press Advanced parking assist and front- deactivates advanced parking rear parking assist both use the same assist. -
Page 167
Driving and operating Indication The system warns the driver with acoustic signals against potentially hazardous obstacles behind the vehicle in a distance range up to 1.5 metres and in front up to 80 cm . Depending on which side of the vehicle is closer to an obstacle, you will hear acoustic warning signals in the vehicle on the respective side. -
Page 168
Driving and operating When the system is deactivated, the Functionality LED in the button extinguishes and, if Parking slot searching mode manually deactivated, Park Assist Indication in the Driver Information Off pops-up in the Driver Information Centre Centre. After a manual deactivation, the front- rear parking assist is activated again if r is pressed. -
Page 169
Driving and operating Select parallel or perpendicular When a slot is detected, a visual parking slot in Driver Information feedback on the Colour-Info-Display Centre by pressing SET/CLR. and an acoustic signal is given. The system is configured to detect If the driver does not stop the vehicle parking slots by default on the after a parking slot is proposed, the passenger side. -
Page 170
Driving and operating Always pay attention to the sound of ● The demand to accelerate or ● driving faster than 30 km/h during the front-rear parking assist. brake. parking slot search Continuous sound indicates that the ● For some of the instructions a ●… -
Page 171
Driving and operating If an object is detected during parking acoustic noise or mechanical Caution instructions, Stop is indicated on the misalignments (sporadic false display. Removing the object will warnings may occur). Performance of the system can be resume the parking manoeuvre. If the Make sure that the front number reduced when sensors are object is not removed, the system will… -
Page 172: Side Blind Spot Alert
Driving and operating Note Side blind spot alert uses some of the Note If engaging a forward gear and advanced parking assist sensors If the passing vehicle is at least exceeding a certain speed, the rear which are located in the front and rear 10 km/h faster than the passed parking assist will be deactivated bumper on both sides of the vehicle.
-
Page 173: Rear View Camera
Driving and operating When the vehicle is started, both Side blind spot alert does not operate e.g. below the bumper or exterior mirror displays will briefly when the left or right corners of the underneath the vehicle, are not come on to indicate that the system is rear bumper are covered with mud, displayed.
-
Page 174: Traffic Sign Assistant
Driving and operating The camera is mounted between the Display settings The rear view camera may not number plate lights and has a viewing operate properly when: Brightness and contrast can be set by angle of 130°. tapping the touch screen display ●…
-
Page 175
Driving and operating Add-on signs ● additional hints to traffic signs ● restriction of trailer towing ● tractor constraints ● wet warning ● ice warning An exclamation mark in a frame ● direction arrows indicates that there is an additional sign detected which cannot be clearly Speed limit signs and no passing identified by the system. -
Page 176
Driving and operating Additionally, the currently valid speed Alert function limit is displayed permanently in the The alert function can be activated or lower line of the Driver Information deactivated in the setting menu of the Centre. In case a speed limit with traffic sign assistant page. -
Page 177
Driving and operating Select Alerts ON or Alerts OFF by In some cases, traffic sign assistant is ● There are adverse environmental turning the adjuster wheel and press cleared up automatically by the conditions, e.g. heavy rain, snow, SET/CLR. system. direct sunlight or shadows. -
Page 178: Lane Departure Warning
Driving and operating Activation The driver assistance systems do not relieve the driver from full responsibility for vehicle operation. Lane departure warning Deactivation The lane departure warning system observes the lane markings between The system is deactivated by which the vehicle is driving via a front pressing ), LED in the button camera.
-
Page 179: Fuel
Driving and operating Fuel Do not use marine diesel oils, heating Caution oils, Aquazole and similar diesel- water emulsions. Diesel fuels must Fuel for petrol engines Use of fuel that does not comply to not be diluted with fuels for petrol EN 228 or E DIN 51626-1 or Only use unleaded fuel that complies engines.
-
Page 180
Driving and operating Full function of the LPG system can press on the accelerator. The LED When switching automatically only be guaranteed with liquid gas status shows the current operating between petrol or gas operation, a which complies with the minimum mode. -
Page 181: Refuelling
Driving and operating fulfilled. If conditions allow, it might be When using underground car parks, Follow the operating and safety possible to manually switch back to follow the instructions of the operator instructions of the filling station liquid gas operation. and local laws.
-
Page 182
Driving and operating The fuel filler cap can be retained in the bracket on the fuel filler flap. T refuel, fully insert the pump nozzle and switch it on. After the automatic cut-off, the tank can be topped up by operating the pump nozzle a maximum of two more times. -
Page 183
DISH filler neck: Place the filler nozzle 9 Warning Opel Distributors and from Opel into the adapter. Press locking lever Authorised Repairers. on filler nozzle down. Due to the system design, an… -
Page 184: Fuel Consumption — Co Emissions
Driving and operating Fuel consumption — CO Emissions The fuel consumption (combined) of the model Opel Corsa is within a range of 7.5 to 3.1 l/100 km. The CO emission (combined) is within a range of 174 to 82 g/km.
-
Page 185: Trailer Hitch
Driving and operating Trailer hitch The figures are provided only for the Driving characteristics and purpose of comparison between towing tips different vehicle variants and must General information Before attaching a trailer, lubricate not be taken as a guarantee for the Only use towing equipment that has the coupling ball.
-
Page 186: Trailer Towing
Driving and operating Trailer towing The permissible gross train weight Rear axle load must not be exceeded. This weight is Petrol and diesel engines Trailer loads specified on the identification plate When the trailer is coupled and the 3 239. The permissible trailer loads are towing vehicle fully loaded, the vehicle and engine-dependent…
-
Page 187: Towing Equipment
Driving and operating General Disengage and fold down the socket. If the permitted rear axle load is Remove the sealing plug from the exceeded a maximum speed of opening for the coupling ball bar and 100 km/h applies. If lower national stow it.
-
Page 188
Driving and operating Otherwise, the coupling ball bar must Inserting the coupling ball bar be tensioned before it is inserted into the coupling housing: Green marking on the rotary knob is visible. Insert the tensioned coupling ball bar Lock coupling ball bar and remove in the opening and push firmly key. -
Page 189: Trailer Stability Assist
Driving and operating Eye for break-away stopping cable Insert sealing plug in opening for 9 Warning coupling ball bar. Fold away socket. Towing a trailer is permitted only Trailer stability assist when a coupling ball bar is fitted correctly. If the coupling ball bar If the system detects snaking does not engage correctly, seek movements, engine power is reduced…
-
Page 190: Vehicle Care
Vehicle care Vehicle care Number plate light ….204 Appearance care ……. 231 Interior lights ……204 Exterior care ……231 Instrument panel illumination … 204 Interior care ……234 Electrical system ……205 General Information ….189 Fuses ……..205 Accessories and vehicle Engine compartment fuse box .
-
Page 191: General Information
Vehicle care General Information Vehicle storage ● Open the bonnet, close all doors and lock the vehicle. Storage for a long period of time Accessories and vehicle ● Disconnect the clamp from the negative terminal of the vehicle modifications If the vehicle is to be stored for several battery.
-
Page 192: Vehicle Checks
Vehicle care Vehicle checks Gas vehicles must be recycled by a 9 Danger service centre authorised for gas vehicles. Performing work The ignition system and Xenon headlights use extremely high voltage. Do not touch. Bonnet Opening 9 Warning Only perform engine compartment checks when the ignition is off.
-
Page 193: Engine Oil
Vehicle care If the bonnet is opened during an Check with the vehicle on a level Autostop, the engine will be restarted surface. The engine must be at automatically for safety reasons. operating temperature and switched off for at least five minutes. Closing Pull out the dipstick, wipe it clean, insert it to the stop on the handle, pull…
-
Page 194: Engine Coolant
Vehicle care The engine oil level must not exceed temperatures, the factory filled the MAX mark on the dipstick. coolant provides frost protection down to approx. -37 °C. Caution Only use approved antifreeze. Coolant level Caution Too low a coolant level can cause We recommend the use of the same engine damage.
-
Page 195: Washer Fluid
Vehicle care If the cooling system is cold, the Washer fluid 9 Warning coolant level should be above the filling line mark. Allow the engine to cool before opening the cap. Carefully open the cap, relieving the pressure slowly. To top-up, use a 1:1 mixture of released coolant concentrate mixed with clean tap water.
-
Page 196: Brakes
Vehicle care Brakes In the event of minimum thickness of the brake lining, a squealing noise sounds during braking. Continued driving is possible but have the brake lining replaced as Batteries do not belong in household soon as possible. waste. They must be disposed of at Once new brake linings are installed, an appropriate recycling collection do not brake unnecessarily hard for…
-
Page 197
Using an AGM vehicle battery and the ventilation in the vicinity of the different from the original Opel negative terminal must be opened. vehicle battery may result in a lower Only use batteries that allow the fuse performance. -
Page 198: Diesel Fuel System Bleeding
Vehicle care ● See the Owner’s manual for Wiper blade replacement Wiper blade on the rear window further information. ● Explosive gas may be present in the vicinity of the battery. Diesel fuel system bleeding If the tank has been run dry, the diesel fuel system must be bled.
-
Page 199: Bulb Replacement
Vehicle care Bulb replacement Low beam Switch off the ignition and switch off the relevant switch or close the doors. Only hold a new bulb at the base! Do not touch the bulb glass with bare hands. Use only the same bulb type for replacement.
-
Page 200
Vehicle care 2. Press the clip to disengage bulb High beam 2. Press the clip to disengage bulb holder. Withdraw the bulb holder holder. Withdraw the bulb holder from the reflector. from the reflector. 1. Rotate the cap (3) anticlockwise and remove it. -
Page 201: Xenon Headlights
Vehicle care Sidelight/daytime running light 2. Press both clips together and Sidelight/daytime running light withdraw the bulb socket from the with bulbs with LEDs headlamp housing. Sidelights and daytime running lights are designed as LEDs and cannot be changed. Consult a workshop in case of a defective LED.
-
Page 202: Fog Lights
Vehicle care Corner lighting 2. Rotate the bulb holder Fog lights anticlockwise to disengage. The bulbs are accessible from the Withdraw the bulb holder from the underside of the vehicle. reflector. 1. Rotate the cap (3) anticlockwise and remove it. 1.
-
Page 203: Front Turn Signal Lights
Vehicle care Tail lights 2. Unscrew both plastic securing nuts from the inside by hand. 2. Disengage the bulb socket from the plug connector by pressing 1. Release the cover in the load the retaining lug. 3. Carefully withdraw the light compartment on the respective 3.
-
Page 204
Vehicle care 4. Press the retaining lugs and Reversing light/rear fog light remove the bulb carrier from the Left-hand drive models light assembly. Reversing light is located on the right light assembly in the tailgate, and the rear fog light is located on the left light assembly in the tailgate. -
Page 205: Side Turn Signal Lights
Vehicle care Side turn signal lights To replace bulb, remove lamp housing: 4. Remove the bulb by pushing 2. Turn bulb holder anticlockwise slightly into the socket and and remove from housing. rotating anticlockwise. Replace the bulb. 1. Slide lamp to its left side and 5.
-
Page 206: Centre High-Mounted Brake Light
Vehicle care 4. Insert bulb holder and turn 4. Pull bulb from bulb holder and clockwise. replace it. 5. Insert left end of the lamp, slide to 5. Insert bulb holder into lamp the left and insert right end. housing and turn clockwise. 6.
-
Page 207: Electrical System
Vehicle care Electrical system There are different kinds of fuses in the vehicle. Fuses Data on the replacement fuse must match the data on the defective fuse. There are two fuse boxes in the vehicle: ● in the front left of the engine compartment ●…
-
Page 208: Engine Compartment Fuse Box
Vehicle care Engine compartment fuse No. Circuit Trailer interface module, rear carrier system Battery sensor Chassis control module fuel pump Low beam and Daytime running light left, Xenon high beam shutter left and right – The fuse box is in the front left of the engine compartment.
-
Page 209
Vehicle care No. Circuit No. Circuit 14 Heated exterior mirror 30 Engine control module 15 – 31 High beam left, Xenon low beam left 16 Brake booster kit 32 High beam right, Xenon low 17 Ignition, crank power supply beam right 18 Engine control module 33 Engine control module 19 Fuel pump… -
Page 210: Instrument Panel Fuse Box
Vehicle care The fuse box is located behind a Circuit cover in the glovebox. Open the ABS pump glovebox, then open the cover and fold it down. Front wiper Blower Instrument panel – Diesel fuel heater Transmission The fuse box is behind the light switch Cooling fan low in the instrument panel.
-
Page 211
Vehicle care No. Circuit No. Circuit No. Circuit – 18 Air conditioning system 34 – – 19 Sunroof 35 Tyre repair kit Power windows 20 Parking assist/Rain sensor/ 36 – Front camera Voltage transformer 37 Rear wiper 21 Brake switch Body control module 1 38 Cigarette lighter 22 Audio system… -
Page 212: Vehicle Tools
Vehicle care Vehicle tools Vehicles with spare wheel Tools Vehicles with tyre repair kit On OPC or LPG version or versions with rear carrier system or double The jack, wheel bolt wrench and load-bay floor, the tools are located some tools are located on the right together with the towing eye and tyre side of the load compartment, behind repair kit on the right side of the load…
-
Page 213: Wheels And Tyres
Vehicle care Wheels and tyres Tyre designations Directional tyres E.g. 195/55 R 16 95 H Directional tyres must be mounted so that they rotate in the correct Tyre condition, wheel condition 195 : tyre width, mm direction. The proper rotation 55 : cross-section ratio (tyre height Drive over edges slowly and at right direction is indicated by a symbol…
-
Page 214
Vehicle care Tyre pressure 3 251. For the tyres approved for your ignition and select the relevant setting vehicle, refer to the EEC Certificate of on the page Tyre load in the Driver The tyre pressure information label Conformity provided with your vehicle Information Centre 3 97. -
Page 215: Tyre Pressure Monitoring System
Vehicle care Tyre pressure monitoring The menu can be selected by pressing the buttons on the turn system signal lever. The tyre pressure monitoring system checks the pressure of all four tyres once a minute when vehicle speed exceeds a certain limit. Caution Tyre pressure monitoring system warns only about low tyre pressure…
-
Page 216
Vehicle care The tyre pressures for all tyres are After inflating, some driving may be The use of commercially-available displayed on one page. required to update the tyre pressure liquid tyre repair kits can impair the values in the Driver Information function of the system. -
Page 217
Vehicle care The menu Tyre Load only appears if tyre pressure sensor matching the vehicle is at a standstill and the process should also be performed parking brake is applied. On vehicles after replacing a spare wheel with a with automatic transmission, the road wheel containing a tyre pressure selector lever must be in P. -
Page 218
Vehicle care 3. On vehicles with automatic 6. Press SET/CLR to begin the transmission: set the selector sensor matching process. A lever to P. message requesting acceptance of the process should be On vehicles with manual displayed. transmission automated: Keep brake pedal depressed. -
Page 219: Tread Depth
Vehicle care matched to the left side rear speedometer as well as the nominal wheel, and the tyre pressure tyre pressure and to make other sensor matching process is no vehicle modifications. longer active. After converting to a different tyre 13.
-
Page 220: Tyre Chains
Vehicle care If the wheel covers and tyres used are Tyre chains Tyre chains are permitted on tyres of not factory approved, the tyres must size 195/55 R16 with rims of size not have a rim protection ridge. 16 x 6 and 16 x 6.5, the latter only in combination with limited steering Wheel covers must not impair brake angle.
-
Page 221
Vehicle care If you have a flat tyre: 4. Screw the compressor air hose to the connection on the sealant Apply the parking brake and engage bottle. first gear, reverse gear or P. 5. Fit the sealant bottle into the The tyre repair kit is stowed in the load retainer on the compressor. -
Page 222
Vehicle care 9. Connect the compressor plug to 13. The prescribed tyre pressure Drain excess tyre pressure with the power outlet or cigarette should be obtained within ten the button over the pressure lighter socket. minutes. Tyre pressure 3 251. indicator. -
Page 223
Vehicle care Vehicles with tyre repair kit in the 1. Take the sealant bottle and bracket with air hose from the sidewall insert. If tyre pressure is more than 1.3 bar, set it to the correct value. Repeat the procedure until there is no more loss of pressure. -
Page 224
Vehicle care 5. Screw tyre inflation hose to valve. 10. All of the sealant is pumped into the tyre. Then the tyre is inflated. 6. Screw air hose onto compressor connection. 11. The prescribed tyre pressure should be obtained within ten 7. -
Page 225: Wheel Changing
Vehicle care This prevents sealant from General information Wheel changing escaping. Stow tyre repair kit in Make the following preparations and Note load compartment. observe the following information: The driving characteristics of the 13. Remove any excess sealant repaired tyre are severely affected, ●…
-
Page 226
Vehicle care ● Do not start the vehicle when it is 2. Install the wheel wrench ensuring raised on the jack. that it locates securely and loosen each wheel bolt by half a turn. ● Before screwing in the wheel bolts, clean them and lightly coat The wheels might be protected by the taper of each wheel bolt with… -
Page 227
Vehicle care may be used. The vehicle may be Install wheel bolt caps or centre damaged. cap on alloy wheel. 11. Install vehicle jacking point cover. 12. Stow and secure the replaced wheel, the vehicle tools 3 210 and the adapter for the locking wheel bolts 3 58. -
Page 228: Spare Wheel
Vehicle care Rear arm position of the lifting To remove, unscrew wing nut, lift Caution platform located centrally under the spare wheel, move to a vertical recess of the sill. position and remove from above. The use of a spare wheel that is When stowing the replaced wheel or smaller than the other wheels or in the temporary spare wheel back in…
-
Page 229
Vehicle care Temporary spare wheel The following applies to tyres fitted opposing the rolling direction: Caution ● Driveability may be affected. Have the defective tyre renewed The use of the temporary spare or repaired as soon as possible wheel could affect driveability. and fit it instead of the spare Have the defective tyre renewed wheel. -
Page 230: Jump Starting
Vehicle care Jump starting ● A discharged vehicle battery can ● Apply the parking brake, already freeze at a temperature transmission in neutral, of 0 °C. Defrost the frozen battery automatic transmission in P. Do not start with a quick charger. before connecting jump leads.
-
Page 231: Towing
Vehicle care Towing 3. Connect the black lead to the 4. Switch on electrical consumers negative terminal of the booster (e.g. headlights, heated rear vehicle battery. window) of the vehicle receiving Towing the vehicle the jump start. 4. Connect the other end of the black lead to a vehicle grounding point, 5.
-
Page 232: Towing Another Vehicle
Vehicle care Towing another vehicle Caution Drive slowly. Do not drive jerkily. Excessive tractive force can damage the vehicle. When the engine is not running, considerably more force is needed to brake and steer. To prevent the entry of exhaust gases from the towing vehicle, switch on the air recirculation and close the Screw in the towing eye as far as it will…
-
Page 233: Appearance Care
Vehicle care Appearance care Caution Exterior care Drive slowly. Do not drive jerkily. Excessive tractive force can Locks damage the vehicle. The locks are lubricated at the factory After towing, unscrew the towing eye. using a high quality lock cylinder grease.
-
Page 234
Vehicle care If using a car wash, comply with the Thoroughly rinse and leather-off the Unpainted plastic body parts must not car wash manufacturer’s instructions. vehicle. Rinse leather frequently. Use be treated with wax or polishing The windscreen wiper and rear separate leathers for painted and agents. -
Page 235
Vehicle care Clean smearing wiper blades with a Paintwork damage Liquid gas system soft cloth and window cleaner. Rectify minor paintwork damage with 9 Danger Remove dirt residues from smearing a touch-up pen before rust forms. wiper blades by using a soft cloth and Have more extensive damage or rust window cleaner. -
Page 236: Interior Care
Vehicle care Interior care Caution Interior and upholstery Close Velcro fasteners as open Velcro fasteners on clothing could Only clean the vehicle interior, damage seat upholstery. including the instrument panel fascia and panelling, with a dry cloth or The same applies to clothing with interior cleaner.
-
Page 237: Service And Maintenance
Service and maintenance Service and General information Andorra, Austria, Belgium, Bosnia- Herzegovina, Bulgaria, Croatia, maintenance Cyprus, Czech Republic, Denmark, Service information Estonia, Finland, France, Germany, In order to ensure economical and Greece, Greenland, Hungary, safe vehicle operation and to Iceland, Ireland, Italy, Latvia, maintain the value of your vehicle, it General information ….
-
Page 238: Recommended Fluids And
Service and maintenance Recommended fluids, Confirmations Dexos is the newest engine oil quality that provides optimum protection for lubricants and parts Confirmation of service is recorded in petrol and diesel engines. If it is the Service and Warranty Booklet. unavailable, engine oils of other listed Recommended fluids and The date and mileage is completed qualities have to be used.
-
Page 239
Service and maintenance Additional engine oil additives northern countries with very low temperatures the factory filled coolant The use of additional engine oil provides frost protection down to additives could cause damage and approx. -37 °C. This concentration invalidate the warranty. should be maintained all year round. -
Page 240: Technical Data
Technical data Technical data Vehicle identification Vehicle Identification Number Vehicle identification ….238 Vehicle Identification Number .. 238 Identification plate ….239 Engine identification ….239 Vehicle data ……. 240 Recommended fluids and lubricants …….. 240 Engine data ……243 Performance ……
-
Page 241: Identification Plate
Technical data Identification plate Information on identification label: Engine identification 1 : manufacturer The technical data tables use the 2 : type approval number engine identifier code. The engine 3 : vehicle identification number data table additionally shows the 4 : permissible gross vehicle weight engineering code.
-
Page 242: Vehicle Data
Technical data Vehicle data Recommended fluids and lubricants European service schedule Required engine oil quality All European countries with European service interval 3 235 Engine oil quality Petrol engines Diesel engines (including CNG, LPG, E85) dexos 1 – – dexos 2 ✔…
-
Page 243
Technical data International service schedule Required engine oil quality All countries with international service interval 3 235 Engine oil quality Petrol engines Diesel engines (including CNG, LPG, E85) dexos 1 (if available) ✔ – dexos 2 ✔ ✔ In case dexos quality is unavailable, you may use the oil qualities listed below: All countries with international service interval 3 235 Engine oil quality Petrol engines… -
Page 244
Technical data All countries with international service interval 3 235 ACEA C3 ✔ ✔ API SM ✔ – API SN resource conserving ✔ – Engine oil viscosity grades All countries with international service interval 3 235 Ambient temperature Petrol and diesel engines down to -25 °C SAE 5W-30 or SAE 5W-40 below -25 °C… -
Page 245: Engine Data
Technical data Engine data Engine identifier code B10XFL B10XFT B12XEL B14XEJ B14XEL B14NEJ Sales designation Engineering code B10XFT B10XFT B12XER B14XER B14XER B14NEL 1229 1398 1398 1364 Piston displacement [cm Engine power [kW] at rpm 3700 — 6000 5000 — 6000 5600 4200 — 6000 6000…
-
Page 246
Technical data Engine identifier code B14XEL B14NEH B16LER Sales designation 1.4 LPG 1.4 Turbo Engineering code B14XER B14NET B16LER 1398 1364 1598 Piston displacement [cm Engine power [kW] at rpm 6000 5000 5800 Torque [Nm] at rpm 4000 3000-4500 1900-5800 Fuel type Liquid gas/Petrol Petrol… -
Page 247: Performance
Technical data Engine identifier code B13DTC B13DTE B13DTE B13DTR Sales designation Engineering code B13DTC B13DTE B13DTE B13DTR 1248 1248 1248 1248 Piston displacement [cm Engine power [kW] at rpm 3750 3750 3750 3750 Torque [Nm] at rpm 1500 — 2500 1500 — 2500 1500 — 3500 1500 — 3000…
-
Page 248
Technical data Engine B14XEL LPG B14NEH B16LER Maximum speed [km/h] Manual transmission Manual transmission automated – – – Automatic transmission – – – B13DTC B13DTE B13DTE B13DTR Engine 55kW 70kW Maximum speed [km/h] Manual transmission Manual transmission automated – – –… -
Page 249: Vehicle Weight
Technical data Vehicle weight Kerb weight, 5-door vehicle, basic model without any optional equipment Engine Manual transmission Manual transmission Automatic transmission automated without / with air conditioning B10XFL 1199 / 1214 – – [kg] B10XFT 1199 / 1214 – – B12XEL 1163 / 1178 –…
-
Page 250
Technical data Kerb weight, 3-door vehicle and van, basic model without any optional equipment Engine Manual transmission Manual transmission Automatic transmission automated without / with air conditioning B10XFL 1163 / 1178 – – [kg] B10XFT 1163 / 1178 – – B12XEL 1120 / 1135 –… -
Page 251: Vehicle Dimensions
Technical data Vehicle dimensions 5-door vehicle 3-door vehicle Length [mm] 4021 4036 4036 Width without exterior mirrors [mm] 1746 1736 1736 Width with two exterior mirrors [mm] 1944 1944 1944 Height (without antenna) [mm] 1466 — 1516 1466 — 1501 1466 — 1501 Length of load compartment floor [mm] Length of load compartment with folded rear seats [mm]…
-
Page 252: Capacities
Technical data Capacities Engine oil Engine B10XFL B12XEL B14XEL B14XEL LPG B16LER B13DTC B10XFT B14XEJ B14NEH B13DTE B14NEJ B13DTR including Filter [l] between MIN and MAX [l] Fuel tank Engine B10XFL B12XEL B14XEL B14XEL LPG B16LER B13DTC B10XFT B14XEJ B14NEH B13DTE B14NEJ B13DTR…
-
Page 253: Tyre Pressures
Technical data Tyre pressures Comfort with up to 3 people ECO with up to 3 people With full load Engine Tyres front rear front rear front rear [kPa/bar] [kPa/bar] [kPa/bar] [kPa/bar] [kPa/bar] [kPa/bar] ([psi]) ([psi]) ([psi]) ([psi]) ([psi]) ([psi]) B12XEL, 175/70 R14, 210/2.1 (31) 210/2.1 (31)
-
Page 254
Technical data Comfort with up to 3 people ECO with up to 3 people With full load Engine Tyres front rear front rear front rear [kPa/bar] [kPa/bar] [kPa/bar] [kPa/bar] [kPa/bar] [kPa/bar] ([psi]) ([psi]) ([psi]) ([psi]) ([psi]) ([psi]) B14NEH SPORT 195/55 R16 230/2.3 (34) 230/2.3 (34) 270/2.7 (39) 250/2.5 (37) -
Page 255: Customer Information
Customer information Customer Customer information information Declaration of conformity Transmission systems Customer information ….253 This vehicle has systems that Declaration of conformity ..253 transmit and/or receive radio waves Collision damage repair … 255 subject to Directive 1999/5/EC. Software acknowledgement ..255 These systems are in compliance with the essential requirements and Vehicle data recording and pri‐…
-
Page 256
Customer information Jack… -
Page 257: Collision Damage Repair
Product designation: Jack Engineering Group Manager Chassis party software please see http:// Type/GM part number: 13331922 & Structure www.lg.com/global/support/ is in compliance with the provisions of Adam Opel AG opensource/index. Directive 2006/42/EC. D-65423 Rüsselsheim libcurl Applied technical standards: GMN9737 : jacking…
-
Page 258
Customer information copyright holders be liable for any Gordon, Ian Gorman, Chris Herborth, 1. Redistributions of source code claim, damages or other liability, Dirk Haase, Greg Hartwig, Robert must retain the above copyright whether in an action of contract, tort Heath, Jonathan Hudson, Paul notice, definition, disclaimer, and or otherwise, arising from, out of or in… -
Page 259: Vacy
Customer information Vehicle data recording original source. Such altered ● Vehicle reactions in particular versions also must not be driving situations (e.g. inflation of and privacy misrepresented as being Info-ZIP an airbag, activation of the releases—including, but not stability regulation system). Event data recorders limited to, labeling of the altered ●…
-
Page 260: Radio Frequency Identification (Rfid)
RFID technology in Opel vehicles does not use or record personal information or link with any other Opel system containing…
-
Page 261
Customer information… -
Page 262: Index
Index Bonnet ……..190 Brake and clutch fluid….236 Accessories and vehicle Brake and clutch system ….. 93 modifications ……189 Brake assist ……. 150 Adjustable air vents ….131 Brake fluid ……..194 Airbag and belt tensioners … 91 Brakes …….
-
Page 263
Control indicators……88 Electronic Stability Control..152 Folding mirrors ……30 Control of the vehicle ….134 Electronic Stability Control and Following distance indication..159 Controls……..77 Traction Control system…. 94 Forward collision alert….157 Convex shape ……30 Electronic Stability Control off..94 Front airbag system ….. -
Page 264
Headlights……..113 Interior mirrors……31 Mirror adjustment ……8 Headlights when driving abroad 115 Interruption of power supply ..144 Misted light covers ….. 119 Head restraint adjustment ….. 8 Introduction ……..3 Head restraints ……36 ISOFIX child restraint systems ..56 New vehicle running-in …. -
Page 265
Selector lever ….. 142, 146 Top-tether fastening eyes …. 56 Service ……..132 Tow bar……..183 Radio Frequency Identification Service display ……87 Towing…….. 183, 229 (RFID)……..258 Service information ….235 Towing another vehicle ….. 230 Radio remote control ….23 Service vehicle soon …. -
Page 266
Upholstery……..234 Wheels and tyres ……. 211 Using this manual ……3 Windows……..32 Windscreen……..32 Windscreen wiper/washer … 78 Vehicle battery ……194 Winter tyres ……. 211 Vehicle checks……190 Wiper blade replacement ..196 Vehicle data…….. 240 Vehicle data recording and privacy…….. -
Page 267
Copyright by ADAM OPEL AG, Rüsselsheim, Germany. The information contained in this publication is effective as of the date indicated below. Adam Opel AG reserves the right to make changes to the technical specifications, features and design of the vehicles relative to the information in this publication as well as changes to the publication itself.
OPEL CORSA
Инструкция по эксплуатации
Введение
3
Технические данные
автомобиля
Запишите параметры Вашего авто‐
мобиля на предыдущей странице
и храните их в легко доступном
месте. Найти эту информацию
можно в разделах «Техническое об‐
служивание» и «Технические дан‐
ные», а также на типовой табличке
автомобиля.
Введение
Ваш автомобиль — это оптимальное
сочетание передовой технологии,
безопасности, экологичности и эко‐
номии.
Настоящее Руководство пользова‐
теля содержит всю необходимую
для уверенного и эффективного
управления Вашим автомобилем
информацию.
Кроме Вас, и пассажиры тоже
должны знать о возможных при не‐
правильной эксплуатации автомо‐
биля несчастных случаях и трав‐
мах. Расскажите им об этом.
Обязательно выполняйте дей‐
ствующие законы и предписания
той страны, в которой находитесь.
Соответствующее законодатель‐
ство может отличаться от приве‐
денной в настоящем Руководстве
информации.
При необходимости посещения
станции техобслуживания, мы ре‐
комендуем обращаться к Автори‐
зованному сервисному центру
Opel. Для обслуживания автомоби‐
лей с газобаллонным оборудова‐
нием рекомендуется обращаться
на фирменные станции техниче‐
ского обслуживания Opel, автори‐
зованные для обслуживания газо‐
топливных систем.
Все Авторизованные сервисные
центры Opel предложат Вам пер‐
воклассный сервис по умеренным
ценам. Опытные специалисты,
прошедшие обучение на фирме
Opel, обслужат Ваш автомобиль,
руководствуясь оригинальными
технологическими инструкциям
компании.
Пакет с литературой для клиента
должен всегда находиться в авто‐
мобиле.
Как пользоваться
настоящим
Руководством
■ В настоящем руководстве опи‐
саны все опции и оборудование
данной модели. Описание
отдельных элементов и функций
меню может быть неприменимо
к вашему автомобилю ввиду
различия модификаций
и исполнений для разных
регионов, а также отсутствия или
наличия дополнительного
оборудования и аксессуаров.
■ Предварительный обзор Вы най‐
дете в главе «Коротко».
■ В содержании в начале данного
руководства и в каждом разделе
указано местоположение инфор‐
мации.
■ Конкретную информацию можно
найти с помощью Алфавитного
указателя.
Назад
к
обзору
4
Введение
■ В настоящем Руководстве поль‐
зователя описаны автомобили
с левым расположением руле‐
вого колеса. Обслуживание авто‐
мобилей с правым расположе‐
нием рулевого колеса выполня‐
ется аналогично.
■ В Руководстве пользователя ис‐
пользованы заводские обозначе‐
ния двигателя. Соответствую‐
щие торговые обозначения при‐
ведены в разделе «Технические
данные».
■ Указания направления, напри‐
мер, влево — вправо или вперед —
назад всегда приводятся относи‐
тельно направления движения.
■ На дисплеях информационной
системы автомобиля информа‐
ция может не отображаться на
вашем родном языке.
■ Отображаемые информацион‐
ной системой сообщения и над‐
писи в салоне автомобиля в тек‐
сте настоящего руководства вы‐
делены жирным шрифтом.
Опасность,
Предупреждение
и Внимание
9 Опасность
Текст, отмеченный
9 Опасность, содержит инфор‐
мацию, связанную с риском
смертельного исхода. Прене‐
брежение этими сведениями
может оказаться опасным для
жизни.
9 Предупреждение
Текст, помеченный
9 Предупреждение, содержит
информацию, связанную с рис‐
ком несчастного случая или
травмы. Пренебрежение этими
сведениями может стать причи‐
ной травмы.
Внимание
Текст, помеченный Внимание,
информирует о том, что автомо‐
биль может быть поврежден.
Пренебрежение этой информа‐
цией может привести к повреж‐
дению автомобиля.
Символы
Ссылки на страницы обозначаются
с помощью 3. 3 означает «см. стр.».
Желаем Вам счастливого пути.
Adam Opel AG
Назад
к
обзору
6
Коротко
Коротко
Исходные сведения,
необходимые при
вождении
Отпирание автомобиля
Поверните ключ в замке двери во‐
дителя по направлению к передней
части автомобиля, либо нажмите
на кнопку q, чтобы разблокиро‐
вать двери и багажный отсек. От‐
кройте двери, потянув за ручки.
Чтобы открыть заднюю багажную
дверь, потяните за кнопку под мол‐
дингом.
Пульт дистанционного управления
3
22, центральный замок 3 23,
багажное отделение 3 27.
Регулировка сидений
Установка сиденья
в требуемое положение
Потяните ручку, сдвиньте сиденье,
отпустите ручку.
Регулировка сиденья 3 40, поло‐
жение сиденья 3 39.
Назад
к
обзору
Коротко
7
9 Опасность
Чтобы избежать травмирования
во время срабатывания по‐
душки безопасности, не придви‐
гайтесь к рулевому колесу
ближе чем на 25 см.
Спинки сидений
Поверните рукоятку. Во время ре‐
гулировки не откидывайтесь на
спинку.
Регулировка сиденья 3 40, поло‐
жение сиденья 3 39, складыва‐
ние спинки сиденья переднего пас‐
сажира 3 41.
Высота сиденья
Для изменения высоты сиденья
выполните рычагом качающие дви‐
жения
вверх = поднять
вниз = опустить
Сиденья 3 40, положение си‐
денья 3 39.
Назад
к
обзору
8
Коротко
Регулировка
подголовника
Нажмите на разблокирующую
кнопку, отрегулируйте высоту, за‐
блокируйте подголовник.
Подголовники 3 38.
Ремень безопасности
Вытяните ремень безопасности
и зафиксируйте его в замке. Ре‐
мень безопасности не должен быть
перекручен и должен плотно при‐
легать к телу. Нельзя откидывать
спинку слишком далеко (не бо‐
лее 25°).
Для того чтобы снять ремень, на‐
жмите красную кнопку на его замке.
Ремни безопасности 3 43, по‐
душки безопасности 3 46, поло‐
жение сиденья 3 39.
Регулировка зеркал
Внутреннее зеркало
Для уменьшения риска ослепления
поверните рычаг в нижней части
зеркала.
Внутреннее зеркало 3 32, авто‐
матическое неослепляющее внут‐
реннее зеркало 3 33.
Назад
к
обзору
Коротко
9
Наружные зеркала
Настройка при помощи
четырехпозиционного
переключателя в системе с ручным
управлением положением зеркал
Сначала выберите зеркало, кото‐
рое нужно настроить, потом отре‐
гулируйте его положение с по‐
мощью ручки управления.
Настройка при помощи
четырехпозиционного
переключателя в системе
с электронным управлением
положением зеркал
Сначала выберите зеркало, кото‐
рое нужно настроить, потом отре‐
гулируйте его положение с по‐
мощью ручки управления.
Электронная регулировка 3 30,
выпуклые наружные зеркала
3
30, складывающиеся наружные
зеркала 3 31, наружные зеркала
с обогревом 3 32.
Регулировка положения
рулевого колеса
Отоприте рычаг, отрегулируйте ру‐
левое колесо, затем зафиксируйте
рычаг и убедитесь, что он полно‐
стью заблокирован. Выполняйте
регулировку только на стоящем ав‐
томобиле с разблокированным ру‐
левым колесом.
Подушки безопасности 3 46, по‐
ложения зажигания 3 125.
Назад
к
обзору
Руководство на английском языке по техническому обслуживанию и ремонту автомобилей Opel Corsa и Vauxhall Corsa 2006-2010 годов выпуска с бензиновыми и дизельными двигателями.
- Автор: John S. Mead
- Издательство: Haynes Publishing
- Год издания: 2010
- Страниц: 297
- Формат: PDF
- Размер: 184,5 Mb
Руководство на английском языке по техническому обслуживанию и ремонту автомобилей Opel Corsa и Vauxhall Corsa 1997-2000 годов выпуска с бензиновыми двигателями.
- Автор: John S. Mead
- Издательство: Haynes Publishing
- Год издания: 2002
- Страниц: 386
- Формат: PDF
- Размер: 905,9 Mb
Руководство на английском языке по техническому обслуживанию и ремонту автомобилей Opel Corsa и Vauxhall Corsa 2000-2003 годов выпуска с бензиновыми и дизельными двигателями.
- Автор: —
- Издательство: Haynes Publishing
- Год издания: 2004
- Страниц: 388
- Формат: PDF
- Размер: 99,2 Mb
Сборник руководств по эксплуатации и техническому обслуживанию автомобиля Opel Corsa D.
- Автор: —
- Издательство: Opel AG
- Год издания: —
- Страниц: —
- Формат: PDF
- Размер: 45,3 Mb
Руководство по техническому обслуживанию и ремонту автомобиля Opel Corsa 2003-2006 годjd выпуска с бензиновыми и дизельными двигателями.
- Автор: —
- Издательство: Алфамер
- Год издания: —
- Страниц: 384
- Формат: —
- Размер: —
Руководство по техническому обслуживанию и ремонту автомобиля Opel Corsa с 2006 года выпуска с бензиновыми и дизельными двигателями.
- Автор: —
- Издательство: Алфамер
- Год издания: —
- Страниц: 320
- Формат: —
- Размер: —
Руководство по эксплуатации, техническому обслуживанию и ремонту автомобилей Opel Corsa/Combo/Combo Tour/Meriva с 2000 года выпуска с бензиновыми и дизельными двигателями.
- Автор: —
- Издательство: Автоклуб
- Год издания: —
- Страниц: 222
- Формат: —
- Размер: —
Руководство по эксплуатации, техническому обслуживанию и ремонту автомобиля Opel Corsa с 2006 года выпуска с бензиновыми и дизельными двигателями.
- Автор: —
- Издательство: Арго-Авто
- Год издания: —
- Страниц: 400
- Формат: —
- Размер: —
Мультимедийное руководство по техническому обслуживанию и ремонту автомобилей Opel Combo/Corsa/Tigra 1993-2000 годов выпуска.
- Автор: —
- Издательство: —
- Год издания: —
- Страниц: —
- Формат: —
- Размер: 68,1 Mb
Руководство по эксплуатации, техническому обслуживанию и ремонту автомобилей Opel Combo/Corsa/Meriva 2000-2006 годов выпуска.
- Автор: —
- Издательство: Арус
- Год издания: —
- Страниц: 355
- Формат: PDF
- Размер: 32,8 Mb
Мультимедийное руководство по техническому обслуживанию и ремонту автомобиля Opel Corsa C.
- Автор: —
- Издательство: Новая версия
- Год издания: 2007
- Страниц: —
- Формат: —
- Размер: 276,6 Mb
Opel Corsa
G73
Был 4 часа назад
Игорь живу за МКАДом, 44 года
Я езжу на Opel Vectra Две трубы, значит дизель (до этого — 8 машин)
Ульяновск, Россия
Opel Corsa D обслуживание и ремонт(изд. Арус)
346 стр, чб, качество хорошее.
3 декабря 2019
Метки: просто так
Ранее Помыл машину в праздник.
Далее Литература для скачки 2.Opel Corsa D.
Разместить рекламу
Реклама
Машины в продаже
Шахты
Opel Corsa, 2014
675 000 ₽
Сальск
Opel Corsa, 2008
519 900 ₽

Шахты
Opel Corsa, 2014
675 000 ₽
Сальск
Opel Corsa, 2007
399 900 ₽
Посмотреть больше машин на Дроме
Комментарии
11
Войдите или зарегистрируйтесь, чтобы писать комментарии, задавать вопросы и участвовать в обсуждении.
Войти
Зарегистрироваться
JMachikin
Я езжу на Opel Astra G
2 года
2 года
dentaku
Я езжу на Chevrolet Lacetti 5D
3 года
Viorel077
Я езжу на Opel Corsa D
Красава.
А где можно найти такую же книгу только с дизельным двигателем?
3 года
она вроде на английском, завтра будет пост
3 года
Viorel077
Я езжу на Opel Corsa D
3 года
домашний интернет плоховат
3 года
Nikolai796
Я езжу на Opel Corsa D
3 года
3 года
AlgDandi
Я езжу на Opel Corsa D
Спасибо тебе добрый человек, я уже был близок к ее покупке =)
3 года
на днях будут ещё 3-ри книги. Интернет подвел, не смог загрузить их в «облако»
3 года
Инструкция и руководство для
Opel Corsa на русском
248 страниц подробных инструкций и пользовательских руководств по эксплуатации
Надежная иномарка за 400? Opel Corsa D | Подержанные автомобили
Opel Corsa D. Авто для девушек и не только
Новая Opel Corsa 2020 — Немец по рецепту от французов
Новый Опель Корса – первый тест обзор — хит или не хит?
OPEL CORSA D 1.3 CDTI (2008 ) ОБЗОР ОТ ВЛАДЕЛЬЦА !
Обзор от владельца Опель Корса D 2020 # Opel corsa D #
OPEL CORSA Инструкция по эксплуатации.
Инструкция по эксплуатации

Введение.

Введение

Технические данные автомобиля, Введение, Как пользоваться настоящим руководством
Запишите параметры Вашего авто‐
мобиля на предыдущей странице
и храните их в легко доступном
месте. Найти эту информацию
можно в разделах «Техническое об‐
служивание» и «Технические дан‐
ные», а также на типовой табличке
Ваш автомобиль — это оптимальное
сочетание передовой технологии,
безопасности, экологичности и эко‐
номии.
Настоящее Руководство пользова‐
теля содержит всю необходимую
для уверенного и эффективного
управления Вашим автомобилем
информацию.
Кроме Вас, и пассажиры тоже
должны знать о возможных при не‐
правильной эксплуатации автомо‐
биля несчастных случаях и трав‐
мах. Расскажите им об этом.
Обязательно выполняйте дей‐
ствующие законы и предписания
той страны, в которой находитесь.
ство может отличаться от приве‐
денной в настоящем Руководстве
информации.
При необходимости посещения
станции техобслуживания, мы ре‐
комендуем обращаться к Автори‐
зованному сервисному центру
Opel. Для обслуживания автомоби‐
лей с газобаллонным оборудова‐
нием рекомендуется обращаться
на фирменные станции техниче‐
ского обслуживания Opel, автори‐
зованные для обслуживания газо‐
топливных систем.
Все Авторизованные сервисные
Источник
Opel Corsa: инструкция по эксплуатации

Инструкция к автомобилю Опель Корса подходит для всех моделей, выпущенных до 2006 года включительно. Здесь можно скачать руководство в пдф или читать его онлайн.
Опель Корса: руководство по эксплуатации
Инструкция по эксплуатации Опель Корса: содержание

- Коротко и ясно …2
- Приборы…30
- Ключи, двери, капот…54
- Сидения, салон…72
- Системы безопасности…82
- Освещение … 108
- Окна, раздвижная крыша … 117
- Поддержание микроклимата … 122
- Easytronic Опель Корса Руководство по эксплуатации … 140
- Автоматическая коробка передач Опель Корса … 148
- Инструкция водителю Opel Corsa … 154
- Экономия топлива, нормы защиты окружающей среды … 156
- Расход топлива автомобиля, качество топлива для Опель Корса, заправка … 158
- Работа катализатора, выхлопные газы … 161
- Ходовые системы автомобиля Опель Корса Инструкция по эксплуатации… 166
- Тормоза … 174
- Колеса, шины …. 178
- Езда с прицепом … 186
- Багажник на крыше, система Flex-Fix … 194
- Самопомощь … 205
- Сервис фирмы Opel … 244
- Инспекционная система, техническое обслуживание Opel Corsa Инструкция … 246
- Уход за автомобилем … 258
- Технические данные …. 262
- Предметный указатель … 282
Мануал Опель Корса: условные обозначения


Опель Корса — небольшой автомобиль немецкого бренда Opel, увидел мир в 1982 г. Первое поколение Corsa A было доступно в кузовах:
- 3-дверный хэтчбек
- 5-дверный хэтчбек
- 2-дверный седан
- 4-дверный седан
Передняя ось приводилась в движение поперечно установленными 4-цилиндровыми двигателями 1,0-1,6 литра и мощностью 45-101 л.с. Дизельный вариант с рабочим объемом 1,5 литра и 50 л.с. как вакуум или 67 л.с. как турбо.
Серия B выпускалась в 1993-2000 гг. К традиционным кузовам добавился универсал. Помимо обычных двигателей, с 1997 г. был предложен 3-цилиндровый бензиновый вариант мощностью 55 л.с. Уточнить технические характеристики можно в руководстве по эксплуатации Opel Corsa.
Corsa C производилась в 2000-2006 гг. На обеих сериях устанавливались дизеля от марки Isuzu объемом 1,5-1,7 л., мощностью 50-67 л.с. Доступны версии коробок:
Корса D выпускается с 2006 г. и доступна как хэтчбек и фургон. Имеет только 4-цилиндровые двигатели 1,0-1,6 л., которые — частично с турбонаддувом — выдают 60-192 л.с. Представлена всеми видами трансмиссии. В 2014 г. появилась Корса E в кузовах 3-х и 5-дверный хэтчбеки и стандартным расходом топлива — 3,7 литра. В инструкции по эксплуатации Opel Corsa представлены более подробные сведения.
Источник
Руководства по эксплуатации, обслуживанию и ремонту Opel Corsa
Руководство на английском языке по техническому обслуживанию и ремонту автомобилей Opel Corsa и Vauxhall Corsa 2006-2010 годов выпуска с бензиновыми и дизельными двигателями.
- Автор: John S. Mead
- Издательство: Haynes Publishing
- Год издания: 2010
- Страниц: 297
- Формат: PDF
- Размер: 184,5 Mb
Service and Repair Manual Opel Corsa 1997-2000 г.
Руководство на английском языке по техническому обслуживанию и ремонту автомобилей Opel Corsa и Vauxhall Corsa 1997-2000 годов выпуска с бензиновыми двигателями.
- Автор: John S. Mead
- Издательство: Haynes Publishing
- Год издания: 2002
- Страниц: 386
- Формат: PDF
- Размер: 905,9 Mb
Service and Repair Manual Opel Corsa 2000-2003 г.
Руководство на английском языке по техническому обслуживанию и ремонту автомобилей Opel Corsa и Vauxhall Corsa 2000-2003 годов выпуска с бензиновыми и дизельными двигателями.
- Автор: —
- Издательство: Haynes Publishing
- Год издания: 2004
- Страниц: 388
- Формат: PDF
- Размер: 99,2 Mb
Инструкция по эксплуатации Opel Corsa D.
Сборник руководств по эксплуатации и техническому обслуживанию автомобиля Opel Corsa D.
- Автор: —
- Издательство: Opel AG
- Год издания: —
- Страниц: —
- Формат: PDF
- Размер: 45,3 Mb
Ремонт и ТО Opel Corsa 2003-2006 г.
Руководство по техническому обслуживанию и ремонту автомобиля Opel Corsa 2003-2006 годjd выпуска с бензиновыми и дизельными двигателями.
- Автор: —
- Издательство: Алфамер
- Год издания: —
- Страниц: 384
- Формат: —
- Размер: —
Ремонт и ТО Opel Corsa с 2006 г.
Руководство по техническому обслуживанию и ремонту автомобиля Opel Corsa с 2006 года выпуска с бензиновыми и дизельными двигателями.
- Автор: —
- Издательство: Алфамер
- Год издания: —
- Страниц: 320
- Формат: —
- Размер: —
Руководство по ремонту Opel Corsa с 2000 г.
Руководство по эксплуатации, техническому обслуживанию и ремонту автомобилей Opel Corsa/Combo/Combo Tour/Meriva с 2000 года выпуска с бензиновыми и дизельными двигателями.
- Автор: —
- Издательство: Автоклуб
- Год издания: —
- Страниц: 222
- Формат: —
- Размер: —
Руководство по эксплуатации, ремонту и ТО Opel Corsa с 2006 г.
Руководство по эксплуатации, техническому обслуживанию и ремонту автомобиля Opel Corsa с 2006 года выпуска с бензиновыми и дизельными двигателями.
- Автор: —
- Издательство: Арго-Авто
- Год издания: —
- Страниц: 400
- Формат: —
- Размер: —
Устройство, обслуживание, ремонт Opel Corsa 1993-2000 г.
Мультимедийное руководство по техническому обслуживанию и ремонту автомобилей Opel Combo/Corsa/Tigra 1993-2000 годов выпуска.
- Автор: —
- Издательство: —
- Год издания: —
- Страниц: —
- Формат: —
- Размер: 68,1 Mb
Устройство, обслуживание, ремонт Opel Corsa 2000-2006 г.
Руководство по эксплуатации, техническому обслуживанию и ремонту автомобилей Opel Combo/Corsa/Meriva 2000-2006 годов выпуска.
- Автор: —
- Издательство: Арус
- Год издания: —
- Страниц: 355
- Формат: PDF
- Размер: 32,8 Mb
Устройство, обслуживание, ремонт Opel Corsa C.
Мультимедийное руководство по техническому обслуживанию и ремонту автомобиля Opel Corsa C.
- Автор: —
- Издательство: Новая версия
- Год издания: 2007
- Страниц: —
- Формат: —
- Размер: 276,6 Mb
Источник
Руководство по ремонту OPEL CORSA D [PDF]

pisikot
Opel Сorsa D руководство по эксплуатации, техническому обслуживанию и ремонту

Цветное иллюстрированное справочно-информационное издание Руководство по ремонту Opel Сorsa с 2006 года выпуска. А также руководство по эксплуатации, техническому обслуживанию и устройство модели. Автомобили оборудованы бензиновыми двигателями Z10XEP (1,0 л), Z12XEP (1,2 л), Z14XEP (1,4 л).
Пособие поможет всем владельцам автомобилей Опель Корса с кузовом 3- и 5-дверный хэтчбек, работникам СТО и автосервисов поддерживать автомобиль в надлежащем рабочем состоянии, экономить время и деньги.
Мануал содержит более 2000 цветных фотографий, подробно отображающих весь процесс пошагового ремонта Opel Сorsa, в том числе ремонт двигателя, полные технические характеристики автомобиля, перечни возможных неисправностей и рекомендации по их устранению.
Технология работ выбрана применительно к условиям гаража с использованием универсального инструмента, и только в исключительных случаях приведены рекомендации по применению специального инструмента, имеющегося в свободной продаже.
Операции ремонта узлов и агрегатов в каждом разделе подобраны по принципу от простого к сложному: от простейших операции по обслуживанию, регулировке узлов и систем, замене часто выходящих из строя деталей, до крупного ремонта агрегатов.
Все материалы книги созданы на конкретном опыте, полученном в ходе полной разборки и сборки Opel Сorsa высококвалифицированными автомеханиками. Весь порядок поиска неисправности проиллюстрирован цветными фотографиями.
В предлагаемом пособии Вы найдете:
Устройство автомобиля Опел Корса – общие сведения и паспортные данные, панели и приборы управления
Рекомендации по эксплуатации – подготовка к выезду, рекомендации по безопасности движения
Неисправности в пути – что делать в каждом случае
Техническое обслуживание – полное пошаговое руководство
Информацию по ремонту таких составляющих автомобиля, как двигатель, трансмиссия, ходовая часть, рулевое управление, тормозная система – регулировки, малый и большой ремонт, сборка и разборка узлов и агрегатов машины
Электрооборудование – диагностика неисправностей и основные блоки
Электрические схемы – упрощают поиск неисправностей в электрооборудовании
В отдельные разделы мануала входят инструкция по эксплуатации Opel Сorsa, рекомендации по техническому обслуживанию и схемы электрооборудования (электросхемы) автомобиля.
Настоящая книга будет полезна владельцам автомобилей Опель Корса, механикам, специалистам СТО, ремонтных мастерских и автосервисов.
Год выпуска: 2009 г.
Издательство: Третий Рим
Формат: PDF
Количество страниц: 384
Качество: Отсканированные страницы
Источник
Opel Corsa D Руководство по эксплуатации, техническому обслуживанию и ремонту: бензиновые двигатели Z10XEP (DOHC 1,0 л); Z12XEP (DOHC 1,2 л); Z14XEP (DOHC 1,4 л) с кузовами трех- и пятидверный хэтчбек. Опель Корса «Д» с 2006 года выпуска пошаговый ремонт в фотографиях
Opel/ Vauxhall Corsa D Petrol/ Turbo-diesel; Hatchback and Corsa Van Service and Repair Manual ЗДЕСЬ
Opel Corsa «D» 2013 Инструкция по эксплуатации
Opel Corsa «D» 2012 Инструкция по эксплуатации
Opel Corsa «D» 2011 Инструкция по эксплуатации
Opel Corsa «D» 2010 Инструкция по эксплуатации
Opel Corsa «D» 2009 Инструкция по эксплуатации
ЕСЛИ ВЫ ВИДИТЕ ОШИБКУ 406 Not Acceptable и не видите документ, то скорей всего у Вас IP РФ и его надо сменить, на любой другой страны, с помощью VPN ( Scribd и SlideShare блокируют посетителей с Российским IP).
Видео Опель Корса «Д» замена ламп передних фар (Corsa D с 06)
Опель Корса «Д» общая информация (Corsa D 2006-2015)
Автомобиль малого класса В (по европейской классификации) Opel Corsa D впервые был представлен в 2006 году на Лондонском автосалоне. Автомобили построены на платформе compact, разработанной совместно компаниями 1944 General Motors и Fiat, и выпускаются с кузовами трех- и пятидверный хэтчбек.
На автомобили устанавливают восемь двигателей, среди которых:
— бензиновые двигатели 1,0 л Z 10 ХЕР (60 л.с.); 1,2 л Z 12 ХЕР (80 л.с.); 1,4 л Z 14 ХЕР (90 л.с.):
— бензиновые двигатели оснащенные системой турбонаддува 1, 6 л Z 16 LEL (150 л.с.) 1,6 л Z 16 LER (192 л.с.) — последний для спортивной модификации автомобиля ОРС,
— дизельные двигатели с системой турбонаддува 1.3 л Z 13 DTJ (75 л.с.) 1,3 л Z 13 DTH (90 л.с.); 1,7 л Z 17 DTR (125 л.с.) Модификацию Opel Corsa ОРС выпускают только с кузовом трехдверный хэтчбек.
Для российского рынка автомобили Opel Corsa комплектуют двигателями Z 10 ХЕР, Z 12 ХЕР и Z 14 ХЕР, оснащенными системой Twinport изменения длины впускного трубопровода, а также двигателями Z 16 LEL, Z 16 LER и Z 13 DTJ В данной книге подробно рассмотрены модификации, оснащенные первыми тремя из перечисленных двигателей. На автомобили устанавливают 5-ступенчатую (автомобили с двигателями Z 10 ХЕР, Z 12 ХЕР, Z 14 ХЕР, Z 13 DTJ) или 6-ступенчатую автомобили с двигателями Z 16 LEL, Z 16 LER, Z 13 DTH и Z 17 DTR) механическую коробку передач, 4-ступенчатую автоматическую коробку передач (только автомобили с двигателями Z 14 ХЕР) и роботизированную механическую коробку передач Easytronic (агрегатируют только с двигателями Z 12 ХЕР и Z 13 DTH).
В России автомобили Opel Corsa предлагают в трех базовых комплектациях: Essentia, Enjoy и Cosmo.
На автомобили в базовой комплектации Essentia все комплектации штатно устанавливают антиблокировочную систему тормозов (ABS), иммобилизатор, подушку безопасности водителя и отключаемую подушку безопасности переднего пассажира, электроусилитель рулевого управления. центральный замок. систему отопления и кондиционирования с пакетами оснащения для холодного климата и с фильтром очистки воздуха салона, регулируемую по углу наклона рулевую колечку, информационный дисплей на панели приборов, полноразмерное запасное колесо, пакет «для курильщика» (прикуриватель и передняя пепельница), аудиоподготовку (антенна и четыре динамика).
В комплектацию Enjoy дополнительно включены центральный замок с дистанционным управлением, пакет опций Comfort (сиденье водителя регулируемое по высоте, рулевая колонка, регулируемая по углу наклона и вылету), пакет опций Electric Comfort (электрические стеклоподъемники передних дверей, центральный замок с дистанционным управлением, один ключ со складным лезвием), солнцезащитный козырек с зеркалом со стороны водителя, двухуровневый пол багажника, заднее сиденье с раздельной спинкой, наружные ручки дверей и молдинги, окрашенные в цвет кузова колесные диски с посадочным диаметром 15 дюймов.
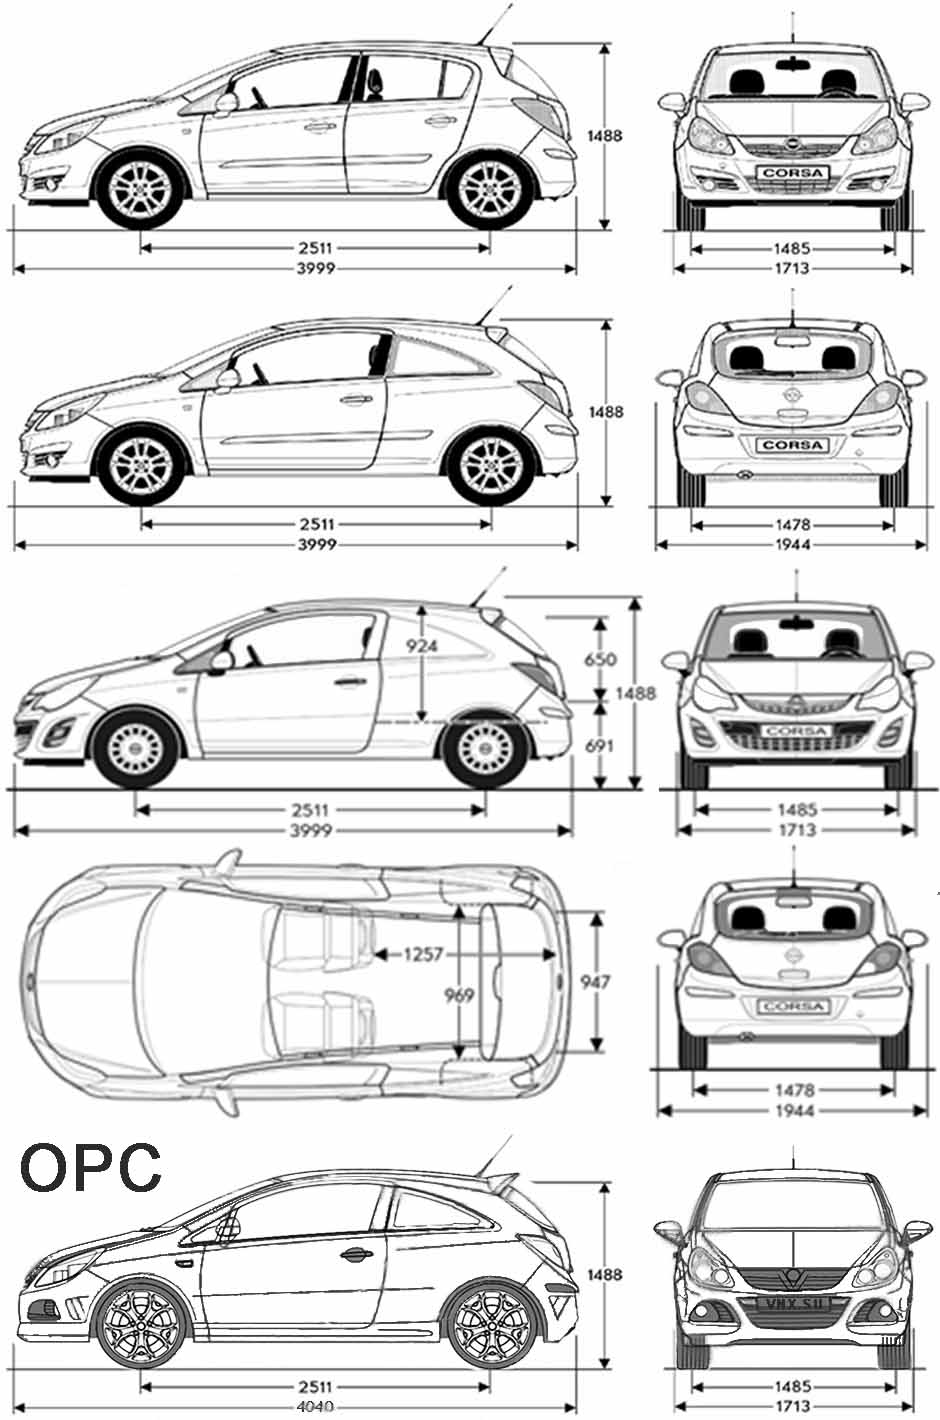
Основные технические характеристики (General technical specifications) Opel Corsa D с 2006 года, 5-дверный хэтчбек, модель с мотором 1.4 литра
| № | Спецификация / Specs | Данные |
| Габариты (мм/mm) и масса (кг/kg) / Dimensions and Weight | ||
| 1 | Длина / Length | 3999 |
| 2 | Ширина (без/с зеркалами) / Width | 1713/1944 |
| 3 | Высота (загружен/пустой) / Height | 1488 |
| 4 | Колёсная база / Wheelbase | 2511 |
| 5 | Дорожный просвет (клиренс) / Ground clearance | 125 |
| 6 | Снаряжённая масса / Total (curb) weight | 1163 |
| Полная масса / Gross (max.) weight | 1565 | |
|
Двигатель / Engine |
||
| 7 | Тип / Engine Type, Code | Бензиновый, жидкостного охлаждения, четырехтактный, Z14XEP |
| 8 | Количество цилиндров / Cylinder arrangement: Total number of cylinders, of valves | 4-цилиндровый, 16V, рядный, DOHC с верхним расположением двух распределительных валов |
| 9 | Диаметр цилиндра / Bore | 73.4 мм |
| 10 | Ход поршня / Stroke | 80.6 мм |
| 11 | Объём / Engine displacement | 1364 см³ |
| 12 | Система питания / Fuel supply, Aspiration | Распределенный впрыск топлива |
| Атмосферный | ||
| 13 | Степень сжатия / Compression ratio | 10.5:1 |
| 14 | Максимальная мощность / Max. output power kW (HP) at rpm | 67 кВт (90 л.с.) при 5600 об/мин |
| 15 | Максимальный крутящий момент / Max. torque N·m at rpm | 125 Нм при 4000 об/мин |
|
Трансмиссия / Transmission |
||
| 16 | Сцепление / Clutch type | Однодисковое, сухое, с диафрагменной нажимной пружиной и гасителем крутильных колебаний, постоянно замкнутого типа |
| 17 | КПП / Transmission type | МКПП 6 шестиступенчатая механическая, двухвальная, с синхронизаторами на всех передачах переднего хода |
О Книге
- Название: Opel Corsa D Руководство по эксплуатации, техническому обслуживанию и ремонту: с кузовами трех- и пятидверный хэтчбек, пошаговый ремонт в фотографиях
- Бензиновые двигатели: Z10XEP (DOHC 1,0 л); Z12XEP (DOHC 1,2 л); Z14XEP (DOHC 1,4 л)
- Выпуск с 2006 года
- Серия: «Ремонт без проблем»
- Год издания: 2010
- Автор: Коллектив авторов
- Издательство: «Ассоциация независимых издателей»
- Формат: PDF
- Страниц в книге: 383
- Размер: 86.28 МБ
- Язык: Русский
- Количество электросхем: 21