
Operating Instructions
DVD Stereo System
Model No. SC-VK725D/SC-VK825D/
SC-VK925D
Before connecting, operating or adjusting this
product, please read the instructions completely.
Please keep this manual for future reference.
Region number
The player plays DVD-Video marked with labels
containing the region number «2» or «ALL».
Example:
2
3
4
2
RQT8251-G
L0605NC0
GC
En Pe Ar
The above illustration of the unit is an example and shows SC-VK725D.
RQT8251(Cv)new 6/7/05, 3:24 PM1
Инструкцию для Panasonic SC-VK825 DEE-S на русском языке, в формате pdf можно скачать с нашего сайта. Наш каталог предоставляем Вам инструкцию производителя фирмы Panasonic, которая была взята из открытых источников. Ознакомившись с руководством по эксплуатации от Panasonic, Вы на все 100% и правильно сможете воспользоваться всеми функциями устройства.
Для сохранения инструкции «Музыкальный центр Micro Panasonic SC-VK825 DEE-S» на русском языке на вашем компьютере либо телефоне, нажмите кнопку «Скачать инструкцию». Если активна кнопка «Инструкция онлайн», то Вы можете просмотреть документ (manual), в своём браузере онлайн.
Если у Вас нет возможности скачать инструкцию по эксплуатации либо просмотреть её, Вы можете поделиться ссылкой на эту страницу в социальных сетях и при удобном моменте скачать инструкцию. Либо добавьте эту страницу в закладки Вашего браузера, нажав кнопку «Добавить страницу в закладки браузера».
Инструкция и руководство для
Panasonic SC-VK81D  на русском

36 страниц подробных инструкций и пользовательских руководств по эксплуатации
 09:48
09:48
Panasonic SA-VK91 02 Ремонт Музыкальных центров Panasonic
 08:24
08:24
3 недостатка panasonic sc-vk960 и скорее всего всей этой серии
 12:00
12:00
►Разобрал саб от музыкальной системы Panasonic SA-VK950✔♚
 11:49
11:49
обзор: Panasonic SC-VK81D
 29:55
29:55
Panasonic sa-vk950 обзор, история покупки его
DVD стерео система
Panasonic
Инструкция по эксплуатации
Model No.
SC“VK81 D
AUDIO/VIDEO [
digital
VIDEq
RAM
PLAYER
Региональный код,
поддерживаемый этим
проигрывателем
Региональные коды присваиваются DVD
проигрывателям и программному
обеспечению в соответствии с тем, где
они продаются.
• Региональным кодом этого
проигрывателя является “5”.
• Проигрыватель будет воспроизводить
диски DVD-Video, маркированные
этикетками, содержащими “5” или
“ALL”.
Например:
Перед подключением, работой или регулировкой
данного аппарата прочтите, пожалуйста, эту
инструкцию полностью.
Сохраните, пожалуйста, эту инструкцию.
RQT7898-R

c: Уважаемый покупатель Благодарим Вас за то, что Вы приобр…
Страница 2
- Изображение
- Текст
■
‘S
О)
s
3“
m
h-
S.
c;
c
O
O
s
&
c:
Уважаемый покупатель
Благодарим Вас за то, что Вы приобрели эту систему.
Чтобы получить оптимальное качество работы системы
и обеспечить безопасность, пожалуйста, внимательно прочитайте
эту инструкцию.
Система
SC-VK81D
Основной аппарат
SA-VK81D (1 блок)
Передние динамики
SB-VK81 (2 блока)
Центральный динамик
SB-PC81 (1 блок)
Динамики окружающего звучания
SB-PS81 (2 блока)
Сабвуфер
SB-WVK81 (1 блок)
Содержание
Перед эксплуатацией
Принадлежности…………………………………………………………………. 2
Информация о дисках……………………………………………………… 3
Простая установка
ПУНКТ1 Расположение…………………………………………………..4
ПУНКТ2 Подсоединения динамиков……………. …………….. 5
ПУНКТЗ Видео подсоединения…………………………………… 5
ПУНКТ4 Подсоединения радио и электропитания ….. 6
ПУНКТ5 Сведения о дистанционном управлении……. 6
пункте
QUICK SETUP (Быстрая установка)………………… 7
ПУНКТ? Установка времени…………………………………………. 7
Функция DEMO………………………………………………………………. 7
Справочное руководство по органам
управления………….8
Операции с дисками
Диски—Основное воспроизведение………………………………….10
Диски —Удобные функции……………………………………………….. 12
Запоминание позиции / Пропуск страницы / Режим CD /
Трансфокатор / Аудио / Субтитры / Быстрое повторное
воспроизведение…………………………………………………………. 12
Функции режима воспроизведения ; Программное
воспроизведение (до 24 пунктов) / Повторное
воспроизведение…………………………………………………………… i3
Диски —Использование меню навигации………………………….14
Воспроизведение дисков с данными / Использование
меню навигации / Использование экрана содержания
для поиска дорожки / Использование вспомогательного
меню …………………………………………………………………………….. 14
Воспроизведение дисков HighMAT / Воспроизведение
программ / Воспроизведение списка воспроизведения … 15
Диски—Использование экранных меню…………………………… 16
Основное меню / Other Settings ……………………………………….. 16
Диски —Изменение установок проигрывателя………………… 18
Изменение времени задержки (Speaker Setting)……………….. 19
Операции с радио
Радиоприемник……………………………………………………………………20
ручная настройка / Предварительная настройка / Выбор
каналов………………………………………………………………………….. 20
Операции с лентой
Кассетные ленты……………………………………………………………….. 21
Управление
звуковым
полем
и
качеством звука
Звуковое поле и качество звука……………………………………….. 22
Режимы Dolby Digita! и DTS / Dolby Pro Logic II /
Улучшенное окружающее звучание /
Центральный фокус………………………………………………………. 22
Регулировки уровня динамиков / Двойное
Обновление-
Наслаждение более естественным звучанием.
Управление звуковым полем / Использование ручного
эквалайзера (MANUAL EQ) / Использование супер
звукового эквалайзера / Уровень сабвуфера………………….. 23
RQT7898
Операции записи
Операции в этой инструкции описаны преимущественно
для управления с помощью пульта ДУ, но Вы можете
проводить операции на основном аппарате, если органы
управления являются такими же.
Операции с таймером
Использование таймеров…………………………………………………. 25
Таймер воспроизведения / записи / Таймер сна……………….. 25
Прослушивание караоке…………………………………………………… 26
Использование функции караоке / Изменение тональности ;
Добавление эффекта эха / Чтобы записать Ваше
выступление в режиме караоке / Чтобы записать
Ваш голос…………………………………………………………………….. 27
Удобные функции………………………………………………………………28
Изменение дисплея основного аппарата / Уменьшение
яркости дисплея
1
Приглушение звука / Автоматическое
отключение питания / Использование головных
телефонов / Управление телевизором…………………………… 25
Изменение дисплея звукового диапазона………………………….29
Использование другого оборудования……………………………. 30
Использование внешнего аппарата / Подсоединение
дополнительных антенн………………………………………………… 30
Словарь терминов……………………………………………………………. 31
Процедура обращения с лотком/диском…………………………..31
Руководство по поиску и устранению
неисправностей…………………………………………………………….. 32
Меры предосторожности………………………………………………….. 34
Уход…………………………………………………………………………………. 34
Технические характеристики……………………………………………..35
Другие функции
Принадлежности
: ‘ожалуиста. проверьте и идентифицируйте
наличие поставляемых принадлежностей.
1 Шнур электропитания
переменного тока
1 Рамочная
АМ-антенна
1 Внутренняя FM-
антенна
1 Пульт ДУ
(N2QAJB000110)
2 Батарейки
Прилагаемый шнур сетевого питания предназначен для
использования только с этим аппаратом. Не используйте его
с другим оборудованием.
Запись………………………………………………………………………………… 24

Информация о дисках, Диски, которые не могут воспроизводиться, Во время воспроизведения dvd и vídeo cd
Мл1 1»ул1г1, Меры предосторожности при обращении с дисками, Видео системы, 0jd§e [sd§e
- Изображение
- Текст
Информация о дисках
Диски, которые могут воспроизводиться
Диски
Логотип
Обозначение,
используемое
в инструкции
Замечания
DVD-RAM
R A M
R A M 4 . 7
Записанный, используя
версию 1.1 формата
видеозаписи
(унифицированный стандарт
видеозаписи).
•Записанный на DVD видеомагнитофонах,
DVD видеокамерах, персональных
компьютерах и т.д.
• Вытащите диски из их картриджей перед
использованием.
IJPEGI
Записанный, используя
стандарт DCF (Design rule for
Camera File system).
•Записанный на DVD видеомагнитофонах
Panasonic.
•Чтобы воспроизводить файлы JPEG,
выберите “Piay as Data Disc” в меню Other
Menu («► стр. 17).
DVD-Audio
A U D I O
riTiiro
—
rimra
Некоторые диски DVD-Audio включают содержание DVD-Video.
Чтобы воспроизводить содержание DVD-Video, выберите “Piay as DVD-Video»
в меню Other Menu (^ стр. 17).
DVD-Video
V I D E O
fiOTiM
—
DVD-R
R
R4.7
Диски Panasonic DVD-R, записанные и завершенные на DVD
видеомагнитофонах Panasonic или DVD видеокамерах, воспроизводятся на
этом аппарате как DVD-Video.
Video CD
a
[
díg
COMPACT
ogg
TAL
video
!
—
SVCD
Í
|su
COMPACT
DS®
=ER VIDEO)
Удовлетворяющий стандарту IEC62107
CD
_n
COMPACT
_n
COMPACT
0JD§E [SD§E
DIGITAL AUDIO DIGITAL AUDIO
1 ■■’TEXT ‘1
(CD]
Этот аппарат совместим с HDCD, но не поддерживает функцию Peak Extend.
(Функция, которая расширяет динамический диапазон сигналов с высоким
уровнем)
HDCD-кодированные диски CD звучат лучше, так как они закодированы с 20
битами, по сравнению с 16 битами для всех других дисков CD,
• Во время воспроизведения диска HDCD, на дисплее аппарата появляется
индикация “HDCD»
CD-R
CD-RW
—
|WMA|
ÍMP31
[JPEG]
Ш
|!ЙЕ1
• Этот аппарат может воспроизводить CD-R/RW (записанный аудио диск),
записанный в форматах, указанных слева. Закройте сессию и завершите
диск после записи.
• Диски HighMAT
Только файлы WMA, MP3 или JPEG.
Чтобы воспроизводить без использования функции HighMAT, выберите
“Piay as Data Disc” в меню Other Menu (^ стр. 17).
>5
0)
S’
(Q
К
(О
с;
с
о
о
§
&
с
Процесс, который позволяет воспроизводить на совместимом оборудовании.
• В любом случае может быть невозможно воспроизводить перечисленные выше диски из-за типа диска или условий записи.
■ Диски, которые не могут воспроизводиться
DVD-ROM, CD-ROM, CDV, CD-G, DVD-bR, +RW, DVD-RW, SACD.
Divx Video Discs и Photo CD, DVD-RAM, которые не могут быть
извлечены из их картриджей, 2,6-Гбайт и 5,2-Гбайт DVD-RAM и
диски “Chaoji VCD”, имеющиеся в продаже, включая CVD, DVCD
и SVCD, которые не удовлетворяют стандарту IEC62107.
Во время воспроизведения DVD и Vídeo CD
Производитель этих дисков может контролировать, как они
воспроизводятся
так,
что
Вы
не
всегда
можете
контролировать воспроизведение, как описано в этой
инструкции
по
эксплуатации
(например,
если
время
воспроизведения не высвечивается, или если диск Video CD
имеет меню). Прочитайте внимательно инструкцию диска.
■ Чтобы почистить диски
НУЛД!! liyjia^J [CDi
Протрите с помощью влажной ткани, а затем вытрите насухо.
|;МЛ1 1»ул1г1
• Очистите с помощью дополнительного очистителя дисков
DVD-RAM/PD (ГР-К2000СА1, там где доступен).
• Никогда не используйте ткань или очистители для СП и т.д.
■ Меры предосторожности при обращении с дисками
• Не наклеивайте на диски этикетки или наклейки (Это может
вызвать деформацию диска, что приведет к невозможности
его использования).
• Не пишите на стороне этикетки шариковой ручкой или
другими пишущими принадлежностями.
• Не пользуйтесь аэрозолями для очистки пластинок, бензином,
разбавителями, антистатическими жидкостями и прочими
растворителями.
• Не используйте предохраняющие от царапин протекторы или
футляры.
• Не используйте следующие диски:
— Диски с выступающим клейким слоем от удаленных
наклеек или этикеток (диски, взятые напрокат, и т.п.).
— Диски, которые сильно деформированы или треснуты.
— Диски необычной формы, например, в форме сердца.
■ Видео системы
-Этот аппарат может воспроизводить форматы PAL и NTSC,
но Ваш телевизор должен соответствовать системе,
используемой на диске.
-Диски PAL не могут правильно просматриваться на
телевизоре NTSC.
-Этот аппарат может преобразовывать NTSC сигналы в PAL
60 для просмотра на телевизоре PAL (-► стр. 18, раздел
«Video” —NTSC Disc Output).
RQT7898

Передние динамики, Центральный динамик, Динамики окружающего звучания
- Изображение
- Текст
Простая установка
п у н к т
!
Расположение
Оптимальное размещение
Дистанция: A=B=C=D=E
I
Центральный
динамик
Передний
динамик
(левый) /■’
I
■ D
Телевизор
(не прилагаются)
Передний
динамик
(правый)
—— Динамик Динамик
окружающего окружающего.
звучания звучания
‘ — (левый) (правый)-»”
I
SB-PS81
Передние динамики
Динамики сконструированы идентично, так что нет
необходимости в ориентации левого или правого каналов.
Центральный динамик
• Вы можете также поместить этот динамик непосредственно
под телевизор.
• Вибрация, вызванная центральным динамиком, может
привести к ухудшению изображения, если он расположен
непосредственно на телевизоре. Поместите центральный
динамик на стойку или полку.
Динамики окружающего звучания
Маленькие динамики с длинными шнурами являются
динамиками окружающего звучания. Разместите с обеих
сторон от позиции прослушивания или немного сзади,
примерно 1 на метр выше, чем уровень ушей, с логотипом
Panasonic, обращенным в направлении позиции
прослушивания.
Эффект отличается в зависимости от типа музыки и
музыкального источника.
Сабвуфер
Разместите справа от телевизора на полу или на устойчивой
полке так, чтобы не возникало вибрации.
Оставьте 10 см сзади для вентиляции.
Используйте только прилагаемые динамики
Использование других динамиков может повредить аппарат
и отрицательно сказаться на качестве звучания.
Установите динамики на ровную поверхность, чтобы не
допустить их падения. Если не удается установить их на
ровную поверхность, то следует принять соответствующие
меры предосторожности, чтобы не допустить их падения.
Примечание
Углы на схеме даны приблизительно.
Держите Ваши динамики на расстоянии по крайней мере
10 мм от системы для надлежащей вентиляции.
Вы не можете снять переднюю сетку с динамика.
Крепление к стене
Динамики окружающего звучания и центральный динамик
могут быть прикреплены к стенам.
Установите динамик на винты (не прилагаются) и
задвиньте сквозь скобу, чтобы зафиксировать на месте.
Динамик
Центральный динамик
Ш
RQT7898
Примечание
Стена или колонна, к которым крепятся динамики,
должна выдерживать вес, равный 10 кг на винт.
Расположение для наилучшего эффекта
То, как Вы установите динамики, может влиять на басы и
на звуковое поле. Обратите внимание на следующие
моменты.
• Размещайте динамики на плоских устойчивых
основаниях.
• Размещение динамиков слишком близко к полу, стенам
и углам может привести к излишним басам. Закройте
стены и окна толстыми занавесками.
Замечания по использованию динамиков
• Вы можете повредить Ваши динамики и сократить срок их
службы, если Вы воспроизводите звук с вьюоким уровнем
громкости в течение длительного периода времени.
• Чтобы предотвратить повреждения, уменьшите громкость
в следующих случаях.
— При воспроизведении искаженного звука.
— Когда динамики испускают необычный шум
(завывание) из микрофона или проигрывателя
грампластинок, помехи от РМ радиовещания или
продолжительного сигнала с осциллятора, тестового
диска или электронного инструмента.
— При регулировке качества звука.
— При включении или выключении аппарата.
Если на Вашем телевизоре нарушилась
цветопередача
Данные динамики сконструированы специально для
работы вблизи от телевизора, но отдельные модели
телевизоров и способы установки динамиков могут
привести к искажению изображения.
Если это произошло, отключите телевизор
приблизительно на 30 минут.
Функция размагничивания телевизора должна устранить
проблему. Если проблема не устраняется, отодвиньте
динамики подальше от телевизора.
Предостережение
* Используйте эти динамики только с рекомендуемой
системой. Несоблюдение этого требования может
вызвать повреждение усилителя и/или динамиков
и может привести к пожару. Если произошло
повреждение,
или
Вы
заметили
внезапное
изменение характера работы, проконсультируйтесь
с квалифицированным сервисным специалистом.
* Не пытайтесь прикрепить динамики к стенам
какимлибо иным способом, кроме описанного в
данной инструкции.

Пункт, Примечание, Подсоединение к телевизору с разъемом video in
Подсоединение к телевизору с разъемом s video in, Чтобы наслаждаться построчным видео, Пункиз, Подсоединения динамиков, Видео подсоединения
- Изображение
- Текст
ПУНКТ
2
Подсоединения динамиков
Скрутите и снимите виниловые концы шнуров динамиков.
Серый {+
— Голубой (-)
— Серый (+)
■ Голубой (-)
Красный (+)
«Черный (-)
Красный (+)
‘ Черный (-)
Динамик
окружающего
звучания (правый)
Центральный
динамик
Передний динамик
(правый)
Сабвуфер
то
SUB-
SB.WVK81
WOOFER
(6
12
)
Примечание
Подсоедините левую (L) сторону таким же образом.
I
S
Q
О
£
fS
2
о
О
3
пункиз
Видео подсоединения
Подсоединение к телевизору с разъемом VIDEO IN
Видео кабель
Разъем VIDEO OUT
Не подсоединяйте аппарат через видео кассетный
магнитофон, так как изображение может воспроизводиться
неправильно из-за функции защиты от копирования.
■ Подсоединение к телевизору с разъемом S VIDEO IN
S VIDEO
IN
Разъем S VIDEO OUT
3a счет разделения сигналов цветности (С) и яркости (Y) при
использовании разъема S VIDEO достигается более яркое
изображение, чем при использовании разъема VIDEO OUT.
(Действительный результат зависит от телевизора.)
Подсоединение к телевизору с разъемами
COMPONENT VIDEO IN
COMPONENT
VIDEO IN
Задняя панель
этого аппарата
Разъемы COMPONENT VIDEO OUT
Эти разъемы могут использоваться как для
чересстрочного, так и для построчного вывода, и они
обеспечивают более четкое изображение, чем разъем
S VIDEO OUT. Соединение, используя эти разъемы,
выводит раздельно сигналы цветности
(P
b
/P
r
)
и
сигнал
яркости (Y) для достижения высокой точности при
воспроизведении цветов. Описание разъемов
компонентного видео входа зависит от телевизора или
монитора (например,
Y/P
b
/P
r
, Y/B-Y/R-Y, Y/C
b
/C
r
).
Подоедините к разъемам соответствующих цветов.
Чтобы наслаждаться построчным видео
1. Соедините с разъемами компонентного видеовхода
на телевизоре, совместимом с форматом 480Р.
(Видео не будет правильно показываться, если
соединение выполнено с несовместимым
телевизором.)
2. В меню QUICK SETUP, установите пункт
“Progressive Out” в положение “Enable”.
3. Измените пункт “Progressive” на “480Р” стр. 17,
Picture Menu—Video Output Mode).
• Все телевизоры, произведенные компанией
Panasonic, которые имеют входные разъемы 480Р,
являются совместимыми. Проконсультируйтесь с
производителем, если Вы имеете телевизор
другой марки.
• Вне зависимости от установок выходной сигнал
будет чересстрочным, если аппарат подсоединен к
телевизору через разъемы VIDEO OUT или
S VIDEO OUT.
RQT7898

Пункт, Рамочная ам-антенна, Внутренняя рм-антенна
Экономия электроэнергии, Использование, Подсоединения радио и электропитания, Сведения о дистанционном управлении
- Изображение
- Текст
ПУНКТ
4
Подсоединения радио и электропитания
Подсоедините сетевой шнур после того, как будут завершены все остальные соединения.
Рамочная АМ-антенна
Внутренняя РМ-антенна
Шнур электропитания
переменного тока
П
0
X
2
(е
2
1
Рамочная АМ-антенна
Установите антенну на ее
основание.
Провод антенны не должен
касаться других проводов и
шнуров.
Внутренняя РМ-антенна
Зафиксируйте другой конец
антенны в месте наилучшего
приема. I
——Клейкая лента
Экономия электроэнергии
Аппарат потребляет электроэнергию (приблиз. 1 Вт), даже
когда он выключен с помощью переключателя [О]
(основной аппарат: [с1)/1]). Для экономии электроэнергии
отсоедините аппарат от бытовой сетевой розетки, когда он
не будет использоваться в течение долгого периода
времени. Вы будете должны настроить некоторые пункты
памяти после подсоединения аппарата.
к
ПУНКТ
5
Сведения о дистанционном управлении
Пульт ДУ
Батарейки
ЯОТ7898
Не;
• смешивайте старые и новые батарейки.
• используйте одновременно батарейки разных
типов.
• нагревайте и не допускайте контакта с пламенем.
• разбирайте и не замыкайте контакты.
• пытайтесь перезарядить щелочные или
марганцевые батарейки.
• используйте батарейки, если снята наружная
оболочка.
Неправильное обращение с батарейками может стать
причиной вытекания электролита, который при
попадании на предметы может повредить их и вызвать
пожар.
Удалите, если пульт ДУ не будет использоваться в
течение длительного периода времени. Храните в
прохладном темном месте.
■ Использование
Направьте на сенсор, избегая препятствий, с
максимального расстояния 7 метров прямо перед
аппаратом.

Пункт, Shift, Setup
Clock, Timer, Dvd/cd, Включите, Cd + cd, О + cd, Чтобы изменить эти установки позднее
- Изображение
- Текст
ПУНКТ
6
QUICK SETUP (Быстрая установка)
Экран QUICK SETUP помогает Вам выполнить необходимые установки.
Включите телевизор и выберите подходящий видео вход на телевизоре.
V
SKIP
л
44
SHIFT-
SETUP
CLOCIU
TllffiB
И!ГГДЧ
-CD
-SETUP
CLOCK/
TIMER
► ,DVD/CD
ENTER
RETURN
Cl)
О
Включите
аппарат.
Выберите
“DVD/CD”.
pj Выберите
DCE)ctli О
RETURN
Подтвердите
Следуйте сообщениям и
выполните установки.
MMlii ,
CD + CD
Показывает экран
QUICK SETUP.
Нажмите, чтобы
завершить
QUICK SETUP.
I
Q
О
г
Ì2
ос
S
о
о
!§■
штл ,
о + CD
Нажмите,
чтобы выйти.
Чтобы изменить эти установки позднее
В разделе «Others» выберите «QUICK SETUP» стр. 19).
ПУНКТ
7
Установка времени
Часы показывают время в 24-часовом формате.
1
CD
Выберите
«CLOCK”
у SKIP л
(пТГ) CwQ
Установите
время
(нажмите в течение
примерно 7 секунд).
CD
Нажмите, чтобы
завершить
установку
времени.
‘ Часы показываются в течение приблизительно 5
секунд, когда Вы опять выбираете «CLOCK».
‘ Регулярно переустанавливайте часы для точного
функционирования.
Функция DEMO
•DEM0-
Когда аппарат подсоединяется к электрической сети первый
раз. го на дисплее может показываться демонстрация его
функций.
Если функция демонстрации выключена, Вы можете показать
демонстрацию, выбрав функцию демонстрации.
Нажмите и удерживайте кнопку [-DEMO].
Дисплей изменяется каждый раз, когда удерживается кнопка.
N0 DEMO
(выкл.) ^
DEMO 0N
(вкл.)
Вы можете уменьшить потребление электроэнергии в режиме
ожидания, выключив режим демонстрации.
RQT7898

Справочное руководство по органам управления, Справочное руководство по органам, Управления
С; с
- Изображение
- Текст
Справочное руководство по органам управления
Основной аппарат
‘5
Ф
S
а-
Ф
к-
<XJ
bs
с;
с
о
о
5
6
с
у>-
&)■
С4>
f
Л
(2)———-=
@)
(Т) Лотки дисков
(2) Кнопка проверки диска [DISC CHECK]………………………… 11
(3) Датчик сигнала пульта ДУ
(4) Индикатор питания переменното тока [АС IN]
Этот индикатор горит, когда аппарат подсоединен к
штепсельной розетке.
Переключатель режима ожидания/включено [0/1]
Нажмите переключатель, чтобы переключить аппарат из
режима “включено” в режим ожидания, и наоборот. В режиме
ожидания аппарат тем не менее потребляет небольшое
количество электроэнергии.
5) Кнопка двойного обновления [MULTI RE-MASTER]………..23
(6) Кнопка улучшенного окружающего звучания
[SUPER SURROUND] …………………………………………………. 22
v
T) Кнопка выбора деки 1/2 [DECK 1/2] …………………………..21
С§) Кнопка записи [• REC] …………………………………………… 24
@ Регулятор уровня громкости микрофона
[MIC VOL MIN, МАХ]……………… ……………………………………… 26
Гнезда микрофонов [MIC 1, 2]………………………………… 26
@
Кассетодержатель деки 1……………………………………….. 21
@ Кнопка открытия/закрытия лотка диска
[OPEN/CLOSE ±]………………………………………………………… 10
@ Кнопка замены диска [DISC CHANGE ±]………………………….. 11
Дисплей
® Кнопки прямого воспроизведения DVD/CD [1-5]……………. 11
(I5j Кнопка супер звукового эквалайзера
[SUPER SOUND EQ]…………………………………………………… 23
(16) Кнопка звукового эквалайзера [SOUND EQ]………………. 23
(17) Кнопка сабвуфера [SUBWOOFER]……………………………… 23
5|)
Гнездо головных телефонов [PHONES] ……………….. 28
1?
Кассетодержатель деки 2…………………………………………. 21
Центральная консоль
@
‘g)
g
:26;
g
Кнопка воспроизведения DVD/CD [►, DVD/CD]…………….7
Кнопка воспроизведения/напраления ленты
[◄►,ТАРЕ]………………………………………………………………… 21
Кнопка выбора тюнера/диапазона [BAND, TUNER]…….. 20
Кнопка выбора внешнего источника [AUX]………………. 30
Кнопка остановки
р,
STOP]……………………………………….. 10
Кнопки пропуска/поиска диска/ замедленного
воспроизведения, ускоренной перемотки ленты в
прямом/обратном направлении, настройки/выбора
предустановленного канала, регулировки времени
[!◄◄, REW/V, Л/FF] ……………………………………………. 10, 20, 21
Кнопка открытия деки 1 [±, DECK1] ………………………. . 21
Кнопка режима дисплея, демонстрации
[DISP MODE, -DEMO] ……………… ……………………………. . 7, 29
Кнопка открытия деки 2 [±, DECK2] …………………… ……… 21
Регулятор громкости [VOLUME DOWN,
UP] …………… 10
RQT7898

Пульт ДУ
‘Ш-
ТУФ
————
(!) TV/V10E0 SETUP /DIMMER
SLEEP аОСК/ / mPUY/
-AUTOOFF TMER/ ^ REC
—
(32>
PLAY MODE
(34>
Ф-
-Q © © ©
© ©
■Зб>
39b
C4Ti-
PAGE
TV
CHV
<
V SKIP Л
I
SLQW/SEARCH
(1^
i33b
ODPUl S.W00F6R ИДЕШТЕЯ
Мд1 S.SRKO ШШР£0 50ШЕ0
‘MANUAL EQ
v54,-
ECHO b—————-#
OOP
ECHO
V.MUTE fSUBTITLE AUDIO
dJa_Q:
MIX 2CH
C.F
^55-
-o О
TEST CH SEL
Q O
-(§)
-©
<48)
-(50)
-’53)
big’
57)
b§)
-4Ф
‘Щ
Такие кнопки, как © работают точно так же, как кнопки на
основном аппарате.
(
35
) Кнопка таймера сна, автоматического выключения,
выбора режима видео входа ТВ/Видео
[SLEEP, -AUTO OFF, TV/VIDEO]………………………………..25, 28
@) Кнопка режима ожидания/включения, включения/
выключения ТВ [с!), TVO]……………………………. …………. 7, 28
@ Кнопка программирования [PROGRAM]…………………….13, 20
Кнопка выбора режима воспроизведения
[PLAY MODE]…………………………………………………….. 13, 20, 21
@ Кнопка приглушения звука [MUTING]…………………………….. 28
(Ц) Кнопка повтора [REPEAT]…………………………………………….. 13
(5§) Кнопка тюнера/внешнего источника [TUNER/AUX] .20, 30
57 Кнопка паузы, запоминания позиции
[II, Р. MEMORY]……………………………………………………….. 10, 12
IJ) Кнопка остановки, отмены [I, CANCEL]………………. 10, 13, 21
Кнопка верхнего меню, прямого навигатора, страницы
[ТОР MENU, DIRECT NAVIGATOR, PAGE]…….. …………11-15
®j Кнопка дисплея, дисплея FL
[DISPLAY, FL DISPLAY] …………………………………….. 11, 14, 16
@ Кнопки пропуска диска, быстрой перемотки ленты в
прямом/обратном направлении, выбора
предустановленного канала, регулировки времени
[l◄◄,►►l,vSKIPл]…………………………… …….. 7, 10, 20, 21, 25
® Кнопка сдвига [SHIFT]
Для использования функций, помеченных оранжевым:
Нажимая кнопку [SHIFT], нажмите соответствующую
кнопку.
Кнопка улучшенного окружающего звучания,
Dolby Pro Logic 11 [S.SRND, anPLIl]…………………………….. 22
® Кнопка часов/таймера, установки
[CLOCKmMER, SETUP]……………………………………….. 7, 18, 25
® Кнопка таймера воспроизведения/таймера записи,
уменьшения яркости дисплея
[0PLAY/REC, DIMMER]…………………… ………………………. 25, 28
® Кнопка выбора диска, режима CD [DISC, CD MODE],
Кнопка диска [1-5]……………………………………………………11,12
@ Кнопки с цифрами [0 — 9, ^10]…………………………………………. 11
48) Кнопка меню, списка воспроизведения, группы
[MENU, PLAYLIST, GROUP]…………………………………11, 14, 15
® Кнопки курсора [Ж,Т,^, ►],
Кнопка ввода [ENTER]……………… …………………. 7, 10, 11, 23
Эти кнопки имеют следующие функции.
[А,Т] : Кнопки уровня громкости ТВ
[TV VOL+, TV VOL-]……………………………………………………… 28
[◄, ►] ; Кнопки выбора каналов ТВ
[TV CHV. TV СНЛ] …………………………………………………………28
Кнопка возврата [RETURN]………………………………… 7, 11, 12
@ Кнопки замедленного воспроизведения/поиска,
настройки [◄◄, ►►, SLOW/SEARCH]………………… 10, 14, 20
Эти кнопки имеют следующие функции.
◄ ◄] : Кнопка быстрого повторного воспроизведения
[QUICK REPLAY]………………………………………………. 12
[►►] ; Кнопка трансфокатора [ZOOM]………………………….. 12
52) Кнопка звукового эквалайзера, ручного эквалайзера,
двойного обновления
[SOUND EQ, -MANUAL EQ, M.RE-MASTER]…………………..23
V® Кнопка супер звукового эквалайзера, сабвуфера
[S.SOUND EQ, S.WOOFER] ……………………………………….. 23
5$
Кнопка эхо [ECHO] ………………………………………………….. 27
Кнопки управления тональностью [Ь, #]…………………….27
Кнопка приглушения вокала [V.MUTE]………………………..26
55
Кнопка микширования на 2 канала [MIX 2СН] ………….. 22
56) Кнопка аудио [AUDIO]…………………………………………12, 26, 27
@ Кнопка субтитров [SUBTITLE] ……………………………………11, 12
58
) Кнопка центгэального фокуса [C.F] ………………………… 22
59
) Кнопка выбора канала [СН SEL] ……………………………….. 23
60) Кнопка тестового сигнала [TEST]……………………………… 23
■
0)
s
3
*
ь.
05
bs
с;
с
о
it:
о
5
6
с
ROT7898

Диски — основное воспроизведение, Disc, Subtitle
Cancel, Topmenu, Enter fl display, Кнопки с цифрами, Volume, Menu, Group
- Изображение
- Текст
Диски — Основное воспроизведение
О
S
4
о
$
5
ZX
CQ
а
Ф
с
о
DISC-
1 — 5
SUBTITLE-
■,CANCEL-
TOPMENU-
ENTER
FL DISPLAY-
VSKIPЛ-
SHIFT-
ПШ
р
I
■|ОтСК
1
>^
———— Г SUBtlTLEr——————————
© ® ©
0 0
ire:-, (——- 1 p-SS^
LilJ
DVD/CD
-О’
0
о-
-о
и
а
у SMP л >1 SLQW/SEARCH
Г^||Г^ гтг
1яят
-CZ)
■ Кнопки с
цифрами
“? +
— VOLUME
MENU
GROUP
RETURN
DISC CHECK-
■,STOP-
4M,
REW/V-
►►I, A ‘FF
SLOW/SEARCH
-0PEN/CL0SE±
-DISC CHANGED
DVD/CD
-DIRECT PLAY
1 — 5
DVD/CD
— VOLUME
DOWN, UP
OPEN CLOSE
i
Откройте лоток
дисков.
• Аппарат
автоматически
включится и лоток
откроется.
2
Расположите диск.
3
OPEN CLOSE
±
• Загрузите двухсторонние
i
t
диски так. чтобы этикетка
для стороны, которую Вы
собираетесь
воспроизводить, была
Закройте лоток
обращена вверх. (^ стр.
дисков.
31, Процедура обращения
с лотком/диском)
0
• Вытащите диски TYPE 2 и
4 из их картриджей перед
использованием.
Внимательно прочитайте
инструкцию диска.
Регулировка
громкости
QG)
Остановка
Позиция остановки воспроизведения
запоминается, когда высвечивается
индикация “RESUME’!
• Нажмите кнопку [►. DVD/CD],
чтобы возобновить
воспроизведение.
глтач Чтобы выполнить
предварительный просмотр
предыдущих глав
стр. 12, Запоминание позиции).
• Нажмите кнопку [■], чтобы
очистить позицию.
Пропуск
г2^о
Начните
воспроизведение.
у SKIP л
(П^ CtiTi
0
о а
Q
■ 1УУМА1[МР^иРЕ01
[А, Т]: Пропуск группы во
время
воспроизведения.
[◄, ►]: Пропуск содержания
во время
воспроизведения.
RQT7898
Пауза
• Нажмите кнопку [►. DVD/CD].
~1
чтобы возобновить
воспроизведение.
Поиск
(во время
воспроизведения)
Замедленное
воспроизведение
(во время
паузы)
SLOW SEARCH
CED
* До 5 шагов.
► Нажмите кнопку
[►. ОУО/СО] чтобы
возобновить
воспроизведение.
•
Только часть с
движущимся
изображением.
» Замедленное
воспроизведение.только в
прямом направлении.

Комментарии
 Loading…
![]()
Operating Instructions
DVD Stereo System
Model No. SC-VK725D/SC-VK825D/
SC-VK925D
The above illustration of the unit is an example and shows SC-VK725D.
GC En Pe Ar
Region number
The player plays DVD-Video marked with labels containing the region number «2» or «ALL».
Example:
2 
 234
234
Before connecting, operating or adjusting this product, please read the instructions completely.
Please keep this manual for future reference.
RQT8251-G
L0605NC0
ENGLISH
Dear customer
Thank you for purchasing this product.
For optimum performance and safety, please read these instructions carefully.
VK725D : indicates features applicable to SC-VK725D only.
VK825D : SC-VK825D only.
VK925D : SC-VK925D only.
¡Unless otherwise indicated, illustrations in these operating instructions are of SC-VK725D.
¡Operations in these instructions are described mainly with the remote control, but you can do the operations on the main unit if the controls are the same.
|
System |
SC-VK725D |
SC-VK825D |
SC-VK925D |
|
Main unit |
SA-VK725D (1 unit) |
SA-VK825D (1 unit) |
SA-VK925D (1 unit) |
|
Front speakers |
SB-VK72 (2 units) |
SB-VK82 (2 units) |
SB-VK92 (2 units) |
|
Center speaker |
SB-PC72 (1 unit) |
SB-PC82 (1 unit) |
SB-PC92 (1 unit) |
|
Surround speakers |
SB-PS72 (2 units) |
SB-PS82 (2 units) |
SB-PS92 (2 units) |
|
Subwoofer(s) |
—- |
SB-WVK82 (1 unit) |
SB-WVK92 (2 units) |
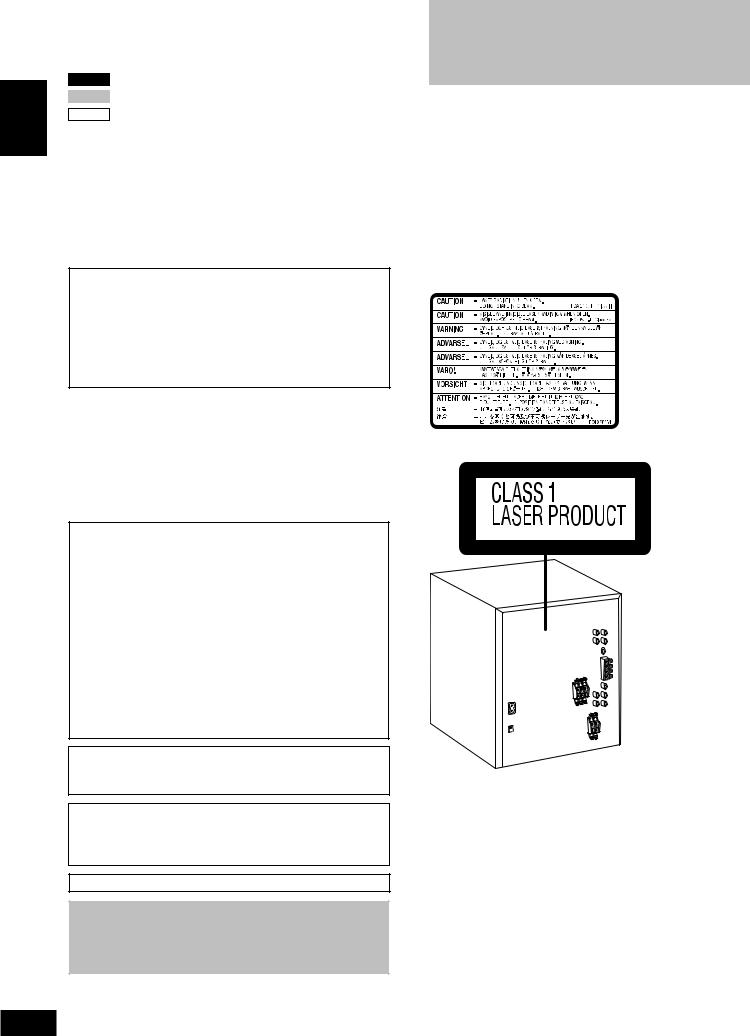
CAUTION!
THIS PRODUCT UTILIZES A LASER.
USE OF CONTROLS OR ADJUSTMENTS OR PERFORMANCE
OF PROCEDURES OTHER THAN THOSE SPECIFIED HEREIN
MAY RESULT IN HAZARDOUS RADIATION EXPOSURE.
DO NOT OPEN COVERS AND DO NOT REPAIR YOURSELF.
REFER SERVICING TO QUALIFIED PERSONNEL.
|
WARNING: |
(Inside of product) |
|||
|
TO REDUCE THE RISK OF FIRE, ELECTRIC SHOCK |
||||
|
OR PRODUCT DAMAGE, DO NOT EXPOSE THIS |
||||
|
APPARATUS TO RAIN, MOISTURE, DRIPPING OR |
||||
|
SPLASHING AND THAT NO OBJECTS FILLED WITH |
||||
|
LIQUIDS, SUCH AS VASES, SHALL BE PLACED ON |
||||
|
THE APPARATUS. |
||||
CAUTION!
•DO NOT INSTALL OR PLACE THIS UNIT IN A BOOKCASE, BUILT-IN CABINET OR IN ANOTHER CONFINED SPACE.
ENSURE THE UNIT IS WELL VENTILATED. TO PREVENT RISK OF ELECTRIC SHOCK OR FIRE HAZARD DUE TO OVERHEATING, ENSURE THAT CURTAINS AND ANY OTHER MATERIALS DO NOT OBSTRUCT THE VENTILATION VENTS.
• DO NOT OBSTRUCT THE UNIT’S VENTILATION OPENINGS WITH NEWSPAPERS, TABLECLOTHS, CURTAINS, AND SIMILAR ITEMS.
• DO NOT PLACE SOURCES OF NAKED FLAMES, SUCH AS LIGHTED CANDLES, ON THE UNIT.
• DISPOSE OF BATTERIES IN AN ENVIRONMENTALLY FRIENDLY MANNER.
The socket outlet shall be installed near the equipment and easily accessible or the mains plug or an appliance coupler shall remain readily operable.
This product may receive radio interference caused by mobile telephones during use. If such interference is apparent, please increase separation between the product and the mobile telephone.
THIS UNIT IS INTENDED FOR USE IN TROPICAL CLIMATES.
CAUTION:
The AC voltage is different according to the area.
Be sure to set the proper voltage in your area before use. (For details, please refer to page 8.)
RQT8251
2
2

Safety precautions
Placement
Set the unit up on an even surface away from direct sunlight, high temperatures, high humidity, and excessive vibration. These conditions can damage the cabinet and other components, thereby shortening the unit’s service life.
Do not place heavy items on the unit.
Voltage
Do not use high voltage power sources. This can overload the unit and cause a fire.
Do not use a DC power source. Check the source carefully when setting the unit up on a ship or other place where DC is used.
Power cord protection
Ensure the AC power cord is connected correctly and not damaged. Poor connection and lead damage can cause fire or electric shock. Do not pull, bend, or place heavy items on the lead.
Grasp the plug firmly when unplugging the lead. Pulling the AC power cord can cause electric shock.
Do not handle the plug with wet hands. This can cause electric shock.
Foreign matter
Do not let metal objects fall inside the unit. This can cause electric shock or malfunction.
Do not let liquids get into the unit. This can cause electric shock or malfunction. If this occurs, immediately disconnect the unit from the power supply and contact your dealer.
Do not spray insecticides onto or into the unit. They contain flammable gases which can ignite if sprayed into the unit.
Service
Do not attempt to repair this unit by yourself. If sound is interrupted, indicators fail to light, smoke appears, or any other problem that is not covered in these instructions occurs, disconnect the AC power cord and contact your dealer or an authorized service center. Electric shock or damage to the unit can occur if the unit is repaired, disassembled or reconstructed by unqualified persons.
Extend operating life by disconnecting the unit from the power source if it is not to be used for a long time.
Accessories
Please check and identify the supplied accessories.
|
1 AC power supply cord |
3 |
Speaker cords |
|
|
VK725D |
|||
|
1 x short cord |
|||
|
2 x long cords |
|||
|
1 Remote control |
|||
|
VK725D |
1 |
Video cable |
|
|
(N2QAJB000143) |
|||
|
VK825D |
|||
|
(N2QAJB000142) |
|||
|
VK925D |
1 |
AM loop antenna |
|
|
(N2QAJB000141) |
|||
2 Batteries for remote control
1 FM indoor antenna
Note
The included AC power supply cord is for use with this unit only. Do not use it with other equipment.
Table of contents
Getting started
|
Safety precautions ……………………………………………………………… |
3 |
|
Accessories ……………………………………………………………………….. |
3 |
|
Disc information …………………………………………………………………. |
4 |
Simple setup
|
STEP1 |
………………………………………………………Positioning |
5 |
ENGLISH |
|
STEP2 |
Speaker connections ………………………………………. |
6 |
|
|
STEP3 |
Video connections ………………………………………….. |
7 |
|
|
STEP4 Radio and power supply connections ……………… |
8 |
||
|
STEP5 |
The remote control ………………………………………….. |
8 |
|
|
STEP6 |
QUICK SETUP …………………………………………………. |
9 |
|
|
STEP7 |
……………………………………………….Setting the time |
9 |
|
DEMO function ……………………………………………………………. |
9 |
|
Control reference guide ……………………………………………………. |
10 |
Disc operations
|
Discs — Basic play …………………………………………………………… |
12 |
|||
|
Discs — Convenient functions ………………………………………….. |
14 |
|||
|
Disc information / Displaying current playback condition |
contents |
|||
|
(QUICK OSD) / Reviewing titles to play |
||||
|
(ADVANCED DISC REVIEW) / CD sequential play (CD MODE) / |
||||
|
Quick replay / Skipping 30 seconds forward / |
||||
|
Changing the zoom ratio / Changing the play speed / |
of |
|||
|
Angle selection and Still picture rotation/advance / Changing |
||||
|
precautions/Accessories/Table |
||||
|
soundtracks / Changing subtitles / Repeat play |
||||
|
Discs — Using navigation menus ……………………………………… |
16 |
|||
|
Playing data discs / Playing from the selected track in the CD / |
||||
|
Playing HighMATTM discs / Playing RAM/DVD-RW (DVD-VR) |
||||
|
discs |
||||
|
Discs — Program/Random play ………………………………………… |
18 |
|||
|
Program play (up to 32 items) / Random play / |
||||
|
ALL-DISC random play |
||||
|
Discs — Using on-screen menus ………………………………… |
19–20 |
|||
|
Main Menu / Other Settings |
||||
|
Discs — Changing the player settings ………………………………. |
20 |
|||
|
Changing the delay time (Speaker Settings) |
||||
|
Radio operations |
||||
|
The radio ………………………………………………………………………….. |
22 |
Safety |
||
|
Manual tuning / Preset tuning / Selecting channels |
||||
|
Tape operations |
||||
|
Cassette tapes ………………………………………………………………….. |
23 |
|||
|
Playback / Recording |
||||
|
Karaoke operations |
||||
|
Enjoying karaoke ……………………………………………………………… 24 |
||||
|
Enjoying karaoke function / Changing the key / Adjusting the |
||||
|
echo effect / To record your karaoke performance / |
||||
|
To record your voice |
||||
|
Other operations |
||||
|
Sound field and sound quality …………………………………………… |
26 |
|||
|
Down-mixing / Dolby Pro Logic II / Center Focus / Super |
||||
|
Surround / Sound field control / Using the Manual Equalizer |
||||
|
(MANUAL EQ) / Using the Super Sound Equalizer / Super |
||||
|
Woofer / Subwoofer level / Multi Re-master—Enjoying more |
||||
|
natural sound / Speaker level adjustments |
||||
|
Using the timers ……………………………………………………………….. |
28 |
|||
|
The play/record timer / The sleep timer |
||||
|
Other functions ………………………………………………………………… |
29 |
|||
|
Muting the volume / Auto-off function / Dimming the display / |
||||
|
Changing the sound range display |
||||
|
Using other equipment …………………………………………………. |
29-30 |
|||
|
Using headphones / Operating a television / Using a subwoofer / |
||||
|
Using an external unit / Optional antenna connections |
||||
|
Reference |
||||
|
About DivX VOD content …………………………………………………… |
31 |
|||
|
Glossary …………………………………………………………………………… |
31 |
|||
|
Troubleshooting guide …………………………………………………. |
32-34 |
|||
|
Language code list …………………………………………………………… |
34 |
|||
|
Tray/disc handling procedure ……………………………………………. |
35 |
|||
|
Maintenance …………………………………………………………………….. |
35 |
RQT8251 |
||
|
Specifications …………………………………………………………………… |
36 |
|||
|
3 |
||||
3

ENGLISH
Disc information
RQT8251
4
4
Disc information
Discs that can be played
|
Indication |
||||||||||||||||||||||
|
Disc |
Logo |
in these |
Remarks |
|||||||||||||||||||
|
operating |
||||||||||||||||||||||
|
instructions |
||||||||||||||||||||||
|
Recorded with devices using Version 1.1 of the Video Recording Format (a unified |
||||||||||||||||||||||
|
video recording standard) such as DVD video recorders, DVD video cameras, |
||||||||||||||||||||||
|
RAM |
||||||||||||||||||||||
|
personal computers, etc. |
||||||||||||||||||||||
|
Recorded with Panasonic SD multi cameras or DVD video |
• To play JPEG, |
|||||||||||||||||||||
|
JPEG |
recorders using the DCF (Design rule for Camera File system) |
|||||||||||||||||||||
|
MEPG4 or DivX |
||||||||||||||||||||||
|
Standard Version 1.0. |
||||||||||||||||||||||
|
DVD-RAM |
video contents, |
|||||||||||||||||||||
|
Recorded with Panasonic SD multi cameras or DVD video |
||||||||||||||||||||||
|
select “Play as Data |
||||||||||||||||||||||
|
recorders [conforming to SD VIDEO specifications (ASF |
||||||||||||||||||||||
|
Disc” in Other Menu |
||||||||||||||||||||||
|
MPEG4 |
standard)/MPEG4 (Simple Profile) video system/G.726 audio |
|||||||||||||||||||||
|
system]. |
(A page 20). |
|||||||||||||||||||||
|
1 |
— |
|||||||||||||||||||||
|
DivX |
||||||||||||||||||||||
|
— |
||||||||||||||||||||||
|
DVD-A |
||||||||||||||||||||||
|
DVD-Audio |
||||||||||||||||||||||
|
Some DVD-Audio discs contain DVD-Video content. |
||||||||||||||||||||||
|
DVD-V |
||||||||||||||||||||||
|
To play DVD-Video content, select “Play as DVD-Video” in Other Menu (A page 20). |
||||||||||||||||||||||
|
DVD-Video |
— |
|||||||||||||||||||||
|
DVD-R |
Discs recorded and finalized2 on Panasonic DVD video recorders or DVD video |
|||||||||||||||||||||
|
(DVD-Video)/ |
cameras. |
|||||||||||||||||||||
|
DVD-V |
||||||||||||||||||||||
|
DVD-RW |
||||||||||||||||||||||
|
(DVD-Video) |
||||||||||||||||||||||
|
+R (Video)/ |
— |
Discs recorded and finalized2 on DVD video recorders or DVD video cameras. |
||||||||||||||||||||
|
+RW (Video) |
||||||||||||||||||||||
|
DVD-R |
Finalize2 the disc after recording. |
|||||||||||||||||||||
|
(DivX Video)/ |
1 |
|||||||||||||||||||||
|
DVD-RW |
DivX |
|||||||||||||||||||||
|
(DivX Video) |
||||||||||||||||||||||
|
DVD-RW |
Discs recorded and finalized2 on DVD video recorders or DVD video cameras using |
|||||||||||||||||||||
|
DVD-RW VR |
||||||||||||||||||||||
|
(DVD-VR) |
Version 1.1 of the Video Recording Format (a unified video recording standard). |
|||||||||||||||||||||
|
Video CD |
— |
|||||||||||||||||||||
|
SVCD |
VCD |
Conforming to IEC62107. |
||||||||||||||||||||
|
This unit is compatible with HDCD, but does not support the Peak Extend function (a |
||||||||||||||||||||||
|
CD |
function which expands the dynamic range of high level signals). |
|||||||||||||||||||||
|
CD |
HDCD-encoded CDs sound better because they are encoded with 20 bits, as compared |
|||||||||||||||||||||
|
with 16 bits for all other CDs. |
||||||||||||||||||||||
|
• |
This unit can play CD-R/RW (audio recording disc) recorded with the formats on |
|||||||||||||||||||||
|
WMA |
||||||||||||||||||||||
|
the left. Close the sessions or finalize2 the disc after recording. |
||||||||||||||||||||||
|
MP3 |
||||||||||||||||||||||
|
• |
HighMAT discs |
|||||||||||||||||||||
|
CD-R |
JPEG |
|||||||||||||||||||||
|
WMA, MP3 or JPEG files only. |
||||||||||||||||||||||
|
— |
||||||||||||||||||||||
|
CD-RW |
CD |
To play without using the HighMAT function, select “Play as Data Disc” in Other |
||||||||||||||||||||
|
MPEG4 |
Menu (A page 20). |
|||||||||||||||||||||
|
1 |
||||||||||||||||||||||
|
DivX |
• |
This unit does not support Multiple Bit Rate (MBR: a file that contains the |
||||||||||||||||||||
|
WMA |
||||||||||||||||||||||
|
same content encoded at several different bit rates). |
||||||||||||||||||||||
|
VCD |
||||||||||||||||||||||
1 Created using DivX ver.3.11, 4.x, 5.x [DivX video system/MP3, Dolby Digital or MPEG audio system]. 2 A process that allows play on compatible equipment.
•It may not be possible to play the above discs in all cases due to the type of disc or condition of the recording, the recording method and how the files were created (A page 17, Tips for making data discs).
7 Discs that cannot be played
Version 1.0 of DVD-RW, DVD-ROM, CD-ROM, CDV, CD-G, SACD and Photo CD, DVD-RAM that cannot be removed from their cartridge,
2.6-GB and 5.2-GB DVD-RAM, and “Chaoji VCD” available on the market including CVD, DVCD and SVCD that do not conform to
IEC62107.
Playing DVDs and Video CDs
The producer of these discs can control how they are played so you may not always be able to control play as described in these operating instructions (for example if the play time is not displayed or if a Video
CD has menus). Read the disc’s instructions carefully.
7 Audio format of DVDs
This unit automatically recognizes and decodes discs with these symbols.
7 To clean discs
Wipe with a damp cloth and then wipe dry.
7 Disc handling precautions
•Do not attach labels or stickers to discs (This may cause disc warping, rendering it unusable).
•Do not write on the label side with a ball-point pen or other writing instrument.
•Do not use record cleaning sprays, benzine, thinner, static electricity prevention liquids or any other solvent.
•Do not use scratch-proof protectors or covers.
•Do not use the following discs:
–Discs with exposed adhesive from removed stickers or labels (rented discs, etc).
–Discs that are badly warped or cracked.
–Irregularly shaped discs, such as heart shapes.
7 Video systems
–This unit can play PAL and NTSC, but your television must match the system used on the disc.
–PAL discs cannot be correctly viewed on an NTSC television.
–This unit can convert NTSC signals to PAL 60 for viewing on a PAL television (A page 21, “Video” tab — NTSC Disc Output).
Simple setup
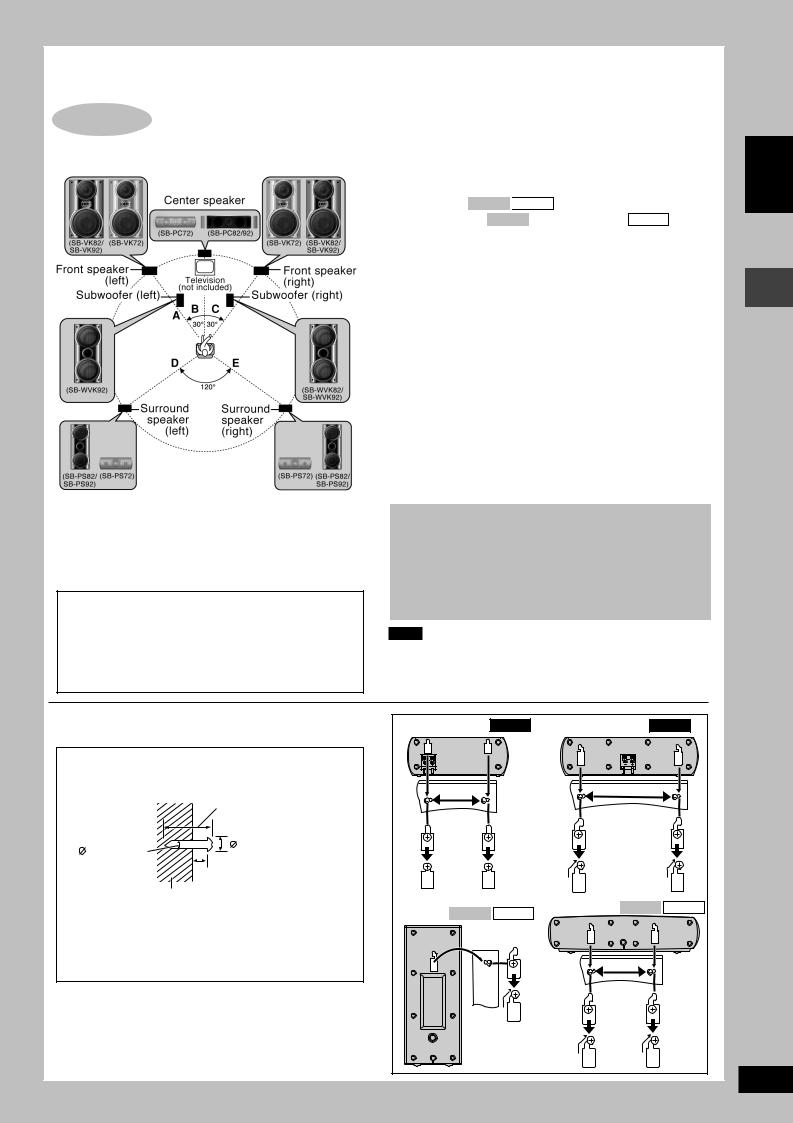
STEP1 Positioning
Optimum location
Distance: A=B=C=D=E
Positioning for best effect
How you set up your speakers can affect the bass and the sound field. Note the following points:
•Place speakers on flat secure bases.
•Placing speakers too close to floors, walls, and corners can result in excessive bass. Cover walls and windows with a thick curtain.
•The angles in the diagram are approximate.
Caution
•Use the speakers only with the recommended system. Failure to do so may lead to damage to the amplifier and/ or the speakers, and may result in the risk of fire. Consult a qualified service person if damage has occurred or if you experience a sudden change in performance.
•Do not attempt to attach these speakers to walls using methods other than those described in this manual.
Front speakers
Speakers are designed identically so that no left or right channel orientation is necessary.
Center speaker
•Vibration caused by the center speaker can disrupt the picture if it is placed directly on the television. Put the center speaker on a rack or shelf.
•To prevent the speakers from falling, do not place directly on top of the television.
Subwoofer(s) VK825D 
 VK925D
Place to the right ( VK825D ) or right and left ( VK925D ) of the
television, on the floor or a sturdy shelf so that it won’t cause vibration.
Leave 10 cm at the rear for ventilation.
Use only supplied speakers
•Using other speakers can damage the unit and sound quality will be negatively affected.
•Set the speakers up on an even surface to prevent them from falling. Take proper precautions to prevent the speakers from falling if you cannot set them up on an even surface.
Notes on speaker use
•You can damage your speakers and shorten their useful life if you play sound at high levels over extended periods.
•Reduce the volume in the following cases to avoid damage.
–When playing distorted sound.
–When the speakers are reverberating due to a record player, microphone(s), noise from FM broadcasts, continuous signals from an oscillator, test disc, or electronic instrument.
–When adjusting the sound quality.
–When turning the unit on or off.
If irregular coloring occurs on your television
The front and center speakers and subwoofer(s) are designed to be used close to a television, but the picture may be affected with some televisions and set-up combinations.
If this occurs, turn the television off for about 30 minutes.
The television’s demagnetizing function should correct the problem. If it persists, move the speakers further away from the television.
Note
•Keep your speakers at least 10 mm away from the system for proper ventilation.
•You cannot take the front net off the speakers.
7 Attaching to a wall
Surround and center speakers can be attached to a wall.
1 Drive a screw (not included) into the wall.
2Fit the speaker securely onto the screw(s) with the hole(s).
|
30 35 mm |
|
|
3.0 4.0 mm |
7.5 9.4 mm |
|
4.0 7.0 mm |
|
|
Wall or pillar |
•The wall or pillar on which the speakers are to be attached should be capable of supporting 10 kg per screw. Consult a qualified building contractor when attaching the speakers to a wall. Improper attachment may result in damage to the wall and speakers.
|
Surround speaker VK725D |
Center speaker VK725D |
||
|
90 mm |
180 mm |
||
|
Surround VK825D |
VK925D |
Center speaker VK825D |
VK925D |
|
speaker |
|||
|
169 mm |
ENGLISH
Positioning
RQT8251
5
5

ENGLISH
Speaker connections
RQT8251
6
STEP2 Speaker connections
Twist and pull off the vinyl tip of the speaker cords.
OR
If the speaker cords do not have vinyl tips, directly connect them to the terminals.
VK725D
3 Speaker cords
 1 x short cord: For center speaker
 2 x long cords: For surround speakers
Connecting center and surround speakers
Be sure to connect only positive (gray) wires to
|
positive (+) terminals and negative (blue) wires to |
Surround speaker (left) |
|||
|
negative ( |
) terminals. Incorrect connection can |
|||
|
damage the speakers. |
||||
|
Gray |
3 |
|||
|
+ : Gray |
||||
|
1 |
||||
|
: Blue |
||||
|
+ |
2 |
Gray (+) |
||
|
Blue ( ) |
||||
|
Blue |
Center speaker |
|||
|
R |
L |
Surround speaker (right) |
Connecting front speakers
Red
 3 1
3 1
|
+ |
2 |
||
|
Red (+) |
|||
|
Black |
Black ( ) |
Front speaker (left) |
|
|
R |
L |
Note
Connect the right (R) side in the same way.
VK825D
Connecting center and surround speakers
Gray
|
3 |
|||
|
1 |
|||
|
+ |
2 |
||
|
Gray (+) |
|||
|
Blue |
Blue ( ) |
Surround speaker (left) |
|
|
R |
L |
Center speaker |
|
|
Surround speaker (right) |
Connecting front speakers and subwoofer
Red
|
3 |
|||
|
1 |
|||
|
+ |
2 |
||
|
Red (+) |
|||
|
Black |
Black ( ) |
Front speaker (left) |
|
|
R |
L |
Subwoofer |
|
|
Front speaker (right) |
6

VK925D
Connecting center and surround speakers
Gray
|
3 |
|||
|
1 |
|||
|
+ |
2 |
||
|
Gray (+) |
|||
|
Blue |
Blue ( ) |
Surround speaker (left) |
|
|
R |
L |
Center speaker |
|
|
Surround speaker (right) |
Connecting front speakers and subwoofers
|
Gray |
Red |
Red |
||
|
3 |
||||
|
1 |
||||
|
+ |
2 |
|||
|
Red (+) |
||||
|
Black ( ) |
Subwoofer (left) |
|||
|
Blue Black |
Black |
Front speaker (left) |
||
|
Gray (+) |
||||
|
R |
L |
|||
|
Blue ( ) |
Front speaker (left) |
|||
Note
Connect the right (R) side in the same way.
STEP3 Video connections
•Do not connect the unit through a video cassette recorder
Due to copy guard protection, the picture may not be displayed correctly.
•Turn the television off before connecting, and refer to the television’s operating instructions.
7 Television with a VIDEO IN terminal
|
VIDEO COMPONENT |
VIDEO IN |
|||
|
OUT |
VIDEO OUT |
|||
|
Back of the |
PB |
|||
|
main unit |
Y |
PR |
Video cable |
Television |
|
S VIDEO |
(included) |
(not included) |
OUT
7 Television with an S VIDEO IN terminal
|
VIDEO COMPONENT |
Television |
|||
|
OUT |
VIDEO OUT |
|||
|
Back of the |
PB |
S-video cable |
(not included) |
|
|
main unit |
Y |
PR |
(not included) |
S-VIDEO |
|
IN |
||||
|
S VIDEO |
||||
|
OUT |
S VIDEO OUT terminal
The S VIDEO terminal achieves a more vivid picture than the VIDEO OUT terminal by separating the chrominance (C) and luminance (Y) signals. (Actual results depend on the television.)
Video cable
7 Television with COMPONENT VIDEO IN terminals
|
Video cables |
VIDEO IN |
||
|
(not included) |
|||
|
COMPONENT |
|||
|
VIDEO COMPONENT |
|||
|
OUT |
VIDEO OUT |
Y |
|
|
Back of the |
PB |
PB |
|
|
main unit |
Y |
PR |
|
|
PR |
|||
|
S VIDEO |
Television |
||
|
OUT |
(not included)
COMPONENT VIDEO OUT terminals
These terminals can be used for either interlace or progressive output and provide a purer picture than the S VIDEO OUT terminal. Connection using these terminals outputs the color difference signals (PB/PR) and luminance signal (Y) separately in order to achieve high fidelity in reproducing colors.
•The description of the component video input terminals depends on the television or monitor (e.g. Y/PB/PR,Y/B-Y/R-Y, Y/CB/CR). Connect to terminals of the same color.
To enjoy progressive video
Connect to the component video input terminals on a 625p or 525p compatible television. (Video will not be displayed correctly if connected to an incompatible television.)
ENGLISH
Speaker connections/Video connections
RQT8251
7
7

ENGLISH
Radio and power supply connections/The remote control
RQT8251
8
STEP4 Radio and power supply connections
AM loop antenna FM indoor antenna AC power supply cord
•Connect the AC power supply cord only after all other connections are complete.
•Optional antenna connections ( A page 30).
Preparation
Twist and pull off the vinyl tip of the antenna wires.
AM loop antenna
Stand the antenna up
Before connecting the AC power supply cord, set the voltage.
Voltage Selector
Use a flat-head screwdriver to set the voltage selector on the back of the main unit to the appropriate position for the area in which this system is used.
220-240V
 110-127V
VOLT ADJ
FM indoor antenna
Tape the antenna where reception is best.
Adhesive tape
tape
2
Conserving power
The unit consumes power ( VK725D : approx. 0.8 W or VK825D 
 VK925D : approx. 0.9 W) even when it is turned off with [f] (main unit: [f/I]). To save power when the unit is not to be used for a long time, unplug it from the household AC power socket. You will need to reset some memory items after plugging in the unit.
STEP5 The remote control
Remote control 


 Batteries
Insert so the poles (+ and –) match those in the remote control.
|
• Do not use |
|
|
R6/LR6, AA, UM-3 |
rechargeable |
|
type batteries. |
Do not:
•mix old and new batteries.
•use different types at the same time.
•heat or expose to flame.
•take apart or short circuit.
•attempt to recharge alkaline or manganese batteries.
•use batteries if the covering has been peeled off.
Mishandling of batteries can cause electrolyte leakage which can damage items the fluid contacts and may cause a fire.
Remove if the remote control is not going to be used for a long period of time. Store in a cool, dark place.
7 Use
Aim at the remote control signal sensor (A page 10), avoiding obstacles, at a maximum range of 7 m directly in front of the unit.
8
STEP6 QUICK SETUP
The QUICK SETUP screen assists you to make necessary settings.
Turn on the television and select the appropriate video input on the television.
1Press [:, DVD/CD] to select “DVD/CD” as the source.
The unit comes on.
Press [L] when a disc is in the tray.
2Press [SHIFT] + [SETUP] to show the QUICK SETUP screen.
3Follow the messages and press [8, 9, ;, :] to select, then press [ENTER] to make the settings.
Press [RETURN] to go back to the previous screen.
4Press [ENTER] and then [SHIFT] + [SETUP] to end the settings.
STEP7 Setting the time
This is a 24-hour clock.
1Press [CLOCK/TIMER] to select “CLOCK”.
Every time you press the button:
CLOCK 
 PLAY
PLAY 
 REC
REC
Previous display 
2(within 7 seconds or so)
Press [g, REW/4] or [f, 3/FF] to set the time.
3Press [CLOCK/TIMER] to finish setting the time.
The display will return to whatever was displayed before you set the time.
To display the time
Press [CLOCK/TIMER] once when the unit is on or at standby mode.
The time is shown for about 5 seconds.
Note
Reset the clock regularly to maintain accuracy.
When the unit is first plugged in, a demonstration of its functions may be shown on the display.
If the demo setting is off, you can show a demonstration by turning on the demo.
Press and hold [DISPLAY –DEMO].
The display changes each time the button is held down.
DEMO OFF (off) ↔ DEMO ON (on)
You can reduce the power consumed in standby mode by turning the demonstration off.
ENGLISH
QUICK SETUP/Setting the time/DEMO function
RQT8251
9
9

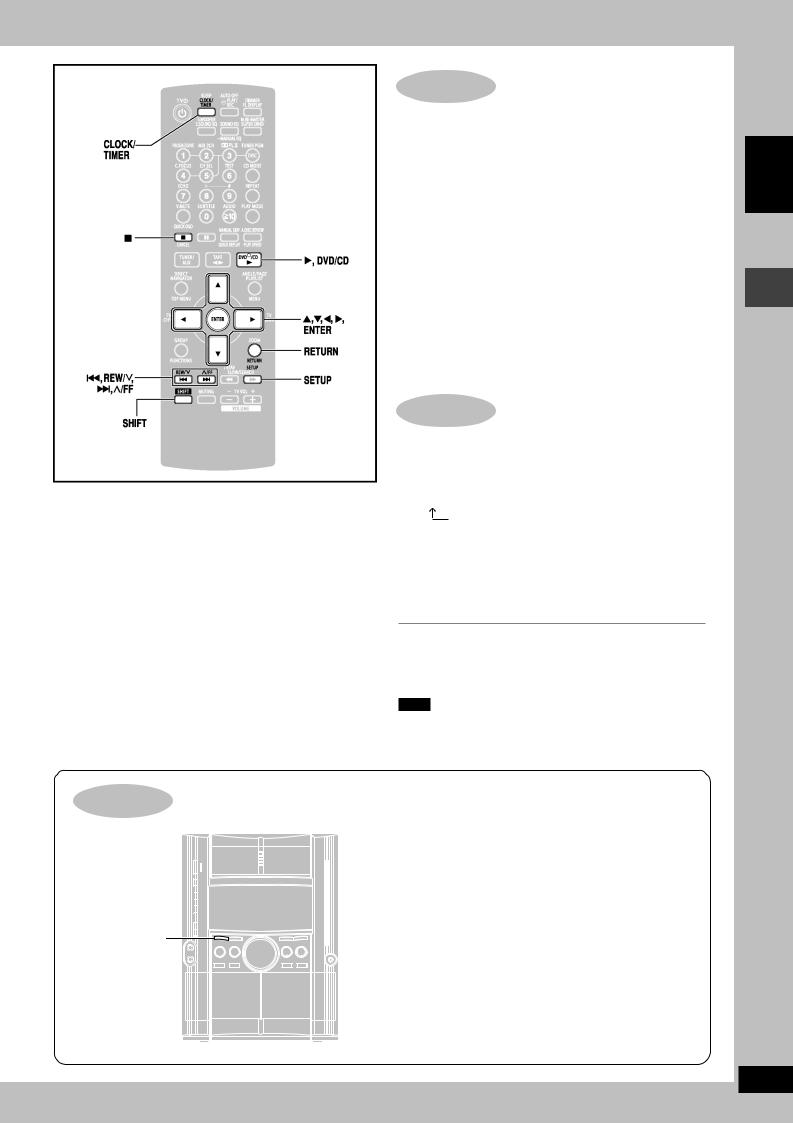
Control reference guide
Main unit
|
ENGLISH |
|
Controlreferenceguide |
1 Disc drawer
2AC supply indicator [AC IN]
This indicator lights when the unit is connected to the AC mains supply.
3Standby/on switch [f/I]
Press to switch the unit from on to standby mode or vice versa. In standby mode, the unit is still consuming a small amount of power.
|
4 |
Disc check button [DISC CHECK] ………………………………… |
12 |
|
|
5 |
Display |
||
|
6 |
Multi Re-master button [MULTI RE-MASTER] ……………….. |
27 |
|
|
7 |
Super surround button [SUPER SURROUND] ………………. |
26 |
|
|
8 |
Sound EQ button [SOUND EQ] …………………………………….. |
26 |
|
|
9 |
Microphone volume level buttons |
||
|
[MIC LEVEL DOWN, UP] ………………………………………………. |
24 |
||
|
Ä Microphone jacks [MIC 1, 2] ………………………………………… |
24 |
||
|
Å Deck 1 cassette holder ………………………………………………… |
23 |
||
|
Ç Disc tray open/close button [c, OPEN/CLOSE] …………….. |
12 |
||
|
É Disc change button [c, DISC CHANGE] ………………………. |
12 |
||
|
Ñ Remote control signal sensor |
|||
|
Ö DVD/CD direct play buttons [1–5] ………………………………… |
12 |
||
|
Ü Super sound EQ button [SUPER SOUND EQ] ………………. |
27 |
||
|
á VK725D Super woofer button [S.WOOFER] …………………. |
27 |
||
|
VK825D VK925D Subwoofer button [SUBWOOFER] ……. |
27 |
||
|
à Headphone jack [PHONES] ………………………………………….. |
29 |
||
|
â Deck 2 cassette holder ………………………………………………… |
23 |
||
|
Center console |
|||
|
ä Disc skip/search/slow-motion play, tape fast-forward/ |
|||
|
rewind, tune, time adjust buttons |
|||
|
[REW/4/g, f/3/FF] ………………………………….. |
12, 22, 23 |
||
|
ã Display mode, demonstration button |
|||
|
[DISPLAY –DEMO] ………………………………………………….. |
9, 29 |
||
|
å Tuner/band select button [TUNER/BAND] …………………….. |
22 |
||
|
ç AUX button [AUX] ………………………………………………………. |
30 |
||
|
é Deck 1/2 selection button [DECK 1/2] …………………………… |
23 |
||
|
è Deck 1 open button [c DECK 1] …………………………………. |
23 |
||
|
ê Volume control [VOL DOWN, VOL UP] ………………………… |
25 |
||
|
ë Stop button [L STOP] ………………………………………………….. |
12 |
||
|
í Tape play/direction button [; :, TAPE] ……………………….. |
23 |
||
|
ì DVD/CD play button [:, DVD/CD] ………………………………….. |
9 |
||
|
î Record button [a REC] ………………………………………………. |
23 |
||
|
ï Deck 2 open button [DECK 2 c] …………………………………. |
23 |
10
![]()
Remote control
|
5 |
|
|
6 |
|
|
] |
|
|
7 |
|
|
^ |
|
|
_{ |
8 |
|
| |
|
|
} |
? |
|
> |
|
|
V |
9 |
|
! |
|
|
0 |
« |
|
1 |
# |
|
2 |
$ |
|
3 |
%
&
(
)
|
Buttons such as ífunction in exactly the same way as the buttons |
|
|
on the main unit. |
|
|
ñ Standby/on, TV power on/off button [f, TVf] …………… |
28, 29 |
|
ó Numbered buttons [0 – 9, X10] ……………………………………… |
13 |
|
ò Quick OSD, Vocal mute button |
|
|
[QUICK OSD, V.MUTE] …………………………………………….. |
14, 24 |
|
ô Pause button [J] ………………………………………………………….. |
13 |
|
ö Stop, Cancel button [L, CANCEL] …………………… |
9, 13, 17, 18 |
|
õ Manual skip, Quick replay button |
|
|
[MANUAL SKIP, QUICK REPLAY] ………………………………….. |
14 |
|
ú Tuner/aux button [TUNER/AUX] ……………………………….. |
22, 30 |
|
ù Top menu, Direct navigator button |
|
|
[TOP MENU, DIRECT NAVIGATOR] …………………….. |
13, 16, 17 |
|
û Functions, Group button [FUNCTIONS, GROUP] …. |
13, 16, 19 |
|
ü Disc skip, tape fast-forward/rewind, preset channel select, |
|
|
time adjust buttons [g, REW/4, f, 3/FF] ……… |
9, 22, 23 |
†Shift button [SHIFT]
To use functions labeled in orange:
While pressing [SHIFT], press the corresponding button.
|
° Muting button [MUTING] ………………………………………………. |
29 |
|
¢ Clock/timer, Sleep timer button |
|
|
[CLOCK/TIMER, SLEEP] ……………………………………………. |
9, 28 |
|
Play/record timer, Auto off button |
|
|
[˚PLAY/REC, AUTO OFF] ……………………………………….. |
28, 29 |
|
FL display, Dimmer button [FL DISPLAY, DIMMER] ….. |
13, 29 |
£VK725D Super Sound EQ, Super woofer button
|
[S.SOUND EQ, S.WOOFER] ………………………………………….. |
27 |
||
|
VK825D VK925D Super Sound EQ, Subwoofer button |
|||
|
[S.SOUND EQ, SUBWOOFER] ………………………………………. |
27 |
||
|
Sound EQ, Manual EQ button |
|||
|
[SOUND EQ, –MANUAL EQ] ……………………………………. |
26, 27 |
||
|
Super surround, Multi Re-master button |
|||
|
[SUPER SRND, M.RE-MASTER] ……………………………….. |
26, 27 |
||
|
§ Disc select, Tuner program button |
|||
|
[DISC, TUNER PGM] ……………………………………………….. |
14, 22 |
||
|
• CD mode button [CD MODE] ………………………………………… |
14 |
||
|
Repeat button [REPEAT] ………………………………………………. |
15 |
||
|
Play mode button [PLAY MODE] ………………………… |
18, 22, 23 |
||
|
¶ Advanced disc review, Play speed button |
|||
|
[A.DISC REVIEW, PLAY SPEED] ………………………………. |
14, 15 |
||
|
ß Menu, Playlist, Angle/Page button |
|||
|
[MENU, PLAYLIST, ANGLE/PAGE] |
……………………… |
13, 15–17 |
|
|
® Cursor buttons [8,9,/, —], |
|||
|
Enter button [ENTER] ………………………….. |
9, 13, 15–17, 25, 27 |
||
|
These buttons have the following functions. |
|||
|
[/, —] : TV channel select buttons |
[TV CH 4, TV CH3] ……. |
29 |
|
|
© Return, Zoom button [RETURN, ZOOM] …………………….. |
9, 15 |
||
|
™ Slow/search, Tuning buttons |
|||
|
[//, —, SLOW/SEARCH] ………………………………. |
13, 16, 22 |
||
|
These buttons have the following functions. |
|||
|
[//] : TV/AV input mode select button [TV/AV] ………………… |
29 |
||
|
[—] : Setup button [SETUP] …………………………………………… |
9 |
||
|
´ Volume buttons, TV volume buttons |
|||
|
[–, +, VOLUME, – TV VOL +] ……………………………………. |
25, 29 |
||
|
¨ Progressive video button [PROGRESSIVE] ……………………. |
13 |
||
|
2 channel down-mixing button [MIX 2CH] ……………………… |
26 |
||
|
Dolby Pro Logic II button [0PLII] ……………………………….. |
26 |
||
|
≠ Center focus button [C.FOCUS] ……………………………………. |
26 |
||
|
Channel select button [CH SEL] ……………………………………. |
27 |
||
|
Test signal button [TEST] …………………………………………….. |
27 |
||
|
Æ Echo button [ECHO] …………………………………………………….. |
25 |
||
|
Key control buttons [I, #] ……………………………………………… |
25 |
||
|
Ø Subtitle button [SUBTITLE] ……………………………………… |
13, 15 |
||
|
∞ Audio button [AUDIO] ………………………………………… |
15, 24, 25 |
ENGLISH
Control reference guide
RQT8251
11
11

ENGLISH
Discs — Basic play
Discs — Basic play
1 Press [c, OPEN/CLOSE] to open the tray.
The unit comes on.
• To load discs in other trays, press [1]–[5] to select the tray and press [c, OPEN/CLOSE] to open the tray.
•You can load up to 5 discs (one per tray).
•Load double-sided discs so the label for the side you want to play is facing up.
•RAM Remove the disc from its cartridge before use.
Do not pull or push the tray with your hand.
2 Press [c, OPEN/CLOSE] to close the tray.
Check the disc location
Press [DISC CHECK] during play.
Press again to close the trays.
•To check the location of the 12 cm discs.
•If a disc is being played, the corresponding tray will not open.
•Do not remove or insert disc(s) during a disc check.
•Do not pull out the trays during a disc check.
Skip/Search/Slow-motion play
Change a disc in another tray
Press [c, DISC CHANGE] and then [1]–[5].
Press [c, DISC CHANGE] again to close the tray.
•You can also remove a disc while another is playing.
•If you select a disc which is being played, play stops and the tray opens.
3Press [1]–[5] to play the disc.
You can also press
[:, DVD/CD] if the current disc is your desired disc.
Stop
Press [L STOP] during play.
The position is memorized while “RESUME” is on the display.
•Press [:, DVD/CD] to resume.
•Press [L STOP] again to clear the position.
:, DVD/CD
|
• To skip: Press [REW/4/g] or [f/3/FF]. |
|||||||
|
• To search: Hold down [REW/4/g] or [f/3/FF] during play. |
|||||||
|
• To play in slow-motion: Hold down [REW/4/g] or [f/3/FF] during pause. |
|||||||
|
• |
Slow motion play is for forward direction only. |
||||||
|
VCD |
|||||||
|
• |
Slow motion does not work. |
||||||
|
MPEG4 |
DivX |
||||||
|
• Search/slow motion play speed increases up to 5 steps. |
|||||||
|
Note |
|||
|
RQT8251 |
• Discs |
continue to rotate while menus are displayed. Press [L STOP] when you finish to preserve the unit’s motor and your television screen. |
|
|
12 |
• Total title number may not be displayed properly on +R/+RW. |
||
12

Enjoy progressive video
Press [SHIFT] + [PROGRESSIVE].
You can enjoy progressive video (A page 7).
Enter numbers
RAM
 DVD-RW VR
 DVD-A
DVD-A
 DVD-V
DVD-V
 VCD
VCD
 CD
CD
Press the numbered buttons.
E.g. to select 12: [h10] A [1] A [2]
VCD with Playback control (PBC)
Press [L] to cancel the PBC functions, then press the numbered buttons.
WMA
 MP3
MP3
 JPEG
JPEG
 MPEG4
MPEG4 
 DivX
DivX
Press the numbered buttons, then press [ENTER].
E.g. to select 123: [1] A [2] A [3] A [ENTER]
• Press [SHIFT]+[CANCEL] to cancel the number(s).
L, CANCEL
Pause
Press [J] during play.
• Press [:, DVD/CD] to restart play.
ENTER
Skip frame-by-frame
RAM
 DVD-RW VR
 DVD-A (Motion picture part) DVD-V
 VCD
VCD
Press [;, :] during pause.
• VCD Forward direction only.
(, ), SLOW/SEARCH
SHIFT 


Main unit display
Press [FL DISPLAY] to change display.
RAM
 DVD-RW VR
 DVD-A
DVD-A
 DVD-V
DVD-V
 WMA
WMA
 MP3 MPEG4
 DivX
DivX
Time display ↔ Information display
JPEG
When Slideshow (A page 19) is on:
SLIDE ↔ Information display
When Slideshow (A page 19) is off:
PLAY ↔ Information display
Subtitles/Information screen
Press [SHIFT] + [SUBTITLE].
RAM
 DVD-RW VR
Selects subtitles on/off (A page 15).
DVD-V
 DivX
DivX 
 VCD (SVCD only)
Selects a subtitle language (A page 15).
JPEG
Selects the information displayed.
Date No information
:, DVD/CD
Start play from a selected group
DVD-A
 WMA
WMA
 MP3
MP3
 JPEG
JPEG
 MPEG4
MPEG4 
 DivX
DivX
Press [SHIFT] + [GROUP], then press [8, 9] to select, then press [ENTER] to start play.
•A folder on WMA/MP3, JPEG, MPEG4 and DivX video discs is treated as a “Group”.
Group/Content skip during play
WMA
 MP3
MP3
 JPEG
JPEG
 MPEG4
MPEG4 
 DivX
DivX
Group skip: Press [8, 9].
Content skip: Press [;, :].
Disc menus
a: Press to show a disc top menu
(DVD-V
 DVD-A ) or programs (RAM DVD-RW VR ).
b: Press to show a disc menu
(DVD-V ) or a playlist (RAM DVD-RW VR ).
VCD with Playback control (PBC)
Press [RETURN] to show disc menu.
 b a
b a
On-screen item select
Press [8, 9, ;, :] to select, then press
[ENTER] to make the settings.
• Press [RETURN] to return to previous screen.
ENGLISH
Discs — Basic play
13

Discs — Convenient
 functions
|
DISC |
|||
|
Numbered |
CD MODE |
||
|
buttons |
REPEAT |
||
|
ENGLISH |
|||
|
QUICK OSD |
AUDIO |
||
|
SUBTITLE |
|||
|
A.DISC REVIEW, |
|||
|
MANUAL SKIP, |
PLAY SPEED |
||
|
QUICK REPLAY |
, DVD/CD |
||
|
ANGLE/PAGE |
|||
|
, |
|||
|
RETURN, |
|||
|
ZOOM |
|||
|
SHIFT |
|
functions |
|||||||||
|
Disc information |
|||||||||
|
Convenient |
|||||||||
|
You can select the disc after checking the discs loaded with the Disc |
|||||||||
|
information screen. |
|||||||||
|
• You can also select the disc directly with the disc buttons on the main |
|||||||||
|
unit. |
|||||||||
|
— |
1 Press [DISC] to show the Disc information screen. |
||||||||
|
e.g. |
|||||||||
|
Discs |
Disc Information |
||||||||
|
DVD-Video |
|||||||||
|
CD |
Track 10 |
Time 60:15 |
|||||||
|
DVD-VR |
|||||||||
|
Unchecked |
|||||||||
|
No Disc |
|||||||||
|
Empty |
Not yet read |
2 Press the numbered buttons ([1]–[5]) to select the disc.
To clear the screen
Press [DISC].
Displaying current playback condition
(QUICK OSD)
Press [QUICK OSD].
|
Basics |
Details |
|||
|
Off |
||||
7 Basics
Current playback number Elapsed play time
e.g. DVD-V
|
Title 1 |
Chapter 4 |
Time |
0:41:23 |
||||||||||||||||
|
Playback |
|||||||||||||||||||
|
condition |
|||||||||||||||||||
|
Program Playback |
|||||||||||||||||||
|
Play |
mode or |
||||||||||||||||||
|
Current position |
|||||||||||||||||||
|
title of content |
|||||||||||||||||||
|
7 Details |
|||||||||||||||||||
|
e.g. |
|||||||||||||||||||
|
DVD-V |
Audio information |
Details-DVD-Video |
|||||||||||||||||
|
Audio |
1 |
DTS 3/2.1ch |
|||||||||||||||||
|
Subtitle information |
Subtitle |
||||||||||||||||||
|
Angle information |
Angle |
1/1 |
|||||||||||||||||
|
Aspect of current title |
Source Aspect |
4:3 |
|||||||||||||||||
|
Total play time of current title |
Title Total Time |
0:54:28 |
|||||||||||||||||
•MPEG4 
 DivX Video and audio information is not displayed during search.
RQT8251
CD The QUICK OSD screen will appear automatically.
14
Reviewing titles to play (ADVANCED
DISC REVIEW)
RAM
 DVD-RW VR (Except still picture part) DVD-V (Except +R/+RW) Allows you to browse the disc contents and start playing from the selected position. You can select either “Intro Mode” or “Interval Mode” in “Advanced Disc Review” in the “Disc” tab (A page 20).
1Press [A.DISC REVIEW].
The QUICK OSD screen is displayed. e.g. RAM
04
2Press [:, DVD/CD] when you find a title/program to play.
•This may not work depending on the disc and the play condition.
•RAM
 DVD-RW VR This does not work when playing a playlist (A page 17).
CD sequential play (CD MODE)
This feature is very convenient if you want to play several music CDs sequentially. Make sure that the applicable disc is in the play position before playing.
DVD, JPEG, MPEG4 and DivX are skipped without being played.
While stopped
1Press [CD MODE].
2Press [:, DVD/CD].
Note
•If the disc in the play position is not applicable (e.g. DVD), CD Mode does not work.
•HighMAT menus and Video CD playback control are disabled.
•You cannot change the mode during play, or while in program or random mode.
•If you want to play a DVD, press [CD MODE] again to cancel CD Mode. (CD Mode is also canceled when you open the current disc tray, switch the unit to standby or select another source.)
Quick replay
(Only when the elapsed play time can be displayed.)
(Except MPEG4 
 DivX , +R/+RW)
Press [SHIFT] + [QUICK REPLAY] to skip back a few seconds.
Skipping 30 seconds forward
(Only when the elapsed play time can be displayed.)
RAM
 DVD-RW VR
 DVD-V (Except +R/+RW)
Play restarts from approximately 30 seconds later. Convenient when you want to skip commercials etc.
During play
Press [MANUAL SKIP].
RAM
 DVD-RW VR It is not possible to skip through the current program if the start of the next program is within about 30 seconds of the point you are skipping from.
14

Changing the zoom ratio
RAM
 DVD-RW VR
 DVD-A (Motion picture part)
DVD-V
 VCD
VCD
 MPEG4
MPEG4 
 DivX
DivX
This feature expands the letterbox picture to fit the screen.
|
During play |
|||||||||||||||
|
Press [SHIFT] + [ZOOM] |
Functions |
||||||||||||||
|
several times to select the |
|||||||||||||||
|
Just Fit Zoom |
1.00 |
||||||||||||||
|
preset aspect ratio (Just Fit |
|||||||||||||||
|
Zoom) or “Auto”. |
|||||||||||||||
|
(Motion picture part) |
|||||||||||||||
|
RAM |
|||||||||||||||
|
DVD-RW VR |
DVD-A |
||||||||||||||
|
DVD-V |
VCD |
||||||||||||||
|
Auto 4:3 Standard |
|||||||||||||||
|
Cinemascope2 |
|||||||||||||||
|
e.g. |
16:9 Standard (16:9) |
||||||||||||||
|
4:3 Standard (4:3) |
|||||||||||||||
|
European Vista (1.66:1) |
|
American Vista (1.85:1) |
|
Cinemascope1 (2.35:1) |
|
Cinemascope2 (2.55:1) |
MPEG4 
 DivX
DivX
|
Standard (x0.25 full-screen) |
Original (actual recorded size) |
Full (full-screen)
• This may not work depending on the discs recording.
Fine adjustments (Manual Zoom)
After selecting the preset aspect ratio or “Auto”, press [;, :].
–from “x1.00” to “x1.60” (in 0.01 units)
–from “x1.60” to “x2.00” (in 0.02 units)
–from “x2.00” to “x4.00” (in 0.05 units) ( MPEG4 
 DivX only)
•It may not be possible to zoom up to “x4.00” depending upon the connected television and its settings.
•Press and hold [;, :] to alter faster.
Changing the play speed
RAM
 DVD-RW VR
 DVD-A (Motion picture part) DVD-V
During play
Press [SHIFT] + [PLAY SPEED] several times to select “Normal”, “Fast” or “Slow”.

 Functions
Play Speed 
 1.0
1.0
 Normal
Fast
Slow
Changing play speed between the range of “x0.6” to “x1.4” (in 0.1 units)
Press [;, :] while the above message is displayed.
•Press [:, DVD/CD] to return to normal play.
•This function may not work depending on the disc’s recording.
Angle selection and Still picture rotation/
advance
Press [SHIFT] + [ANGLE/PAGE] several times to select the angle or rotate/advance the still picture.
DVD-V (with multiple angles) – Angle selection
DVD-A – Still picture advance
(Press [RETURN] to go back to page 1.)
JPEG – Still picture rotation
Changing soundtracks
RAM
 DVD-RW VR
 DVD-A
DVD-A
 DVD-V
DVD-V
 VCD
VCD
 DivX (with multiple soundtracks)
Press [SHIFT] + [AUDIO] several times to select the soundtrack.
|
RAM |
DVD-RW VR |
VCD |
e.g. |
DVD-V |
|||||||||||||||||
|
You |
can use this button to select “L”, “R” |
||||||||||||||||||||
|
or “L R”. |
Functions |
||||||||||||||||||||
|
DivX |
Audio |
1 |
|||||||||||||||||||
|
While the menu is displayed |
|||||||||||||||||||||
|
Press [;, :] to select “L” or “R” or “LR”. |
|||||||||||||||||||||
|
(Karaoke discs) |
|||||||||||||||||||||
|
DVD-V |
|||||||||||||||||||||
|
While |
the menu is displayed |
||||||||||||||||||||
|
Press [;, :] to select “On” or “Off” for vocals. |
|||||||||||||||||||||
|
Read the disc’s instructions for details. |
|||||||||||||||||||||
|
Signal type/data |
|||||||||||||||||||||
|
LPCM/PPCM/0Digital/DTS/MPEG: Signal type |
|||||||||||||||||||||
|
kHz (Sampling frequency)/bit/ch (Number of channels) |
|||||||||||||||||||||
|
Example: 3 / 2 .1ch |
|||||||||||||||||||||
|
.1: Low frequency effect |
|||||||||||||||||||||
|
(not displayed if there is no signal) |
|||||||||||||||||||||
|
0: No surround |
|||||||||||||||||||||
|
1: Mono surround |
|||||||||||||||||||||
|
2: Stereo surround (left/right) |
1:Center
2:Front left + Front right
3:Front left + Front right + Center
•DivX It may take some time for play to start if you change the audio on a DivX video disc.
Changing subtitles
DVD-V
 DivX (with multiple subtitles) VCD (SVCD only)
Press [SHIFT] + [SUBTITLE] several times to select the subtitle language.
•On +R/+RW, a subtitle number may be shown for subtitles that are not displayed.
|
To display/clear the subtitles |
e.g. |
||||||||
|
Press [;, :] to select “On” or “Off”. |
DVD-V |
||||||||
|
(On/Off only with |
Functions |
||||||||
|
RAM |
DVD-RW VR |
||||||||
|
discs that contain subtitle on/off |
Subtitle |
Off |
|||||||
|
information) |
|||||||||
Press [SHIFT] + [SUBTITLE] to select “On” or “Off”.
•Subtitle on/off information cannot be recorded using Panasonic DVD Recorders.
Repeat play
(Only when the elapsed play time can be displayed.
JPEG : Works with all JPEG content.)
During play
Press [REPEAT] several times to select an item to be
|
repeated. |
e.g. |
|||||||
|
DVD-V |
Functions |
|||||||
|
Repeat |
Off |
Off |
Chapter
Title
RAM
 DVD-RW VR : Program → Disc → Off
•During playlist play: Scene → Playlist → Off DVD-A : Track → Group → Off
DVD-V : Chapter → Title → Off
VCD
 CD : Track → Disc → Off
•When CD Mode is on: Track → Disc → All CD’s → Off
•When CD Mode is on, during program and random play: Track → All CD’s → Off
WMA
 MP3
MP3
 MPEG4
MPEG4 
 DivX : Content → Group → Off
•WMA
 MP3 When CD Mode is on: Content → Group → All CD’s → Off
•WMA
 MP3 When CD Mode is on, during program and random play: Content → All CD’s → Off
JPEG : Group → Off
“All” is displayed during program and random play.
ENGLISH
Discs — Convenient functions
RQT8251
15
15

ENGLISH
Discs — Convenient functions
Discs — Using navigation menus
RQT8251
16
Discs — Using 
 navigation
 menus
menus
|
TOP MENU, |
MENU, |
|
DIRECT |
PLAYLIST, |
|
NAVIGATOR |
ANGLE/PAGE |


 , , , ,
ENTER
FUNCTIONS 

,
SHIFT
Playing data discs
WMA
 MP3
MP3
 JPEG
JPEG
 MPEG4
MPEG4 
 DivX
DivX
You can play JPEG, MPEG4 and DivX video contents on DVD-RAM or play HighMAT discs without using the HighMAT function (A page
20, “Play as Data Disc” in Other Menu).
Playing items in order (Playback Menu)
1Press [TOP MENU].
2Press [8, 9] to select “All” (WMA/MP3/JPEG/MPEG4/
DivX video), “Audio” (WMA/MP3), “Picture” (JPEG) or “Video” (MPEG4/DivX video), then press [ENTER].
•To exit the screen
Press [TOP MENU].
Playing from the selected item (Navigation Menu)
1Press [MENU].
2Press [8, 9, ;, :] to select the group or audio/picture/ video content and press [ENTER].
•After listing all the contents in one group, the list for the next group appears.
3To play content in the group in order
Press [ENTER].
To start play from the selected content
|
Press [8, 9]. |
|||||
|
e.g. |
Group and content number |
||||
|
Navigation Menu |
G 2 |
C 5 |
MP3 1:54 |
||
|
currently playing |
|||||
|
Sep 15 2003 |
Breaking The Habit |
: WMA/MP3 files |
|||
|
Lirkin Park |
Meteora |
Dont_Stay |
|||
|
Penguins |
Faint |
||||
|
Hit_The_Floor_ _Abyss |
; : indicates the group/content |
||||
|
Lirkin Park [Hyorid Theor |
|||||
|
Lirkin Park_Cure For The |
currently playing |
||||
|
Lirkin_Park_ _Metora_ |
|||||
|
Lirkin_Park_ _Metora_ |
|||||
|
Lying_From_You |
: MPEG4 and DivX video |
||||
|
Somewhere_I_Belong |
|||||
|
Lady Starfish |
: JPEG files |
||||
|
Life on Jupiter |
|||||
|
Group 002/003 |
Content 0005/0012 |
Number currently selected |
|||
|
FUNCTIONS to display the sub menu |
RETURN to exit |
||||
|
Group |
Content |
•Press [SHIFT]+[ANGLE/PAGE] to skip page by page in the group or content field.
•To enjoy listening to WMA/MP3 contents while showing a JPEG image on the screen.
Select a JPEG file first, and then select audio contents.
(The opposite order is not effective.)
•To exit the screen
Press [MENU].
7 Using the submenu
1While the menu is displayed
Press [FUNCTIONS].
Items shown differ depending on the type of disc.
Multi
List
Tree
Thumbnail
Next group Previous group
All
Audio
Picture
Video
Help display Find
Groups and contents are displayed.
Contents only
Groups only
Thumbnail images JPEG
To go to next group
To go to previous group
WMA/MP3, JPEG, MPEG4 and DivX video
WMA/MP3 only
JPEG only
MPEG4 and DivX video only
To switch between guide messages and the elapsed play time indicator To search by content or group title ( see below)
2 Press [8, 9] to select an item and press [ENTER].
7 Searching by content or group title
Highlight a group title to search the group, or a content title to search its content.
1 While the submenu is displayed (A see above)
|
Press [8, 9] to select “Find” |
||||
|
and press [ENTER]. |
A |
Find |
||
2Press [8, 9] to select a character and press [ENTER].
•Repeat to enter other characters.
•Lower case is also searched.
•Press [(, )] to skip between A, E, I, O, and U.
•Press [;] to erase a character.
•Leave the asterisk ( ) when you search for the titles including the character you enter.
•Erase the asterisk ( ) to search for the titles starting with the character you enter. To add the asterisk (
 ) again, display the submenu again and select “Find”.
3Press [:] to select “Find” and press [ENTER].
The search results screen appears.
4Press [8, 9] to select the content or group and press [ENTER].
Playing from the selected track in the CD
CD
Titles appear with CD Text disc playback.
1 Press [TOP MENU] or [MENU].
e.g. CD text
|
CD Text |
T |
|||
|
Title |
: Celine Dion One Heart |
|||
|
Artist |
: Celine Dion |
|||
|
: I Drove All Night (Album |
||||
|
: |
||||
|
Need (Album Version) |
||||
|
Version) |
||||
|
(Album Version) |
||||
|
Version) |
||||
|
Version) |
||||
|
Love |
||||
|
to select and press ENTER |
RETURN to exit |
2Press [8, 9] to select the track and press [ENTER].
•Press [SHIFT]+[ANGLE/PAGE] to skip page by page.
•Press [FUNCTIONS] to show the playback position and current position.
•To exit the screen
Press [TOP MENU] or [MENU].
16
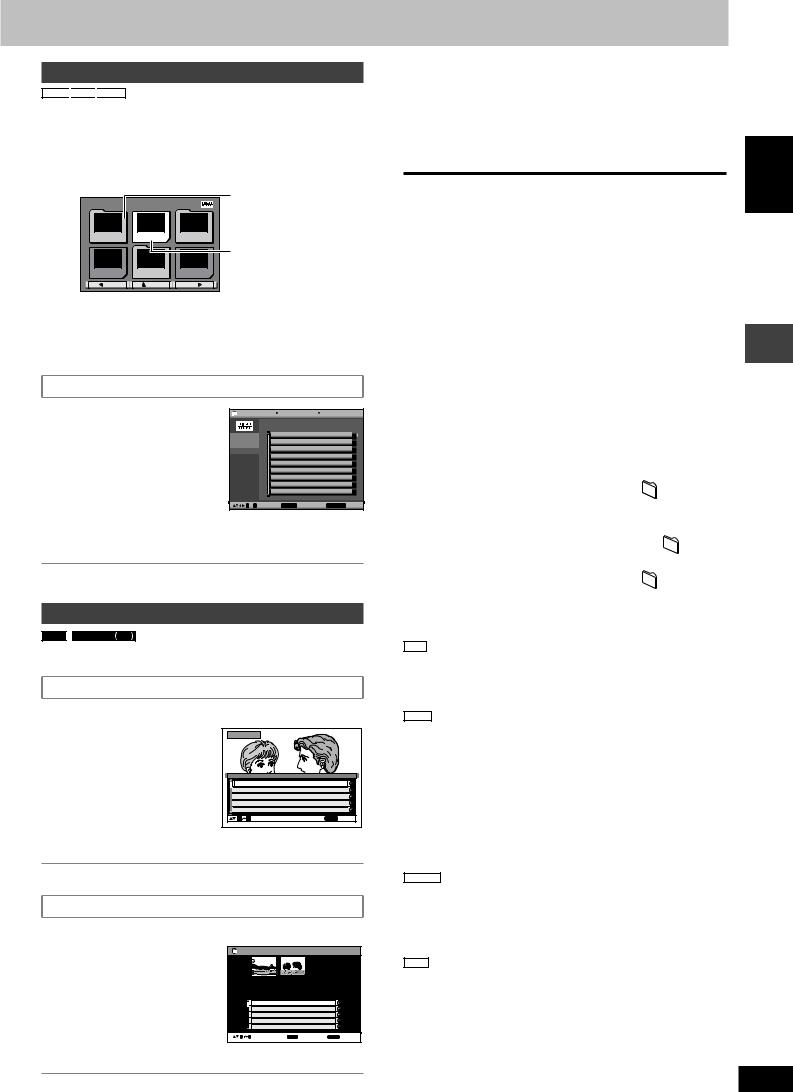
Sound field and sound quality
Playing HighMATTM discs
WMA
 MP3
MP3
 JPEG
JPEG
1While stopped
Press [TOP MENU].
2Press [8, 9, ;, :] to select the item, then press
[ENTER].
• Repeat this step if necessary.
|
e.g. |
Menu: Take you to the |
||
|
New Playlist Item Long Name Display Te |
PAG E 1/3 |
next menu which |
|
|
shows playlists or |
|||
|
Menu1 |
Play list1 |
Menu2 |
another menu |
|
Playlist: play starts |
|||
|
Play list2 |
Menu3 |
Play list3 |
|
|
Prev |
Return |
Next |
•To change the menu background
Press [FUNCTIONS].
The background changes to the one recorded on the disc.
•To exit the screen
Press [L].
Selecting from the list
1During play
Press [MENU].
2Press [;] then [8, 9] to switch among “Playlist”, “Group” and “Content” lists.
3Press [:] then [8, 9] to select an item and press [ENTER].
|
e.g. |
Playlist |
All by Artist |
The Beatles |
||
|
No. |
Content title |
||||
|
Playlist |
1 |
Love Me Do |
|||
|
Group |
2 |
From Me to You |
|||
|
Content |
3 |
She Loves You |
|||
|
4 |
I Want to Hold Your Hand |
||||
|
5 |
Can’t Buy Me Love |
||||
|
0 ~ 9 |
to select |
ENTER to play |
RETURN |
to exit |
•Press [SHIFT]+[ANGLE/PAGE] to skip page by page.
•To exit the screen
Press [MENU].
Playing RAM/DVD-RW (DVD-VR) discs
RAM
 DVD-RW VR
•Titles appear only if the titles are recorded on the disc.
•You cannot edit programs, playlists and disc titles.
|
Playing the programs |
|||||||
|
1 |
Press [DIRECT NAVIGATOR]. |
||||||
|
2 |
Press [8, 9] or the |
e.g. |
Direct Navigator |
||||
|
numbered buttons to |
|||||||
|
select the program. |
|||||||
|
• Press [SHIFT]+[ANGLE/ |
No. |
Date |
On |
T i t l e |
Contents |
||
|
PAGE] to skip page by page. |
1 |
11/ 1(WED) |
0:05 |
Monday feature |
|||
|
• To select a 2-digit number |
2 |
1/ 1 (MON) |
1:05 |
Auto action |
|||
|
4 |
3/ 3 (WED) |
3:37 |
Music |
||||
|
3 |
2/ 2 (TUE) |
2:21 |
Cinema |
||||
|
e.g. 23: [h10] A [2] A[3]. |
5 |
4/10(THU) |
11:05 |
Baseball |
|||
|
• Press [:] to show the contents |
0 |
9 to select |
RETURN to exit |
||||
|
of the program and the disc. |
3 Press [ENTER].
•To exit the screen
Press [DIRECT NAVIGATOR].
Playing a playlist
(Only when the disc contains a playlist)
|
1 Press [PLAYLIST]. |
e.g. |
P l a y l i s t |
||||
|
2 Press [8, 9] or the |
1 |
2 |
||||
|
numbered buttons to |
||||||
|
select the playlist. |
No. |
Date |
Total Time |
T i t l e |
Contents |
|
|
• Press [SHIFT]+[ANGLE/ |
1 |
11/1 |
0:00:01 |
City Penguin |
||
|
2 |
1/ 1 |
0:01:20 |
Ashley at Prom |
|||
|
PAGE] to skip page by page. |
3 |
2/ 2 |
1:10:04 |
Formula one |
||
|
4 |
3/ 3 |
0:10:20 |
Soccer |
|||
|
• To select a 2-digit number |
5 |
4/10 |
0:00:01 |
Baseball |
||
|
0 9 to select |
and press ENTER |
RETURN to exit |
||||
|
e.g. 23: [h10] A [2] A[3]. |
3 Press [ENTER].
•To exit the screen
Press [PLAYLIST].
L Playing scenes one by one
1While the playlist menu is displayed
Press [:].
2Press [8, 9] to select “Scene List” and press [ENTER].
• “Contents” shows playlist information.
3Press [8, 9, ;, :] to select a scene and press [ENTER].
Tips for making data discs
•When there are more than 8 groups, the eighth group onwards will be displayed on one vertical line in the menu screen.
•There may be differences in the display order on the menu screen and computer screen.
•This unit cannot play files recorded using packet write.
DVD-RAM
•Discs must conform to UDF 2.0.
CD-R/RW
•Discs must conform to ISO9660 level 1 or 2 (except for extended formats).
•This unit supports multi-session but if there are a lot of sessions it
takes more time for play to start. Keep the number of sessions to a minimum to avoid this.
DVD-R/RW
•Discs must conform to UDF bridge (UDF 1.02/ISO9660).
•This unit does not support multi-session. The default session only is played.
|
Naming folders and files (Files are treated |
e.g. |
||||||||||||
|
MP3 |
|||||||||||||
|
as contents and folders are treated as |
root |
||||||||||||
|
groups on this unit.) |
001group |
||||||||||||
|
At the time of recording, prefix folder and file |
|||||||||||||
|
001 |
|||||||||||||
|
names. This should be with numbers that |
|||||||||||||
|
001track.mp3 |
|||||||||||||
|
have an equal number of digits, and should |
|||||||||||||
|
002track.mp3 |
|||||||||||||
|
be done in the order you want to play them |
003track.mp3 |
||||||||||||
|
002group |
|||||||||||||
|
(this may not work at times). Files must have |
|||||||||||||
|
the extension (A see below). |
001track.mp3 |
||||||||||||
|
(Extension: “.WMA” or “.wma”) |
|||||||||||||
|
WMA |
003group |
002track.mp3 |
|||||||||||
|
• Compatible compression rate: between 48 |
003track.mp3 |
||||||||||||
|
kbps and 320 kbps |
004track.mp3 |
||||||||||||
|
001track.mp3 |
|||||||||||||
|
• You cannot play WMA files that are copy |
|||||||||||||
|
002track.mp3 |
|||||||||||||
|
protected. |
003track.mp3 |
||||||||||||
|
• This unit does not support Multiple Bit Rate (MBR). |
MP3 (Extension: “.MP3” or “.mp3”)
•Compatible compression rate: between 32 kbps and 320 kbps
•This unit does not support ID3 tags.
•Compatible sampling rates: 8, 11.02, 12, 16, 22.05, 24, 32, 44.1 and 48 kHz.
JPEG (Extension: “.JPG”, “.jpg”, “.JPEG” or “.jpeg”)
•To view JPEG files on this unit:
–Take them on a digital camera that meets the DCF Standard (Design rule for Camera File system) Version 1.0. Some digital cameras have functions that are not supported by the DCF Standard
Version 1.0 like automatic picture rotation which may render a picture unviewable.
–Do not alter the files in any way or save them under a different name.
•This unit cannot display moving pictures, MOTION JPEG and other such formats, still pictures other than JPEG (e.g. TIFF) or play pictures with attached audio.
MPEG4 (Extension: “.ASF” or “.asf”)
•You can play MPEG4 data [conforming to SD VIDEO specifications
(ASF standard)/MPEG4 (Simple Profile) video system/G.726 audio system] recorded with Panasonic SD multi cameras or DVD video recorders with this unit.
•The recording date may differ from that of the actual date.
DivX (Extension: “.DIVX”, “.divx”, “.AVI” or “.avi”)
•You can play DivX data created using ver.3.11, 4.x, 5.x [DivX video system/MP3, Dolby Digital or MPEG audio system].
•GMC (Global Motion Compensation) is not supported.
•DivX files greater than 2GB or have no index may not be played properly on this unit.
•This unit supports all resolutions up to maximum of 720 x 480 (NTSC)/
720 x 576 (PAL).
•You can select up to 8 types of audio and subtitles on this unit.
ENGLISH
Discs — Using navigation menus
RQT8251
17
17
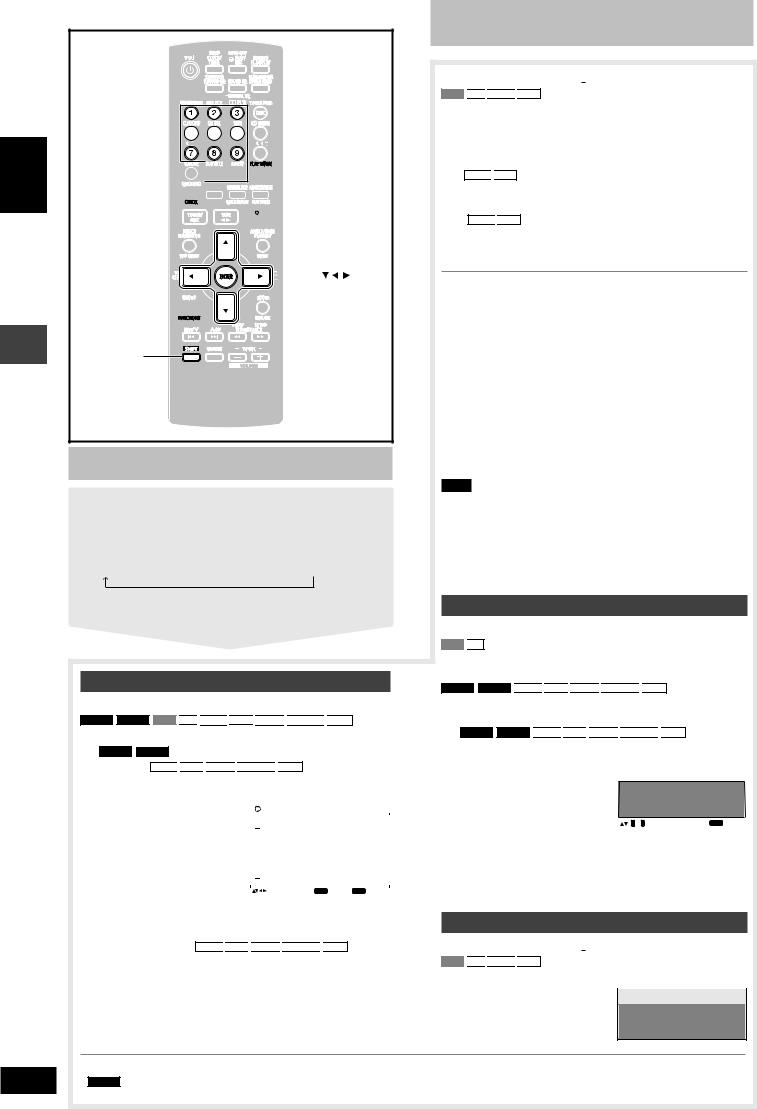
ENGLISH
Discs — Program/Random play
RQT8251
18
18
Numbered 


 buttons


 PLAY MODE CANCEL


 , DVD/CD


 , , , ,
ENTER
FUNCTIONS 

SHIFT
Discs — Program/Random play
Starting program/random play While stopped
Press [PLAY MODE] to select the desired mode.
Program and random playback screens appear sequentially. Every time you press the button:
Program  Random
  off (Normal play)
To exit program or random play mode
Press [PLAY MODE] several times while stopped.
Program play (up to 32 items)
When CD mode is off
DVD-A
 DVD-V
DVD-V
 VCD
VCD
 CD
CD 
 WMA
WMA
 MP3
MP3
 JPEG
JPEG
 MPEG4
MPEG4 
 DivX
DivX
You can program all the items on a disc in the play position.
1 DVD-A
 DVD-V Press the numbered buttons to select a group (WMA
 MP3
MP3
 JPEG
JPEG
 MPEG4
MPEG4 
 DivX then press [ENTER]) or title.
|
• To select a 2-digit number |
e.g. |
DVD-V |
||||||||||||||
|
e.g. 25: [h10] A [2] A[5] |
Program Playback |
|||||||||||||||
|
Choose a title and chapter. |
||||||||||||||||
|
No. Disc T/G |
C/T |
|||||||||||||||
|
WMA |
MP3 |
JPEG |
MPEG4 |
1 |
Play |
|||||||||||
|
DivX |
Clear |
|||||||||||||||
|
[2] A [5] A [ENTER] |
Clear all |
|||||||||||||||
|
to select and press |
ENTER |
PLAY to start |
||||||||||||||
2Press the numbered buttons to select a chapter or track/content (WMA
 MP3
MP3
 JPEG
JPEG
 MPEG4
MPEG4 
 DivX then press [ENTER]).
• Repeat steps 1 and 2 to program other items.
3Press [:, DVD/CD].
Discs — Program/Random play
When CD mode is on (A page 14)
VCD
 CD
CD 
 WMA
WMA
 MP3
MP3
You can program all the items on all the discs.
1Press the numbered buttons ([1]–[5]) to select a disc.
2Press the numbered buttons to select the items (WMA
 MP3 then press [ENTER]).
•To select a 2-digit number e.g. 25: [h10] A [2] A[5]
WMA
 MP3 [2] A [5] A [ENTER]
•Repeat steps 1 and 2 to program other items.
3Press [:, DVD/CD].
To select an item using the cursor buttons
Press [ENTER] and [8, 9] to select an item, then press [ENTER] again to register.
To change a selected program
1.Press [8, 9] to select an item.
2.Repeat above steps 1 and 2.
To clear a selected program
1.Press [8, 9] to select an item.
2.Press [SHIFT]+[CANCEL] (or press [8, 9, ;, :] to select “Clear” and press [ENTER]).
To clear the whole program
Select “Clear all” with [8, 9, ;, :] and press [ENTER].
Note
The program is retained in memory unless one of the following occurs:
–The current disc tray is opened.
–Another source is selected.
–The unit is switched to standby.
–CD mode is turned on or off.
–You manually select another disc (while CD mode is off).
Random play
When CD mode is off
VCD
 CD
CD
You can play all the items on the disc in the play position in random order.
DVD-A
 DVD-V
DVD-V
 WMA
WMA
 MP3
MP3
 JPEG
JPEG
 MPEG4
MPEG4 
 DivX
DivX
You can play the selected item(s) on the disc in the play position in random order.
1 DVD-A
 DVD-V
DVD-V
 WMA
WMA
 MP3
MP3
 JPEG
JPEG
 MPEG4
MPEG4 
 DivX
DivX
Press the numbered buttons to select a group or title.
|
e.g. |
DVD-V |
Random Playback |
||||||
|
DVD-A |
||||||||
|
• To enter all groups, press |
Choose a title. |
|||||||
|
Title |
1 |
|||||||
|
[;, :] to select “All” and |
||||||||
|
press [ENTER]. |
||||||||
|
0 |
~ 9 to select |
PLAY to start |
||||||
•To deselect a group, press the numbered button corresponding to the group you want to clear.
2 Press [:, DVD/CD].
ALL-DISC random play
When CD mode is on (A page 14)
VCD
 CD
CD 
 WMA
WMA
 MP3
MP3
You can play all the items on all the discs in random order.
|
Press [:, DVD/CD]. |
e.g. |
CD |
Random Playback |
|
Press PLAY to start
•Disable HighMAT disc play to use program and random play. Select “Play as Data Disc” in Other Menu (A page 20).
•DVD-A Some discs contain bonus groups. If a password screen appears after selecting a group, enter the password with the numbered buttons to play the bonus group. Refer also to the disc’s jacket.

Discs — Using on-screen menus
|
1 |
Press [FUNCTIONS] once. |
3 Press [,, 9, ;, :] to select the item, then press |
|
2 |
Press [,, 9, ;, :] to select the menu, then press |
[ENTER] to make the settings. |
|
[ENTER] to begin selecting items. |
Alternatively, press the numbered buttons. |
Items shown differ depending on the type of disc.
Main Menu
|
Program, Group, Title, |
To start from a specific item |
||||||||||
|
Chapter, Track, Playlist, |
|||||||||||
|
Content |
|||||||||||
|
To skip incrementally or decrementally |
|||||||||||
|
(Time Slip for play only) |
|||||||||||
|
Time |
1 Press [ENTER] twice to show Time Slip |
||||||||||
|
indicator. |
|||||||||||
|
(Except |
2 Press [8, 9] to select the time and press |
||||||||||
|
+R/+RW) |
[ENTER]. |
||||||||||
|
• Press and hold [8, 9] to alter faster. |
|||||||||||
|
To start from a specific time (Time Search) |
|||||||||||
|
To change remaining/elapsed time display |
|||||||||||
|
MPEG4 |
DivX |
||||||||||
|
Video |
To display pixel number |
||||||||||
|
fps (frame per second) is also displayed. |
|||||||||||
|
DivX |
|||||||||||
|
Audio |
(A page 15, Changing soundtracks) |
||||||||||
|
To display the current disc type |
|||||||||||
|
WMA |
MP3 |
||||||||||
|
Still Picture |
To switch still picture |
||||
|
Thumbnail |
To show thumbnail images |
||||
|
Subtitle |
(A page 15, Changing subtitles) |
||||
|
To recall a marker |
|||||
|
RAM |
DVD-RW VR |
||||
|
Marker (VR) |
recorded on DVD-Video recorders |
||||
|
To recall a marker: |
|||||
|
Press [8, 9] A Press [ENTER] |
|||||
|
Angle |
(multiple angles) |
||||
|
To select the angle |
|||||
|
Rotate Picture |
To rotate pictures |
||||
|
Slideshow |
To turn slideshow on/off |
||||
|
To change the slideshow timing (0 – 30 sec) |
|||||
|
Other Settings |
(A see below) |
||||
Other Settings
RAM
 DVD-RW
  VR
VR
 DVD-A (Motion picture
|
Play Speed |
part) |
DVD-V |
||
|
To change play speed |
||||
|
– from “x0.6” to “x1.4” (in 0.1 unit steps) |
||||
|
L Play Menu |
|
Repeat |
(A page 15) |
|||||||||||||
|
Except |
(Still picture |
|||||||||||||
|
JPEG |
RAM |
DVD-RW VR |
||||||||||||
|
part) |
||||||||||||||
|
A-B Repeat |
MPEG4 |
DivX |
||||||||||||
|
To repeat a specified section |
||||||||||||||
|
Press [ENTER] at the starting and ending |
||||||||||||||
|
points. Press [ENTER] again to cancel. |
||||||||||||||
|
Except |
||||||||||||||
|
RAM |
DVD-RW VR |
|||||||||||||
|
To mark up to 5 positions to play again |
||||||||||||||
|
Press [ENTER]. (The unit is now ready to |
||||||||||||||
|
accept markers.) |
||||||||||||||
|
To mark a position: |
||||||||||||||
|
Marker |
Press [ENTER] (at the desired point) |
|||||||||||||
|
To mark another position: |
||||||||||||||
|
Press [;, :] to select “ |
” A Press [ENTER] |
|||||||||||||
|
To recall a marker: |
||||||||||||||
|
Press [;, :] A Press [ENTER] |
||||||||||||||
|
To erase a marker: |
||||||||||||||
|
Press [;, :] A Press [SHIFT]+[CANCEL] |
||||||||||||||
|
• This feature does not work during program |
||||||||||||||
|
and random play. |
||||||||||||||
|
Advanced |
[A page 14, Reviewing titles to play |
|||||||||||||
|
Disc Review |
(ADVANCED DISC REVIEW)] |
|||||||||||||
|
L Picture Menu |
||||||||||||||
|
Normal |
||||||||||||||
|
Cinema1: Mellows images and enhances |
||||||||||||||
|
detail in dark scenes. |
||||||||||||||
|
Cinema2: Sharpens images and enhances |
||||||||||||||
|
detail in dark scenes. |
||||||||||||||
|
Animation |
||||||||||||||
|
Dynamic |
||||||||||||||
|
Picture Mode |
User (Press [ENTER] to select “Picture |
|||||||||||||
|
Adjustment”) (A see below) |
||||||||||||||
|
Picture Adjustment |
||||||||||||||
|
Contrast |
Sharpness |
|||||||||||||
|
Brightness |
Colour |
|||||||||||||
|
Gamma (Adjusts the brightness of dark parts.) |
||||||||||||||
|
Depth Enhancer (Reduces the rough noise in the |
||||||||||||||
|
background to give a greater feeling of depth.) |
||||||||||||||
|
• PAL disc |
||||||||||||||
|
625i (Interlace) ↔ 625p (Progressive) |
||||||||||||||
|
• NTSC disc |
||||||||||||||
|
Video Output |
525i (Interlace) ↔ 525p (Progressive) |
|||||||||||||
|
When you select “625p” or “525p”, a |
||||||||||||||
|
Mode |
confirmation screen appears. Select “Yes” only |
|||||||||||||
|
if connecting to a progressive output |
||||||||||||||
|
compatible television. |
||||||||||||||
|
The number displayed depends on the disc |
||||||||||||||
|
being played or “Picture/Video Output” setting |
||||||||||||||
|
(A page 21). |
||||||||||||||
|
If you have chosen “625p” or “525p”, (A see left), |
||||||||||
|
select the method of conversion for video output |
||||||||||
|
to suit the type of material. |
||||||||||
|
When you play PAL discs, MPEG4 or DivX |
||||||||||
|
video contents |
||||||||||
|
Auto: Detects 25 frame-per-second film |
||||||||||
|
Transfer |
content and appropriately converts it. |
|||||||||
|
Video: Select when using Auto, and the video |
||||||||||
|
Mode |
content is distorted. |
|||||||||
|
When you play NTSC discs |
||||||||||
|
Auto1 (normal): Detects 24 frame-per-second |
||||||||||
|
film content and appropriately |
||||||||||
|
converts it. |
||||||||||
|
Auto2: Compatible with 30 frame-per-second |
||||||||||
|
film content in addition to 24 frame-per- |
||||||||||
|
second film content. |
||||||||||
|
Video: Select when using Auto1 or Auto2, and |
||||||||||
|
the video content is distorted. |
||||||||||
|
When you select “Auto” the constructing |
||||||||||
|
Source |
method of the DivX contents is automatically |
|||||||||
|
distinguished and output. If the picture is |
||||||||||
|
Select |
distorted, select “I (Interlace)” or “P |
|||||||||
|
DivX |
(Progressive)” depending on which constructing |
|||||||||
|
method was used when the contents were |
||||||||||
|
recorded to disc. |
||||||||||
|
Auto, I (Interlace), P (Progressive) |
||||||||||
|
L Audio Menu |
||||||||||
|
Dolby Pro |
(A page 26) |
|||||||||
|
Logic II |
||||||||||
|
To make the dialogue in movies easier to hear |
||||||||||
|
(Dolby Digital, DTS, MPEG, 3-channel or |
||||||||||
|
Dialogue |
DVD-V |
|||||||||
|
Enhancer |
higher, with the dialogue recorded in the center |
|||||||||
|
channel) |
||||||||||
|
(Dolby Digital, 3-channel or higher, with |
||||||||||
|
DivX |
||||||||||
|
the dialogue recorded in the center channel) |
||||||||||
|
On ↔ Off |
||||||||||
|
Multi |
(A page 27) |
|||||||||
|
Re-master |
||||||||||
|
Except |
||||||||||
|
MPEG4 |
DivX |
|||||||||
|
Sound |
Enhances audio output to produce a warm |
|||||||||
|
hall-like sound. |
||||||||||
|
Enhancement |
||||||||||
|
On ↔ Off |
||||||||||
(Continued on next page)
ENGLISH
Discs — Using on-screen menus
RQT8251
19
19
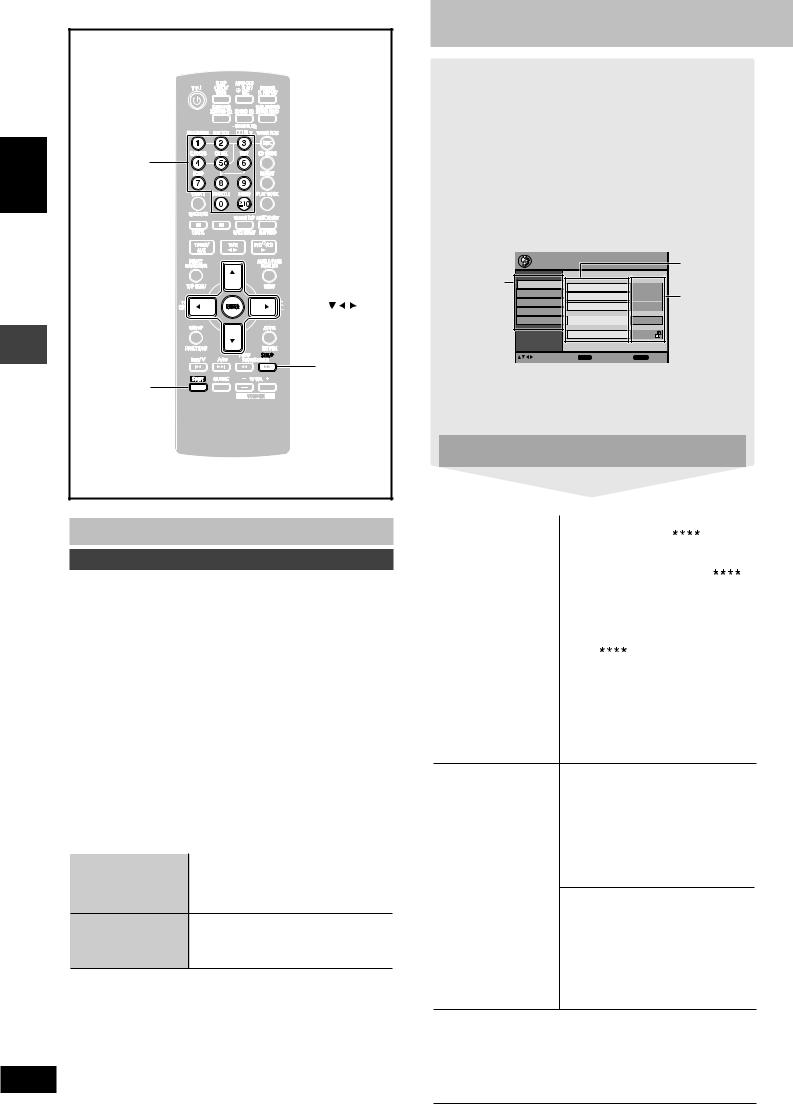
ENGLISH
Discs — Using on-screen menus / Discs — Changing the player settings
RQT8251
20
20


 , , , ,
ENTER
SETUP
SHIFT
Discs — Using on-screen menus
Other Settings
L Display Menu
|
Information |
On ↔ Off |
|||||||||||||
|
Subtitle Position |
0 to –60 (in 2 unit steps) |
|||||||||||||
|
Subtitle Brightness |
Auto, 0 to –7 |
|||||||||||||
|
Just Fit Zoom |
To select the appropriate screen size |
|||||||||||||
|
to fit your TV screen |
||||||||||||||
|
Manual Zoom |
To zoom in and out manually |
|||||||||||||
|
(Motion |
||||||||||||||
|
Bit Rate Display |
RAM |
DVD-RW VR |
DVD-A |
|||||||||||
|
picture part) |
||||||||||||||
|
DVD-V |
VCD |
MPEG4 |
DivX |
|||||||||||
|
On ↔ Off |
||||||||||||||
|
GUI See-through |
Off, On, Auto |
|||||||||||||
|
GUI Brightness |
–3 to +3 |
|||||||||||||
|
To display current playback condition |
||||||||||||||
|
Quick OSD |
Off, Basics, Details |
|||||||||||||
|
After registering the item, press |
||||||||||||||
|
[RETURN] to show the QUICK OSD |
||||||||||||||
|
screen (A page 14). |
||||||||||||||
|
L Other Menu |
||||||||||||||
|
Setup |
(A see right) |
|||||||||||||
|
Play as DVD-Video |
• Select “Play as DVD-Video” to play |
|||||||||||||
|
or |
DVD-Video contents of DVD-Audio. |
Play as DVD-Audio
Play as DVD-VR, • Select “Play as Data Disc” to play JPEG,
Play as HighMAT MPEG4 or DivX video contents on or DVD-RAM or to play HighMAT
Play as Data Disc disc without using the HighMAT function.
Discs — Changing the player settings
1Press [SHIFT] + [SETUP] to show the setup menu.
•If you have not set QUICK SETUP (A page 9), the QUICK SETUP screen appears.
2Press [8, 9] to select the tab, then press [:] to begin selecting the items.
3Press [8, 9] to select the item, then press [ENTER] to begin selecting the settings.
4Press [8, 9, ;, :] to select, then press [ENTER] to make the settings.
Alternatively, press the numbered buttons. e.g. Setup menu
|
Setup |
Item |
||||
|
Tab |
Disc |
Audio |
English |
||
|
Video |
Setting |
||||
|
Subtitle |
Automatic |
||||
|
Audio |
|||||
|
Menus |
English |
||||
|
Display |
|||||
|
Others |
Advanced Disc Review |
Intro Mode |
|||
|
Ratings |
Level 8 |
||||
|
to select and press ENTER |
RETURN to |
exit |
•To exit, press [SHIFT]+[SETUP].
•The settings remain intact even if you switch the unit to standby.
•Underlined items in the following diagram are the factory preset.
The QUICK SETUP enables successive settings of the items in the shaded area.
L “Disc” tab
|
Audio |
• English |
• (Language options)1 |
||||
|
Choose the audio |
• Original2 |
• Other |
3 |
|||
|
language. |
||||||
|
Subtitle |
• Automatic4 |
• English |
||||
|
Choose the subtitle |
• (Language options)1 |
• Other |
3 |
|||
|
language. |
||||||
|
Menus |
• English |
|||||
|
Choose the language |
• (Language options)1 |
|||||
|
for disc menus. |
||||||
|
Changing the menu |
• Other |
|||||
|
language in QUICK |
3 |
|||||
|
SETUP also changes |
||||||
|
this setting. |
||||||
|
Advanced Disc Review |
• Intro Mode: |
|||||
|
(A page 14) |
Reviews each title/program. |
•Interval Mode:
Reviews not only each title/program but also each 10 minute interval within a title/program.
|
Ratings |
Setting ratings (When level 8 is |
||
|
Set a ratings level to |
selected) |
||
|
limit DVD-Video play. |
• 8 |
No Limit |
• 1 to 7 |
|
• Follow the on-screen |
• 0 |
Lock All: To prevent play of discs |
|
|
instructions. |
without rating levels. |
||
|
Changing ratings (When level 0 to 7 is |
|||
|
selected) |
•Unlock Player • Change Password
•Change Level • Temporary Unlock
When you select your ratings level, a password screen is shown.
Follow the on-screen instructions.
Do not forget your password.
A message screen will be shown if a DVD-Video exceeding the ratings level is inserted in the unit.
Enter your password and then follow the on-screen instructions.
1 Language options
French, German, Italian, Spanish, Portuguese, Russian and
Dutch
2 The original language designated on the disc is selected. 3 Input a code number referring to the table on page 34.
4 If the language selected for “Audio” is not available, subtitle appears in that language (if available on the disc).
![]()
L “Video” tab
|
TV Aspect |
• 4:3 Pan&Scan: Regular aspect television (4:3) |
||||||||||||||
|
Choose the setting suit your television |
The sides of the widescreen picture are cut off so it fills the screen |
||||||||||||||
|
and preference. |
(unless prohibited by the disc). |
||||||||||||||
|
• 4:3 Letterbox: Regular aspect television (4:3) |
|||||||||||||||
|
Widescreen software is shown in the letterbox style. |
|||||||||||||||
|
• 16:9: Widescreen television (16:9) |
|||||||||||||||
|
TV Type |
• Standard (Direct View TV) |
||||||||||||||
|
Select to suit the type of television. |
• CRT Projector |
•LCD TV/Projector |
|||||||||||||
|
• Projection TV |
•Plasma TV |
||||||||||||||
|
Time Delay |
• 0ms |
•20ms |
•40ms |
•60ms |
•80ms |
•100ms |
|||||||||
|
When connected with a Plasma display, adjust |
|||||||||||||||
|
if you notice the audio is out of sync with the video. |
|||||||||||||||
|
Still Mode |
• Automatic |
||||||||||||||
|
Specify the type of picture shown when |
• Field: |
The picture is not blurred, but picture quality is lower. |
|||||||||||||
|
paused. |
• Frame: Overall quality is high, but the picture may appear blurred. |
||||||||||||||
|
NTSC Disc Output |
• PAL60: When connected to a PAL television. |
||||||||||||||
|
Choose PAL 60 or NTSC output when playing |
• NTSC: When connected to an NTSC television. |
||||||||||||||
|
NTSC discs (A page 4, Video systems). |
|||||||||||||||
|
Picture/Video Output |
• Automatic |
• PAL |
|||||||||||||
|
Change the video signal format to be output |
• NTSC/PAL60: Output will depend on “NTSC Disc Output” setting (A see above). |
||||||||||||||
|
for JPEG, MPEG4 and DivX video if picture |
|||||||||||||||
|
output is not smooth during playback. |
|||||||||||||||
|
L “Audio” tab |
|||||||||||||||
|
Dynamic Range Compression |
• |
Of |
f |
||||||||||||
|
• |
On: |
Adjust for clarity even when the volume is low by compressing the range of the |
|||||||||||||
|
lowest sound level and the highest sound level. Convenient for late night viewing. |
|||||||||||||||
|
(Only works with Dolby Digital) |
|||||||||||||||
|
Speaker Settings (A see below) |
• Center (C): |
0.0/1.0/2.0/3.0/4.0/5.0 ms |
|||||||||||||
|
Set the delay time for your center and |
• Surround (LS/RS): 0.0/5.0/10.0/15.0 ms |
||||||||||||||
|
surround speakers. |
|||||||||||||||
|
L “Display” tab |
|||||||||||||||
|
Menu Language |
• English • Français |
• Deutsch |
• Italiano |
• Español |
• Português • Pуcский • Nederlands |
||||||||||
|
On-Screen Messages |
• On |
•Off |
|||||||||||||
|
Background during Play |
• Black |
•Grey |
|||||||||||||
|
Select backgroud during JPEG, MPEG4 and |
|||||||||||||||
|
DivX video playback. |
|||||||||||||||
|
L “Others” tab |
|||||||||||||||
|
DivX Registration |
You need this registration code to purchase and play DivX Video-on-Demand (VOD) content. |
||||||||||||||
|
Displays the unit’s registration code. |
(A page 31, About DivX VOD content) |
||||||||||||||
|
QUICK SETUP |
• Yes |
•No |
|||||||||||||
|
Re-initialise Setting |
• Yes: The password screen is shown if Ratings (A page 20) are set. Please enter the same |
||||||||||||||
|
This returns all values in the Setup menus |
password. After “INIT” on the display disappears, turn the unit to the default settings. |
||||||||||||||
|
off and on again. |
• No |
||||||||||||||
|
. |
Changing the delay time (Speaker Settings)
(Effective when playing multi-channel audio)
(Center and surround speakers only)
For optimum listening with 5.1-channel sound, all the speakers, except for the subwoofer, should be the same distance from the seating position.
If you have to place the center or surround speakers closer to the seating position, adjust the delay time to make up for the difference.
|
C |
: Actual speakers position |
|
L |
C |
R |
|
|
a |
c |
: Ideal speakers position |
|
|
abc : Primary listening distance |
|||
|
SW |
|||
|
b |
|||
|
LS |
RS |
Approximate room dimensions |
|
|
LS |
RS |
Circle of constant primary listening distance
If either distance a or b is less than c, find the difference in the table and change to the recommended setting.
|
a Center speaker |
b Surround speaker |
||
|
Difference (Approx.) |
Setting |
Difference (Approx.) |
Setting |
|
30 cm |
1.0 ms |
150 cm |
5.0 ms |
|
60 cm |
2.0 ms |
300 cm |
10.0 ms |
|
90 cm |
3.0 ms |
450 cm |
15.0 ms |
|
120 cm |
4.0 ms |
||
|
150 cm |
5.0 ms |
1 Press [8, 9] to select the delay time box and press [ENTER].
2 Press [8, 9] to adjust the delay time and press [ENTER].
Center delay time
|
L |
ms |
C |
R |
|
|
0.0 |
||||
|
Exit |
Exit |
SW |
||
|
LS |
ms |
RS |
||
|
0.0 |
||||
Surround delay time
To finish the speaker setting
Press [;] to select “Exit” and press [ENTER].
ENGLISH
Discs — Changing the player settings
RQT8251
21
21

|
REW/ |
/ |
, |
STOP |
||
|
ENGLISH |
/ |
/FF |
|||
|
, TAPE |
|||||
|
TUNER/BAND |
|||||
|
, DVD/CD |
|||||
|
DECK 1/2 |
|||||
|
DECK 2 |
|||||
|
DECK 1 |
|||||
|
REC |
|||||
|
DECK 1 |
DECK 2 |
|
TUNER PGM |
|
Numbered |
|
buttons |
|
PLAY MODE |
|
radio |
TUNER/AUX |
, DVD/CD |
|
The |
, TAPE |
|

 ,
, /FF
/FF
SHIFT
The radio
Manual tuning
1Press [TUNER/AUX] (main unit: [TUNER/BAND]) to select “FM” or “AM”.
The unit comes on.
2Press [(] or [)] (main unit: [REW/4/g] or [f/3/FF]) to select the frequency.
Press and hold [(] or [)] (main unit: [REW/4/g] or
[f/3/FF]) until the frequency starts scrolling to start automatic tuning. Tuning stops when a station is found.
“TUNED” is displayed when a radio station is tuned.
“ST” is displayed when a stereo FM broadcast is being received.
L If noise is excessive in FM
Press [PLAY MODE] to display “MONO”.
Monaural sound is selected and noise reduces when reception is weak.
Press [PLAY MODE] again to cancel the mode.
“MONO” is also canceled if the frequency is changed.
RQT8251
22
The radio
L AM allocation setting (main unit only)
The step is factory-set to 9 kHz, but you can change it to receive broadcasts allocated to 10 kHz steps.
1.Select “FM”.
2.Press and hold [TUNER/BAND].
After a few seconds the display changes to show the current minimum frequency. Continue to hold the button down. The minimum frequency changes and the step is changed.
To return to the original step, repeat the above steps.
Note
After changing the “allocation” setting, the frequencies you previously preset in the memory will be cleared. Preset them again.
Preset tuning
Remote control only
There are two methods of pre-setting stations.
Automatic presetting :All the stations the tuner can receive are preset.
Manual presetting :You can select the stations to preset and the order they are preset in.
Up to 15 stations each can be set in the FM and AM bands.
Preparation:
Press [TUNER/AUX] to select “FM” or “AM”.
Automatic presetting
Do the following once each for FM and AM.
Preparation: Tune to the frequency where pre-setting is to begin.
Press [SHIFT] + [TUNER PGM] until the frequency changes.
The tuner presets all the stations it can receive into the channels in ascending order. The last station to be set is then played.
Manual presetting
Pre-set the stations one at a time.
1Tune to the station (A see left).
2Press [SHIFT] + [TUNER PGM].
3While “PGM” is flashing on the display
Press the numbered buttons to select a channel.
Alternatively, press [g, REW/4] or [f, 3/FF] then press [SHIFT]+[TUNER PGM].
The station occupying a channel is erased if another station is preset in that channel.
Selecting channels
Remote control only
1Press [TUNER/AUX] to select “FM” or “AM”.
2Press the numbered buttons or [g, REW/4] or [f, 3/FF] to select the channel.
•To select a 2-digit number e.g. 12: [h10] A [1] A[2].
22

Adhesive tape
Cassette tapes
Playback
You can use either deck 1 or deck 2 for tape playback.
Use normal position tapes.
High position and metal position tapes can be played, but the unit will not be able to do full justice to the characteristics of these tapes.
1Press [; :, TAPE].
The unit comes on.
If a cassette was loaded, play starts automatically (One touch play).
2Press [c DECK 1] or [DECK 2 c] on the main unit and
insert the cassette.
|
Insert with the side to be played |
Front side |
|
facing towards you and the exposed |
|
|
tape facing down. |
|
|
Close the holder by hand. |
3Press [; :, TAPE] to start playback.
Every time you press the button: F: ↔ ;R F:: Forward side is played.
;R: Reverse side is played.
To stop tape playback
Press [L] (main unit: [L STOP]).
To select the reverse mode
While TAPE is selected as the source
Press and hold [PLAY MODE].
Every time you press and hold the button:
 : One side is played.
 : Both sides are played. (forward → reverse) Play stops at the end of the reverse side.
 : Both sides are played repeatedly until [L] (main unit: [L STOP]) is pressed.
To listen to 2 tapes consecutively, load a tape into each deck and select “ ”. Both tapes will be played repeatedly until [L] (main unit: [L STOP]) is pressed.
To fast-forward or rewind
Press [REW/4/g] (rewind) or [f/3/FF] (fast-forward).
To select between loaded decks
Press [PLAY MODE] (main unit: [DECK 1/2]).
Note
•Tape playback is momentarily interrupted if you open the other deck.
•Tapes exceeding 100 minutes are thin and can break or get caught in the mechanism.
•Tape slack can get caught up in the mechanism and should be taken up before the tape is played.
•Endless tapes can get caught up in the deck’s moving parts if used incorrectly. Use tapes appropriate to this unit’s auto-reverse mechanism.
Recording
Selection of tapes for recording
Use normal position tapes.
High position and metal position tapes can be used, but this unit will not be able to record or erase them correctly.
Preparation:
• Wind up the leader tape so recording can begin immediately.
• Press [; :, TAPE] and then [L] (main unit: [L STOP]).
ENGLISH
1 Press [DECK 2 c] on the main unit and insert the cassette to be recorded.
Insert with the side to be recorded facing towards you and the exposed tape facing down.
The tape direction is automatically set to “F:”.
2 Press and hold [PLAY MODE] to select the reverse mode.
Every time you press and hold the button:
 : One side only records.
 ,
,  : Both sides record (forward → reverse).
“ ” is automatically changed to “ ” when [[ REC] is pressed.
3 Select the source to be recorded.
|
Radio recording: |
||
|
Tune to the required station. (A page 22) |
||
|
Disc recording: |
||
|
1Insert the disc(s) you want to record. |
tapes |
|
|
Press [:, DVD/CD] and then [L] (main unit: [L STOP]). |
||
|
2Prepare the desired disc recording mode. |
||
|
• To record programmed items [A do steps 1–2 on page 18, |
Cassette |
|
|
1Press [; :, TAPE] and then [L] (main unit: [L STOP]). |
||
|
“Program play (up to 32 items)”]. |
||
|
Ensure disc is stopped. |
||
|
Tape-to-tape recording: |
2Press [c DECK 1] on the main unit and insert the cassette you want to record.
4 Press [[ REC] on the main unit to start recording.
To stop recording
Press [L] (main unit: [L STOP]).
If the tape finishes before the disc
The disc continues playing. Press [L] (main unit: [L STOP]) to stop it.
Note
•Multi-channel sources (3 to 5.1 channels) are automatically downmixed to 2 channels during recording.
•Changes to volume and sound or field quality do not affect recording.
•You cannot open deck 1 while recording.
•You cannot fast-forward or rewind one deck while recording with the other.
Erasure prevention
Use a screwdriver or similar
object to break out the tab.
Side A
Tab for side B Tab for side A
To re-record on a protected cassette
Cover the hole with adhesive tape.
To erase a tape
1.Press [; :, TAPE] and then [L] (main unit: [L STOP]).
2. Insert the recorded tape into deck 2.
Ensure there is no tape in deck 1.
3.Press and hold [PLAY MODE] to select the reverse mode.
4.Press [[ REC] on the main unit.
RQT8251
23
23
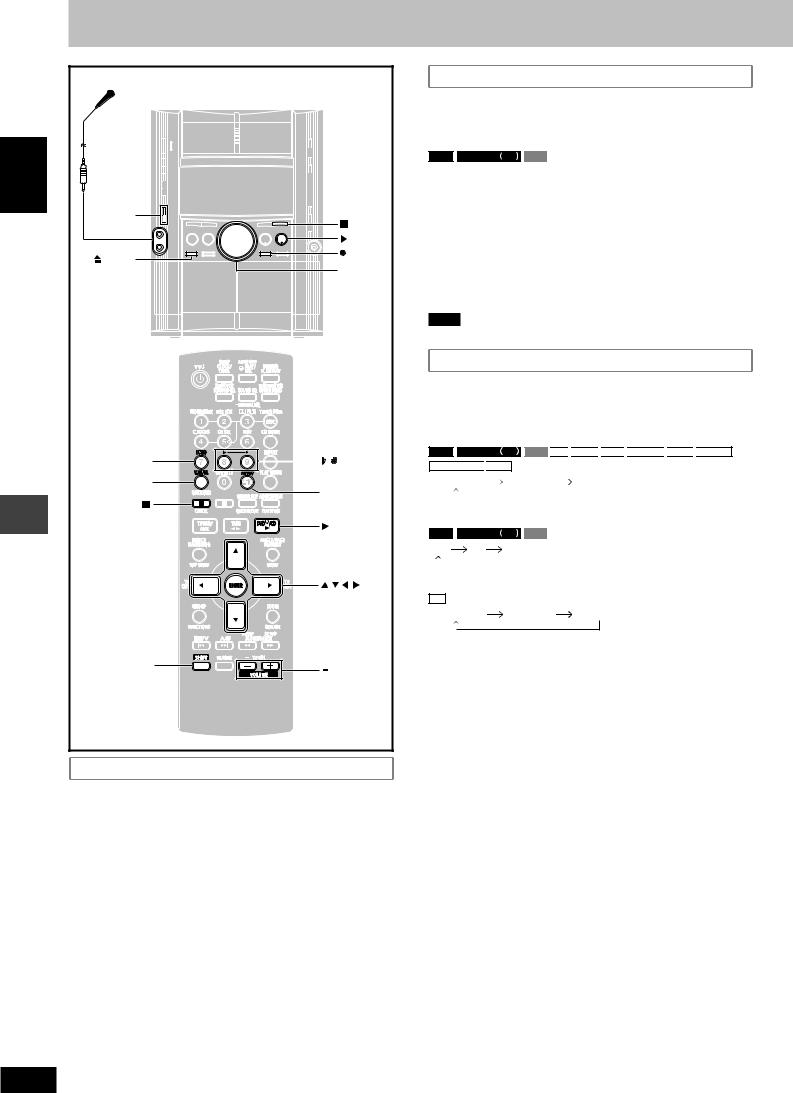
Enjoying karaoke
|
Microphone(s) |
|||
|
(not included) |
|||
|
ENGLISH |
|||
|
MIC LEVEL |
STOP |
||
|
DOWN, UP |
|||
|
, DVD/CD |
|||
|
DECK 1 |
REC |
||
|
VOL DOWN, |
|||
|
VOL UP |
|||
|
ECHO |
, |
||
|
V.MUTE |
AUDIO |
||
|
, DVD/CD |
|||
|
karaoke |
, , , |
, |
|
|
Enjoying |
ENTER |
||
|
SHIFT |
, +, |
||
|
VOLUME |
Before enjoying the karaoke function
•Lower the microphone volume with [MIC LEVEL DOWN] on the main unit, then connect the microphone(s) to the microphone jack(s).
Every time you press the [MIC LEVEL DOWN, UP] buttons:
MIC 7 ↔ 6 ↔ 5 ↔ 4 ↔ 3 ↔ 2 ↔ 1 ↔ OFF
Use a dynamic microphone.
Plug type: 6.3 mm monaural.
Audio is automatically switched to stereo (2ch)
You cannot perform karaoke with surround effects, Dolby Pro
Logic II or Center Focus, or during speaker level adjustments.
•If a strange noise (howling) is emitted during use, move the microphone away from the speakers, or lower the microphone volume.
•When you are not using the microphone, disconnect it from the microphone jack, and lower the microphone volume level to “MIC OFF”.
Vocal mute function
Use this function when enjoying sources not formatted for karaoke. The voice portion of the track is blocked out but not the background music.
Preparation:
RAM
 DVD-RW VR
 VCD
VCD
Press [SHIFT]+[AUDIO] to select “L R”.
Press [SHIFT] + [V.MUTE] to switch the function on or off.
You need software recorded in stereo sound if you want to use the vocal mute function. Voice and/or static may be reproduced with the following types of software.
•Software recorded monaural
•Classical music or works performed by a limited number of instruments
•Chorus works or duets
Note
There might be some strange sound heard during playback.
Audio mode function
Use this function to set the audio source after switching off the vocal mute function.
Press [SHIFT] + [AUDIO].
Every time you press the button:
RAM
 DVD-RW VR
 VCD
VCD
 CD
CD 
 WMA
WMA
 MP3
MP3
 MPEG4
MPEG4 
 DivX
DivX 
 TUNER CASSETTE
 AUX
AUX
|
AUDIO LR |
AUDIO L |
AUDIO R |
||||||||||||||||
|
(Display on the main unit) |
||||||||||||||||||
|
RAM |
DVD-RW VR |
VCD |
||||||||||||||||
|
L R |
L |
R |
||||||||||||||||
|
(On-screen display on the television) |
||||||||||||||||||
|
CD |
||||||||||||||||||
|
WMA |
MP3 |
MPEG4 |
||||||||||||||||
|
AUDIO LR |
R |
(On-screen display on the television)
AUDIO LR (L R) : Left channel sound is heard from the left speaker and right channel sound is heard from the right speaker (Vocal and accompaniment).
AUDIO L (L) : Only left channel sound (No vocal).
AUDIO R (R) : Only right channel sound (Vocal).
Select no vocal for karaoke.
Vocal and no vocal may be reversed.
Actual operations depend on the disc. Read the disc’s instructions for details.
24

Enjoying karaoke function
1Select the source and start play.
2Start singing and adjust volume with [–, + VOLUME] (main unit: [VOL DOWN, VOL UP]) and [MIC LEVEL DOWN, UP] on the main unit.
To turn the vocals on and off
DVD-V
1Press [SHIFT] + [AUDIO] during play.
2Press [8] or [9] then [ENTER], or [;, :] to select the mode.
|
Solo discs |
Duet discs |
|
|
Off: Vocals off |
Off: |
Vocals off |
|
On: Vocals on |
V1+V2: |
Both parts |
|
V1: |
Part 1 only |
|
|
V2: |
Part 2 only |
Changing the key
To raise the key by a halftone:
Press [SHIFT] + [i].
Every time the button is pressed, the key will change as follows: KEYCON –6 → –5 → –4 → –3 → –2 → –1 → 0 → +1 → +2 → +3 → +4 → +5 → +6
To lower the key by a halftone:
Press [SHIFT] + [I].
Every time the button is pressed, the key will change as follows:
KEYCON +6 → +5 → +4 → +3 → +2 → +1 → 0 → –1 → –2 → –3 →
–4 → –5 → –6
To cancel
Press [SHIFT]+[I] or [SHIFT]+[i] to display “0”.
Adjusting the echo effect
Press [SHIFT] + [ECHO].
Every time you press the button:
ECHO 1 → ECHO 2 → ECHO 3 → ECHO 4 → ECHO OFF (off)
↑
The effect increases with the level.
To record your karaoke performance
|
Preparation: |
||
|
• Do the preparatory steps 1–2 on page 23. |
||
|
• When singing along with discs |
||
|
Insert the disc(s) you want (A page 12). |
ENGLISH |
|
|
Press [:, DVD/CD]. |
||
|
• When singing along with tape |
||
|
Press [c DECK 1] on the main unit and insert the tape you want. |
||
|
• When singing along with radio |
||
|
Select your desired station (A page 22). |
||
|
• When singing along from an external source |
||
|
Connect and prepare the source (A page 30). |
1Press [SHIFT] + [AUDIO] to select the voice mode.
2Adjust volume with [–, + VOLUME] (main unit: [VOL DOWN, VOL UP]) and [MIC LEVEL DOWN, UP] on the main unit.
Press [[ REC] on the main unit and start karaoke performance.
To stop recording
Press [L] (main unit: [L STOP]).
Note
To playback the recorded tape, be sure to press [SHIFT]+[AUDIO] to select the “AUDIO LR” mode.
To record your voice
Preparation: Do the preparatory steps 1–2 on page 23.
Ensure that there is no tape in deck 1.
|
1 |
Press [[ REC] on the main unit to start recording. |
karaoke |
|
|
2 |
Speak through the microphone and adjust volume with |
||
|
[–, + VOLUME] (main unit: [VOL DOWN, VOL UP]) and |
|||
|
[MIC LEVEL DOWN, UP] on the main unit. |
Enjoying |
||
RQT8251
25
25
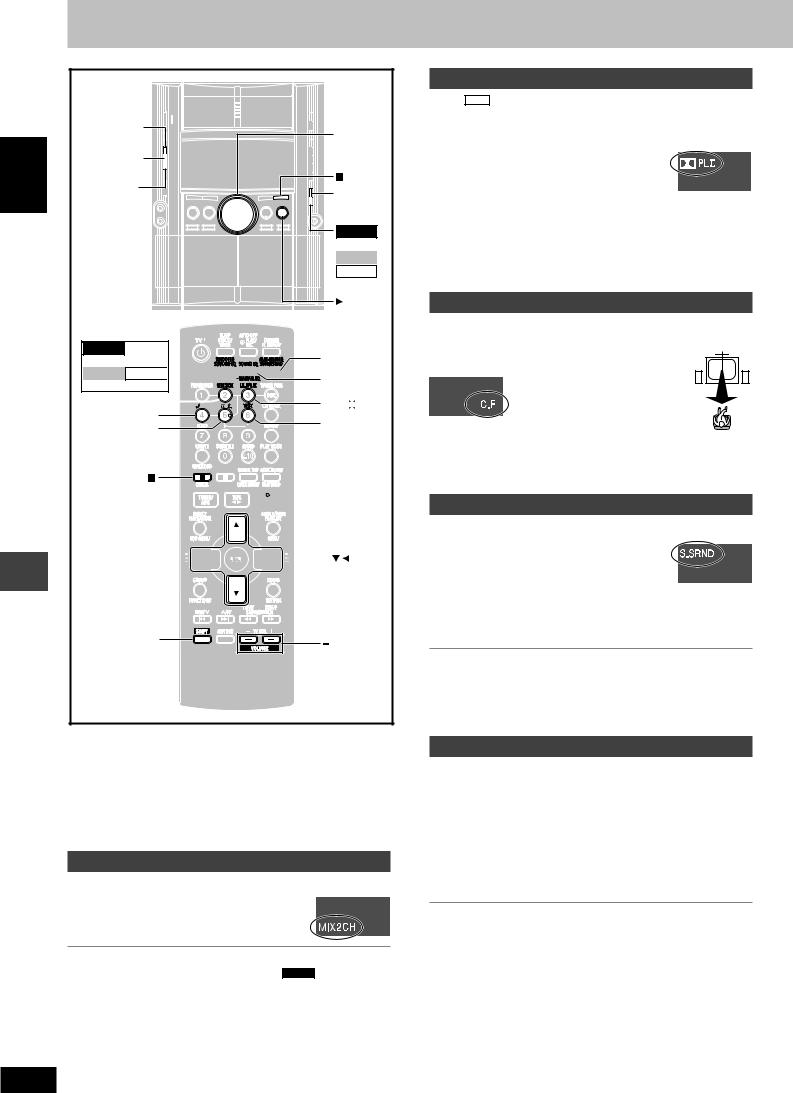
ENGLISH
Sound field and sound quality
Sound field and sound quality
|
MULTI |
||
|
RE-MASTER |
VOL DOWN, |
|
|
SUPER |
VOL UP |
|
|
SURROUND |
||
|
SOUND EQ |
STOP |
|
|
SUPER |
||
|
SOUND EQ |
||
|
VK725D |
||
|
S.WOOFER |
||
|
VK825D |
||
|
VK925D |
||
|
SUBWOOFER |
||
|
, DVD/CD |
S.SOUND EQ,
VK725D
S.WOOFER
VK825D VK925D 


SUBWOOFER
MIX 2CH


C.FOCUS
CH SEL
SUPER SRND, M.RE-MASTER
SOUND EQ, MANUAL EQ
 PL
PL
TEST

 , DVD/CD


 , , ,
, , ,
VOLUME
•Down-mixing, Center Focus, Super Surround, Super Woofer (A page
27)and Subwoofer level (A page 27) cannot be performed if headphones are connected (“ERROR” appears on the display).
•You may experience a reduction in sound quality when these sound field systems are used with some sources. If this occurs, turn the sound field system off.
•The following functions may not work depending on the discs recording.
Down-mixing
You can output the down-mixed 2 channel signals when necessary.
Press [SHIFT] + [MIX 2CH].
Each time you press the button:
MIX 2CH ON ↔ MIX 2CH OFF
•When “D.MIX” flashes on the display, the disc contains multiplechannel signals that cannot be down-mixed. DVD-A
Dolby Pro Logic II
Except DivX
Dolby Pro Logic II is an advanced decoder that derives 5-channel surround (Left and Right Front, Center, Left and Right Surround) from any stereo program material, whether or not it has been specifically Dolby Surround encoded.
Press [SHIFT] + [pPLII].
Every time you press the button:
MOVIE: Movie software, recorded in Dolby
Surround.
MUSIC: Stereo sources
OFF: Cancel
•This works only in DVD/CD mode.
•“pPLII” lights when there is effect.
Center Focus
(Discs where the dialogue is recorded in the center channel)
You can make the sound of the center speaker seem like it is coming from within the television. 

Press [SHIFT] + [C.FOCUS].
Every time you press the button:
C FOCUS ON ← → C FOCUS OFF
•This does not work when Super Surround is turned on.
•This will also work when Dolby Pro Logic II is turned on.
Super Surround
Press [SUPER SRND] (main unit: [SUPER SURROUND]).
Every time you press the button:
MUSIC: Adds surround effects to stereo sources.
MOVIE: Use this mode when playing movie software.
PARTY: Sound is in stereo regardless of the direction you are facing.
(off): Cancel
•You can adjust the volume of the surround speakers to get the best surround effect (A page 27, Speaker level adjustments).
•Super Surround does not work when playing a DVD recorded with 5.1 channel.
•When Super Surround is on, Dolby Pro Logic II turns off.
Sound field control
Press [SOUND EQ] to select a setting.
Every time you press the button: HEAVY: Adds punch to rock. CLEAR: Clarifies higher sounds. SOFT: For background music.
DISCO: Reverberates sound to make you feel like you are in a disco.
LIVE: Makes vocals more alive.
HALL: Expands sound to make you feel like you are in a hall. EQ-OFF: Canceled (no effect is added) (factory preset).
To check the current setting
Press [SOUND EQ].
26

Using the Manual Equalizer (MANUAL EQ)
Create your own sound quality effects.
1Press and hold [–MANUAL EQ] until “MANUAL EQ” appears.
2(Within 12 seconds)
Change the sound quality with the cursor buttons.
1 Select the sound range to be adjusted with [;] or [:].
BASS ←→ MID ←→ TREBLE
2Adjust the level with [8] or [9]. (–3 to +3)
Repeat step 2 to set the desired sound quality.
The original display is restored on the display panel in about 3 seconds.
To cancel
Press [SOUND EQ] to select “EQ-OFF”.
The changes you make are stored and automatically recalled the next time you select “MANUAL EQ”.
Using the Super Sound Equalizer
Turning on the super sound equalizer gives you a more powerful sound.
Press [S.SOUND EQ] (main unit: [SUPER SOUND EQ]).
The “S.SOUND EQ” indicator lights up.
Every time you press the button:
S.SOUND EQ 1 S.SOUND EQ 2
S.SOUND EQ OFF 
To cancel
Press [S.SOUND EQ] (main unit: [SUPER SOUND EQ]) to turn off the indicator.
Press [SHIFT] + [S.WOOFER] (main unit: [S.WOOFER]).
Every time you press the button:
SUPER WOOFER ON ←→ SUPER WOOFER OFF
|
Subwoofer level |
||||
|
VK825D |
VK925D |
|||
Press [SHIFT] + [SUBWOOFER] (main unit: [SUBWOOFER]).
Every time you press the button:
SUB W1 SUB W2 SUB W3 (factory preset) SUB W4
Multi Re-master — Enjoying more natural sound
RAM
 DVD-RW
  VR
VR
 DVD-A
DVD-A
 DVD-V
DVD-V
 CD
CD 
 VCD
VCD
Discs recorded with multi channels LPCM at 44.1 kHz or 48 kHz
This feature gives you a more natural sound by adding the higher frequency signals not recorded on the disc.
WMA
 MP3
MP3
Discs recorded at 44.1 kHz or 48 kHz
This feature reproduces the frequencies lost during recording to give you a sound closer to the original.
During play
Every time you press [SHIFT] + [M.RE-MASTER] (main unit: [MULTI RE-MASTER]):
|
Setting |
|||||||||||||||||
|
RAM |
DVD-RW VR |
DVD-A |
DVD-V |
WMA |
MP3 |
||||||||||||
|
Type of music |
Effect level |
||||||||||||||||
|
CD |
VCD |
||||||||||||||||
|
1 |
High tempo (e.g., pop and rock) |
Light |
|||||||||||||||
|
2 |
Various tempos (e.g., jazz) |
Medium |
|||||||||||||||
|
3 |
Low tempo (e.g., classical) |
Strong |
|||||||||||||||
|
Off |
Off |
Off |
|||||||||||||||
Speaker level adjustments
|
This is one of the ways to get appropriate surround effects. |
|
|
Preparation: |
|
|
Press [:, DVD/CD] and then [L] (main unit: [L STOP]). |
|
|
1 While stopped and no on-screen display is shown |
ENGLISH |
|
R: Front right |
|
|
Press [SHIFT] + [TEST] to output a test signal. |
L: Front left
C: Center
RS: Right surround LS: Left surround
• There is no output from SW (subwoofer) channel.
2Press [–, + VOLUME] (main unit: [VOL DOWN, VOL UP]) to set the volume level normally used for listening.
3Press [8] (increase) or [9] (decrease) to adjust the speaker level for each speaker.
C, RS, LS: –6 dB to +6 dB
(L, R: Only the balance is adjustable.)
•To adjust the balance of the front speakers
While outputting the test signal, press [;, :].
•Adjust the speaker level to the same level as the front speakers.
To stop the test signal
Press [SHIFT]+[TEST] again.
L To adjust speaker level during play
(Effective when playing multi-channel audio or Dolby Pro Logic II or Super Surround is on.)
1 Press [SHIFT] + [CH SEL] to select the speaker.
|
L→C→R→RS→LS→SW |
|||||
|
SW: Subwoofer |
|||||
|
• You can adjust SW only if the disc includes a subwoofer |
|||||
|
channel. |
|||||
|
• “SW” does not appear on the display and is not adjustable |
|||||
|
quality |
|||||
|
when Dolby Pro Logic II is turned on. |
|||||
|
• “S” appears on the display when “MUSIC” |
or “MOVIE” is |
||||
|
selected with Super Surround (A page 26). In this case, you |
|||||
|
can adjust both surround speaker levels at the same time |
sound |
||||
|
using [8, 9]. |
|||||
|
S: –6 dB to +6 dB |
|||||
|
2 Press [8] (increase) or [9] (decrease) to adjust the |
and |
||||
|
speaker level for each speaker. |
|||||
|
C, RS, LS, SW: –6 dB to +6 dB |
field |
||||
|
(L, R: Only the balance is adjustable.) |
|||||
|
• To adjust the balance of the front speakers |
Sound |
||||
|
While “L” or “R” is selected, press [;, :]. |
|||||
RQT8251
27
27

|
Headphones |
|||
|
(not included) |
|||
|
ENGLISH |
DISPLAY |
DEMO |
|
|
PHONES |
|||
|
VOL DOWN, |
|||
|
VOL UP |
|||
|
TV |
DIMMER |
||
|
PLAY/REC, |
|||
|
CLOCK/ |
AUTO OFF |
||
|
TIMER, |
|||
|
SLEEP |
|
TV CH , |
|||
|
timers |
TV CH |
||
|
, REW/ , |
, +, |
||
|
, /FF |
TV/AV |
||
|
theUsing |
SHIFT |
TV VOL |
|
|
MUTING |
|||
Using the timers
The play/record timer
You can set the timer to come on at a certain time to wake you up (play timer) or to record a radio station or from the aux source (record timer).
The play and record timers cannot be used together.
Preparation:
•Turn the unit on and set the clock (A page 9).
•For the play timer, prepare the desired music source (tape/disc/ radio/aux), and set the volume.
•For the record timer, check the cassette’s erasure prevention tabs (A page 23) and insert the tape in deck 2 (A page 23). Tune to the radio station (A page 22) or select the aux source
(A page 30).
1 Press [CLOCK/TIMER] to select the timer function.
Every time you press the button:
CLOCK 
 PLAY
PLAY 
 REC
REC
 Previous display
rPLAY: to set the play timer rREC: to set the record timer
(Proceed to the next step within 7 seconds)
2ON time setting
1 Press [g, REW/4] or [f, 3/FF] to set the start time.
|
RQT8251 |
2 Press [CLOCK/TIMER]. |
|
|
28 |
OFF time setting |
|
|
Repeat steps 1 and 2. |
||
Using the timers
The play/record timer
3Press [rPLAY/REC] to display the timer indicator.
Every time you press the button:
PLAY REC  (off)
(off)
rPLAY: to turn the play timer on rREC: to turn the record timer on
(The indicator doesn’t appear if the start and finish times or the clock hasn’t been set.)
4Press [f] to turn the unit off.
The unit must be off for the timers to operate.
|
• |
Play timer: Play will start in the set condition at the set |
|
time with volume increasing gradually to the |
|
|
• |
set level. |
|
Record timer: The unit comes on 30 seconds before the set |
|
|
time with the volume muted. |
To cancel the timer
Press [rPLAY/REC] to clear the timer indicator from the display. (The timer comes on at the set time everyday if the timer is on.)
To change the settings (when the unit is on)
To change the play/record times
Do steps 1, 2 and 4.
To change the source or volume
1.Press [rPLAY/REC] to clear the timer indicator from the display.
2.Make changes to the source or volume.
3.Do steps 3 to 4.
To check the settings
Press [CLOCK/TIMER] while the unit is on to select “rPLAY” or “rREC”.
The settings are shown in the following order:
Play timer: start time→finish time→source→volume Record timer: start time→finish time→source
To check the settings while the unit is off, press [CLOCK/TIMER] twice.
If you use the unit after the timers are set
After using, check that the correct tape/disc(s) are loaded before turning the unit off.
Note
•If you turn the unit off and on again while a timer is functioning, the finish time setting will not be activated.
•If you selected AUX as the source, when the timer comes on, the unit turns on and engages “AUX” as the source. If you want to playback or record from a connected unit, set that unit’s timer to the same time. (See the connected unit’s instruction manual.)
The sleep timer
This timer turns the unit off after a set time.
While enjoying the desired source:
Press [SHIFT] + [SLEEP] to select the time (minutes).
Every time you press the button:
 SLEEP 30
  SLEEP 60
 SLEEP 90
  SLEEP 120
  SLEEPOFF
To cancel the sleep timer
Press [SHIFT]+[SLEEP] to select “SLEEPOFF”.
To confirm the remaining time
Press [SHIFT]+[SLEEP] once.
The remaining time is shown for about 5 seconds.
To change the setting
Press [SHIFT]+[SLEEP] to select the new setting.
You can use the sleep timer in combination with the play/record timer.
Make sure the unit is off before the play/record timer’s start time.
Note
The sleep timer will be turned off when you start recording.
28

Other functions
Muting the volume
Press [MUTING].
Volume is reduced to minimum.
To cancel
Press [MUTING] again or reduce the volume to minimum (—dB), then raise it to the required level.
Muting is also canceled when you switched the unit to standby.
Auto-off function
When disc or tape is selected as the source
To save power, the unit turns off if it is left unused for ten minutes.
This function does not work if the source is tuner or AUX.
Press [SHIFT] + [AUTO OFF].
“AUTO OFF” is shown on the main unit’s display.
The setting is maintained even if the unit is turned off.
If you select tuner or AUX as the source, “AUTO OFF” goes out. It comes on again when you select disc or tape.
To cancel
Press [SHIFT]+[AUTO OFF] again.
Dimming the display
Press [SHIFT] + [DIMMER].
To return to the original brightness, press [SHIFT]+[DIMMER] again.
•The display is dimmed, but brightens when you perform some operations.
Changing the sound range display
The unit’s display shows the level of each sound range with the four types of display described below.
Press [DISPLAY –DEMO] on the main unit.
Every time you press the button:
Normal display → Peak-hold display → Aurora display  (off) ← Reflection display
Normal display
This display indicates the strength of the sound in each tonal range.
Peak-hold display
The peak sound value of each sound range is held on the display for about one second after it occurs.
Aurora display
The peak sound value of each sound range is displayed in inverted form.
Reflection display
The display which indicates the strength of the sound in each tonal range is displayed in inverted form.
ENGLISH
Using other equipment
Using headphones
1Reduce the volume and connect the headphones (not included).
Headphone plug type: 3.5 mm stereo
2Adjust headphone volume with [VOL DOWN, VOL UP] on the main unit.
Audio is automatically switched to stereo (2-channel).
Note
Avoid listening for prolonged periods of time to prevent hearing damage.
Operating a television
Point the remote control at the television for the following operations.
Turning the television on/off
Press [SHIFT] + [TVf].
Switching the television’s video input mode
Press [SHIFT] + [TV/AV].
Changing channels
Press [SHIFT] + [TV CH4] or [SHIFT] + [TV CH3].
Adjusting the volume
Press [SHIFT] + [–TV VOL] or [SHIFT] + [TV VOL+].
Note
Some models cannot be operated by this remote control.
|
Using a subwoofer |
VK725D |
|
|
Connect an active subwoofer (not included). See below for |
||
|
connection. |
||
|
Back of the |
||
|
main unit |
Audio cable |
|
|
(not included) |
||
|
S.WOOFER |
To the |
|
|
OUT |
||
|
subwoofer’s |
||
|
LINE |
input terminal |
|
|
OUT |
AUX
R L
Adjust the volume on the subwoofer to suit your preference.
Note
When using headphones, the subwoofer should be switched off.
Other functions/Using other equipment
29

ENGLISH
Using other equipment
Using other equipment
Using an external unit
You can playback the sound from a video cassette recorder, tape deck, laser disc player, etc., through this unit’s speaker.
Before connection
•Disconnect the AC power supply cord.
•Turn off all equipment and read the appropriate operating instructions.
•The equipment connections described are examples.
•Peripheral equipment and optional cables are sold separately unless otherwise indicated.
LINE
Back of the OUT main unit
AUX
|
R |
L |
Audio cable |
|
(not included) |
||
|
PLAY OUT |
REC IN |
|
Audio cable |
L |
L |
|
|
(not included) |
|||

 R R
R R 

Video cassette recorder
(not included)
When connecting a record player
We recommend using a record player with a built-in phono equalizer.
If your player doesn’t have a built-in equalizer, connect it first to a separate equalizer and then connect that to this unit.


 STOP AUX


 REC
REC
TUNER/AUX 

1Press [TUNER/AUX] (main unit: [AUX]) to select “AUX”.
The unit comes on.
2For listening : Proceed to step 3.
For recording : Press [[ REC] on the main unit
(recording starts).
Press [L] (main unit: [L STOP]) to stop recording.
3 Start playback from external source.
•For details, refer to the instruction manual of the units which are to be connected.
•When units other than those described above are to be connected, please consult your audio dealer.
Optional antenna connections
Use outdoor antenna if radio reception is poor.
Note
Disconnect the outdoor antenna when the unit is not in use. Do not use the outdoor antenna during a lightning storm.
FM outdoor antenna
|
FM outdoor antenna |
||
|
(not included) |
||
|
Back of the |
75 coaxial cable |
|
|
main unit |
(not included) |
|
|
FM ANT |
1 |
|
|
GND |
Shield braid |
|
|
(75 ) |
||
|
Core wire |
||
|
2 |
•Disconnect the FM indoor antenna.
•The antenna should be installed by a competent technician.
AM outdoor antenna
AM outdoor antenna
(not included)
|
Back of the |
5 -12 m |
|
|
main unit |
||
|
1 |
||
|
AM ANT |
||
|
EXT |
||
|
LOOP |
AM loop |
|
|
2 |
antenna |
|
|
(included) |
||
•Run a piece of vinyl wire horizontally across a window or other convenient location.
•Leave the loop antenna connected.
30
![]()
About DivX VOD content
DivX Video-on-Demand (VOD) content is encrypted for copyright protection. In order to play DivX VOD content on this unit, you first need to register the unit.
Follow the online instructions for purchasing DivX VOD content to enter the unit’s registration code and register the unit. For more information about DivX VOD, visit www.divx.com/vod.
Display the unit’s registration code
(A page 21, “DivX Registration” in “Others” tab)

 Setup
Setup
DivX Registration
Disc
Video
|
Audio |
DivX Video-on-Demand |
|
Display |
|
|
Others |
8 alphanumeric |
|
Your registration code is : XXXXXXXX |
|
|
To learn more visit www.divx.com/vod |
characters |
Press ENTER to continue
•We recommend that you make a note of this code for future reference.
•After playing DivX VOD content for the first time, another registration code is then displayed in “DivX Registration”. Do not use this registration code to purchase DivX VOD content. If you use this code to purchase DivX VOD content, and then play the content on this unit, you will no longer be able to play any content that you purchased using the previous code.
•If you purchase DivX VOD content using a registration code different from this unit’s code, you will not be able to play this content. (“Authorization Error” is displayed.)
Regarding DivX content that can only be played a set number of times
Some DivX VOD content can only be played a set number of times. When you play this content, the remaining number of plays is displayed. You cannot play this content when the number of remaining plays is zero. (“Rented Movie Expired” is displayed.)
When playing this content
•The number of remaining plays is reduced by one if
–you turn off the unit or press [SHIFT]+[SETUP].
–you press [L]. (Press [J] to pause play.)
–you press ([g, REW/4] or [f, 3/FF]) or ([(] or [)]) etc. and arrive at another content or the start of the content being played.
•Resume (A page 12, Stop) and Marker (A page 19, Play Menu) functions do not work.
ENGLISH
Glossary
Decoder
A decoder restores the coded audio signals on DVDs to normal. This is called decoding.
DivX
A video compression format developed by DivXNetworks, Inc. that compresses video files without any considerable loss of video quality.
Dolby Digital
This is a method of coding digital signals developed by Dolby Laboratories. Apart from stereo (2-channel) audio, these signals can also be multi-channel audio. A large amount of audio information can be recorded on one disc using this method.
DTS (Digital Theater Systems)
This surround system is used in many movie theaters around the world. There is good separation between the channels, so realistic sound effects are possible.
Dynamic range
Dynamic range is the difference between the lowest level of sound that can be heard above the noise of the equipment and the highest level of sound before distortion occurs.
Film and video
DVD-Videos are recorded using either film or video. This unit can determine which type has been used, then uses the most suitable method of progressive output.
For PAL
Film is 25 frames per second.
Video is 50 fields per second (two fields making up one frame). For NTSC
Film is 24 or 30 frames per second, with motion picture film generally being 24 frames per second.
Video is 60 fields per second (two fields making up one frame).
Frame still and field still
Frames are the still pictures that go together to make a moving picture. There are about 30 frames shown each second.
One frame is made up of two fields. A regular television shows these fields one after the other to create frames.
A still is shown when you pause a moving picture. A frame still is made up of two alternating fields, so the picture may appear blurred, but overall quality is high.
A field still is not blurred, but it has only half the information of a frame still so picture quality is lower.
Progressive/Interlace
The PAL video signal standard has 625 interlaced (i) scan lines, whereas progressive scanning, called 625p, uses twice the number of scan lines. For the NTSC standard, these are called 525i and 525p respectively.
Using progressive output, you can enjoy the high-resolution video recorded on media such as DVD-Video.
Your television must be compatible to enjoy progressive video.
|
I/P/B |
|||
|
MPEG 2, the video compression standard adapted for use with |
|||
|
DVD-Video, codes frames using these 3 picture types. |
|||
|
I: Intra coded picture |
|||
|
Glossary/ |
|||
|
B: Bidirectionally-predictive coded picture |
|||
|
This picture has the best quality and is the best to use when |
|||
|
adjusting the picture. |
|||
|
P: Predictive coded picture |
|||
|
This picture is calculated based on past I or P-pictures. |
content |
||
|
This picture is calculated by comparing past and future I |
and |
||
|
P-pictures so it has the lowest volume of information. |
|||
|
Linear PCM (Pulse Code Modulation) |
VOD |
||
|
These are uncompressed digital signals, similar to those found on |
|||
|
CDs. |
DivX |
||
|
Playback control (PBC) |
|||
|
If a Video CD has playback control, you can select scenes and |
About |
||
|
MPEG4 |
|||
|
information with menus. |
A compression system for use on mobile devices or a network, that allows highly efficient recording at a low bit rate.
Sampling frequency
Sampling is the process of converting the heights of sound wave (analog signal) samples taken at set periods into digits (digital encoding). Sampling frequency is the number of samples taken per second, so larger numbers mean more faithful reproduction of the original sound.
RQT8251
31
31

ENGLISH
Troubleshooting guide
RQT8251
32
Troubleshooting guide
Before requesting service, make the following checks. If you are in doubt about some of the check points, or if the remedies indicated in the chart do not solve the problem, consult your dealer for instructions.
|
Power |
Page |
||||||||||||||||||||||||
|
No power. |
• Insert the AC power supply cord securely. |
8 |
|||||||||||||||||||||||
|
The unit is automatically |
• The unit was switched to standby by the sleep timer or auto-off function. |
28, 29 |
|||||||||||||||||||||||
|
switched to the standby mode. |
|||||||||||||||||||||||||
|
Unresponsive or inoperable function |
|||||||||||||||||||||||||
|
No response when buttons |
• This unit cannot play discs other than the ones listed in these operating instructions. |
4, 17 |
|||||||||||||||||||||||
|
pressed. |
• Some operations may be prohibited by the disc. |
— |
|||||||||||||||||||||||
|
• The unit may not be operating properly due to lightning, static electricity or some other external |
— |
||||||||||||||||||||||||
|
factor. Turn the unit off then back to ON. Alternatively, turn the unit off, disconnect the AC power |
|||||||||||||||||||||||||
|
supply cord, and then reconnect it. |
|||||||||||||||||||||||||
|
• Condensation has formed: Wait 1 to 2 hours for it to evaporate. |
— |
||||||||||||||||||||||||
|
No operations can be |
• Check that the batteries are installed correctly. |
8 |
|||||||||||||||||||||||
|
performed with the remote |
• The batteries are depleted: replace them with new ones. |
8 |
|||||||||||||||||||||||
|
control. |
• Aim the remote control at the remote control sensor and operate. |
10 |
|||||||||||||||||||||||
|
Cannot play DVDs. |
• CD Mode is on. Press [CD MODE] to turn CD Mode off. |
14 |
|||||||||||||||||||||||
|
No picture or sound. |
• Check the video or audio connection. |
6, 7 |
|||||||||||||||||||||||
|
• Check the power or input setting of the connected equipment. |
— |
||||||||||||||||||||||||
|
• Check that the disc has something recorded in it. |
— |
||||||||||||||||||||||||
|
You have forgotten your |
• While stopped and “DVD/CD” is the source, press and hold [L STOP] on the main unit and |
— |
|||||||||||||||||||||||
|
ratings password. |
[h10] on the remote control until “Initialised” disappears from the television. |
||||||||||||||||||||||||
|
Reset all the settings to Factory |
Turn the unit off and on again. |
||||||||||||||||||||||||
|
Preset. |
All settings will return to the default values. |
||||||||||||||||||||||||
|
Specific operation undesirable or unexpected |
|||||||||||||||||||||||||
|
It takes time before play starts. |
• Play may take time to begin when an MP3 track has still picture data. Even after the track starts, |
— |
|||||||||||||||||||||||
|
the correct play time will not be displayed. This is normal. |
|||||||||||||||||||||||||
|
• This is normal on DivX video. |
— |
||||||||||||||||||||||||
|
Folders deeper than the eighth |
• Folders deeper than the eighth layer are displayed as the eighth layer. |
— |
|||||||||||||||||||||||
|
layer on a data disc are not |
|||||||||||||||||||||||||
|
displayed correctly. |
|||||||||||||||||||||||||
|
MP3 |
MPEG4 |
||||||||||||||||||||||||
|
WMA |
JPEG |
DivX |
|||||||||||||||||||||||
|
A menu screen appears during |
• This is normal for Video CDs. |
— |
|||||||||||||||||||||||
|
skip or search. |
|||||||||||||||||||||||||
|
VCD |
|||||||||||||||||||||||||
|
Playback control menu doesn’t |
• Press [L] twice and then press [:, DVD/CD]. |
— |
|||||||||||||||||||||||
|
appear. |
VCD |
with playback control |
|||||||||||||||||||||||
|
The program and random play |
• These functions do not work with some DVD-Videos. |
— |
|||||||||||||||||||||||
|
functions do not work. |
|||||||||||||||||||||||||
|
DVD-V |
|||||||||||||||||||||||||
|
Programmed items are not |
• Some items cannot be played even if you have programmed them. |
— |
|||||||||||||||||||||||
|
played. |
DVD-V |
||||||||||||||||||||||||
|
The on-screen menu shows |
• Even if a second soundtrack isn’t recorded, two numbers will normally be shown. |
— |
|||||||||||||||||||||||
|
“2” as a soundtrack option |
|||||||||||||||||||||||||
|
when [SHIFT]+[AUDIO] is |
|||||||||||||||||||||||||
|
pressed, but the audio does not |
|||||||||||||||||||||||||
|
change. |
|||||||||||||||||||||||||
|
DVD-A |
|||||||||||||||||||||||||
|
Play doesn’t start. |
• This unit may not play WMA and MPEG4 that contains still picture data. |
— |
|||||||||||||||||||||||
|
• If playing DivX VOD content, refer to the homepage where you purchased the DivX VOD |
— |
||||||||||||||||||||||||
|
content. (Example: www.divx.com/vod) |
DivX |
||||||||||||||||||||||||
|
• If a disc contains CD-DA and other formats, proper playback may not be possible. |
— |
||||||||||||||||||||||||
|
Play restarts from the |
• This is normal for DVD-Audio. |
— |
|||||||||||||||||||||||
|
beginning of the track when the |
|||||||||||||||||||||||||
|
soundtrack is changed. |
|||||||||||||||||||||||||
|
DVD-A |
|||||||||||||||||||||||||
|
Scenes are skipped |
• If you change the volume or sound field/quality setting during ADVANCED DISC REVIEW, the |
14 |
|||||||||||||||||||||||
|
intermittently. |
function continues without the on-screen display. Press [A.DISC REVIEW] again to cancel the |
||||||||||||||||||||||||
|
RAM |
DVD-RW VR |
DVD-V |
function. |
||||||||||||||||||||||
|
Subtitle |
|||||||||||||||||||||||||
|
Subtitle position is wrong. |
• Adjust the position. (“Subtitle Position” in the Display Menu.) |
20 |
|||||||||||||||||||||||
|
No subtitles. |
• Display the subtitles. |
15 |
|||||||||||||||||||||||
|
• Subtitles may not be displayed depending on the disc. |
DivX |
— |
|||||||||||||||||||||||
|
Marker |
|||||||||||||||||||||||||
|
Cannot add markers. |
• You cannot add markers. |
RAM |
DVD-RW VR |
— |
|||||||||||||||||||||
|
• If the disc’s elapsed play time doesn’t appear on the unit’s display, you cannot add markers. |
— |
||||||||||||||||||||||||
|
A-B repeat |
|||||||||||||||||||||||||
|
Point B is automatically set. |
• The end of an item becomes point B when it is reached. |
— |
|||||||||||||||||||||||
|
A-B repeat is automatically |
• A-B repeat is canceled when you press [SHIFT]+[QUICK REPLAY]. |
— |
|||||||||||||||||||||||
|
canceled. |
32

|
Sound |
Page |
||||||||||
|
Sound distorted. |
• Noise may occur when playing WMA. |
— |
|||||||||
|
Effects do not work. |
• Some audio effects do not work or have less effect with some discs. |
— |
|||||||||
|
• Multi Re-master and Dolby Pro Logic II do not work if you have changed the play speed. |
— |
||||||||||
|
Humming heard during play. |
• An AC power supply cord or fluorescent light is near the cables. Keep other appliances and |
— |
|||||||||
|
cords away from this unit’s cables. |
|||||||||||
|
No sound. |
• There may be a pause in sound when you change the play speed. |
— |
|||||||||
|
• Audio may not be output due to how files were created. |
17 |
||||||||||
|
DivX |
|||||||||||
|
Menus |
|||||||||||
|
The Setup menu cannot be |
• Select “DVD/CD” as the source. |
— |
|||||||||
|
accessed. |
• Cancel program and random play. |
18 |
|||||||||
|
Picture abnormal or un-viewable |
|||||||||||
|
Picture distorted. |
• Some distortion is normal during SEARCH. |
— |
|||||||||
|
• Ensure that the unit is connected directly to the television, and is not connected through a video |
7 |
||||||||||
|
cassette recorder. |
|||||||||||
|
• Change “Source Select” in Picture Menu. |
19 |
||||||||||
|
DivX |
|||||||||||
|
Picture size doesn’t fit the |
• Change “TV Aspect” in the “Video” tab. |
21 |
|||||||||
|
screen. |
• Change the Zoom setting. |
15 |
|||||||||
|
Picture stops. |
• Picture may stop if the DivX files are greater than 2GB. |
— |
|||||||||
|
DivX |
|||||||||||
|
The television may display |
• The unit and television are using different video systems. |
— |
|||||||||
|
incorrectly or colors appear |
Use a multi-system or PAL television. |
||||||||||
|
faded. |
• The system used on the disc does not match your television. |
— |
|||||||||
|
– PAL discs cannot be correctly viewed on an NTSC television. |
|||||||||||
|
– This unit can convert NTSC signals to PAL 60 for viewing on a PAL television (“NTSC Disc |
21 |
||||||||||
|
Output” in “Video” tab.) |
|||||||||||
|
Menu is not displayed |
• Restore the zoom ratio to “x1.00”. |
15 |
|||||||||
|
correctly. |
• Set “Subtitle Position” in Display Menu to “0”. |
20 |
|||||||||
|
Auto zoom function does not |
• Turn off TV’s zoom function. |
— |
|||||||||
|
work well. |
• Use the other preset aspect ratios or manual adjustment. |
15 |
|||||||||
|
• Zoom function may not work well, especially in dark scenes and may not work depending on |
— |
||||||||||
|
the type of disc. |
|||||||||||
|
The picture on the television |
• Mobile telephone chargers can cause some disturbance. |
— |
|||||||||
|
disappears or stripes appear |
• If you are using a TV indoor antenna, change to an outdoor antenna. |
— |
|||||||||
|
on the screen. |
• The television antenna wire is too close to the unit. Separate the antenna wire of the television from the unit. |
— |
|||||||||
|
Progressive video |
|||||||||||
|
There is ghosting when |
• This problem is caused by the editing method or material used on DVD-Video, but should be |
19 |
|||||||||
|
progressive output is on. |
corrected if you use interlace output. Change “Video Output Mode” in Picture Menu to “625i” |
||||||||||
|
or “525i”. |
|||||||||||
|
Picture not in progressive |
• Press [SHIFT]+[PROGRESSIVE] so “PRG” is displayed. Or select “625p” or “525p” in |
13, 19 |
|||||||||
|
output. |
“Video Output Mode” in Picture Menu. |
||||||||||
|
• If the unit is connected to the television through VIDEO OUT or S VIDEO OUT terminal, output |
7 |
||||||||||
|
will be interlace, even if “PRG” is displayed. |
|||||||||||
|
Listening to the radio |
|||||||||||
|
Noise is heard. |
• Adjust the position of the FM or AM antenna. |
— |
|||||||||
|
“ST” flickers or doesn’t light. |
• Use an outdoor antenna. |
30 |
|||||||||
|
Sound is distorted. |
|||||||||||
|
A beat sound is heard. |
• Turn the television off or separate it from the unit. |
— |
|||||||||
|
A low hum is heard during AM |
• Separate the antenna from other cables and cords. |
— |
|||||||||
|
broadcasts. |
|||||||||||
|
Using the cassette deck |
|||||||||||
|
Poor quality sound. |
• Clean the heads. |
35 |
|||||||||
|
Recording is not possible. |
• If the erasure prevention tabs have been removed, cover the holes with adhesive tape. |
23 |
ENGLISH
Troubleshooting guide
33

ENGLISH
Troubleshooting guide/Language code list
RQT8251
34
Troubleshooting guide
|
Unit displays |
Page |
|||||
|
Although the unit is on standby |
• Turn off the demo function. |
9 |
||||
|
mode, the display lights up and |
• If you set the clock, demo function will be turned off automatically. |
9 |
||||
|
changes continuously. |
||||||
|
The display is dark. |
• Press [SHIFT]+[DIMMER] to brighten the display. |
29 |
||||
|
“NO PLAY” |
• You inserted a disc the unit cannot play; insert one that can. |
4 |
||||
|
• You inserted a blank disc. |
— |
|||||
|
“NO DISC” |
• You haven’t inserted a disc; insert one. |
— |
||||
|
• You haven’t inserted the disc correctly; insert it correctly. |
35 |
|||||
|
“F61” |
• Check and correct the speaker cord connections. |
6, 7 |
||||
|
If this does not fix the problem, there is a power supply problem. Consult the dealer. |
||||||
|
“DVD U11” |
• Disc is dirty. Wipe it clean. |
4 |
||||
|
“ERROR” |
• Incorrect operation performed. Read the instructions and try again. |
— |
||||
|
“DVD HMM” |
• Trouble may have occurred. The number following “H” depends on the status of the unit. |
— |
||||
|
MM stands for a number. |
Turn the unit off and back to ON. Alternatively, turn the unit off, disconnect the AC power |
|||||
|
supply cord, and then reconnect it. |
||||||
|
• If the service numbers fail to clear, note the service number and contact a qualified service person. |
— |
|||||
|
Television displays |
||||||
|
“This disc may not be played |
• You can only play DVD-Video if their region number is the same or includes the same region number |
— |
||||
|
in your region” |
as the unit or if the DVD-Video is marked “ALL”. Confirm the region number for the unit on the back of |
|||||
|
the main unit. |
||||||
|
No on-screen display. |
• Select “On” in “On-Screen Messages” in “Display” tab. |
21 |
||||
|
“ ” |
• The operation is prohibited by the unit or disc. |
— |
||||
|
“Cannot play group xx, |
• You are trying to play incompatible group or content. |
— |
||||
|
content xx” |
||||||
|
“Cannot display group xx, |
||||||
|
content xx” |
||||||
|
“Group xx, content xx is |
• You are trying to play protected group or content. You cannot play it. |
— |
||||
|
protected” |
||||||
|
“Cannot play audio” |
• Audio has not been recorded, or recorded in a format this unit cannot playback. Video playback |
17 |
||||
|
“No audio” |
only is possible. |
|||||
|
“Check the disc” |
• This disc may be dirty. |
4 |
||||
|
“Authorization Error” |
DivX |
• You are trying to play the DivX VOD content that was purchased with a different registration code. |
31 |
|||
|
You cannot play the content on this unit. |
||||||
|
“Rented Movie Expired” |
• The DivX VOD content has zero remaining plays. You cannot play it. |
31 |
||||
|
DivX |
||||||
Memory reset (Initialization)
When the following situations occur, refer to the instructions below to reset the memory:
•There is no response when buttons are pressed.
•You want to clear and reset the memory contents.
To reset memory
1 Disconnect the AC power supply cord. (Wait at least 3 minutes before proceeding to step 2.)
2While pressing and holding down [y/I] on the main unit, reconnect the AC power supply cord.
“– – – – – – – – ” appears on the display.
3Release [y/I].
All the settings are returned to the factory preset. You will need to reset the memory items.
Language code list
|
Abkhazian: |
6566 |
Danish: |
6865 |
Italian: |
7384 |
Norwegian: |
7879 |
Swedish: |
8386 |
|
Afar: |
6565 |
Dutch: |
7876 |
Japanese: |
7465 |
Oriya: |
7982 |
Tagalog: |
8476 |
|
Afrikaans: |
6570 |
English: |
6978 |
Javanese: |
7487 |
Pashto, Pushto: |
8083 |
Tajik: |
8471 |
|
Albanian: |
8381 |
Esperanto: |
6979 |
Kannada: |
7578 |
Persian: |
7065 |
Tamil: |
8465 |
|
Ameharic: |
6577 |
Estonian: |
6984 |
Kashmiri: |
7583 |
Polish: |
8076 |
Tatar: |
8484 |
|
Arabic: |
6582 |
Faroese: |
7079 |
Kazakh: |
7575 |
Portuguese: |
8084 |
Telugu: |
8469 |
|
Armenian: |
7289 |
Fiji: |
7074 |
Kirghiz: |
7589 |
Punjabi: |
8065 |
Thai: |
8472 |
|
Assamese: |
6583 |
Finnish: |
7073 |
Korean: |
7579 |
Quechua: |
8185 |
Tibetan: |
6679 |
|
Aymara: |
6589 |
French: |
7082 |
Kurdish: |
7585 |
Rhaeto-Romance: 8277 |
Tigrinya: |
8473 |
|
|
Azerbaijani: |
6590 |
Frisian: |
7089 |
Laotian: |
7679 |
Romanian: |
8279 |
Tonga: |
8479 |
|
Bashkir: |
6665 |
Galician: |
7176 |
Latin: |
7665 |
Russian: |
8285 |
Turkish: |
8482 |
|
Basque: |
6985 |
Georgian: |
7565 |
Latvian, Lettish: |
7686 |
Samoan: |
8377 |
Turkmen: |
8475 |
|
Bengali; Bangla: |
6678 |
German: |
6869 |
Lingala: |
7678 |
Sanskrit: |
8365 |
Twi: |
8487 |
|
Bhutani: |
6890 |
Greek: |
6976 |
Lithuanian: |
7684 |
Scots Gaelic: |
7168 |
Ukrainian: |
8575 |
|
Bihari: |
6672 |
Greenlandic: |
7576 |
Macedonian: |
7775 |
Serbian: |
8382 |
Urdu: |
8582 |
|
Breton: |
6682 |
Guarani: |
7178 |
Malagasy: |
7771 |
Serbo-Croatian: |
8372 |
Uzbek: |
8590 |
|
Bulgarian: |
6671 |
Gujarati: |
7185 |
Malay: |
7783 |
Shona: |
8378 |
Vietnamese: |
8673 |
|
Burmese: |
7789 |
Hausa: |
7265 |
Malayalam: |
7776 |
Sindhi: |
8368 |
Volapük: |
8679 |
|
Byelorussian: |
6669 |
Hebrew: |
7387 |
Maltese: |
7784 |
Singhalese: |
8373 |
Welsh: |
6789 |
|
Cambodian: |
7577 |
Hindi: |
7273 |
Maori: |
7773 |
Slovak: |
8375 |
Wolof: |
8779 |
|
Catalan: |
6765 |
Hungarian: |
7285 |
Marathi: |
7782 |
Slovenian: |
8376 |
Xhosa: |
8872 |
|
Chinese: |
9072 |
Icelandic: |
7383 |
Moldavian: |
7779 |
Somali: |
8379 |
Yiddish: |
7473 |
|
Corsican: |
6779 |
Indonesian: |
7378 |
Mongolian: |
7778 |
Spanish: |
6983 |
Yoruba: |
8979 |
|
Croatian: |
7282 |
Interlingua: |
7365 |
Nauru: |
7865 |
Sundanese: |
8385 |
Zulu: |
9085 |
|
Czech: |
6783 |
Irish: |
7165 |
Nepali: |
7869 |
Swahili: |
8387 |
34

249 ₽
Инструкция (руководство пользователя) на DVD-стереосистема Panasonic SC-VK825D
Артикул: panasonic-sc-vk825d
Категория: Panasonic
-
Описание
-
Детали
Описание
Инструкцию по эксплуатации Panasonic SC-VK825D на русском языке можно будет скачать в личном кабинете после оформления и оплаты заказа.
Детали
| Формат файла |
|
|---|---|
| Размер инструкции в кб |
12526 |