- Manuals
- Brands
- Volkswagen Manuals
- Automobile
- Passat 2011
Manuals and User Guides for Volkswagen Passat 2011. We have 11 Volkswagen Passat 2011 manuals available for free PDF download: Workshop Manual, Body Repair Manual, Maintenance Manual
Volkswagen Passat 2011 Workshop Manual (475 pages)
General body repairs, exterior
Brand: Volkswagen
|
Category: Automobile
|
Size: 18.84 MB
Table of Contents
-
Table of Contents
3
-
Technical Data
11
-
Safety Information
11
-
Safety Measures When Working on Vehicles with a Start/Stop System
11
-
-
Body — Front
12
-
Lock Carrier
12
-
Assembly Overview — Lock Carrier
12
-
Service Position
13
-
Removing and Installing Lock Carrier
18
-
Wings
21
-
Assembly Overview — Front Wing
21
-
Removing and Installing Front Wing
22
-
Bulkhead
25
-
Assembly Overview — Plenum Chamber Bulkhead
25
-
Assembly Overview — Plenum Chamber Cover
27
-
Removing and Installing Plenum Chamber Cover
27
-
-
Bonnet, Rear Lid
31
-
Bonnet (Hood)
31
-
Assembly Overview — Bonnet
31
-
Removing and Installing Bonnet
31
-
Removing Gas Strut
35
-
Releasing Gas from Gas Strut
35
-
Assembly Overview — Bonnet Hinge
35
-
Removing and Installing Bonnet Hinge
36
-
Removing and Installing Insulation
39
-
Assembly Overview — Bonnet Lock and Release Components
41
-
Removing and Installing Bonnet Lock
41
-
Detaching Bowden Cable
43
-
Adjusting Bonnet
43
-
Removing and Installing Release Lever
46
-
Rear Lid (Saloon)
47
-
Tools
47
-
Assembly Overview — Rear Lid
47
-
Removing and Installing Rear Lid
48
-
Removing Gas Strut
50
-
Installing Gas Strut
51
-
Releasing Gas from Gas Strut
52
-
Assembly Overview — Rear Lid Hinge
52
-
Removing and Installing Rear Lid Hinge
53
-
Assembly Overview — Hinge Seal
56
-
Removing and Installing Hinge Seal
57
-
Removing and Installing Striker Pin
59
-
Adjusting Rear Lid
59
-
Assembly Overview — Release Element
62
-
Removing and Installing Release Element
63
-
Removing and Installing Bonnet Lock
65
-
Rear Lid Seal
66
-
Removing and Installing Rear Lid Seal
67
-
Rear Lid (Estate)
69
-
Tools
69
-
Assembly Overview — Rear Lid
69
-
Removing and Installing Rear Lid
70
-
Removing and Installing Rear Lid Hinge
72
-
Removing and Installing Bonnet Lock
74
-
Removing and Installing Striker Pin
76
-
Removing and Installing Release Button (Vehicle Identification Number > 3C-8E108000 / 3C-8P064070)
77
-
Removing and Installing Release Button (Vehicle Identification Number 3C-8E108001 / 3C-8P064071 >)
79
-
Adjusting Rear Lid
81
-
Removing and Installing Gas Strut
85
-
Releasing Gas from Gas Strut
85
-
Removing and Installing Motor in Control Unit for Electrically Operated Rear Lid
85
-
Rear Lid Seal
89
-
Removing and Installing Rear Lid Seal
89
-
Assembly Overview — Cover
92
-
Tank Flap Unit
93
-
Tools
93
-
Assembly Overview — Tank Flap Unit and Actuator
93
-
Assembly Overview — Tank Flap Unit for Natural Gas Vehicles
95
-
Removing and Installing Tank Flap Unit
96
-
Removing and Installing Actuator
98
-
-
Front Doors, Door Components, Central Locking
99
-
Rear Door
99
-
Tools
99
-
Assembly Overview — Front Door
100
-
Assembly Overview — Door Hinges
102
-
Removing and Installing Door
103
-
Adjusting Door
105
-
Door Components
107
-
Tools
107
-
Assembly Overview — Assembly Carrier
108
-
Removing and Installing Subframe
108
-
Assembly Overview — Door Handle and Door Lock
114
-
Removing and Installing Lock Cylinder Housing Cover Cap
115
-
Removing and Installing Lock Cylinder Housing
116
-
Removing and Installing Door Handle
117
-
Removing and Installing Door Handle with Access and Start Authorisation
118
-
Removing and Installing Door Lock
120
-
Removing and Installing Mounting Bracket
124
-
Removing and Installing Retaining Bracket
127
-
Inner Door Seal
128
-
Removing and Installing Inner Door Seal
129
-
Removing and Installing Outer Door Seal
130
-
Assembly Overview — Insulation
134
-
Central Locking
135
-
Fitting Location Overview — Central Locking Components
135
-
Adapting Remote Control Keys to Remote Control
137
-
System)
137
-
Adapting Remote Control Keys to Immobilizer (Vehicles with or Without Entry and Start Authorisation System)
137
-
Removing and Installing Remote Control Key Battery
137
-
-
Rear Doors, Door Components
140
-
Rear Door (Saloon)
140
-
Tools
140
-
Assembly Overview — Rear Door
141
-
Assembly Overview — Door Hinges
143
-
Removing and Installing Door
144
-
Adjusting Door
146
-
Rear Door (Estate)
148
-
Tools
148
-
Assembly Overview — Rear Door
149
-
Assembly Overview — Door Hinges
150
-
Removing and Installing Door
152
-
Adjusting Door
155
-
Door Components
157
-
Tools
157
-
Assembly Overview — Assembly Carrier
158
-
Removing and Installing Subframe
158
-
Assembly Overview — Door Handle and Door Lock
165
-
Removing and Installing Lock Cylinder Housing Cover Cap
166
-
Removing and Installing Lock Cylinder Housing
167
-
Removing and Installing Door Handle
168
-
Removing and Installing Door Handle with Access and Start Authorisation
169
-
Removing and Installing Door Lock
171
-
Removing and Installing Mounting Bracket
174
-
Removing and Installing Retaining Bracket
177
-
Door Inner Seals
178
-
Removing and Installing Inner Door Seal
179
-
Removing and Installing Outer Door Seal
180
-
Assembly Overview — Insulation
184
-
-
Sunroof
185
-
Sliding/Tilting Sunroof with Glass Panel (Meritor)
185
-
Tools
185
-
Function
185
-
Assembly Overview — Sliding/Tilting Sunroof with Glass Panel
186
-
Removing and Installing Bellows
189
-
Removing Sliding/Tilting Sunroof Glass Panel
190
-
Installing Sliding/Tilting Sunroof Glass Panel
191
-
Adjusting Height of Sliding/Tilting Sunroof Glass Panel
191
-
Adjusting Panel Seal
192
-
Removing and Installing Panel Seal
193
-
Removing and Installing Wind Deflector
193
-
Removing and Installing Sliding Headliner
194
-
Removing and Installing Sliding/Tilting Sunroof Glass Panel Drive
195
-
Adjusting Drive for Sliding/Tilting Sunroof Glass Panel («0» Position)
196
-
Removing and Installing Sliding/Tilting Sunroof Glass Panel Automatic Preselection Switch
197
-
Checking Parallel Running
197
-
Adjusting Parallel Running
197
-
Assembly Overview — Carrier Unit
198
-
Removing and Installing Carrier Unit
199
-
Operating Without Current
202
-
Removing and Installing Guide Plate
202
-
Removing and Installing Guide Plate
203
-
Cleaning Water Drainage Hoses
204
-
Sliding/Tilting Sunroof with Solar Panel (Webasto)
207
-
Tools
207
-
Function
207
-
Assembly Overview — Sliding/Tilting Sunroof with Solar Panel
208
-
Removing Sliding/Tilting Sunroof Solar Panel
209
-
Installing Sliding/Tilting Sunroof Solar Panel
210
-
Adjusting Sliding/Tilting Sunroof Solar Panel Height
210
-
Checking Parallel Running of Solar Panel
211
-
Adjusting Parallel Running of Solar Panel
212
-
Renewing Panel Seal
212
-
Removing Wind Deflector
212
-
Removing Solar Panel Trim
213
-
Removing Sliding/Tilting Sunroof Drive
213
-
Adjusting Drive for Sliding/Tilting Sunroof (Zero Position)
214
-
Removing Pre-Selector Control for Sliding/Tilting Sunroof
215
-
Removing Electrical Contact in Solar Roof
215
-
Removing Electrical Contact for Sliding/Tilting Sunroof Solar Panel in Carrier Unit
215
-
Removing and Installing Carrier Unit
216
-
Operating Without Current
219
-
Cleaning Water Drainage Hoses
219
-
Panorama Sliding Sunroof (Arvin-Meritor)
222
-
Tools
222
-
Function
222
-
Basic Setting, Panoramic Sliding Sunroof
223
-
Assembly Overview — Panoramic Sliding Roof
223
-
Removing and Installing Front Glass Panel
225
-
Removing and Installing Rear Glass Panel
229
-
Adjusting Height of Front and Rear Glass Panel
231
-
Renewing Seals for Rear Glass Panel
233
-
Removing and Installing the Exterior Seal
237
-
Removing and Installing Interior Seal
239
-
Removing and Installing Wind Deflector
241
-
Removing and Installing Preselector for Glass Panel and Sunroof Sun Blind
244
-
Removing and Installing Sliding Sunroof Motor
245
-
Removing and Installing Sun Blind Motor
248
-
Removing and Installing Sun Blind
251
-
Removing and Installing Sunroof Sun Blind Cross Strut
259
-
Assembly Overview — Assembly Frame
260
-
Removing and Installing Sun Blind Bowden Cable
261
-
Removing and Installing Assembly Frame
265
-
Removing and Installing Rear Part
268
-
Removing and Installing Front Motor Plate
272
-
Removing and Installing Tilting Mechanism and Front Glass Panel Cable
275
-
Maintenance and Care
279
-
Operating Without Current
280
-
Cleaning Water Drainage Hoses
281
-
-
Bumpers
284
-
Front Bumper Cover
284
-
Tools
284
-
Repairing Front Bumper Cover
284
-
Installing Brackets for Parking Aid System
284
-
Assembly Overview — Front Bumper Cover
289
-
Removing and Installing Front Bumper Cover
290
-
Front Bumper Cover Add-On Parts
292
-
Front Bumper Cover Add-On Parts, Passat Alltrack
294
-
Front Bumper Cover Substructure Parts
295
-
Assembly Overview — Front Bumper Carrier
296
-
Assembly Overview — Front Bumper Carrier (USA)
297
-
Number Plate Carrier
298
-
Rear Bumper Cover (Saloon)
301
-
Tools
301
-
Repairing Rear Bumper Cover
301
-
Installing Brackets for Parking Aid System
301
-
Bumper, Rear
306
-
Rear Bumper Cover Add-On Parts 11.2010
311
-
Assembly Overview — Rear Bumper Carrier
312
-
Assembly Overview — Towing Bracket
312
-
Removing and Installing Drive for Swivelling Ball Head
314
-
Rear Bumper Cover (Estate)
315
-
Tools
315
-
Repairing Rear Bumper Cover
315
-
Installing Brackets for Parking Aid System
315
-
Bumper, Rear
320
-
Rear Bumper Cover Add-On Parts
325
-
Rear Bumper Cover Add-On Parts, Passat Alltrack
326
-
Assembly Overview — Rear Bumper Carrier
327
-
Assembly Overview — Towing Bracket
327
-
Removing and Installing Drive for Swivelling Ball Head
329
-
Advertisement
Volkswagen Passat 2011 Body Repair Manual (381 pages)
Brand: Volkswagen
|
Category: Automobile
|
Size: 57.11 MB
Table of Contents
-
Table of Contents
3
-
Technical Data
7
-
Vehicle Identification Data
7
-
Vehicle Identification Number
7
-
Passat 2011 ➤ , Passat Variant
7
-
Safety Instructions
9
-
Moulded Foam Elements
10
-
Galvanized Body Parts, High/Higher-Strength and Hot-Formed Body Panels
12
-
Body
12
-
Laser Welding
15
-
Body Panel Gaps/Shut Lines
16
-
Body — Front
16
-
Body — Centre
17
-
Body — Rear
18
-
Body — Rear (Variant)
19
-
Body Dimensions
20
-
Body — Front
20
-
Body — Centre
22
-
Body — Centre (Variant)
27
-
Body — Rear
28
-
Body — Rear (Variant)
29
-
Floor Group — Front
30
-
Floor Group — Centre
31
-
Floor Group — Rear
32
-
Tools
33
-
Alignment Bracket Set
34
-
Overview
34
-
Portal Gauge
35
-
Overview
35
-
-
Body — Front
37
-
Renewing Left Console
37
-
Tools
37
-
Removing
38
-
Installing
40
-
Renewing Right Console
42
-
Tools
42
-
Removing
43
-
Installing
44
-
Renewing Retaining Bracket for Subframe
46
-
Tools
46
-
Removing
47
-
Installing
48
-
Renewing Bumper Bracket
50
-
Tools
51
-
Removing
51
-
Installing
52
-
Renewing Upper Wheel Housing Longitudinal Member
54
-
Tools
55
-
Removing
56
-
Installing
58
-
Renewing Front Wheel Housing
62
-
-
Tools
63
-
Removing
63
-
Installing
65
-
Repairing Threads for Securing Subframe (Suspension Subframe)
72
-
Tools
73
-
Contents of Thread Repair Kit
73
-
Repairing Threads
74
-
Renewing Front Longitudinal Member
77
-
Tools
78
-
Removing
78
-
Installing
81
-
Renewing Front Longitudinal Member — Part Section
88
-
Tools
89
-
Removing
89
-
Installing
92
-
Body — Centre
97
-
Renewing Roof
97
-
Tools
98
-
Removing
100
-
Installing
102
-
Renewing Roof — Vehicles with Sliding/Tilting Sunroof
113
-
Tools
114
-
Removing
116
-
Installing
118
-
Renewing Roof (Variant)
130
-
Tools
131
-
Removing
133
-
Installing
135
-
Renewing Roof — Variant with Panorama Sliding Sunroof
146
-
Tools
147
-
Removing
149
-
Installing
151
-
Renewing Roof Side Member
163
-
Tools
164
-
Removing
164
-
Installing
166
-
Foam Treating Roof Side Member
172
-
Renewing Front Roof Cross Member
175
-
Tools
176
-
Removing
176
-
Installing
177
-
Renewing Rear Roof Cross Member (Saloon)
179
-
Tools
180
-
Removing
180
-
Installing
181
-
Renewing Rear Roof Cross Member (Variant)
183
-
Tools
184
-
Removing
184
-
Installing
185
-
Renewing A-Pillar
188
-
Tools
189
-
Removing
189
-
Installing
191
-
Renewing A-Pillar Reinforcement — Part Section
198
-
Tools
199
-
Removing
199
-
Installing
201
-
Renewing B-Pillar
205
-
Tools
206
-
Removing
206
-
Installing
208
-
Renewing B-Pillar Reinforcement — Part Section
216
-
Tools
217
-
Removing
217
-
Installing
219
-
Renewing Inner B-Pillar
229
-
Tools
230
-
Removing
230
-
Installing
232
-
Renewing Side Member
235
-
Tools
236
-
Removing
236
-
Installing
238
-
Renewing Front Side Member Reinforcement
244
-
Tools
245
-
Removing
245
-
Installing
246
-
Renewing Rear Side Member Reinforcement
251
-
Tools
252
-
Removing
252
-
Installing
253
-
Renewing Seat Middle Cross Member
256
-
Volkswagen Passat 2011 Workshop Manual (281 pages)
General body repairs, interior
Brand: Volkswagen
|
Category: Automobile
|
Size: 8.45 MB
Table of Contents
-
Table of Contents
3
-
Interior Equipment
7
-
Interior Mirror
7
-
Removing and Installing Interior Mirror
7
-
Bonding on Retaining Plate for Interior Mirror Without Rain Sensor
8
-
Removing and Installing Interior Mirror with Rain Sensor
9
-
Bonding on Retaining Plate for Interior Mirror with Rain Sensor
10
-
Removing and Installing Interior Mirror in Vehicles with a Multifunction Camera
10
-
Compartments, Covers and Trims
12
-
Tools
12
-
Removing and Installing Centre Console
12
-
Removing and Installing Footwell Trim
15
-
Removing and Installing Front Ashtray/Storage Tray
16
-
Removing and Installing Infotainment Surround
18
-
Removing and Installing «Climatronic/Climatic» Cover
19
-
Removing and Installing Rear Trim
20
-
Removing and Installing Centre Console Air Duct
21
-
Removing and Installing Centre Console Compartment
23
-
Removing and Installing Centre Console Extension
24
-
Removing and Installing Centre Console Armrest
27
-
Removing and Installing Armrest Compartment
28
-
Removing and Installing Upper Part of Armrest
29
-
Removing and Installing Dash Panel End Trims
30
-
Removing and Installing Steering Column Trim
31
-
Removing and Installing Glove Compartment
32
-
Removing and Installing Glove Compartment Lock Cylinder
34
-
Removing and Installing Footwell Cover on Driver Side
35
-
Removing and Installing Dash Panel Trim, Front Passenger Side
36
-
Removing and Installing Dash Panel Insert Trim
37
-
Removing and Installing Analogue Clock Holder
38
-
Removing and Installing Analogue Clock
39
-
Removing and Installing Trim on Driver Side
40
-
Removing and Installing Spectacles Holder in Moulded Headliner
41
-
Removing and Installing Spectacles Holder in Moulded Headliner
42
-
Removing and Installing Single Sun Visors
43
-
Removing and Installing Double Sun Visor (Saloon and Estate)
45
-
Removing and Installing Permit/Pass Holder
47
-
Sill Panel Mouldings
49
-
Removing and Installing Sill Panel Mouldings
49
-
Removing and Installing Wheel Housing Liner
51
-
Grab Handles
54
-
Removing and Installing Roof Grab Handles
54
-
Rear Shelf/Roller Sunblind
56
-
Removing and Installing Rear Shelf (Saloon with no Roller Sunblind)
56
-
Removing and Installing Rear Shelf (Saloon with Roller Sunblind)
57
-
Removing and Installing Roller Sunblind (Saloon)
59
-
Removing and Installing Sunblind on Rear Door Trim
61
-
Net Partition
65
-
Removing and Installing Net Partition
65
-
Removing and Installing Net Partition Mountings
66
-
-
Passenger Protection
67
-
Seat Belts
67
-
General Safety Regulations When Working on Airbag, Belt Tensioner and Battery Isolator Units (Pyrotechnic Components)
68
-
Special Instructions for Belt Tensioners
69
-
Storage, Transportation and Disposal of Airbag, Belt Tensioner and Battery Isolator Units (Pyrotechnic Components)
69
-
Removing and Installing Front Seat Belts (Saloon and Estate)
69
-
Removing and Installing Front Belt Height Adjuster (Saloon and Estate)
72
-
Removing and Installing Front Belt Buckle
73
-
Removing and Installing Rear Outer Seat Belts with Belt Tensioner (Saloon)
75
-
Removing and Installing Rear Outer Seat Belts with no Belt Tensioner (Saloon)
77
-
Removing and Installing Rear Outer Seat Belts with Belt Tensioner (Estate)
79
-
Removing and Installing Rear Outer Seat Belts with no Belt Tensioner (Estate)
82
-
Removing and Installing Middle, Rear Seat Belt
85
-
Removing and Installing Rear Double Belt Buckle
86
-
Inspecting Seat Belts
88
-
Points to Check
88
-
Checking Child Seat Anchors (ISOFIX) after an Accident
91
-
Points to Check
91
-
Airbag
92
-
Tools
92
-
Overview of Locations — Airbag Systems
93
-
General Safety Regulations When Working on Airbag, Belt Tensioner and Battery Isolator Units (Pyrotechnic Components)
95
-
Special Instructions for Driver and Front Passenger Airbag
96
-
Special Instructions for Curtain Airbag Modules
96
-
Storage, Transportation and Disposal of Airbag, Belt Tensioner and Battery Isolator Units (Pyrotechnic Components)
97
-
Deactivating the Airbag
97
-
Renewing Airbag Units Following an Accident
97
-
Removing and Installing Airbag Control Unit J234
98
-
Removing and Installing Driver Airbag Unit
100
-
Removing and Installing Airbag Coil Connector and Return Spring with Slip Ring F138
103
-
Removing and Installing Front Passenger Airbag Unit
104
-
Removing and Installing Front Side-Airbag
106
-
Removing and Installing Rear Side-Airbag
109
-
Removing and Installing Curtain Airbag (Saloon)
110
-
Removing and Installing Curtain Airbag (Estate)
113
-
Removing and Installing Seat Occupied Sensor, Front Passenger Side G128
115
-
Adapting Components
116
-
Crash Sensors
117
-
Tools
117
-
Removing and Installing Front Airbag Crash Sensor, Driver Side G283
117
-
Removing and Installing Side-Airbag Crash Sensor, Driver Side G179
118
-
Removing and Installing Side-Airbag Crash Sensor, Front Passenger Side G180
121
-
Removing and Installing Rear Side-Airbag Crash Sensor, Driver Side G256
124
-
Removing and Installing Rear Side-Airbag Crash Sensor, Front Passenger Side G257
125
-
Advertisement

Volkswagen Passat 2011 Workshop Manual (222 pages)
6-cylinder direct-injection engine (3.6 l engine, 4V)
Brand: Volkswagen
|
Category: Automobile
|
Size: 11.59 MB
Table of Contents
-
Table of Contents
3
-
Technical Data
7
-
Identification
7
-
Engine Number/Engine Data
7
-
General Information
9
-
Numbering of Cylinders
9
-
Safety Information
10
-
Safety Precautions During Work on Fuel System
10
-
Safety Precautions When Using Testers and Measuring Instruments During a Road Test
10
-
Safety Precautions When Working on the Cooling System
11
-
Safety Precautions When Working on Ignition System
11
-
Repair Notes
12
-
Rules for Cleanliness
12
-
Foreign Objects in Engine
12
-
-
Removing and Installing Engine
13
-
Removing Engine
13
-
Separating Engine and Gearbox
21
-
Securing Engine on Engine and Gearbox Support
23
-
Installing Engine
25
-
Assembly Mountings
27
-
Assembly Overview — Assembly Mountings
27
-
Removing and Installing Engine Mounting
28
-
Adjusting Assembly Mountings
30
-
Checking Adjustment of Assembly Mountings (Engine and Gearbox Mountings)
33
-
-
Crankshaft Group
34
-
Cylinder Block (Pulley End)
34
-
Assembly Overview — Cylinder Block (Pulley End)
34
-
Assembly Overview — Poly V-Belt Drive
36
-
Removing and Installing Poly-V Belt
37
-
Removing and Installing Tensioner for Poly V-Belt
38
-
Removing and Installing Vibration Damper
38
-
Removing and Installing Bracket for Ancillaries
39
-
Removing and Installing Sealing Flange on Pulley End
40
-
Cylinder Block, Gearbox End
42
-
Assembly Overview — Cylinder Block, Gearbox End
42
-
Removing and Installing Flywheel
42
-
Renewing Crankshaft Oil Seal (Gearbox End)
43
-
Crankshaft
46
-
Assembly Overview — Crankshaft
46
-
Renewing Needle Bearing in Crankshaft
48
-
Crankshaft Dimensions
50
-
Measuring Axial Clearance of Crankshaft
50
-
Measuring Radial Clearance of Crankshaft
50
-
Allocation of Main Bearing Shells
51
-
Removing and Installing Sender Wheel
55
-
Pistons and Conrods
57
-
Assembly Overview — Pistons and Conrods
57
-
Removing and Installing Pistons
58
-
Checking Pistons and Cylinder Bores
61
-
Separating New Conrod
62
-
-
Cylinder Head, Valve Gear
64
-
Cylinder Head
64
-
Assembly Overview — Cylinder Head
64
-
Removing and Installing Cylinder Head
66
-
Removing and Installing Cylinder Head Cover
74
-
Assembly Overview — Vacuum Pump
75
-
Removing and Installing Vacuum Pump
76
-
Checking Compression
77
-
Cover for Timing Chain
81
-
Assembly Overview — Cover for Timing Chain
81
-
Removing and Installing Timing Chain Cover
82
-
Removing and Installing the Camshaft Control Valve Seal
84
-
Assembly Overview — Valve Timing Housing
85
-
Chain Drive
87
-
Assembly Overview — Camshaft Timing Chains
87
-
Removing and Installing Camshaft Timing Chain
89
-
Removing and Installing Chain Drive Sprocket for High-Pressure Pump
92
-
Removing and Installing Timing Chain and Chain Drive for Oil Pump
93
-
Checking Valve Timing
97
-
Adjusting Valve Timing
99
-
Valve Gear
104
-
Assembly Overview — Valve Gear
104
-
Measuring Axial Play of Camshaft
106
-
Removing and Installing Camshaft
107
-
Removing and Installing Camshaft Adjuster
111
-
Removing and Installing Camshaft Control Valve
118
-
Removing and Installing Valve Stem Seals
122
-
Inlet and Exhaust Valves
125
-
Checking Valve Guides
125
-
Reworking Valve Seats
125
-
Valve Dimensions
127
-
-
Lubrication
128
-
Sump, Oil Pump
128
-
Assembly Overview — Sump/Oil Pump
128
-
Removing and Installing Oil Spray Jet
130
-
Removing and Installing Sump
131
-
Removing and Installing Oil Pump
133
-
Engine Oil
137
-
Oil Filter, Oil Pressure Switch
139
-
Assembly Overview — Oil Filter Housing, Oil Pressure Switch
139
-
Checking Oil Pressure and Oil Pressure Switch
141
-
Volkswagen Passat 2011 Maintenance Manual (188 pages)
Brand: Volkswagen
|
Category: Automobile
|
Size: 11.93 MB
Table of Contents
-
Table of Contents
3
-
1 Engine List
5
-
2 Service Work
7
-
Information about Flexible or Fixed Service
7
-
Service Tables
11
-
-
3 General Information
25
-
Raising Vehicle with Lifting Platform or Trolley Jack
25
-
Stickers
26
-
Connecting Vehicle Diagnostic Tester
27
-
Vehicle Identification Number
28
-
Vehicle Data Sticker
29
-
Country Overview for Diesel Not Compliant with en 590
30
-
Country Overview for Petrol Not Compliant with en 228
31
-
Engine Code and Engine Number
32
-
Severe Operating Conditions
32
-
Countries with Hot Climate
33
-
Countries with High Levels of Dust
34
-
Identification Plate
35
-
Shortened Intervals for Spark Plug Replacement
35
-
-
4 Descriptions of Work
40
-
Swivel Joints, Axle Mountings, Coupling Rod Bearings and Anti-Roll Bar Rubber Mounting
42
-
Inspecting for Damage
42
-
-
Activation of Environment Monitoring System (Front Assist): Checking
43
-
Automatic Headlight Control and Static Cornering Light: Checking Function
43
-
Front Passenger Front Airbag: Checking Key Switch and «ON/OFF Function
44
-
Battery: Checking Battery Terminal Clamps for Secure Seating
46
-
Battery: Checking with Battery Tester (Always Refer to Workshop Manual)
49
-
Status of Battery: Reading, Sending Diagnosis Protocol Online
49
-
Reducing Agent (Adblue®/Def): Replenishing
50
-
Reducing Agent (Adblue®/Def): Changing
55
-
Tyres: Checking Condition, Wear Pattern, Tyre Pressure and Tread Depth
55
-
Brake and Clutch System: Changing Brake Fluid
81
-
Brake System and Shock Absorbers: Inspecting for Leaks and Damage
85
-
Brakes, Front and Rear: Checking Thickness of Brake Pads and Condition of Brake Discs
86
-
Brake Fluid Level: Checking
88
-
Diesel Particulate Filter: Checking
89
-
Dual Clutch Gearbox 02E: Changing Gear Oil and Filter
89
-
Electric Windows: Checking Positioning (Open and Close Functions)
90
-
Natural Gas Tank: Renew
91
-
Natural Gas Filler Connection and Sealing Cap: Check Condition, Clean if Necessary and Check Seal
91
-
Fault Memory of All Systems: Reading with Vehicle Diagnostic Tester , Correcting Possible Faults
91
-
According to Repair Guidelines
91
-
-
Bonnet Catch Hook: Grease
92
-
Gearbox, Final Drive and Drive Shaft Boots: Inspect for Leaks and Damage
92
-
All-Wheel Drive Coupling: Changing Oil
93
-
Interior and Exterior Body: Inspecting for Corrosion with Doors and Flaps Open
97
-
Poly V-Belt: Renewing
97
-
Poly V-Belt: Check Condition
97
-
Cooling System: Checking Frost Protection and Coolant Level
99
-
Diesel Fuel Filter: Renewing
101
-
Air Filter: Cleaning Housing and Renewing Filter Element
103
-
Multi-Purpose Additive for Diesel Fuel: Adding
106
-
Multi-Purpose Additive for Petrol Fuel: Adding
108
-
Memory Seat: Initialising
109
-
Engine and Components in Engine Compartment: Inspecting for Leaks and Damage (from above and Below)
109
-
Engine Cover Panel «Top»: Removing and Installing
110
-
Engine Compartment Cover (Noise Insulation) «Bottom»: Removing and Installing
113
-
Engine Oil Level: Checking
113
-
Engine Oil: Draining or Extracting, Renewing Oil Filter and Replenishing Engine Oil
114
-
Engine Oil: Capacities and Specifications
120
-
Panorama Tilting/Sliding Roof with Rear Panorama Roof: Checking Function, Cleaning and Greasing Guide Rails, and Cleaning Wind Deflector
120
-
Road Test: Performing (Driving Behaviour, Noises, Air Conditioner Etc.)
123
-
Wheel Securing Bolts: Tightening to Specified Torque
124
-
Radio Code: Reading Using Vehicle Diagnostic Tester
127
-
Radio/Navigation System: Entering PIN of Anti-Theft Coding and Storing Local Radio Stations to Station Buttons
128
-
Tyre Pressure Monitoring : Performing Basic Setting
128
-
Tyre Repair Set: Checking
131
-
Window Wash/Wipe System and Headlight Washer System: Checking Function
131
-
Wiper Blade Protection: Removing
135
-
Headlight Adjustment: Checking Halogen Headlights
138
-
Headlight Adjustment: Checking Gas Discharge Headlights Without DLA
141
-
Headlight Adjustment: Checking Gas Discharge Headlights with DLA
145
-
Headlight Adjustment: Checking Fog Lights
151
-
Sliding Sunroof Drains: Checking for Blockage, Cleaning if Necessary
153
-
Service Interval Display: Resetting
153
-
Service Interval Display: Recoding
156
-
Sunroof: Checking Function, Cleaning and Greasing Guide Rails
158
-
Track Rods: Checking Clearance, Attachment and Boots
158
-
Auxiliary Heater: Setting Weekday in Menu of Dash Panel Insert
158
-
Dust and Pollen Filter: Cleaning Housing and Renewing Filter Element
159
-
Transportation Mode: Switching off
160
-
Transportation Devices: Removing Blocking Pieces from Springs on Front Axle
160
-
Transportation Devices: Removing Tie-Down Rings
162
-
Door Arrester: Grease
164
-
Clock and Date: Setting
165
-
Underbody: Inspecting for Damage to Underbody Sealant, Underbody Panels, Routing of Lines, Plugs
165
-
Camshaft Drive Toothed Belt (Diesel Engines): Renewing
165
-
Spark Plugs: Renewing
166
-
Natural Gas System: Inspect Natural Gas Tank for Corrosion and Leakage
174
-
Natural Gas System: Checking Wax Layer between Natural Gas Fuel Tank and Fuel Tank Shut-Off Valve
179
-
Volkswagen Passat 2011 Workshop Manual (180 pages)
Brand: Volkswagen
|
Category: Automobile
|
Size: 1.72 MB
Table of Contents
-
Table of Contents
5
-
Technical Data
7
-
1 General Notes on Air Conditioning Systems
7
-
Introduction
7
-
Additional Information
7
-
Basics of Air Conditioning
8
-
Vapour Pressure Table for Refrigerant R134A
9
-
Refrigerant R134A
10
-
Characteristics of Refrigerant R134A
11
-
Refrigerant Machine Oil
13
-
Comfort
15
-
How Air Conditioning Works
15
-
General Safety
16
-
Safety Precautions for When Working on Vehicles with Air Conditioning and When Handling
19
-
Refrigerant R134A
19
-
-
Basics for Working on Refrigerant Circuit
20
-
-
2 General Information on Refrigerant Circuit
23
-
Refrigerant Circuit Components
23
-
Design of Refrigerant Circuit
31
-
Evacuation and Charging Valves for Quick-Release Couplings of Air Conditioner Service Station
31
-
On Refrigerant Circuit
31
-
-
Switch and Sender in Refrigerant Circuit and Related Connections
33
-
Electrical Components Not Installed in Refrigerant Circuit
36
-
Pressures and Temperatures in the Refrigerant Circuit
38
-
Refrigerant Circuit with Expansion Valve
38
-
Refrigerant Circuit with Restrictor and Reservoir
40
-
Test and Measurement Work that Can be Performed Using a Pressure Gauge
42
-
Air Conditioner Service and Recycling Equipment
43
-
Notes to Repairs on Refrigerant Circuit
44
-
-
3 Statutory Texts and Instructions
45
-
Statutes and Regulations
45
-
Recycling and Refuse Law
50
-
Converting R12 Refrigerant Circuits to R134A Refrigerant Circuits and Repairing Them (Retrofitting)
51
-
Maintaining Records on Refrigerant
51
-
-
4 Refrigerant Circuit
52
-
Important Repair Notes on Air Conditioning
52
-
Retrofitting Refrigerant Circuit from R12 Refrigerant to R134A Refrigerant
52
-
-
5 Working with the Air Conditioner Service Station
53
-
Important Notes for Working with the Air Conditioner Service Station
54
-
Connecting Air Conditioner Service Station for Measuring and Checking
54
-
Draining Refrigerant Circuit Using Air Conditioner Service Station
55
-
Evacuating Refrigerant Circuit Using Air Conditioner Service Station
56
-
Charging Refrigerant Circuit Using Air Conditioner Service Station
57
-
Bringing Air Conditioning System into Service after Charging
58
-
Charging Container in Air Conditioner Service Station with Refrigerant
59
-
Draining Air Conditioner Service Station
59
-
-
6 Detecting Leaks in Refrigerant Circuit
61
-
Leak Detection in Refrigerant Circuit Using Compressed Air or Nitrogen
62
-
Searching for Leaks in Refrigerant Circuits Using Leak Detector V.A.G 1796
64
-
Detecting Leaks in Refrigerant Circuit Using Leak Detecting System VAS 6196 or Leak Detecting
65
-
System VAS 6201 or a Later Model
65
-
-
Volkswagen Passat 2011 Workshop Manual (130 pages)
Heating, air conditioner
Brand: Volkswagen
|
Category: Automobile
|
Size: 7.27 MB
Table of Contents
-
Table of Contents
3
-
Technical Data
5
-
Safety Information
5
-
Safety Precautions When Working on Air Conditioning Systems
5
-
Safety Measures When Working on Vehicles with a Start/Stop System
5
-
Safety Precautions When Working on the Cooling System
5
-
General Information
7
-
Notes Concerning Odours in Air Conditioned Vehicles
7
-
Notes for Vehicles with Start-Stop System
7
-
Repair Notes
8
-
Checking Cooling Output
8
-
Working on Refrigerant Circuit
9
-
Refrigerant Circuit Seals
9
-
Notes on Control Motors
10
-
Technical Data
16
-
Refrigerant Capacity
16
-
Refrigerant Oil Capacities
16
-
Oil Distribution
17
-
-
Heating
18
-
Air Conditioning System
19
-
Overview of Fitting Locations — Air Conditioning System
19
-
Overview of Fitting Locations — Components Located in Front Section of Passenger Compartment
19
-
Refrigerant Circuit
24
-
System Overview — Refrigerant Circuit
24
-
Assembly Overview — Condenser
26
-
Removing and Installing High-Pressure Sender G65
26
-
Removing and Installing Expansion Valve
28
-
Removing and Installing Condenser
30
-
Removing and Installing Desiccant Bag or Cartridge
32
-
Removing and Installing Evacuating and Charging Valves on Low and High-Pressure Side
38
-
Air Conditioner Compressor
41
-
Assembly Overview — Pulley
41
-
Removing Air Conditioning Compressor from and Installing on Bracket
42
-
Removing and Installing Air Conditioner Compressor
44
-
Checking High-Pressure Safety Valve on Air Conditioner Compressor
47
-
Removing and Installing Pulley
48
-
Control Motors
51
-
Overview of Fitting Locations — Front Control Motors
51
-
Removing and Installing Temperature Flap Control Motor V68
53
-
Removing and Installing Defroster Flap Control Motor V107
55
-
Removing and Installing Air Recirculation Flap Control Motor V113
57
-
Removing and Installing Left Temperature Flap Control Motor V158
62
-
Removing and Installing Right Temperature Flap Control Motor V159
64
-
Removing and Installing Right Temperature Flap Control Mo- Tor V159
64
-
Removing and Installing Indirect Ventilation Flap Control Motor V213
66
-
Removing and Installing Fresh Air/Recirculated Air, Air Flow Flap Control Motor V425
67
-
Removing and Installing Front Air Distribution Flap Control Motor V426
69
-
Removing and Installing Air Distribution Flap Control Motor V428
70
-
Removing and Installing Fresh Air/Air Recirculation, Air Flow Flap Actuator
71
-
Front Heater and Air Conditioning Unit
72
-
Assembly Overview — Heater and Air Conditioning Unit
72
-
Removing and Installing Evaporator
77
-
Dismantling and Assembling Evaporator Housing
77
-
Removing and Installing Heater and Air Conditioning Unit
78
-
Dismantling and Assembling Heater and Air Conditioning Unit
82
-
Removing and Installing Air Distribution Housing
84
-
Dismantling and Assembling Air Distribution Housing
85
-
Checking Auxiliary Air Heater Element Z35
87
-
Removing and Installing Auxiliary Air Heater Element Z35
88
-
Removing and Installing Evaporator Temperature Sensor G308
89
-
Removing and Installing Dust and Pollen Filter
89
-
Removing and Installing Fresh Air Blower Series Resistor with Overheating Fuse N24
90
-
Removing and Installing Fresh Air Blower V2
91
-
Removing and Installing Fresh Air Blower Control Unit J126
93
-
Removing and Installing Heat Exchanger
93
-
Removing and Installing Condensation Drain
97
-
Checking Condensation Drain
98
-
Air Duct
99
-
Assembly Overview — Air Duct and Air Distribution in Passenger Compartment
99
-
Removing and Installing Centre Vent
100
-
Removing and Installing Driver or Front Passenger Side Air Vents
101
-
Removing and Installing Rear Vents
102
-
Removing and Installing Driver Side Footwell Vents
103
-
Removing and Installing Front Passenger Side Footwell Vents
104
-
Removing and Installing Left or Right Side Window Vents
105
-
Removing and Installing Rear Footwell Vent
106
-
Removing and Installing Rear Centre Console Vent Duct
107
-
Removing and Installing Rear Footwell Vent
108
-
Removing and Installing Fresh Air Intake
108
-
Removing and Installing Glove Box Cooling
109
-
Checking Forced Ventilation for Passenger Compartment
109
-
Removing and Installing Forced Ventilation for Passenger Compartment
110
-
Operating and Display Unit
112
-
Overview of Operating and Display Unit
112
-
Overview of Control and Display Unit, Air Conditioning System with Electric and Manual Controls, as of WEEK 22/2012
115
-
-
Overview of Operating and Display Unit, Climatronic up to Week 44/2011
116
-
Overview of Operating and Display Unit, Climatronic up to Week 21/2012
119
-
Overview of Operating and Display Unit, Climatronic from Week 22/2012
121
-
Removing and Installing Operating and Display Unit
122
-
Other Controlling and Regulating Components
126
-
Removing and Installing Sunlight Penetration Photosensor G107
126
-
Principle of Operation of Air Quality Sensor G238
126
-
Removing and Installing Air Quality Sensor G238
128
-
Removing and Installing Ambient Temperature Sensor G17
128
-
Removing and Installing Left Vent Temperature Sender G150
129
-
Removing and Installing Right Vent Temperature Sender G151
129
-
Removing and Installing Left Footwell Vent Temperature Sender G261
130
-
Removing and Installing Right Footwell Vent Temperature Sender G262
130
-
Volkswagen Passat 2011 Workshop Manual (140 pages)
Brake systems
Brand: Volkswagen
|
Category: Automobile
|
Size: 9.45 MB
Table of Contents
-
Table of Contents
3
-
Technical Data
5
-
Identification
5
-
Allocation of PR Number — Brakes
5
-
Technical Data
6
-
Technical Data for Brakes
6
-
Brake Test
8
-
General Information
8
-
Checking Vehicles with Front-Wheel Drive
8
-
Checking Vehicles with Four-Wheel Drive
8
-
Checking Parking Brake
9
-
-
Anti-Lock Brake System
11
-
General Information
11
-
Repair Instructions for Repair Work on ABS
11
-
Vehicle Diagnosis, Testing and Information System
12
-
Overview of Fitting Locations
14
-
Abs/Esp
14
-
Control Unit and Hydraulic Unit
18
-
Assembly Overview
18
-
Removing and Installing Control Unit and Hydraulic Unit
21
-
Connecting Brake Lines to Hydraulic Unit
29
-
Sensors
32
-
Assembly Overview — Speed Sensor on Front Axle
32
-
Removing and Installing Speed Sensor on Front Axle
33
-
Assembly Overview — Speed Sensor on Rear Axle
33
-
Removing and Installing Speed Sensor on Rear Axle
35
-
Removing and Installing ESP Sensor Unit
36
-
Removing and Installing Steering Angle Sender
37
-
Removing and Installing Brake Servo Vacuum Sender
37
-
-
Brakes — Mechanism
39
-
Front Brakes
39
-
Assembly Overview — Front Brakes
39
-
Removing and Installing Brake Pads/Linings
42
-
Removing and Installing Brake Caliper
47
-
Rear Brakes
51
-
Assembly Overview — Rear Brakes
51
-
Removing and Installing Brake Pads/Linings
54
-
Removing and Installing Brake Caliper
57
-
Handbrake
60
-
Overview of Fitting Locations — Parking Brake
60
-
Removing and Installing Control Unit
61
-
Removing and Installing Parking Brake Motor
61
-
Brake Pedal
64
-
Assembly Overview — Brake Pedal
64
-
Separating Brake Pedal from Brake Servo
66
-
Connecting Brake Pedal to Brake Servo
67
-
Removing and Installing Brake Pedal
67
-
Removing and Installing Mounting Bracket
70
-
-
Brakes — Hydraulics
75
-
Front Brake Calipers
75
-
Assembly Overview — Front Brake Caliper
75
-
Removing and Installing Brake Caliper Piston
76
-
Rear Brake Calipers
82
-
Assembly Overview — Rear Brake Caliper
82
-
Removing and Installing Rear Brake Caliper Piston
83
-
Brake Servo and Brake Master Cylinder
86
-
Assembly Overview — Brake Servo/Brake Master Cylinder
86
-
Removing and Installing Brake Light Switch
90
-
Removing and Installing Brake Master Cylinder
92
-
Removing and Installing Brake Servo
106
-
Vacuum System
124
-
Assembly Overview — Vacuum Pump
124
-
Assembly Overview — Electric Vacuum Pump
125
-
Checking Non-Return Valve
126
-
Removing and Installing Brake Servo Pressure Sensor
126
-
Checking Vacuum System
126
-
Brake Lines
131
-
Repairing Brake Lines
131
-
Hydraulic System
136
-
General Notes on Brake Fluid
136
-
Pre-Bleeding Hydraulic System
136
-
Bleeding Hydraulic System Following Standard Procedure
138
-
Subsequent Bleeding of Hydraulic System
139
-
Testing for Leaks
139
-
Volkswagen Passat 2011 Workshop Manual (134 pages)
Communication
Brand: Volkswagen
|
Category: Automobile
|
Size: 7.16 MB
Table of Contents
-
Table of Contents
3
-
Technical Data
5
-
Repair Instructions
5
-
General Information
5
-
Suppression Measures
5
-
Overview of Battery, Transmitter and Receiver Unit, Fuse and Wiring Harness
6
-
Installation and Operation of Two-Way Radios with a Transmitting Power above 10 Watts
7
-
Mobile Telephones or Portable Two-Way Radios Without Separate External Aerial
7
-
Transmitting Power and Aerial Fitting Locations
7
-
General Repair Instructions
9
-
-
Communication
12
-
Radio / Radio Navigation Systems R / J503
13
-
Components of Radio / Radio Navigation Systems R / J503
13
-
Overview of Fitting Locations — Radio / Radio Navigation System R / J505
28
-
Removing and Installing Radio / Radio Navigation Systems R / J503
45
-
Interface for External Multimedia Unit R215
48
-
Pin Assignments
50
-
-
-
2 Sound System
69
-
General Notes on Amplifiers
69
-
System Overview — Amplifier R12
69
-
Removing and Installing Amplifier R12
72
-
General Notes on Loudspeaker Systems
74
-
Removing and Installing Front Bass and MID-Range Loud- Speakers
74
-
Removing and Installing Front Bass and MID-Range Loudspeakers
74
-
Removing and Installing Rear Bass Loudspeakers R17 / R15
75
-
Removing and Installing Front Treble Loudspeakers R22 / R20
76
-
R14
77
-
Removing and Installing Rear Treble Loudspeakers R16
77
-
Removing and Installing Rear Treble Loudspeakers R16 / R14
77
-
Aerial Systems
79
-
System Overview — Aerial Systems, Saloon
79
-
System Overview — Aerial Systems, Estate
85
-
Removing and Installing Aerial Modules and Aerial Amplifiers
90
-
Removing and Installing Roof Aerial RX5
93
-
CD Changer
95
-
General Information
95
-
Removing and Installing CD Changer R41
95
-
-
5 Telephone System
98
-
General Notes on Universal Preparation for Mobile Phone UTP
98
-
System Overview of Universal Mobile Phone Preparation
99
-
Utp
99
-
Removing and Installing Telephone Bracket
102
-
Removing and Installing Mobile Telephone Operating Elec- Tronics Control Unit J412
104
-
Removing and Installing Mobile Telephone Operating Electronics Control Unit J412
104
-
Changing Mobile Phone Cradle from Old to New Dash Pan- el
105
-
Changing Mobile Phone Cradle from Old to New Dash Panel
105
-
Removing and Installing Emergency Button E276
107
-
Removing and Installing Telephone Microphone R38
108
-
Components of Reversing Camera System
110
-
Reversing Camera
110
-
Assembly Overview — Reversing Camera
111
-
Removing and Installing Reversing Camera R189
112
-
Calibrating Reversing Camera
114
-
Removing and Installing Reversing Camera System Control Unit J772
117
-
Renewing Video Cable
118
-
General Information
121
-
Multifunction Steering Wheel
121
-
Removing and Installing Steering Wheel Multifunction Buttons E441 / E440
121
-
Components of Connection for External Multimedia Units
123
-
Connection for External Multimedia Devices
123
-
Connectors, Connection for External Multimedia Devices
128
-
Removing and Installing Connection for External Audio Sources R199
131
-
Removing and Installing Interface for External Multimedia Devices R215
132
-

Volkswagen Passat 2011 Workshop Manual (120 pages)
Brand: Volkswagen
|
Category: Automobile
|
Size: 4.84 MB
Table of Contents
-
Table of Contents
3
-
Technical Data
5
-
Safety Information
5
-
Safety Regulations for Working on Fuel Supply
5
-
Safety Precautions When Using Testers and Measuring Instruments During a Road Test
5
-
Safety Precautions When Working on Vehicles with a Start/Stop System
6
-
Identification
7
-
Engine Number/Engine Data
7
-
General Information
8
-
Rules for Cleanliness When Working on Auxiliary/Supplementary Heater and Fuel System
8
-
Repair Notes
9
-
Routing and Attaching Lines
9
-
General Repair Instructions
9
-
-
Assembly Overview — Fuel Tank, Vehicles with Front-Wheel Drive
10
-
Fuel Supply System
10
-
Assembly Overview — Fuel Tank, Vehicles with Four-Wheel Drive
14
-
Emptying Fuel Tank
18
-
Emptying Fuel Tank When Fuel Pump Is Intact
18
-
Continued for All Vehicles
20
-
Vehicles with Auxiliary Heater
20
-
Special Tools and Workshop Required
26
-
Emptying Fuel Tank at Fuel Delivery Unit Flange
27
-
-
Removing and Installing Fuel Tank
30
-
Continuation for All Other Engine Codes
33
-
Vehicles with Engine Code BWS or CCZB
39
-
Vehicles with Engine Code CNNA
39
-
-
Assembly Overview — Fuel Delivery Unit/Fuel Gauge Sender
45
-
Fuel Delivery Unit, Fuel Gauge Sender
45
-
Installation Position of Fuel Delivery Unit
46
-
Removing and Installing Fuel Delivery Unit, Fuel Gauge Sender
47
-
If a New Fuel Delivery Unit Is Installed
54
-
Installing Fuel Line
54
-
Assignment of Plug-In Connectors
55
-
Colour Assignment
55
-
-
Plug-In Connectors
55
-
Separating Plug-In Connectors
55
-
Fuel Filter
59
-
Activated Charcoal Filter with Fuel Tank Leak Detection
60
-
Assembly Overview — Activated Charcoal Filter System
60
-
Removing and Installing Activated Charcoal Filter
61
-
Checking Fuel System for Leaks
62
-
Schematic Overview of Activated Charcoal Filter System
67
-
Activated Charcoal Filter Without Fuel Tank Leak Detection
70
-
Assembly Overview — Activated Charcoal Filter System
70
-
Removing and Installing Activated Charcoal Filter
70
-
Checking Fuel Tank Breather
71
-
Accelerator Pedal
74
-
Assembly Overview — Accelerator Module
74
-
Removing and Installing Accelerator Pedal Module — GX2-
74
-
Checking Fuel System Pressurisation Pump G6
77
-
Checking Function and Voltage Supply
77
-
Fuel Pump
77
-
Test Sequence
78
-
Vehicle Diagnostic Tester
78
-
Checking Fuel Pressure
80
-
If no Fault Is Found
85
-
If Reading Matches Specification
85
-
If Specification Is Not Obtained
85
-
Checking Holding Pressure
88
-
Checking Residual Pressure at Flange for Delivery Unit
90
-
If no Fault Can be Determined
90
-
If Pressure Drops Again (Leak on Fuel Tank Side)
90
-
-
Removing and Installing Suction-Jet Pump
110
-
Function of Suction-Jet Pump
112
-
If Engine Starts OK Now
112
-
Removing Suction-Jet Pump
112
-
Installing Suction-Jet Pump
113
-
-
Removing and Installing Fuel Gauge Sender G
115
-
Senders and Sensors
115
-
Removing and Installing Fuel Gauge Sender 2 G169
116
-
Volkswagen Passat 2011 Workshop Manual (25 pages)
Wheels and Tyres Guide
Brand: Volkswagen
|
Category: Automobile
|
Size: 1.76 MB
Table of Contents
-
Table of Contents
3
-
Wheels, Tyres, Vehicle Geometry
5
-
Wheel and Tyre Combinations
5
-
General Information
5
-
Explanations Regarding World Regions
6
-
-
Wheel Allocation
12
-
61/2 J X
12
-
61/2 J X 17 Offset
14
-
X 18 Offset
18
-
Dimensions:
18
-
-
Wheel Offset in MM: Wheel Load in Kg
19
-
Dimensions: / 2 J X
20
-
Wheel Load in Kg: 650
20
-
Recommended Summer Tyres
21
-
Recommended Summer Tyres, Worldwide Except North America, China, Japan, South America, Taiwan, India
21
-
Recommended Summer Tyres, India
22
-
Recommended Summer Tyres, Japan
22
-
Recommended Summer Tyres, South America
22
-
Recommended Summer Tyres, Taiwan
22
-
Recommended All-Season Tyres
23
-
Recommended All-Season Tyres, Worldwide Except North America and China
23
-
Recommended All-Season Tyres, Worldwide Except North America, China, Brazil and
23
-
Recommended Winter Tyres
24
-
Recommended Winter Tyres, Passat Alltrack, Worldwide Except North America and China
24
-
Recommended Winter Tyres, Passat Saloon, Passat Variant, Worldwide Except North America
24
-
Recommended Temporary Spare Tyres and Wheels
25
-
Advertisement
Related Products
-
Volkswagen Passat 2006
-
Volkswagen Passat 2012
-
Volkswagen Passat 2015
-
Volkswagen Passat 2020
-
Volkswagen Passat 2021
-
Volkswagen Passat 2022
-
Volkswagen Passat Estate 2020
-
Volkswagen Passat Variant 1997
-
Volkswagen Passat 1994
-
Volkswagen Passat Estate Highline
Volkswagen Categories
Automobile
Automobile Accessories
Car Receiver
Adapter
Engine
More Volkswagen Manuals
-
Contents
-
Table of Contents
-
Bookmarks
Quick Links
Service
Workshop Manual
Passat 2011 ➤
Passat Variant 2011 ➤
Communication
Edition 07.2019
Service Department. Technical Information
Related Manuals for Volkswagen Passat 2011
Summary of Contents for Volkswagen Passat 2011
-
Page 1
Service Workshop Manual Passat 2011 ➤ Passat Variant 2011 ➤ Communication Edition 07.2019 Service Department. Technical Information… -
Page 2
In addition, the normal basic safety precautions for working on motor vehicles must, as a matter of course, be observed. All rights reserved. No reproduction without prior agreement from publisher. Copyright © 2019 Volkswagen AG, Wolfsburg D3E8031BC84… -
Page 3: Table Of Contents
Passat 2011 ➤ , Passat Variant 2011 ➤ Communication — Edition 07.2019 Contents 00 — Technical data ……….. .
-
Page 4
Passat 2011 ➤ , Passat Variant 2011 ➤ Communication — Edition 07.2019 Connection for external multimedia devices ……..119 Components of connection for external multimedia units . -
Page 5: Technical Data
Passat 2011 ➤ , Passat Variant 2011 ➤ Communication — Edition 07.2019 00 – Technical data Repair instructions (VRL013181; Edition 07.2019) ⇒ “1.1 General information”, page 1 ⇒ “1.2 Suppression measures”, page 1 ⇒ “1.3 Overview of battery, transmitter and receiver unit, fuse and wiring harness”, page 2…
-
Page 6: Overview Of Battery, Transmitter And Receiver Unit, Fuse And Wiring Harness
Passat 2011 ➤ , Passat Variant 2011 ➤ Communication — Edition 07.2019 To suppress interference, electrical components such as capac‐ itors, coils and diodes are installed directly in the electrical com‐ ponents. Interference-suppressing components are also installed in the connector housings of electrical consumers.
-
Page 7: Installation And Operation Of Two-Way Radios With A Transmitting Power Above 10 Watts
Passat 2011 ➤ , Passat Variant 2011 ➤ Communication — Edition 07.2019 Installation and operation of two-way ra‐ dios with a transmitting power above 10 watts Installation and operation of two-way radios with a transmitting power above 10 watts is only permissible under the following conditions: •…
-
Page 8
Passat 2011 ➤ , Passat Variant 2011 ➤ Communication — Edition 07.2019 Designation Pmax (watts) Prescribed aerial fitting loca‐ tions 2 m frequency 20 (effective) Front wing band Front centre of roof Centre of roof Rear centre of roof 2 m frequency… -
Page 9: General Repair Instructions
Passat 2011 ➤ , Passat Variant 2011 ➤ Communication — Edition 07.2019 Designation Pmax (watts) Prescribed aerial fitting loca‐ tions 70 cm 50 (effective) Centre of roof Front centre of roof Rear centre of roof Centre of rear lid 23 cm 20 (effective) All locations on vehicle exte‐…
-
Page 10
Passat 2011 ➤ , Passat Variant 2011 ➤ Communication — Edition 07.2019 Voltage supply If a transceiver is retrofitted in the vehicle, the battery is used to connect the positive and negative wires. In addition, the wiring harness must be manufactured: ♦… -
Page 11
Passat 2011 ➤ , Passat Variant 2011 ➤ Communication — Edition 07.2019 Adapting radio components For adaption, use ⇒ Vehicle diagnostic tester in “Radio functions” mode. Adapting radio navigation system components For adaption, use ⇒ Vehicle diagnostic tester in “Radio navigation system functions”… -
Page 12: Communication
Passat 2011 ➤ , Passat Variant 2011 ➤ Communication — Edition 07.2019 91 – Communication Rep. gr.91 — Communication…
-
Page 13: Radio / Radio Navigation Systems R / J503
Passat 2011 ➤ , Passat Variant 2011 ➤ Communication — Edition 07.2019 Radio / radio navigation systems -R- / -J503- ⇒ “1.1 Components of radio / radio navigation systems R / J503 ”, page 9 ⇒ “1.2 Overview of fitting locations — radio / radio navigation sys‐…
-
Page 14
Passat 2011 ➤ , Passat Variant 2011 ➤ Communication — Edition 07.2019 The radio is also available with a final stage power output of 4 x 20 watts as an option. In this case, loudspeakers are also installed in the passenger compartment. -
Page 15
Passat 2011 ➤ , Passat Variant 2011 ➤ Communication — Edition 07.2019 Your system rights are then determined. The operating data, the VIN and the unit number of the radio or radio/navigation system are then read out automatically. Note When installing radios or radio navigation systems which are new… -
Page 16
Passat 2011 ➤ , Passat Variant 2011 ➤ Communication — Edition 07.2019 1.1.2 Components of radio system RCD 310 View of radio “RCD 310” The “RCD 310” radio system consists of the Radio — R- and the loudspeakers. ♦ Sound system ♦… -
Page 17
Passat 2011 ➤ , Passat Variant 2011 ➤ Communication — Edition 07.2019 Anti-theft coding The radio is equipped with an electronic convenience anti-theft system, which is effective in combination with the dash panel in‐ sert. After disconnecting the radio voltage supply, radio operation is restored when reconnecting the voltage supply without entering the code number. -
Page 18
Passat 2011 ➤ , Passat Variant 2011 ➤ Communication — Edition 07.2019 – When you have entered the right code number, confirm it with the “OK” function button on the display. The unit will be released and is ready for use. -
Page 19
Passat 2011 ➤ , Passat Variant 2011 ➤ Communication — Edition 07.2019 1.1.3 Components of radio system RCD 510 Radio system “RCD 510” The “RCD 510” radio system consists of the radio — R- and the front and rear loudspeakers. -
Page 20
Passat 2011 ➤ , Passat Variant 2011 ➤ Communication — Edition 07.2019 ♦ CD-RW ♦ mp3 ♦ WMA Note Mixed-mode CDs (CDs having both computer data and music) cannot be played. The aerial system version has a “diversity function” integrated in the radio. -
Page 21
Passat 2011 ➤ , Passat Variant 2011 ➤ Communication — Edition 07.2019 The anti-theft code must be entered in the radio manually. Deactivating anti-theft coding: – Switch on radio. An entry mask with a 10-key numeric keypad, a correction button and an entry button is displayed. -
Page 22
Passat 2011 ➤ , Passat Variant 2011 ➤ Communication — Edition 07.2019 – Press and hold down keys identified with -arrows- simultane‐ ously for at least 5 seconds. The following appears on the radio display: CDC transport lock activated. A button with the word “Deactivate” is located under it. -
Page 23
Passat 2011 ➤ , Passat Variant 2011 ➤ Communication — Edition 07.2019 1.1.4 Components of radio navigation system RNS 315 View of radio navigation system “RNS 315” ♦ Sound system ♦ Features of radio “RNS 315” ⇒ page 19 ♦ Anti-theft coding ⇒… -
Page 24
Passat 2011 ➤ , Passat Variant 2011 ➤ Communication — Edition 07.2019 ♦ 2 or 4 x 20 watt output power ♦ AUX-IN connection ♦ External CD changer connection without mp3 ♦ Support for multifunction steering wheel ♦ Support for multifunction indicator (MFI, Highline dash panel insert) ♦… -
Page 25
Passat 2011 ➤ , Passat Variant 2011 ➤ Communication — Edition 07.2019 Note When installing radios or radio navigation systems which are new or have not yet been adapted to the vehicle, it may occur that the tester is unable to read out the unit number of the radio or the radio navigation system. -
Page 26
Passat 2011 ➤ , Passat Variant 2011 ➤ Communication — Edition 07.2019 1.1.5 Components of radio navigation system RNS 510 Radio navigation system “RNS 510” The radio navigation system “RNS 510” combines the functions of a navigation system with those of a high-quality radio system. -
Page 27
Passat 2011 ➤ , Passat Variant 2011 ➤ Communication — Edition 07.2019 After disconnecting the radio navigation system’s voltage supply, system operation is restored when reconnecting the voltage sup‐ ply without entering the code number. The prerequisites are that initial activation of the anti-theft coding has been performed and the radio navigation system is reconnected in the same vehicle. -
Page 28: Overview Of Fitting Locations — Radio / Radio Navigation System R / J505
Passat 2011 ➤ , Passat Variant 2011 ➤ Communication — Edition 07.2019 Note If you entered an incorrect anti-theft code, this can be corrected immediately in a new attempt. If the incorrect anti-theft code is entered twice, the radio navigation system is blocked for one hour.
-
Page 29
Passat 2011 ➤ , Passat Variant 2011 ➤ Communication — Edition 07.2019 1 — Roof aerial — RX5- for tele‐ phone aerial — R65- ❑ Installed as an option on estate model ❑ For telephone (GSM) 2 — Aerial — R11- ❑… -
Page 30
Passat 2011 ➤ , Passat Variant 2011 ➤ Communication — Edition 07.2019 ❑ No interface for external multimedia devices possible if CD changer is installed as they both have the same installation location. System overview — RCD 210, Passat Saloon… -
Page 31
Passat 2011 ➤ , Passat Variant 2011 ➤ Communication — Edition 07.2019 1 — Control unit in dash panel insert — J285- 2 — Aerial — R11- in rear left side window 3 — Connection for external au‐ dio sources — R199- 4 — Interface for external multi‐… -
Page 32
Passat 2011 ➤ , Passat Variant 2011 ➤ Communication — Edition 07.2019 1.2.2 Assembly overview — radio system RCD 310 1 — Roof aerial — RX5- for tele‐ phone aerial — R65- ❑ Installed as an option on estate model ❑… -
Page 33
Passat 2011 ➤ , Passat Variant 2011 ➤ Communication — Edition 07.2019 12 — Rear right treble loudspeaker — R16- and rear left treble loudspeaker — R14- ❑ Installed in rear door trims on both sides 13 — CD changer — R41- ❑… -
Page 34
Passat 2011 ➤ , Passat Variant 2011 ➤ Communication — Edition 07.2019 System overview — RCD 310, Passat Estate 1 — Control unit in dash panel insert — J285- 2 — Aerial — R11- in rear left side window 3 — Aerial wire for terrestrial ra‐… -
Page 35
Passat 2011 ➤ , Passat Variant 2011 ➤ Communication — Edition 07.2019 1.2.3 Assembly overview — radio system RCD 510 1 — Roof aerial — RX5- for tele‐ phone aerial — R65- ❑ Installed as an option on estate model ❑… -
Page 36
Passat 2011 ➤ , Passat Variant 2011 ➤ Communication — Edition 07.2019 12 — Rear right treble loudspeaker — R16- and rear left treble loudspeaker — R14- ❑ Installed in rear door trims on both sides 13 — CD changer — R41- ❑… -
Page 37
Passat 2011 ➤ , Passat Variant 2011 ➤ Communication — Edition 07.2019 System overview — RCD 510, Passat Estate 1 — Control unit in dash panel insert — J285- 2 — Aerial — R11- in rear left side window 3 — Aerial wire for terrestrial ra‐… -
Page 38
Passat 2011 ➤ , Passat Variant 2011 ➤ Communication — Edition 07.2019 1.2.4 Assembly overview — radio navigation system RNS 315 1 — Roof aerial — RX5- for GPS aerial — R50- and optional tele‐ phone aerial — R65- ❑ Only installed on estate model ❑… -
Page 39
Passat 2011 ➤ , Passat Variant 2011 ➤ Communication — Edition 07.2019 11 — Rear right bass loudspeaker — R17- and rear left bass loudspeaker — R15- ❑ Installed in rear door trims on both sides 12 — Rear right treble loudspeaker — R16- and rear left treble loudspeaker — R14- ❑… -
Page 40
Passat 2011 ➤ , Passat Variant 2011 ➤ Communication — Edition 07.2019 9 — Bass loudspeaker, front right — R23- 10 — Front right treble loudspeaker — R22- 11 — Bass loudspeaker, rear right — R17- 12 — Treble loudspeaker, rear right — R16-… -
Page 41
Passat 2011 ➤ , Passat Variant 2011 ➤ Communication — Edition 07.2019 11 — Bass loudspeaker, front right — R23- 12 — Front right treble loudspeaker — R22- 13 — Bass loudspeaker, rear right — R17- 14 — Treble loudspeaker, rear right — R16-… -
Page 42
Passat 2011 ➤ , Passat Variant 2011 ➤ Communication — Edition 07.2019 7 — Control unit with display for radio and navigation — J503- ❑ RNS 510 ❑ Fitted as option with voice control microphone — R206- ❑ Removing and installing ⇒… -
Page 43
Passat 2011 ➤ , Passat Variant 2011 ➤ Communication — Edition 07.2019 1 — Control unit in dash panel insert — J285- 2 — Aerial — R11- , radio aerial 2 — R93- , digital radio aerial — R183- and GPS aerial — R50- in rear window 3 — Connection for external au‐… -
Page 44
Passat 2011 ➤ , Passat Variant 2011 ➤ Communication — Edition 07.2019 1 — Control unit in dash panel insert — J285- 2 — Aerial — R11- in rear left side window 3 — Aerial wire for terrestrial ra‐ dio reception with diversity… -
Page 45: Removing And Installing Radio / Radio Navigation Systems R / J503
Passat 2011 ➤ , Passat Variant 2011 ➤ Communication — Edition 07.2019 Removing and installing radio / radio navigation systems -R- / -J503- Note Please read relevant chapter for the respective device before in‐ stalling or removing. Special tools and workshop equipment required ♦…
-
Page 46
Passat 2011 ➤ , Passat Variant 2011 ➤ Communication — Edition 07.2019 – Unscrew screws -arrows- holding radio/radio navigation sys‐ tem in place. – Pull radio/radio navigation system in -direction of arrow- out of installation slot until you can access connectors on rear of ra‐… -
Page 47
Passat 2011 ➤ , Passat Variant 2011 ➤ Communication — Edition 07.2019 – Swing locking bar in direction of -arrow-. This causes the con‐ nector to be pushed out. – Press fuse -A- on audio/video connector and swing bar in di‐… -
Page 48: Interface For External Multimedia Unit R215
Passat 2011 ➤ , Passat Variant 2011 ➤ Communication — Edition 07.2019 Interface for external multimedia unit — R215- General information Analogue (via AUX-IN input) as well as digital (via USB or iPod input) audio content can be played over the radio or the radio navigation system via the interface for external multimedia units — R215- .
-
Page 49
Passat 2011 ➤ , Passat Variant 2011 ➤ Communication — Edition 07.2019 1 — Loudspeaker system of ra‐ dio or radio navigation system 2 — Radio or radio navigation system 3 — Multifunction steering wheel 4 — CAN bus 5 — LF wire ❑… -
Page 50: Pin Assignments
Passat 2011 ➤ , Passat Variant 2011 ➤ Communication — Edition 07.2019 Pin assignments ⇒ “1.5.1 Connector pin assignment, RCD 210”, page 46 ⇒ “1.5.2 Connector pin assignment, RCD 310”, page 48 ⇒ “1.5.3 Connector pin assignment, RCD 510”, page 50 ⇒…
-
Page 51
Passat 2011 ➤ , Passat Variant 2011 ➤ Communication — Edition 07.2019 Multi-pin connector 1, 8-pin, loudspeaker outputs 1 — Rear right loudspeaker, positive 2 — Front right loudspeaker, positive 3 — Front left loudspeaker, positive 4 — Rear left loudspeaker, positive… -
Page 52
Passat 2011 ➤ , Passat Variant 2011 ➤ Communication — Edition 07.2019 Multi-pin connector 4, 12-pin, connection for external audio sour‐ ces, CD changer control and CD audio input signal 1 — Left AUX audio signal input, positive 2 — AUX audio input, negative… -
Page 53
Passat 2011 ➤ , Passat Variant 2011 ➤ Communication — Edition 07.2019 Multi-pin connector 1, 8-pin, loudspeaker outputs 1 — Rear right loudspeaker, positive 2 — Front right loudspeaker, positive 3 — Front left loudspeaker, positive 4 — Rear left loudspeaker, positive… -
Page 54
Passat 2011 ➤ , Passat Variant 2011 ➤ Communication — Edition 07.2019 Multi-pin connector 4, 12-pin, AUX audio input, CD changer con‐ trol and CD audio input signals 1 — AUX audio input, positive, left 2 — AUX audio input, negative… -
Page 55
Passat 2011 ➤ , Passat Variant 2011 ➤ Communication — Edition 07.2019 Multi-pin connector 1, 8-pin, loudspeaker outputs 1 — Rear right loudspeaker, positive 2 — Front right loudspeaker, positive 3 — Front left loudspeaker, positive 4 — Rear left loudspeaker, positive… -
Page 56
Passat 2011 ➤ , Passat Variant 2011 ➤ Communication — Edition 07.2019 Multi-pin connector 4, 12-pin, AUX audio input, CD changer con‐ trol and CD audio input signals 1 — AUX audio input, positive, left 2 — AUX audio input, negative… -
Page 57
Passat 2011 ➤ , Passat Variant 2011 ➤ Communication — Edition 07.2019 1.5.4 Connector pin assignment, RNS 315 1 — Connection for digital radio reception (DAB) ❑ Optional 2 — Multi-pin connector 1, 8-pin 3 — Multi-pin connector 2, 8-pin… -
Page 58
Passat 2011 ➤ , Passat Variant 2011 ➤ Communication — Edition 07.2019 Multi-pin connector 2, 8-pin, voltage supply, CAN bus, mute switch 9 — CAN bus, High 10 — CAN bus, Low 11 — Not assigned 12 — Terminal 31 voltage supply, negative… -
Page 59
Passat 2011 ➤ , Passat Variant 2011 ➤ Communication — Edition 07.2019 Multi-pin connector, audio and video, 26-pin 1 — Reserved for Debug RX protocol 2 — Reserved for Debug TX protocol 3 — Not assigned 4 — Video signal input, blue, plus… -
Page 60
Passat 2011 ➤ , Passat Variant 2011 ➤ Communication — Edition 07.2019 1 — Connection for navigation ❑ Only for vehicles for Ja‐ 2 — Aerial connection ❑ DAB aerial input con‐ nection, optional. 3 — Multi-pin connector 1, 8-pin… -
Page 61
Passat 2011 ➤ , Passat Variant 2011 ➤ Communication — Edition 07.2019 Multi-pin connector 2, 8-pin, voltage supply, CAN bus, mute switch 9 — CAN bus, High 10 — CAN bus, Low 11 — BOSE pin 12 — Terminal 31 voltage supply, negative… -
Page 62
Passat 2011 ➤ , Passat Variant 2011 ➤ Communication — Edition 07.2019 Multi-pin connector, audio and video, 26-pin 1 — Reserved for Debug RX protocol 2 — Reserved for Debug TX protocol 3 — Not assigned 4 — Not assigned… -
Page 63
Passat 2011 ➤ , Passat Variant 2011 ➤ Communication — Edition 07.2019 1.5.6 Connector pin assignment, 8-channel amplifier — R12- Version 1 with 2-way system at front and rear Multi-pin connector A, 16-pin 23 — CAN bus, low 24 — Not assigned… -
Page 64
Passat 2011 ➤ , Passat Variant 2011 ➤ Communication — Edition 07.2019 Multi-pin connector B, 22-pin 1 — Terminal 31 voltage supply, negative 2 — Terminal 30 voltage supply, positive 3 — Bass loudspeaker, front right, negative 4 — Not assigned… -
Page 65
Passat 2011 ➤ , Passat Variant 2011 ➤ Communication — Edition 07.2019 Multi-pin connector A, 16-pin 23 — CAN bus, low 24 — Not assigned 25 — Optional additional function USB 3 26 — Not assigned 27 — Mono 2 input, negative (radio loudspeaker output rear left,… -
Page 66
Passat 2011 ➤ , Passat Variant 2011 ➤ Communication — Edition 07.2019 Multi-pin connector B, 22-pin 1 — Terminal 31 voltage supply, negative 2 — Terminal 30 voltage supply, positive 3 — Bass loudspeaker, front right, negative 4 — Not assigned… -
Page 67
Passat 2011 ➤ , Passat Variant 2011 ➤ Communication — Edition 07.2019 1.5.7 Connector pin assignment, 10-channel amplifier — R12- Multi-pin connector A, 24-pin 1 — Rear left treble loudspeaker, positive 2 — Rear right bass loudspeaker, negative 3 — Rear right bass loudspeaker, positive… -
Page 68
Passat 2011 ➤ , Passat Variant 2011 ➤ Communication — Edition 07.2019 Multi-pin connector B, 23-pin 1 — CAN low 2 — Front left mid-range loudspeaker, negative 3 — Front left mid-range loudspeaker, positive 4 — CAN high 5 — Not assigned… -
Page 69: Sound System
Passat 2011 ➤ , Passat Variant 2011 ➤ Communication — Edition 07.2019 Sound system ⇒ “2.1 General notes on amplifiers”, page 65 ⇒ “2.2 System overview — amplifier R12 ”, page 65 ⇒ “2.3 Removing and installing amplifier R12 ”, page 68 ⇒…
-
Page 70
Passat 2011 ➤ , Passat Variant 2011 ➤ Communication — Edition 07.2019 1 — Radio — R- or control unit with display for radio and nav‐ igation — J503- 2 — Wiring connections for au‐ dio signals from radio or radio… -
Page 71
Passat 2011 ➤ , Passat Variant 2011 ➤ Communication — Edition 07.2019 2.2.2 System overview — 8-channel amplifier — R12- with 3-way system at front and 2-way system at rear 1 — Radio — R- or control unit with display for radio and nav‐… -
Page 72: Removing And Installing Amplifier R12
Passat 2011 ➤ , Passat Variant 2011 ➤ Communication — Edition 07.2019 2.2.3 System overview — 10-channel amplifier — R12- 1 — Radio — R- or control unit with display for radio and nav‐ igation — J503- 2 — Wiring connections for au‐…
-
Page 73
Passat 2011 ➤ , Passat Variant 2011 ➤ Communication — Edition 07.2019 View of 10-channel amplifier: Removing Removal and installation of the amplifier is identical for both ver‐ sions. The only difference is that the connectors are not the same. -
Page 74: General Notes On Loudspeaker Systems
Passat 2011 ➤ , Passat Variant 2011 ➤ Communication — Edition 07.2019 – Push amplifier in direction of arrow -A- into fold -B- of retainer. Further installation is carried out in reverse order! General notes on loudspeaker systems Note ♦…
-
Page 75: Removing And Installing Rear Bass Loudspeakers R17 / R15
Passat 2011 ➤ , Passat Variant 2011 ➤ Communication — Edition 07.2019 Before a loudspeaker can be renewed, the door trim must be re‐ moved ⇒ General body repairs, interior; Rep. gr. 70 ; Trims, insulation; Door trims; Removing and installing trim on driver door or ⇒…
-
Page 76: Removing And Installing Front Treble Loudspeakers R22 / R20
Passat 2011 ➤ , Passat Variant 2011 ➤ Communication — Edition 07.2019 – Drill out rivets -arrows- with a suitable drill bit and take out loudspeaker. Note It is essential that all swarf be removed from the door because ♦…
-
Page 77: Removing And Installing Rear Treble Loudspeakers R16 / R14
Passat 2011 ➤ , Passat Variant 2011 ➤ Communication — Edition 07.2019 – If the plastic clip -arrow- is still on the trim after removing, re‐ move the clip and insert it in the door at the dedicated fitting location.
-
Page 78
Passat 2011 ➤ , Passat Variant 2011 ➤ Communication — Edition 07.2019 – Remove weld joint -arrows- for loudspeaker trim using propri‐ etary brazing iron. As an alternative, the weld joint can also be cut through. If the loudspeaker needs to be renewed, the loudspeaker trim will also need renewing. -
Page 79: Aerial Systems
Passat 2011 ➤ , Passat Variant 2011 ➤ Communication — Edition 07.2019 Aerial systems ⇒ “3.1 System overview — aerial systems, Saloon”, page 75 ⇒ “3.2 System overview — aerial systems, Estate”, page 81 ⇒ “3.3 Removing and installing aerial modules and aerial ampli‐…
-
Page 80
Passat 2011 ➤ , Passat Variant 2011 ➤ Communication — Edition 07.2019 Note The diversity aerial system optimises and improves the quality ♦ of reception in the vehicle. On these radios or radio navigation systems, the diversity ♦ function is installed directly in the unit. No additional aerial se‐… -
Page 81
Passat 2011 ➤ , Passat Variant 2011 ➤ Communication — Edition 07.2019 3.1.3 Aerial system with RCD 310 and RCD 510 1 — Radio — R- ❑ Radio RCD 310 or RCD 2 — Aerial wiring from radio to radio reception aerial module… -
Page 82
Passat 2011 ➤ , Passat Variant 2011 ➤ Communication — Edition 07.2019 3.1.4 Aerial system with RNS 315 1 — Control unit with display unit for radio and navigation — J503- ❑ Radio navigation sys‐ tem RNS 315 2 — Aerial wiring from radio nav‐… -
Page 83
Passat 2011 ➤ , Passat Variant 2011 ➤ Communication — Edition 07.2019 3.1.5 Aerial system with RNS 510 1 — Control unit with display unit for radio and navigation — J503- ❑ Radio navigation sys‐ tem RNS 510 2 — Data wire from TV tuner to… -
Page 84
Passat 2011 ➤ , Passat Variant 2011 ➤ Communication — Edition 07.2019 3.1.6 Overview of aerial system in rear window 1 — Aerial connection for digital radio reception (DAB) 2 — Aerial — R11- , radio aerial 2 — R93- . Digital radio aerial -… -
Page 85: System Overview — Aerial Systems, Estate
Passat 2011 ➤ , Passat Variant 2011 ➤ Communication — Edition 07.2019 System overview — aerial systems, Es‐ tate ⇒ “3.2.1 General information”, page 81 ⇒ “3.2.2 Aerial system with RCD 210 radio system”, page 81 ⇒ “3.2.3 Aerial system with RCD 310 and RCD 510 radio sys‐…
-
Page 86
Passat 2011 ➤ , Passat Variant 2011 ➤ Communication — Edition 07.2019 1 — Mobile phone — R54- 2 — Aerial wire from telephone system to roof aerial 3 — Roof aerial — RX5- with tel‐ ephone aerial — R65- and GPS aerial — R50- ❑… -
Page 87
Passat 2011 ➤ , Passat Variant 2011 ➤ Communication — Edition 07.2019 3.2.3 Aerial system with RCD 310 and RCD 510 radio systems 1 — Mobile phone — R54- 2 — Aerial wire from telephone system to roof aerial 3 — Roof aerial — RX5- with tel‐… -
Page 88
Passat 2011 ➤ , Passat Variant 2011 ➤ Communication — Edition 07.2019 3.2.4 Aerial system with RNS 315 radio system 1 — Mobile phone — R54- 2 — Aerial wire from telephone system to roof aerial 3 — Roof aerial — RX5- with tel‐… -
Page 89
Passat 2011 ➤ , Passat Variant 2011 ➤ Communication — Edition 07.2019 3.2.5 Aerial system with RNS 510 radio system 1 — Mobile phone — R54- 2 — Aerial wire from telephone system to roof aerial 3 — Roof aerial — RX5- with tel‐… -
Page 90: Removing And Installing Aerial Modules And Aerial Amplifiers
Passat 2011 ➤ , Passat Variant 2011 ➤ Communication — Edition 07.2019 Removing and installing aerial modules and aerial amplifiers ⇒ “3.3.1 Removing and installing aerial modules and aerial am‐ plifiers, Saloon”, page 86 ⇒ “3.3.2 Removing and installing aerial modules and aerial am‐…
-
Page 91
Passat 2011 ➤ , Passat Variant 2011 ➤ Communication — Edition 07.2019 Note The contacts on the aerial module -arrows- are not allowed to ♦ be bent and the metal must be clean in order to avoid reception problems. The same applies to the contact surfaces on the rear window. -
Page 92
Passat 2011 ➤ , Passat Variant 2011 ➤ Communication — Edition 07.2019 – Detach retaining clips -arrows-. – Carefully remove aerial module. Installing: Installation is carried out in the reverse sequence of removal. 3.3.2 Removing and installing aerial modules and aerial amplifiers, Estate The aerial amplifier 2 — R111- for the “FM2”… -
Page 93: Removing And Installing Roof Aerial Rx5
Passat 2011 ➤ , Passat Variant 2011 ➤ Communication — Edition 07.2019 – Unscrew bolt -arrow-. – Push aerial amplifier in -direction of arrow-. – Remove aerial amplifier in direction of -arrow- from body. Installing: Install in reverse order of removal.
-
Page 94
Passat 2011 ➤ , Passat Variant 2011 ➤ Communication — Edition 07.2019 Note When positioning the aerial for installation, ensure that the ♦ seal is seated correctly. The two guide lugs of the seal must be located in the relevant holes -arrows- of the aerial base. -
Page 95: Cd Changer
Passat 2011 ➤ , Passat Variant 2011 ➤ Communication — Edition 07.2019 CD changer ⇒ “4.1 General information”, page 91 ⇒ “4.2 Removing and installing CD changer R41 ”, page 91 General information Note If the CD changer plays original CDs but not burnt CDs, the ♦…
-
Page 96
Passat 2011 ➤ , Passat Variant 2011 ➤ Communication — Edition 07.2019 – Pull tab -A- and CD changer will move downwards. – Push radio release tools — 3316- into the intended slots on left and right of CD changer -arrows- until they engage audibly. -
Page 97
Passat 2011 ➤ , Passat Variant 2011 ➤ Communication — Edition 07.2019 – Secure connector -A- on top of glove compartment with new cable tie -arrow-. When doing this, ensure that no flapping noises can occur. Cut off excess from cable tie. -
Page 98: Telephone System
Passat 2011 ➤ , Passat Variant 2011 ➤ Communication — Edition 07.2019 Telephone system ⇒ “5.1 General notes on universal preparation for mobile phone UTP”, page 94 ⇒ “5.2 System overview of universal mobile phone preparation”, page 95 ⇒ “5.3 Removing and installing telephone bracket”, page 98 ⇒…
-
Page 99: System Overview Of Universal Mobile Phone Preparation
Passat 2011 ➤ , Passat Variant 2011 ➤ Communication — Edition 07.2019 5.1.2 General notes on universal preparation for mobile phone UTP, preparation for mobile phone UTP Premium with Blue‐ tooth and wireless communication inter‐ face The “UTP Premium” type of mobile phone preparation is only available in combination with a radio or a radio navigation system.
-
Page 100
Passat 2011 ➤ , Passat Variant 2011 ➤ Communication — Edition 07.2019 1 — Loudspeaker system 2 — Radio — R- or control unit with display for radio and nav‐ igation — J503- 3 — Telephone aerial, naviga‐ tion and telestart for auxiliary heater — R66- ❑… -
Page 101
Passat 2011 ➤ , Passat Variant 2011 ➤ Communication — Edition 07.2019 1 — Loudspeaker system 2 — Radio — R- or control unit with display for radio and nav‐ igation — J503- 3 — Telephone aerial — R65- ,… -
Page 102: Removing And Installing Telephone Bracket
Passat 2011 ➤ , Passat Variant 2011 ➤ Communication — Edition 07.2019 1 — Control unit in dash panel insert — J285- 2 — Telephone microphone — R38- ❑ For hands-free opera‐ tion of telephone ❑ Installed in front interior light in roof console ❑…
-
Page 103
Passat 2011 ➤ , Passat Variant 2011 ➤ Communication — Edition 07.2019 – Grasp telephone bracket by hand, as shown in illustration, and carefully tilt it in -direction of arrow-. – Insert a suitable screwdriver into the resulting slot -A-. -
Page 104: Removing And Installing Mobile Telephone Operating Electronics Control Unit J412
Passat 2011 ➤ , Passat Variant 2011 ➤ Communication — Edition 07.2019 Appearance of removed telephone bracket with wiring connec‐ tions. Installing Installation is carried out in the reverse sequence of removal. Removing and installing mobile tele‐ phone operating electronics control unit…
-
Page 105: Changing Mobile Phone Cradle From Old To New Dash Panel
Passat 2011 ➤ , Passat Variant 2011 ➤ Communication — Edition 07.2019 – Pull out mobile phone operating electronics control unit in -direction of arrow- from bracket. Installing Installation is carried out in the reverse sequence of removal. Changing mobile phone cradle from old…
-
Page 106
Passat 2011 ➤ , Passat Variant 2011 ➤ Communication — Edition 07.2019 – Drill holes -1 to 4-. Drill additional holes as required. – Cut out remaining material using workshop means. – Unclip old screw backplate from old dash panel and insert in new one -arrows-. -
Page 107: Removing And Installing Emergency Button E276
Passat 2011 ➤ , Passat Variant 2011 ➤ Communication — Edition 07.2019 Feed wiring harness through opening -1-, and make sure that cradle support is seated correctly on mounting -arrows-. Removing and installing emergency but‐ ton — E276- Removing – Switch off ignition and all electrical consumers.
-
Page 108: Removing And Installing Telephone Microphone R38
Passat 2011 ➤ , Passat Variant 2011 ➤ Communication — Edition 07.2019 – Press locking lugs -arrows- and remove emergency call but‐ ton. – Detach connector of wire leading to emergency call button. Installing Installation is carried out in the reverse sequence of removal.
-
Page 109
Passat 2011 ➤ , Passat Variant 2011 ➤ Communication — Edition 07.2019 – Unscrew bolts -arrows-. – Remove roof console section and rotate. – Press locking lugs -arrows- and remove microphone. – Detach connector of wire leading to microphone. Installing Installation is carried out in the reverse sequence of removal. -
Page 110: Reversing Camera
Passat 2011 ➤ , Passat Variant 2011 ➤ Communication — Edition 07.2019 Reversing camera ⇒ “6.1 Components of reversing camera system”, page 106 ⇒ “6.2 Assembly overview — reversing camera”, page 107 ⇒ “6.3 Removing and installing reversing camera R189 ”, page 108 ⇒…
-
Page 111: Assembly Overview — Reversing Camera
Passat 2011 ➤ , Passat Variant 2011 ➤ Communication — Edition 07.2019 Assembly overview — reversing camera ⇒ “6.2.1 Assembly overview — reversing camera, Estate”, page 107 ⇒ “6.2.2 Assembly overview — reversing camera, Saloon”, page 108 6.2.1 Assembly overview — reversing camera, Estate…
-
Page 112: Removing And Installing Reversing Camera R189
Passat 2011 ➤ , Passat Variant 2011 ➤ Communication — Edition 07.2019 6.2.2 Assembly overview — reversing camera, Saloon 1 — Control unit with display unit for radio and navigation — J503- ❑ Fitting location: at front of centre console ❑…
-
Page 113
Passat 2011 ➤ , Passat Variant 2011 ➤ Communication — Edition 07.2019 ♦ Torque wrench — V.A.G 1783- Removing – Removing and installing handle button with camera ⇒ General body repairs, exterior; Rep. gr. 55 ; Rear lid; Removing and installing handle . -
Page 114: Calibrating Reversing Camera
Passat 2011 ➤ , Passat Variant 2011 ➤ Communication — Edition 07.2019 – Removing and installing swivel badge in rear lid ⇒ General body repairs, exterior; Rep. gr. 55 ; Rear lid; Removing and installing operating mechanism . • The reversing camera — R189- must be calibrated after it has been removed and installed ⇒…
-
Page 115
Passat 2011 ➤ , Passat Variant 2011 ➤ Communication — Edition 07.2019 1 — Wheel centre mounting — VAS 6350/1- 2 — Wheel centre mounting — VAS 6350/1- 3 — Right angle for mounting measuring unit for distance measurement 4 — Linear laser — VAS 6350/3- ❑… -
Page 116
Passat 2011 ➤ , Passat Variant 2011 ➤ Communication — Edition 07.2019 – Fit the wheel centre mountings onto the wheel bolts on the rear wheels. Wheel centre mountings are positioned and secured in the adapters through »O-rings«. Note Place wheel centre mountings on wheels in such a way that no »anti-theft wheel bolts«, if any, are connected to wheel bolt adapt‐… -
Page 117: Removing And Installing Reversing Camera System Control Unit J772
Passat 2011 ➤ , Passat Variant 2011 ➤ Communication — Edition 07.2019 – Hold the spacing laser for distance measurement -2-, as shown in the illustration, on one side of the calibration unit flush in the bracket. The spacing laser must be firmly in contact with the bracket.
-
Page 118: Renewing Video Cable
Passat 2011 ➤ , Passat Variant 2011 ➤ Communication — Edition 07.2019 Note If the reversing camera system control unit — J772- is to be ♦ replaced, the procedure to “renew control unit for reversing camera system” must always be performed to read out the codes stored in the unit ⇒…
-
Page 119
Passat 2011 ➤ , Passat Variant 2011 ➤ Communication — Edition 07.2019 The replacement cable can be found in ⇒ ETKA under part num‐ ber “7N1971327”. – Remove radio ⇒ Rep. gr. 91 ; Radio; Removing and installing radio . -
Page 120
Passat 2011 ➤ , Passat Variant 2011 ➤ Communication — Edition 07.2019 6.6.3 Renewing video cable connector strip – Separate old 54-pin connector from reversing camera system control unit — J772- . – Open old 54-pin connector and remove video cable. -
Page 121: Multifunction Steering Wheel
Passat 2011 ➤ , Passat Variant 2011 ➤ Communication — Edition 07.2019 Multifunction steering wheel ⇒ “7.1 General information”, page 117 ⇒ “7.2 Removing and installing steering wheel multifunction but‐ tons E441 / E440 ”, page 117 General information The multifunction steering wheel allows some functions of the communication system and the cruise control system to be se‐…
-
Page 122
Passat 2011 ➤ , Passat Variant 2011 ➤ Communication — Edition 07.2019 – Unscrew bolt -arrow-. – Remove keypad. – Detach connector -arrow- from keypad. Installing Installation is carried out in the reverse order of removal. Note Ensure that wiring between both button sets of steering wheel ♦… -
Page 123: Connection For External Multimedia Devices
Passat 2011 ➤ , Passat Variant 2011 ➤ Communication — Edition 07.2019 Connection for external multimedia devices ⇒ “8.1 Components of connection for external multimedia units”, page 119 ⇒ “8.2 Connectors, connection for external multimedia devices”, page 124 ⇒ “8.3 Removing and installing connection for external audio sources R199 ”, page 127…
-
Page 124
Passat 2011 ➤ , Passat Variant 2011 ➤ Communication — Edition 07.2019 1 — Sound system 2 — Radio/RNS 3 — Multifunction steering wheel 4 — CAN bus 5 — Connection for external au‐ dio sources — R199- ❑ Pin assignment ⇒… -
Page 125
Passat 2011 ➤ , Passat Variant 2011 ➤ Communication — Edition 07.2019 Location of connection for external audio sources — R199- in the case of the RNS 315 On the radio navigation system -RNS 315-, a connection for ex‐ ternal audio sources is integrated in the RNS unit -1-. For further information, refer to the ⇒… -
Page 126
Passat 2011 ➤ , Passat Variant 2011 ➤ Communication — Edition 07.2019 1 — Sound system 2 — Radio/RNS 3 — Multifunction steering wheel 4 — CAN bus 5 — LF wire ❑ Connection for external audio sources — R199- 6 — Connection for external au‐… -
Page 127
Passat 2011 ➤ , Passat Variant 2011 ➤ Communication — Edition 07.2019 Fitting location interface for external multimedia units — R215- The interface for external multimedia devices — R215- -2- is in‐ stalled in the storage compartment of the centre console. -
Page 128: Connectors, Connection For External Multimedia Devices
Passat 2011 ➤ , Passat Variant 2011 ➤ Communication — Edition 07.2019 UMI and UMI control unit installed in glove compartment The interface for external multimedia devices — R215- -1- is in‐ stalled in the glove compartment. UMI and UMI control unit installed in centre console The interface for external multimedia devices — R215- -2- is in‐…
-
Page 129
Passat 2011 ➤ , Passat Variant 2011 ➤ Communication — Edition 07.2019 8.2.2 Connector interface for external multi‐ media units — R215- Multi-pin connector, 12-pin Terminal 31 CAN bus, Low Not assigned Audio signal, right, to radio/RNS Audio signal, left, from connection for external audio sour‐… -
Page 130
Passat 2011 ➤ , Passat Variant 2011 ➤ Communication — Edition 07.2019 A — multi-pin connector, 54-pin Terminal 30 Terminal 31 Switch-on signal Telephone LF (+), left, to radio — R- Telephone LF (-), left, to radio — R- LF (+) from control unit for emergency call module and com‐… -
Page 131: Removing And Installing Connection For External Audio Sources R199
Passat 2011 ➤ , Passat Variant 2011 ➤ Communication — Edition 07.2019 37 — Not assigned 38 — Terminal 30, to telephone bracket — R126- 39 — Not assigned 40 — DIAG signal from telephone bracket — R126- 41 — Not assigned…
-
Page 132: Removing And Installing Interface For External Multimedia Devices R215
Passat 2011 ➤ , Passat Variant 2011 ➤ Communication — Edition 07.2019 – Disconnect electrical connector -arrow-. Removing Installation is carried out in the reverse order of removal. Removing and installing interface for ex‐ ternal multimedia devices — R215- ⇒ “8.4.1 Removing and installing interface for external multimedia units R215 , glove compartment”, page 128…
-
Page 133
Passat 2011 ➤ , Passat Variant 2011 ➤ Communication — Edition 07.2019 – Push tools in direction -A- and pull out control unit in direction -B-. – Release connector -A- on control unit -arrow- and pull off. Installing Installation is carried out in the reverse order of removal. -
Page 134
Passat 2011 ➤ , Passat Variant 2011 ➤ Communication — Edition 07.2019 – Unscrew bolts -arrows-. – Remove outer trim of centre console extension -2- from ex‐ tension carrier -1-. – Unscrew bolt -1-. – Pull out bracket -2- with interface for external multimedia units — R215- from extension -arrow A-.
Volkswagen Passat B7 — документация по ремонту
VW Passat B7 (362) 2011 — 2015
VW Passat Variant B7 (365) 2011 — 2015
VW Passat CC (358) 2012 — 2017
VW Passat NMS (A32) 2012 — 2015
VW Magotan B7 (942) 2012 — 2016
Быстрый переход по разделам:
Двигатели
Система охлаждения, отопления и кондиционирования
Топливная система
Система выпуска
Передняя и задняя подвеска
Тормозная система
Рулевое управление
Коробки передач, сцепление
Кузов
Электрооборудование
Общая документация
Двигатели
(Engines)
Возможные проблемы двигателя 1.8 TSI (CDAB, CDAA) и их решение (rus.) Фотоотчет.
Серия двигателей EA888 одна из самых распространённых. На сегодняшний день насчитывается уже три поколения этих двигателей. Это моторы с объёмом двигателя 1.8-2 литра оборудованные системой непосредственного впрыска топлива и турбонагнетателем. Помимо распространенности данную серию можно охарактеризовать, как самую проблемную. Если проблема нагарообразования свойственна любому двигателю с непосредственным впрыском топлива, то в данной серии к ней добавляются проблемы цепного привода ГРМ, изменяемой геометрии впускного коллектора, насоса охлаждающей жидкости, масляного голодания и т.д. Список проблем можно перечислять до бесконечности, но главной проблемой является повышенный расход масла. По заводским нормам расход не должен превышать 0.5л на тысячу километров, но в большинстве случаев расход в разы превышает нормы. Различные варианты решения этих проблем в этом фотоотчете.
Двигатели CDAB, CDAA устанавливались на автомобили: VW Passat B6, VW Passat B7, VW Passat CC, VW Golf 6,
VW Sharan, Skoda Octavia A5, Skoda Yeti, Skoda Superb 2, Audi A3, Audi TT, SEAT Leon 2, SEAT Altea.
Двигатель TSI 1.4 л / 90 кВт с турбонаддувом (rus.) Устройство и принцип действия. Пособие по программе самообразования 405 VW/Audi. Буквенное обозначение двигателя: CAXA.
Двигатель TSI 1,4 л (122 л.с.) предназначен для замены двигателя FSI 1,6 л (115 л.с.). По сравнению со своим предшественником новый двигатель TSI при значительно более низком расходе топлива и выбросе CO2 имеет существенно лучшие мощностные характеристики. От двух двигателей TSI с двойным наддувом его отличает прежде всего отсутствие компрессора и новая система охлаждения наддувочного воздуха.
Содержание: Технические особенности, Технические характеристики, Система впуска, ГБЦ, Одинарный наддув с турбонагнетателем ОГ, Системы охлаждения, Охлаждение наддувочного воздуха, Топливная система с объёмной подачей в зависимости от расхода, Обзор системы управление двигателем Bosch Motronic MED 17.5.20, Датчики, Исполнительные элементы, Функциональная схема.
Новое семейство бензиновых двигателей EA211 (rus.) Устройство и принцип действия. Программа самообучения.
Буквенные обозначения: Двигатель MPI 1,0 л 44/50/55 кВт (CHYA, CPGA, CHYB). Двигатель TSI 1,2 л 63/77 кВт с турбонаддувом (CJZB, CJZA). Двигатель TSI 1,4 л 90 кВт с турбонаддувом (CMBA). Двигатель TSI 1,4 л 103 кВт с турбонаддувом (CHPA, CPTA с ACT). Двигатель MPI 1,4 л 66 кВт / 1,6 л 81 кВт (CKAA, CPDA). Двигатель TGI 1,4 л 81 кВт (CPWA — для работы на газовом топливе). Двигатель TSI 1,4 л 90 кВт MultiFuel (CPVA). Двигатель TSI 1,4 л 110 кВт Hybrid (CRJA — Европа) и (CNLA — Северная Америка).
С внедрением модульной платформы с поперечным расположением силового агрегата (Modularer Quer Baukasten, сокращённо MQB) Volkswagen приступил к реализации модульной стратегии при разработке и создании автомобилей. Согласно этой стратегии, для всех моделей автомобилей класса Polo, Golf и Passat используются единые стандартные компоненты и модули.
Начиная с нового семейства двигателей EA211 схожая стратегия начинает использоваться при создании бензиновых двигателей. Речь идёт о модульном семействе бензиновых двигателей (Modularer Ottomotoren Baukasten) EA211. Они имеют рабочий объём от 1,0 до 1,6 л. Базовым двигателем является при этом TSI 1,4 л 103 кВт.
Содержание: Введение: Модульное семейство бензиновых двигателей MOB, Обзор нового семейства бензиновых двигателей EA211. Механическая часть двигателя: Привод поликлиновым ремнём, Привод зубчатым ремнём, Блок цилиндров, Кривошипно-шатунный механизм, Головка блока цилиндров, Корпус распредвалов, Газораспределительный механизм, Регулирование фаз газораспределения, Подача воздуха, Турбонаддув, Контур смазки, Система вентиляции картера, Система охлаждения, Система питания, Система выпуска отработавших газов.
Система управления двигателя: Обзор элементов системы управления, Блок управления двигателя J623, Система питания, Датчики, Исполнительные механизмы. Техническое обслуживание: Специальные инструменты, Технические указания.
Двигатель TDI 1.6 л с системой впрыска Common Rail (rus.) Устройство и принцип работы. Пособие по программе самообразования 442 VW/Audi. Буквенное обозначение двигателей: CAYA, CAYB, CAYC.
Данный двигатель 1,6л TDI представляет собой базовый агрегат для всех перспективных четырёхцилиндровых дизельных двигателей. Этот двигатель является представителем нового поколения высокоэффективных, экономичных и динамичных дизелей концерна Volkswagen.
Этот двигатель является эталоном динамики, удовольствия от вождения, экономичности и надёжности. Кроме того, внедрение технологии Common Rail позволило заметно снизить уровень вибраций и улучшить акустический комфорт и соответствие нормам токсичности Евро 5.
Содержание: Введение, Механическая часть двигателя, Схема системы, Функциональная схема, Сервисное обслуживание, Контрольные вопросы.
Установка натяжителя цепи нового образца на двигатели CBFA, CCTA, CCZA, CCZB, CDAA, CDAB (rus.) Заводское руководство по ремонту.
Двигатели CBFA, CCTA, CCZA, CCZB, CDAA, CDAB устанавливались на автомобили:
Фольксваген Пассат СС (код модели: 357, 358)
Фольксваген Пассат Б7 (код модели: 362, 365)
Информация по ремонту двигателей VAG / Engines repair
Данная информация по ремонту двигателей подходит ко всем автомобилям VAG. Для того чтобы быстро найти документацию по Вашему двигателю просто нажмите на клавиатуре Ctrl-F и наберите буквы своего двигателя. Например: 2E или BSE (только на английском языке!)
Система охлаждения, отопления, вентиляции и кондиционирования
Cooling, Heating, Air Conditioning and Climate Control Systems
VW Passat B7 — Heating, air conditioner (eng.) Repair Manual
VW Passat с 2011 года выпуска, Passat Variant с 2011 года выпуска.
Руководство по ремонту системы отопления и кондиционирования Фольксваген Пассат Б7 (код модели: 362, 365). Редакция 06.2017.
Содержание (группы ремонта): 00 — Technical data, 80 — Heating, 87 — Air conditioning system.
Technical data, Heating, Overview of fitting locations — air conditioning system, Refrigerant circuit, Air conditioner compressor, Control motors, Front heater and air conditioning unit, Air duct, Operating and display unit, Other controlling and regulating components,
130 страниц.
Чистка вентилятора печки Фольксваген Пассат Б6 (3C) (rus.) Фотоотчет
Если иногда поскирипывает вентилятор печки, например на холодную или на определенных оборотах или же свистит постоянно, как у меня сейчас,
то вам сюда! У меня раньше поскрипывал иногда, а потом стало постоянно…
Дистанционное управление дополнительным / жидкостным отопителем Eberspächer / Webasto
Значение мигания контрольной лампы пульта ДУ дополнительного отопителя.
Auxiliary heater, Workshop Manual (eng.) Руководство по ремонту отопителя Webasto Thermo Top V. Редакция 09.2008
Автономный стояночный отопитель Webasto Thermo Top V устанавливался вместе с двигателями:
AXX, AZV, BAG, BKG, BKC, BJB, BLF, BLN, BLP, BLS, BRV, BSE, BSF, BMM, BLG, BMY, BPY, BWA, BKD, BMN, BGU, BLX, BLY, BLR, BUB, BVX, BVY, BVZ, BXE, BXF, BXJ, CAVD, CAWB, CAXA, CBAB, CBRA, CBFA, CCTA, CHGA
на многие автомобили, в том числе на Volkswagen Passat B7 (362, 365, 358) 2011 — 2015
Содержание (группы ремонта): 82 — Auxiliary heating.
Repairing auxiliary heater Thermo Top V, Removing and installing auxiliary heater Thermo Top V, Connecting auxiliary heater Thermo Top V to coolant circuit, Fuel supply for auxiliary heater Thermo Top V, Regulation of auxiliary heater Thermo Top V, Electric engine preheater, 230V or 115V, Checking connector, Testing safety switch, Removing and installing engine preheater, Connecting engine preheater into cooling circuit — 2.0L FSI, 1.9L TDI, 1.6L MPI.
Ремонт автономного отопителя Thermo Top V, Снятие и установка автономного отопителя Thermo Top V, Подключение автономного отопителя Thermo Top V к контуру охлаждающей жидкости, Подвод топлива для автономного отопителя Thermo Top V, Регулировка автономного отопителя Thermo Top V, Электрический подогреватель двигателя, 230 В или 115 В , Проверка разъема, Проверка предохранительного выключателя, Снятие и установка подогревателя двигателя, Подсоединение подогревателя двигателя к контуру охлаждения — 2,0 л FSI, 1,9 л TDI, 1,6 л MPI.
64 страницы. 1 Mb.
Общая информация по системам охлаждения, отопления и вентиляции
Подходит ко многим автомобилям VW, Skoda, SEAT, Audi
Много информации по системе охлаждения, относящаяся к конкретным типам двигателей, находится в разделе «Двигатели»
Топливная система
(Fuel System)
Замена топливного фильтра на двигателях: BLS, BXE, BMP, CBBB, CFFB, CFGB, CLJA, CBAA, CBAB (rus.) Фотоотчет
Двигатель CFFB 2.0 TDI Common Rail. Несколько познавательных фото ТНВД и советов (rus.) Фотоотчет
Fuel supply system, petrol engines (eng.) Repair Manual
VW Passat B7 с 2015 года выпуска, VW Passat B7 Variant с 2015 года выпуска.
Руководство по ремонту топливной системы для бензиновых двигателей с буквенным обозначением:
CZCA, CZEA, CJSA, CJSC, CHHB, CJXA, CWLA, CZDA, CZPA, CXDA, DJHC, CZPB, DADA, DLRB, DJVA, DACB, DKTA, DKZA, DNUA, DPBE, DPCA.
Fuel supply system, diesel engines (eng.) Repair Manual
VW Passat B7 с 2015 года выпуска, VW Passat B7 Variant с 2015 года выпуска.
Руководство по ремонту топливной системы дизельных двигателей с буквенными обозначениями:
CRGA, CRLB,CUAA, CUPA, DDAA, DCXA, DFCA, CLHC, DCZA, DFEA, DFGA, DCYA, DDMA, DFGB, CRFC, CYKB, DBGA, DFHA, DCYB, DGDB, DFEB, DFGC, CRFZ, CRGB, CRLD, CYKC, DBGB, DBGC, CRFD, DSRB.
Топливная система двигателей FSI (rus.) Устройство и принцип действия. Пособие по программе самообразования 334 VW/Audi.
Все двигатели FSI мощностью 66 кВт и более оснащаются усовершенствованной топливной системой.
Эта система имеет следующие отличия: Детали насоса высокого давления и рампы форсунок имеют специальное антикоррозионное покрытие, которое защищает их от воздействия
топлива с содержанием этанола до 10%. Изменено управление насосом высокого давления. Устранен за ненадобностью трубопровод отвода
(в бак) топлива, просочившегося вдоль плунжера. Отвод топлива, сбрасываемого через установленный на рампе форсунок предохранительный
клапан, производится через относительно короткий трубопровод в контур низкого давления, перед насосом высокого давления.
В данной программе самообразования описываются устройство и действие усовершенствованной
топливной системы на примере двухлитрового двигателя FSI мощностью 110 кВт.
Содержание: Состав и схема топливной системы, Принцип регулирования подачи топлива по его расходу, Компоненты топливной системы, Блок управления топливным насосом, Подкачивающий электронасос, Насос высокого давления с регулятором давления топлива, Датчик низкого давления, Датчик высокого давления, Форсунки высокого давления, Регулятор давления, Переходник с дросселем.
Насос-форсунка с пьезоэлектрическим клапаном (rus.) Конструкция и принцип действия. Пособие по программе самообразования 352 VW/Audi.
Применение насос-форсунок и постоянное улучшение их конструкции позволили повысить давления впрыска, точность дозирования топлива и улучшить КПД топливной аппаратуры дизелей и тем самым обеспечить их высокую конкурентоспособность.
Разработанная совместно с фирмой Siemens VDO Automotive AG насос-форсунка не только сохраняет известные преимущества предыдущей конструкции, но и обладает рядом улучшенных характеристик в отношении формирования запальной, основной и дополнительных доз топлива.
В результате применения в ее конструкции ряда перспективных технических решений удалось улучшить смесеобразование и повысить КПД ее
привода, а также снизить шум, производимый при работе топливной аппаратуры.
Содержание: Введение, Общие сведения, Улучшенные характеристики новой насос-форсунки, Устройство насос-форсунки, Общая конструкция, Пьезоэлектрический клапан, Полость пружины форсунки, Процесс впрыска топлива, Впрыск запальной дозы, Впрыск основной дозы, Впрыск дополнительной дозы, Техническое обслуживание.
Общая информация по топливным системам
Подходит ко многим автомобилям VW, Skoda, SEAT, Audi
Система выпуска
(Exhaust system)
Анализ состояния сажевого фильтра, двигатели 1.6 TDI CR (CAYA, CAYB, CAYC) (rus.) Фотоотчет
Управление регенерацией сажевого фильтра, двигатели 1.6 TDI CR (CAYA, CAYB, CAYC) (rus.) Фотоотчет
Общая информация по системам выпуска отработанных газов
Подходит ко многим автомобилям VW, Skoda, SEAT, Audi
Передняя и задняя подвеска
(Front and rear suspension)
Замена стойки стабилизатора Фольксваген Пассат Б6, B7, Шкода Суперб (rus.) Фотоотчет
По гарантии прошлой зимой (30 тыс.км) меняли стойку слева сейчас загремело снова но справа (56 тыс.км).
Купил стойки Lemfoerder, может они покрепче оригинала будут… цена за штуку 870р.
Из инструмента понадобится ключ комбинированный 18 мм и бита Spline M6…
VW Passat B7 — Running gear, axles, steering (eng.) Repair manual
VW Passat с 2011 года выпуска, VW Passat Variant с 2011 года выпуска. Редакция 03.2015
Подробное руководство по ремонту ходовой части, мостов и рулевого управления Фольксваген Пассат Б7 (код модели: 362, 365) с 2011 по 2015 годы выпуска.
Содержание (группы ремонта): 00 — Technical data, 40 — Front suspension, 42 — Rear suspension, 43 — Self-levelling suspension, 44 — Wheels, tyres, vehicle geometry, 48 — Steering.
00 — Технические данные, 40 — Передняя подвеска, 42 — Задняя подвеска, 43 — Самовыравнивающаяся подвеска, 44 — Колеса, шины, углы установки колес, 48 — Рулевое управление.
442 страницы. 8 Mb.
Общая информация по подвеске
Подходит ко многим автомобилям VW, Skoda, SEAT, Audi
Тормозная система
(ABS, EDS, ESP / Brake system)
Устранение грохота задних суппортов VW Passat B7, VW Passat CC. 1KW скобы задние (rus.) Фотоотчет
VW Passat CC 2009 ➤, VW CC 2010 ➤, VW CC 2012 ➤. Brake systems (eng.) Workshop Manual.
Руководство по ремонту тормозной системы. Редакция 12.2011
Repairing front brakes: FN3 (16”), FNR-G (17”), C60 (17”).
Repairing rear brake: CII 38 (16″), CII 41 (17″).
Содержание (группы ремонта): 00 — Technical data, 45 — Anti-lock brake system, 46 — Brakes — mechanism, 47 — Brakes — hydraulics.
100 страницы. 2 Mb.
VW Passat B7 — Brake systems (eng.) Repair Manual
VW Passat с 2011 года выпуска, Passat Variant с 2011 года выпуска.
Руководство по ремонту тормозной системы Фольксваген Пассат Б7 (код модели: 362, 365). Редакция 02.2014
Тип установленной в автомобиле тормозной системы указан на наклейке с PR номерами. Наклейка с данными об
автомобиле находится в нише запасного колеса и вклеена на первой странице сервисной книги. Ниже приведены номера PR.
По ним Вы сможете определить точный тип тормозного суппорта / тормозного диска вашего автомобиля:
Front brakes FN3 (16”) — PR number: 1ZM
Front brakes C60 (17”) — PR number: 1LA
Rear brakes CII 38 (16″) — PR number: 1KW
Rear brakes CII 41 (17″) — PR number: 2EA
Repair Group: 00 — Technical data, 45 — Anti-lock brake system, 46 — Brakes — mechanism, 47 — Brakes — hydraulics.
Содержание (группы ремонта): 00 — Технические данные, 45 — антиблокировочная система тормозов, 46 — тормоза — механика, 47 — тормоза — гидравлика.
140 страниц.
Общая информация по тормозным системам, ABS, EDS, ESP и др.
Подходит ко многим автомобилям VW, Skoda, SEAT, Audi
Рулевое управление
(Steering)
VW Passat B7 — Running gear, axles, steering (eng.) Repair manual
VW Passat с 2011 года выпуска, VW Passat Variant с 2011 года выпуска. Редакция 03.2015
Подробное руководство по ремонту ходовой части, мостов и рулевого управления Фольксваген Пассат Б7 (код модели: 362, 365) с 2011 по 2015 годы выпуска.
Содержание (группы ремонта): 00 — Technical data, 40 — Front suspension, 42 — Rear suspension, 43 — Self-levelling suspension, 44 — Wheels, tyres, vehicle geometry, 48 — Steering.
00 — Технические данные, 40 — Передняя подвеска, 42 — Задняя подвеска, 43 — Самовыравнивающаяся подвеска, 44 — Колеса, шины, углы установки колес, 48 — Рулевое управление.
442 страницы. 8 Mb.
Общая информация по рулевому управлению
Подходит ко многим автомобилям VW, Skoda, SEAT, Audi
Коробки передач, сцепление
(Transmission, clutch)
Замена масла в шестиступенчатой коробке передач типа 02Q (rus.) Фотоотчет
Замена масла в коробке передач типа 02E (DSG) (rus.) Фотоотчет
Необходимые запчасти: Фильтр 02E 305 051C. Шайба сливной пробки, и O-Ring крышки фильтра.
ATF: G052 182 A2 — 5 литров…
Снятие коробки передач DSG типа 02E (rus.) Фотоотчет
6-Speed Dual Clutch Transmission 02E. Repair Manual (eng.) Руководство по ремонту коробки передач 02Е. Редакция 09.2015
Данная коробка передач устанавливалась на двигатели с буквенными обозначениями: BRM, BPY, CBFA, CCTA, CBEA, CJAA, CPLA, CPPA и др.
Комбинации двигателей и коробок передач 02E:
КПП 02E с кодами: JBT, JPS, KDC, KNF, KPY, KVV, LRC устанавливалась на двигатели 1.4L — 103 kW TSI и 1.4L — 125 kW TSI
КПП 02E с кодами: GPW, GYQ, HLH, HQH, HQQ, HQN, HXU, JPL, KCW, KMZ, KPQ, LQS, MKJ, MLW устанавливалась на двигатели 1.9L — 74 kW TDI и 1.9L — 77 kW TDI
КПП 02E с кодами: HBP, HFQ, HLE, HQF, HQL, HXS, JPJ, KCU, KMW, KMX, KPS, KQC, LQT, LTD, LQV, LTE, MFL, MFM, MSU, MSV, NJK, NLP, PBF, PPY устанавливалась на двигатели 2.0L — 100 kW TDI, 2.0L — 103 kW TDI и 2.0L — 125 kW TDI
КПП 02E с кодами: HBQ, HRW, HUS, HUT, HXW, JPP, KCZ, KNC, KPV, LQZ, LTL, MMA, MSX, MSY, NJL, NJM, NLQ, NVW, PBG, PPZ, PQL устанавливалась на двигатели 2.0L — 147 kW TFSI
Коробка передач DSG с двумя сцеплениями 02E устанавливалась на автомобили:
VW Passat B7 (362, 365) 2011 — 2015
VW Passat CC (358) 2012 — 2015
и др.
Содержание (группы ремонта): 00 — General, Technical Data, 30 — Clutch, 34 — Controls, Housing, 35 — Gears, Shafts, 39 — Final Drive, differential.
157 страниц. 6 Mb.
Устранние люфта первичного вала 6 ступенчатых коробок передач 02N, 02M, 02Q, 02Z и 0А5 (rus.) Фотоотчет
Признаки люфта: Плохая работа сцепления, затрудненное выключение первой передачи и заднего хода. В некоторых случаях невозврат педали сцепления. В основном проблема возникает после того как люди поездят с гремящим маховиком…
Замена масла в АКПП 09M (rus.) Фотоотчет
7-Speed Dual Clutch Transmission 0AM. Repair Manual (eng.) Руководство по ремонту DSG 0AM. Редакция 09.2015
7-ми ступенчатая коробка передач со сдвоенным сцеплением 0AM для VW Passat B7 и VW Passat CC
с буквенными обозначениеми коробки передач (КПП):
KUC, LWE, MDH, MGK, MGU, MLB, MPH, NAS, NBA, NQA, NQK, NTP, NTZ, PKM, PKW, PMH, PMS устанавливалась на двигатели 1.2 L — 77 kW TSI
с буквенными обозначениеми КПП:
KHN, LKG, LKM, LPJ, LWZ, MGK, MLB, MPH, NAS, NQA, NTP, PKM, PMH устанавливалась на двигатели 1.4L — 90 kW TSI
с буквенными обозначениеми КПП:
KUT, LKP, LPL, LWW, MGM, MLD, MPK, MSL, MUV, NAU, NAZ, NQA, NQJ, NTP, NTX, PKM, PMH, PMQ устанавливалась на двигатели 1.4L — 118 kW TSI
с буквенными обозначениеми КПП:
LKJ, LPN, LSU, MGP, MLF, MPM устанавливалась на двигатели 1.6L — 75 kW MPI
с буквенными обозначениеми КПП:
KHM, LKF, LKL, LPH, LSR, MGJ устанавливалась на двигатели 1.9L — 77 kW TDI PD
с буквенными обозначениеми КПП:
LKQ, LQN, LST, MGN, MLE, MPL, NAV, NQD, NTS, PKP, PMK устанавливалась на двигатели 1.6L — 77 kW TDI Common Rail
Содержание (группы ремонта): 00 — Technical data, 30 — Clutch, 34 — Controls, housing, 35 — Gears, shafts, 39 — Final drive, differential.
221 страница. 14 Mb.
6-speed manual gearbox 02S (eng.) Руководство по ремонту МКПП 02S. Буквенные обозначения коробок передач: FNG, HYG, GQM, GQP, GXV, JAU, JYL, JCL, JCN, JCP, JCQ, JYG, JXP, JXR, KWB.
Ручная 6-ти ступенчатая коробка передач 02S устанавливалась на автомобили: VW Passat B6 (3C), VW Passat CC (35), VW Passat B7 (36) и др.
Содержание: 00 — Technical data, 30 — Clutch, 34 — Controls, housing, 35 — Gears, shafts, 39 — Final drive — differential. 206 страниц.
6-speed manual gearbox 02Q (eng.) Руководство по ремонту МКПП 02Q.
Ручная 6-ти ступенчатая коробка передач 02Q с буквенными обозначениями коробок передач: GRF, GVT, GXC, HDV, HVS, KNQ, KNS, KNU, KNY, KRM, KXZ, KZS, LHD, LNN, NFN, NFP, MDL устанавливалась на автомобили: VW Golf 5 / VW Jetta 5 (1K), VW Golf Plus (5M), VW Polo (9A), VW Passat B6 (3C), VW Passat CC (35), VW Touran (1T), VW Golf 6 (5K), VW Golf Variant (AJ5), VW Eos (1F), VW Scirocco (137), VW Caddy 2 (2K), VW Crafter (2F), VW Golf Plus (521), VW Jetta (162), VW Beetle Cabrio (5C), VW Passat B7 (36), VW Caddy 3 (2C), VW Caddy 4 (SA), Skoda Octavia A5 (1Z), Skoda Superb 2 (3T), Skoda Yeti (5L), Audi A3 (8P), SEAT Altea (5P), SEAT Leon Mk2 (1P), SEAT Toledo (5P).
Содержание (группы ремонта): 00 — Technical data, 30 — Clutch, 34 — Controls, housing, 35 — Gears, shafts, 39 — Final drive — differential. 246 страниц.
6-Speed Manual Transmission 02Q, Repair Manual (eng.) Руководство по ремонту МКПП 02Q. Редакция 05.2013
Двигатели с буквенным обозначением: BPY, CCTA, CBFA, CBEA, CJAA, CPLA, CPPA.
Шестиступенчатая коробка передач 02Q с буквенными обозначениеми: GRF, GVT, GXC, HDV, HVS, JLU, JLW, JMA, KDN, KDQ, KDS, KNS, KNU, KNY, KRM, KXX, KXZ, KZS, LHD, MDL, NFN, NFP, PDA (для переднеприводных автомобилей) и FWZ, JLS, JYS, KDX, KNQ, KXV, LNN (для полноприводных автомобилей) устанавливались на автомобили:
Фольксваген Пассат Б7 (362, 365) 2011 — 2015
VW Passat CC (357, 358) 2009 — 2015
Содержание (группы ремонта): 00 — Technical data, 30 — Clutch, 34 — Controls, housing, 35 — Gears, shafts, 39 — Final Drive and Differential.
427 страниц. 11 Mb.
Gearbox 02Q and 0FB, Workshop Manual (eng.) Руководство по ремонту МКПП 02Q и 0FB. Редакция 06.2014
Механическая коробка передач 0FB имеет меры усиления вблизи выходного вала с 1-й по 4-ю передачу и предназначена для передачи момента до 380 Нм.
Шестиступенчатая коробка передач 02Q с буквенными обозначениеми коробки передач: GRF, HDV, GVT, JLU, JLW, JMA, KDN, KDQ, KDS, KNS, KNU, KNY, KXX, KXZ, KZS, LHD, NFP, NFN, FWZ, JLS, JLR, KDX, KDL, KNP, KNQ, KSC, KXU, KXV, LHC, LNN, LNM, NFR, NFQ, NFR, PFL, PFN, NBK, PNN, MRV, PFM, PGS, KNS, NFU, NGD, KNW, KXY, NFM, NFV, NGC, KRN. и шестиступенчатая коробка передач 0FB, с буквенными обозначениеми коробки передач: PDT устанавливались на автомобили:
VW Passat B7 (362, 365)
VW Passat CC (358)
Содержание (группы ремонта): 00 — Technical data, 30 — Clutch, 34 — Controls, housing, 35 — Gears, shafts, 39 — Final drive — differential.
392 страницы. 12 Mb.
Gearbox 0AJ, Workshop Manual (eng.) Руководство по ремонту МКПП 0AJ. Редакция 05.2014
Шестиступенчатая коробка передач 0AJ с буквенными обозначениеми коробки передач: KRG LHY LHX LNY MHT MYF JPG NBY NBX NBW PRG PRH PRG PRL устанавливались на автомобили:
VW Passat B7 (362, 365)
Содержание (группы ремонта): 00 — Technical data, 30 — Clutch, 34 — Controls, housing, 35 — Gears, shafts, 39 — Final drive — differential.
214 страницы. 7 Mb.
7-speed dual clutch gearbox 0DL (eng.) Repair Manual. Редакция 12.2019
VW Passat B7 с 2015 года выпуска, VW Passat B7 Variant с 2015 года выпуска.
Руководство по ремонту коробки передач DSG 0DL.
Identification code: QAX, QAY, QAZ, QBA, QBB, RCG, RPK, RPL, RPM, RPN, RPP, RWU, SDK, SDL, SDM, SDN, SDR, SDS, TAH, TFQ, TFR, TFS, TFT, TFU, TJG, TJL, TJM, TNY, TNZ, TUR, TUS.
For engines: 2.0 l — 105, 110 kW TDI, 2.0 l — 130, 140 kW TDI, 2.0 l — 132, 162 kW TSI, 2.0 l — 169 kW TSI, 2.0 l — 176 kW TDI.
Содержание (группы ремонта): 00 — Technical data, 30 — Clutch, 34 — Controls, housing, 35 — Gears, shafts, 39 — Final drive — differential.
218 страницы.
Информация по ремонту коробок передач VAG / Transmission repair
Данная информация по ремонту коробок передач подходит ко всем автомобилям VAG.
Кузов
(Body)
VW Passat B7 Body Repairs (eng.) Workshop Manual. Редакция 04.2011
VW Passat 2011 ➤ VW Passat Variant 2011 ➤
Руководство по ремонту кузова Фольксваген Пассат Б7.
Размеры кузова, контрольные точки, геометрия кузова, сварка, ремонт, замена кузовных деталей и пр.
Содержание (группы ремонта): 00 — Technical data, 50 — Body — front, 51 — Body — centre, 53 — Body — rear.
381 страница. 14 Mb.
VW Passat B7 — General body repairs, exterior (eng.) Repair Manual
VW Passat с 2011 года выпуска. VW Passat Variant с 2011 года выпуска. Редакция 08.2017
Подробное руководство по ремонту кузова Фольксваген Пассат Б7 (код модели: 362, 365) с 2011 по 2015 годы выпуска.
В документации рассматриваются: 50 — Кузов — перед, 55 — Капот, крышка багажника, 57 — Передние двери, компоненты дверей, центральный замок, 58 — Задние двери, компоненты дверей, 60 — Люк в крыше, 63 — Бамперы, 64 — Остекление, 66 — Наружное оборудование.
Содержание (группы ремонта): 50 — Body — front, 55 — Bonnet, rear lid, 57 — Front doors, door components, central locking, 58 — Rear doors, door components, 60 — Sunroof, 63 — Bumpers, 64 — Glazing, 66 — Exterior equipment.
474 страницы.
VW Passat B7 — General body repairs, interior (eng.) Repair Manual
VW Passat с 2011 года выпуска. VW Passat Variant с 2011 года выпуска. Редакция 01.2015
Подробное руководство по ремонту интерьера Фольксваген Пассат Б7 (код модели: 362, 365) с 2011 по 2015 годы выпуска.
В документации рассматриваются: 68 — Внутреннее оборудование, 69 — Защита пассажира, подушки безопасности, ремни безопасности, 70 — Внутренняя отделка, 72 — Каркасы сидений, 74 — Сиденье — обивка, чехлы.
Содержание (группы ремонта): 68 — Interior Equipment, 69 — Passenger Protection, Airbags, Seat Belts, 70 — Interior Trim, 72 — Seat Frames, 74 — Seat — padding, covers.
281 страница.
Общая информация по кузову, шинам и дискам
Подходит ко многим автомобилям VW, Skoda, SEAT, Audi
Электрооборудование
(Electrical equipment)
Замена реле зарядки генератора Bosch 140А, номер по VAG: 06F 903 023 F (rus.) Фотоотчет
Замена шкива генератора с муфтой свободного хода (rus.) Фотоотчет
Volkswagen Passat B7 — Component Locations (eng.) Component Locations
Расположение всех электронных блоков, предохранителей и реле, точки соединения с массой, места установки разъемов.
Номинальная величина предохранителей и за что они отвечают. Распиновка всех разъемов для Фольксваген Пассат Б7 (код модели: 362, 365) с 2011 по 2015 годы выпуска.
98 страниц 6 Mb.
Volkswagen Passat B7 — Wiring Diagrams (eng.)
Полные цветные электросхемы для Фольксваген Пассат Б7 (код модели: 362, 365) с 2011 по 2015 годы выпуска.
1.6L diesel engine CAYC
2.0L diesel engine CFFA, CFFB, CFGB, CFGC, CLLA
1.4L petrol engine CAXA
1.4L petrol engine CDGA
1.4L petrol engine CKMA, CTHD
1.8L petrol engine CDAA, CDAB
2.0L petrol engine CCZB
3.6L petrol engine BWS
Dual clutch gearbox 0AM
Dual clutch gearbox 02E
Anti-lock brake system (ABS) with electronic differential lock (EDL) and traction control system (TCS) and electronic stabilisation program (ESP)
и многое другое…
668 страниц! 8 Mb.
VW Passat B7 — Electrical system (eng.) Repair Manual
VW Passat B7 с 2011 года выпуска, VW Passat B7 Variant с 2011 года выпуска
Руководство по ремонту электрооборудования Фольксваген Пассат Б7 (код модели: 36). Редакция 03.2020.
Технические данные, Стартер, источник тока, круиз-контроль, Датчики, приборы, Система омывания / очистки стекла, Фары, лампочки, выключатели — снаружи, Фары, лампочки, выключатели — интерьер, электропроводка.
Группы ремонта: 00 — Technical data, 27 — Starter, current supply, CCS, 90 — Gauges, instruments, 92 — Windscreen wash/wipe system, 94 — Lights, bulbs, switches — exterior, 96 — Lights, bulbs, switches — interior, 97 — Wiring.
365 страниц.
Общая информация по электрооборудованию
Подходит ко многим автомобилям VW, Skoda, SEAT, Audi
Магнитолы и радионавигационные системы Volkswagen, Audi, Skoda, Seat
Документация по автомагнитолам и навигации Фольксваген, Ауди, Шкода, Сеат
Общая документация по автомобилю
VW Passat B7: Maintenance (eng.) Repair Manual
VW Passat B7 с 2011 года выпуска, VW Passat B7 Variant с 2011 года выпуска
Описание сервисных работ Фольксваген Пассат Б7 (код модели: 36) с бензиновыми двигателями: BWS, CAXA, CCZB, CDAA, CDAB, CDGA, CKMA, CTHD и дизельными двигателями: CAYC, CFFA, CFFB, CFGB, CFGC, CLLA. Редакция 01.2019
Heading: Engine list, Service work, General information, Descriptions of work, Exhaust emissions test, Glossary.
188 страниц.
Руководство по эксплуатации Volkswagen Passat B7 (rus.) Заводское руководство по эксплуатации Фольксваген Пассат Б7.
458 страниц. 140 Мб.
Volkswagen Passat B7. Инструкция по эксплуатации (rus.) Органы управления, приборы и оборудование.
Содержание: Внешний вид. Салон. Приборы. Перед поездкой. Двери и окна. Правильная посадка на сиденье. Освещение и обзор. Перевозка грузов. Полезное оборудование. Пуск двигателя, переключение передач, парковка. Вспомогательные системы для водителя. Климатическая установка. На АЗС. В моторном отсеке. Поддержание чистоты и исправного состояния. Практические советы. Сокращения. Алфавитный указатель. 442 страницы, 166 Мб.
Volkswagen Passat 2011 (rus.) Программа самообучения. Новый Passat седьмого поколения стал ещё более совершенным в плане комфорта, качества, безопасности и предлагаемых вспомогательных систем для водителя. Прямые линии, чётко разделённые поверхности и динамичные пропорции отличают дизайн нового поколения седана и универсала. Возможность разблокировки задних сидений из багажного отсека, многослойные безопасные шумоизолирующие ветровое и боковые стёкла и парковочный ассистент 2&го поколения позволяют
насладиться новым уровнем комфорта. На автомобили устанавливаются мощные и экологичные двигатели TSI, двигатели TDI-CR облегчённой конструкции, двигатель, работающий на природном газе и двигатель новейшего поколения, работающий на топливе с максимальной долей этанола 85%. Применение в системе привода компактных двигателей малого объёма, системы Старт-стоп и технологии рекуперации энергии обеспечивает существенную экономию топлива. Ассистент контроля дистанции спереди Front Assist с функцией экстренного торможения City и функция распознавания усталости водителя являются новыми и продвинутыми функциями в области систем обеспечения безопасности.
Содержание: Введение, Кузов, Системы пассивной безопасности, Двигатели, Трансмиссия, Ходовая часть, Вспомогательные системы для водителя, Электрооборудование, Электрооборудование систем комфорта, Головное устройство, навигационная система и телефон, Отопление и климатическая установка.
The all new 2012 Passat (eng.) Устройство и принцип действия. Программа самообучения 890113 VW USA.
Содержание: Introduction, Body, Occupant Protection, Engines, Transmission, Running Gear, Electrical Systems, Radio, Navigation and Telephone, Heating and Air Conditioning.
Общая информация по сервисному обслуживанию
Подходит ко многим автомобилям VW, Skoda, SEAT, Audi
Как здесь найти нужную информацию?
Расшифровка заводской комплектации автомобиля (англ.)
Расшифровка заводской комплектации VAG на русском!
Диагностика Фольксваген, Ауди, Шкода, Сеат, коды ошибок.
Если вы не нашли информацию по своему автомобилю — посмотрите ее на автомобили построенные на платформе вашего авто.
С большой долей вероятности информация по ремонту и обслуживанию подойдет и для Вашего авто.

Вообщем, решил попытаться найти тех. документацию именно по ремонту Passat CC и хочу сказать, что в бесплатном доступе очень и очень трудно это сделать( говорю именно о книге. Я начал свой серфинг интернета с телефона, потом психанул и сел за пк… Потратил около 3 часов, чтобы найти хоть что то похожее на то, что я искал.
Кому будет полезно и интересно кидаю ссылку: disk.yandex.ru/d/qAGb-TNQT2MMAw
Все файлы в пдф, присутствует и руководство по эксплуатации и отдельная книга совсместно с passat b6 и b7 ремонту, также там есть информация о имеющихся комплектациях и вариациях моторов!
Спасибо за внимание, надеюсь мой труд еще кому-нибудь будет полезен!

Это самая интересная книга из данной подборки
Войдите или зарегистрируйтесь, чтобы писать комментарии, задавать вопросы и участвовать в обсуждении.
Руководство по эксплуатации Volkswagen Passat B7 (rus.) 458 страниц. (150 Мб)
Заводское руководство по эксплуатации Фольксваген Пассат Б7.Volkswagen Passat B7. Инструкция по эксплуатации (rus.) 442 страницы, (175 Мб)
Органы управления, приборы и оборудование.
Содержание:
Внешний вид. Салон. Приборы. Перед поездкой. Двери и окна. Правильная посадка на сиденье. Освещение и обзор. Перевозка грузов. Полезное оборудование. Пуск двигателя, переключение передач, парковка. Вспомогательные системы для водителя. Климатическая установка. На АЗС. В моторном отсеке. Поддержание чистоты и исправного состояния. Практические советы. Сокращения. Алфавитный указатель.Volkswagen Passat 2011 (rus.) (6Мб)
Программа самообучения.Содержание:
Введение, Кузов, Системы пассивной безопасности, Двигатели, Трансмиссия, Ходовая часть, Вспомогательные системы для водителя, Электрооборудование, Электрооборудование систем комфорта, Головное устройство, навигационная система и телефон, Отопление и климатическая установка.Новое семейство бензиновых двигателей EA211 (rus.) (5Мб)
Устройство и принцип действия. Программа самообучения.
Буквенные обозначения: Двигатель MPI 1,0 л 44/50/55 кВт (CHYA, CPGA, CHYB).
Двигатель TSI 1,2 л 63/77 кВт с турбонаддувом (CJZB, CJZA).
Двигатель TSI 1,4 л 90 кВт с турбонаддувом (CMBA).
Двигатель TSI 1,4 л 103 кВт с турбонаддувом (CHPA, CPTA с ACT).
Двигатель MPI 1,4 л 66 кВт / 1,6 л 81 кВт (CKAA, CPDA).
Двигатель TGI 1,4 л 81 кВт (CPWA — для работы на газовом топливе).
Двигатель TSI 1,4 л 90 кВт MultiFuel (CPVA).
Двигатель TSI 1,4 л 110 кВт Hybrid (CRJA — Европа) и (CNLA — Северная Америка).Содержание:
Введение: Модульное семейство бензиновых двигателей MOB, Обзор нового семейства бензиновых двигателей EA211.
Механическая часть двигателя: Привод поликлиновым ремнём, Привод зубчатым ремнём, Блок цилиндров, Кривошипно-шатунный механизм, Головка блока цилиндров, Корпус распредвалов, Газораспределительный механизм, Регулирование фаз газораспределения, Подача воздуха, Турбонаддув, Контур смазки, Система вентиляции картера, Система охлаждения, Система питания, Система выпуска отработавших газов.
Система управления двигателя: Обзор элементов системы управления, Блок управления двигателя J623, Система питания, Датчики, Исполнительные механизмы.
Техническое обслуживание: Специальные инструменты, Технические указания.Двигатель TSI 1.4 л / 90 кВт с турбонаддувом (rus.) Устройство и принцип действия.
Пособие по программе самообразования 405 VW/Audi.
Буквенное обозначение двигателя: CAXA.
Двигатель TSI 1,4 л (122 л.с.) предназначен для замены двигателя FSI 1,6 л (115 л.с.).
По сравнению со своим предшественником новый двигатель TSI при значительно более низком расходе топлива и выбросе CO2 имеет существенно лучшие мощностные характеристики.
От двух двигателей TSI с двойным наддувом его отличает прежде всего отсутствие компрессора и новая система охлаждения наддувочного воздуха.
Содержание: Технические особенности, Технические характеристики, Система впуска, ГБЦ, Одинарный наддув с турбонагнетателем ОГ, Системы охлаждения, Охлаждение наддувочного воздуха, Топливная система с объёмной подачей в зависимости от расхода, Обзор системы управление двигателем Bosch Motronic MED 17.5.20, Датчики, Исполнительные элементы, Функциональная схема.Двигатель TDI 1.6 л с системой впрыска Common Rail (rus.) Устройство и принцип работы.
Пособие по программе самообразования 442 VW/Audi.
Буквенное обозначение двигателей: CAYA, CAYB, CAYC.
Данный двигатель 1,6л TDI представляет собой базовый агрегат для всех перспективных четырёхцилиндровых дизельных двигателей.
Этот двигатель является представителем нового поколения высокоэффективных, экономичных и динамичных дизелей концерна Volkswagen.
Этот двигатель является эталоном динамики, удовольствия от вождения, экономичности и надёжности.
Кроме того, внедрение технологии Common Rail позволило заметно снизить уровень вибраций и улучшить акустический комфорт и соответствие нормам токсичности Евро 5.
Содержание: Введение, Механическая часть двигателя, Схема системы, Функциональная схема, Сервисное обслуживание, Контрольные вопросы.Установка натяжителя цепи нового образца на двигатели CBFA, CCTA, CCZA, CCZB, CDAA, CDAB (rus.) Заводское руководство по ремонту.
Двигатели CBFA, CCTA, CCZA, CCZB, CDAA, CDAB устанавливались на автомобили:
Volkswagen Passat CC / Фольксваген Пассат СС (код модели: 357, 358)
Volkswagen Passat B7 / Фольксваген Пассат Б7 (код модели: 362, 365)Все материалы взяты с дружественного сайта Volkswagen Technical Site
http://www.vwts.ru

Руководство на английском языке по кузовному ремонту автомобилей Volkswagen Passat/Passat Variant с 2011 года выпуска.
- Автор: —
- Издательство: Volkswagen AG
- Год издания: 2011
- Страниц: 381
- Формат: PDF
- Размер: 54,5 Mb
Руководство на английском языке по техническому обслуживанию и ремонту автомобиля Volkswagen Passat с 1995 года выпуска.
- Автор: —
- Издательство: Bentley Publishers
- Год издания: —
- Страниц: 4313
- Формат: PDF
- Размер: 49,8 Mb
Руководство на английском языке по техническому обслуживанию и ремонту автомобиля Volkswagen Passat B2 syncro.
- Автор: —
- Издательство: —
- Год издания: —
- Страниц: 47
- Формат: PDF
- Размер: 3,6 Mb
Руководство по техническому обслуживанию и ремонту автомобиля Volkswagen Passat 1988-1996 годов выпуска с бензиновыми и дизельными двигателями.
- Автор: —
- Издательство: Машсервис
- Год издания: 2002
- Страниц: 289
- Формат: PDF
- Размер: 38,7 Mb
Руководство на польском языке по техническому обслуживанию и ремонту автомобиля Volkswagen Passat B5
- Автор: H.R Etzold
- Издательство: WKT
- Год издания: 2004
- Страниц: 429
- Формат: PDF
- Размер: 23,0 Mb
Руководство по техническому обслуживанию и ремонту автомобиля Volkswagen Passat с 2005 года выпуска.
- Автор: Г.Р. Этцольд
- Издательство: Алфамер
- Год издания: —
- Страниц: 296
- Формат: —
- Размер: —
Руководство по эксплуатации, техническому обслуживанию и ремонту автомобиля Volkswagen Passat 1988-1996 годов выпуска с бензиновыми и дизельными двигателями.
- Автор: —
- Издательство: Алфамер
- Год издания: —
- Страниц: 408
- Формат: —
- Размер: —
Руководство по техническому обслуживанию и ремонту автомобиля Volkswagen Passat 1988-1996 годов выпуска с бензиновыми и дизельными двигателями.
- Автор: —
- Издательство: Алфамер Паблишинг
- Год издания: 2003
- Страниц: 365
- Формат: PDF
- Размер: 89,0 Mb
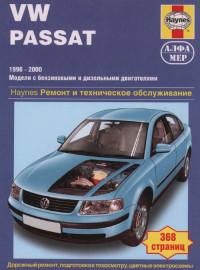
Руководство по техническому обслуживанию и ремонту автомобиля Volkswagen Passat 1996-2000 годов выпуска с бензиновыми и дизельными двигателями.
- Автор: —
- Издательство: Алфамер Публишинг
- Год издания: 2003
- Страниц: 359
- Формат: PDF
- Размер: 99,8 Mb
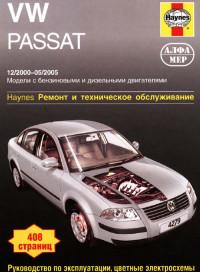
Руководство по эксплуатации, техническому обслуживанию и ремонту автомобиля Volkswagen Passat 2000-2005 годов выпуска с бензиновыми и дизельными двигателями.
- Автор: А.К. Легг
- Издательство: Алфамер Паблишинг
- Год издания: —
- Страниц: 389
- Формат: —
- Размер: —
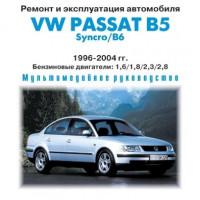
Мультимедийное руководство по эксплуатации и ремонту автомобиля Volkswagen Passat B5/Syncro/B6 1996-2004 годов выпуска с бензиновыми двигателями.
- Автор: —
- Издательство: —
- Год издания: —
- Страниц: —
- Формат: —
- Размер: 301,5 Mb

Мультимедийное руководство по эксплуатации и ремонту автомобиля Volkswagen Passat B5 c 1996 года выпуска.
- Автор: —
- Издательство: —
- Год издания: —
- Страниц: —
- Формат: —
- Размер: 111,7 Mb
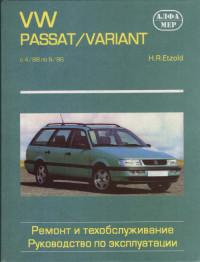
Руководство по эксплуатации, техническому обслуживанию и ремонту автомобиля Volkswagen Passat 1988-1996 годов выпуска.
- Автор: —
- Издательство: Алфамер Публишинг
- Год издания: 1997
- Страниц: 318
- Формат: PDF
- Размер: 164,9 Mb
Руководство по ремонту автомобилей Volkswagen Passat и Volkswagen Santana 1981-1988 годов выпуска.
- Автор: —
- Издательство: —
- Год издания: 1995
- Страниц: 177
- Формат: DjVu
- Размер: 8,7 Mb
Руководство по ремонту автомобилей Volkswagen Passat B3 1988-1996 годов выпуска.
- Автор: —
- Издательство: Motorist
- Год издания: —
- Страниц: 358
- Формат: —
- Размер: —
Руководство по эксплуатации, техническому обслуживанию и ремонту + каталог расходных запчастей автомобиля Volkswagen Passat 1996-2000 годов выпуска с бензиновыми и дизельными двигателями.
- Автор: —
- Издательство: Легион-Автодата
- Год издания: —
- Страниц: 404
- Формат: —
- Размер: —

Руководство по эксплуатации и ремонту автомобилей Volkswagen Passat и Volkswagen Santana 1980-1988 годов выпуска с бензиновыми и дизельными двигателями
- Автор: —
- Издательство: Ozino
- Год издания: 1995
- Страниц: 268
- Формат: PDF
- Размер: 9,8 Mb
Руководство по эксплуатации и ремонту автомобилей Volkswagen Passat и Volkswagen Santana 1980-1988 годов выпуска с бензиновыми и дизельными двигателями.
- Автор: —
- Издательство: Петит
- Год издания: 2002
- Страниц: 300
- Формат: PDF
- Размер: 142,1 Mb
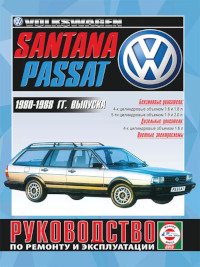
Руководство по эксплуатации и ремонту автомобилей Volkswagen Passat и Volkswagen Santana 1980-1988 годов выпуска с бензиновыми и дизельными двигателями.
- Автор: —
- Издательство: Гуси-Лебеди
- Год издания: —
- Страниц: 304
- Формат: —
- Размер: —
Руководство по эксплуатации и ремонту автомобиля Volkswagen Passat 1988-1994 годов выпуска.
- Автор: —
- Издательство: Ассоциация независимых издателей
- Год издания: 1998
- Страниц: 253
- Формат: PDF
- Размер: 51,8 Mb
Руководство по эксплуатации и ремонту автомобиля Volkswagen Passat 1988-1996 годов выпуска.
- Автор: —
- Издательство: Ассоциация независимых издателей
- Год издания: 1999
- Страниц: 358
- Формат: PDF
- Размер: 81,8 Mb
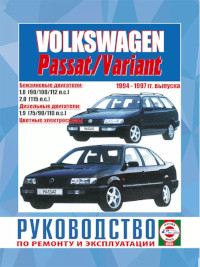
Руководство по эксплуатации и ремонту автомобилей Volkswagen Passat и Volkswagen Passat Variant 1994-1997 годов выпуска с бензиновыми и дизельными двигателями.
- Автор: —
- Издательство: Гуси-Лебеди
- Год издания: —
- Страниц: 360
- Формат: —
- Размер: —
Руководство по эксплуатации и ремонту автомобилей Volkswagen Passat B5/Passat B5 Variant с 1996 года выпуска с бензиновыми и дизельными двигателями
- Автор: —
- Издательство: Монолит
- Год издания: —
- Страниц: 470
- Формат: —
- Размер: —
Руководство по эксплуатации и ремонту автомобиля Volkswagen Passat B5 с 2000 года выпуска с бензиновыми и дизельными двигателями.
- Автор: —
- Издательство: Монолит
- Год издания: —
- Страниц: 404
- Формат: —
- Размер: —
Руководство по эксплуатации и ремонту автомобиля Volkswagen Passat B8 с 2015 года выпуска с бензиновыми и дизельными двигателями.
- Автор: —
- Издательство: Монолит
- Год издания: —
- Страниц: 524
- Формат: —
- Размер: —
Руководство по эксплуатации и ремонту автомобиля Volkswagen Passat B8 с 2015 года выпуска с бензиновыми и дизельными двигателями.
- Автор: —
- Издательство: Монолит
- Год издания: —
- Страниц: 523
- Формат: —
- Размер: —

Руководство по эксплуатации и ремонту автомобилей Volkswagen Passat B6 с 2005, Volkswagen Passat CC с 2008 и Wolkswagen Passat B7/Alltrack с 2010 года выпуска с бензиновыми и дизельными двигателями.
- Автор: —
- Издательство: Монолит
- Год издания: —
- Страниц: 386
- Формат: —
- Размер: —
Руководство по эксплуатации, техническому обслуживанию и ремонту автомобиля Volkswagen Passat 1988-1993 годов выпуска.
- Автор: —
- Издательство: АСТ
- Год издания: 2006
- Страниц: 273
- Формат: DjVu
- Размер: 13,1 Mb
Руководство по эксплуатации и техническому обслуживанию автомобиля Volkswagen Passat B6 с 2005 года выпуска.
- Автор: —
- Издательство: Volkswagen AG
- Год издания: —
- Страниц: 612
- Формат: PDF
- Размер: 290,4 Mb
Руководство по эксплуатации и техническому обслуживанию автомобиля Volkswagen Passat B7 с 2011 года выпуска.
- Автор: —
- Издательство: Volkswagen AG
- Год издания: 2011
- Страниц: 443
- Формат: PDF
- Размер: 161,9 Mb
Руководство по эксплуатации, техническому обслуживанию и ремонту автомобилей Volkswagen Passat/Passat Variant 1996-2000 годов выпуска с бензиновыми и дизельными двигателями
- Автор: —
- Издательство: Арго-Авто
- Год издания: —
- Страниц: 325
- Формат: —
- Размер: —
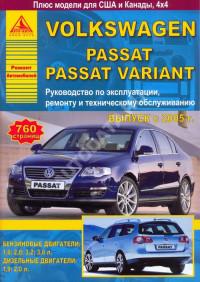
Руководство по эксплуатации, техническому обслуживанию и ремонту автомобилей Volkswagen Passat/Passat Variant с 2005 года выпуска с бензиновыми и дизельными двигателями.
- Автор: —
- Издательство: Арго-Авто
- Год издания: —
- Страниц: 760
- Формат: —
- Размер: —
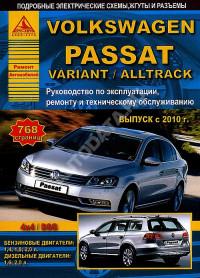
Руководство по эксплуатации, техническому обслуживанию и ремонту автомобилей Volkswagen Passat/Passat Variant/Passat Alltrack с 2010 года выпуска с бензиновыми и дизельными двигателями.
- Автор: —
- Издательство: Арго-Авто
- Год издания: —
- Страниц: 768
- Формат: —
- Размер: —

Мультимедийное руководство по эксплуатации, техническому обслуживанию и ремонту автомобиля Volkswagen Passat с 2004 года выпуска с бензиновыми и дизельными двигателями.
- Автор: —
- Издательство: —
- Год издания: —
- Страниц: —
- Формат: MDF
- Размер: 265,1 Mb
Руководство по эксплуатации, техническому обслуживанию и ремонту автомобиля Volkswagen Passat B5 2000-2005 годов выпуска.
- Автор: —
- Издательство: Делия
- Год издания: 2009
- Страниц: 632
- Формат: PDF
- Размер: 290,9 Mb
Схемы электрооборудования автомобилей Volkswagen Passat B3/B5.
- Автор: —
- Издательство: —
- Год издания: —
- Страниц: 43
- Формат: PDF
- Размер: 38,1 Mb
Руководство по эксплуатации, техническому обслуживанию и ремонту автомобиля Volkswagen Passat с 1996 года выпуска.
- Автор: —
- Издательство: Арус
- Год издания: —
- Страниц: 345
- Формат: PDF
- Размер: 85,5 M
Руководство по эксплуатации, техническому обслуживанию и ремонту автомобиля Volkswagen Passat с 2005 года выпуска.
- Автор: О.Н. Попков
- Издательство: Арус
- Год издания: 2006
- Страниц: 318
- Формат: PDF
- Размер: 61,2 Mb


Идентификационные данные
Стикер с данными автомобиля Рис. 1.1. Стикер с данными автомобиля Стикер с идентификационными данными автомобиля (рис. 1.1) находится слева от н…


Дистанционное управление замками
Рис. 1.12. Дистанционный блок управления замками Посредством дистанционного радиоуправления без применения механических ключей можно осуществлять сле…

Отпирание отдельной двери
Отпирание при включенном режиме отпирания отдельной двери Для отпирания автомобиля следует, находясь в зоне действия дистанционного управления, направить р…
Двери, центральный замок
При отпирании или запирании механически замка двери водителя благодаря центральному замку (системе центральной блокировки замков) одновременно отпираются или за…

Клавиша центрального замка
Рис. 1.14. Клавиша центрального замка: 1 – кнопка отпирания; 2 – кнопка запирания Блокирование Нажатием на клавишу 2 все двери и крышка багажник…

Крышка багажника
Положения цилиндра замка Рис. 1.16. Положение цилиндра замка Положение А: крышка багажника может быть заблокирована и разблокирована центральным…

Охранная система сигнализации
Посредством охранной системы сигнализации существенно затруднено злонамеренное проникновение в автомобиль и его угон. При несанкционированном проникновении в ав…

Управление электростеклоподъемниками
Рис. 1.20. Переключатели электростеклоподъемников на двери водителя: 1 – дверь водителя; 2 – дверь переднего пассажира; 3 – предохранительный выключатель;…

Подъемносдвижная панель люка крыши
Принцип действия Все функции открывания и закрывания подъемно-сдвижного люка со стеклянной панелью выполняются при включенном зажигании. После выключе…
Привод вентилятора от солнечных батарей
На автомобилях с солнечными батареями на сдвижной панели люка крыши при достаточном солнечном освещении вентилятор автоматически переключается при выключении за…

Открывание капота моторного отсека
Рис. 1.24. Рычаг открывания капота в салоне автомобиля: 1 – рычаг Для отпирания капота следует потянуть за рукоятку, расположенную слева под передней…

Панель приборов и органы управления
Рис. 1.26. Органы управления: 1 – ручка открывания двери; 2 – кнопки управления единым замком; 3 – переключатель наружного освещения; 4 – выключатель стоя…
Контрольные и сигнальные лампы
Система надувных подушек безопасности Контрольная лампа горит после включения зажигания несколько секунд. На автомобилях с отключенной надувной подушкой дл…

Выключатели и переключатели
Переключатель наружного освещения Рис. 1.31. Переключатели режимов освещения: 1 – переключатель наружного очвещения; 2 – подсветка контрольных прибор…


Стеклоочистители и стеклоомыватели
Рис. 1.33. Подрулевой переключатель режимов стеклоочистителя и стеклоомывателя Внимание: Стеклоочистители и стеклоомыватели работают только при включ…

Внутреннее освещение
Передний плафон Рис. 1.35. Передний плафон Переключатель А. Этим переключателем производится управление передним плафоном и обоими светильн…

Зеркала заднего вида
Рис. 1.38. Схема управления зеркалами заднего вида Зеркала заднего вида должны быть установлены перед началом поездки таким образом, чтобы в любой мо…

Подстаканники
Передний подстаканник Рис. 1.41. Передний подстаканник Около рычага стояночного тормоза находятся два подстаканника (рис. 1.41). Не ставьте…

Прикуриватель
Рис. 1.44. Центральный прикуриватель Прикуриватель включается при нажатии на его кнопку. Когда элемент нагреется докрасна, кнопка резким движением ве…

Ящики для вещей
Рис. 1.45. Перчаточный ящик Для открывания запираемой крышки следует поднять ручку (рис. 1.45). Внимание: По соображениям безопасности необходим…

Лючок горловины топливного бака
Разблокирование крышки лючка топливозаливной горловины Вытягиванием выключателя в двери водителя разблокируют крышку лючка топливозаливной горловины. Разбл…

Багажник
Внимание: Необходимо иметь в виду, что при перевозке тяжелых предметов ходовые качества автомобиля из-за изменения положения центра тяжести меняются. Поэтому сл…
Багажная полка
Полка за спинкой заднего сиденья может быть использована для размещения предметов одежды. Учтите, что вследствие нахождения предметов одежды на багажной по…

Багажник на крыше
При транспортировке груза на крыше следует принимать во внимание следующее: Так как на крыше имеются водосточные желобки, не следует использовать первый по…

Запасное колесо
Вынимание запасного колеса Запасное колесо размещено в нише под настилом багажника. Оно закреплено маховичком. Рис. 1.49. Извлечение запасного к…
Бортовой инструмент и домкрат
Внимание: Поставляемый вместе с автомобилем домкрат предназначен только для модели вашего автомобиля. Ни в коем случае не следует использовать этот домкрат для …
Передние сиденья
Правильная установка сидений необходима для: быстрого и уверенного доступа к органам управления; ненапряженного и не утомительного положения тела; максимал…

Регулировка сиденья
Регулировка сиденья в продольном направлении Рис. 1.51. Схема регулировки водительского сиденья Потяните рукоятку вверх и сдвиньте сиденье. Зате…


Подголовники
Подголовники регулируют по высоте в соответствии с телосложением человека. Правильно установленные подголовники обеспечивают вместе с ремнями безопасности эффек…

Подлокотники
Передний подлокотник Рис. 1.58. Передний подлокотник В подлокотнике находится вещевой отсек. Для открывания отсека поднимите крышку. Подлок…
Есть 1 комментарий

Задние сидения
Для увеличения вместимости багажника спинка заднего сиденья может быть откинута вперед. На автомобилях с раздельными задними сиденьями спинки обоих сидений отки…
Отопление и вентиляция
При помощи системы отопления и вентиляции автомобиля можно установить в салоне комфортную для пассажиров температуру воздуха. Для этого следует установить орган…

Климат-контроль
Климат-контроль (система «Климатроник») полностью автоматически поддерживает заданную температуру внутри автомобиля. Для этого автоматически изменяются тем…

Пуск двигателя
Выключатель зажигания и блокировки рулевого колеса Рис. 1.67. Выключатель зажигания: 1 – зажигание выключено, рулевое управление не заблокировано; 2 …
Механическая коробка передач
Пятиступенчатая коробка передач Для включения задней передачи этой коробки передач нет необходимости предварительно вдавливать книзу рычаг переключения.
…

Противозаносная система
Противозаносная система (электронная система стабилизации – ESP) действует совместно с антиблокировочной системой (ABC) и включает в себя противобуксо-вочную си…