 08:13
08:13
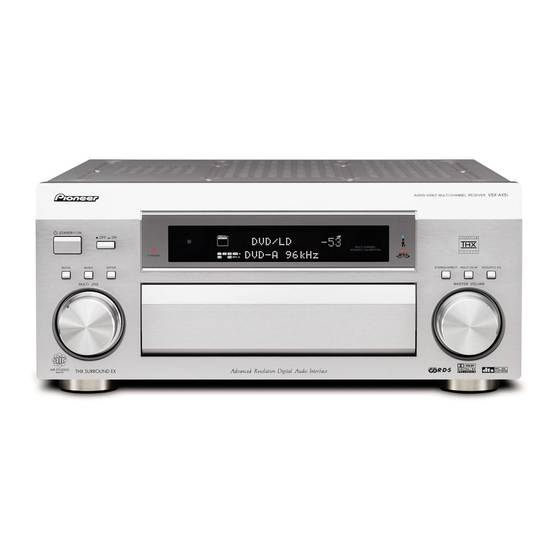
AV Ресивер Pioneer VSX-AX5Ai 22 кг
 01:44
01:44
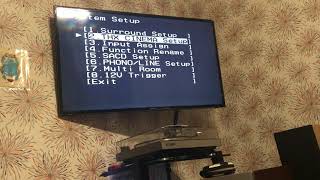
AV Ресивер Pioneer VSX-AX5Ai меню
 04:03
04:03
Pioneer PD-7700, Pioneer VSX-AX5Ai, Audio Research Laboratory
 15:43
15:43
Test Pioneer VSX AX5i
 02:17
02:17
100ГДШ-33-8, Pioneer VSX-AX5Ai
 08:06
08:06
( Đã bán ) Ampli Đa Kênh Cao Cấp Pioneer VSA-AX5i : Công Suất 440w -Jack Mạ Vàng !
 33:57
33:57
( Đã bán ) Khủng Long Pioneer VSA- AX5i : 20Kg — 440W- Jack Mạ Vàng — Giá 5t2 — Có Remote
 01:42
01:42
TQWP 100ГДШ-33-8 и Pioneer VSX-AX5Ai

Предупреждение, Обязательная вентиляция, Условия эксплуатации
Страница 2
- Изображение
- Текст
Символ молнии, заключенный в
равносторонний треугольник, используется
для предупреждения пользователя об
«опасном напряжении» внутри корпуса
изделия, которое может быть достаточно
высоким и стать причиной поражения людей
электрическим током.
ВНИМАНИЕ:
ВО ИЗБЕЖАНИЕ ПОРАЖЕНИЯ
ЭЛЕКТРИЧЕСКИМ ТОКОМ НЕ СНИМАЙТЕ
КРЫШКУ (ИЛИ ЗАДНЮЮ СТЕНКУ). ВНУТРИ
НЕ СОДЕРЖАТСЯ ДЕАТЛИ,
ПРЕДНАЗНАЧЕННЫЕ ДЛЯ РЕМОНТА
ПОЛЬЗОВАТЕЛЕМ. ДЛЯ ОБСЛУЖИВАНИЯ
ОБРАТИТЕСЬ К КВАЛИФИЦИРОВАННОМУ
СОТРУДНИКУ СЕРВИСНОЙ СЛУЖБЫ.
Восклицательный знак, заключенный в
равносторонний треугольник, используется
для предупреждения пользователя о наличии
в литературе, поставляемой в комплекте с
изделием, важных указаний по работе с ним и
обслуживанию.
D3-4-2-1-1_Ru_A
ПРЕДУПРЕЖДЕНИЕ
Данное оборудование не является
водонепроницаемым. Во избежание пожара или
поражения электрическим током не помещайте
рядом с оборудованием емкости с жидкостями
(например, вазы, цветочные горшки) и не
допускайте попадания на него капель, брызг,
дождя или влаги.
D3-4-2-1-3_A_Ru
ПРЕДУПРЕЖДЕНИЕ
Перед первым включением оборудования
внимательно прочитайте следующий раздел.
Напряжение в электросети может быть разным в
различных странах и регионах. Убедитесь, что
сетевое напряжение в местности, где будет
использоваться данное устройство,
соответствует требуемому напряжению
(например, 230 В или 120 В), указанному на
задней панели.
D3-4-2-1-4_A_Ru
Благодарим вас за покупку этого изделия марки Pioneer.
Полностью прочтите настоящие инструкции по
эксплуатации, чтобы знать, как правильно обращаться с
этой моделью. Прочитав инструкции, сохраните их в
надежном месте для использования в будущем.
ОБЯЗАТЕЛЬНАЯ ВЕНТИЛЯЦИЯ
При установке устройства обеспечьте
достаточное пространство для вентиляции во
избежание повышения температуры внутри
устройства (не менее 60 см сверху, 10 см сзади и
по 30 см слева и справа).
ПРЕДУПРЕЖДЕНИЕ
В корпусе устройства имеются щели и отверстия
для вентиляции, обеспечивающие надежную
работу изделия и защищающие его от перегрева.
Во избежание пожара эти отверстия ни в коем
случае не следует закрывать или заслонять
другими предметами (газетами, скатертями и
шторами) или устанавливать оборудование на
толстом ковре или постели.
D3-4-2-1-7b_A_Ru
ПРЕДУПРЕЖДЕНИЕ
Во избежание пожара не приближайте к
оборудованию источники открытого огня
(например, зажженные свечи).
D3-4-2-1-7a_A_Ru
Условия эксплуатации
Изделие эксплуатируется при следующих
температуре и влажности:
+5 °C – +35 °C; влажность менее 85%
(не заслоняйте охлаждающие вентиляторы)
Не устанавливайте изделие в плохо проветриваемом
помещении или в месте с высокой влажностью или
открытом для прямого солнечного света (или
сильного искусственного света)
D3-4-2-1-7c_A_Ru
Производите утилизацию использованных
батареек в соответствии с действующими в
стране или регионе государственными
постановлениями или правилами по охране
окружающей среды.
ПРИМЕЧАНИЕ: ПРЕДУПРЕЖДЕНИЕ ОБ ОТСУТСТВИИ В ОТСЕКЕ ДЕТАЛЕЙ, ПРЕДНАЗНАЧЕННЫХ ДЛЯ РЕМОНТА
ПОЛЬЗОВАТЕЛЕМ, РАЗМЕЩЕНО НА КРЫШКЕ ПРИБОРА

ВНИМАНИЕ
Переключатели OFF (ВЫКЛ.) ON (ВКЛ.) и
STANDBY/ON (ОЖИДАНИЕ/ВКЛ.) данного
устройства не полностью отключают его от
электросети. Чтобы полностью отключить питание
устройства, вытащите вилку кабеля питания из
электророзетки. Поэтому устройство следует
устанавливать так, чтобы вилку кабеля питания
можно было легко вытащить из розетки в
чрезвычайных обстоятельствах. Во избежание
пожара следует извлекать вилку кабеля питания
из розетки, если устройство не будет
использоваться в течение долгого времени
(например, если вы уезжаете в отпуск).
D3-4-2-2-2a_A_Ru
Если вилка шнура питания изделия не
соответствует имеющейся электророзетке, вилку
следует заменить на подходящую к розетке.
Замена и установка вилки должны производиться
только квалифицированным техником.
Отсоединенная от кабеля вилка, подключенная к
розетке, может вызвать тяжелое поражение
электрическим током. После удаления вилки
утилизируйте ее должным образом.
Оборудование следует отключать от электросети,
извлекая вилку кабеля питания из розетки, если
оно не будет использоваться в течение долгого
времени (например, если вы уезжаете в отпуск).
D3-4-2-2-1a_A_Ru
Важная информация об электророзетках питания переменного тока данного устройства
(общая мощность подключенных устройств МАКС.100 Вт)
Питание, подающееся через эти розетки, включается и выключается при помощи переключателей OFF (ВЫКЛ.)
ON (ВКЛ.) и STANDBY/ON (ОЖИДАНИЕ/ВКЛ.). Общая электрическая потребляемая мощность подключенного к
розетке оборудования не должна превышать 100 Вт.
ВНИМАНИЕ
• Не подключайте телевизор, монитор, обогреватель или подобные устройства к электророзеткам переменного тока
данного изделия.
• Не подключайте к розетке устройства с высоким энергопотреблением во избежание перегрева или возгорания.
Это может вызвать неисправности устройства.
D3-4-2-2-1b_A_Ru


Управление другим оборудованием Использование пульта дистан…
Страница 5
- Изображение
- Текст

01 перед началом работы, Особенности проверка прилагаемых принадлежностей, Перед началом работы
Глава 1, Особенности, Проверка прилагаемых принадлежностей
- Изображение
- Текст
Перед началом работы
01
6
Ru
Глава 1
Перед началом работы
Особенности
•
Быстрая настройка благодаря
усовершенствованной системе многоканальной
акустической калибровки (MCACC)
Настройка звука домашнего кинотеатра так же проста, как
подключение громкоговорителей, проигрывателя DVD или
другого источника и телевизора. Система автоматической
настройки объемного звучания (Auto Surround Setup)
позволяет быструю и точную настройку системы объемного
звучания при одновременном сохранении возможности
регулировки вручную всех параметров объемного звучания.
Кроме того, при профессиональной акустической калибровке
измеряются реверберационные характеристики помещения,
что облегчает настройку системы под конкретное помещение с
помощью графических индикаторов, которые могут быть
отображены как на дисплее системы, так и на компьютере.
•
Цифровой интерфейс i.LINK
Цифровой интерфейс i.LINK обеспечивает подключение
данного ресивера к компонентам, имеющим интерфейс i.LINK,
что позволяет прослушивание многоканального цифрового
звука формата PCM с высокой частотой дискретизации (до 192
кГц) как дисков стандартов DVD-Audio и SACD, так и
цифрового звука дисков DVD-Video, CD и Video CD при
помощи единственного кабеля.
При воспроизведении дисков SACD можно отключить
обработку сигнала в ресивере и непосредственно
прослушивать 1-битный звуковой сигнал формата DSD (Direct
Stream Digital).
•
Декодирование Dolby Digital и DTS, включая Dolby
Digital EX, DTS 96/24 и DTS-ES
Декодирование Dolby Digital и DTS позволяет получить дома
такой же звук, как в кинотеатре, при этом используются до
шести каналов объемного звучания, включая специальный
канал LFE (низкочастотный эффект) для обеспечения глубоких
и реалистичных звуковых эффектов.
Встроенные декодеры Dolby Pro Logic IIx и DTS Neo:6 не только
обеспечивают полное декодирование объемного звучания для
любого источника Dolby Surround, но и создают эффект
реалистичного объемного звучания для любого
стереофонического источника.
Дополнив систему громкоговорителем объемного звучания,
можно воспользоваться преимуществами встроенных
декодеров Dolby Digital EX и DTS-ES для шестиканального
объемного звука.
•
Удобный видеоконвертер
Благодаря преобразователю видеосигнала Pioneer, возможно
попеременное использование большого количества
различных типов кабелей, что обеспечивает больше
возможностей при подключении видео.
•
Цифровой интерфейс USB
Можно прослушивать аудиоисточники с компьютера,
подключив его через интерфейс USB на задней панели
ресивера.
•
Превосходное соответствие стандартам мирового
класса
Благодаря сотрудничеству со звукоинженерами мирового
класса компании AIR Studios, этот ресивер отмечен эмблемой
AIR Studios Monitor.
Проверка прилагаемых
принадлежностей
Проверьте наличие перечисленных ниже принадлежностей:
• Установочный микрофон и подставка
• Пульт дистанционного управления
• Щелочные батарейки (AA IEC LR6) x 4
• Рамочная антенна АМ
• Проволочная антенна FM

Установка батареек, Перед началом работы, Установка ресивера
Открывание передней панели, Использование пульта дистанционного управления
- Изображение
- Текст
Перед началом работы
01
7
Ru
• Кабель питания
• Инструкции по эксплуатации
Примечание
• В зависимости от страны приобретения набор
принадлежностей может быть разным. Если в набор
входят два шнура питания, выберите тот из них, который
соответствует стандартам вашей страны.
Установка ресивера
• При установке данного устройства убедитесь в том, что
оно размещено на ровной и твердой поверхности.
Не устанавливайте ресивер в следующих местах:
– на цветной телевизор (на экран могут появиться искажения);
– рядом с кассетной декой или устройством, которое излучает
магнитное поле (могут возникать помехи в звучании);
– в местах с прямым воздействием солнечных лучей;
– в сырых или влажных местах;
– в местах со слишком высокой или слишком низкой
температурой;
– в местах с повышенной вибрацией или подверженных
сотрясениям;
– в очень пыльных местах;
– в местах, подверженных воздействию горячего пара или
масла (например, кухня).
Открывание передней панели
Чтобы открыть переднюю панель, осторожно нажмите пальцем
на нижнюю треть панели.
Использование пульта
дистанционного управления
Установка батареек
Установите щелочные батарейки (AA IEC LR6) в пульт
дистанционного управления, как показано ниже. Когда
обнаружится уменьшение дальности действия пульта,
замените батарейки новыми.
Предупреждение
Неправильная установка батареек может стать причиной
возникновения опасной ситуации, например, утечки
внутреннего вещества или взрыва. Соблюдайте
перечисленные ниже меры предосторожности.
• Не используйте новые батарейки вместе со старыми.
• Не используйте вместе батарейки разных типов – хотя по
внешнему виду они могут быть похожи, разные батарейки
могут иметь разное напряжение.
• Убедитесь, что плюсовой и минусовый концы каждой
батарейки соответствуют пометкам в отсеке батареек.
• Если оборудование не будет использоваться в течение
месяца или дольше, выньте батарейки из него.
• Производите утилизацию использованных батареек в
соответствии с действующими в стране или регионе
государственными постановлениями или правилами по
охране окружающей среды.
H048 Ru

Перед началом работы
01
8
Ru
Индикатор батареек пульта дистанционного
управления
При разрядке батареек на пульте дистанционного управления
загорается предупреждающий индикатор. Замените
батарейки, как показано выше. Замена батареек должна
продолжаться не более пяти минут, иначе все настройки
пульта дистанционного управления будут утрачены.
Дальность действия пульта дистанционного
управления
Дальность действия довольно велика, однако при
использовании пульта дистанционного управления
необходимо помнить перечисленные ниже правила:
• Убедитесь в отсутствии препятствий между пультом
дистанционного управления и датчиком устройства.
• Дальность действия пульта составляет примерно 7
метров.
• При попадании на датчик устройств сильного солнечного
света или света от люминесцентных ламп работа
дистанционного управления может стать ненадежной.
• Пульты дистанционного управления различных приборов
могут создавать взаимные помехи. Старайтесь не
использовать дистанционное управление для другого
оборудования, расположенного рядом с данным
устройством.
30
7м
30

02 краткое руководство, Краткое руководство, Глава 2
Ознакомление с системой домашнего кинотеатра, Прослушивание в режиме объемного звучания
- Изображение
- Текст
Краткое руководство
02
9
Ru
Глава 2:
Краткое руководство
Ознакомление с системой домашнего кинотеатра
Возможно, для прослушивания музыки вы привыкли использовать стереоаппаратуру, но системы домашних кинотеатров
обеспечивают более эффектное воспроизведение звукового материала (например, объемное звучание).
С помощью домашнего кинотеатра эффект объемного звучания создается путем использования нескольких звуковых дорожек,
при этом создается впечатление, что вы находитесь в центре событий или в концертном зале. Качество объемного звучания,
воспроизводимого с помощью системы домашнего кинотеатра, зависит не только от того, какие громкоговорители установлены
в помещении, но также от источника и настройки звука ресивера.
Благодаря своему размеру, качеству и простоте использования, формат DVD-Video стал основным исходным материалом для
домашних кинотеатров. В зависимости от используемой системы DVD с одного диска можно получать до семи различных
звуковых дорожек, сигналы которых выводятся на разные громкоговорители. Благодаря этому, создается эффект объемного
звучания и ощущение “присутствия”.
В зависимости от настройки громкоговорителей ресивер автоматически декодирует сигналы с дисков DVD-Video в формате Dolby
Digital, DTS или Dolby Surround. В большинстве случаев нет необходимости вносить какие-либо изменения для создания
реалистичного эффекта объемного звучания. Другие функции (такие как воспроизведение диска CD с многоканальным
объемным звуком) описаны в разделе
Прослушивание системы
на стр. 38.
Прослушивание в режиме объемного звучания
Конструкция ресивера позволяет легко и быстро производить настройку объемного звучания с помощью следующего краткого
руководства по быстрой установке. В большинстве случаев для всех параметров можно оставить значения по умолчанию.
Подключайте устройство к сети переменного тока только после подключения всех разъемов.
1
Подключите проигрыватель DVD.
Для прослушивания объемного звучания потребуется цифровое соединение для подключения проигрывателя DVD к ресиверу.
Для этого можно использовать коаксиальное или оптическое соединение (выполнять оба соединения нет необходимости). При
подключении с помощью оптического кабеля, чтобы назначить оптический вход для
DVD/LD
, см. раздел
The Input Assign menu
(Меню назначения входов)
на стр. 81.
Для подключения видеовыхода проигрывателя DVD к ресиверу подключите стандартный видеокабель RCA к соответствующим
гнездам, как показано ниже.
2
Подключите телевизор.
Для подключения ресивера к телевизору подключите стандартный видеокабель RCA к соответствующим гнездам, как показано
ниже.
S400
S400
CENTER
SELECTABLE
S
CE
DIGITAL OUT
VIDEO OUT
VIDEO IN
Коаксиальный
цифровой
аудиокабель
Стандартный
видеокабель RCA
Оптический кабель
Проигрыватель
DVD
Телевизор
Стандартный
видеокабель RCA

Краткое руководство
02
10
Ru
3
Подключите громкоговорители.
Для наиболее полного использования возможностей объемного звучания ресивера подключите все громкоговорители: передние,
центральный, объемного звучания, задний громкоговоритель объемного звучания, а также низкочастотный. И хотя такое
соединение является идеальным, можно выполнить и другие конфигурации: без подключения низкочастотного или центрального
громкоговорителя, или даже без подключения громкоговорителей объемного звучания. Вообще необходимы только передние
громкоговорители (правый и левый). Учтите, что боковые громкоговорители объемного звучания всегда нужно подключать в паре,
однако задний громкоговоритель объемного звучания может быть подключен отдельно (к контактам левого громкоговорителя
объемного звучания).
Можно использовать громкоговорители с номинальным сопротивлением от 6 до 16
Ω
(если предполагается использование
громкоговорителей с сопротивлением менее 8
Ω
, см. раздел
Изменение сопротивления громкоговорителей
на стр. 68).
S400
S400
CENTER
SELECTABLE
VSX-AX5Ai
Передний
левый
Передний
правый
Центральный
Объемного
звучания
левый
Объемного
звучания
правый
Объемного
звучания
правый задний
Объемного
звучания
левый задний
LINE LEVEL
INPUT
Низкочастотный
Предупреждение
На контактах громкоговорителей
имеется ОПАСНОЕ ДЛЯ ЖИЗНИ
напряжение. Чтобы избежать
поражения электрическим током при
подключении или отключении кабелей
громкоговорителей, отсоединяйте
кабель питания, прежде чем прикасаться
к любым неизолированным деталям.
Телевизор

Комментарии
-
Contents
-
Table of Contents
-
Troubleshooting
-
Bookmarks
Quick Links
Related Manuals for Pioneer VSX-AX5i-G
Summary of Contents for Pioneer VSX-AX5i-G
-
Page 2: Installing The Receiver
NOTE: THE NO USER-SERVICEABLE PARTS COMPARTMENT WARNING IS LOCATED ON THE APPLIANCE BONNET Thank you for buying this Pioneer product. Please read through these operating instructions so you will know how to operate your model properly. After you have finished reading the instructions, put them away in a safe place for future reference.
-
Page 3: Operating Environment
TWO VOLTAGE SELECTOR SWITCHES (multi-voltage model only) Only multi-voltage model is provided with these switches. European models are not provided with these switches. Main voltages in Saudi Arabia are 127 V and 220 V only. Never use this model with the 110 V setting in Saudi Arabia.
-
Page 4: Table Of Contents
Table of Contents Features … 6 Before You Start … 7 Checking the Supplied Accessories … 7 Preparing the Remote Control … 7 Loading the batteries … 7 Remote Control Battery Indicator … 7 Operating range of remote control unit … 8 Opening the Front Panel …
-
Page 5
SPEAKERS Button … 76 Setting up and Using the USB Audio Connection … 77 Connecting Additional Amplifiers … 78 The PIONEER SR System: Operating other PIONEER components … 79 Multi Operations … 80 Performing Multi Operations … 81 System Off … 82 Using SYSTEM OFF … -
Page 6: Features
DVD-Video, CD and Video CD discs. In addition to simplified connection, jitterless audio is possible with Pioneer’s PQLS* technology when playing DVD- As, audio CDs and SACDs. By suppressing jitter, deterioration of audio quality is minimized and digital audio of the highest quality is realized.
-
Page 7: Before You Start
Before You Start Checking the Supplied Accessories Please check that you have received all of the following supplied accessories. AM Loop Antenna FM Wire Antenna Microphone for Auto Surround Sound Setup Remote Control Unit Memo: Multi-voltage model has two power cords. These accessories will be different depending on the country of purchase. Please use the correct cord for your country.
-
Page 8: Operating Range Of Remote Control Unit
Before You Start Operating range of remote control unit The area in which you can use the remote control to operate the VSX-AX5i is fairly large. To use, point the remote control toward the remote sensor on the front panel of this unit while within the range shown below. Remote control may not function properly if: •…
-
Page 9: Easy Setup Guide Part 1
Easy Setup Guide Part 1 Displays & Controls Home Theater: The Basics Most consumers are used to using stereo equipment to listen to music but many people are not used to home theater systems that give you many more options when listening to soundtracks. In fact, home theater is not really complicated and this little guide should give you an understanding of the basics.
-
Page 10: Hooking Up Your Dvd Player And Tv
Easy Setup Guide Part 1 Before making or changing the connections, switch off the power and disconnect the power cord from the AC outlet. 1 Hooking Up Your DVD Player and TV In order to use Dolby Digital/DTS soundtracks, which are at the heart of home theater, you need to hook up your DVD player with digital audio connections.
-
Page 11: Speaker Connections
2 Speaker Connections Home theater is designed to be setup with five, or seven speakers (front left and right; center; surround left and right; and, optimally, surround back left and right) and a subwoofer, but you can use this receiver with fewer speakers.
-
Page 12: Setting Up The Main Unit
Easy Setup Guide Part 1 3 Setting up the Main Unit 1 Connect the supplied AC power cord to the AC IN on this receiver and plug in the other end to a wall outlet. 2 Press the OFFON button to put the receiver in ON mode. 3 Press the …
-
Page 13: Easy Setup Guide Part 2
Easy Setup Guide Part 2 1 Auto Surround Sound Setup If setting up your surround sound speakers seems like it’s going to be an involved task you only need to use this quick, automatic method, known as the MCACC system, to achieve good surround sound. You’ll need to hook up the microphone so that the receiver can hear and judge the distance, size, sound character and sound pressure level of the speakers and thus know what settings to make.
-
Page 14
Easy Setup Guide Part 2 Speaker Distance Select AUTO SETTING with the buttons and press ENTER. Some auto setup instructions will be listed, make sure to follow them. Make sure you have: hooked up the microphone and moved obstacles to the speakers out of the way. If you have a subwoofer make sure it is turned on and has the volume turned up. -
Page 15: Playing A Dvd With Surround Sound
Memo: • Make sure the room environment follows the guidelines displayed on the OSD during auto setup. If the room environment is not optimal for auto setup (too much ambient noise, obstacles blocking the speakers from the microphone, etc.) the final settings may be incorrect.
-
Page 16: Connecting Your Equipment
Connecting Your Equipment Connecting Your Equipment Connecting your TV Before making or changing the connections, switch off the power and disconnect the power cord from the AC outlet. Connect your TV to the jacks as shown below. Hook up with either component video, S video, or composite video cords (the quality descends in this order) but you must use the same type of video cords to hook up your DVD player (and all other video components) as you use to hook up your TV.
-
Page 17: Connecting Video Components
Connecting Video Components Before making or changing the connections, switch off the power and disconnect the power cord from the AC outlet. Connect your video components as shown on this and the following page. For video components (for example, a DVD player) there are two types of connections to make, video and audio. Hook up your video signal with either component video, S video or composite video cords (the quality descends in this order) but you must use the same type of cord as you used to hook up your TV.
-
Page 18: Connecting Vcrs Or Dvrs
Connecting Your Equipment Connecting VCRs or DVRs Before making or changing the connections, switch off the power and disconnect the power cord from the AC outlet. Connect the video out of your VCR/DVR using either S video or composite video cords, depending on how you connected the receiver to your TV (see page 16).
-
Page 19: Connecting Satellite Tv (Sat) Components
Connecting Satellite TV (SAT) Components Before making or changing the connections, switch off the power and disconnect the power cord from the AC outlet. Hook up the video signal with either component video, S video, or composite video cords, depending on how you connected the receiver to your TV (see page 16).
-
Page 20: Connecting Analog Audio Components
Connecting Your Equipment Connecting Analog Audio Components Before making or changing the connections, switch off the power and disconnect the power cord from the AC outlet. Connect your audio components to the jacks as shown below. These are all analog connections and your analog audio components (turntable, cassette deck) use these jacks.
-
Page 21: Connecting To The Multi Channel Analog Inputs (Dvd-Audio Or Super Audio Cd (Sacd) Compatible Player)
Connecting to the Multi Channel Analog Inputs (DVD-Audio or Super Audio CD (SACD) compatible player) Before making or changing the connections, switch off the power and disconnect the power cord from the AC outlet. If you have a DVD-Audio or Super Audio CD (SACD) compatible player, or are using an external Dolby Digital/ DTS decoder, connect it to the multichannel analog inputs as shown below.
-
Page 22: Connecting Digital Audio Components
Connecting Your Equipment Connecting Digital Audio Components Before making or changing the connections, switch off the power and disconnect the power cord from the AC outlet. Connect your digital components as shown below. The VSX-AX5i has two coaxial and two optical inputs for a total of four digital inputs on the rear panel plus one digital input on the front panel.
-
Page 23: Digital Input Default Settings
Coaxial cords/Optical cables Commercially available digital audio coaxial cords (standard video cords can also be used) or optical cables (not supplied) are used to connect digital components to this receiver. Be sure to insert completely and in the case of the optical cable, right-side up.
-
Page 24: Connecting The Radio Antennas
Connecting Your Equipment Connecting the Radio Antennas Before making or changing the connections, switch off the power and disconnect the power cord from the AC outlet. Connect the supplied FM wire antenna and the AM loop antenna to the ANTENNA terminals as shown below. These antennas should provide adequate reception quality in most cases, but connecting outdoor antennas should noticeably improve sound quality.
-
Page 25: Connecting Speakers
Connecting Speakers Before making or changing the connections, switch off the power and disconnect the power cord from the AC outlet. We recommend a full complement of seven speakers and a subwoofer as shown here but, naturally, everyone’s home setup will vary. Simply connect the speakers you have in the manner described below. One of the latest features of home theater is the use of surround back speakers.
-
Page 26: Speaker Impedance
Connecting Your Equipment Speaker impedance You can change the speaker impedance for VSX-AX5i but we recommend using speakers with an impedance of 8 — 16 (the default setting). If you are using 6 change the impedance setting. Use any speaker rated between 6 — less than 8 impedance speakers, you need to — 16…
-
Page 27: Placing Your Speakers
Placing Your Speakers Proper speaker placement is essential to realize the best sound from your system. It is very important for speaker placement to read the instructions that come with your speakers so please be sure to do so. Speaker placement If you have a multiple speaker arrangement the placement of the speakers is extremely important.
-
Page 28: Using I.link Interface
Using i.LINK Interface Using i.LINK Interface What is i.LINK? i.LINK is a trademark name for IEEE1394, a high-speed interface for digital audio, video and other data found on personal computers, digital camcorders, and other kinds of audio and audio/visual equipment. A single i.LINK connector can both send and receive data at the same time, so only one cable is required to connect components for two-way communication.
-
Page 29: Creating An I.link Network
i.LINK connectors Use a 4-pin, S400 i.LINK cable, less than 3.5 m long, to connect i.LINK-equipped components. Be sure to insert the i.LINK cable straight into connector. When properly aligned the cable can be inserted with little resistance. Forcing the cable into the connector will damage the connector pins.
-
Page 30: Displays And Controls
Displays and Controls Displays & Controls Displays and Controls Front Panel All the controls on the front panel are explained and/or referenced here. To open the front panel push gently on the lower third of the panel. 1 MULTI JOG dial You can use this dial for many purposes.
-
Page 31
8 Display (see page 35) 9 MCACC indicator (see pages 13 and 51) Lights when the ACOUSTIC CAL EQ is on. (After the Auto Surround Sound Setup has been completed the ACOUSTIC CAL EQ is set on and this display will light.) 10 i.LINK indicator Lights when an i.LINK -Audio-equipped component is selected. -
Page 32: Remote Control
Displays and Controls Remote Control This page describes the buttons on the remote control used to operate the receiver. 1 Remote Control Display Screen 2 SOURCE button Use this button to turn on/off other components. You must input the preset code in order to use this function (see page 67).
-
Page 33
ON/OFF/AUTO. 12 SYSTEM OFF button (see page 82) This button turns off components in two ways. First, when pressed it will turn off all PIONEER components. Secondly, any component that has programmed into the SYSTEM OFF settings will be turned off. -
Page 34
Displays and Controls 16 TOP MENU/GUIDE button Use to find stations or menus on a digital TV tuner. For a DVD player use this button to bring up the DVD menu. 17 RETURN button When you are in a receiver setup operation this button will go back one step in the SYSTEM SETUP procedure. -
Page 35: Display
Display All the display information is explained and/or referenced here. 1 SIGNAL indicators Light to indicate the input signal you selected. AUTO: Lights when the receiver is set to select the input signal automatically. DIGITAL: Lights when digital audio signals are selected.
-
Page 36: Back Panel
(see page 28). 2 CONTROL IN/OUT terminals (see page 79) You can use these jacks to hook up other PIONEER equipment, that has a CONTROL terminal, so that you can control them all by pointing the remote control(s) at one remote sensor.
-
Page 37
(AUDIO) S400 S400 8 COMPONENT VIDEO MONITOR OUT ter- minals Use these terminals to output the video signal from the COMPONENT VIDEO IN terminals to your TV. See page 16 for more information. 9 SPEAKERS terminals (see page 25) Use these terminals to connect speakers to the receiver. -
Page 38: Setting Up For Surround Sound
Setting Up for Surround Sound Displays & Controls Setting Up for Surround Sound To ensure the best possible surround sound, complete the following setup operations. Some of these are the same (and take precedence over) the settings you made in the Easy Setup Guide, so consider if the ones you made at that time were adequate.
-
Page 39: Surround Back System
Surround Back System This setup selects how your surround back system will be used. If you want to use it for surround back speakers in your main speaker system choose NORMAL SYSTEM. In this case you won’t have any B (or secondary) speaker system as these speakers fill that role also for the VSX-AX5i.
-
Page 40: Normal Setup
Setting Up for Surround Sound NORMAL Setup This is the manual method to setup your sound parameters for surround sound. You don’t need to do this, however, if you did the AUTO SURROUND SETUP method on page 13. If you feel the settings in the AUTO SURROUND SETUP do not suit your personal tastes, the settings you input here will override them and allow you to adjust the parameters manually.
-
Page 41: Speaker Setting
Speaker Setting The information below shows you how to select the correct settings for the type and number of speakers you connected. Most importantly, you need to decide how to route the sound for all the speakers you connected. To do this select the size of the front, center, surround and surround back speakers (if you hooked them up).
-
Page 42
Setting Up for Surround Sound 1 SPEAKER SETTING should be selected. If it isn’t use the buttons to select it. Press the ENTER button. The setup possibilities appear on your TV. 2 With the buttons choose the speakers that you want to set. Press the ENTER button. -
Page 43: Channel Level
Channel Level The following steps show you how to balance the sound output level of your speakers. Proper speaker balance is essential for obtaining high quality surround sound. If continuing from SPEAKER SETTING go to step 1. If starting fresh, complete steps 1–2 on page 40. in MANUAL setting in AUTO setting Memo:…
-
Page 44: Speaker Distance
Setting Up for Surround Sound Speaker Distance Adding a slight delay to some speakers is necessary to achieve proper sound depth, separation as well as an effective surround sound effect. You need to figure out the distance from your listening position to your speakers to add the proper delay.
-
Page 45: Basic Operation
Basic Operation Displays & Controls Stereo and Multichannel Playback The following instructions show you how to play sound sources with the VSX-AX5i. Before doing so be sure to complete the setup procedures described in the “Easy Setup Guide Part 2” (starting on page 13) or “Setting Up for Surround Sound”…
-
Page 46: Selecting The Input Signal
Basic Operation Selecting the Input Signal This button selects the type of input signal, AUTO, ANALOG or DIGITAL, sent to the receiver. You need to take special care to switch to the appropriate input when necessary. For example, the switch would have to be on DIGITAL to hear digital sources like Dolby Digital or DTS but it would have to be on analog to record from the ANALOG out jacks on the receiver.
-
Page 47: Listening Modes
Listening Modes The three listening mode types on the receiver are explained here (to select listening modes see page 45). The kind of playback you can get in the three modes depends on what kind of a source (DVD, etc.) you are using. The basic distinction is between 2 channel sources and multichannel sources.
-
Page 48: Movie Modes (Surround Mode)
(for example, Dolby Digital or DTS). With two channel sources these first four modes will create surround channels. Next, there are six PIONEER original sound modes that use DSP (Digital Signal Processing) to create different types of sound environments as described below.
-
Page 49: Music Modes (Surround Mode)
(for example, Dolby Digital or DTS). With two channel sources these first two modes will create surround channels. Then there are five PIONEER original sound modes that use DSP (Digital Signal Processing) to create different types of sound environments as described below.
-
Page 50: Adjusting The Effect Of A Listening Mode
Basic Operation Adjusting the Effect of a Listening Mode The DSP (Digital Signal Processing) listening modes have sound processing added to accentuate a certain kind of atmosphere or effect (see the preceding pages for explanation). You can choose if you want to strengthen or weaken this effect in the given mode.
-
Page 51: Listening With Acoustic Cal Eq
Listening with ACOUSTIC CAL EQ You can listen to the soundtrack with the ACOUSTIC CAL EQ you set automatically when you did the AUTO SURROUND SETUP (page 13) or you set manually on (page 100). To do so follow the instructions below. MCACC indicator Digital Noise Reduction (DIGITAL NR Function) To reduce extraneous noise switch on DIGITAL NR.
-
Page 52: Listening In Midnight Mode
Basic Operation Listening in MIDNIGHT Mode This useful feature makes it possible to get excellent surround sound effects even when listening at low volumes. It can be used with any surround sound source and play soundtracks so that the quieter sounds are audible even while playing a soundtrack at low volumes.
-
Page 53: Adjusting Bass And Treble
Adjusting Bass and Treble You can adjust the low (bass) and high (treble) frequencies. The TONE button can also be used to bypass the tone circuitry. 2 3 4 Listening with Sound Delay Some video displays have a slight delay in presentation of the video. Using sound delay you can slow the presentation of the sound to match the presentation of the video.
-
Page 54: Listening In Audio Scaler Mode
Basic Operation Listening in Audio Scaler mode Use to hear CD and DVD, as well as other digital soundtracks, at a wider dynamic range, allowing for finer audio reproduction. Multi Channel In Playback MULTI CH IN allows you to connect a DVD-Audio/SACD player or an external decoder to enjoy certain multichannel discs.
-
Page 55: Surround Back Channel Modes
VIRTL SB ON: virtual surround back sound is available with all SURROUND modes except THX CINEMA; for a stereo signal you must choose the NEO:6 MOVIE/MUSIC SURROUND mode or a Pioneer original sound mode (see pages 48 and 49). VIRTL SB AUTO: same as above except whether virtual…
-
Page 56: Dual Mono Setting And Playback
Basic Operation Dual Mono setting and playback The dual mono setting can only be used when listening to Dolby Digital or homemade discs that have dual mono software encoded in them. Dual mono software usually is used to put two different mono soundtracks, that you can listen to together or separately, on one DVD.
-
Page 57: Video Select
Video Select This function allows you to listen to one sound source while you watch a different video source on your TV. The sound source is set in the normal fashion as explained on page 45. You then change the video input with the VIDEO SEL button.
-
Page 58: Using The Tuner
Using the Tuner Using the Tuner Automatic and Manual Tuning The following steps show you how to tune in FM and AM radio broadcasts using the automatic (search) and manual (step) tuning functions. If you already know the exact frequency of the station you want, see “Direct Access Tuning“ on the following page.
-
Page 59: Channel Step Setting (Multi-Voltage Model Only)
Channel Step Setting (multi-voltage model only) The unit has been factory preset to the channel allocation value for the area in which it is to be sold. If this value is set incorrectly, the tunes in frequency may be wrong, or sound may be distorted, resulting in an inability to reproduce reception signals at their proper sound quality.
-
Page 60: Memorizing Frequently Used Stations
Using the Tuner Memorizing Frequently Used Stations The following steps show you how to memorize up to 30 radio stations in 3 classes (each holding 10 stations). When memorizing FM frequencies, the receiver also memorizes the MPX mode (STEREO or MONO) and the RF ATT mode (European model only).
-
Page 61: Naming Memorized Stations
Naming Memorized Stations You can input a name of up to four characters for each preset station in the receiver’s memory (see the previous page). This name can be anything you choose. For example, you could input JAZZ for that station and when you listen to it the name, rather than the frequency number, will appear on your display.
-
Page 62: Recalling Memorized Stations
Using the Tuner Recalling Memorized Stations European model multi-voltage model 1 Press the TUNER button. This selects the TUNER function on the receiver and sets the remote to the TUNER operation mode. 2 Press the CLASS button repeatedly to select a class number. Each press switches the display: CLASS A 3 Use the number buttons to select the…
-
Page 63: An Introduction To Rds (European Model Only)
An introduction to RDS (European model only) Radio Data System, or RDS as it’s usually known, is a system used by FM radio stations to provide listeners with var- ious kinds of information—the name of the station and the kind of show they’re broadcasting, for example. This information shows up as text on the display, and you can switch between the kind of information shown.
-
Page 64: Searching For Rds Programs (European Model Only)
Using the Tuner Searching for RDS programs (European model only) One of the most useful features of RDS is the ability to search for a particular kind of radio program. You can search for any of the program types (listed on page 63). 2 4 3 1,4 5-6 1 Tune into an FM station.
-
Page 65: Basics Of Eon (Enhanced Other Network Information) (European Model Only)
Basics of EON (Enhanced Other Network information) (European model only) When EON is turned on, the receiver jumps to an EON-linked broadcast when it begins, even if a receiver function other than the tuner is being used. It cannot be used in areas that EON information is not transmitted and when FM broadcast stations do not transmit PTY data.
-
Page 66: Clearing All Stations From The Rds Or Eon Search (European Model Only)
Using the Tuner Clearing all stations from the RDS or EON search (European model only) The receiver will automatically register an identifying marker (called a PI code) for any station you input into the memory classes which can receive RDS or EON data. If you want to remove the currently memorized stations from RDS and EON searches, you can do it by erasing the PI codes.
-
Page 67: Remote Control Of Other Components
Remote Control of Other Components Displays & Controls Setting Up the Remote Control to Control Other Components In addition to controlling the receiver, the supplied remote control can operate your other components (VCR, TV, DVD, CD, etc.) after you program it to do so. If your component(s) are listed in the remote control’s memory, simply follow the steps below.
-
Page 68: Remote Control Of Other Components
Remote Control of Other Components 6 Point the remote control at the component you want set and press ENTER. OK? will appear in the remote control display. If the component you are trying to control turns on/off you have set it correctly. Use the buttons to select YES and go on to step 7.
-
Page 69: Programming Signals From Other Remote Controls (Learning Mode)
Programming Signals from Other Remote Controls (LEARNING Mode) If preset codes are not available for your component(s), or the available preset codes do not operate correctly, you can use this procedure to program in signals from the remote control(s) of your other component(s). These steps can also be used to add further operations to the remote control that were successfully set with the stored settings (see page 67).
-
Page 70
Remote Control of Other Components Buttons that are able to learn new commands Memo: • If FULL appears in step 5 it means that there isn’t enough capacity to learn this command. If you want to clear other buttons to make room for this one follow the procedure on page 86. -
Page 71: Using Remote Control With Other Components
Using Remote Control with Other Components CD/MD/CD-R/VCR/DVD/LD/DVD Recorder/Cassette Deck operations Button(s) SOURCE Press to switch the components between STANDBY and ON. Press to return to the start of the current track or chapter. Repeated presses skips to the start of previous tracks or chapter. …
-
Page 72: Cable Tv/Satellite Tv/Tv Operations
Remote Control of Other Components Button(s) RETURN/EXIT Takes you to the previous menu. button Navigate menus/options. & ENTER Basic playback options. Cable TV/Satellite TV/TV operations Button(s) Press to switch the TV, Satellite TV or Cable TV between STANDBY TV and ON.
-
Page 73: Setting Up The Direct Function
Setting up the Direct Function The direct function is designed in case you have an external video source connected to your TV (a video source that is not going through the VSX-AX5i). For this explanation we’ll call this the external video deck. You’d like to control external video deck with this unit’s remote control so you’ve assigned it a function button (for example purposes, the VCR 2 button).
-
Page 74: Using Other Functions
Using Other Functions Using Other Functions Recording from Audio/Video Components The following explanations show you how make a recording from one component to another connected to this receiver. Note that an analog recorder (such as a VCR) cannot record from a source that is connected using only a digital connection.
-
Page 75: Speakers B Setup
SPEAKERS B Setup Stereo playback in another room (SECOND ZONE) This setup enables you to listen to a pair of stereo speakers independently of the main speaker system (A speakers) hooked up to the receiver. You can choose SECOND ZONE, and use the speakers hooked up to the surround back terminals as a B speaker system, that is, playing the same source as the main speaker system but from independent stereo speakers.
-
Page 76: Speakers Button
Using Other Functions SPEAKERS Button If you selected NORMAL SYSTEM in the SURRBACK SYSTEM setup (see page 39) your surround back speakers will be used as part of your A speakers (main speaker system) and this button will simply switch it off or on. If you selected SECOND ZONE in the SURRBACK SYSTEM setup (see page 39) this button will cycle through the A (main) speaker system, the B speaker system (the surround back speakers acting as a separate second zone), both speaker systems, and off.
-
Page 77: Setting Up And Using The Usb Audio Connection
• Don’t use other applications on your computer when playing back through this USB connection. • Pioneer cannot be held responsible for damage to your ® computer system, software crashes or failures or any ® other possible computer problems due to this configuration.
-
Page 78: Connecting Additional Amplifiers
Using Other Functions Connecting Additional Amplifiers This receiver has more than sufficient power for any home use, but it is possible to add additional amplifiers to every channel of your system. Make the connections shown below to add amplifiers to power your speakers. Before making or changing the connections, switch off the power and disconnect the power cord from the AC outlet.
-
Page 79: The Pioneer Sr System: Operating Other Pioneer Components
The PIONEER SR System: Operating other PIONEER components Connecting an optional control cord allows you to operate other PIONEER components simply by pointing the receiver’s remote control at the remote sensor on the front panel of the receiver. The receiver then sends the remote control signals to the other devices via the CONTROL OUT terminal.
-
Page 80: Multi Operations
MULTI CONTROL button. You don’t need to program power commands for this receiver or any other Pioneer components. They will automatically turn on when a multi operation is performed. (Programming Pioneer video components automatically turns on Pioneer TVs.) Memo: Be sure to set up each component before programming multi operations (see “Setting Up the Remote…
-
Page 81: Performing Multi Operations
2 Press the MULTI CONTROL button for the component that has been set up with multi operations. The power of the receiver (and any Pioneer components use in the program) goes on and the programmed multi operations are performed automatically.
-
Page 82: System Off
Using SYSTEM OFF Press the SYSTEM OFF button. All Pioneer components and all components programmed into the SYSTEM OFF mode will stop and/or go off. 1 Press the REMOTE SETUP button for more than three seconds.
-
Page 83: Editing Remote Control Display Names
Editing Remote Control Display Names Use this capability to rename the display on the remote control for different MULTI CONTROL buttons (DVD/LD, etc.). For example, you could change TV to DVD2. In this way you can personalize your system. This is similar to the feature on page 93 but that feature changes the display on the receiver.
-
Page 84: Editing Button Names (Key Label)
Using Other Functions Editing Button Names (KEY LABEL) Use the KEY LABEL capability to rename the display on the remote control for different buttons (keys). You would want to do this if you taught a specific button a new operation. Memo: •…
-
Page 85: Adjusting The Light On The Remote Control
Adjusting the Light on the Remote Control This feature allows you to adjust the brightness of the light on the remote control. Using Other Functions 1 Press the REMOTE SETUP button for three seconds. The REMOTE SETUP menu appears on the remote display.
-
Page 86: Clearing Remote Control Settings You Have Input
Using Other Functions Clearing Remote Control Settings You Have Input This feature allows you to clear a particular setting, or all of the settings from a function in the REMOTE SETUP menu. Memo: • To exit from the REMOTE SETUP mode at anytime press the REMOTE SETUP button.
-
Page 87: Resetting The Main Unit
Resetting the Main Unit The following operations allow you to reset the unit to the default settings. Using Other Functions Put the receiver in the STANDBY mode. 1 While holding down the TONE button press the STANDBY/ON button for about three seconds. 2 When you see RESET? appear in the display, press the TONE –…
-
Page 88: Fine Tuning Your System
Fine Tuning Your System Fine Tuning Your System THX CINEMA Setup This setup lets you choose which decoding method for 2 channel sources the receiver will use for THX CINEMA. For more information on the decoding (playback) formats see «Techno Tidbits» starting on page 106. 1 Turn on the receiver and your TV, press RECEIVER on the remote con- trol.
-
Page 89: Assigning The Digital Inputs
Assigning the Digital Inputs If you did not hook up your digital equipment in accordance with the default settings for the digital inputs (see pages 17, 19 and 22) you need to complete the procedure below. You have to do this in order to tell the receiver what digital equipment is hooked up to which terminal so the buttons on the remote correspond to what you have hooked 3-8 2 Memo:…
-
Page 90: Assigning The Component Video Inputs
Fine Tuning Your System Assigning the Component Video Inputs This receiver has two component video inputs. Their default settings are video inputs for the DVD/LD (COMPONENT VIDEO IN 1) and TV/SAT (COMPONENT VIDEO IN 2) functions, but you can reassign them if you want to use them as video inputs for other receiver functions (for example a VCR).
-
Page 91: Assigning I.link Inputs
Assigning i.LINK Inputs With this function you can assign i.LINK-equipped components to a function, for example DVD/LD. By assigning i.LINK inputs you will be able to select both audio and video signals from i.LINK-equipped components by turning the MULTI JOG. Memo: If no i.LINK-equipped components are connected i.LINK Input cannot be selected.
-
Page 92
Fine Tuning Your System 7 Use the buttons to select the source you want. Press the ENTER button. When you assign an i.LINK-equipped video component, select the input source to which you have connected the video signal from the component. TUNER, PHONO and USB inputs cannot be assigned. -
Page 93: Function Rename
Function Rename Use the FUNCTION RENAME capability to rename the display on the receiver and your OSD for different functions (DVD, etc.). For example, you could rename VCR1/DVR as DVR-7000. For this particular setup using the controls on the front panel is more convenient than using the remote control. Use the MULTI JOG dial instead of the buttons and use the ENTER button on the front panel.
-
Page 94: Sacd Setup
Fine Tuning Your System SACD Setup The SACD setup allows you to enjoy 1-bit (Direct Stream Digital) high quality sound directly from an SACD component bypassing the DSP circuitry. 3-7 2 1 Turn on the receiver and your TV, press RECEIVER on the remote con- trol.
-
Page 95: Phono/Line Setup
PHONO/LINE Setup The PHONO/LINE setup allows you to decide whether you’ll hook up a turntable or a line level component (most components, like CD players and DVD players, are line level). 3-6 2 Fine Tuning Your System 1 Turn on the receiver and your TV, press RECEIVER on the remote con- trol.
-
Page 96: Expert System Settings
Expert System Settings Expert System Settings EXPERT Setup The settings here can only be done if you’ve performed the more basic preliminary setups. Thus, before doing these settings do either AUTO SETTING on page 13 or NORMAL setup page 40. These settings are to further heighten your surround sound.
-
Page 97: Crossover Network
Crossover Network Crossover frequency is the point where the receiver divides the high and low sounds (the frequencies) between the speakers. Certain bass sounds will play back from the subwoofer if you selected it as YES (or PLUS) or from the front speakers if you selected them as LARGE.
-
Page 98: Fine Channel Level
Expert System Settings Fine Channel Level The following steps show you how to balance the sound output level of your speakers more finely than in the NORMAL setup (see page 40). Proper speaker balance is essential for obtaining high quality surround sound and the better the speaker balance the better surround sound you can get.
-
Page 99: Fine Channel Delay
Fine Channel Delay The following steps show you how to adjust the delay level of your speakers more finely than in the NORMAL setup (see page 40). Adding a slight delay to some speakers is necessary to achieve proper sound depth, separation as well as an effective surround sound effect.
-
Page 100: Acoustic Calibration Eq
Expert System Settings Acoustic Calibration EQ This receiver lets you choose between two types of ACOUSTIC CAL EQ equalizer curves: ALL CH ADJUST and FRONT ALIGN, with the former equalizing the speakers individually and the latter equalizing the speakers in accordance with the front speakers.
-
Page 101
Expert System Settings To start the process use DATA COPY to paste the ALL CH ADJUST or FRONT ALIGN settings into CUSTOM 1 or CUS- TOM 2. Follow steps 1-5 on page 96, if necessary, to get to the starting point mentioned here. 1 ACOUSTIC CAL EQ should be selected, if it isn’t use the … -
Page 102
Expert System Settings For explanation purposes the illustrations use ALL CH ADJUST. This explanation is for CUSTOM 1 or CUSTOM 2. 1 Use the buttons to select CUSTOM 1 or CUSTOM 2. Press ENTER. 2 Use the buttons to select ALL CH ADJUST or FRONT ALIGN and press ENTER. -
Page 103
Expert System Settings 7 TRIM should be selected (if it isn’t use the buttons to select it) and press ENTER. 8 Use the buttons to adjust the TRIM and press ENTER. TRIM will balance the volume level of each frequency in the overall volume of that speaker. -
Page 104: Bass Peak Level
Expert System Settings Bass Peak Level The LFE (Low Frequency Effect) channel in Dolby Digital and DTS program sources can produce heavily concentrated ultra-low bass tones that may exceed the capabilities of your speaker system. The following steps show you how to limit the peak level for the LFE channel. If continuing from the preceding page the BASS PEAK LEVEL should be selected.
-
Page 105: Dynamic Range Control
Dynamic Range Control This feature makes it possible to enjoy full surround sound effects on Dolby Digital and DTS sources even at low volumes. It does this by compressing the dynamic range. Dynamic range is the difference between the loudest and the softest sounds in any given signal.
-
Page 106: Techno Tidbits And Problem-Solving
Techno Tidbits and Problem-solving Techno Tidbits and Problem-solving Dolby Dolby Digital Dolby Digital is a discrete digital surround format used for multichannel surround sound. It was developed after the Dolby Surround System and Dolby Pro Logic Surround System. Dolby Digital is a high quality digital sound format that is used by many theatrical film releases.
-
Page 107: Dts-Es
Because of these differences we often miss the power and emotion that thrills us in a good movie. Now Pioneer and THX have teamed up to bring the full glory of accurate cinema sound to the comfort and convenience of your home.
-
Page 108: I.link Related Messages
Techno Tidbits and Problem-solving i.LINK Related Messages You may see the following messages displayed in the front panel display when using the i.LINK interface. BUS FULL The i.LINK bus has reached its capacity and cannot transmit any more data. CANNOT LINK 1 The interface between the receiver and the selected i.LINK-equipped component is unstable.
-
Page 109: Troubleshooting
Sometimes the trouble may lie in another component. Investigate the other components and electrical appliances being used. If the trouble cannot be rectified even after exercising the checks listed below, ask your nearest PIONEER authorized service center or your dealer to carry out repair work. Symptom Cause i.LINK interface…
-
Page 110
• Remove the foreign object from the fan. If you can’t do this and/or the fan is broken call a Pioneer-accredited repair center to look at the problem. • Turn the receiver off and allow it to cool down with good ventilation. -
Page 111
Symptom Cause The LARGE and SMALL • There are other frequencies in the room settings for speakers after the that are affecting the auto setup. Auto Surround Sound Setup are incorrect. After the proper settings have • The speakers have been incorrectly con- been made, there still seems nected (left and right connections are to be something wrong with… -
Page 112
Techno Tidbits and Problem-solving Symptom No sound output from the surround back speakers. No sound output from one (set of) speaker(s). Sound is produced from some components, but not from digital components. Other audio problems Subwoofer output is very low. • Settings route signal away from sub- During multichannel playback, there is no sound output from one speaker. -
Page 113
Symptom Cause Broadcast stations cannot be • The antenna is poorly positioned. selected automatically. • Interference caused by other equipment (fluorescent lamp, motor, etc.). • Weak radio signals. Noise or hum can be heard • There is electrical interference from even when there is no sound another component or appliance. -
Page 114
Techno Tidbits and Problem-solving Symptom Input/display The display is dark. You can’t get DIGITAL to come up when using the SIGNAL SELECT button. The digital format indicator doesn’t light up even when playing a non-PCM digital source. A compressed digital source is being played, but the digital format indicators don’t light During playback of a… -
Page 115: Maintenance Of External Surfaces
Symptom Cause Remote control Cannot be remote controlled. • The remote control batteries have worn out. • Too far away or improper angle of opera- tion. • There is an obstacle between the receiver and the remote control. • Strong light such as fluorescent light is shining onto the unit’s remote control signal light-receiving window.
-
Page 116: Preset Code Brands
Techno Tidbits and Problem-solving Preset Code Brands Brand Brand PIONEER PIONEER DENON DENON FISHER PHILIPS PANASONIC KENWOOD MAGNAVOX SAMSUNG MARANTZ SONY ONKYO TOSHIBA PANASONIC YAMAHA PHILIPS SANYO SHARP Brand SONY PIONEER TEAC DENON TECHNICS KENWOOD YAMAHA PANASONIC PHILIPS STB (Satellite/…
-
Page 117: Specifications (European Model)
Specifications (European model) Continuous Power Output (DIN) Front …100 W + 100 W (DIN 1 kHz, THD 1%, 8 ) Center…100 W (DIN 1 kHz, THD 1%, 8 ) Surround …100 W + 100 W (DIN 1 kHz, THD 1%, 8 ) Surround Back …100 W + 100 W (DIN 1 kHz, THD 1%, 8 ) Rated Power Output…
-
Page 118: Specifications (Multi-Voltage Model)
Techno Tidbits and Problem-solving Specifications (multi-voltage model) Maximum Output Power … 130 W/channel Continuous Power Output (DIN) Front … 100 W + 100 W (DIN 1 kHz, THD 1%, 8 ) Center … 100 W (DIN 1 kHz, THD 1%, 8 ) Surround…
-
Page 120
Published by Pioneer Corporation. Copyright © 2003 Pioneer Corporation. All rights reserved. <TNMWF/03E00001> Printed in <ARB7286-A>…
В представленном списке руководства для конкретной модели Усилителя — Pioneer VSX-AX5I. Вы можете скачать инструкции к себе на компьютер или просмотреть онлайн на страницах сайта бесплатно или распечатать.
- Инструкции и файлы
- Характеристики
- Основные поломки
- Сервисы по ремонту
В случае если инструкция на русском не полная или нужна дополнительная информация по этому устройству, если вам нужны
дополнительные файлы: драйвера, дополнительное руководство пользователя (производители зачастую для каждого
продукта делают несколько различных документов технической помощи и руководств), свежая версия прошивки, то
вы можете задать вопрос администраторам или всем пользователям сайта, все постараются оперативно отреагировать
на ваш запрос и как можно быстрее помочь. Ваше устройство имеет характеристики:Тип: AV-ресивер, 7.1, Количество каналов: 7, Схемотехника: полупроводниковый, Мощность фронтальных каналов: 100 Вт (20 Гц — 20000Гц , 0.09%, 8 Ом), Мощность центрального канала: 100 Вт, Мощность тыловых каналов: 100 Вт, полные характеристики смотрите в следующей вкладке.
Для многих товаров, для работы с Pioneer VSX-AX5I могут понадобиться различные дополнительные файлы: драйвера, патчи, обновления, программы установки. Вы можете скачать онлайн эти файлы для конкретнй модели Pioneer VSX-AX5I или добавить свои для бесплатного скачивания другим посетителями.
Если вы не нашли файлов и документов для этой модели то можете посмотреть интсрукции для похожих товаров и моделей, так как они зачастую отличаются небольшим изменениями и взаимодополняемы.
Обязательно напишите несколько слов о преобретенном вами товаре, чтобы каждый мог ознакомиться с вашим отзывом или вопросом. Проявляйте активность что как можно бльше людей смогли узнать мнение настоящих людей которые уже пользовались Pioneer VSX-AX5I.

Геннадий
2020-11-20 06:05:12
Первые впечатления хорошие
Основные и самые важные характеристики модели собраны из надежных источников и по характеристикам можно найти похожие модели.
| Общие характеристики | ||
| Тип | AV-ресивер, 7.1 | |
| Количество каналов | 7 | |
| Схемотехника | полупроводниковый | |
| Параметры усилителя | ||
| Мощность фронтальных каналов | 100 Вт (20 Гц — 20000Гц , 0.09%, 8 Ом) | |
| Мощность центрального канала | 100 Вт | |
| Мощность тыловых каналов | 100 Вт | |
| Мощность центральных тыловых каналов | 100 Вт | |
| Воспроизводимый диапазон частот | 5 — 100000 Гц ( 0 / -3 дБ) | |
| Отношение сигнал/шум | 92 дБ | в режиме FM моно: 62 дБ, в режиме FM стерео: 58 дБ |
| Линейный вход/выход | ||
| Чувствительность | 335 мВ | в режиме FM моно: 1.1 мкВ, в режиме FM стерео: 50 мкВ |
| Входное сопротивление | 47 кОм | |
| Фонокорректор | ||
| Фонокорректор | есть, MM | |
| Регулировки | ||
| Регулировка баланса | есть | |
| Регулировка тембра | есть | |
| Эквалайзер | есть, 5-полосный | |
| Тонкомпенсация | есть | |
| Цифровая обработка звука | ||
| DSP | есть, Motorola 150 MIPS 48 бит | |
| Частота дискретизации аудио ЦАП | 192 кГц | |
| Разрядность аудио ЦАП | 24 бит | |
| Количество предустановок DSP | 11 | |
| Интерфейсы | ||
| Входы | композитный x5, S-Video x5, компонентный x2, FireWire x2, коаксиальный x2, оптический x3, 7.1CH x1, линейный x3, Phono | |
| Выходы | композитный x2, S-Video x3, компонентный x1, оптический x2, линейный x2, PreAmp | |
| Интерфейсы | USB Type B | |
| Разъемы на передней панели | композитный вход, S-Video-вход, оптический вход | |
| Функции | ||
| Bi/Tri-amping | есть | |
| Автоматическая калибровка объемного звука | есть | |
| Подключение дополнительных комплектов акустики | есть | |
| Декодеры | ||
| Dolby Digital | есть | |
| Dolby Pro Logic | есть | |
| Dolby Pro Logic II | есть | |
| Dolby Digital EX | есть | |
| DTS | есть | |
| DTS 96/24 | есть | |
| DTS ES Matrix 6.1 | есть | |
| DTS ES Discrete 6.1 | есть | |
| DTS Neo:6 | есть | |
| Тюнер | ||
| Тип тюнера | цифровой | |
| Режимы | AM/FM | |
| Количество станций | общее: 30 | |
| Чувствительность | 335 мВ | в режиме FM моно: 1.1 мкВ, в режиме FM стерео: 50 мкВ |
| Отношение сигнал/шум | 92 дБ | в режиме FM моно: 62 дБ, в режиме FM стерео: 58 дБ |
| Разделение каналов в режиме FM | 40 дБ | |
| Функции | RDS | |
| Питание | ||
| Блок питания | встроенный | |
| Конструкция | ||
| Дисплей | есть | |
| Цветовое оформление | серебристый | |
| Размеры (ШхВхГ) | 420x188x464 мм | |
| Вес | 19.8 кг | |
| Дополнительная информация | ||
| Пульт ДУ | есть, мультибрендовый, управление другими компонентами, с режимом обучения | |
| Сертификаты | THX |
Здесь представлен список самых частых и распространенных поломок и неисправностей у Усилителей. Если у вас такая поломка то вам повезло, это типовая неисправность для Pioneer VSX-AX5I и вы можете задать вопрос о том как ее устранить и вам быстро ответят или же прочитайте в вопросах и ответах ниже.
| Название поломки | Описание поломки | Действие |
|---|---|---|
| Перегорают Защитные Предохранители | ||
| Автоусилитель Уходит В Защиту | ||
| При Включении Усилителя Загорается Красный Светодиод | ||
| Усилитель Включается, Но Звука Нет | ||
| Str-De698 | При Включении На Дисплее Protect | |
| После Сбоя При Обновлении Не Работает Кнопка Menu | Во Время Обновления Произошел Сбой В Эл/Сети И Процесс Обновления Был Нарушен. После Включения Ресивера Перестала Работать Кнопка Меню. Причем Сделать Сброс Удалось, Зажав И Удерживая Одновременно Кнопки Power И Menu. Но Это Не Помогло. Всё Остальное — Зв | |
| Не Работает Вход По Usb. | Усилитель Работает Нормально. При Подключении В Качестве Цап Компьютер Не Реагирует На Подключение Юсб Устройства, С Телефона Нет Вывода Сигнала. Другой Цап С Телефоном Работает Без Проблем. Е18 Был Куплен На Тайване, Под Воздействием Пары Пива В Надежде | |
| Туго Вращается Регулятор Громкости На Yamaha Rx-V459 | Очень Туго Вращается Регулятор Громкости На Yamaha Rx-V459. Пластиковая Ручка Просто Прокручивается … Невольно Хочется Смазать Как Ось Вращения | |
| Тюнер Работает. Все Остальные Входы:hdmi, Опто, Видео Не Работают | ||
| Нет Выхода Hdmi | На Hdmi Выходе Нет Сигнала. Иногда Проскакивает Изображение На Зеленом Фоне. Сильно Греется Микросхема Is 3850 (Adv 7322). Не Могу Найти Прошивку. | |
| Не Работают Каналы Мощности На Фронтальные Колонки | При Включении Усилителя Не Работают Фронтальные Колонки, При Запуске Теста Выдает Code 33 | |
| Vsx 520 K | Не Включается. Ничего Не Сгорели Не Щелкнет | |
| При Ресивер | ||
| Хлопок В Колонках После Включения Усилителя Musical Fidelity M6Si | После Включения Усилителя Musical Fidelity M6Si Примерно Через Минуту Слышен Сильный Хлопок В Колонках . После Этого Усилительработае Хорошо . Это Происходит Не Каждый День . Один Раз В Три Дня . Но Это Не Всегда . Иногда При Каждом Включении В Тот Же Ден |
В нашей базе сейчас зарегестрированно 18 353 сервиса в 513 города России, Беларусии, Казахстана и Украины.

ДЕМАЛ-СЕРВИС В ПЕРОВО
⭐
⭐
⭐
⭐
⭐
Адресс:
1-я владимирская д. 41
Телефон:
74951337215
Сайт:
n/a
Время работы
Будни: с 0945 до 1845
Суббота: с 1015 до 1545
Воскресенье: с 1015 до 1545
МТЕХНИК
⭐
⭐
⭐
⭐
⭐
Адресс:
Острякова ул., д. 6
Телефон:
74991572252
Сайт:
n/a
Время работы
Время работы не указано
ОРБИТА-СЕРВИС
⭐
⭐
⭐
⭐
⭐
Адресс:
ленинский проспект 95
Телефон:
74957446988
Сайт:
n/a
Время работы
Будни: с 1000 до 1900
Суббота: с 1100 до 1600
Воскресенье: выходной
МУЗЫКАЛЬНЫЙ СЕРВИС-ЦЕНТР
⭐
⭐
⭐
⭐
⭐
Адресс:
улица Гурьянова дом 30
Телефон:
74997050606
Сайт:
n/a
Время работы
Будни: с 1000 до 1900
Суббота: с 1000 до 1900
Воскресенье: выходной
БРИКС
⭐
⭐
⭐
⭐
⭐
Адресс:
Новощукинская, 1
Телефон:
74991930137
Сайт:
n/a
Время работы
Время работы не указано
Очень доволен
хочу
авпваы
Хочу купить
ирлдоьвап ькеьпрлджыкеь дзьакерджь щзрбкежбрь апкыезрбкыеджрбеджр щзапбкерл
Только приобрела,а инструкции нет
Только приобрела,а инструкции нет
Отвалился распрыскиватель