- Manuals
- Brands
- JB Systems Manuals
- Lighting Equipment
- Plano Spot 7TC
- Operation manual
-
Contents
-
Table of Contents
-
Bookmarks
Quick Links
WWW.BEGLEC.COM
Copyright © 2011 by BEGLEC NV
‘t Hofveld 2C ~ B1702 Groot-Bijgaarden ~ Belgium
Reproduction or publication of the content in any manner, without express permission of the publisher, is prohibited.
Manual de instrucciones
Version: 1.0
Operation Manual
Mode d’emploi
Gebruiksaanwijzing
Bedienungsanleitung
EN
FR
NL
DE
ES
Related Manuals for JB Systems Plano Spot 7TC
Summary of Contents for JB Systems Plano Spot 7TC
-
Page 1
Operation Manual Mode d’emploi Gebruiksaanwijzing Bedienungsanleitung Manual de instrucciones WWW.BEGLEC.COM Copyright © 2011 by BEGLEC NV ‘t Hofveld 2C ~ B1702 Groot-Bijgaarden ~ Belgium Reproduction or publication of the content in any manner, without express permission of the publisher, is prohibited. Version: 1.0… -
Page 2
DANGER ~ GEVAAR ~ GEFAHR ~ PELIGRO ~ PERIGO WARNING: DANGER! never expose the lens to direct sunlight, even for a short period. This may damage the light effect or even cause fire! ATTENTION: DANGER! n’exposez jamais la lentille directement aux rayons de soleil, même pendant un bref instant. -
Page 3: Before Use
The lightning flash with arrowhead symbol within the equilateral triangle is intended to alert the ® Thank you for buying this JB Systems product. To take full advantage of all possibilities and for your own use or the presence of un-insulated “dangerous voltage” within the product’s enclosure that may safety, please read these operating instructions very carefully before you start using this unit.
-
Page 4: Electrical Installation
Remark: You can connect a CA-8 remote controller to the master unit if you want to have more control over the master/slave operation. You can also connect the LEDCON 02 remote controller JB SYSTEMS 3/54 PLANO SPOT 7TC JB SYSTEMS 4/54 PLANO SPOT 7TC ®…
-
Page 5
Once the right show is selected, press the ENTER button to confirm. Press the MENU button for about 2 seconds to return to running mode. JB SYSTEMS 5/54 PLANO SPOT 7TC JB SYSTEMS 6/54 PLANO SPOT 7TC ®… -
Page 6: Operating Instructions
Once the mode is selected, press the ENTER button to confirm. rhythm of the music and show the internal chase programs. Press the MENU button for about 2 seconds to return to running mode. JB SYSTEMS 7/54 PLANO SPOT 7TC JB SYSTEMS 8/54 PLANO SPOT 7TC ®…
-
Page 7: Maintenance
You can download the latest version of this user manual on our website: www.beglec.com Channel4 can have 4 different behaviors, depending on the channel mode (1,2,3 or 4) you selected. JB SYSTEMS 9/54 PLANO SPOT 7TC JB SYSTEMS 10/54 PLANO SPOT 7TC ®…
-
Page 8: Caractéristiques
Confiez toute réparation à un personnel qualifié uniquement. ® Nous vous remercions d’avoir acheté ce produit JB Systems . Pour tirer pleinement profit de toutes les Le symbole de l’éclair à l’intérieur d’un triangle équilatéral, est destiné à alerter l’utilisateur de la possibilités et pour votre propre sécurité, lisez ces instructions très attentivement avant d’utiliser cet appareil.
-
Page 9: Installation Électrique
Remarque : Vous pouvez connecter une télécommande CA-8 à l’appareil maître, si vous voulez avoir plus de contrôle sur le fonctionnement maître/esclave. Vous pouvez également connecter la télécommande LEDCON 02 JB SYSTEMS 13/54 PLANO SPOT 7TC JB SYSTEMS 14/54 PLANO SPOT 7TC ®…
-
Page 10
Utilisé pour sélectionner l’un des fondus enchaînés préprogrammés lorsqu’il est utilisé en mode autonome ou mode maître/esclave. Tous les projecteurs produisent toujours une sortie identique. Appuyez sur la touche MENU jusqu’à ce que soit affiché à l’écran. JB SYSTEMS 15/54 PLANO SPOT 7TC JB SYSTEMS 16/54 PLANO SPOT 7TC ® ®… -
Page 11
Appuyez sur la touche MENU jusqu’à ce que soit affiché à l’écran. sélectionner la couleur suivante. Appuyez sur la touche ENTER pour afficher la version du logiciel de l’appareil. JB SYSTEMS 17/54 PLANO SPOT 7TC JB SYSTEMS 18/54 PLANO SPOT 7TC ® ®… -
Page 12: Instructions D’utilisation
Afin de protéger l’appareil de toute surchauffe, les ventilateurs de rafraîchissement (le cas échéant) et les ouvertures de ventilation doivent être nettoyés mensuellement. L’intérieur de l’appareil doit être nettoyé une fois par an à l’aide d’un aspirateur ou d’un jet d’air. JB SYSTEMS 19/54 PLANO SPOT 7TC JB SYSTEMS 20/54 PLANO SPOT 7TC ®…
-
Page 13: Spécifications
Nettoyez avec un chiffon doux en utilisant des produits de nettoyage pour verre normal. Séchez toujours les pièces soigneusement. ® Hartelijk dank voor de aankoop van dit JB Systems product .Om ten volle van alle mogelijkheden te Attention : Nous vous conseillons fortement de faire effectuer le nettoyage interne par un personnel qualifié…
-
Page 14: Elektrische Installatie
Repareer nooit een zekering of sluit nooit de zekeringhouder kort. Vervang altijd een kapotte zekering master/slave-werking wilt hebben. U kunt ook de LEDCON 02-afstandsbediening aansluiten met een zekering van hetzelfde type en elektrische specificaties! JB SYSTEMS 23/54 PLANO SPOT 7TC JB SYSTEMS 24/54 PLANO SPOT 7TC ®…
-
Page 15
Zodra de gewenste menuoptie is geselecteerd, druk op de “ENTER”-knop om te bevestigen. Opmerking:Druk op en houd de “MENU”-knop ongeveer 2 seconden ingedrukt om naar de werkingsmodus terug te keren of wacht gewoon 8 seconden. JB SYSTEMS 25/54 PLANO SPOT 7TC JB SYSTEMS 26/54 PLANO SPOT 7TC ®… -
Page 16
Gebruik de “DOWN”- en “UP”-knoppen om één van de beschikbare opties te selecteren: Selecteer één van de vooraf ingestelde kleuren en druk op de “ENTER”-knop om te bevestigen. JB SYSTEMS 27/54 PLANO SPOT 7TC JB SYSTEMS 28/54 PLANO SPOT 7TC ® ®… -
Page 17
Als u naar de normale bedrijfsmodus wilt terugkeren: druk ongeveer 2 seconden lang op de “MENU”-knop. MODUS (LED UIT) (LED AAN) (LED knippert (LED knippert snel) langzaam) JB SYSTEMS 29/54 PLANO SPOT 7TC JB SYSTEMS 30/54 PLANO SPOT 7TC ® ®… -
Page 18
Wanneer een optische lens zichtbaar door scheuren of diepe krassen is beschadigd, moet het worden vervangen. De netsnoeren moeten in perfecte conditie zijn en onmiddellijk worden vervangen wanneer zelfs een klein probleem wordt gedetecteerd. JB SYSTEMS 31/54 PLANO SPOT 7TC JB SYSTEMS 32/54 PLANO SPOT 7TC ® ®… -
Page 19
Sicherung ersetzen! Bei Fehlfunktion das Gerät nicht benutzen und sich mit dem Händler in Verbindung setzen. Bei sichtbaren Beschädigungen müssen Gehäuse und Optik ersetzt werden. JB SYSTEMS 33/54 PLANO SPOT 7TC JB SYSTEMS 34/54 PLANO SPOT 7TC ®… -
Page 20: Elektrische Installation
Sie einfach 8 Sekunden. Hinweis: Sie können einen Fernsteuerungscontroller CA-8 das Master-Gerat anschließen, wenn Sie zusätzliche Steuerungsmöglichkeiten des Master-/Slave-Betriebs verwenden möchten. Sie können auch die Fernbedienung LEDCON 02 anschließen. JB SYSTEMS 35/54 PLANO SPOT 7TC JB SYSTEMS 36/54 PLANO SPOT 7TC ® ®…
-
Page 21
Drücken Sie die Taste MENU, bis auf dem Display angezeigt wird. Zur Auswahl ENTER drücken. Benutzen Sie DOWN (Abwärts) und UP (Aufwärts), um eine der vorprogrammierten Shows zu wählen. JB SYSTEMS 37/54 PLANO SPOT 7TC JB SYSTEMS 38/54 PLANO SPOT 7TC ® ®… -
Page 22
(Aufwärts) den Wert zwischen 000 und 255 ein. Bestätigen Sie mit ENTER. Wählen Sie mit DOWN Halten Sie MENU ungefähr 2 Sekunden gedrückt, um in den Betriebsmodus zurückzukehren. (Abwärts) und UP (Aufwärts) die nächste Farbe. JB SYSTEMS 39/54 PLANO SPOT 7TC JB SYSTEMS 40/54 PLANO SPOT 7TC ®… -
Page 23: Wartung
Mit einem weichem Tuch und gewöhnlichem Glasreiniger säubern. Alle Teile stets gut abtrocknen. Achtung: Wir empfehlen dringend, die Reinigung des Geräteinneren nur von qualifiziertem Personal durchführen zu lassen! JB SYSTEMS 41/54 PLANO SPOT 7TC JB SYSTEMS 42/54 PLANO SPOT 7TC ® ®…
-
Page 24: Technische Daten
250 V 6,3A langsam (20 mm Glas) IEC Eingang/Ausgangsverkettung: 40 Einh. Gracias por comprar este producto JB Systems®. Para aprovechar al máximo todas las posibilidades y para Klangregler: Integriertes Mikrofon su propia seguridad, lea cuidadosamente este manual de instrucciones antes de comenzar a utilizar la DMX-Anschlüsse:…
-
Page 25: Instrucciones De Seguridad
Nunca repare un fusible ni haga una derivación en el portafusibles. ¡Sustituya siempre un fusible dañado sobre el funcionamiento maestro/esclavo. También puede conectar el controlador LEDCON 02. por otro que sea del mismo tipo y que tenga las mismas especificaciones eléctricas! JB SYSTEMS 45/54 PLANO SPOT 7TC JB SYSTEMS 46/54 PLANO SPOT 7TC ®…
-
Page 26
Una vez seleccionada la opción deseada del menú, pulse el botón ENTER para confirmar. Observación: Pulse el botón MENU durante unos 2 segundos para volver al modo activo, o espere 8 segundos. JB SYSTEMS 47/54 PLANO SPOT 7TC JB SYSTEMS 48/54 PLANO SPOT 7TC ®… -
Page 27
Utilice los botones ABAJO y ARRIBA para seleccionar uno de los espectáculos preprogramados. entre 000 y 255. Confirme con el botón ENTER. Utilice los botones ABAJO y ARRIBA para seleccionar el siguiente color. JB SYSTEMS 49/54 PLANO SPOT 7TC JB SYSTEMS 50/54 PLANO SPOT 7TC ®… -
Page 28: Instrucciones De Funcionamiento
Pulse el botón ENTER para visualizar la versión del software de la unidad. Pulse el botón MENU durante unos 2 segundos para volver al modo activo. JB SYSTEMS 51/54 PLANO SPOT 7TC JB SYSTEMS 52/54 PLANO SPOT 7TC ®…
-
Page 29: Especificaciones
Límpielo con un paño suave utilizando productos normales para la limpieza del vidrio. Siempre seque cuidadosamente las piezas. Atención: ¡Recomendamos enfáticamente que la limpieza se lleve a cabo por personal cualificado! JB SYSTEMS 53/54 PLANO SPOT 7TC JB SYSTEMS 54/54 PLANO SPOT 7TC ®…
ENGLISH
JB SYSTEMS
®
OPERATION MANUAL
5/54
PLANO SPOT 7TC
ENGLISH
DMX512 Address Setting
Used to set the start address in a DMX setup, you can also automatically program the next PLANO
SPOT projectors in the same DMX-chain.
Program a DMX start address in 1 unit:
Press the MENU button until
is shown on the display.
Press the ENTER button to select.
Use DOWN and UP buttons to change the DMX512 address.
Once the correct address is shown on the display, press the ENTER button to confirm.
Press the MENU button for about 2 seconds to return to running mode.
Automatically program the DMX start addresses of several units in a DMX-chain:
Connect the DMX in/outputs of all projectors together and switch them all on
On the first unit in the chain:
Press the MENU button until
is shown on the display.
Press the ENTER button to select.
Use DOWN and UP buttons to change the DMX512 address.
Once the correct address shows on the display, press 2 times the ENTER button.
After this, use the DOWN and UP buttons until
Press the ENTER button to start the automatic programming all units flash one time to indicate
that the addresses are automatically set, starting from the address programmed in the first unit.
Press the MENU button on the first unit for about 2 seconds to return to running mode.
Example: the first projector was set to DMX-address 100 when you perform the automtic
addressing, the other projectors in the DMX-chain will receive addresses: 104, 108, 112, 116, …
Channel Mode
The unit has 4 different channel modes, each with different functions for the 4
DMX-chart to see the differences.
Press the MENU button until
is shown on the display.
Press the ENTER button to select.
Use DOWN and UP button to select one of the available channel modes.
Once the mode is selected, press the ENTER button to confirm.
Press the MENU button for about 2 seconds to return to running mode.
Show Mode
Used to choose to select one of the preprogrammed multi channel shows when used in standalone
or master/slave mode.
Press the MENU button until
is shown on the display.
Press the ENTER button to select.
Use DOWN and UP buttons to select one of the preprogrammed shows:
all shows played in random mode.
to
12 different built-in shows.
Except for the random show (Show 0) you will also be asked to select a running speed for the static mode.
With the UP/DOWN buttons you can select
Once the right show is selected, press the ENTER button to confirm.
Press the MENU button for about 2 seconds to return to running mode.
Color chase Mode
Used to choose to select one of the preprogrammed colorfades when used in standalone or
master/slave mode. All projectors will always show an identical output.
Press the MENU button until
is shown on the display.
Press the ENTER button to select.
Use DOWN and UP buttons to select one of the preprogrammed shows
You will also be asked to select a running speed for the static mode. With the UP/DOWN buttons you can
select
(slow) to
(fast).
Once the right show is selected, press the ENTER button to confirm.
Press the MENU button for about 2 seconds to return to running mode.
JB SYSTEMS
®
OPERATION MANUAL
is shown on the display.
th
channel. Refer to the
(slow) to
(fast).
6/54
PLANO SPOT 7TC
JB Systems Plano Spot 7TC: Available Instructions
Note for Owners:
Guidesimo.com webproject is not a service center of JB Systems trademark and does not carries out works for diagnosis and repair of faulty JB Systems Plano Spot 7TC equipment. For quality services, please contact an official service center of JB Systems company. On our website you can read and download documentation for your JB Systems Plano Spot 7TC device for free and familiarize yourself with the technical specifications of device.
-
BEGA 84 377
BEGA Gantenbrink-Leuchten KG · Postfach 31 60 · 58689 Menden · [email protected] · www.bega.com07.18 · Technische Änderungen vorbehalten · Technical amendments reserved · Modications techniques réservéesIP 65!FassadenscheinwerferFaçade oodlightProjecteur pour façade84 3778°8°520520395395115115Ø 711511512012060607575 Gebrauchsanweisung Instructions for use Fiche d’utilisati …
84 377 Flood Light, 3
-
shada LED’s light 300710
MV#: 20171220 13:22 Installation and Operating ManualD Bedienungsanleitung Installatie en gebruiksaanwijzingF Montage et utilisation Montag et mode d‘emploiArt.nr 30071X + LED Sensor FloodlightD LED Sensor StrahlerF LED Sensor ProjecteurLED’s lightLED Sensor FloodlightLED Sensor StrahlerLED Sensor Projecteur*30071X-MAN-ML-2017122001-SHA — Complete Book A5.indb 1 2017-12-20 13: …
LED’s light 300710 Flood Light, 20
-
American DJ DJ Spot LED
Specications:• Intelligent Moving Head with high output 25W LED source• 7 colors + white • 11 gobos + spot• Separate Color & Gobo Wheels• Gobo scroll mode• 4-Button LED DMX menu system makes it easy to navigate• 17-degree beam angle• 8 DMX Channels• 3 Operational modes: DMX controller, Master/Slave & Sound Active• Internal light show programs operational via sound ac …
DJ Spot LED Flood Light, 1
-
Ikan IFB1024
IFB10241024 Featherweight Dual-Color LED Light QUICKSTART GUIDEwww.ikancorp.comCONDITIONS OF WARRANTY SERVICE • Free service for one year from the day of purchase if the problem is caused by manufacturing errors. • The components and maintenance service fee will be charged if the warranty period has expired. Free Service will not be Provided in the Following Situations: (* Even if the …
IFB1024 Flood Light, 3
-
MEDC XB10
© Eaton MEDC Ltd 2018 01/18Technical Manual for the Xenon Beacon – XB10Notice technique – Feux Xenon – XB10Technische Anleitung für die Xenon-Blitzleuchte XB10Manual Técnico para o alarme visual de Xénon XB10Please note that every care has been taken to ensure the accuracy of our technical manual. We do not, however, acceptresponsibility for damage, loss or expense resulting from any err …
XB10 Flood Light, 20
-
Thorn ALTIS
7 96263426 PB 06/20131232,5 Nm20 NmDL2380/400/415VZRM (D)380V-Remplacer toute protection fissurée.-Les luminaires classe II doivent être installés de façon à ce que la partie métallique ne soit pas en contact avec l’installation électrique connectée à la terre.ATTENTION:Les luminaires classe Idoivent être reliés à la terre.-Ce luminaire fonctionne à une tension nominale qui doit …
ALTIS Flood Light, 2
-
Laserworld Club Series
Manual / Bedienungsanleitung / Mode d‘emploi Club SeriesCS-500RGB KeyTEXPlease spend a few minutes to read this manual fullybefore operating this laser!Bitte lesen Sie diese Bedienungsanleitung sorgfältigvor Inbetriebnahme dieses Showlasersystems!Avant d’utiliser cet appareil pour la première fois nous vous recommandonsde lire cette notice d’utilisation!EnglishDeutschFrançais10/2021 …
Club Series Lighting Equipment, 18
-
American DJ Fire Bowl
American DJ®American DJ® 4295 Charter StreetLos Angeles Ca. 90058www.americandj.comUnpacking: Thank you for purchasing the Fire Bowl™ by American DJ®. Every Fire Bowl™ has been thoroughly tested and has been shipped in perfect operating condition. Carefully check the shipping carton for damage that may have occurred during shipping. If the carton appears to be damaged, car …
Fire Bowl Flood Light, 4
-
Deluce Lighting DL2MGFL10WBLKG
IMPORTANT INSTALLATION INFORMATION• Installation should be carried out in accordance with the latest edition of the IEE Wiring Regulations (BS7671) and taking into consideration the latest Building Regulations. If in doubt, consult a qualified electrician.• Important: Ensure that ALL electrical connections are tight with no loose strands including factory made connections.• Before commenc …
DL2MGFL10WBLKG Flood Light, 2
-
Chauvet Intimidator COLOR LED
• Feature-packed compact moving head wash ed with 20-W quad-color RGBW LEDs • Convenient, wireless non-DMX control using the oponal IRC-6 remote• Manual zoom for short-throw or long-throw applicaons• Simple navigaon and a full text readout with the full-color LCD screen• Save me running cables by power linking mulple units• Generate a synchronized show in …
Intimidator COLOR LED DJ Equipment, 1
Popular Flood Light User Guides:
![]()
Отложить
Отложено
Сравнить
В сравнении
Артикул
3294
Под заказ
Наши менеджеры обязательно свяжутся с вами и уточнят условия заказа
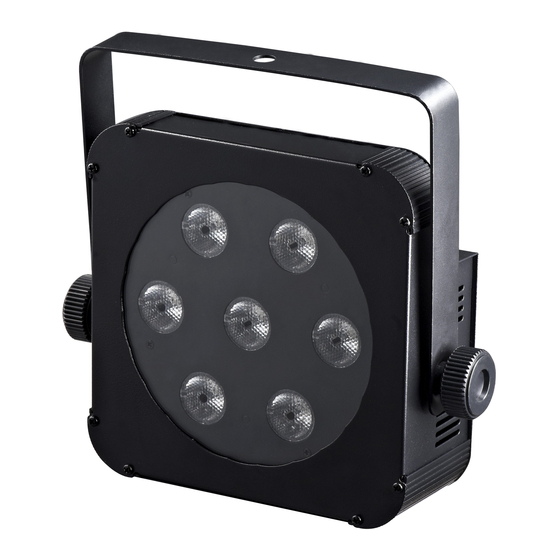
Мощный и компактный RGB LED-прожектор, 7 высоко-мощных 3-in-1 RGB 3W светодиодов. Угол луча = 25°. Очень плавная смена RGB цветов.
Цена действительна только для интернет-магазина и может отличаться от цен в розничных магазинах
- Описание
- Характеристики
- Отзывы о товаре
- Задать вопрос
- Наличие на складе
-
Мощный и компактный RGB LED-прожектор, 7 высоко-мощных 3-in-1 RGB 3W светодиодов. Угол луча = 25°. Очень плавная смена RGB цветов. Режимы работы: Standalone, Master/slave: до 18 приборов, DMX: 4 режима, 4 канала (R, G, B + Dimmer/strobe/sound chase).
-
Вы можете задать любой интересующий вас вопрос по товару или работе магазина.
Наши квалифицированные специалисты обязательно вам помогут.
Задать вопрос
- Персональные рекомендации
JBS Plano Spot 7TC яркий и компактный RGB LED-прожектор, 7 высоко-мощных 3-в-1 RGB 3-х ватных светодиодов, сопоставимых с 500 Вт источником света. Угол раскрытия луча 25°. Очень плавная и гладкая смена цветов. Прибор остаётся прохладным даже при работе на полную мощность длительное время. Экономичный и практичный Plano Spot 7TC отлично проявляет себя как на праздниках, в клубах, барах, для мобильных ди-джеев так и на выставках в режимах статичных цветов, либо для красочной подсветки в шатрах.
Технические характеристики:
- LED-источник света: 7 диодов 3 в 1, мощностью по 3 Вт (RGB)
- Режимы управления: Standalone, Master/slave: до 18 приборов, DMX: 4 режима, 4 канала (R, G, B + Dimmer/strobe/sound chase).
- Звуковая активация: встроенный микрофон
- Входвыход DMX-разъемы: XLR 3-х пиновые
- Питание: 230В 50Гц
- Потребляемая мощность: 28,5 Ватт
- Вес: 2.5 кг