") |
| ИБП Power-Vision Black (new) |
Купить однофазный источник бесперебойного питания (ИБП).
Power-Vision Black (новая ревизия). Источники бесперебойного питания. N-Power. 6 кВА … 30 кВА
Схема On-Line с двойным преобразованием напряжения и изолирующим трансформатором. Однофазные модели 1ф вх./1ф вых. и трехфазные модели 3ф вх./1ф выход. Новая модификация хорошо зарекомендовавшей себя серии Power-Vision Black. Для защиты вычислительного оборудования, компьютерных залов, офисов небольших организаций и другой нагрузки, предъявляющей повышенные требования к бесперебойности электропитания, качеству напряжения и его форме.
| 1ф вход./1ф вых. | 3ф вход./1ф вых. | ||||
| 6 кВА / 4.8 кВт (1ф / 1ф) | LT | 10 кВА / 8.0 кВт (3ф / 1ф) | |||
| 10 кВА / 8.0 кВт (1ф / 1ф | LT | 15 кВА / 12 кВт (3ф / 1ф) | LT | ||
| 20 кВА / 16 кВт (1ф / 1ф) | LT | ||||
| 30 кВА / 24 кВт (1ф / 1ф) | |||||
Далее… |
ИБП серии Power-Vision Black (новая ревизия) являются дальнейшим развитием хорошо зарекомендовавшей себя в работе серии Power-Vision Black. Она имеет схему On-Line с двойным преобразованием напряжения и изолирующий трансформатор для гальванической развязки. Предыдущие модификации Power-Vison (классическая – выпускалась с 1998 года) и Power-Vision Black (c 2009 года) снискали репутацию одних из самых удачных устройств за свою надежность (малое количество случаев выхода из строя). Они была неприхотливы в работе и «неубиваемы», т.е. устойчиво работали как при неполадках в электросети / нагрузке, так и при неправильных действиях со стороны эксплуатирующего персонала.
Разумеется, прогресс не стоит на месте и номенклатура комплектующих изделий за последние годы существенно обновилась, улучшились её характеристики, что, в свою очередь, привело к необходимости внесения конструктивных изменений в устройство. Так появилась модель Power-Vision Black, а затем Power-Vision Black (новая ревизия).
Основные особенности серии Power-Vision Black (новая ревизия)
- Модели 1ф вход / 1ф выход и модели 3ф вход / 1ф выход.
- Классический On-Line с двойным преобразованием напряжения и выходным изолирующим трансформатором на низкой частоте (Low Frequency).
- Цифровая микропроцессорная технология управления работой устройства: DSP (Digital Signal Processors).
- Высокая перегрузочная способность (до 150%).
- Двухканальное цифровое управление схемой Bypass для повышение надежности работы.
- Раздельный вход Bypass позволяет делать схемы с последовательным резервированием.
- Возможность параллельного подключения блоков с целью масштабирования выходной мощности или параллельного резервирования. Схема синхронизации использует современную технологию управления токами parallel current-sharing.
- Функция «холодного» старта, т.е. запуск нагрузки без входной электросети.
- Мощное зарядное устройство: 2 A, 4 A, 6 A, 8 A, 10 A, 12 A (программируется – стандартная функция), 14 A, 16 A, 18 A, 20 A, 22 A, 24 A (программируется – дополнительная опция).
- Продвинутая схема защиты (высоковольтные импульсы, короткое замыкание, перенапряжение, пониженное напряжение, перезаряд батарей, защита от неправильного подключения и др.).
- Выходное напряжение имеет чистую синусоидальную форму и генерируется ШИМ-инвертором.
- Инвертор построен с использованием современных мощных IGBT-транзисторов.
- Широкий допустимый диапазон изменения входного напряжения без перехода в батарейный режим работы.
- Выходное напряжение имеет идеальную синусоидальную форму с КНИ менее 3%.
- Возможность подключения дополнительных батарейных комплектов для увеличения времени автономной работы.
- Возможность совместной работы с дизельной электростанцией.
- Фильтр радиочастотных и электромагнитных помех.
- ЖК-дисплей на передней панели отображает электрические параметры сети и нагрузки, в том числе мощность нагрузи в %, а также остаточный заряд батарей.
- ЖК-дисплей и светодиодные индикаторы сигнализируют перегрузку, сетевой режим работы ИБП и состояние батарей.
- «Интеллектуальная» система управления зарядным током батарей (Advanced Battery Management), продлевая их срок службы.
- Нулевое время переключения из сетевого режима в батарейный и назад.
- Коммуникационный интерфейс RS232 и USB-порт для подключения системы дистанционного мониторинга (стандартная поставка).
- Дополнительные опции: SNMP-адаптер, комплект для параллельного включения, входной изолирующий трансформатор, THD-фильтр.
 - вид сзади") |
| ИБП Power-Vision Black (new) — вид сзади |
") |
| Блок-схема ИБП Power-Vision Black (new) |
Страница 1 из 2
 |
| Power-Vision HF |
Купить источники бесперебойного питания.
Power-Vision HF. ИБП N-Power. 10 кВА … 120 кВА
Трехфазные (3ф / 3ф), высокочастотный On-Line с двойным преобразованием напряжения питания. PF=0.9. Для защиты вычислительных залов, серверных помещений, офисов и др. нагрузки.
| Power-Vision HF 10 | 10 кВА / 9 кВт |
| Power-Vision HF 20 | 20 кВА / 18 кВт |
| Power-Vision HF 30 | 30 кВА / 27 кВт |
| Power-Vision HF 40 | 40 кВА / 36 кВт |
| Power-Vision HF 60 | 60 кВА / 54 кВт |
| Power-Vision HF 80 | 80 кВА / 72 кВт |
| Power-Vision HF 100 | 100 кВА / 90 кВт |
| Power-Vision HF 120 | 120 кВА / 108 кВт |
Далее… |
Трехфазные источники бесперебойного питания серии Power-Vision HF (High Frequency) выполнены по схеме высокочастотного On-Line с двойным преобразованием напряжения. Оснащены сенсорным ЖК-дисплеем на передней панели, обладают малыми габаритами и весом, адаптируются к батарейным линейкам различной «длины» (от 32 до 40 аккумуляторов в последовательной цепочке), экономичны по стоимости.
Основные технические особенности Power-Vision HF
- Высокочастотный On-line с двойным преобразовнием напряжения и цифровым микропроцессорным управлением (DSP).
- Модульный дизайн, высокая надежность, легкость в техническом обслуживании.
- Раздельный вход Bypass позволяет строить схемы повышенной надежности (последовательное резервирование).
- Устройство корректировки входного коэффициента мощности (PFC).
- Широкий диапазон входного напряжения без перехода в батарейный режим, автоматическая адаптация к частоте входной сети 50 Гц / 60 Гц.
- Поддержка двух возможных режимов преобразования частоты: 50 Гц вход / 60 Гц выход, а также 60 Гц вход / 50 Гц выход.
- Входной коэффициент мощности > 0.99, входной коэффициент нелинейных искажений по току (КНИ — THDi) ≤ 3%, выходной КНИ по напряжению ≤3%.
- Выходной коэффициент мощности: 0.9.
- Высокий КПД системы: нагрузка >10%, КПД ≥90%; нагрузка >50%, КПД≥93%.
- Зарядное устройство с цифровым управлением: возможность гибкого изменения параметров зарядного устройства и батарейных комплектов, отслеживание состояния батарей (обрыв подключения) в режиме on line.
- Возможность использования как совместных, так и раздельных батарейных комплектов при параллельном включении ИБП.
- Гибкая возможность настройки параметров зарядного устройства в зависимости от типов и количества аккумуляторных батарей: 32 шт / 34 шт / 36 шт / 38 шт / 40 шт.
- Продвинутая технология заряда и поддержки аккумуляторных батарей (Advanced Intelligent Battery Management Technique) эффективно продлевает их срок службы.
- Поддержка «холодного» старта, т.е. возможность запуска устройства в батарейном режиме без входной сети. Полный автостарт при наличии входной сети.
- Сенсорный ЖК-дисплей 5.7 дюймов на передней панели блока, удобный пользовательский интерфейс.
- Превосходные функции защиты, реализованные как программно, так и аппаратно, мощная автоматическая диагностика, ведение журнала событий для последующего анализа.
- Функции защиты паролем, в том числе: пароль при первом включении, пользовательский пароль, пароль для управления и поддержки.
- Автоматическое напоминание о необходимости обслуживания (завершении гарантии) на аккумуляторные батареи и конденсаторы постоянной линии.
- Стандартная кнопка аварийного отключения (EPO – Emergency Power Off).
- Стандартные коммуникационные интерфейсы RS232 / USB / RS485 / «сухие» контакты.
- Дополнительный коммуникационный порт SNMP.
- Дополнительная возможность параллельной работы до 6 блоков по схеме параллельного резервирования (N+1).
- Дополнительный встроенный изолирующий трансформатор.
- Дополнительное устройство температурной компенсации тока зарядного устройства.
 |
| Параллельная система 2×40 кВА — Power-Vision HF |
Страница 1 из 3
- Manuals
- Brands
- PowerVision Manuals
- Drones
- PowerEgg
- User manual
-
Contents
-
Table of Contents
-
Bookmarks
Quick Links
PowerEgg
User Manual
PEGF-E1.3
PowerVision
Related Manuals for PowerVision PowerEgg
Summary of Contents for PowerVision PowerEgg
-
Page 1
PowerEgg User Manual PEGF-E1.3 PowerVision… -
Page 2: Table Of Contents
Contents ……………………1 Product Overview Introduction……………………..1 Feature Highlights……………………1 Components of the Aircraft…………………..2 Components of Remote Controller………………3 Preparation of the Aircraft………………….6 Preparation of Remote Controller and Base Station………….8 …………………………9 Aircraft Overview of the Aircraft………………….9 Flight Modes……………………..9 Accessibility……………………..10 Aircraft Status Indicator………………….14 Description of Aircraft Status Indicator……………..15 Visual Positioning System………………….16 Propellers………………………18 Intelligent Battery……………………18…
-
Page 3
Maestro Operation………………….28 ™ Maestro Turn On/Off………………..29 ™ Maestro Charge………………….29 ™ Maestro Control………………….30 ™ Maestro Indicator………………….32 ™ Base Station ……………………..33 Overview of Base Station…………………33 Operation of Base Station………………..33 Turn On/Off……………………33 Charge……………………..34 Indicator ……………………34 Connection……………………35 Frequency Match of Base Station…………….35 Gimbal Camera ……………………36 Overview of Gimbal Camera………………..36 Gimbal Usage……………………36… -
Page 4
Map Direction Lock………………….43 Image Transmission………………….43 Taking Photos/Shooting………………..43 Settings……………………..43 Media ………………………..46 Service ……………………….46 Flight …………………………47 Flight Restrictions and Special Area Limited Flight…………47 Flight Environment Requirements………………47 Connection of Aircraft, Remote Controller and Vision+………….49 Compass Calibration………………….51 Start/Stop The Motor………………….53 Emergency Stop……………………54 Basic Flight……………………..55… -
Page 5: Product Overview
Product Overview Introduction PowerEgg is a ight system which consists of an aircraft, a gimbal camera, a standard remote controller, a gesture-based remote controller, a base station and Vision+, the ight app for iOS or Android. The user may perform ight over the aircraft by connecting the standard or gesture-based remote controller to the base station.
-
Page 6
Aircraft 1.4K UHD camera on 3-axis gimbal 2.Micro SD card slot 3.Optical positioning sensors and ultr- asonic positioning system 4.Aircraft front LED indicator 5.Aircraft Status LED indicator 6.Brushless, low friction motor pods 7.Propellers 8.Power switch/Landing gear control/ Frequency button 9.Battery compartment access button… -
Page 7
Standard Controller 1.Mode switch 2.Left joystick 3.Right joystick 4.landing gear button 5.Take off/land/stop landing 6.Status/battery indicator 7.Return-to-home/Cancel 8.Top right button: take photos/videos 13.Left top button: gimbal back to position 9.Right nger wheel: gimbal yaw with short press/sel e with double press/ 10.Micro USB charging port gimbal face downward with long press 11.Port: connect to base station… -
Page 8
Maestro Gesture-based Controller ™ 1.StatusBattery indicator 2.Joystick: gimbal control 3.Custom button 4.Ascend button 5.Descend button 6.Take off/land/stop landing 7.Return-to-home/cancel 8.Take photos/videos 9.Gesture activation 10.Power switch 11.Port: connect to base station 12.Micro USB charging port… -
Page 9
Base Station 1.Battery indicator 2.Image transmitting signal indicator 3.Power switch 4.Cell phone connection bracket 5.Tablet connection bracket 6.USB port 7.Port: connect to the controller 8.Micro USB charging port How to use bracket is presented in the graph. -
Page 10: Preparation Of The Aircraft
Preparation of the Aircraft 1.Spread the four arms one by one as shown. You’ll hear a clicking sound when the arms are properly positioned and self-locked. 2.Press the upper cover switch and open the top battery cover. Hold the arms and insert the battery into the chamber.
-
Page 11
4.First short press and then long press the power button to power on the device. To deploy the landing gear, quickly press the power switch three times when the blue status indicator of the aircraft is on. 5.Spread the propellers of the aircraft with both hands. 6.Place the aircraft on the ground surface at least 10m from the pilot, with the head of the aircraft (indicated by the red lights on the arms) facing the ying direction and pilot facing the tail (the power button also indicates the front of the aircraft). -
Page 12
Preparation of Remote Controllers If the gesture-based remote controller is used for ight control, rst connect the base station and the gesture-based remote controller with a data cable. Connect the data cable to this port Connect the data cable to this port If the standard remote controller is used for ight control, connect the base station to the bracket of the standard remote controller and connect them through cable. -
Page 13: Aircraft
Aircraft Flight Modes PowerEgg has three different ight modes: P Mode (Professional): professional ight mode In this mode, sonar is used instead of GPS and the visual positioning system. The aircraft is essentially on full manual control. N Mode (Normal): Normal ight mode In this mode, the aircraft uses GPS or the visual positioning system, depending on their signal strength.
-
Page 14: Accessibility
regardless of aircraft’s true orientation. There also will be a 10m-radius safe zone located around the operator. The aircraft cannot enter the safe zone and the control of the aircraft within the safe zone is disabled. Accessibility Automatic take-off Unlock the aircraft and ensure ight conditions for either via GPS signals or the visual positioning system meet minimum requirements.
-
Page 15
Smart return-to-home behavior The return-to-home behavior depends on the location of the aircraft when it is switched to return-to-home mode. 1.When the aircraft is located within 10m horizontally from the return-to-home point, it deploys the landing gear and automatically lands on the spot. Return point Less than 10m 2.If the aircraft ies higher than the return altitude (default value: 20m) beyond 10m, it rst… -
Page 16
If the aircraft ies lower than the return altitude beyond10m, it rst vertically climbs to the return altitude, then turns the head to the operator and returns to the point above the return point. Then, the aircraft turns the tail towards the operator, deploys the landing gear and vertically lands on the ground. -
Page 17
Smart return-to-home can be realized in three patterns: lost control return, one-click return and low power return 1.Lost control return In the case of loss of signal, the aircraft rst hovers in the air and then triggers lost control return in 10 seconds. After gaining signal of the remote controller again, the aircraft switches to the mode used prior to the loss of signal and continues to y. -
Page 18: Aircraft Status Indicator
Aircraft Status Indicator Each arm of PowerEgg has a head indicator (head lamp) and an aircraft status indicator (tail lamp).The following gure indicates the speci c locations of the indicators. Head indicator…
-
Page 19: Description Of Aircraft Status Indicator
The head indicator is used to identify the head direction. When the power of the aircraft is turned on, the indicator is normally on and lights in red. The tail indicator gives information about status of the aircraft, with different ashing modes indicating different statuses. Description of Aircraft Status Indicator The head indicator is red when the aircraft is powered and the system is operating normally.
-
Page 20: Visual Positioning System
Quick ashing in white Shutdown process Code matching of remote controller Slow ashing in blue Alarm of low battery or loss of signal of remo- Slow ashing in red te controller Successful mode switching; successful task Flashing in green execution; successful sensor calibration Slow ashing in red In a no- y zone where take-off is forbidden Visual-aided Positioning System…
-
Page 21
Optical ow positioning system The optical ow positioning system applies to any environment having a height not greater than 3m and with weak or no GPS signals, particularly for indoor ight. See the gure below. Less than 3m Using steps of the optical ow positioning system 1.Switch the remote controller to N Mode: normal ight mode. -
Page 22: Propellers
PowerEgg uses customized high-performance 10.5-inch folding propellers. Intelligent Battery PowerEgg is equipped with a specially designed smart ight battery which has a capacity of 6,400 mAh, operates at a voltage of 14.8V and has charging-discharging management capabi- lites. The battery consists of high-energy cells and an advanced battery management system to guarantee adequate power supply to the aircraft.
-
Page 23
Make sure the intelligent battery is fully charged before its rst use. Please refer to “Battery charging” for details. Functions of the intelligent battery The intelligent battery has the following functions: 1.Battery status display: the battery has a status indicator to indicate current status of the battery. -
Page 24
Please carefully read and abide by the requirements of PowerEgg provided in this manual, the disclaimer and the tag on the battery before use. The user shall assume the consequences for not using the battery as instructed. -
Page 25
2.It’s not recommended to use the battery at ambient temperature lower than -10℃. 3.It is suggested to end the ight when a low-voltage warning is sent from the PowerEgg Ground Station in a cold environment. 4.It is suggested that the battery be preheated to over 5℃ at the minimum, or over 20℃… -
Page 26
Do not insert or remove the battery when it is turned on. The smart battery must be charged using the special charger supplied by PowerVision. PowerVision will take no responsibility for the consequences of not using the chargers provided by PowerVision. -
Page 27: Remote Controller
3-axis gimbal. The built-in rechargeable battery in PowerEgg stan- dard remote controller has a capacity of 3,000mAh and can continuously work for 20 hours.
-
Page 28: Operation Of Standard Controller
Operation of Standard Remote Controller Startup and shutdown of standard remote controller The remote controller may be started by sliding the power switch from the left to the right. The connection status of the remote controller may be distinguished according to the noti cation tone of the remote controller.
-
Page 29: Standard Remote Controller Indicator
The battery of the remote controller should be charged with the special charger of cially designated by PowerVision, which will not be liable for any consequences caused by charging the battery with the charger not of cially provided by PowerVision.
-
Page 30
Mode 2: The left joystick of the remote controller controls the up/down of the aircraft. Mode 1: The right joystick of the remote controller controls the up/down of the aircraft. Left joystick Right joystick Up/down Turn left / turn right Forward/backward Left/right Start of motors: Position both joysticks towards the bottom center like a “V”… -
Page 31
Left nger wheel:for the control of the gimbal pitch. Right nger wheel:for the control of gimbal yaw. Left top button:The gimbal back to position by short pressing the key; press the key until there is a vibration, and the gimbal faces downward; short press the key for 2 times, sel e mode is triggered. -
Page 32
3-axis gimbal pitch, taking photos and video shooting. Users can easily complete various operations of the aircraft with the assistance of the remote controller. The built-in rechargeable battery in PowerEgg gesture-based remote controller has a capac- ity of 1,500mAh and can continuously work for 10 hours. The current battery level may be checked via the battery level indicator. -
Page 33
Start-up and shutdown of gesture-based remote controller The remote controller may be started by sliding the power switch from the left to the right. The connection status of the remote controller may be distinguished according to the noti — cation tone of the remote controller. When the remote controller plays music for 1 second, it indicates that the communication connection between the remote controller and the aircraft is successful. -
Page 34
The battery of gesture-based remote controller should be charged with the special charger of cially designated by PowerVision, which will not be liable for any consequences caused by charging the battery with the charger not of cially provided by PowerVision. -
Page 35
Under normal circumstances, the motor may be automatically stopped when the aircraft lands. One-click takeoff/landing button: When the aircraft has not taken off, press and hold the key until there is a vibration, and the aircraft begins to take off; when the aircraft takes off, press the key again until there is another vibration, and the aircraft begins to land;… -
Page 36
Indicator for gesture-based remote controller The gesture-based remote controller has a three-color battery level indicator. The indicator shows the battery level of the battery when the remote controller is on (whether charging or not): In case of charging when the remote controller is off, the indicator is red, indicating charging; when the remote controller is fully charged, the indicator is green, indicating full charging;… -
Page 37: Base Station
Overview of Base station This section describes PowerEgg base station, including its usage and precautions. The working frequency band of PowerEgg base station is 2.4Ghz. The base station integrates advanced 4K/HD image transmission system, can directly output HD aerial image to mobile device, and can support mobile phones, tablet computers, and other mobile smart devices with different speci cations.
-
Page 38: Indicator
Charging of base station The base station should be charged with the special charger supplied by PowerEgg for 5h. The red Micro USB port should be used for charging. Base Station The module will be fully charged in 5h. Indicator of base station The built-in rechargeable battery of the wireless base station has a capacity of 6,000mAh.
-
Page 39: Connection
2) Open Vision+ APP and connect the mobile device to the base station. 3) Go the PowerEgg product page on the APP and press on the logo on the upper left corner shown in right screen shot.
-
Page 40
If the linking between aircraft and base station is not successful, it will be required to reset the base station and the aircraft before linking. Please follow the below steps: 1. Reset the aircraft: a. Power on the aircraft and wait the aircraft to complete the starting sequence. b. -
Page 41: Gimbal Camera
4K UHD Gimbal Camera Overview of 4K UHD Gimbal Camera This section describes the technical parameters of the camera, and the range of motion and work mode of 4K UHD gimbal camera. Three-axis stabilized gimbal helps the camera isolate the gesture and high-frequency vibration of the aircraft. The control accuracy is up to 0.05° to help the camera take stable and smooth pictures and conduct video shooting.
-
Page 42: Introduction To Vision
Introduction to Vision+ Overview of Vision+ PV ground control system is the UAV software of PowerEgg. Users can obtain the status information of PowerEgg and can control UAV, 3-axis gimbal and camera module via Vision+. Download APP and other resuoces Please scan QD code to download Vision + APP, PC Suite, User Manual, Speci cation and watch video tutorials.
-
Page 43
Systems-Check of the aircraft When the equipment is connected, click the “Start Flying”. A systems check will com- mence. Flying is only possible after the aircraft passes the systems-check. If something fails the systems-check, it must be resolved prior to ight. -
Page 44: Display Of Relevant Parameters
Display of relevant parameters Aircraft altitude: it displays N/A if there is no value, and displays the current altitude of the aircraft if there is a value. Man-machine distance: the distance between the aircraft and the operator. Vertical velocity: velocity of vertical rise and fall of the aircraft. Horizontal velocity:the ight velocity of the aircraft at current level.
-
Page 45: One-Click Return Home
One-click return-to-home One-click return-to-home: the aircraft return-to-homes automatically; if “return-to-home point setting” is set, it return-to-homes to the user assigned location; if “return-to-home point setting” is not set, it return-to-homes to the takeoff point. See the “Smart return-to-home” section for details. Route planning Click “waypoint planning”…
-
Page 46: Flight Modes
Flight Mode Flight modes include circling mode, sel e mode and follow mode. Orbit mode:The aircraft will orbit a point set by the user in the Vision+ software. Following mode: when the following mode is started, the aircraft will follow the position of the remote controller at certain distance.
-
Page 47: Positioning
Electronic fence Click “safe zone” to select a safe zone on the map. The aircraft will y within the safe fence in the selected zone. When the aircraft ies outside the electronic fence, it will return-to-home and may stop return-to-home when it enters the electronic fence and keep ying in the original mode. Positioning Positioning: human positioning and aircraft positioning.
-
Page 48: Settings
Locking of map orientation Locking of map orientation:the map orientation is locked by default. Map locked:the map orientation will not change by rotating the phone left and right. Map unlocked:the map orientation will change by rotating the phone left and right. Back transmission of images The UAV has a camera image transmission device, which transmits images via RF, data transfer radio or satellite to the base station.
-
Page 49
Flight control setting Aircraft attitude and compass calibration:when the magnetometer of the aircraft is abnormal, magnetic calibration should be performed manually according to the prompt. Aircraft landing threshold:users may self-de ne a minimum battery level for forced land- ing of the aircraft. No- y zone restriction:when no- y zone restriction is switched on, the aircraft cannot y in the zone in an unlocked manner. -
Page 50
Link setting Channel selection: users can select a self-de ned channel according to the interference conditions to realize the optimum ight experience. Automatic setting of the channel: when started, it will automatically select the channel for you without manual setting. Video code rate setting: users can set the code rate for image transmission according to their own needs. -
Page 51: Media
Media Library It is used to manage photos and videos taken by the aircraft. Here you can upload, down- load, share, edit and delete pictures and videos. Service The Service module includes four sub-modules: Flight Academy, Flight Peripherals, Technical Support, and Repair Application. If you click to enter the corresponding module, it will directly skip to the secondary function page.
-
Page 52: Flight
Flight Flight Restrictions and Special Restricted Areas In view of the management system for UAV and airspace control of each country’s civil avia- tion authority, the UAV should not y in certain speci c airspaces to ensure safety. Vision + will prompt the user when the aircraft enters these restricted areas from unrestricted areas, and the user can choose whether to continue the ight.
-
Page 53
sea level) due to environmental factors resulting in performance degradation of the battery and power system of the aircraft. 4.GPS mode cannot be used in Antarctic Circle or Arctic Circle, where attitude mode and visual positioning system can be used. <120m Fly in an open and Keep your… -
Page 54
Connect the Aircraft, Remote Controller and Vision+ 1.Start the standard remote controller / gesture-based remote controller and the base station. 2.Turn on your phone and connect WIFI: Power _ Groundxxx with the password: 1234567890. Enter Password WIFI Password 1234567890 WIFI √… -
Page 55
4.For outdoor ight under the mode of P/N/E, wait until aircraft status indicator becomes green, and the status indicator of standard controller or Maestro turns green. This indicates ™ the aircraft is prepared for unlocking and ight. *Base station uses a 5GHz Wi connection. Only Mobile devices with a 5G WiFi can be used to connect to the Base station. -
Page 56: Compass Calibration
Compass Calibration Precautions The compass must sometimes be calibrated before ight. As the compass is susceptible to the complex environment outside, when calibrating the compass, attention should be paid to the following matters in order to ensure the accuracy of the compass. This is to ensure an ideal condition of the aircraft.
-
Page 57
Power button facing forward Power button facing upward 3.When the three setting positions in the interface are all green, the calibration is complete. Conditions requiring recalibration 1.The ight site is far from the site of last calibration; 2.It spins in ight or cannot y in a straight line. -
Page 58
Start-up/Shutdown of the Motor Start the motor Connect the remote controller, and pull the sticks down and in to start the motor. For the standard remote controller, pull both joysticks inward and downward to start the motor. After the motor is started, release the joysticks quickly. For the gesture-based remote controller, press the Ascend key, then press and hold the Descend key to start the motor. -
Page 59
In-air motor shutdown method The in-air motor shutdown method can only be used to shut the motor down in case of special conditions (such as when an aircraft is crashing into a crowd) where emergency shutdown is needed to minimize personnel injury. Note: The aircraft will fall to the ground and most likely be destroyed. -
Page 60: Basic Flight
Basic Flight 1.Take out the aircraft, the battery, the base and the remote controller/ base station from the package, and place the aircraft on the base. 2.Release the buckles at the end of the arms to open the four arms in turn. 3.Open the aircraft’s top cover to place the battery into the body and fasten the cover.
-
Page 61
14.You can also use the remote controller by slowly pushing the Ascend/Descend joystick, to take-off. 15.If descending is needed, slowly pull down the Ascend/Descend joystick, so that the aircraft slowly and steadily lands on the ground. 16.After landing, pull the Ascend/Descend joystick to its lowest position and hold for more than two seconds until the motor is shut down. -
Page 62
This equipment has been tested and found to comply with the limits for a Class B digital device, pursuant to Part 15 of the FCC Rules.These limits are designed to provide reasonable protection against harmful interference in a residential installation.This equipment generates uses and can radiate radio frequency energy and, if not installed and used in accordance with the instructions, may cause harmful interference to radio communications. -
Page 63
70100026-00 PowerVision Get it on Copyright 2017 ©Powervision Robot Inc. All rights reserved.
Здравствуйте, друзья!
Я начинаю серию обзоров на электронные стабилизаторы со стабилизатора для смартфона Power Vision S1. В нём есть свои интересные моменты.
- Вступление
- Power Vision S1
- Внешний вид, эргономика, конструктив
- Краткая инструкция по пользованию электронным стабилизатором Power Vision S1
- Технические характеристики
- Полевые тесты
- Итоги
- Плюсы
- Минусы
к содержанию ↑
Вступление
Начать стоит с того что современное видео по умолчанию должно быть со стабилизацией изображения. Когда смотришь старые видеосъемки (я, например, много смотрю документальных фильмов по истории), то замечаешь, что камера трясётся и это раздражает. Когда эти фильмы снимались, не было ни дронов, ни качественных стабилизаторов изображения. Например, съемки с вертолета легко отличить от съемок с дрона именно по качеству стабилизации изображения.
На сегодняшний день есть такие виды стабилизации изображения:
1. Оптическая
Оптическая стабилизация изображения появилась очень давно, но всех проблем стабилизации она не решает и имеется не во всех устройствах. Суть её в перемещении линз внутри объектива.
2. Стабилизация датчика изображения (IBIS)
Весьма эффективный вид стабилизации. Может сочетаться с оптической стабилизацией.
3. Программная
Программное смещение изображения с учётом его резкого скачка на сенсоре камеры. Требует обрезания краёв изображения из-за принципа работы, часто вызывает эффект «желе» на изображении.
4. Гироскопическая
Редкий способ стабилизации, механический. Знаю и пробовал его только на больших устройствах.
5. Электронная
Смещение стабилизируемого устройства с помощью электрических моторчиков. Как правило работает для 3-х осей.
Поскольку мы говорим про внешнее устройство, то ему остается использовать только тип 4 или 5. Power Vision S1 использует более энергоэффективный и современный способ электронной стабилизации.
Компания PowerVision имеет головной офис в Китае, но филиалы во многих других странах. Специализируется компания на роботизированных системах, в частности, подводных и плавающих дронах. С точки зрения механики её устройства точно уникальны и в этом вы убедитесь в обзоре.
к содержанию ↑
к содержанию ↑
Внешний вид, эргономика, конструктив
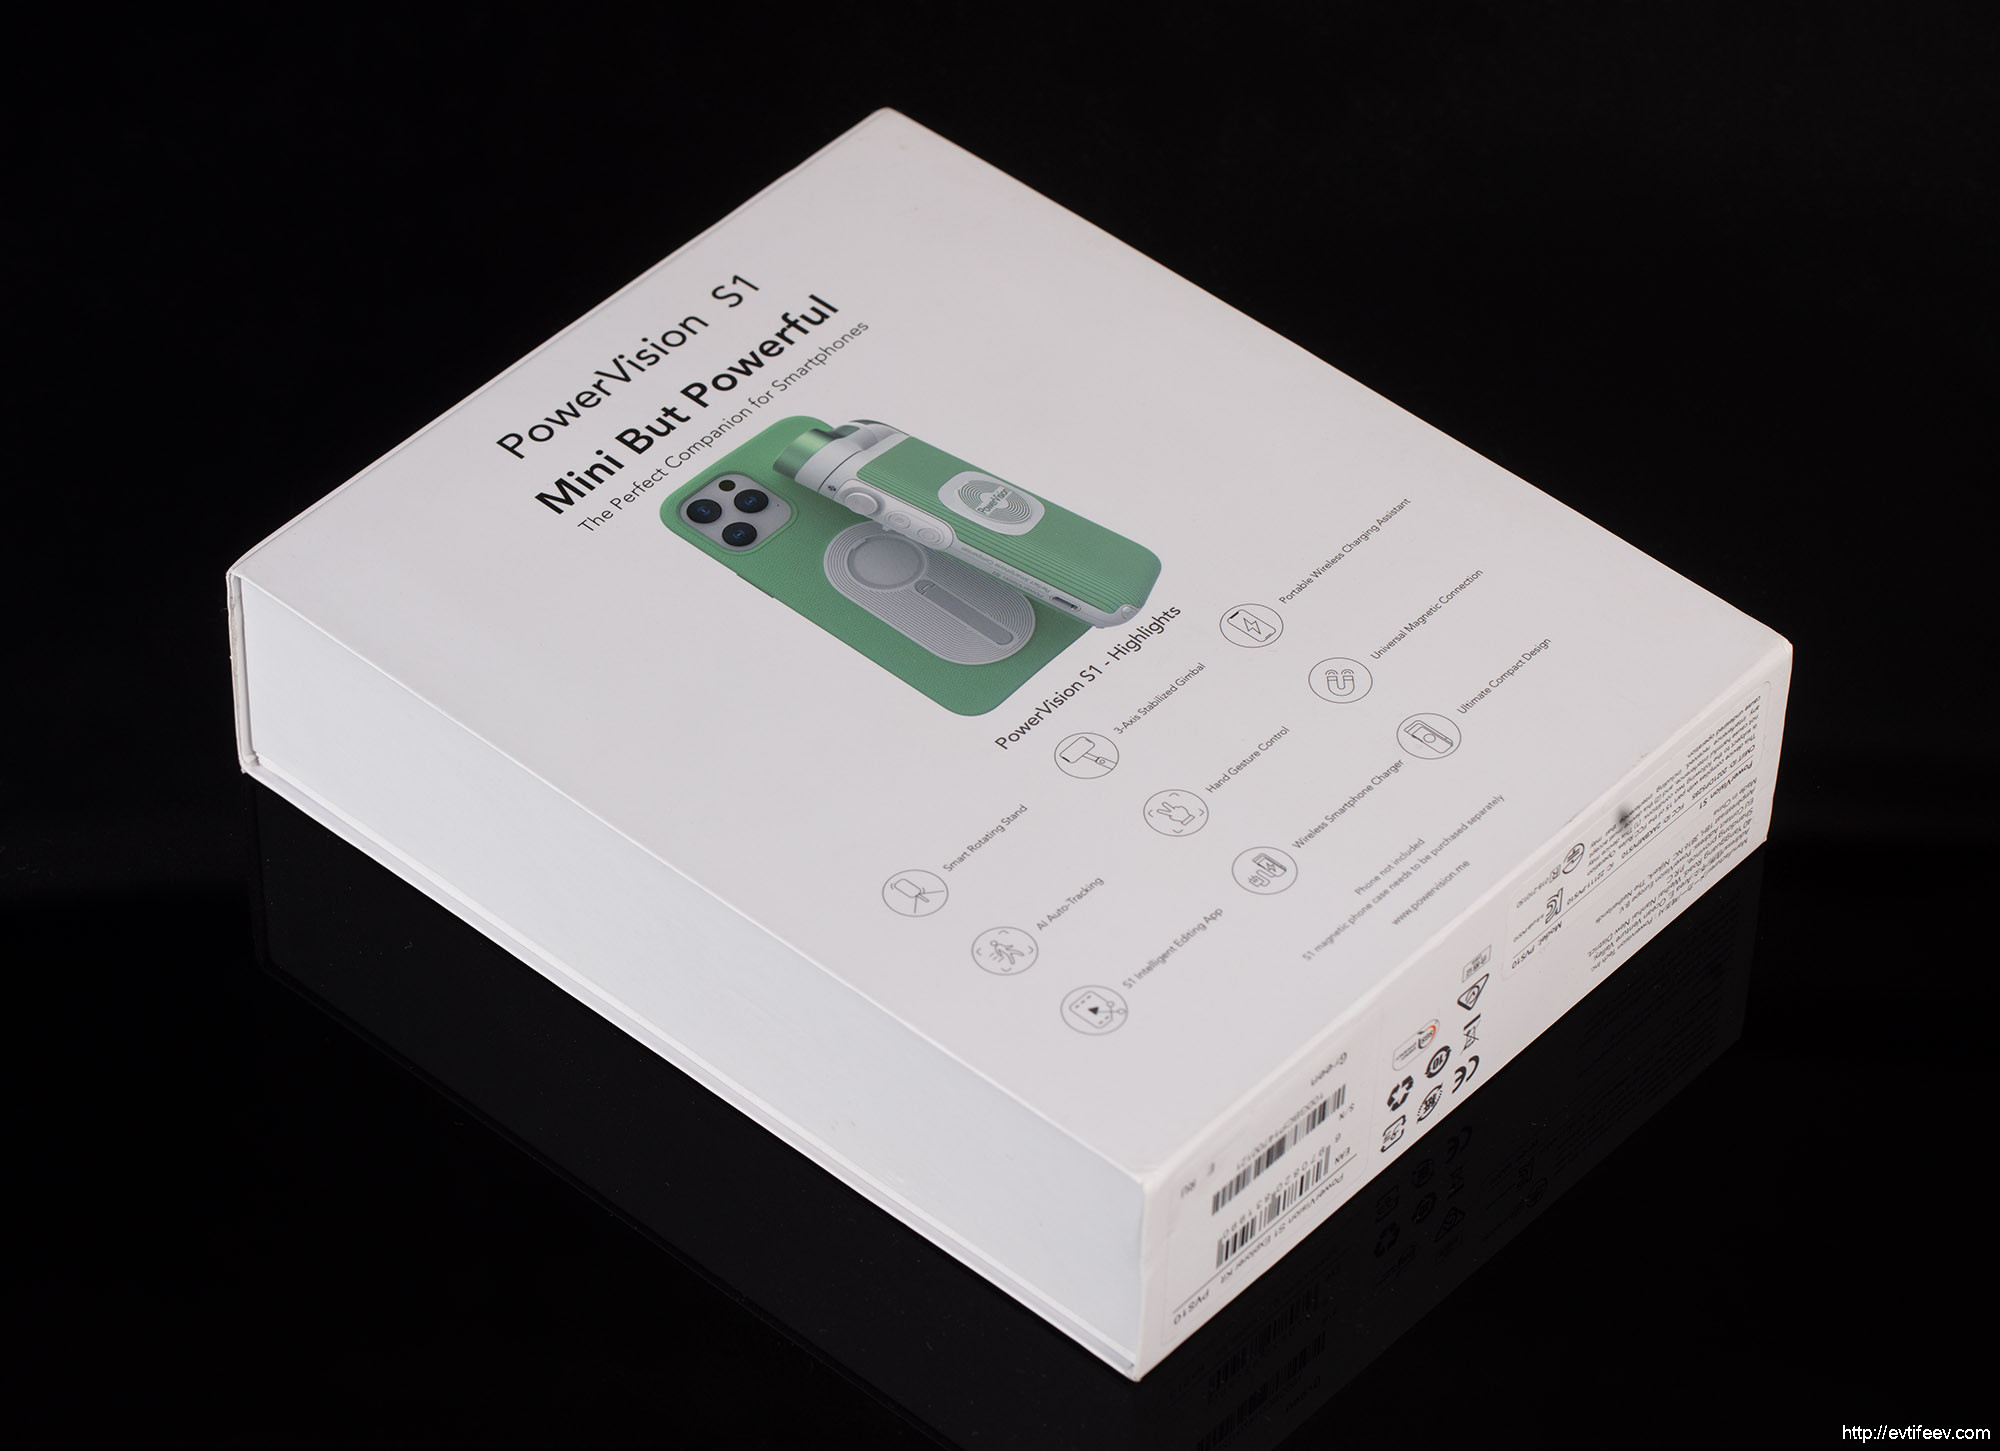
Стабилизатор Power Vision S1 поставляется в плотной картонной коробке, которая открывается как книжка.
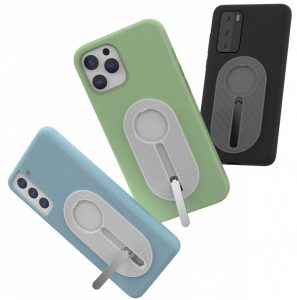
Выглядит как хороший подарочный вариант. Мне достался стабилизатор в цветах Hatsune Miku и это уже не первое устройство в нежно-салатных тонах  Есть варианты в нежно-голубом и чёрном цветах.
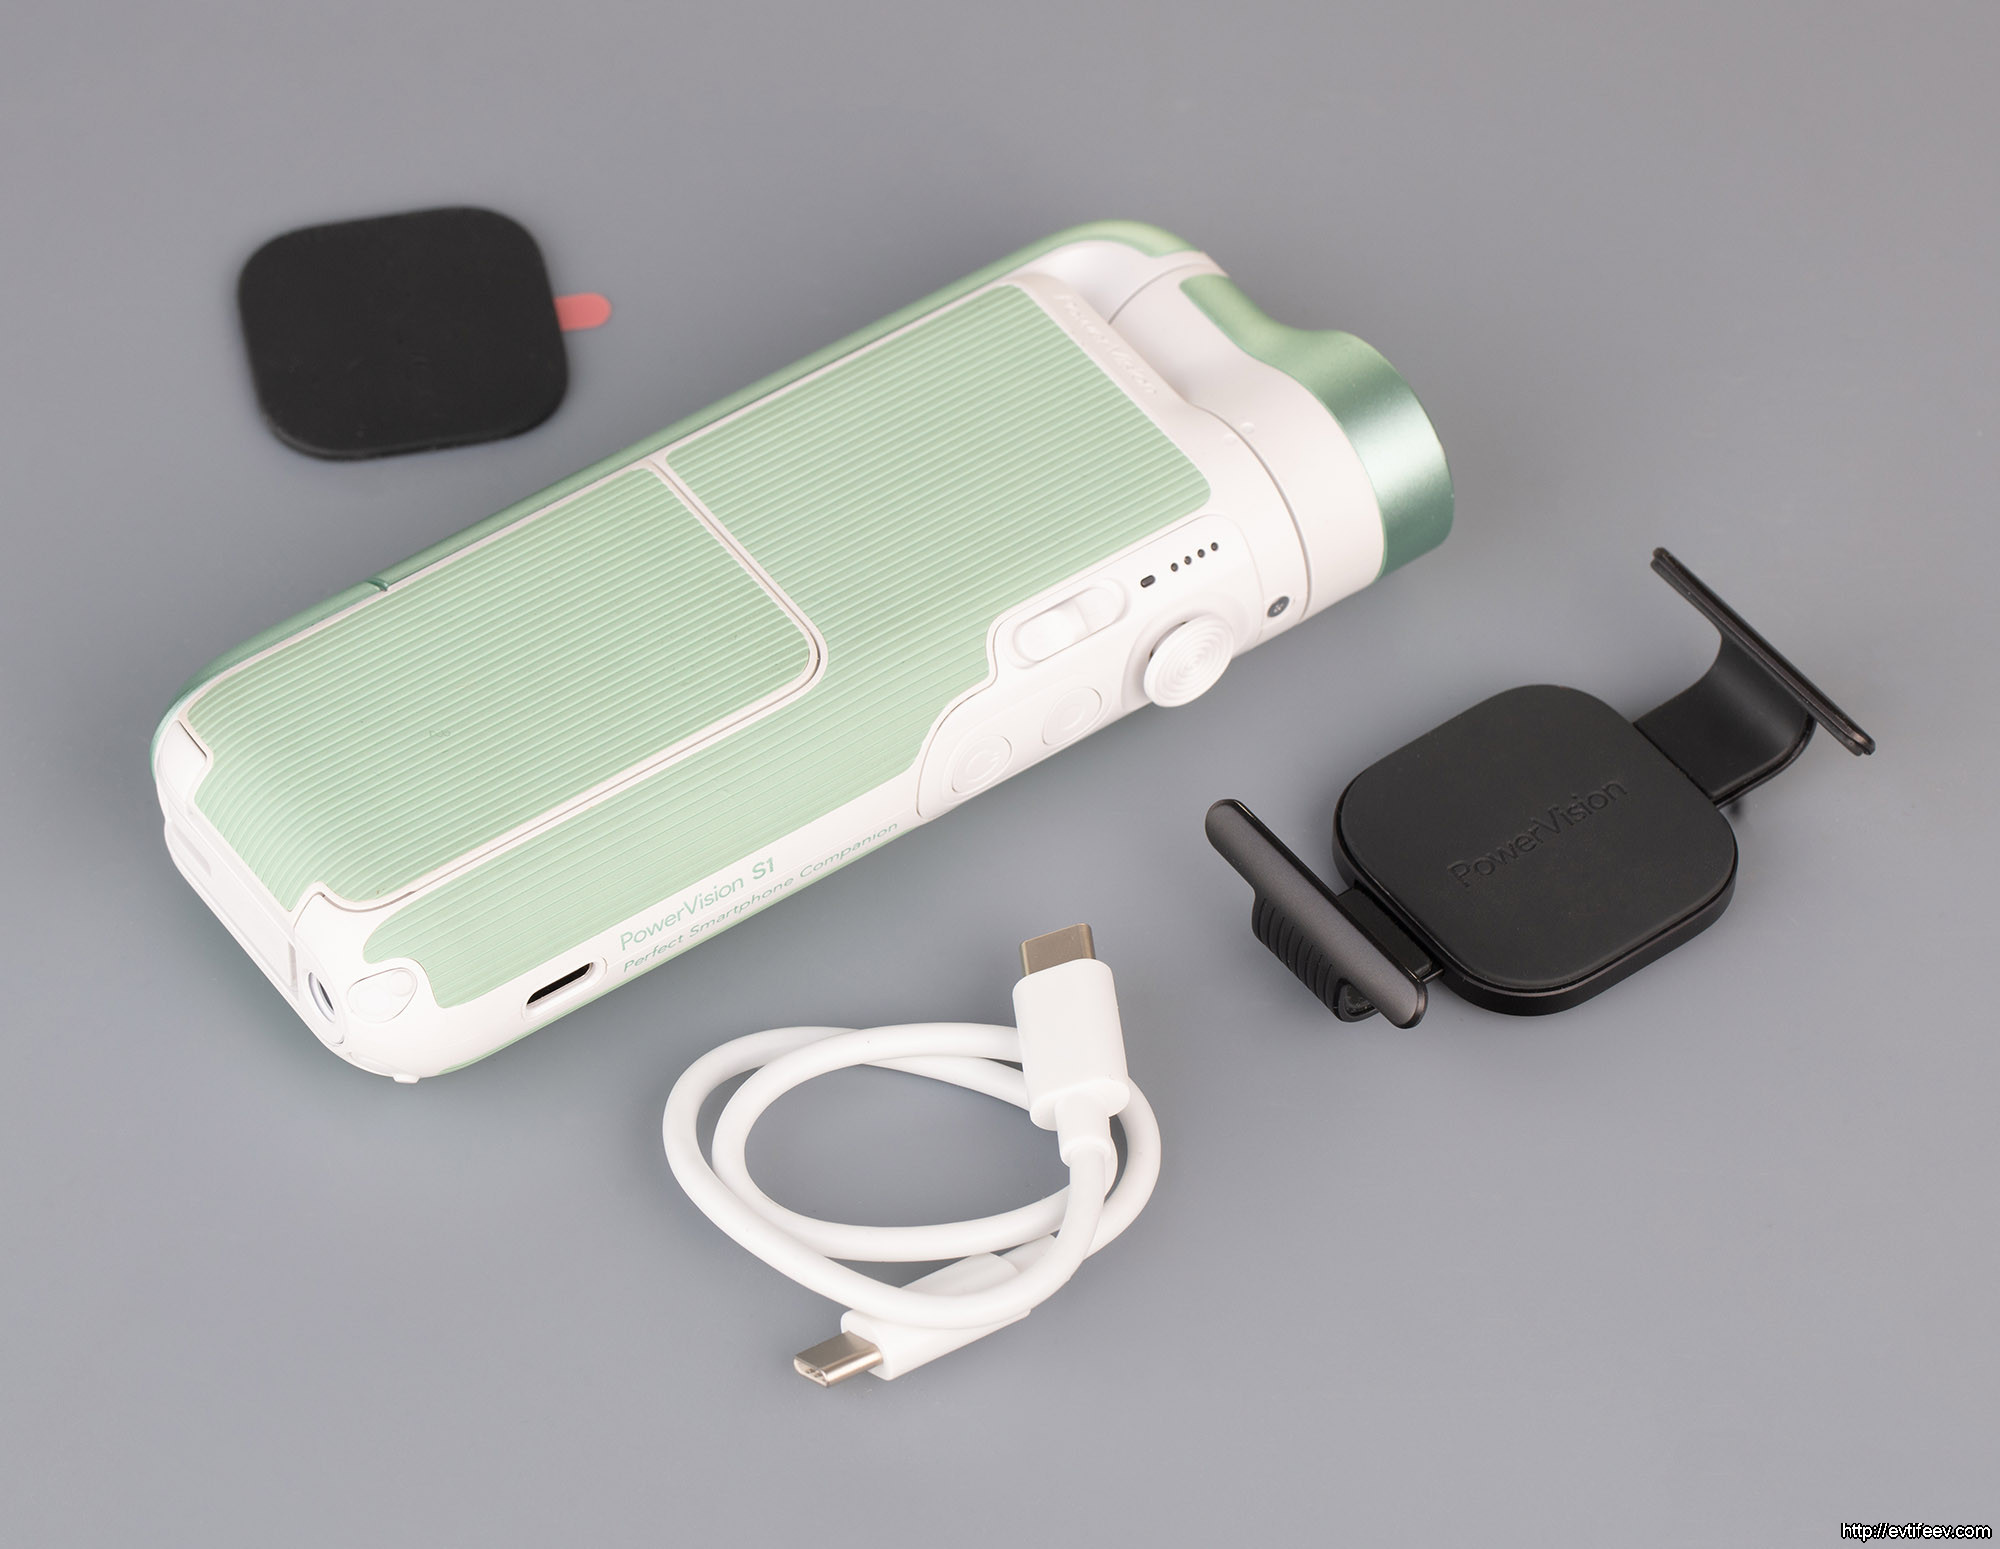
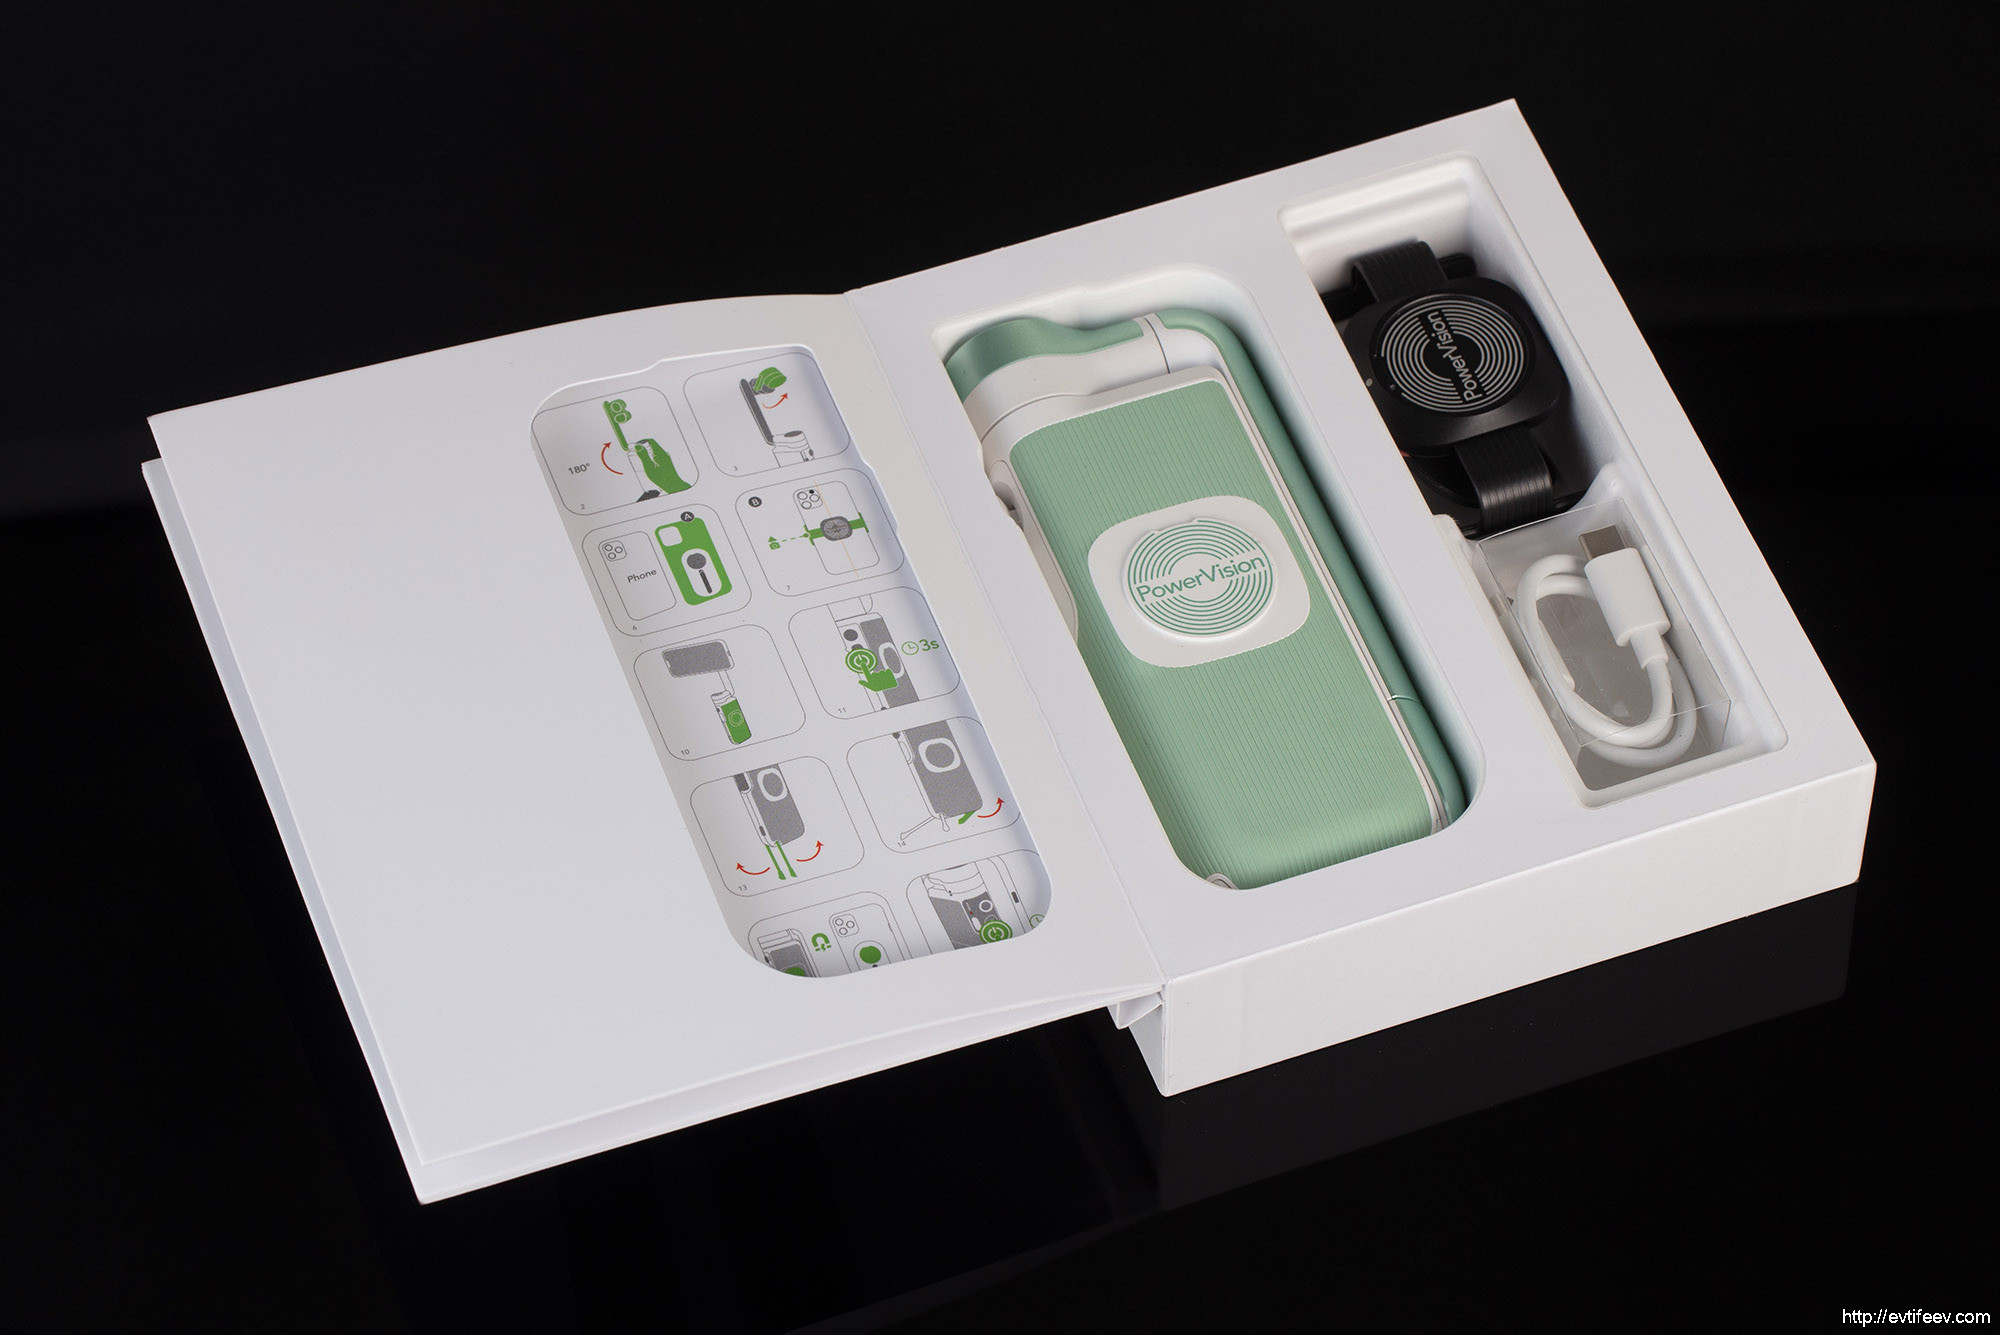
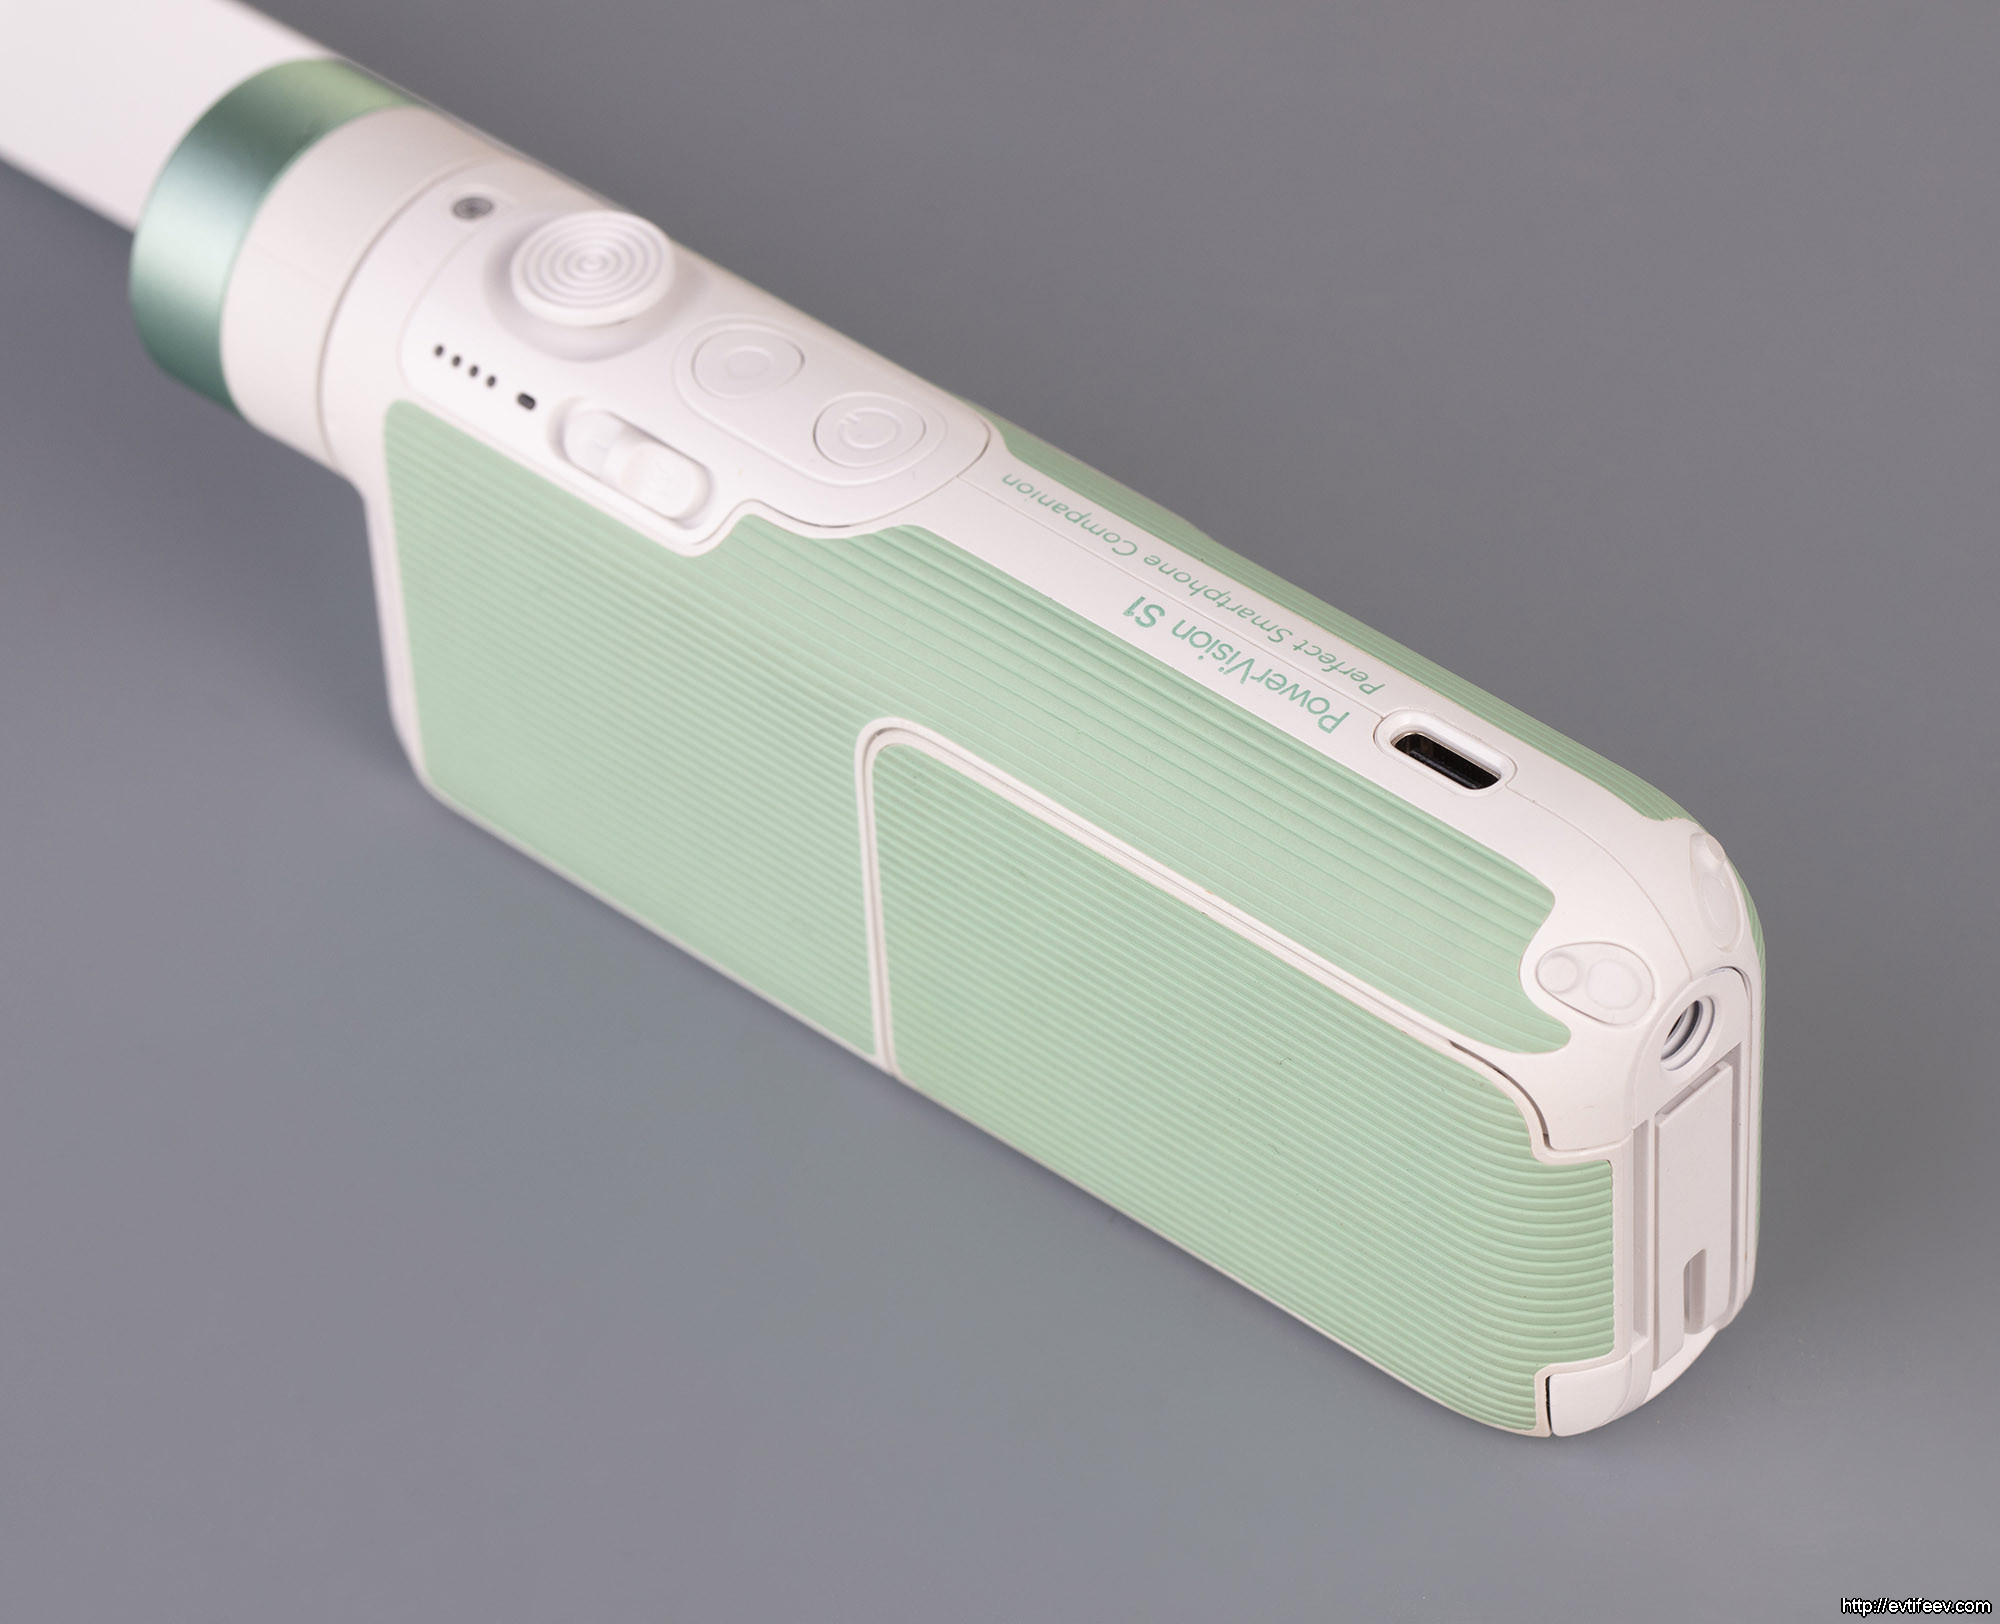
Внутри — небольшой, но достаточный набор аксессуаров. Сам стабилизатор, крепление для смартфона клипсой, мягкое универсальное крепление и шнур USB type-C для подключения к компьютеру и зарядки.
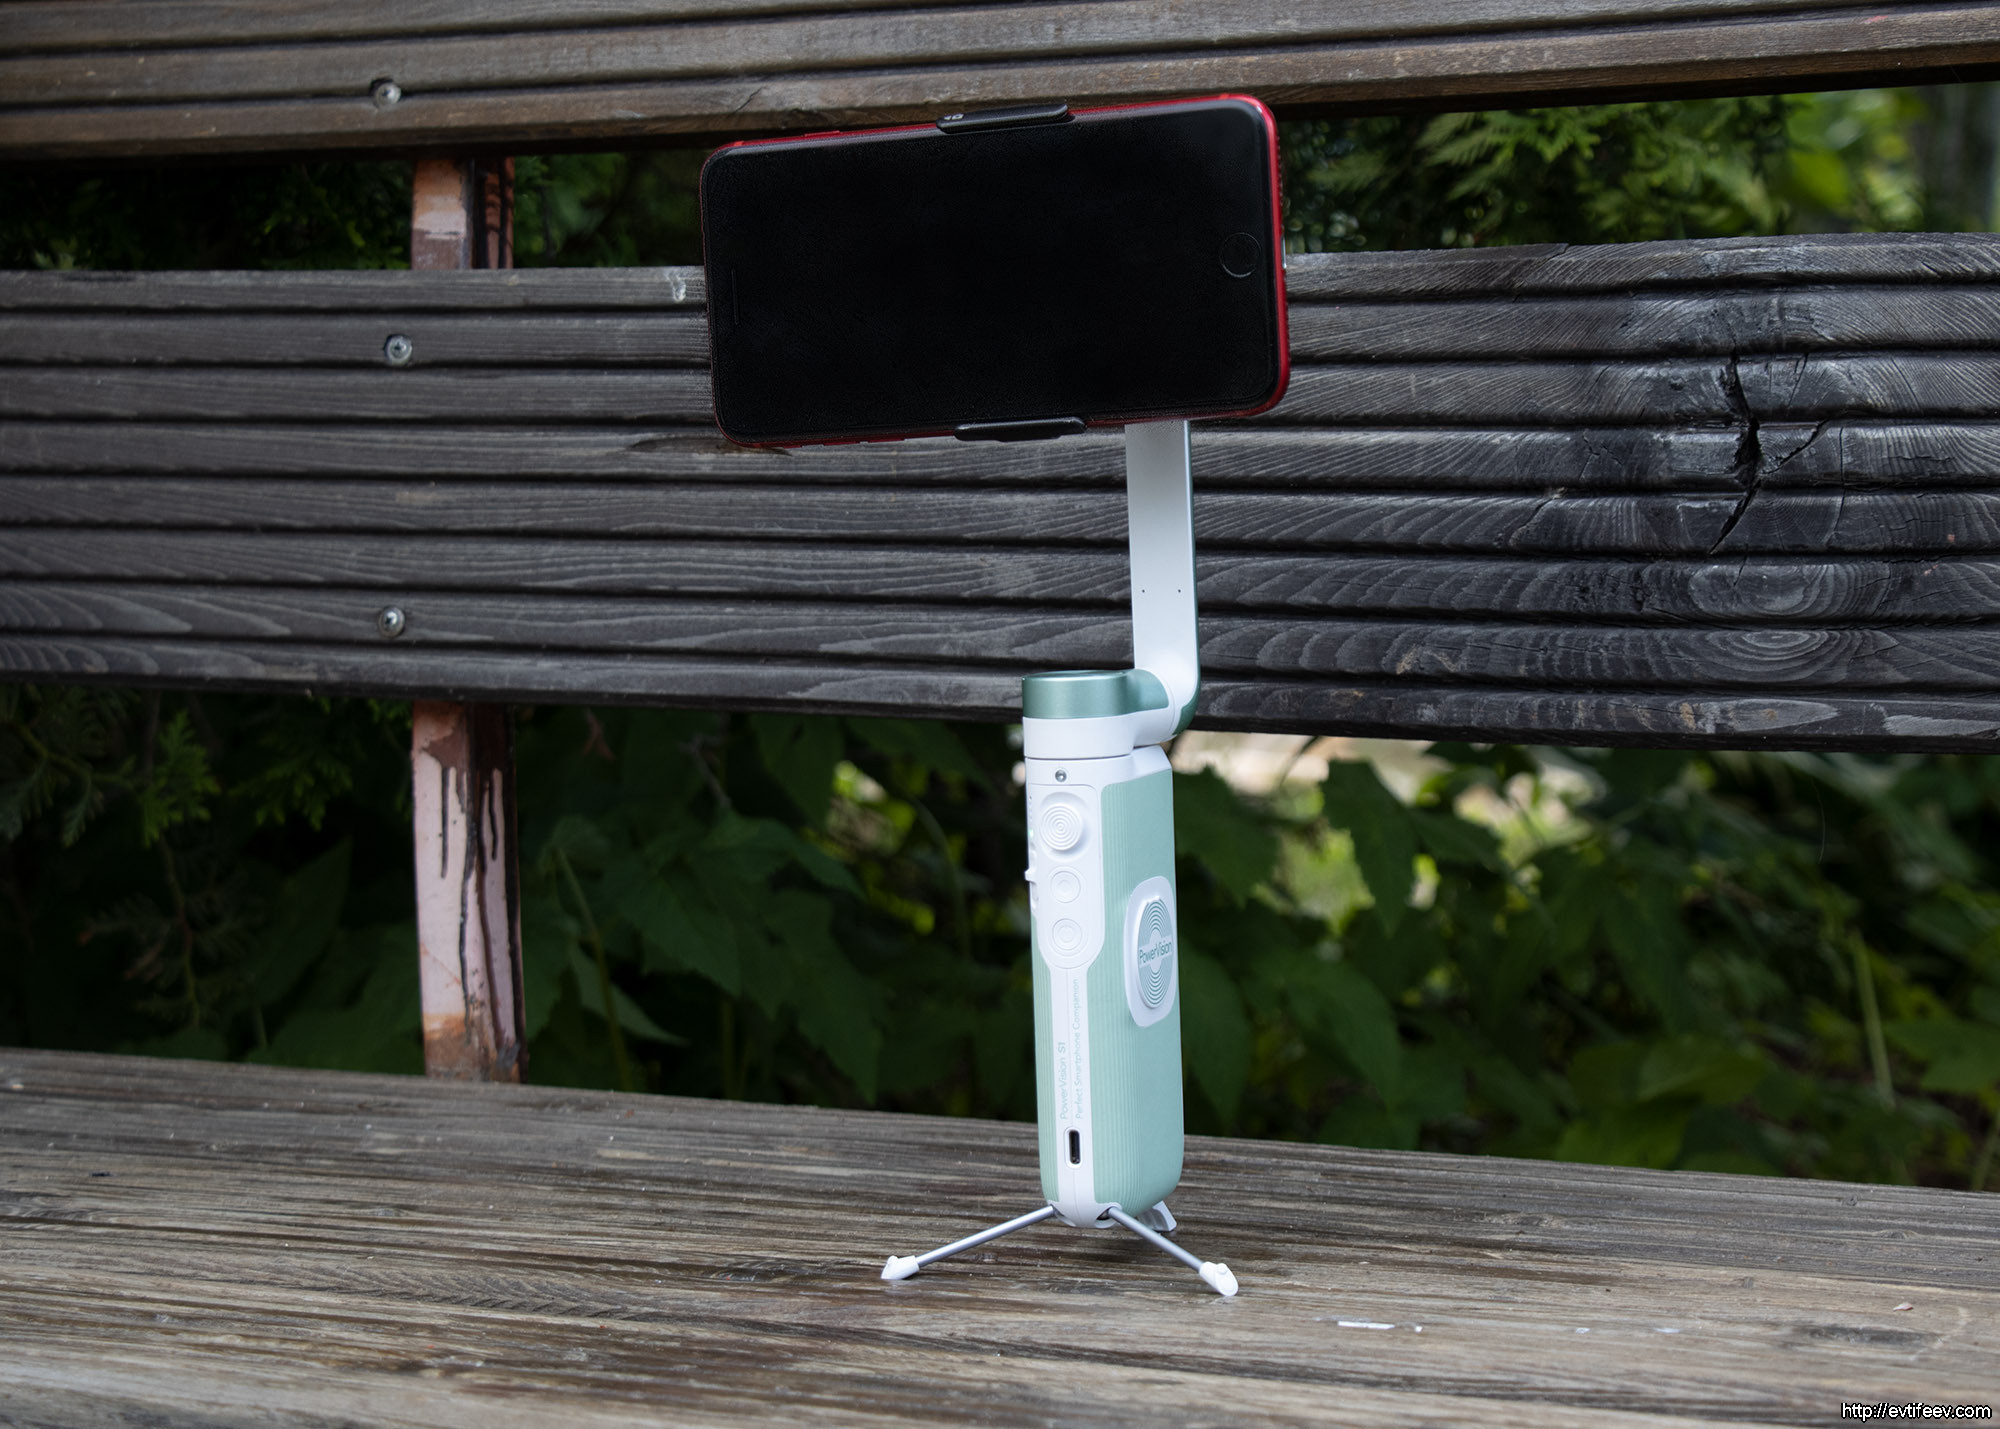
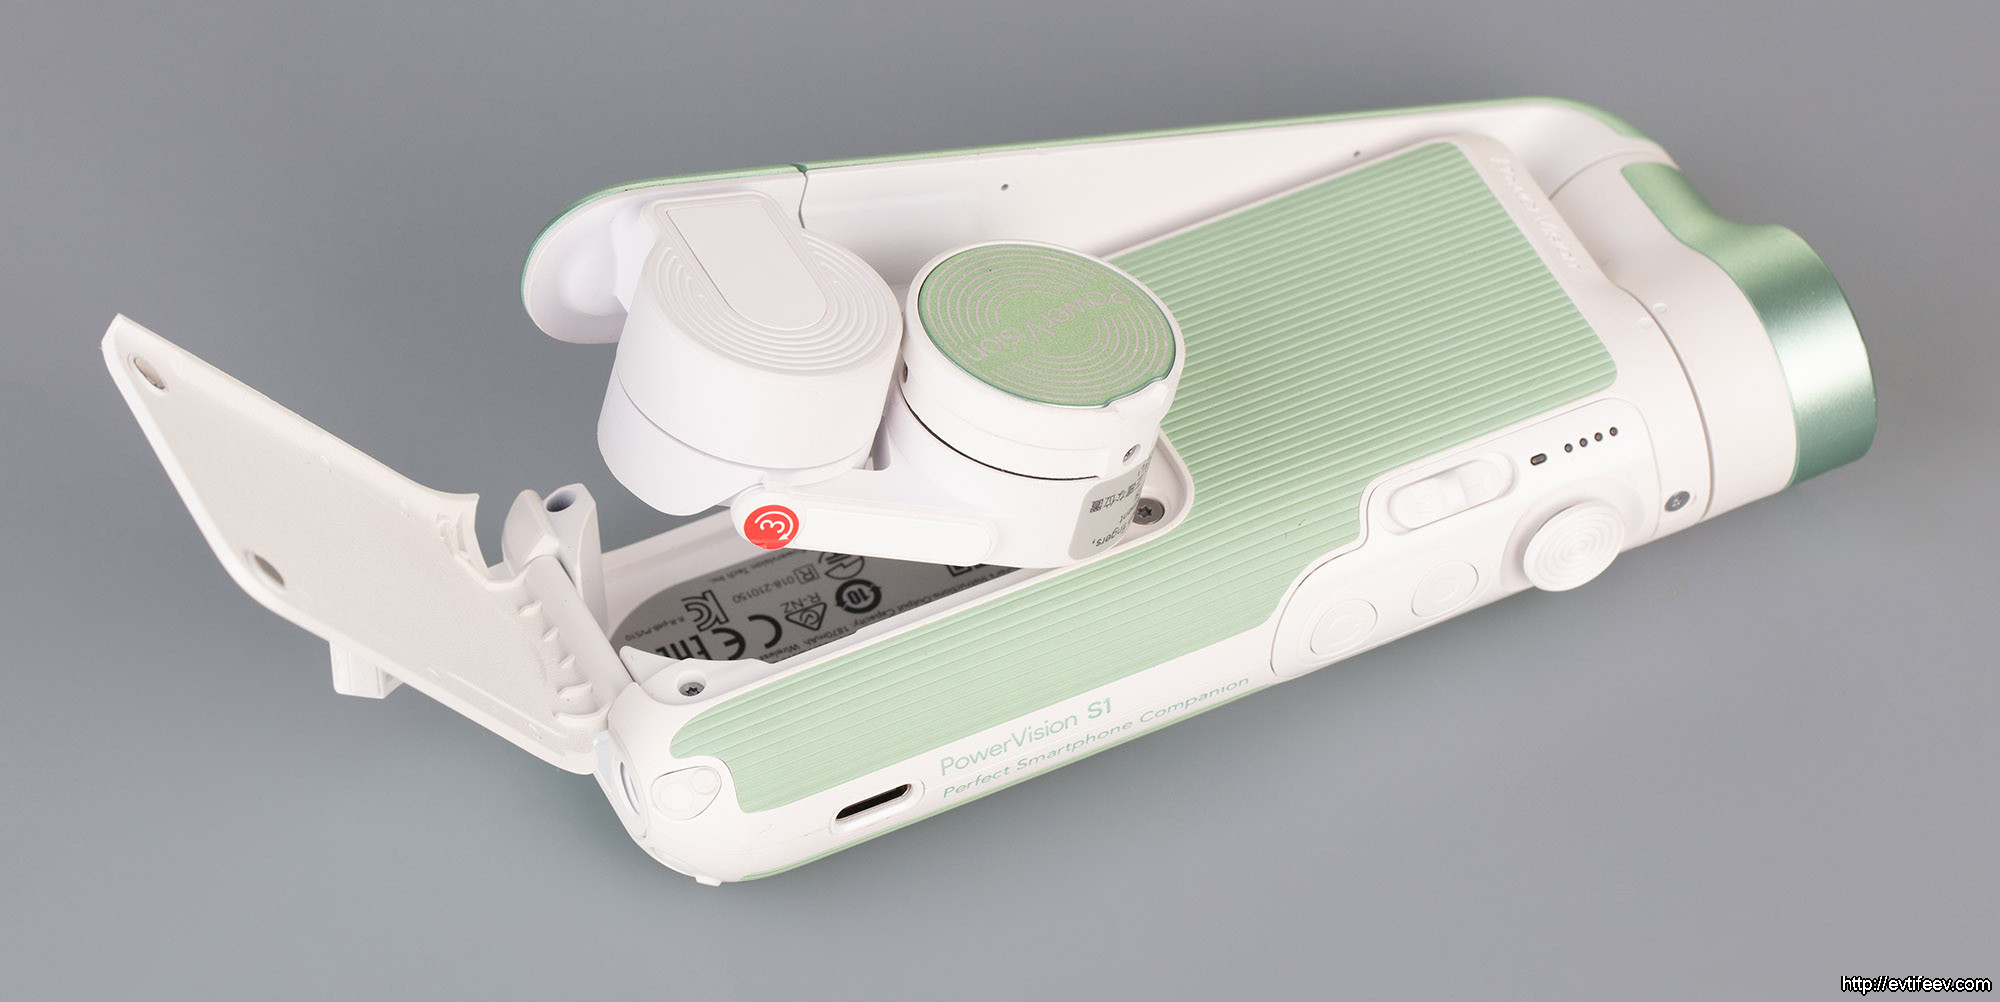
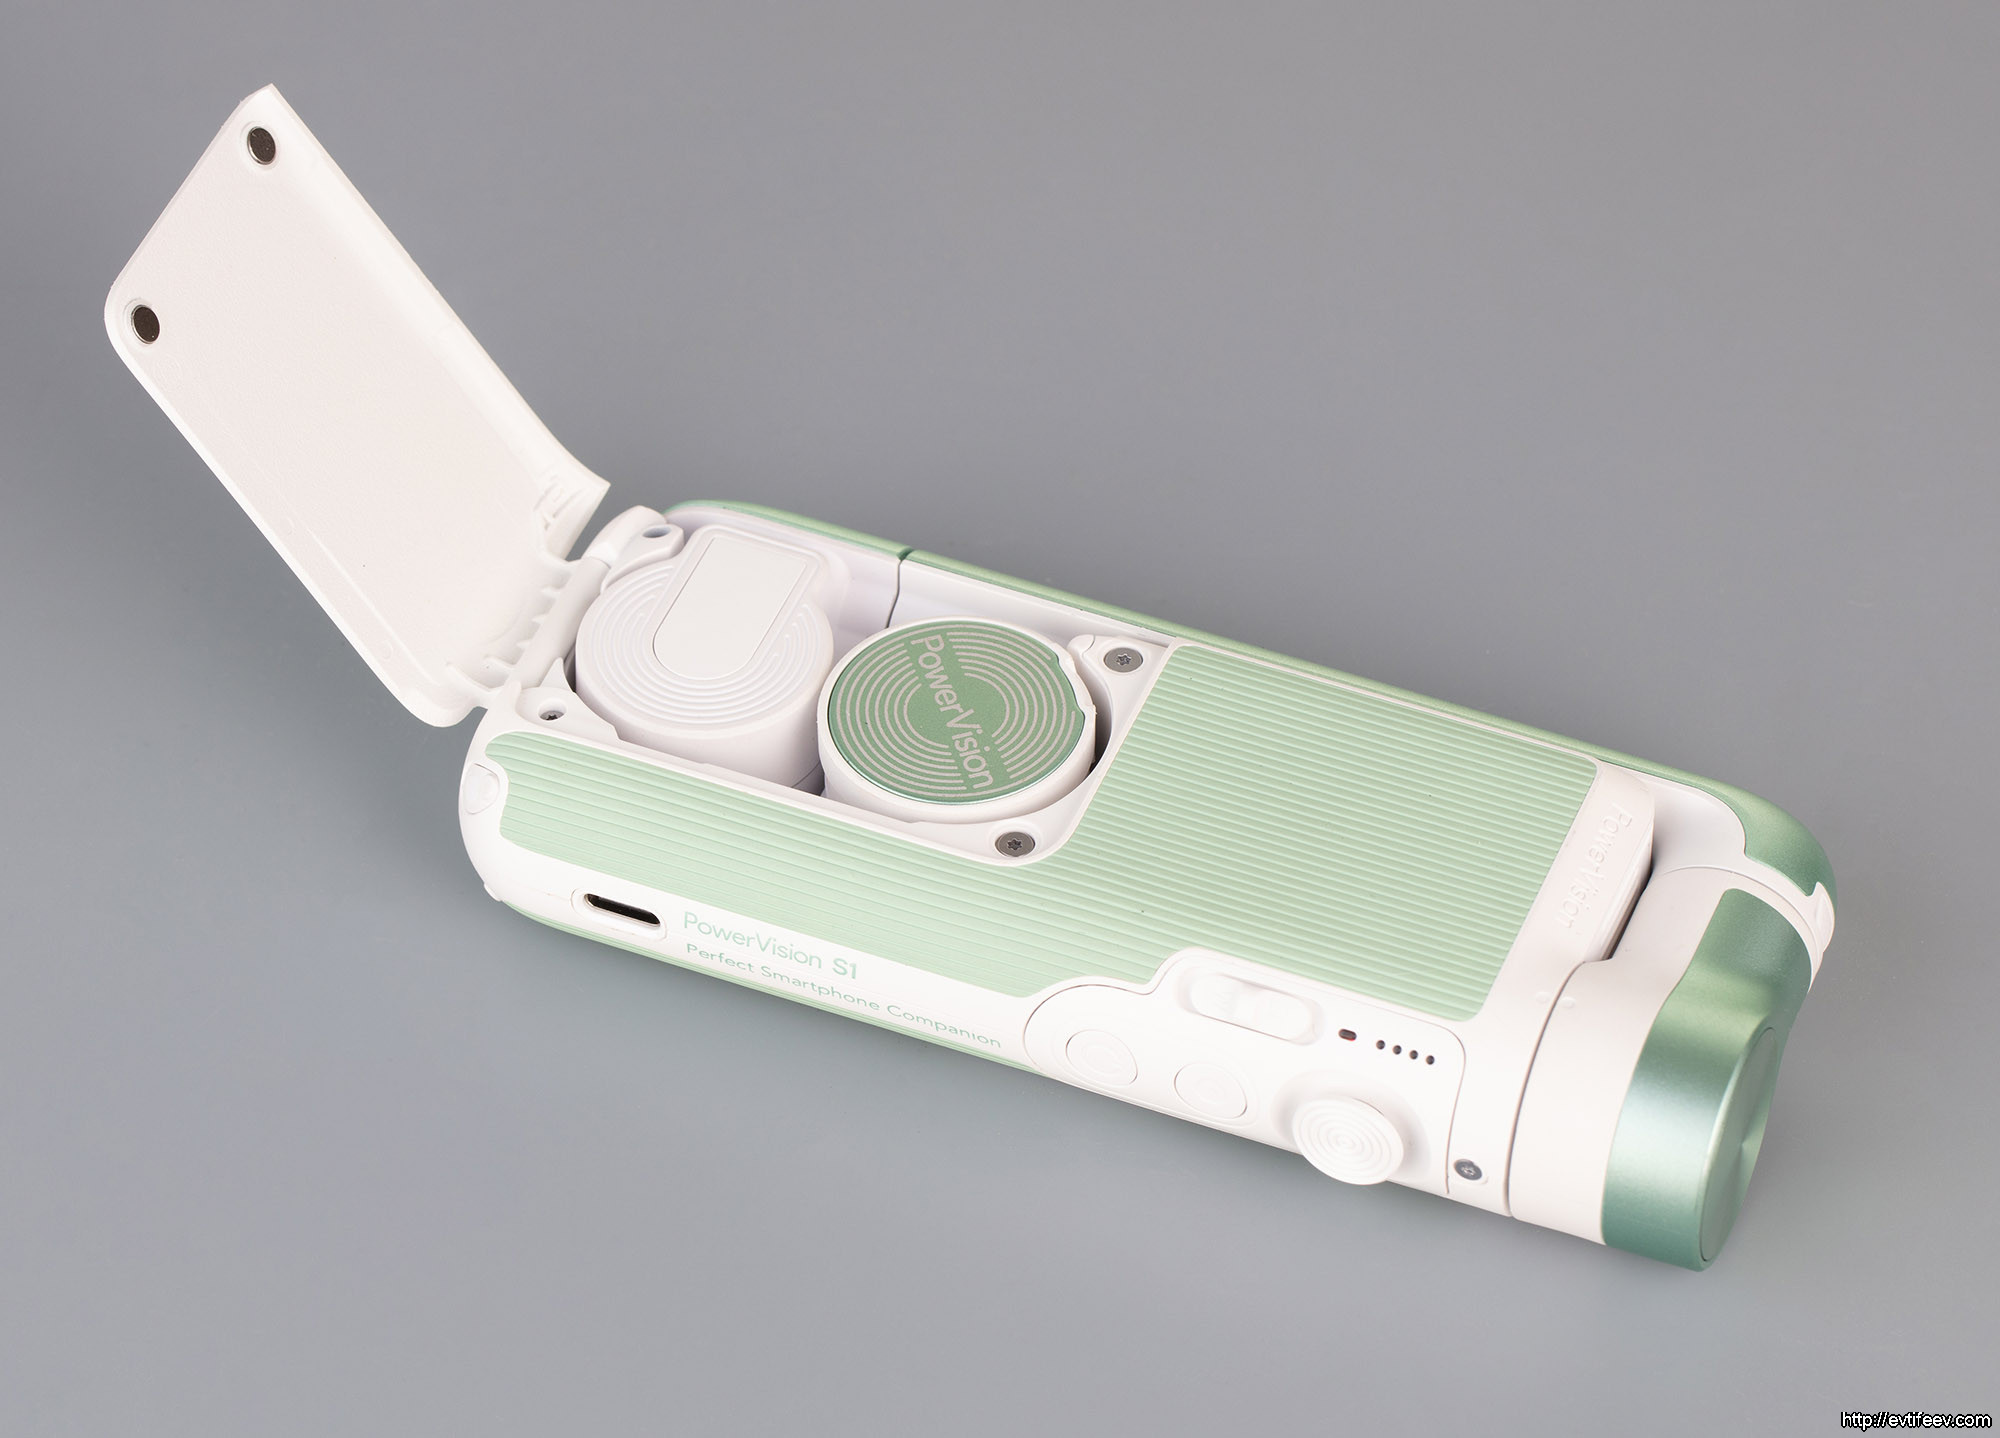
Есть еще скрытый аксессуар — мини-штатив. Стабилизатор имеет весьма дизайнерский корпус в стиле 60-ых, когда много экспериментировали с формой и возможностью интегрировать механические крепления.
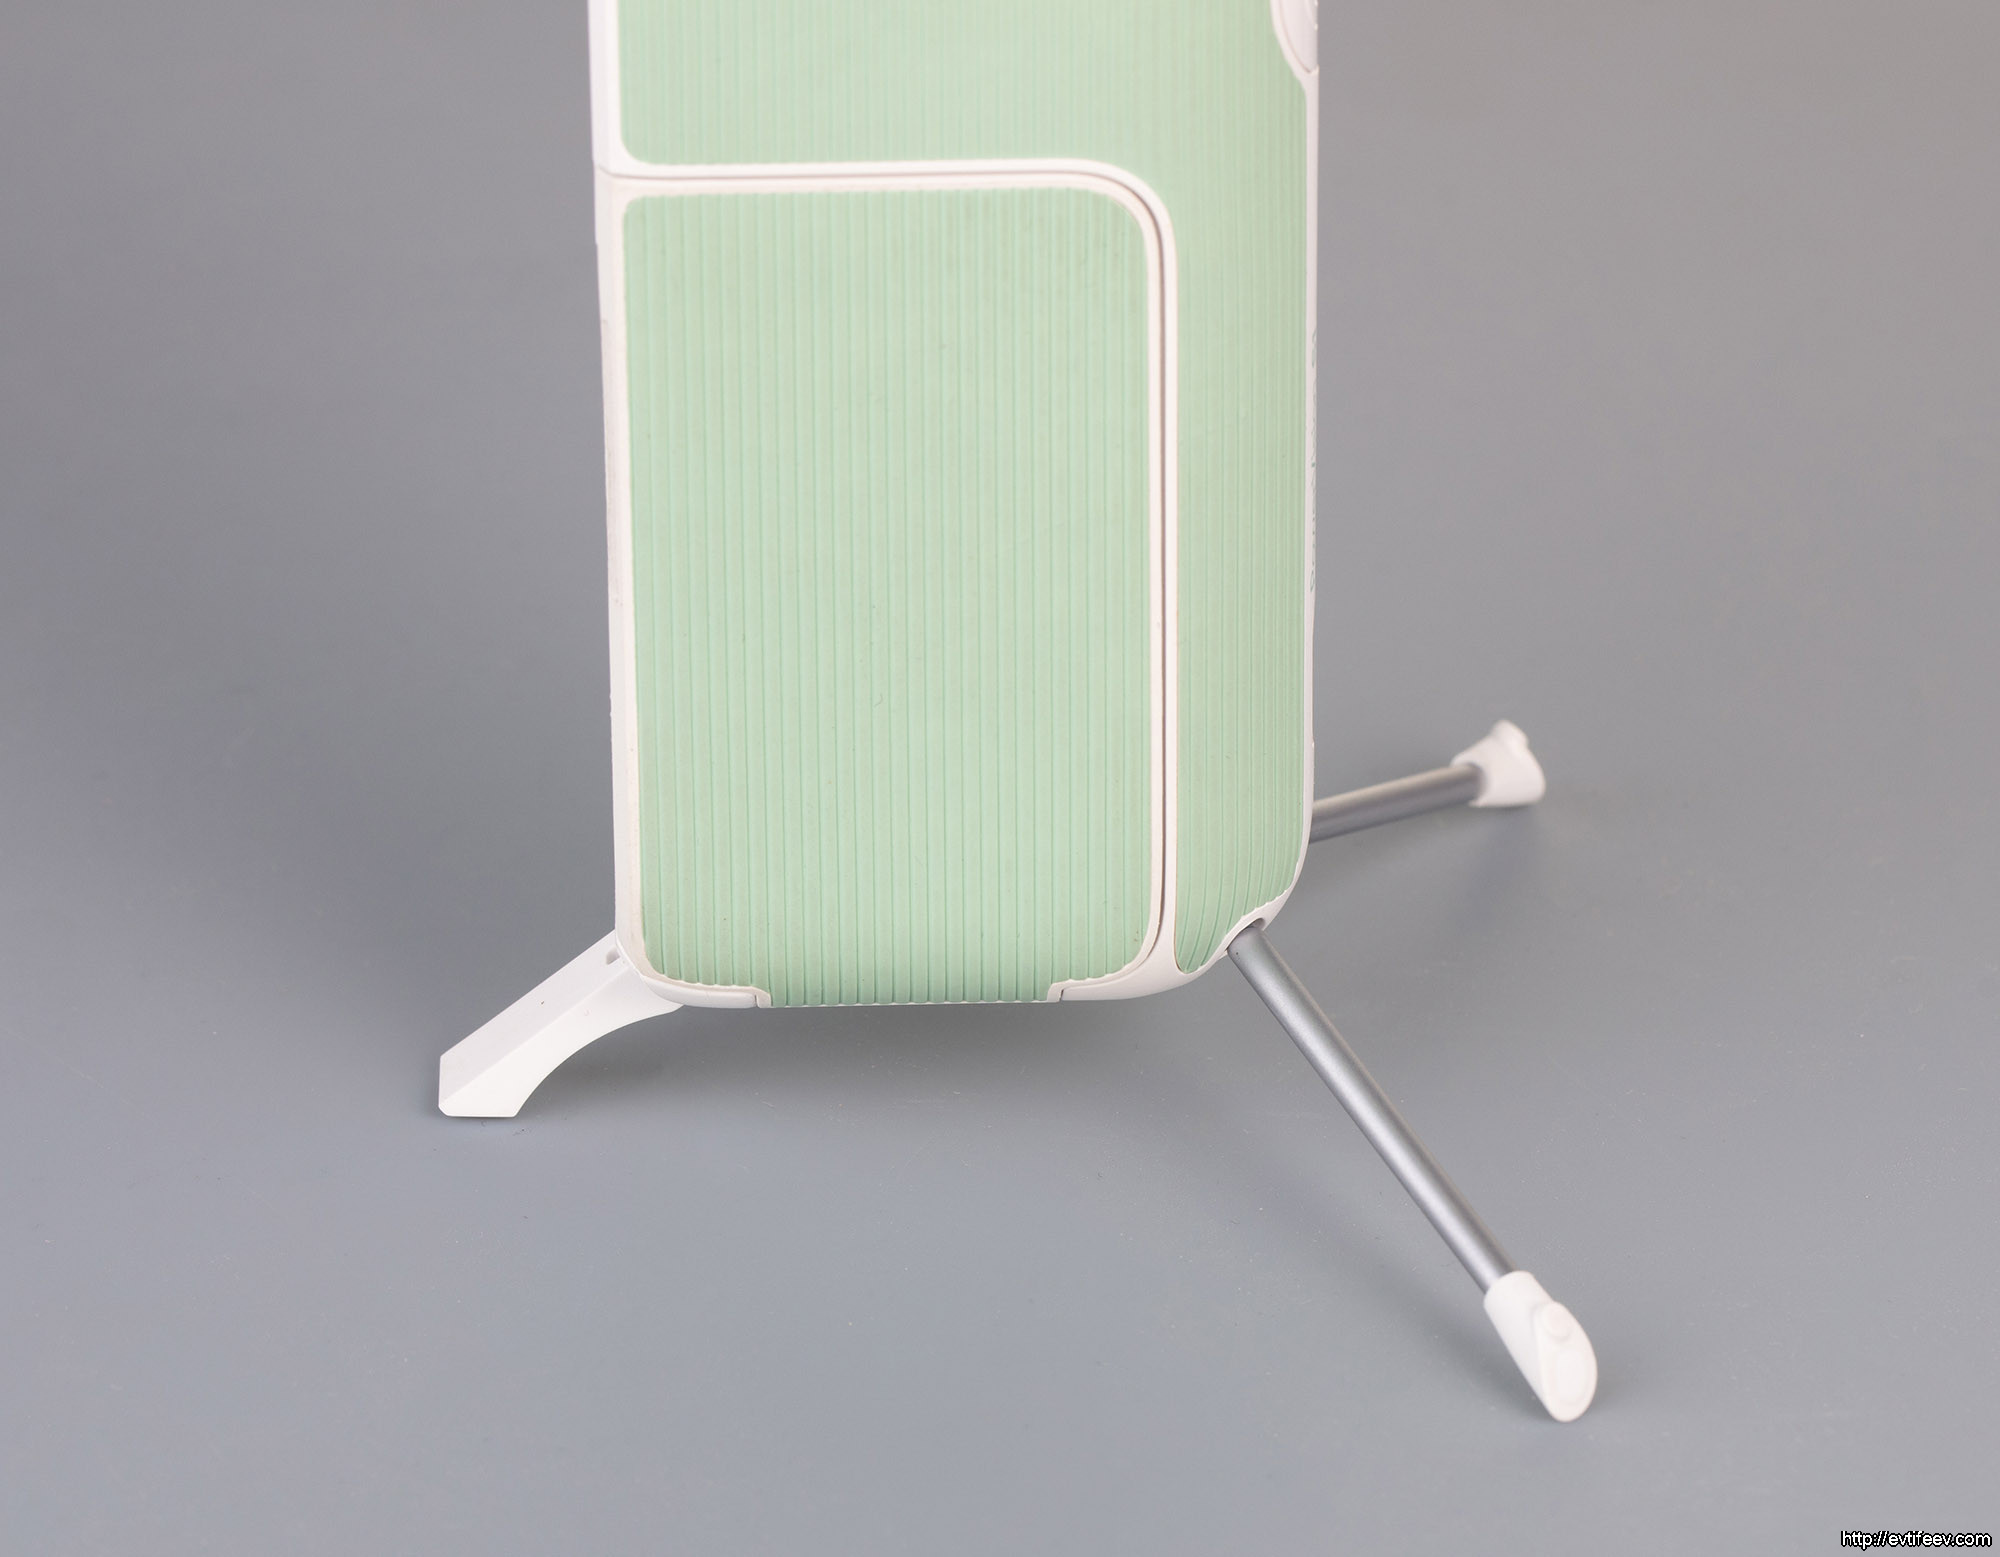
Маленькие ножки штатива так ловко спрятаны, что вы не догадаетесь об их наличии если не прочитаете заранее обзор.
Две ножки это белые круглые выступы на нижней части корпуса, а третья — пластиковая тонкая пластинка там же.
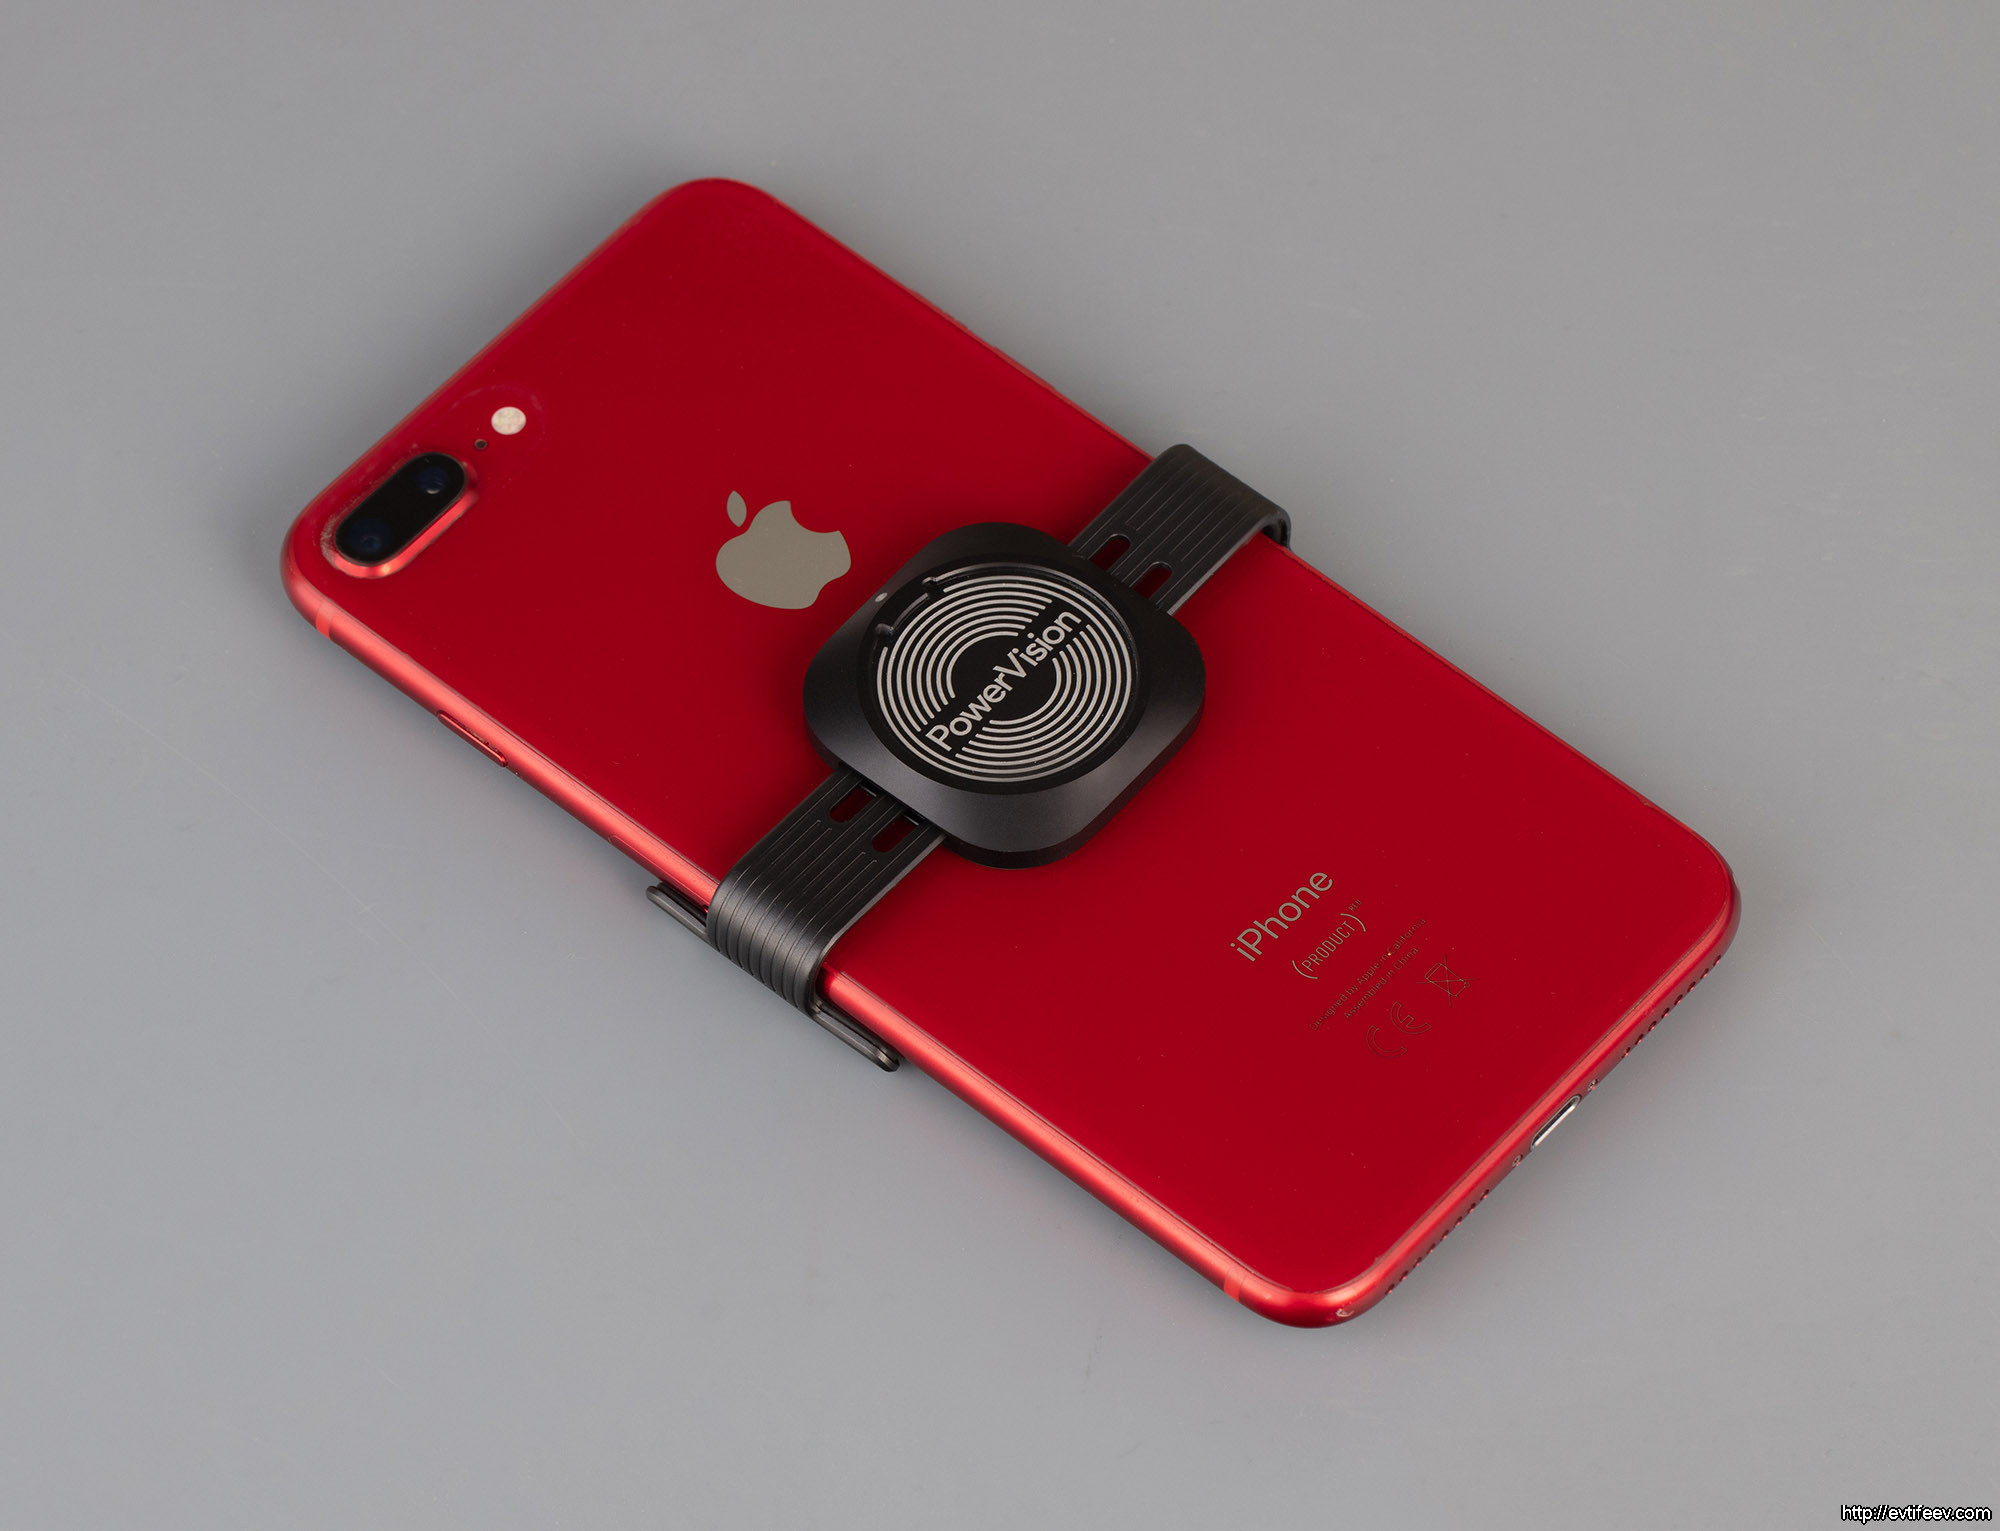
Клипса с магнитным креплением даёт возможность закрепить очень большой список смартфонов с шириной от 67 до 84 мм. Мой iPhone 8 Plus без чехла вполне поместился, хотя не заявлен напрямую. Ограничением может служить наличие кнопок в центральной части смартфона где клипса обжимает его корпус т.к. смартфон требует балансировки на стабилизаторе, а это подразумевает что он ставится по центру тяжести, примерно посередине.
И, конечно, ограничением является вес смартфона, не более 298 г.
Вот магнит, к которому крепится клипса. Он весьма мощный и бояться за то что смартфон упадёт не приходится. Клипсу с магнита снимать приходится с усилием — сделано надежно.
Магнит крепления со всем механизмом спрятан внутри корпуса стабилизатора.
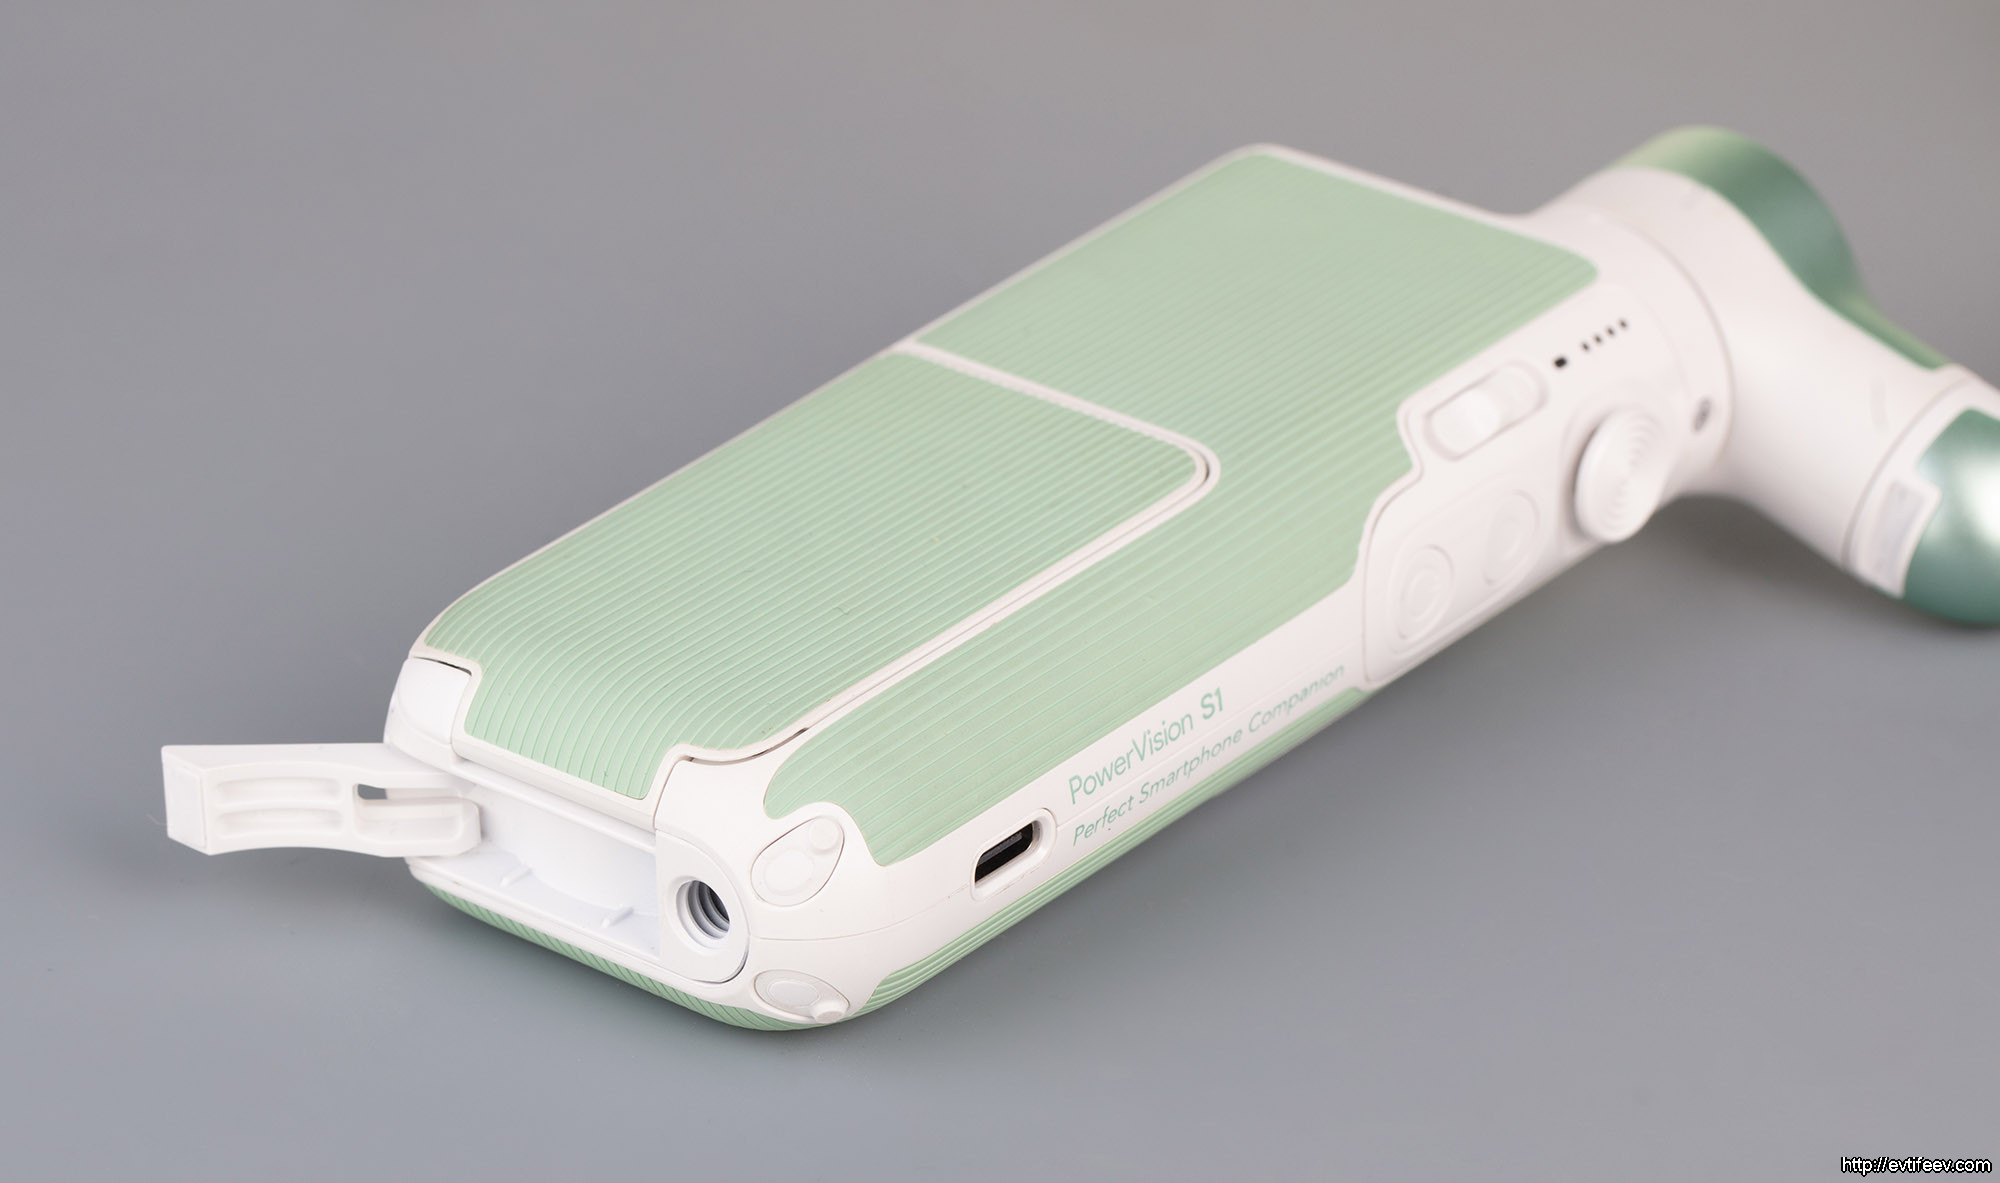
Спрятан в этом вот отсеке.
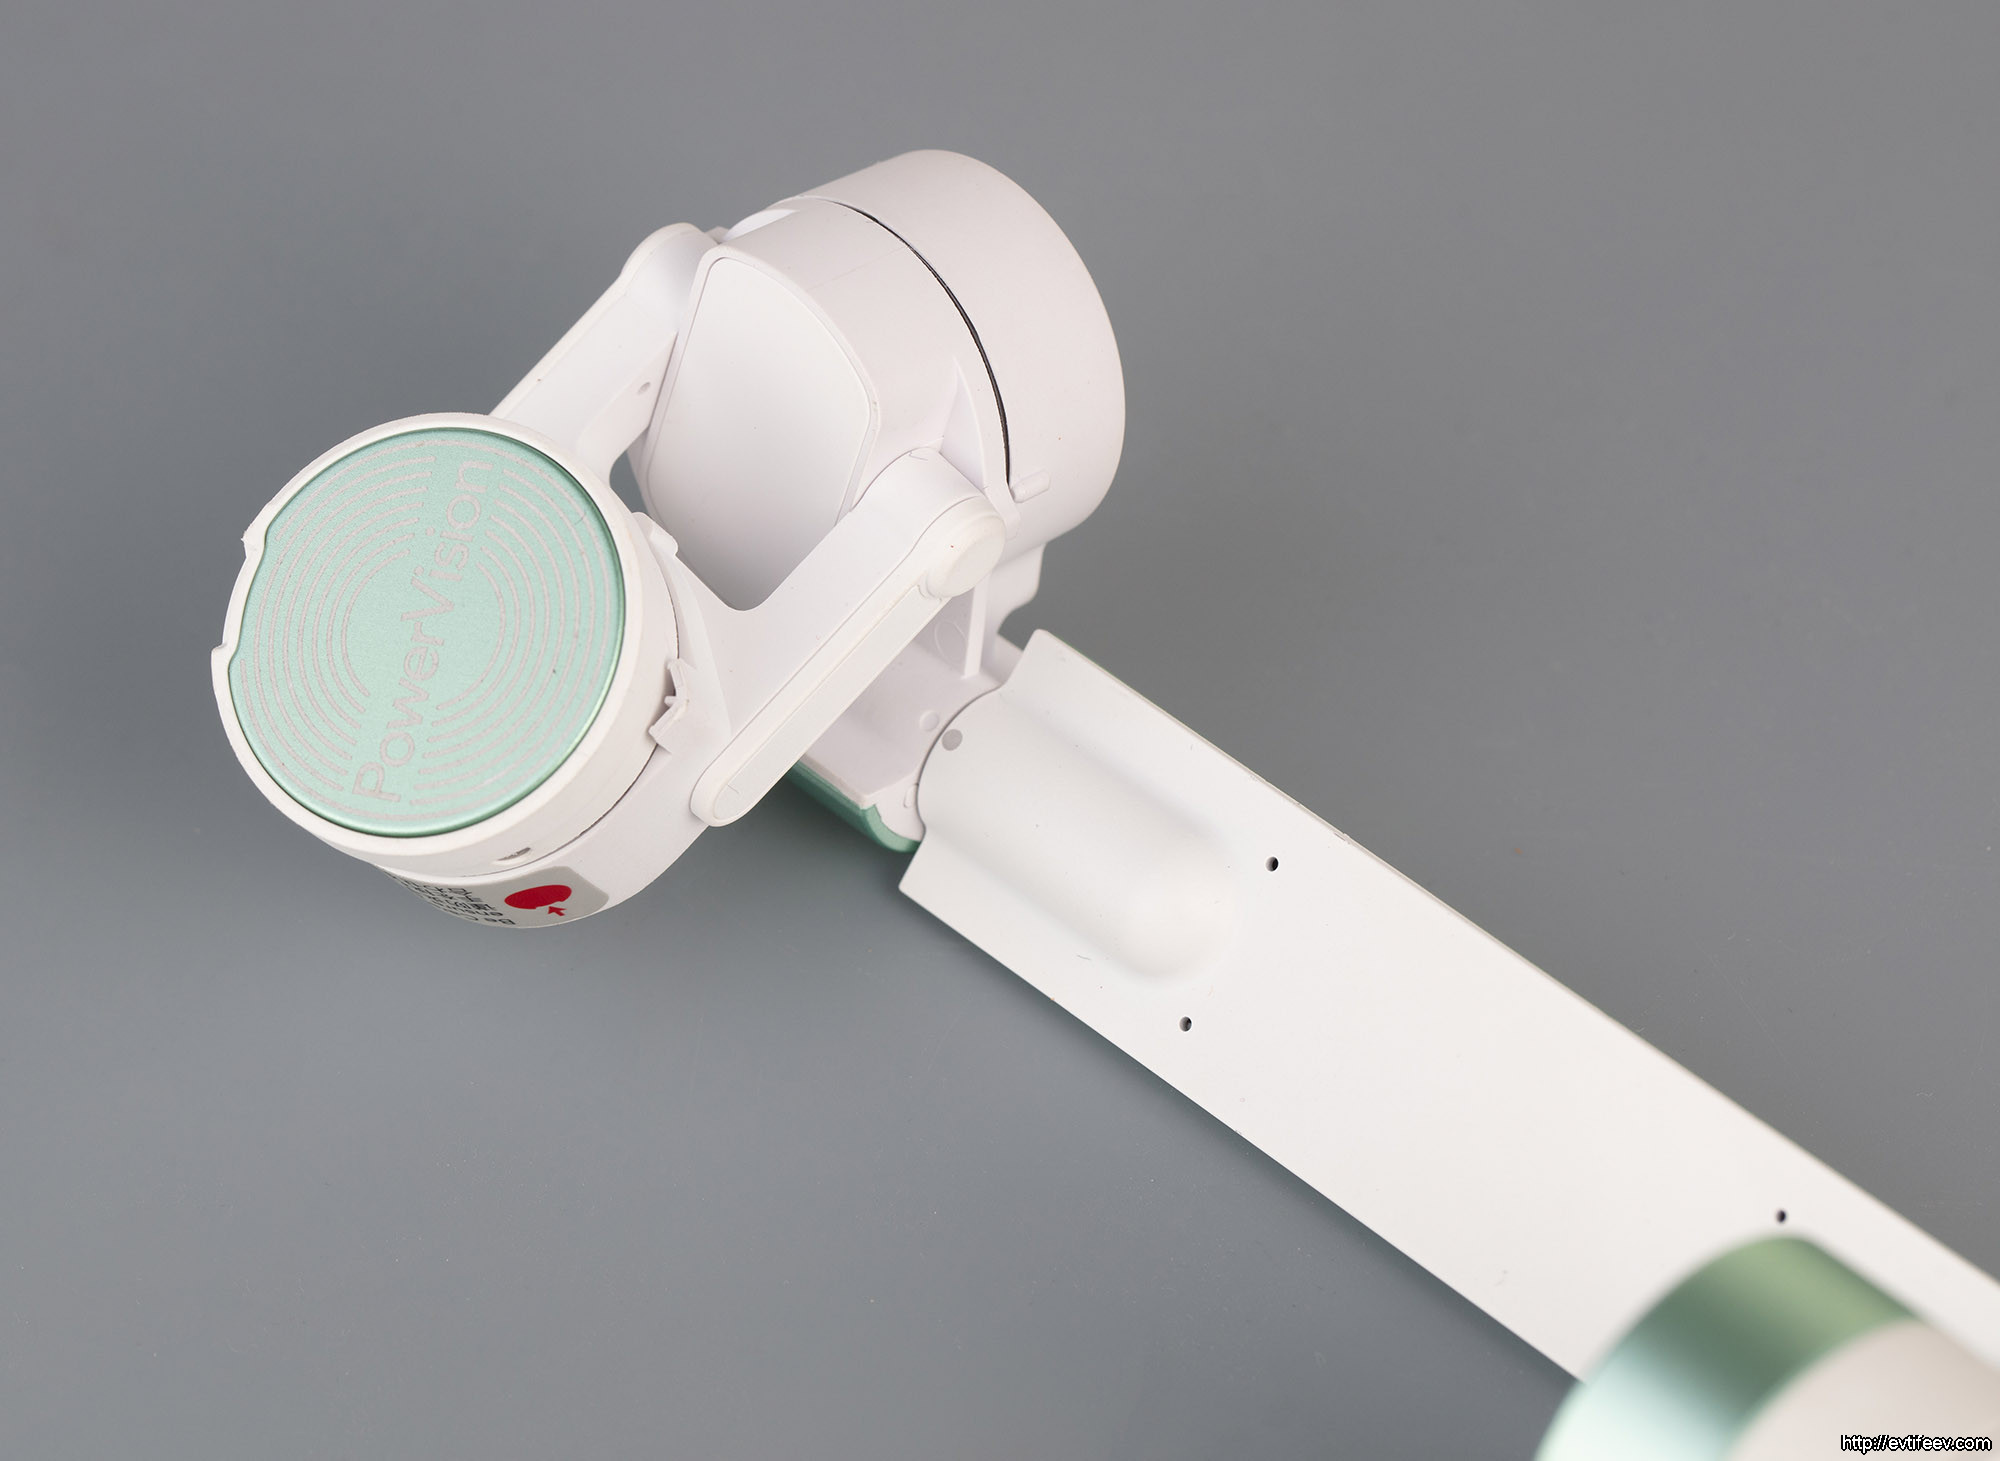
Для того чтобы привести Power Vision S1 в рабочее состояние нужно знать как это сделать т.к. изначально он сложен хитрым образом.
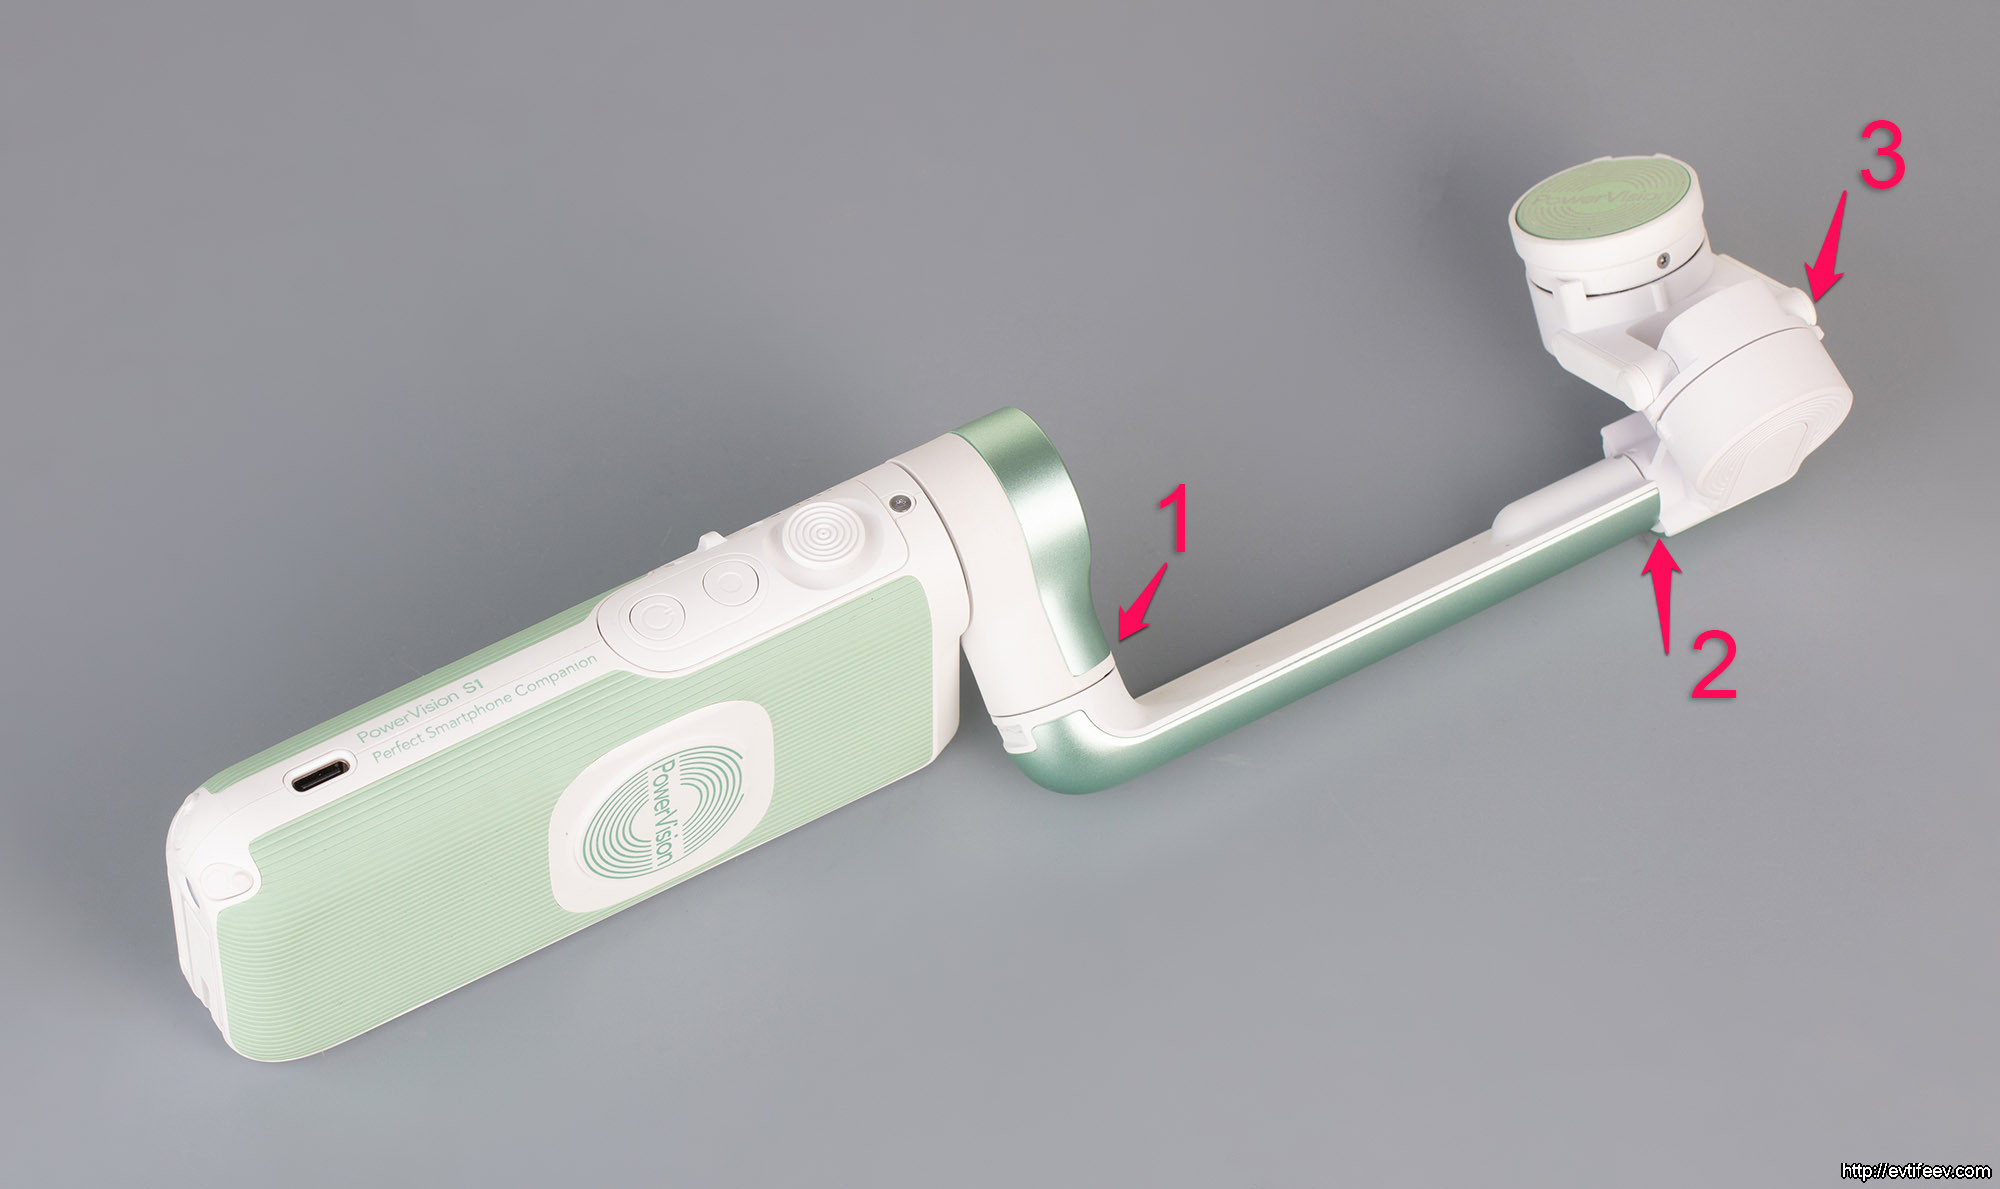
1 — первая ось вращений, которая поставит основную «штангу» в рабочее положение (и включит первый моторчик, панорамирования).
2 — вторая ось вращения, которая приведёт в рабочее положение второй моторчик.
3 — третья ось вращения, которая включит третий моторчик.
Если не уверены в своих действиях, посмотрите в приложении для смартфона Vision+S1 — там просто масса видеоинструкций как это сделать. Наверное, это вообще самый оснащенный видеоинструкциями прибор из моей практики.
Резюмируя по конструктиву — он крепкий. Внутри стабилизатора встроен Powerbank, так что он еще и ощутимо увесистый для такого малыша, что собственно хорошо для стабилизатора (в разумных пределах).
Конструкция Power Vision S1 необычная, но единожды разложив его по инструкции привыкаешь и легко раскладываешь уже без опасений повредить (а когда смотришь на него в первый раз, то не понимаешь как разложить не посмотрев соответствующее видео).
Встроенный мини-штатив удивителен и удобен если нет никакого штатива. Я лично сторонник чтобы было что-то когда нет ничего На ровном столе таким штативом вполне удобно пользоваться и я могу легко представить ситуацию типа записи видеоблога, где это востребовано и позволяет не носить с собой маленькие китайские штативы занимающие место.
к содержанию ↑
Краткая инструкция по пользованию электронным стабилизатором Power Vision S1
На корпусе Power Vision S1 три кнопки и рычажок зума. Функций на кнопки «завязано» много, так что расскажу кратко как пользоваться.
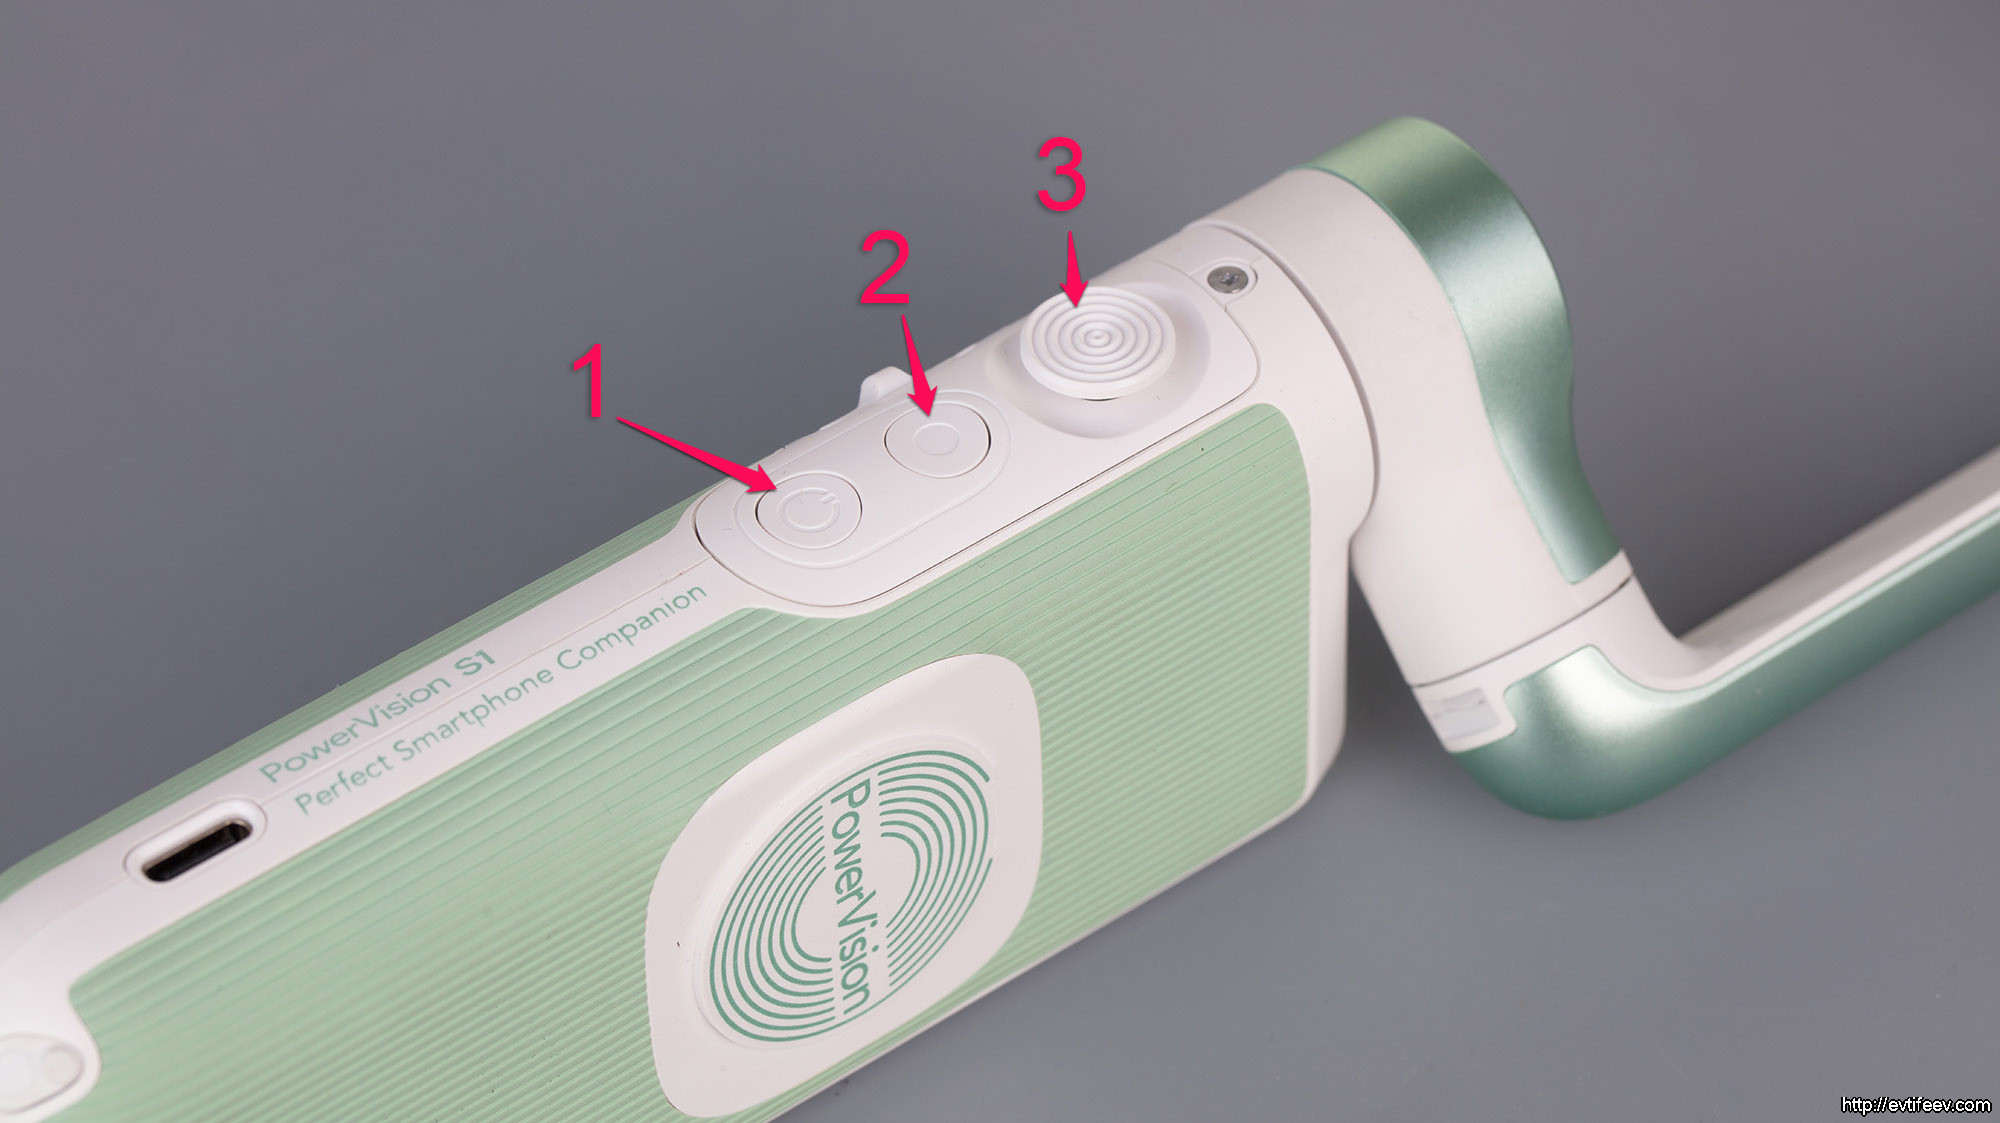
Одно нажатие на кнопку питания (1) покажет вам заряд аккумулятора и осуществит переход в режим повербанка.
В режиме съемки двойное нажатие на кнопку питания осуществит переворот с альбомной ориентации смартфона на портретную или обратно.
Долгое нажатие на кнопку питания выключит стабилизатор.
Кнопку (2) можно назвать кнопкой «спуска» т.к. она включает съёмку фото или видео. Коротким нажатием снимаем фото в режиме фото или включаем запись видео в режиме видео.
Одинарное нажатие на джойстик (3) включит режим трекинга (слежения) за объектом. Повторное нажатие — выключит.
В остальном джойстик позволяет настаивать наклон установленного смартфона вперед-назад в поворот влево-вправо.
Двойное нажатие на джойстик осуществит центровку смартфона (такая функция есть во всех стабах).
Одинарное короткое нажатие, а потом длинное включает спортивный режим, где стабилизатор даёт больше мощности на моторы, что актуально, например, при съемке спорта.

На другом боку Power Vision S1 есть так называемая «качелька», которая осуществляет зум в режиме фото и видео. Очень удобная штука!
Сразу установите родное приложение т.к. все функции доступны только через него. Я был в себе очень уверен и пытался использовать стабилизатор без установки приложения сначала, и не мог понять почему у меня горизонт всё время наклонён в одну сторону. Потом всё-таки поставил приложение и обнаружил что у стабилизатора в настройках стоит наклон в 10°.
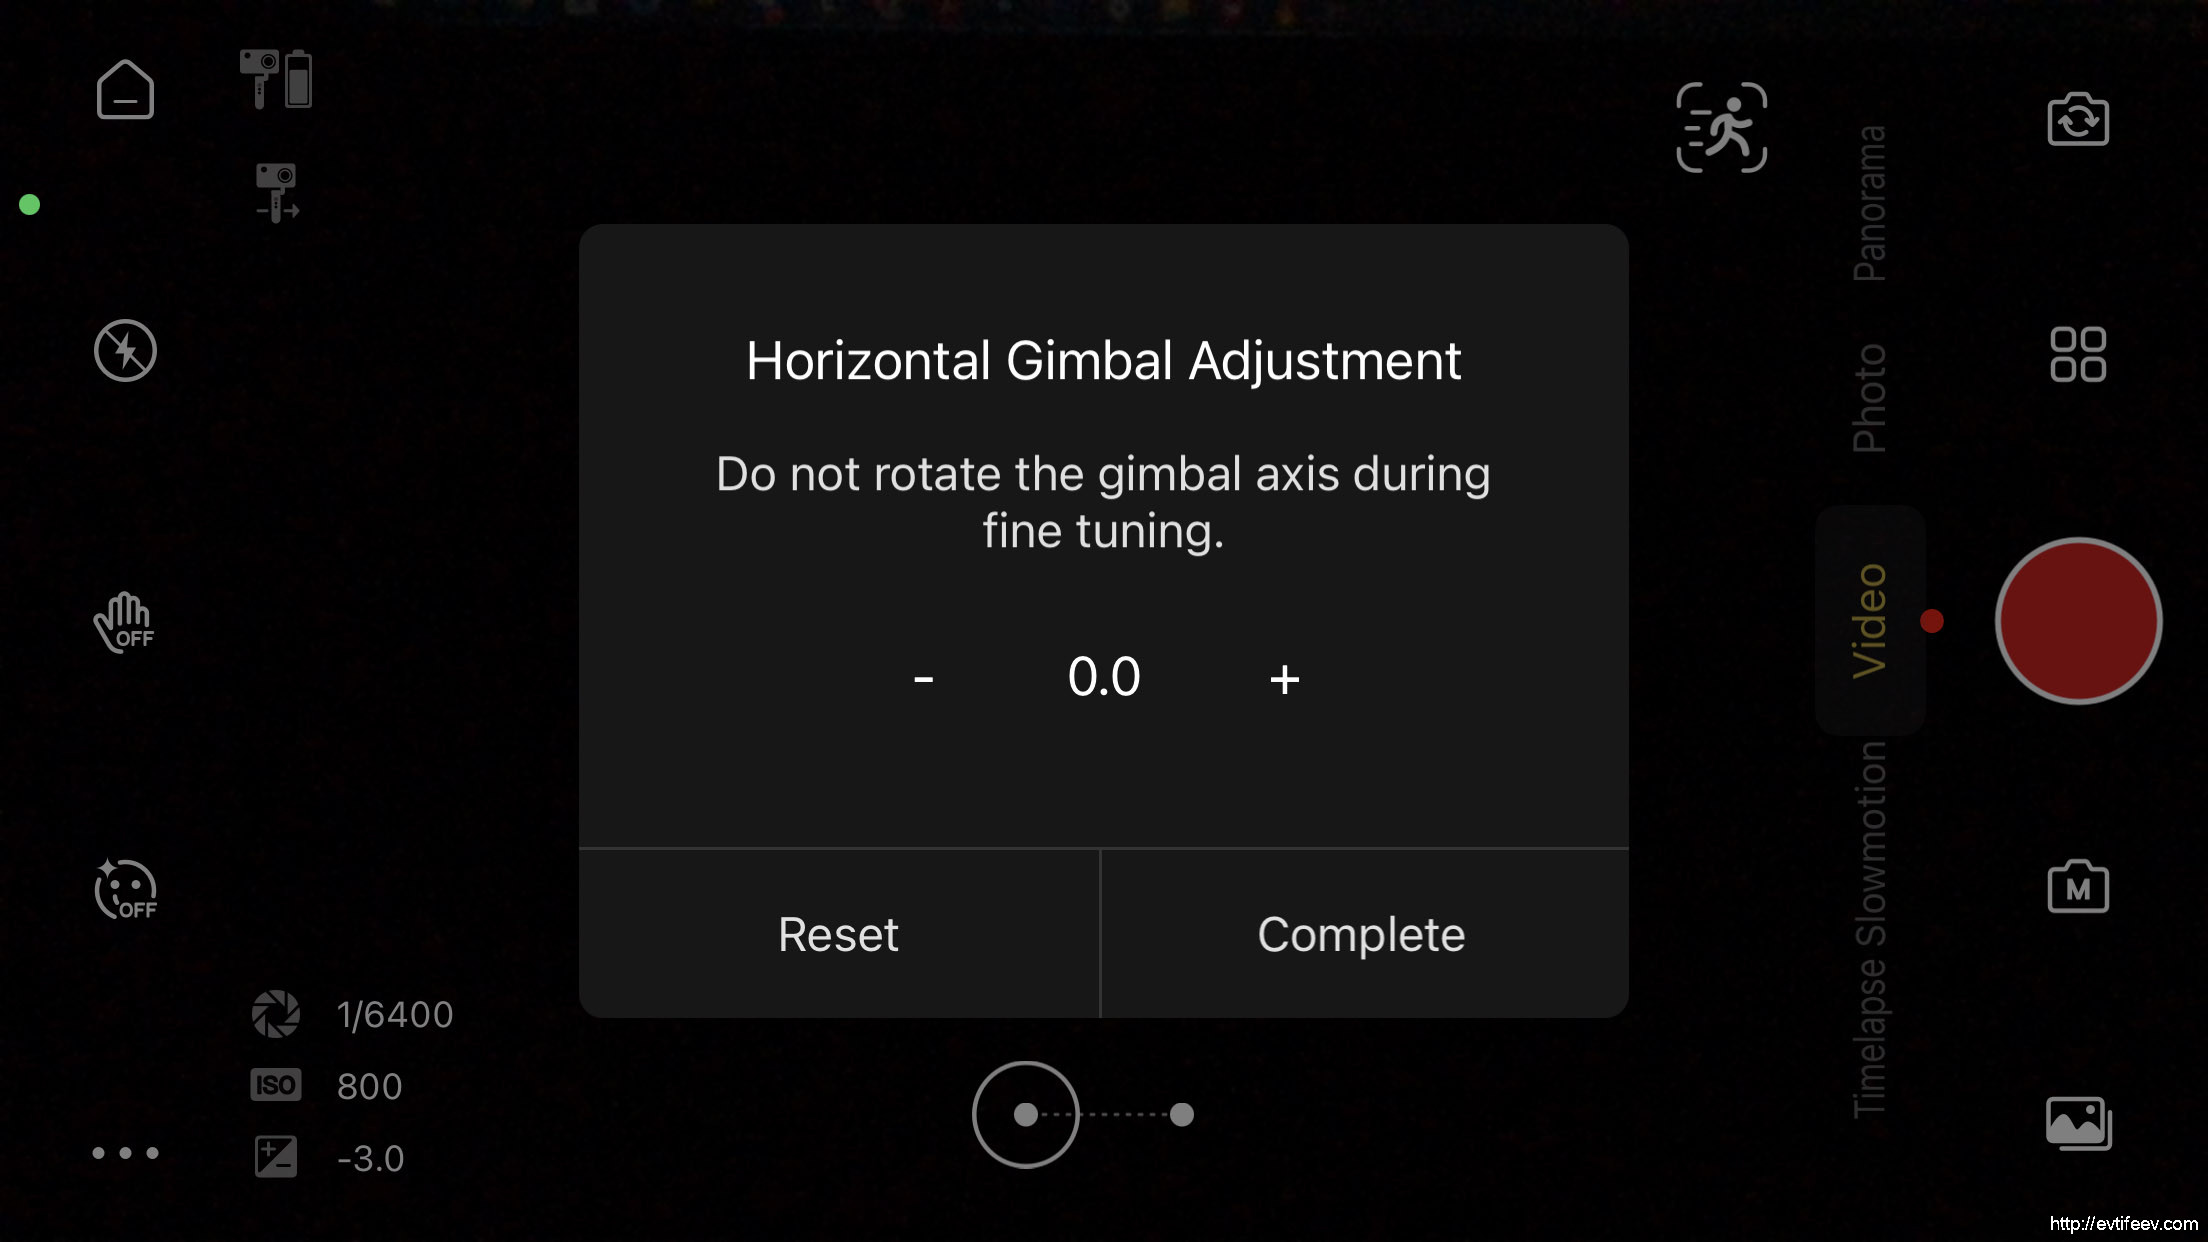
Это, кстати, максимальная поправка горизонта. Убрал её и всё стало горизонтально.
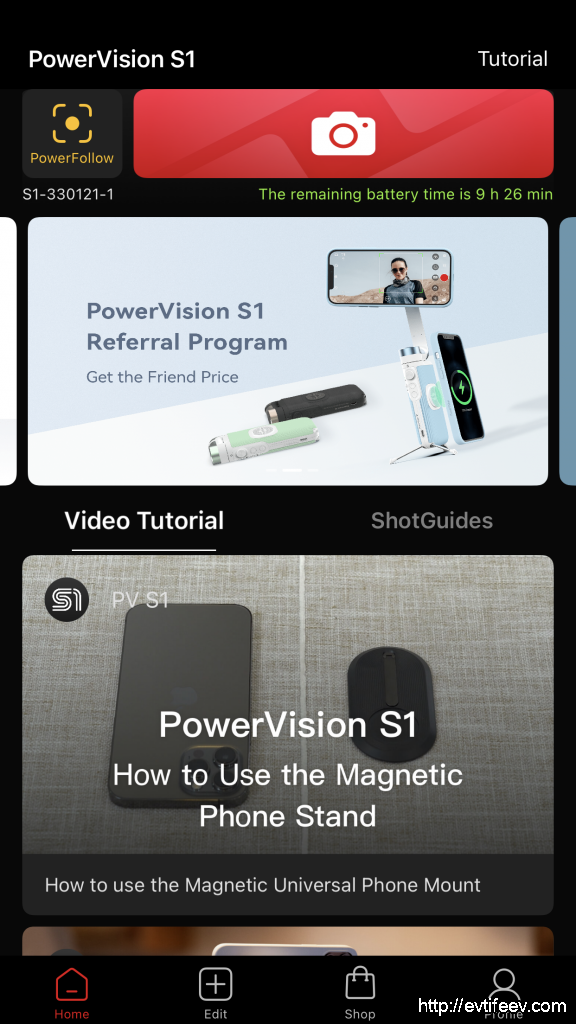
Неочевидный момент еще состоит в том где кроются сами настройки стабилизатора. А они находятся уже в режиме съемки т.к. на главном экране только обучающие ролики как работать со стабилизатором. Это необычно и сначала поставило меня в тупик. Прошло то время когда к каждой вещи прилагали толстую бумажную инструкцию. Теперь все предлагается смотреть в виде видео, что требует от пользователя времени на просмотр кучи материалов. Всё-таки бумажные инструкции более удобны.
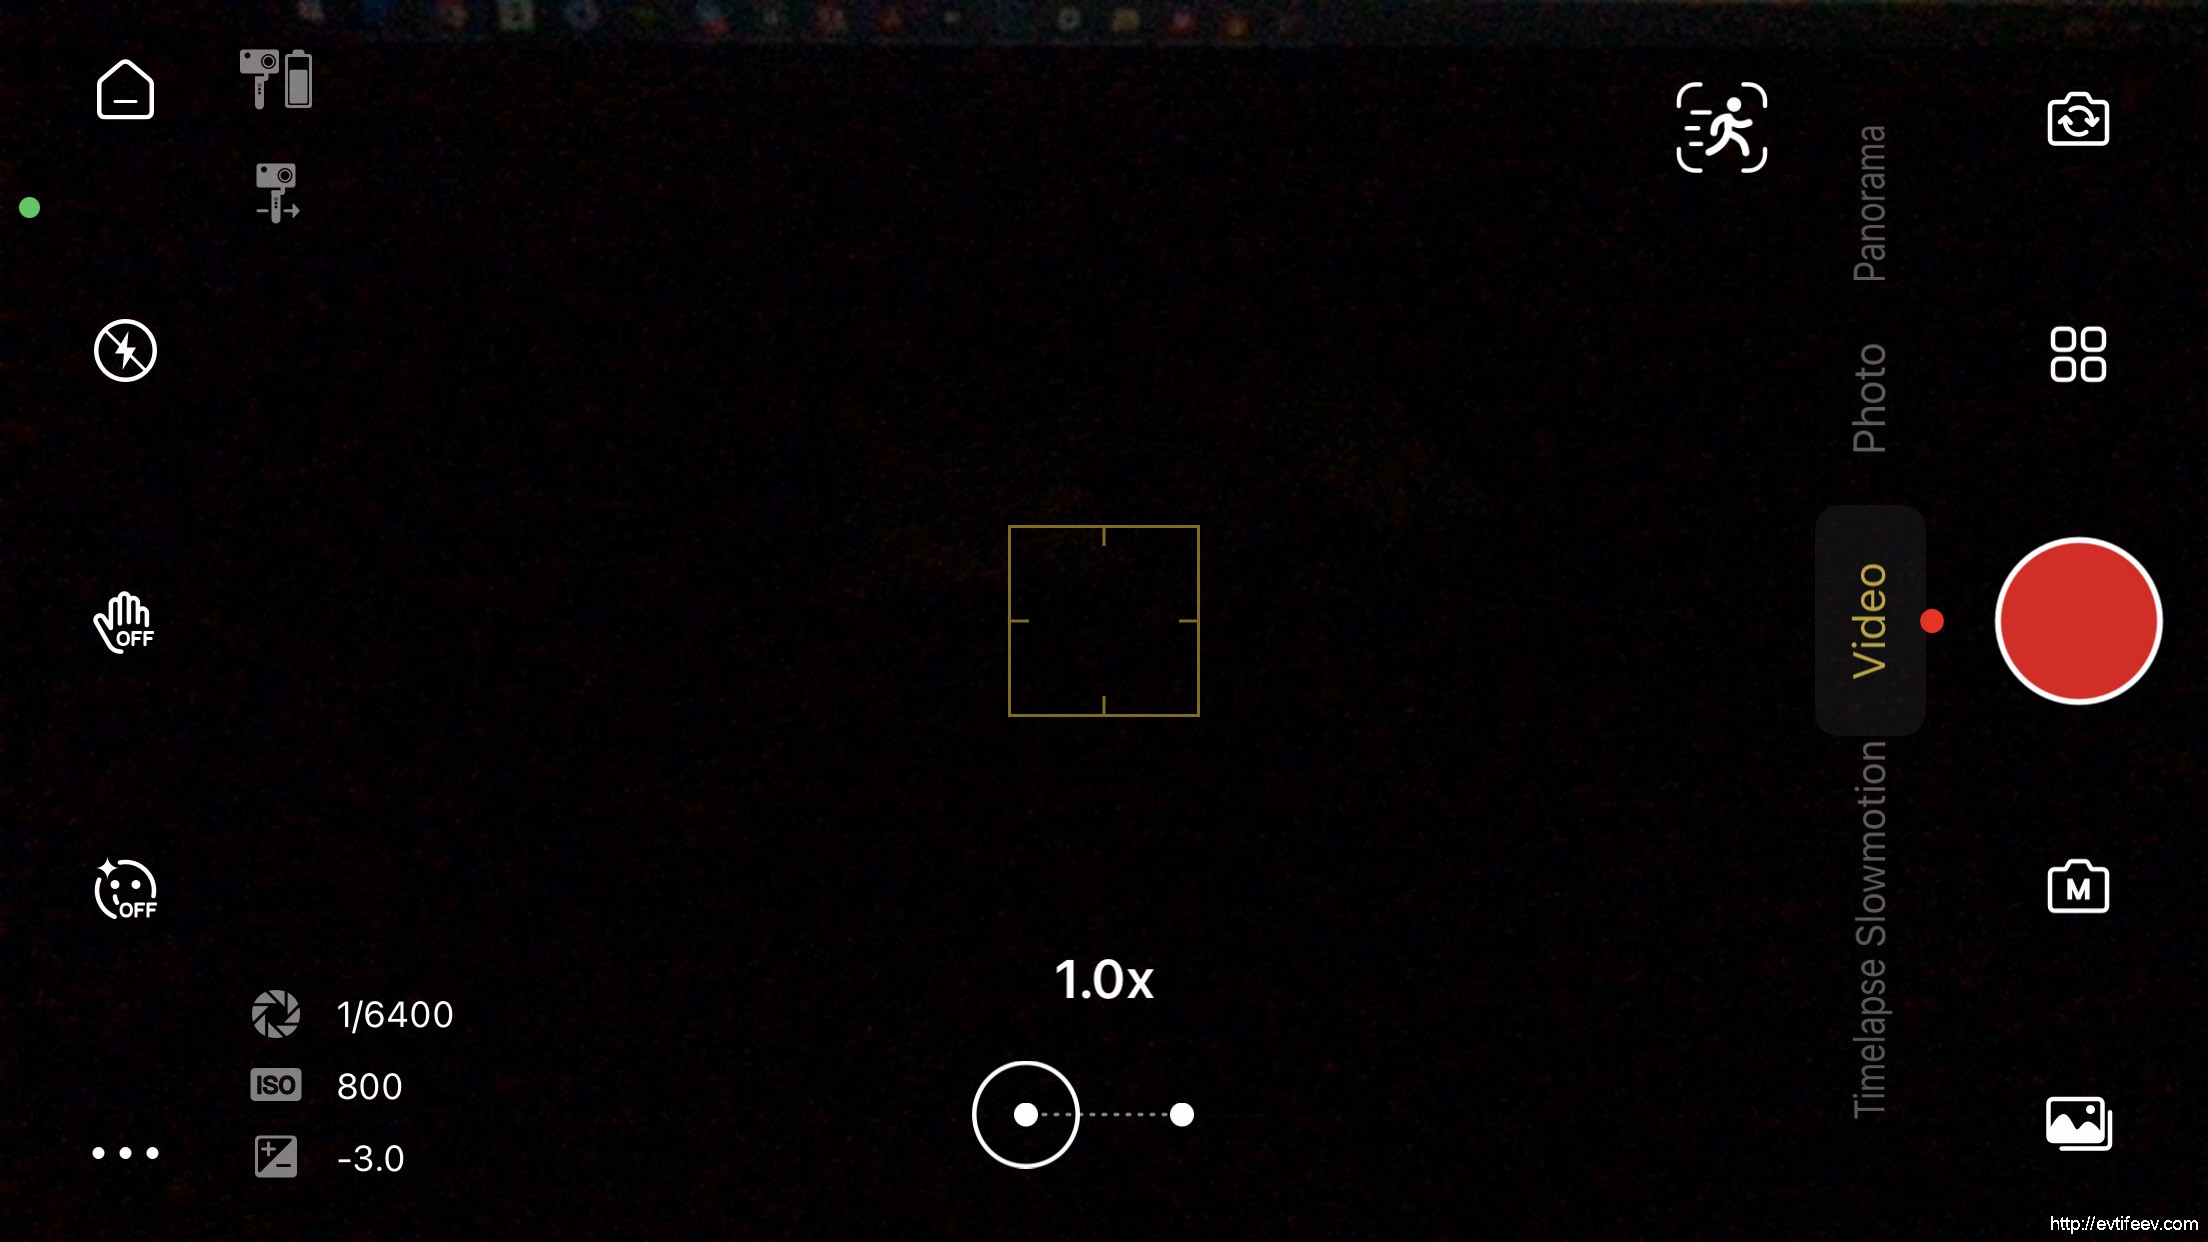
Итак, в режиме съемки (это большая кнопка с рисунком камеры) мы получаем доступ ко всем настройкам.
Рядом с большой красной съемки, кстати, находится кнопка «Powerfollow» — это специальный режим для прямого вещания на разные платформы типа Youtube, Facebook и прочие с трекингом лица.
Больше всех меня поразила функция панорамы! Давно такое искал — ставишь стабилизатор на штатив, нажимаешь кнопку съемки и он сам делает все снимки под разными углами, а потом сшивает! Т.е., в отличие от самого смартфона, он делает многорядную панораму! 3 кадра по горизонтали и 3 по вертикали.
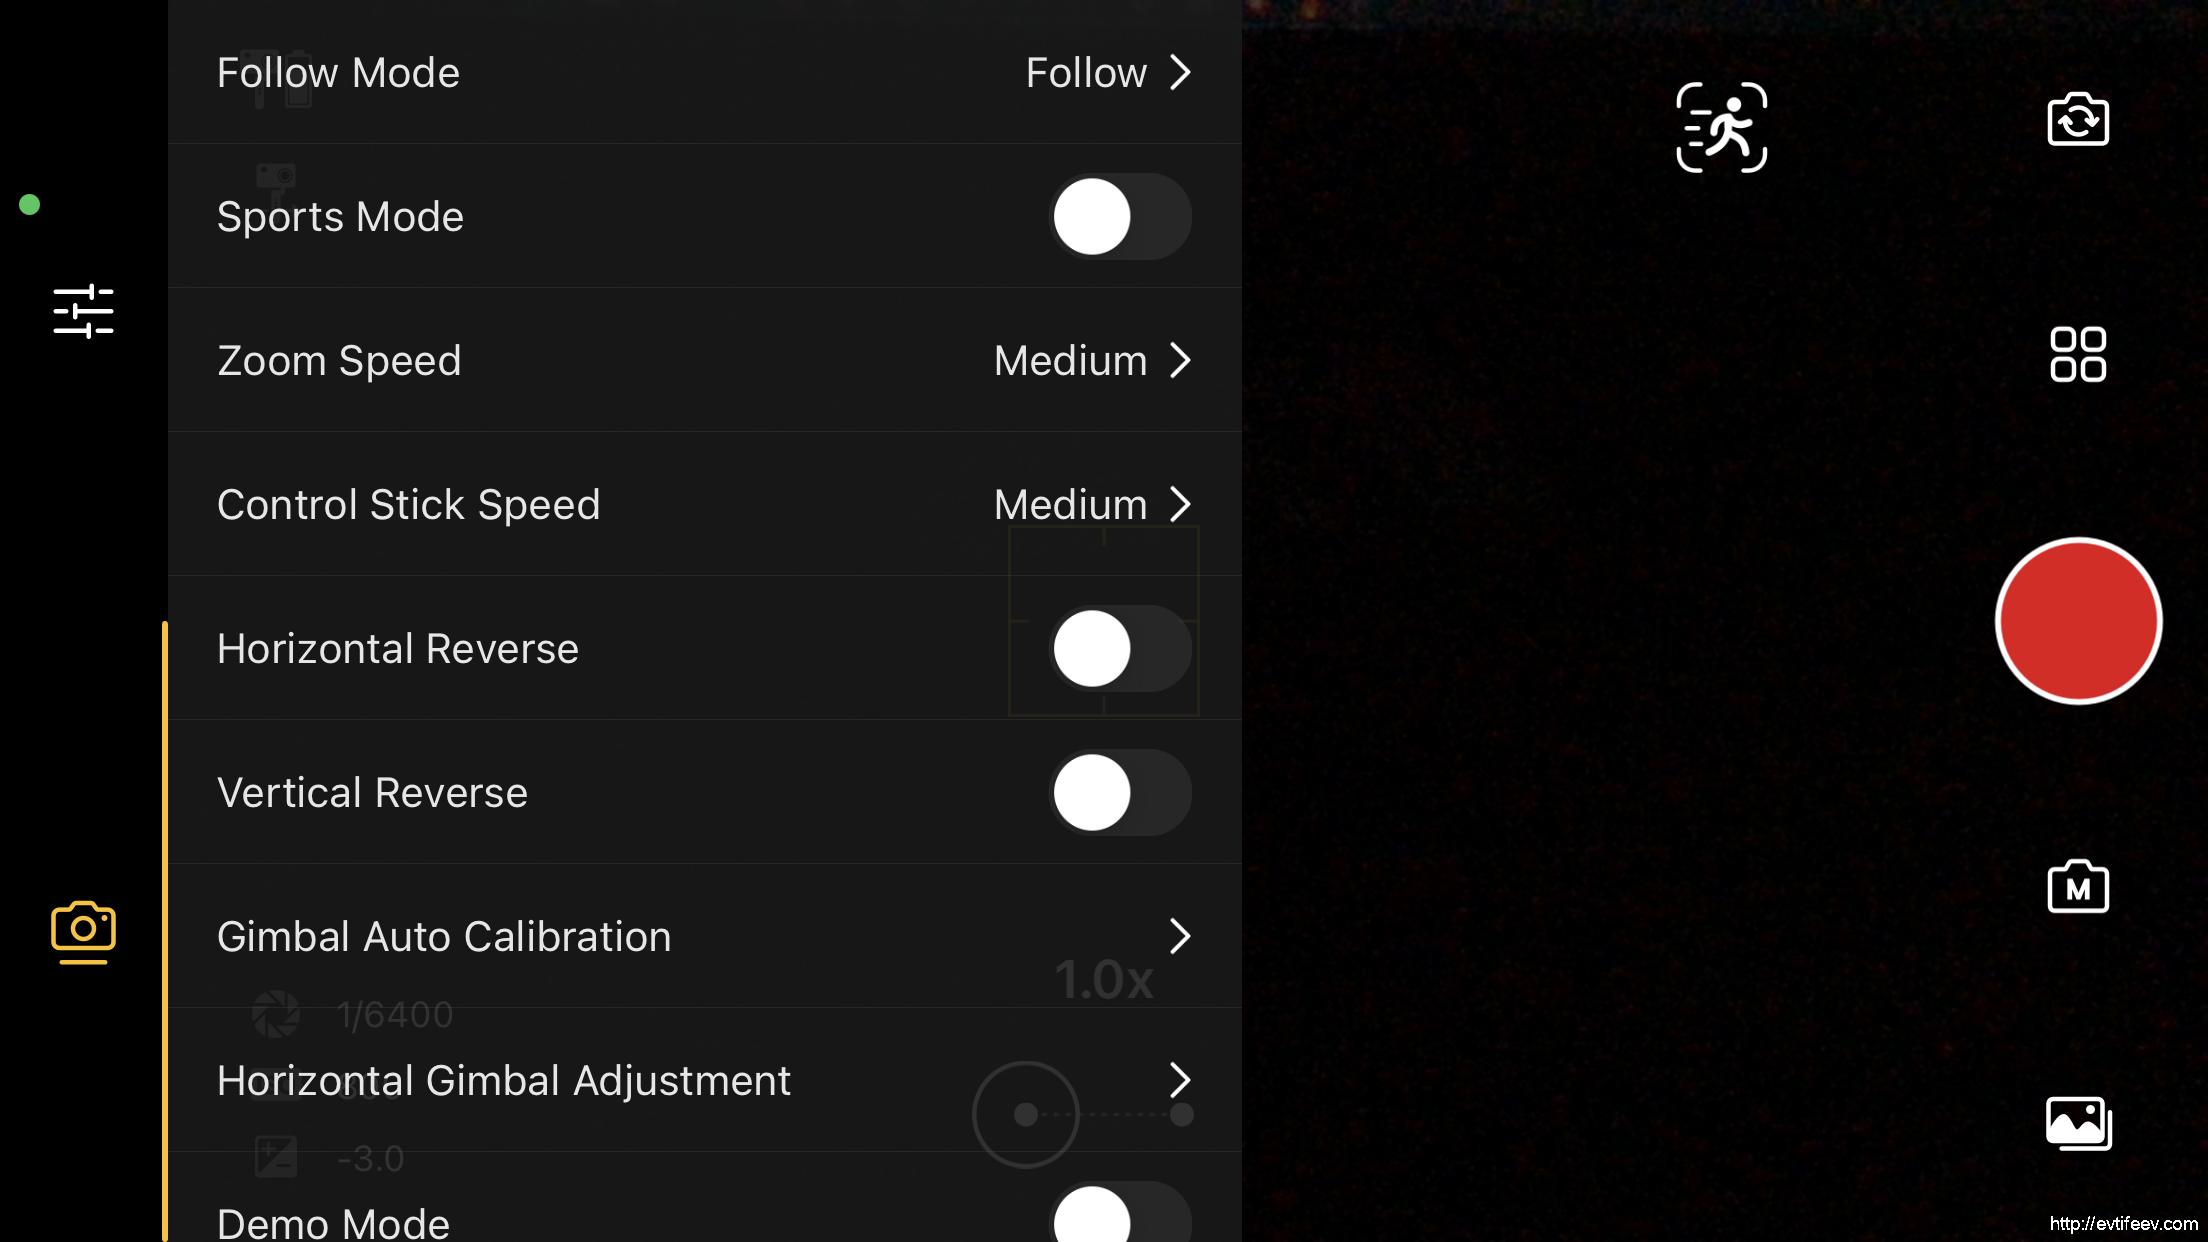
В режиме видео у Power Vision S1 три функции стабилизации: Follow, Tilt-locked и FPV.
Follow — ось вращения в сторону (roll) заблокирована, а оси вращения вперед (tilt) и по горизонтали (yaw) разблокированы.
Tilt-locked — ось вращения в сторону (roll) и вращение вперед (tilt) заблокированы, а вращение по горизонтали (yaw) разблокировано.
FPV — все оси разблокированы.
Если же что-то всё-таки непонятно, то поможет инструкция:
PowerVision S1 User Manual
к содержанию ↑
Технические характеристики
| Модель | Power Vision S1 |
|---|---|
| Тип | Стабилизатор для смартфона |
| Система стабилизации | 3-х осевая |
| Совместимый Вес полезной нагрузки, г | 220±60 |
| Совместимая Длина смартфона (макс), мм | 164 |
| Поддерживаемые модели телефонов | Apple: iPhone 12 Pro max、iPhone 12 Pro,iPhone 12,iPhone 11 pro max、iPhone 11 pro, iPhone 11 Samsung: Galaxy S21 Ultra,Galaxy S21, Galaxy S20 Huawei: P40 Pro ,P40 , Mate30 |
| Диапазон поворота осей | Панорамирования:±150° Наклон: ±90° Крен: -214,8° – 96° |
| Максимальное рабочее время, ч | 15 |
| Время зарядки, ч | 2 |
| Слежение за объектом | есть |
| Вес, г | 298 |
| Универсальное крепление | 1/4″ |
| Рабочая температура | 0 – 40℃ |
| Интерфейсы | USB-C, Bluetooth |
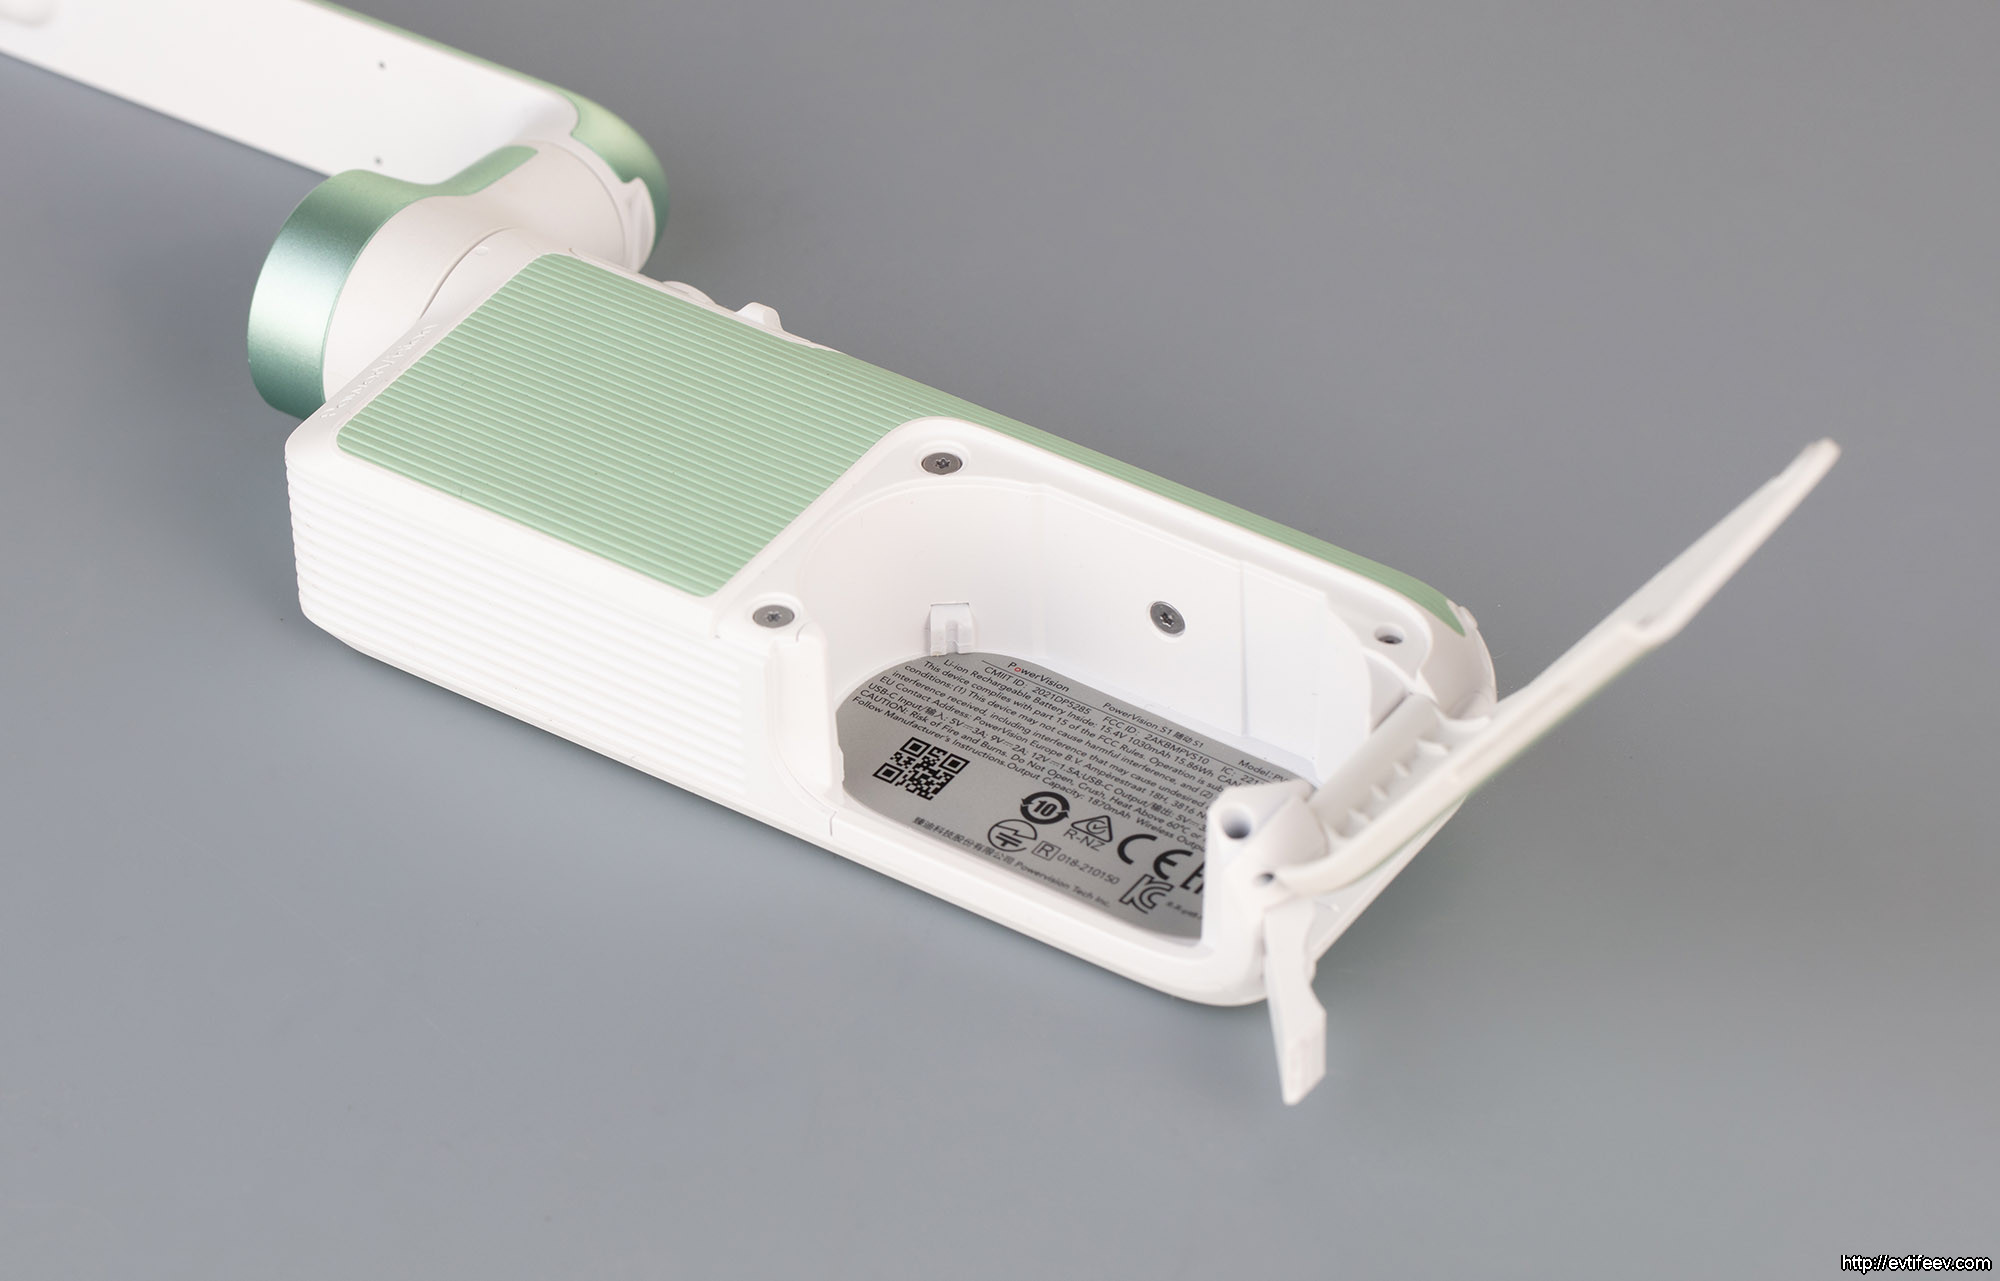
| Источник питания | Li-ion 4120 мАч |
Вес смартфона Power Vision S1 выдерживает достаточно приличный, сложностей в работе я не заметил. У некоторых стабилизаторов бывают слабоватые моторчики, но я подобного не заметил, снимал как спокойное движение, так и активный бег с поворотами.
Максимальная ширина смартфона, который помещается в магнитное крепление не такая большая, мой iPhone 8 Plus встал впритык. Но другие стабилизаторы имеют сходные параметры для своих креплений смартфонов.
Ширина совместимых смартфонов 64 – 84 мм
Толщина совместимых смартфонов 7 – 10 мм
Диапазона поворота осей мне хватало. Причем ограничением служит скорее габарит смартфона, нежели параметры стабилизатора. Можно поставить смартфон в портретную ориентацию и сделать большой наклон стабилизатора вниз чтобы смартфон уперся в штангу стабилизатора при выравнивании… Но зачем?
Энергопотребление у стабилизатора или очень умеренное или он так долго работает ввиду большой ёмкости батареи. В любом случае мне хватало на много съемок.
Слежением за объектом я был очень доволен. Легко выделяешь объект рамкой на экране смартфона и стабилизатор уверенно держит объект в кадре. Причем интересным образом держит почти всегда даже если человек повернулся затылком. Наверное, не зря называется с «искусственным интеллектом».
Крепление на штатив у стабилизатора универсальное, ¼» — на любом штативе есть. Особенно удобно для использования сторонних мини-штативов для записи с плоской поверхности типа стола или легких штативов типа Gitzo GK1545T-82TQD Traveler для съемки панорам.
к содержанию ↑
Полевые тесты
Полевые тесты я проводил на поляне где мои дети играли в прятки. Местность с кочками, так что когда бежишь смартфон сильно трясётся обычно и съемки такие не получаются. Основная проблема смартфона это завал горизонта влево и вправо, что делает видео несмотрибельным. Электронный стабилизатор призван компенсировать как раз эти наклоны. Смещения вверх-вниз он не компенсирует, это забота самого смартфона.
Очевидно что польза от Power Vision S1 есть и она очень большая. Благодаря ровному горизонту видео не вызывает отторжения. Заметна только программная стабилизация самого смартфона по смещению вверх-вниз. Я использовал экстремальные условия с бегом по кочкам, а на более ровной поверхности будет еще лучше.
к содержанию ↑
Итоги
Очень интересное изделие. Не буду скрывать, сначала я его не понял. Какая-то хитрая конструкция с убирающимися в себя элементами показалась сложной т.к. привык я к стабилизаторам у которых нет никаких убирающихся элементов. Второй момент был с наклоном горизонта, который оказалось был установлен в настройках, а я думал что это какая-то проблема. Третий пункт — интуитивно непонятный доступ к настройкам. Но преодолев эти три момента я оказался очень доволен тем что предоставляет Power Vision S1.
Первое что сильно понравилось — не нужно заходить в настройки смартфона и что-то менять, программа стабилизатора сама находит сразу смартфон и можно сразу им управлять. Нет никаких глюков с кнопками — всё сразу работает! Что зум «качелькой», что спуск кнопкой. Оговорюсь, что я пробовал только на айфоне и не пробовал приложение для Андроид, но для айфона работает замечательно.
Никогда ранее не задумывался о видеоблоге в режиме селфи с прогулкой по поляне, а попробовал и как-то захотелось. Очень удобно, что не нужно долго готовить материал, а можно делать более спонтанные и эмоциональные видеоролики. Я к такому формату не привык, но очень интересно.
Очень порадовал трекинг.
Во-первых, просто включается и также легко выключается нажатием на джойстик. Во-вторых, надежно держит объект в кадре и, пожалуй, лучше многих камер. Многие девайсы заявляют что у них интеллектуальный трекинг объекта, но стоит человеку повернуться спиной и они его теряют, а Power Vision S1 держал в кадре затылок человека также надежно как лицо. Вот это и правда интеллектуальный трекинг. Человек, которого снимают, имеет возможность отворачиваться от камеры, что он делает в обычной беседе.
Последним, но немаловажным отмечу режим панорамы. Ну наконец-то вменяемое решение для панорам. Больше не нужно таскать с собой специальную панорамную головку и фотокамеру тем кто не занимается профессионально фотосъемкой, но хочет получить большой угол обзора на фотографии. Качественное и простое решение.
к содержанию ↑
Плюсы
— очень компактный
— быстрая синхронизация со смартфоном и безглючное управление смартфоном кнопками стабилизатора
— качественный интеллектуральный трекинг объекта в кадре
— долгое время работы от аккумулятора
— полезный интегрированный мини-штатив
— режим многорядной панорамы
к содержанию ↑
Минусы
— настройки только в приложении
— интуитивно непонятная подготовка к работе при первом знакомстве и нет бумажной инструкции
-
Contents
-
Table of Contents
-
Bookmarks
Quick Links
PowerRay
Quick Start Guide
PowerVision
Related Manuals for PowerVision PowerRay
Summary of Contents for PowerVision PowerRay
-
Page 1
PowerRay Quick Start Guide PowerVision… -
Page 2: Table Of Contents
PowerRay Diving Preparation Diving and Safety PowerRay Introduction Battery and Charging Locking and Unlocking PowerRay PowerRay Vehicle Charging Remote Control Modes Base Station Check Battery Levels Using the FishFinder Sonar Prepare PowerRay Remote control 8-11 Diving safety 01 02 03…
-
Page 3: Powerray Introduction
PowerRay Introduction: PowerRay Vehicle The PowerVision PowerRay can dive as deep as 98 feet underwater in either fresh water or salt water. It can be used for underwater photography, fish detecting, and fish luring. Users can operate the PowerRay through the PowerVision Edition of ZEISS VR ONE Plus Goggles, transmitter, or app to stream real-time video.
-
Page 4: Base Station
The PowerRay base station connects to the submersible through the tether cable. By connecting to the base station, the user can control the PowerRay camera with the remote controller, VR goggles, or a cell phone. The base station battery is 3000mAh and can work for up to 3 hours. Users can check the battery level through the battery indicator.
-
Page 5: Remote Controller
Users can operate PowerRay easily through the remote control. The built-in rechargeable battery’s capacity is 3000mAh and can operate continuously for up to 20 hours. Users can check the battery level through the battery indicator.
-
Page 6: Fishfinder
FishFinder PowerRay FishFinder sonar can detect fish and underwater landscapes up to 130 feet below the surface and sends real-time images to the app. The sonar is equipped with a fish luring light, and can be attached to the PowerRay or used as a stand-alone sonar device.
-
Page 7: Battery And Charging
Charging All-in-one charger: The PowerVision charging adaptor can charge the PowerRay, remote control, and the base station at the same time. You can also charge your cell phone with the USB port on the adaptor. Remote Controller Base Station PowerRay Vehicle 3.5 hours to fully charge…
-
Page 8
Battery Levels Vehicle: PowerRay vehicle battery level is displayed on the Vision+ App interface. FishFinder: The FishFinder will automatically turn on when the charging port touches the water. It will turn off 1 minute after leaving the water. Battery level is displayed on the Vision+ App inferface. -
Page 9
Battery Levels Remote Controller and Base Station: Check battery indicator, marked in red below. Above 30% 30% — 10% Below 10% Above 60% 60% — 20% Below 20%… -
Page 10: Prepare Powerray
2. Plug the cable into the base station. 3. Open the vehicle power port protector. 4. Plug the other side of the cable tightly into PowerRay. Note: Make sure to dry the port immediately after use! 5. Use a mobile device to turn on the WiFi, connect to…
-
Page 11
You will hear a notification sound when connection is complete. Make sure you connect to the Wi-Fi to (PRA Station). Launch the Vision+ App and switch to PowerRay. When it shows “Device is connected,” click on “Start Diving” and you’re ready to explore! -
Page 12: Vision+ App Functions
“Vision+” App Functions Connection Status Base Station Battery Base Station Signal Vehicle Battery Master/Slave Mode Album VR Mode Switch Camera Parameters Switch Photo/ Sonar Mode Switch Video Mode Bait Drop Take Photo/Video Prompt Message Left Joystick Right Joystick Water Depth Front Light Control Depth Maintenance Switch Speed Mode…
-
Page 13
Head gesture function activation: Press down on the left shutter button to enable this function. You will now be able to guide the PowerRay through head gesture commands. Once you’re done, push the left shutter button again to release this feature. -
Page 14: Locking And Unlocking Powerray
Locking and Unlocking PowerRay To prevent users from spinning the propellers accidently outside the water, PowerRay pilots need to unlock the PowerRay to enable the motors. Unlock: Dial the left finger wheel to the right and press camera/fish finder button for 1 second until it vibrates.
-
Page 15: Remote Control Modes
Remote Control Modes PowerRay has 4 modes in which to control the submersible. The remote control’s default mode is “MODE 4.” Users can choose the mode that best fits their control of the PowerRay through the App. MODE 1 / JAPANESE…
-
Page 16: Using The Fishfinder Sonar
1. The FishFinder must be installed on the PowerRay before connecting the power cable to the Ray. 2. Once the PowerRay is powered on, the FishFinder will start to work when it enters the water. 3. The FishFinder will automatically connect to the PowerRay. You can also connect to the FishFinder Wi-Fi, “PSE_xxx”.
-
Page 17: Diving Safety
Dive in Keep within Do not exceed Turn off the base open water visual range 30M depth station to save battery Do not spin motors Do not touch Do not throw Do not pull the cable in the air outside of into water with strong force spinning propellers…
-
Page 18
PowerVision www.powervision.me…