-
Contents
-
Table of Contents
-
Troubleshooting
-
Bookmarks
Quick Links
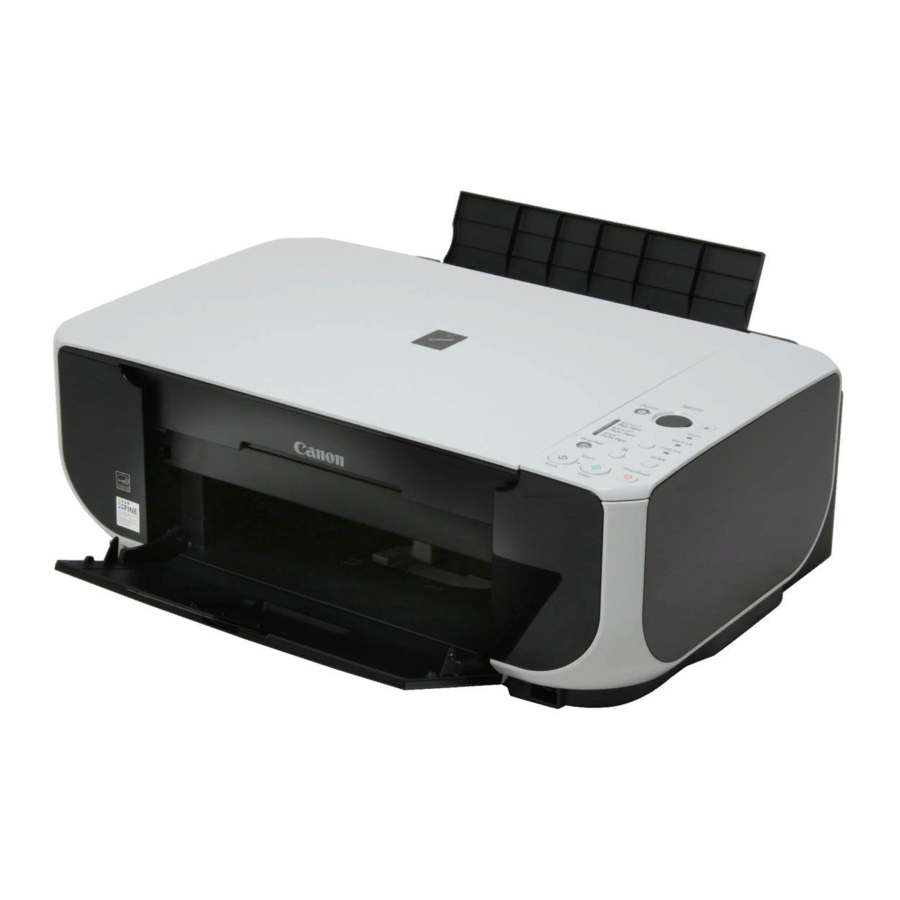
Photo All-in-One
series
Quick Start Guide
Q T 5 1 2 0 8 V 0 1
Related Manuals for Canon PIXMA MP210 Series
Summary of Contents for Canon PIXMA MP210 Series
-
Page 1: Quick Start Guide
Photo All-in-One series Quick Start Guide Q T 5 1 2 0 8 V 0 1…
-
Page 2: Getting Help From Canon
CarePAK offers toll-free Canon technical support and includes Canon’s superb InstantExchange product replacement program. For further information about extending your Canon service and support, call (1-800-385-2155), or visit our Web site at www.canonesp.com. CarePAK must be purchased during your product’s warranty period.
-
Page 3
series Photo All-in-One Quick Start Guide… -
Page 4
© 2007 Canon U.S.A., Inc. Disclaimer Canon U.S.A., Inc. has reviewed this manual thoroughly in order that it will be an easy-to-use guide to your Canon PIXMA MP210 series Photo All-in-One. All statements, technical information and recommendations in this manual and in any guides or related documents are believed reliable, but… -
Page 5: Table Of Contents
Table of Contents Before Using the Machine …2 Operation Panel…2 Turning the Machine On and Off …4 Handling the Original Document…6 Loading Printing Paper …7 Copying …15 Making Copies …15 Changing the Copy Settings …16 Using Useful Copy Functions …16 Printing from Your Computer…17 Printing with Windows…17 Printing with Macintosh…18…
-
Page 6: Before Using The Machine
For details, see “An Error Code Is Displayed on the LED” on page 44. Power lamp flashing green once and Alarm lamp flashing orange once alternately: An error that requires contacting your Canon Service representative may have occurred. For details, see “Power Lamp Flashes Green and Alarm Lamp Flashes Orange Alternately”…
-
Page 7
(7) Stop/Reset button Cancels operations or a print job in progress. (8) Color button* Starts color copying. Also, finalizes your selection for the menu or setting item. (9) Black button* Starts black & white copying. Also, finalizes your selection for the menu or setting item. (10) (Maintenance) button Accesses the Maintenance menu. -
Page 8: Turning The Machine On And Off
Turning the Machine On and Off Turn on the machine before printing. Turning on the Machine Before turning on the machine, confirm the following. The FINE Cartridges are installed properly. If you are using the machine connected to a computer, confirm also the following. The machine is connected to your computer (or a compatible device).
-
Page 9
Screen-saver Mode The LED goes out if the machine is not operated for about five minutes*. Perform a print operation to restore the display. * You cannot change the wait time before the LED goes out. Note When you want to restore the display, perform a print operation or press any button except for the ON/OFF button. -
Page 10: Handling The Original Document
Handling the Original Document This section describes how to load the original document on the Platen Glass. Original Document Requirements The original documents you load on the Platen Glass for copying or scanning must meet these requirements: Document type Size (W x L) Thickness Loading Original Documents Load originals to copy or scan on the Platen Glass.
-
Page 11: Loading Printing Paper
Loading Printing Paper This section describes how to load printing paper in the Rear Tray. Using Specialty Media Canon recommends that you use Canon genuine media to ensure optimal print quality. Photo Quality Media Glossy Photo Paper Matte Photo Paper…
-
Page 12: Paper Handling
T-Shirt Transfers TR-301 *1 Paper with a Model Number is Canon specialty media. Refer to the instruction manual supplied with the paper for detailed information on the printable side and notes on handling paper. For information on the paper sizes available for each Canon genuine paper, visit our website.
-
Page 13: Media Types You Cannot Use
Folded, curled, or wrinkled paper Damp paper Paper that is too thin (weighing less than 17 lb / 64 gsm) Paper that is too thick (plain paper, except for Canon genuine paper, weighing more than 28 lb / 105 gsm) Picture postcards…
-
Page 14: Loading Paper
Canon provides for use with its various printers, see “Using Specialty Media” on page 7. When Printing on Plain Paper You can use general copy paper or Canon’s Super White Paper. When printing on both sides, we recommend Canon’s Super White Paper Double-Sided. Paper size: –…
-
Page 15
Prepare to load paper. (1) Open the Paper Support, then pull out the Paper Support Extension. (2) Open the Paper Output Tray. (3) Open the Output Tray Extension. (4) Adjust the position of the Paper Thickness Lever. Set it to the right when printing on envelopes or T-shirt transfers, and left when printing on any other type of paper. -
Page 16: Loading Envelopes
Loading Envelopes Use either European DL or US Comm. Env. #10-sized envelope. Important You need to print from the computer to print on envelopes. Do not use the following envelopes: – Envelopes with a double flap (or sticker flaps) – Envelopes with an embossed or treated surface –…
-
Page 17
Load the envelopes. (1) Load the envelope against the right side of the Rear Tray. Load with the address side facing UP and the rear flaps DOWN on the left. Up to 10 envelopes can be loaded at once. (2) Pinch the Paper Guide and slide it against the left side of the envelope. -
Page 18
Loading Small-Sized Paper You can use 4″ x 6″ / 101.6 x 152.4 mm, 5″ x 7″ / 127.0 x 177.8 mm, and Credit card-sized papers. Load the paper. (1) Load the paper against the right side of the Rear Tray with the print side facing UP. (2) Pinch the Paper Guide and slide it against the left side of the paper stack. -
Page 19: Copying
Copying Making Copies This section describes the basic procedure to make copies. Turn on the machine. See “Turning the Machine On and Off” on page 4. Load paper. See “Loading Printing Paper” on page 7. Load the original on the Platen Glass. See “Loading Original Documents”…
-
Page 20: Changing The Copy Settings
Changing the Copy Settings Setting The Default Page Size You can switch the size of paper loaded in the Rear Tray between A4 and Letter. Press the Maintenance button repeatedly until d appears. Press the Black button to select A4, or the Color button to select Letter. Using Useful Copy Functions For details, refer to “Fit-to-Page Copying (MP210 series)”…
-
Page 21: Printing From Your Computer
Create a document or open a file to print using an appropriate application software. Select Print on the application software’s File menu. Make sure that Canon XXX Printer (where “XXX” is your machine’s name) is selected in Select Printer, and click Preferences (or Properties).
-
Page 22: Printing With Macintosh
Printing with Macintosh Note Depending on your application program, operations may differ. For details, refer to the instruction manual of your application. The steps described in this section are for printing in Mac Turn on the machine and load the paper in the machine. See “Turning the Machine On and Off”…
-
Page 23: Scanning Images
Scanning Images You can scan images from the machine to a computer without printing them and save them in popular image types such as JPEG, TIFF, bitmaps, or PDF. If you are scanning printed text, you can use the OCR (Optical Character Recognition) software to convert it to text data. Scanning Methods You can select from the various scanning methods.
-
Page 24: Printing Photographs Directly From A Compliant Device
Printing Photographs Directly from a Compliant Device You can connect a PictBridge compliant device such as a digital camera, camcorder, or mobile phone using a USB cable recommended by the device’s manufacturer, and print recorded images directly without using a computer. Connectable Devices PictBridge is an industry standard enabling a range of digital photo solutions, including the direct printing of photos from a digital still camera, camcorder or mobile phone* without the need to use…
-
Page 25
Connect the PictBridge compliant device to the machine. Note Depending on the model or brand of your device, you may have to select a print mode compliant with PictBridge before connecting the device. You may also have to turn on the device or select Play mode manually after connecting the device to the machine. -
Page 26: About Pictbridge Print Settings
PictBridge compliant device. Note In the following description, names of setting items are given according to those used in Canon- brand PictBridge compliant devices. Setting item names may be different depending on the brand or model of your device.
-
Page 27
You can select the optimization method to obtain high print quality. When you select On, the shooting information is used to print the optimized image. If you are using a Canon-brand PictBridge compliant device, the following additional options may be available, depending on the model. -
Page 28
Setting on the Machine This section describes the PictBridge print settings on the machine. Set the print settings to Default on the PictBridge compliant device when you want to print according to the settings on the machine. Setting Items and Specifying the Settings Setting Item How to Specify Page size… -
Page 29: Routine Maintenance
Routine Maintenance List of Maintenance Codes To perform maintenance of the machine, press the Maintenance button repeatedly until the desired code is displayed on the LED, then press the Black or Color button. Maintenance Operation Code Prints the nozzle check pattern. Performs Print Head Cleaning.
-
Page 30: When Printing Becomes Faint Or Colors Are Incorrect
When Printing Becomes Faint or Colors Are Incorrect When printing becomes faint or colors are incorrect, the print head nozzles on FINE Cartridges are probably clogged. Print the nozzle check pattern to confirm the condition of the nozzles and then perform Print Head Cleaning.
-
Page 31: Printing The Nozzle Check Pattern
Printing the Nozzle Check Pattern Print the nozzle check pattern to determine whether the ink ejects properly from the print head nozzles. Make sure that the machine is turned on, then load a sheet of A4 or Letter-sized plain paper in the Rear Tray. Open the Paper Output Tray, then open the Output Tray Extension.
-
Page 32: Examining The Nozzle Check Pattern
Examining the Nozzle Check Pattern Examine the nozzle check pattern, and perform cleaning if necessary. Note The nozzle check pattern will not be printed correctly if there is not enough ink. Replace the FINE Cartridge if the remaining amount of ink is insufficient. See “Replacing a FINE Cartridge”…
-
Page 33: Print Head Cleaning
Print Head Cleaning Clean the Print Head if lines are missing or if white streaks appear in the printed nozzle check pattern. Cleaning unclogs the nozzles and restores the print head condition. Note that cleaning the Print Head causes used ink to be absorbed in the ink absorber. Cleaning the Print Head consumes ink, so perform Print Head Cleaning only when necessary.
-
Page 34: Print Head Deep Cleaning
Print Head Deep Cleaning If print quality does not improve by standard Print Head Cleaning, try Print Head Deep Cleaning, which is a more powerful process. Note that cleaning the Print Head causes used ink to be absorbed in the ink absorber. Print Head Deep Cleaning consumes more ink than standard Print Head Cleaning, so perform this procedure only when necessary.
-
Page 35: Aligning The Print Head
Aligning the Print Head If ruled lines are printed misaligned or print results are otherwise unsatisfactory, adjust the print head position. Make sure that the machine is turned on, then load a sheet of A4 or Letter-sized plain paper in the Rear Tray. Open the Paper Output Tray, then open the Output Tray Extension.
-
Page 36
Note If it is difficult to pick the best pattern, pick the setting that produces the least noticeable white streaks. (A) Less noticeable vertical white streaks (B) More noticeable vertical white streaks (C) Less noticeable horizontal white streaks (D) More noticeable horizontal white streaks (2) Repeat the procedure until you finish selecting the pattern number for column L. -
Page 37: Replacing A Fine Cartridge
Replacing a FINE Cartridge This section explains the way to confirm the ink status and the procedure to replace FINE Cartridges. When ink runs out or other errors occur, an error code is displayed on the LED to inform you of the error.
-
Page 38
(C) The Ink lamp flashes. With the Computer Screen You can confirm the status of each FINE Cartridge on the printer status monitor (Windows) and Canon IJ Printer Utility (Macintosh). (A) Confirm whether any symbols are displayed here. Routine Maintenance Ink is low. -
Page 39
To confirm the FINE Cartridge information, click the Ink Details menu. Note You can also display the printer status monitor by clicking Canon XXX Printer (where “XXX” is your machine’s name) which appears on the taskbar during printing. Open the Canon IJ Printer Utility. -
Page 40
If a FINE Cartridge runs out of ink, you can print with either Color or Black FINE Cartridge, in whichever ink remains, only for a while. However the print quality may be reduced compared to when printing with both cartridges. Canon recommends to use new FINE cartridges in order to obtain optimum qualities. -
Page 41
Caution Do not hold the FINE Cartridge Holder to stop or move it. Do not touch the metallic parts inside the machine. Important If the Scanning Unit (Printer Cover) is left open for more than 10 minutes, the FINE Cartridge Holder moves to the right. -
Page 42
Install the FINE Cartridge. (1) Insert a new FINE Cartridge all the way into the appropriate slot. The Black FINE Cartridge should be installed into the left slot ( Cartridge should be into the right slot ( (2) Push up the FINE Cartridge until it clicks into place. -
Page 43: Keeping The Best Printing Results
Keeping the Best Printing Results To avoid drying of the Print Head and clogging of the nozzles, note the following. Note Ink may blur depending on the paper in the following cases: – Printed area is traced with a highlight pen or paint-stick, or –…
-
Page 44: Cleaning Your Machine
Cleaning Your Machine This section describes the cleaning procedure that is needed to maintain your machine. Caution Do not use tissue paper, paper towels, or similar materials for cleaning. Paper tissue powders or fine threads may remain inside the machine and cause problems such as a blocked Print Head and poor printing results.
-
Page 45: Cleaning The Paper Feed Roller (Roller Cleaning)
Rear Tray with a moistened cotton swab or the like. Rotate the roller (A) manually as you clean it. Do not touch the roller with your fingers; rotate it with the cotton swab. If this does not solve the problem, contact your Canon service representative. Cleaning the Inside of the Machine (Bottom Plate Cleaning) This section describes how to clean the inside of the machine.
-
Page 46: Cleaning The Protrusions Inside The Machine
Open the Paper Output Tray, then open the Output Tray Extension. Fold a single sheet of A4 or Letter-sized plain paper in half widthwise, and then unfold the paper. Load this and only this sheet of paper in the Rear Tray with the open side to the front. Set the Paper Thickness Lever to the left.
-
Page 47: Troubleshooting
Troubleshooting This section describes troubleshooting tips for problems you may encounter when using the machine. Note This section mainly describes the methods of machine operation for troubleshooting. To handle problems using your computer, refer to “Troubleshooting” in the User’s Guide on-screen manual. For details on how to view the on-screen manuals, see “Reading the On-screen Manuals”…
-
Page 48: Error Codes
However, because printing is disabled once the ink absorber becomes completely full and until the ink absorber is replaced, you are recommended to contact your Canon service representative as early as possible. (You will need to replace a particular part of the machine.) A communication time out occurs if an operation takes too long or if it takes too much time to send data.
-
Page 49: Power Flashes Green/Alarm Lamp Flashes Orange
Canon recommends to use new genuine Canon cartridges in order to obtain optimum qualities. Please be advised that Canon shall not be liable for any malfunction or trouble caused by continuation of printing under the ink out condition. The FINE Cartridge may not be compatible with this machine. Install the appropriate FINE Cartridge.
-
Page 50: Led Cannot Be Seen At All
After a while, plug the power cord of the machine back in, and then turn on the machine. If the same error occurs, contact your Canon service representative. Action If the Power lamp is off The machine is not powered on.
-
Page 51: Cannot Connect To Computer Properly
If the CD-ROM icon is still not displayed, try different disks and see if they are displayed. If other disks are displayed, there is a problem with the Setup CD- ROM. Contact your Canon service representative. Follow the procedure described in your setup sheet for proper installation.
-
Page 52: Print Results Not Satisfactory
“This device can perform faster” Message Is Displayed Cause Your system environment is not fully compatible with USB 2.0 Hi-Speed. Print Results Not Satisfactory If the print result is not satisfactory, confirm the paper and print quality settings first. Do the page size and media type settings match the size and type of the loaded paper? When these settings are incorrect, you cannot obtain a proper print result.
-
Page 53
Printing Does Not Start/Printing Is Blurred/Colors Are Wrong/Straight Lines Are Misaligned Cause FINE Cartridge is not installed properly / There is no ink left. Print Head nozzles are clogged. The media is loaded with the wrong side facing upwards. Print Head is misaligned. White Streaks Cause Print Head nozzles are clogged. -
Page 54: Printed Paper Curls Or Has Ink Blots
Troubleshooting Action When printing data with high color saturation such as photographs or images in deep color, we recommend using Photo Paper Pro or other Canon specialty paper. See “Media Types You Cannot Use” on page 9. Action Clean the Paper Feed Rollers. Cleaning the Paper Feed Rollers will wear the rollers, so perform this procedure only when necessary.
-
Page 55
Cause Paper is curled. Inappropriate Paper Thickness Lever setting. Printing graphics with the intensity setting set too high. Printing beyond the recommended printing area. Action For Plain Paper Turn the paper over and reload it to print on the other side. Leaving the paper loaded in the Rear Tray for a long time may cause the paper to curl. -
Page 56: The Print Result Not Satisfactory When Copying
Colors Are Uneven or Streaked Cause Print Head nozzles are clogged. Print Head is misaligned. The Print Result Not Satisfactory When Copying Cause The original document is not loaded correctly. The original document is not loaded with the side to be copied faced down. The original document is a printout from this machine.
-
Page 57: Paper Does Not Feed Properly
Cause The machine is not ready. Paper Does Not Feed Properly Cause Printing on inappropriate type of paper. Paper Feed Rollers are dirty. Paper not loaded properly. Too much paper loaded. Foreign object in the Rear Tray. Envelopes not prepared nor loaded properly.
-
Page 58: Paper Jams
If you cannot remove the paper or the paper tears inside the machine, or if the paper jam error continues after removing the paper, contact your Canon Service representative. Do not load credit card-sized paper in landscape orientation.
-
Page 59: Error Message Appears On The Computer Screen
In non-Vista Windows, open the File menu then select Properties. (5)Click the Ports tab to confirm the port settings. Make sure that a port named USBnnn (where “n” is a number) with Canon XXX Printer appearing in the Printer column is selected for Print to the following port(s).
-
Page 60
Cause Machine is not connected properly. Your machine is not selected in Printer on the Print dialog box. Error No.: 1700/1710 Is Displayed Cause The ink absorber is almost full. Error No.: 2001 Is Displayed Cause No response from connected digital camera or video camcorder. -
Page 61: Error Message Appears On A Pictbridge Compliant Device
The error messages and operations may vary depending on the device you are using. For errors on non-Canon PictBridge compliant devices, check the error code on the LED and take the appropriate action to clear the error. For details, see “An Error Code Is Displayed on the LED” on page 44.
-
Page 62: Scanning Problems
Scanning Problems ScanGear Won’t Start Cause The scanner driver (ScanGear) is not installed. Other Scanning Troubles Refer to the Scanning Guide on-screen manual. Troubleshooting Action Follow the procedure described in your setup sheet to reinstall the MP Drivers.
-
Page 63: Appendix
Appendix How to Use the Documentation Provided Printed Documentation Setup Sheet Be sure to read this sheet first. This sheet includes instructions for setting up your machine and getting it ready for use. Quick Start Guide (This guide) Read this guide when starting to use the machine. After following instructions in your setup sheet, we recommend you read this guide to familiarize yourself with the basic operation of some of the main functions that can be performed on your machine.
-
Page 64: Reading The On-Screen Manuals
You can view the on-screen manuals in the following way: To view the on-screen manual, double-click the XXX On-screen Manual shortcut icon on the desktop, or click Start > All Programs (or Programs) > Canon XXX Manual > XXX On-screen Manual (where “XXX” is your machine’s name).
-
Page 65: Specifications
Approx. 451 (W) x 353 (D) x 169 (H) mm * With the Paper Support and Paper Output Tray retracted. Weight Approx. 5.9 kg (Approx. 12.8 lb.) * With the FINE Cartridges installed. Canon FINE Cartridges Nozzles: Black: 320 nozzles Cyan/Magenta/Yellow: 384 x 3 nozzles Multiple copy…
-
Page 66
OmniPage SE: Windows 2000 Professional SP2 and SP3 not supported MP Navigator EX: QuickTime v6.4 or later is needed (Macintosh only) Some functions may not be available with Windows Media Center To upgrade from Windows XP to Windows Vista, first uninstall software bundled with the Canon inkjet printer. Appendix Camera Direct Print (PictBridge) 4″… -
Page 67
Additional System Requirements for On-Screen Manuals Browser: Windows HTML Help Viewer Note: Microsoft Internet Explorer 5.0 or later must be installed. The on-screen manual may not be displayed properly depending on your operating system or Internet Explorer version. We recommend that you keep your system up to date with Windows Update. -
Page 68: Safety Precautions
Safety Precautions Please read the safety warnings and cautions provided in this manual to ensure that you use the machine safely. Do not attempt to use the machine in any way not described in this manual. Warning You may cause an electric shock, fire, or damage the machine if you ignore any of these safety precautions.
-
Page 69
Cleaning the machine Use a damp cloth to clean the machine. Never use flammable solvents such as alcohol, benzene or thinners. If flammable solvents come in contact with electrical components inside the machine, it could cause a fire or electric shock. Always unplug the machine from the power outlet before cleaning the machine. -
Page 70
Working around the Never put your hands or fingers in the machine while it is printing. machine When moving the machine, carry the machine at both ends. Do not hold the rear side of the machine. Do not place any object on the machine. Do not place metal objects (paper clips, staples, etc.) or containers of flammable solvents (alcohol, thinners, etc.) on top of the machine. -
Page 71: And Use Of Images
Legal Limitations on Use of Your Product and Use of Images It may be unlawful to make copies of, scan, print, or use reproductions of the following documents. The list provided is non-exhaustive. When in doubt, check with a legal representative in your jurisdiction.
-
Page 72: Users In The U.s.a
1-516-328-5600 Canon U.S.A., INC. LIMITED WARRANTY — (USA Only) The limited warranty set forth below is given by Canon U.S.A., Inc. (“Canon USA”) with respect to the new or refurbished Canon-brand product (“Product”) packaged with this limited warranty, when purchased and used in the United States only.
-
Page 73
Separate Warranty. Non-Canon brand equipment and software that may be distributed with the Product are sold “as is” and without warranty of any kind by Canon USA, including any implied warranty regarding merchantability or fitness for a particular purpose, and all such warranties are disclaimed. -
Page 74
Toll-free live technical support Monday-Saturday (excluding holidays) at 1-800-828-4040 Telephone Device for the Deaf (TDD-1-866-251-3752) Repair or Exchange Service Options: In the event service is required for the Product during the limited warranty period, Canon USA offers two hardware support options: Authorized Service Facility Carry-In / Mail-In Service Canon USA’s Carry-In/Mail-In Service provides repair or exchange, at Canon USA’s option,… -
Page 75
Lake Success, NY 11042 Canon is a registered trademark of Canon Inc. ©2007 Canon U.S.A., Inc. Canon is a registered trademark of Canon Inc. in the United States and may also be a registered trademark in other countries. Safety Precautions… -
Page 76: Index
Index Appendix 59 Before Using the Machine 2 Canon U.S.A., Inc. Limited Warranty — U.S. Only 68 Cleaning exterior 40 inside 41 platen glass and document cover 40 protrusions inside the machine 42 roller 41 Copying 15 Error Code 44…
-
Page 79: Ordering Information
© 2007 Canon U.S.A., Inc. Canon is a registered trademark of Canon Inc. in the United States and may be a registered trademark or trademarks in other countries. All other product and brand names are trademarks of their respective owners. As an ®…
-
Page 80
The following FINE Cartridges are compatible with this product. For information on product specifications, please visit our website at www.usa.canon.com QT5-1208-V01 XXXXXXXX © CANON INC. 2007 PRINTED IN VIETNAM…
This manual is also suitable for:
2175b002
Skip to content
На чтение 1 мин. Просмотров 38 Опубликовано 15.12.2019
Для непрерывной работы техники советуем бесплатно скачать руководство потребителя многофункционального устройства Canon PIXMA MP210 / MP220. С помощью данной инструкции Вы сможете правильно контролировать работу аппарата.
Для просмотра содержания инструкции Вам понадобится программа Adobe Reader или DjVu.
Если на Вашем компьютере они не установлены, то Adobe Reader можно скачать с сайта Adobe  , а DjVu с сайта DjVu
Смотрите также другие инструкции раздела МФУ (многофункциональные устройства):
Смотрите также другие инструкции раздела Canon:
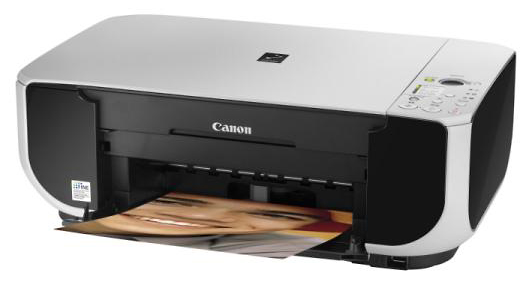
Инструкция CANON PIXMA MP210 на русском языке в формате pdf для устройства: принтер. Прочитайте инструкцию для ознакомления с функциями и условиями эксплуатации, характеристиками и способами исправления неисправностей. Данное руководство пользователя поможет использовать весь функционал изделия и увеличит срок службы при условии соблюдения всех правил изложенных в документе.
Страница скачивания руководства по обслуживанию Canon PIXMA MP210 Series
Размер: 2,84 MB
Добавлено: 2013-10-31 12:37:54
Количество страниц: 80
Скачивание руководства по обслуживанию Canon PIXMA MP210 Series должно начаться в течении нескольких секунд. Если загрузка не началась автоматически в течение 10 секунд, нажмите на Прямая ссылка. Если у Вас остаются проблемы со скачиванием инструкции Canon PIXMA MP210 Series, свяжитесь с нами, используя формуляр для сообщения об ошибках.;
We use cookies on our website to give you the most relevant experience by remembering your preferences and repeat visits. By clicking “Accept”, you consent to the use of ALL the cookies.

PDF инструкция · 80 страниц(ы) английский
инструкцияCanon Pixma MP210

series
Quick Start Guide
QT5-1208-V01 XXXXXXXX © CANON INC. 2007 PRINTED IN VIETNAM
The following FINE Cartridges are compatible with this product.
QT51208V01
For information on product specifications, please visit our website at
www.usa.canon.com
Photo All-in-One
Посмотреть инструкция для Canon Pixma MP210 бесплатно. Руководство относится к категории Принтеры, 7 человек(а) дали ему среднюю оценку 8.2. Руководство доступно на следующих языках: английский. У вас есть вопрос о Canon Pixma MP210 или вам нужна помощь? Задайте свой вопрос здесь
- Before Using the Machine
- Copying
- Printing from Your Computer
- Scanning Images
- Printing Photographs Directly from a Compliant Device
- Routine Maintenance
- Troubleshooting
- Appendix
- Safety Precautions
- Index
Главная
| Canon | |
| Pixma MP210 | 2175B002 | |
| Принтер | |
| 0013803081329 | |
| английский | |
| Руководство пользователя (PDF) |
Печать
| Максимальное разрешение | 4800 x 1200 DPI |
| Скорость печати (ч/б, обычное кач., A4/US Letter) | 22 ppm |
| Скорость печати (цвет., обычное кач., A4/US Letter) | 17 ppm |
| Технология печати | Струйная |
| Печать DVD/CD | Нет |
| Печать | цветная печать |
Свойства
| Число картриджей для печати | 4 |
| Цифровой передатчик | Нет |
Сканирование
| Максимальная область сканирования | 216 x 297 mm |
| Глубина входного цвета | 48 бит |
| Разрешение оптического сканирования | 600 x 1200 DPI |
| Сканирование | Сканирование моно |
Копирование
| Скорость копирования (обычное кач., ч/б, A4) | 22 cpm |
| Скорость копирования (обычное кач., цвет., A4) | 17 cpm |
| Максимальное число копий | 9 копий |
| Копирование | Черно-белое копирование |
Входная и выходная емкость
| Маскимальная вместимость на входе | 100 листов |
Прочие свойства
| Стандартные размеры печатного материала | 10 x 15cm, 10 x 18cm, 13 x 18cm, 20 x 25cm, 54 x 86mm |
| Совместимые операционные системы | Windows Vista / Windows XP SP1, SP2 / Windows 2000 Professional SP2, SP3, SP4nMac OS X v.10.2.8 — v.10.4 |
| Требования к питанию | AC 100-240V, 50/60 Hz |
| Мультифункциональсть устройства | Copy, Scan |
| Функции МФУ в цвете | Печать |
Типы и характеристики бумаги
| Размеры носителей печати без полей | A4 |
| Размеры конвертов | DL |
| ISO A-форматы (А0…А9) | A4, A5 |
| ISO B-форматы (B0…B9) | B5 |
| Плотность носителей для печати (лоток 1) | 64 — 105 g/m² |
| Типы материалов для печати | Envelopes, Glossy paper, Photo paper, Plain paper |
| Размеры бумаги не соответствующие стандарту ISO | Legal |
| Максимальный размер бумаги ISO A-формата | A4 |
Производительность
| Минимальные системные требования | 1024x768nCD-ROM |
| Уровень давления звука (печать) | 42.5 dB |
| Совместимость с Mac | Да |
Системные требования
| Минимальный процессор | Pentium II 300 MHz/PowerPC G3 |
| Минимальный объём ОЗУ | 128 MB |
Порты и интерфейсы
| Стандартные интерфейсы | USB 2.0 |
| Прямая печать | Да |
| USB порт | Да |
Вес и размеры
Содержимое упаковки
| Поставляемое ПО | MP Navigator EX, Easy-PhotoPrint EX, ScanSoft OmniPage SE |
Энергопитание
| Средняя потребляемая мощность (в рабочем режиме) | 13 W |
| Потребляемая мощность (выкл.) | 0.8 W |
| Потребляемая мощность (в режим ожидания) | 1.1 W |
Условия эксплуатации
| Диапазон температур при эксплуатации | 5 — 35 °C |
| Диапазон относительной влажности при эксплуатации | 10 — 90 % |
Факс
Дизайн
| Позиционирование на рынке | Дом и офис |
показать больше
Не можете найти ответ на свой вопрос в руководстве? Вы можете найти ответ на свой вопрос ниже, в разделе часто задаваемых вопросов о Canon Pixma MP210.
Какой вес Canon Pixma MP210?
Как удалить замятую бумагу из принтера?
Почему после установки оригинального картриджа принтер не работает?
Чем обусловлено плохое качество печати?
В чем разница между лазерным и струйным принтером?
Почему при печати на струйном принтере появляются черные полосы?
Что означает аббревиатура DPI?
Сколько картриджей можно поместить в Canon Pixma MP210?
Инструкция Canon Pixma MP210 доступно в русский?
Не нашли свой вопрос? Задайте свой вопрос здесь
11.02.2016
Драйверы принтеров
1
Драйверы для принтера Canon PIXMA MP210
Скачать бесплатно, без регистрации драйвер для необходимой операционной системы, а также Руководство пользователя принтера Canon PIXMA MP210 .
Драйвер принтера Canon PIXMA MP210 x64
 Версия: 1.01 | Язык: EN | Размер: 24 MB
Совместимость: Windows 10, Windows 8.1, Windows 8, Windows 7, Windows Vista, Windows XP
Установка: Скачать драйвер, открыть файл « mp210swin64101ea24.exe », нажать кнопку Setup, следовать инструкциям программы установки драйвера.
Скачать
Драйвер принтера Canon PIXMA MP210 х32
 Версия: 1.01 | Язык: EN | Размер: 23,6 MB
Совместимость: Windows 10, Windows 8.1, Windows 8, Windows 7, Windows Vista, Windows XP
Установка: Скачать драйвер, открыть файл « mp210swin101ea24.exe », нажать кнопку Setup, следовать инструкциям программы установки драйвера.
Скачать
Драйвер принтера Canon PIXMA MP210 для Mac OS
![]() Версия: 10.67.2.0 |Язык: EN | Размер: 11,2 MB
Версия: 10.67.2.0 |Язык: EN | Размер: 11,2 MB
Совместимость: Mac OS X 10.5/10.6/10.7/10.8/10.9/10.10/10.11
Скачать
Руководство пользователя для принтера Canon PIXMA MP210
Язык: RU | Размер: 10,5 Mb
Руководство по установке и настройке принтера Canon PIXMA MP210
Скачать
Рекомендуемые товары:
-

3 в наличии
Код: 50010
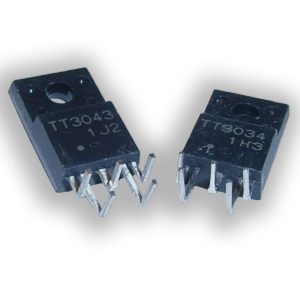
Транзисторная пара TT3034, TT3043 для Epson R290, T50, P50, L800, L805 и др.
640.00 руб.
Купить -
В наличии
Код: 00022
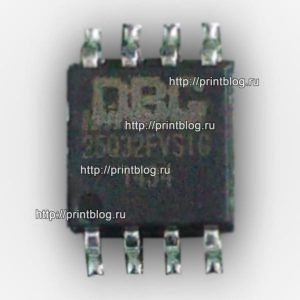
Дамп микросхемы 25Q32 для Canon i-SENSYS MF3010
228.00 руб.
Купить -
1 в наличии
Код: 00036
Микросхема EEPROM 508RP, WP, 95080WP для Canon E404 с сброшенным счетчиком памперса
305.80 руб.
Купить -
В наличии
Код: 00026
Canon iR 1133a дамп микросхемы MX29LV160DT MX29LV160AT
459.00 руб.
Купить

Комментарии для сайта Cackle