PyCharm is a dedicated Python Integrated Development Environment (IDE) providing a wide range of essential tools for Python developers, tightly integrated to create a convenient environment for productive Python, web, and data science development.
Choose the best PyCharm for you
PyCharm is available in two editions:
-
Community (free and open-sourced): for smart and intelligent Python development, including code assistance, refactorings, visual debugging, and version control integration.
-
Professional (paid) : for professional Python, web, and data science development, including code assistance, refactorings, visual debugging, version control integration, remote configurations, deployment, support for popular web frameworks, such as Django and Flask, database support, scientific tools (including Jupyter notebook support), big data tools.
For details, see the editions comparison matrix.
Supported languages
To start developing in Python with PyCharm you need to download and install Python from python.org depending on your platform.
PyCharm supports the following versions of Python:
-
Python 2: version 2.7
-
Python 3: from the version 3.6 up to the version 3.12
Besides, in the Professional edition, one can develop Django , Flask, and Pyramid applications. Also, it fully supports HTML (including HTML5), CSS, JavaScript, and XML: these languages are bundled in the IDE via plugins and are switched on for you by default. Support for the other languages and frameworks can also be added via plugins (go to or for macOS users, to find out more or set them up during the first IDE launch).
Supported platforms
PyCharm is a cross-platform IDE that works on Windows, macOS, and Linux. Check the system requirements:
|
Requirement |
Minimum |
Recommended |
|---|---|---|
|
RAM |
4 GB of free RAM |
8 GB of total system RAM |
|
CPU |
Any modern CPU |
Multi-core CPU. PyCharm supports multithreading for different operations and processes making it faster the more CPU cores it can use. |
|
Disk space |
3.5 GB |
SSD drive with at least 5 GB of free space |
|
Monitor resolution |
1024×768 |
1920×1080 |
|
Operating system |
Officially released 64-bit versions of the following:
Pre-release versions are not supported. |
Latest 64-bit version of Windows, macOS, or Linux (for example, Debian, Ubuntu, or RHEL) |
You can install PyCharm using Toolbox or standalone installations. If you need assistance installing PyCharm, see the installation instructions: Install PyCharm
Start with a project in PyCharm
Everything you do in PyCharm, you do within the context of a project. It serves as a basis for coding assistance, bulk refactoring, coding style consistency, and so on. You have three options to start working on a project inside the IDE:
-
Open an existing project
-
Check out a project from version control
-
Create a new project
Open an existing project
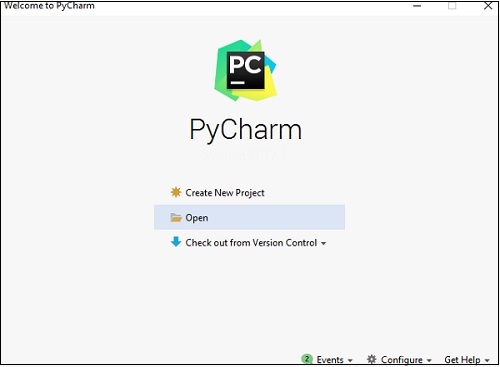
Begin by opening one of your existing projects stored on your computer. You can select one in the list of the recent projects on the Welcome screen or click Open:

Otherwise, you can create a project for your existing source files. Select the command Open on the menu, and specify the directory where the sources exist. PyCharm will then create a project from your sources for you. Refer to the section Create a project from existing sources for details.
Check out an existing project from Version Control
You can also download sources from a VCS storage or repository. Choose Git (GitHub), Mercurial, Subversion, Perforce (supported in Professional edition only), and then enter your credentials to access the storage.
Then, enter a path to the sources and clone the repository to the local host:

Refer to the section Version control for details.
Create a new project
To create a project, do one of the following:
-
From the main menu, choose
-
On the Welcome screen, click New Project
In PyCharm Community, you can create only Python projects, whereas, with PyCharm Professional, you have a variety of options to create a web framework project.


See more details in Create a Python project.
When creating a new project, you need to specify a Python interpreter to execute Python code in your project. You need at least one Python installation to be available on your machine.
For a new project, PyCharm creates an isolated virtual environment: venv, pipenv, poetry, or Conda. As you work, you can change it or create new interpreters. You can also quickly preview packages installed for your interpreters and add new packages in the Python Package tool window.

For more details see Configure a Python interpreter.
Look around
When you launch PyCharm for the very first time, or when there are no open projects, you see the Welcome screen. It gives you the main entry points into the IDE: creating or opening a project, checking out a project from version control, viewing documentation, and configuring the IDE.
When a project is opened, you see the main window divided into several logical areas. Let’s take a moment to see the key UI elements here:

-
Window header contains a set of widgets which provide quick access to the most popular actions: project widget, VCS widget, and run widget. It also allows you to open Code With Me, Search Everywhere, and Settings.
-
Project tool window on the left side displays your project files.
-
Editor on the right side, where you actually write your code. It has tabs for easy navigation between open files.
-
Context menus open when you right-click an element of the interface or a code fragment and show the actions available.
-
Navigation bar allows you to quickly navigate the project folders and files.
-
Gutter, the vertical stripe next to the editor, shows the breakpoints you have, and provides a convenient way to navigate through the code hierarchy like going to definition/declaration. It also shows line numbers and per-line VCS history.
-
Scrollbar, on the right side of the editor. PyCharm constantly monitors the quality of your code by running code inspections. The indicator in the top right-hand corner shows the overall status of code inspections for the entire file.
-
Tool windows are specialized windows attached to the bottom and the sides of the workspace. They provide access to typical tasks such as project management, source code search and navigation, integration with version control systems, running, testing, debugging, and so on.
-
The status bar indicates the status of your project and the entire IDE, and shows various warnings and information messages like file encoding, line separator, inspection profile, and so on. It also provides quick access to the Python interpreter settings.

-
Project tool window on the left side displays your project files.
-
Editor on the right side, where you actually write your code. It has tabs for easy navigation between open files.
-
Navigation bar allows you to quickly navigate the project folders and files.
-
Gutter, the vertical stripe next to the editor, shows the breakpoints you have, and provides a convenient way to navigate through the code hierarchy like going to definition/declaration. It also shows line numbers and per-line VCS history.
-
Scrollbar, on the right side of the editor. PyCharm constantly monitors the quality of your code by running code inspections. The indicator in the top right-hand corner shows the overall status of code inspections for the entire file.
-
Tool windows are specialized windows attached to the bottom and the sides of the workspace. They provide access to typical tasks such as project management, source code search and navigation, integration with version control systems, running, testing, debugging, and so on.
-
The status bar indicates the status of your project and the entire IDE, and shows various warnings and information messages like file encoding, line separator, inspection profile, and so on. It also provides quick access to the Python interpreter settings.
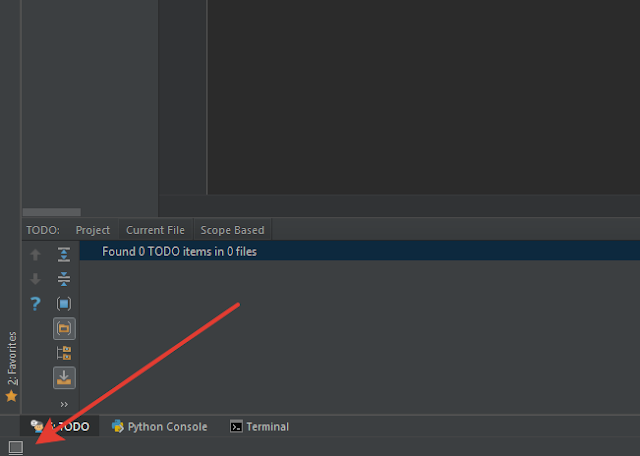
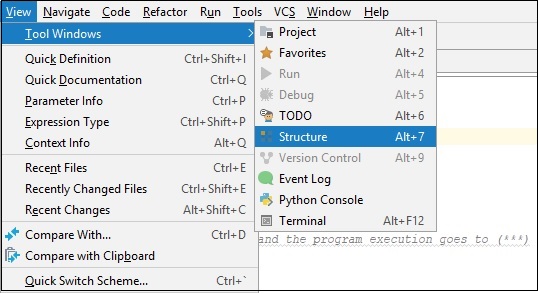
Also, in the bottom-left corner of the PyCharm window, in the Status bar, you see the button  or
or . This button toggles the showing of the tool window bars. If you hover your mouse pointer over this button, the list of the currently available tool windows shows up.
See the pages User interface and Tool windows to learn more about showing or hiding tool windows.
Code with smart assistance
When you have created a new project or opened an existing one, it is time to start coding.
Create a Python file
-
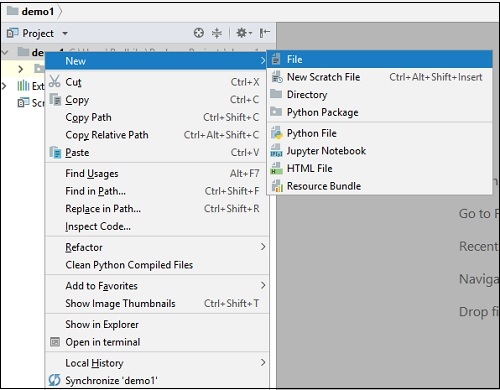
In the Project tool window, select the project root (typically, it is the root node in the project tree), right-click it, and select .

-
Select the option Python File from the context menu, and then type the new filename.

PyCharm creates a new Python file and opens it for editing.


PyCharm takes care of the routine so that you can focus on the important. Use the following coding capabilities to create error-free applications without wasting precious time.
Code completion
Code completion is a great time-saver, regardless of the type of file you’re working with.
Basic completion works as you type and completes any name instantly.
Smart type-matching completion analyzes the context you’re currently working in and offers more accurate suggestions based on that analysis.

Intention actions
PyCharm keeps an eye on what you are currently doing and makes smart suggestions, called intention actions, to save more of your time. Indicated with a lightbulb, intention actions let you apply automatic changes to code that is correct (in contrast to code inspections that provide quick-fixes for code that may be incorrect). Did you forget to add some parameters and field initializers to the constructor? Not a problem with PyCharm. Click the lightbulb (or press Alt+Enter) and select one of the suggested options:

The full list of available intention actions can be found in or for macOS users.
Keep your code neat
PyCharm monitors your code and tries to keep it accurate and clean. It detects potential errors and problems and suggests quick-fixes for them.
Every time the IDE finds unused code, an endless loop, and many other things that likely require your attention, you’ll see a lightbulb. Click it, or press Alt+Enter, to apply a fix.
The complete list of available inspections can be found under (or for macOS users). Disable some of them, or enable others, plus adjust the severity of each inspection. You decide whether it should be considered an error or just a warning.
Generate some code
Writing code can be a lot easier and quicker when you use the code generation options available in PyCharm. The menu Alt+Insert will help you with creating symbols from usage, as well as suggest overriding or implementing some functions:

Use live templates (choose or press Ctrl+J) to produce the entire code constructs. You can explore the available ready-to-use live templates In the Settings dialog (Ctrl+Alt+S) (Settings | Editor | Live templates or if you are a macOS user).
If you see that you are lacking something especially important for your development, extend this set of templates with your own. Also, consider quickly surrounding your code with complete constructs (choose or press Ctrl+Alt+T. For example, with an if statement:

Find your way through
When your project is big, or when you have to work with someone else’s code, it’s vital to be able to quickly find what you are looking for and dig into the code. This is why PyCharm comes with a set of navigation and search features that help you find your way through any code no matter how tangled it is.
Basic search
With these search facilities, you can find and replace any fragment of code both in the currently opened file Ctrl+F, or in an entire project Ctrl+Shift+F.
Search for usages
To find where a particular symbol is used, PyCharm suggests full-scale search via Find Usages Alt+F7:

Project navigation
You can tell a lot just looking at your File Structure, with its imports or call hierarchies:

Also, you can navigate to:
-
Class, file, or symbol by its name.
-
Declaration Ctrl+B.
-
Base class/base function Ctrl+U.
The icons in the left-hand gutter can also help you with navigation:

Navigate through the timeline
Remembering all your activity in the project, PyCharm can easily navigate you to the Recent Files Ctrl+E or Recently Changed Files Alt+Shift+C.
To go through the history of changes, try using Back/Forward navigation (Ctrl+Alt+Left / Ctrl+Alt+Right) and/or go to last edit locationCtrl+Shift+Backspace.
Search Everywhere
If you have a general idea of what you’re looking for, you can always locate the corresponding element using one of the existing navigation features. But what if you want to look for something in every nook and cranny? The answer is to use Search Everywhere!
To try it, click the magnifying glass button in the upper right-hand corner of the window, or invoke it with Double Shift (press Shift twice).

Run, debug and test
Now when you’ve played with the code and discovered what you can do with it, it’s time to run, debug and test your app.
Run
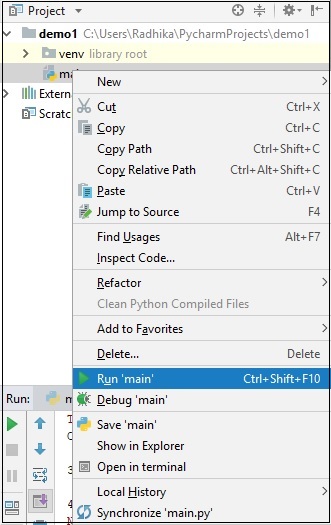
The easiest way to run an application is to right-click in the editor, and then choose from the context menu:

If your Python script contains the __main__ clause, then you can click the  button in the gutter, and then choose the desired command.
You can see the your script execution in the Run tool window.

When you perform run, debug, or test operations with PyCharm, you always start a process based on one of the existing run/debug configurations, using its parameters.
When you run your application for the very first time, PyCharm automatically creates the temporary Run/Debug configuration. You can modify it to specify or alter the default parameters and save it as a permanent Run/Debug configuration.
See how to tune run/debug configurations in Run/debug configurations.
Debug
Does your application stumble on a runtime error? To find out what’s causing it, you will have to do some debugging. PyCharm supports the debugger on all platforms.
Debugging starts with placing breakpoints at which program execution will be suspended, so you can explore program data. Just click the gutter of the line where you want the breakpoint to appear.
To start debugging your application, press Shift+F9. Then go through the program execution step by step (see the available options in the menu or the Debug tool window), evaluate any arbitrary expression, add watches, and manually set values for the variables.

Refer to the section Debugging for details.
Test
It is a good idea to test your applications, and PyCharm helps doing it as simple as possible.
With PyCharm, you can:
-
Create tests
-
Create special testing run/debug configurations.
-
Run and debug tests right from the IDE, using the testing run/debug configurations.
-
And, finally, the most important thing — you can explore test results in the test runner tab of the Run tool window:


To learn about the numbers, read the Test Runner tab section.
PyCharm supports all the major Python testing frameworks:
-
Unittest
-
Doctest
-
Nosetest
-
pytest
For each of these frameworks, PyCharm provides its own run/debug configuration.
Refer to tutorial Step 3. Test your first Python application and to the Run tests section for details.
With PyCharm Professional you can run, debug, and test your Python code remotely. You can deploy your local applications to some remote server. To learn about deployment servers, refer to the section Configuring Synchronization with a Web Server. PyCharm Professional also helps compare local and remote folders, and synchronize the local copy with that deployed on the server.
Keep your source code under Version Control
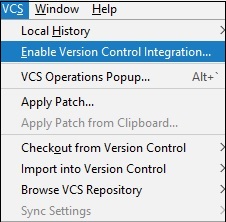
VCS
If you are keeping your source code under version control, you will be glad to know that PyCharm integrates with many popular version control systems: Git (or GitHub), Mercurial, Perforce (supported in Professional edition only), Subversion. To specify credentials and any settings specific to a particular VCS, go to (or if you are a macOS user).
The VCS menu gives you a clue about what commands are available. For example, you can see the changes you’ve made, commit them, create changelists and much more from the Local Changes view: (or just press Alt+9). Also, find some VCS basic commands in the Navigation bar above the editor:

Refer to the section Version control for details.
Local history
In addition to traditional version control, you can use the local history. With Local History, PyCharm automatically tracks changes you make to the source code, the results of refactoring, and so on
Local history is always enabled. To view it for a file or a folder, bring up Local History by selecting . Here you can review the changes, revert them, or create a patch.
Process data
PyCharm has an interactive Python console to perform smart operations over data with on-the-fly syntax check with inspections, braces and quotes matching, and of course, code completion. You can also benefit from the built-in support for Anaconda.
With PyCharm Professional, you can analyze and visualize various scientific and statistical data. Jupyter Notebook integration enables editing, executing, and debugging notebook source code and examining execution outputs, including stream data, images, and other media.

With the R plugin installed in PyCharm, you can perform various statistical computing using R language and use coding assistance, visual debugging, smart running and preview tools, and other popular IDE features.

As you might have noticed already, creating projects of the various types (Django, for example) requires a data source. It is also quite possible that you inject SQL statements into your source code.
PyCharm Professional does not enable you to create databases, but provides facilities to manage and query them. Once you are granted access to a certain database, you can configure one or more data sources within PyCharm that reflect the structure of the database and store the database access credentials. Based on this information, PyCharm establishes a connection to the database and provides the ability to retrieve or change information contained therein.
Access to the databases is provided by the Database window (). This tool window allows you to work with the databases. It lets you view and modify data structures in your databases, and perform other associated tasks.

See Database tools and SQL for details.
Customize your environment
Feel free to tweak the IDE so it suits your needs perfectly and is as helpful and comfortable as it can be. Go to Settings to see the list of available customization options.
Appearance
The first thing to fine-tune is the general «look and feel.» Go to File | Settings | Appearance and Behavior | Appearance ( for macOS users) to select the IDE theme: the light themes or Darcula if you prefer a darker setting.
Editor
The many pages available under File | Settings | Editor ( for macOS users) help you adjust every aspect of the editor’s behavior. A lot of options are available here, from general settings (like Drag’n’Drop enabling, scrolling configuration, and so on.), to color configuration for each available language and use case, to tabs and code folding settings, to code completion behavior and even postfix templates.
Refer to the section Configuring PyCharm settings for details.
Code style
Code style can be defined for each language under File | Settings | Editor | Code Style ( for macOS users). You can also create and save your own coding style scheme.

Refer to Configuring code style and Code Quality Assistance Tips and Tricks, or How to Make Your Code Look Pretty? for details.
Keymap
PyCharm uses the keyboard-centric approach, meaning that nearly all actions possible in the IDE are mapped to keyboard shortcuts.
The set of keyboard shortcuts you work with is one of your most intimate habits — your fingers «remember» certain combinations of keys, and changing this habit is easier said than done. PyCharm supplies you with a default keymap (choose from the main menu) making your coding really productive and convenient. However, you can always change it going to File | Settings | Keymap ( for macOS users).
There are also some pre-defined keymaps (like Emacs, Visual Studio, Eclipse, NetBeans and so on), and you can also create your own keymap based on an existing one.
If you feel most productive with vi/Vim, an emulation mode will give you the best of both worlds. Enable the IdeaVim plugin in the IDE and select the vim keymap.
Refer to the section Configure keyboard shortcuts for details.
That’s it! Go ahead and develop with pleasure!
We hope this brief overview of essential PyCharm features will give you a quick start. There are many important features that make a developer’s life easier and more fun, and the source code neater and cleaner. Take these first few steps now, and then dig deeper when you feel the time is right:
- Step 1. Create and run your first Python project
- Step 2. Debug your first Python application
- Step 3. Test your first Python application
- Step 4. Create and run your first Django project
Enjoy PyCharm! With any questions visit our Discussion Forum, twitter and blog, where you can find news, updates, and useful tips and tricks. Also, don’t hesitate to report any problems to our support team or the PyCharm issue tracker.
Last modified: 10 March 2023
Уровень сложности
Простой
Время на прочтение
9 мин
Количество просмотров 19K
Приветствие
Привет, сегодня я расскажу новичкам про полезные и удобные функции PyCharm (далее пайчарм). Эта статья предназначена для тех, кто только знакомится с PyCharm и написал свои первые программы. Затронем основной функционал пайчарма, который может упростить и ускорить вашу работу и узнаем, как запускать сервер и тесты Django в один клик. Поскольку, статья для новичков, то буду писать довольно подробно.
Буду рад увидеть в комментариях и другие полезные возможности пайчарма, о которых я не упомянул в статье.
Создание и настройка проекта
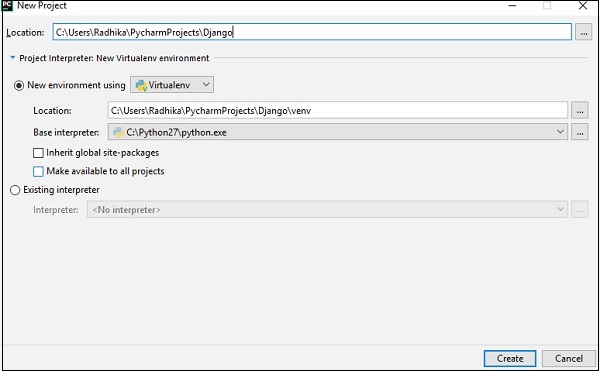
Начнём с самого главного — создания нового проекта (File → New Project).

На вкладке слева можно выбрать на чём будет основан ваш проект. Я покажу пример создания проекта Django (далее джанго), но Pure Python не будет сильно отличаться.
-
В поле
Locationвыбираем директорию, в которой создадим наш проект. После выбора директории в поле прописываем название_проекта — это и будет папка нашего проекта. -
Выбор между новой виртуальной средой (
New enviroment using) и уже существующей (Previosly configured interpreter)
а) Если вы выбираете уже существующую виртуальную среду, то нужно указать путь до файла python.exe в папке ../venv/Scripts/python.exe (для Linux ../venv/bin/python)
б) Но как правило создаётся новая виртуальная среда. В полеLocationможно выбрать местонахождение папки venv. По умолчанию папка venv расположится внутри папки проекта. Если необходимо создать папку с именем отличным от venv, то в полеLocationсотрите venv и впишите название папки.
ПунктInherit global site-packagesпозволяет включить в нашу виртуальную среду все библиотеки установленные в глобальной среде.Make available to all projectsотвечает за видимость созданной виртуальной среды для других проектов. Если вам нужна одна виртуальная среда сразу на несколько проектов, то стоит выбрать этот пункт. -
Если у вас отсутствует путь в
Base interpreter, то нужно добавить python в PATH. -
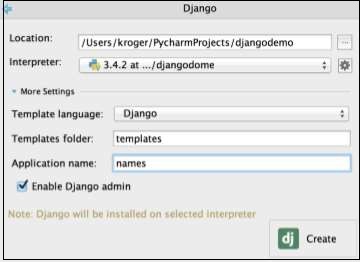
Тут уже начинаются настройки для джанго. В поле
Tempate languagesидёт выбор языка для html шаблонов. Можно оставить стандартный Django или при необходимости выбрать Jinja2. -
Поле
Templates folderотвечает за название папки с шаблонами. Без особой необходимости менять название этой папки не стоит. -
В
Application nameможно указать имя нашего первого приложения, которое мы хотим создать. -
Пункт
Enable Django adminотвечает за работу стандартной админ. панели джанго. Если вам не нужна полностью своя админ. панель, то смело ставим тут галочку. Функционала стандартной админ. панели, как правило, достаточно.
Нажимаем Create и ждём пока создастся наш проект. Созданный проект будет иметь следующую структуру:

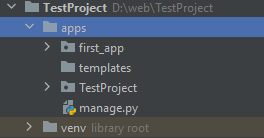
Я привык работать с проектом, когда все приложения вложены ещё в одну папку, а в главной директории находится папка с приложениями, файлы настройки и папка venv. Поэтому я создам папку apps (ПКМ по основной(верхней) папке → New → Directory) и перенесу в неё папки first_app, TestProject, templates и файл manage.py. (Зажав Ctrl кликаем на нужные папки, далее нажимаем Ctrl+X, выбираем созданную ранее папку apps и нажимаем Ctrl+V). Если после переноса файлов у вас в папке apps появился файл __init__.py, то удалите его. Получим следующую структура проекта:
Чтобы джанго правильно искал шаблоны и все импорты работали корректно нужно промаркировать папки. Для этого кликаем правой кнопкой по папке apps → выбираем пункт Make Directory as и выбираем Sources Root. Для папки templates установим значение Template Folder. В папке apps создадим папку static, для хранения статических файлов и промаркируем её как Resource Root.

В процессе разработки могут появится файлы, которые не нужно проверять линтеру, такие директории можно помечать как Excluded. Например, папка vevn отмечена так по умолчанию.
Ещё немного про виртуальную среду
Функционал пайчарма часто позволяет избегать работы с терминалом и настраивать всё проще и быстрее. Поэтому даже в уже существующем проекте виртуальную среду можно удобно настроить. Для этого откроем настройки (Ctrl+Alt+S), и перейдём во вкладку Project: <Имя проекта>. Здесь нас интересует пункт Python Interpretter

В поле Python Interpretter указана используемая версия python, имя проекта (в скобках) и путь к файлу python.exe для виртуальной среды. Если вам потребовалось сменить виртуальную среду или у вас она не выбрана, то нажимаем на Add Interpreter → Add Local Interpreter. Дальнейшие действия по настройке виртуальной среды можно посмотреть в главе «Создание проекта» пункт 2.
Возможности PyCharm
Терминал
В настройках можно включить автоматическую активацию виртуальной среды в терминале при его открытии. Очень полезная вещь, ведь теперь не придётся каждый раз активировать её вручную. Для этого открываем настройки (Ctrl+Alt+S) → Tools → Terminal.

Здесь можно настроить стартовую директорию при открытии терминала (Start directory), выбрать какой терминал будет открываться по умолчанию (Shell path) и самое главное установить автоматическую активацию виртуальной среды. Ставим галочку перед Activate virtualenv и готово.
Если у вас выбран терминал bash, то вы столкнётесь с тем, что при открытии терминала над строкой ввода не будет отображаться название виртуальной среды. Не пугайтесь. Не знаю с чем связан данный баг, но всё работает корректно и виртуальная среда уже активирована. Можете проверить выбранный интерпритатор с помощью команды which python .

Работа с Git
Больше не придётся мучаться с командами в терминале. Все основные действия с гитом можно проделывать с помощью встроенных инструментов пайчарм. В левой верхней части окна находится вкладка Commit. Нажав на неё откроется меню работы с гитом.
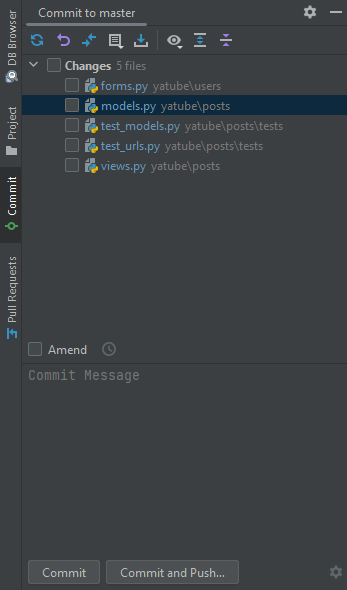
Первые три значка в верхней строке отвечают за проверку последних изменений, откат изменений и сравнение файла до и после изменений.
Можно выбрать файлы, которые войдут в коммит, написать комментарий (Commit Message), дополнить последний коммит (Amend). Кнопки Commit и Commit and Push отвечают соответственно за создание коммита и его отправку на GitHub или другой сервис. При входе в свой GitHub аккаунт в дальнейшем не потребуется каждый раз вводить пароль перед пушем, всё произойдёт автоматически.
Базы данных
По умолчанию инструменты для работы с БД доступны только в pro версии пайчарма. Для бесплатной версии есть плагин, который предоставляет схожий функционал. Расскажу про оба варианта.
Работа с БД в PyCharm Professional
Стандартный функционал предоставляет обширный функционал для работы БД, который покрывают различные ваши потребности, но я расскажу о самом простом и полезном для новичков.
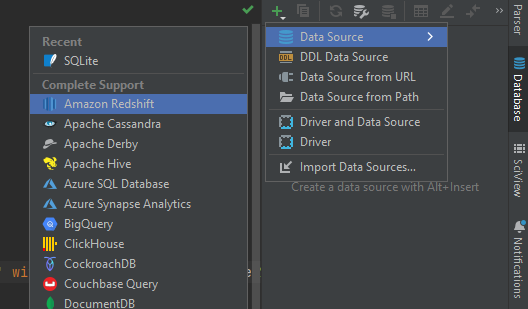
Для начала необходимо установить связь с БД. В верхнем правом углу находим вкладку Database→ нажимаем на плюс → Data Source→SQLite (тут выбираем нужную СУБД).
В открывшемся окне в поле Name вводим имя, которое мы хотим видеть при работе с БД (на название файла БД это никак не повлияет). В поле File выбираем наш файл БД и нажимаем ОК.
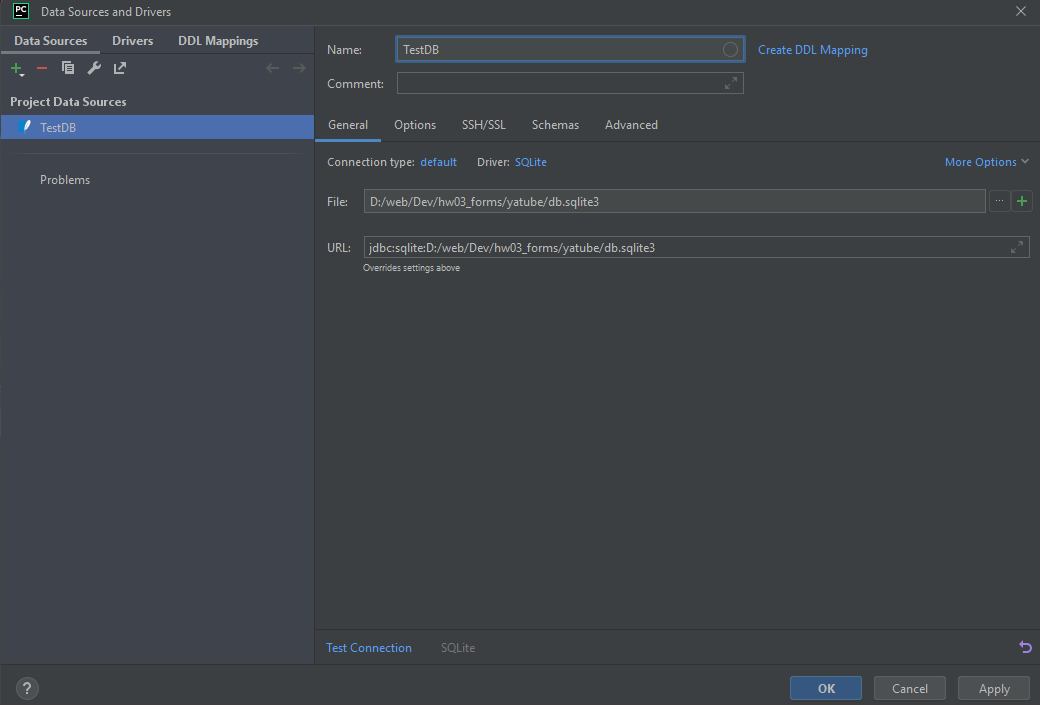
Теперь в списке можем увидеть нашу БД. Для того, чтобы обновить данные БД нажимаем на стрелочки (или комбинация Ctrl+F5) и получаем последнее состояние БД.

В этом окне мы можем видеть все таблицы БД. Двойной клик по ним откроет окно редактирования таблицы. Можно посмотреть правильно ли сохранились данные или подправить что-то при необходимости.
Работа с БД в PyCharm Community
Для работы с БД с бесплатной версии необходимо установить плагин Database Navigator (процесс установки плагинов описан ближе в главе «Плагины» ближе к концу статьи).
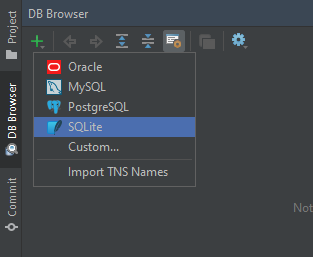
После установки плагина, в левой верхней части интерфейса появится вкладка DB Browser. Во вкладку нажимаем на плюс и выбираем нужную СУБД.

В открывшемся меню в поле Name указываем название соединения. Вместо sqlite.db указываем путь к нашей БД и нажимаем ОК.

Двойной клик по таблице откроет окно, в котором будет предложено составить SQL запрос для выбора данных из таблицы. Просто нажимаем на кнопку No Filter и получаем все записи из таблицы. Теперь у нас есть доступ к таблицам БД, возможность просматривать и редактировать их.
Настройка сервера и тестов для Django
Каждый раз для запуска сервера джанго приходится вводить команду в терминал и открывать ещё один терминал, т.к. при работе сервера нельзя пользоваться терминалом. Это доставляет неудобства, поэтому в пайчарм можно настроить запуск сервера и тестов в один клик и без блокировки терминала.

Открываем выпадающее меню и кликаем на Edit Configurations.... В открывшемся окне нажимаем на крестик и находим Django Server.
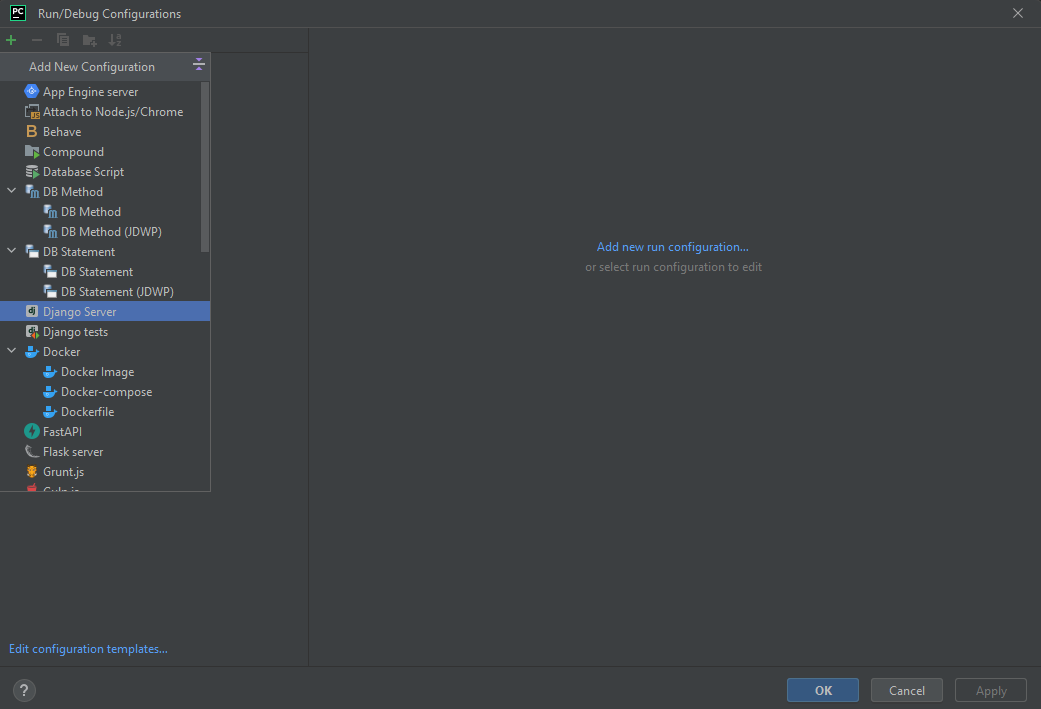
В правой части окна нам предложат настроить нашу конфигурацию. В поле Name вводим имя конфигурации, а в поле Working directory выбираем папку проекта, которую при создании мы отметили как Sources Root. Если же все приложения у вас хранятся в основной директории проекта, то укажите её в этом поле. Сохраняем конфигурацию и теперь можно запустить сервер, просто нажав на кнопку Run (зелёный треугольник).

На нижней панели появится вкладка Run, которая будет показывать информацию о работе нашего сервера и можно будет свободно работать с терминалом.

Для создания тестовой сборки вместо Django server выбираем Django tests. Поля Name и Working directory заполняются аналогично конфигурации сервера. Полезным может оказаться поле Options. Оно позволяет передать дополнительные аргументы при запуске тестов, так как при вводе команд в терминале.

Теперь все тесты будут запускаться в специальном окне, где хорошо видно, какие тесты прошли проверку, а какие нет. Можно оставить только неудачные тесты и удобно переключаться между ними. Чтобы увидеть информацию по конкретному тесту, можно просто выбрать его, а не копаться в море ошибок, пытаясь найти нужную информацию.

После такой настройки можно запускать сервер и тесты в один клик. При необходимости можно настроить и другие конфигурации, например для запуска тестов в отдельном приложении джанго.
Аналогичные конфигурации можно создать для Flask, FastAPI и многих других фреймворков.
Полезные плагины
Плагины могут очень сильно расширить и дополнить стандартный функционал. Я разделил их на три группы: обязательные, опциональные и косметика. Рекомендую скачать все плагины из первой категории. Для установки плагинов откройте настройки (Ctrl+Alt+S) → Plugins и останется выбрать только нужные вам расширения.
Обязательные
-
Tabnine – потрясающий плагин, который будет писать код за вас). Часто спасает при вводе длинных строк, которые он дописывает сам. И даже может дописывать простенькие функции или логические конструкции. В общем, крайне полезная вещь. Конечно же есть и минус, большая часть функционала платная, по подписке. Но даже бесплатная версия будет полезна
-
Rainbow Brackets – меняет цвет скобок в зависимости от их вложенности. Очень упрощает работу и позволяет гораздо быстрее ориентироваться в коде.
-
Requirements – плагин для более удобной работы с файлом requirements.txt
Опциональные
-
Translation – если вы прекрасно знаете английский, то этот плагин вам ни к чему, но всегда удобно иметь переводчик под рукой.
-
WakaTime – позволяет отслеживать сколько времени вы потратили на работу, на какой проект и многое другое. Есть и платный функционал, но для простого анализа потраченного на работу времени хватает и бесплатной версии.
-
GitToolBox – расширяет стандартный функционал работы с гитом.
-
PyLint, SonarLint и другие. Я считаю, что линтеров много не бывает, поэтому предлагаю поставить какой-нибудь дополнительный линтер.
-
MyPy – плагин помогает в проверке статических типов. Он использует собственную динамическую проверку Python или неявную (утиную) типизацию с подсказкой самого типа.
-
Flake8 – проверяет код на соответствие PEP8. Его установка отличается от стандартных плагинов. Как установить flake8 в pycharm.
Косметика
-
ExtraToolWindows Colorful Icons – делает многие иконки цветными и лично для меня упрощает навигацию по ним.
-
Pokemon Progress – добавит немного веселья в работу. Плагин меняет полосу загрузки на покемонов. Можно выбрать нескольких любимых, а можно каждый раз любоваться новыми.
-
Ещё есть всевозможные варианты тем на любой вкус и цвет. При большом желании можно создать и свою. Лично меня вполне устраивает стандартная тема
Darcula.
Это список основных плагинов, которыми я пользуюсь. Есть и другие, но не буду нагружать вас слишком сильно, для начала хватит и этого. В комментариях можете поделиться своими самыми полезными плагинами.
Горячие клавиши и всякие мелочи
В этой главе будут самые полезные горячий клавиши и небольшие фишки пайчарма.
-
Быстрое открытие файла, функции, класса. Двойное нажатие Shift откроет строку поиска. Здесь вводим нужное нам название и можно быстро перейти к найденному элементу. Особенно полезно, когда проект большой и приходится лазить по папкам в поиска нужного файла или функции.
-
Разделение рабочей области. Нажав ПКМ на вкладку открытого файла, можно выбрать один из пунктов
Splitи видеть перед собой сразу два и более файлов. -
Переход к функции, классу или файлу. Зажав Ctrl и кликнув по функции или классу можно быстро переместиться к ним, даже если они находятся в другом файле. А если в коде у вас, например, указано имя html шаблона, то по клику можно быстро его открыть.
-
Автоформатирование кода. Комбинация Ctrl+Alt+L приводит весь код в файле в соответствие с настройками форматирования для данного типа файла. Удобно применять при переносе строк, чтобы все отступы подравнялись и заодно поправить то, что вы могли пропустить
-
Дублировать текущую строку. Ctrl+D создаёт дубликат строки и вставляет его на следующую строку. Пригождается при написании похожих и длинных конструкций
-
Переименовать что угодно. Shift+F6 переименует выбранную переменную, файл и много другое сразу во всём проекте или при необходимости только в выбранном файле. Если имя файле в коде хранится в виде строки, то оно тоже изменится.
-
Комбинация Ctrl+/ закомментирует (либо расскомментирует) все выделенные строки, если выбрана английская раскладка. При активной русской раскладке данная комбинация свернёт выбранный участок кода, а при нажатии на появившийся символ многоточия раскроет его обратно.
-
Левый Alt+ЛКМ(левая кнопка мыши) добавит дополнительный курсор в указанное место.
-
Поиска по файлу — Ctrl+F. Поиска и замена в файле — Ctrl+R. Ctrl+Shift+F текстовый поиск сразу по всему проекту.
-
Отмена последнего действия — Сtrl+Z, операция обратная отмена последнего действия (если переборщили с Ctrl+Z) Ctrl+Y. При Первом использовании Ctrl+Y пайчарм предложит выбрать, что назначить на эту комбинацию: удаление строки или Ctrl+Z наоборот. Я предпочитаю второе.
-
Открыть буфер обмена. Win+V откроет буфер обмена и можно выбрать нужное из последних скопированных данных. Данная комбинация относится к windows, а не пайчарму, но она очень полезна в работе. Для Linux тоже можно найти менеджеры буфера обмена.
-
Установки длины строки по PEP8. В настройках перехожим в Editor → Code Stile → Python. В поле
Hard wrap atустанавливаем значение79. В полеWrap on typingустанавливаем значениеYes. Теперь справа от кода мы будем видеть линию, которая ограничивает длину строки в 79 символов, но при необходимости можно за неё вылезти. -
Список всех горячих клавиш в PyCharm
В этой статье, я постарался рассказать о самых полезных возможностях пайчарма. Если вы знаете, как ещё можно упростить процесс разработки, то пишите об этом в комментариях, возможно я и другие пользователи дополним свой арсенал инструментов разработки. Так же пишите, о чём ещё вы хотели бы услышать в таком развёрнутом формате.

Это краткое руководство предназначено для ознакомления с ключевыми понятиями и поможет быстро начать работу с IDE.
Шаг 0. Прежде чем вы начнете
На каких языках поддерживается PyCharm?
С PyCharm вы можете разрабатывать приложения на Python. Кроме того, в Professional Edition можно разрабатывать приложения Django, Flask и Pyramid. Кроме того, он полностью поддерживает HTML (включая HTML5), CSS, JavaScript и XML: эти языки включены в IDE через плагины и включены для вас по умолчанию. Поддержка других языков и фреймворков также может быть добавлена через плагины (перейдите к Settings | Plugins или PyCharm | Preferences | Plugins для пользователей MacOS, чтобы узнать больше или установить их во время первого запуска IDE).
 |
| File / Settings / Plugins |
На каких платформах я могу запустить PyCharm?
PyCharm — это кросс-платформенная среда разработки, работающая в Windows, MacOS и Linux. Если вам нужна помощь в установке PyCharm, см. Инструкции по установке для Linux , macOS и Windows .
Шаг 1. Откройте / создайте проект в PyCharm
Зачем мне нужен проект?
Все, что вы делаете в PyCharm, выполняется в контексте проекта. Он служит основой для поддержки кодирования, рефакторинга, согласованности стиля кодирования и т.д.
У вас есть три варианта начать работу над проектом внутри среды IDE:
1. Открыть существующий проект
Начните с открыв один из ваших существующих проектов, хранящихся на вашем компьютере. Вы можете сделать, нажав Открыть проект (Open )на экране приветствия (или File | Open):
 |
| Светлый интерфейс |
 |
| Темный интерфейс |
Или выберите Open в меню File и укажите каталог, в котором находятся ваши источники:
 |
| PyCharm File/Open |
Затем PyCharm создаст для вас проект из ваших источников.
Смотрите также. Раздел Импорт проекта из существующего исходного кода.
2. Создать проект с нуля
Если вы предпочитаете начинать с нуля, нажмите New Project и на открывшемся экране введите имя проекта в диалоговом окне и будет создан проект Python.
 |
| File / New Project |
Смотрите также. Раздел Создание и управление проектами
Шаг 2. Ознакомьтесь с интерфейсом
Когда вы запускаете PyCharm в первый раз или когда нет открытых проектов, вы видите Экран приветствия . Он предлагает вам основные точки входа в среду IDE: создание или открытие проекта , проверка проекта с помощью контроля версий,просмотр документации и настройка среды IDE.
Когда проект открывается, вы видите главное окно, разделенное на несколько логических областей. Давайте рассмотрим ключевые элементы пользовательского интерфейса здесь:
 |
| Интерфейс PyCharm (тёмный) |
 |
| Интерфейс PyCharm (светлый) |
- Project Tool Window. Панель инструментов проекта. В этом окне отображаются файлы вашего проекта.
- PyCharm Editor. Редактор PyCharm. Находится с правой стороны, где вы пишете свой код. В нем есть вкладки для удобной навигации между открытыми файлами.
- Navigation Bar. Панель навигации. Находится над редактором, позволяет быстро запускать и отлаживать ваше приложение, а также выполнять процедуры контроля версий VCS.
- Left gutter. Левый столбец, вертикальная полоса рядом с редактором, показывает брекпоинты и обеспечивает удобный способ перехода по иерархии кода. Он также отображает номера строк и историюVCS.
- Right gutter. Правый столбец, справа от редактора. PyCharm постоянно контролирует качество вашего кода и постоянно показывает результаты проверки в правом столбце: ошибки, предупреждения и т.д. Индикатор в правом верхнем углу показывает общий статус проверки кода для всего файла.
- PyCharm Tool Windows. Панель инструментов PyCharm. Это специальные окна, прикрепленные к низу и сторонам рабочей области, которые обеспечивают доступ к типичным задачам, таким как управление проектами, поиск и навигация по исходному коду, интеграция с системами контроля версий и т.д.
- Status Bar. Строка состояния. Указывает состояние вашего проекта и показывает различные предупреждения и информационные сообщения.
Кроме того, в нижнем левом углу окна PyCharm в строке состояния вы увидите кнопку. Эта кнопка переключает показ панелей инструментов. Если вы наведите указатель мыши на эту кнопку, появится список доступных в данный момент панелей:
 |
| Эта кнопка переключает показ панелей инструментов |
 |
| Переключение между панелями |
Шаг 3. Настройте свою среду
Вы можете настроить среду IDE, чтобы она идеально соответствовала вашим потребностям и была удобна для Вас. Зайдите в меню File / Settings, чтобы просмотреть список доступных параметров настройки.
 |
| File / Settings PyCharm |
 |
| Settings PyCharm |
Внешний вид IDE
Первое, что нужно подстроить, — это общий «внешний вид». Зайдите в меню File / Settings / Appearance and Behavior /Appearance, чтобы выбрать Тему IDE : тема по умолчанию, или Dracula, если вы предпочитаете более темную настройку:
 |
| File / Settings / Appearance and Behavior /Appearance |
Редактор
Множество вкладок, доступных в меню File / Settings / Editor помогут вам настроить каждый аспект поведения редактора. Здесь доступно множество опций, начиная с общих настроек (например, с помощью функции Drag’n’Drop, конфигурации прокрутки и т.д.). Для настройки цвета для каждого доступного языка и варианта использования, для вкладок и настроек свертки кода, для поведения завершения кода и.т.д.
 |
| File / Settings / Editor |
Стиль кода
Стиль кода может быть определен для каждого языка File / Settings / Editor / Code Style. Вы также можете создать и сохранить свой собственный стиль кода.
 |
| File / Settings / Editor / Code Style |
Раскладка
PyCharm использует подход, ориентированный на клавиатуру, что означает, что почти все действия, доступные в среде IDE, сопоставляются с комбинациями клавиш.
Горячие клавиши, с которыми вы работаете, — одна из ваших личных привычек — ваши пальцы «помнят» определенные комбинации клавиш, и изменить эти привычки достаточно сложно.
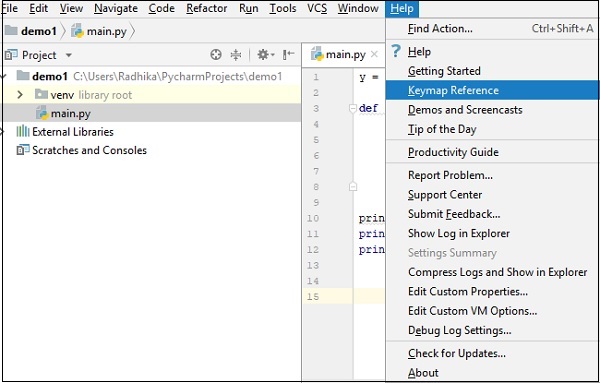
PyCharm предоставляет вам стандартную раскладку (выберите Help / Keymap Reference в главном меню), делая ваше кодирование действительно продуктивным и удобным. Однако вы всегда можете её изменить File / Settings / Keymap
 |
| Help / Keymap Reference |
 |
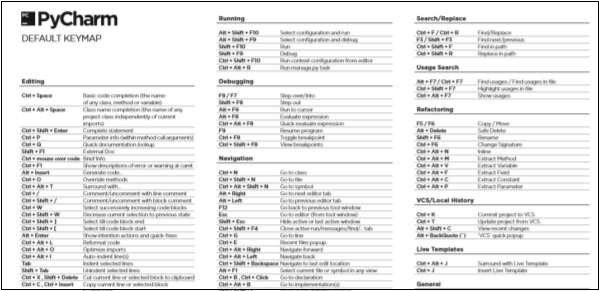
| PyCharm Default keymap |
 |
| File / Settings / Keymap |
Также есть некоторые предварительно определенные раскладки клавиатуры (такие как Emacs, Visual Studio, Eclipse, NetBeans и т.д.), И вы также можете создать свою собственную раскладку на основе существующей.
 |
| Некоторые предварительно определенные раскладки клавиатуры |
Завершение кода
Автозаполнение кода ( Auto-Completing Code) — отличная экономия времени, независимо от типа файла, с которым вы работаете. Завершение работает по мере ввода и завершения любого имени мгновенно.
Интеллектуальный ввод анализирует контекст, в котором вы сейчас работаете, и предлагает более точные предложения, основанные на этом анализе.
 |
| Auto-Completing Code PyCharm |
Intention Actions
PyCharm следит за тем, что вы сейчас делаете, и делает умные предложения, называемые Intention Actions. При указании с лампочкой Intention Actions позволяют применять автоматические изменения к коду.
 |
| Intention Actions |
Полный список доступных Intention Actions можно найти в File / Settings / Editor / Intentions
 |
| File / Settings / Editor / Intentions |
Шаг 5. Сделайте свой код аккуратным
PyCharm контролирует ваш код и пытается сохранить его точным и чистым. Он обнаруживает потенциальные ошибки и проблемы и предлагает быстрые исправления (quick-fixes) для них.
Каждый раз, когда среда IDE находит неиспользованный код, бесконечный цикл и многое другое, что , вероятно, потребует вашего внимания, вы увидите лампочку. Щелкните по ней или нажмите Alt+Enter, чтобы применить исправление.
Полный список доступных проверок можно найти в разделе меню File / Settings / Editor / Inspections. Отключите некоторые из них или включите другие, а также настройте степень серьезности каждой проверки. Вы решаете, следует ли считать это ошибкой или просто предупреждением.
 |
| File / Settings / Editor / Inspections |
Шаг 6. Создание кода
Написание кода может быть намного проще и быстрее, если вы используете варианты генерации кода, доступные в PyCharm. The Code / Generate ( Alt+Insert) поможет вам создать символы, а также предложит переопределить / реализовать некоторые функции:
Pycharm — Introduction
PyCharm is the most popular IDE used for Python scripting language. This chapter will give you an introduction to PyCharm and explains its features.
PyCharm offers some of the best features to its users and developers in the following aspects −
- Code completion and inspection
- Advanced debugging
- Support for web programming and frameworks such as Django and Flask
Features of PyCharm
Besides, a developer will find PyCharm comfortable to work with because of the features mentioned below −
Code Completion
PyCharm enables smoother code completion whether it is for built in or for an external package.
SQLAlchemy as Debugger
You can set a breakpoint, pause in the debugger and can see the SQL representation of the user expression for SQL Language code.
Git Visualization in Editor
When coding in Python, queries are normal for a developer. You can check the last commit easily in PyCharm as it has the blue sections that can define the difference between the last commit and the current one.
Code Coverage in Editor
You can run .py files outside PyCharm Editor as well marking it as code coverage details elsewhere in the project tree, in the summary section etc.
Package Management
All the installed packages are displayed with proper visual representation. This includes list of installed packages and the ability to search and add new packages.
Local History
Local History is always keeping track of the changes in a way that complements like Git. Local history in PyCharm gives complete details of what is needed to rollback and what is to be added.
Refactoring
Refactoring is the process of renaming one or more files at a time and PyCharm includes various shortcuts for a smooth refactoring process.
User Interface of PyCharm Editor
The user interface of PyCharm editor is shown in the screenshot given below. Observe that the editor includes various features to create a new project or import from an existing project.
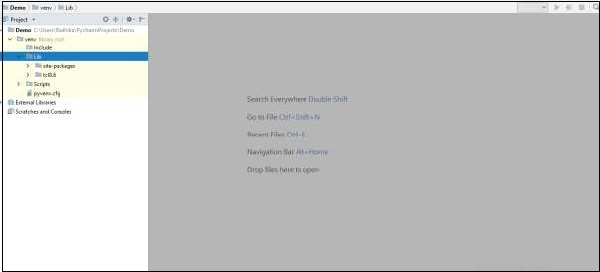
From the screenshot shown above, you can see the newly created project Demo and the site-packages folder for package management along with various other folders.
You can download the PyCharm Editor and read its official documentation at this link −
https://www.jetbrains.com/pycharm/
Pycharm — Installation
In this chapter, you will learn in detail about the installation process of PyCharm on your local computer.
Steps Involved
You will have to follow the steps given below to install PyCharm on your system. These steps show the installation procedure starting from downloading the PyCharm package from its official website to creating a new project.
Step 1
Download the required package or executable from the official website of PyCharm https://www.jetbrains.com/pycharm/download/#section=windowsHere you will observe
two versions of package for Windows as shown in the screenshot given below −
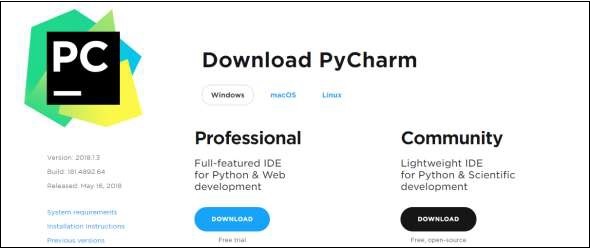
Note that the professional package involves all the advanced features and comes with free trial for few days and the user has to buy a licensed key for activation beyond the trial period. Community package is for free and can be downloaded and installed as and when required. It includes all the basic features needed for installation. Note that we will continue with community package throughout this tutorial.
Step 2
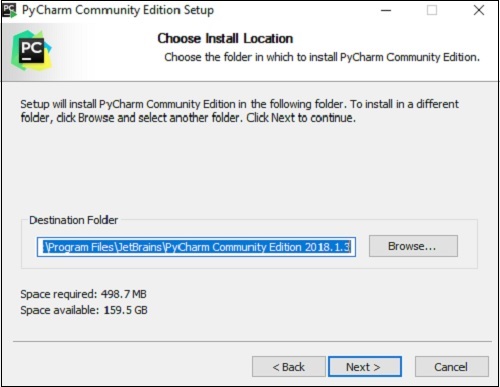
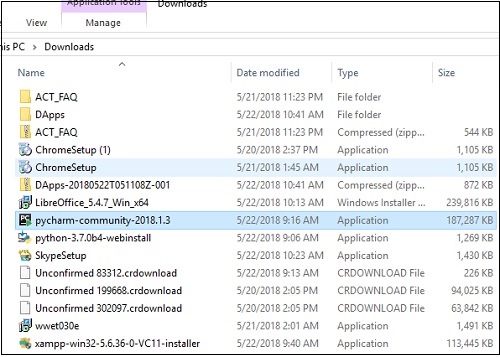
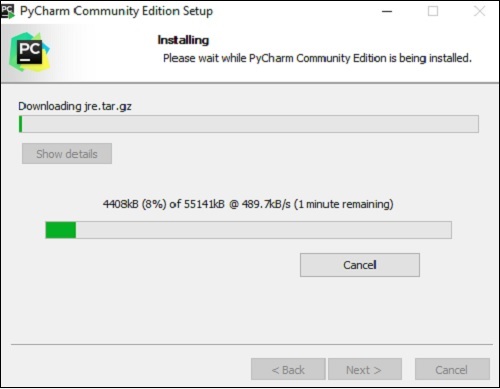
Download the community package (executable file) onto your system and mention a destination folder as shown below −
Step 3
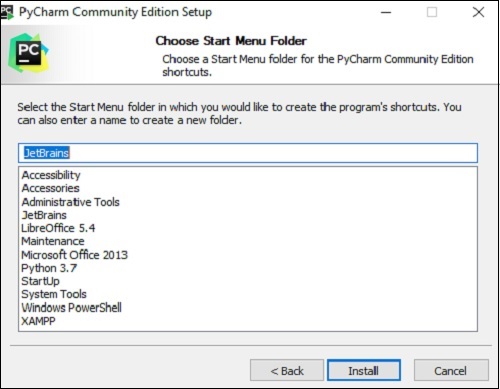
Now, begin the installation procedure similar to any other software package.
Step 4
Once the installation is successful, PyCharm asks you to import settings of the existing package if any.
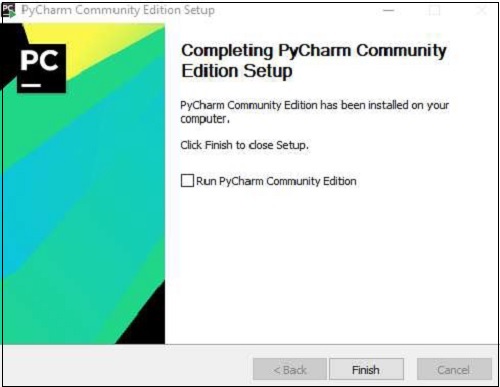
This helps in creating a new project of Python where you can work from the scratch. Note that unlike other IDEs, PyCharm only focusses on working with projects of Python scripting language.
Pycharm — Understanding Basics
This chapter will discuss the basics of PyCharm and make you feel comfortable to begin working in PyCharm editor.
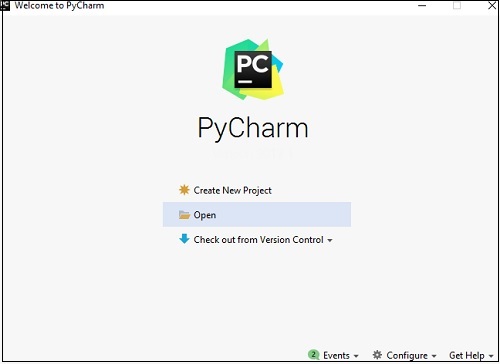
When you launch PyCharm for the first time, you can see a welcome screen with entry points to IDE such as −
- Creating or opening the project
- Checking out the project from version control
- Viewing the documentation
- Configuring the IDE
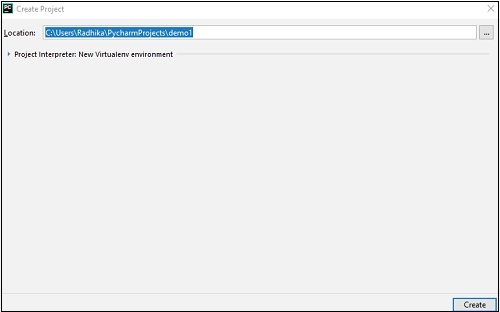
Recall that in the last chapter, we created a project named demo1 and we will be referring
to the same project throughout this tutorial. Now we will start creating new files in the same project to understand the basics of PyCharm Editor.
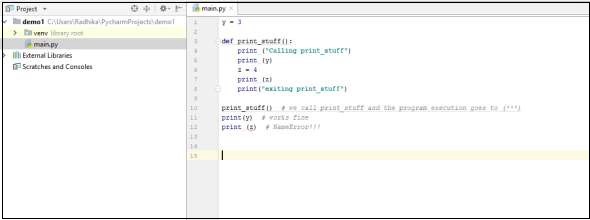
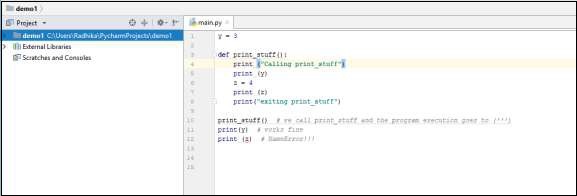
The above snapshot describes the project overview of demo1 and the options to create a new file. Let us create a new file called main.py.
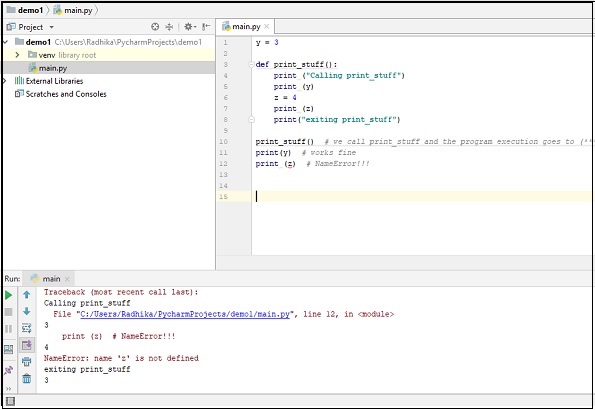
The code included in main.py is as follows −
y = 3

def print_stuff():
   print ("Calling print_stuff")
   print (y)
   z = 4
   print (z)
   print("exiting print_stuff")

print_stuff() # we call print_stuff and the program execution goes to (***)
print(y) # works fine
print (z) # NameError!!!
The code created in the file main.py using PyCharm Editor is displayed as shown below −
This code can be run within IDE environment. The basic demonstration of running a program is discussed below −
Note that we have included some errors within the specified code such that console can execute the code and display output as the way it is intended to.
Pycharm — Keymaps
PyCharm includes various Keymaps to show the most-used commands in the editor. This chapter discusses Keymaps in detail.
You can find the list of Keymaps available in the file menu Help -> Keymap Reference
as shown in the screenshot given below −
You can find the list of Keymaps and the available shortcuts in PDF format as shown below −
Note − The default Keymap for Windows and Linux operating systems is default, while in Mac OS the default Keymap is OSX 10.5.
You can also view the list of Keymaps available using the Settings option in Windows and Linux Operating system (Preferences in Mac OS) as shown in the screenshot given below −
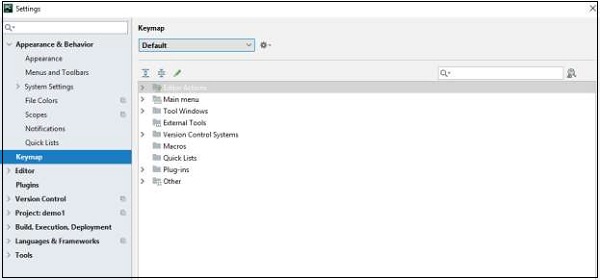
The default Keymap includes various sections for Editor Actions, Main Menu, Tool Windows, External tools, Version Control System, Macros, Quick Lists, Plug-ins and Other options as well.
Pycharm — Shortcuts
Shortcuts are the combinations of keys being used to perform a set of activities. You can find the list of PyCharm shortcuts in Keymaps guide reference.
Finding Shortcut
The list of shortcuts is available in the following option Help -> Find Action menu where it pops up with a shortcut window.
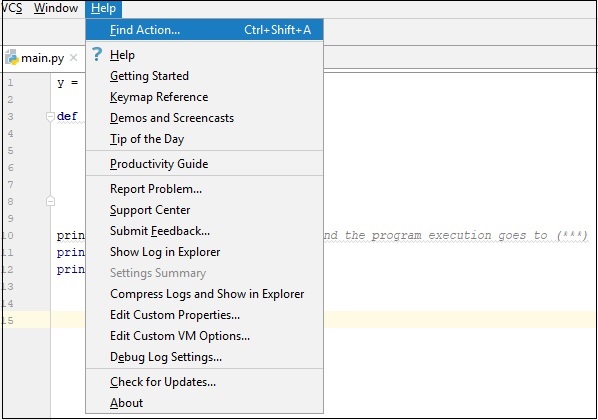
You can see the shortcut window as shown here −
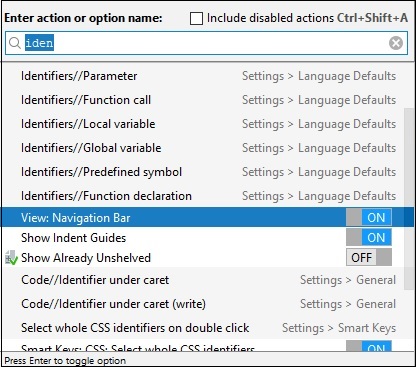
The shortcut includes a list of Identifiers, shortcuts with functions and option menu bar.For example, View Navigation Bar includes toggle ON and OFF which displays the navigation bar as per the value set (ON and OFF).
Pycharm — Omni
Omni is the section in PyCharm which deals into anywhere from any place. It includes various tools for a user to move from one place to another. It helps in such a scenario that you need to quickly move from one project directory into another. This chapter will familiarize you with the functionalities of Omni.
Functionalities
The Navigate menu describes the functionalities involved in Omni. This section discusses these in detail −
Class
This helps to navigate from one class to another in a mentioned project. This is very helpful to navigate through a list of classes.
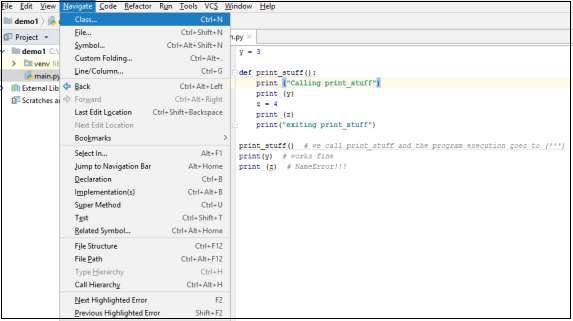
Back
This option helps to move backwards from the existing state. The shortcut key is Ctrl+Alt+Left.

Forward
It works similar to the back option. However, the functionality is completely vice-versa.
Pycharm — Macros
The difference between a macro and Omni is subtle in PyCharm Editor. Omni allows you to go to the exact location of editor or a specified place of code with no particular significance. Macro on the other hand allows the user to navigate through functions and classes or particular class method.
Navigate Macro
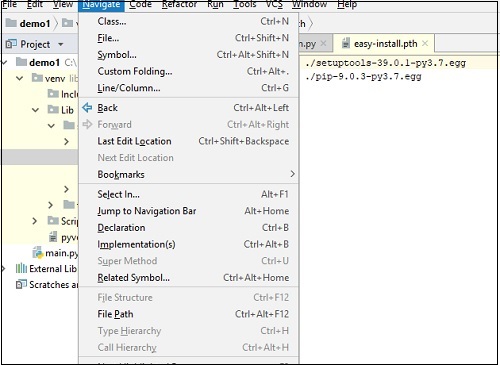
Observe the following screenshot for a better understanding of Navigate macro −
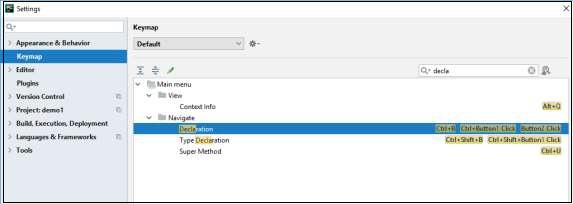
The Navigate -> Declaration helps to show declaration, type declaration and to define super methods. Various attributes included in the type declaration are shown below −

However, there is an issue with this macro, if a user tries to go to the declaration of a .so object for example, navigating from datetime module to select module, then each time it will encounter the stub file.
Search Everywhere
It helps to search the classes and associated methods. It includes the option to search with Google as well.
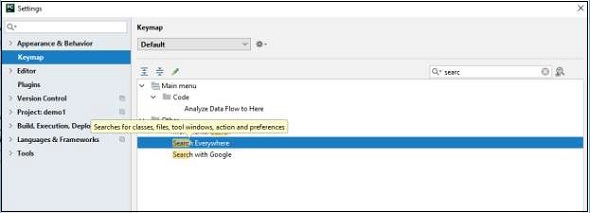
Each of these parts includes a shortcut key combination next to its section name. Search Everywhere is a gateway to other search actions available in PyCharm.
Pycharm — Micros
Micros deal with getting places within a specified file. These tools end up using most of the development procedure. In this chapter, you will learn Micro in detail.
Consider the example of Structure Panel which is being used as representation of micros.
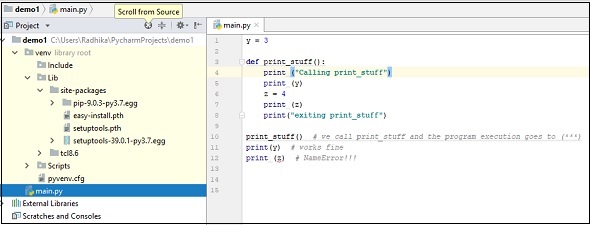
Scroll from Source
It helps to scroll from the mentioned source like the complete folder location of the specified file.
Collapse All
Consider the screenshot shown below which shows opening the file with specified location.In order to collapse the folder structure, you can use the shortcut key shown in the image.
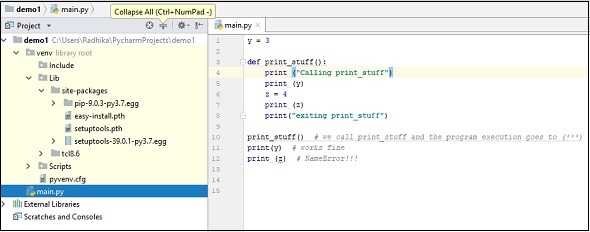
This shortcut key helps in collapsing the folder location of specified code as shown below.
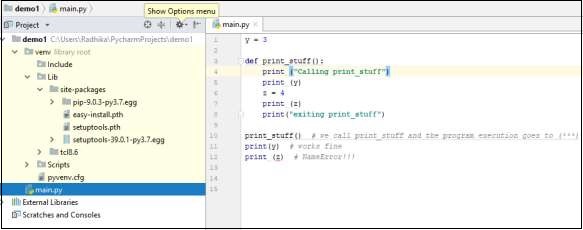
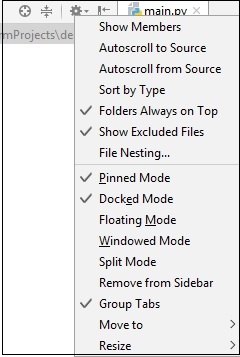
Show Options menu
The Show Options menu of the structure panel of project displays the list of options available for the project created. Observe the screenshot shown below for a better understanding −
The list of options is displayed below −
Hide
This option helps to hide the structure panel of the project window. The user interface of the structure panel after being collapsed is as shown below −
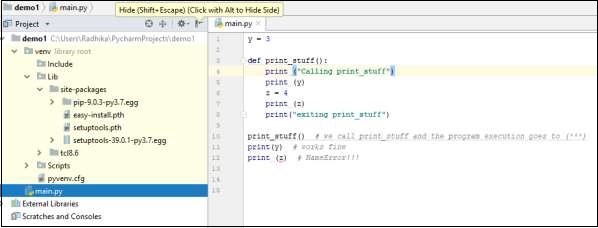

You can reopen the structure panel as shown here −
Pycharm — Improving and Writing Code
PyCharm includes various standards for writing code with proper indentations valid for Python. This makes it interesting to improve the code standards and writing the complete code in PyCharm editor.
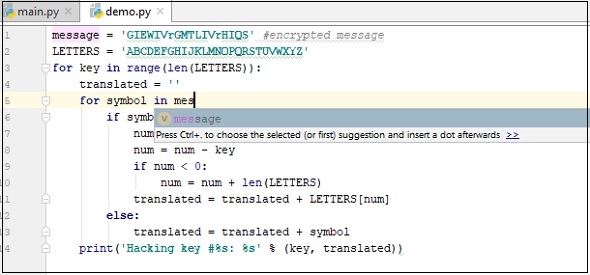
Improving Code Completion
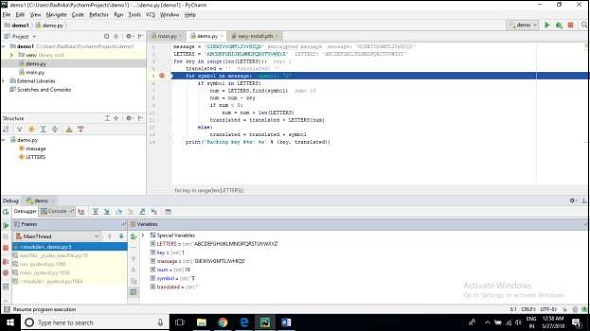
Code completion in PyCharm is really unique. You can enhance it further using many other features. Note that the editor provides start and end of the code block. Consider a file named demo.py with the following code −
message = 'GIEWIVrGMTLIVrHIQS' #encrypted message
LETTERS = 'ABCDEFGHIJKLMNOPQRSTUVWXYZ'

for key in range(len(LETTERS)):
   translated = ''

   for symbol in message:
      if symbol in LETTERS:
         num = LETTERS.find(symbol)
         num = num - key
         if num < 0:
            num = num + len(LETTERS)
         translated = translated + LETTERS[num]
      else:
         translated = translated + symbol
   print('Hacking key #%s: %s' % (key, translated))
The code is completed using the following construct −
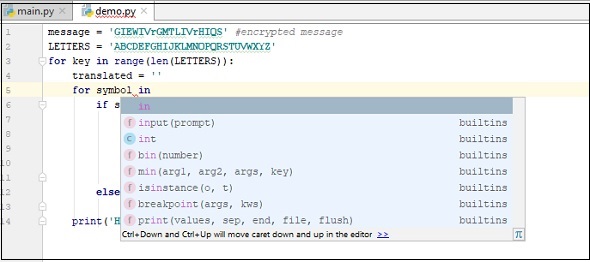
If you press Ctrl + spacebar while this popup is on the screen, you can see more code completion options −
Intention Actions
PyCharm includes intent specific actions and the shortcut key for the same is Alt+Enter. The most important example of intentions at work is using language injection in strings.
The screenshot given below shows the working of intention actions −
Note that we can insert many different languages of intention actions in PyCharm Editor.
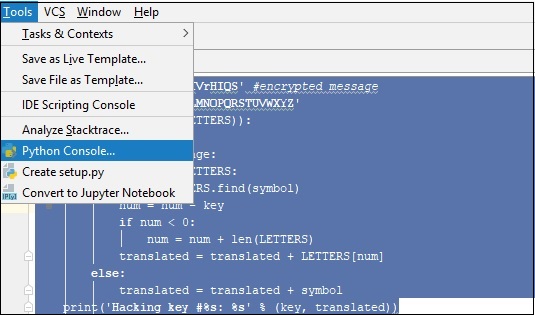
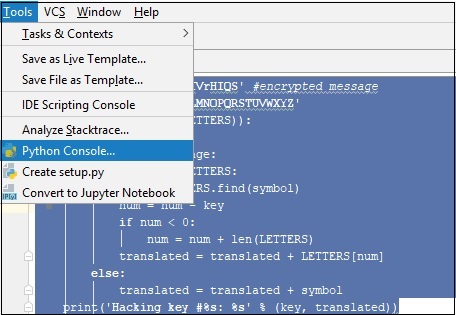
Pycharm — Console
PyCharm has a full-fledged Python console with full code completion which is available in the option menu Tools -> Run Python Console.
Consider the code which was mentioned in the previous chapter, as shown below −
message = 'GIEWIVrGMTLIVrHIQS' #encrypted message
LETTERS = 'ABCDEFGHIJKLMNOPQRSTUVWXYZ'
for key in range(len(LETTERS)):
   translated = ''
   for symbol in message:
      if symbol in LETTERS:
         num = LETTERS.find(symbol)
         num = num - key
         if num < 0:
            num = num + len(LETTERS)
         translated = translated + LETTERS[num]
      else:
         translated = translated + symbol
   print('Hacking key #%s: %s' % (key, translated))
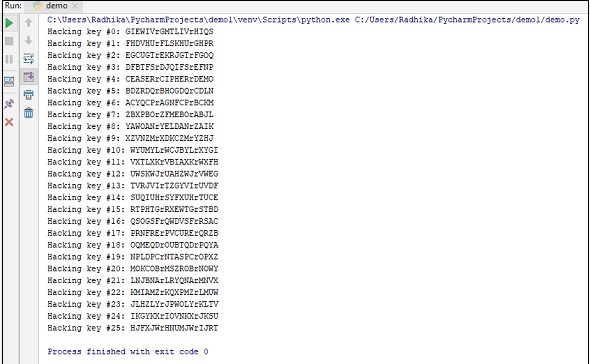
Now, let us run the code with the help of console to execute the script for getting the desired output, as shown below.
You can observe the output as shown below −
Pycharm — Interpreters
PyCharm includes interpreters to create a new project with new features as the way it is needed. You can create a virtual environment in your system as the way you need it. You can also inherit global site packages in the dialog box. Interpreters are available on Python Package Index (PyPI) and can be easily installed and accessed using pip install.
Creation of Interpreter
For creating an interpreter, it is always recommended to create a new project where desired configurations are managed. Look at the following screenshot for a better understanding −
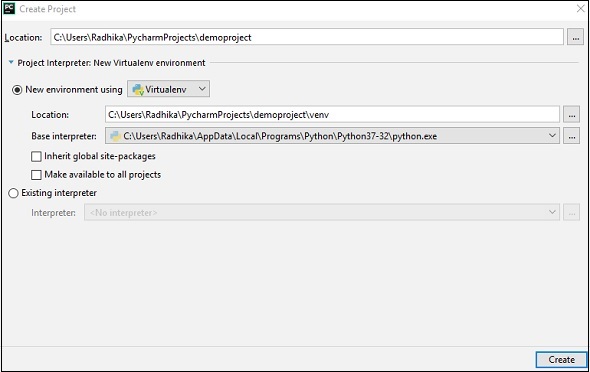
These parameters include −
-
Location − This describes the parameter where virtual environment is created focusing on the location on system.
- Basic interpreter − It defines the attributes of interpreter.
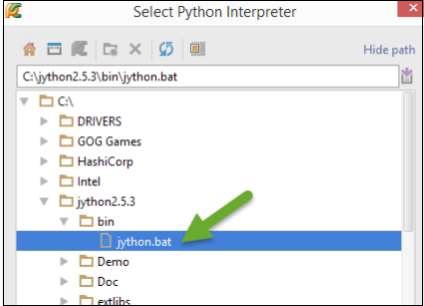
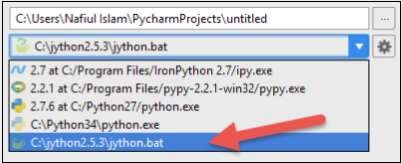
The dialog box also refers to the parameter where an existing virtual interpreter will be taken as an attribute. Once the user adds a new local interpreter, PyCharm will ask the user for the binary of interpreter. In most cases, it is always considered to be a .exe file. In case of Jython, it will be always a .bat file.
The details of Project Interpreter and the basic configuration of the existing project demo1 can be seen as shown below −
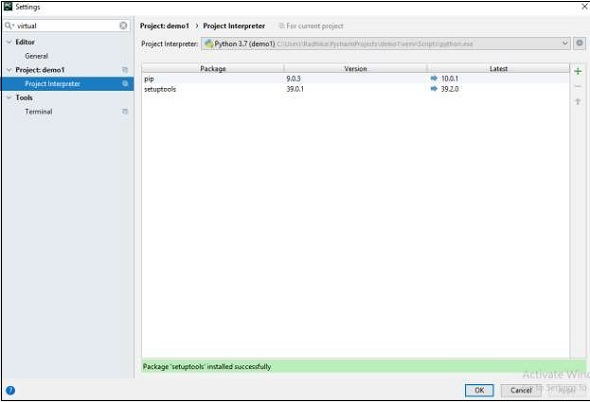
Remember that the interpreter also includes the basic packages which are mandatory for smooth functioning of working of project.
Pycharm — Debugging and Breakpoints
Running a python code comprises of two modes: running a script and debugging the script. This chapter focusses on debugging the Python script using PyCharm.
Steps Involved
The steps for debugging the Python project are as explained below −
Step 1
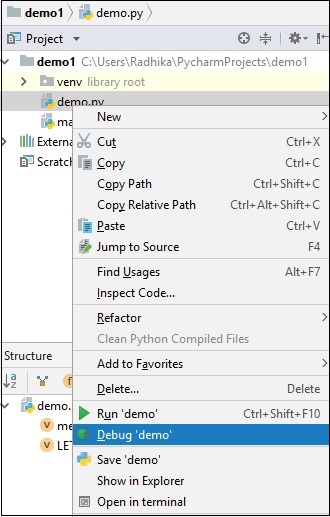
Start with debugging the Python project as shown in the screenshot below −
Step 2
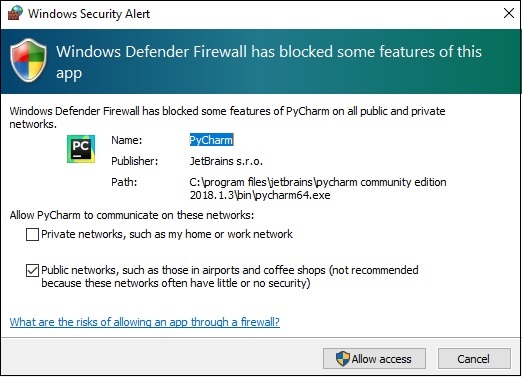
Now, Windows firewall asks permission for debugging the Python project as the procedure involves line by line compilation.
Step 3
The debugging console is created in PyCharm editor as shown below which executes the output line by line.
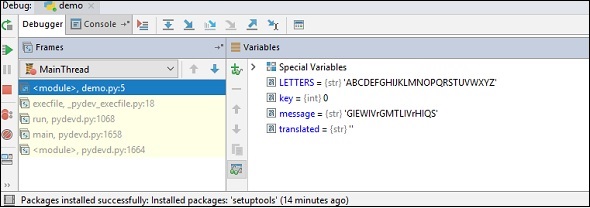
The run button moves from one line to another to execute the output as the way we want.
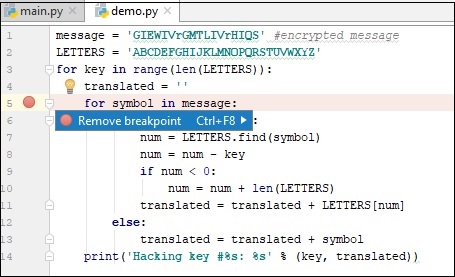
Understanding Breakpoints
While debugging a particular script, it is intentional to create a breakpoint. Breakpoints are intentional stopping place or the place where the code is paused in order to identify the output at specific stage.
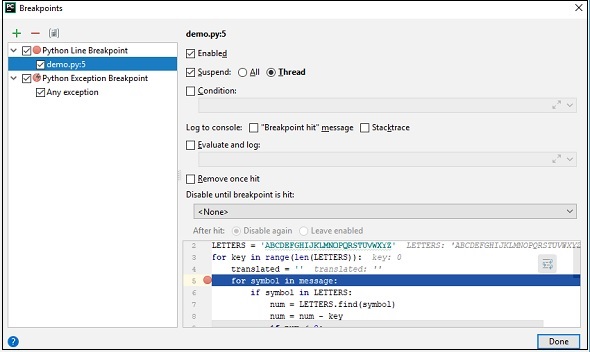
In PyCharm, breakpoints are visible using a separate dialog in the specified editor. It includes various attributes to evaluate the breakpoints defined and tracing log for the same with a main motive to achieve better programming practice.
Pycharm — Integration of Version Control
PyCharm supports various subversion control systems. This feature helps in improving the code base managing various versions together. This chapter talks about this concept in detail.
Steps Involved
You will have to go through the following steps for initializing and managing version control system −
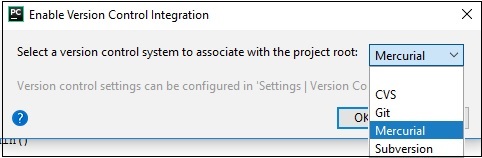
Initializing a Subversion Control System
To start the version control system in a systematic way, it is important to initialize it. Various options are available in PyCharm for different version control systems.
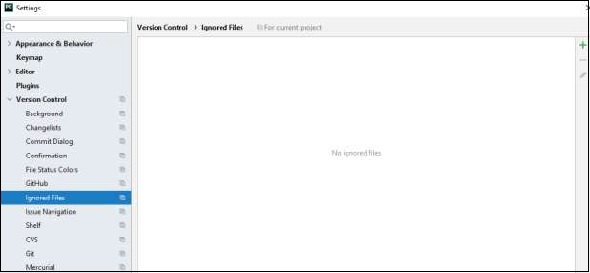
Ignoring File
In any project of PyCharm where we set up the default project and the virtual environment on it, we should also create its management with version control system. For example, Git includes .gitignore files which are ignored during commit operation, however, includes some of its configurations. Now, go to the Settings menu and check for the following −
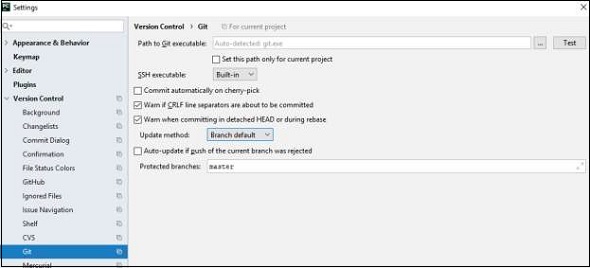
It includes various configurations for checking the path of Git executable and verifying if any files are ignored.
Configuration of GitHub
PyCharm includes settings to include configuration of GitHub repository, where a user can include username, password and other credentials, if any.
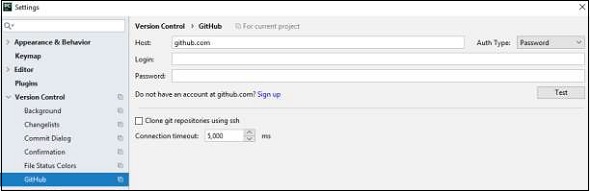
Once you are done with the settings mentioned, you can directly add and commit the local changes to Git repository.
Pycharm — HTML and CSS Integration
HTML and CSS are well supported in PyCharm Editor. PyCharm Editor includes a special shorthand and provides tag completion for HTML.
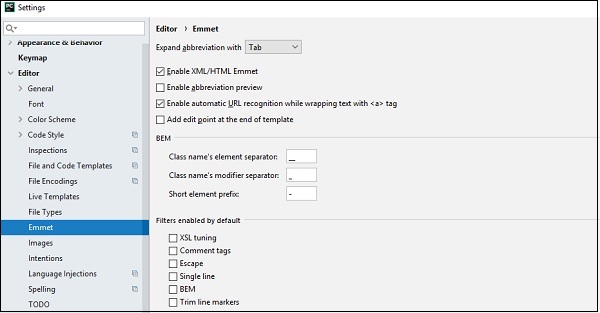
Emmet
Emmet is the shorthand used in PyCharm editor. It includes various features such as abbreviation preview, automatic URL recognition and edit points, for HTML and CSS files.The user interface of the settings section is shown in the screenshot given below −
Creating HTML and CSS files
PyCharm includes an inbuilt feature for creating HTML and CSS files. The basic steps for creating new HTML and CSS files are as follows −

Now, mention the name of file while creating HTML files in the project as shown below −
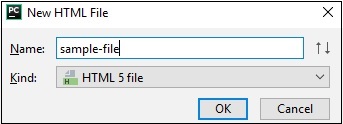
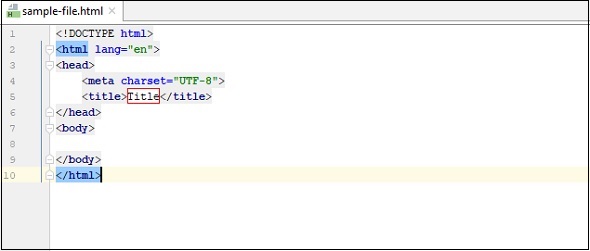
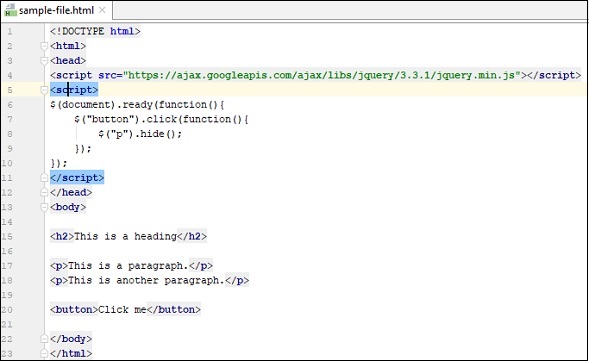
This creates the sample-file.html file as shown below −
Creating CSS file
The steps for creating a CSS file are shown here −
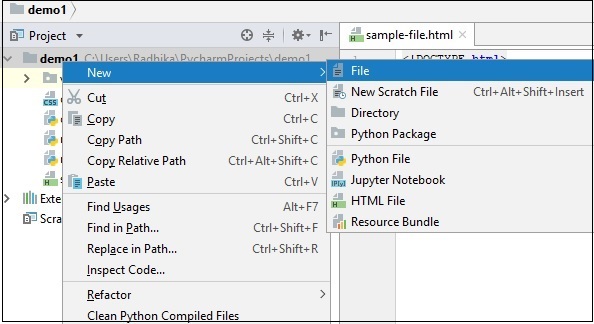
From the New menu, select the File option as shown below −

Specify the name of CSS during its creation as shown here −
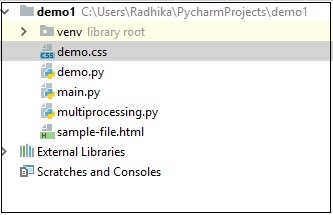
You can see the complete project structure with various files mentioned in different color combinations as shown below −
Pycharm — JavaScript Support
In this chapter, we will focus on main features in using JavaScript in PyCharm editor. When a user implements JavaScript library through URL, PyCharm intends to download a local copy so it can be used for completion and code analysis.
Consider the sample code of our HTML file as shown below, which we created in the previous chapter −
For each HTML file or JavaScript file, you can check the external libraries loaded through Settings configuration of PyCharm Editor. Observe the screenshot shown below for a better understanding −
Note that you cannot see any library unless you download and implement it. PyCharm also includes JavaScript support of various libraries through a toolbox called JS Toolbox. The following screenshot shows this.
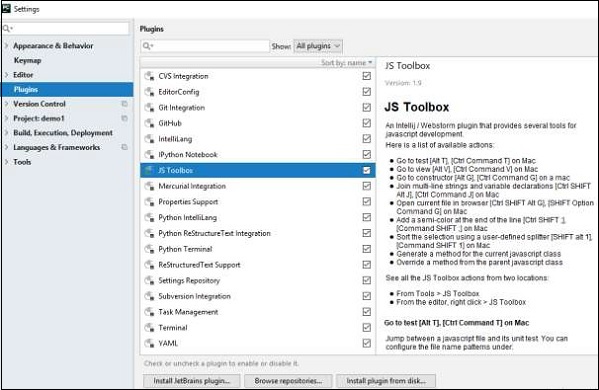
It also includes various attributes which are necessary for the JavaScript file configuration. The list of attributes and configurations is shown below −
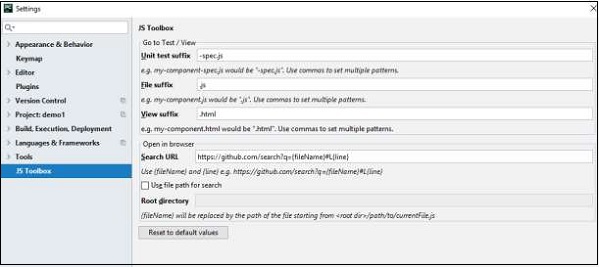
Observe that it includes various parameters such as Unit test suffix, File suffix, View suffix, Search URL and the specific Root directory.
Pycharm — Tips
PyCharm includes various tips during startup that help its user to understand its functionalities and operations. It also includes some shortcuts which are mandatory to understand.
In this chapter, you will see some of the important PyCharm tips.
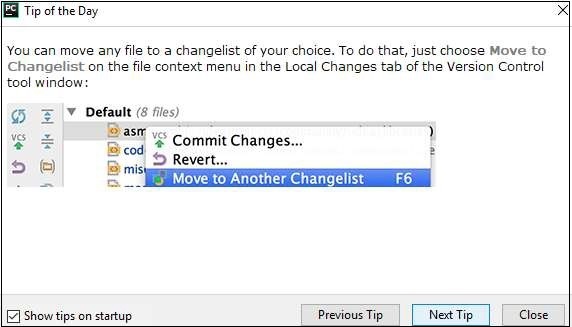
Changing the File to a Specific Changelist
This tip shows how to change the file to a specific changelist as per the user’s choice. This helps in managing repositories as per version control system settings. Observe the following screenshot for a better understanding −
Display the List of all Usages in a Class
This function displays the list of all usages included in a specific class, method or variable across the project. It quickly enables the user to jump to specific area. Observe the following screenshot for a better understanding −

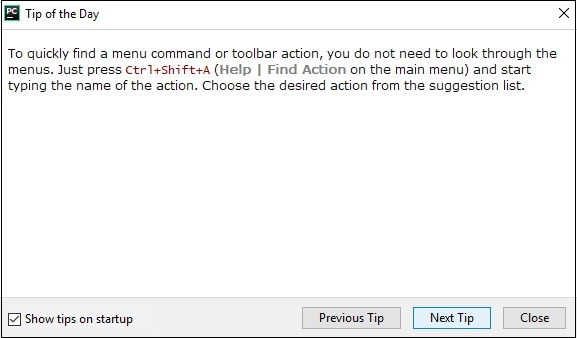
To find Menu Command for an Action
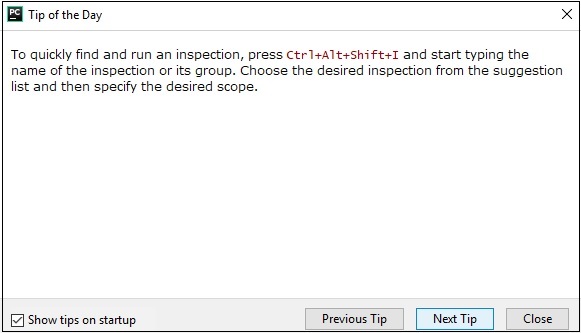
This tip helps to find menu command for a specific action and the shortcut key for the same is Ctrl+Shift+A. A user can select desired action from the mentioned suggestion list.
Running Inspection through a Code
This tip helps in running a specific inspection through the code. The shortcut key combination for the same is Ctrl+Alt+Shift+I.
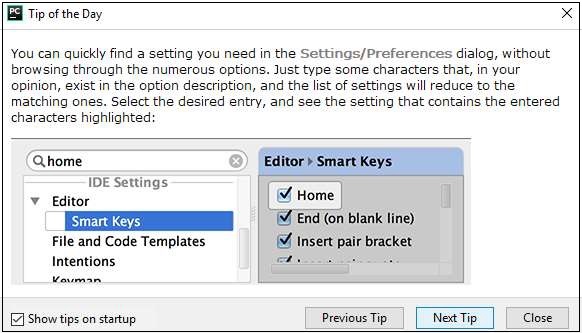
Specify the List of Settings
This tip is used to specify the list of desired settings. It includes smart keys for specific editor. The smart keys are shortcut keys for some operations.
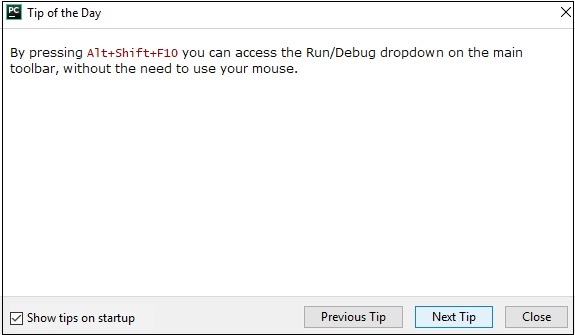
Run / Debug the Script Files
This tip is very useful for running or debugging the script files which you can access through main toolbar. The shortcut key combination for same is Alt+Shift+F10.
Pycharm — Database Tools
PyCharm supports interface support with various types of databases. Once a user grants access to the created database, it provides schema diagram of the database with SQL writing tools which provide code completion. In this chapter, we will focus on MySQL database connectivity which will involve following steps.
Adding a Data Source
It is important to keep a note that PyCharm supports a wide variety of database connectivity.
Step 1
Open the database tool window View -> Tool Windows -> Database> and open the dialog called Data Sources and Dialog.

Now, select MySQL database for adding a new data source.
Step 2
User should download the missing driver files to get proper connectivity with MySQL database.

Step 3
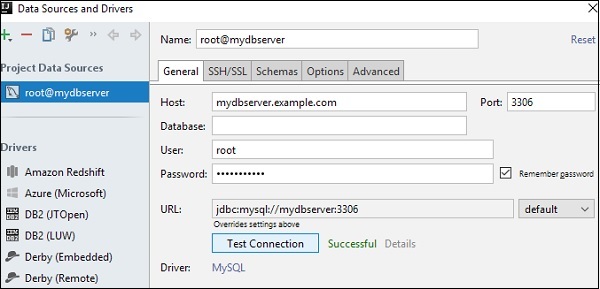
Now, specify the configuration settings for connectivity to be achieved.
Host − If you database server is on a different computer, replace localhost with the IP address of the server host, e.g. 172.20.240.163.
Port − The default MySQL server port is 3306. If your server uses a different port, specify that port.
User and Password − These are the required credentials.
Step 4
Always make sure that database connectivity is successful through Test Connection feature.
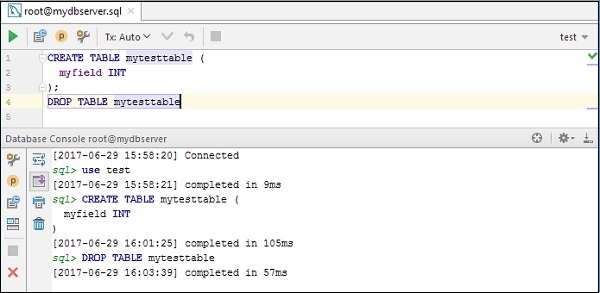
Testing the connection also involves creating test table through query and executing them. Once the execution is successful, you can drop the database.
Pycharm — Exporting Data
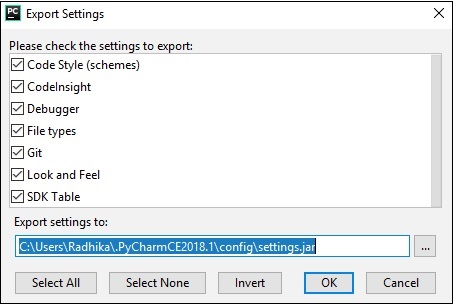
PyCharm IDE includes various features for converting the existing code file into HTML format or CSV format. In this chapter, you will learn exporting data using PyCharm IDE.
The export settings of PyCharm editor are shown in the figure given below −
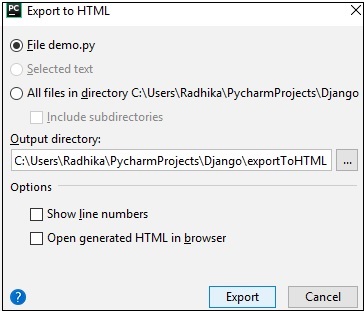
Export to HTML feature
This feature helps in exporting the specific file in HTML format. This is done to improve the security purposes of the given module. The following screenshot gives a better understanding −
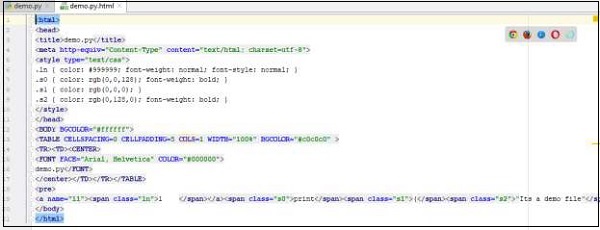
Once the export operation is successful, the generated HTML file will display in browser output as shown below −

Now, if you check the HTML code generated after the export operation, you can observe that line numbers are also included to achieve this operation.
Pycharm — Web Frameworks
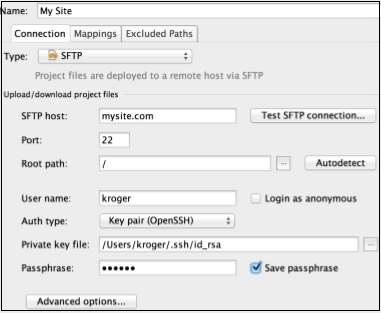
This chapter focusses on web frameworks and its deployment. PyCharm has a simple functionality to deploy code and files. To deploy code with PyCharm, we need to add a web server with Menu Option Settings -> Build, Execution-> Deployment.
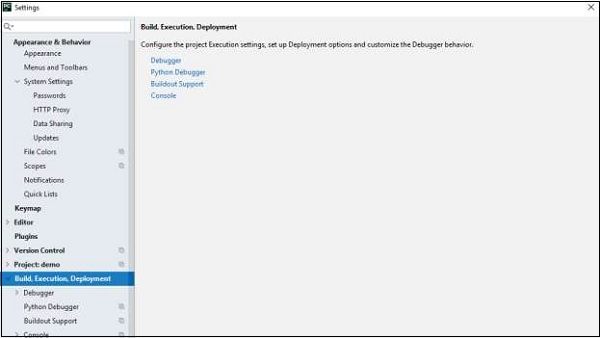
Now, include all the settings with various configurations required for deployment of the project.
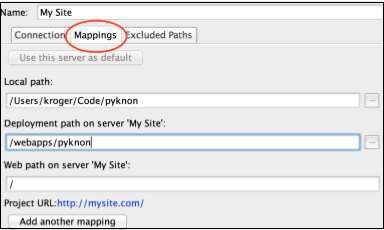
In the Mappings tab, a user can specify where the local code is and where it should be copied to remotely.
The code can be deployed using Tools -> Deployment option under the Tools menu bar.
Deployment in PyCharm is very granular: a user can deploy one single file or the whole source code.
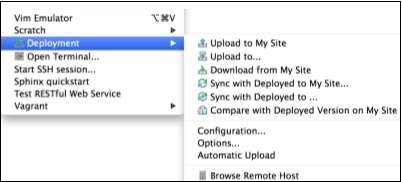
PyCharm also includes various actions to compare remote and local versions. The editor is more reliable to use automatic deployments and a version control system to compare local and remote versions.
Pycharm — Django
One of the features of PyCharm is that it includes a support for Django. With the ability of including JavaScript features within PyCharm, it can be considered as the best IDE for Django.
The basic steps for creating a Django project in PyCharm IDE are given below −
If the EnableDjangoadmin option is enabled, PyCharm will setup the admin site for you.
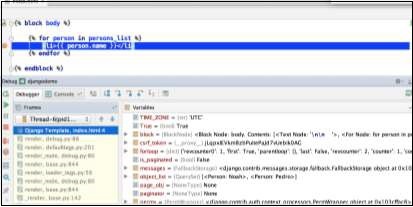
Template Debugging
Debugging works with Django and Jinja templates. We can inspect variables, step through code, and do what we expect in a debugger.
Pycharm — Pyramid
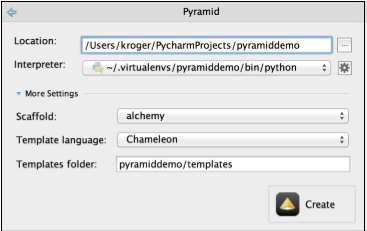
You can create a project of Pyramid Framework in PyCharm editor by using its Welcome Window.
A user can set the project’s interpreter and Python location, choosing scaffold, and a template language by default. The scaffold in Pyramid framework uses URL dispatch to map URLs and to view code and SQLAlchemy for persistence properties.
PyCharm editor will ask user with list of required packages in the setup.py file and prompts the user to download the required packages.

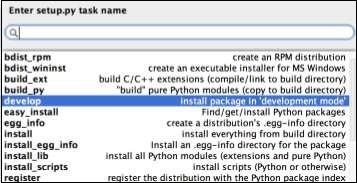
Install the project in development mode (refer to official documentation of Pyramid for more details). The user should run python setup.py through the menu Tools -> Run setup.py option.
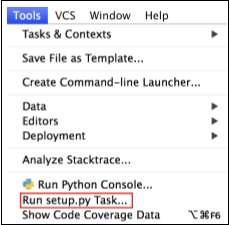
A user should select develop task while running a .py file as mentioned in the below window −
It is important to initialize the database using console script named initialize <project_name> using the following command −
initialize_pyramiddemo_db development.ini
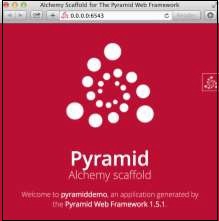
The user can start the server by running the project which will display the result as shown below −
Pycharm — Flask
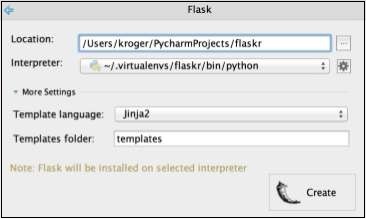
PyCharm supports Flask framework development. You can easily create a new Flask project by creating new project through welcome screen. You can set the project’s location and the virtual environment and choose a template language and where the templates will be located.
You can run a project by using Run -> Run ‘<project-name>’.
You can also add a new data source with this framework. Let us create a file called squema.sql and add SQL code to create some tables. PyCharm editor will recognize the files and asks you to configure a data source and set up to the database dialect.
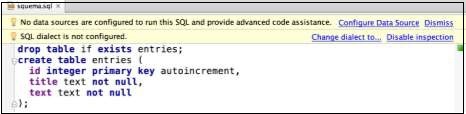
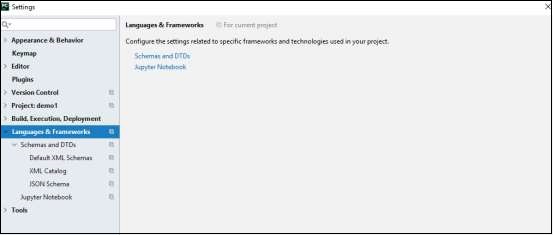
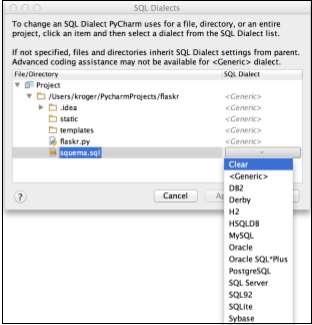
PyCharm will let you choose the desired dialect that you want to use. You can change the properties of the SQL: Settings -> Language and Frameworks -> SQL Dialects
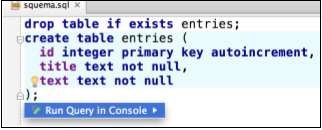
For flask editor, the easiest way to run the SQL query is to click somewhere in the query and click on the inspection window and click “Run Query into console “.
The user interface of the Flask framework is displayed as below −

#статьи
- 31 янв 2023
-

0
Коротко и ясно о PyCharm — популярной IDE для программирования на Python.
Иллюстрация: Оля Ежак для Skillbox Media

Журналист, изучает Python. Любит разбираться в мелочах, общаться с людьми и понимать их.
Писать код можно даже в блокноте, и он будет работать. Однако гораздо удобнее делать это в специальной среде разработки, которая поможет программировать быстрее, проще и чище. Одна из них — PyCharm, которая создана для всех, кто пишет на языке Python.
- Что такое PyCharm
- Какие у неё системные требования
- Чем различаются версии Community и Pro
- Как установить PyCharm
- Как с ней работать
PyCharm — это интегрированная среда разработки на языке Python, созданная компанией JetBrains. Среди питонистов эта IDE вторая по популярности после редактора кода Visual Studio Code: как основную её используют 31% разработчиков.
В PyCharm есть все инструменты, чтобы писать, отлаживать и тестировать код. Например, можно быстро исправить программу сразу в нескольких местах, а встроенный форматер приведёт её в соответствие со стандартом PEP 8.
Также IDE позволяет использовать в проектах другие языки программирования, синхронизировать код с системами контроля версий и развёртывать его.
Базовый набор функций PyCharm можно расширять с помощью плагинов, которые позволяют, например, настраивать внешний вид интерфейса и подключать дополнительные инструменты.
Операционная система:
- Windows 8, 10 или 11 (64-битные версии);
- macOS 10.14 или более поздняя версия;
- Linux со средой GNOME, KDE или Unity DE; если дистрибутив не включает Glibc 2.14 или более позднюю версию (например, RHEL 6 или CentOS 6), то PyCharm может быть для него недоступен.
Процессор: никаких специальных требований нет, но рекомендуется, чтобы он был многоядерным, так как PyCharm поддерживает многопоточность. Это позволит выполнять операции быстрее.
Оперативная память: 4 ГБ свободной RAM. Рекомендуется, чтобы общая оперативная память у устройства была 8 ГБ.
Место на диске: 2,5 ГБ и ещё 1 ГБ для кэша. Рекомендуется использовать SSD и иметь хотя бы 5 ГБ свободного пространства.
Разрешение экрана: не менее 1024 × 768 пикселей, рекомендуется 1920 × 1080.
Версия Python:
- Python 2.7;
- Python 3.6 или более поздняя версия.
У PyCharm есть две версии: бесплатная называется Community, а платная — Pro, или Professional.
Community подойдёт для тех, кто только изучает программирование или работает над небольшим проектом. Она предназначена для кодинга на чистом Python, хотя и поддерживает несколько дополнительных языков и форматов: Jython, HTML, XML, JSON, YAML, XSL, XPath и Markdown. Используя плагины, можно также установить Rust и Dart.
Professional умеет всё то же, что и Community, плюс кое-что ещё. Например:
- в бэкенде — поддерживает Cython и SQL;
- во фронтенде — работает с JavaScript, TypeScript, CSS, Sass, SCSS, Less. В качестве плагинов доступны Haml, Slim, Liquid.
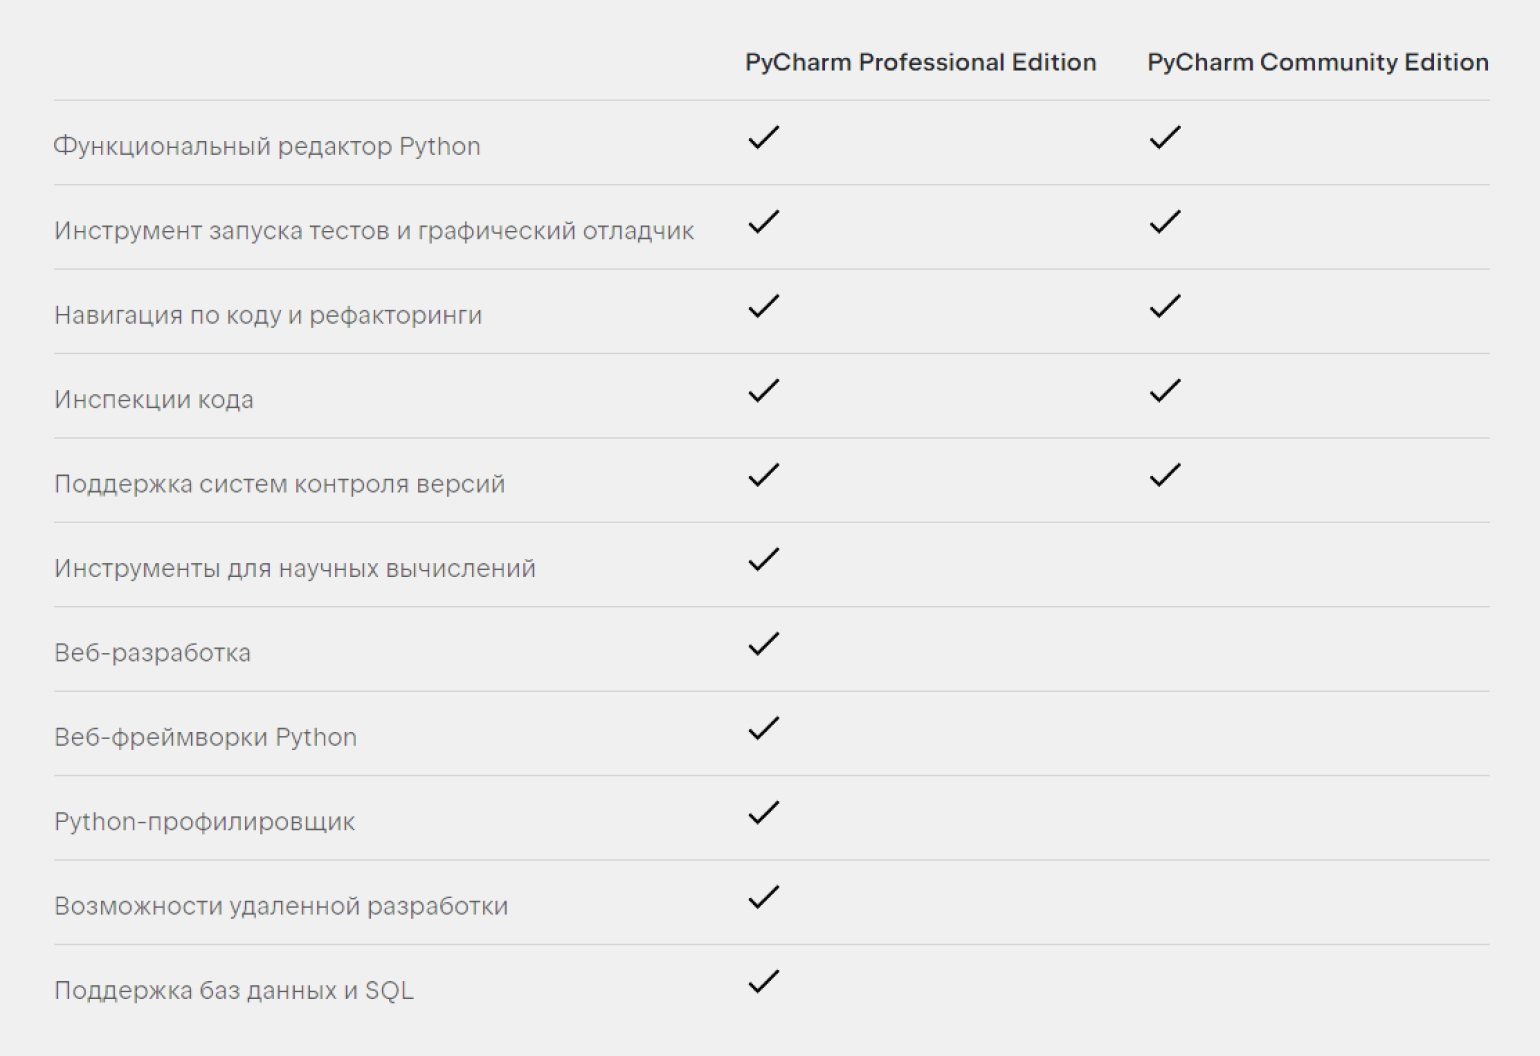
Полноценная веб-разработка доступна только в редакции Pro; в ней есть поддержка веб-фреймворков:
- для Python: Django, Flask, Pyramid;
- для других языков: React, React Native, Angular, Node.js, Next.js, Vue.js.
К слову, в Community из фреймворков — только PyQt.
Ещё крупные различия:
- из инструментов сборки в Community есть Virtualenv/Buildout, в Pro — дополнительно NPM, Webpack, Gulp, Grunt, Vite;
- в Pro есть поддержка удалённых интерпретаторов: SSH, Docker, Docker Compose, WSL, Vagrant;
- в Community совместная разработка ограничена сеансами по 30 минут, в которых не больше трёх гостей, в Pro ограничений по времени нет, а гостей может быть вплоть до 50.
Подробнее различия между версиями можно посмотреть на сайте JetBrains. Ах да: если вас заинтересовала версия Pro, но вы ещё побаиваетесь её покупать, для неё есть бесплатный 30-дневный пробный период.
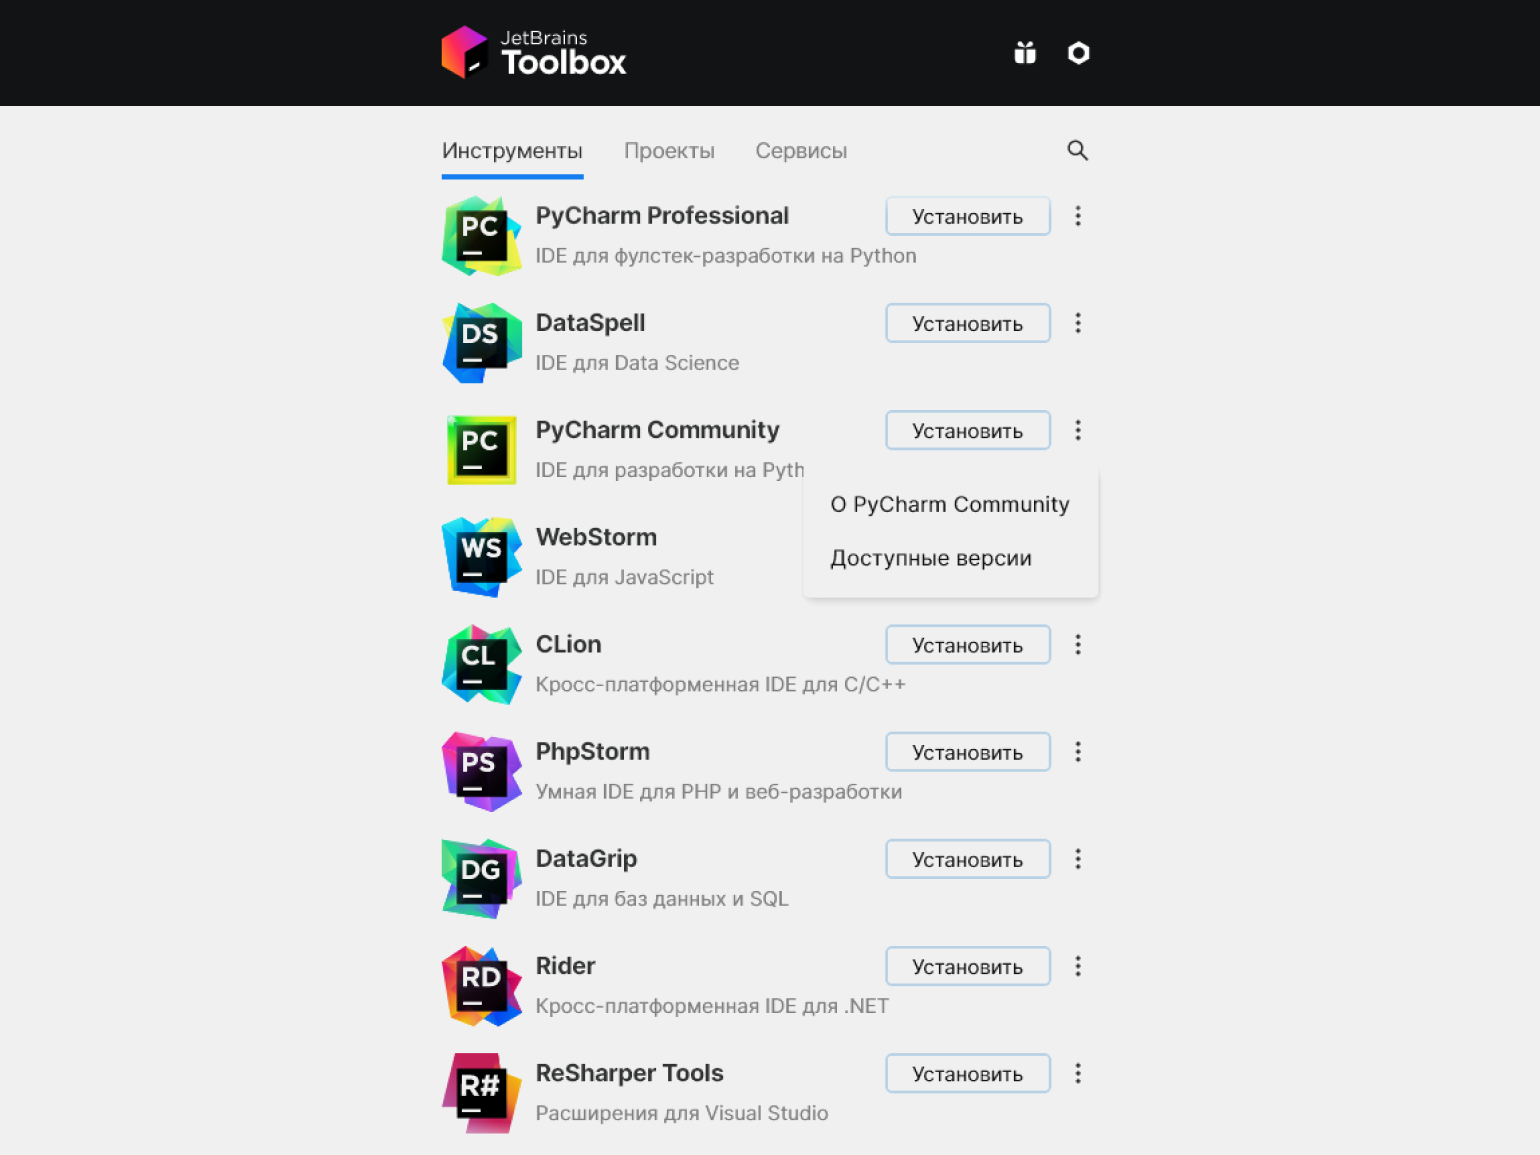
Скачать PyCharm можно двумя способами: напрямую с сайта разработчика или через Toolbox — приложение для управления инструментами от JetBrains.
JetBrains рекомендует использовать для управления своими продуктами именно Toolbox. Приложение позволяет быстро и из одного места устанавливать нужные инструменты, автоматически обновлять их сразу вместе с плагинами, откатываться до предыдущей версии и работать в нескольких версиях параллельно.
Toolbox будет особенно удобен, если вы пользуетесь сразу несколькими продуктами от JetBrains. Скачать приложение можно здесь.
Toolbox для Windows
- Скачать и запустить установщик в формате .exe.
- Следовать инструкциям установщика.
- Toolbox будет доступен по иконке на панели задач.
 на панели задач.
Toolbox для macOS
- Скачать образ диска в формате .dmg. Обратите внимание, что есть две версии файла: для процессоров Intel и Apple silicon.
- Смонтировать образ в системе и перетащить JetBrains Toolbox в папку «Приложения» (Applications).
Toolbox для Linux
- Скачать архив в формате .tar.gz.
- Распаковать его в директорию, которая поддерживает выполнение файлов.
- Запустить jetbrains-toolbox. После первого запуска в главном меню появится иконка , по которой Toolbox и будет доступен.
После запуска Toolbox любую редакцию PyCharm в любой версии можно скачать и запустить прямо из приложения.
Скачать PyCharm можно и отдельно, без использования дополнительных приложений. Чтобы пощупать PyCharm для себя, сначала можно скачать Community Edition. Версия Pro доступна по той же ссылке.
Для Windows
- Скачать установщик в формате .exe. Их есть два вида: для компьютеров с процессором ARM64 и для всех остальных.
- После загрузки файла открывается страница с благодарностью. На ней можно загрузить контрольную сумму SHA, чтобы проверить целостность установщика.
- Запустить установщик, следовать его инструкциям, выбрать нужные параметры.
Для macOS
- Скачать образ диска в формате .dmg. Их два вида: для процессоров Intel и Apple silicon.
- После загрузки файла открывается страница с благодарностью. На ней можно загрузить контрольную сумму SHA, чтобы проверить целостность образа диска.
- Смонтировать образ в системе и перетащить PyCharm в папку «Приложения» (Applications).
Для Linux
- Скачать архив в формате .tar.gz. Их два вида: для компьютеров с процессором ARM64 и для всех остальных.
- После загрузки файла открывается страница с благодарностью. На ней можно загрузить контрольную сумму SHA, чтобы проверить целостность архива.
- Распаковать скачанный файл. Если нынешняя директория «Загрузки» (Downloads) не поддерживает выполнение файла, то распакуйте его в другую. Сделать это можно с помощью команды:tar xzf pycharm-*.tar.gz -C <new_archive_folder>
Вместо звёздочки нужно указать версию PyCharm, вместо
<new_archive_folder> — директорию. Производитель рекомендует использовать директорию /opt. Например:tar xzf pycharm-community-2022.3.1.tar.gz -C /opt/
- Перейти в субдиректорию /bin:
cd <new archive folder>/pycharm-*/bin
- Запустить pycharm.sh:
sh pycharm.sh
Напишем и запустим программу, которая будет выводить «Hello, world!». Для этого откроем PyCharm и создадим новый проект, нажав New Project.
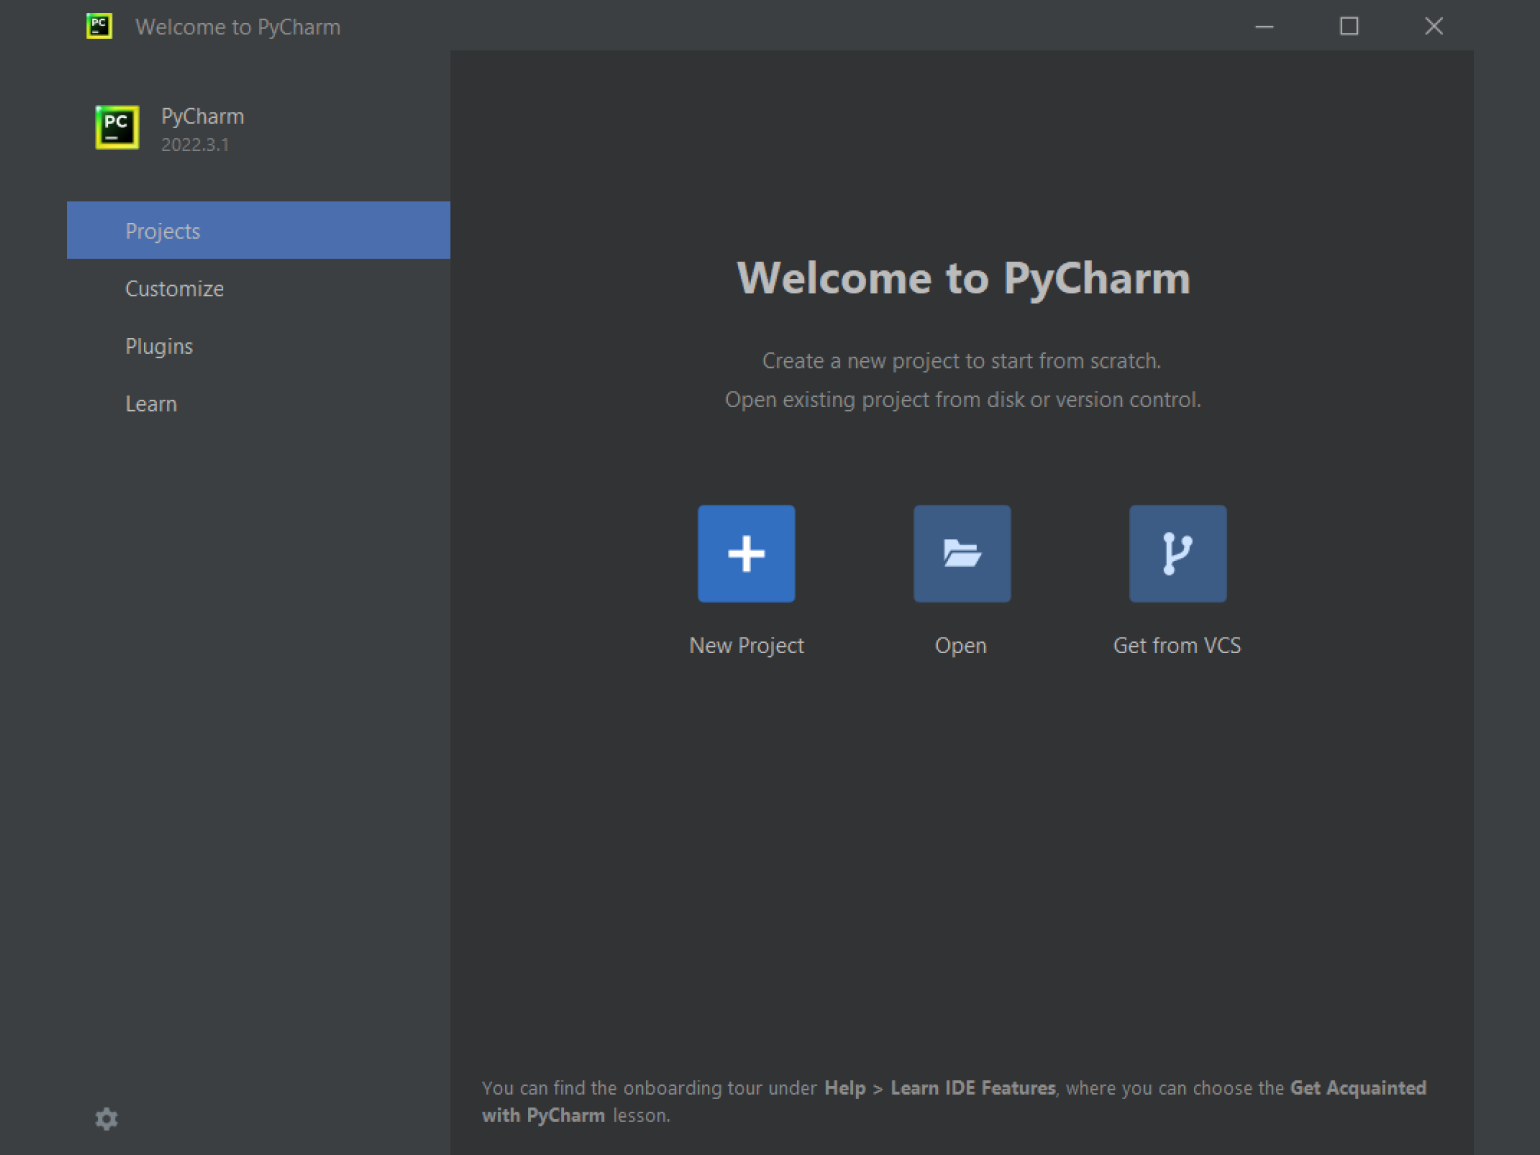
Откроется страница с настройками проекта. Здесь выберем местоположение и виртуальную среду (в нашем случае это virtualenv, но можно и любую другую).
Также уберём флажок с пункта Create a main.py welcome script. Если его оставить, то при создании проекта PyCharm автоматически создаст файл main.py с примером кода.
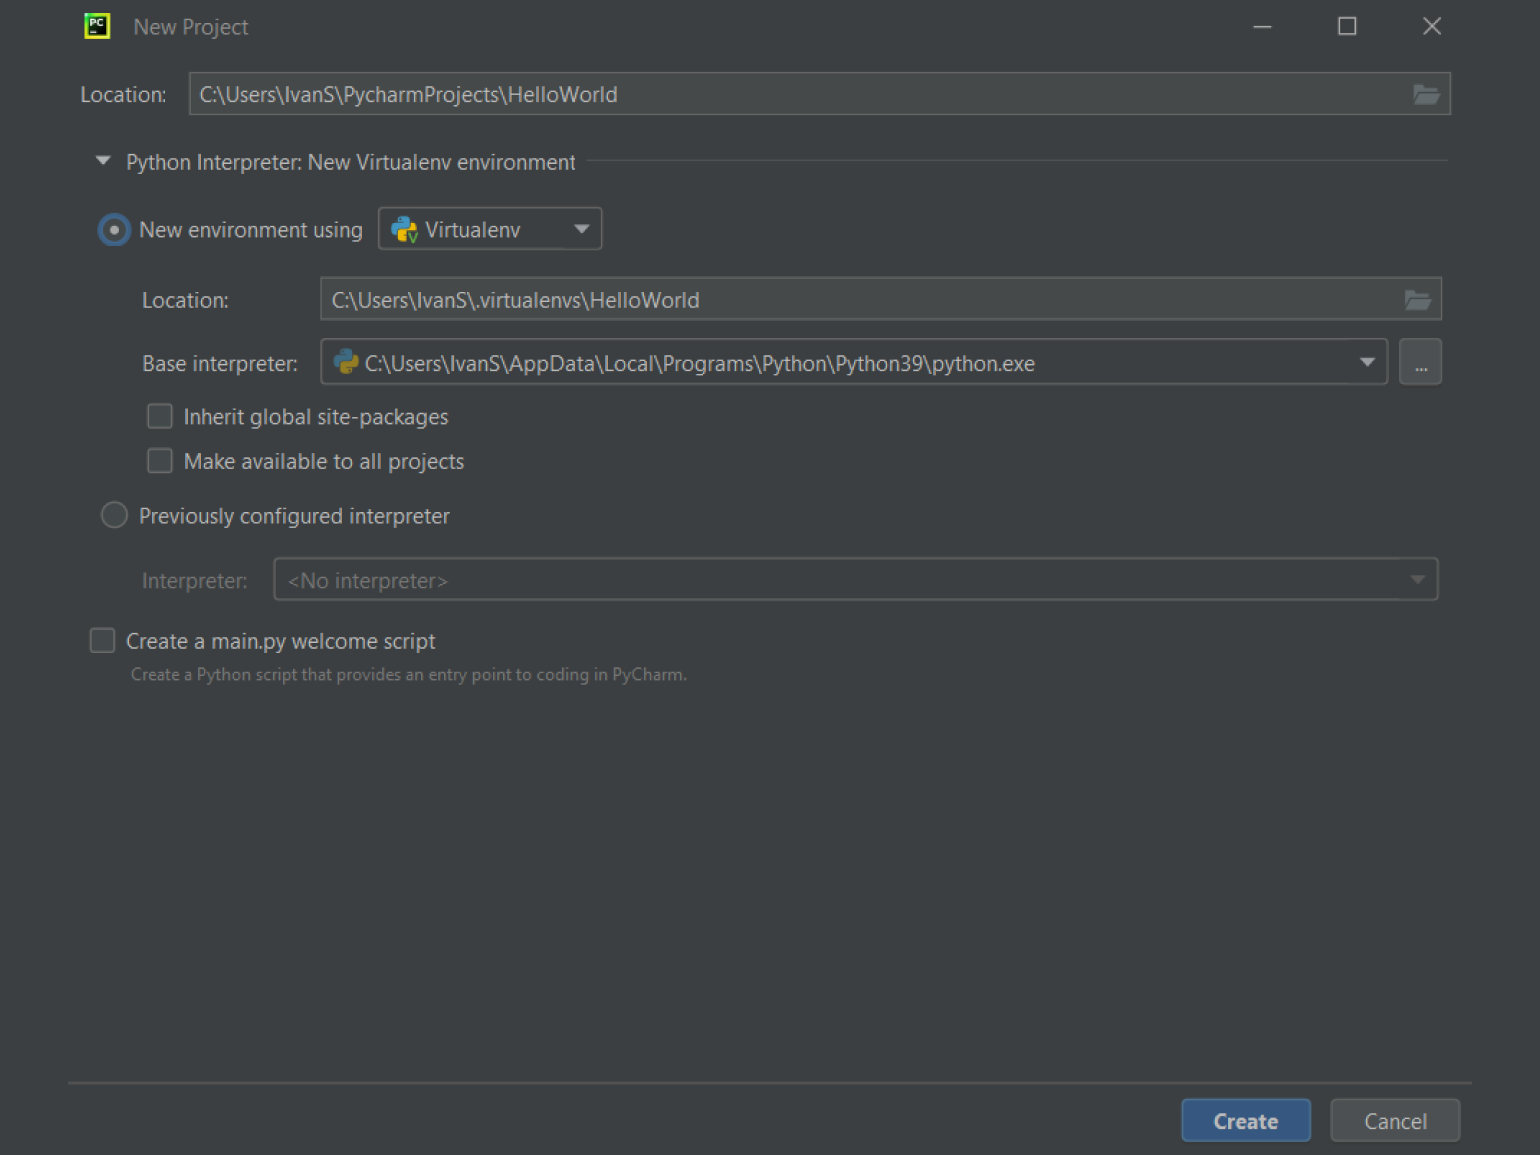
Нажмём на кнопку Create и создадим проект, после чего он сразу же откроется.
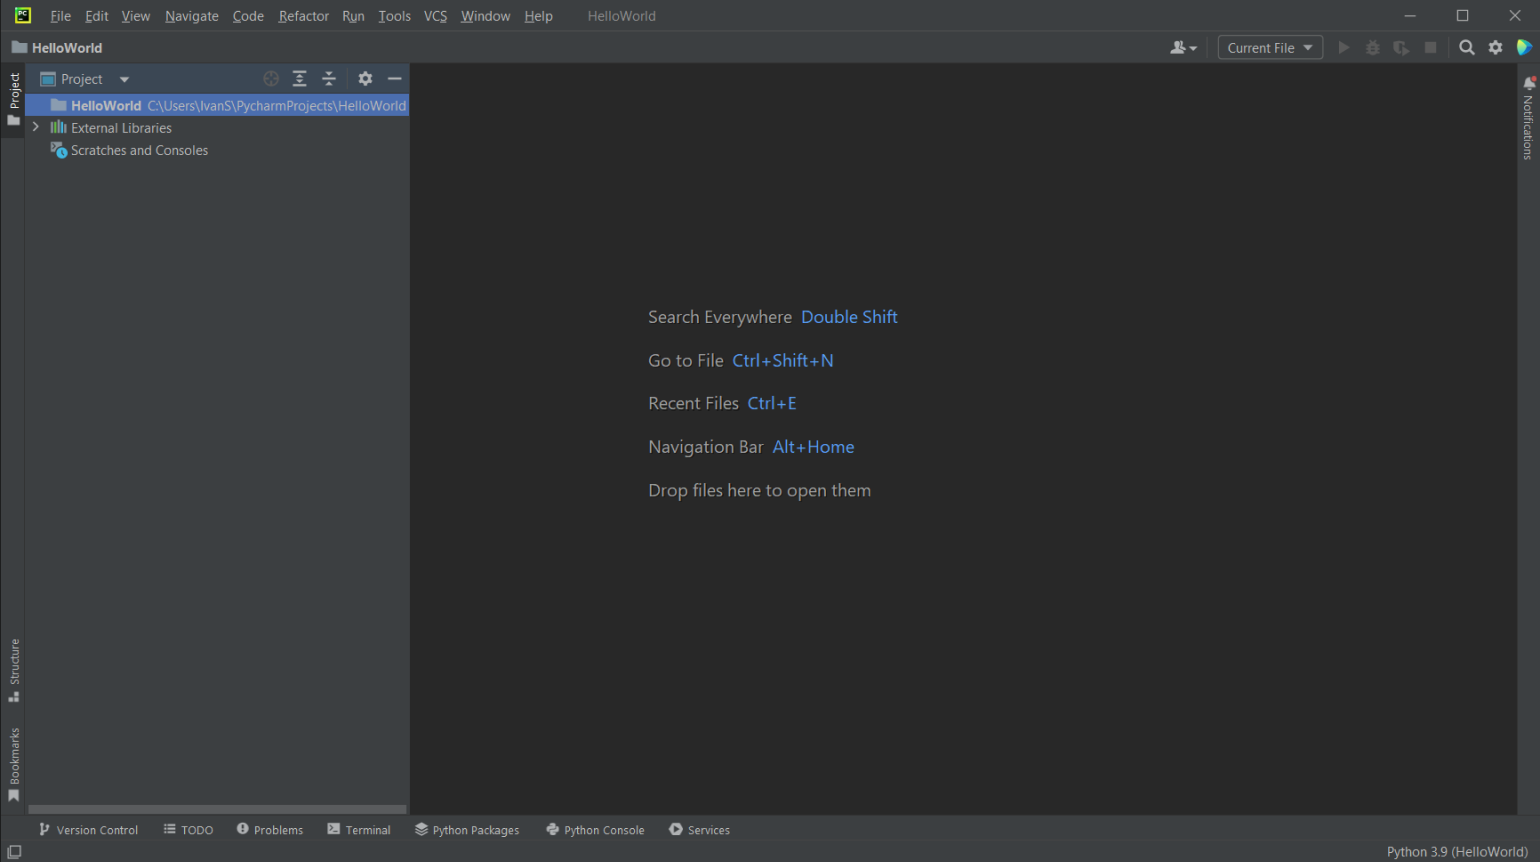
Создадим Python-файл, в котором напишем свой код. Для этого в окне Project правой кнопкой мыши нажмём на корневую папку HelloWorld. Во всплывающем окне выберем New → Python File.
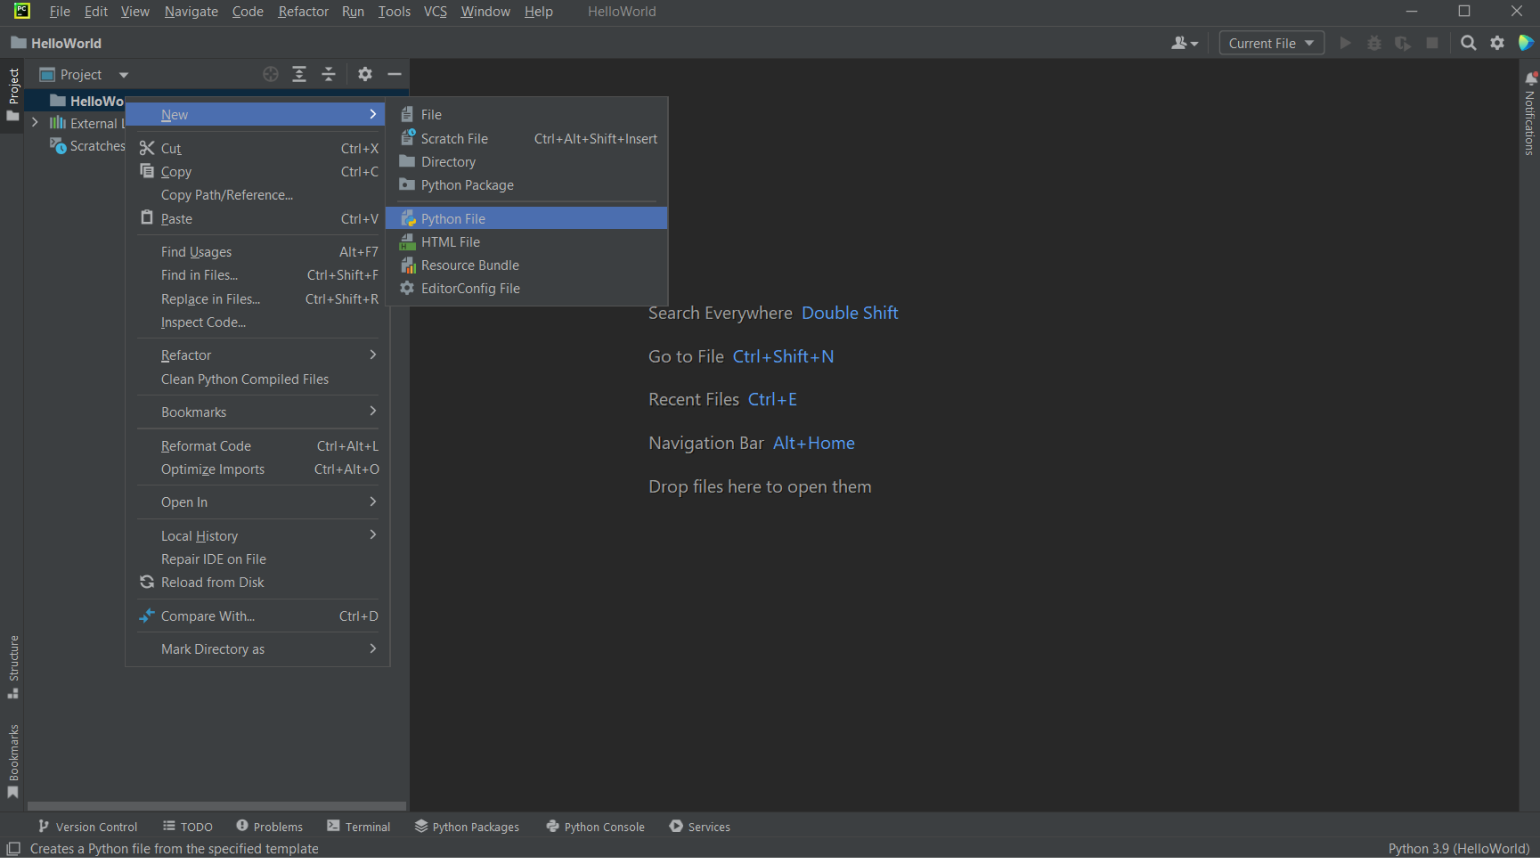
Откроется окно, в котором введём название файла. Назовём его hello или любым другим именем, нажмём Enter.
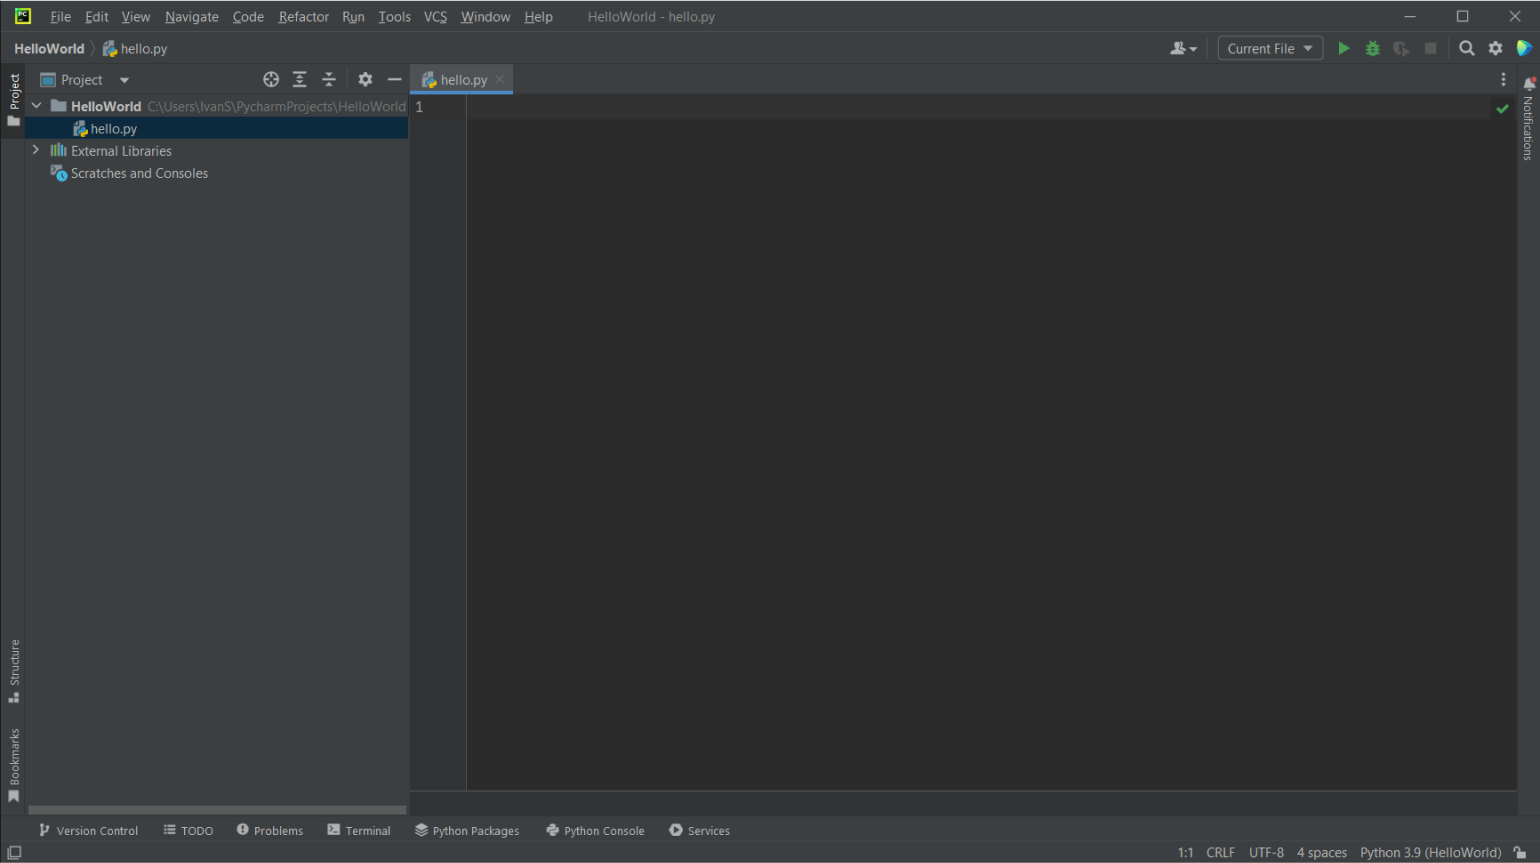
PyCharm создаст файл, в котором и напишем наш код.
if __name__ == '__main__':
    print('Hello, world!')
После этого его можно запустить несколькими способами:
- использовать горячие клавиши: Ctrl + Shift + F10 для Windows и Linux, ⌃ + ⇧ + R — для macOS;
- правой кнопкой мыши щёлкнуть по вкладке hello.py и во всплывающем окне выбрать пункт Run ‘hello’;
- нажать на значок возле номера строки и во всплывающем окне выбрать пункт Run ‘hello’.
 возле номера строки и во всплывающем окне выбрать пункт Run ‘hello’.
Откроется инструмент Run, в котором PyCharm и выполнит код.
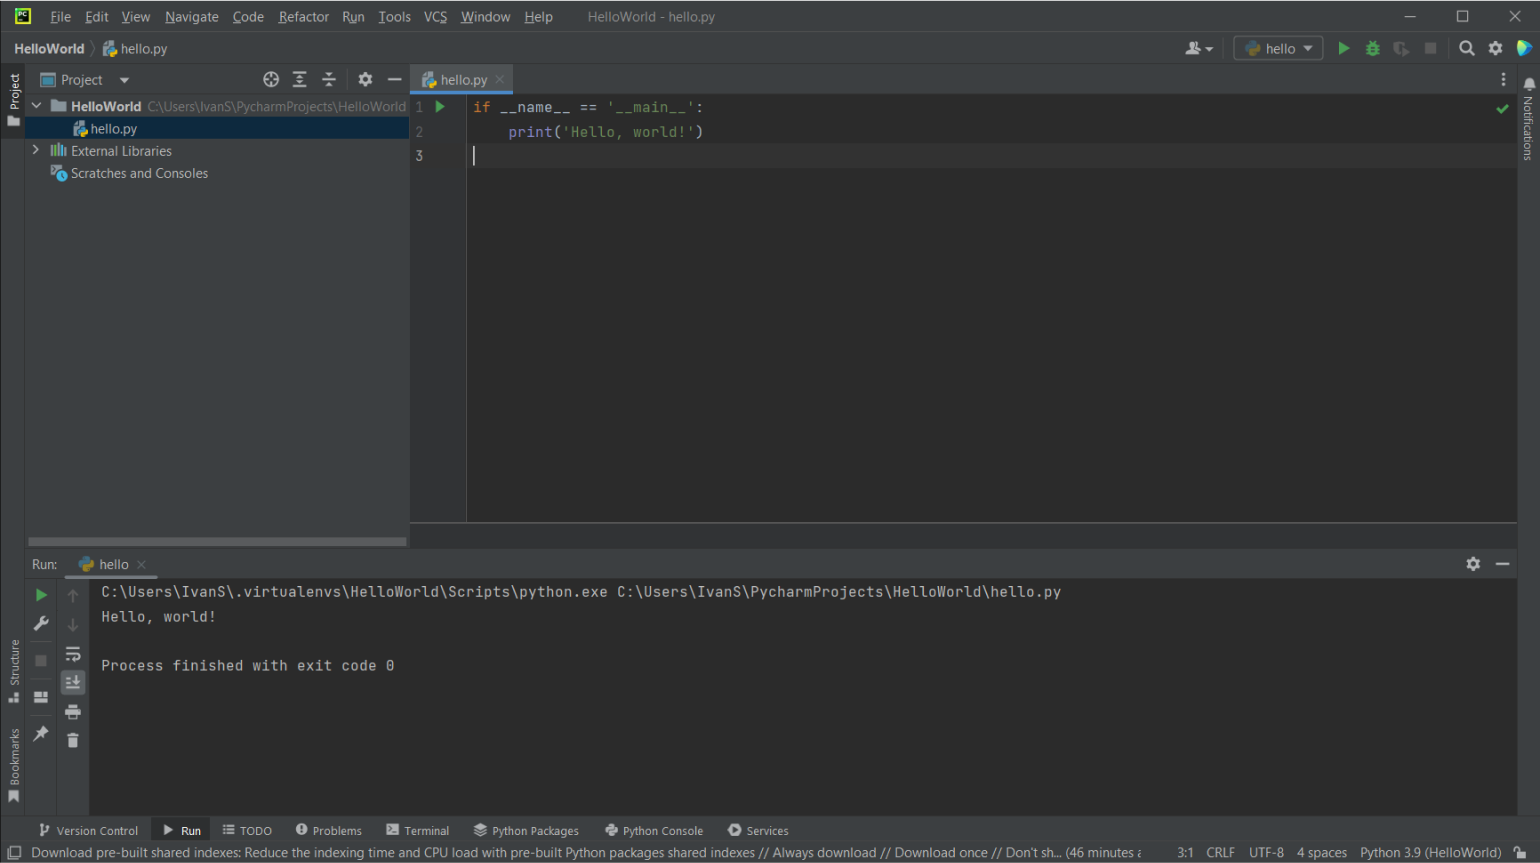
Вот мы и написали свою первую программу в PyCharm. Вы могли обратить внимание, что даже в ней PyCharm подсказывал и помогал:
- автоматически выставлял отступы;
- подсвечивал ошибки (например, если забыли поставить двоеточие в конце первой строки);
- при написании функции print предложил автодополнение уже после первых двух букв;
- проверял код на соответствие стандарту PEP 8.
Подробнее о том, как работать в PyCharm, можно прочитать в её документации.
- PyCharm — популярная среда разработки, заточенная под потребности Python-разработчиков. Она упрощает и ускоряет работу с кодом, помогает избегать багов и писать более чисто.
- PyCharm существует в двух редакциях: Community и Professional. Community бесплатна, а Professional даёт обширный набор инструментов.
- Community Edition будет достаточно для обучения программированию и небольших личных проектов, написанных на чистом Python.
- Professional Edition подойдёт для крупных проектов, научной и веб-разработки.
А вообще, опытные разработчики и хакеры рекомендуют программировать в Vim. Это бесплатный редактор кода, который можно превратить в полноценную IDE с кучей полезных функций. В прошлом году у нас как раз вышел бесплатный курс по нему.