- Manuals
- Brands
- Renault Manuals
- Automobile
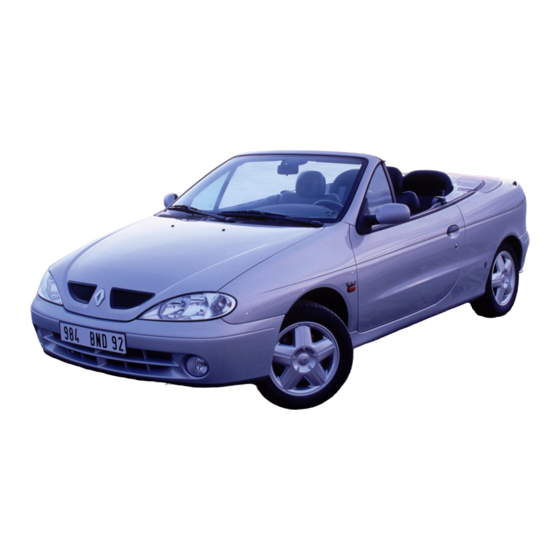
- 2000 Megane
- Driver’s handbook manual
-
Contents
-
Table of Contents
-
Bookmarks
Related Manuals for Renault 2000 Megane
Summary of Contents for Renault 2000 Megane
-
Page 1
the driver’s handbook… -
Page 2: Driving
API : GL5 RENAULTMATIC D3 SYN AUTOMATIC GEARBOX All types DEXRON III RENAULTMATIC D2 POWER STEERING All types DEXRON II FRELUB 650 BRAKE FLUID All types DOT 4 ELF recommends its lubricants as approved by RENAULT. For more information, go to www.elf-lub.com…
-
Page 3
Brief overview • Opening and closing the hood …………p. 3.02 3.14 • Tyre inflation pressures ………………p. 0.04 • Adjusting the seats and driving positions ……… p. 1.09 1.13 • Child safety ……………….. p. 1.21 1.27 • Instrument panel lights ……………. p. 1.32 1.44 •… -
Page 4: Table Of Contents
Sections Getting to know your car …………..Driving ………………….. Your comfort ………………..Maintenance ………………..Practical advice ………………. Technical specifications ……………. Alphabetical index ………………Opening and closing the hood: pages 3.02 to 3.14 0.03…
-
Page 5
Tyre inflation pressures when cold (in bar) 1.6 l 16V Versions 1.4 l 16V 2.0 l IDE 2.0 l Type EA10 — EAOD EA11 — EA1Y EAOP (see vehicle identification plate) EA1H — EAOW EAO4 — EAOB EAO3 EAOJ Normal use •… -
Page 6
Section 1: Getting to know your car Keys — Plip remote control unit ………………….1.02 1.04 Doors …………………………1.02 1.06 Engine immobiliser system ……………………1.07 — 1.08 Head restraints — Seats ……………………. 1.09 1.11 Seat belts/Methods of restraint in addition to the front seat belts ……….1.12 1.20 Child safety ………………………. -
Page 7
KEYS / REMOTE CONTROL DOOR LOCKS 1 Radio frequency remote control locking unit, ignition key, key for doors, luggage compartment and fuel filler flap. If there is a child (or animal) in the car, never leave it unattended with the key in the ignition. With the key in the ignition it would be possible to operate the electrical equipment such as the… -
Page 8
RADIO FREQUENCY REMOTE CONTROL DOOR LOCKING The range within which the Locking/unlocking the doors remote control will operate Press the plip remote control for approximately one second to lock or This varies according unlock the doors. (Light 2 will environment: therefore take care illuminate.) when handling the remote control that you do not inadvertently lock… -
Page 9: Radio Frequency Remote Control
If you lose your keys or need factors in the immediate vicinity another set of keys (or a remote (external installations or the use of control), contact your Renault equipment operating on the same Dealer. frequency as the remote control).
-
Page 10: Opening The Doors
OPENING THE DOORS Opening the doors from the Opening the doors from inside Electric central locking outside the car This enables all the doors, the luggage compartment and fuel flap Use the key to unlock one of the Move handle 3. locked unlocked front door locks 2.
-
Page 11
AUTOMATIC LOCKING OF DOORS, ETC. WHEN DRIVING To deactivate it Operating principle With the ignition on, press the When the vehicle moves off, the unlocking side (opposite the red system automatically locks the dot) of the door central locking doors, etc. as soon as a speed of 4 button approximately mph (6 km/h) is attained. -
Page 12: Engine Immobiliser
If the vehicle does not recognise the (computer, wiring, etc.) code of the ignition key, tell-tale may be dangerous. It must be light 1 flashes continuously and the carried out by trained Renault engine cannot be started. network personnel. 1.07…
-
Page 13
ENGINE IMMOBILISER (continued) In all cases, it is essential to consult a Renault Dealer as only he is qualified to repair the engine immobiliser. If your coded ignition key is faulty, use the second key (given to you when the vehicle is delivered). If… -
Page 14: Head Restraints
HEAD RESTRAINTS To refit the head restraint Insert the rods into the sleeves, with the notches facing the front. Lower the head restraint until it locks in position. To raise or lower the head restraint To adjust the angle of the head restraint Pull the head restraint towards you and slide it up or down at the same…
-
Page 15: Front Seats
FRONT SEATS To move forwards or backwards: To incline the seatback: So that the effectiveness of Lift lever 2 to unlock the seat. Move lever 4 and tilt the seatback seat belts Release the lever in the required until it is in the required position. reduced, we would advise position and ensure that the seat you not to recline the…
-
Page 16
FRONT SEATS (continued) Access to the rear seats Heated seats Lift handle 5 and tilt the seatback With the ignition on, press switch 6. forwards. An indicator light will illuminate on the instrument panel. To return the seat to its initial position, move the seatback into an upright position until it locks in place. -
Page 17: Seat Belts
SEAT BELTS Adjusting your driving position Always wear your seat belt when travelling in your car. You must also • Sit with your back firmly against comply with the local legislation in the seatback. This is essential to the particular country you are in. ensure that your lumbar vertebrae are in the correct position.
-
Page 18
— Then allow the belt to rewind automatically. — Unwind it again. — If the problem persists, consult your Renault Dealer. To release Press button 4 on the catch 5 and the seat belt will be returned by the To fasten inertia reel. -
Page 19
• No modifications may be made to the component parts of the restraint system (belts and seats and their mountings) fitted originally. For special applications (e.g. fitting child seats) consult your Renault Dealer. • Do not use any devices which give any play in the belts (clothes pegs, clips, for example). A seat belt that is worn too loosely may cause injuries in the event of an accident. -
Page 20
— if the air bag and force limiter are • When scrapping your vehicle, If the vehicle is subject to a triggered, they provide additional contact your Renault Dealer for severe frontal impact, piston 1 protection in the event of the most disposal of the gas generator. -
Page 21
10 years An air bag may be provided for both and after operation. This must the driver and the front passenger. only be carried out by a Renault “Air bag” inscriptions on the dealer. steering wheel… -
Page 22
30 millisecond(s), cushioning the impact of the driver’s head against Consult your Renault Dealer as soon the steering wheel and the front as possible. Your protection will be passenger’s head… -
Page 23
• As a safety precaution, have the air bag system checked if your vehicle has been involved in an accident, is stolen or broken into. • When selling or lending the vehicle, inform the user of these points and hand over this handbook with the vehicle. • When scrapping your vehicle, contact your Renault Dealer for disposal of the gas generator(s). 1.18… -
Page 24
• The steering wheel must not be removed (except by qualified personnel within the Renault network). • Do not sit too close to the steering wheel. If you sit with your arms slightly bent (see information on “Adjusting your driving position” in section 1), it will ensure that there is sufficient space for the air bag to inflate properly and to be fully effective. -
Page 25
• Fitting seat covers: Seats equipped with an air bag require special covers specifically designed for your vehicle. Consult your Renault Dealer to see if appropriate covers are available from Renault outlets. The use of any covers other than those designed for your vehicle (and including those designed for another vehicle) may affect the operation of these air bags and reduce your protection. -
Page 26
CHILD SAFETY In all countries there are regulations Child restraints for which type governing the use of restraints for approval was obtained after 1992 children and babies. provide a level of security greater than restraints with type In Europe, children under 12 years approval before that date. -
Page 27
The safety of your children is also your responsibility. To give your children maximum protection, we recommend that you use seats obtained from a Renault Dealer. If your vehicle is equipped with an Isofix system, it is preferable to use Isofix seat. -
Page 28
CHILD SAFETY (continued) Category 3 For children aged over 7, a booster seat with belt guides recommended to ensure that the belt will be worn flat over the child’s thighs. booster seat with height-adjustable seatback and a belt guide is recommended as this will allow the belt to be worn as close to the base of the neck as possible but not on it. -
Page 29
CHILD SAFETY (continued) DANGER A rear-facing child seat must not be fitted to the front passenger seat if the vehicle is fitted with a passenger air bag. The child may suffer very serious injuries if the air bag inflates. Label 5 (on the dashboard) and label 6 (on the passenger side sun visor) remind you of these instructions. -
Page 30
CHILD SAFETY (continued) CHILD SAFETY • No modifications may be made to the component parts of the restraint system (belts and seats and their mountings) fitted originally. • The fitting instructions provided by the manufacturer of the restraint system should be followed carefully. •… -
Page 31
• Two anchoring rings per seat located between the seat and the seatback. • A special Renault child seat fitted with two catches which hook onto the two rings. Only the specific Renault seat is type approved for this vehicle. -
Page 32
CHILD SAFETY (continued) Fitting a child seat Isofix seat installed in the rear-facing position • Before fitting and using the seat, • Latch the hooks onto the rings read the instructions provided and make sure the seat is locked The front seat must not be moved carefully. -
Page 33
DRIVER’S LAYOUT, LEFT-HAND DRIVE 28 27 26 25 24 23 22 21 20 19 17 16 1.28… -
Page 34
DRIVER’S LAYOUT, LEFT-HAND DRIVE (continued) The equipment fitted, described below, depends on the version, option and country. 1 Demister outlet for left-hand 9 Warning lights for: 20 Ashtray and cigarette lighter side window • Driver’s seat belt not fastened • Door(s) and boot lid open 21 Radio location 2 Stalk for: 10 Switches for:… -
Page 35
DRIVER’S LAYOUT, RIGHT-HAND DRIVE 17 16 15 14 13 25 24 22 21 20 1.30… -
Page 36: Headlight Beam Adjustment
DRIVER’S LAYOUT, RIGHT-HAND DRIVE (continued) The equipment fitted, described below, depends on the version, option and country. 1 Demister outlet for left-hand 9 Driver’s air bag location 17 Ignition switch side window 10 Radio satellite 18 Horn 2 Storage compartment position of passenger air bag 11 •…
-
Page 37: Instrument Panel
INSTRUMENT PANEL The presence and operation of the warning lights, described below, depend on the vehicle equipment and country. 4a 4 If these warning lights illuminate, you must stop as soon as traffic conditions allow. 1.32…
-
Page 38
Consult your Headlight dipped beam Renault Dealer as soon as 4 Coolant temperature indicator warning light possible. In normal use, the needle should be below zone 4a. -
Page 39
INSTRUMENT PANEL The presence and operation of the warning lights, described below, depend on the vehicle equipment and country. If these warning lights illuminate, you must stop as soon as traffic conditions allow. 1.34… -
Page 40
INSTRUMENT PANEL (continued) The presence and operation of the warning lights, described below, depend on the vehicle equipment and country. 7 Multifunction display To move to on-board computer 8 Multifunction key reading, press the button again. • Engine oil level indicator Press repeatedly on the key to The vehicle must be parked select… -
Page 41
INSTRUMENT PANEL The presence and operation of the warning lights, described below, depend on the vehicle equipment and country. If these warning lights illuminate, you must stop as soon as traffic conditions allow. 1.36… -
Page 42: Instrument Panel
If it illuminates when the electronic fault. Consult your vehicle is being driven, it is • Warning light for serious Renault Dealer as soon as advisable to stop at a Renault injection incident possible. Dealer soon. If it flashes when you are…
-
Page 43
INSTRUMENT PANEL The presence and operation of the warning lights, described below, depend on the vehicle equipment and country. If these warning lights illuminate, you must stop as soon as traffic conditions allow. 1.38… -
Page 44
• If it remains lit, consult your This lights when Braking will then occur Renault Dealer as soon as handbrake is applied and then normally, without the anti-lock possible. goes out again. system. • If it flashes, reduce the If it lights up under braking at… -
Page 45
Display flashing Therefore, if the average fuel consumption decreases, the range Consult a Renault Dealer if the will increase. display flashes. • You may also notice that the 1 Display Interpreting… -
Page 46
ON-BOARD COMPUTER (continued) Examples of display selection by Interpreting the display pressing button 3: a) Total mileage recorder. b) Trip mileage recorder. c) Fuel consumed (in litres) since the last reset. d) Average consumption (in mpg or l/100 km) since the last time the reset button was pressed. -
Page 47
ON-BOARD COMPUTER (continued) Examples of the display by pressing Interpreting the display button 3 e) Current consumption (in mpg or litres/100 km) The value is displayed after reaching a speed of 15 mph (25 km/h). f) Estimated range with the remaining fuel (in miles or km) This range takes into consideration the average fuel consumption since the last time the reset button was pressed. -
Page 48
CLOCK AND EXTERNAL TEMPERATURE Clock time and/or external temperature and/or other functions are displayed when the ignition is switched on. Setting the clock Press the key: H for hours M for minutes 1.43… -
Page 49
CLOCK AND EXTERNAL TEMPERATURE (continued) External temperature vehicles fitted with indicator navigation system, refer to the This information must handbook supplied for information never be used as a detector on the special features of this for ice. In effect, ice formation is If the electrical supply is cut equipment. -
Page 50: Rear View Mirrors
REAR VIEW MIRRORS External rear view mirrors with electrical adjustment With the ignition on, turn knob 2: Versions with de-icing rear view mirrors — Position C to adjust the left-hand The external wing mirror rear view mirror The rear view mirrors are de-iced on the driver’s side has two when rear screen demisting is — Position E to adjust the right-hand…
-
Page 51: Steering Wheel
REAR VIEW MIRRORS STEERING WHEEL (continued) Interior rear view mirror On certain vehicles, the position of the steering wheel is adjustable. This is adjustable. When driving at night, to avoid being blinded by the Adjustment headlights of the vehicle behind, Lift lever 2 and put the steering lower the small lever 1 located wheel in the required position;…
-
Page 52: Horn And Warning Lights
HORN AND WARNING LIGHTS Horn “Hazard” warning lights Direction indicators Press buttons 1 or 2 on the steering Press switch 4. Move stalk 3 parallel to the steering wheel boss A. This switch illuminates all four wheel and in the direction you are direction indicators simultaneously.
-
Page 53: External Lighting And Signals
EXTERNAL LIGHTING AND SIGNALS “Lights on” warning buzzer A warning buzzer will sound when the driver’s door is opened and the lights are left switched on after the ignition has been switched off (to prevent discharge of the battery). Side lights Headlight main beams Turn the end of stalk 1 to With stalk 1 in the dipped…
-
Page 54
EXTERNAL LIGHTING AND SIGNALS (continued) When the external vehicle lights are extinguished, the rear fog light is extinguished or the equipment returns to the front lights position (if they are fitted). Front fog lights Rear fog light Move the central ring 4 of Move the central ring 4 stalk 1 to align with mark 5 opposite of the stalk to align with mark 5… -
Page 55
ELECTRICAL ADJUSTMENT OF HEADLIGHT BEAM HEIGHT Adjustment positions of button A Button A allows the height of the beams to be adjusted in relation to the load. Turn button A downwards to lower the headlights and upwards to raise them. 1.50… -
Page 56
DEMISTING/DE-ICING De-icing rear screen Demisting the windscreen With the engine running, Move control 2: press button 1. (The tell-tale light Set it at position illuminates instrument panel.) Close the dashboard air outlets for greater efficiency. This function demists the rear screen and the electric rear view This directs the entire flow of air mirrors (if these are fitted to the… -
Page 57
WINDSCREEN WASH/WIPE Vehicles with automatic Windscreen washer, selection of wiping speed headlight washers If a wiping speed is selected when With the ignition on, pull the stalk 1 driving, wiping speed towards you. reduced to the lower speed when Press briefly to engage one sweep of the car stops: the wiper, press hold to engage three •… -
Page 58: Fuel Tank
Useful capacity of fuel tank: new cap is of the same type. Approx. 13.2 gallons (60 litres). Consult your Renault Dealer. There is a cap holder 1 on the filler Never handle the cap near a source flap for holding the cap when filling of heat or a flame.
-
Page 59
— Insert the nozzle as far as it will go inspected by qualified staff from so as to open the valve. the Renault network. — Start to fill the tank with fuel and keep the nozzle in this position throughout… -
Page 60
Section 2: Driving (Advice on use relating to fuel economy and the environment) Running in/Ignition switch ……………………..2.02 Starting the engine/Stopping the engine ………………….2.03 Special features of petrol versions ……………………2.04 Gear lever/Handbrake/Power assisted steering ………………..2.05 Advice on anti-pollution and how to economise on fuel …………..2.06 2.08 Environment ………………………… -
Page 61: Running In/Ignition Switch
RUNNING IN IGNITION SWITCH For the first 625 miles (1000 km) do “Ignition on” position M not exceed 70 mph (130 km/h) in The ignition is switched on: the highest gear 3000 engine may be started. 3500 rpm. “Start position” D completion miles (1000 km) you may use your car…
-
Page 62: Starting The Engine/Stopping The Engine
STARTING/STOPPING THE ENGINE Stopping the engine Starting the engine With the engine at idling, turn the key In the case of an automatic back to the “stop” position. transmission Refer information automatic transmissions in section 2. Special feature on vehicles equipped with an engine immobiliser system In very cold conditions (temperatures below –20°C): so that it is easier to…
-
Page 63
These incidents may be avoided by • Driving for a long time with the taking your vehicle regularly to low fuel level warning light your Renault Dealer at the intervals illuminated; specified in your servicing booklet. • Faulty ignition, running out of… -
Page 64: Gear Lever/Handbrake/Power Assisted Steering
GEAR LEVER HANDBRAKE POWER STEERING To release: When power assisted steering is fitted, never leave the steering Pull the lever up slightly, press wheel on full lock when the vehicle button 2 and then lower the lever to is parked as this may damage the the floor.
-
Page 65
Have your vehicle checked and engine. Consult your Renault correctly, use it carefully and watch adjusted by your Renault Dealer in Dealer for this information. your driving style. accordance with the instructions in • Idling speed: This does not the vehicle’s servicing booklet. -
Page 66: Advice On Anti-Pollution And How To Economise On Fuel
— If it illuminates continuously, Keep your foot in the same • Drive carefully for the first few consult your Renault Dealer as position on the accelerator pedal. miles until the engine reaches its soon as possible.
-
Page 67
ADVICE ON ANTI-POLLUTION AND HOW TO ECONOMISE ON FUEL (continued) • For vehicles with conditioning, extra fuel consumed in urban cycle can be as high as 2 litres per 100 km: switch the system off when it is not needed. •… -
Page 68: Environment
ENVIRONMENT Your vehicle has been designed In addition to this, your vehicle with the aim of caring for the meets the requirements laid down environment. in European legislation relating to environmental protection. • The majority of versions are equipped with a depollution Make your contribution towards system including…
-
Page 69: Tyre Pressure Monitoring System
TYRE PRESSURE MONITORING SYSTEM This system continuously monitors the tyre pressures. Tyre pressures should be adjusted when the tyres are cold. If tyre pressures cannot be checked when the tyres are cold, assume an increase of 0.2 to 0.3 bar. Never deflate a hot tyre.
-
Page 70
Fitting tyres (replacing tyres or fitting winter tyres) As there are special precautions to be taken when replacing tyres, we advise you to consult your Renault Dealer. Reading the tyre pressures on the instrument panel (if fitted) Once the car’s tyre pressures have… -
Page 71
Replacing wheels / rims… This system requires special equipment (wheels, hubcaps…). Consult your Renault Dealer to find which accessories compatible with the system and which are available from Renault accessory outlets: use of any other Display accessory may impair the operation of the system. -
Page 72
+ lit up + faulty wheel(s) flashing Meaning: puncture, replace the wheel concerned or call your Renault Dealer. lit up + faulty wheel(s) not lit up Meaning: system fault (if, for example, the emergency spare wheel is fitted or winter tyres are fitted…). -
Page 73
TYRE PRESSURE MONITORING SYSTEM (continued) Examples of information which may appear on the display A. Display A Message interpretation The tyre pressure is correct. The flashing wheel is slightly flat or over-inflated, check the tyre pressures. The flashing wheel is flat or over-inflated, slow down and check the tyre pressures as soon as possible. -
Page 74
Examples of information which may appear on the display A. Display A Message interpretation The flashing wheel is very flat, stop as soon as possible to check the tyre pressures or call your Renault Dealer. Puncture: replace the wheel concerned or call your Renault Dealer. 2.15… -
Page 75: Anti-Lock Braking System: Abs
ANTI-LOCK BRAKING SYSTEM (ABS) When braking sharply, the two Also, this system allows you to When system been essential aims are to reduce the optimise stopping distances when activated, you will feel a certain stopping distance and keep your the adhesion of one or more wheels degree of pulsation at the brake vehicle under control.
-
Page 76
Contact your Renault Dealer as a matter of urgency. 2 — The orange warning light and the red brake circuit incident warning light illuminated on the instrument panel. -
Page 77: Emergency Braking Assistance
EMERGENCY BRAKING ASSISTANCE This is a system in addition to ABS which helps reduce the vehicle stopping distances. Operating principle Using a sensor measuring the speed of depressing the brake pedal, the system allows emergency braking situation to be detected. In this case, braking…
-
Page 78
PROACTIVE AUTOMATIC GEARBOX For safety reasons, certain positions may not be selected until the mechanism unlocked: press button A. Only engage D or R when the vehicle is stationary, with your foot on the brake and the accelerator pedal released. Driving With the gear lever in position P or N, switch on the ignition. -
Page 79
PROACTIVE AUTOMATIC GEARBOX (continued) Moving off forwards • In hilly or mountainous country: If you cannot remain in 4th gear Select position D. In the majority of because of the road surface and traffic conditions, you will not have the number of bends, we would to touch your gear selector lever advise you to move the selector to again: gear changing will take place… -
Page 80
Consult your Renault Dealer as How to drive as economically as soon as possible. possible • If a vehicle with an automatic Leave the selector in position D gearbox breaks down, see the (drive) on the open road. -
Page 81
2.22… -
Page 82: Your Comfort
Section 3: Your comfort Manually operated hood …………………… 3.02 3.08 Opening ………………….3.03 3.05 Closing ………………….3.06 3.08 Electrically operated hood ………………….3.09 3.14 Opening ………………….3.10 — 3.11 Closing ………………….3.12 — 3.13 Air vents …………………………3.15 — 3.16 Heating and ventilation ……………………
-
Page 83: Maintenance
MANUALLY OPERATED HOOD: CONDITIONS OF USE / OPENING Conditions of use • Do not leave the hood open for The hood has been designed so that longer than a week at a time in it can be operated as quickly and order to prevent any differences easily as possible.
-
Page 84
MANUALLY OPERATED HOOD: OPENING Before opening the hood • Ensure that it is clean, as dust particles may damage the outside of the hood and the rear screen. • Ensure that hood completely dry, otherwise the compression which subjected when folded could cause marks and even spots of mould in the long term. -
Page 85
MANUALLY OPERATED HOOD: OPENING (continued) C — Lift the rear section of the hood D — Lower the rear section of the E — Fold back the front section of until it reaches the stop. hood. the hood. If this is not possible, raise the front section of the hood slightly and then lift the rear section again. -
Page 86
MANUALLY OPERATED HOOD: OPENING (continued) Operating incidents F — Lower hood compartment cover Note: If the handbrake has been 4 and close it firmly. Make sure released and the hood cover is not When unlatching hood that it is locked in position. properly locked, a bleep will sound. -
Page 87
MANUALLY OPERATED HOOD: CLOSING B — Raise the hood, lifting it by one C — Raise the hood until it is of the handles 3. approximately 14 inches (35 Closing operations centimetres) from described below must windscreen. performed in the order given to prevent damage being caused to the bodywork. -
Page 88
MANUALLY OPERATED HOOD: CLOSING (continued) D — Raise the rear section of the E — Close the hood compartment F — Lower the rear section of the hood. cover. Make sure it is properly hood. locked. 3.07… -
Page 89
MANUALLY OPERATED HOOD: CLOSING (continued) Operating incidents G — From inside the vehicle, turn H — Fold down the handle so that it handle 5 until it reaches the is positioned flat against the When unlatching hood stop and pull the handle until hood (to return it to its initial compartment cover, make sure the the hood closes. -
Page 90
ELECTRICALLY OPERATED HOOD: CONDITIONS OF USE Conditions of use • Do not leave the hood open for The hood has been designed so that longer than a week at a time in it can be operated as quickly and order to prevent any differences easily as possible. -
Page 91
ELECTRICALLY OPERATED HOOD: OPENING Before opening the hood • Ensure that it is clean, as dust particles may damage the outside of the hood and the rear screen. • Ensure that hood completely dry, otherwise the compression which subjected when folded could cause marks and even spots of mould in the longer term. -
Page 92
ELECTRICALLY OPERATED HOOD: OPENING (continued) C — Lift the front of the hood (using D — Press the rear part of switch 4 handle 3). Stop as soon as you until hood opens hear a bleep. completely (hood folded down and hood compartment cover Fold down handle 3. -
Page 93: Electrically Operated Hood Closing
ELECTRICALLY OPERATED HOOD: CLOSING B — Press the front part of switch 1 C — Turn the handle 3 as far as the until the hood stops moving stop. Closing operations completely: hood described below must compartment cover will be performed in the order given to locked and the front edge of the prevent damage being caused to…
-
Page 94
ELECTRICALLY OPERATED HOOD: CLOSING (continued) D — Pull the handle until the hood E — Fold down the handle so that it closes. is positioned flat against the hood (to return it to its initial Move the handle a quarter of a position). -
Page 95: Manually Operated Hood
2 and 3. closed position. Turn screw 3 for the hydraulic Visit your Renault Dealer as soon assembly (located in the luggage — Switch on the ignition again and as possible. compartment) as far as possible.
-
Page 96: Air Vents
AIR VENTS (air outlets) 1 — Left-hand front window demister 5 — Heating/ventilation control unit 6 — Right-hand side air vent 2 — Left-hand side air vent 7 — Right-hand front window demister 3 — Windscreen demisting vents 8 — Footwell heater outlets for front 4 — Central air vents and rear passengers 3.15…
-
Page 97: Air Vents
AIR VENTS Front central air vents and Side air vents on driver’s side passenger side air vents Air flow: Air flow: Move tumblewheel 1 (beyond the Move tumblewheel 4 (beyond the point where a certain resistance is point where a certain resistance is felt).
-
Page 98
HEATING — VENTILATION WITH TEMPORARY ISOLATION OF THE PASSENGER COMPARTMENT • Position The air flow is distributed between dashboard vents footwells. • Position The air flow is distributed between all the vents, the front side window demisting vents, the windscreen demisting vents and the footwells. -
Page 99
HEATING — VENTILATION WITH TEMPORARY ISOLATION OF THE PASSENGER COMPARTMENT (continued) Adjusting the amount of air supplied passenger compartment Normal use Move control C from (position 1) to 4. Ventilation passenger compartment is by “blown air”. The ventilation fan determines the amount of inlet air. -
Page 100
AIR CONDITIONING Controls Adjustments for heat setting A Heat setting adjustment Move control A. B Distribution To the right: Maximum possible passenger compartment temperature C Switching on the air conditioning To the left: Minimum possible temperature D Air conditioning operation tell-tale light E Adjusting the amount of air supplied… -
Page 101
AIR CONDITIONING (continued) • Position Close the dashboard vents for more effective demisting. All the air is directed to the windscreen and front side window demisting vents. this position, conditioning is switched on at the same time demisting may be more effective. -
Page 102: Heating And Ventilation
AIR CONDITIONING (continued) Note: The air conditioning may be used in all conditions but does not operate when external temperature is low. • Button C not activated (tell-tale light D extinguished) The air conditioning is not operational. Heating ventilation therefore identical to that of a vehicle without air conditioning.
-
Page 103
If both these points are correct, switch off the system (tell-tale light D extinguished) and consult a Renault Dealer. In very hot weather or when the When the air conditioning system is vehicle has been parked in the sun,… -
Page 104
AIR CONDITIONING (continued) Adjusting the amount of air supplied passenger compartment Normal use Move control E from (position 1) to 4. Ventilation passenger compartment is by “blown air”. The ventilation fan determines the amount of inlet air. The vehicle speed has a slight effect on this. -
Page 105: Window Risers
WINDOW RISERS Automatic operation (This is in addition to the driver’s window riser described above.) With the engine running, press switch 1 briefly to raise or lower the window completely. Pressing switch 1 during this operation will stop the window moving.
-
Page 106
WINDOW RISERS (continued) Rear electric windows With the ignition on, press switch 3 or 4. Child safety Switch 5 overrides the operation of the rear windows. If there is a child (or animal) in the car, never leave it unattended with the key in the ignition. -
Page 107: Interior Lighting
INTERIOR LIGHTS Map reading light 3 To turn on or off, operate switch 2. Adjust map reading light 3 as you Vehicles with automatic operation wish. of interior lighting •If the doors are unlocked using the plip remote control, the interior lighting switched approximately 15 seconds.
-
Page 108
ASHTRAY — CIGAR LIGHTER / SUN VISOR / WINDSCREEN Windscreen with reflective layers This windscreen reflects the sun and, particular, limits infrared rays entering the passenger compartment. An area around the interior rear view mirror is suitable for affixing passes to the windscreen (e.g. motorway permits, car park season tickets, etc.). -
Page 109: Glove Box — Storage Compartments
GLOVE BOX — STORAGE COMPARTMENTS Passenger side glove box Door storage compartments 3 Front seat pocket 4 To open, unlock (using ignition key) and then press lock 1. Inside the compartment there are two glass holders and a spectacle holder. Storage compartment passenger 2 or location of…
-
Page 110
ROADBOX: FITTING With the vehicle hood folded down • Remove bolts 3 from the seat base. • Unclip rear seat belts 5 by and the hood compartment cover pressing buttons 6. • Lift up seat base 2 and remove it open from the vehicle. -
Page 111
ROADBOX: FITTING (continued) • Secure the seat belts by inserting • Fit carpet 10 on the floor and then • Tighten bolts 1 and then bolts 11. the buckles 7 into the catches 8. install roadbox 9 in the vehicle. •… -
Page 112
ROADBOX: FITTING (continued) Lid 13 locks or unlocks at the same time as the vehicle doors. To open or close lid 13, slide it using handle 14. A light illuminates when the lid is open. If lid 13 is not closed (or not properly closed) when the doors are locked using the plip remote control, a bleep is sounded. -
Page 113
ROADBOX: REMOVING With the vehicle hood folded down • Open lid 3. • Take out the roadbox 5. and the hood compartment cover • Remove bolts 4. • Remove carpet 6 from the floor. open • Release the rear seat belts 7 by •… -
Page 114
ROADBOX: REMOVING (continued) • Route each of the rear seat belts 7 • Tighten bolts 1 as far as they will • Position seat base B and tighten though the corresponding belt the two bolts 13 as far as they will guide 10. -
Page 115: Luggage Compartment
LUGGAGE COMPARTMENT To open: Press lock 1 and pull towards you. To close: Close the luggage compartment lid firmly but without using excessive force. Fittings luggage When closed, luggage compartment is locked at the same compartment time as the doors. An elastic fastening 2 is provided for holding items such as a warning To unlock:…
-
Page 116: Ski Flap
SKI FLAP Move the two screws 1 in the Lift cover 3. luggage compartment a quarter of a turn. Lower flap 2. 3.35…
-
Page 117
3.36… -
Page 118
Section 4: Maintenance Bonnet …………………………4.02 — 4.03 Engine oil level/Oil change …………………… 4.04 4.07 Levels: Power-assisted steering pump ………………….4.08 Coolant …………………………4.09 Brake fluid ……………………….4.10 Windscreen/headlight washer reservoirs ………………. 4.11 Air filter …………………………..4.12 Hood maintenance ……………………….4.13 Bodywork maintenance ……………………. -
Page 119: Bonnet
BONNET Bonnet security lock To open the bonnet, pull handle 1. To unlock, lift catch 2. Take care when working in the engine compartment as the engine cooling fan may cut in at any moment without warning. 4.02…
-
Page 120
(except for qualified staff from the Renault network). Lift the bonnet, release stay 4 from To close the bonnet, refit stay 4 in its its holder 3 and, for your own safety,… -
Page 121
To move to on-board computer Message 2 after the running in period, consult reading, press the button again). Level your Renault Dealer. display — When the minimum oil level is function reached, the dashes and the word Oil change frequency: Check the oil “Oil”… -
Page 122
ENGINE OIL LEVEL / ENGINE OIL CHANGE (continued) Consult your Renault Dealer at once if you notice an abnormal or repeated drop in any of the fluid levels. Reading the level using the dipstick — Take out the dipstick. — Wipe the dipstick using a clean, lint-free cloth. -
Page 123
ENGINE OIL LEVEL / ENGINE OIL CHANGE (continued) 1.4 l 16V — 1.6 l 16V 2.0 l IDE Topping up/filling — Unscrew the fuel filler cap 1. — Top up the level. (For information, The car must be parked on level capacity between ground and the engine should be… -
Page 124: Engine Oil Level/Oil Change
Take care when working under the bonnet as the Never run the engine in an Consult your Renault Dealer at engine cooling fan may cut enclosed space as exhaust once if you notice an abnormal in at any moment.
-
Page 125
LEVELS Consult your Renault Dealer at once if you notice an abnormal or repeated drop in any of the fluid Power assisted steering pump levels. The appearance and position of the Level reservoir depends on the version The correct level when cold should and equipment level of the vehicle. -
Page 126: Coolant
MIN mark. When the engine is hot, do not touch the cooling system. Consult your Renault Dealer at Danger of burns. once if you notice an abnormal or repeated drop in any of the fluid levels.
-
Page 127: Brake Fluid
(continued) Topping up After operation hydraulic circuit, a specialist must replace the brake fluid. Only use Renault-approved fluids taken from a sealed container. Intervals between fluid changes Refer to the servicing booklet for your vehicle. Brake fluid level This should be checked frequently, especially if you notice even the slightest loss in braking efficiency.
-
Page 128
Liquid Liquid Water + special windscreen washer Water + special windscreen washer fluid (anti-freeze product in winter) fluid (anti-freeze product in winter) approved by Renault’s Technical approved by Renault’s Technical Department. Department. Jets Jets Tilt each small sphere with a pin to… -
Page 129
Servicing booklet for your vehicle. The battery does not need to be Consult your Renault Dealer at serviced: never open cover 1. once if you notice an abnormal or repeated drop in any of the fluid levels. Handle the battery with… -
Page 130: Hood Maintenance
(from front to rear). special product hoods available from Renault • To remove marks and stains, Dealerships. (Solvents, chlorinated clean the hood with a soft brush detergents and the like must not following the weft of the fabric.
-
Page 131: Bodywork Maintenance
• Corrosives in the atmosphere spraying products accumulate. — Atmospheric pollution (built-up approved by Renault’s Technical and industrial areas). Department as this could give rise • Allow rust to form following — Saline atmosphere (near the sea, corrosion incorrect minor impacts.
-
Page 132
Consult products approved by Renault’s peel off: the vehicle must be anti-corrosion booklet. Technical Department. washed immediately to remove these… -
Page 133: Interior Trim Maintenance
INTERIOR TRIM MAINTENANCE • Seat belts Whatever type of stain is on the trim, use soapy water (if necessary, These must be kept clean. with warm water) based on: Use products selected by our • natural soap, Technical Department or warm •…
-
Page 134: Practical Advice
Section 5: Practical advice Emergency spare wheel ………………………. 5.02 Tools (jack, wheelbrace, etc.) ……………………… 5.03 Wheel embellishers — Rims ……………………..5.04 Changing a wheel ……………………….. 5.05 Tyres (tyre safety, wheels, winter precautions) …………….. 5.06 5.08 Headlights (changing the bulbs) ………………….5.09 5.11 Rear lights (changing the bulbs) ………………….
-
Page 135: Emergency Spare Wheel
EMERGENCY SPARE WHEEL The emergency spare wheel 2 The emergency wheel is located in • Unscrew the centre nut 3. If a packet of four bolts 4 is supplied the luggage compartment. with the emergency spare wheel, • Take out the emergency spare should these when…
-
Page 136
TOOLS Jack 2 The tools are under the emergency spare wheel When refitting the jack, fold it completely and replace it in its location. Wheelbrace 1 Embellisher key 3 It is used to unclip the wheel embellishers. The jack is designed for Towing ring 4 wheel changing purposes only… -
Page 137
EMBELLISHERS — WHEELS Wheel embellisher with masked Centre embellisher 3 wheel bolts Masked wheel bolts (example: embellisher 1) Remove using wheel Remove using wheel embellisher key A (stored with the embellisher key A (located next to tools). the jack) or the end of the To refit it, align the valve symbol wheelbrace by inserting the hook (engraved on the embellisher) with… -
Page 138: Changing A Wheel
CHANGING A WHEEL • Screw up the jack by hand at first to align the base plate (which should inclined further inwards than the jack head). Use a piece of wood under the base plate if on soft ground. • Insert the end of the wheelbrace 4 into the jack 3 and turn a few times to lift the wheel off the ground.
-
Page 139: Tyres (Tyre Safety, Wheels, Winter Precautions)
When fitting tyres to the car, they should either be identical to those fitted originally conform to those recommended by your Renault Dealer. 5.06…
-
Page 140
TYRES (safety) Tyre inflation pressures Replacing tyres Inflation pressures should checked when the tyres are cold; Tyre inflation pressures must be ignore higher pressures which may adhered to. (Remember to check the be reached in hot weather or emergency spare wheel at the same For safety reasons, this following a fast journey. -
Page 141
If you wish to use chains, you must use special equipment. In all cases, we would recommend Consult your Renault Dealer. that you consult your Renault Dealer who will be able to advise you on the choice of equipment which is most suitable for your vehicle. -
Page 142
Release spring 4 and take out the H4 type bulbs approved bulb. Direction indicator by Renault’s Technical Turn bulb holder 3 a quarter turn Department must be used. Type of halogen bulb: H4 anti U.V. and remove the bulb. -
Page 143
Direction indicator the bulb. H1 and H7 type bulbs Turn the bulb holder 3 a quarter of a approved by Renault’s Type of halogen bulb: 6 turn and remove the bulb. Technical Department must be used. anti U.V. (see box). -
Page 144: Headlights (Changing The Bulbs)
If you wish to fit fog lights or long range headlights to your car, consult a Renault Dealer. Front fog lights 1 Changing a bulb and adjusting the beam: Consult your Renault Dealer. Any operation on (or modification electrical system must be performed by a Renault Dealer…
-
Page 145: Rear Lights (Changing The Bulbs)
REAR LIGHTS (Changing the bulbs) Remove screw 1 and cover 2. Unclip bulb holder 3 by pressing 4 Tail and stop lights the two tabs. Pear-shaped bulb, bayonet type with two filaments P21/5 W. 5 Direction indicator light Pear-shaped bulb, bayonet type P21 W.
-
Page 146: Side Mounted Indicators (Changing The Bulbs)
REAR LIGHTS — SIDE MOUNTED INDICATORS (Changing the bulbs) Third stop light Number plate light Side mounted indicators Undo the four screws 2 to remove Unclip the light 6 by pressing tab 5. Unclip the side mounted indicator 7 the cover 1. (using a tool such as a flat Remove the light cover to gain Remove the bulb holder 4 by…
-
Page 147: Interior Lights (Changing The Bulbs)
INTERIOR LIGHTS (Changing the bulbs) Interior light 1 Map reading light 2 Unclip cover (using a tool such as a Unclip light 2 (using a tool such as a flat screwdriver) flat screwdriver). Release bulb 3. Turn bulb holder 4 a quarter of a turn to gain access to the bulb.
-
Page 148
INTERIOR LIGHTS (Changing the bulbs) Glove box lights 1 Luggage compartment light 2 Unclip the light 1 using a tool such Press tab 3 to release the bulb holder as a flat screwdriver. and gain access to the bulb 4. Disconnect the light. -
Page 149: Fuses
(risk of fire) in the event of an item of A wise precaution: equipment using an excessive Obtain a box of spare bulbs and amount of current. fuses from your Renault Dealer. 5.16…
-
Page 150
FUSES (continued) Allocation of fuses (depending on the equipment level) Symbol Allocation Symbol Allocation Symbol Allocation Rear window de-icing Radio/cigar Not used. lighter/instrument illumination/clock Horn Electric windows Anti-lock braking (ABS) Windscreen wiper Not used Left-hand side lights/ “lights on” buzzer/ instrument panel/ Heated seats number plate light… -
Page 151: Battery
BATTERY (breakdown) In the event of an incident Connecting a battery charger Isolate the battery by unscrewing Both battery leads must • Finally, you should understand one of the terminals. disconnected (with engine that charge decreases switched off). naturally as a result of certain To avoid all risk of sparks permanent consumers such as the Do not disconnect the battery when…
-
Page 152
+ after ignition feed. In this case, it is advisable to have your vehicle fitted with a battery which has an increased nominal capacity. Consult your Renault Dealer. If your vehicle is to be left stationary relatively long… -
Page 153
Start the engine as you would Obtain suitable jump leads (with a normally. As soon as it starts, large cross section) from a Renault disconnect cables A and B in Dealer or, if you already have jump reverse order (4-3-2-1). -
Page 154
The batteries can be obtained from your Renault Dealer. • Release the plip and then press it twice in succession. These batteries should last about two years. There is a delay of If this procedure is not successful, 1 second between locking and contact your Renault Dealer. -
Page 155
• The specifications supports and wires (available as a Renault parts accessory) vary depending on equipment level of your vehicle and the type of radio. To find out their reference, consult your Renault Dealer. -
Page 156
FITTING A RADIO (continued) Rear speakers We would advise you to consult your Renault Dealer about the installation of speakers for the rear seats. Door speakers Unclip grille 1 at the points indicated by the arrows using a tool such as a flat screwdriver. -
Page 157
• Any work on the electric aerials may cause interference to circuit of the vehicle must be the original electronic systems carried out by Renault network fitted to the vehicle: it is advisable engineers: system only to use equipment with an connected incorrectly, it may external aerial. -
Page 158
SCREEN WIPERS To refit To refit the wiper blade, proceed in reverse order to removal. Make sure the blade is correctly locked in position. Replacing windscreen wiper blades 1 • Lift the windscreen wiper arm 3. • Move the blade into a horizontal position. -
Page 159: Towing
Screw in the towing ring 2 (stored country in which you are driving: in the tools unit) as far as it will go. do not exceed the towing weight for your vehicle. Consult your Renault Dealer. 5.26…
-
Page 160
TOWING (breakdown, continued) Towing vehicle with automatic transmission: special points Engine switched off: transmission longer lubricated. It is preferable to tow this type of vehicle on a trailer or tow it with the front wheels off the ground. Exceptional circumstances You may tow the vehicle with all four wheels on the ground using the towing point under the following… -
Page 161
TOWING (trailer) Permissible nose weight when towing a trailer, max. towing weight, braked and unbraked: Refer information “WEIGHTS” in section 6: Refer manufacturer’s instructions for information on how to fit and operate the towing attachment. It is advisable to keep these instructions with your… -
Page 162
Following an impact, the system can be enabled but only after it has been inspected by a qualified person from the Renault network who must ensure that: • the vehicle can be driven; • there is no smell of fuel;… -
Page 163: Operating Incidents
OPERATING INCIDENTS Your car should not be affected by incidents likely to keep it off the road for long if you have followed the Renault Servicing Programme regularly. The following hints will enable you to get going again quickly, albeit temporarily. For reasons of safety you should always consult a Renault Dealer as soon as you can.
-
Page 164
Starting procedure incorrect See “starting engine” section. Poor fuel supply or ignition fault. If the vehicle will not start, do not keep trying to start it. Consult a Renault Dealer. System for cutting off fuel supply Consult Renault Dealer (see… -
Page 165
— on idling Oil pressure too low. Consult the nearest Renault Dealer. — is slow to extinguish or remains Loss of oil pressure. Stop: call for assistance from Renault illuminated on acceleration. Dealer. • Engine loses power. Clogged air filter. -
Page 166
Water pump: belt stretched or broken. Stop the vehicle and switch off the temperature warning light illuminates Faulty engine cooling fan. engine. Consult a Renault Dealer. (or the gauge needle moves into the red zone). Coolant leaks. Check the condition of hoses and clips. -
Page 167
— Feed wire disconnected or connector Reconnect wire. out of position. — Faulty earth connection. Find earth wire and remake a good clean wire-to-earth connection. On both sides: — Fuse blown. Replace fuse. — Flasher unit defective. Replace: consult a Renault Dealer. 5.34… -
Page 168
OPERATING INCIDENTS (continued) Electrical equipment CAUSES REMEDIAL ACTION Headlights One: — Bulb blown. Replace bulb. not working. — Wire disconnected or connector out Check reconnect wire of position. connector. — Faulty earth connection. See above. Both: — If the circuit is fused: Check fuse and change if necessary. -
Page 169
5.36… -
Page 170: Technical Specifications
Section 6: Technical specifications Identification plates ……………………..6.02 — 6.03 Dimensions ………………………….. 6.04 Engine specifications ……………………….6.05 Towing weights …………………………6.06 Weights …………………………..6.06 Replacement parts ……………………….6.07 6.01…
-
Page 171: Identification Plates
VEHICLE IDENTIFICATION PLATES Quote the information on the Vehicle identification plate A identification plate (right-hand 1 Vehicle type and chassis number 6 Technical specifications side) when writing or ordering vehicle 2 Maximum permissible all-up parts. weight 7 Vehicle paint reference 3 Maximum permissible total train 8 Equipment level weight…
-
Page 172
VEHICLE IDENTIFICATION PLATES (continued) Quote the information on the vehicle identification plate and engine plate when writing or ordering parts. Engine plate or engine label B 1 Engine type 2 Engine suffix 3 Engine number 1.4 l 16V — 1.6 l 16V 2.0 l IDE 6.03… -
Page 173: Dimensions
DIMENSIONS (in metres) 4,082 1,450 1,698 Turning circle • Between walls: 11.30 • Between kerbs: 10.80 1,368 * 1,432 * Unladen 6.04…
-
Page 174: Engine Specifications
The type should be shown on a label in the engine compartment, otherwise consult your Renault Dealer. Fitting spark plugs which are not to specification may damage the engine. * If not available, unleaded fuel with an octane rating of 91 can be used.
-
Page 175: Weights
— It is important to comply with the towing weights, governed by local legislation in each country and, in particular laid down in the Road Traffic Regulations. Consult your Renault Dealer about any attachments. Under no circumstances may the total train weight (= max.
-
Page 176: Replacement Parts
If you always fit Renault genuine parts to your vehicle, you will ensure that it performs well. Repairs carried out by the Renault network using original parts are guaranteed for one year.
-
Page 177: Alphabetical Index
ALPHABETICAL INDEX A ABS: anti-lock braking system ….2.16 — 2.17 C Controls …………1.28 1.31 Accessories ………….. 5.24 Coolant …………..4.09 Additional driving lights ……..5.11 Courtesy lights ……..3.11 — 3.12 — 5.14 Adjusting beam height ……….. 1.50 Adjusting the front seats ……..
-
Page 178
ALPHABETICAL INDEX F Fuel (economy advice) ……2.06 J Jack …………….5.03 2.08 Fuel (filling) ……….1.53 — 1.54 Fuel (grade) ……….1.53 — 1.54 Fuel cut-off …………. 5.29 K Keys …………1.02 1.04 Fuel economy ……….. 2.06 2.08 Fuel filler flap …………1.53 Fuel level ………. -
Page 179
ALPHABETICAL INDEX P Paintwork (maintenance) ……4.14 — 4.15 Technical specifications ……6.02 6.07 Paintwork (reference) ……….6.02 Time …………..1.43 — 1.44 Power steering …………2.05 Tool kit (wheelbrace/jack …) ……..5.03 Power steering pump ……….4.08 Towing (attachments) ……….5.28 Practical advice ………. -
Page 181
82 00 148 967 — NU 640-2 — November 2000 — 2 EDITION ANGLAISE…
- Руководства по ремонту
- Руководство по ремонту Рено Меган 1996-2002 г.в.
Руководство по ремонту Renault Megane / Рено Меган
Общая информация об автомобиле.
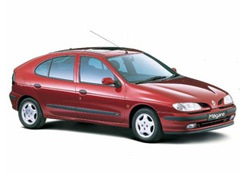
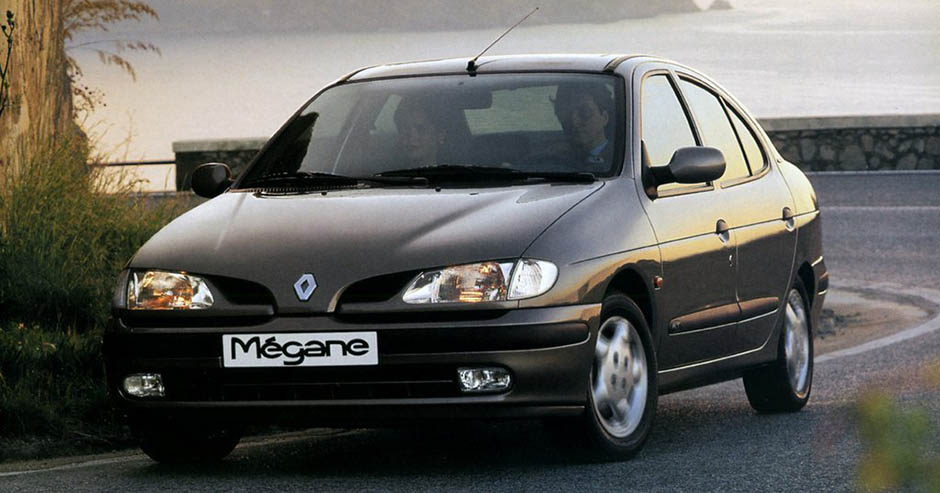
В данном руководстве рассматриваются модели Renault Megane с кузовами Седан (Classic), Хэтчбек, Купе (Coach), Универсал, Кабриолет, а так же минивэн (Scenic), оснащенные бензиновыми двигателями объемом 1390 см 3 , 1598 см 3 и 1998 см 3 (последний имеет 8 — и 16-клапанные версии), а также дизельными двигателями 1870 см 3 , включая и вариант с турбокомпрессором.
Все двигатели имеют верхнее расположение распредвала и установлены поперечно в передней части автомобиля.
Некоторые модели оборудованы пятиступенчатой РКПП, на остальных установлена четырехступенчатая автоматическая трансмиссия.
Все модели имеют передний привод. Подвеска передних колес — независимая, задних — полунезависимая.
Отделка салона отличается высоким вкусом и разнообразием. Модели с расширенной комплектацией оснащены единым замком, электрическими стеклоподъемниками, люком крыши, системой антипробуксовки тормозов (ABS) и кондиционером воздуха.
↓ Комментарии ↓
1. Автомобили марки Renault Megane
1.0 Автомобили марки Renault Megane
1.2 Идентификационные номера автомобиля
1.3 Приобретение запасных частей
1.4 Технология обслуживания, инструмент и оборудование рабочего места
1.5 Поддомкрачивание и буксировка
1.6 Запуск двигателя от вспомогательного источника питания
1.7 Проверки готовности автомобиля к эксплуатации
1.8 Автомобильные химикалии, масла и смазки
1.9 Диагностика неисправностей
1.10 Органы управления и приемы безопасной эксплуатации
1.11 Ключи и дистанционное управление единым замком дверей
1.12 Открывание и закрывание дверей
1.13 Охранная сигнализация
1.14 Противоугонное устройство
1.15 Передние сиденья (с электрической регулировкой)
1.16 Приборная панель
1.17 Путевой компьютер
1.18 Приборы наружного освещения
1.19 Рычаг переключения передач РКПП
1.20 Стояночный тормоз
1.21 Гидроусилитель руля
1.22 Звуковой сигнализатор превышения заданной скорости
1.23 Управление автоматической трансмиссией
1.24 Система антиблокировки тормозов
1.25 Отопитель, вентиляция и воздушный кондиционер
2. Техническое обслуживание
2.0 Техническое обслуживание
2.1 График текущего обслуживания
2.2 Проверка уровней жидкостей
2.3 Проверка состояния и давления в шинах
2.4 Проверка щеток стеклоочистителя
2.5 Проверка состояния и степени зарядки аккумуляторной батареи
2.6 Проверка ламп и предохранителей
2.7 Замена двигательного масла и фильтра
2.8 Удаление воды из топливного фильтра дизельного двигателя
2.9 Проверка колодок передних тормозных механизмов и дисков
2.10 Проверка выпускной системы
2.11 Проверка подвески и рулевого управления
2.12 Проверка защитных чехлов приводного вала и ШРУСов
2.13 Проверка шлангов на наличие утечек жидкости
2.14 Проверка затяжки болтов колес
2.15 Замена пылезащитного фильтра
2.16 Проверка уровня жидкости автоматической трансмиссии
2.17 Проверка системы выпуска
2.18 Проверка системы кондиционирования воздуха
2.19 Проверка системы бортового электрооборудования
2.20 Проверка защитного покрытия днища
2.21 Проверка давления наддува (дизельные модели с турбокомпрессором)
2.22 Проверка ремней безопасности
2.23 Проверка и замена вспомогательного приводного ремня
2.24 Замена свечей зажигания и проверка системы зажигания
2.25 Замена фильтрующего элемента воздушного фильтра
2.26 Замена топливного фильтра дизельного двигателя
2.27 Проверка системы отопления и вентиляции
2.28 Смазка шарниров и замков
2.29 Проверка запасных плавких предохранителей
2.30 Проверка толщины колодок задних тормозных механизмов
2.31 Проверка уровня масла ручной коробки переключения передач
2.32 Замена жидкости автоматической трансмиссии
2.33 Замена топливного фильтра
2.34 Замена тормозной жидкости
2.35 Дорожное испытание
2.36 Очистка клапана рециркуляции отработавших газов (двигатели К7М и
2.37 Замена охлаждающей жидкости
3. Ремонт двигателя
3.0 Ремонт двигателя
3.1. Ремонт бензиновых двигателей 1.4 л и 1.6 л в двигательном отсеке
3.2. Ремонт бензиновых двигателей 2.0 л в двигательном отсеке
3.3. Ремонт дизельного двигателя в двигательном отсеке
3.4. Процедуры снятия и капитального ремонта двигателя
4. Система охлаждения, отопления
4.0 Система охлаждения, отопления
4.1 Разъединение и замена шлангов системы охлаждения
4.2 Снятие, осмотр и установка радиатора
4.3 Снятие, проверка исправности и установка термостата
4.4 Проверка исправности, снятие и установка электровентилятора
4.5 Проверка исправности, снятие и установка датчиков системы охлаждения
4.6 Снятие и установка водяного насоса
4.7 Общее описание отопителя
4.8 Снятие и установка компонентов отопителя (все модели кроме Scenic)
4.9 Снятие и установка компонентов отопителя (модели Scenic)
4.10 Общее описание и предосторожности — система кондиционирования воздуха
4.11 Снятие и установка компонентов системы кондиционирования воздуха
5. Системы питания, выпуска
5.0 Системы питания, выпуска
5.1. Топливная и выхлопная система — бензиновые модели
5.2. Топливная и выхлопная системы — дизельные модели
5.3. Системы снижения токсичности отработавших газов
6. Электрооборудование двигателя
6.0 Электрооборудование двигателя
6.1. Системы заряда и запуска
6.2. Система зажигания — бензиновые модели
6.3. Система преднакала дизельного двигателя
7. Сцепление
7.0 Сцепление
7.1 Снятие и установка тросика сцепления
7.2 Проверка хода, снятие и установка педали сцепления
7.3 Снятие, осмотр и установка корзины сцепления
7.4 Снятие, осмотр и установка выжимного подшипника
8. Трансмиссия
8.0 Трансмиссия
8.1. Ручная коробка переключения передач (РКПП)
8.2. Автоматическая трансмиссия
9. Приводные валы
9.0 Приводные валы
9.1 Снятие и установка приводного вала
9.2 Замена защитного чехла внешнего ШРУСа приводного вала (модели с
9.3 Замена защитного чехла внутреннего ШРУСа правого приводного вала (модели с РКПП)
9.4 Замена защитного чехла внутреннего ШРУСа левого приводного вала
9.5 Общее описание замены защитного чехла приводного вала (модели с автоматической трансмиссией)
9.6 Общее описание переборки приводного вала
10. Тормозная система
10.0 Тормозная система
10.1 Прокачка гидросистемы тормозов
10.2 Замена тормозных трубок и шлангов
10.3 Замена колодок передних тормозных механизмов
10.4 Замена колодок задних тормозных механизмов
10.5 Осмотр, снятие и установка диска переднего тормозного механизма
10.6 Снятие, осмотр и установка барабанов задних тормозных механизмов
10.7 Снятие, переборка и установка суппортов передних тормозных механизмов
10.8 Снятие и установка цилиндра заднего тормозного механизма
10.9 Снятие, переборка и установка главного цилиндра
10.10 Снятие и установка педали тормоза
10.11 Проверка, снятие и установка блока вакуумного усилителя
10.12 Снятие, проверка и установка одностороннего клапана блока вакуумного усилителя
10.13 Регулировка ручного тормоза
10.14 Снятие и установка рычага ручного тормоза
10.15 Снятие и установка тросиков ручного тормоза
10.16 Проверка, снятие и установка клапана регулировки давления в задних
10.17 Снятие, установка и регулировка выключателя фонарей
10.18 Общее описание системы антиблокировки тормозов (ABS)
10.19 Снятие и установка компонентов системы ABS
10.20 Снятие и установка вакуумного насоса (дизельные двигатели)
10.21 Проверка исправности и переборка вакуумного насоса (дизельные двигатели)
11. Подвеска и рулевое управление
11.0 Подвеска и рулевое управление
11.1 Снятие и установка сборки переднего поворотного кулака
11.2 Проверка и замена подшипников ступицы переднего колеса
11.3 Снятие и установка передней стойки
11.4 Переборка передней стойки
11.5 Снятие и установка переднего стабилизатора поперечной устойчивости
11.6 Снятие, переборка и установка нижнего рычага передней подвески
11.7 Снятие и установка шарового шарнира нижнего рычага передней подвески
11.8 Проверка и замена подшипников ступицы заднего колеса
11.9 Снятие, проверка и установка заднего амортизатора
11.10 Снятие и установка заднего стабилизатора поперечной устойчивости (задняя ось закрытого типа)
11.11 Снятие и установка задней оси
11.12 Общее описание переборки задней оси
11.13 Проверка и регулировка дорожного просвета автомобиля
11.14 Снятие и установка рулевого колеса
11.15 Снятие, осмотр и установка рулевой колонки
11.16 Снятие, осмотр и установка рулевого механизма
11.17 Снятие и установка насоса рулевого гидроусилителя
11.18 Прокачка гидросистемы рулевого гидроусилителя
11.19 Замена защитного чехла рулевого механизма
11.20 Снятие и установка наконечника рулевой тяги
11.21 Снятие и установка поперечной рулевой тяги
11.22 Углы установки колес
12. Кузов
12.0 Кузов
12.1 Обслуживание кузова и днища
12.2 Уход за обивкой и ковриками
12.3 Восстановление незначительных повреждений кузова
12.4 Значительные повреждения кузова — восстановление
12.5 Снятие и установка переднего бампера
12.6 Снятие и установка заднего бампера
12.7 Снятие, установка и регулировка капота
12.8 Снятие и установка тросика замка капота
12.9 Снятие и установка замка капота
12.10 Снятие и установка двери
12.11 Снятие и установка панели отделки дверей
12.12 Снятие и установка ручки двери и компонентов замка
12.13 Снятие и установка стекла дверного окна и стеклоподъемника
12.15 Снятие и установка компонентов замка крышки багажника
12.16 Снятие и установка двери багажного отсека
12.17 Снятие и установка компонентов замка задней двери
12.18 Снятие и установка компонентов системы единого замка
12.19 Снятие и установка компонентов электрического стеклоподъемника
12.20 Снятие и установка наружных зеркал и связанных компонентов
12.21 Ветровое и заднее стекла — общая информация
12.22 Верхний люк — общая информация
12.23 Снятие и установка наружных элементов кузовной отделки
12.24 Снятие и установка сидений
12.25 Система натяжения ремней безопасности передних сидений — общая информация
12.26 Снятие и установка компонентов ремней безопасности
12.27 Снятие и установка элементов внутренней отделки салона
12.28 Снятие и установка центральной консоли
12.29 Снятие и установка сборки панели приборов
13. Бортовое электрооборудование
13.0 Бортовое электрооборудование
13.1 Общее описание поиска неисправностей в системе электрооборудования
13.2 Общее описание плавких предохранителей и реле
13.3 Снятие и установка выключателей
13.4 Замена ламп (внешние осветительные приборы)
13.5 Замена ламп (фонари освещения салона)
13.6 Снятие и установка блоков внешних фонарей
13.7 Общее описание регулировки направления оптической оси света фар
13.8 Снятие и установка приборной панели
13.9 Снятие и установка компонентов приборной панели
13.10 Снятие и установка многофункционального дисплея
13.11 Снятие и установка прикуривателя
13.12 Снятие и установка часов
13.13 Снятие и установка звуковых сигналов
13.14 Снятие и установка рычага стеклоочистителя
13.15 Снятие и установка мотора стеклоочистителя и тяги
13.16 Снятие и установка мотора стеклоочистителя заднего стекла
13.17 Снятие и установка компонентов системы омывателя ветрового стекла/задней двери
13.18 Снятие и установка магнитолы
13.19 Снятие и установка громкоговорителей
13.20 Снятие и установка радиоантенны
13.21 Противоугонная сигнализация и иммобилизатор двигателя
13.22 Снятие и установка компонентов электропривода/подогрева переднего сиденья
13.23 Система подушек безопасности — общая информация и меры предосторожности
13.24 Снятие и установка компонентов подушек безопасности
14. Контрольные кузовные размеры
14.0 Контрольные кузовные размеры
14.1 Схемы электрооборудования
14.2 Система запуска и заряда, вентилятор охлаждения двигателя, отопитель
14.3 Контрольные лампы и приборы
14.4 Внешнее освещение
14.5 Внешнее и внутреннее освещение
14.6 Регулировка фар, звуковой сигнал, прикуриватель, часы/дисплей,
14.7 Стеклоочиститель, нагнетатель отопителя и радио
14.8 Единый замок, электрические стеклоподъемники и зеркала
14.9 Система центрального впрыска топлива Siemens — Fenix 3
14.10 Полупоследовательная система распределенного впрыска топлива Siemens
14.11 Последовательная система распределенного впрыска топлива Siemens
14.12 Преднакал и впрыск топлива -двигатель F8Q 784
Renault Megane Mark I оригинальное (77 11 315 884 – NU 671-2 – Май 2002 Русское издание) руководство по техническому обслуживанию и эксплуатации с бензиновыми двигателями: К4J 1.4 л (1390 см³) 95 л.с./70 кВт, К4М 1.6 л (1598 см³) 110 л.с./81 кВт, F4P 1.8 л (1783 см³) 116 л.с./85 кВт, F4R 2.0 л (1998 см³) 138 л.с./101 кВт и турбодизельным F9Q 1.9 л (1870 см³) 80-100-102 л.с./59-74-75 кВт; технические характеристики, устройство, особенности конструкции. Инструкция пользователя легковой автомобиль малого класса Рено Меган Фаза 1 и 2 с цельнометаллическими несущими кузовами пяти- и трехдверный хэтчбек, купе, четырёхдверный седан, универсал и кабриолет переднеприводные модели первого поколения выпуска с 1995 по 2002 год
Руководство по эксплуатации, техническому обслуживанию и ремонту автомобилей Renault Megane
Renault Megane I + cabriolet оригинальное (1995 Edition Anglaise) руководство по ремонту для СТО
Renault Megane — Руководство по ремонту и эксплуатации
Рено Меган/ Сценик руководство по ремонту и эксплуатации 1999-2003
Сборник Принципиальных Электросхем Рено Меган 1998 модельный год, Техническая нота 8130A
Сборник Принципиальных Электросхем Рено Меган 1999 модельный год, Техническая нота 8144A
Сборник Принципиальных Электросхем Рено Меган с января 1999, Техническая нота 8164A
Сборник Принципиальных Электросхем Рено Меган выпуска с 25-10-99, Техническая нота 8169A
Сборник Принципиальных Электросхем Рено Меган 2000 модельный год, Техническая нота 8155A
Приложение Методика диагностики систем автомобилей Renault Megane I-II-III
Рено Меган Сценик 1999 руководство по эксплуатации
ЕСЛИ ВЫ ВИДИТЕ ОШИБКУ 406 Not Acceptable и не видите документ, то скорей всего у Вас IP РФ и его надо сменить, на любой другой страны, с помощью VPN ( Scribd и SlideShare блокируют посетителей с Российским IP).
Renault Megane mk1 Видео замена фильтра салона и охлаждающей жидкости двигателя (Рено Меган 95-02)
Renault Megane Mark I общая информация (Рено Меган 1995-2002)
УРОВНИ ЭКСПЛУАТАЦИОННЫХ ЖИДКОСТЕЙ
Уровень охлаждающей жидкости
Нормальный уровень охлаждающей жидкости на остывшем двигателе должен находиться между отметками «MINI» и «MAXI» на стенке расширительного бачка.
Доливайте охлаждающую жидкость при остывшем двигателе, не допуская снижения уровня ниже отметки «MINI».
Не проверяйте и не обслуживайте систему охлаждения при горячем двигателе.
Это может привести к ожогам.
Периодичность проверки уровня охлаждающей жидкости
Регулярно проверяйте уровень охлаждающей жидкости (при отсутствии охлаждающей жидкости двигатель может выйти из строя).
При необходимости долива используйте только охлаждающую жидкость тех марок, которые одобрены техническими отделами RENAULT, и обеспечивают:
— защиту против замерзания;
— антикоррозионную защиту системы охлаждения двигателя.
При обнаружении быстрого или повторяющегося падения уровня охлаждающей жидкости обратитесь на сервисную станцию RENAULT.
Периодичность замены охлаждающей жидкости
Периодичность замены: См. Сервисную книжку.
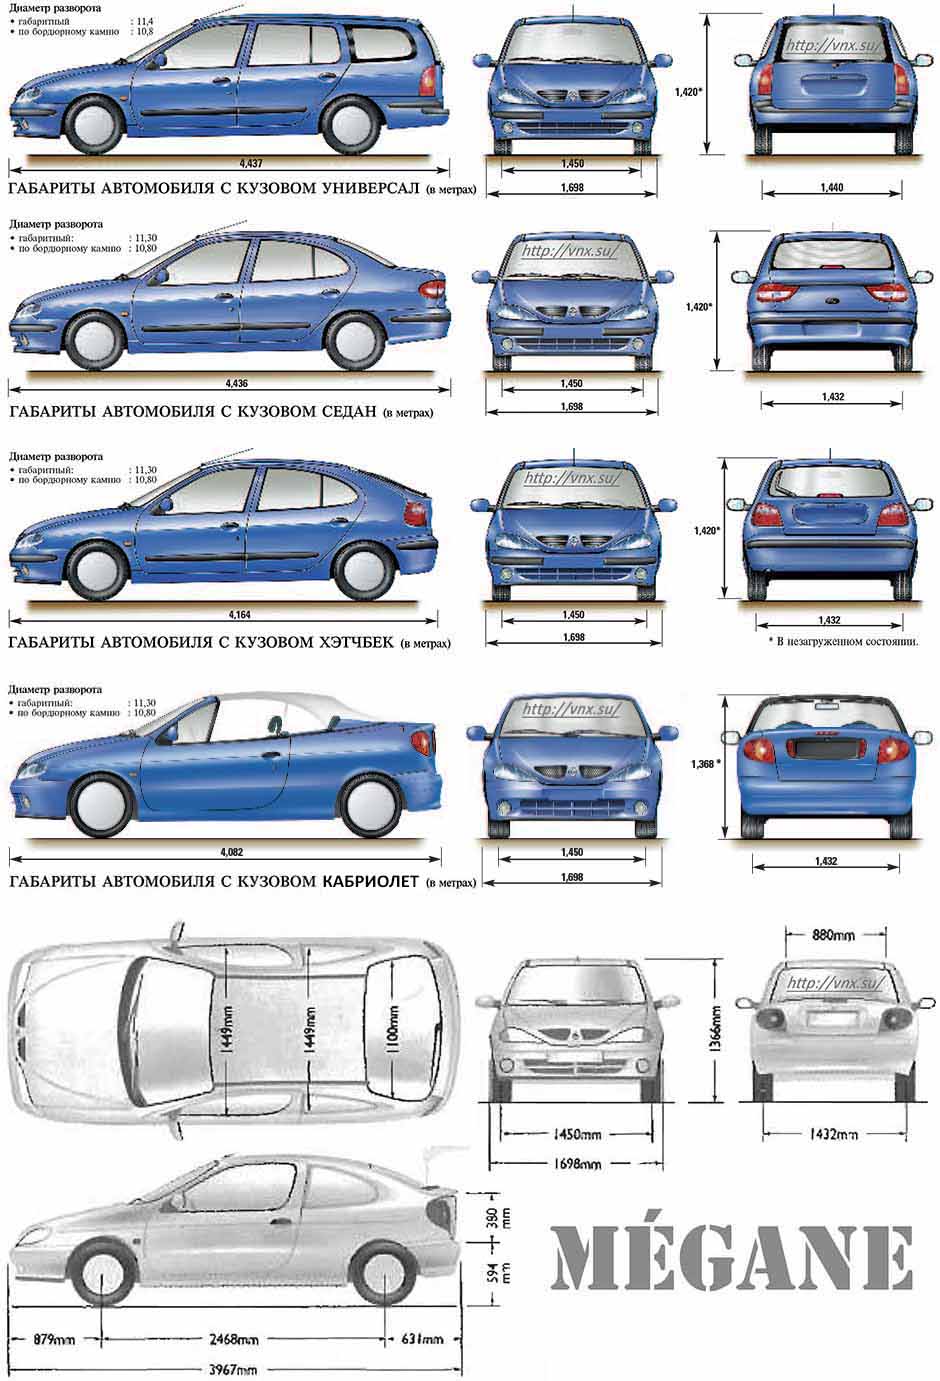
| № | Спецификация / Specs | Данные |
| Габариты (мм/mm) и масса (кг/kg) / Dimensions and Weight | ||
| 1 | Длина / Length | 3967 |
| 2 | Ширина (без/с зеркалами) / Width | 1698 |
| 3 | Высота (загружен/пустой) / Height | 1366 |
| 4 | Колёсная база / Wheelbase | 2486 |
| 5 | Дорожный просвет (клиренс) / Ground clearance | 120 |
| 6 | Снаряжённая масса / Total (curb) weight | 1140 |
| Полная масса / Gross (max.) weight | 1600 | |
|
Двигатель / Engine |
||
| 7 | Тип / Engine Type, Code | Дизельный, жидкостного охлаждения, четырехтактный, F9Q dCi |
| 8 | Количество цилиндров / Cylinder arrangement: Total number of cylinders, of valves | 4-цилиндровый, 8V, рядный, SOHC с верхним расположением одного распределительного вала |
| 9 | Диаметр цилиндра / Bore | 80.0 мм |
| 10 | Ход поршня / Stroke | 93.0 мм |
| 11 | Объём / Engine displacement | 1870 см³ |
| 12 | Система питания / Fuel supply, Aspiration | Непосредственный впрыск топлива Common Rail |
| Турбонаддув и промежуточное охлаждение наддувочного воздуха | ||
| 13 | Степень сжатия / Compression ratio | 18.3:1 |
| 14 | Максимальная мощность / Max. output power kW (HP) at rpm | 75 кВт (102 л.с.) при 4000 об/мин |
| 15 | Максимальный крутящий момент / Max. torque N·m at rpm | 200 Нм при 1500 об/мин |
|
Трансмиссия / Transmission |
||
| 16 | Сцепление / Clutch type | Однодисковое, сухое, с диафрагменной нажимной пружиной и гасителем крутильных колебаний, постоянно замкнутого типа |
| 17 | КПП / Transmission type | МКПП 5 пятиступенчатая механическая трансмиссия, двухвальная, с синхронизаторами на всех передачах переднего хода |
О Книге
- Название: Renault Megane Руководство по эксплуатации
- Бензиновые двигатели: К4J 1.4 л (1390 см³) 95 л.с./70 кВт, К4М 1.6 л (1598 см³) 110 л.с./81 кВт, F4P 1.8 л (1783 см³) 116 л.с./85 кВт, F4R 2.0 л (1998 см³) 138 л.с./101 кВт и турбодизельным F9Q 1.9 л (1870 см³) 80-100-102 л.с./59-74-75 кВт
- Выпуск с 2002 года
- Серия: «Owner Guide / Driver’s handbook»
- Год издания: Май 2002
- Автор: Коллектив авторов
- Издательство: «RENAULT S.A.S»
- Формат: PDF
- Страниц в книге: 204
- Размер: 34.54 МБ
- Язык: Русский и Английский
- Количество электросхем: 0
Поиск по сайту
Остались вопросы или пожелания? Пишите на почту: support@vnx.su
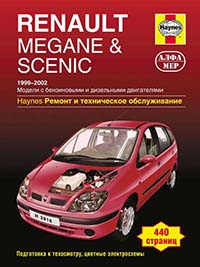
В руководстве рассмотрены: модели Renault Megane с кузовами «хэтчбек», «салун» («седан»), «купе» и Scenic MPV, включая модели специального и ограниченного выпуска. Бензиновые двигатели: 1.4 л. (1390 см3), 1.6 л. (1598 см3) и 2.0 л. (1998 см3). Дизельные двигатели: 1.9 л. (1870 см3) включая двигатели с турбонаддувом.
Даннуй мануал по ремонту описывает текущее обслуживание к которому относятся простые еженедельные проверки, техническое обслуживание которое включает в себя полное пошаговое руководство, поиск неисправностей, в том числе простое решение специфических поломок. В руководстве описываются также дорожные неисправности, подготовка к техосмотру, диагностика. в приложения даны словарь технических терминов, предметный указатель и т.д.
Пособие написано на основании опыта, полученного при полной переборке автомобиля Renault Megane Scenic с использованием самых доступных инструментов.
Рекомендации издательства помогут обойтись без спец. инструментов и упростить выполнение ремонта автомобиля.
Книга написана таким образом, что каждого вида работы определен уровень ее сложности и требуемый опыт исполнителя. Т.е. от простых операций обслуживания для новичка до сложных задач, доступных специалисту.
Название: Renault Megane Scenic 1999-2002., Руководство по ремонту и эксплуатации
Издательство: Haynes
Формат: pdf
Размер: 152,8 МБ
Качество: хорошее
Страниц: 410
Язык: русский
Руководство по эксплуатации автомобиля Renault Megane 1

Введение в руководство по Рено Меган 1
В данном руководстве рассматриваются модели Renault Megane с кузовами Седан (Classic), Хэтчбек, Купе (Coach), Универсал, Кабриолет, а так же минивэн (Scenic), оснащенные бензиновыми двигателями объемом 1390 см 3 , 1598 см 3 и…

Идентификационные номера автомобиля
Расположение номера двигателя на дизельном двигателе F8Q Расположение номера двигателя на бензиновых двигателях E7J и К7М Номер шасси выбит на верхней части купола передней подвески Идентификационный шильдик автомобиля 1 — Тип…
Приобретение запасных частей
Немаловажную роль при ремонтных работах играет использование запасных частей и расходных материалов высокого качества, предназначенных именно для вашего автомобиля. В целом запасные части можно подразделить на две большие группы:…

Технологии обслуживания и ремонта автомобиля
Существует несколько методик выполнения процедур технического обслуживания и ремонта автомобиля, на которые читатель найдет ссылки в тексте данного руководства. Следование им сделает работу домашнего механика более эффективной,…
Необходимый для обслуживания инструмент
Выбор хорошего инструмента является одним из основных требований для каждого, кто планирует самостоятельное выполнение процедур технического обслуживания или ремонта автомобиля. На первый взгляд затраты, связанные с приобретением…

Поддомкрачивание и буксировка автомобиля
Поддомкрачивание Для поддомкрачивания передней части автомобиля следует взвести стояночный тормоз и, для безопасности, подложить под задние колеса клинья. При поддомкрачивании задней части автомобиля необходимо включить передачу…

Запуск двигателя от вспомогательного источника питания
При запуске двигателя от внешнего источника следует помнить о необходимости выполнения следующих требований: a) Перед подсоединением вспомогательной батареи удостоверьтесь, что ключ зажигания повернут в положение «St» (Выкл.). b)…

Проверки готовности автомобиля к эксплуатации
В Разделе перечислены все, подлежащие проверке, узлы и системы и предложены способы самостоятельной проверки их состояния и функционирования. На основании анализа результатов таких проверок можно оценить готовность автомобиля к…
Автомобильные химикалии, масла и смазки
В продажу поступает множество химикалиев, масел и смазок, необходимых в ходе выполнения процедур текущего обслуживания и ремонта автомобиля. Сюда входит широкий спектр продуктов химической и нефтедобывающей промышленности — от…
Диагностика неисправностей автомобиля
В данном Разделе предлагается наиболее простая схема выяснения причин неисправностей и отказов, происходящих в узлах и системах транспортного средства. Отказы и их возможные причины разбиты на группы по признаку отношения к…
Габариты, вес и давление в шинах
Примечание. Все данные приблизительны и могут изменяться в зависимости от модели. Габариты Характеристика Значение Габаритная длина 4129 мм Габаритная ширина (без боковых зеркал) 1699 мм Полная высота (ненагруженный) 1420 мм…

Ключи и дистанционное управление единым замком дверей
Ключи Пульт дистанционного управления единым замком дверей, ключ от замка зажигания, замков дверей, ключ от замка зажигания, замков дверей, крышки багажника, лючка заправочной горловины топливного бака и замка отключения…

Открывание и закрывание дверей
Открывание дверей снаружи Передние двери: Отоприте ключом замок 2 одной из передних дверей. Возьмитесь снизу за ручку 1 и потяните ее на себя. Задние двери: Когда одна из передних дверей открыта, поднимите вверх кнопку 3…

Охранная сигнализация
Охранная сигнализация может быть установлена, в зависимости от комплектации модели. Ваша машина оборудована системой охранной сигнализации, которая выполняет следующие функции: Ультразвуковой контроль объема салона автомобиля…

Противоугонное устройство
Противоугонное устройство может быть установлено, в зависимости от комплектации модели. Автомобили, оборудованные единым замком с дистанционным управлением Ваш автомобиль защищен от несанкционированного использования любым лицом,…
Передние сиденья (с электрической регулировкой)
Выключатели и служат для восстановления параметров регулировки сиденья, которые хранятся в запоминающем устройстве. выключатель обеспечивает перемещения подушки сиденья (в продольном направлении и по высоте), а выключатель -…

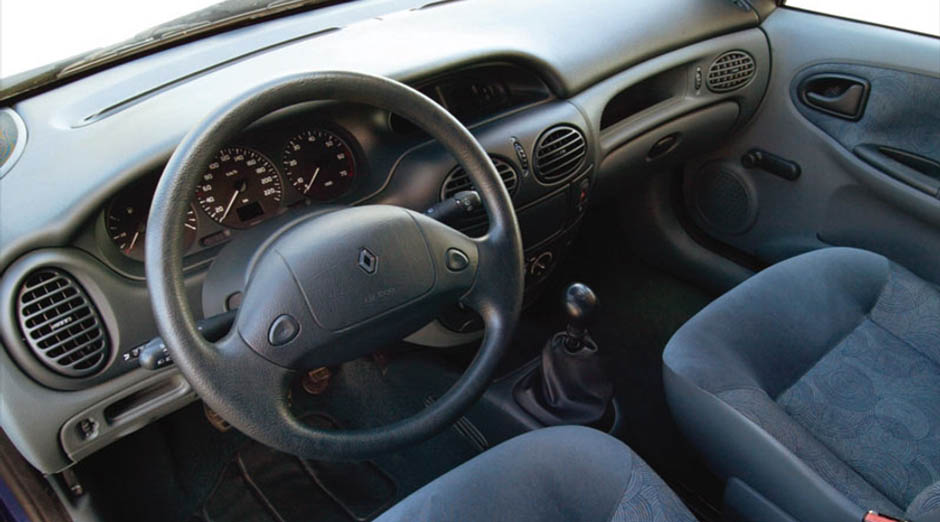
Приборная панель и контрольные лампы
При загорании следующих контрольных ламп следует немедленно остановиться: и одновременно. 1. Панель контрольных ламп Контрольная лампа неисправности подушки безопасности Не используется Контрольная лампа неисправности ABS…

Путевой компьютер
(может быть установлен, в зависимости от комплектации модели) 1 — Дисплей 2 — Кнопка очистки памяти компьютера и управления режимом работы дисплея Очистка памяти компьютера Если нажать и удерживать кнопку 2 в этом положении,…
Приборы наружного освещения
Габаритные фонари Поверните переключатель, расположенный на многофункциональном рычаге 1, в положение, при котором метка 2 совместится с символом. Ближний свет фар Поверните переключатель на рычаге 1 в положение, при котором…

Рычаг переключения механической коробки передач
Включение передачи заднего хода (на неподвижном автомобиле) Переведите рычаг сначала в нейтральное положение, затем — в положение передачи заднего хода. В некоторых коробках передач для включения заднего хода требуется приподнять…
Стояночный тормоз
Выключение стояночного тормоза Потяните слегка рычаг стояночного тормоза вверх, и, нажав на кнопку 2, полностью опустите рычаг до пола. Если стояночный тормоз выключен не полностью, на приборной доске будет гореть красная…
Гидроусилитель руля
Внимание! На автомобилях, оборудованных рулевым гидроусилителем, при парковке не удерживайте долго рулевое колесо в крайних положениях, когда колеса повернуты до упора. Это может вывести из строя гидронасос усилителя. Никогда не…
Звуковой сигнализатор превышения заданной скорости
Может быть установлен, в зависимости от комплектации модели. Работа сигнализатора Если Ваш автомобиль оборудован сигнализатором, можно выбрать и сохранить в памяти этого устройства любое значение скорости (не менее 25 км/ч). В…

Управление автоматической трансмиссией
(может быть установлена, в зависимости от комплектации модели) Рычаг селектора диапазонов Селектор автоматической трансмиссии может находиться в одном из семи положений: «Р» — стоянка; «R» — задний ход; «N» — нейтраль; «D» -…
Система антиблокировки тормозов
(может быть установлена, в зависимости от комплектации модели) При экстренном торможении автомобиля необходимо стремиться одновременно обеспечить достижение двух целей: сокращение тормозного пути и сохранение управляемости и…

Отопитель, вентиляция и воздушный кондиционер
1 — Сопло обдува левого переднего бокового стекла; 2 — Левый боковой вентиляционный дефлектор; 3 — Щель обдува ветрового стекла; 4 — Центральные вентиляционные дефлекторы; 5 — Панель управления отопителем и вентиляцией; 6 -…
Ссылка на этот раздел в разных форматах
TEXTHTMLBB Code